


Ponto
-
Posts
333 -
Joined
-
Last visited
Content Type
Profiles
Forums
Gallery
Events
Posts posted by Ponto
-
-
-
-
-
... such exquisite detail!!!!! Surely this must be full time endeavor?.....I hate to think this is actually possible after spending eight hours a day at some other full time job / career?
JP
- CaptainSteve, mtaylor and GLakie
-
 3
3
-
I start out with a clean desk, lots of room. Then hour by hour, day by day the area that I can work
in gets smaller and smaller. Eventually (usually within a week or two) the space is so small I'm
setting the model on top of the clutter.
Then it's clean it up, put everything where it belongs and within thirty minutes it all starts over again.
Even adding a second then a third bench didn't help. In the long run it just ment I had more to clean up.

LOL........this, in a nutshell is a blow by blow description of what I face. When I start stepping on assorted shrapnel and the sawdust starts to hide this and that, I know it is time to start the cycle over again!
JP
-
-
-
Seems like I'd better forward images of my completed WVH......look for it soon in the completed gallery. Sorry to hear about the issues with the gun carriages......it would have helped matters if they were pinned to the deck. I've got a bucket full of build in progress images so let me know if you get hung up on any specific steps and I'll dig through the archive.
JP
-
-
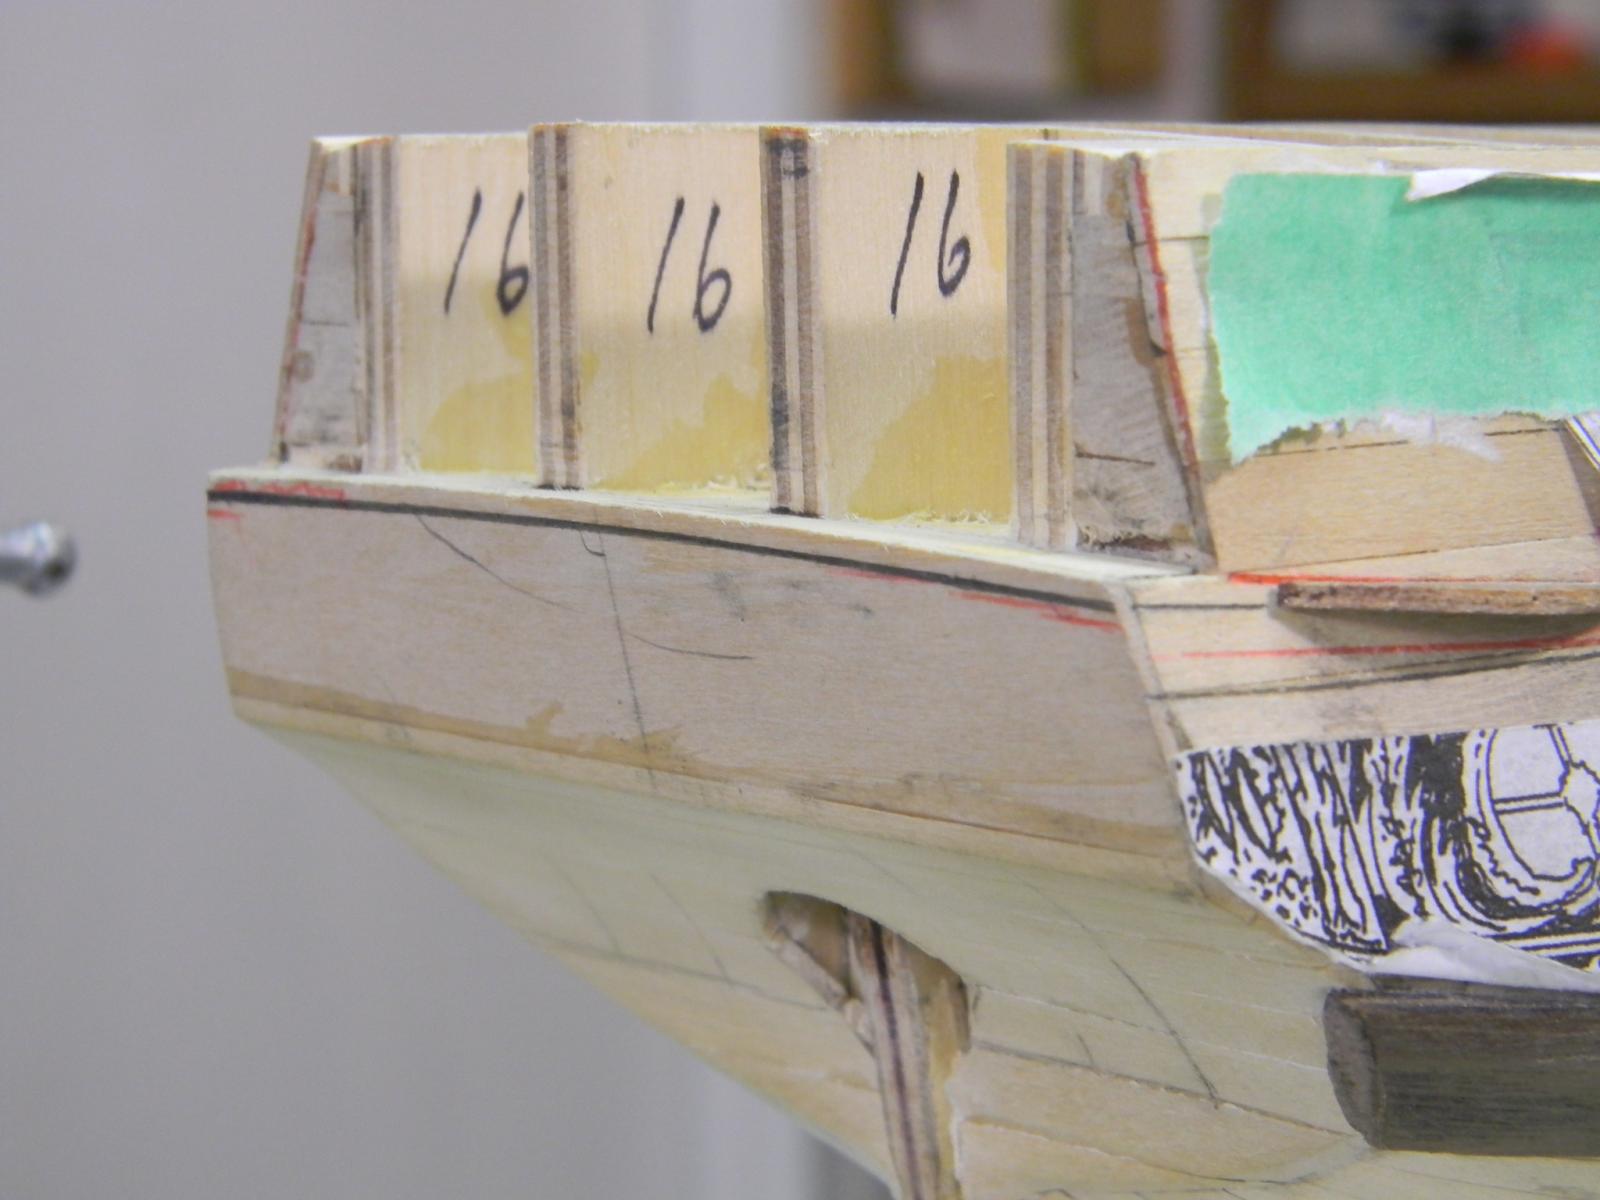
Looks like it's been awhile,...... but, I have been busy with the build. I 'm fairly happy with the progress on the stern as everything fits to my satisfaction. The planking has been completed below the main wale and I even got to try my hand at some spiling. Some current progress shots to follow .........
JP

- Beef Wellington, NMBROOK, mtaylor and 4 others
-
7
-
Gorgeous planking!!!
jp
- Stuntflyer, mtaylor and Canute
-
3
-
-
I used two metal bars with two bolts to clamp my hull until the copper sheeting had been applied. It is similar to what Captsteve shows above.
From that point on I mounted the ship on a wooden board with the posts in place that will hold the ship in its final position.
It is a very rigid support that allows me to handle the whole thing without worries of coming loose. The board has taken a lot of abuse and will be replaced with a better looking one when the ship is finished. The picture below was taken when I made some adjustments to the sails.
I have a lazy Jay to turn the ship around

Yikes!!!.....don't you feel like you're tempting fate??
JP
- mtaylor, Canute and CaptainSteve
-
3
-
zoly99sask, on 15 Oct 2015 - 9:52 PM, said:

Adding detail is a matter of preference and how much time you want spend on it/with proper skill,just for an exemple tke a look at this Hungarian modeller what quality and detail has been built into his HMY Caroline.Realt worth time to check all the pictures!!
http://www.shipmodel...AL_CAROLINE.htm
And the Pandora was built for almost 20 years,20000 work hours!!
http://www.shipmodel...ELL_PANDORA.htmThanks for the links,.....the work found here is SCARY GOOD!!! ... just goes to show that there is no limit to how much detail can go into a build, scratch or kit build.
JP
- Altduck, Canute and zoly99sask
-
3
-
-
Ahhh, the joys of Christmas.....did I understand correctly that the Canadian Dollar is being accepted at par with the Euro???
 ... hope your sale goes well Daniel ........
JP
- mtaylor, zoly99sask, mtdoramike and 2 others
-
5
-
-
I enjoyed and am quite happy with my efforts on Corel's Wappen Von Hamburg kit. It falls into the "larger" scale kit that you seek....only a suggestion as their are many available. Enjoy your search.
JP
- Dimitris71, Canute and mtaylor
-
3
-
-
-
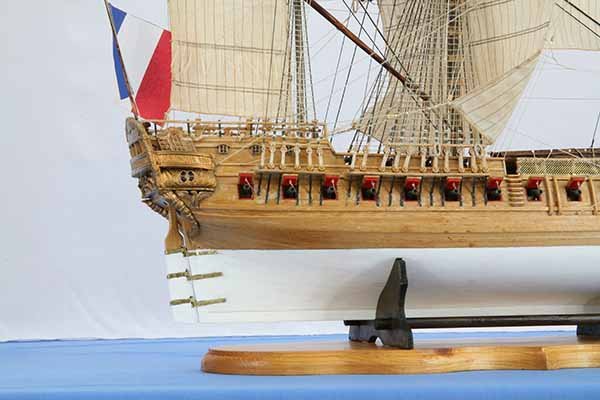
If you'll go here: http://maquettes-marine.pagesperso-orange.fr/renommee/renommee.html there's two photo galleries. They did start simplifying things as time went on to more like the English practiced. That stern that you're looking at JP is not free floating or open like it shows. That's basically what I trying to point out. The galleries themselves were a bit more elaborate than what's in the kit.
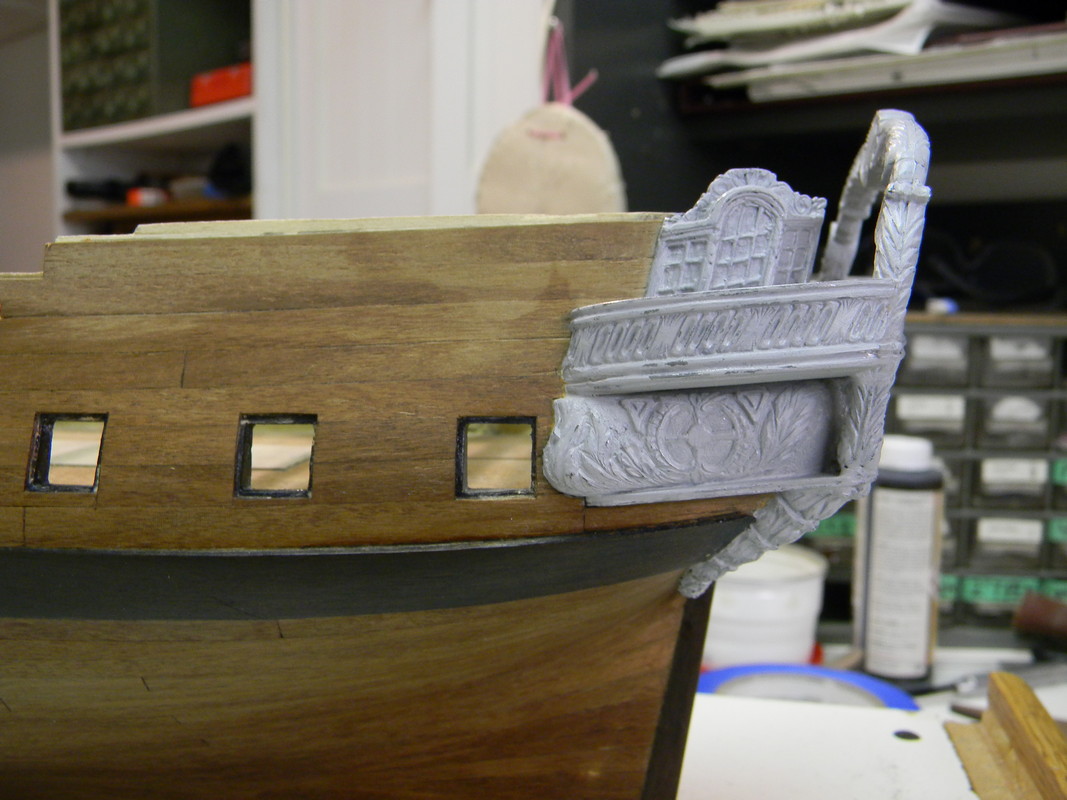
Thanks for the link Mark,...another example of skill on a whole other level. I do believe that the Euromodel kit represents a ship of a different time. These images depict three different takes on the kit that I'm currently working on if I'm not mistaken.

-
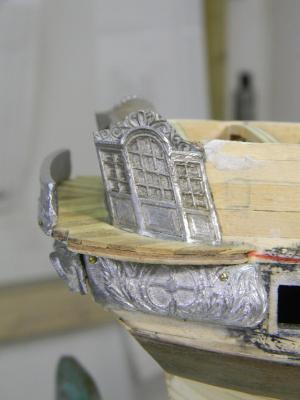
I started a scratch build model of the 1744 version of LA RONOMMEE, which I never completed, but hope to after complete my present project. I used the Harold Hahn version of hull construction, which I find more accurate. The Euromodel cast metal parts on the FALMOUTH East Indianman kit that I am now building, were bulky and difficult to apply to the model surface. I put these metal pieces aside and scratch built wooden replacements. Perhaps, you to will find the same problem with your metal parts, and might have to make copies of these pieces as I did.
Montani semper liberi Happy modeling
Crackers


Good Luck with your scratch build and I'll be sure to follow along when you revisit the build....You're right about the bulky castings and I'll be reducing the bulk (especially on the railings) before they're finally attached. I don't think I have the skills necessary for carving my own components and am no where near attempting a full blown scratch build.... but I really appreciate the efforts of those that do.
JP
- avsjerome2003, mtaylor and Canute
-
3
-

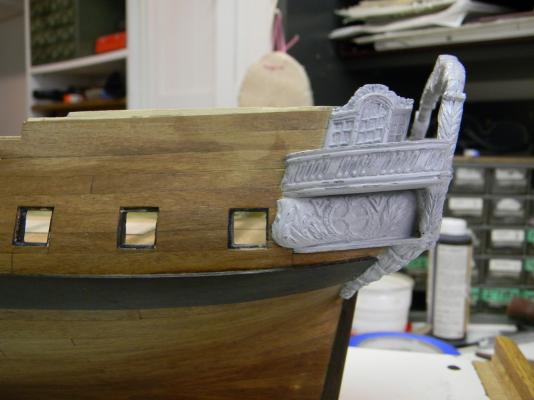
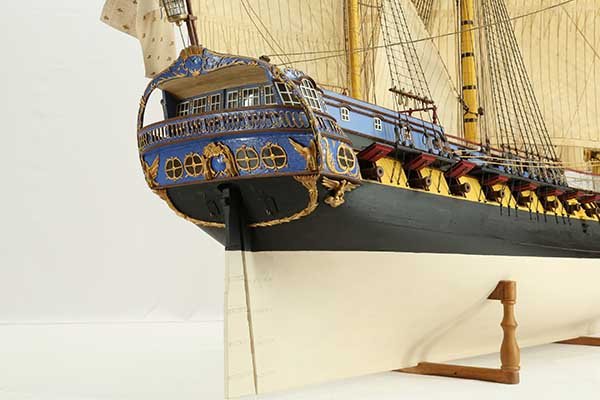
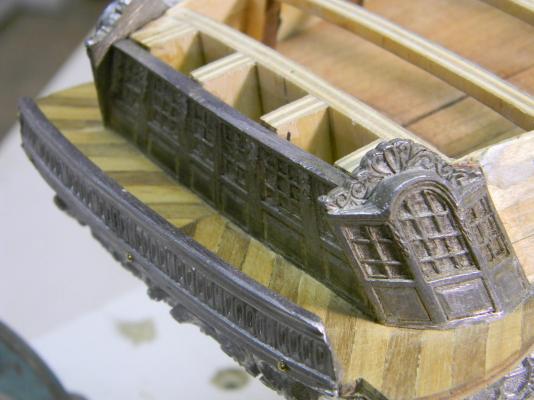
I really like the rich, dark tones found above but some liberties were taken
with the placement and fit of the castings....I'm not too sure if the ornamentation
would have been left floating as depicted and the deck is also cropped at both corners
of the hull..;
This particular build is closer to the plans offered up by Euromodel......I think my plan is to combine the two
efforts and shoot for something in between.
***Links to these builds can be found earlier in this thread.***
JP
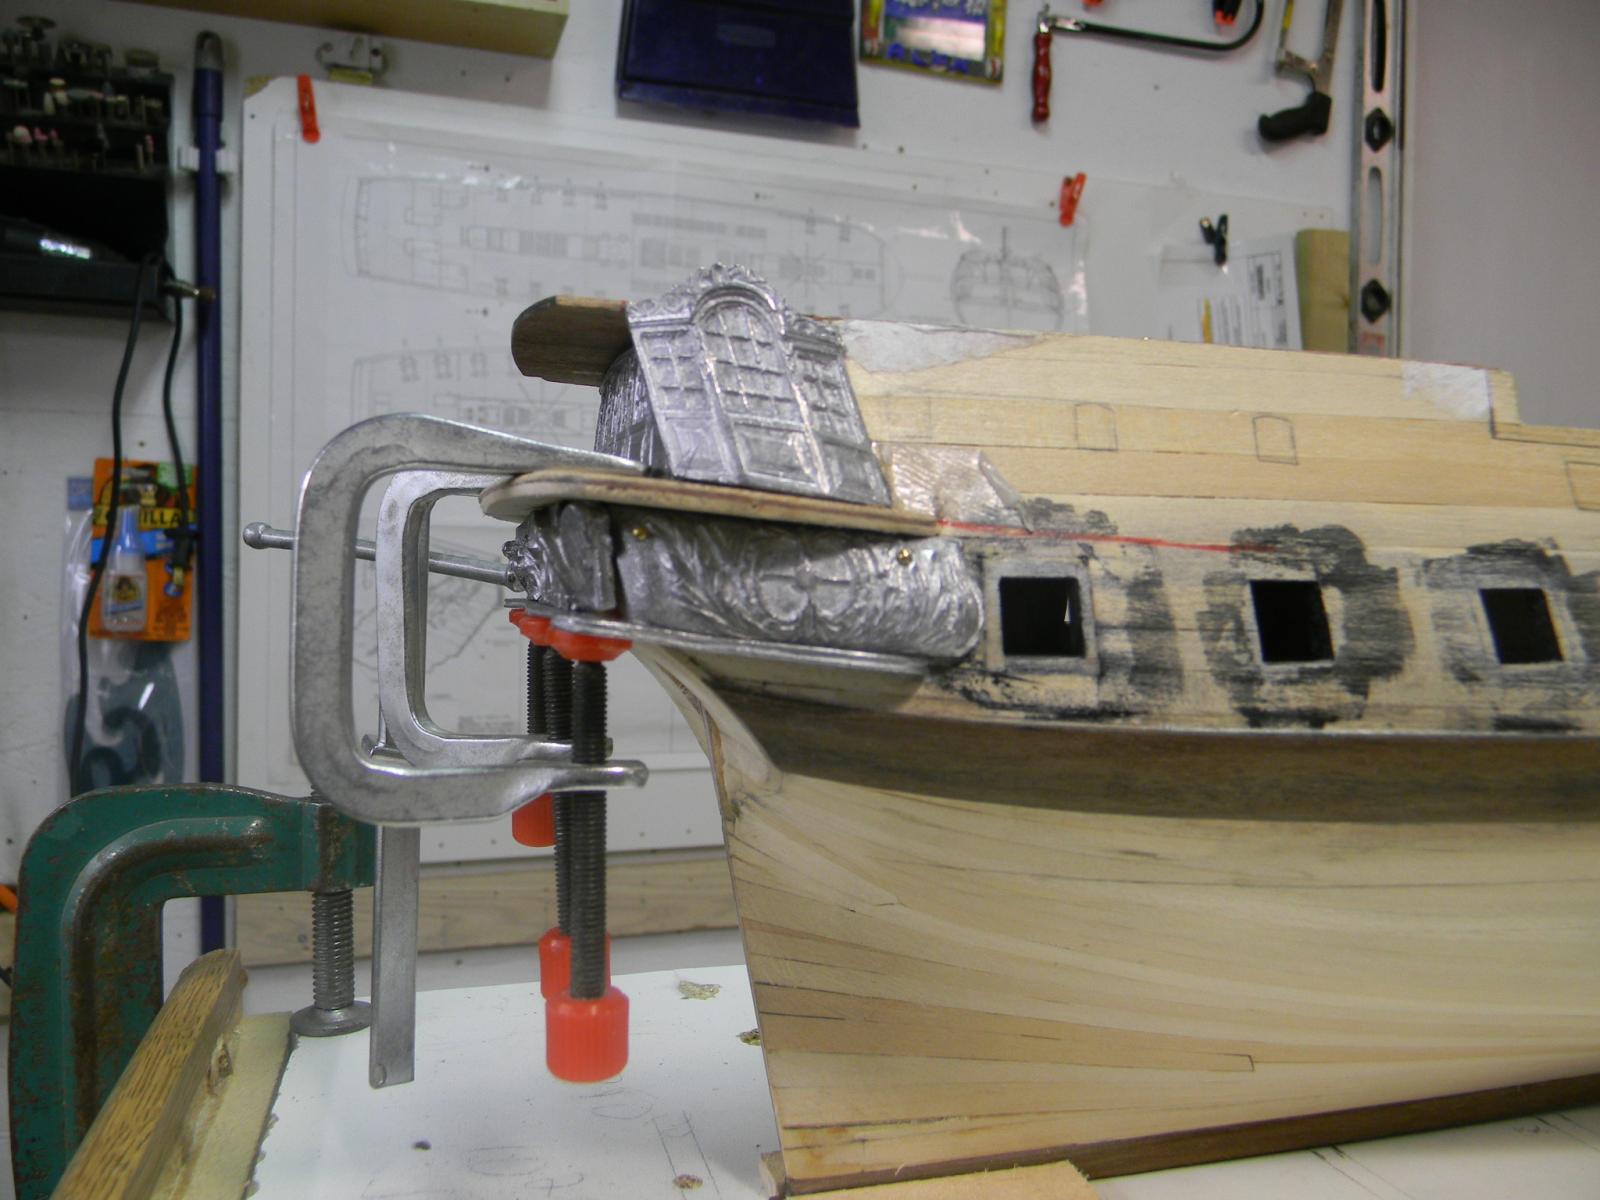
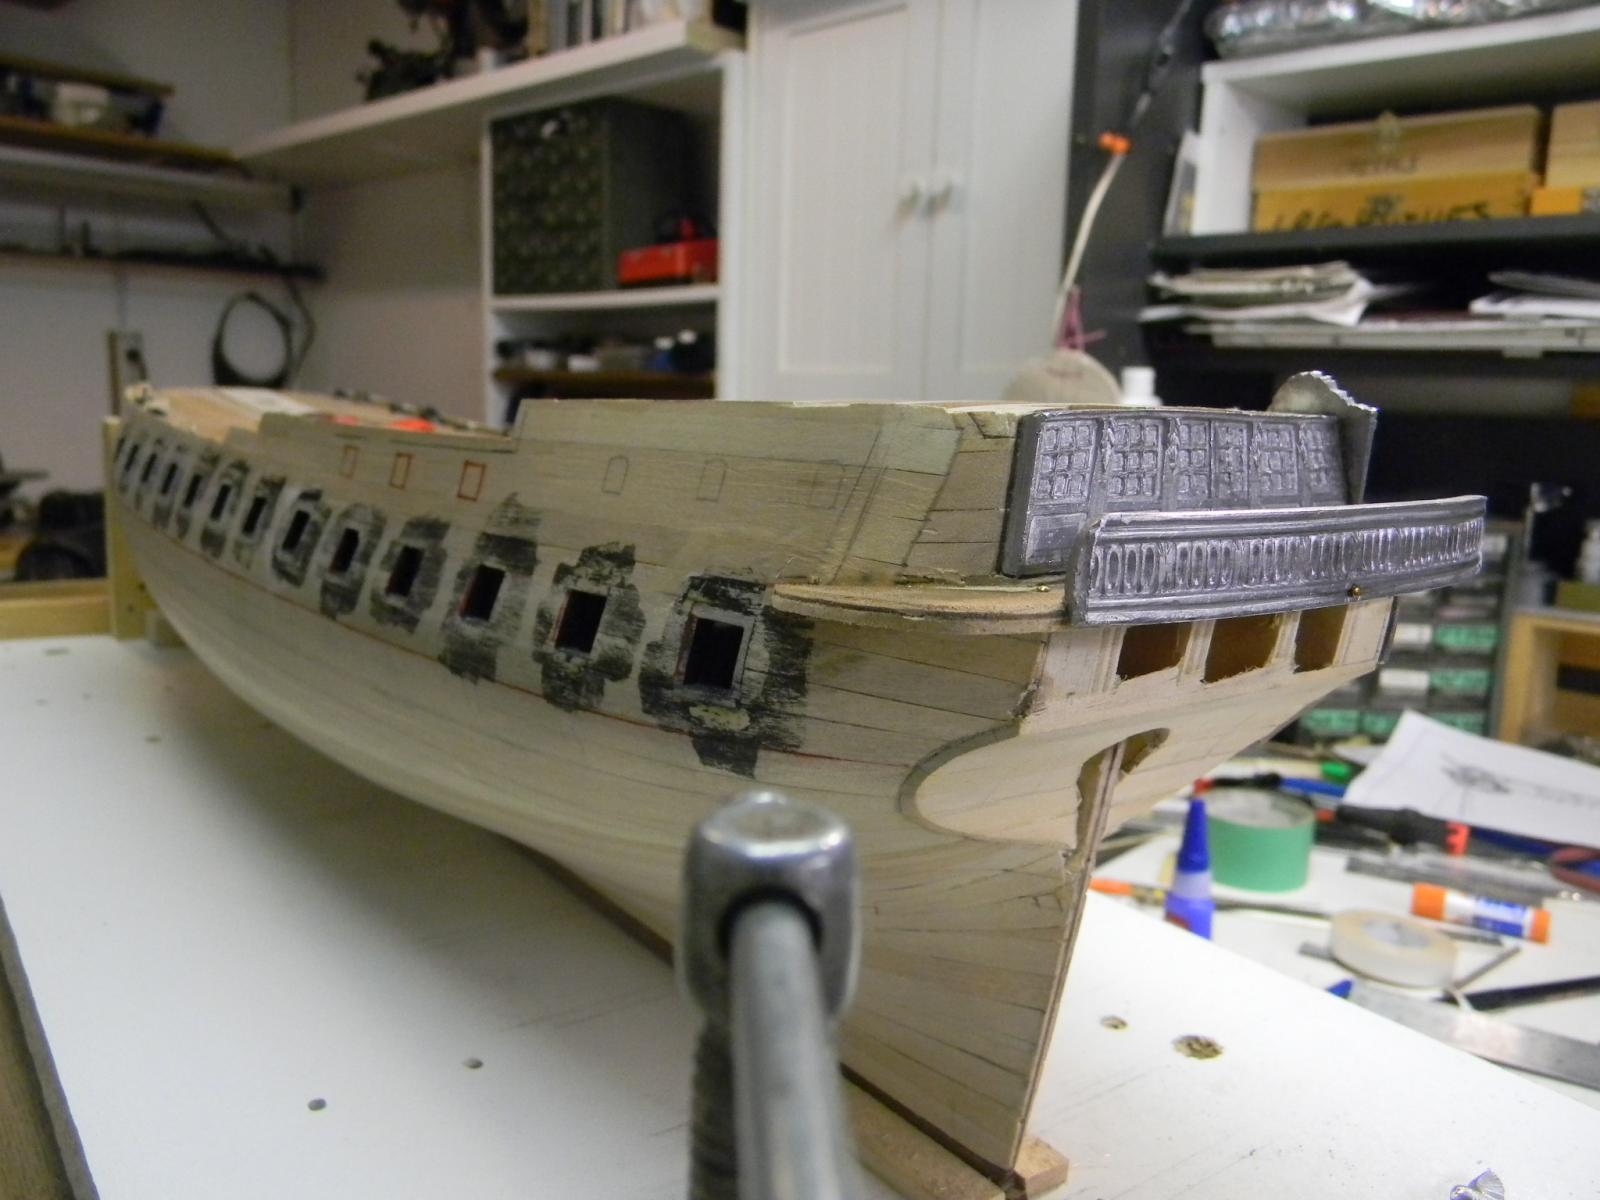
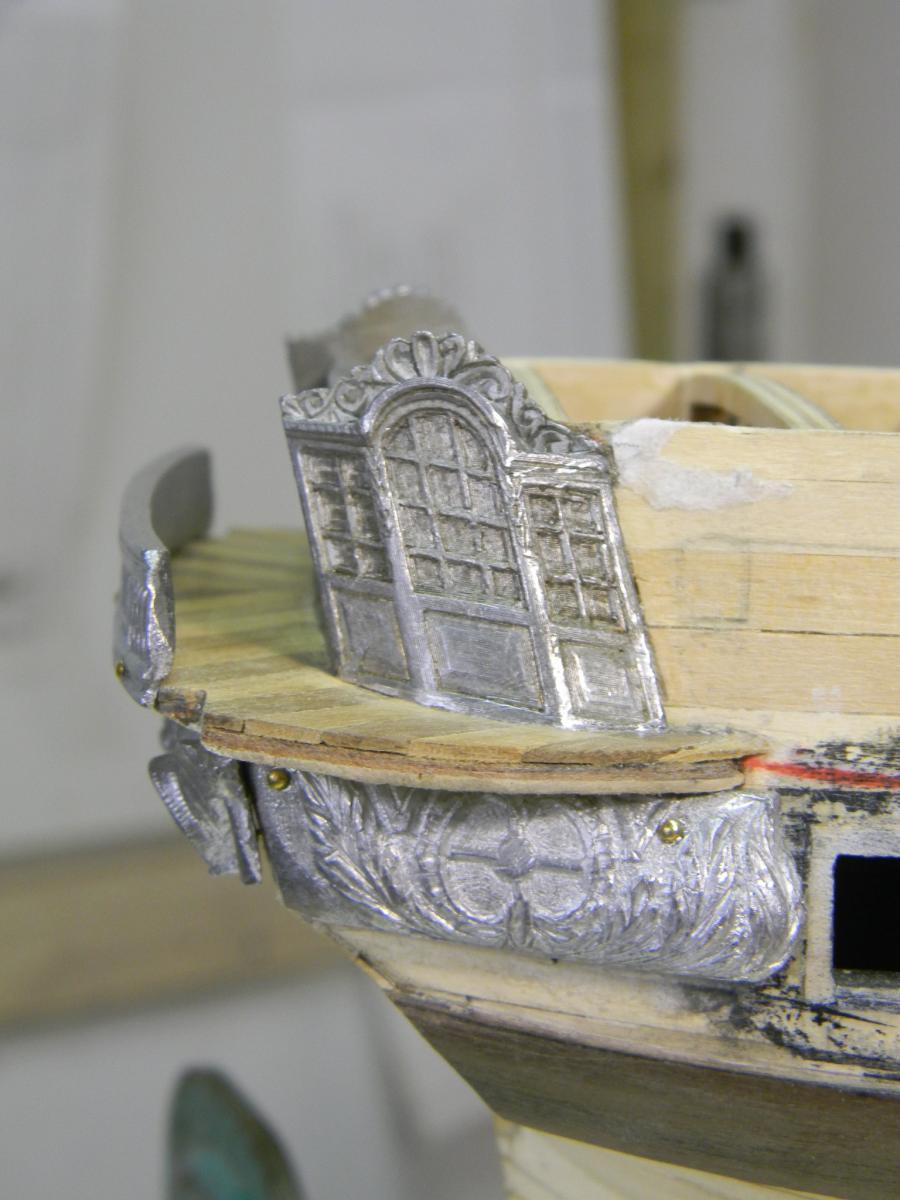
-
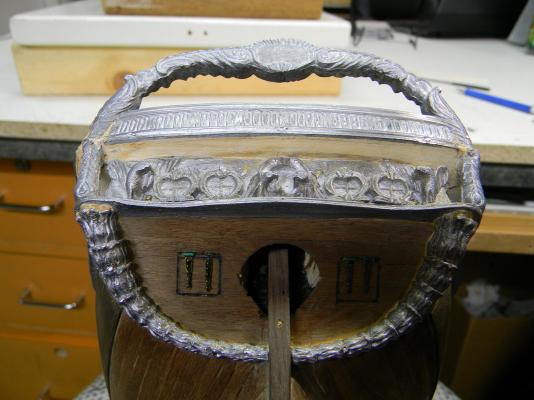
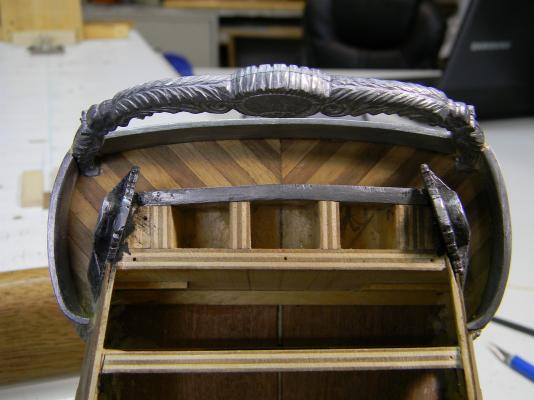
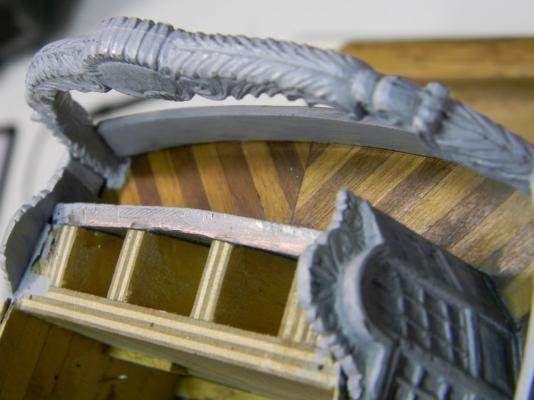
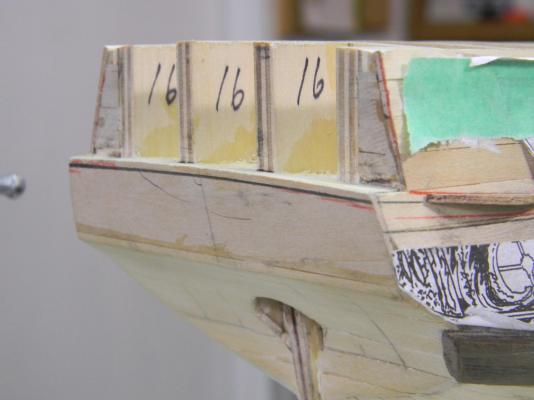
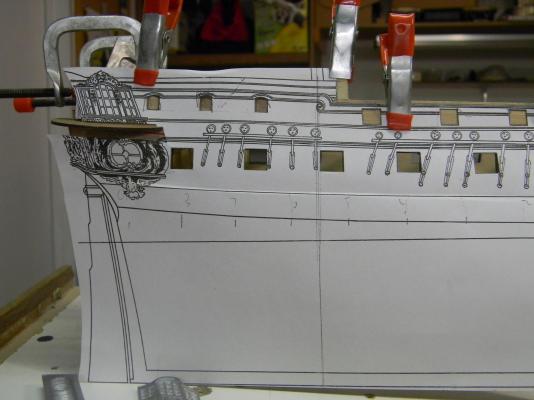
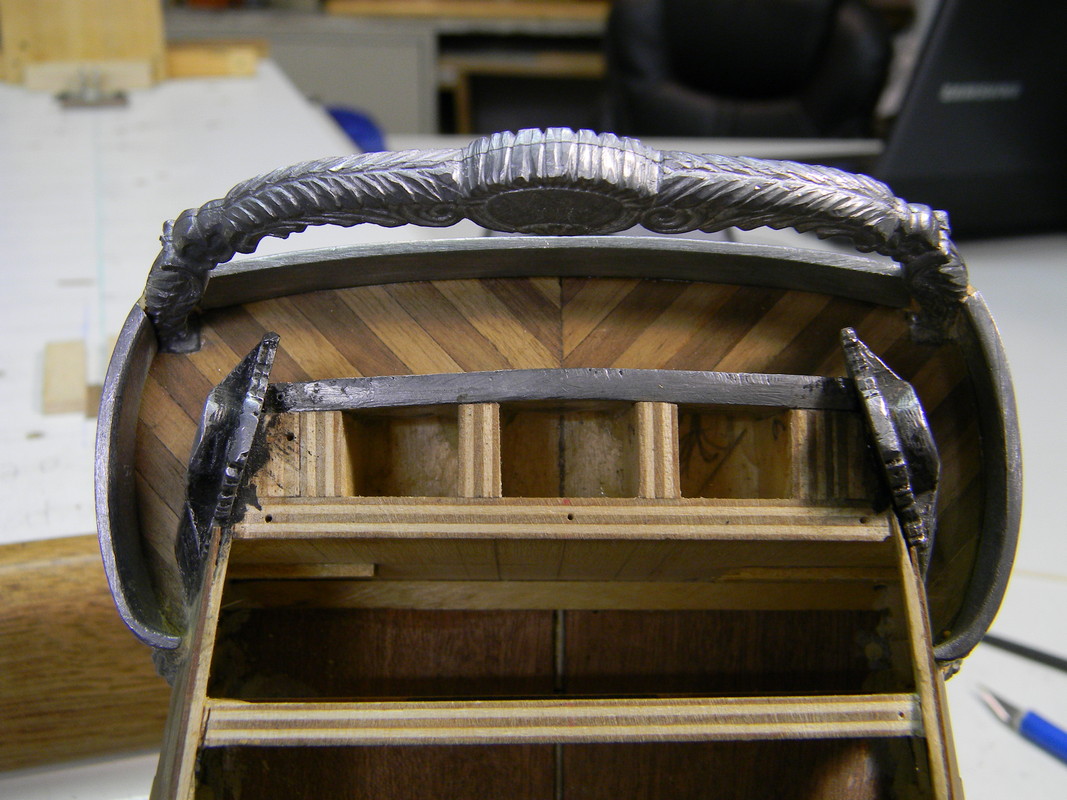
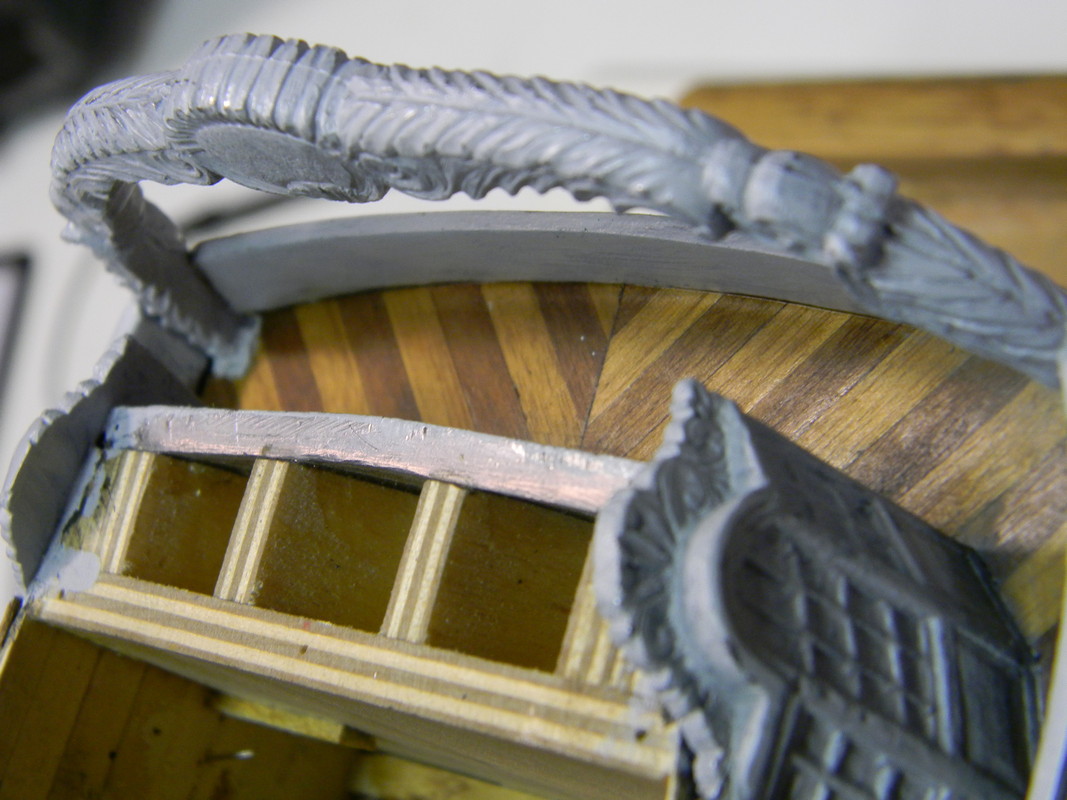
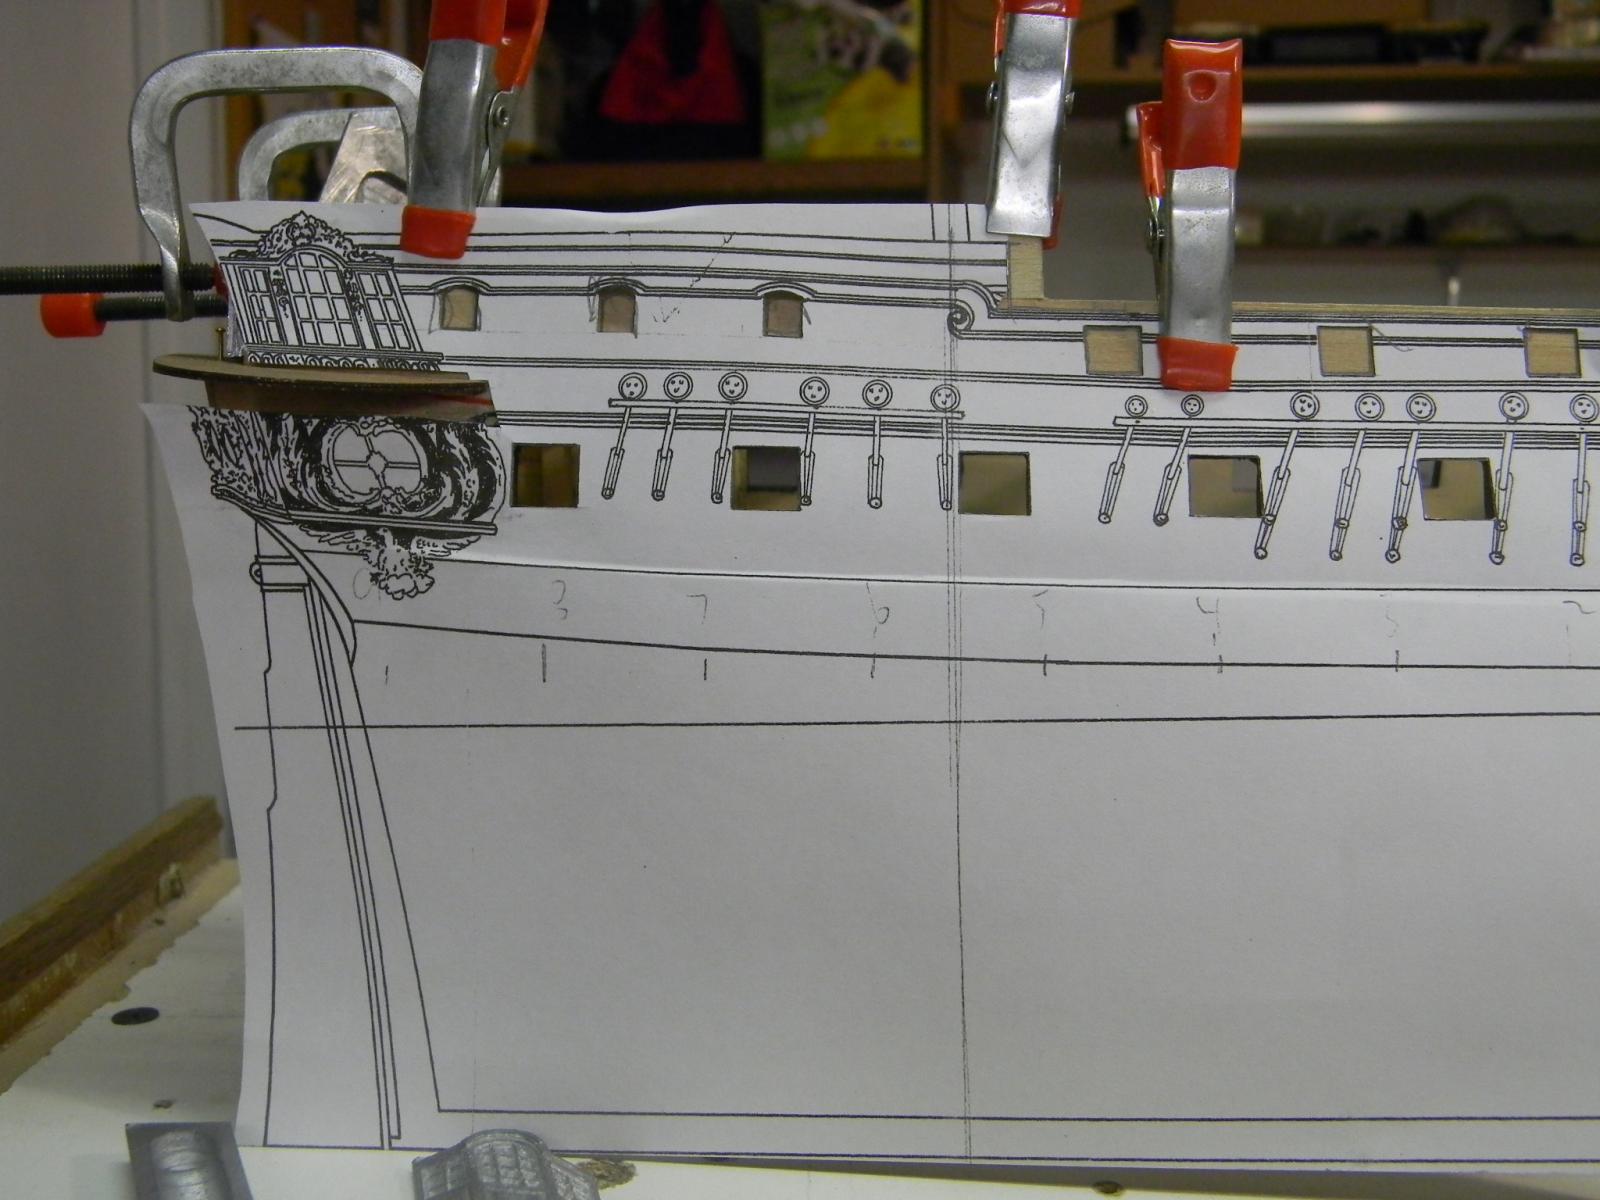
Le Renommee stern is underway,......after many hours of viewing the plans, viewing endless related images found in other logs and those of finished builds, ... and trying to sort out ways to temporarily affix the assorted components,......I think I'm closer to overcoming a hurdle that seems to baffle me with every build. The supplied castings are quite well done for the scale but need some planning and a lot of trial fitting and tweaking. The metal is soft and easy to modify. The following images should help future builders and depict my method of madness........JPattachment=266114:SCALE STENCIL OVERLAY.JPG]


- Ferit, mtaylor, Seventynet and 2 others
-
5


Gun rigging
in Wood ship model kits
Posted
LOL..........I suppose the "rookies" (don't know the seafaring equivalent?) were stuck with the business end of the cannons having to lean out the gun ports when called for.......nasty business that would be!!!
jp