


Ponto
-
Posts
333 -
Joined
-
Last visited
Content Type
Profiles
Forums
Gallery
Events
Posts posted by Ponto
-
-
12 minutes ago, Sheerline said:
Thank you for the input. These are very useful tips which I shall employ.
One thing I might do is measure out the four most distant ports from the drawing and lightly mark them on the hull.
Then if I overlay a printout see if everything coincides. The hull curvature may impact upon this so will proceed with caution.
It's been so long since I worked on the model I'm having to revisit lots of things! Thanks again, much appreciated.
Yes, the hull curvature will pose some challenges with placement. One can reinforce the copied template with any clear thin tape such as packing tape. Use an exacto to open the gun ports on the template and then carefully secure to hull when correct positioning has been confirmed. The openings on the template allow one to mark out positions on the hull and then the cut out process can begin.
-
9 hours ago, Dr PR said:
The bottom sill of gun ports should be the same height above the deck for guns of a given type. For lower decks that aren't visible on the model this isn't critical. The ports should line up according th 0 the sheer and camber of the deck (curvature lengthwise and side to side).
But for open gun decks it is important to get the height above the deck correct. You can really screw this up if you just tape a copy of the plans on the side and start cutting. I make a wooden tool that has the proper opening size spaced correctly above the deck. The tool is a bit tapered on the end.
For an already planked hull I cut a small hole at the center of the port and slowly enlarge it, using the tool as a guide. Keep the tool snug to the deck while using it. I use files to remove the wood slowly until the tapered end of the tool fits into the hole. Then I continue to enlarge the hole until the tool fits in all the way and is a snug fit all around.
One other thing to note is that the sills of the gun port (the framing around the port) are recessed a bit into the hull planking (the thickness of the gun port lids) to make a cavity for the port lid to close into. The opening in the planking is a bit larger than the port opening between the sills. I make another simple wooden tool that fits snugly into the opening in the planking but is a bit smaller all around to be used as a guide for placing the port sills. This will make every port exactly the same size as all the others.
Also, be very careful when scanning and then printing a plan. Many printers do not print the scale accurately. You are certain to have errors if you use the "fit to page" option. Even if you don't a printer may enlarge or reduce the size several percent relative to the scanned original. You may have to experiment and calculate the scale to use with your printer.
Needless to say, using the "fit to page" option for our purposes would indeed lead to unwelcome complications, putting it mildly. Secondly, any method chosen to translate information from a plan can get "screwed up" if care is not taken. What an accurate copy of any gun port plan does is reduce the repetitive transfer of measurements which can lead to inconsistency.
-
2 hours ago, Justin P. said:
This may be a more technically difficult approach for a newbie, but I’ve found it easier to add scratch built gun port framing according to where they should be, and then plank around that. Otherwise it gets finicky to drill/file and cutout holes in a nicely planked hull.
From his description in the original post I would gather that his planking has already been completed and the query is over how to establish a reference for the gun port openings.
-
-
-
There is a fine line between the efficiency resulting from being totally organized and the total euphoria one feels when the elusive tool that has eluded you for quite some time, finally presents itself at the most opportune time. I still struggle to find the happy medium..........................!!!!!!
-
If it works for you and you feel better for the investment, then that is all that matters. Just lost a good portion of my cyano because of a mishap so I understand the challenges with spillage.
- mtaylor, Canute, Captain Slog and 1 other
-
 4
4
-
-
1 hour ago, grsjax said:
I use a 3 drawer wooden art supply organizer. Just the right size for xacto knife handles and blades. Available in 2, 3, 4, 5, 6 and 10 drawer versions. Take the time to apply wax to the drawer runners to ensure smooth operation.
https://www.displays2go.com/P-22078/Art-Supply-Organizer-3-Beechwood-Drawers
Also available from Amazon and Jerry's Artirama .
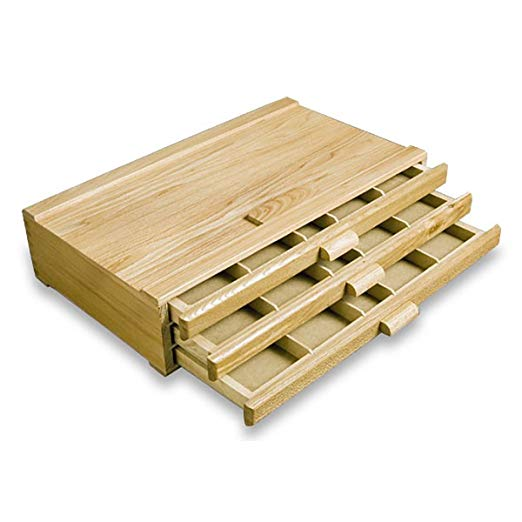
I look at this and know I need one.... price is reasonable too. But I live in Canada and the currency exchange is brutal. Now I can do with out.........
-
-
-
-
Nice.... and I checked amazon and found the same unit rebranded but at double the cost? Go figure??
-
-
I think I've become a fan of this builder. You are doing some very nice work. Looking forward to seeing it finished.
- Elijah and greenstone
-
2
-
9 hours ago, Ferit said:
Flashy ship, a good choice both as a ship model and as a manufacturer and outstanding work as expected...
Thanks Ferit,
I'm surprised to see this old log still has some life and many thanks for the "likes" as well. I'm humbled by one sent by the Mr. Watton. Maybe I should bring her down from under the dust covers and bring her back into the game.
-
-
While the carving is exceptional I would have expected extensive scarring on the finger tips.
- giampieroricci and mtaylor
-
2
-
I'm guessing plenty of projects will be sidelined once this magnificent kit is released. As long as the developers stay true to the prototype and the retail numbers meet with approval, I foresee a shortage of stock at the distributors level because of high demand . Not many builders will be able to resist jumping on this bandwagon..... me included!!!
-
Just as an FYI....the kit in question has been sidelined as my Corel Berlin called out to me from its resting place on my shelves. In response to the most recent posts, yes, the kit was expensive (by my standards anyway) but there is value to the kit contents. Euromodel kits are challenging for various reasons and this one is no exception. Even if there is some confusion over the accuracy of the actual ship I was only interested what a beauty she is as depicted by Euromodel. It is always up to the builder to bring the contents of the kit to life.
-
-
Gorgeous workmanship in an impressive build log. Thank you for sharing!
- Keith Black and mtaylor
-
2
-
-
Superb workmanship Ferit,.....I've cracked the seal on my Berlin and hope to achieve the high standard that you've set with your build. Really good log you have going here!!!
JP
Twisting blade on MicroMark saw?
in Modeling tools and Workshop Equipment
Posted
Yes, that same blade will respond in the same manner when used on my Proxxon FET. If it is used on any hard wood I must take very slow shallow passes, otherwise the deflection appears. Repetitive use on hard woods will certainly shorten the lifespan of its effectiveness......best to be used on softer woods.