schooner
-
Posts
741 -
Joined
-
Last visited
Content Type
Profiles
Forums
Gallery
Events
Everything posted by schooner
-
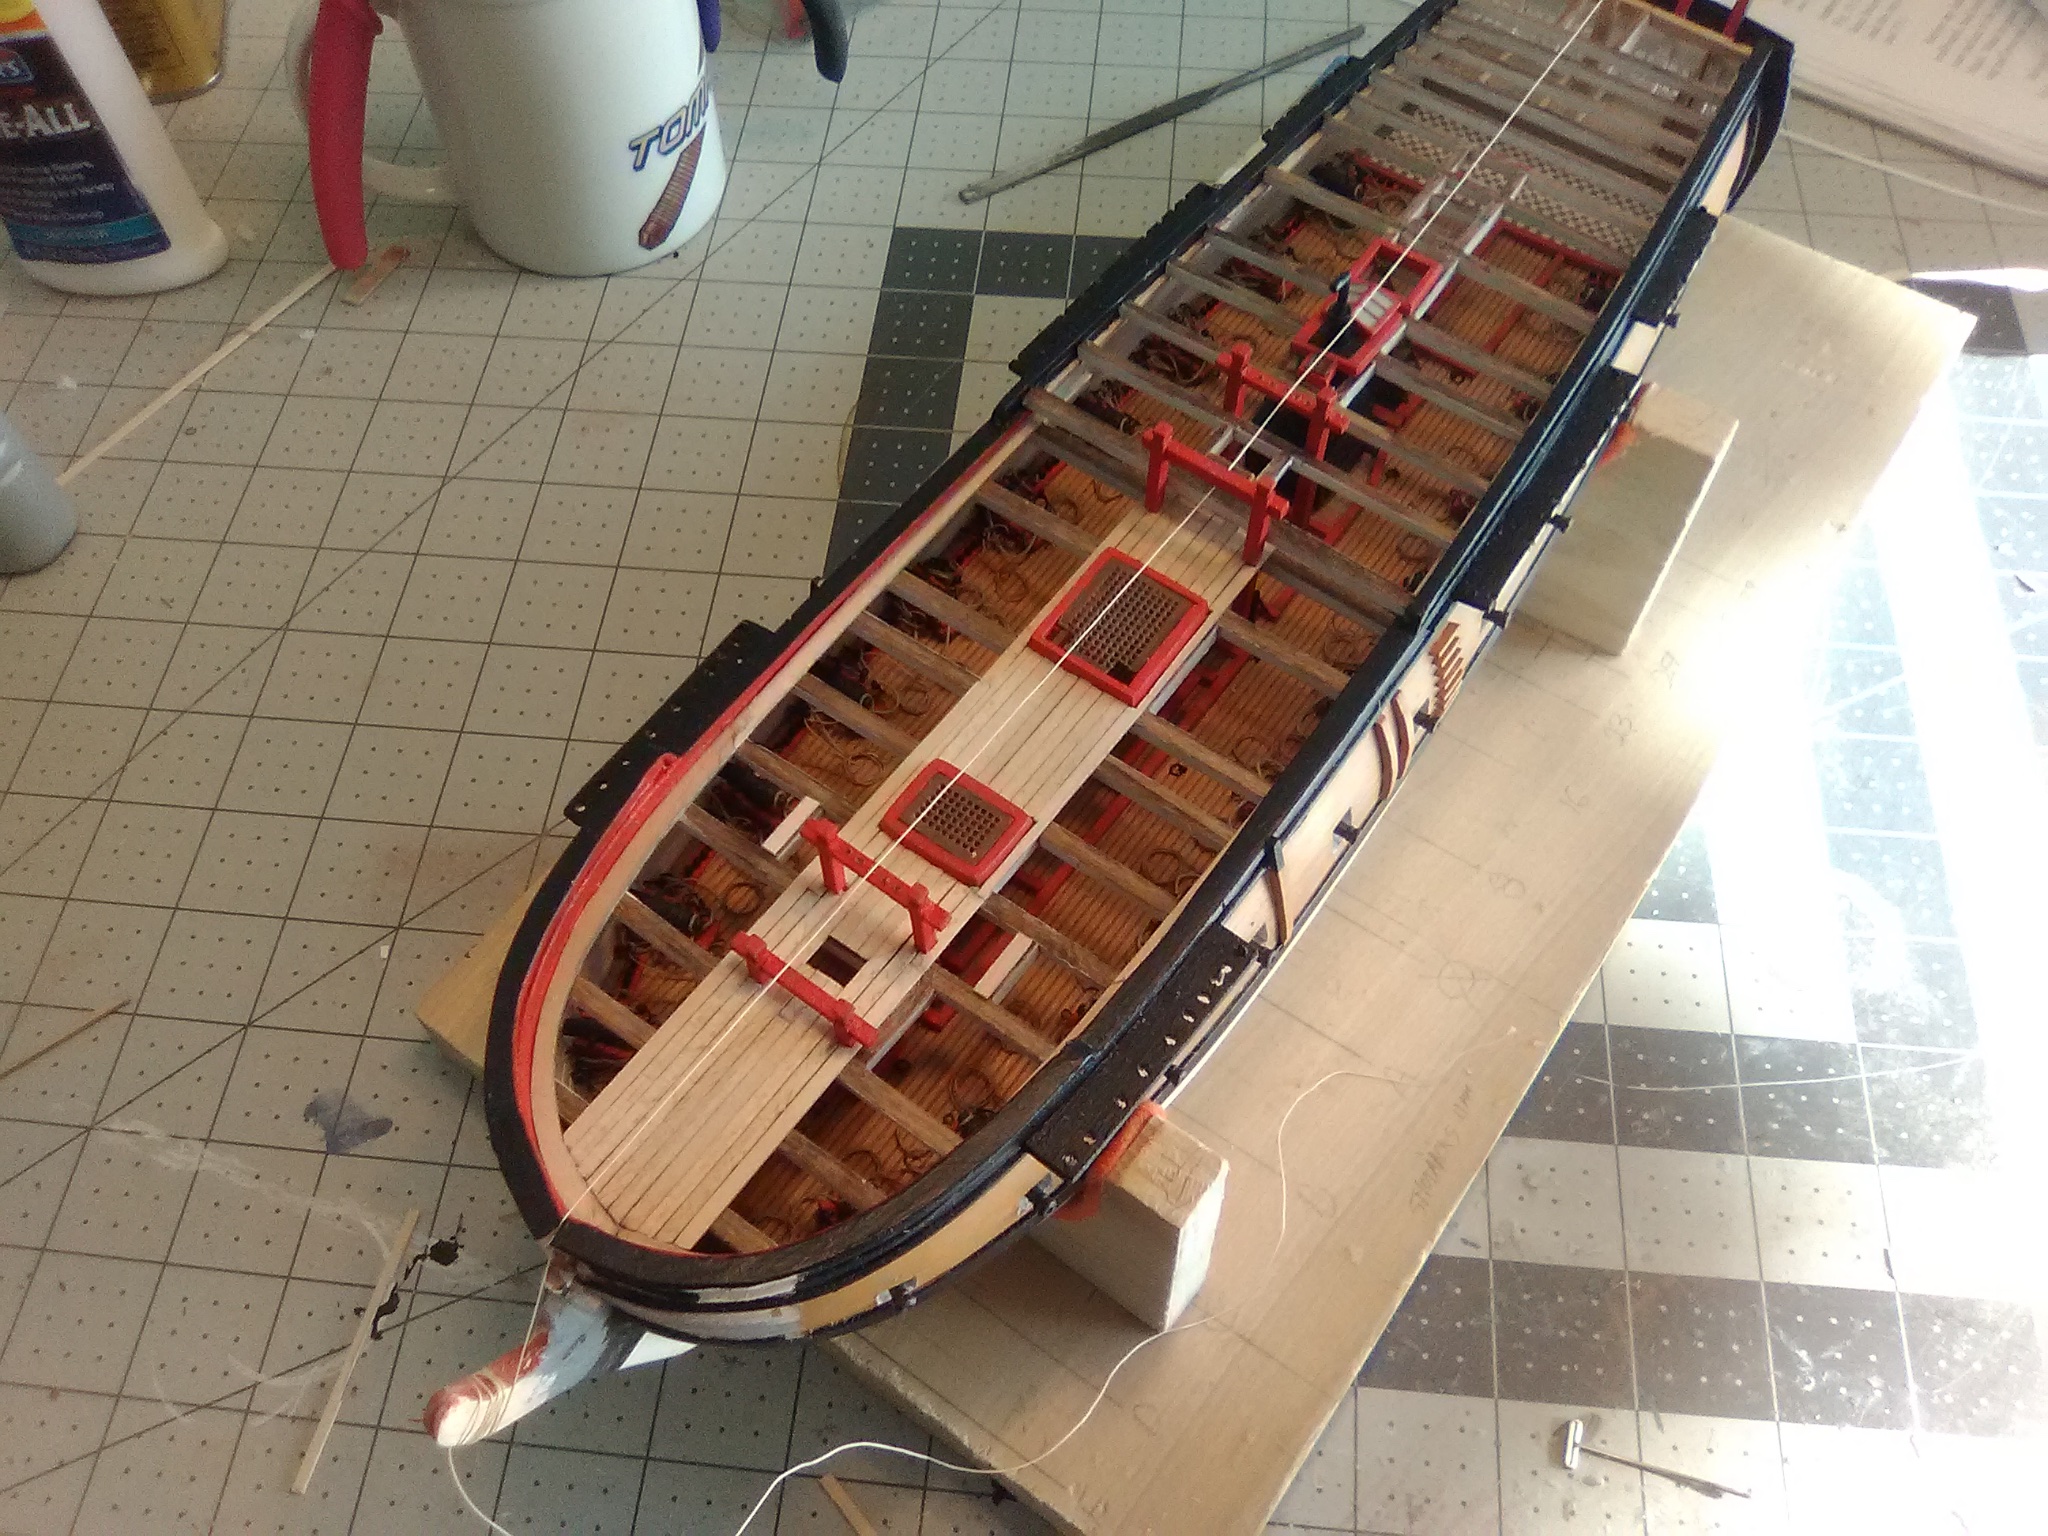
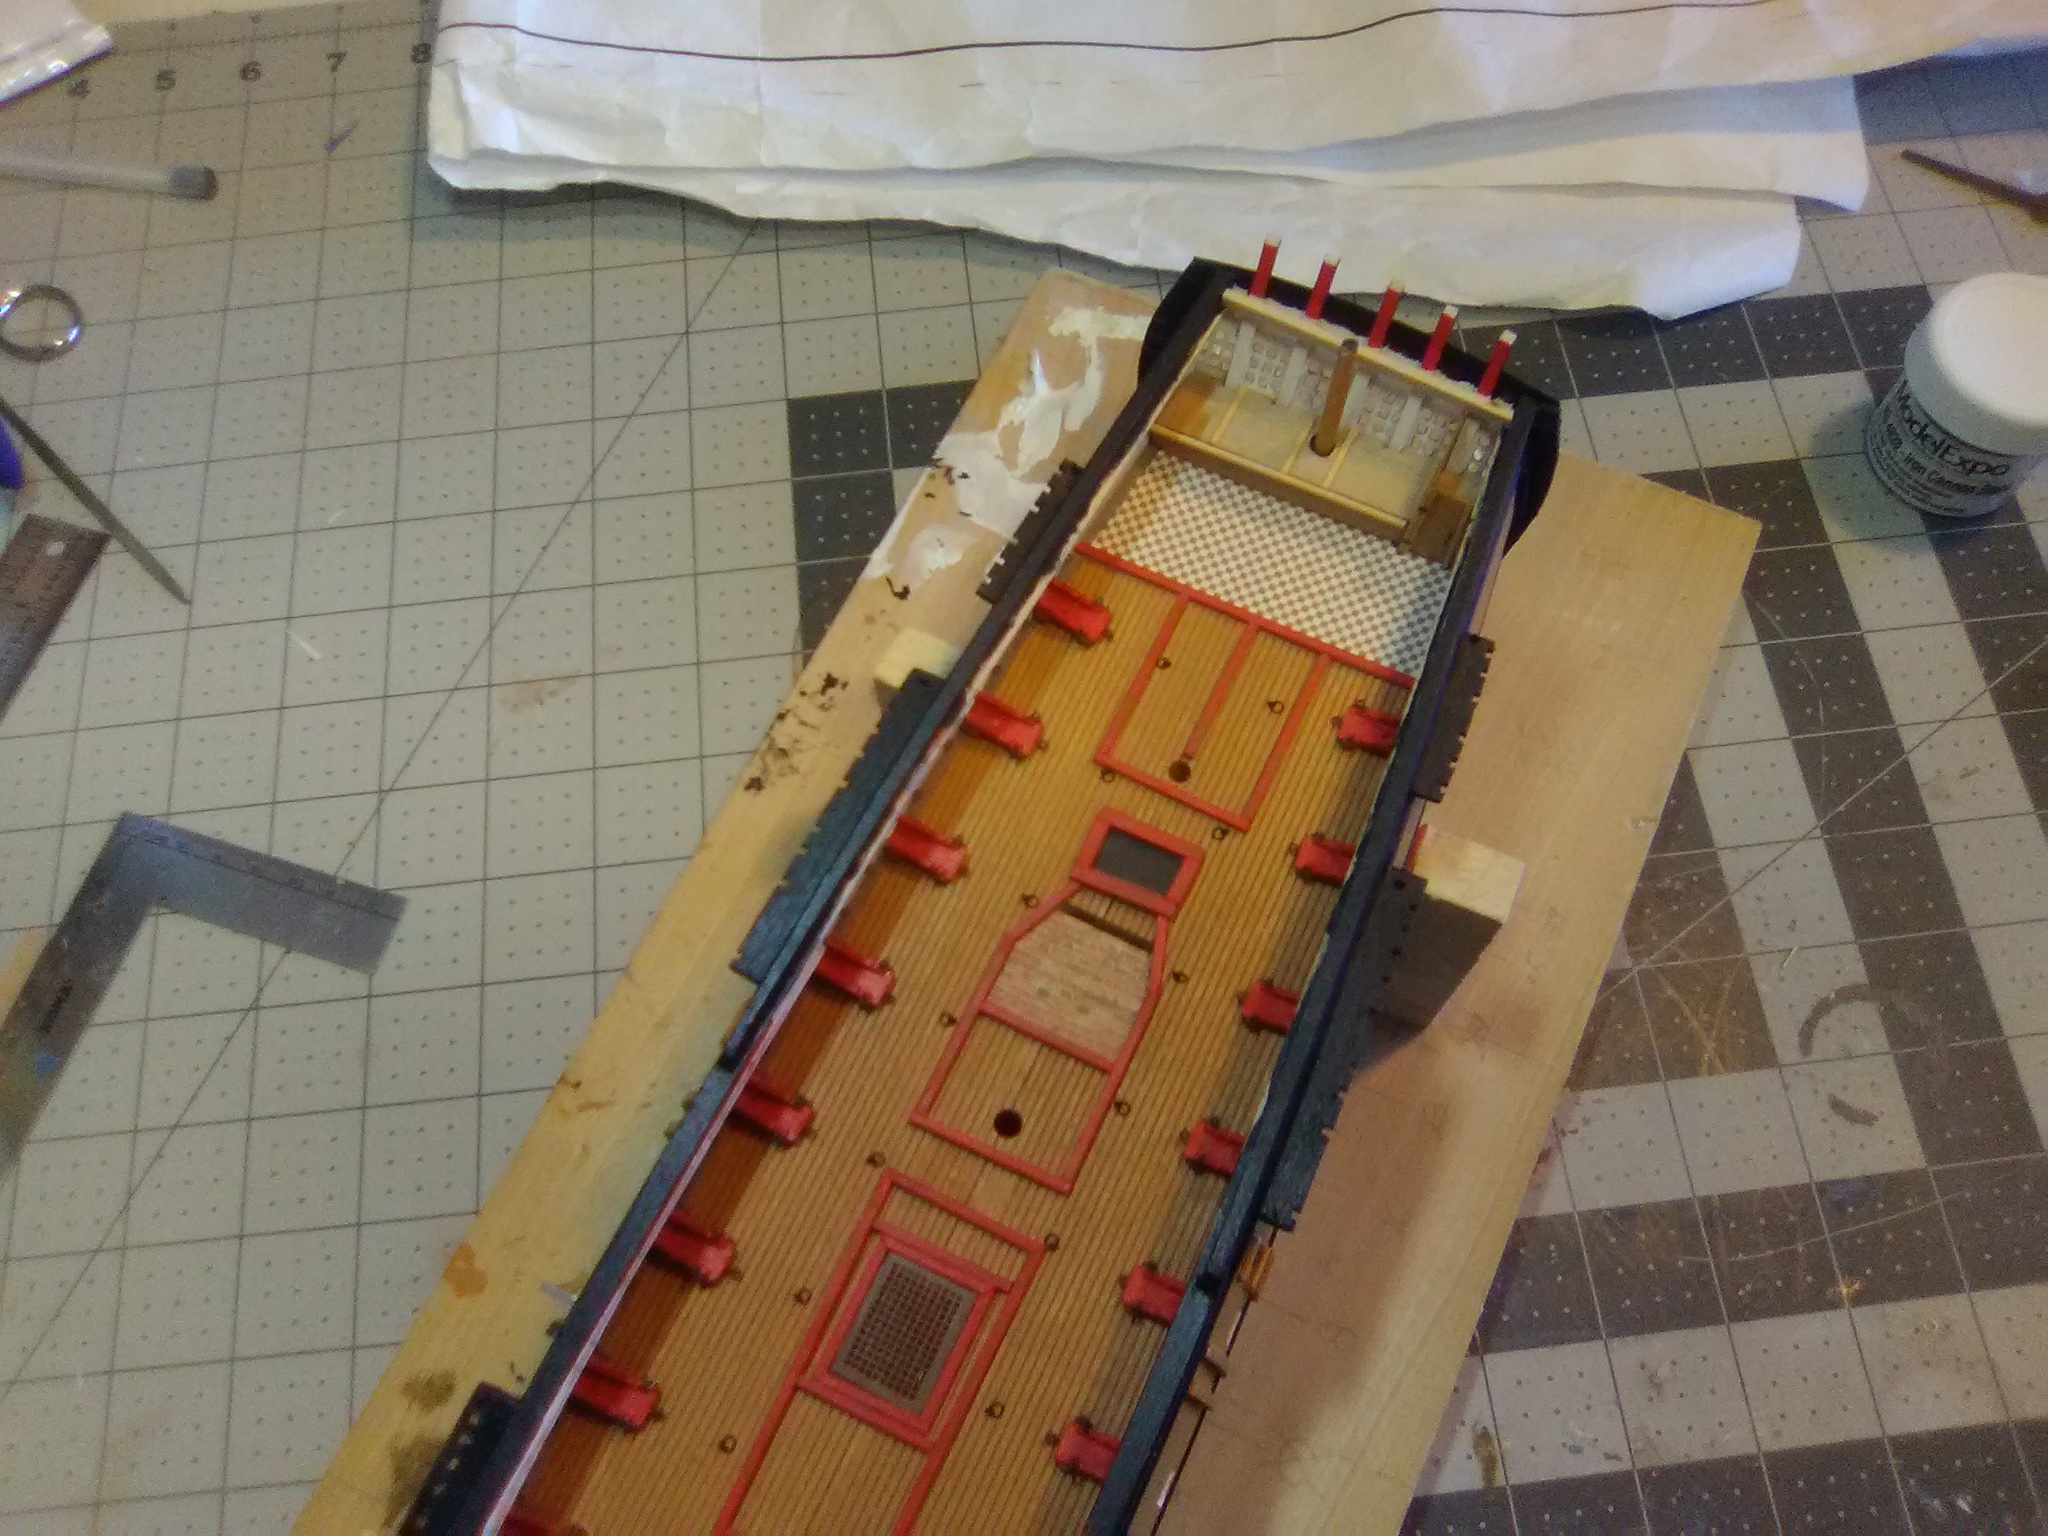
 Starting the Deck Planking I’ve got the centerline portion done. It’s been a real 2-steps forward, 1 back as I relearn how to do this. It would have been easier to plank the centerline and then add the hatches on top of it and cut holes for the bitts but it is really hard to clean up sawdust and debris from the gun deck with all the beams in place so I decided to do it this way. Next I’ll fill in the bow area back to the 3rd beam and then add 1 or 2 planks along each side.
- 142 replies
-
- 7
-

-
- alfred
- solid hull
- (and 2 more)
-
Jep, glad you were able to get this one going again. If you need some references for what kind of stuff was on the catwalks you may want to go to the New Steelnavy site (steelnavy.com), look under "model gallery", select "aircraft carriers". About 2/3 of the way down the list there is the USS Kallin Bay - a very large model at Naval Aviation Museum in Pensacola and then down almost at the bottom of the list is an album of a 1/72 scale scratch build of the Gambier Bay.
- 25 replies
-
- 4
-
-
- Gambier Bay
- BlueJacket Shipcrafters
- (and 1 more)
-
I hope you have as much fun with it as I did. Good luck!
- 30 replies
-
- 2
-
-
- Red Baron
- Bluejacket Shipcrafters
- (and 1 more)
-
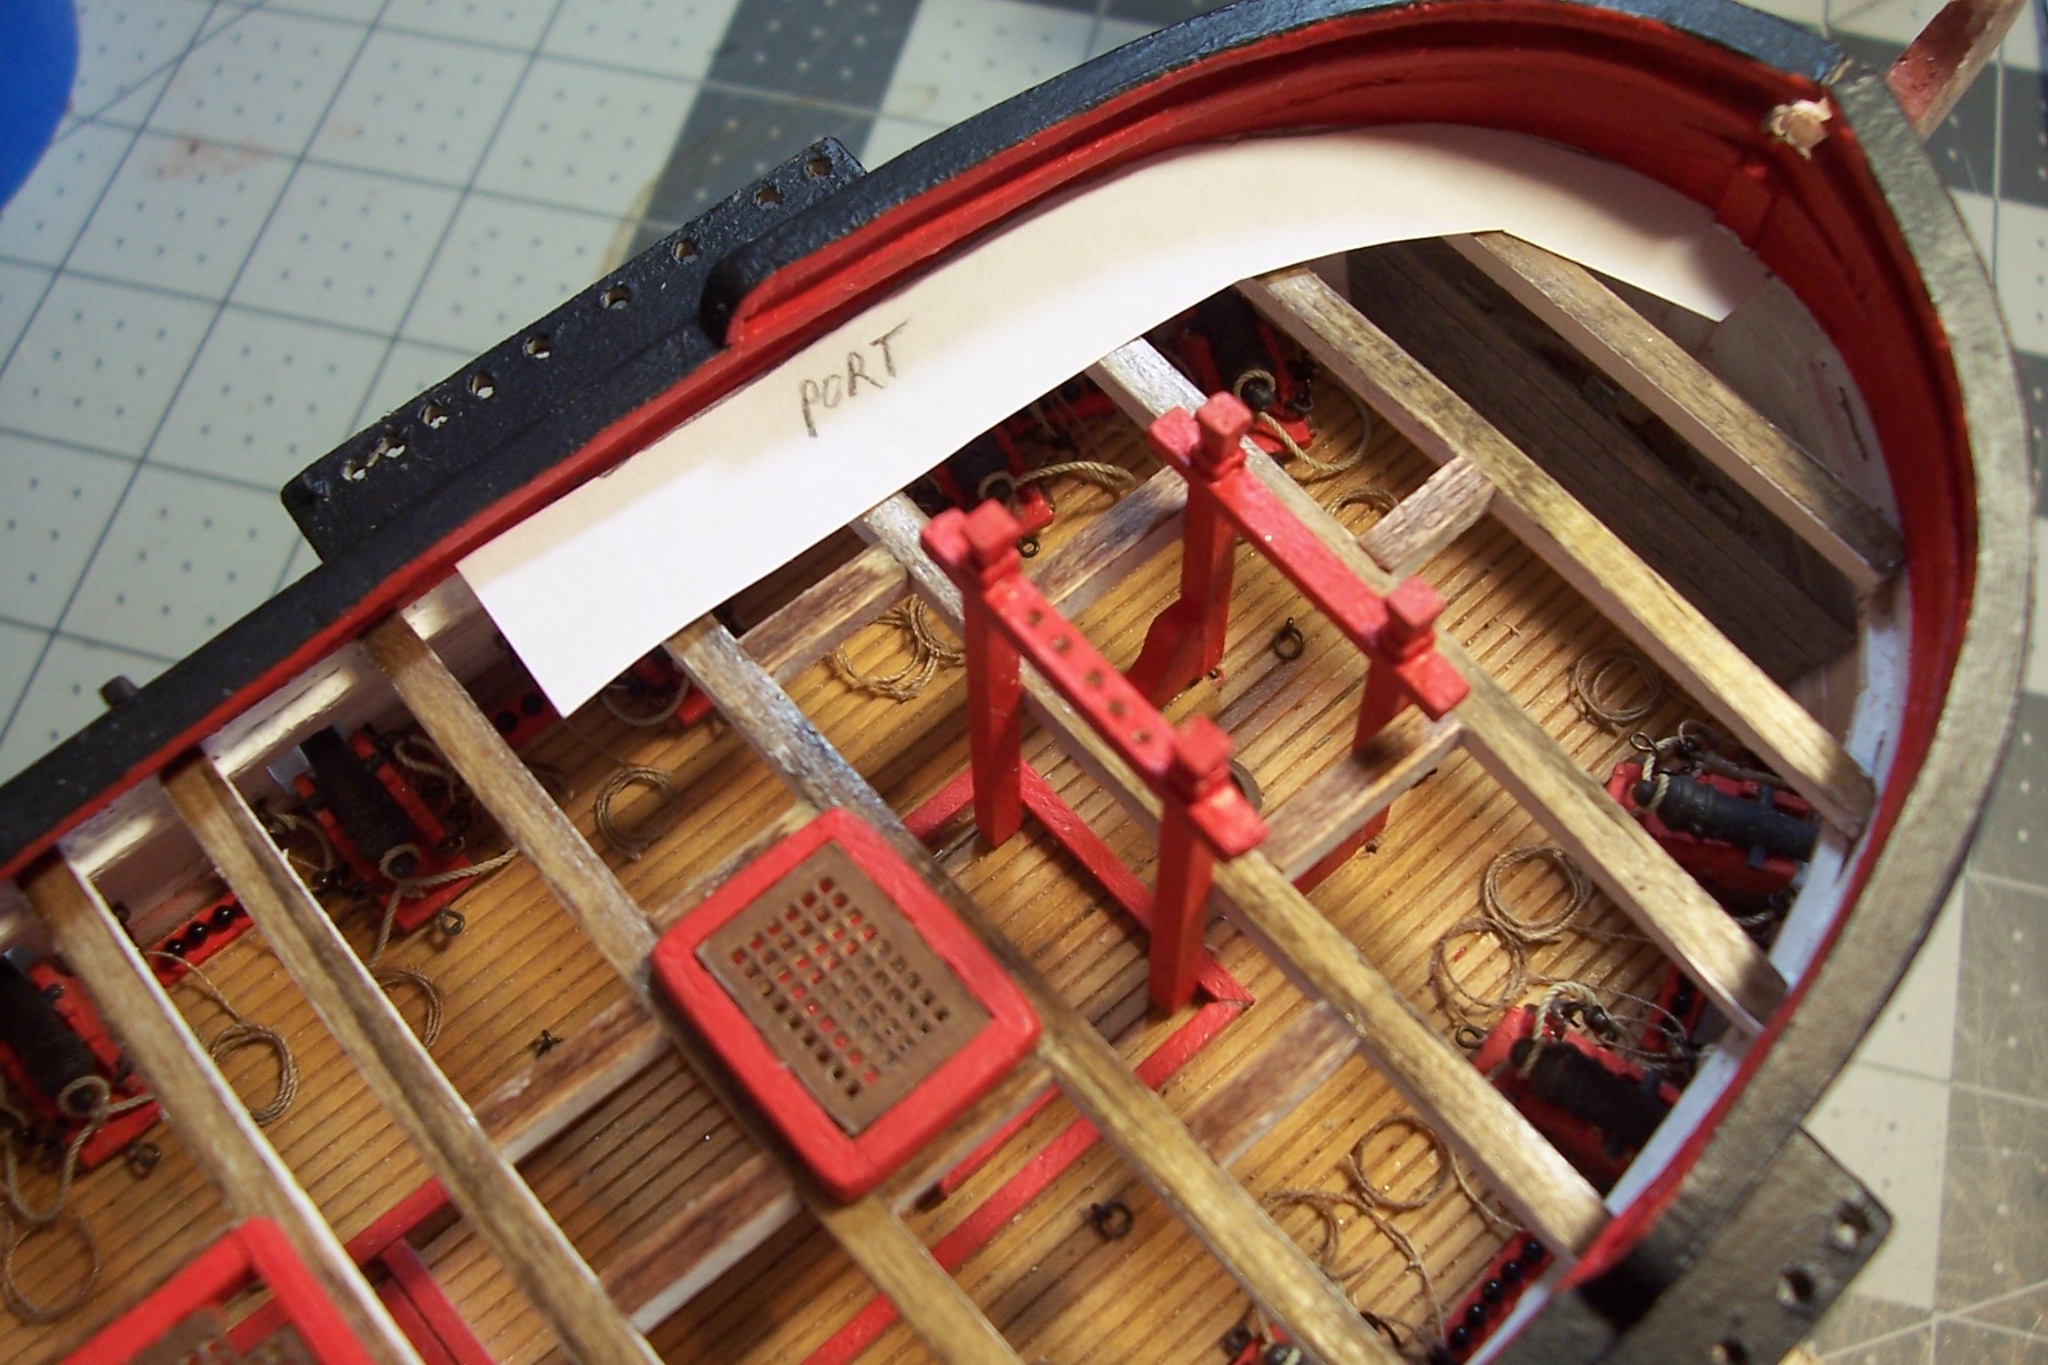
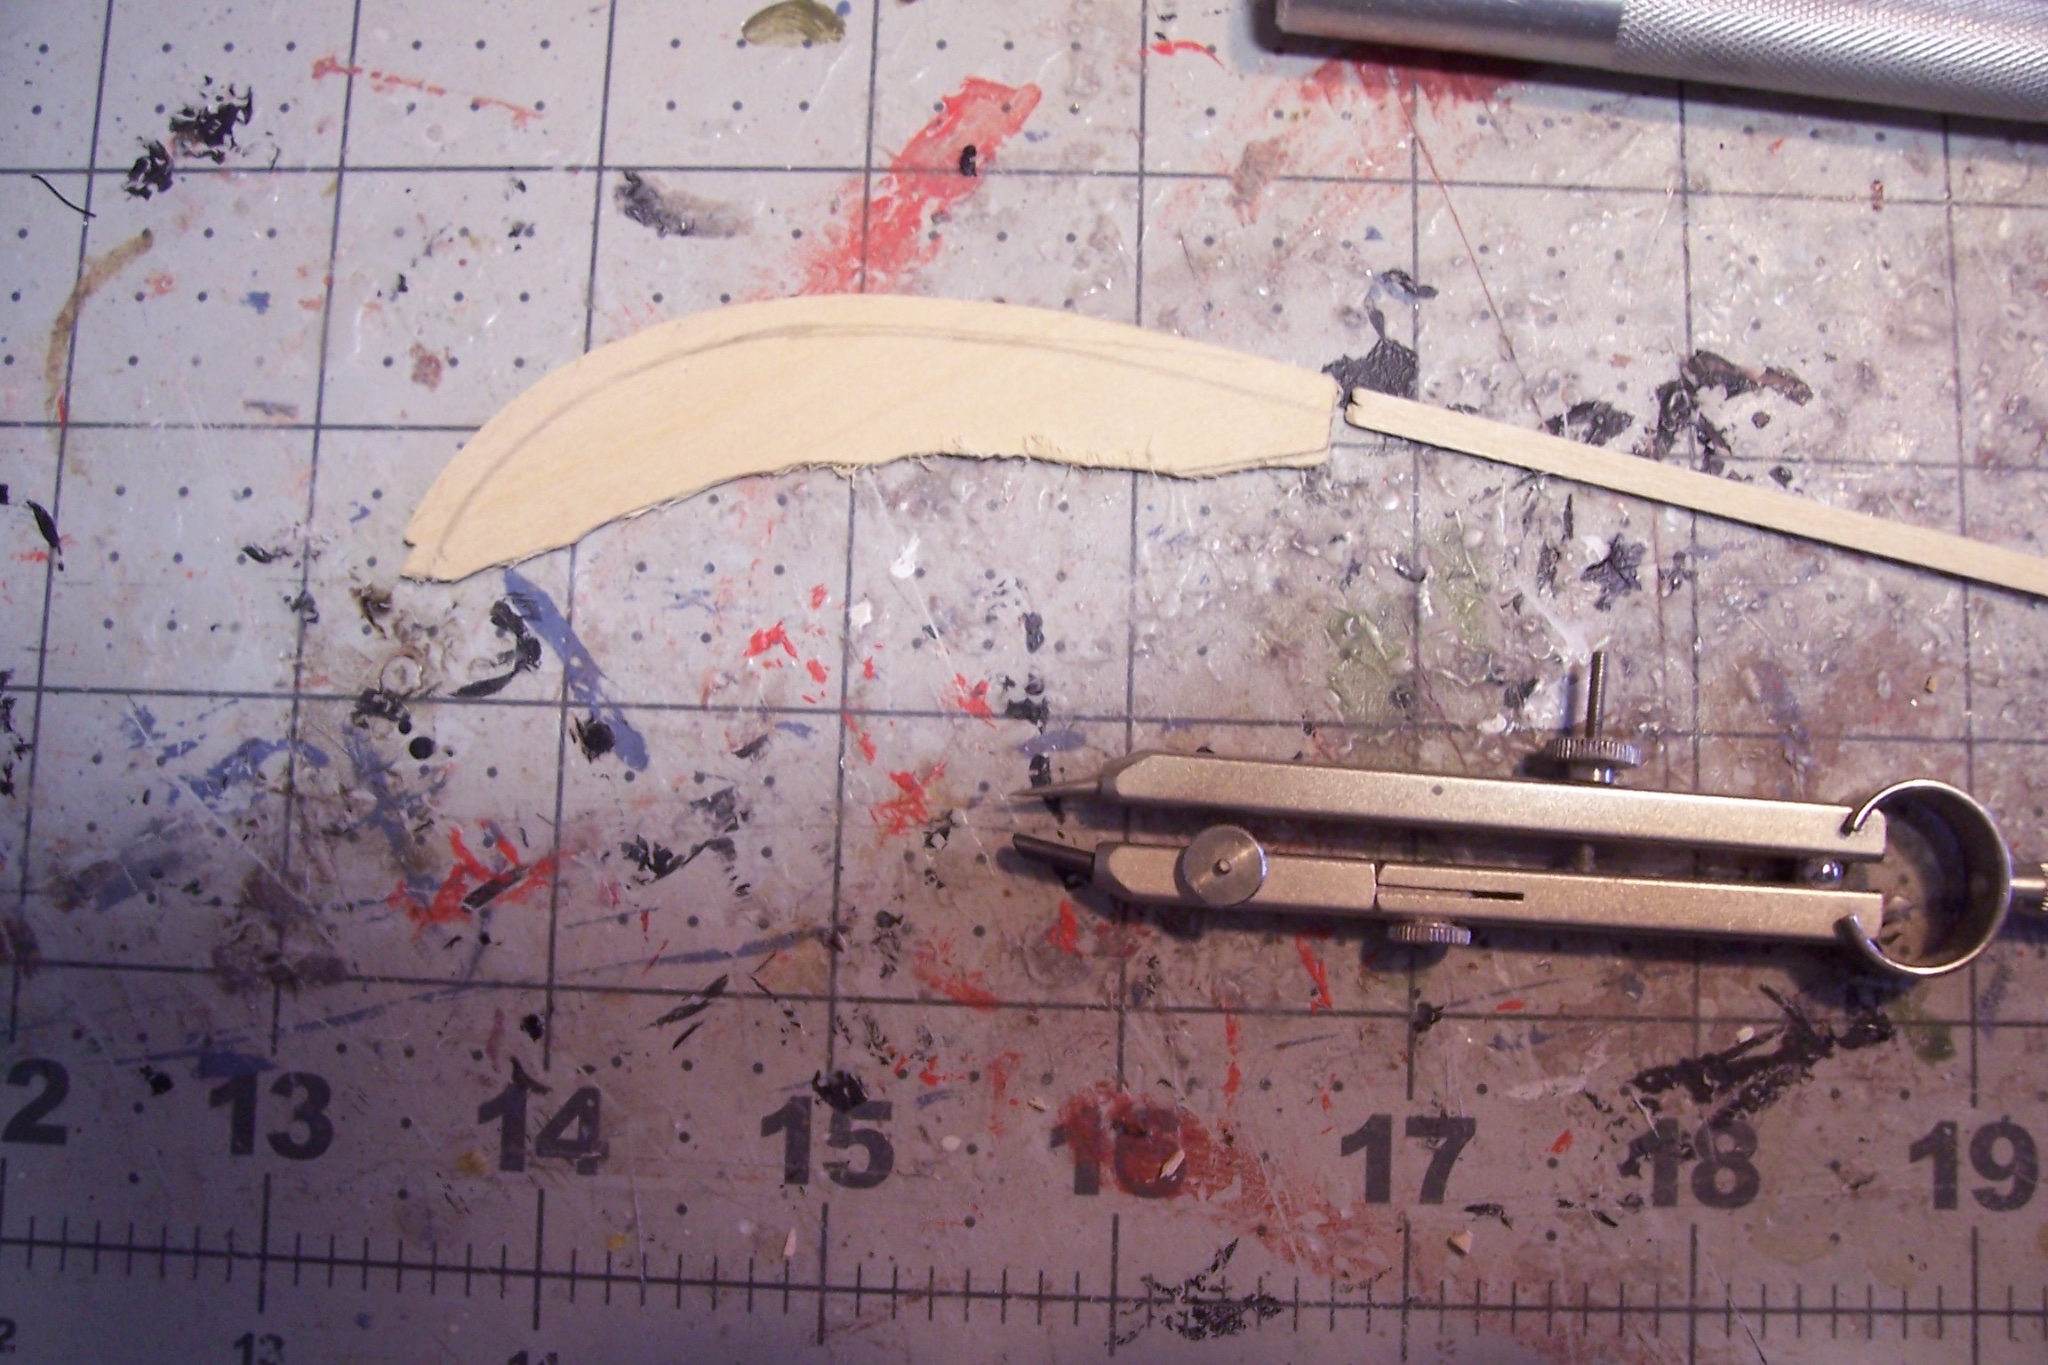
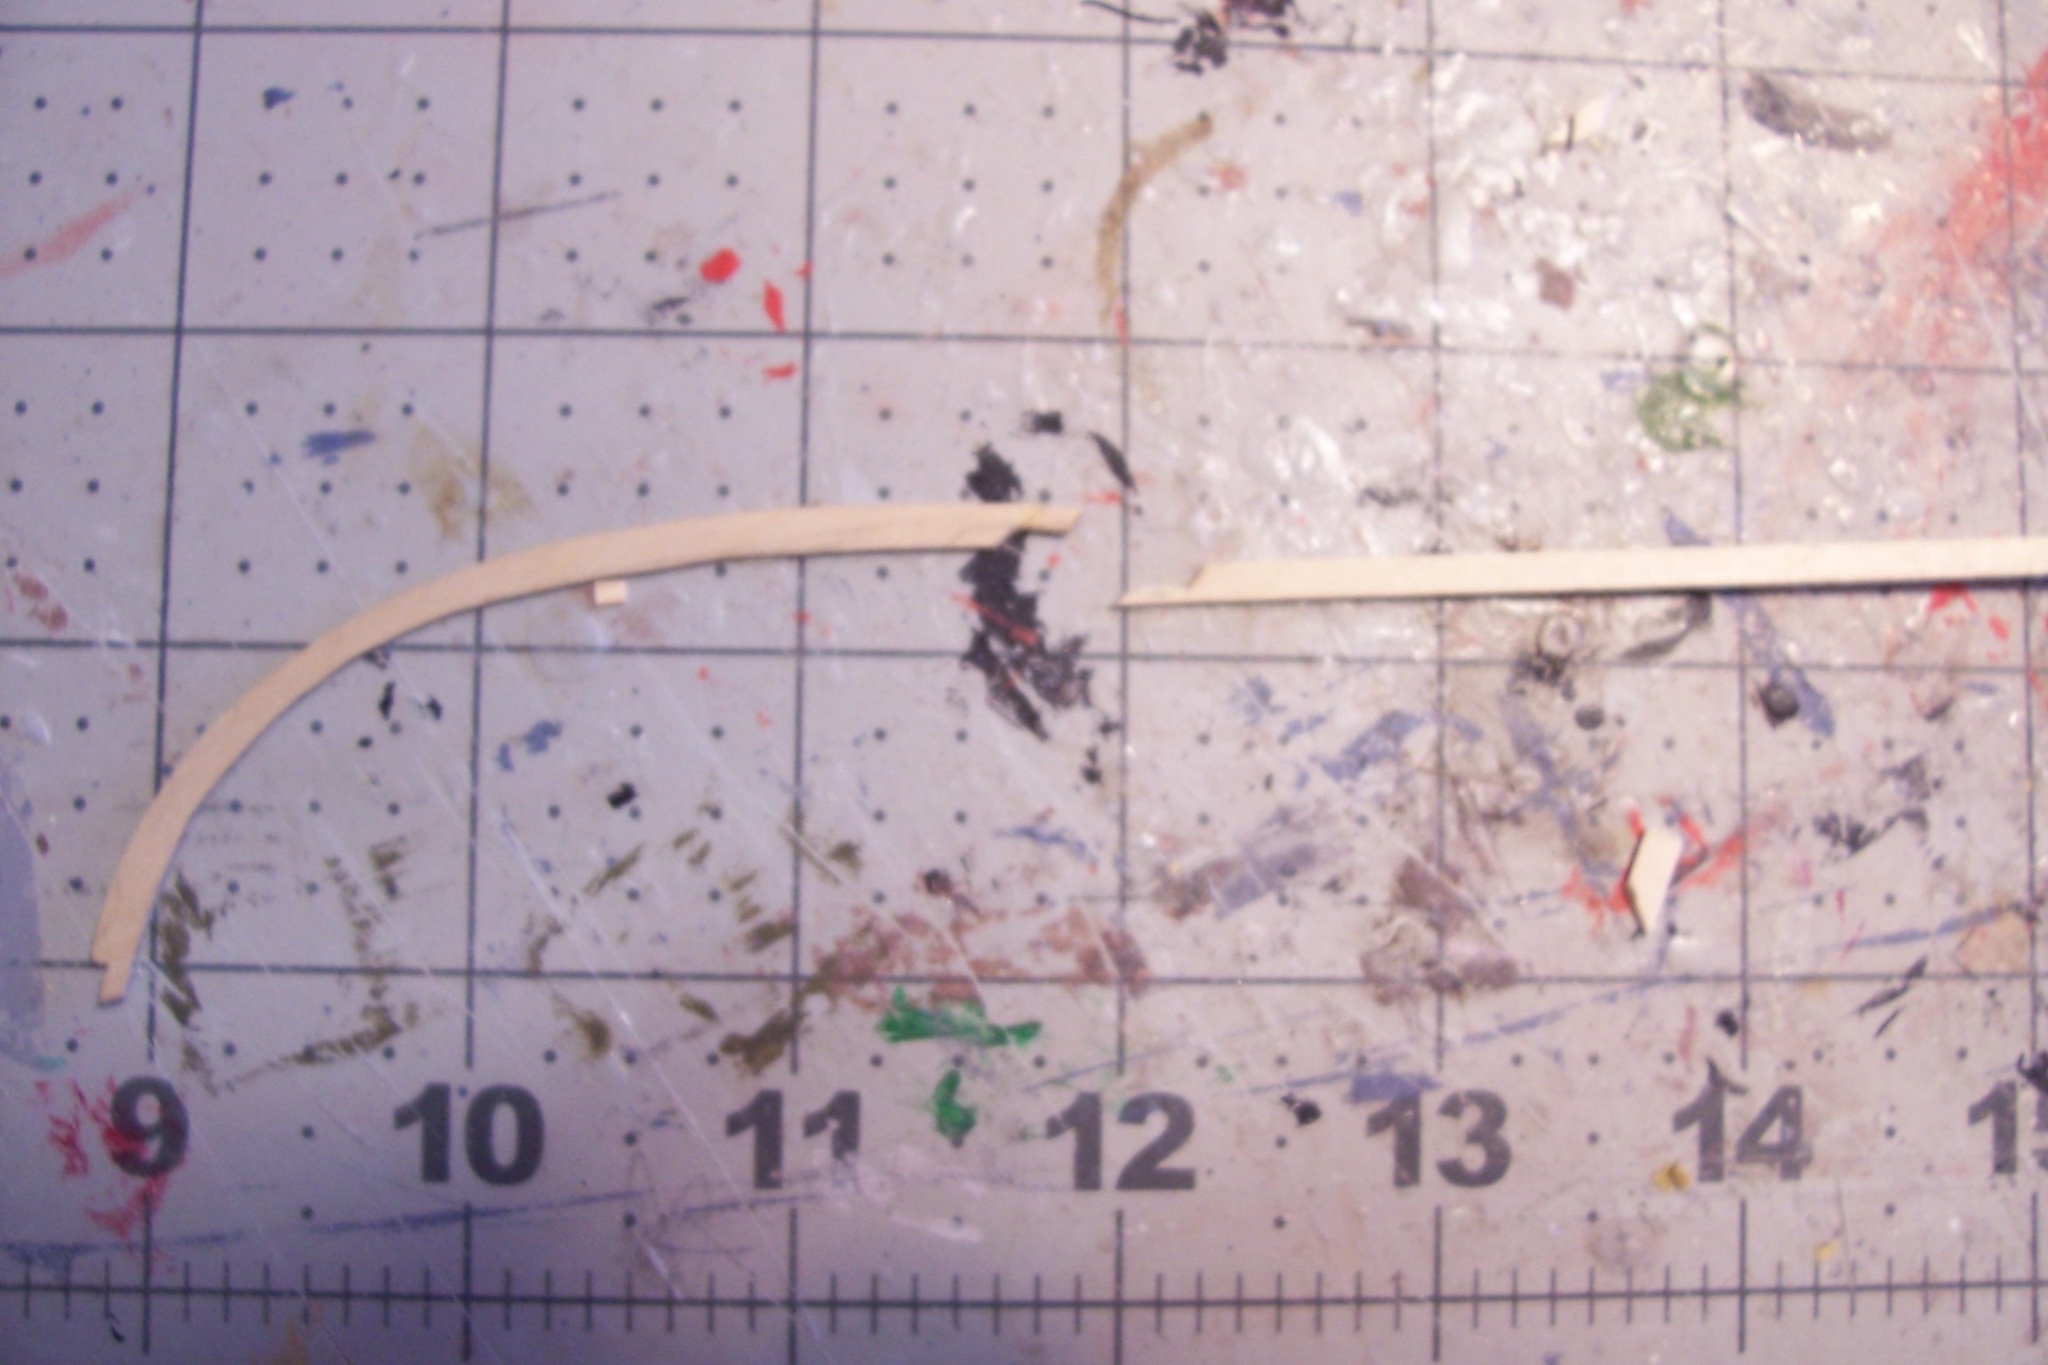
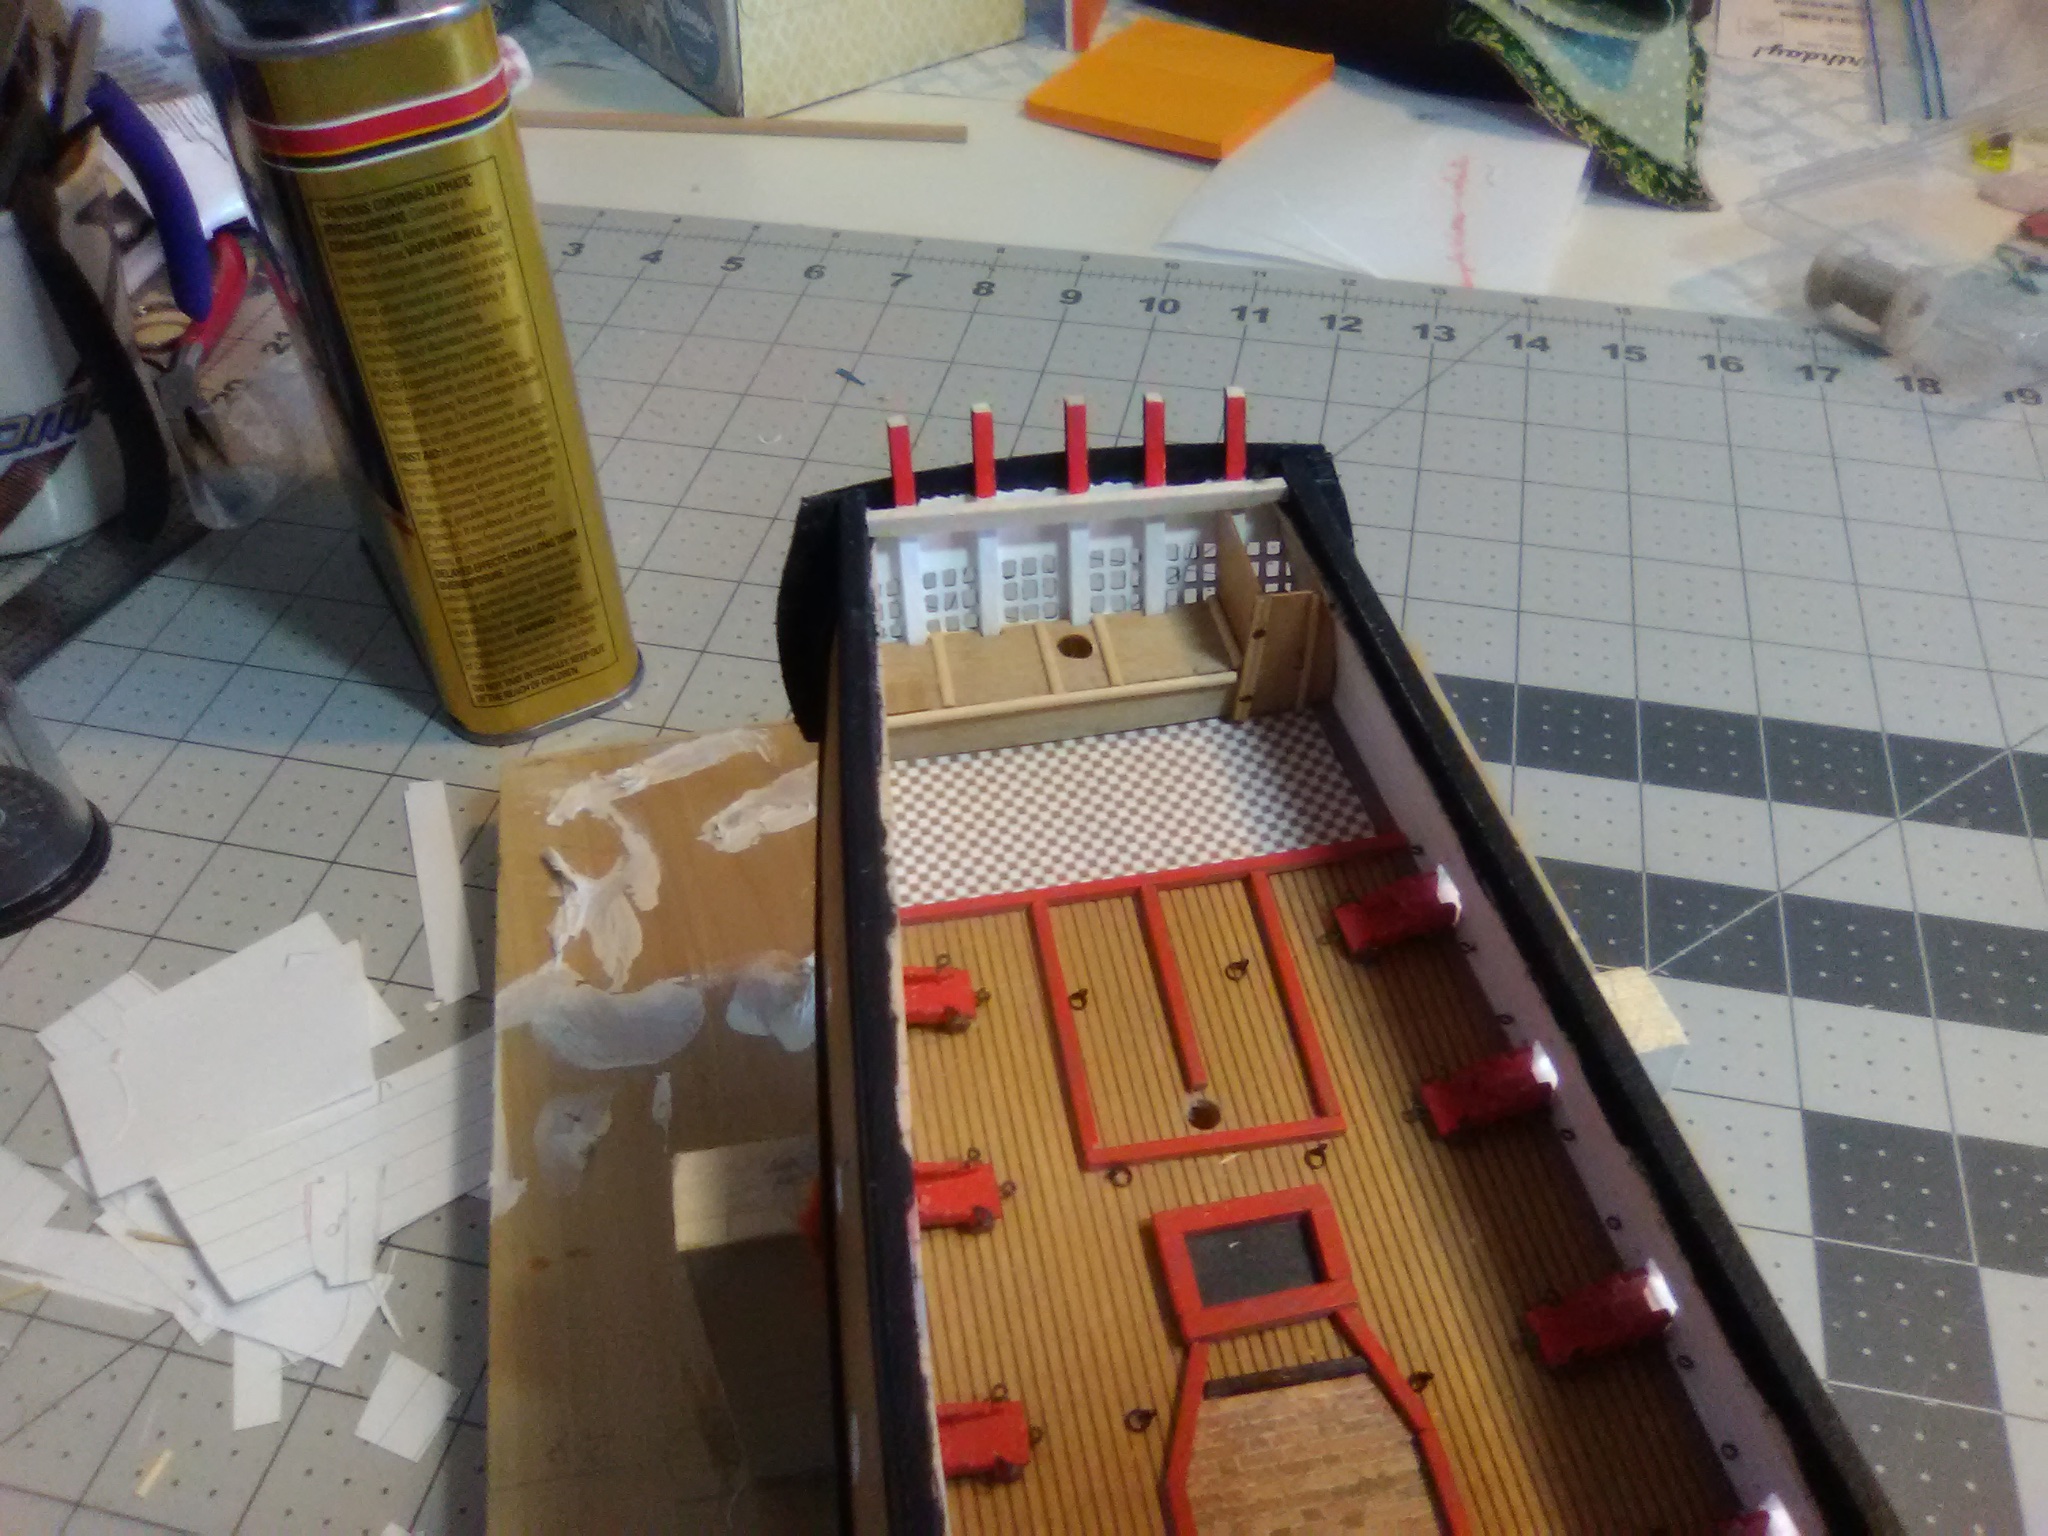
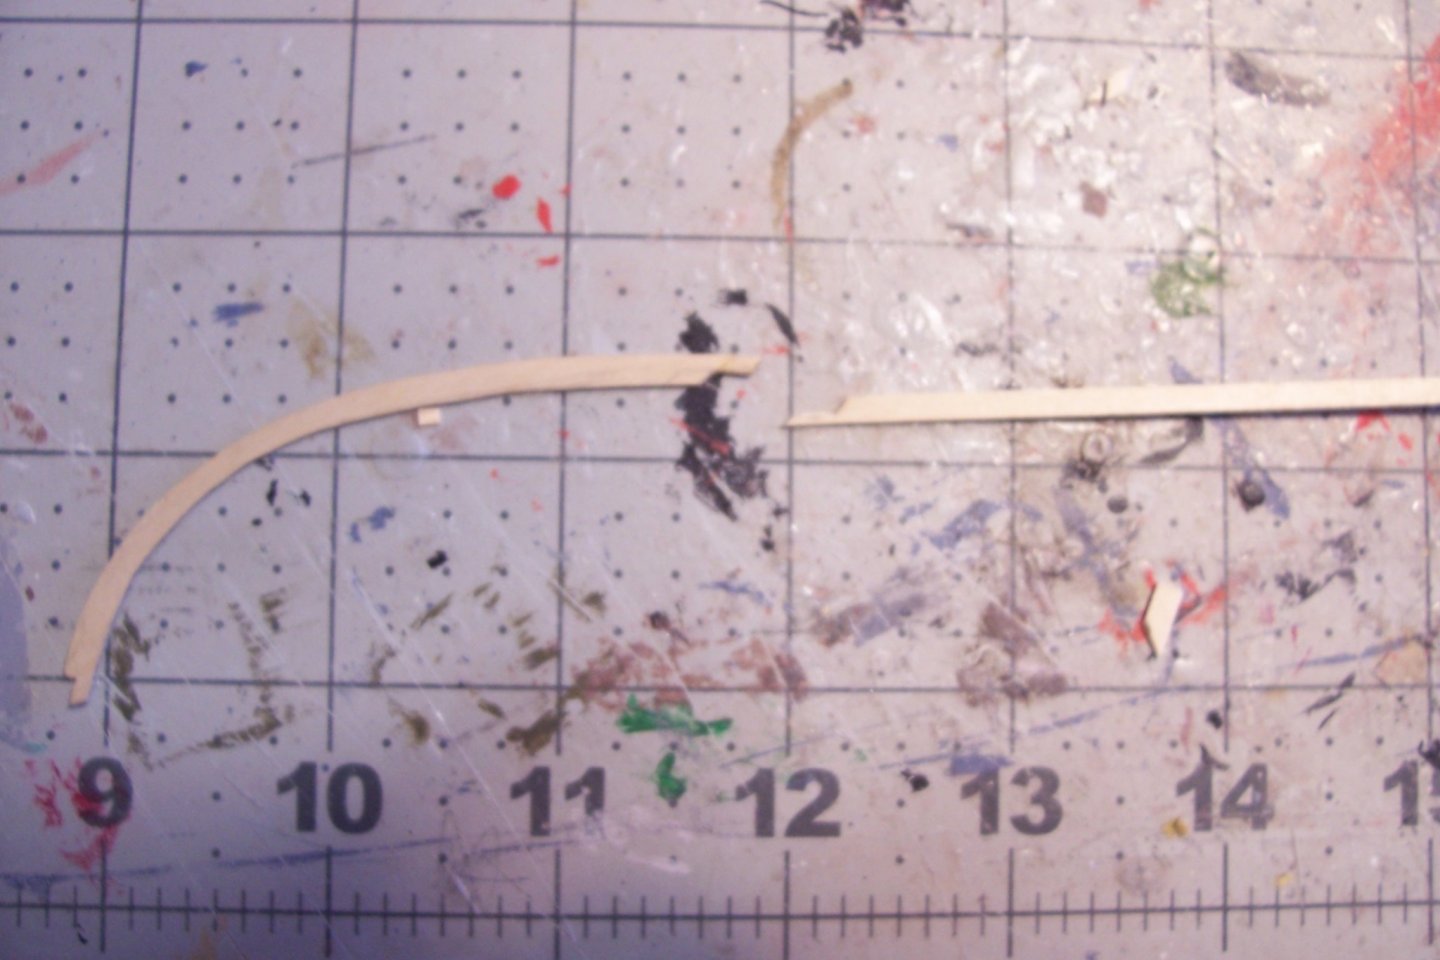
Fitting the Margin Planks My planking strips are 3/32” wide. I needed the margin planks to be a little wider and was able to find some 1/8” strip of the same thickness. The curvature at the bow is too severe to edge-bend the strips so I had to cut it out of sheet material. I traced the forward edge of the deck off of the plans on to a piece of paper to serve as a template. I only took it as far aft as the point where the planks will run straight. After a bit of trimming I had an acceptable fit: I then traced the outboard curve of the paper onto my sheet material, used a Dremel sanding drum to get a pretty close fit to the traced line and then, kept test firing the wood onto the deck, sanding and filing until the wood had a good fit. Next I set a compass at 3/32” and followed the outside of the curve to set the inside curve and the width of the forward, curved plank: A scarp joint was cut into the aft end of the forward plank and transferred to the forward edge of the next piece moving aft: The margin planks for the main deck are now in place:


- 142 replies
-
- 6
-
-
- alfred
- solid hull
- (and 2 more)
-
Thanks Nic, should continue to be a lot of fun - until the rigging starts
- 142 replies
-
- 2
-
-
- alfred
- solid hull
- (and 2 more)
-
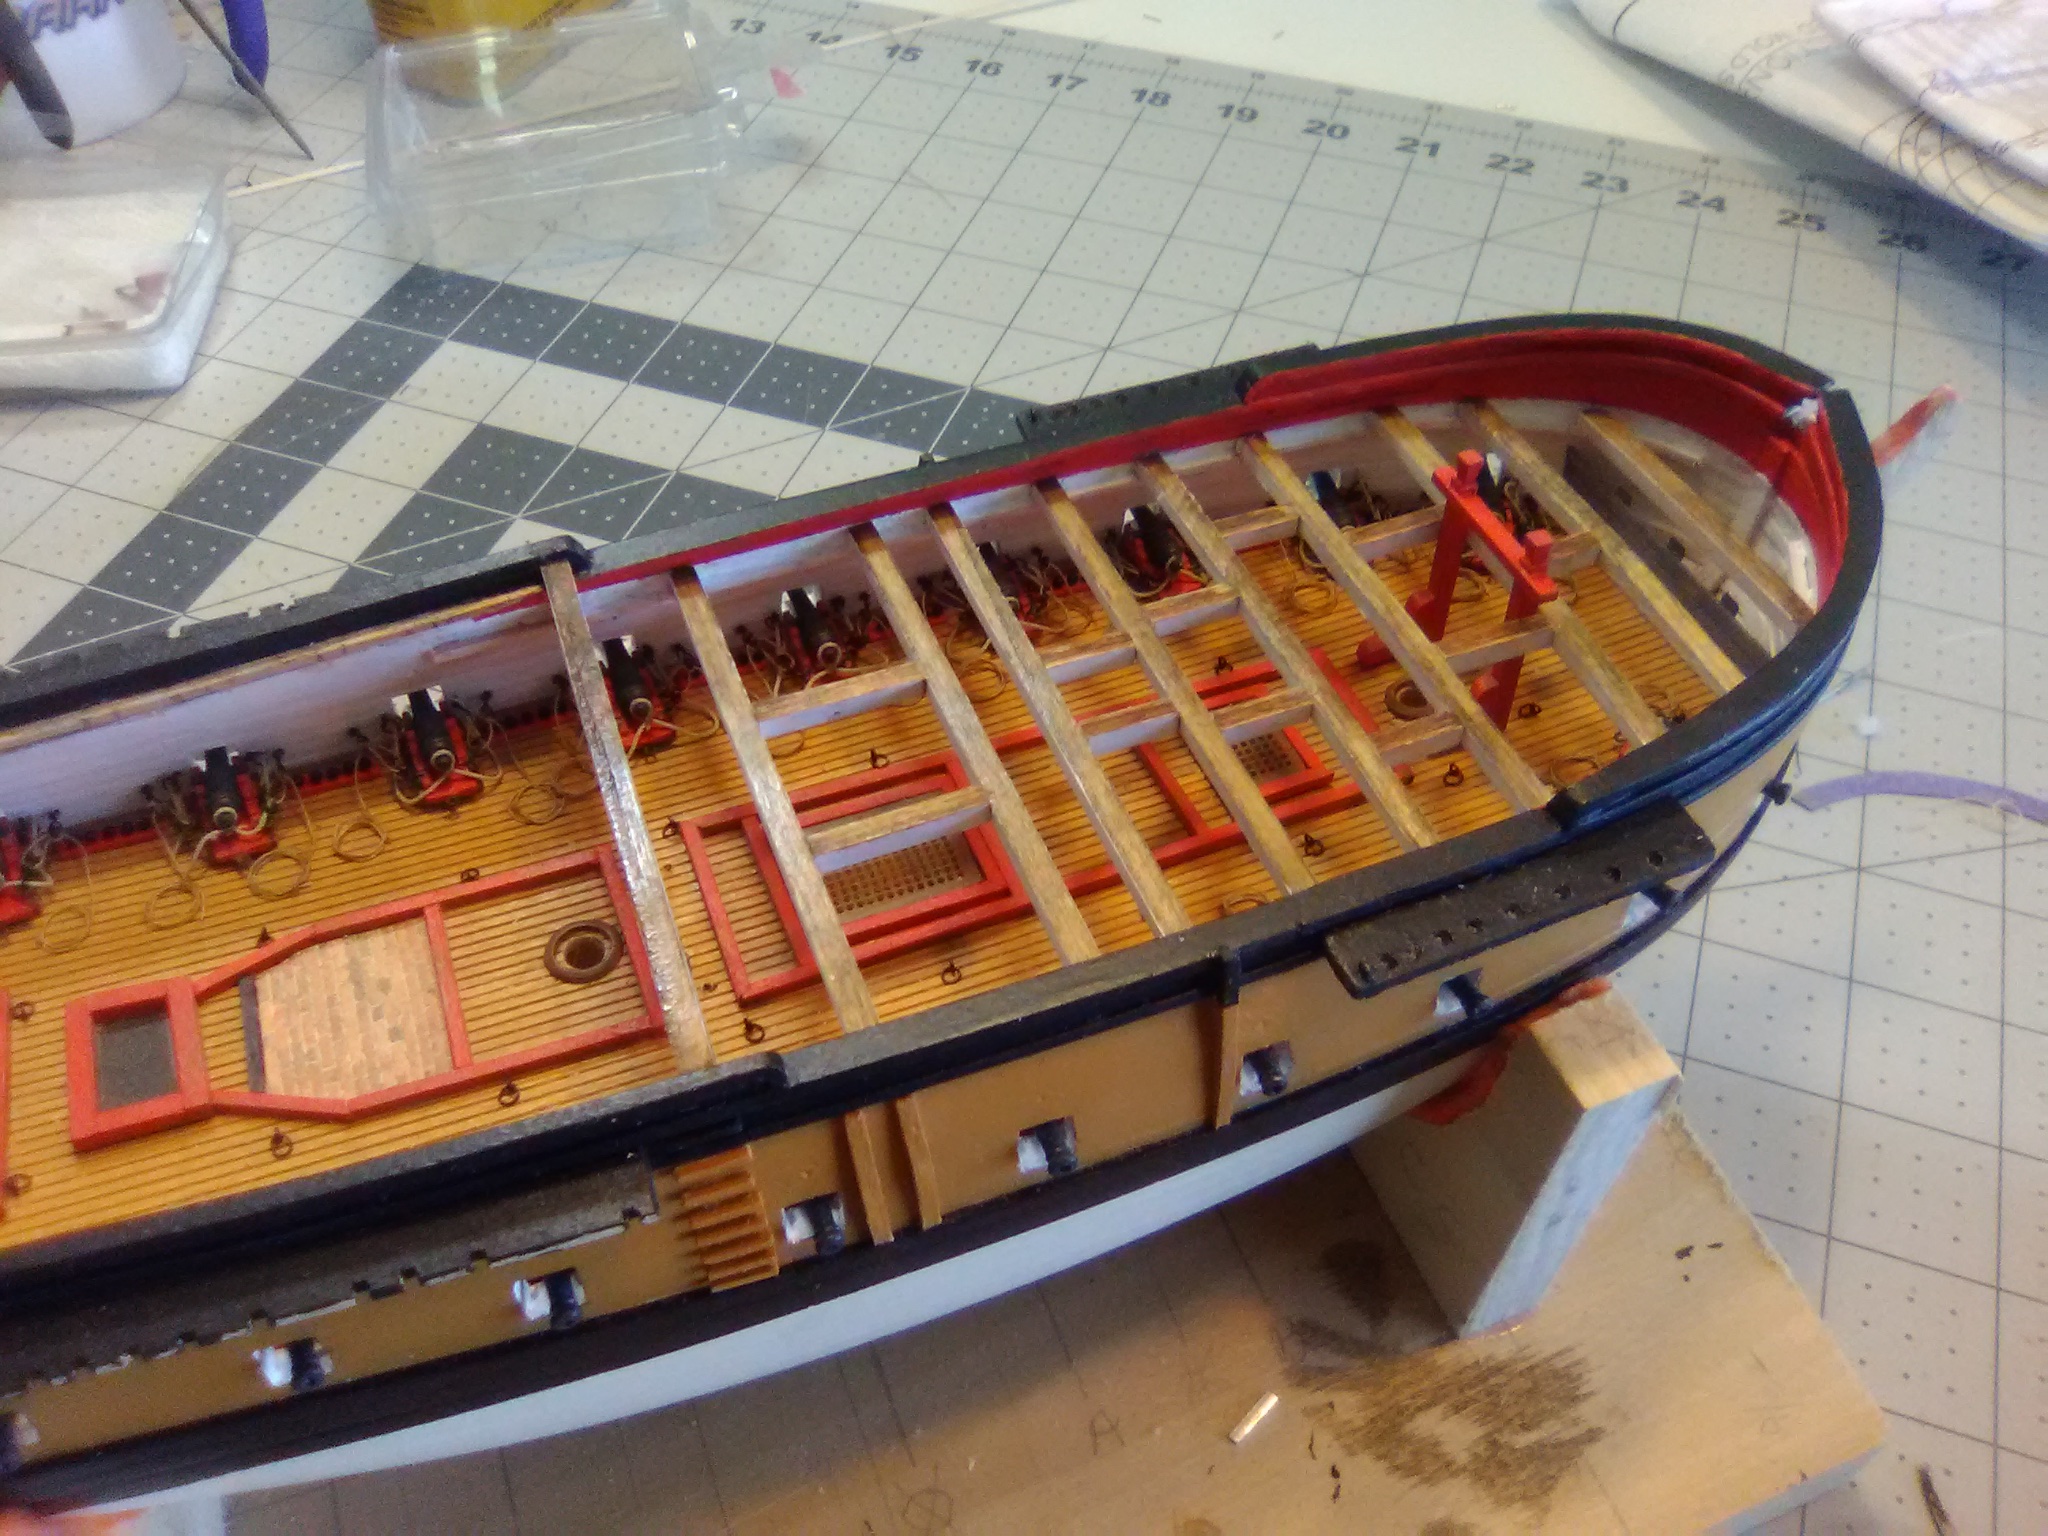
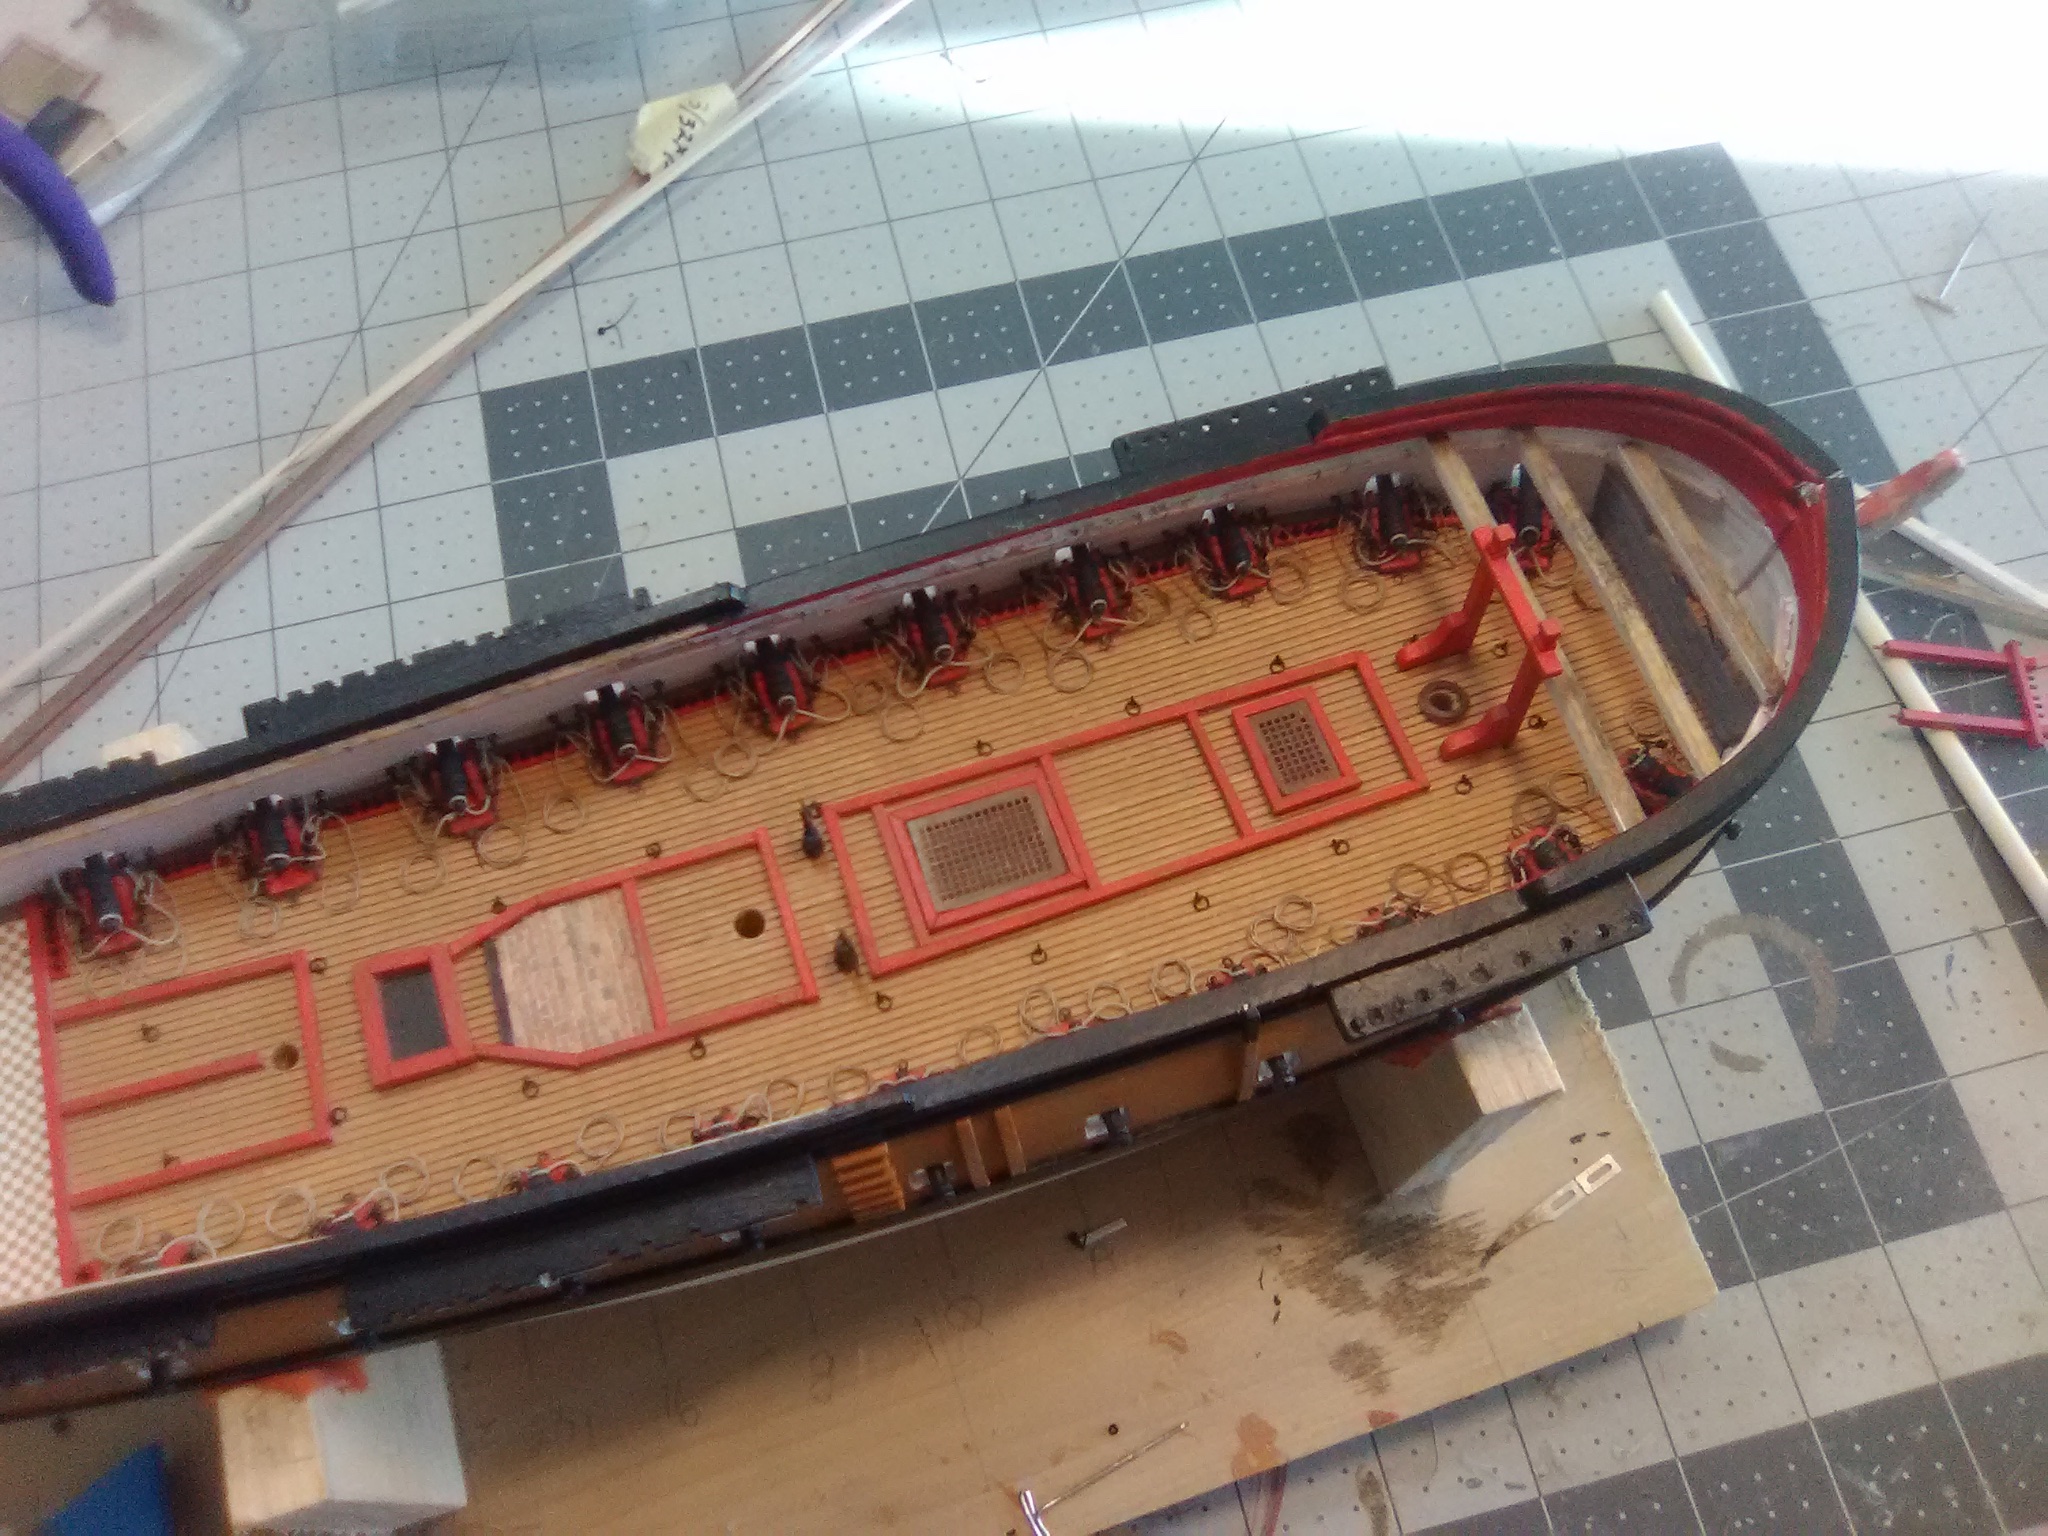
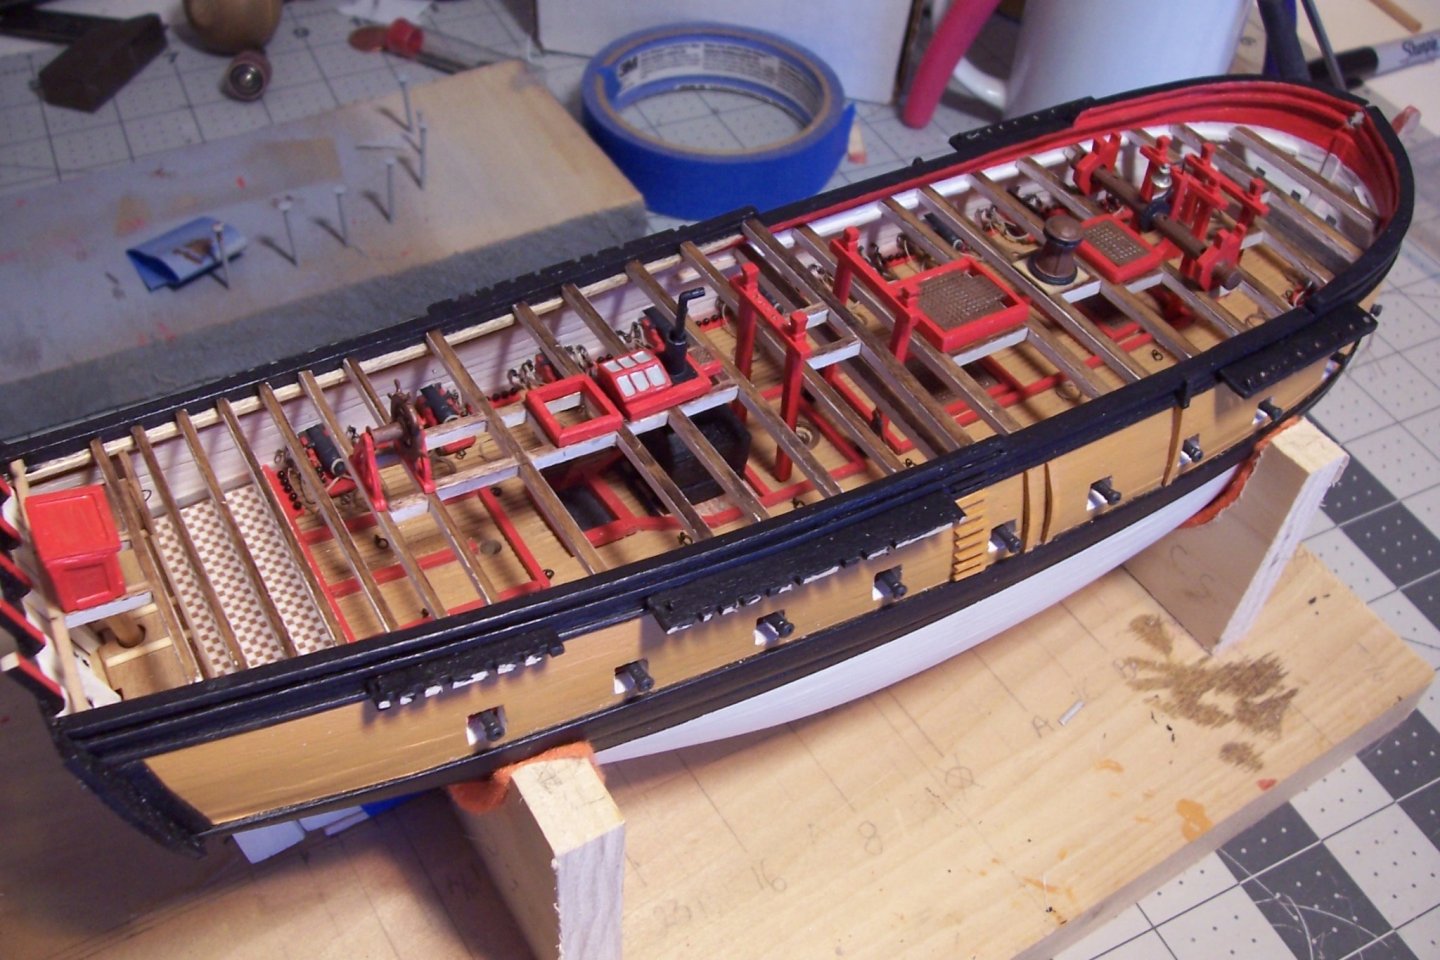
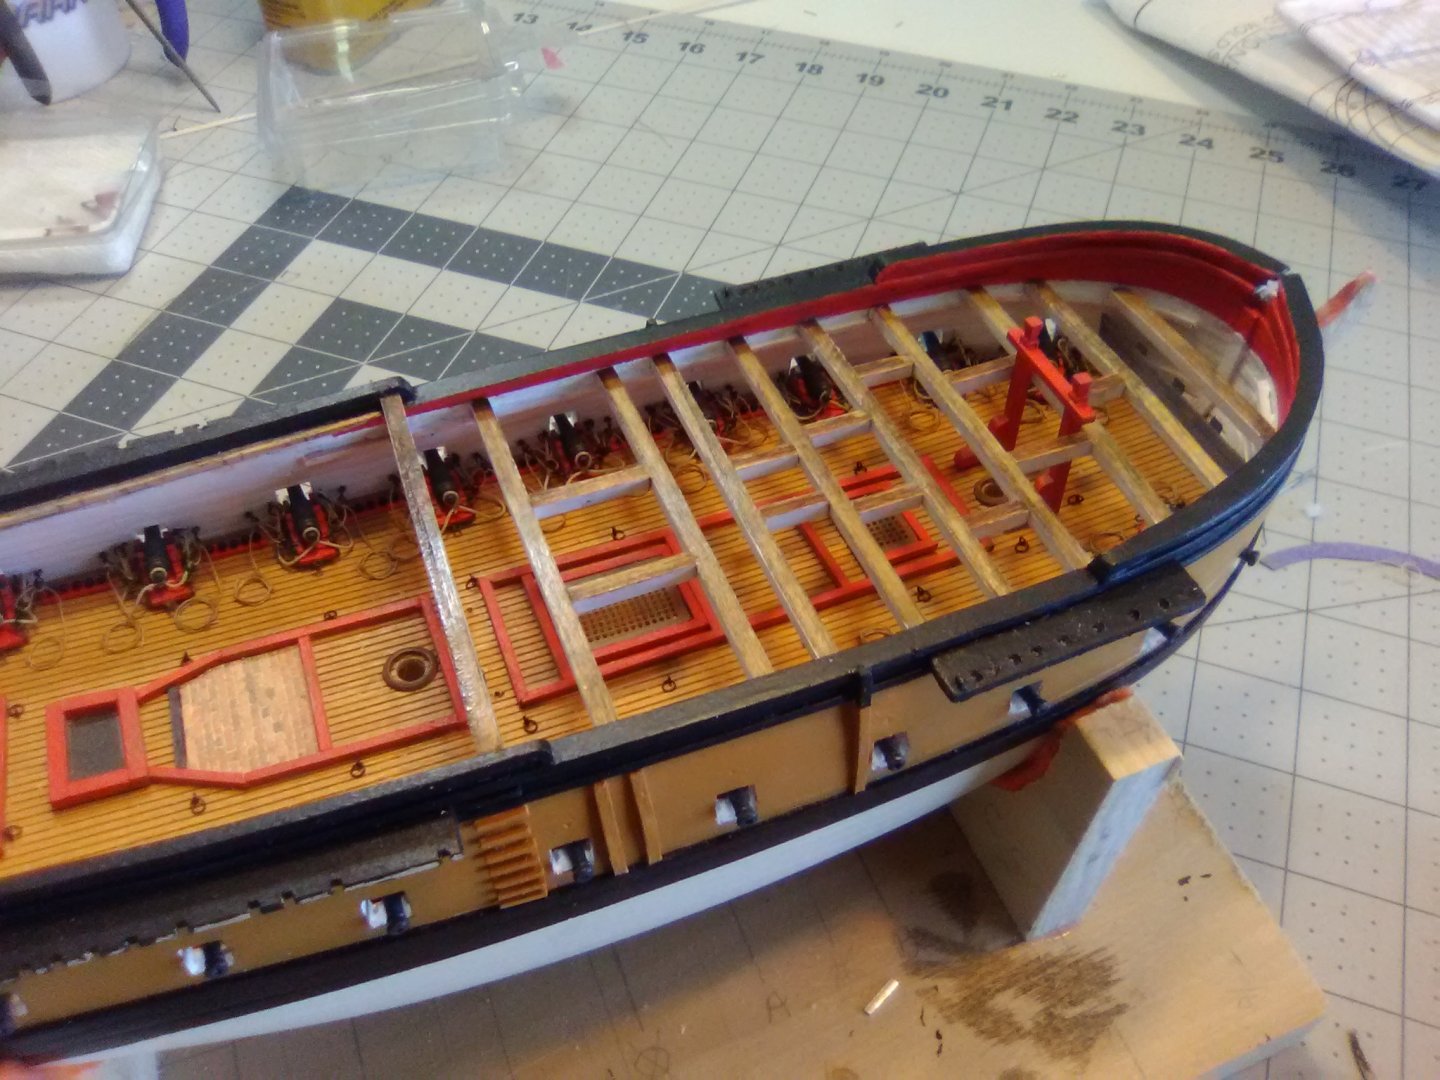
Deck Furniture in place All the deck furniture is now in place. A couple of the items are dry-fitted and will be permanently attached one the planking or rigging is done.
- 142 replies
-
- 8
-
-
- alfred
- solid hull
- (and 2 more)
-
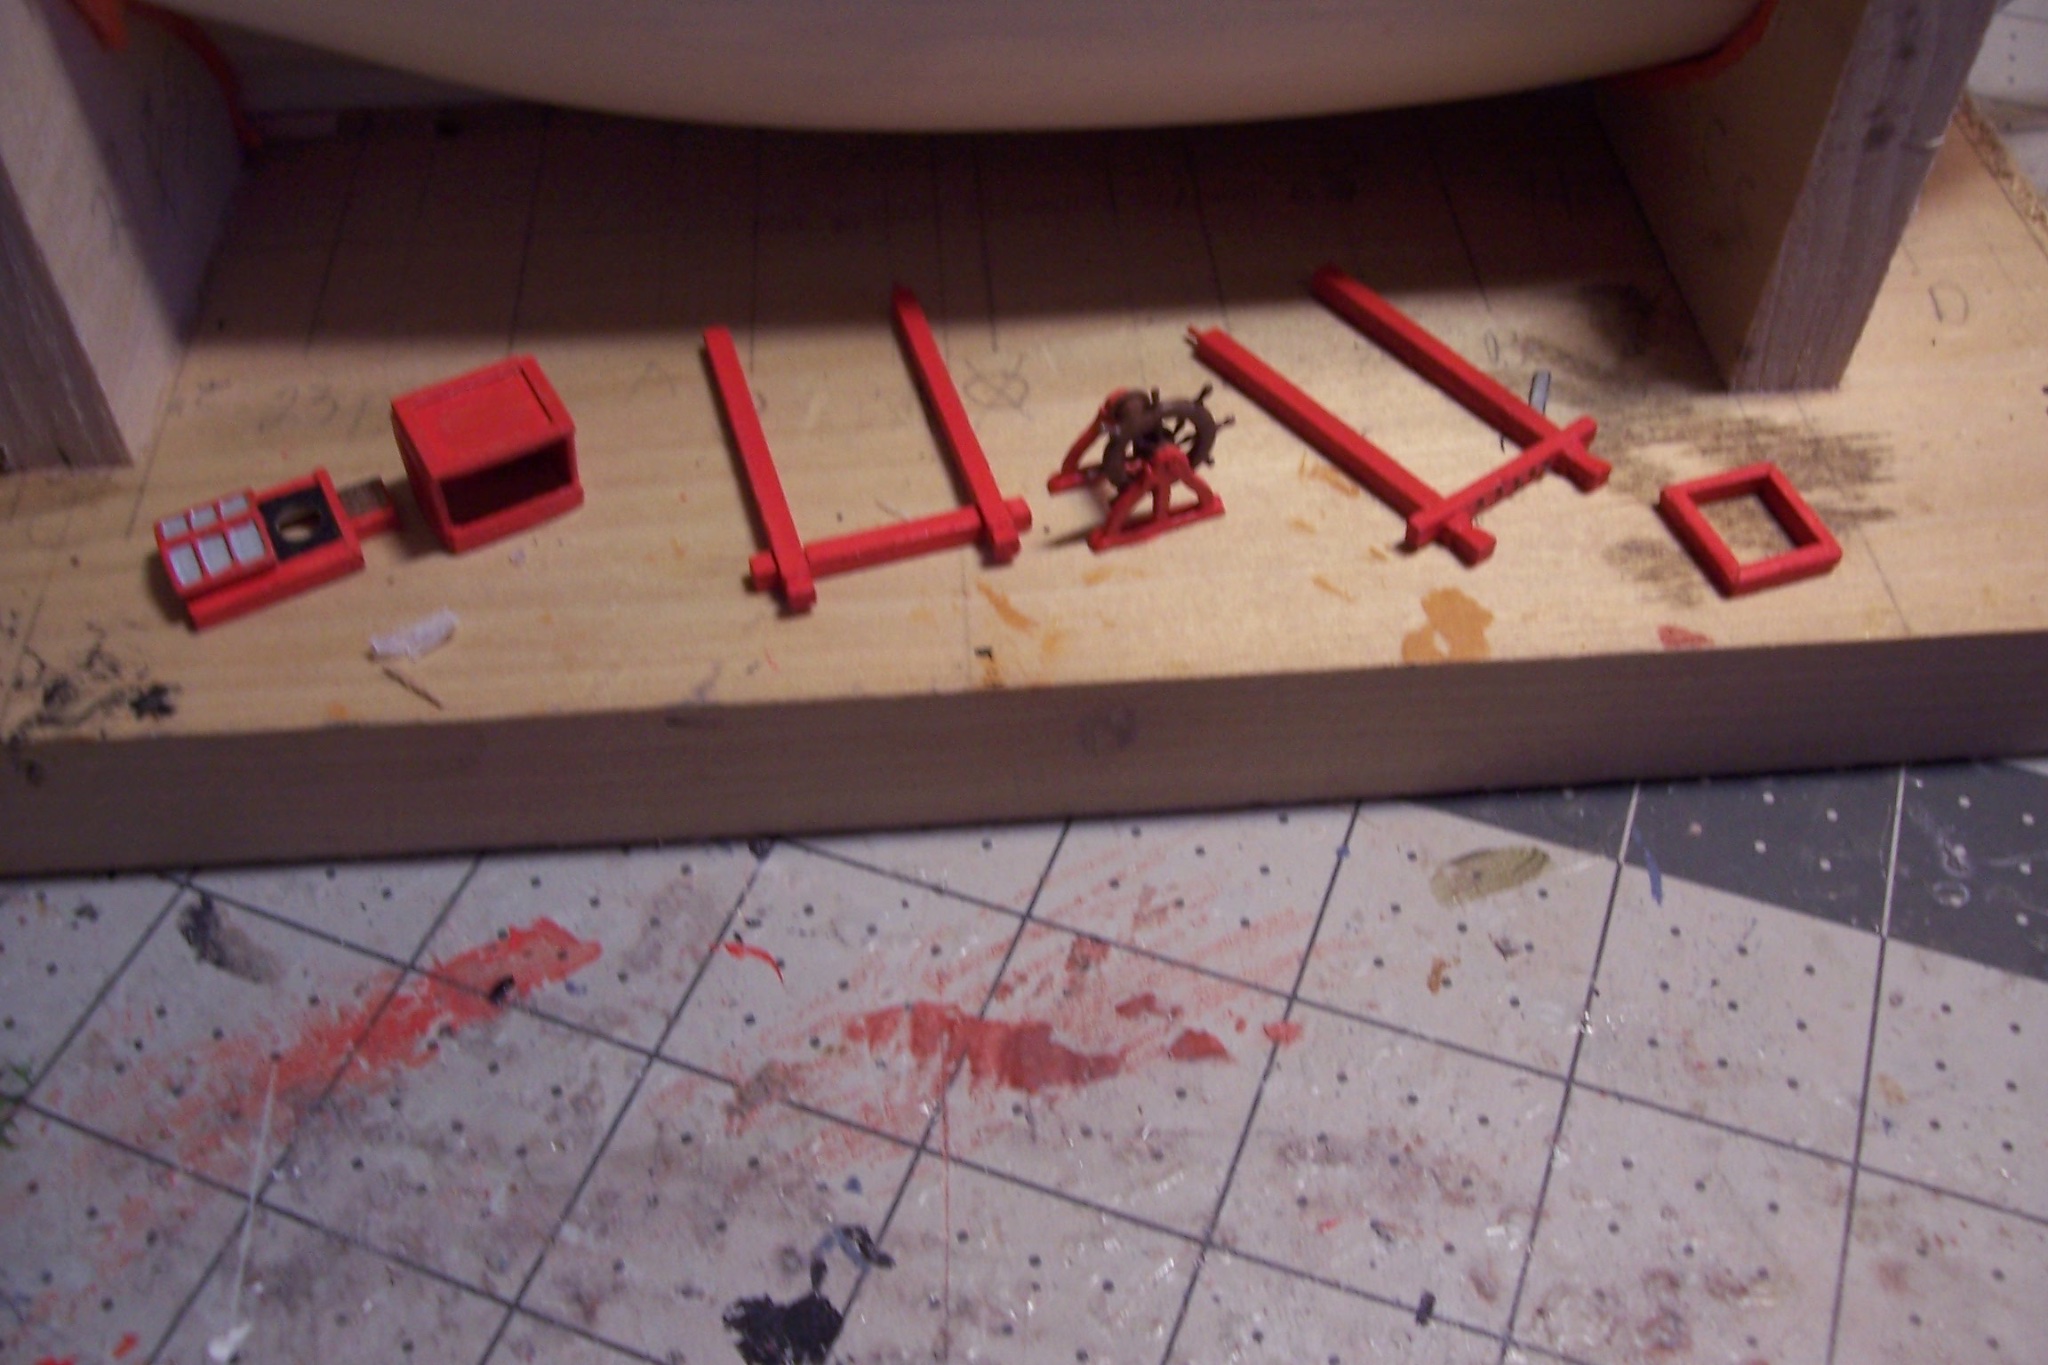
Deck Framing and Furniture for Quarterdeck The deck beams and framing are done for the quarterdeck (which really pushes the term quarterdeck since it take up just over half of the ship’s length). The deck furniture is also done: Next up will be installation of the deck furniture and fabricating the margin planks and then it will be time to plank the decks.


- 142 replies
-
- 6
-
-
- alfred
- solid hull
- (and 2 more)
-
Senior Chief, I sent you a message regading an MSO kit, let me know if you don/t get it.
-
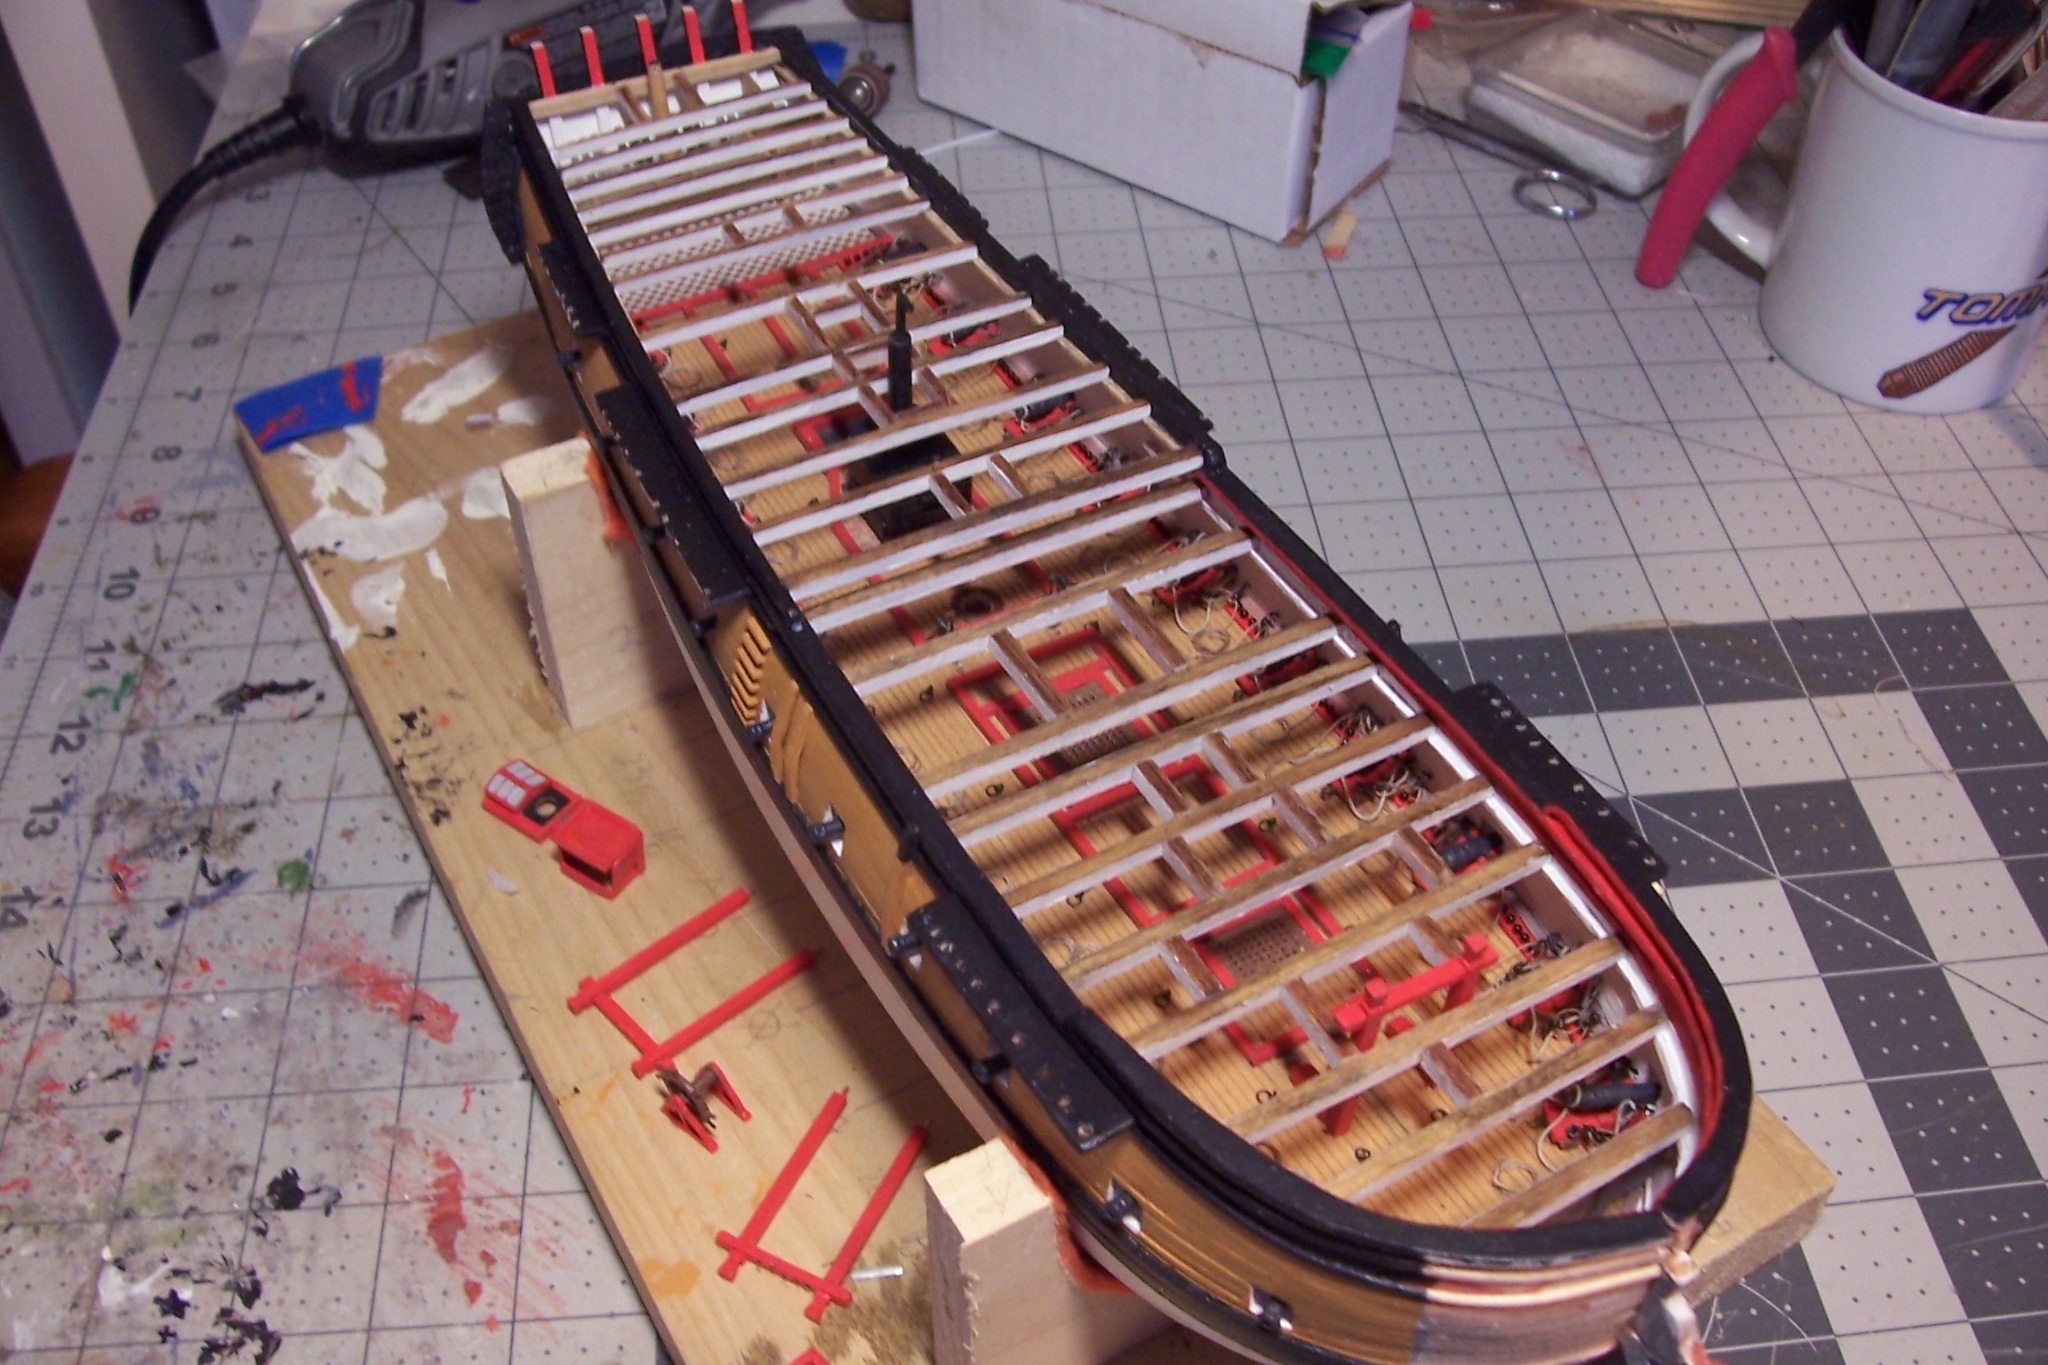
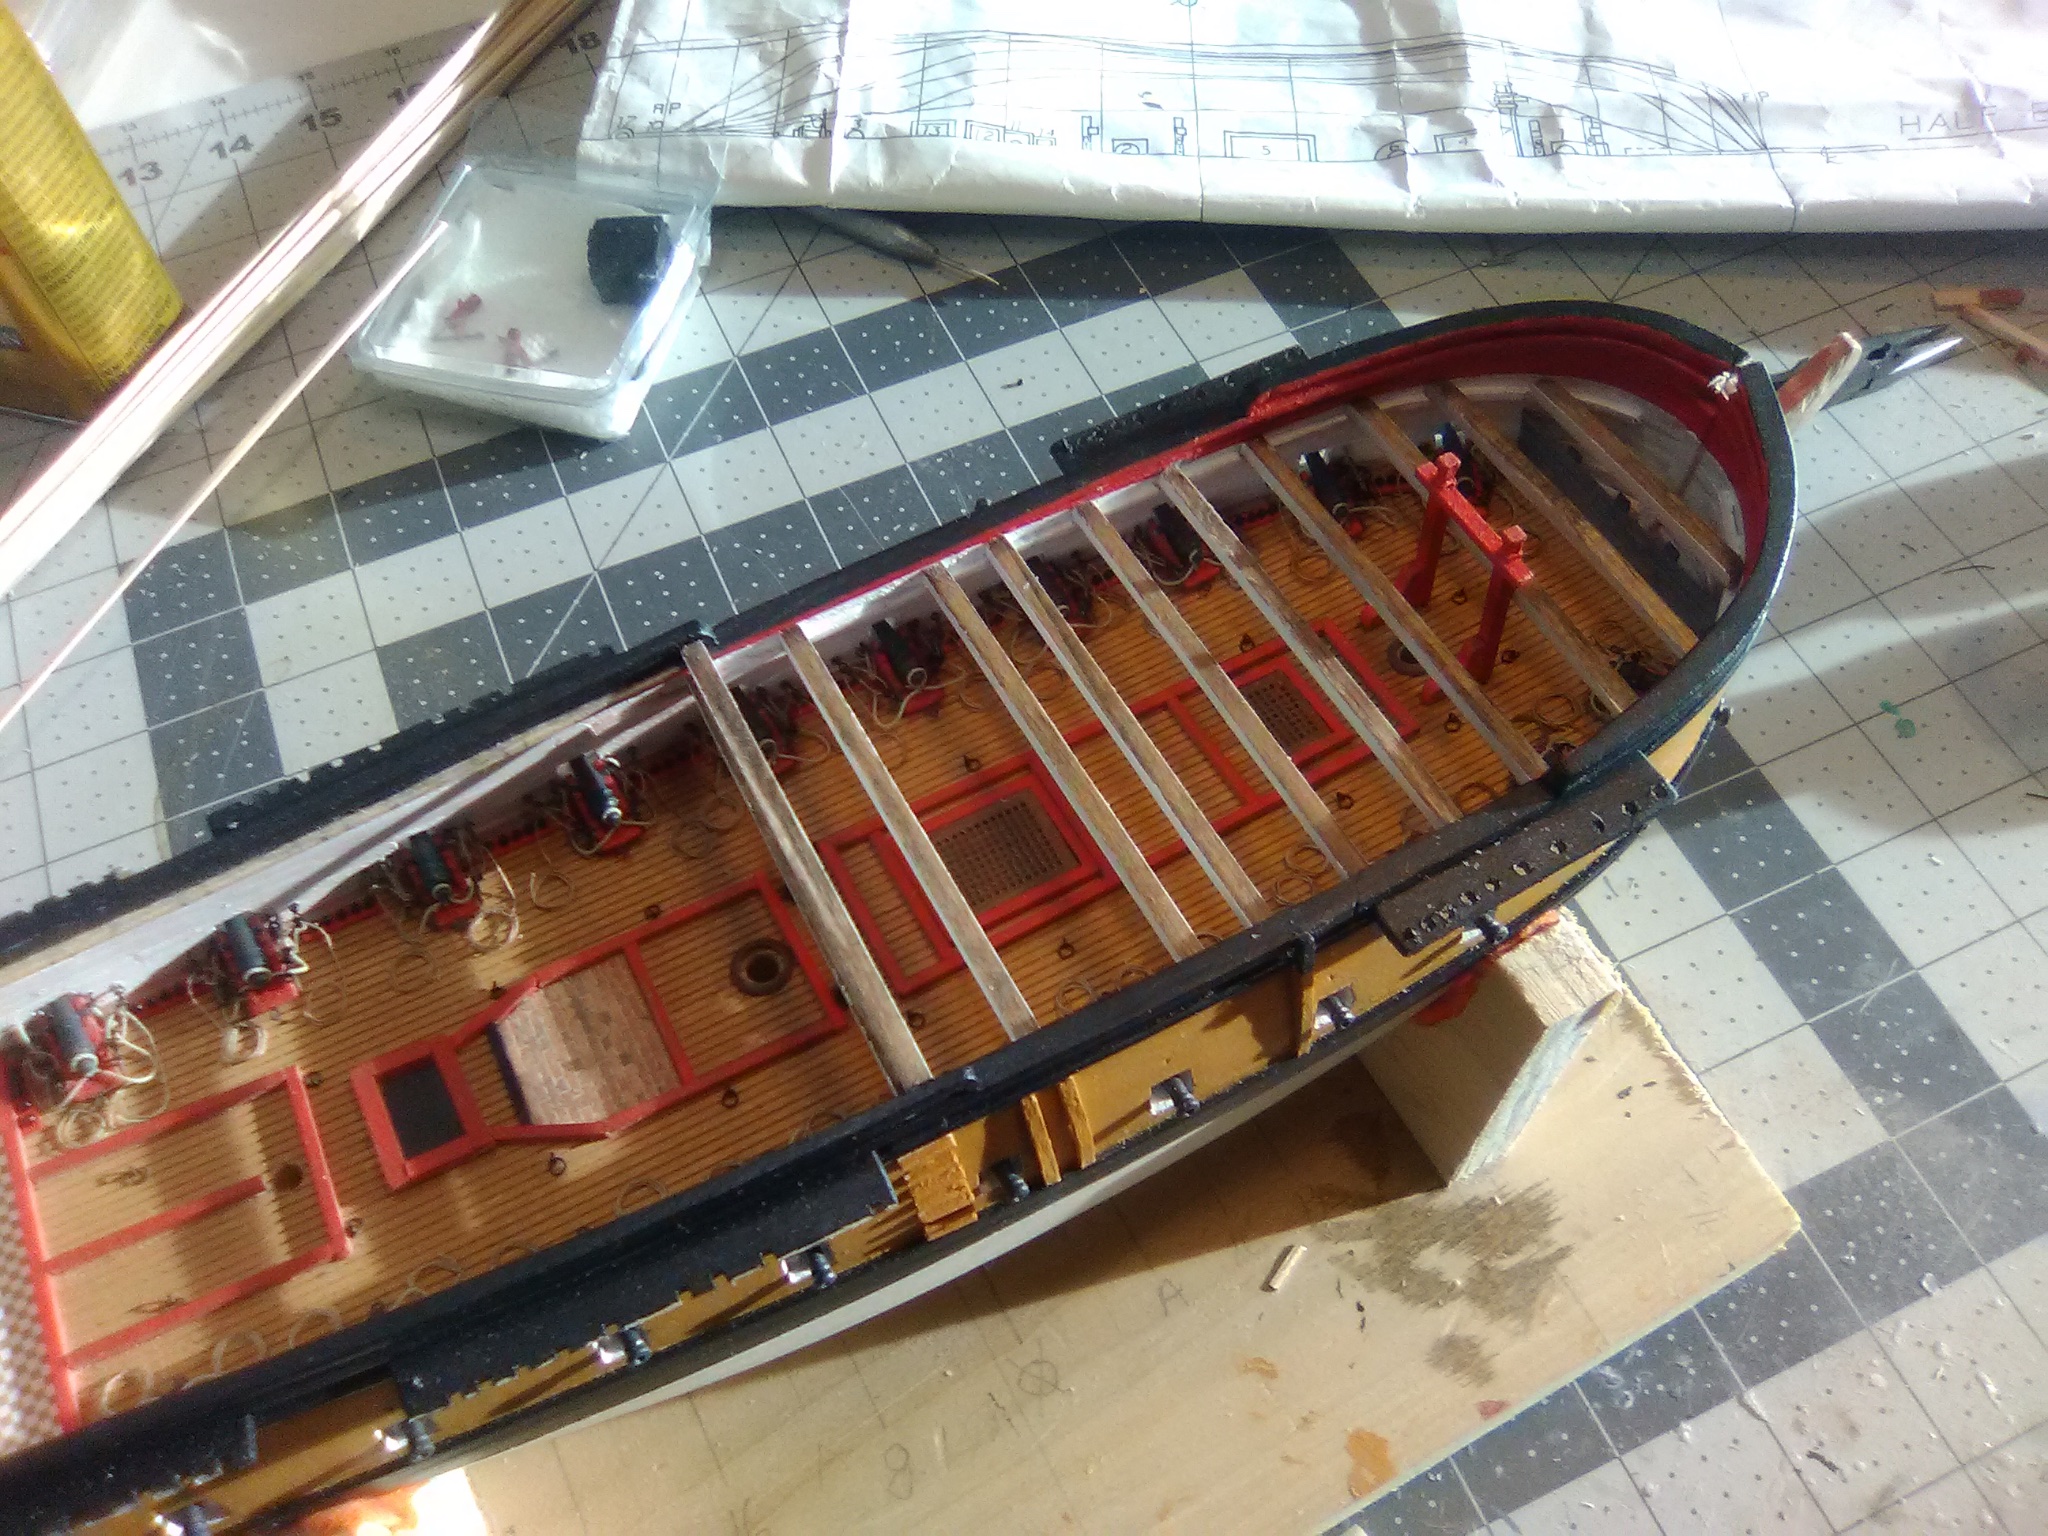
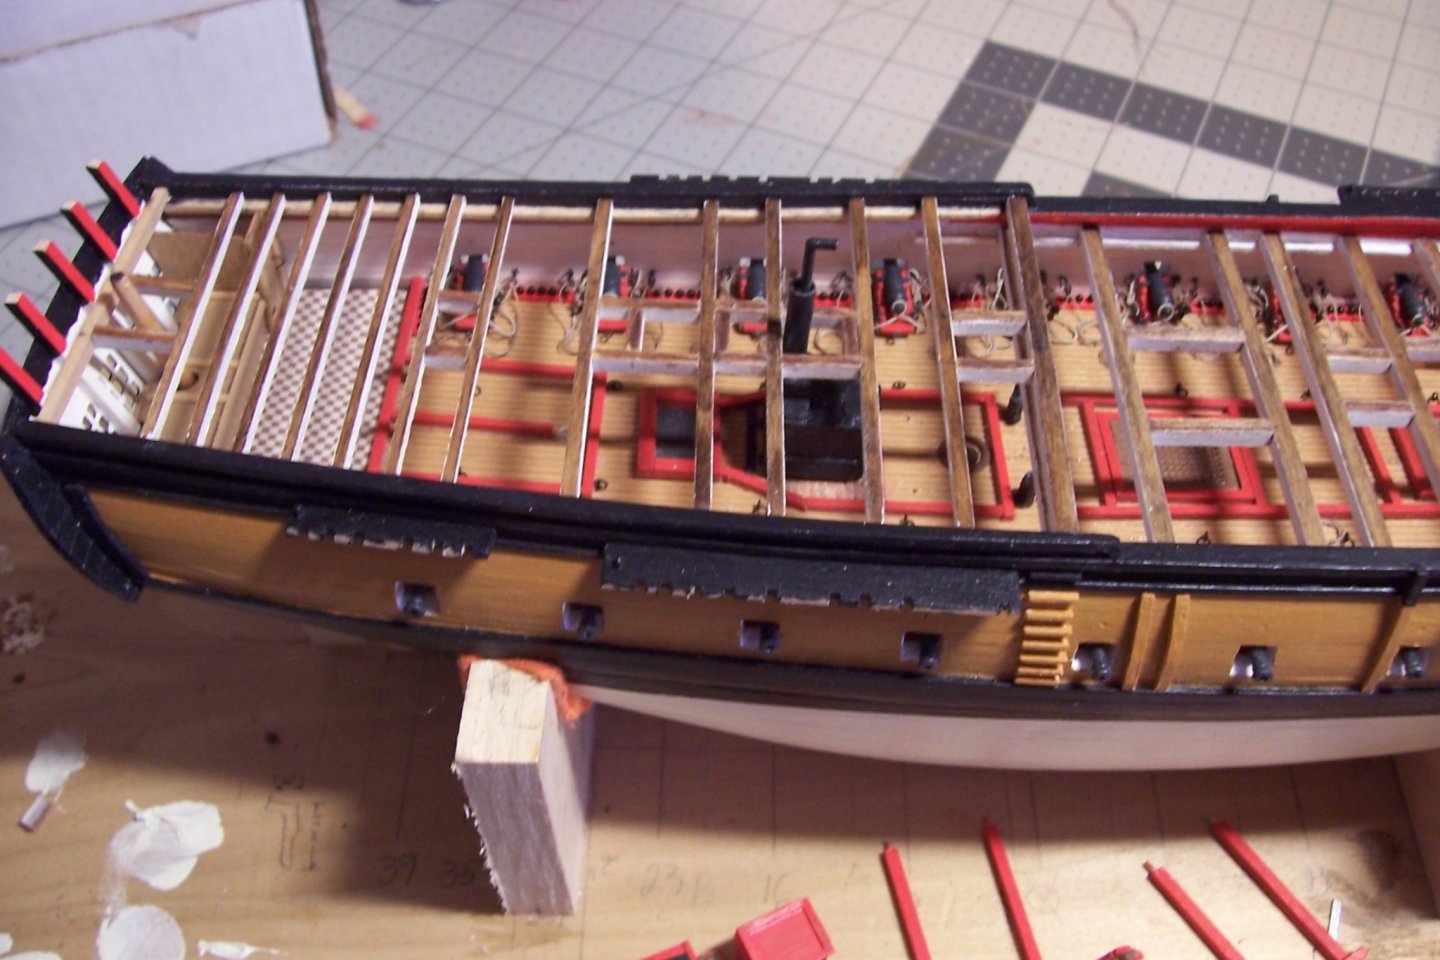
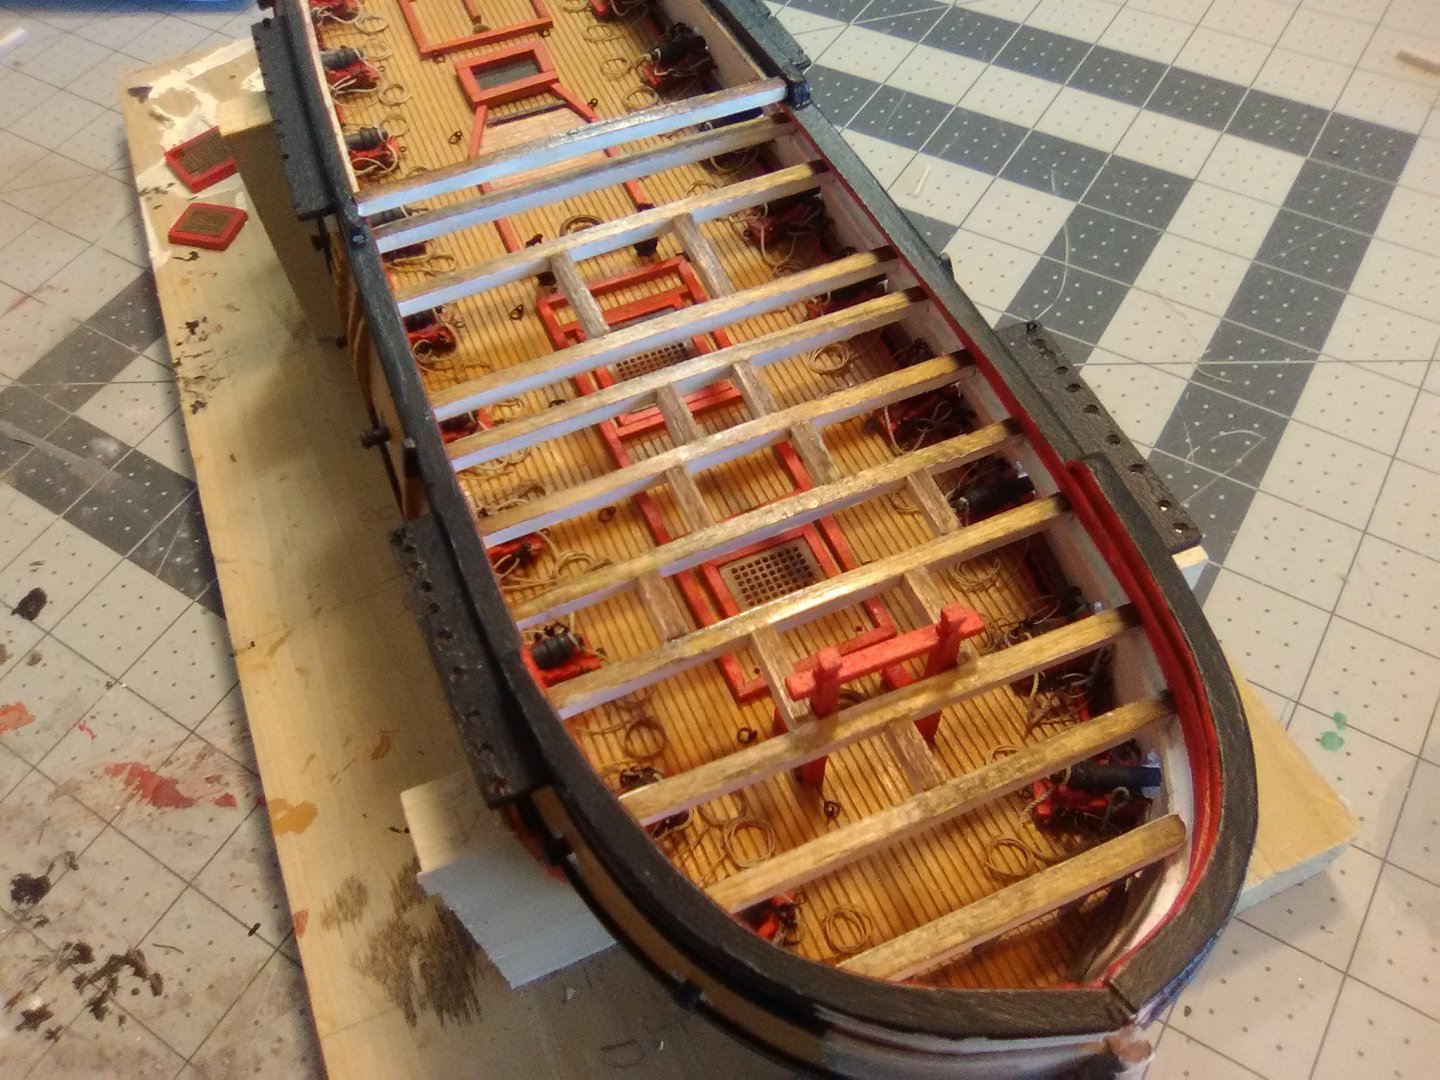
Main Deck Framing All the main deck framing that I intend to add is in place with the exception of the athwartship pieces for the mast partners - I’m going to wait on those until I have the lower masts tapered, I want to avoid having them interfere with the mast rake and ideally, help set it.
- 142 replies
-
- 7
-
-
- alfred
- solid hull
- (and 2 more)
-
Good idea! Thanks Nic.
-
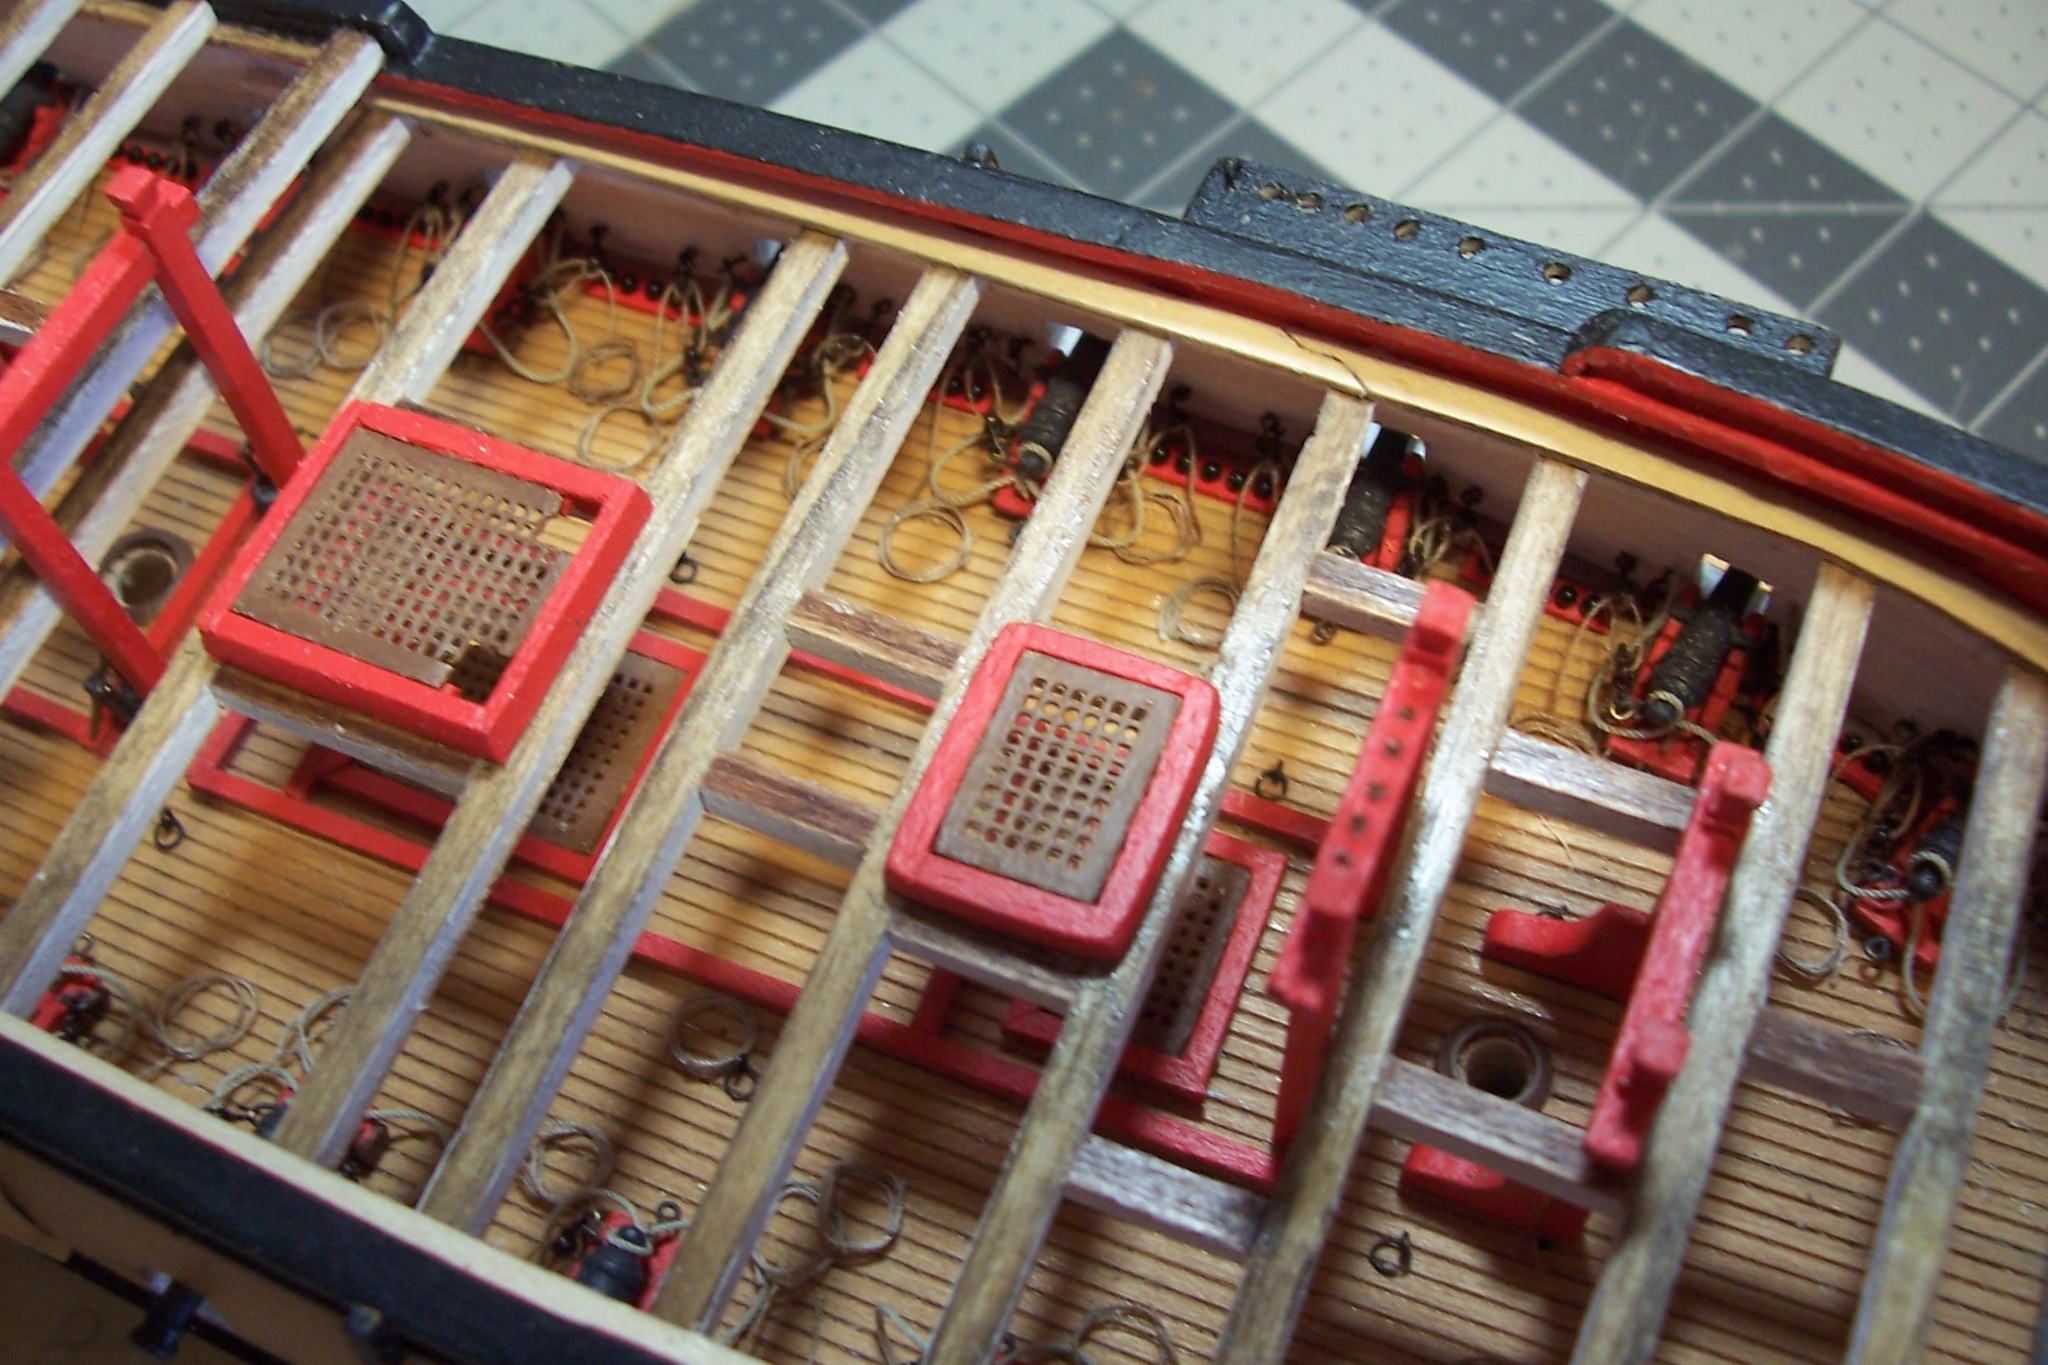
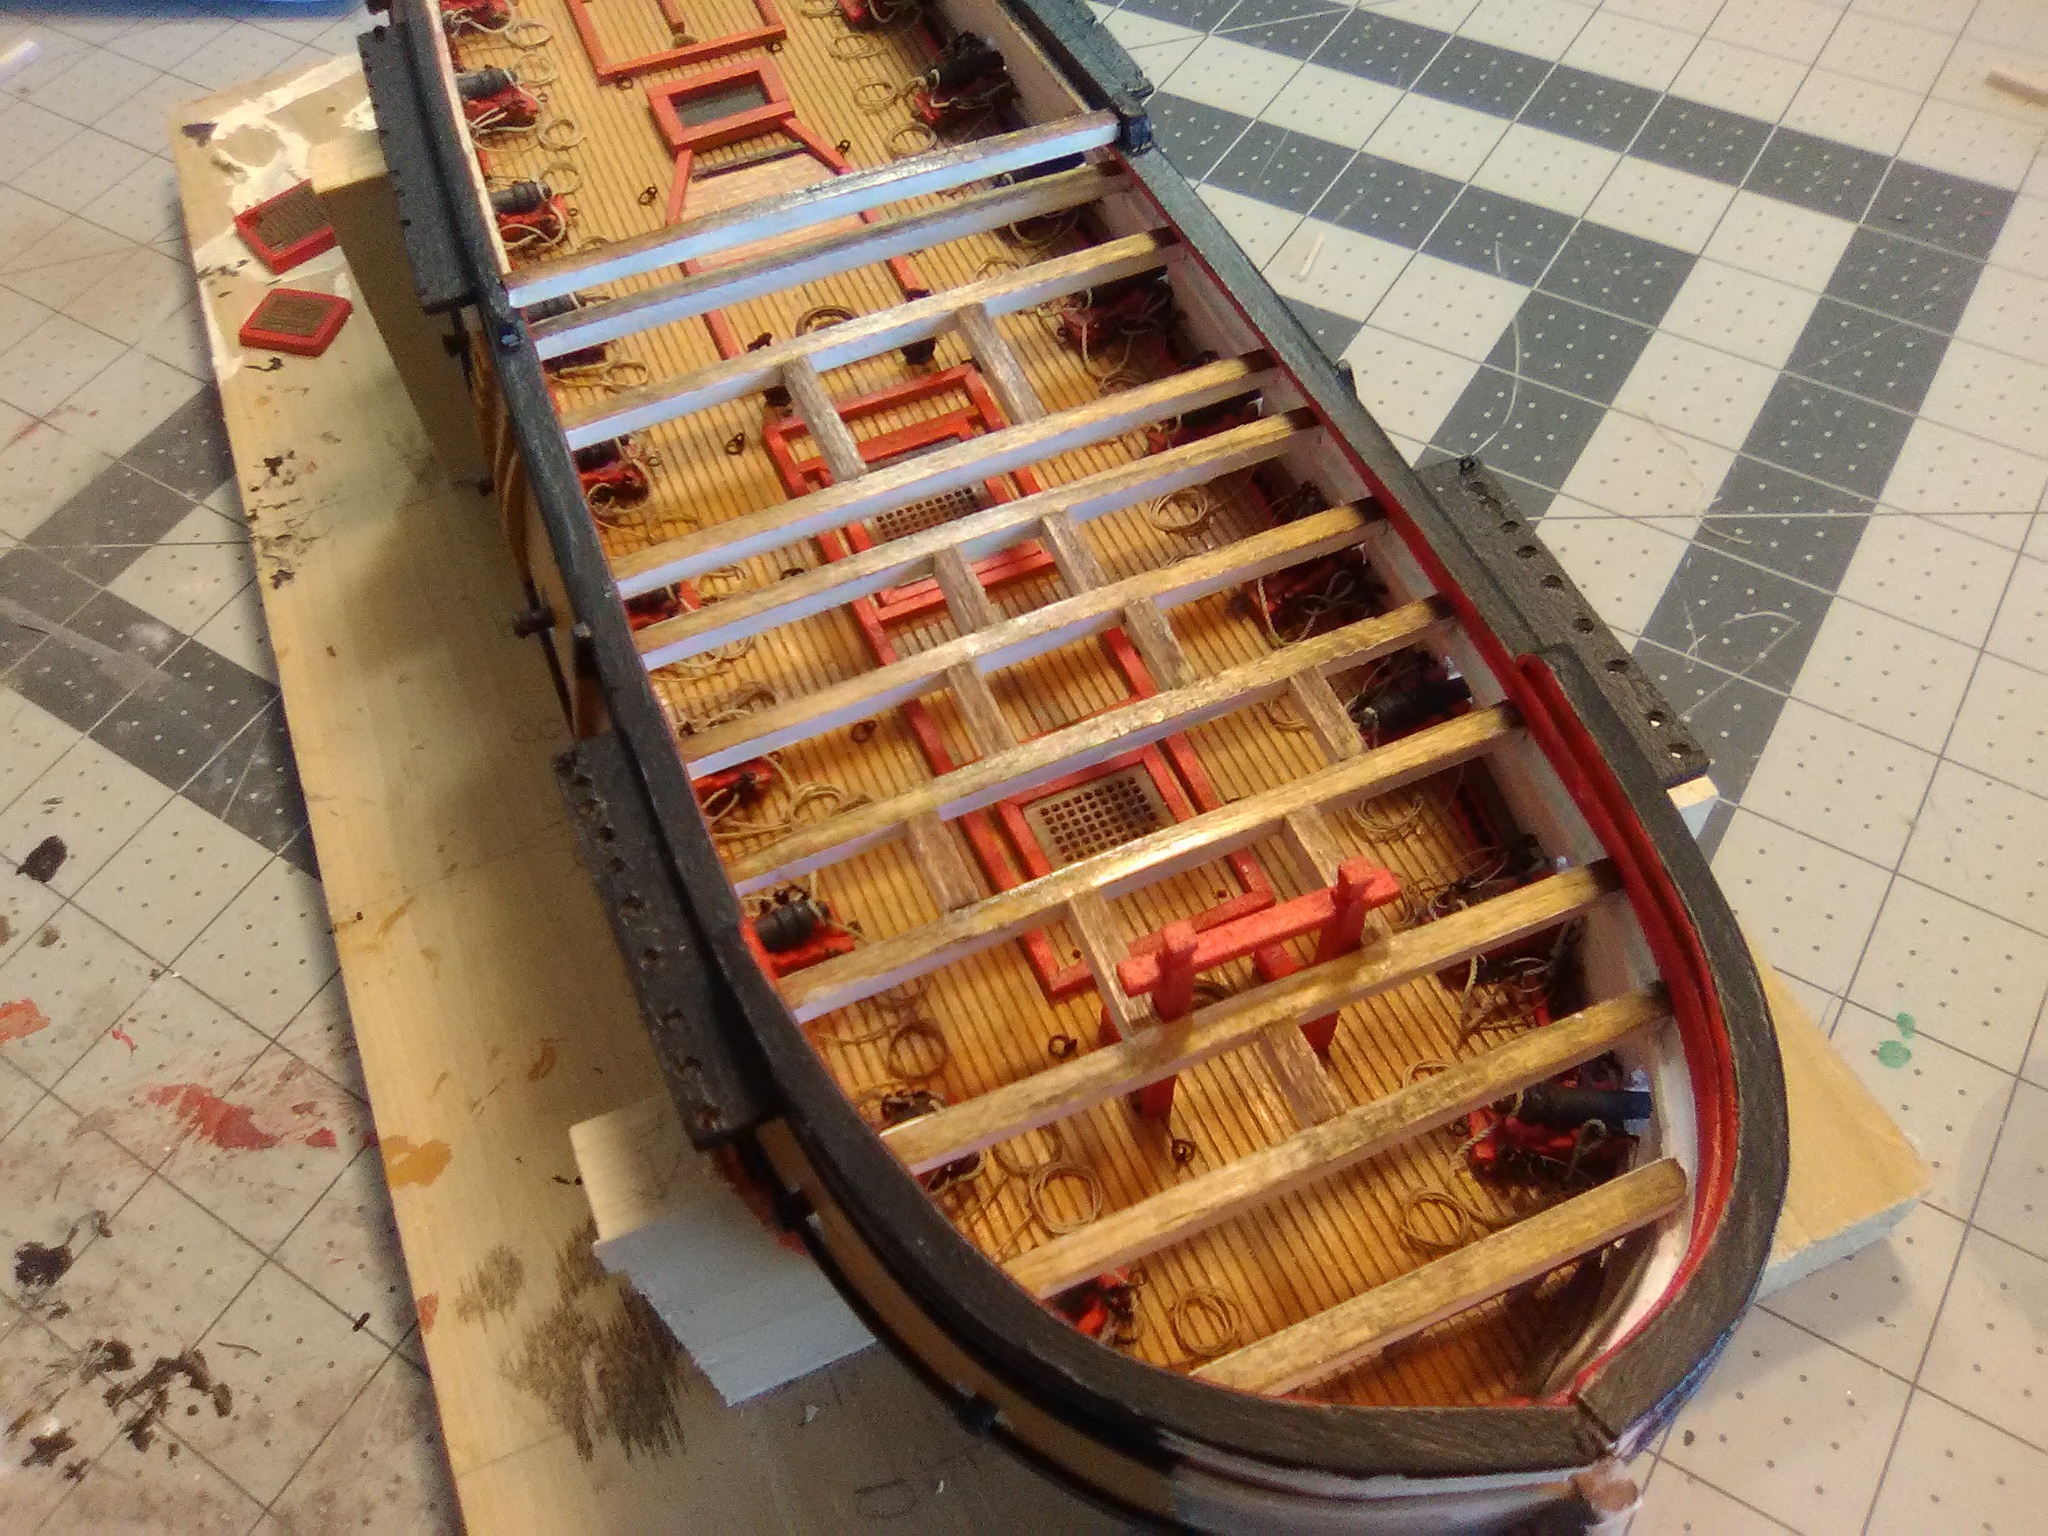
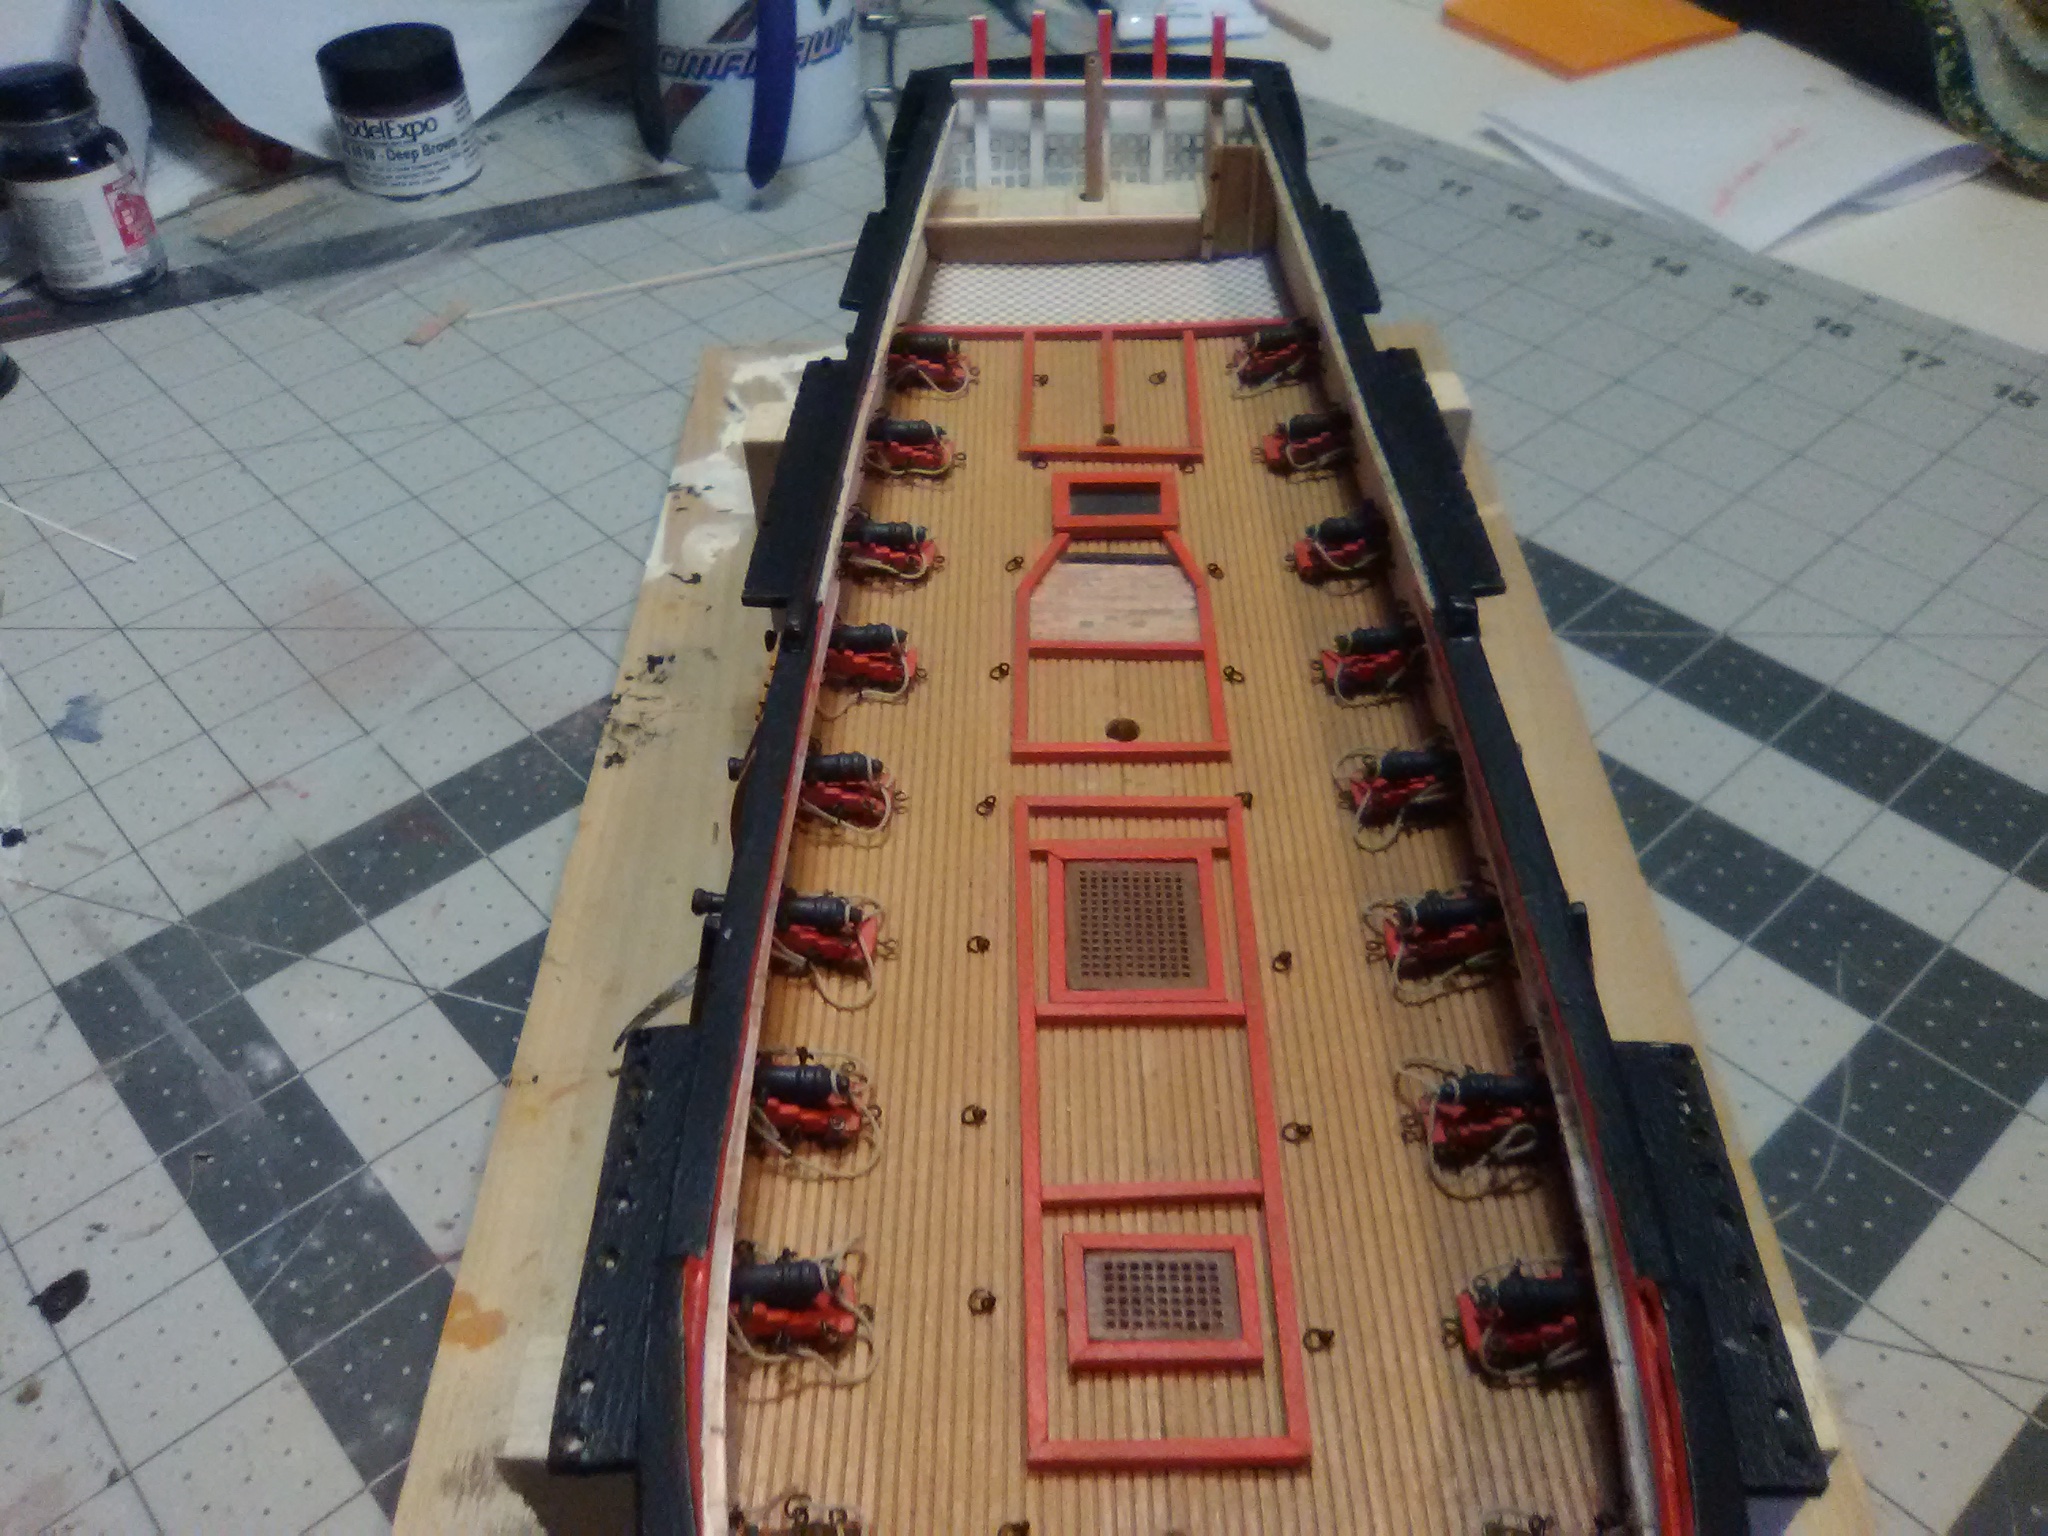
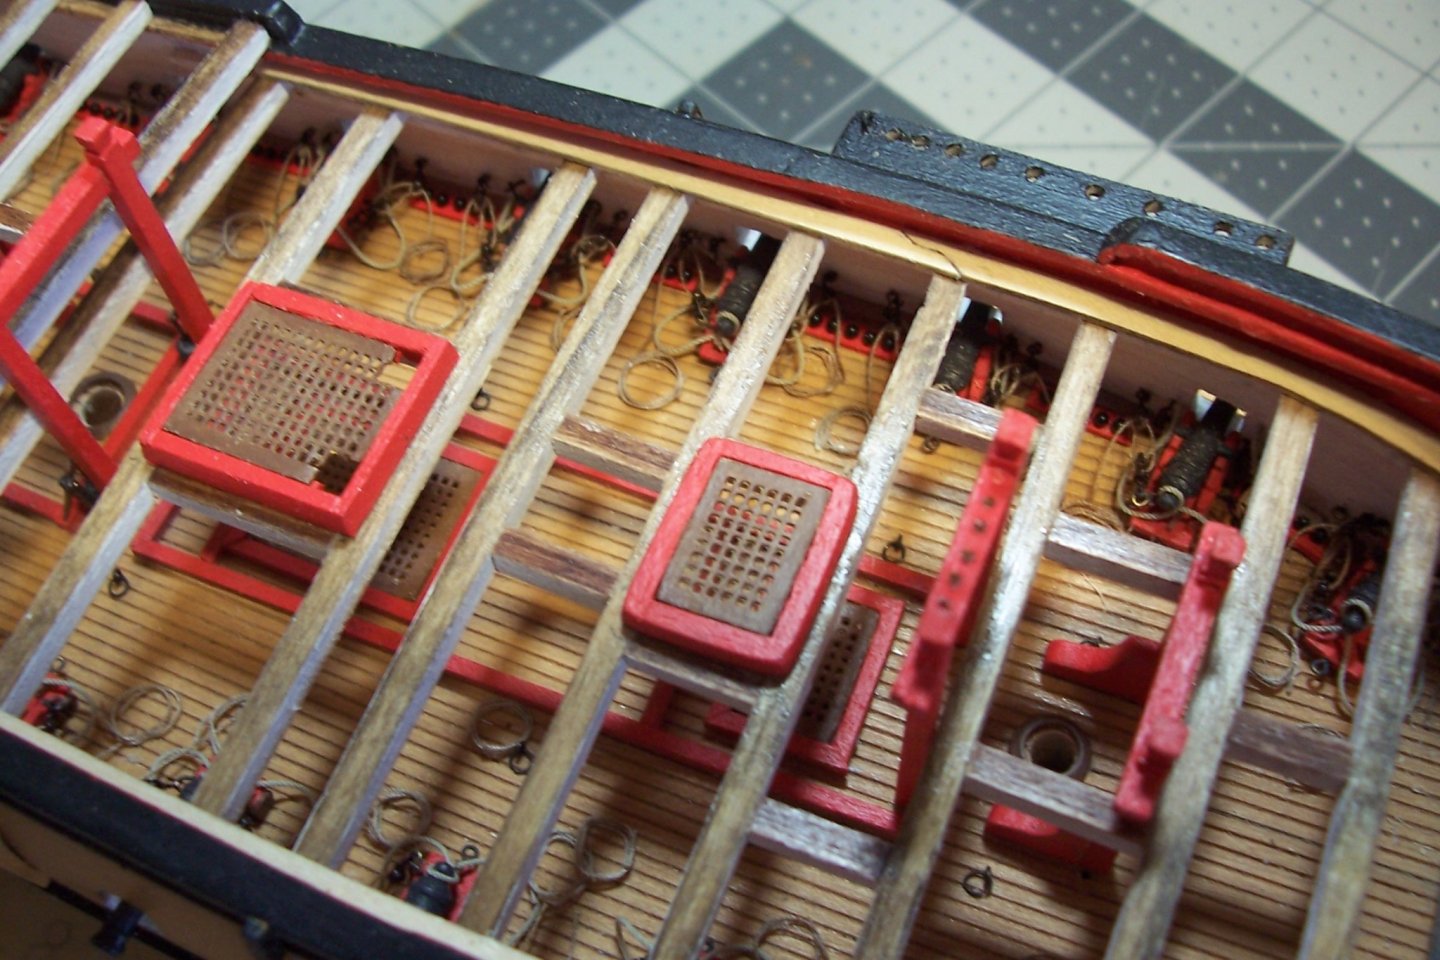
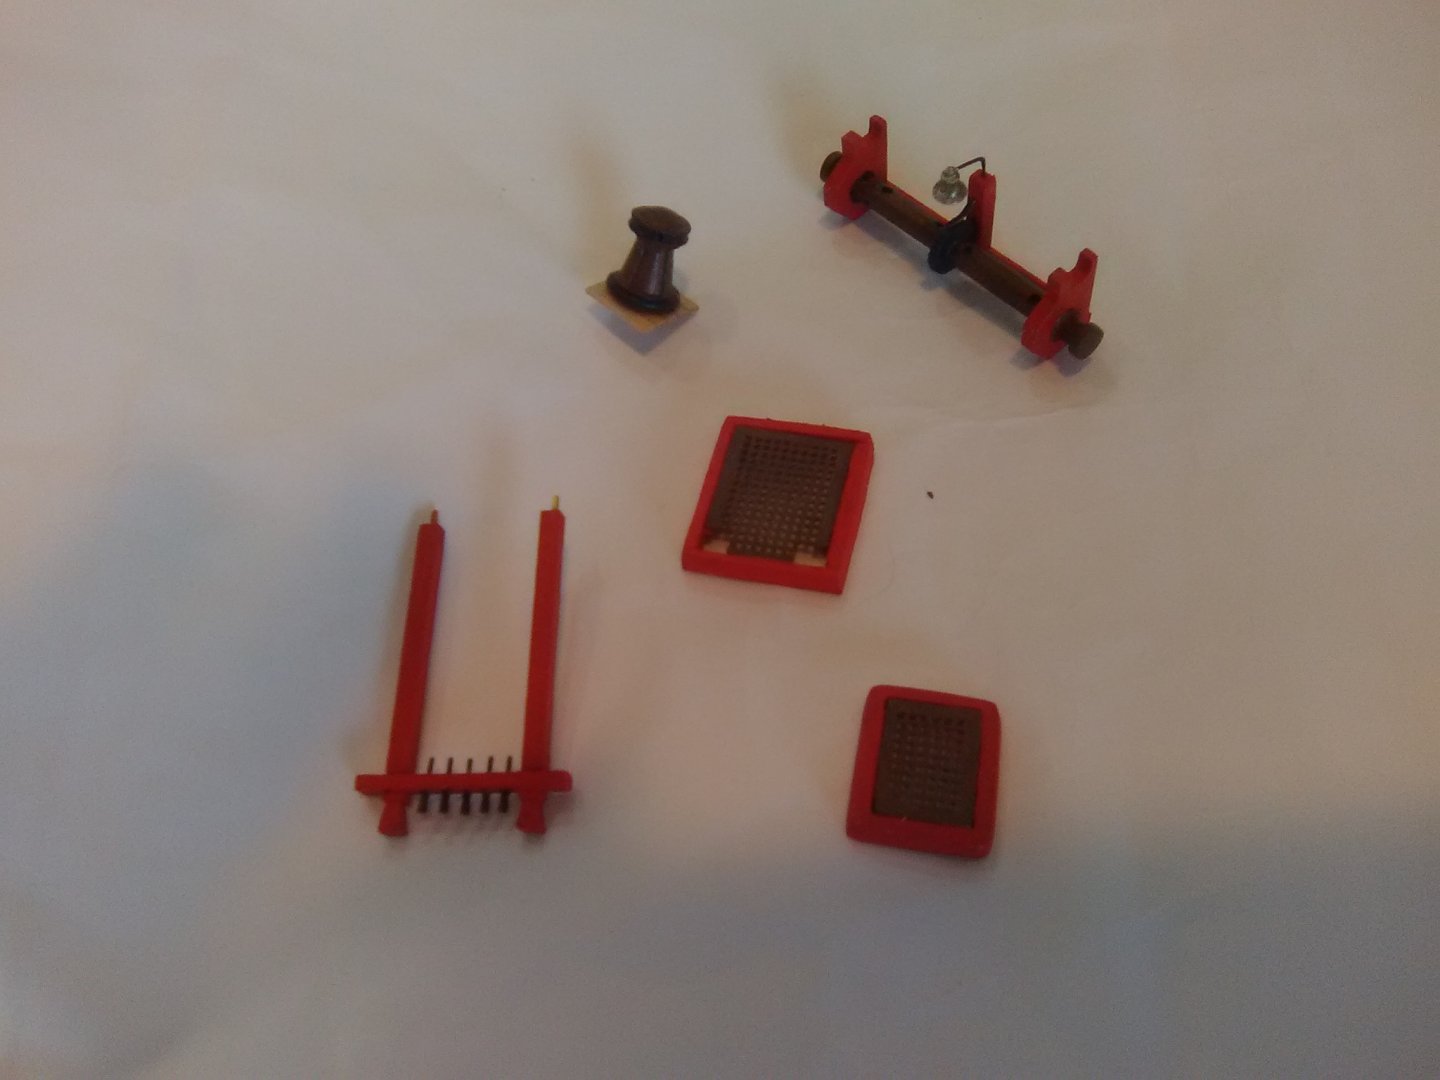
Main Deck Beams and Deck Furniture All the deck beams are in place: The deck furniture for the main deck is done. The capstan is a solid piece of britannia. For the windlass the kit provides 3 britannia pieces; the 2 end pieces and the central axle with gear. The plans show “something” just forward of the windlass axle but it’s not clear what it is and the photos show the ship’s bell mounted above the axle but it’s not clear what it is mounted on. I figured it had to be where the ratchet/pawl assembly was so I made up my own and mounted the bell. The windlass will not be mounted until all the rigging is done around the foremast because otherwise it will be in the way. The belaying pins are very nice, good shape and to scale but I will probably be cursing them in a few month while I'm trying to handle 2 pairs of tweezers in the middle of a jungle of rigging to tie off a line. The openings in the large hatch cover are for the anchor cables to pass down thru.

- 142 replies
-
- 6
-
-
- alfred
- solid hull
- (and 2 more)
-
Wow. There are some very impressive Syren builds on this site but I'd have to rate yours the best. Amazing craftsmanship. Syren will probably be my next build and I expect that I'll be using your build log as much as the kit instructions. Thanks for taking the time to make such a detailed, well illustrated log.
- 950 replies
-
- 3
-
-
- syren
- model shipways
- (and 1 more)
-
Thanks for the likes and kind words. Starting the Main Deck With all the guns finally rigged I can move on to less tedious work. The first 3 deck beams are installed. I’m going to fabricate the deck furniture as I come to it working fore to aft. I’ll need the furniture completed for the next step after the deck beams are installed which is figuring out where to put the carlings and half-beams to support the furniture.

- 142 replies
-
- 5
-
-
- alfred
- solid hull
- (and 2 more)
-
I think body filler/putty should work fine for the larger flaws and CA can take care of the smaller stuff that is too big to sand out. As far as the anchor goes, what do the plans say about where it goes and does it get lashed to something? If so, it might not be a bad idea to show the stock in the "folded " position since that would have been the most space-saving.
-
Beautiful job!!! I'm thinking about this kit for my first RC build. I know that your build is not RC but since you have the only build log on this kit so far do you have any thoughts about the quality of the instructions with regard to installing RC gear? Once again, great job!
-
I don't hesitate to recommend this kit if you are interested. It's big enough to detail but its relatively short height means you don't need a piece of furniture to case it. You can put on as much or as little rigging as you want but all of it is easier than sailing ship rigging. Overall a very enjoyable build.
- 227 replies
-
- 4
-
-
- BlueJacket Shipcrafters
- Stephen Hopkins
- (and 2 more)
-
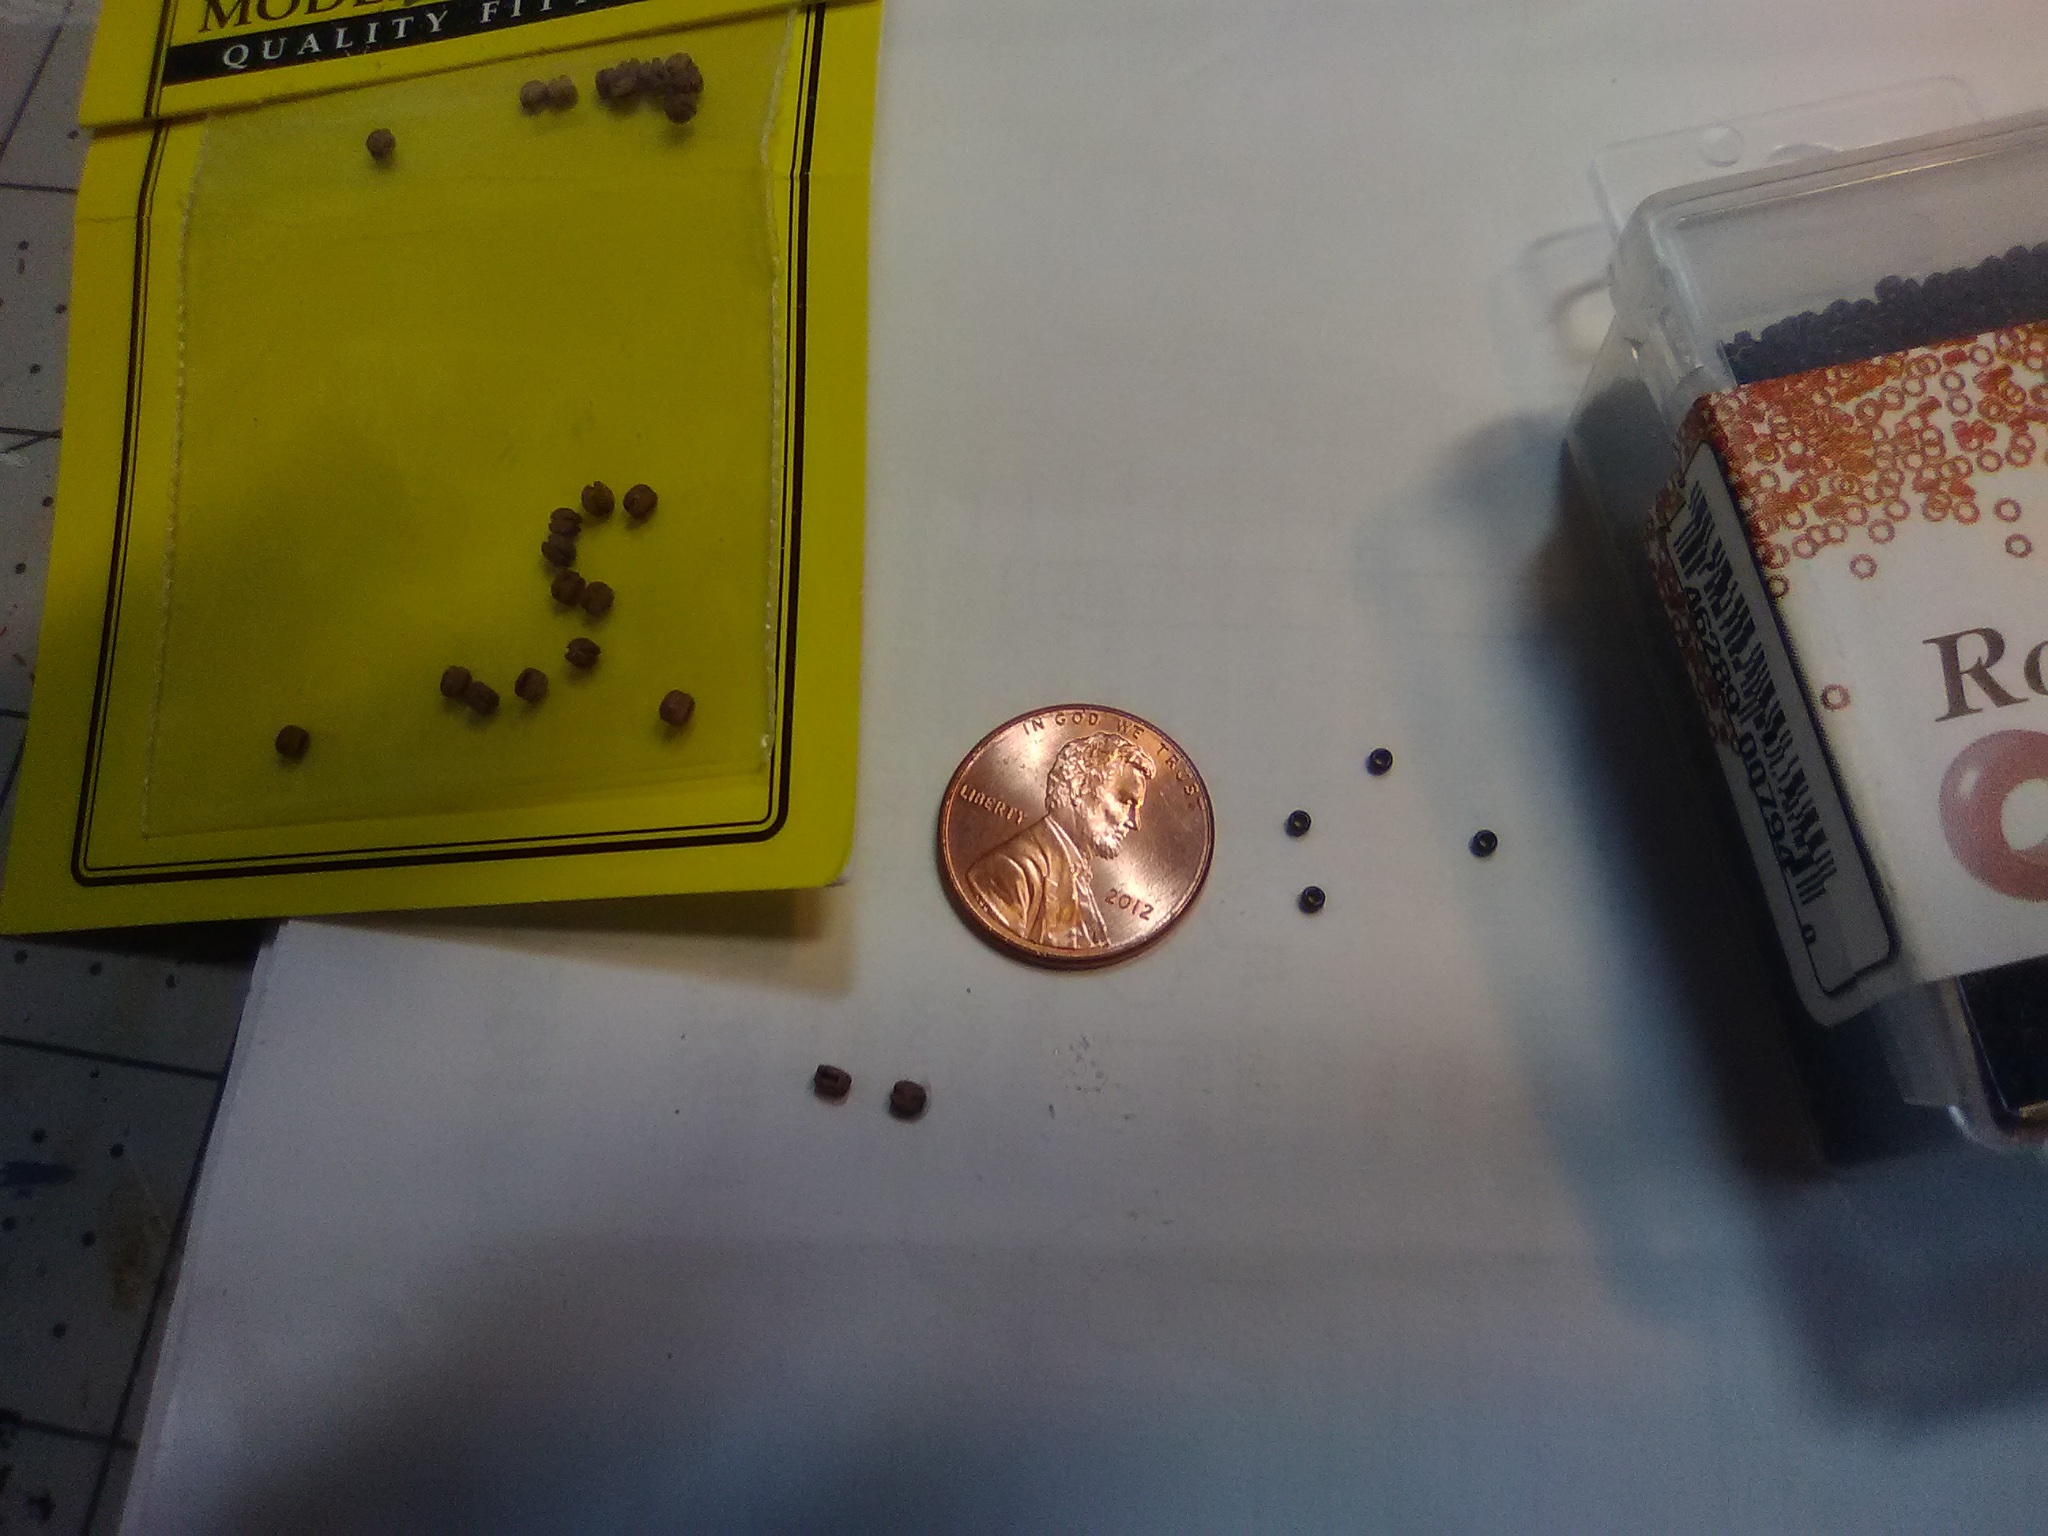
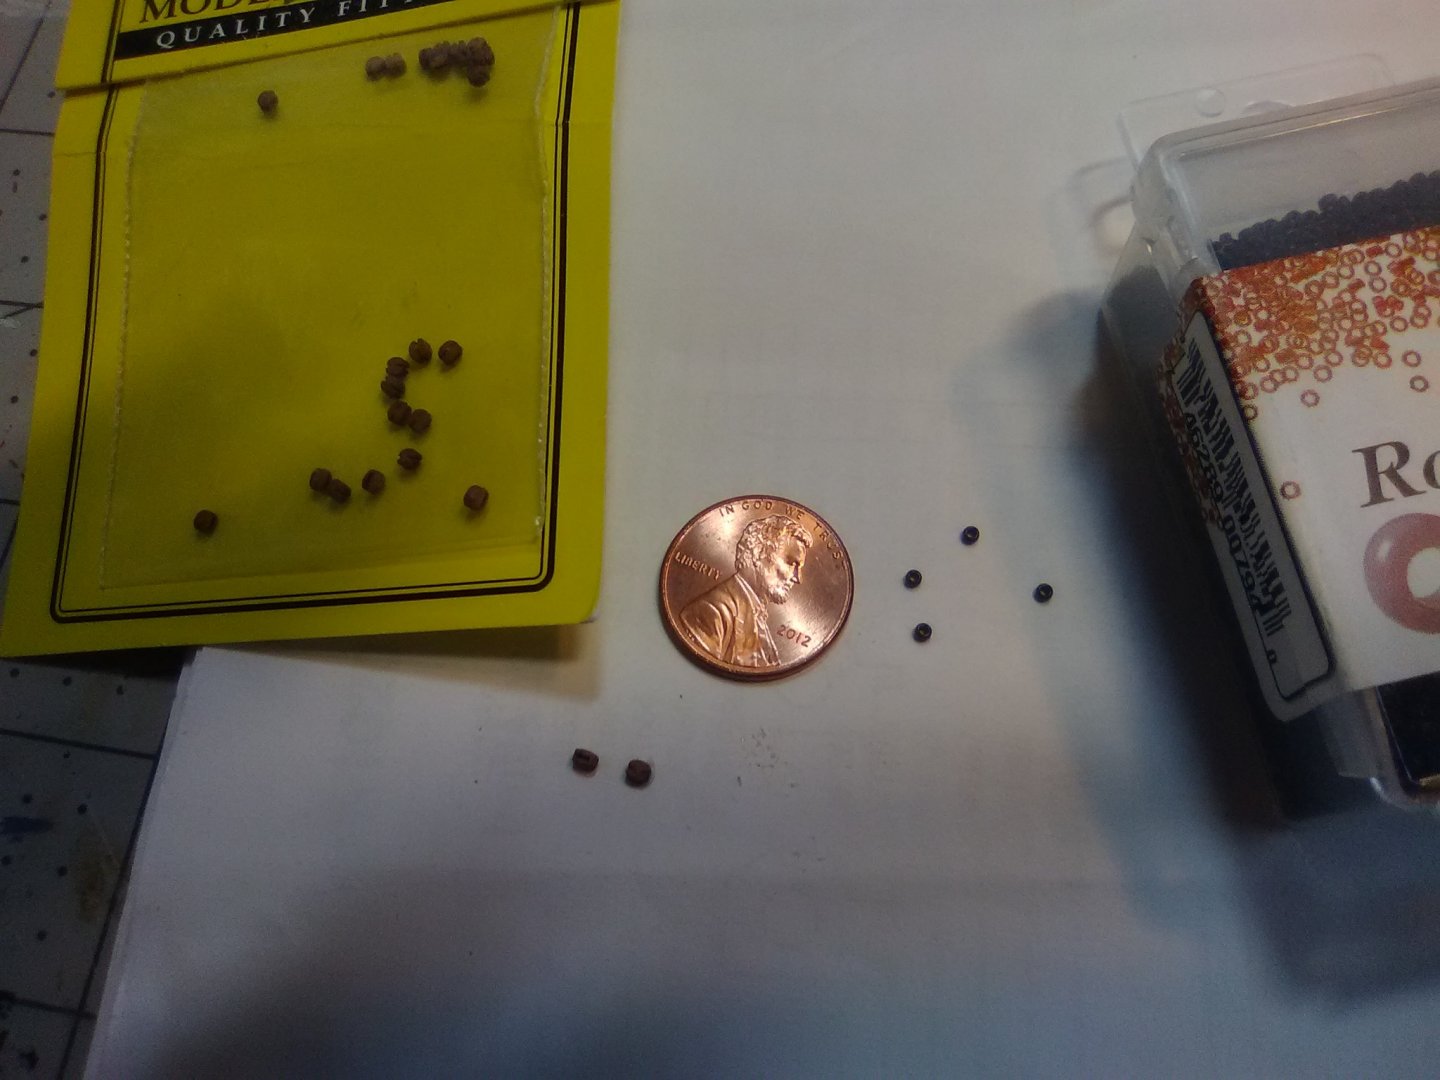
Gun tackles Since 9 pounder guns at 1:96 scale are really small I debated leaving the in (out?) haul tackles off since I could not find workable blocks that would look to scale. Model Expo sells 2.5mm and 2 mm blocks. cdrusn89 used the 2.5 mm blocks which you can see near the bottom of the first page of his CONFEDERACY build log and did a great job with them but 2.5mm is still too big for my needs so I bought some of the 2 mm blocks. They are very nice to look at - the shape is good and there is even a groove machined in their sides for stropping. Unfortunately in a case of taking a good thing too far for some reason instead of placing a single, usable hole in them they decided to go with 2 tiny, tiny holes even though you only use one of them. It took me almost an hour to get the smallest sewing thread I could find thru one of them. Drilling out the holes to a more usable size was a non-starter - the walnut would not hold up to it even when strengthened with CA or PVA, plus trying to hold something the size of a grain of rice while drilling it with a pin vise was more than I could deal with. Fortunately Nic (Mr BlueJacket) gave me a good suggestion. He said that when they get models in to restore or repair that call for tiny blocks they use beads so I went online and found a jewelry supply company that sold 1mm beads in a nice brown color. Here are the 2mm blocks on the left and the beads on the right. Using 30 gage black wire for stropping a hook in each one and then spraying them with dull coat to remove the sheen they were easy to set up in a single block rig. In order to trick the eye into thinking these a real blocks I put the plane of the hooks perpendicular to the axis of the bead holes, that way only the sides of the beads are visible when viewing from above (which is the only way they will be visible on this build): Rope coils were just wrapped around pins and sprayed with hair spray to hold their shape: I can get about 4 guns done per day without too much effort so in a couple of days they should be finished and I can move on to the deck beams:
- 142 replies
-
- 9
-
-
- alfred
- solid hull
- (and 2 more)
-
Wonderful job on that flag! For folding it you may find that 2 dowels of different sizes will help get realistic "curls" with the size of the curls getting progressively smaller as you work your way away from the upper, inboard corner toward the lower, outboard corner (assuming you want it to look like there is a little breeze - in a dead calm the folds would be more equal). If you look at the online instructions for the Brig Syren on the the Model Expo site, the last page of the last chapter has a great pix of a very realistic looking flag. I used that method for the flag on my Olympia build that you can see in the link below my signature. Keep up the good work - I can't believe this is you first build!
- 800 replies
-
- 2
-
-
- snake
- caldercraft
- (and 1 more)
-
Wow, you have made great progress since the last time I checked in! I'm impressed with your copper plating - that is something I have not tried yet.
- 85 replies
-
- 1
-
-
- perry
- BlueJacket Shipcrafters
- (and 1 more)
-
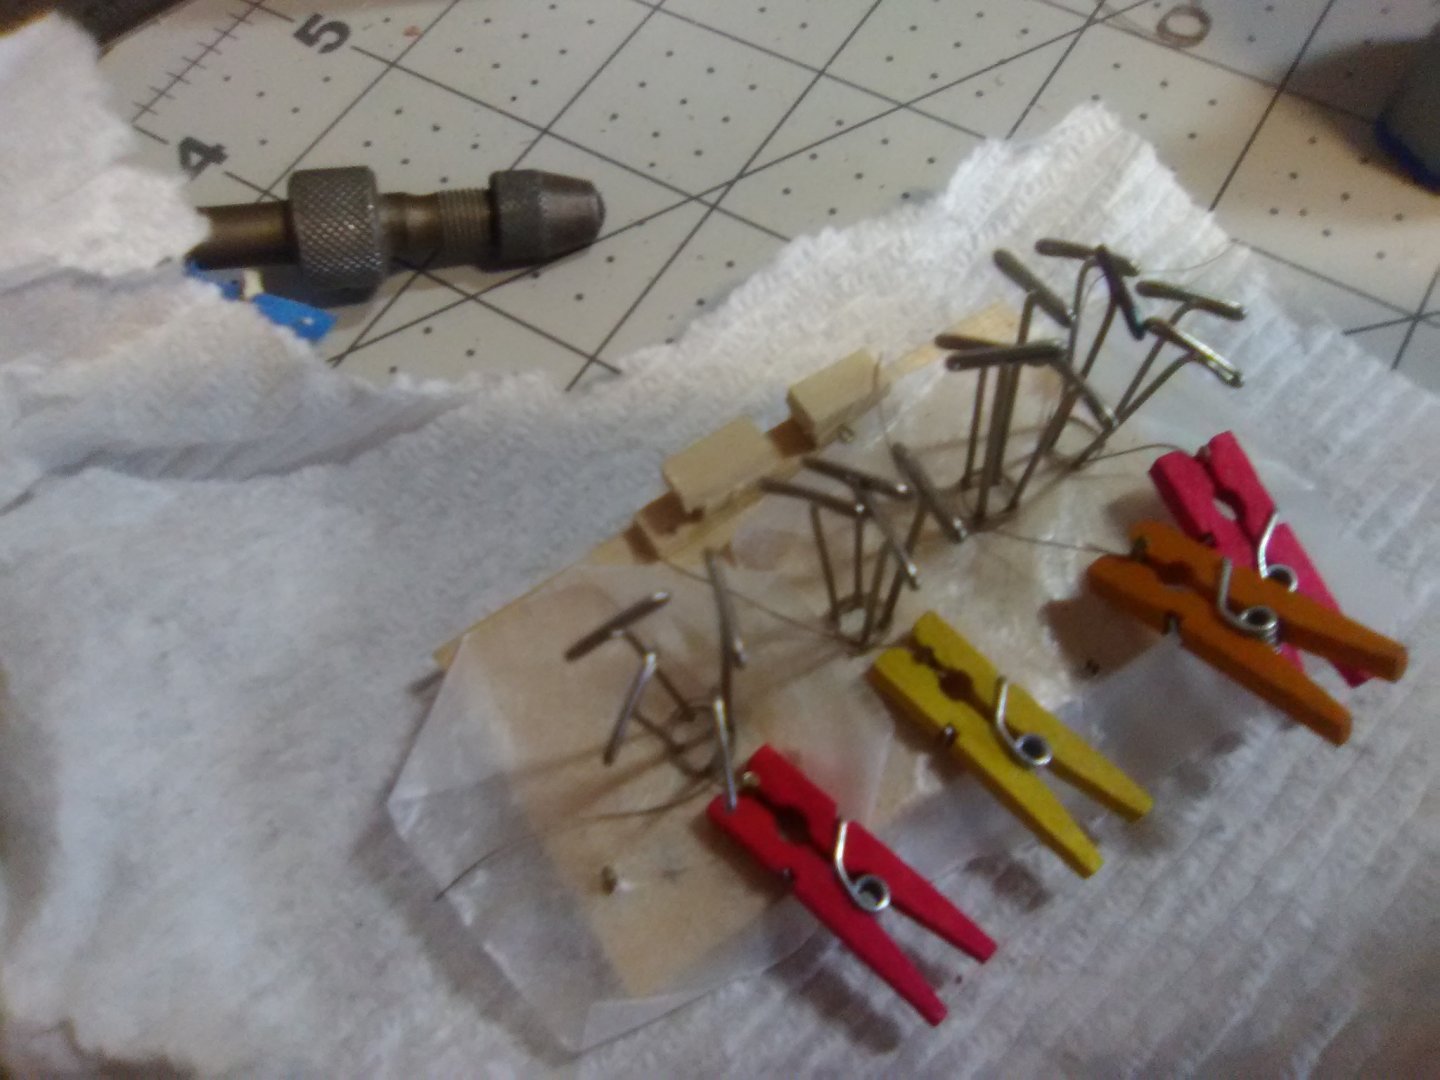
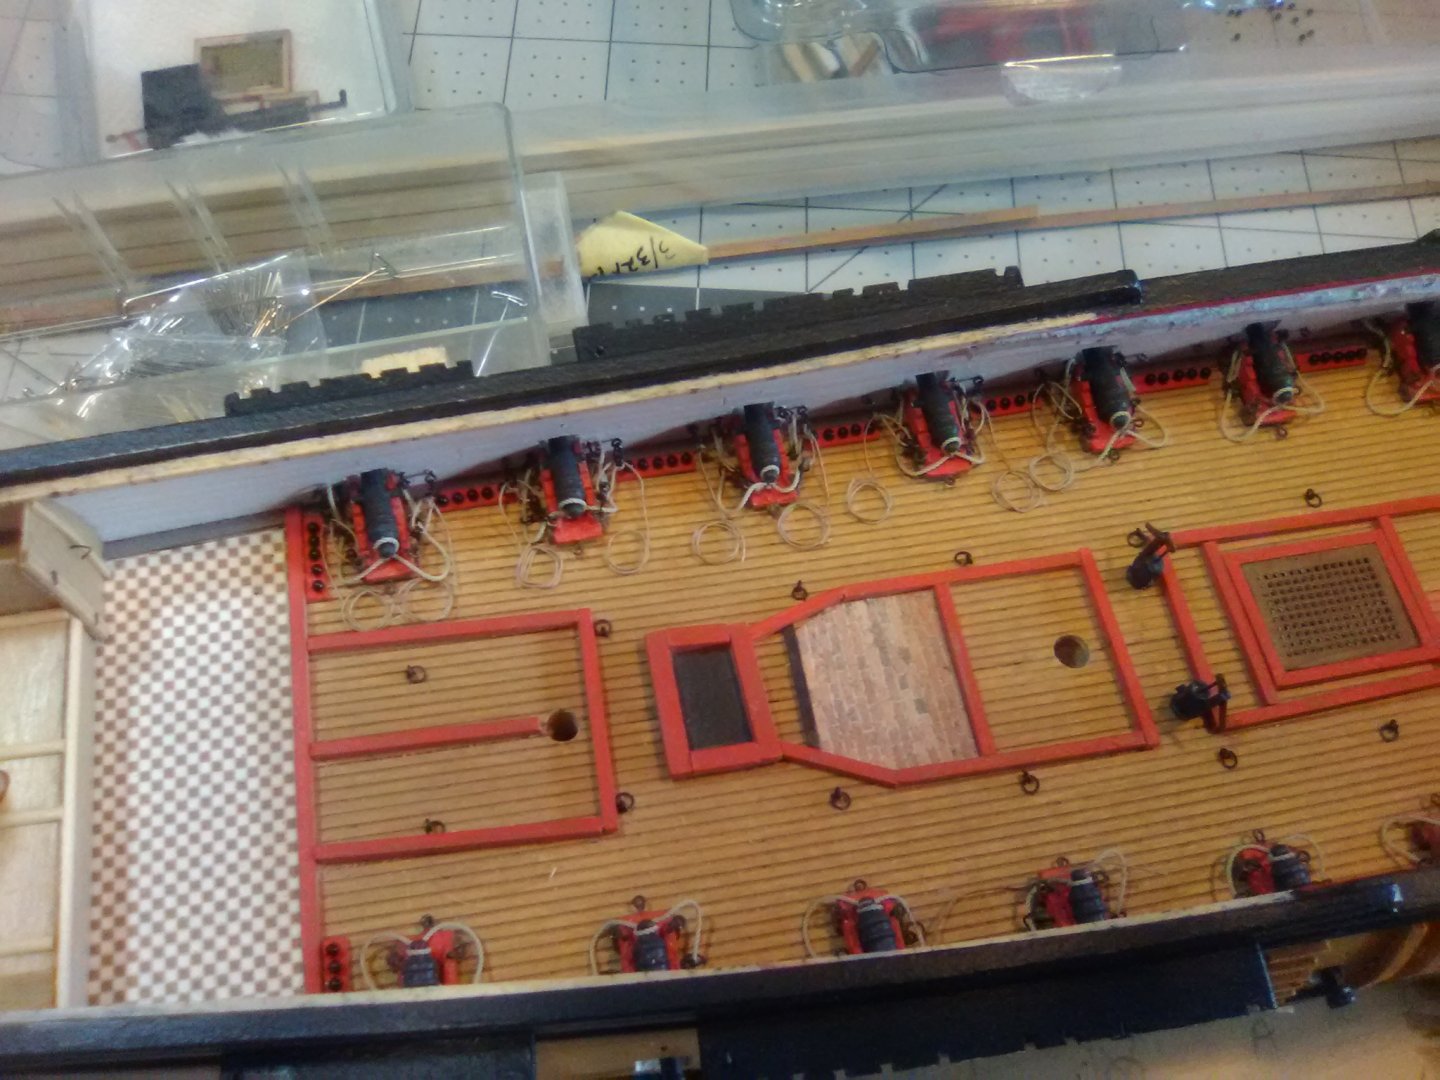
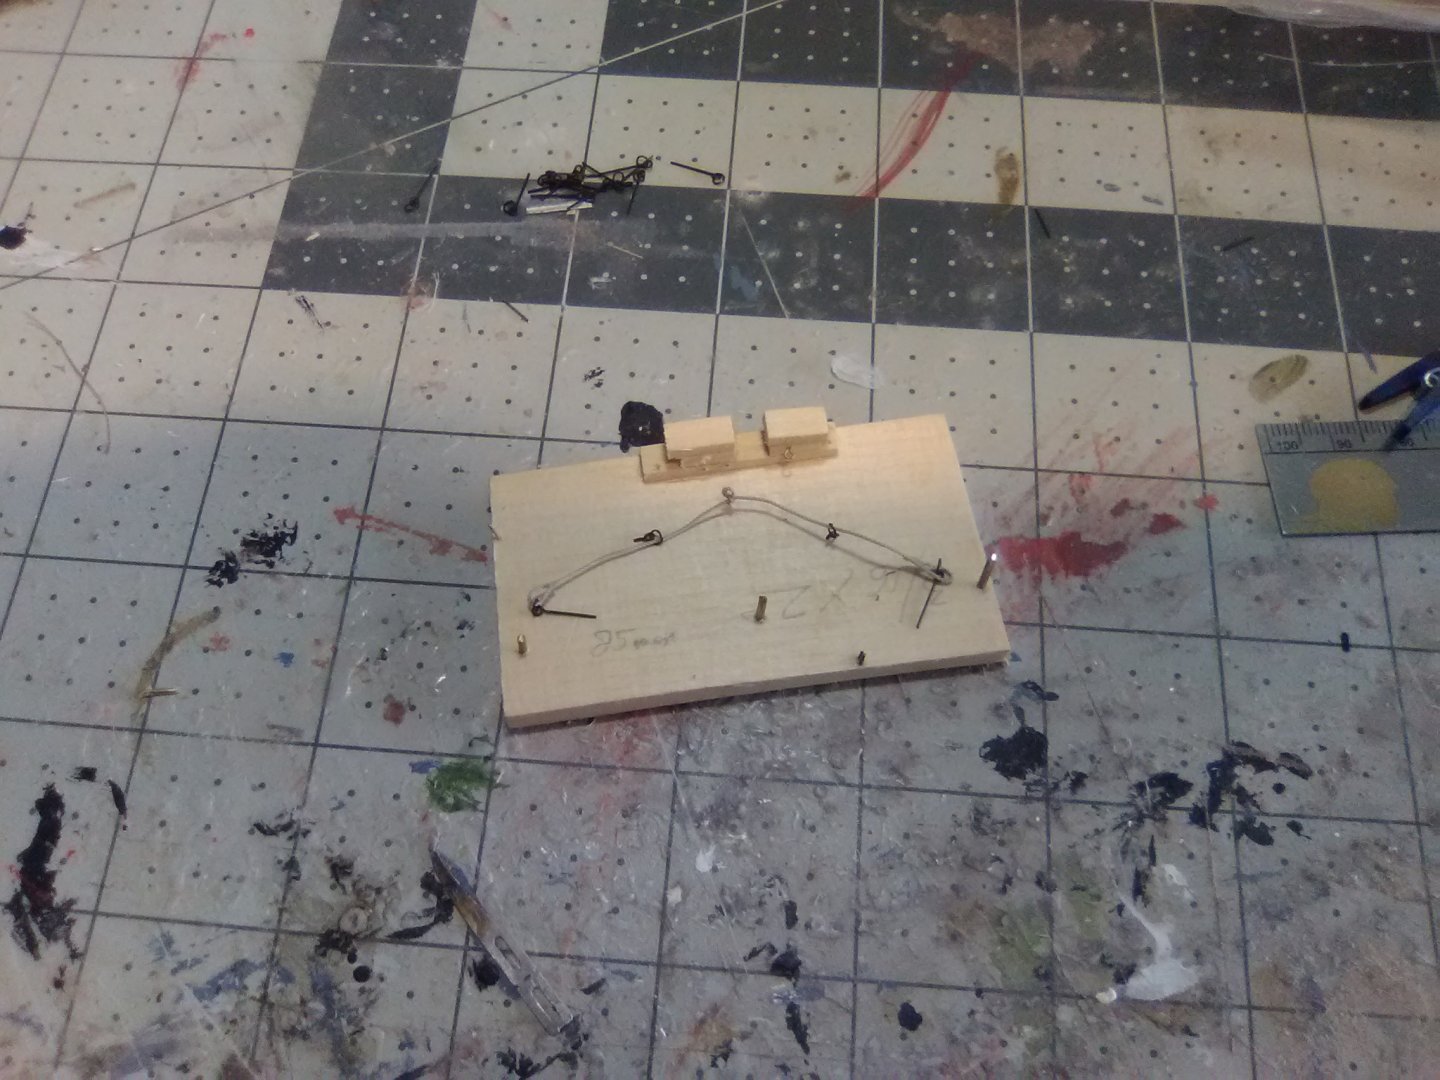
Installing the guns and their breeching lines After too many days of tedium with tweezers, all the guns are in place. I used a little jig to get the loop centered and the lengths equal; I still have to do the in-haul tackles but before I take on working with 80 small blocks I’m going to take a break and work on some deck furniture.


- 142 replies
-
- 7
-
-
- alfred
- solid hull
- (and 2 more)
-
Nice job getting a smoooooth finish with your primer!
- 32 replies
-
- 1
-
-
- red baron
- first build
- (and 1 more)
-
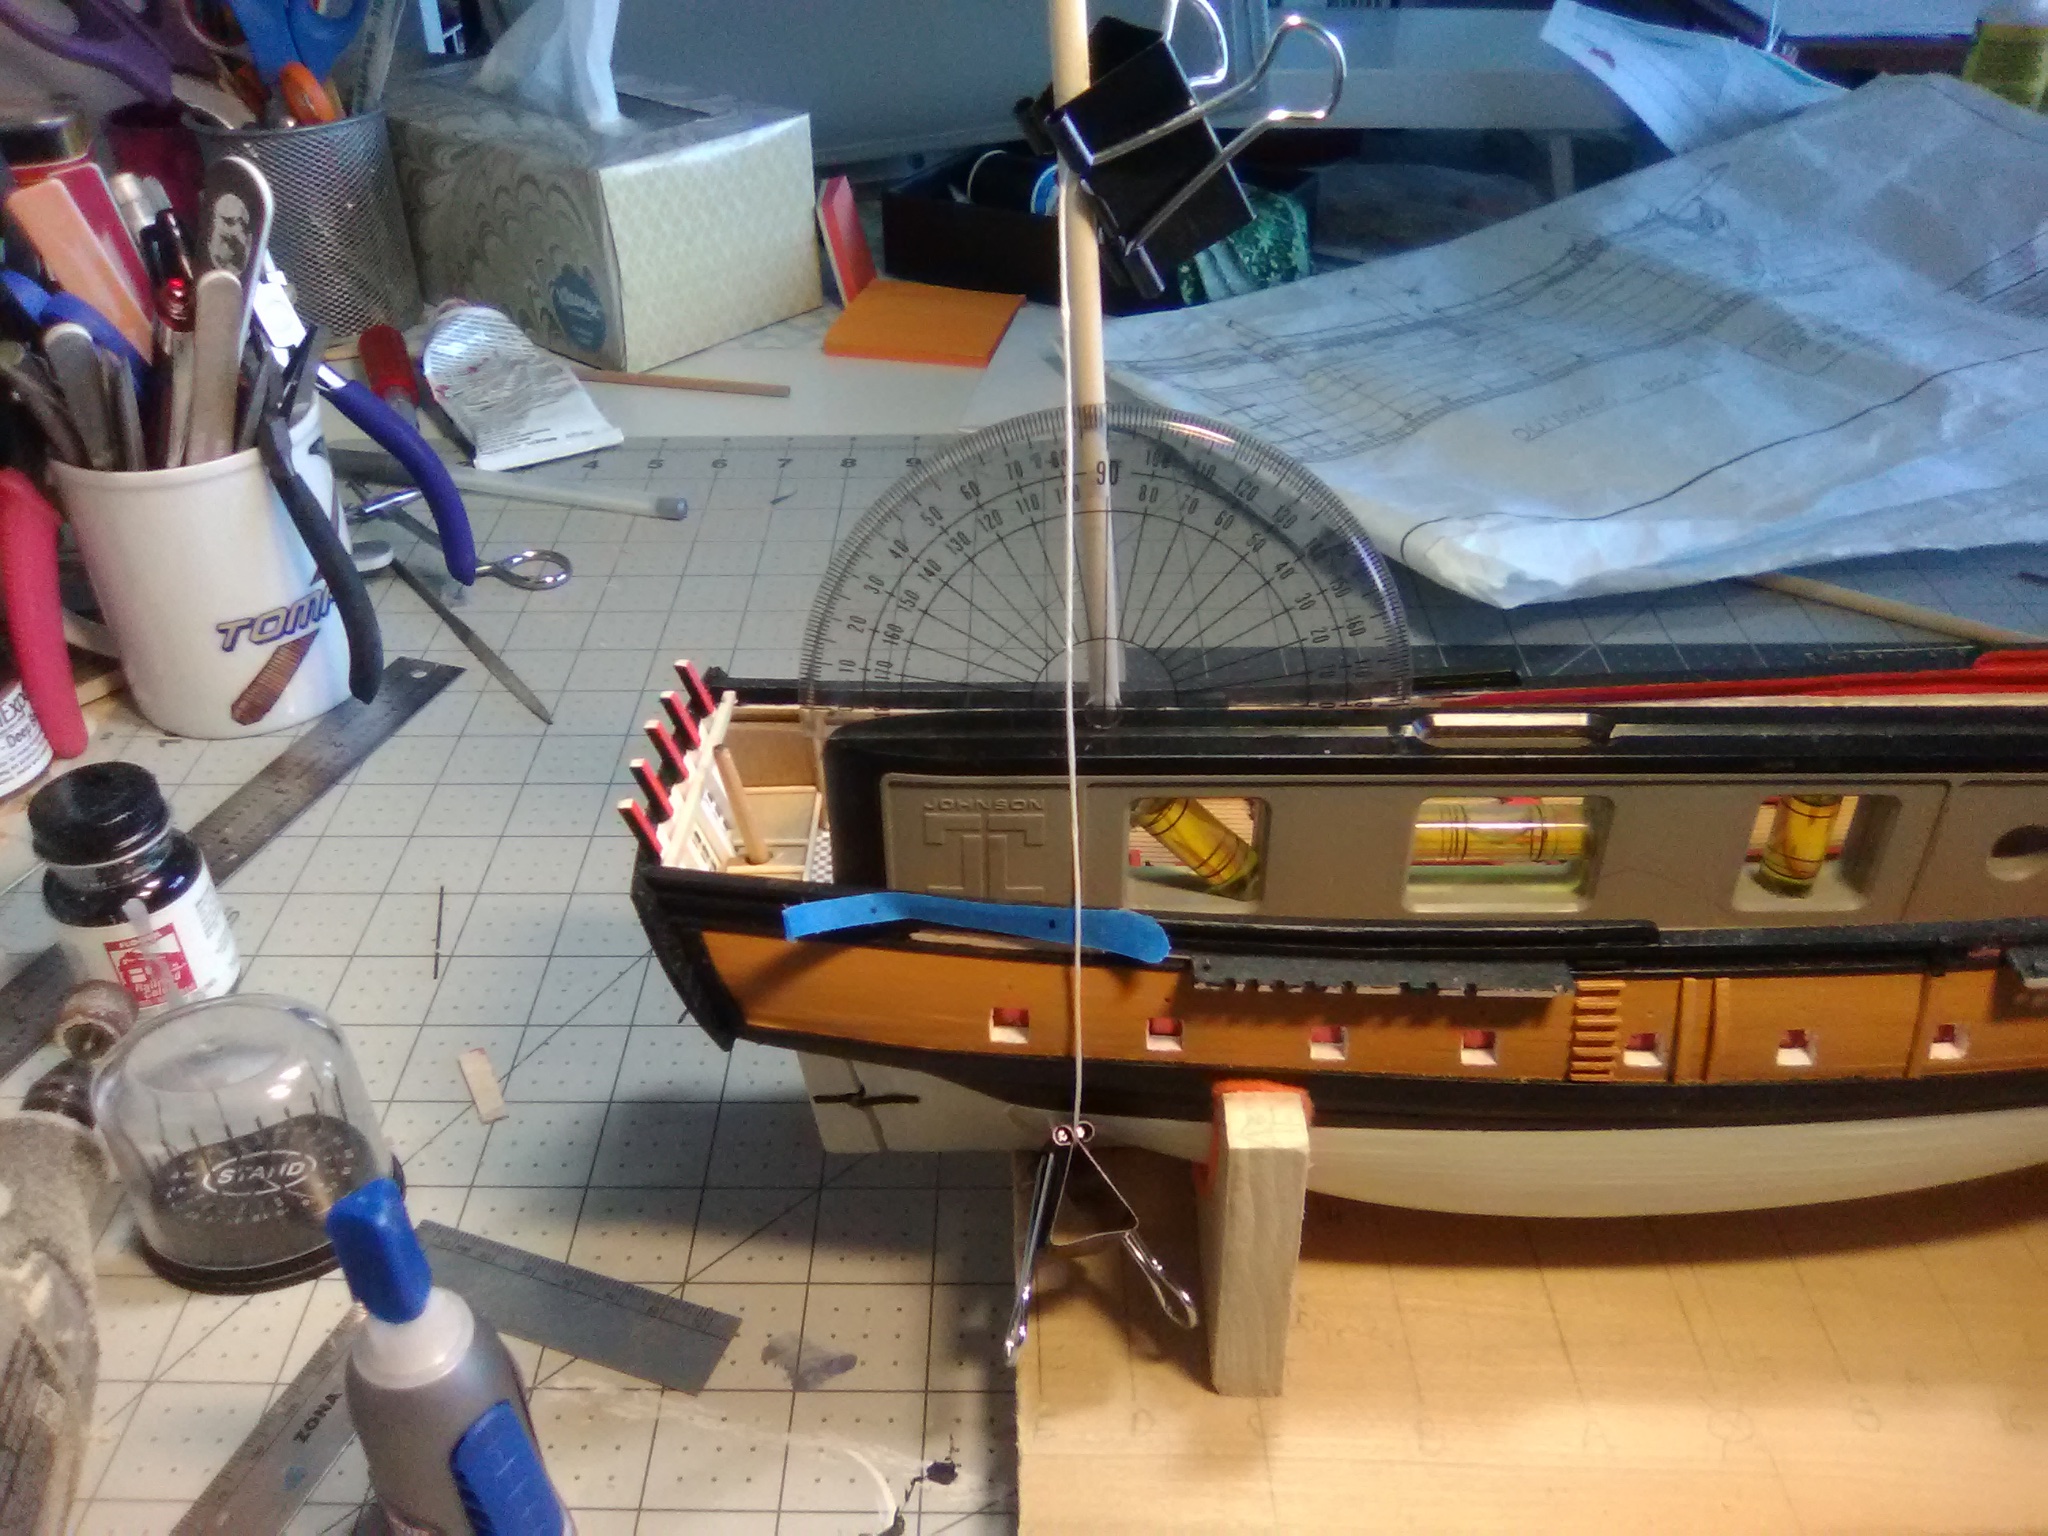
Attaching the Channels I departed from the instructions about when to file the openings for the chains/deadeyes. The instructions call for attaching the channels but not opening up the locations for the deadeyes until the masts are stepped. Given that when all the deadeyes are in place it will be pretty crowded on most of the channels which will leave little flexibility in adjusting the position of the deadeyes I thought it would be better to cut the openings now, then using a mast rake jig to determine where the forward-most shroud needs to come down to be vertical and then attach the channels accordingly. Here’s my jury rig for determining where the shrouds will come down (the rake isn’t much - 89- 88-87 degrees for the 3 masts, fore to aft). When I painted the hull I left the area where the channels would be attached bare wood for better glueing and also pinned all of them. One thing to watch out for for future builders. The plans do not show that all of the channels need an eyebolt at their aft ends for attaching a block and tackle, but the belaying diagram does show it so leave some room at the aft end.


- 142 replies
-
- 5
-
-
- alfred
- solid hull
- (and 2 more)
-
Great Cabin details Since the cabin will be somewhat visible with reduced deck planking I thought it needed a little attention so I added the parquet floor, bench/storage lockers, and the captain’s head since this ship does not have quarter galleries.

- 142 replies
-
- 5
-
-
- alfred
- solid hull
- (and 2 more)