schooner
-
Posts
741 -
Joined
-
Last visited
Content Type
Profiles
Forums
Gallery
Events
Everything posted by schooner
-
 Your photos and explanations are better than ANY kit instructions or practicums I have seen! Thanks!
- 476 replies
-
- 4
-

-

-
- sphinx
- vanguard models
- (and 1 more)
-
Glenn, I have to chime in on the previous "nice shot" comment. Your amazing modeling skills are exceeded only by your equally fine photography work. All of you photos are crystal clear, regardless how close-up they may be and you always take the time to get the "angle" right so we can actually see what you are referring to - not all that common for photos on this site, mine being some of the worst in that regard. Thanks for putting all the effort into supplying a detailed build log, particularly of the rigging - it will be a great reference for any rigging job!
- 476 replies
-
- 3
-
-
- sphinx
- vanguard models
- (and 1 more)
-
Very nicely done! Now I finally understand what that confusing part of the rigging is for! Thanks for the explanation and pix.
-
Wow!, your builds just get better and better (as they should I guess). This has been a real treat to watch, can't wait for the next one!
-
Nice to see another Lib Ship build. Juuuuust in case, as you may already be aware there is another Dean's Robert E. Peary build log in progress here - look at page 3 of the 1901-Present Day kit builds and you will see it. Good luck
-
Nice save on the stem! That "Saturday Night Fever" frigate captain is really getting into it!
- 370 replies
-
- 1
-
-
- Model Shipways
- Confederacy
- (and 1 more)
-
I feel your pain for this part of the build. The whole cheek, head, railing ensemble has been the hardest part of my ALFRED build. I think the source of most problems is the manufacturer trying to portray a VERY 3-D assembly with 2-D plans, and then for us to understand what those plans are trying to tell us.
- 370 replies
-
- 1
-
-
- Model Shipways
- Confederacy
- (and 1 more)
-
The instruction book for my BJ kit of the ALFRED (same scale as yours I think) lists them as 3/4 inch.
-
I had not thought of that, I suspect you are right!
-
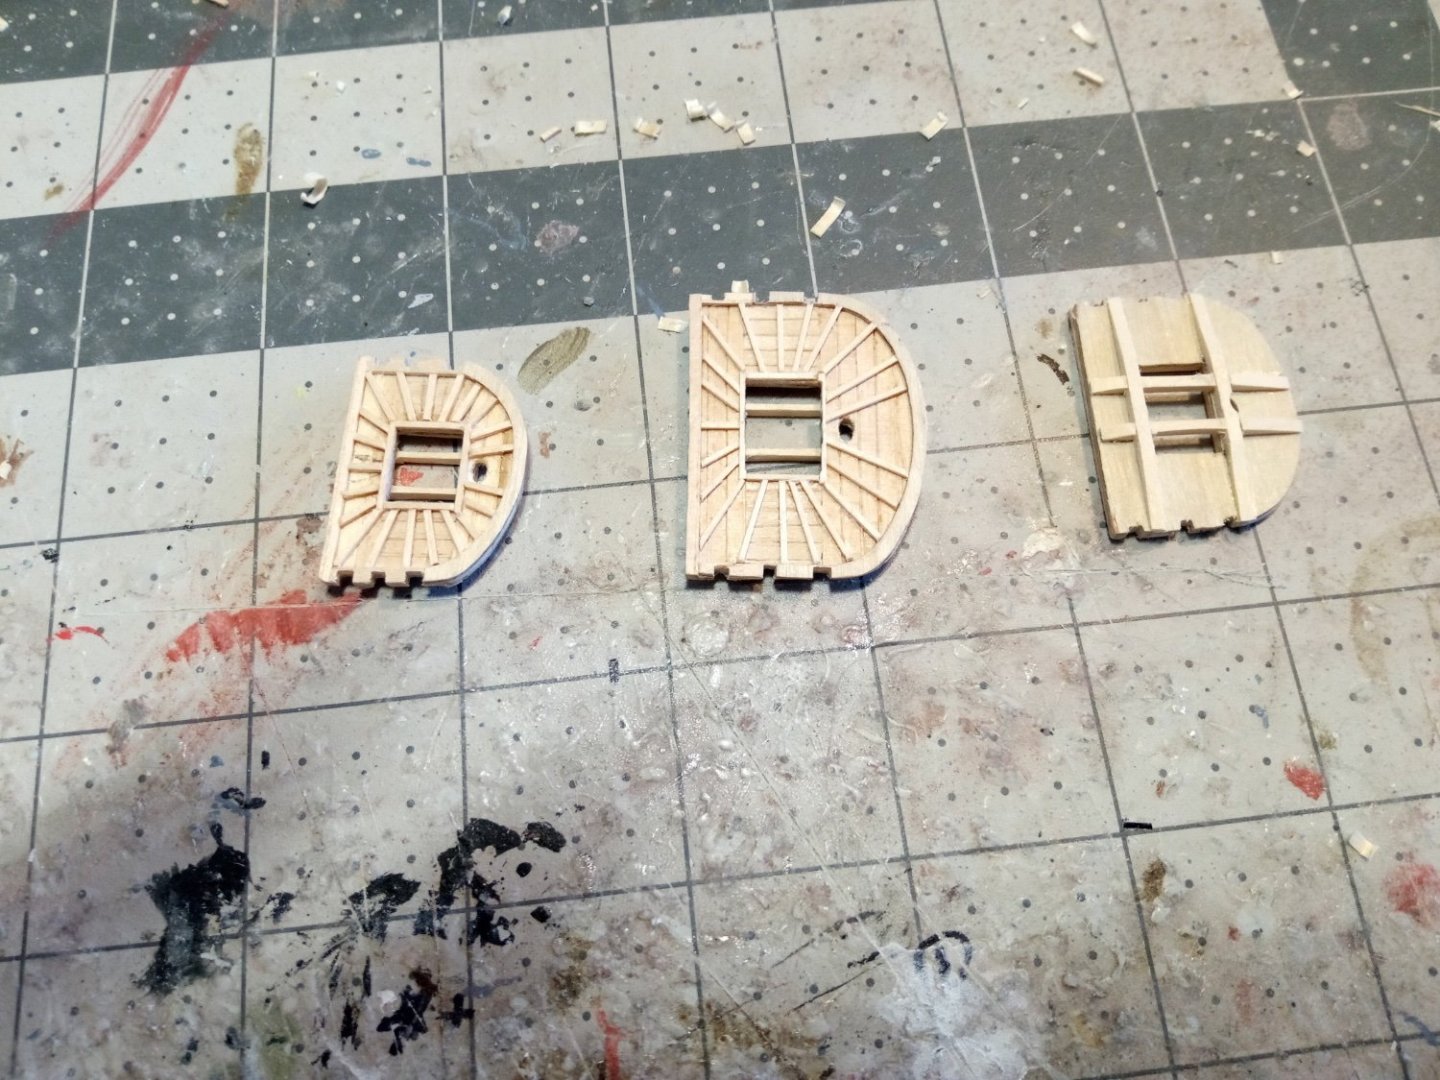
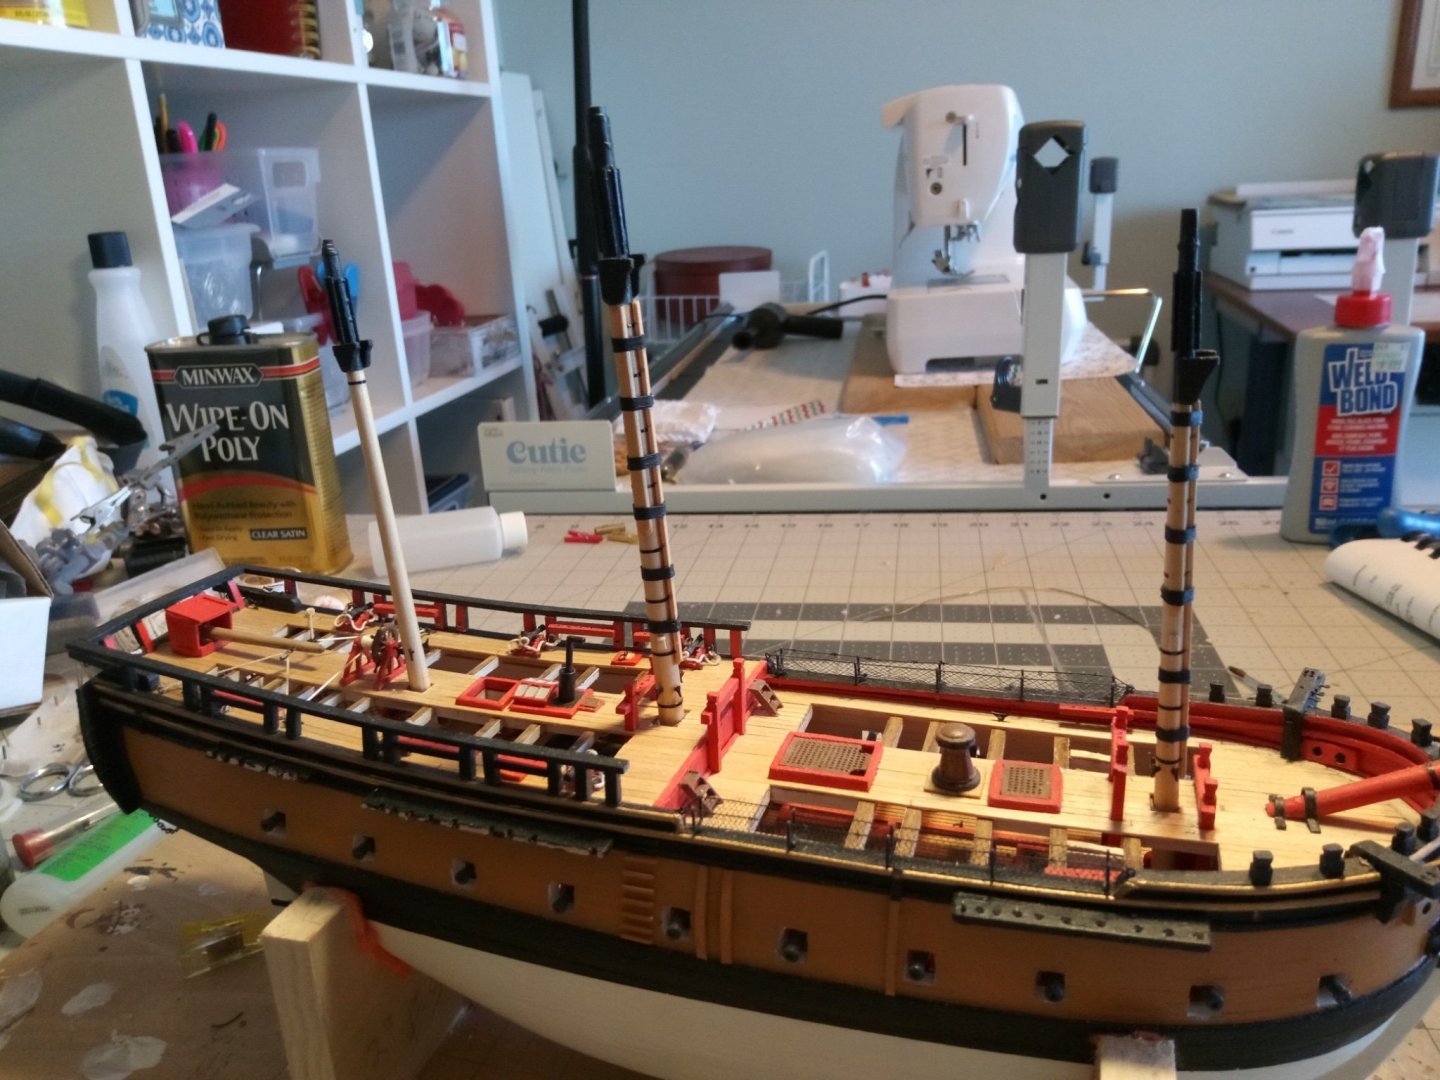
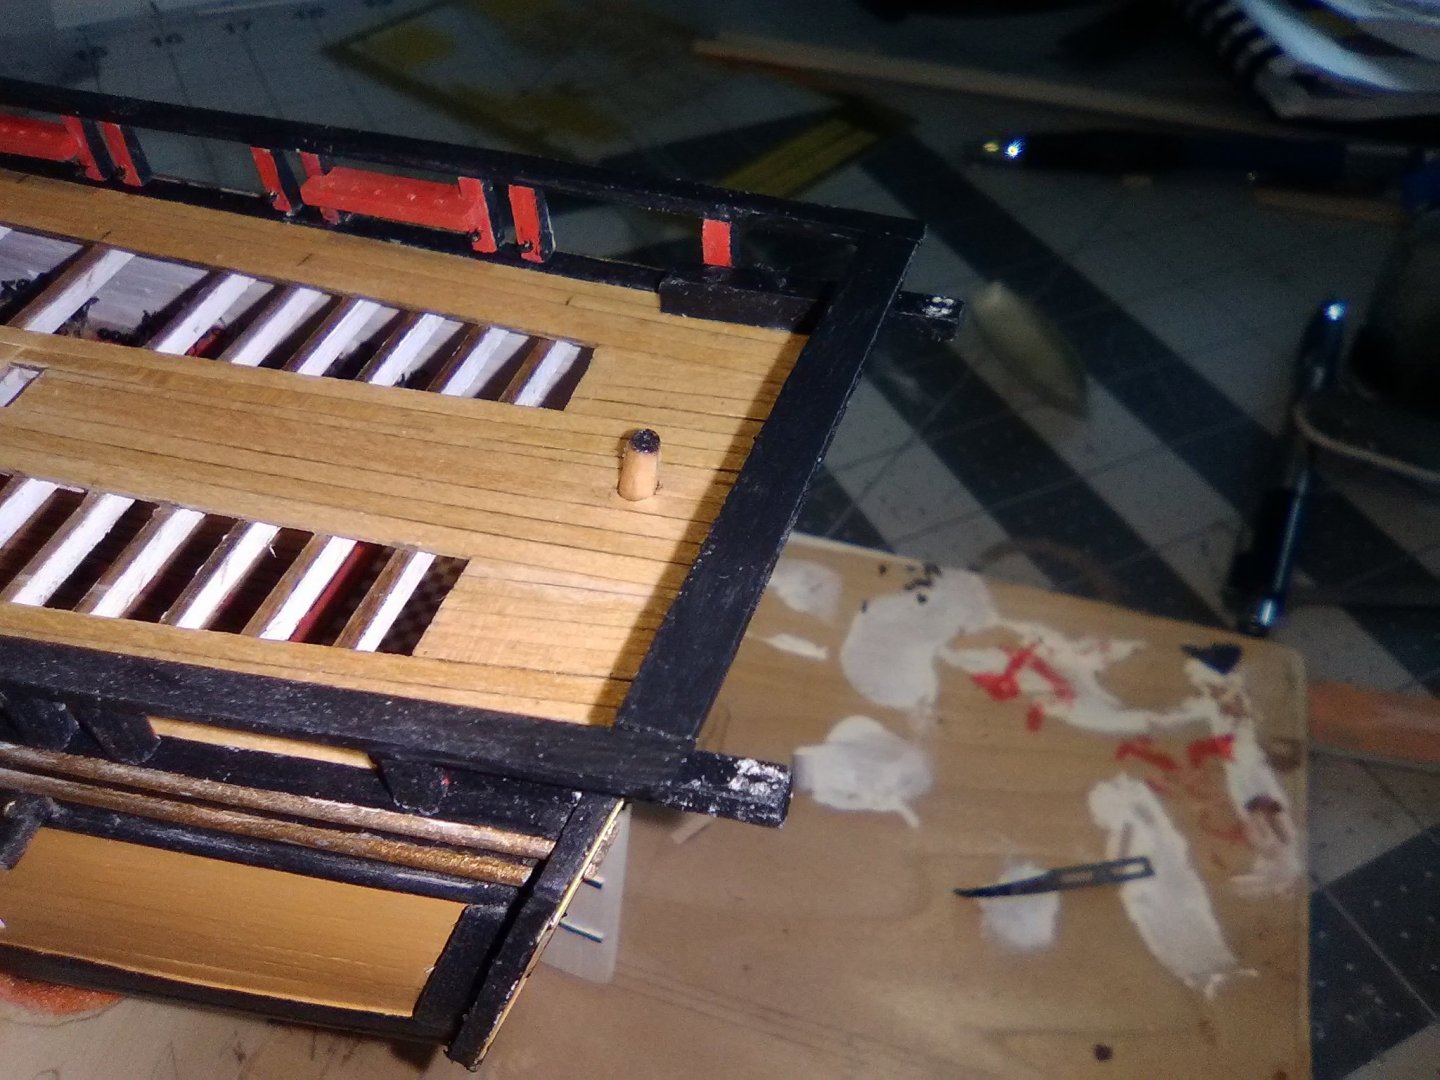
Fighting Tops (cont) I’ve spent quite a bit of time on these and more to go - I never really paid much attention to them when looking at period ship models and did not realize how many parts it takes to make them up. Anyway, the battens have been added (why they put these trip hazards/ankle-twisters on the top surface is beyond me), the slots for the deadeyes have been cut and the crosstrees added: Still to go are the holes for adding the blocks that hang under them, the mountings for the swivel guns, the band that will cover the outboard face and hold the deadeyes in place and the rear railings.
- 142 replies
-
- 13
-
-
- alfred
- solid hull
- (and 2 more)
-
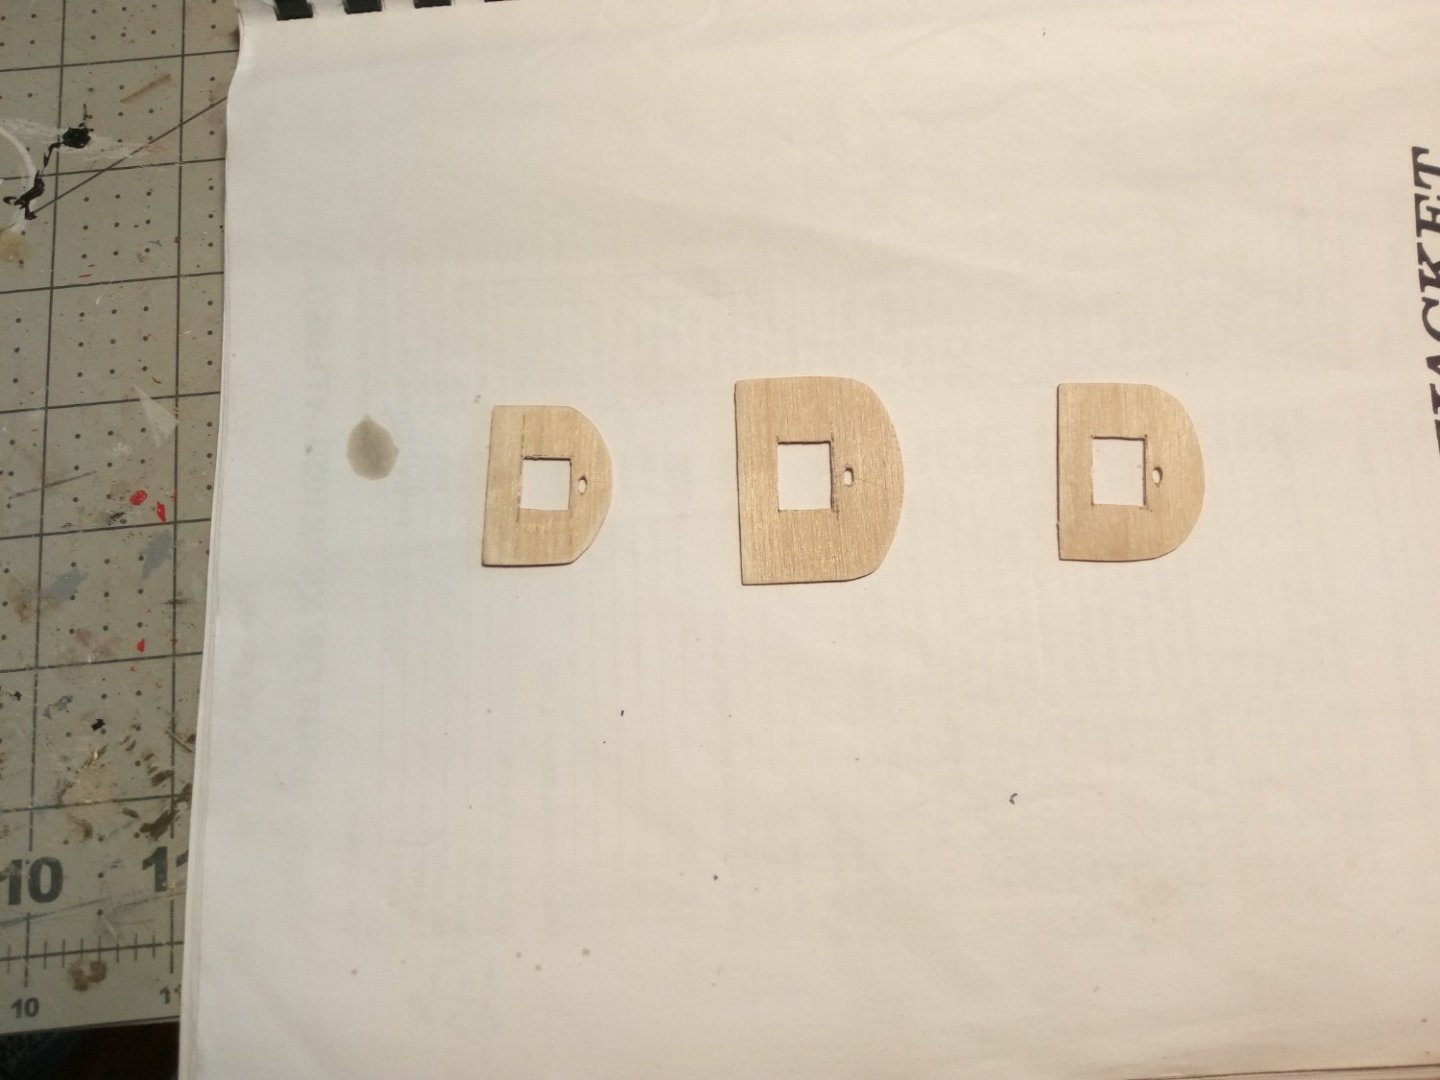
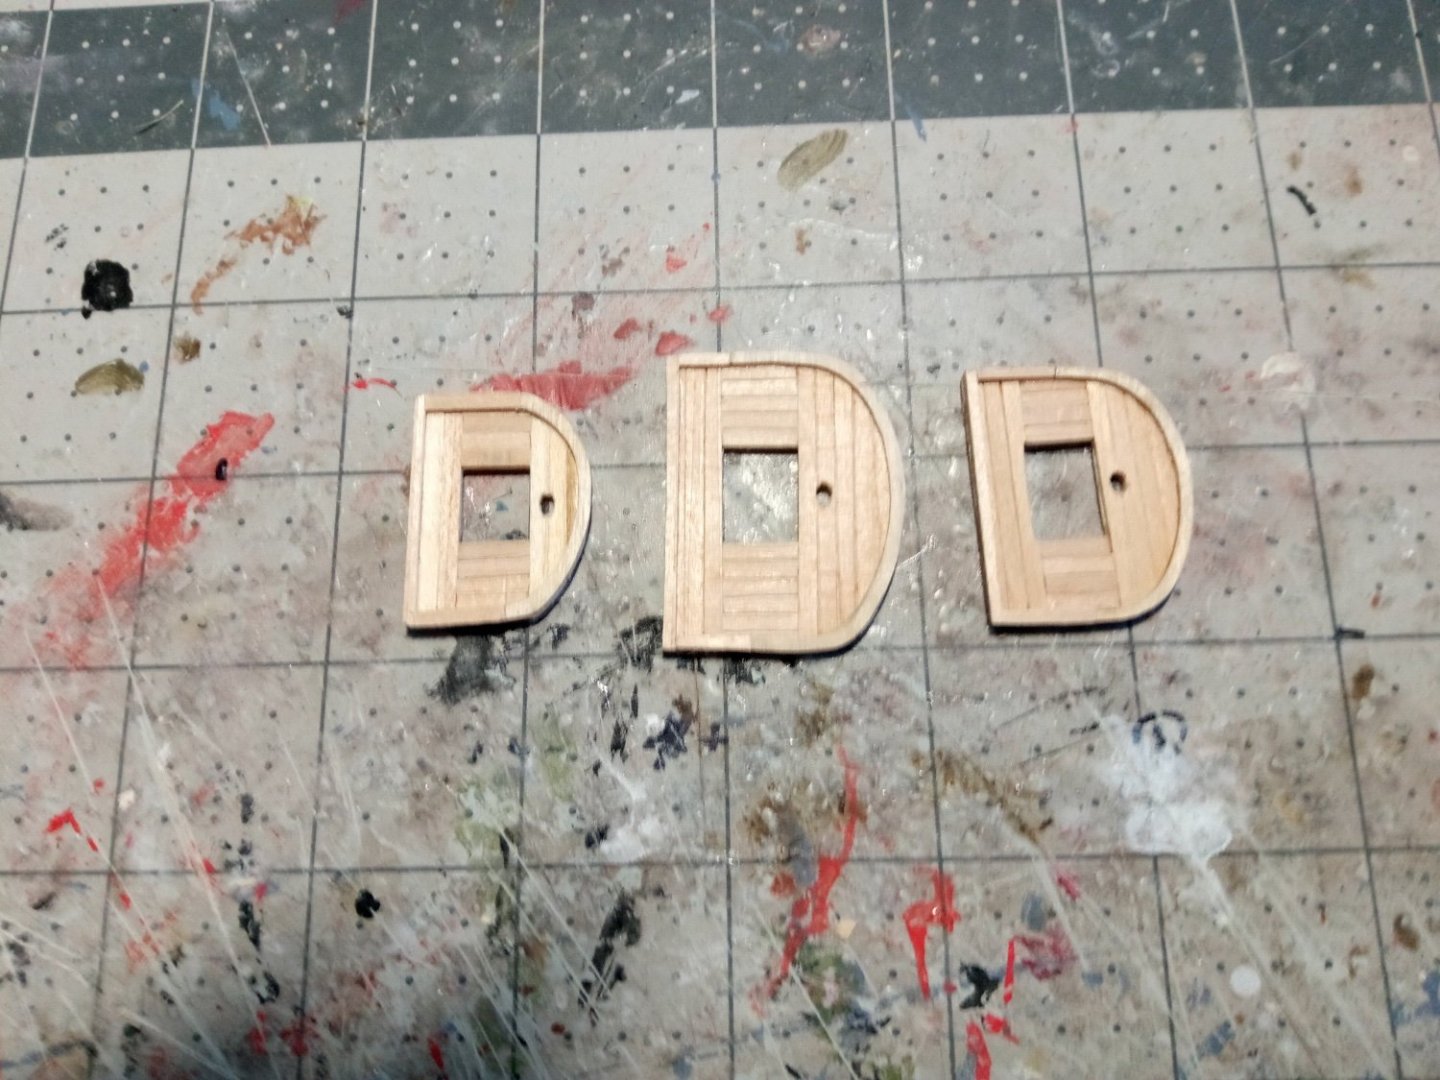
Fighting Tops The tops are all scratch. The instructions recommend making the bases from sheet brass but I find working with plywood to be easier so I traced their shapes and transferred them to 1/32” ply and cut them out: The planking is per the plans, cut a little long and then sanded back to match the base. Given the thiness of the bases I used CA to glue the planking, avoiding wood glue since it's moisture might cause swelling and warping. I used the tip of an awl to drag along the plank seams so that hopefully they will be noticeable after painting. The rims have been added. Next will be the battens and deadeyes.

- 142 replies
-
- 12
-
-
- alfred
- solid hull
- (and 2 more)
-
Nice looking model! You could pair a double block to the triple, assuming that the line starts from a becket on the double block.
-
I just used some black rigging thread from my stash (Amati maybe?) with a standard whipping rig.
-
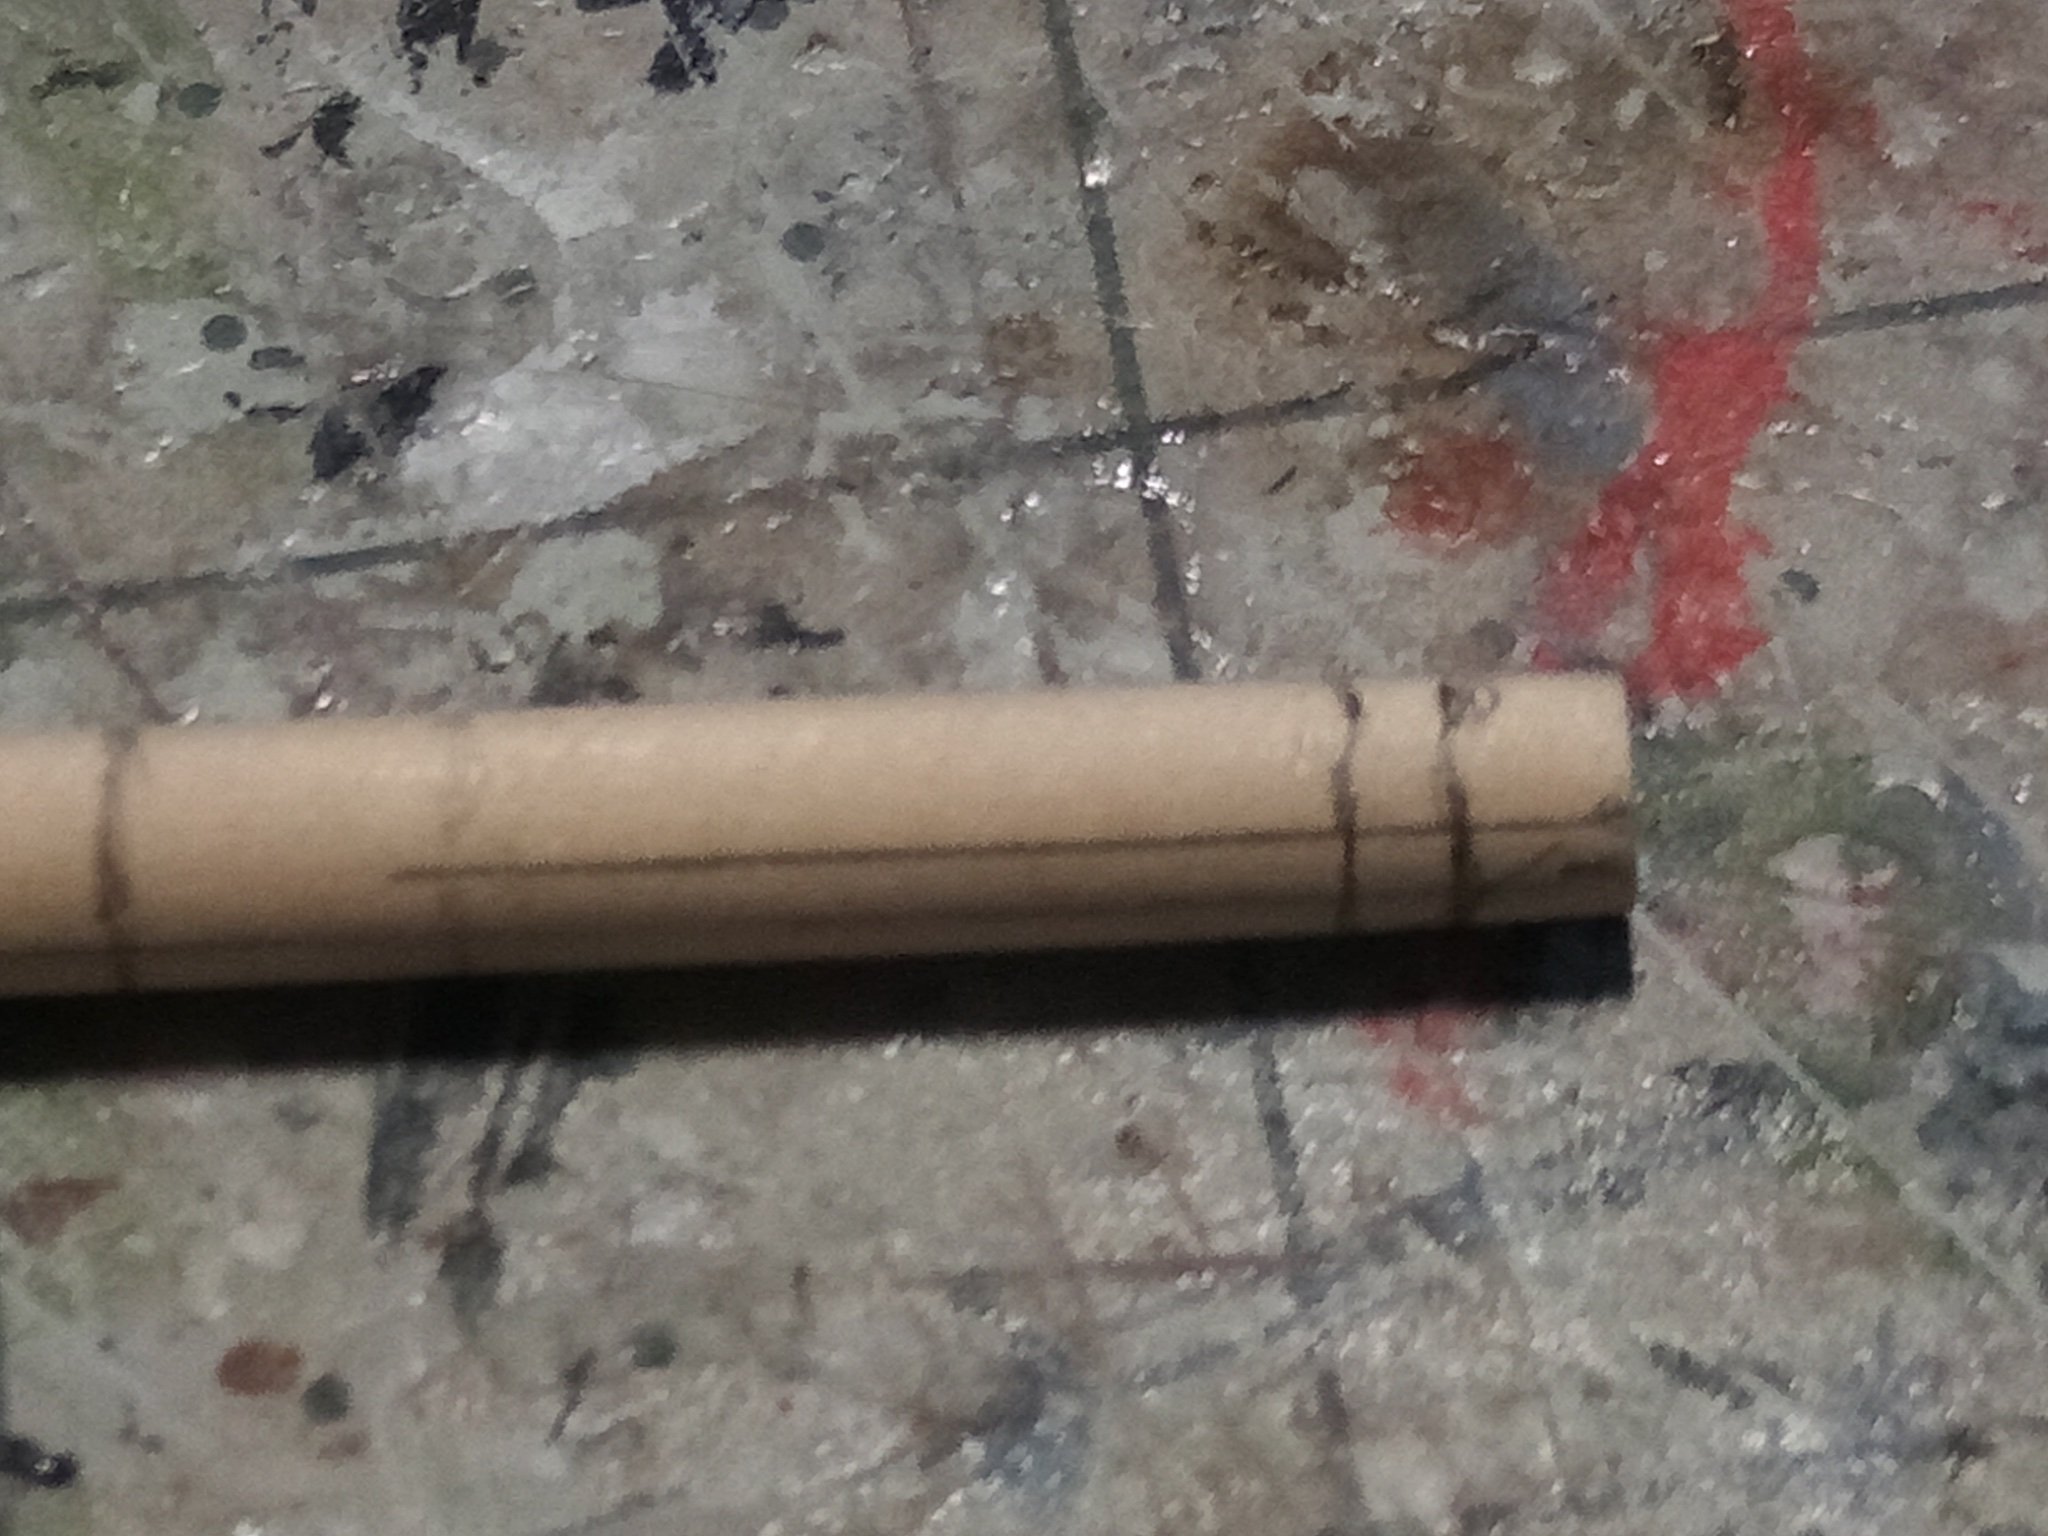
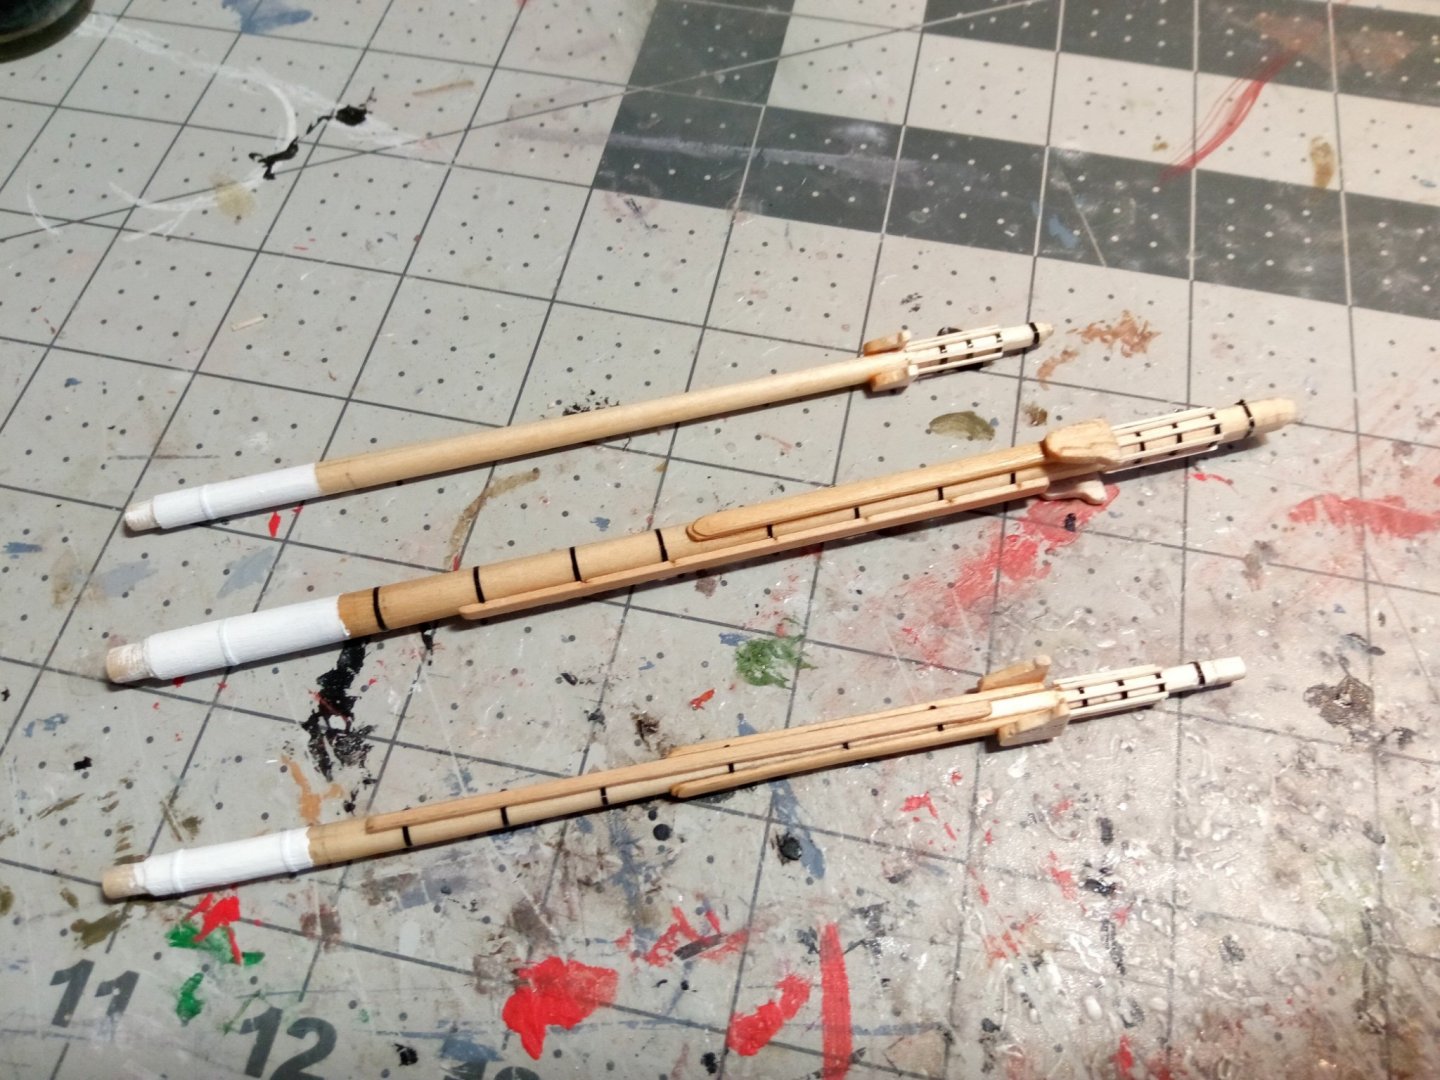
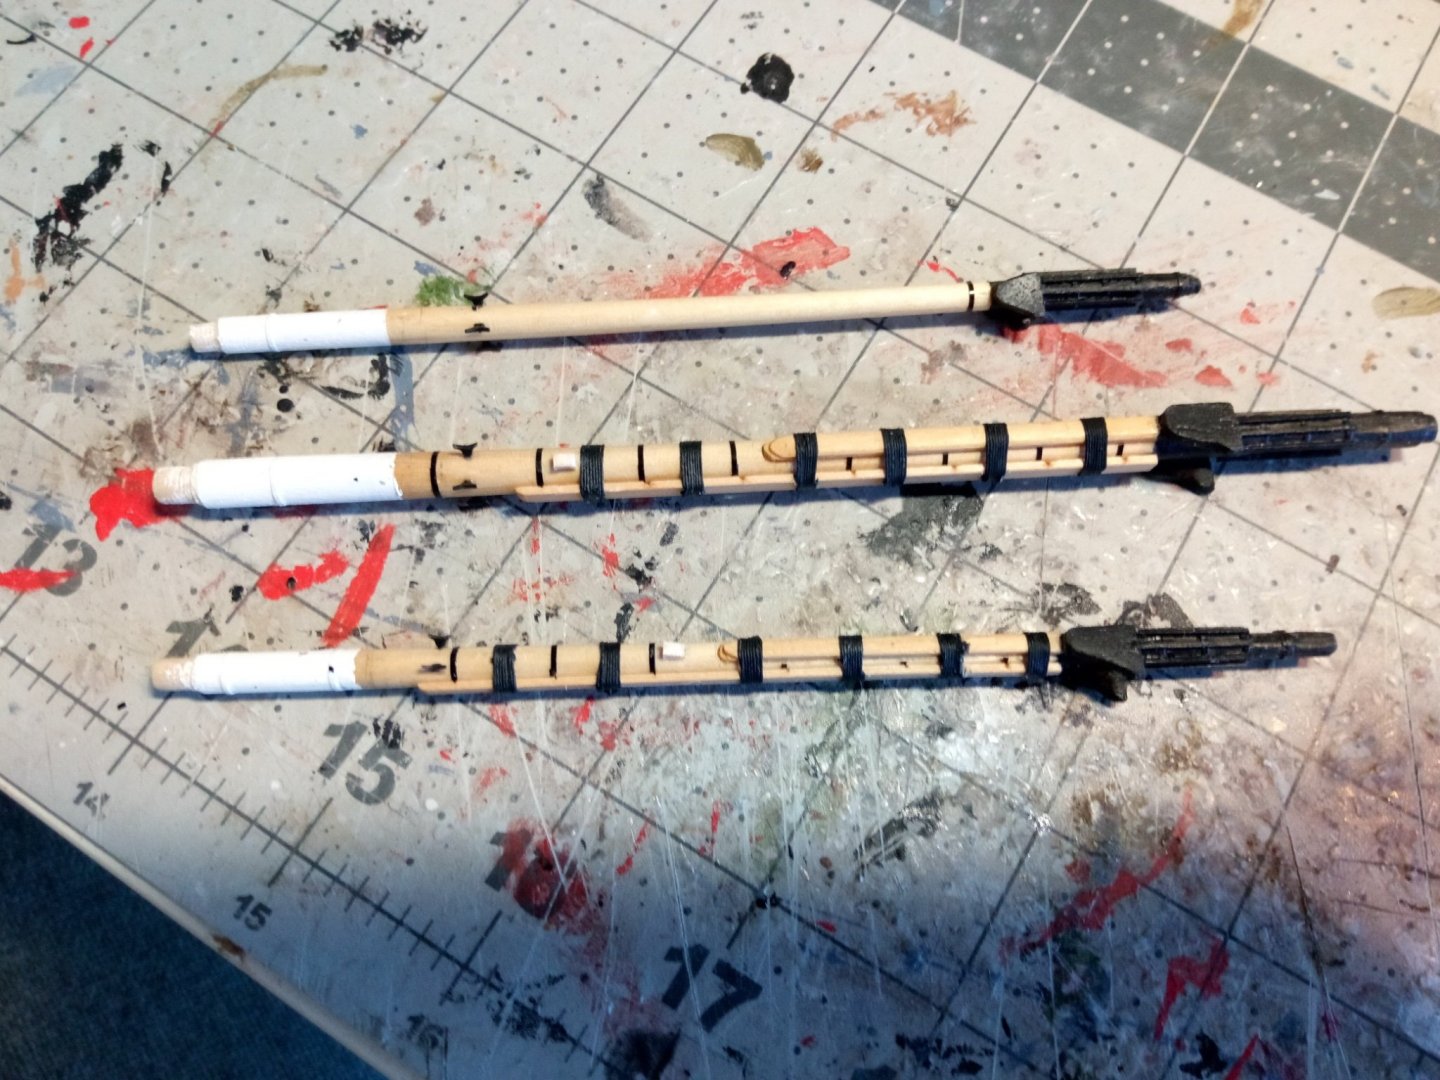
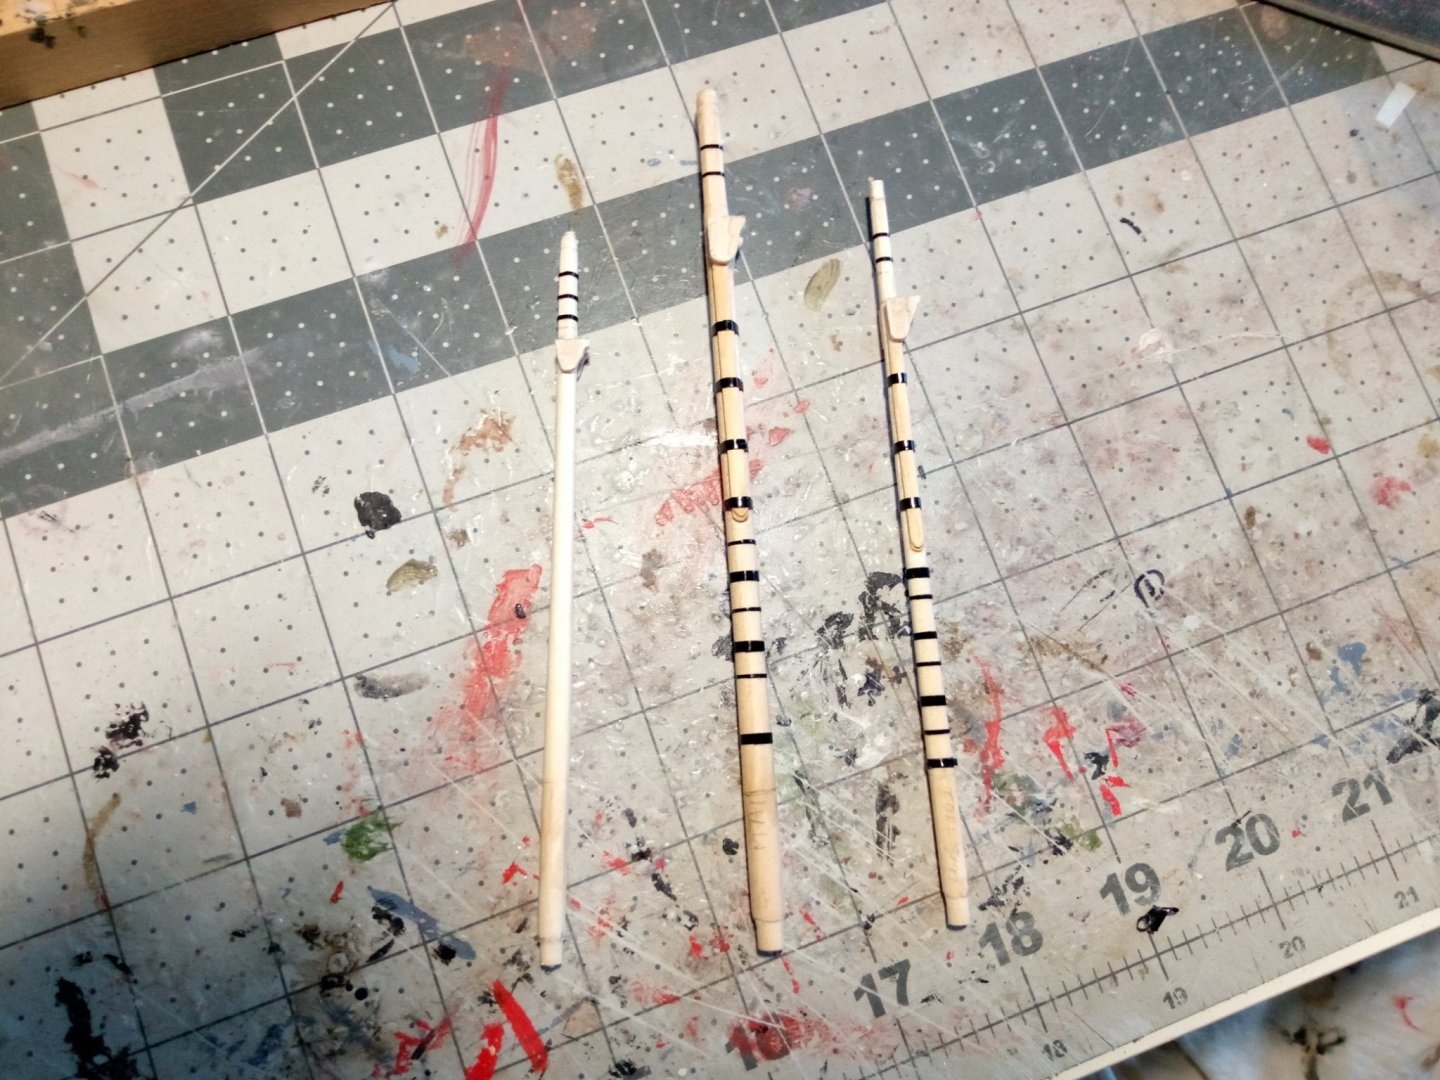
Lower Masts - some re-do and then done After looking at the mast bands from my last post I realized something was wrong - I’ve never seen so many bands and of different sizes on any other build log. After looking at the AOTS ESSEX I figured out that I misunderstood what the plans were showing me; what I thought were larger mast bands were actually “wooldings” which are wraps of tarred line that bind things like the cheeks and fish to the masts so I took all the bands off and started over. Here the front “fish” have been added to the fore and main masts (the fish protect the sails from abrading on the mast bands). One detail that I found on the AOTS book was the battens around the tops of the masts where the shrouds will rest. My guess is that they served to keep the shrouds far enough off the mast that air could circulate behind the shrouds and prevent wood rot from setting in. I have by no means checked every contemporary build log here on MSW but the only one I did find that included the mast battens was the one for the prototype build of Vanguard’s HMS SPHINX. The last step was to spray everything with Testors Dullcoat to cover up the sheen of the pinstripe tape.Here’s the finished masts with the wooldings and addition of chocks on the main and fore masts for the stays and some cleats: Next up will be the mast tops.
- 142 replies
-
- 7
-
-
- alfred
- solid hull
- (and 2 more)
-
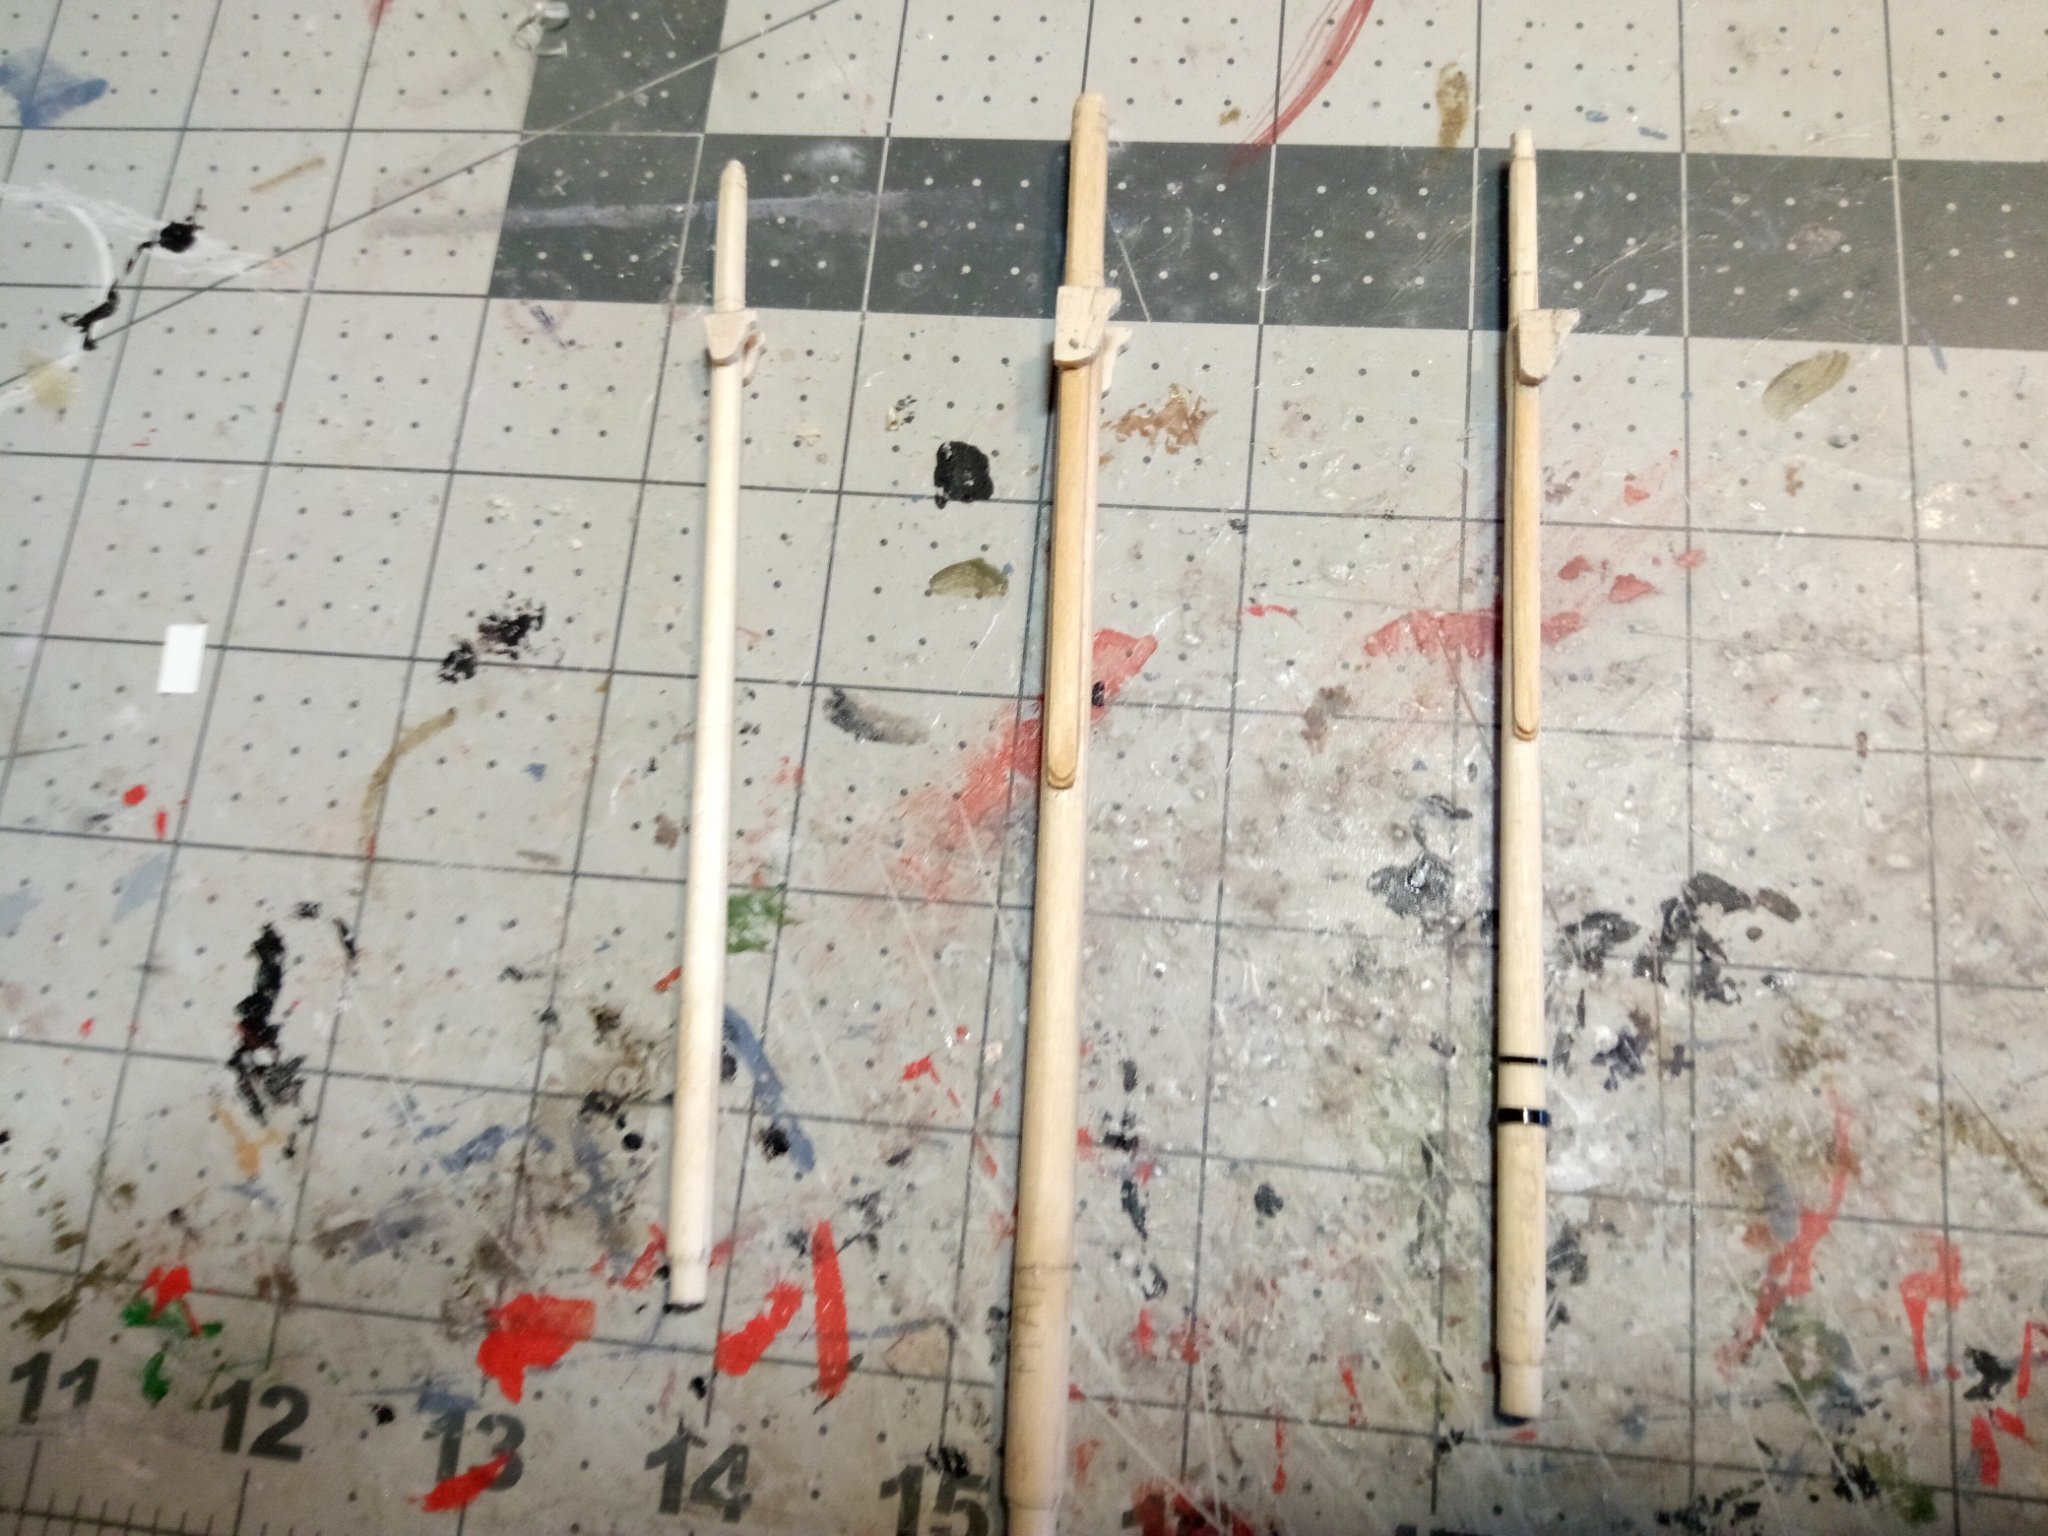
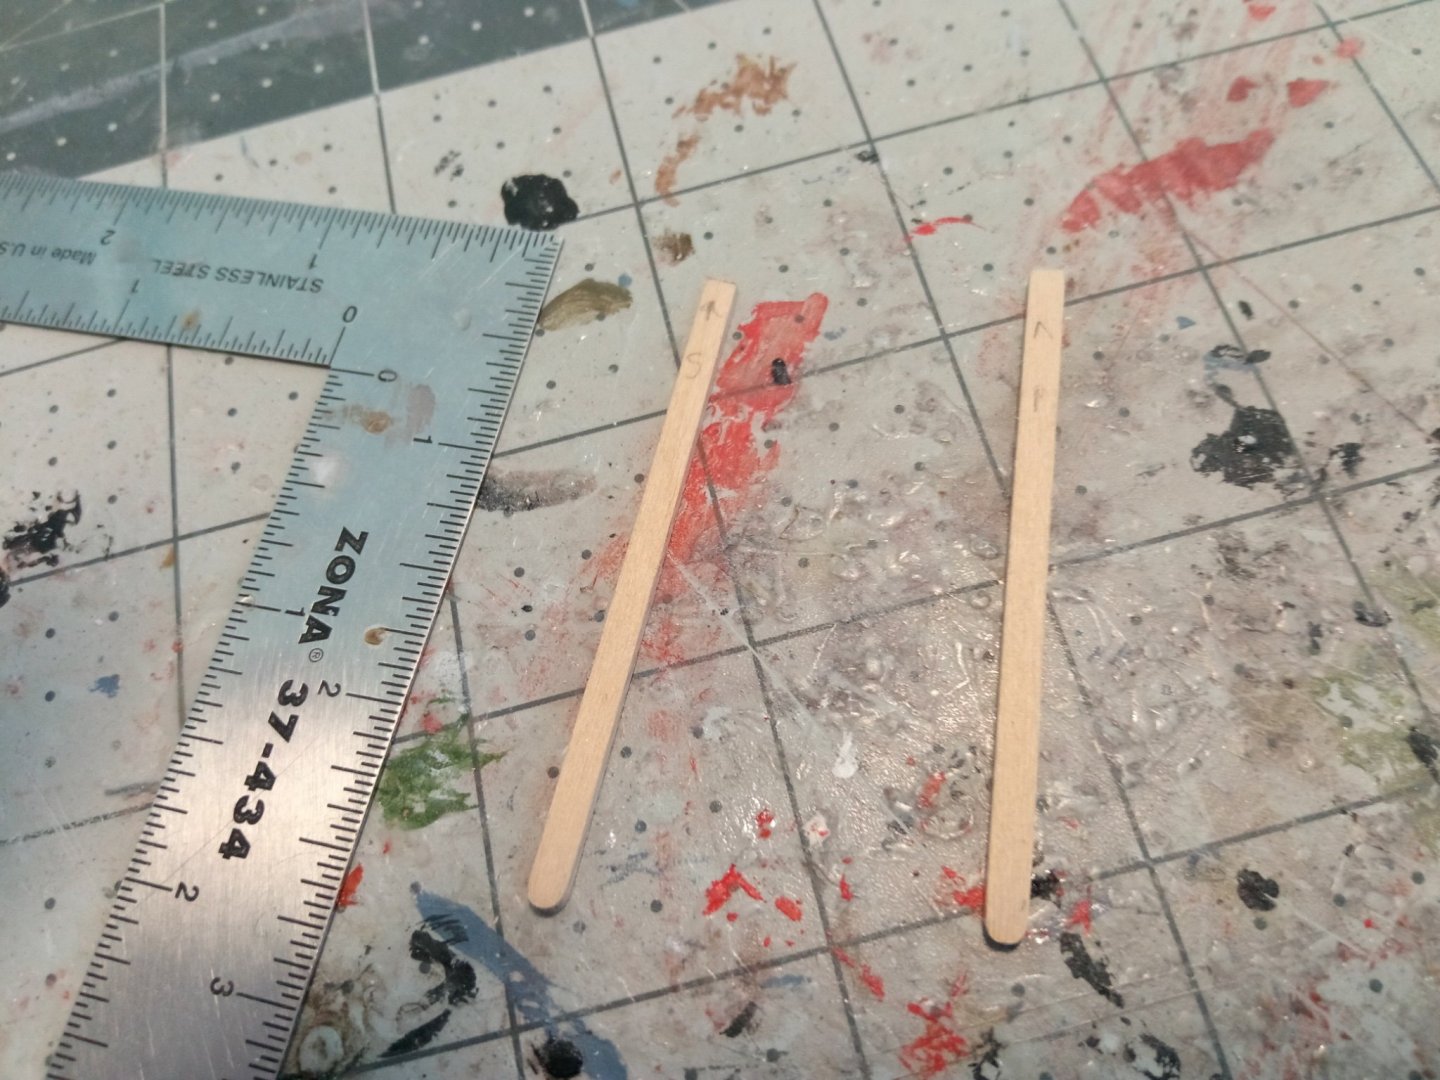
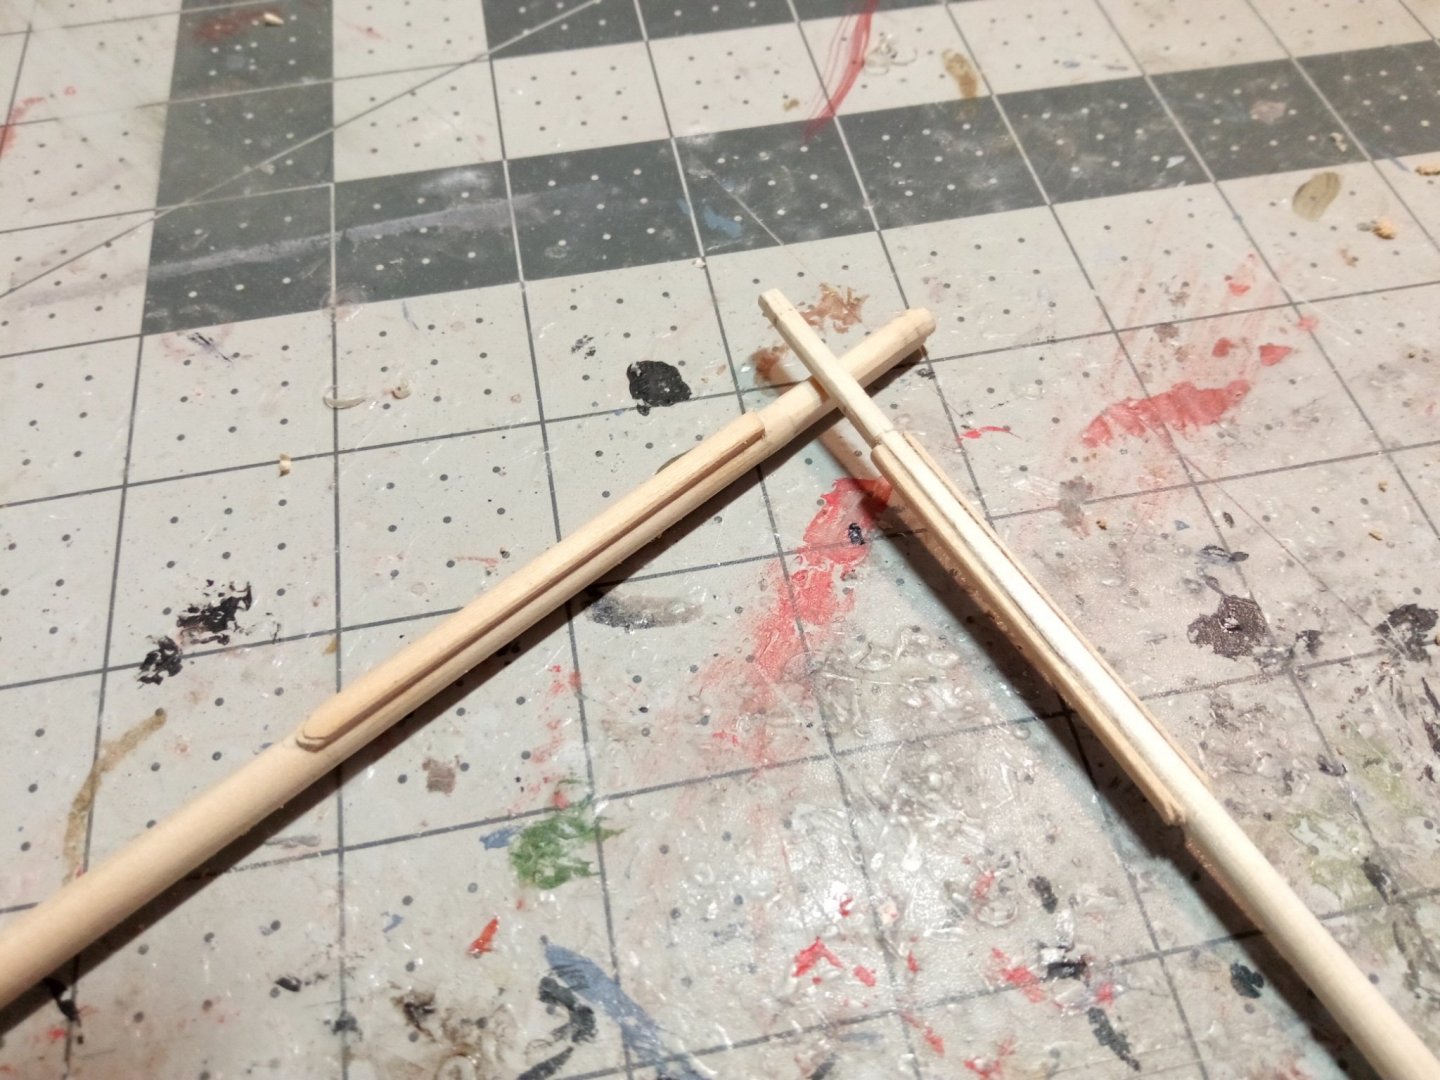
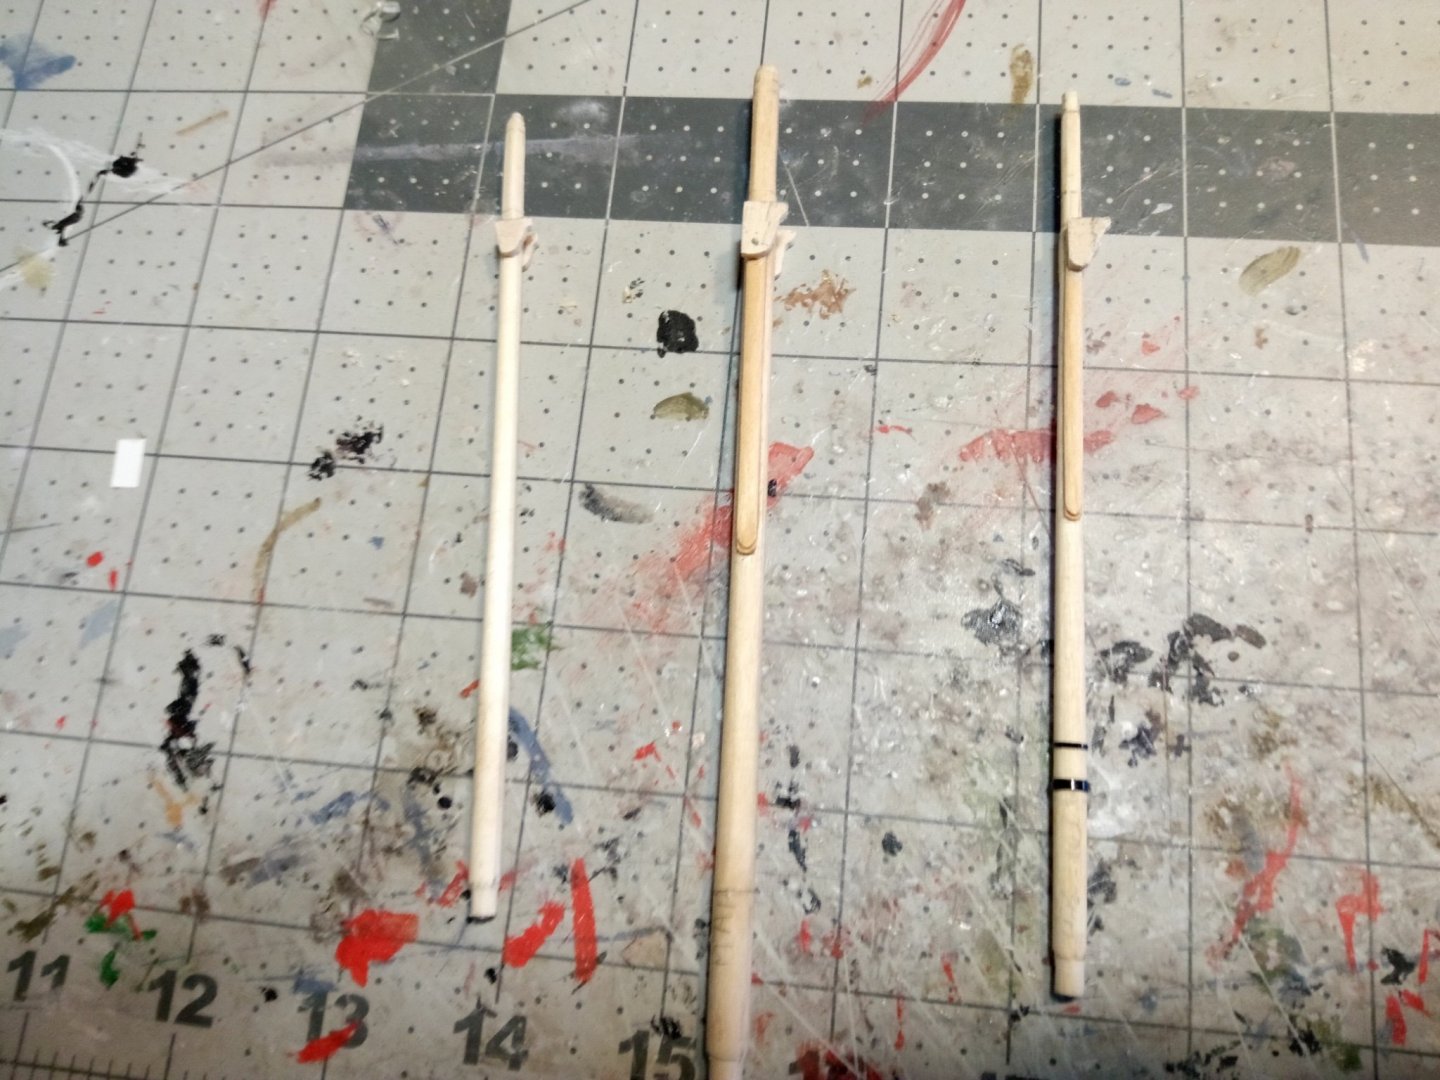
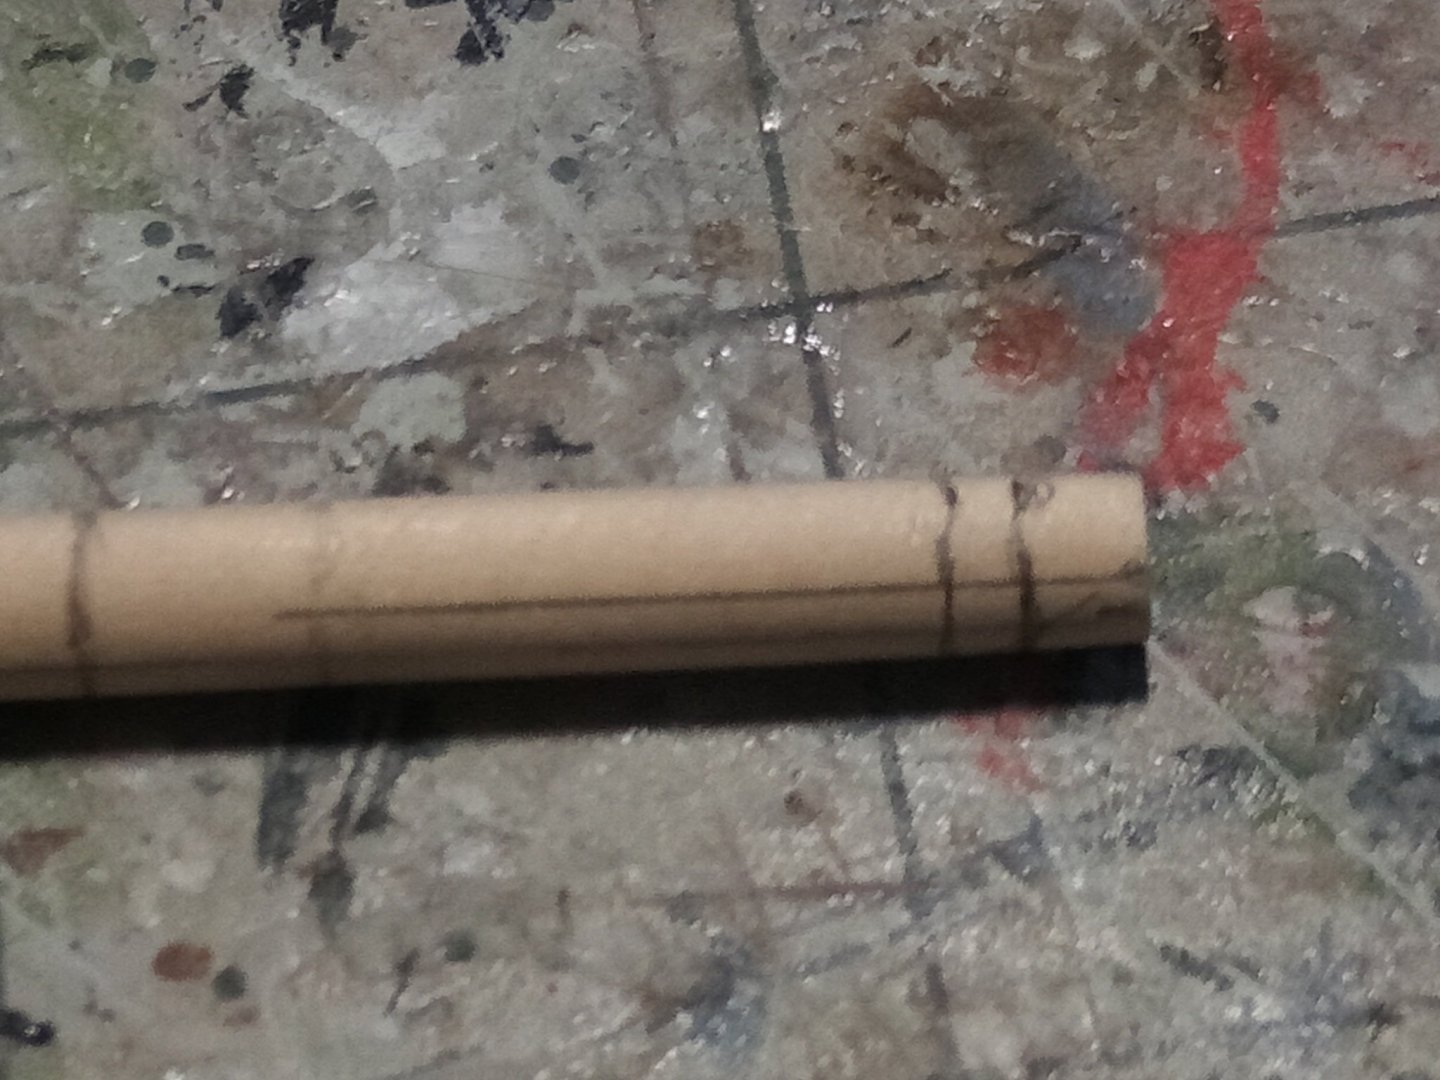
Lower Masts (cont) The cheeks were fashioned out of strip wood whose width matched the plans: They were taped to the masts so that the profiles could be penciled onto the mast - that area was then filed flat so that the cheeks would sit flush on the mast: Here are both masts with their cheeks. The cheeks have been sanded to about half of their original thickness and a “fingernail” profile was filed onto their lower ends (I have no idea what purpose that served): The bibbs were traced from the plans and cut out from sheet wood. Although the foremast will be almost plumb the main mast does have enough rake to it that in order for the top to be level it will have so sit at a slight angle to the mast. The plans show a prominent joint were the bibbs on the fore and main were assembled so I’ve simulated that by scribing a line on the forward portion of the bibbs. The next step was to add the iron bands around the mast using 2 sizes of pinstripe tape: Next up will be the addition of some chocks and cleats and then the painting of the upper and bottom areas of each mast.

- 142 replies
-
- 5
-
-
- alfred
- solid hull
- (and 2 more)
-
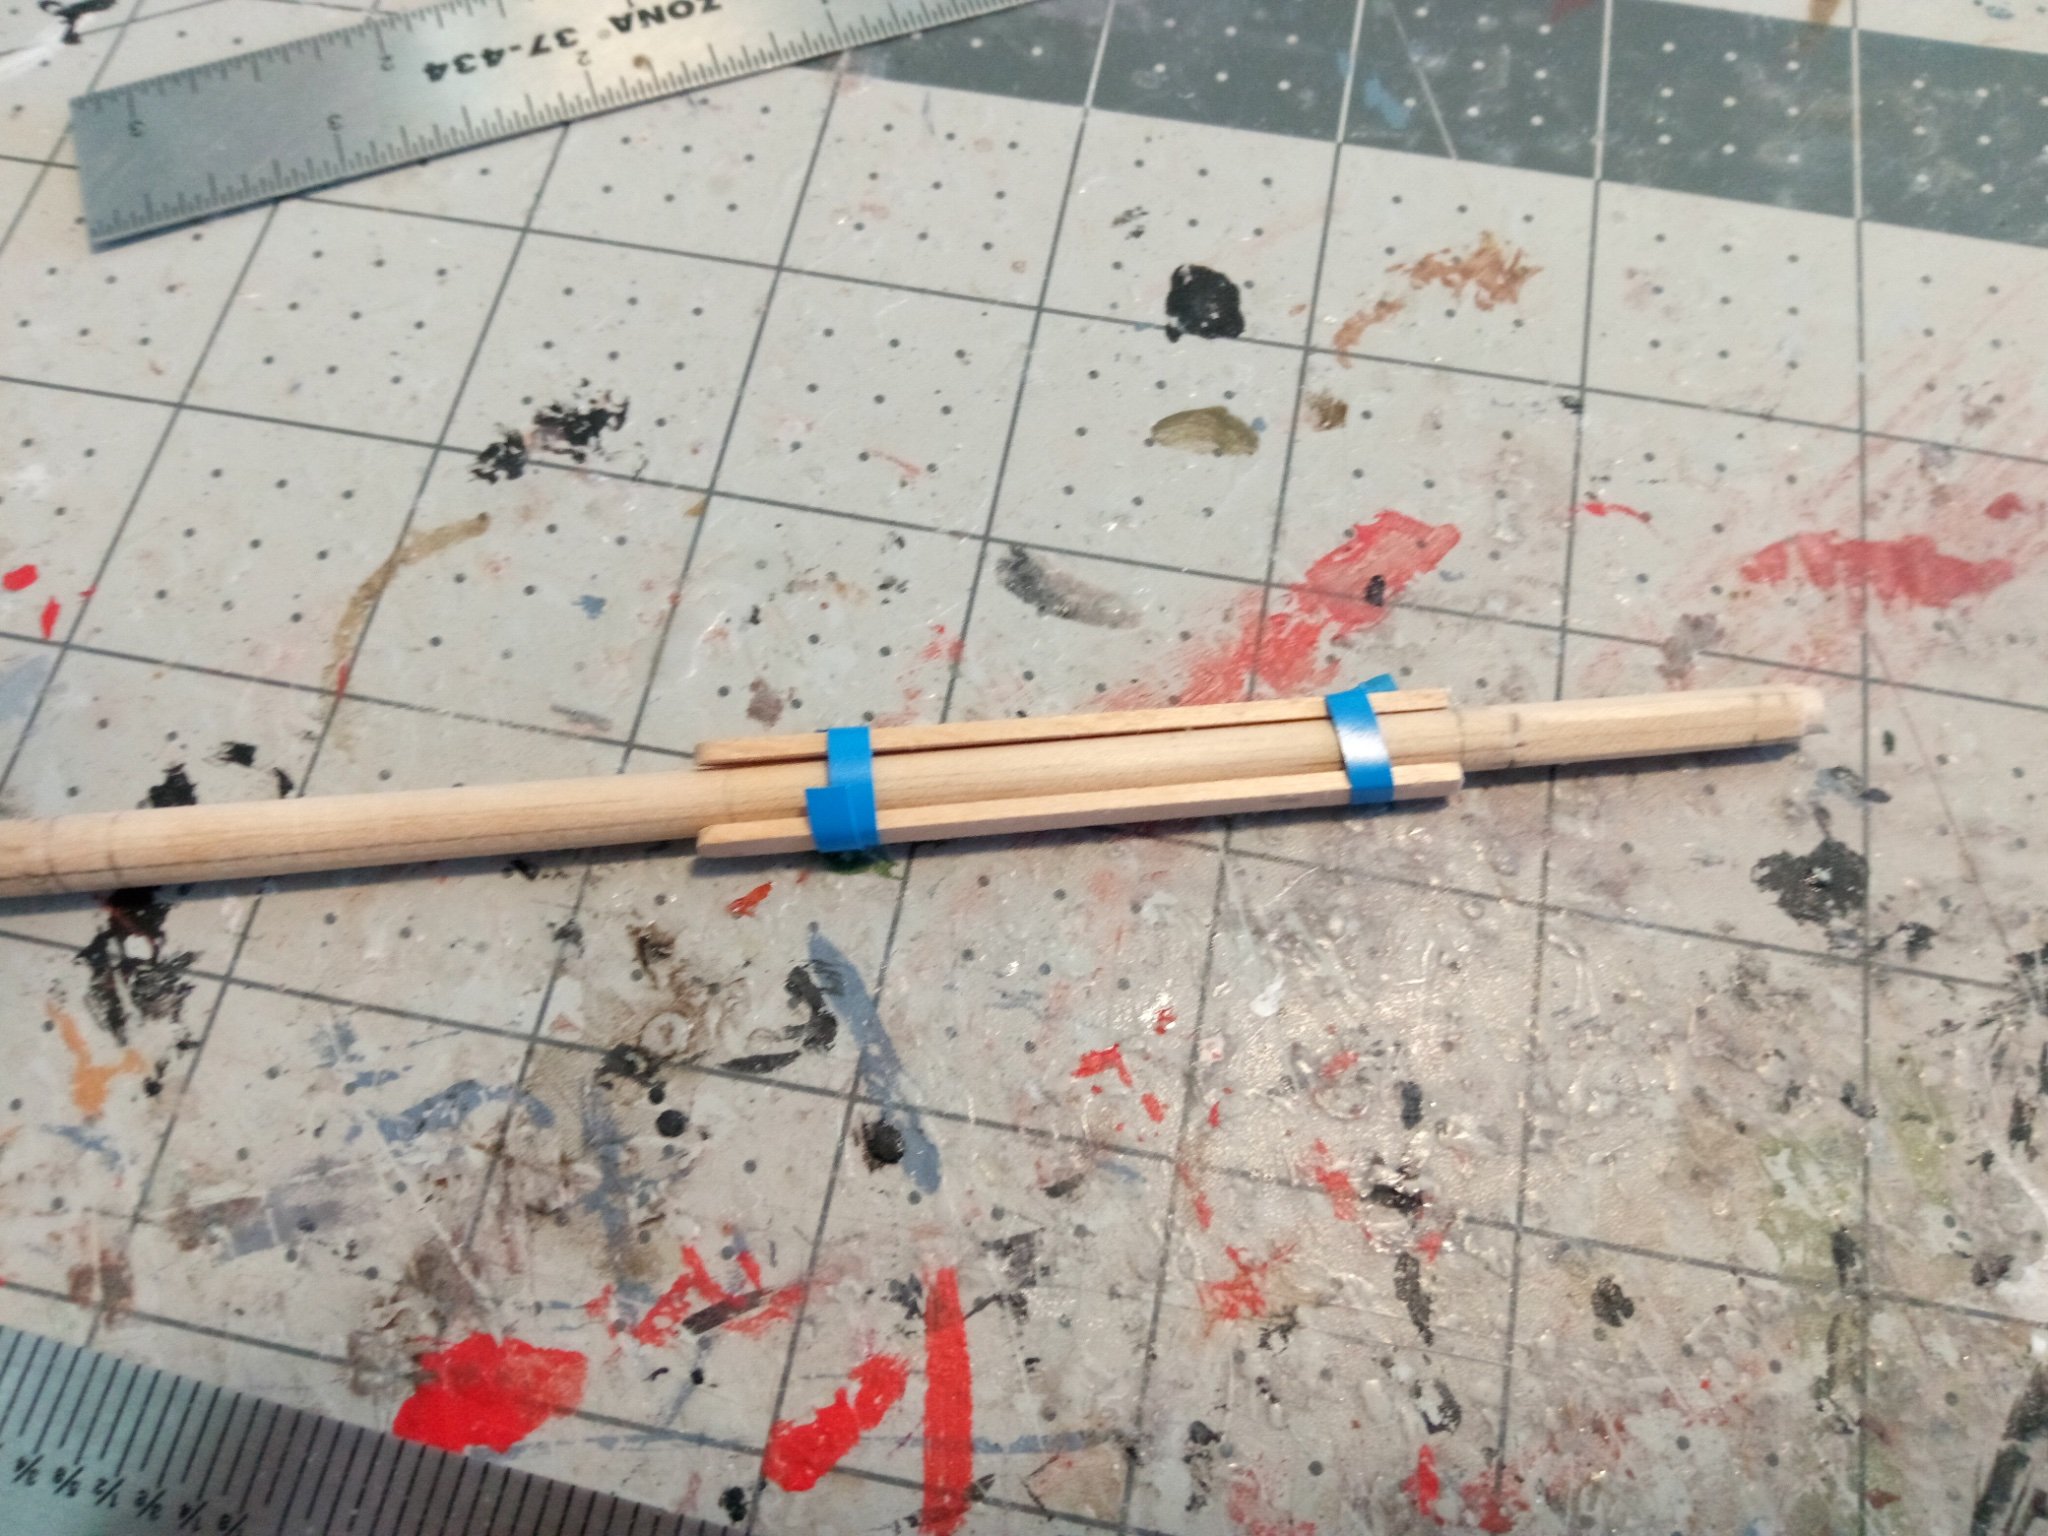
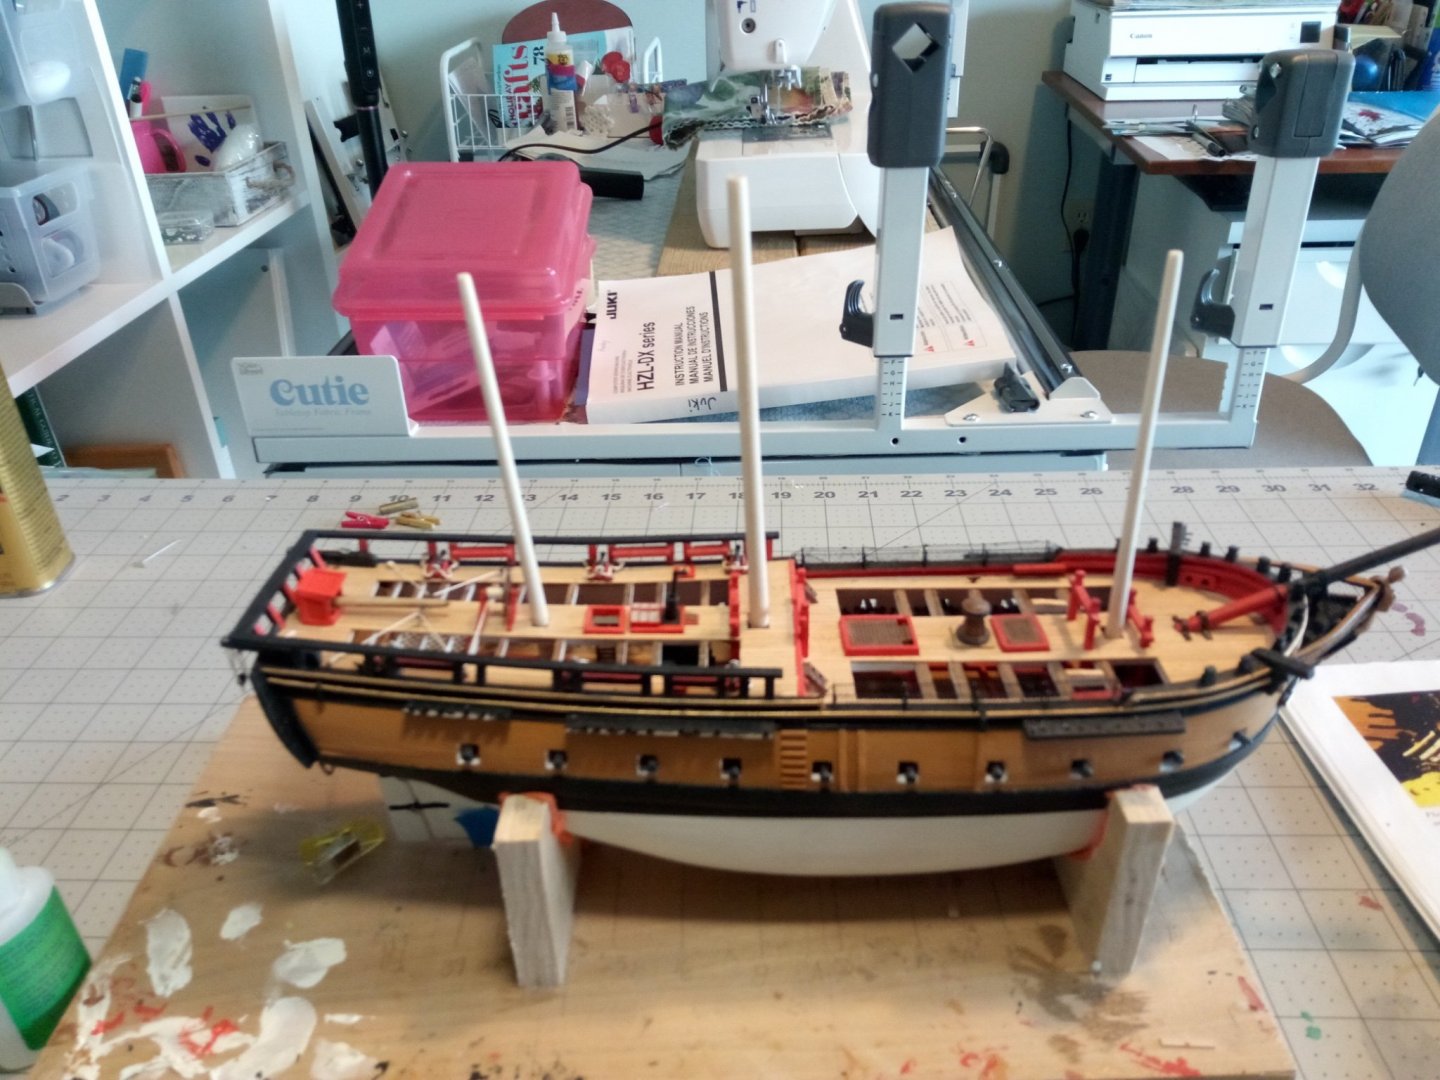
Lower Masts - Initial Shaping This is a new area for me. The kit plans give a good depiction of the finished masts that can be used to get the final dimensions of the various pieces of the masts but the description of how to fabricate them is very general - some on what needs to be done but little on how to do it. I needed more than that so I went looking for some help. The following build logs here on MSW were very helpful with pictures and/or descriptions: USS Constitution by KHauptfuehrer, starting with post #19 HMS Snake by Beef Wellington, starting on pg14 Frigate Essex by Rafine, starting on post #1208 US Brig Syren by Walrusguy, starting on post #688 I also relied on the instruction book for Model Expo’s US Brig SYREN kit (viewable online) which has some very good step by step instructions. If you use the SYREN instructions bear in mind that 1)SYREN did not have a mizzen mast - not a problem since ALFRED’s mizzen is just a simple version of her other masts 2) The SYREN kit is a different scale so disregard any mention of measurements, 3) the SYREN kit provides some laser-cut items that you will have to make from scratch for the ALFRED. I cut the mast dowels to length per the plans. The width of the dowels below deck are an exact match for the mast widths so no tapering is needed, which is good because I already set the mast rakes using the dowels and mast partners and any tapering would throw those off: I then tapered the above deck portions of the masts using my poor man’s lathe i.e. the dowel was chucked up in a power drill and sandpaper was used to run back and forth along the spinning dowel until the desired dimensions were achieved. The next step is to square off the upper portion of the masts. I marked the largest square I could fit onto the top of each mast. Where the corner of each square touched the sides of the dowel I penciled a line parallel to the axis, down as far as the squared section would run: The initial cuts were made with a sharp exacto knife to get a flat surface on all 4 sides and then a file was used to expand the flat areas until everything was square. The final step in the squaring process was to file chamfered edges into the middle portions of each sharp edge. In this photo the lower mast has been squared and the upper squared and chamfered: Next up will be shaping and installing the checks on the fore and main masts (the mizzen doesn’t have them).
- 142 replies
-
- 4
-
-
- alfred
- solid hull
- (and 2 more)
-
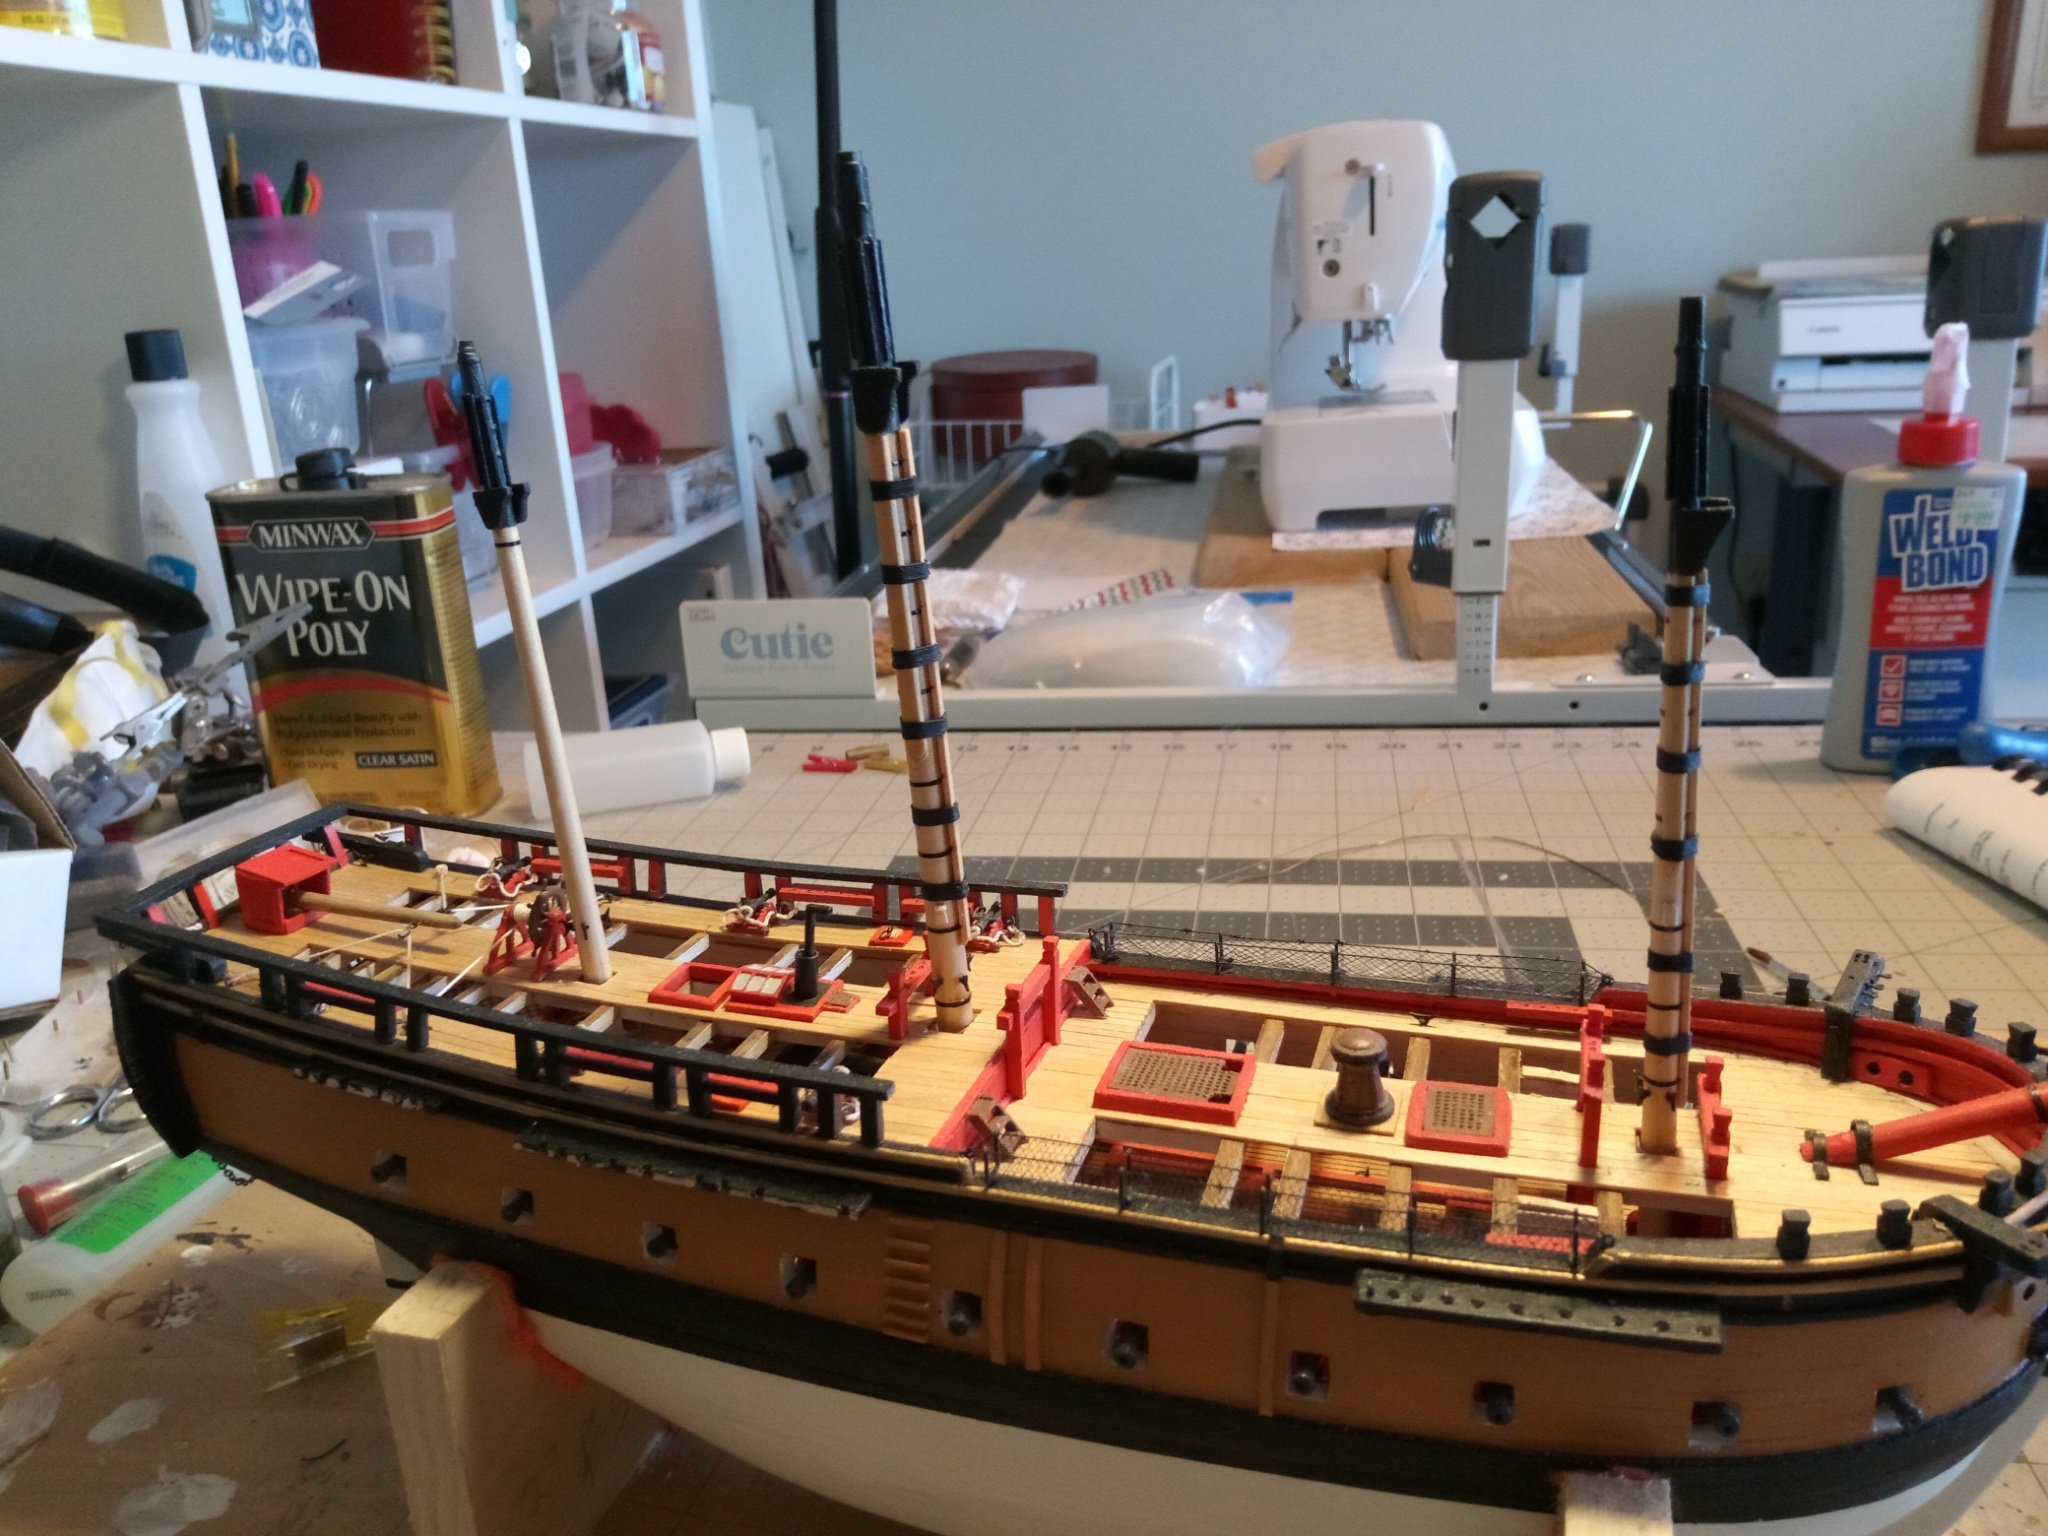
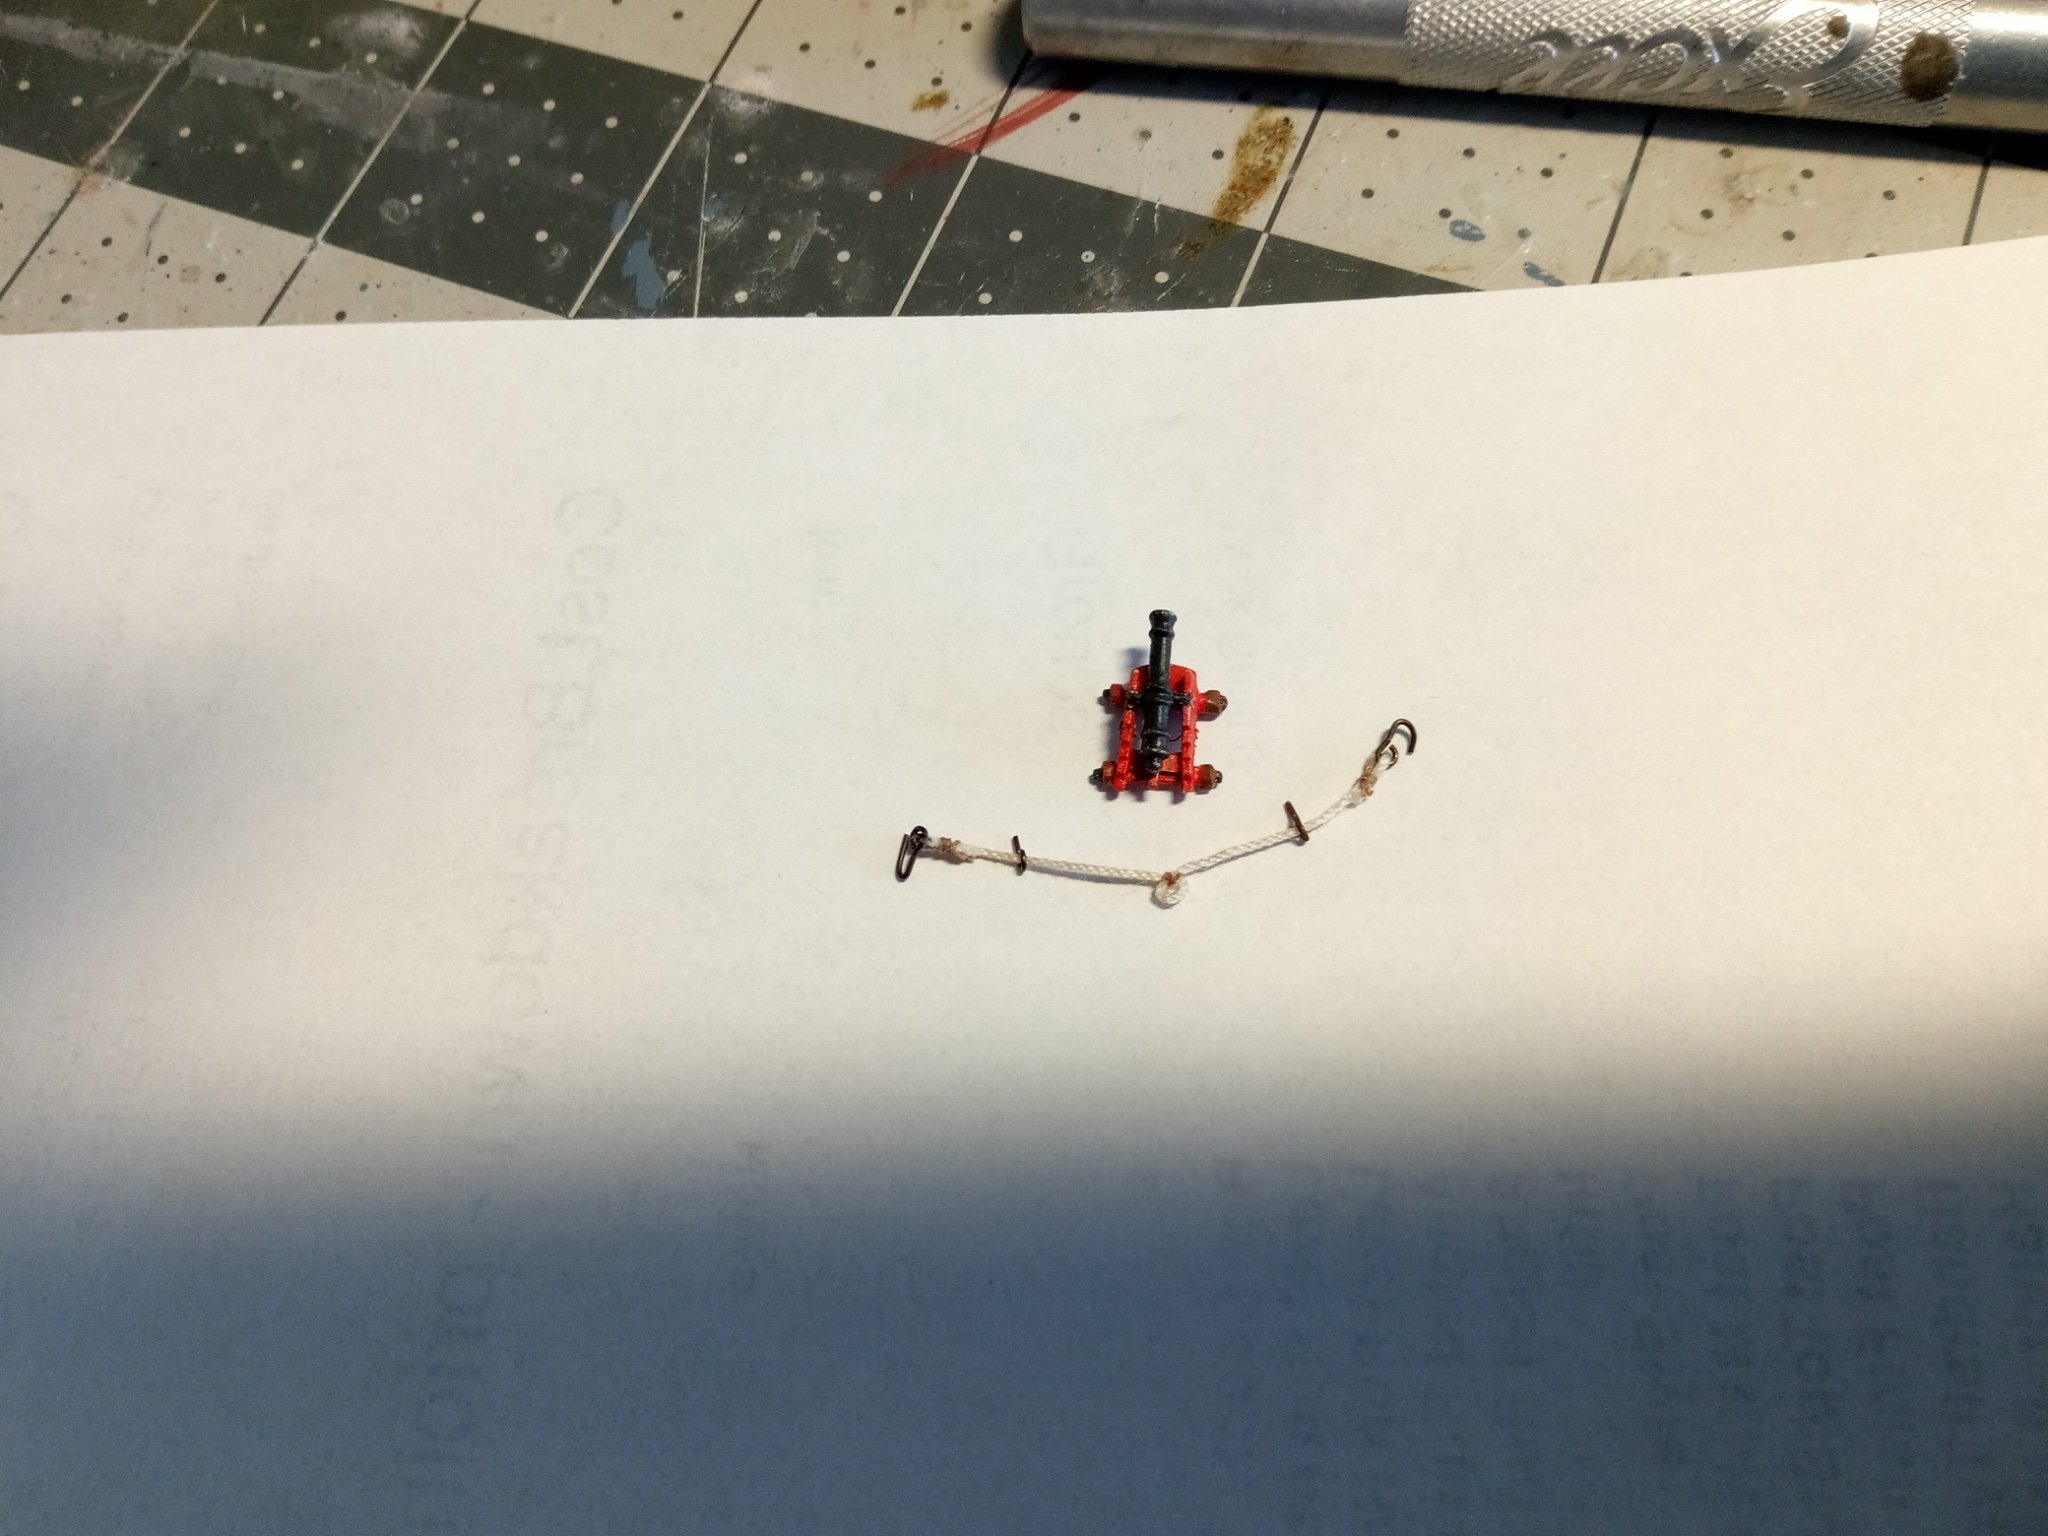
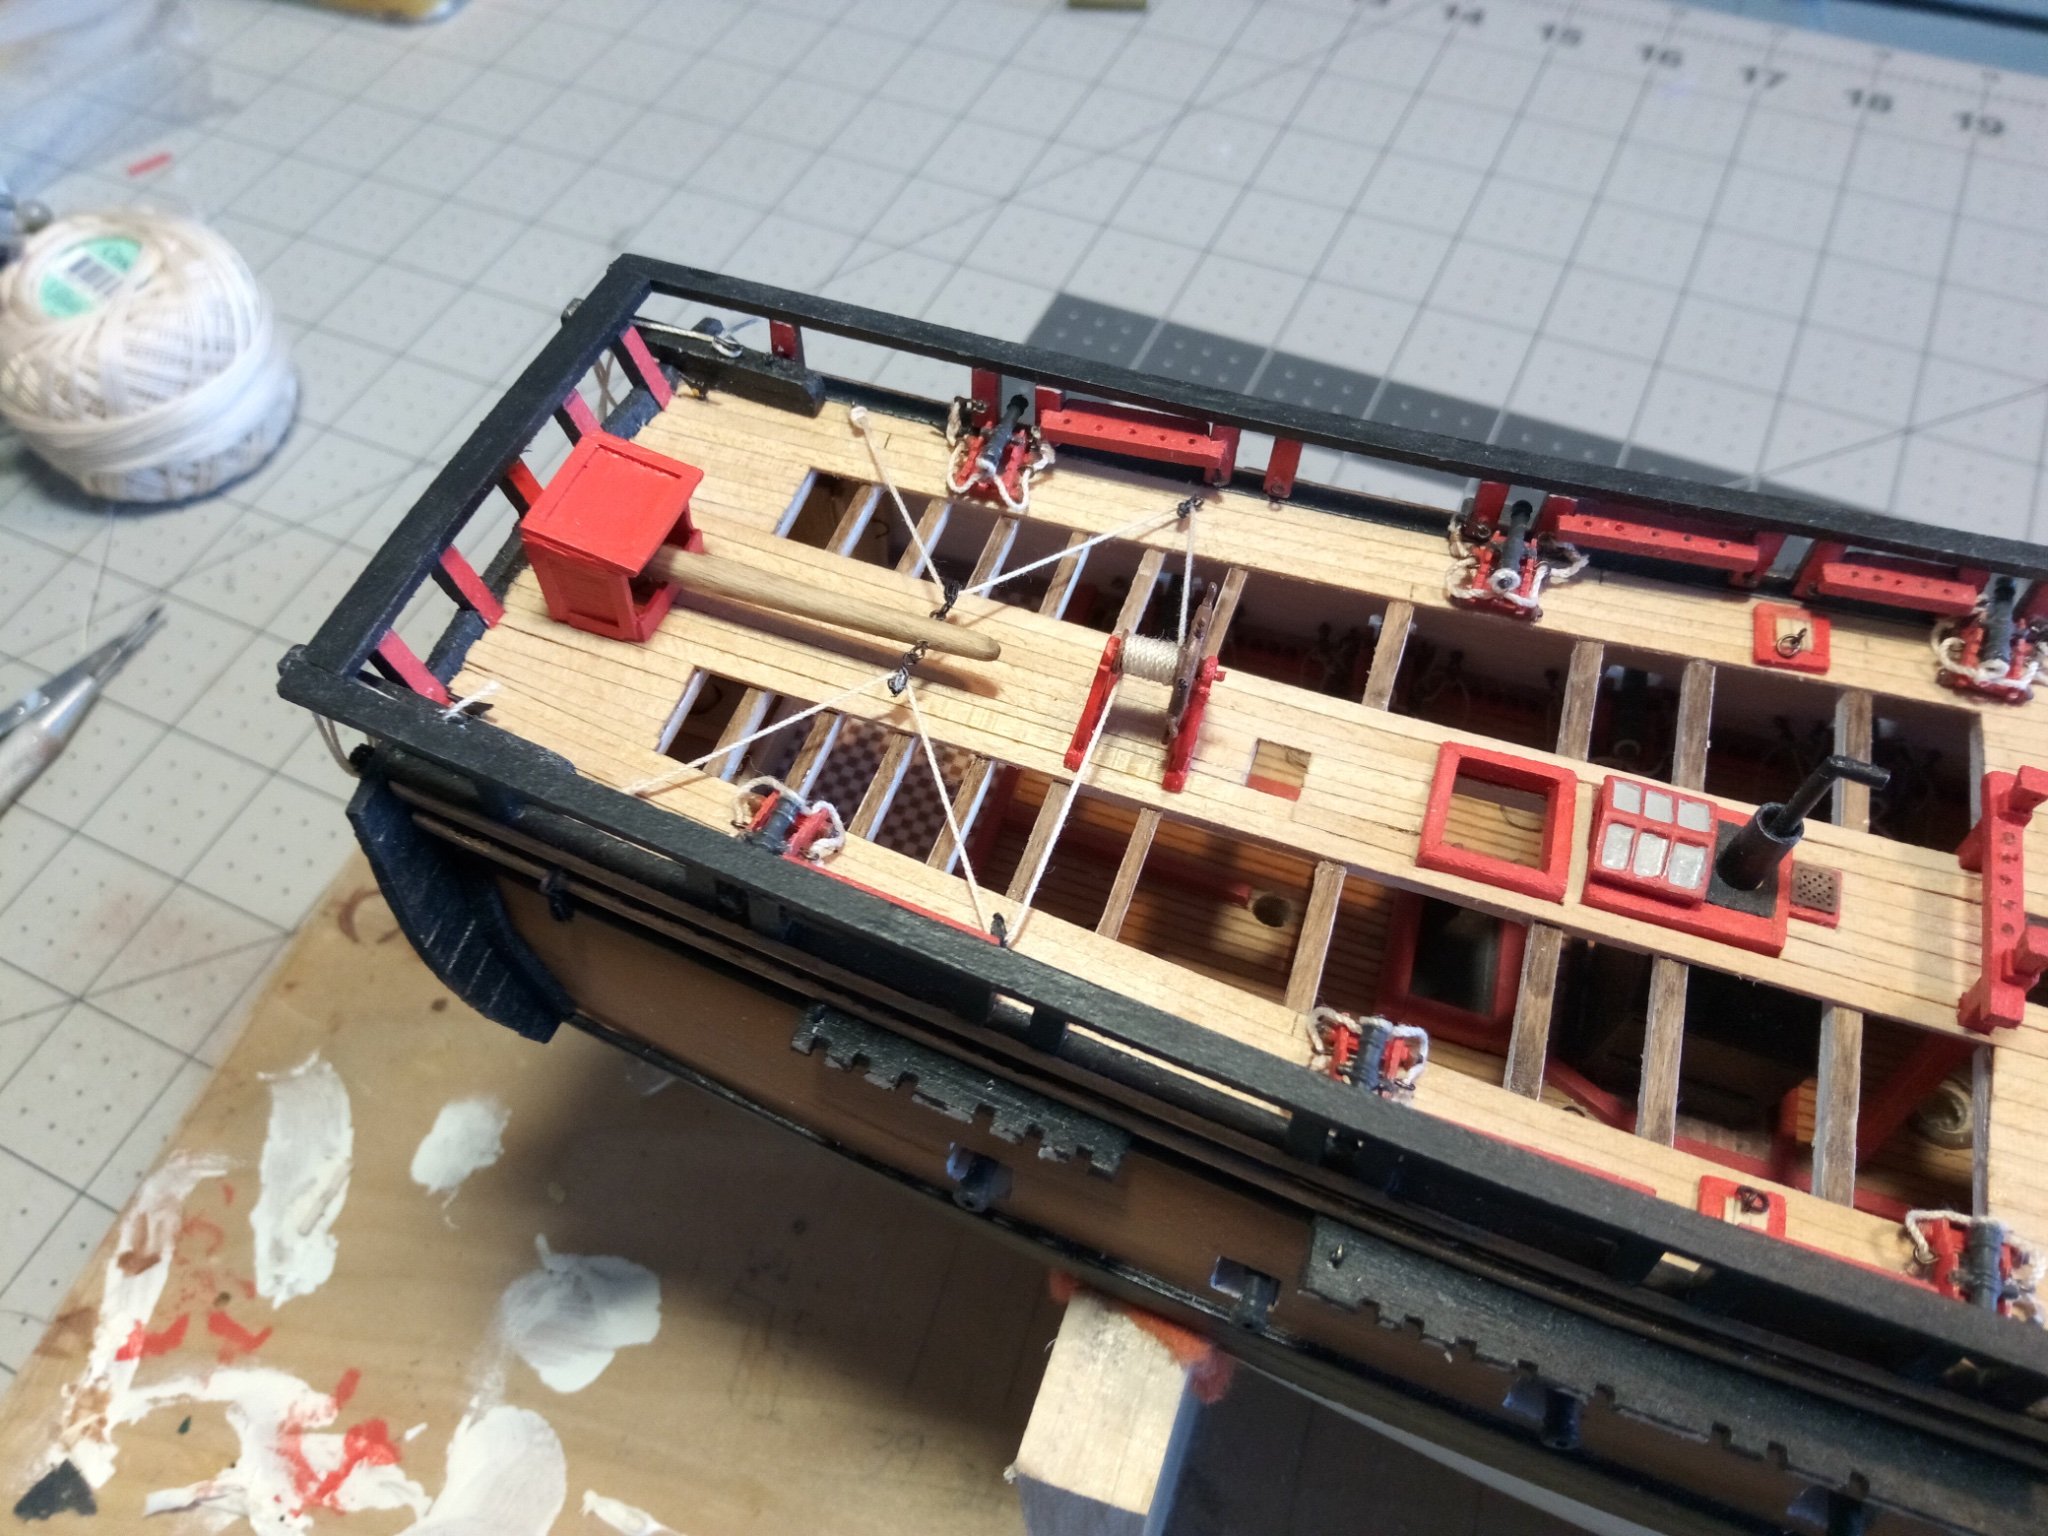
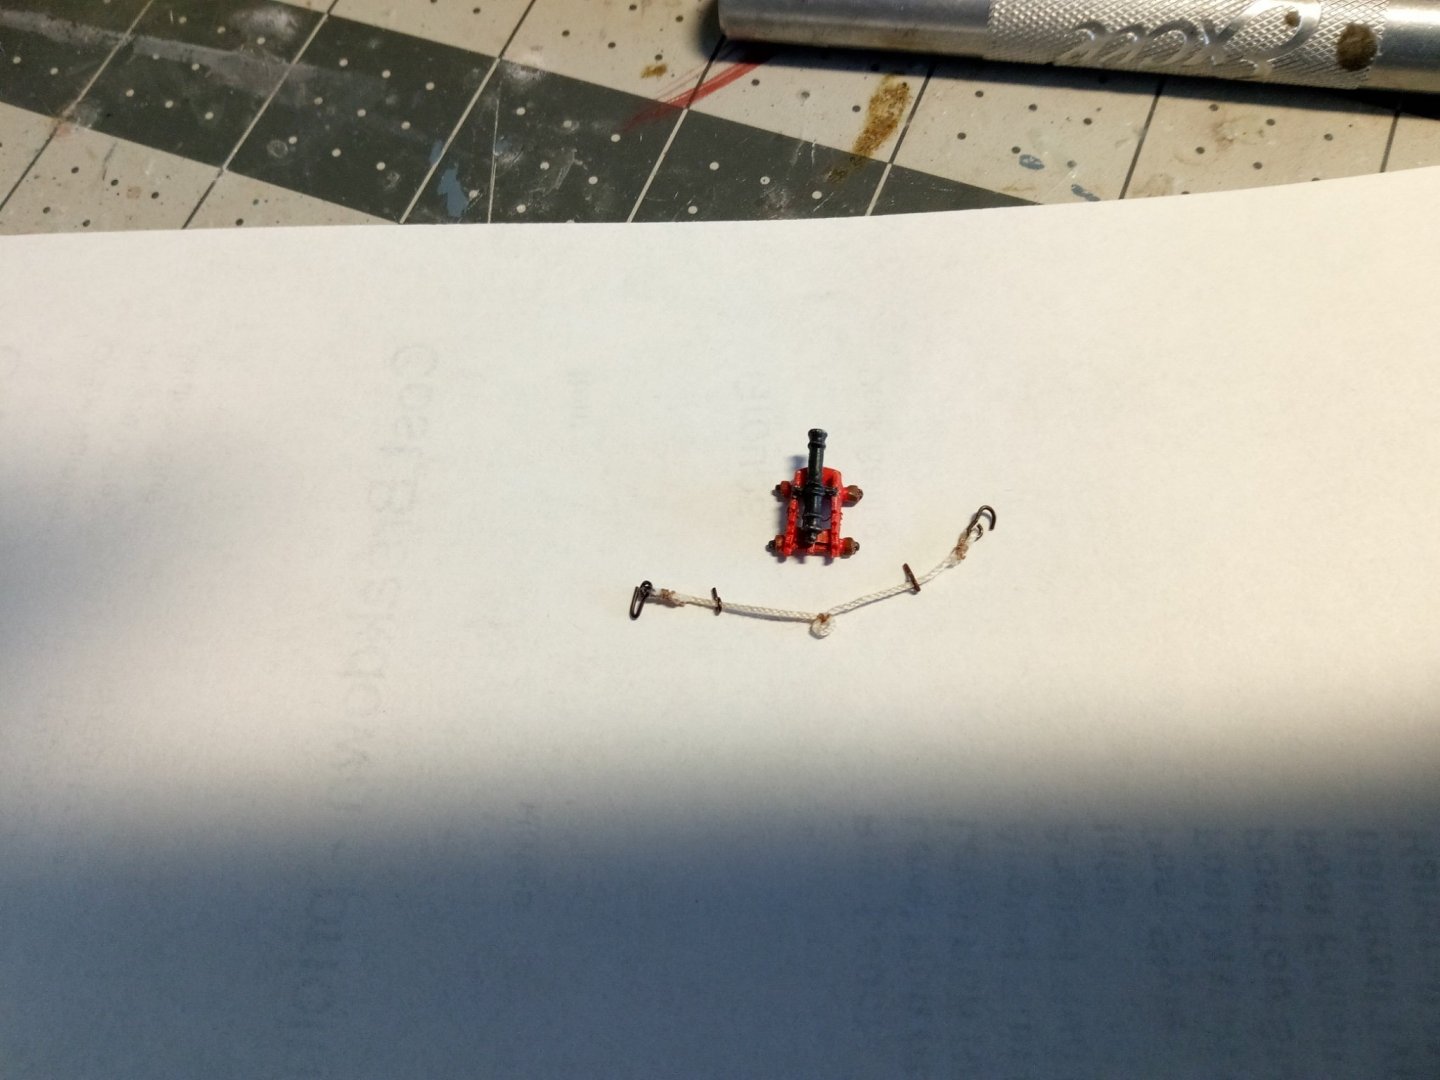
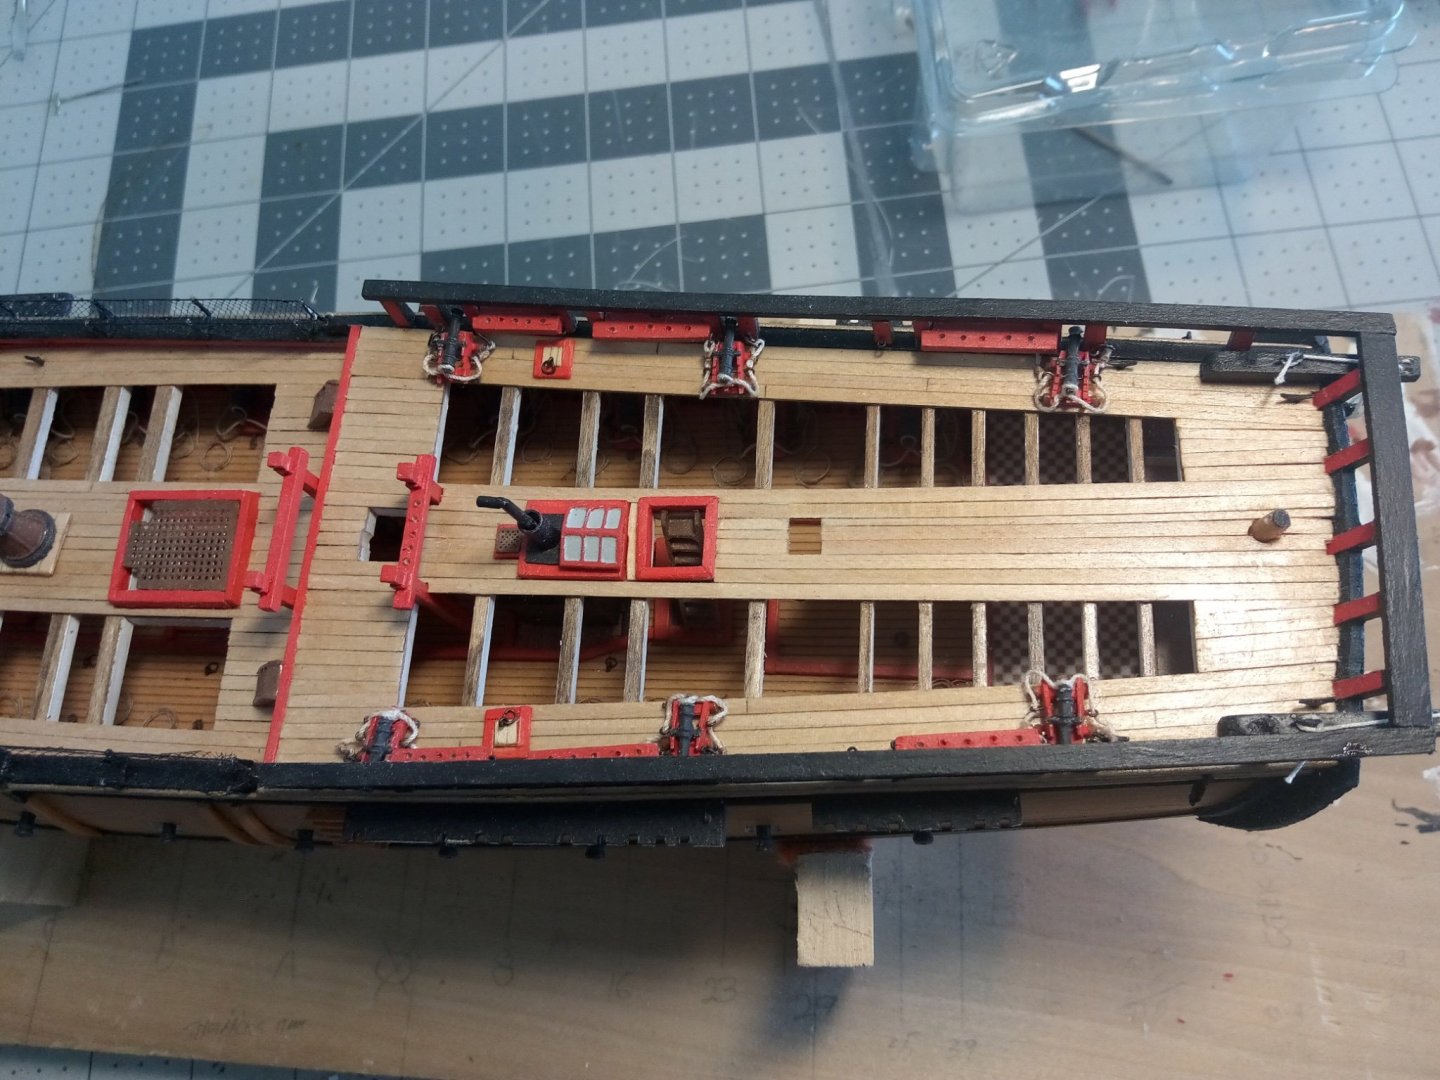
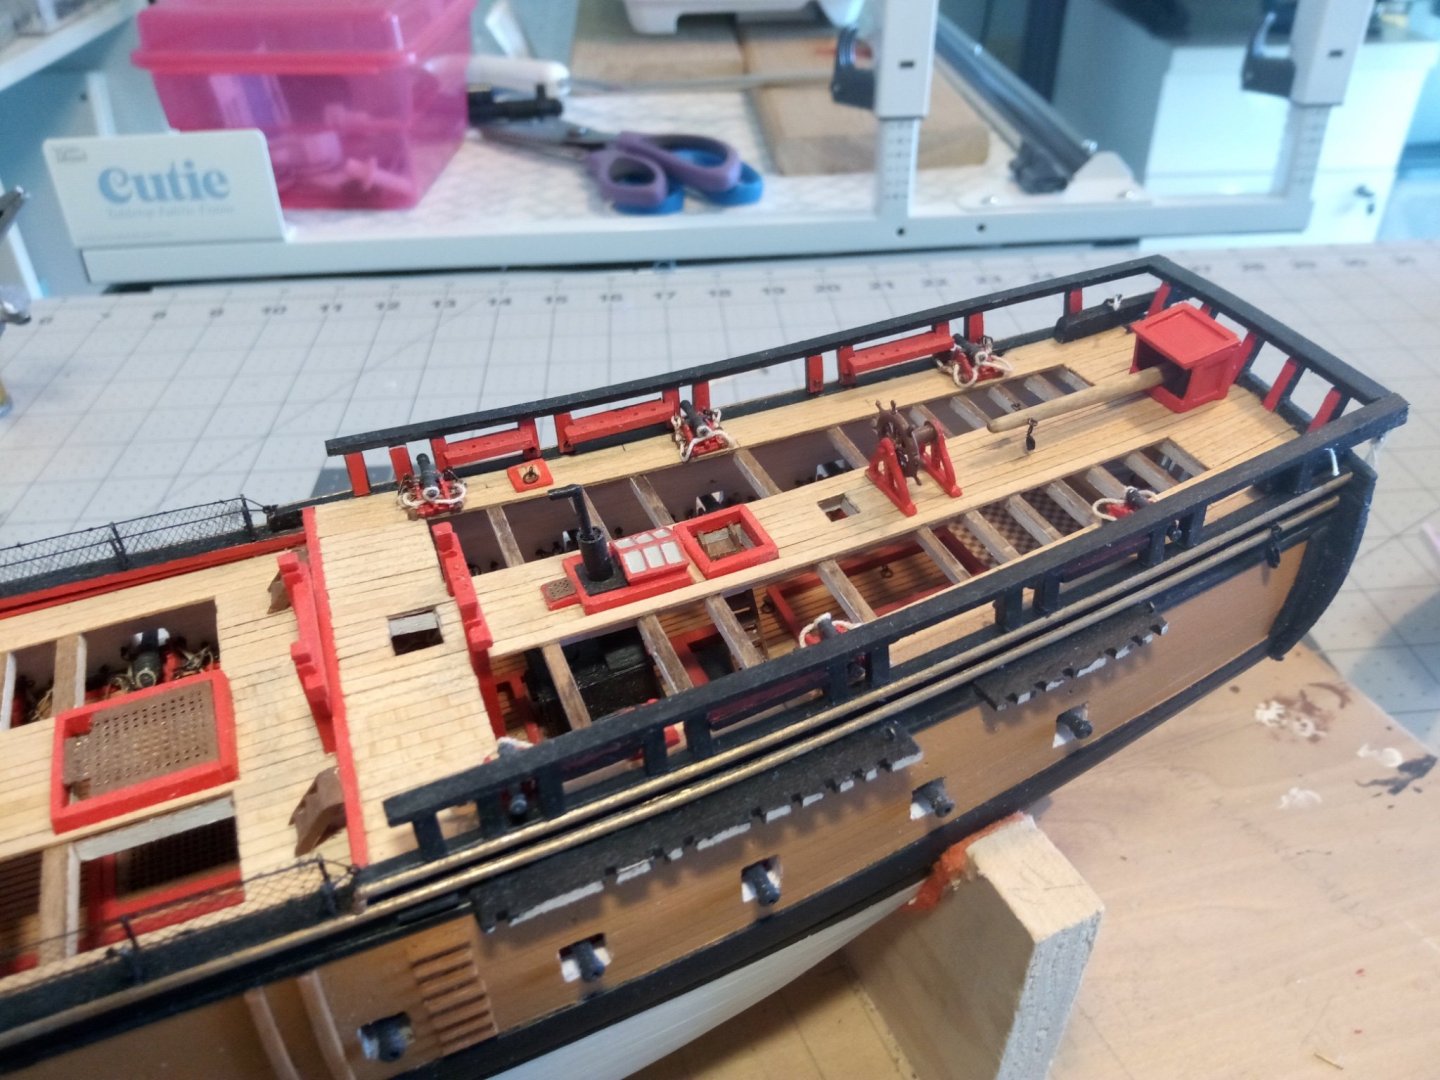
Final hull details There are 6 4-pounder guns on the quarter deck, made up of 4 britannia metal pieces each. They are really small - the instructions said they were likely moved around where needed. I’m guessing that their small size meant they only needed breeching lines and that their in and outhaul movements could be handled with hand spikes or pry bars. Anyway, they are too small for me to attempt to rig blocks and tackles. I used a simple jig to rig up the breeching lines. Here the guns are in place, along with an ammunition scuttle on each side. The tiller and it’s “doghouse” have been fitted, along with the ship’s wheel. The kit provides 2 britannia binnacles to be placed in front of the wheel but I’ll leave those off until all the deck rigging associated with the mizzen mast is in place. Here’s the steering rigging in place: This basically completes all the structural work on the hull except for the gunport lids which I will put on at the end of the build (so I won’t keep knocking them off) and the anchor windlass which goes on the main deck after the rigging is done. Next up will be fabricating the masts and spars.

- 142 replies
-
- 8
-
-
- alfred
- solid hull
- (and 2 more)
-
I agree on Mort on using the instructions that came with the hull, although the new one might help with it's photos in some places. I don't know what your version calls for but mine calls for opening up the gun deck and then after the guns are in place covering everything back up with decking so you would not really be able to tell it's open down there (the big openings in my decks are my addition). I'm happy to answer questions and give advice but please keep in mind I don't have your older version of the instructions and plans. Go slow, think thrice, measure twice, think again and then cut once. Have fun. BTW, although I have not posted in awhile, I still slowly working and post something soon.
-
Hi Susan, That "big bulb" of wood at the bow is the leftovers from when the hull was machined, most solid wood hulls have them, and usually another at the stern. Once you are used to shaping solid hulls you can usually sand those "bulbs" off quickly with a rotary tool.
-
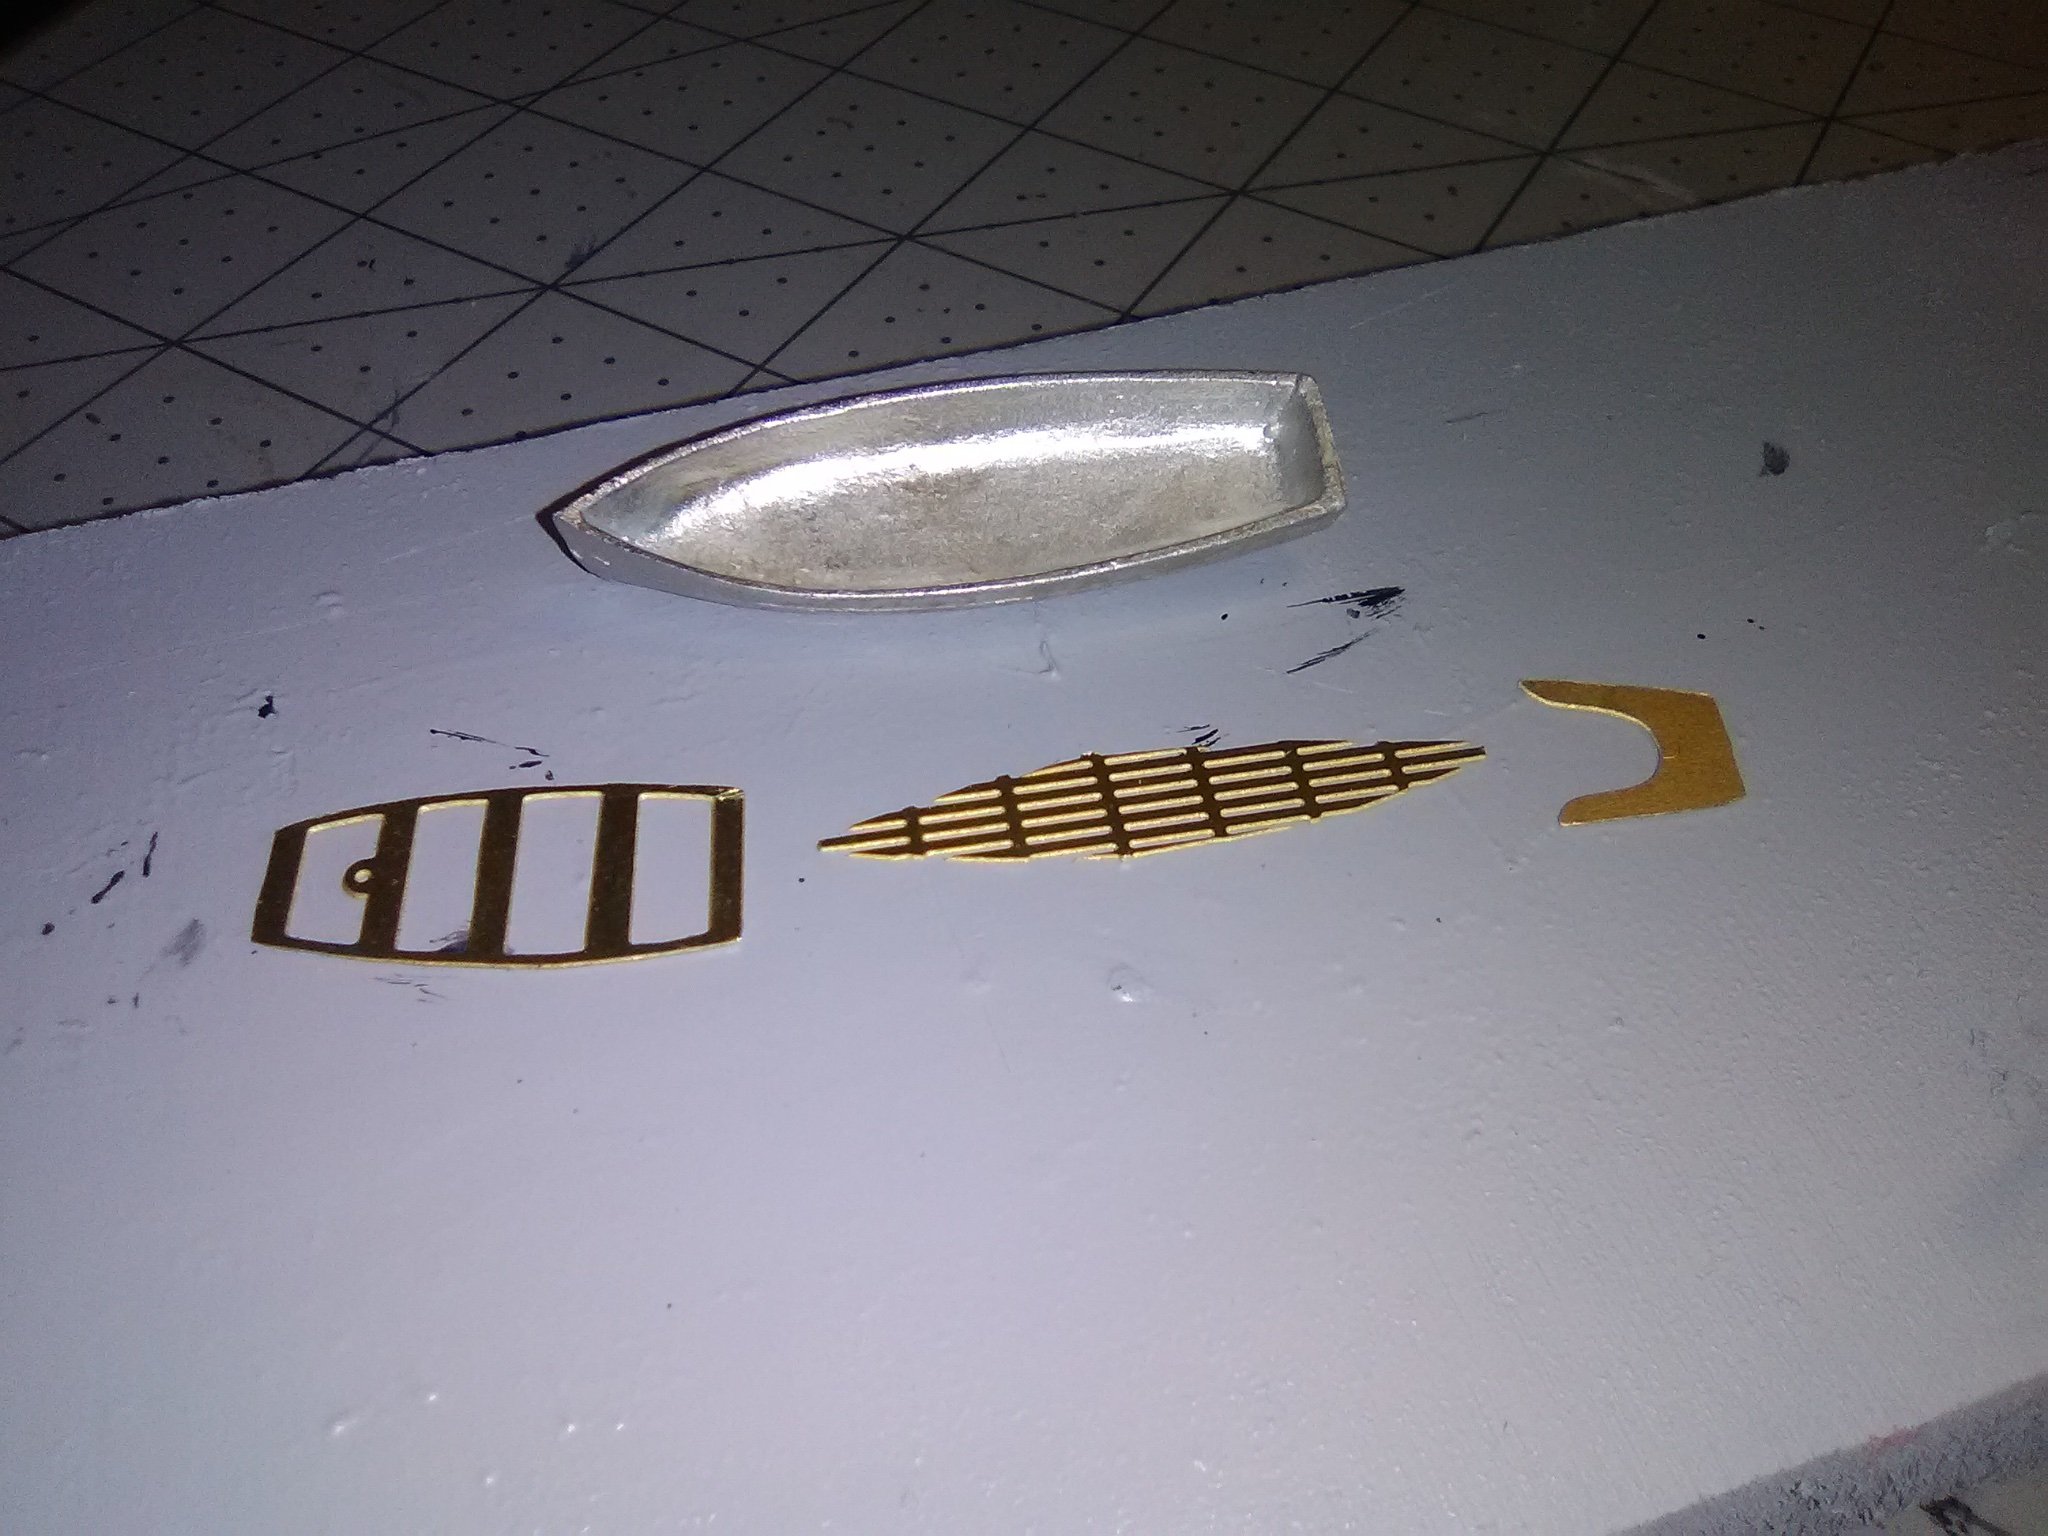
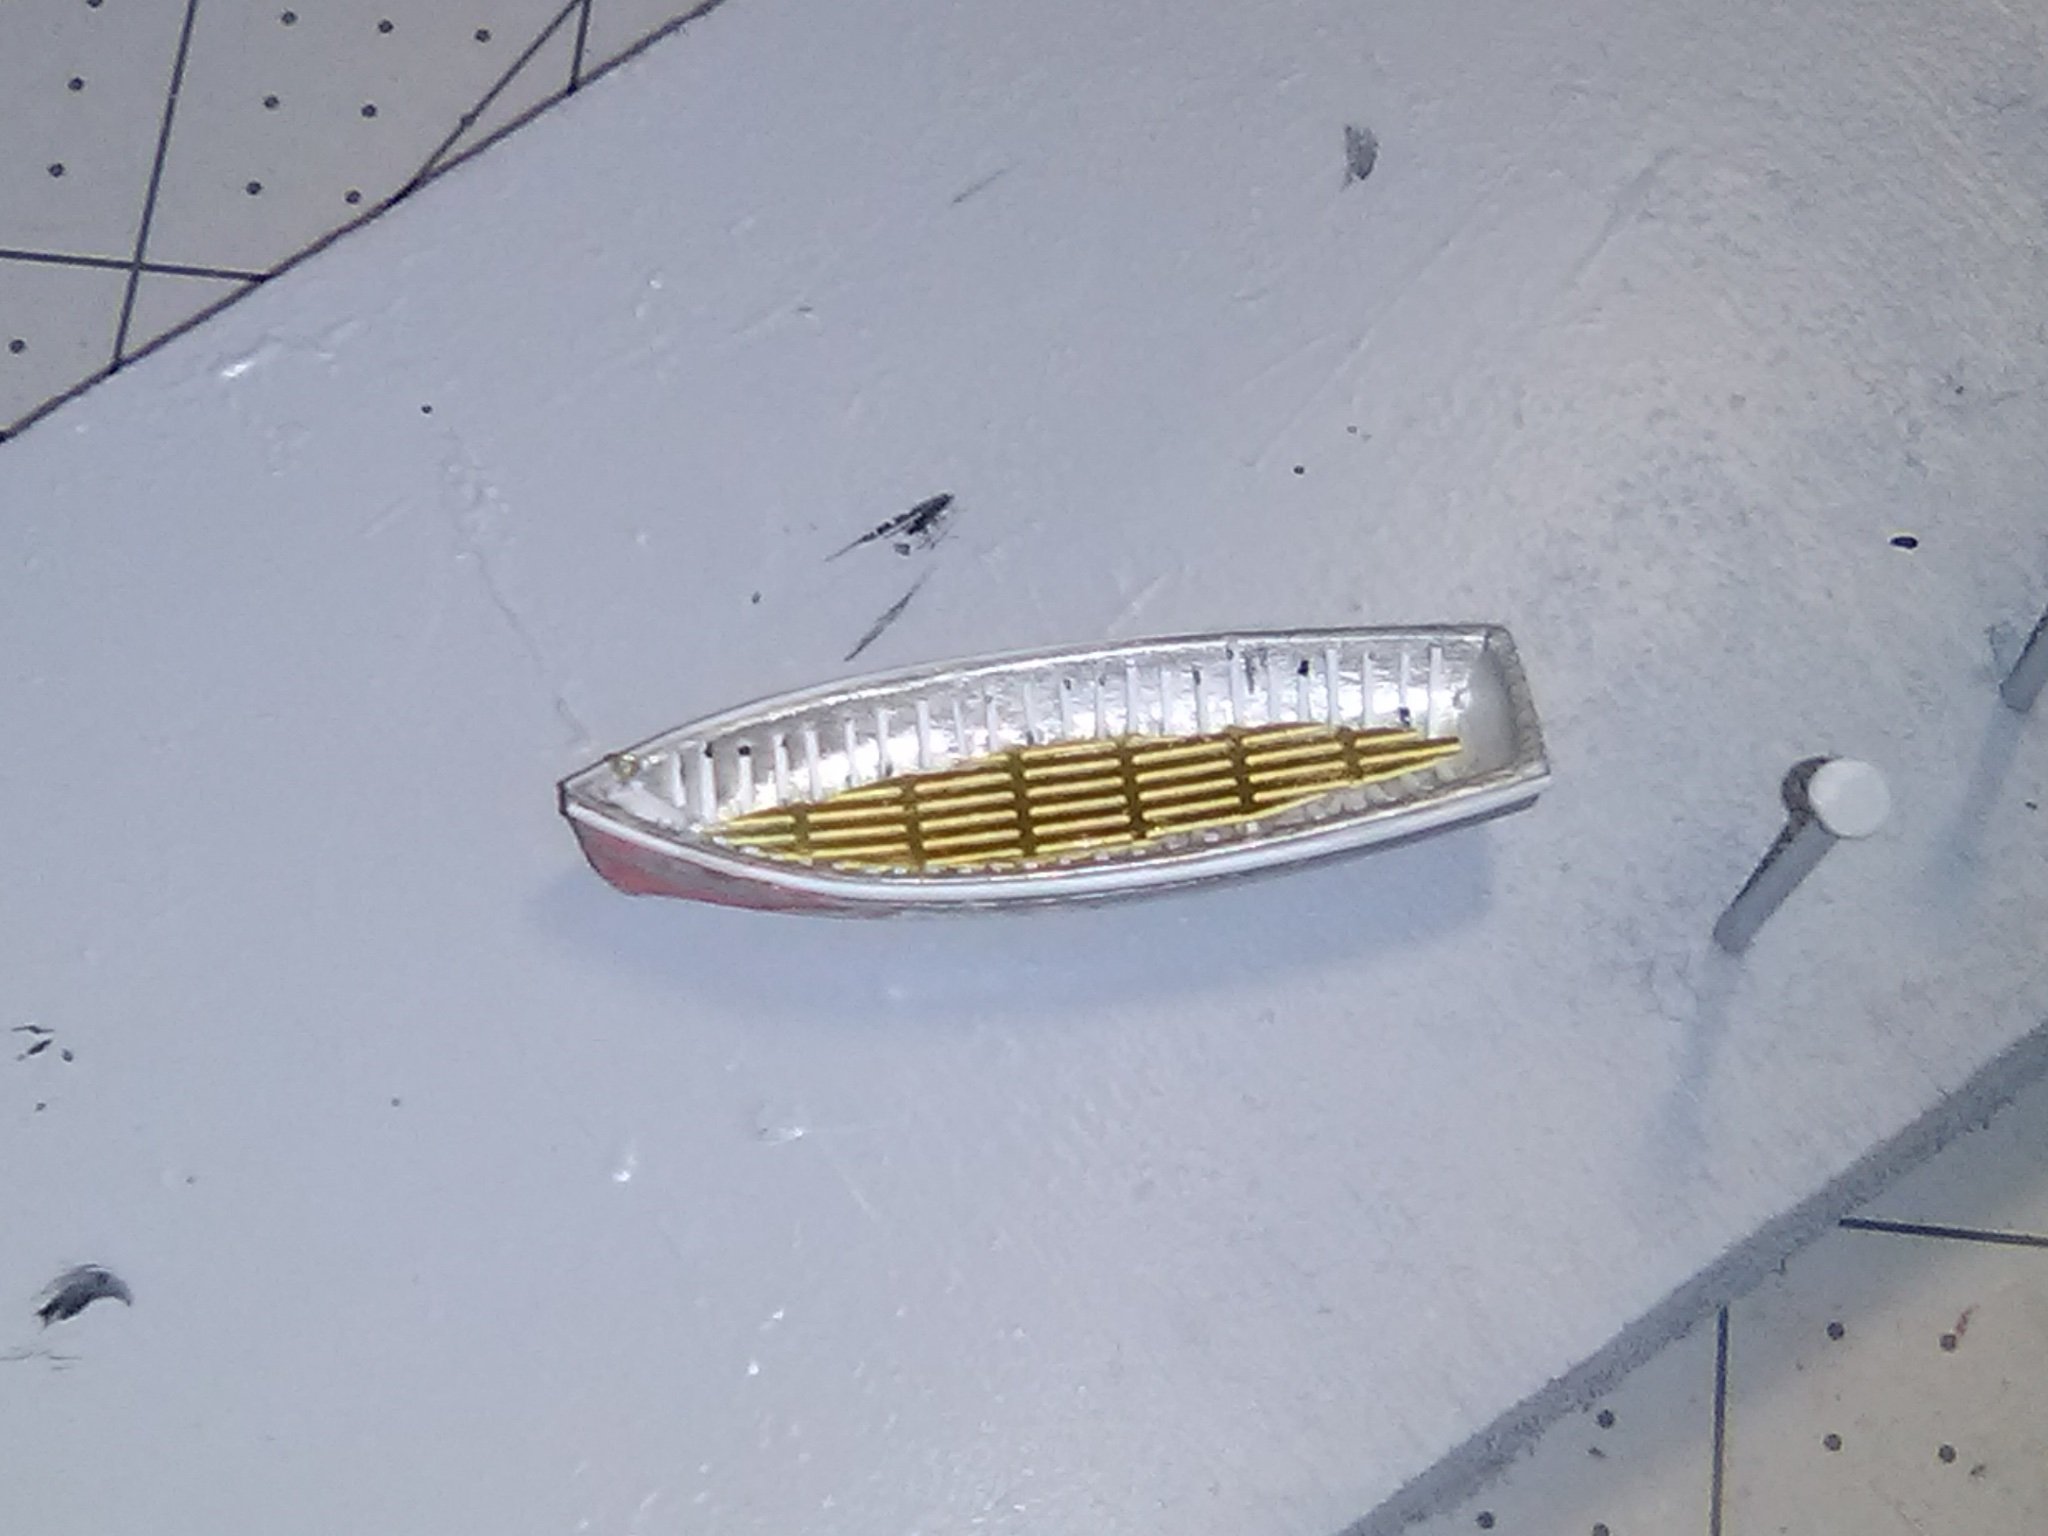
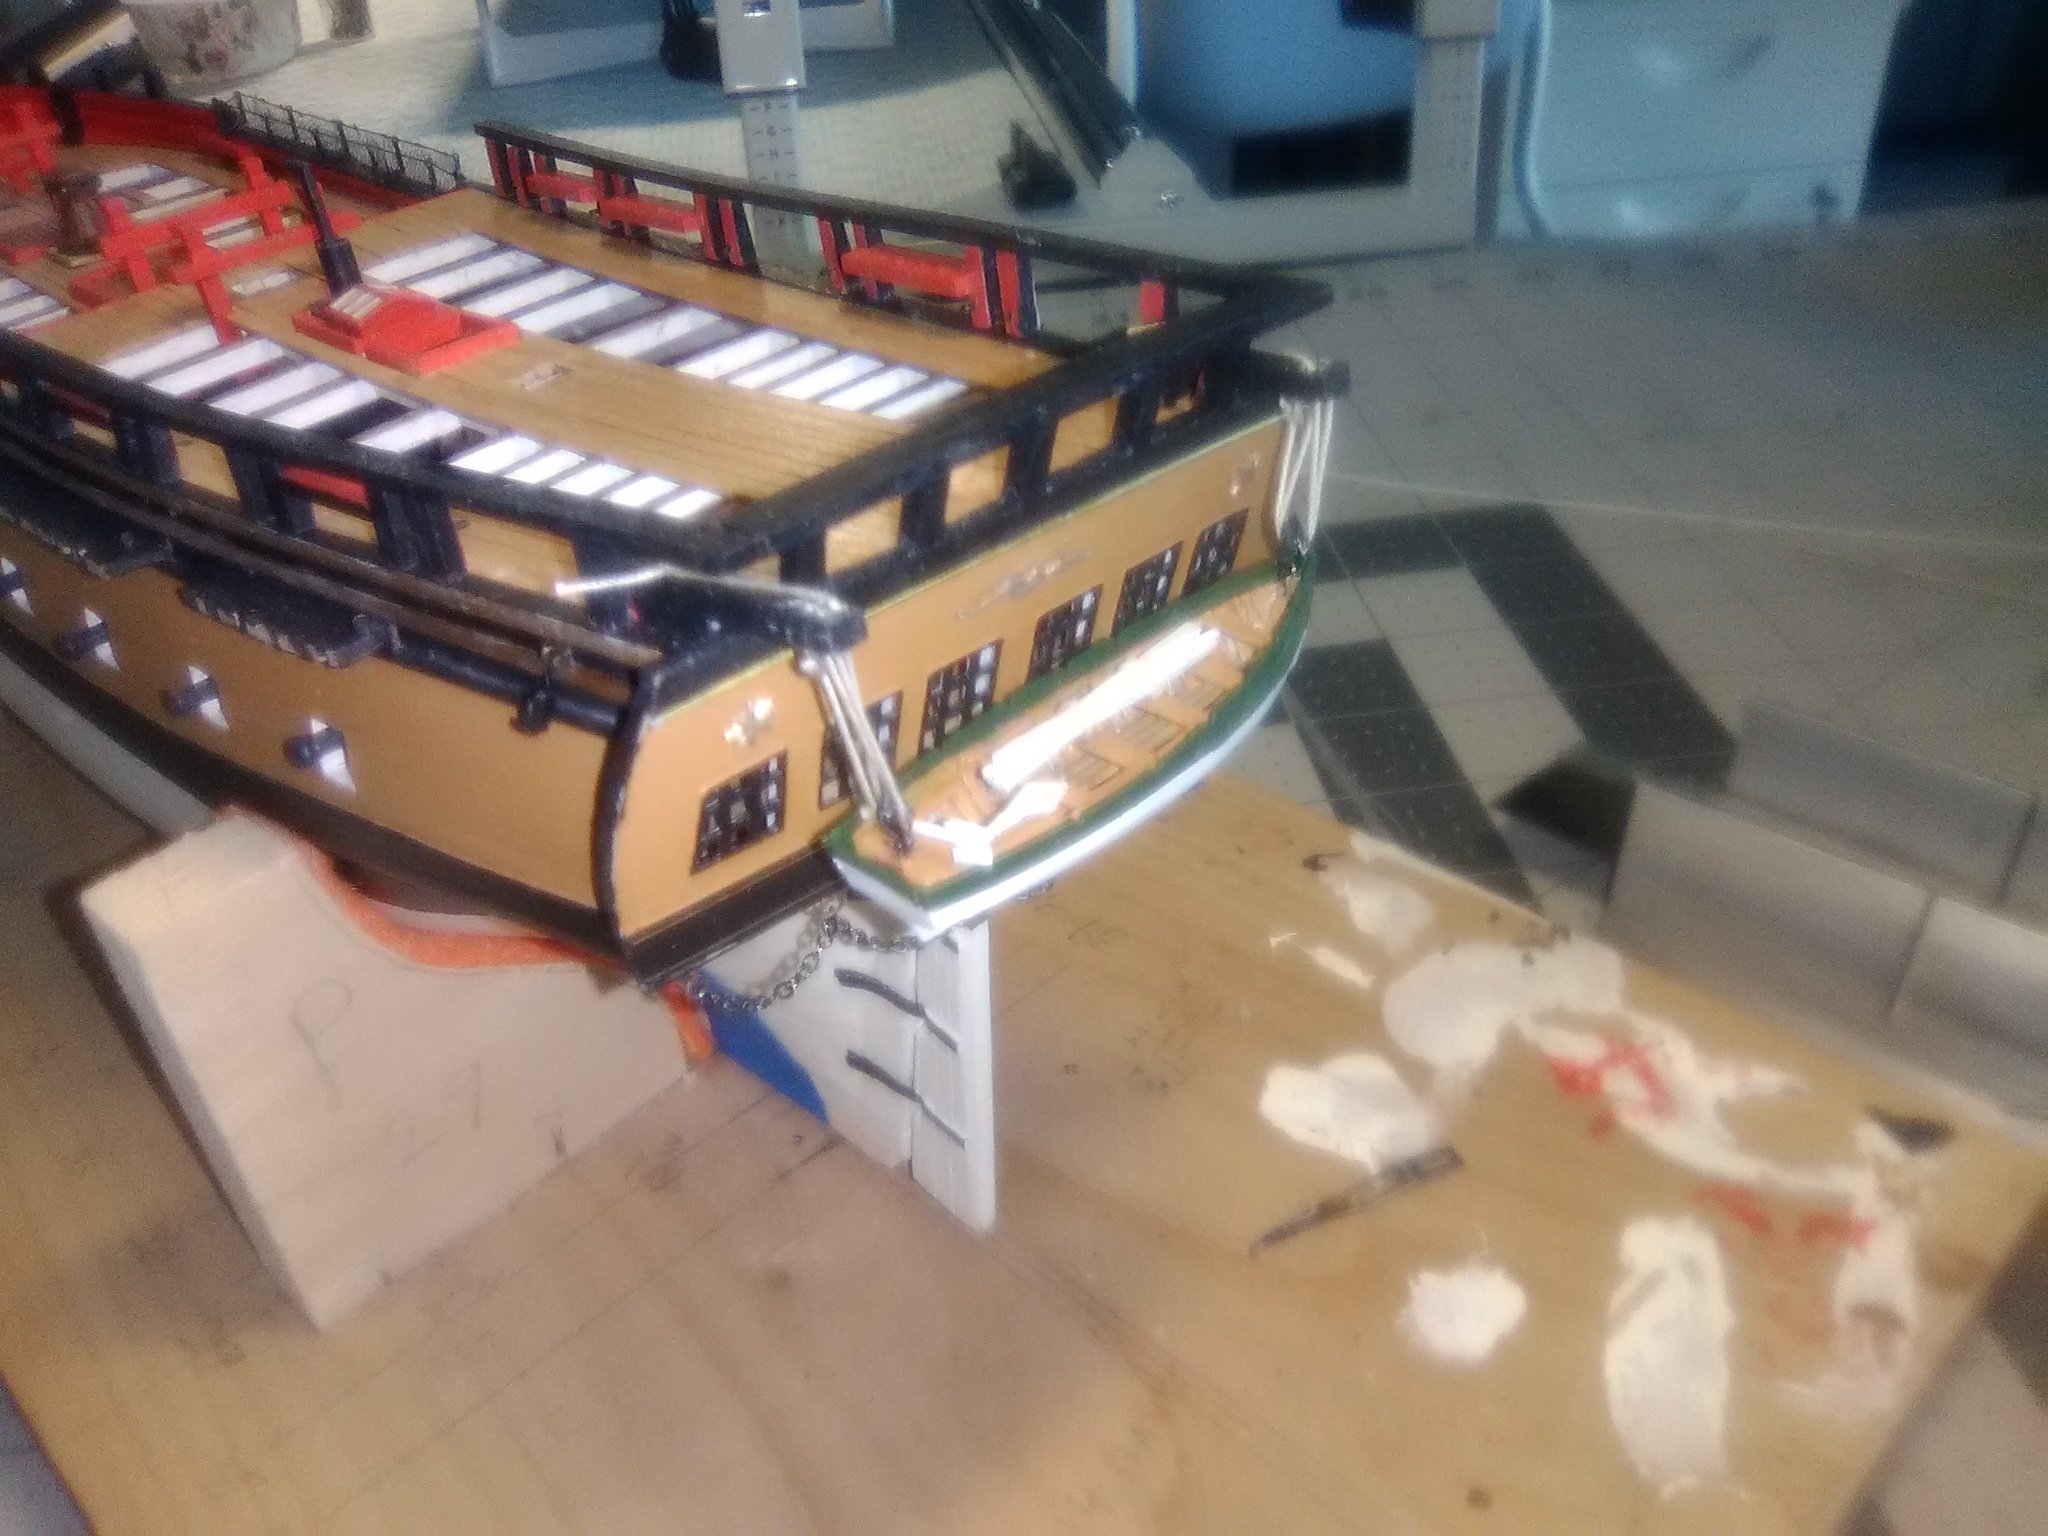
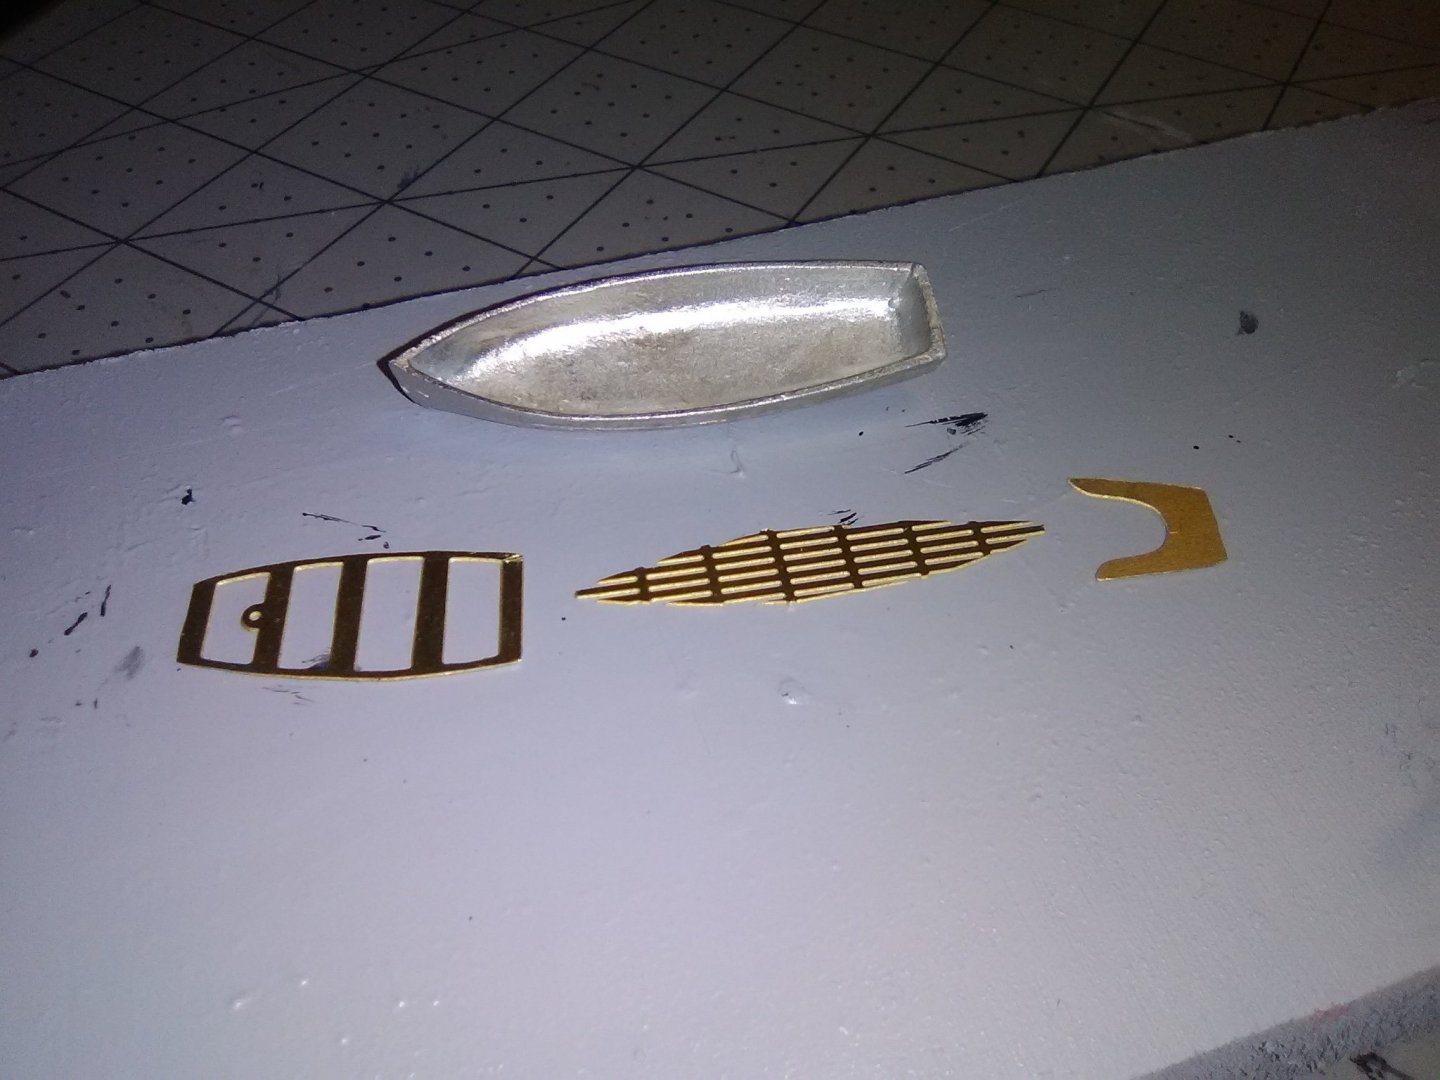
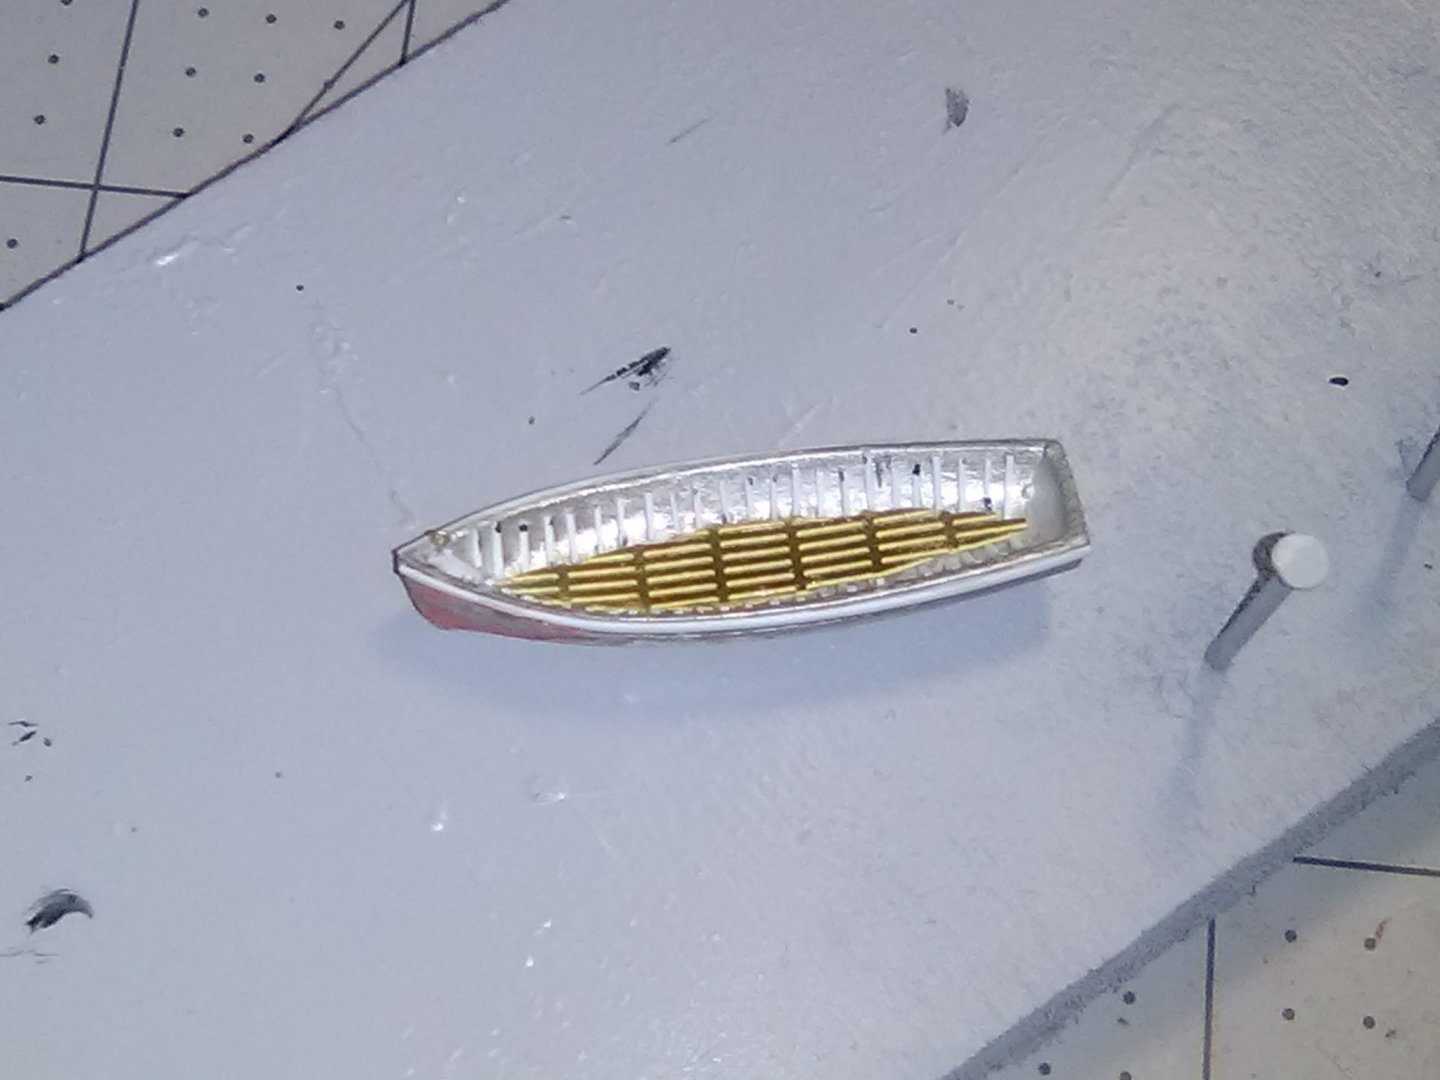
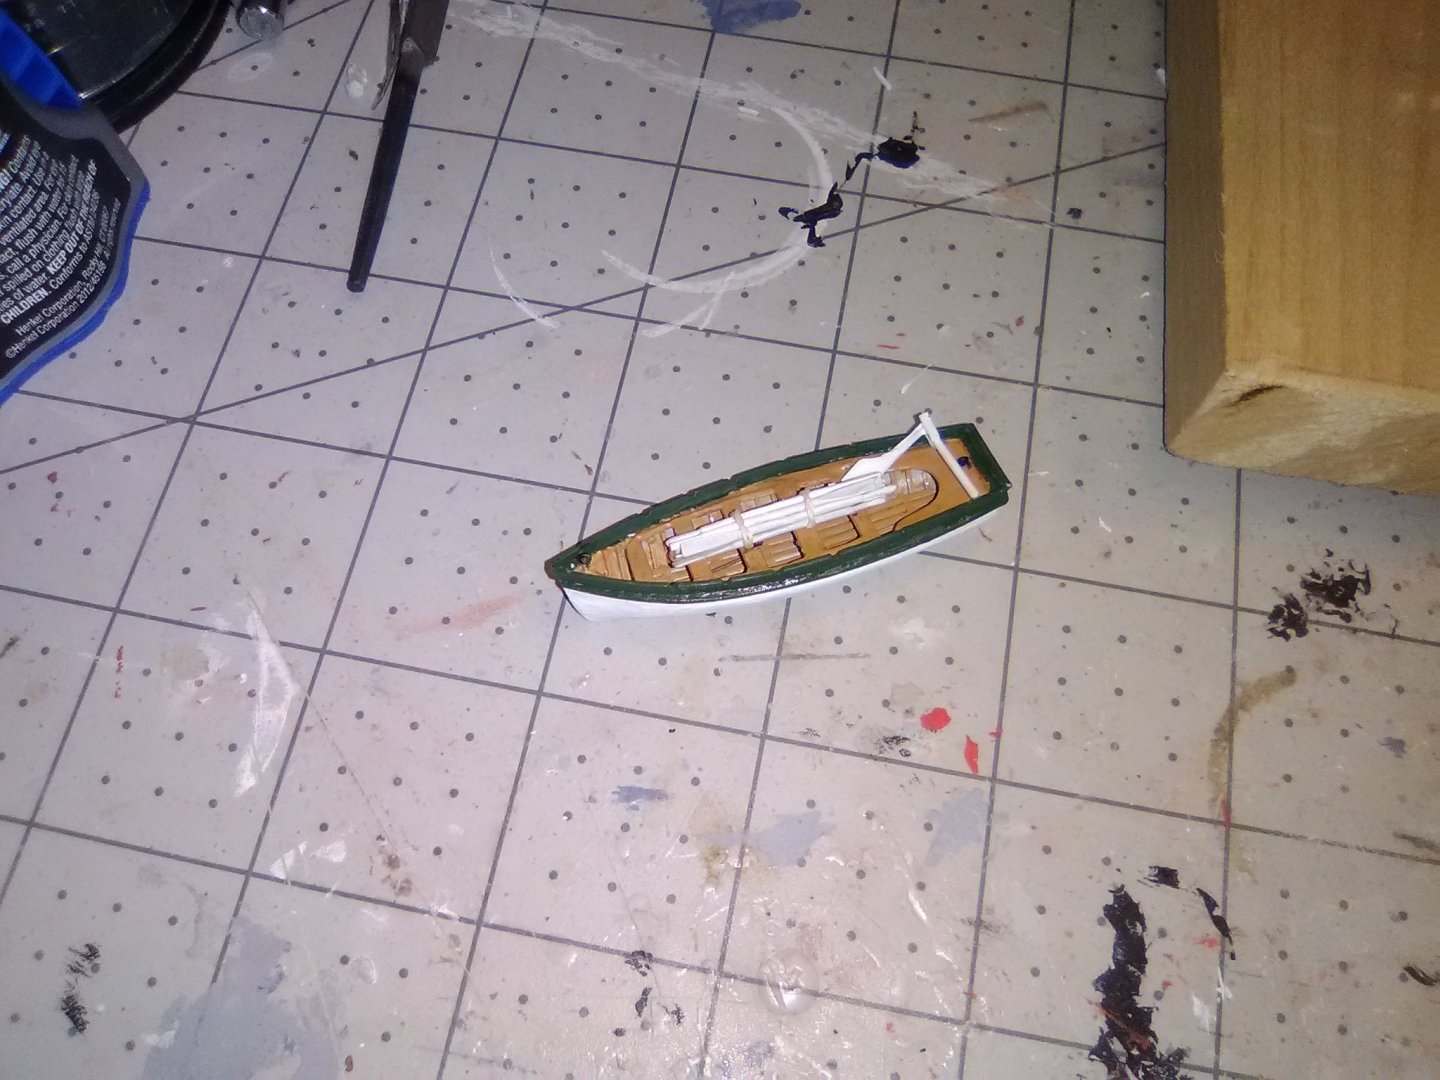
Transom details The stern davits were made out of 2 pieces of strip wood “stepped” above each other so they could pass over the 1/16” lip or edge on the transom piece. Once installed 4 holes where drilled near their outboard ends to simulate sheaves. I was originally going to leave the stern mounted boat off and show the larger longboat on the main deck but after all the work involved in putting in the deck reveals it didn’t make much sense to cover up half of them with a boat. So I decided to put together the smaller boat - I may still do the larger water and either mount is on the display board or show it suspended from the yard whips as it would be during launch or recovery. The kit provides a britannia hull and 3 pieces of photo etch: I decided to add a little detail by using strip plastic for the frames, and raising and thickening the gunwales: The finished boat is shown on the davits, and as you can see I also added the rudder pendants:


- 142 replies
-
- 8
-
-
- alfred
- solid hull
- (and 2 more)