HOLIDAY DONATION DRIVE - SUPPORT MSW - DO YOUR PART TO KEEP THIS GREAT FORUM GOING! (Only 20 donations so far - C'mon guys!)
×


mobbsie
-
Posts
1,493 -
Joined
-
Last visited
Content Type
Profiles
Forums
Gallery
Events
Everything posted by mobbsie
-
 Hi Jason, She's looking crisp and sharp mate, well done. As far as the Airing Ports are concerned I think it depends on how accurate you want to be, would they really be missed, certainly not by persons who don't any better, the one person you have to please is you, if you leave them out will you constantly regret it, if you put them in how much are they going to enhance the look. Good luck with your decision mate, whatever you decide I'm sure it will be right for you. Be Good mobbsie
 -
Hi Frank, Who's been a busy boy then, knew you would sort out the belaying problem mate. I love the rope jungle and the look of the way you have presented them, really good. I still say she's due for a refit.!!!!!!!!!!!!! Stay sane my friend. Be Good mobbsie
-
Evening John, Good to have you back in the yard mate, hope your hols were all you wanted. Your Hull and Deck are absolutely fantastic mate, I don't think I've seen one better, you must be so pleased. Good construction of the cabin frames, it's going to be interesting to see these develop. Be Good mobbsie
- 745 replies
-
- 4
-

-
- francis pritt
- mission ship
- (and 1 more)
-
Hi John, You've made a great job on the boats and equipment mate, I didn't realise the amount of gear they carried, it certainly puts a new perspective on things. It's not something you'd want to go cruising in, I do however have one question mate, where the hell do the crew sit ? Keep it up buddy, it's all coming together very nicely. Be Good mobbsie
- 2,250 replies
-
- 2
-
-
- model shipways
- Charles W Morgan
- (and 1 more)
-
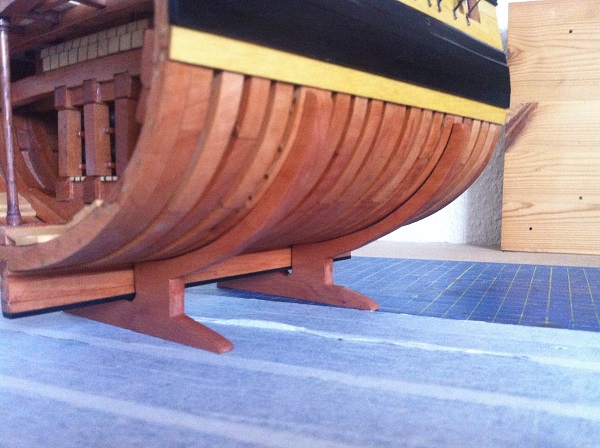
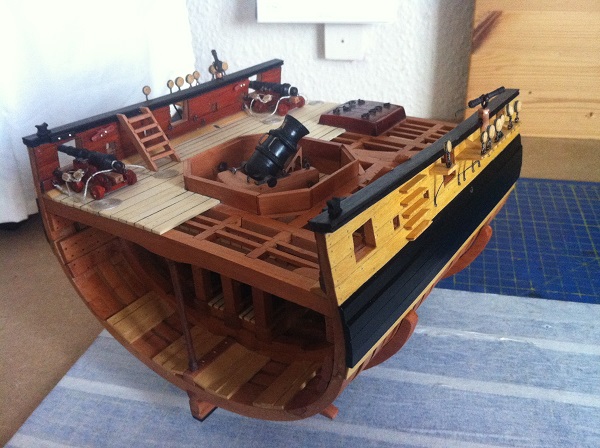
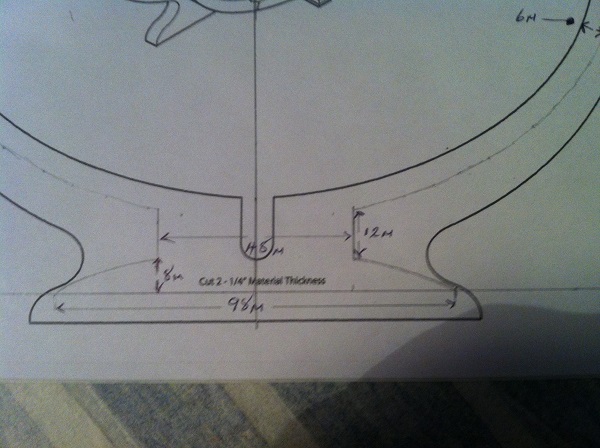
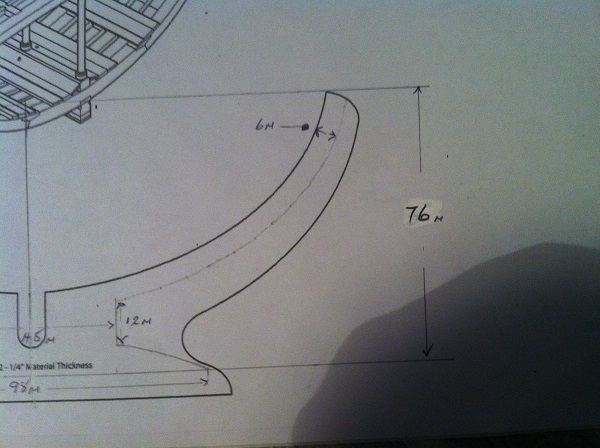
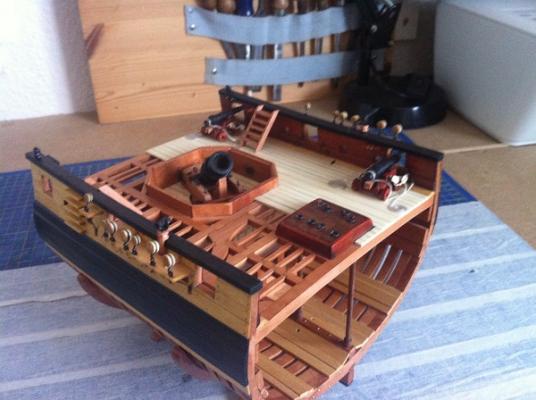
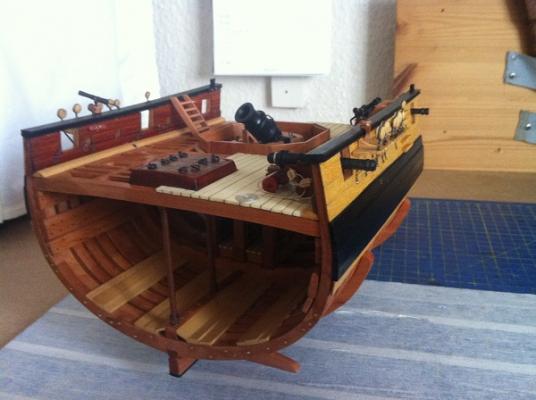
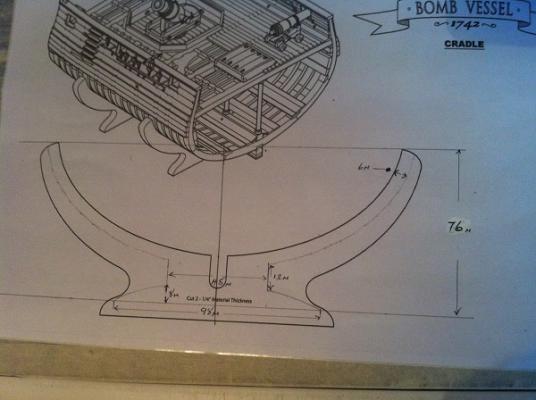
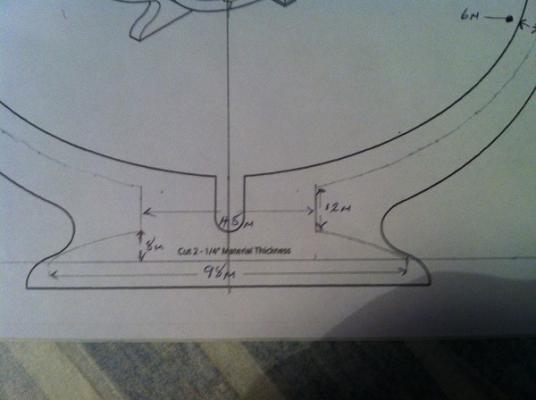
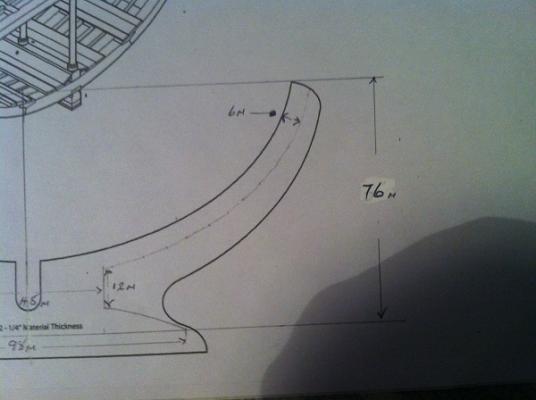
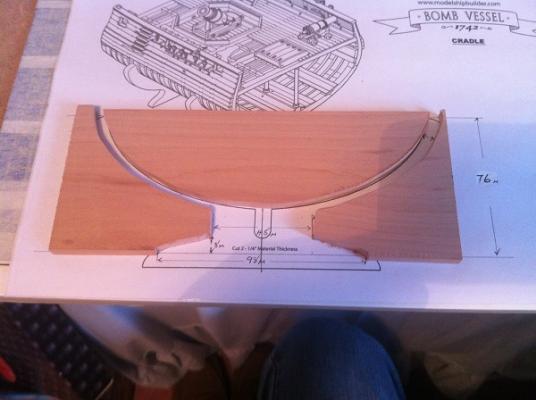
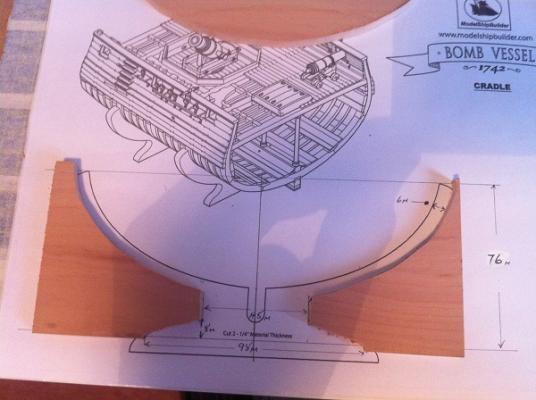
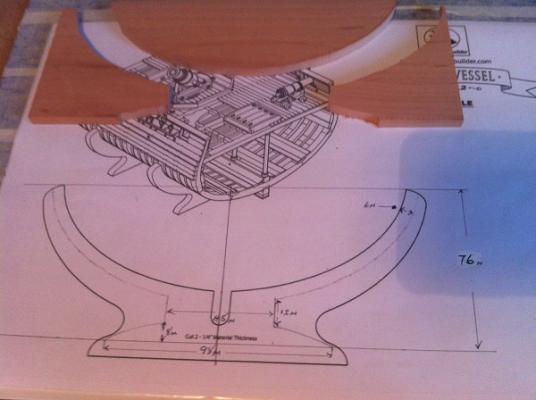
Further to my last post I do have some more pics of the stands I hope that helps. Be Good mobbsie


- 255 replies
-
- 24
-
-

-
- granado
- bomb ketch
- (and 2 more)
-
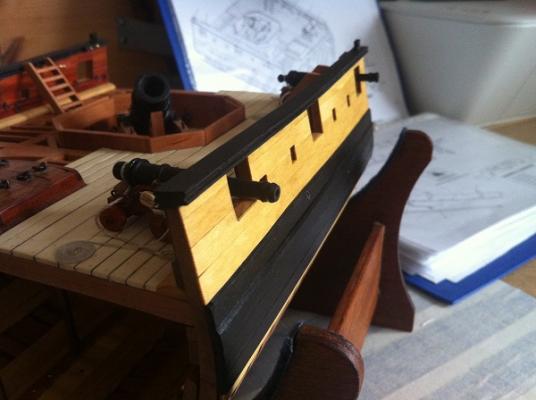
Hi Gents, Thanks very much for your kind words and comments and also for hitting the "like" button, all are very much appreciated. This is the penultimate update, she's completed apart from the display case which should arrive some time this week. I made the Channel Board from 7/16 x 1/16 Swiss Pear, with the template in place I filed the chain cut outs to 1.0mm, I was using 0.04 brass strip for the Chain Plate and didn't need to go too deep. The Chain Plate retaining Paunch is just a straight piece of 1/16 Swiss Pear, the Channel Knees were also 1/16 Swiss Pear. The Chain Plates were cut to a width of 2mm from 0.04mm brass sheet and the end bent around a 1.0mm brass rod, I left a tail on the loop which when fitted would go through the cut outs on the Chain Plate locking the Iron Chain Strop in place, the opposite end had a 0.8mm hole drilled. I pre-shaped my first set of Chain Plates but these turned out to be a dismal failure and a new set was cut and left straight apart from the loop, until they were fitted. The Iron Chain Strop which locks the Deadeye's in place is 0.5mm Copper Wire, this was wrapped around the Deadeye's and a full twist tight beneath them held them in place, the tails were then wound around a 1.0mm brass rod, this loop was then fitted into the loop on the Iron Chain Strops. The Chain Plates and Iron Chain Strops were then blackened using John Penny Antiquing Fluid. Next up came the Swivel Gun Pedestal, These are 3/16 x 3/16 Swiss Pear, they had to be filed down to 6 sides and shaped to fit the Hull and Sheer Rail, a 0.8mm hole was drilled in the top for the Swivel Gun Mounting Yoke. As a small piece of decoration a small sticky backed copper band was placed around the top. The Yoke was made from some spare Hammock Chains from my Agamemnon, they were shaped and cut down to size, 4 x Eyebolts were then glued to top of the Yoke using Resin ( I tried to solder them on but failed miserably, just too small ). The Swivel Guns were next, these little beasties were made from 1/14 x 1/14 Ebony and they done my head in. They weren't difficult to turn except that I still cant get two the same but the basic problem was quite important, I couldn't see the damn things!!!!!!!!!!!!!!!. I had all the lights available to me on the job but I still had to put white paper under them so I could see what I was doing, the only casualty was me in that I ended up with one hell of a headache from eyestrain, anyway the muzzle was drilled out and a hole drilled through to take Trunion. Next up came the Entry Port Ladders, these were made from 3/32 x 1/8 Swiss Pear. I cut three stripes 4" long and glued them together staggering each strip thus forming the basic shape, they were then cut into 5 x 5/8 steps and each end filed forming the step. The last thing I had to do before assembly was to drill and fill the Hull Treenails, 0.8mm holes were drilled and a mixture of saw dust used to fill back. I made the filling from Holly, Ebony and Pear mixed with a white filler, the end result is quite pleasing to my eye. With all the parts made it was time to assemble, I fixed the Entry Port Ladders in place followed by the Chain Board, the Swivel Gun Pedestal was then fixed in place. The Iron Chain Strops were then placed into the Chain Board and the bottoms pinned in place. All that was left to fit was the Swivel Gun Yokes, these just pushed into the Pedestal and did not need fixing. A couple of coats of Poly Satin finish and all is complete, so I do have some pictures but as usual I get too involved with what I'm doing and didn't photo the processes. Some Picture I forgot to mention the stand, I didn't like the stand, I thought it's a bit too chunky and so cut it down, I wont go into written details as I do have some pics that cover that side. So that's it guys, quite a big entry so if anybody has any questions please ask away. Final update will be with the Display Case. Be Good mobbsie


- 255 replies
-
- 24
-
-
- granado
- bomb ketch
- (and 2 more)
-
Jeez I nearly missed it, a very Happy Birthday mate, hopefully your well enough to enjoy it. Plenty more to come mate. Be Good mobbsie
- 2,191 replies
-
- 4
-
-
- confederacy
- Model Shipways
- (and 1 more)
-
Augie, if you could change these well wishes into meds you'd never get sick again, it's a testament to the friendship and respect held for you on the forum. Do as your told and take your meds mate and you'll soon be bouncing back. We'll wait. Be Good mobbsie
- 2,191 replies
-
- 10
-
-
- confederacy
- Model Shipways
- (and 1 more)
-
Good to have you back John, hope you had a fabulous trip mate. Morgan's looking really good with the boats on. I'm afraid I cant help with the removal of the scratch mate other than remove the damaged ones and replace, that may change the patina though, as a suggestion would it be possible to have the boat above it lowered on it's davits so that the scratch is covered by the boat, just a thought. Be Good mobbsie
- 2,250 replies
-
- 3
-
-
- model shipways
- Charles W Morgan
- (and 1 more)
-
Hi Grant, Some nice stuff there mate, Mortar Caps look really good. Nice work on the gun carriage sides, I'm looking forward to seeing the completed guns. Be Good mobbsie
- 456 replies
-
- 6
-
-
- finished
- bomb ketch
- (and 2 more)
-
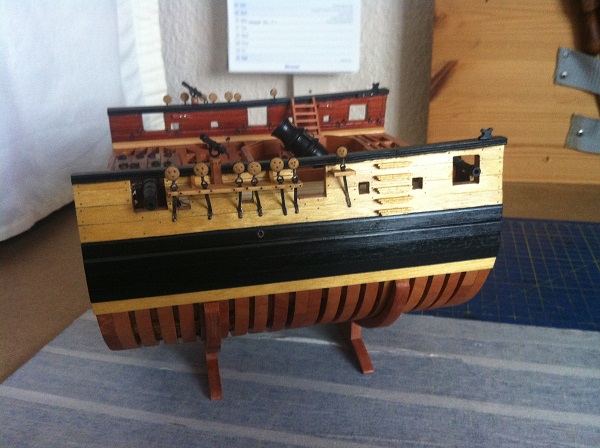
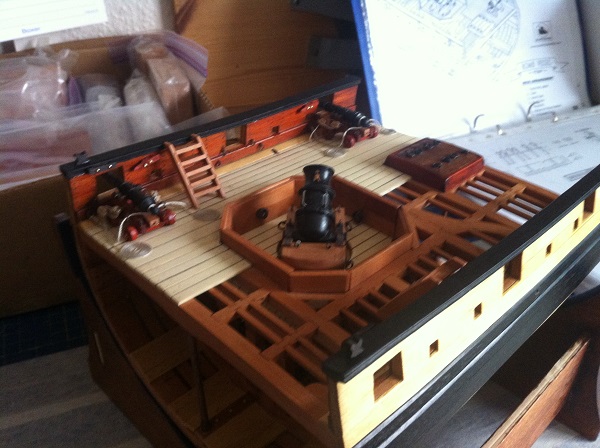
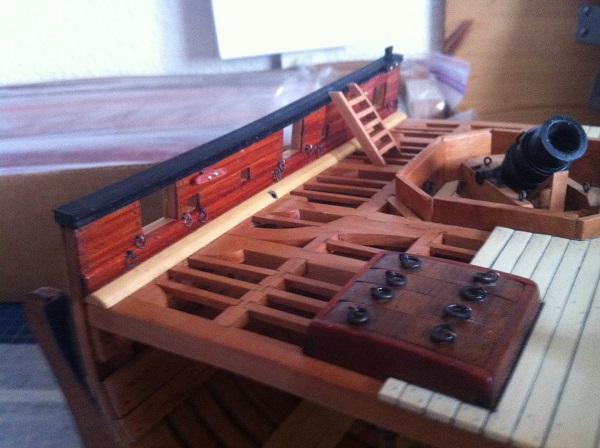
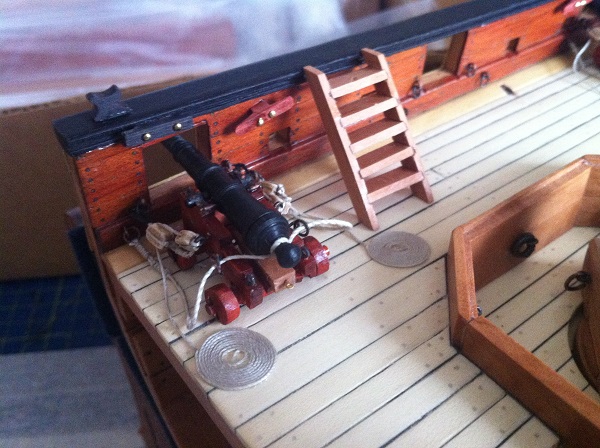
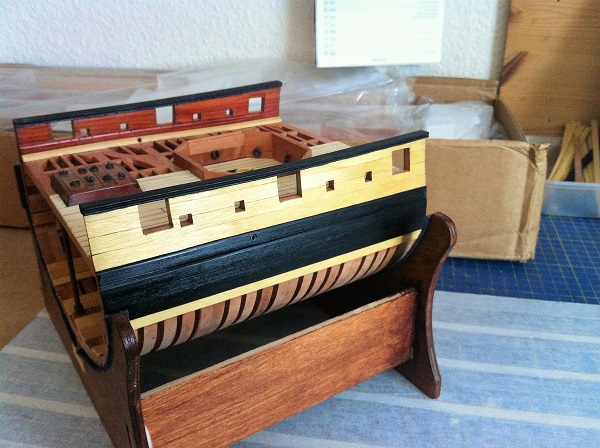
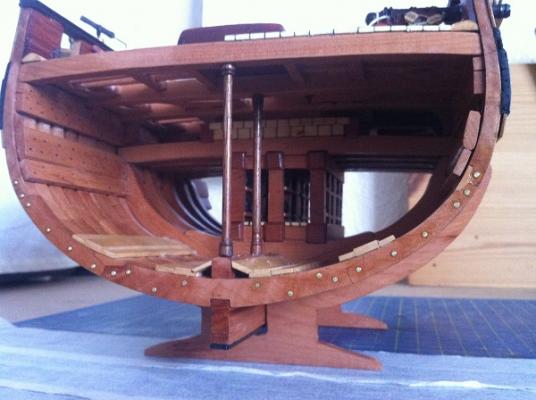
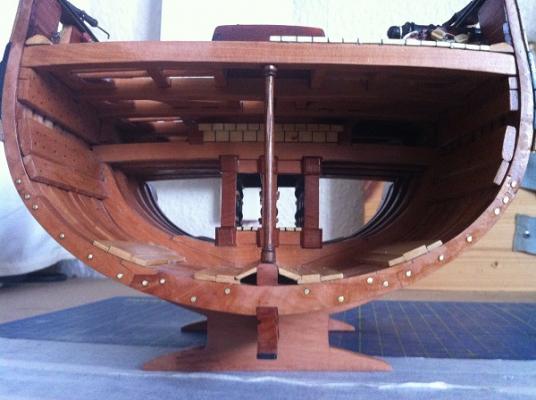
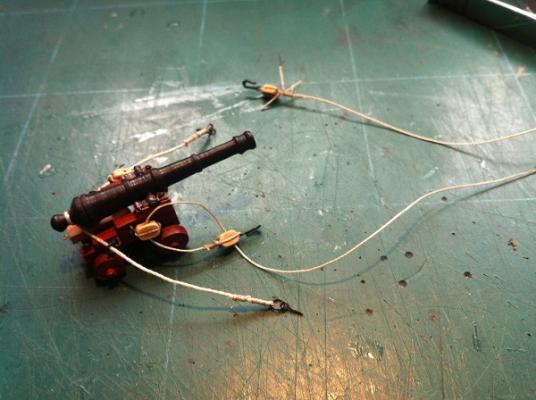
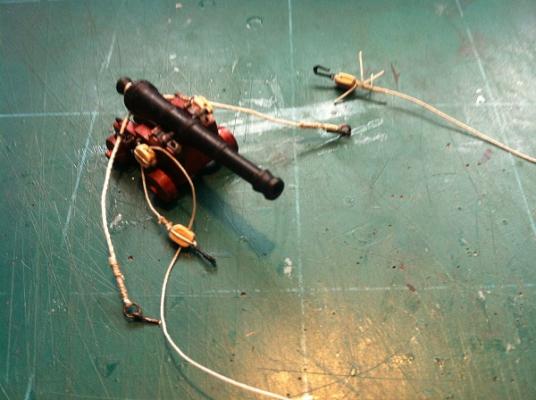
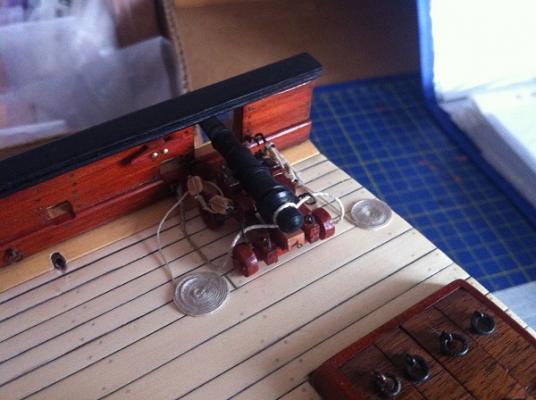
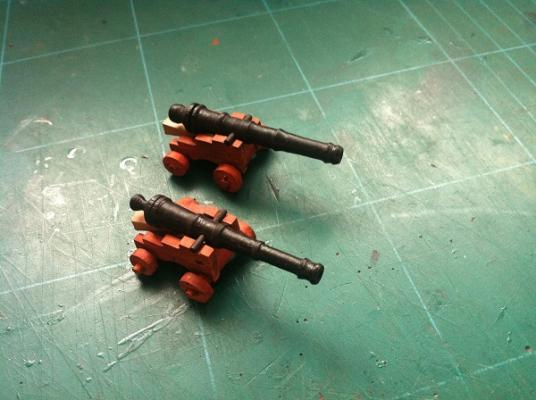
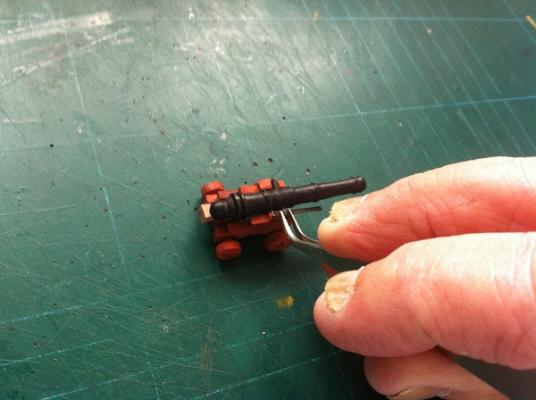
Hi Gents, Thanks guys for your comments and remarks, also for all who hit the "like" button, their all very much appreciated. Its update time again. The deck area is now completed, I started rigging the guns before placing onto the deck, the Breech ropes were measured and the ends were then whipped into the ringbolts, the blocks are 5mm singles ( these blocks were made by Grant for my Agamemnon and were left over from her ), one block x 4 was tied to eyebolts and glued onto each gun carriage. These were then put aside. 24 Ring Bolts, 4 Kevel Cleats,4 Cleats and 2 Entry Port Ladders were made up and then fitted, I didn't take any pics of these items as they are a pretty standard item. The Kevel Cleats on the Sheer Rail are of 3/32 Ebony and is a very simple shaping exercise, the remaining Cleats are 3/32 Red Heart and again are a very simple shaping exercise, these cleats were drilled and fixed in place using glue and pins. The Gun Carriages were glued into position, the Hooks on the running tackles were positioned and the Breech Rope Ring Bolts glued in, 4 Flemish Coils were made and placed on the deck either side of the guns. The Entry Port Ladders were then glued on. The ladders were made from 1/16 Swiss Pear. The Flemish Coils are made from 0.75mm natural thread on a bed of low tack masking tape, once the coils had been formed they were soaked in diluted PVA. Next up will be the Channel Boards and Deadeyes and all the metalwork that goes with them, I have had a practice and I know what I will be doing with them. I have had a good go at making the Deadeyes but all attempts ended in complete failure, so with my mentors approval I will be buying them in, they will still be Boxwood so I will remain true with that. Some Pictures. One of the canons with it's rope work Finished canon with Flemish Coils The finished weather deck ( a big jump ) So there we are, next up is all outer hull work with the exception of the Swivel Guns, ( should be fun ) Be Good mobbsie


- 255 replies
-
- 17
-
-

-
- granado
- bomb ketch
- (and 2 more)
-
Frank, allowing a ship to get into such an appalling state tells me you only have one thing to do, sack the crew mate. Your doing a superb job on the rigging buddy and your right, the Mizzen Forestays do seem a bit large, but if that's what's called for then so be it. Only you have to be happy with it mate. :im Not Worthy: Looking forward to more updates my friend Be Good mobbsie
-
Hi Denis, Just because you have taken a second job doesn't mean you can deprive countless of your followers the pleasure of your updates, you'll just have to pull your digit out mate and knuckle down. Good fix mate on the funnel guys and the decking mate, even forensics would have trouble detecting the repair. Looking forward to further updates. Be Good mobbsie
-
Hi Augie, All the above plaudits are well earned mate, it doesn't matter how well a ship is designed and constructed, the modeller is the guy who puts the life into any build. This is achieved by adding a little love, devotion, skill and DNA. Add all that up and what you get is what you have built so-far, a superb ship. Be Good mobbsie
- 2,191 replies
-
- 11
-
-
- confederacy
- Model Shipways
- (and 1 more)
-
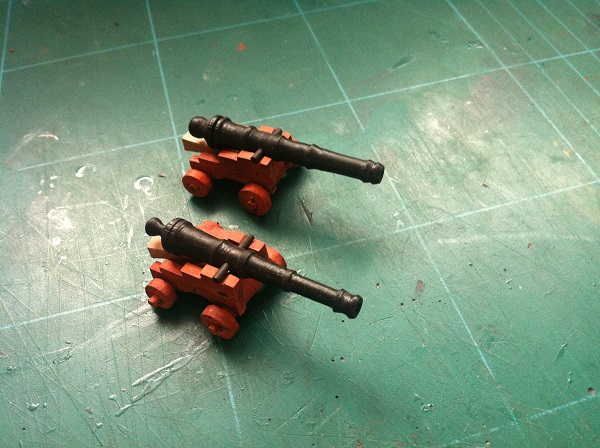
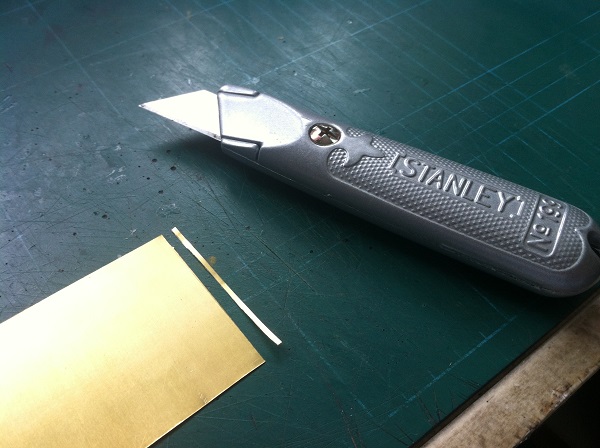
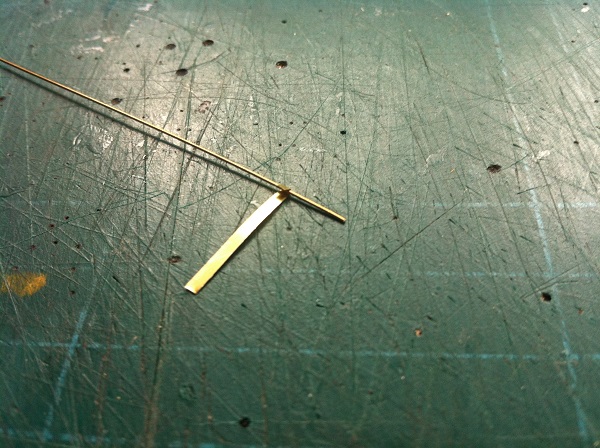
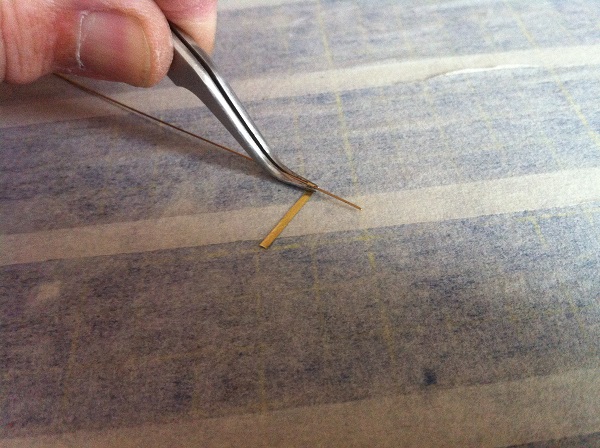
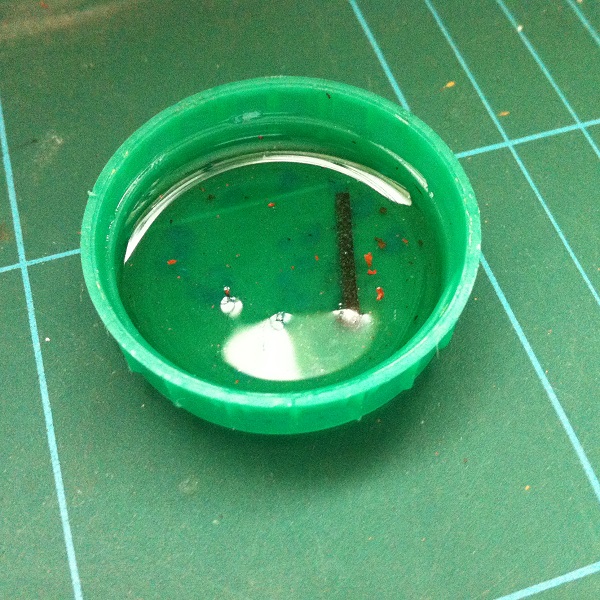
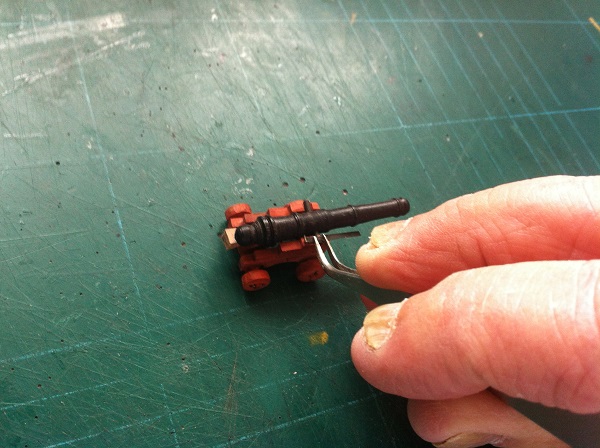
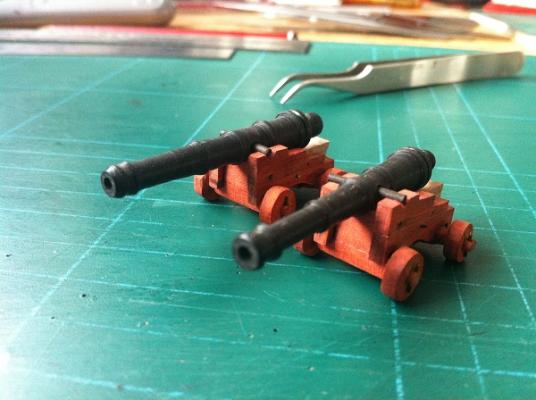
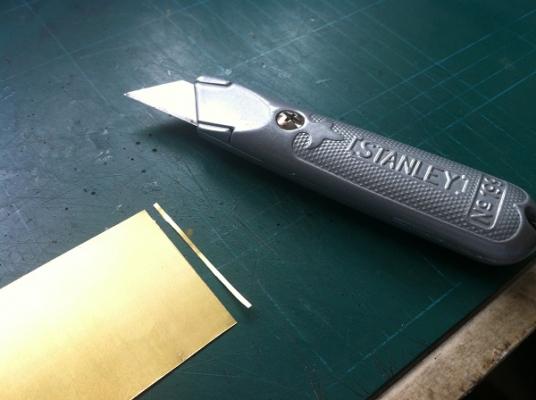
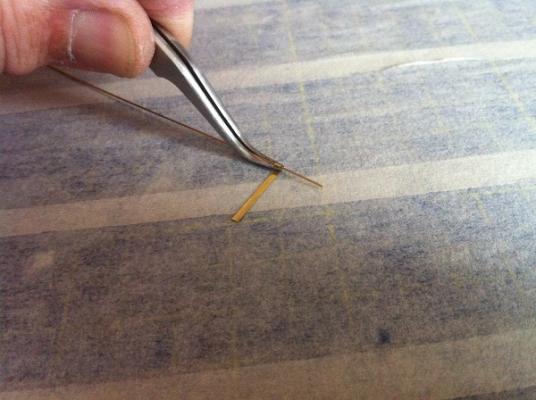
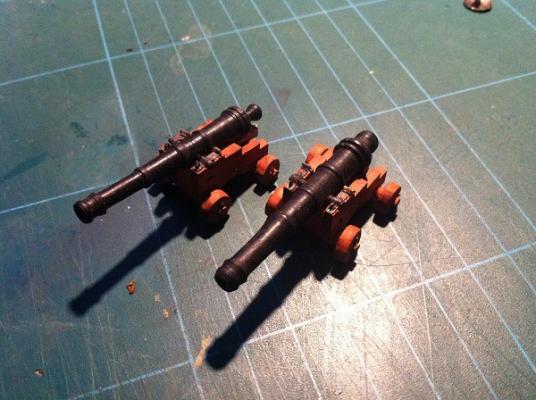
Hi Guys, back from the track and a good day was had by all, it was lovely to see my sons face after each event, took me years back to when he was just a young boy, wonderful. OK, it's time to show the cannon's, as I said in my last post their not identical and their a little longer than should be, but I quite like them. Also I shall be showing some pics of how I do the Trunion Caps, there not meant as a tutorial so please don't think they are, it's just the way I do them. Some pics So now for the Trunion Caps A sheet of 0.4 brass, cut a little narrower than the sides Turn the end of the strip up and place 0.5 brass wire inside Using tweezers, press the turn up down and apply pressure, locking the wire in place. Place strip into blackener. Position the strip onto the carriage side and cut to size, then when in position press firmly either side of the Trunion until the strip forms a good fit over the Trunion. Drill a 0.5m hole into the end of the strip Place a small eyebolt in the end and a light dab of C/A to fix A simple way of making the Trunion Caps, the finished item. I do hope you don't mind me putting my method in here, as I say it's not meant as a tutorial, it's simple and it works for me. Next up is the Deck Arrangement i.e. Ladders, Kevel Cleats etc. Be Good mobbsie


- 255 replies
-
- 18
-
-
- granado
- bomb ketch
- (and 2 more)
-
Nuthin wrong in a few profanities Mark, I do it all the time, par for the course for me. I generally get "I'm going in the garden" from the boss when I start and as long as the window isn't open there's no problem. I'm sure you'll get it right this time, looking good so-far mate. Be Good mobbsie
-
Don't know how you guys do it down under, I tried looking at the pics standing on me head and all the blood rushed into it and made me feel quite dizzy( and don't even think of going there). It does look a lovely place mate, better than sand and camels. Enjoy the rest of your semi retirement hols mate and we'll speak soon. Be Good mobbsie
- 456 replies
-
- 6
-
-
- finished
- bomb ketch
- (and 2 more)
-
Avast there me Captn, Verily I say unto you Captn it's with great pleasure I do see your return to the fold. With all that styrene inside mate she aint gonna sink in a hurry. Really looking forward to seeing the completion of the stern cabin, I do love a good bashing from the original design. Have fun and don't stress out. Marks suggestion is a good one and should give you some extra strength, certainly worth a try. Be Good mobbsie
-
Hi All, Thank you so much for all your suggestions regarding the staining of the wood, I will most likely go for the Caldercraft one suggested by Jason although I don't need it right now. You've all given me a wealth of information for which I am really grateful. Thanks again. I gave turning the Ebony one more try on Friday and I'm happy to say I have two passable cannon, their not identical but not far apart, good enough for a rank amateur turning freehand. I do have some pics which I will post very soon but right now I have to take my son to Brands Hatch (a racing car circuit) , the Admiral and me got him a race day for his birthday and he's chosen today to go. It's a boys thing and very much a bit of fun. He gets to drive two cars, a BMW 4 Series and a Single Seater, full tuition given to start then he's left on his own. I will post an update tomorrow with pics along with my method of making the Trunion Caps. Be Good mobbsie
- 255 replies
-
- 7
-
-
- granado
- bomb ketch
- (and 2 more)
-
Thanks Guys, Greg, thanks for the suggestion mate, I do have some Pear 5/8 x 5/8 square stock and may well give it go, but first I have to try again with the Ebony. One question, what do use to stain the Pear, I can only think of Black Shoe Polish. ? Be Good mobbsie
- 255 replies
-
- 3
-
-
- granado
- bomb ketch
- (and 2 more)
-
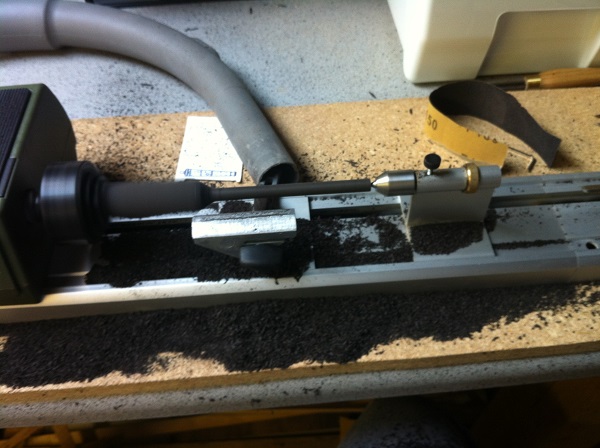
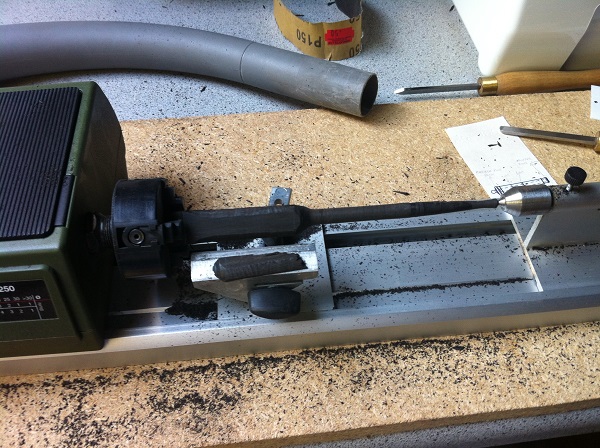
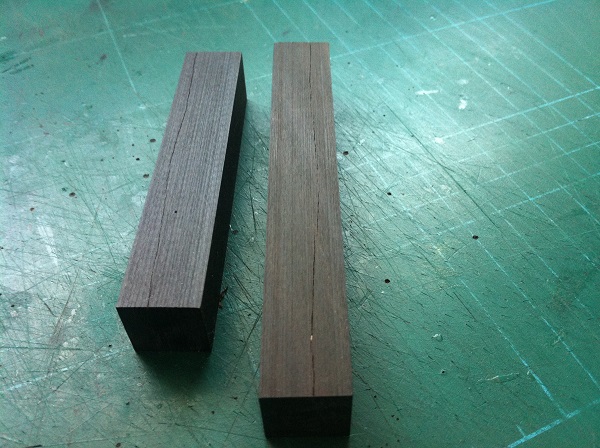
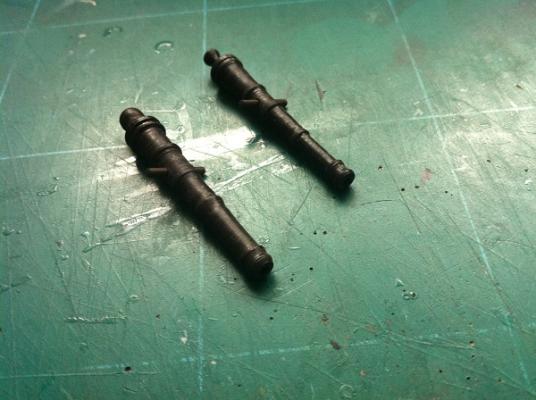
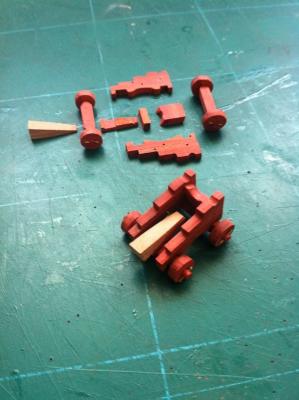
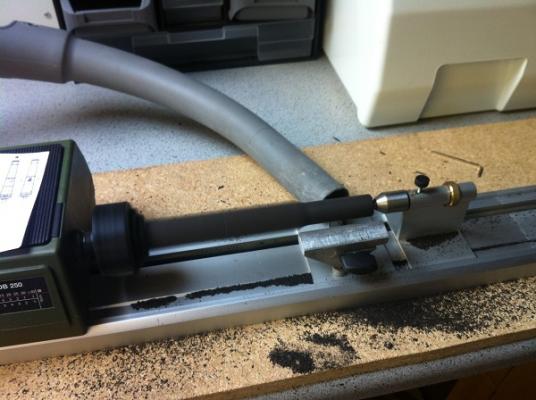
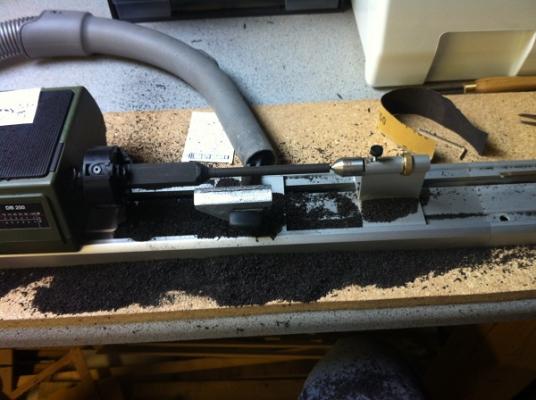
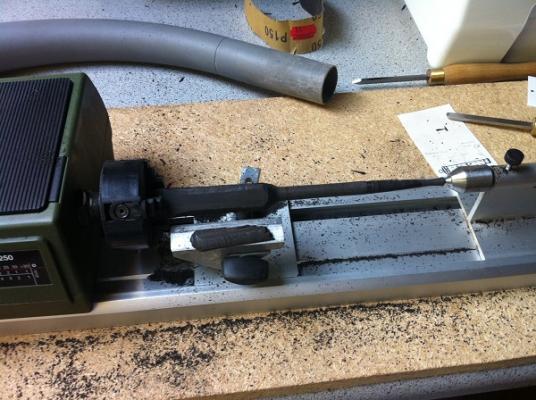
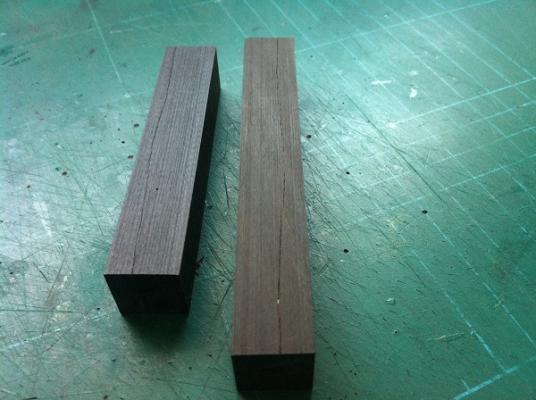
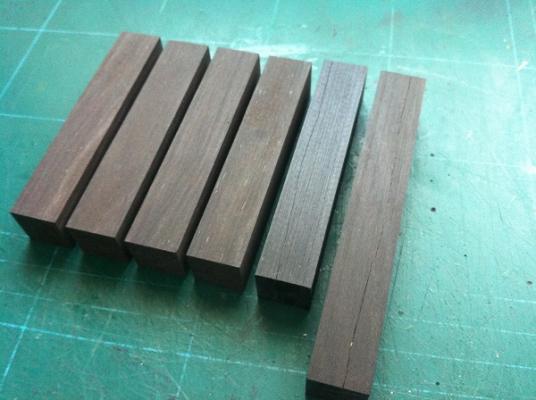
Hi All, Its update time again. Progress made since my last post, both gun carriages are made up, there was no major problems with these but I thought I would offer a mock up to the gun ports and although they fitted they were a little high so I reduced the height by 1mm, this was taken from the lower half of the side (bracket). I'm happier with the fit now. The gun carriage is made up from Red Heart of various thicknesses, the Axles are 3/16 x 1/8, Brackets( sides ) 1/4 x 3/32, Trucks 5/16 x 3/32, Transom 5/16 x 3/32, Bolster 3/32 x 3/32. With all the parts cut out and trimmed off assembly took roughly 15 minutes each, they really are that easy, so I have pictures of the finished gun carriages without the iron works, they will come later. Next up came the gun barrel trunions, these are made up from 1/4 x 1/4 Ebony, they have to be taken down to 2mm so there is a fair bit to come off, my first attempt saw me get then down to approx. 3mm, then it just parted company with each end, I can only assume I was too heavy handed. The second attempt proved to be much better, success was achieved. Then it was the time for the gun barrels, these are made up from 5/8 x 5/8 square stock, fixed firmly in my 4 jaw chuck and centred at the live end of we went, all went well and I got two lengths down to 9mm which is the widest part of the barrel, I started on the muzzle of the first one and was working back which is 5.5mm at its widest point, I made a bit of a pigs ear during the travel back but I thought I would carry on for practice. As I moved towards the rear of the barrel a chunk of wood was spat out, checking it out I thought I had taken too big a bite and so carried on as this was after all a practice piece, I had to move away from this damaged part and so thought why not remove the excess from the remaining block,( I had allowed a length for three barrels ). So I started to remove the excess when the wood just exploded on me, what the hell did I do wrong, I felt no hard snatch on the chisel so I knew I hadn't gouged it. On inspection I found the wood to have had a long split from end to end, this may have caused the damage to the first one. Going back and checking out the rest of my stock I found another two pieces had splits in, I have sufficient left so worries there (thanks to Jeff) so I will have another go later. Some Pics One completed gun carriage and the components for the second Same again different angle Both Gun Trunions are still joined together. The first of the gun barrels being turned (so far so good) Extending the cut to the second gun Both gun barrels down to 9mm My pigs ear on No1 barrel and the damage to the wood Just some of the mess The final split, you can see the chunk that's come off on the chisel support The final pics are of two of the blocks with splits in, it was these splits that caused the problem. So there we are, tomorrows another day, maybe a bit better progress. Be Good mobbsie


- 255 replies
-
- 14
-
-
- granado
- bomb ketch
- (and 2 more)
-
Hi Wayne, Augie & Carl, thanks gents for your remarks and comments. Wayne, I cant wait to see the cannons either, gonna be interesting. Augie, I surprise myself mate, there are some jaw dropping builds on the site, yours included and I can only try and emulate your achievements and skill. Carl, That is an interesting set up mate, unfortunately it's one I wont be able to copy, I have a Proxxon Lathe so there is no travel bed on it, I would have to build a completely new bed for it and I don't have the facilities to do that. I love the idea though and I envy you guys that are able to do that kind of thing, thanks very much. Be Good mobbsie
- 255 replies
-
- 7
-
-
- granado
- bomb ketch
- (and 2 more)
-
RESPECT, Mark that looks fantastic, it looks to me that you have got it just about right. If it looks better in the flesh than in the picture then I would say your already there. I know it may be late but you have made a superb job on your stern counter, it certainly paid off to do the redo although it may not have seemed like it at the time. Lovely stuff. Kudos all round mate. mobbsie
-
Thank you gents, I must admit that what with setting it all up, selecting the correct chisels and finally plucking up the courage to make the first cut took me the best part of a morning. The hardest part for me was boring out the barrel, I had to use a hand held drill. I'll admit to also like working with Ebony, I know it has a bad reputation but it does have good qualities as well. Mark, the crest is just a few scraps of Pear, cut thin with no finess or detail. Next up will be the cannon, two I think, that will give me a headache trying to get them the same, for me that is a challenge. Thanks again gents Be Good mobbsie
- 255 replies
-
- 9
-
-
- granado
- bomb ketch
- (and 2 more)
-
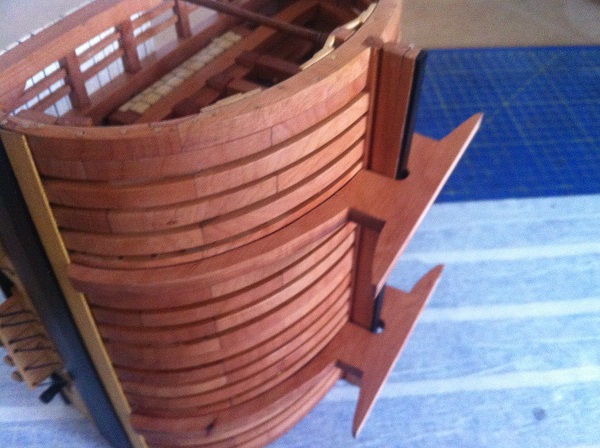
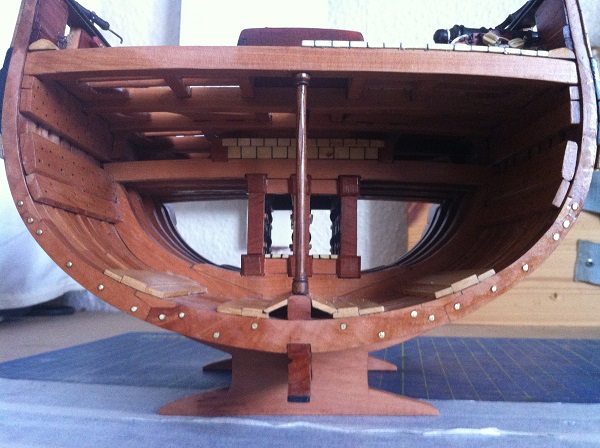
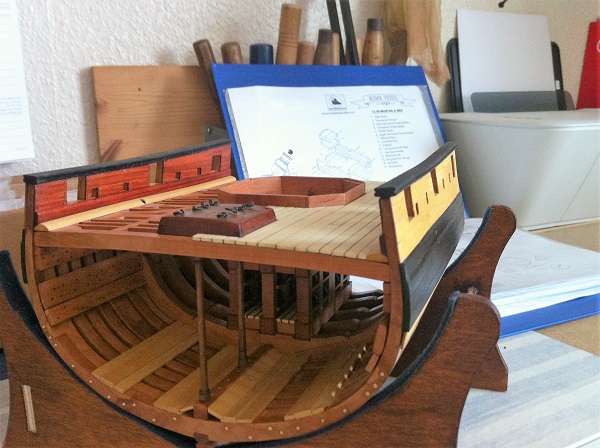
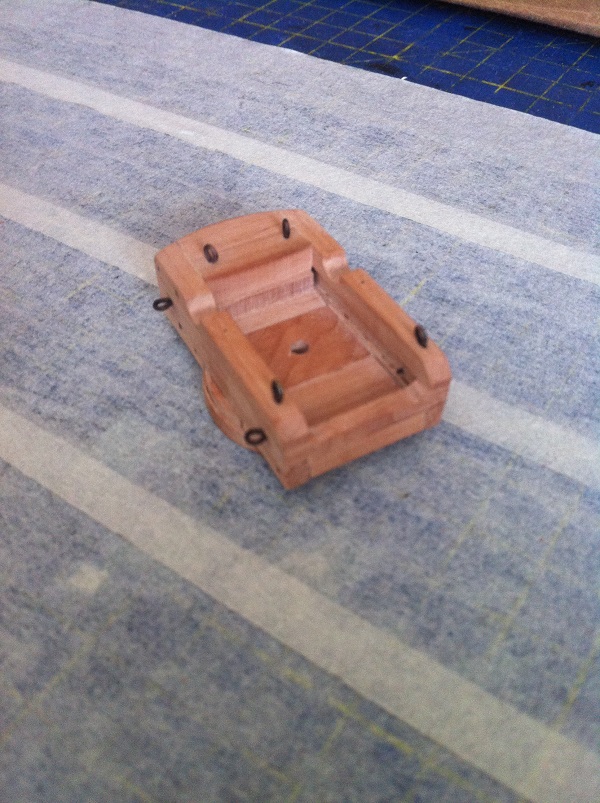
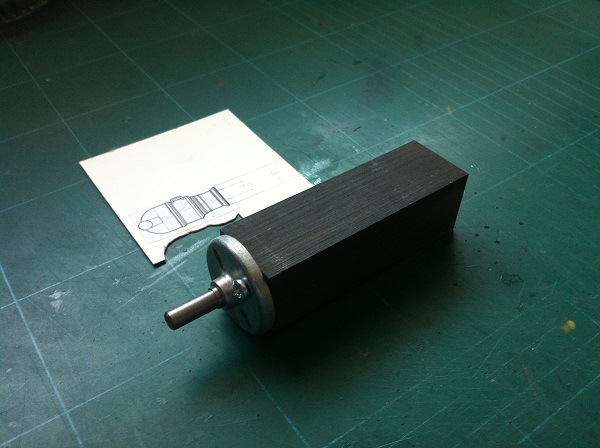
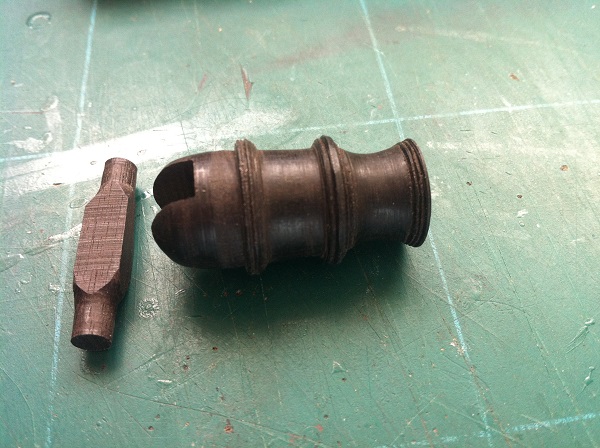
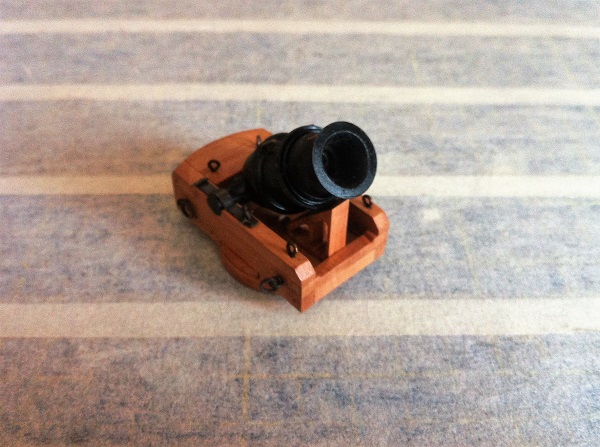
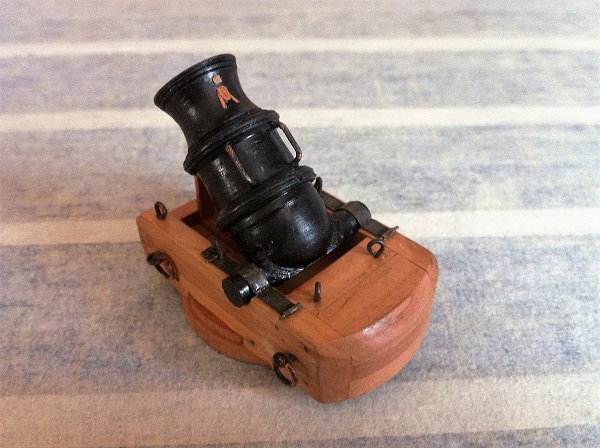
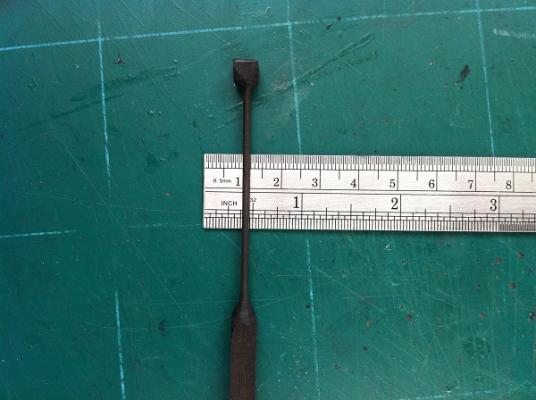
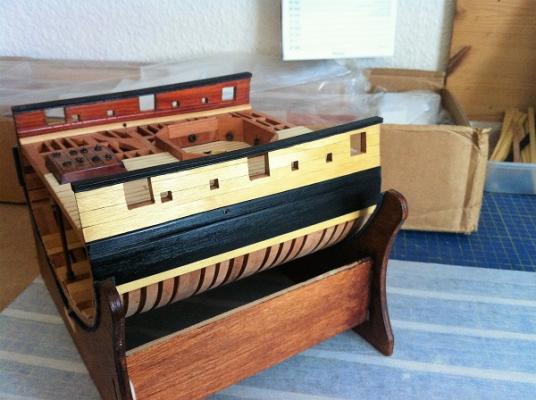
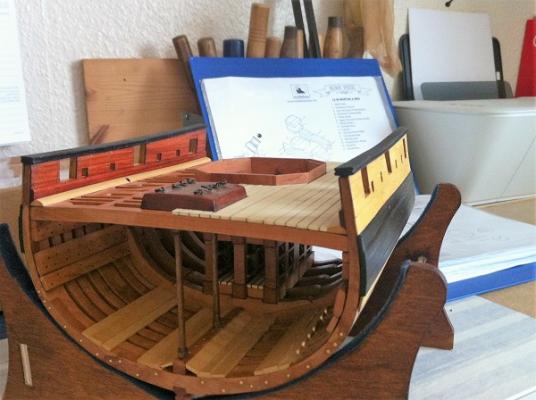
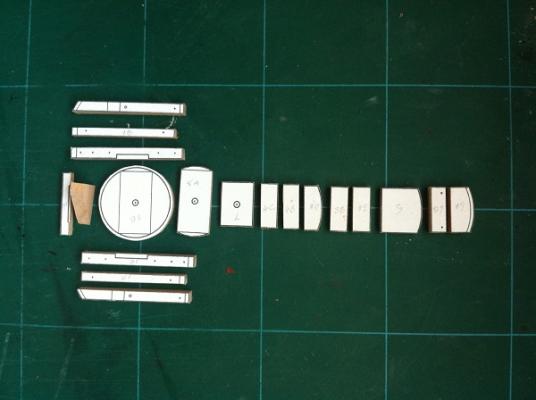
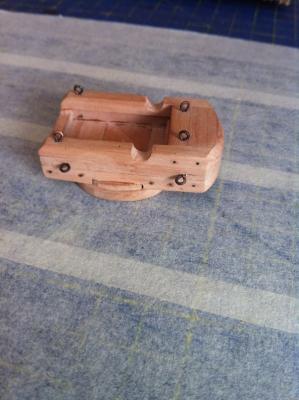
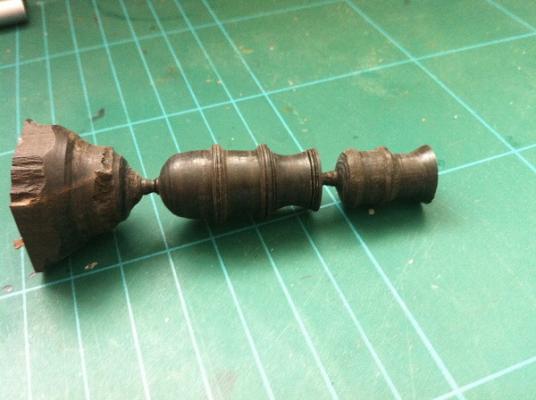
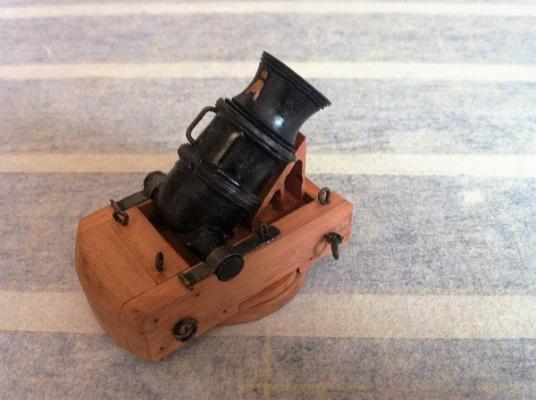
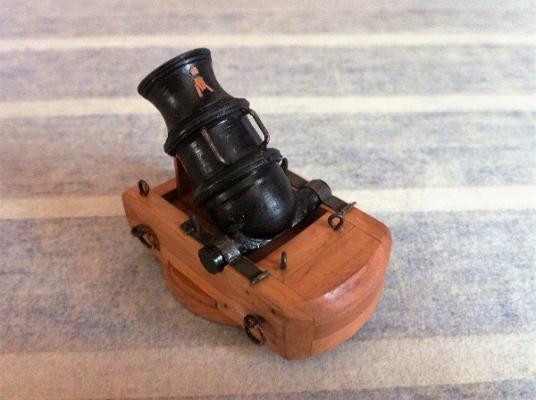
Hi Guys, Thanks for the good word and comments, also those who hit the like button, cheers, very much appreciated. You'll have to bear with me as I've just down loaded Windows 10 and it's all very strange and I think it's going to take quite some getting used to. It's update time again. As seen in my previous post the Sheer Rail was shaped and cut, well it's now fitted and very secure, I followed Grants lead and pinned and used epoxy resin to fix it permanently. The outer hull planking is now complete and is just waiting for the bolts/treenails, its been a coat of wipe on poly. The one difference is that I've placed a single strake under the wales, the strakes being Yellow Heart and it all stands out quite well. Now for the Mortar Bed, all made out of Swiss Pear and it seemed more like a jigsaw puzzle than anything else. However, we prevailed and have come up with a piece that I'm quite happy with. All the furniture has been added as has a coat of poly. The Mortar, now that was a complete different kettle of fish, made from a 1" block of Ebony it really wasn't a job I was looking forward to. With the lathe screw head fitted and the piece fitted into my lathe and the correct selection of carving chisel's of I went. Now I had pictured in my mind just how this was going to turn out but boy was I wrong, I was absolutely disgusted with myself on my first attempt, so it was time to start again. Fortunately I had enough length of wood to continue and not have to reset, the second attempt was much more successful and turned out to be a keeper, I'll let you make your own minds up about that. The Mortar and the Bed have now been married up and all clamps made and fitted, all in all I'm quite pleased with this part of the build, it's like a separate model on it's own. OK, now for the tricky bit, the pictures, I'll most likely lose everything now. It's not gone quite to plan but I hope you like the pics and as always all comments and remarks are most welcome mobbsie


- 255 replies
-
- 25
-
-
-
- granado
- bomb ketch
- (and 2 more)