HOLIDAY DONATION DRIVE - SUPPORT MSW - DO YOUR PART TO KEEP THIS GREAT FORUM GOING! (Only 13 donations so far - C'mon guys!)
×


mobbsie
-
Posts
1,493 -
Joined
-
Last visited
Content Type
Profiles
Forums
Gallery
Events
Everything posted by mobbsie
-
 Jaw droppingly good Remco, beautiful workmanship. Be Good mobbsie
 -
Lovely stuff John, the deck is going to look fantastic when it's cleaned up, love it. Be Good mobbsie
- 745 replies
-
- 1
-

-
- francis pritt
- mission ship
- (and 1 more)
-
Hi Eric Hope you get it soon mate. If I can help just ask. Be Good mobbsie
-
Hi Denis, We've got plenty of the stuff here and all colours imaginable but it's just not the correct pattern, you tell the assistant what it is you're after and they just look at you as if your stupid. Then of course they wonder why it is nobody shops in the town. It's like the time I wanted some Balsa Wood, went into town and ended up doing a 35 mile round trip, it's a complete farce, and they wonder why the towns dying. That's my rant over. Be Good mobbsie
- 1,279 replies
-
- 4
-
-
- agamemnon
- caldercraft
- (and 1 more)
-
Hi Eric, Thanks for looking in and the very kind comments. Boy, talk about jumping in with both feet, the Agamemnon is an advanced build and not really recommended for first timers but if you take your time and think twice before each step you should be fine, there are some really good builders out there who are building the Aggy who will be happy to help if you get stuck. The Hammock Netting is made from Tulle, it's a net used for decorating wedding venues and I suppose anything that needs that material. It can be obtained from most Haberdasher's. The hardest part I found was getting the right pattern, most come with a hexagon pattern but for Hammocks you want either square or diamond. I gave up looking in the UK and a good friend of mine got some diamond pattern for me and sent it from Australia. If will help I can send you a P.M. with the method I used for the nettings although you wont need them for a good while yet. Good luck mate and don't be afraid to ask. If I can help I will. Be Good mobbsie
- 1,279 replies
-
- 1
-
-
- agamemnon
- caldercraft
- (and 1 more)
-
Hi Grant, You've done a really good job on the beams mate, so good in fact that I'm thinking of re-doing mine, this time with the mill, at least I will give it a good shot. I like what you've done and I think I quite like the idea of playing catch up as permanent position so you cant go back to work just yet. Be Good mobbsie
- 456 replies
-
- 4
-
-
- finished
- bomb ketch
- (and 2 more)
-
Thanks Guys, Ken, she floated lovely with not a hint of a list, there is a good bit of ballast below though. Be Good mobbsie
- 255 replies
-
- 2
-
-
- granado
- bomb ketch
- (and 2 more)
-
Stick with it Sir, all will come good and you can then sit back with a full can and enjoy your endeavours. Nice bit of iron work mate. Be Good mobbsie
-
Beautiful work Augie, you deserve all the plaudits heaped upon you mate. Be Good mobbsie
- 2,191 replies
-
- 3
-
-
- confederacy
- Model Shipways
- (and 1 more)
-
Hi Mark, I afraid I am going to be no help to at all regarding the planking mate but I'm sure you will come up with a solution that suits. Just don't overthink it. Be Good mobbsie
-
Wow John, some really good progress mate. The planking and treenails look great, I do like the treenail pattern a lot. Be Good mobbsie
- 745 replies
-
- 1
-
-
- francis pritt
- mission ship
- (and 1 more)
-
You've done it Denis, she's completed and she really doesn't need any further additions mate, to add more I think would be to overdo her. You don't need me to go into superlatives but I will say that you have earned each and every one during the life of this log. All have enjoyed this journey with you and the A.G. and you have finished up with a beautiful, imaginative and lovely boat. Well done my friend. Be Good mobbsie
- 956 replies
-
- 4
-
-
- andrea gail
- trawler
- (and 1 more)
-
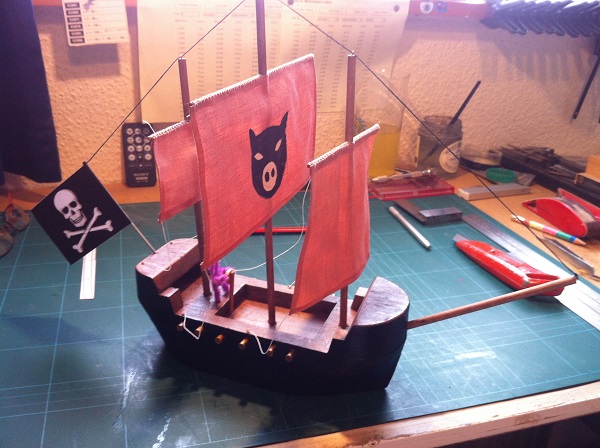
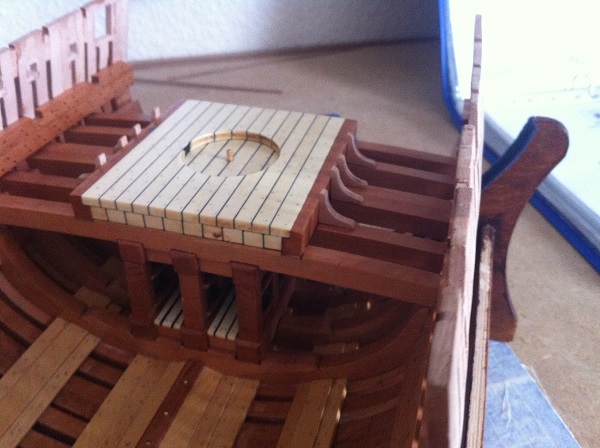
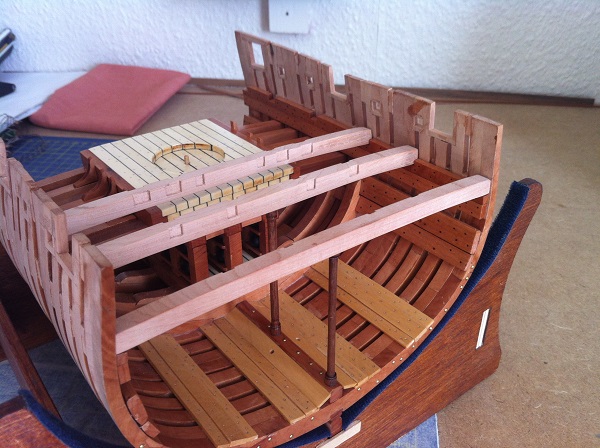
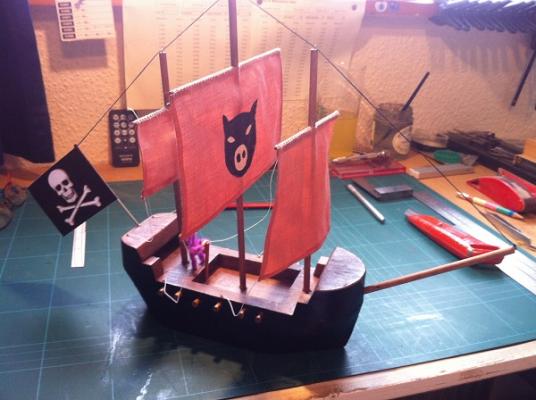
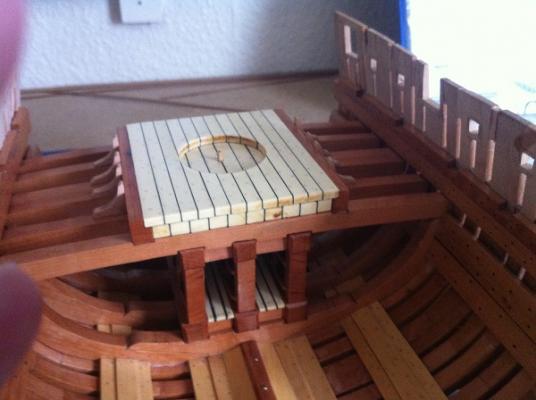
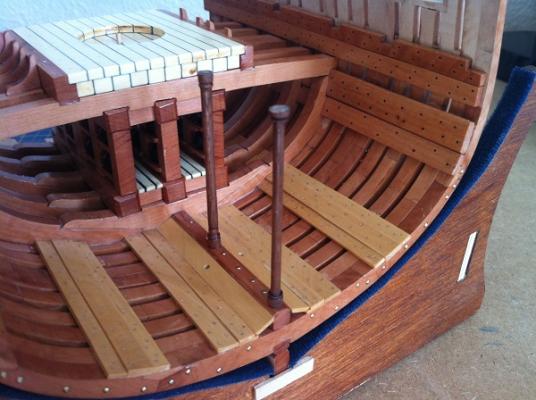
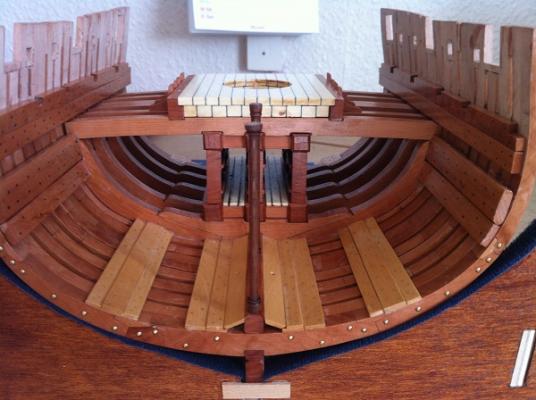
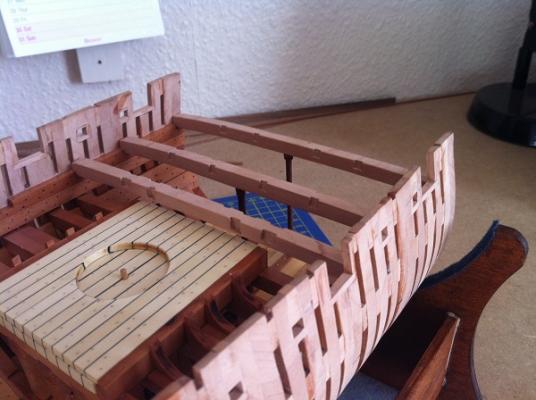
Hi Guys It's update time again. It's been a while since I worked on the Cross Section due mainly to working on the Bawley, that's completed now so it's back to the main build. I was / am playing catch-up to Grant and so have been a bit busy in the shipyard. The Mortar Pit Support Standards are made, fitted and have been given a coat of Poly, at the same time I made the Centre Line Stanchions, these were made from 1/4" x 1/4" Walnut, these were turned on my lathe. I only had to make three but it took me eight attempts to do it ( need more practice ). These have now been given a coat of Poly and have been dry fitted. It's now time to tackle the Upper Deck Beams, I really was not looking forward to doing these as I know for sure they will show up my extremely poor wood working skills. With Beams cut out and sanded down on the drum and disc sanders the top template was lined up and pressed into place, the notches then had to be cut out, instead of milling the cut-outs I used a sharp blade to cut the outer edge of the notch then used a home made chisel and 3mm chisel to remove the unwanted wood, this for is the best way because I have little faith in my drill stand, I don't think I will get the accuracy that is needed, Beams 1, 2 and 3 have so far been made and are dry fitted. I did receive a phone call on Friday evening from my Granddaughter asking if I can make her a Pirate Ship, it doesn't have to be very big but it needs to float and be robust, and can you have it ready to be taken to school on Monday, don't panic. This request was met fully and you will see the result, I was told when she came to take it that weights were going to be placed on it to see how much it would take before it either capsized or sank, wish I had know before I started it. I must thank Grant at this stage for pointing out some errors in the plans, these errors have been validated and corrections being made, thanks mate. Pictures The Black Pig, Captain Pugwash's ship Pit Support Standards 2 of the 3 Stanchions dry fitted The 3 Beams are dry fitted and should eventually match up with other Beams So that's where I am guys, Beam building continues. Any an all remarks and comments are welcome as usual. Be Good mobbsie


- 255 replies
-
- 19
-
-
- granado
- bomb ketch
- (and 2 more)
-
Hi Denis, Thanks for the good word mate. The nearest I will get to it Denis for a while is the Barge, all the rigging, masts and boat davits have been removed. The idiot who dropped it tied the masts together with string and must have used a bottle of CA on it, he also got the sails caught up, they are like cardboard now and totally useless. Still that's for the new log. Apart from the barge it's back to the dark side, I'm playing catch up to Grant would you believe. Hopefully my friend I'll see you in the new log. Be Good mobbsie
- 62 replies
-
- 3
-
-
- harwich bawley
- fishing boat
- (and 2 more)
-
Thank you all for your very kind comments and remarks Gents. The next thing for me is the repair on the Thames Barge, still angry about it but I can see a positive side, some of the build is quite naïve and can and will be improved on, I will be starting a log on this. I still have the Granado Cross Section on the go, I am now following Grant and need to play catch up. I have also ordered 3 Woody Joe's kits but these are as far removed from ships as it's possible to get but they are for the future. Be Good mobbsie
- 62 replies
-
- 4
-
-
- harwich bawley
- fishing boat
- (and 2 more)
-
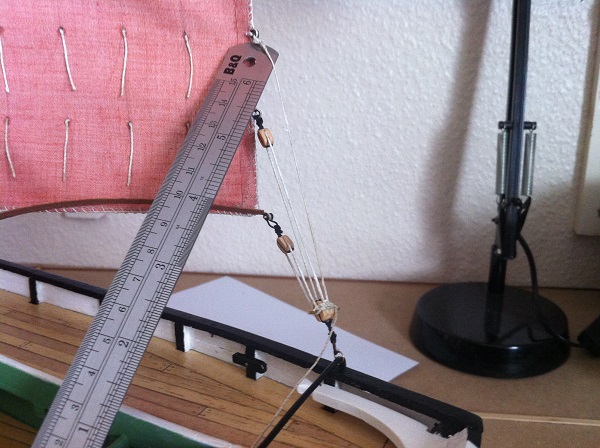
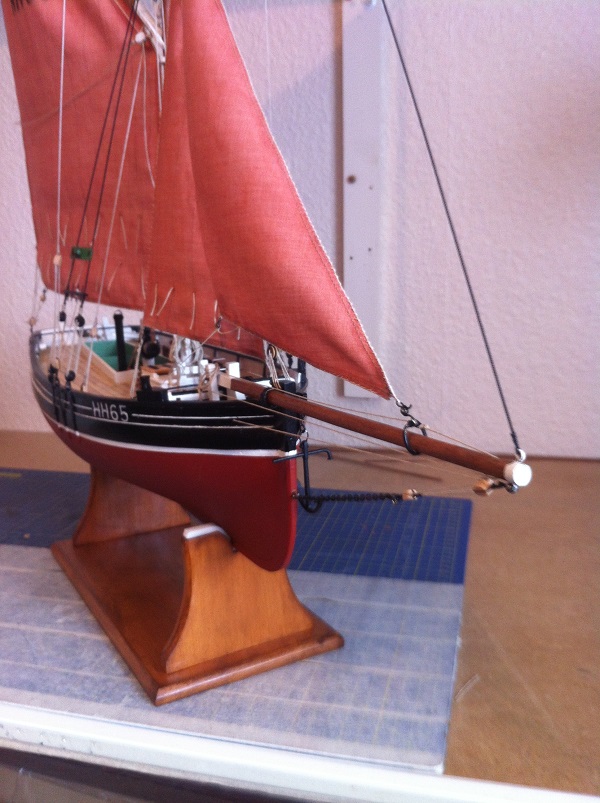
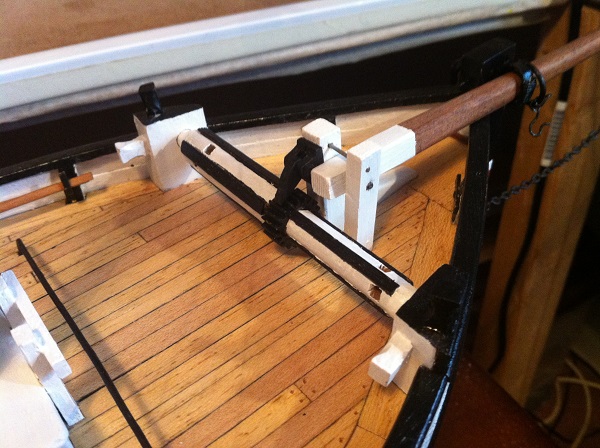
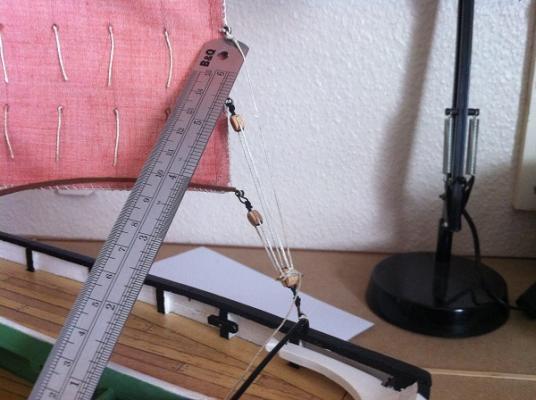
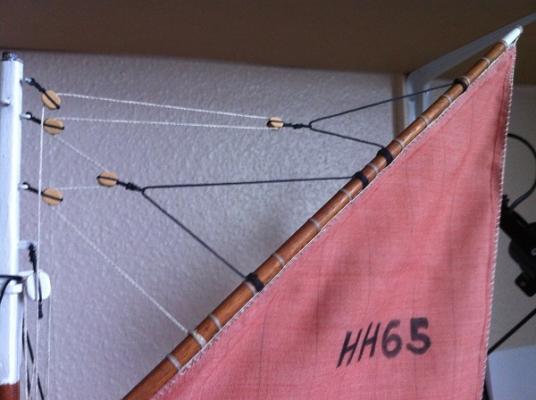
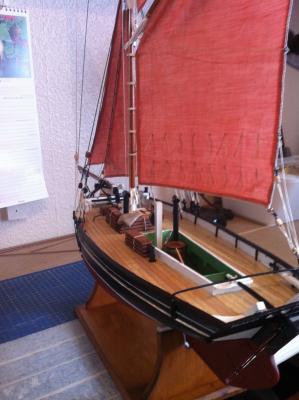
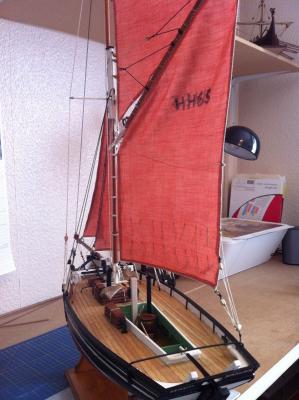
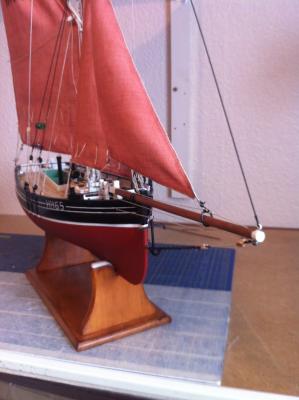
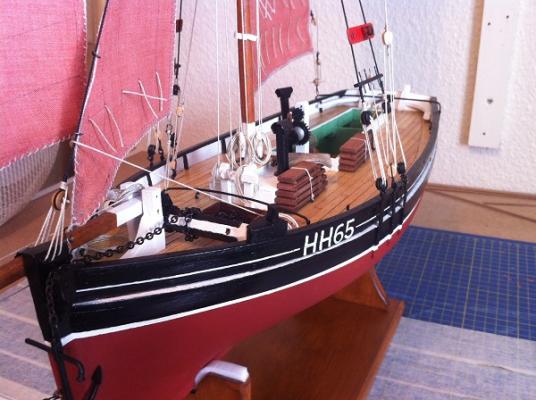
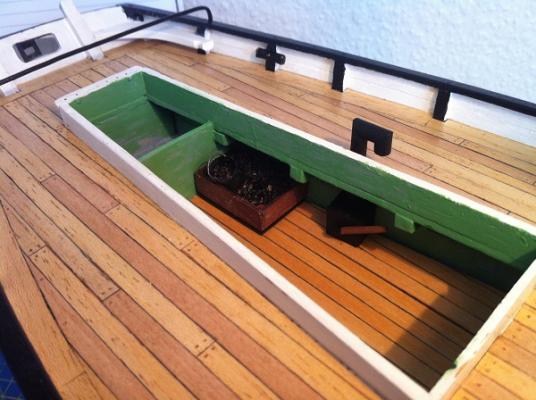
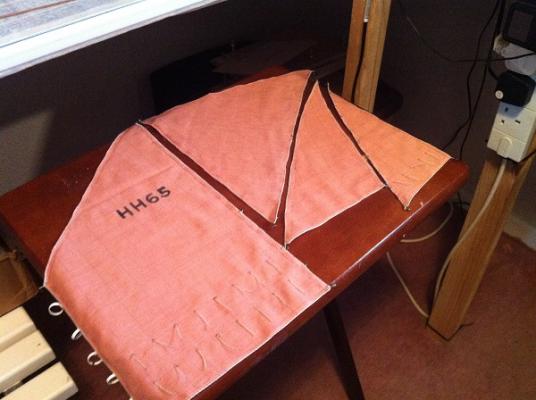
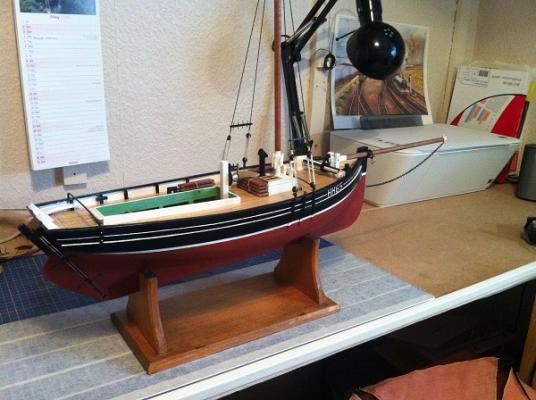
Hi Gents, Thanks for looking in gents and all your kind comments and remarks during this restoration. This will be the final update on the restoration as she is now complete and has been taken down to the museum, I must say they are very pleased with her as am I. The rigging was a bit of a mystery as there is no plan that I could find so it was a case of looking at as many photos and other builds of a similar ilk. She came together very quickly in the end and before I realised it she was almost done and it really wasn't worth making two posts with what was left. I decided to carry on and finish her off. There's no tech info to pass on so I will get straight into the pics and hope you enjoy them. I wanted the sails to billow and so I soaked these ropes in white glue, the ruler is to add some tension and hold the sail out until the glue dries. The main sail with some of the rigging, the Reg Number was put on using a Chinagraph pencil my Admiral uses in the garden, no bleed and it worked a treat I think. A chain storage box was made up The fittings have been placed in the hold All the sails are now on and hopefully they look as if they are filled with air, I used a large fan and starch, sprayed the starch on in small amounts and let it dry by the fan, then add more starch and repeat until desired effect happens. The Top Sail didn't take to well and proved a pointless task, it held for a while then dropped. The Spritsails are clearly billowing The shape of the Mainsail can be seen and it held it's shape. And the final pic So there we are, the finished boat. I have enjoyed doing this restoration as it has made a complete change in the subject which upto now has not been my thing, who knows where we go from here. Be Good mobbsie


- 62 replies
-
- 13
-
-
- harwich bawley
- fishing boat
- (and 2 more)
-
Here's a critique for you Mark, superb mate, nice bit of planking. Cant help you I'm afraid mate with the drop planks, spiling or stealers, a lot of it is all Greek to me. Be Good mobbsie
-
If that's all you can come up with Denis I don't why you bothered in the first place. :D Seriously mate it just gets better and better, you fully deserve each and every plaudit. Gonna stop now before I go all mushy. Be Good mobbsie
- 956 replies
-
- 9
-
-
- andrea gail
- trawler
- (and 1 more)
-
Congrats Piet, what a wonderful way to look back at family history. You've made a superb job of her and you deserve to be very proud for both your Father and yourself. Be Good mobbsie
-
Go earn the pennies mate, I'm sure you could find something to spend it on. The build will still be there when your done and were a patient lot. Good luck with the project and I hope all turns out well for you. See you on your return. Be Safe mobbsie
- 60 replies
-
- 1
-
-
- granado
- bomb ketch
- (and 1 more)
-
Good stuff Grant, both the knee's and stanchions look great. So, you say you have limited ability on the lathe, I do believe we have a tall story here and your just saying that. It would appear now that I'm playing catch up, this has got to be a first for me, not too sure if I like that position. Thanks for the heads up on the possible errors mate, it's still early in the morning to get my head fully around them but I will try, it's 08:43 here and I've not been up long. Benefits of being retired. Be Good mobbsie
- 456 replies
-
- 7
-
-
- finished
- bomb ketch
- (and 2 more)
-
Sorry to hear you've not been well mate but very glad to see you back. All of the above Frank and more besides. I love what I'm seeing mate and seeing what I love, she's looking absolutely brilliant. I am confused however when you say you have a little touching up to make, where ? Be Good mobbsie
-
Really glad to see you back in the workroom again mate, even if it is in a limited capacity. Precision work mate, she's looking really smart, and by the way, I don't see any discolouration at all. Be Good mobbsie
- 456 replies
-
- 1
-
-
- finished
- bomb ketch
- (and 2 more)
-
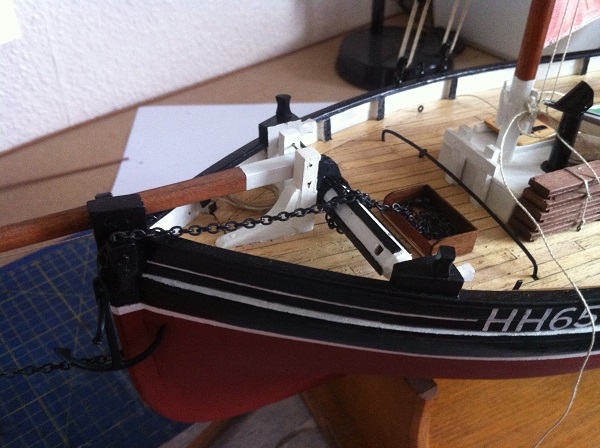
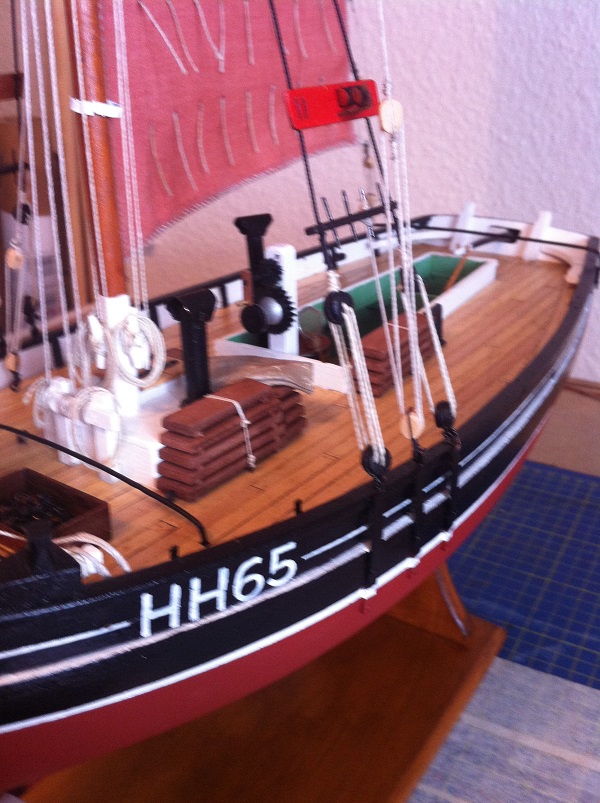
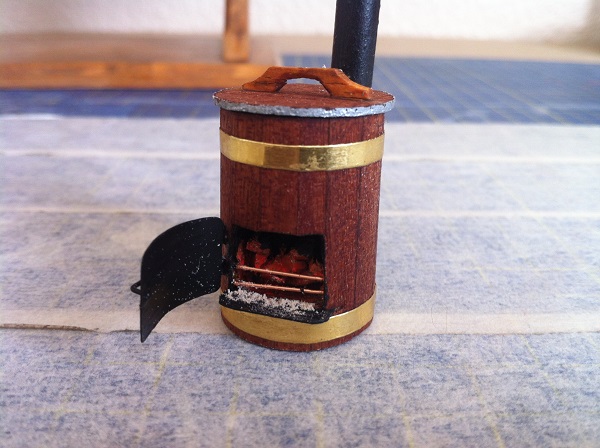
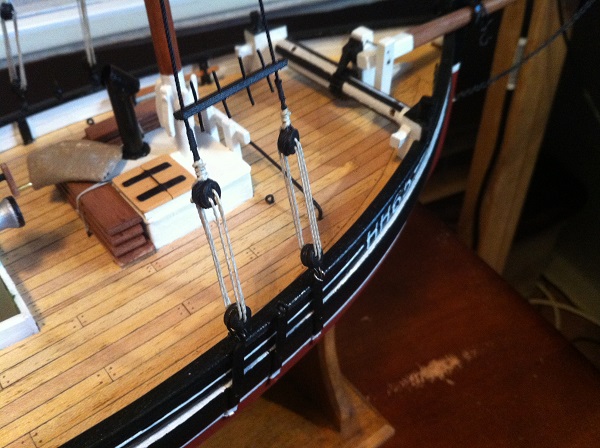
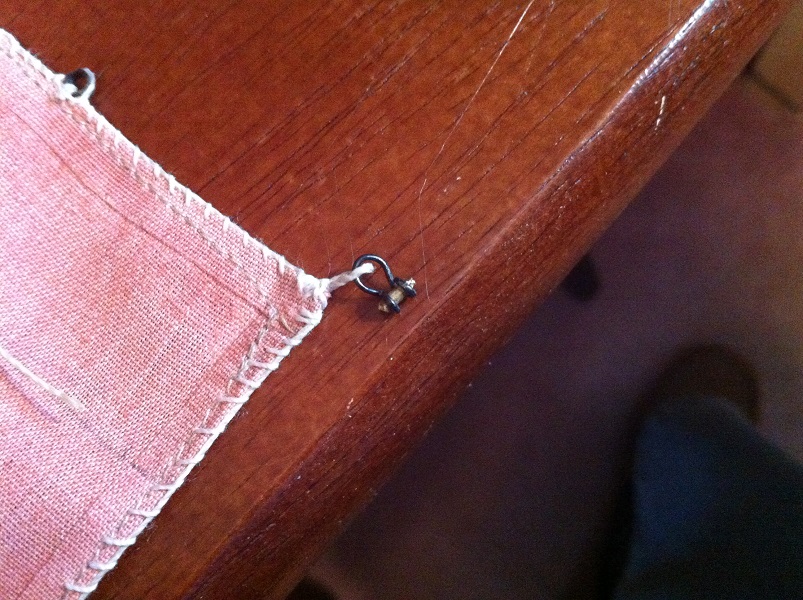
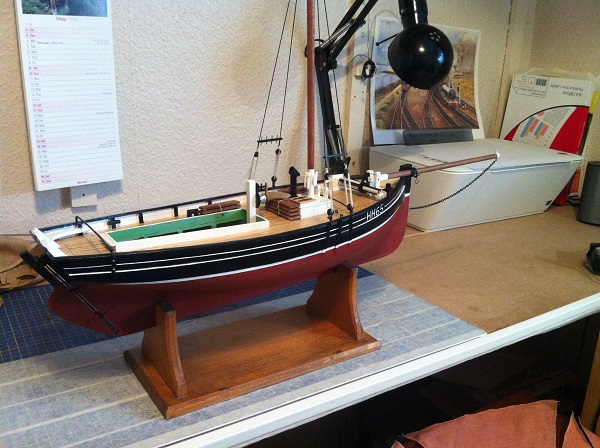
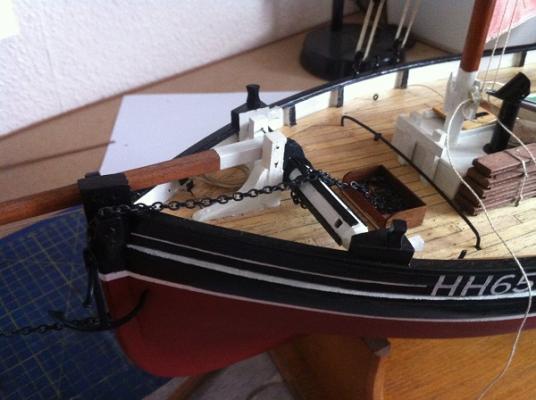
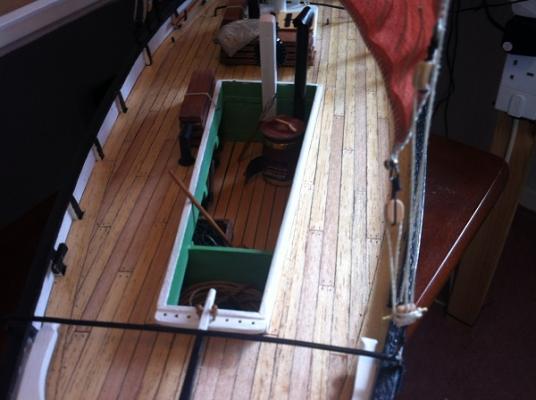
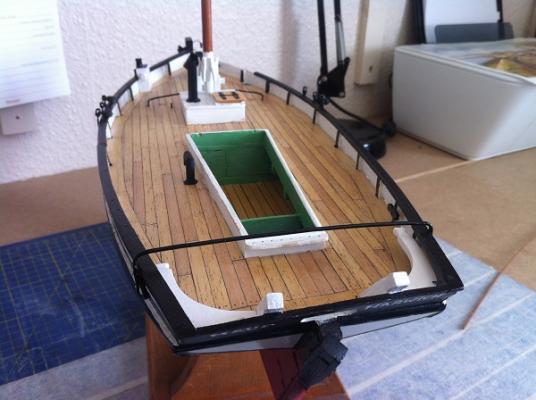
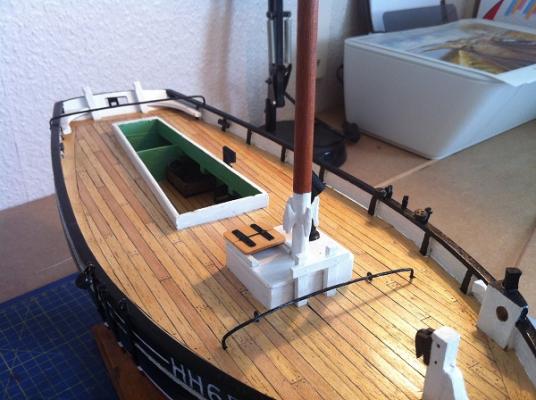
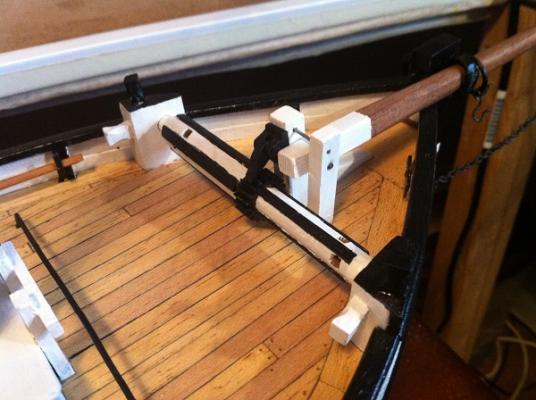
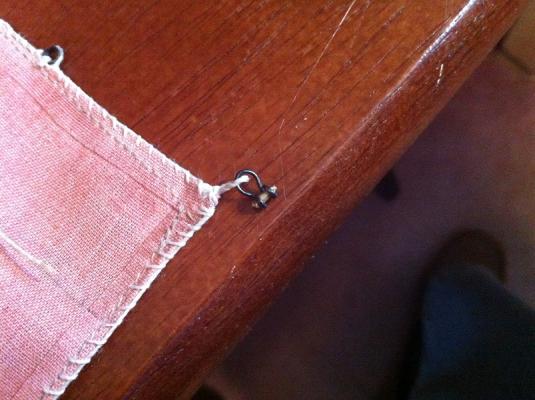
Jeez but time flies, I'm due an update. As already stated the deck is completed and has been given two coats of Poly, I quite like the effect. Bits are starting to go back on, so far the Windlass, Cabin Hatch Cover, Hatch Boards, Canvas Sheet ( kitchen tissue ), Bilge Pump & Pipe ( scratch ), Coal Bunker with Bucket ( scratch ), Port & Starboard Shrouds with Pin Rails, Bow Sprit with Chain and Tackle and a new Boiler ( scratch ). I also made brackets for the Windlass Bars. The sails are all complete, they a lighter colour than I had hoped for because the material is cotton and polyester which doesn't take the dye too well, they look a little faded. They were real fun to make as you can imagine, cutting out, diluted white glue on the hems and a brief turn on the Admirals sewing machine were the easy bit. The hard bit was hand stitching the rope around the edge of all of them, it wasn't until the last sail was halfway through before I found an easy way to do it. Time for some pics. The completed Deck After Deck with Coal Bunker and Bilge Pump in hold Looking Aft with Accommodation Hatch New Boiler Rope work to Main Sale ( the easy way ) Windlass refitted Port & Starboard Shrouds ( no ratlines thankfully ) The full set of completed sails One of the many scratch shackles The boat so-far So there we are guys, your right up to date now, you know the drill, good or bad remarks / comments always welcome. Be Good mobbsie


- 62 replies
-
- 11
-
-
- harwich bawley
- fishing boat
- (and 2 more)