HOLIDAY DONATION DRIVE - SUPPORT MSW - DO YOUR PART TO KEEP THIS GREAT FORUM GOING! (Only 20 donations so far - C'mon guys!)
×


mobbsie
-
Posts
1,493 -
Joined
-
Last visited
Content Type
Profiles
Forums
Gallery
Events
Everything posted by mobbsie
-
 Sometimes Carl it's the only sense I get. Be Good mobbsie
- 255 replies
-
- 2
-

-
- granado
- bomb ketch
- (and 2 more)
-
Hi Eric, Sorry for the delay in replying mate but life has a tendency to get in the way sometimes. Regarding your keel joints, I wouldn't go too fancy mate, when you've completed the second planking she will be coppered below the waterline and all will be covered. I did cut a Rabbit but in all honesty it's not necessary, as I say its all going to be covered. Now, weathering, I'm no expert so I really cant advise you in this area, you need to talk to Riverboat ( Frank ) on this issue, he is a grand master at weathering and I'm sure he will put you right. Hope that helps mate Be Good mobbsie
-
Hi Guys, No update just a big thank you for your kind remarks and hitting the like button, David B, Welcome aboard mate, your more than welcome but don't forget to bring your life preserver, this beast wont float. Augie, Makes a change to see something else season other than me. Mark, No splinters mate but loads of talcum powder like sawdust, horrible stuff and given the opportunity will stain everything around it, a bit like Ebony. Grant, Wad I say, Wad I say. Carl, You've given me the push I needed mate, new rings have been made and will be fitted shortly, I did think they were to big but I told myself they were ok. Be Good mobbsie
- 255 replies
-
- 5
-
-
- granado
- bomb ketch
- (and 2 more)
-
Hi Grant, Slightly out of alignment, must be by a gnats hair coz I cant see it, all I can see is some superb joinery. If your not happy with it then I'll be happy with it for you. Some great work mate. Take it easy with that four letter word thing mate because you still have a ways to go before you finish w---. :D Be Good mobbsie
- 456 replies
-
- 4
-
-
- finished
- bomb ketch
- (and 2 more)
-
Hi Eric, I had the same problem with my Aggy and I know for a fact that others suffered also. The way I got over the problem was to keep the keel in the build board, once your happy with the fit of the bulkheads I removed them and drilled a 1/4" hole through them on both sides. I then fitted the bulkheads back onto the keel and squared them off and glued them in, once the glue was dry I pushed a dowel through the holes drilled in the bulkheads and glued it in place. I found this cured my problem and I didn't have any further issues with the keel. That may help you mate. Be Good mobbsie
- 44 replies
-
- 3
-
-
- agamemnon
- caldercraft
- (and 1 more)
-
A beautiful cutter to enhance a beautiful ship. Well done Ray Be Good mobbsie
- 536 replies
-
- 1
-
-
- diana
- caldercraft
- (and 1 more)
-
Plaudits are well deserved Bob, I will add mine now, She's an absolute picture mate, very well done, perseverance has paid off in droves. :im Not Worthy: Good luck on the Cheerful. Be Good mobbsie
- 1,477 replies
-
- 2
-
-
- essex
- model shipways
- (and 1 more)
-
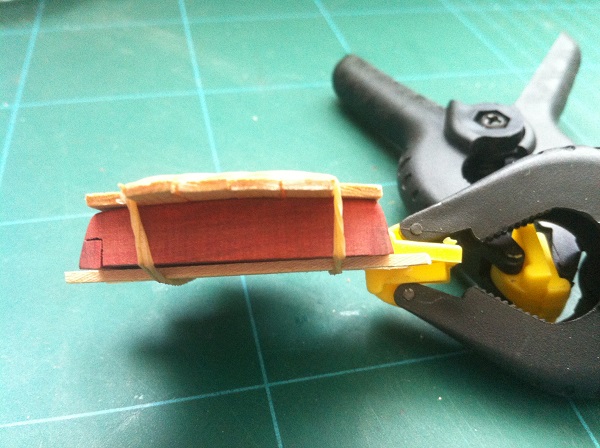
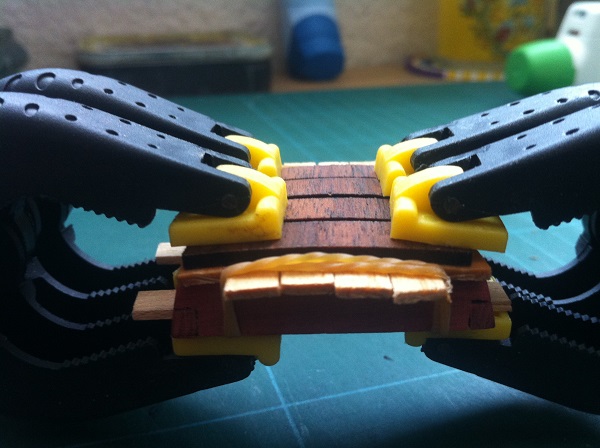
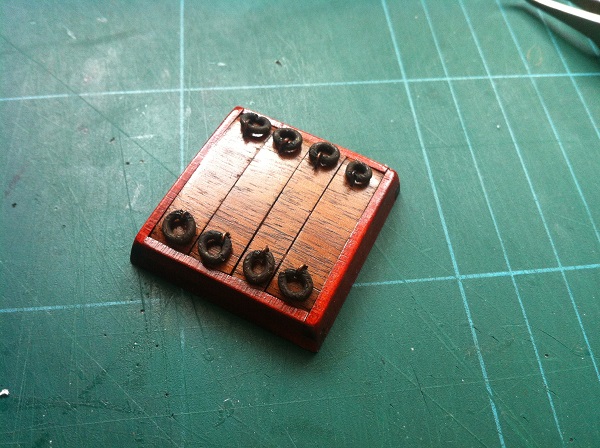
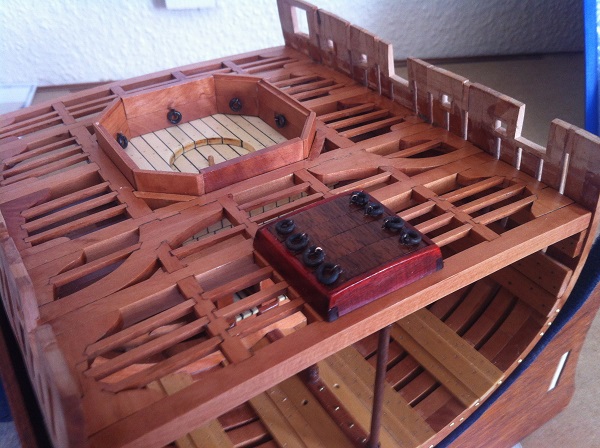
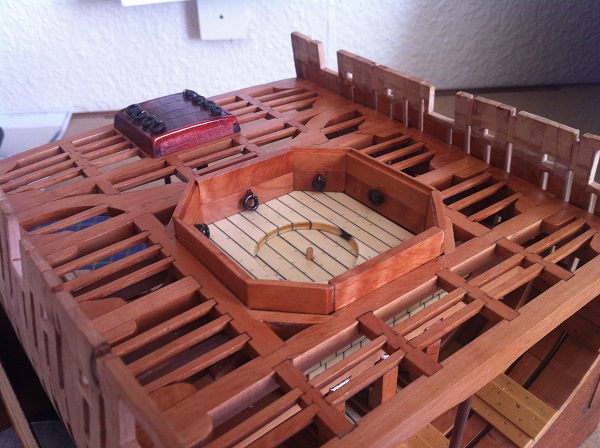
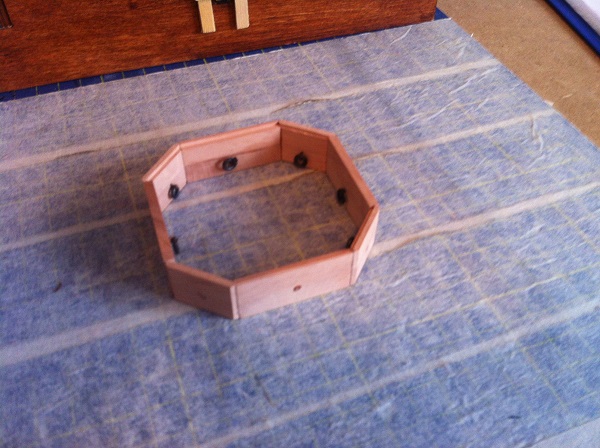
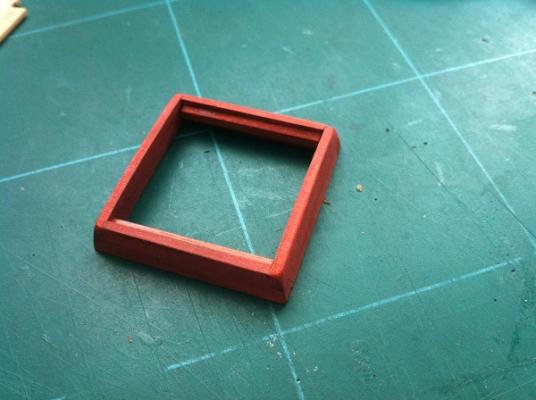
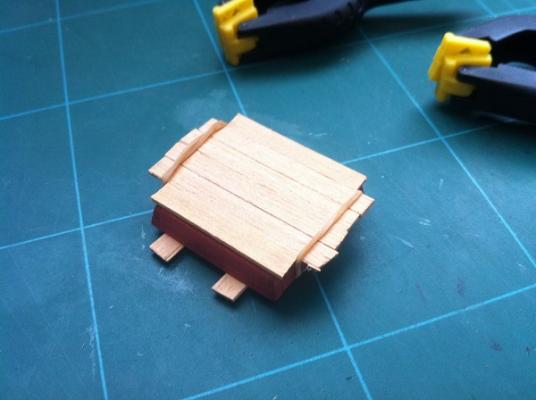
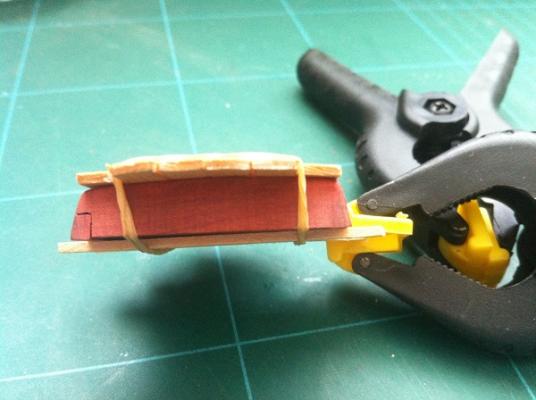
It's update time again gents, only a small one this time though. Thank-you one and all for your positive and very kind remarks, also for all who hit the like button. The Mortar pit is now complete and fitted, given the two coats of WOP and the fit became really tight, fortunately a little persuasion and it went home ok. The Hatch coamings are made from Redheart, not familiar with this wood and I don't think I like it very much, It's really easy to work with and I think is softer than Swiss Pear, another drawback is that the filings act very similar to Ebony in that they stain other wood, when sanding down the sandpaper mustn't be used for any other wood, having said all that the effect is very different. The Hatch Boards are made from Walnut and are so simple, the bend in the boards was formed by moulding them around the Hatch Coaming, you will see the method I used in the pictures, nothing startling there I can assure you. Said Hatch is now complete and fixed onto the deck, the cross section has now been placed into a plastic carrier bag and put aside waiting for company. My attention is currently focused on repairing my Barge which was damaged in the Museum, a log has yet to be set up but will be located in the Scratch Section, this log will be up and running in the next day or so. Picture time The completed Mortar Pit frame Hatch Coaming Old planks laid over the coaming and held down by an elastic band The shape for the boards to follow The four boards clamped in place Completed Hatch including the lifting rings, they look a little on the heavy side. Both Mortar Pit and Coaming fixed in position So your up to date now guys, it may be a while before the next update. Be Good mobbsie


- 255 replies
-
- 20
-
-

-
- granado
- bomb ketch
- (and 2 more)
-
Hi John, Sorry mate to hear about your BIL, and I am pleased for all your family that he is on the mend, bloody nasty things strokes. Have a safe journey home and I look forward to seeing your next up-date. Be Good mobbsie
- 2,250 replies
-
- 3
-
-
- model shipways
- Charles W Morgan
- (and 1 more)
-
I missed the start of this log somehow Peter, mind if I pull up a stool. Your progress has been quick with excellent results mate and I look forward to following along. Be Good mobbsie
-
All the plaudits are well deserved Bob, she looks absolutely fantastic, even without a small boat. Looking forward to your next project mate. Be Good mobbsie
- 1,477 replies
-
- 1
-
-
- essex
- model shipways
- (and 1 more)
-
Lovely job Jason, the rigging is a part of the build I love doing, it's very satisfying when it all works out, and you must be a very satisfied builder right now. Be Good mobbsie
- 800 replies
-
- 2
-
-
- snake
- caldercraft
- (and 1 more)
-
Hi Wes, I don't want to sound patronising mate, but we all have a picture in our "mind's eye" about how something should look, but unfortunately that picture is rarely achieved, I am privileged to know a few through this forum who can achieve this and you mate are in there. You can read all the books in the world and look at as many logs as you want, you still have to produce the goods in the end, this is where I and a good few others fail, but we keep trying. Be Good mobbsie
-
Good to see you back at it Bob, you got your Mo-Jo back. That is a super little sloop mate, the exposed cabin is so different, will you be putting a lift off lid on her or are you going to leave the cabin open. Whichever you choose she looks great. Be Good mobbsie
-
Hi Augie, The wheel and binnacles look fantastic mate. Don't forget to take the Moose and Bug repellent with you mate, don't want any nasty surprises. May you have many tight lines on your vacation, have fun mate. Be Good mobbsie
- 2,191 replies
-
- 8
-
-
- confederacy
- Model Shipways
- (and 1 more)
-
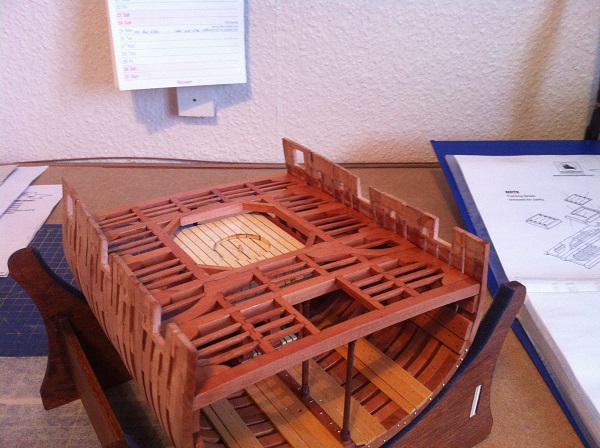
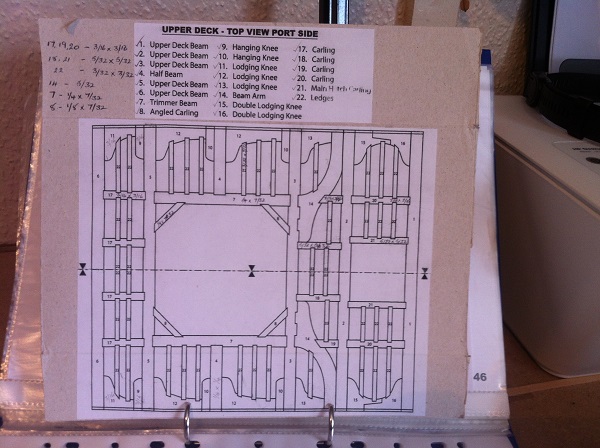
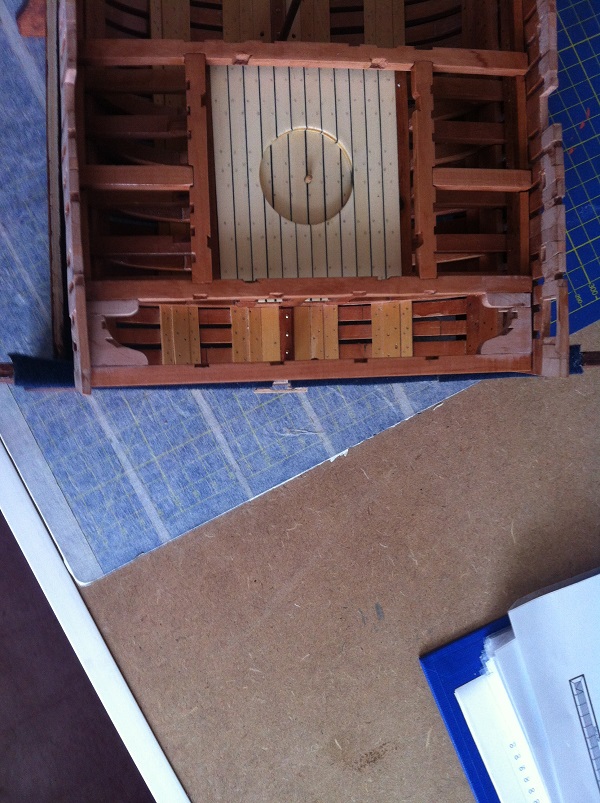
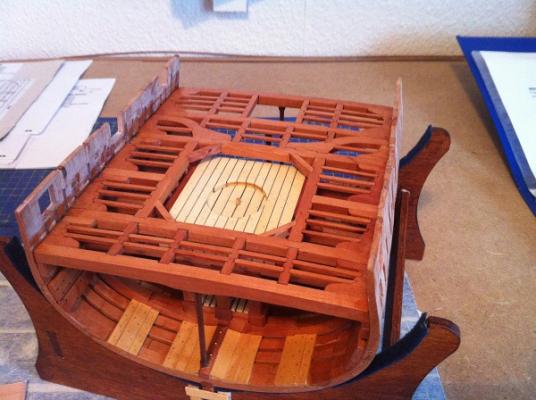
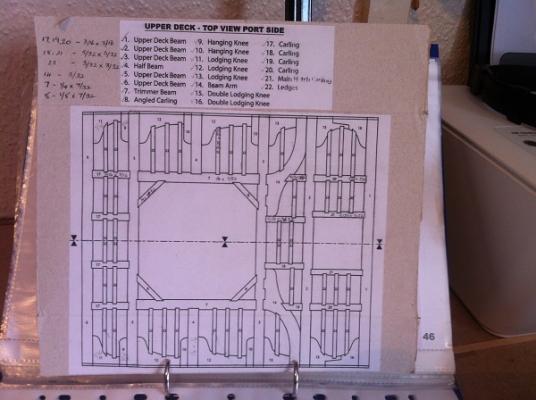
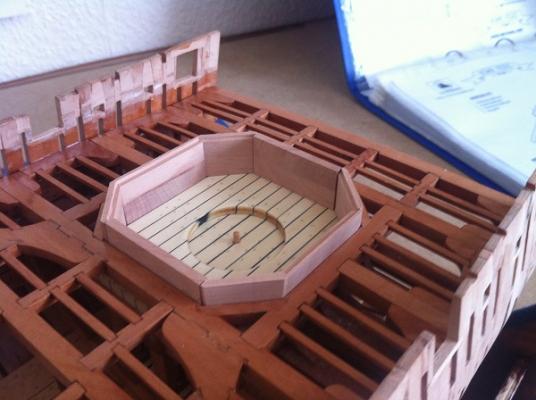
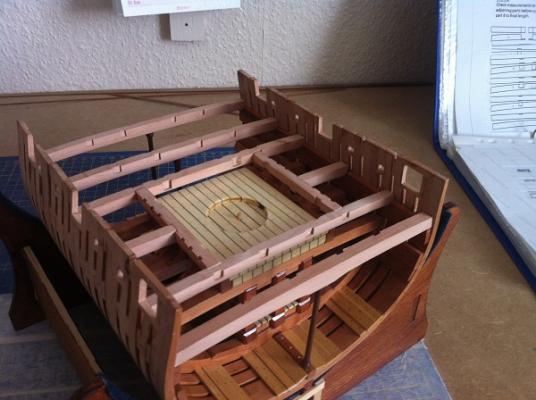
Sorry Guys, I hit the wrong key, we will continue. A big jump, the complete Upper Deck These are the plans for the Upper Deck just for clarity The Mortar Pit dry fitted Mortar Pit all glued up with shackle rings fitted. So there we are guys, your up to date, sorry for the big jump with the Upper Deck but I think I just got carried away. All comments, remarks or suggestions are welcome, good or bad. Be Good mobbsie


- 255 replies
-
- 23
-
-
- granado
- bomb ketch
- (and 2 more)
-
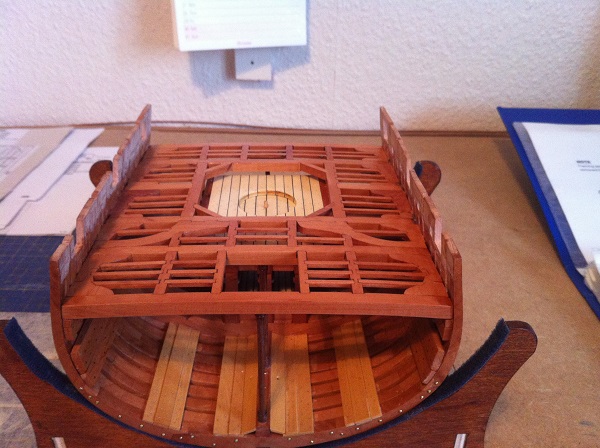
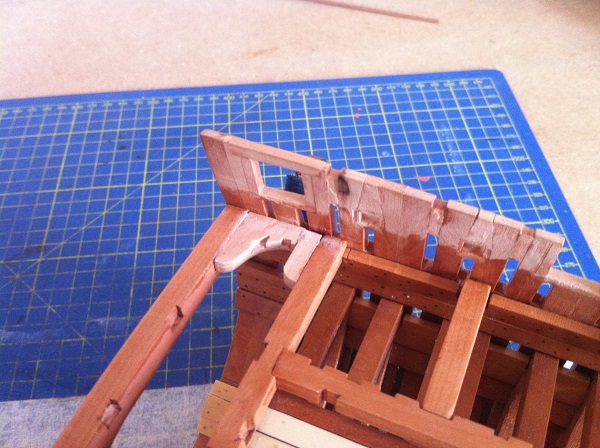
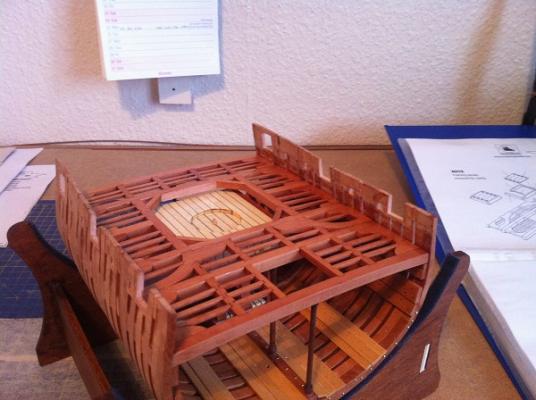
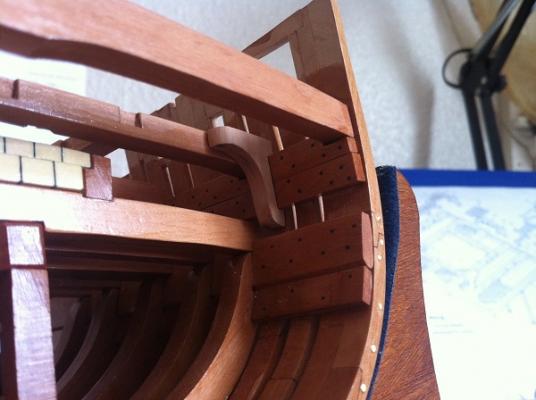
Hi Guys It's update time again. Thanks one and all for your very kind comments and remarks also the like button, very much appreciated. All the Beams are now completed, fitted and given two coats of WOP. The Trimmer Beams were fitted as part of the Upper Deck along with the Carlings, next up came the Hanging Knees and Lodging Knees. Notches cut into the Lodging Knees and some of these proved problematic. Because of my inability to Mill I used a sharp blade to cut the notches, the nature of the wood (Swiss Pear) which very soft some of the edges of the notches broke away, these then had to be remade. On reflection I would have done things differently in that I would not have cut the notches in the Knees until the Ledges had been offered up. Not all notches lined up, and so had to opened up so a parallel fit could be achieved. The Upper Deck came together really quickly which was a surprise, it looked daunting to me and I really wasn't looking forward to this part of the build, I think it's a reasonable finish, after sanding it was given 2 coats of WOP. Next up was the Mortar Pit, its quite a snug fit so sanding will have to be gentle with a fine paper, it's now glued up with the rings attached to the inside, when the glue has set sanding will be done and WOP applied. Enough words, time for some pictures. All the Beams are fitted including the Half Beams, these were a real pig to fit, just awkward. Here's one of the Hanging Knees, these turned out to be a really good fit. The first of the Lodging Knees fitted. First set of Lodging Knees and Hanging Knees


- 255 replies
-
- 19
-
-
- granado
- bomb ketch
- (and 2 more)
-
Starting to look a bit complicated now Wes, you obviously know what your doing and for me this is a really interesting build and she's coming along nicely mate. This is something you can't hurry but I still look forward to further updates. Be Good mobbsie
-
Small it may but nicely done mate. Be Good mobbsie
- 1,616 replies
-
- 5
-
-
- caldercraft
- agamemnon
- (and 1 more)
-
This is one lovely little boat Wayne, love the slipway. Be Good mobbsie
-
She's a real feast for the eye's Ray, wonderful. Be Good mobbsie
- 536 replies
-
- 1
-
-
- diana
- caldercraft
- (and 1 more)
-
Nice work Frank, I like the railings even if they were a pain to do they've come out well and their housings. I have just one comment mate, you need a new cannon, the one you have is rusty. Be Good mobbsie
-
Be-Jeez but that's some small rigging detail mate, well done on your perseverance. Good to have you back at the table Wayne. Be Good mobbsie
-
Nicely done Capt, I can just about imagine you in a pair of tight fitting Levi's, or were you thinking of someone else. Whichever it was it certainly worked. Be Good mobbsie