


Jim Lad
-
Posts
9,581 -
Joined
-
Last visited
Content Type
Profiles
Forums
Gallery
Events
Everything posted by Jim Lad
-
 Glad to see that you managed some shipyard time, Popeye! That funnel colour looks good - a lovely British Merchant Navy buff. John
 -
Thanks for the kind words, all. Bedford - building with an audience is usually fine - it's when the (sometimes) admiring public just stand there and watch your every move with accompanying flattering comments that it gets a bit disconcerting. John
- 745 replies
-
- 6
-

-
- francis pritt
- mission ship
- (and 1 more)
-
Very nice technique for the ports, mate! John
- 2,625 replies
-
- 4
-
-
- kaiser wilhelm der grosse
- passenger steamer
- (and 1 more)
-
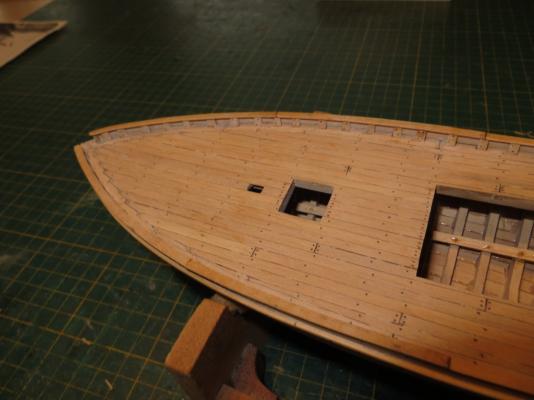
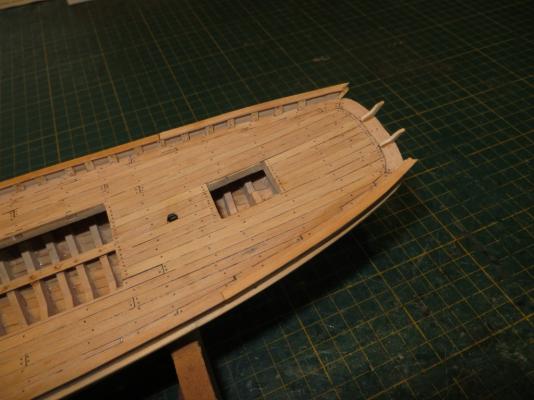
Got plenty of work time in at the museum yesterday, but I didn't seem to get very far. I was hoping to at least get all the capping fitted but, as you can see from the photos, I didn't quite get there. Oh well, next time! John

- 745 replies
-
- 20
-
-
- francis pritt
- mission ship
- (and 1 more)
-
Mobbsie, that's an excellent job you've done on the mast tabernacle! I hate to be a wet blanket, but by 1898 when the Edme was built, life buoys would certainly have grab ropes. John
-
Just catching up on your progress. She's coming along very well and you're doing a beautiful job of her. John
- 253 replies
-
- 1
-
-
- ketkch
- gaff-rigged
- (and 1 more)
-
Dan, if your deck plans are accurately drawn to scale, a careful measurement of the width of each deck might give you a clue to the tumblehome mystery. John
-
You're doing well, Popeye. I'm sure a little problem like that skylight won't even slow you down. John
-
Easy solution, Chris - have a go at scratch building. John
-
Anders, something like the 'Guillemot' dinghy on the web page below should suit your purpose. http://nisboats.com/oughtred/mainpages/dinghies.html John
-
Andrea Doria was a very elegant liner and her tragic end certainly captured my interest as a young boy. She'll make a beautiful model. John
- 108 replies
-
- 2
-
-
- andrea doria
- ocean liner
- (and 1 more)
-
Good to see the shipyard operating again, Augie. John
- 2,191 replies
-
- 2
-
-
- confederacy
- Model Shipways
- (and 1 more)
-
Excellent work as usual, Toni. John
-
I agree - that hull looks first class. Looking forward to her continued progress. John
- 2,625 replies
-
- 1
-
-
- kaiser wilhelm der grosse
- passenger steamer
- (and 1 more)
-
It's good to see an update on your tug. As Mark says, you'll know all that detail is down in the engine room, and so will we! John
- 208 replies
-
- 1
-
-
- john cudahy
- finished
- (and 1 more)
-
Looks like she was hit by quite a squall, Mobbsie, but I'm sure you'll soon have her all shipshape again. John


