


flyer
-
Posts
1,004 -
Joined
-
Last visited
Content Type
Profiles
Forums
Gallery
Events
Posts posted by flyer
-
-
deck furnishing
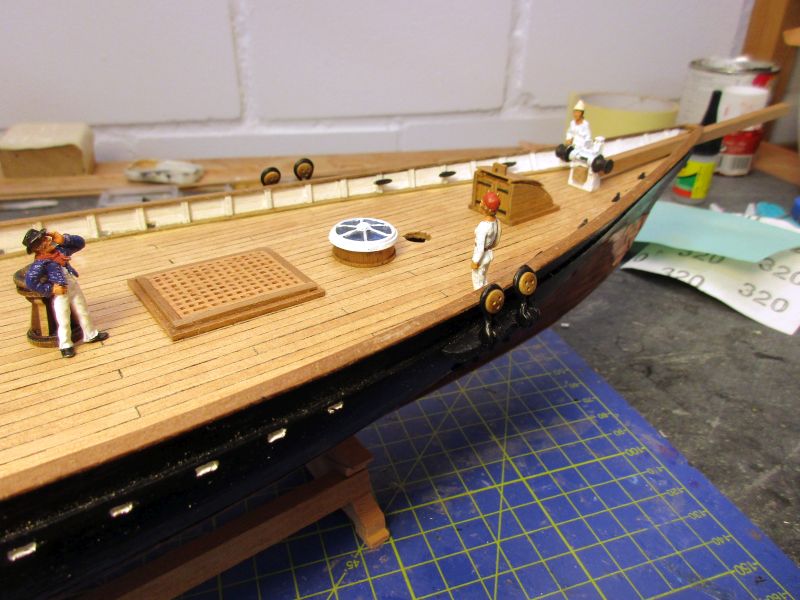
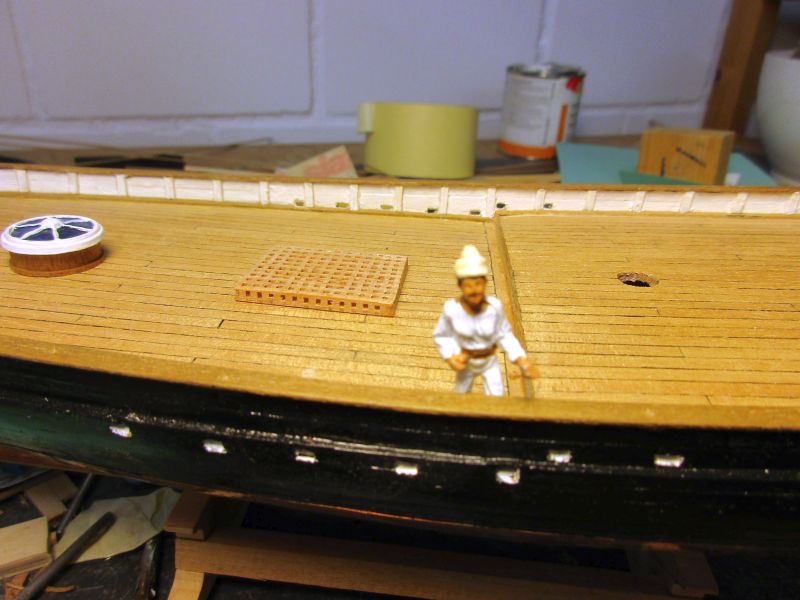
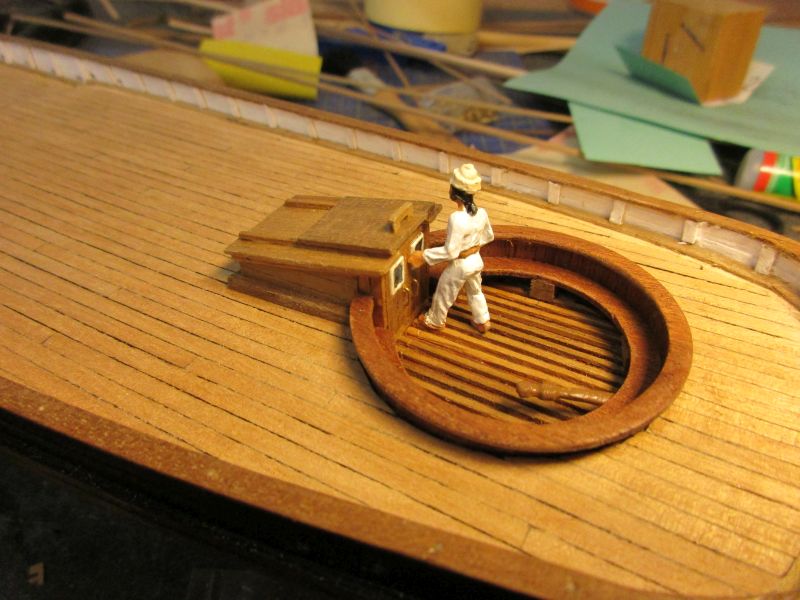
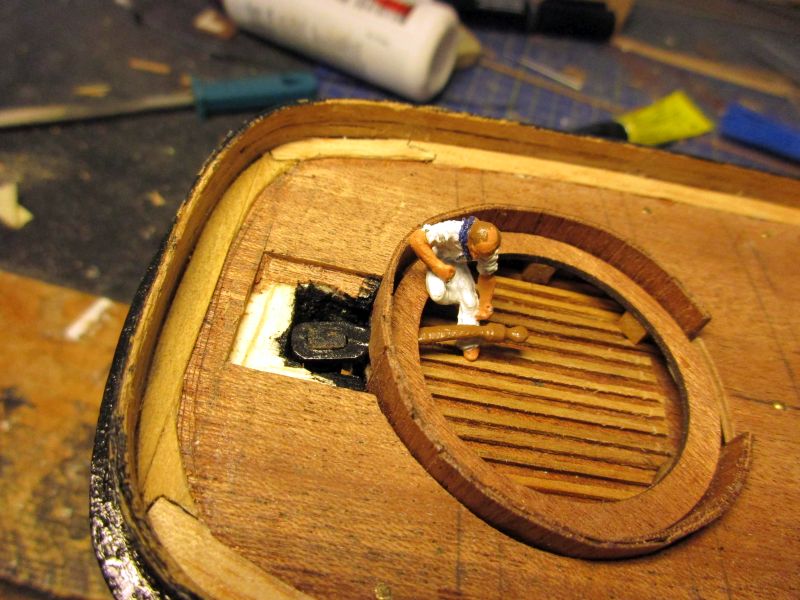
Looking at the various illustrations available of America and several models I notice a certain uncertainty about the exact layout of the deck furnishing. The cockpit seems rather clear-cut, as well as the skylight in front of it and that pretty little round skylight behind the fore mast. The rest differs: The gratings are sometimes companionways and the fore companionway is either there or missing. I decided to put the grating in place and leave the final installation of the fore companionway until after bowsprit and anchors have been installed.
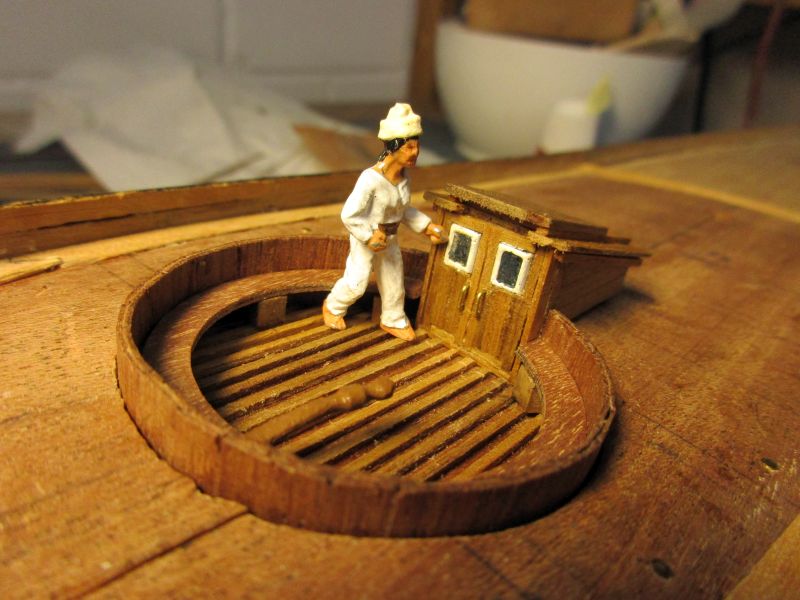
Skylights and gratings as well as the capstan were put together according to kits instructions. Only the sides of the big skylight were additionally planked with 3mm strips. The deck below the grating was painted black. I find it looks as well as a real opening below and was much easier to make than really cutting through the deck. The doors of the fore companionway were glued from 1mm strips with cartridge paper hinges and door handles from brass wire - all similar to the companionway in front of the cockpit.

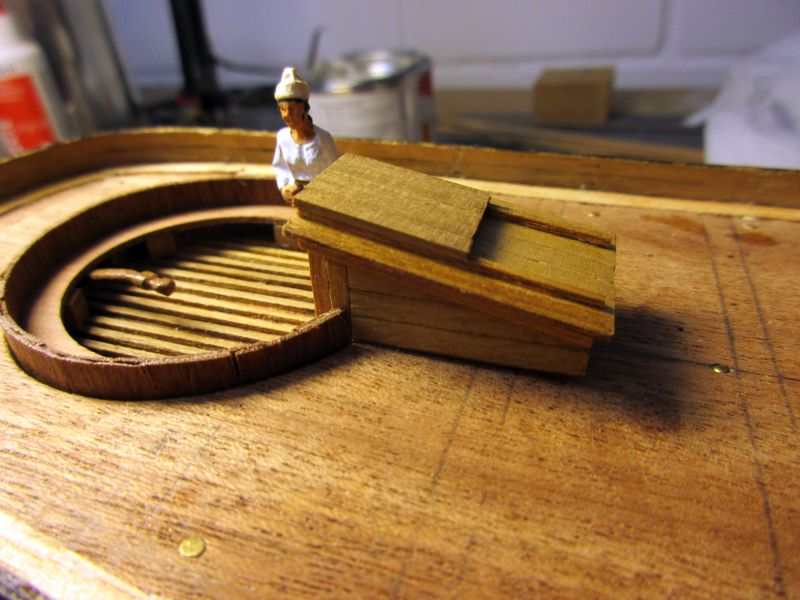
skylight
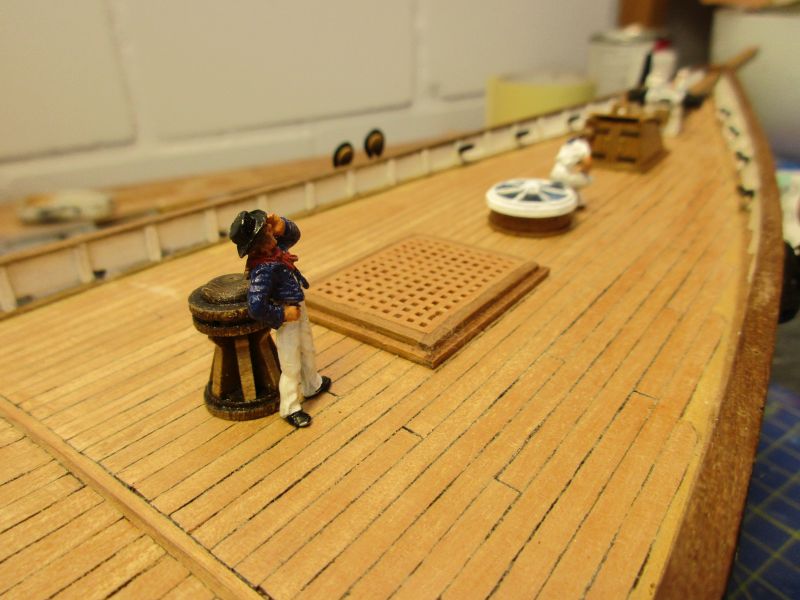
it seems the bosun doesn't like that worker sitting on the skylight
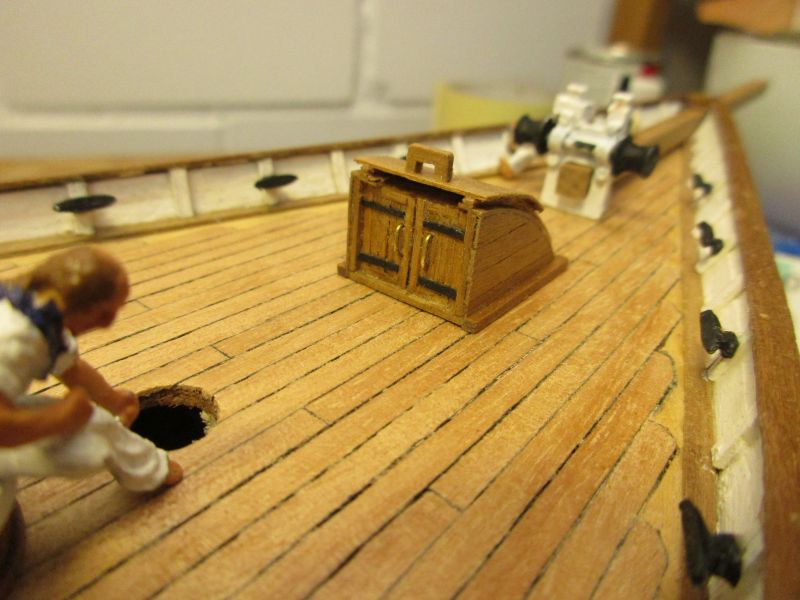
The forward companionway is not yet glued in place. It looks like that wooden handle of the sliding roof will have to be replaced by brass wire anyhow.
Geoff Hunt versus William Turner - or - those ... backstays
Marine painters were not always painstakingly sticking to every little detail of the rigging like Geoff Hunt. William Turner for example was more concerned about light and colour - he was basically a landscape painting impressionist, after all. (Me, although I'm trying to build model ships in Hunt's style, I often end up with something like a cartoon in Turner style...)
Marine painters also not always had full access to their object and sometimes had to paint from memory or drafts. This could explain a certain ambiguity about America's schooner mast topmast backstays. In some pictures you see lines leading to the topmast head but it's never fully clear if those are flag lines or backstays. May be the painter was far from certain himself.
Quite certain however is that no backstays were installed in the manner the kit depicts them: similar to the lower mast shrouds. However I didn't want to leave that poor topmast without any support from the side and the back. Fortunately I found in Marquardt's book ( Karl Heinz Marquart: The Global Schooner) a remark concerning backstays of smaller craft (he cites Steel):" ...hooked to a thimble of a strap round the lower dead eyes and sometimes with a lanyard and thimbles. " You even find an illustration on page 173. This will then be my solution: Only two deadeyes per side for the schooner mast and topmast backstays lashed to the aftermost of them. This decision came in handy when I broke the first two deadeye strops while trying to bend them around those channels. As usual in a mamoli kit there is just enough of everything and no spares.

channels and deadeyes for the fore mast shrouds
those parts forward of the mast are not yet glued in - but I think the companionway makes sense and should stay
- hamilton, Mirabell61, Martin W and 2 others
-
 5
5
-
Hi Nils
Once in a while I have to stop the silent admiring and tell you once again: simply fantastic work!

Just a question concerning that questionable but fantastic crew ladder: It seems a 'de luxe' solution just 'for crew only' (but I appreciate your care for the common crewman). Do you think they still could also have used simple steps mounted on the side of that wall, similar to the entry steps on the side of a 18th century sail ship?
Cheers
peter
- mtaylor, Mirabell61, Piet and 1 other
-
4
-
This morning I felt a bit sick, but working to build this beautiful America helped.
The bulwark is now finished with the - rather tricky - capping rail. The rounded parts in the stern were made from glued stripes as suggested by the kit. The second try was better than the first but the strip quality (or lack thereof) caused some problems.
Then the cockpit was completed using the kit provided parts. Here, the capping proved to be tricky again. The kit's part was cut open and bent into position, then glued with epoxy and fixed with nails for the drying. It sits a of centre. Apparently it moved a bit while I tried to fix it. The relative sizes of bench and capping rings were unfitting - another shortcoming of that kit. The companionway is in place as well and I started on the furnishing of the deck.
As a goodie I already placed the eagle on the stern. It was weathered a bit with walnut stain and the lower part painted to resemble the picture in John Rousmanieres book.
bulwark finished with capping rail
cockpit finished
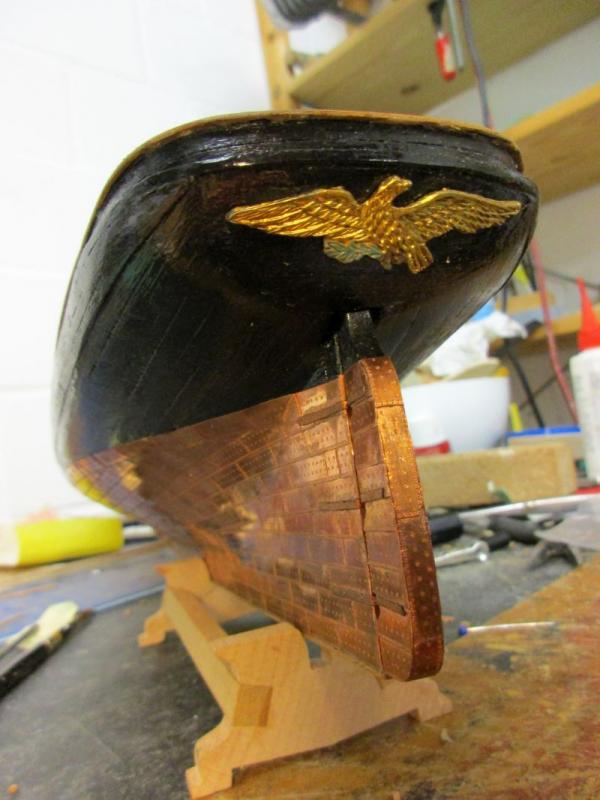
the eagle has landed
- Mirabell61, hamilton, hexnut and 4 others
-
7
-
-
-
The afterdeck was now planked and both decks sanded and scratched to get them smooth. Then the stanchions were glued onto the inner bulwark side. The scuppers were gnawed through but proved to be rather tricky and don't look too good. Working from inside to the outside they ended up on different heights, sometimes just infringing on the upper edge of the wales and correction was difficult.
afterdeck nearly completed
deck finished
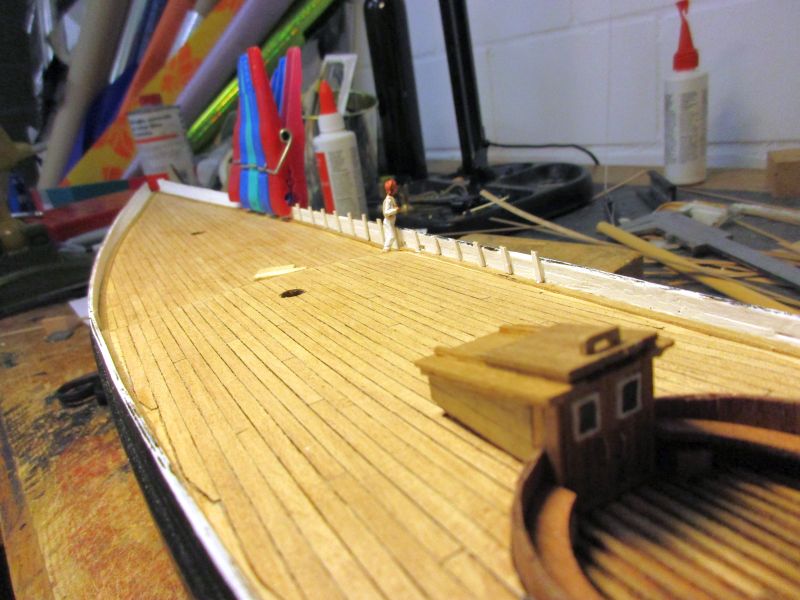
stanchions being glued on
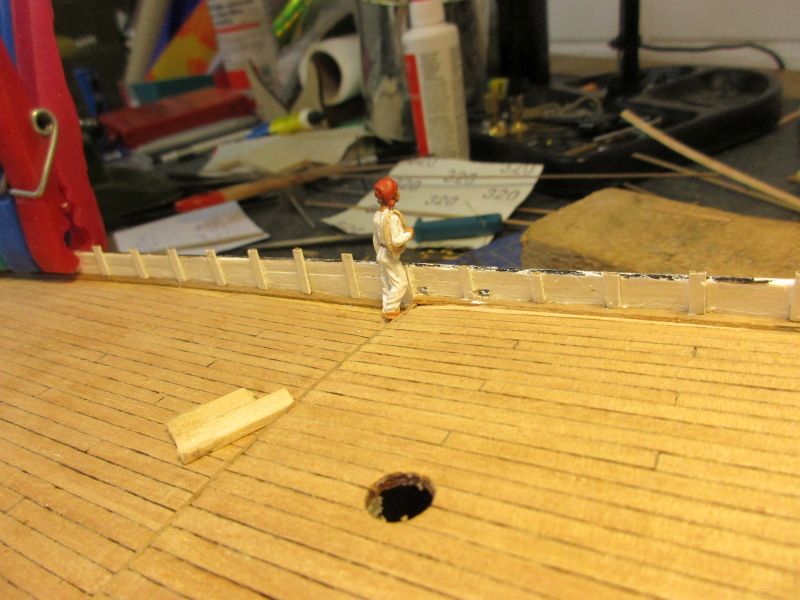
first 2 scuppers...that seaman isn't happy about their quality either
-
Hi Hamilton
Thank you.
Yes, I suppose Switzerland could be dryer than your place. However the part I live is the most foggy region of whole Europe. But only if it doesn't rain. Or snow. But judging by some movies you still win the humidity contest. Personally I went no further northwest than SF which was cool and humid enough - I still ask myself how they could celebrate a summer of love and peace there, back in the 60ties, without freezing their mildewed behinds off.
Never mind. Come to Switzerland. Not only the landscape also the food and the wine are fine. People are a bit grumpy, but you get used to it.
Hi Nils
Thanks. Yes, I love to work with those Amati plates.
Cheers
peter
- hamilton, Martin W, Mirabell61 and 1 other
-
4
-
Before starting on the cockpit and rudder I put on a false keel also to protect my copper plating during work.
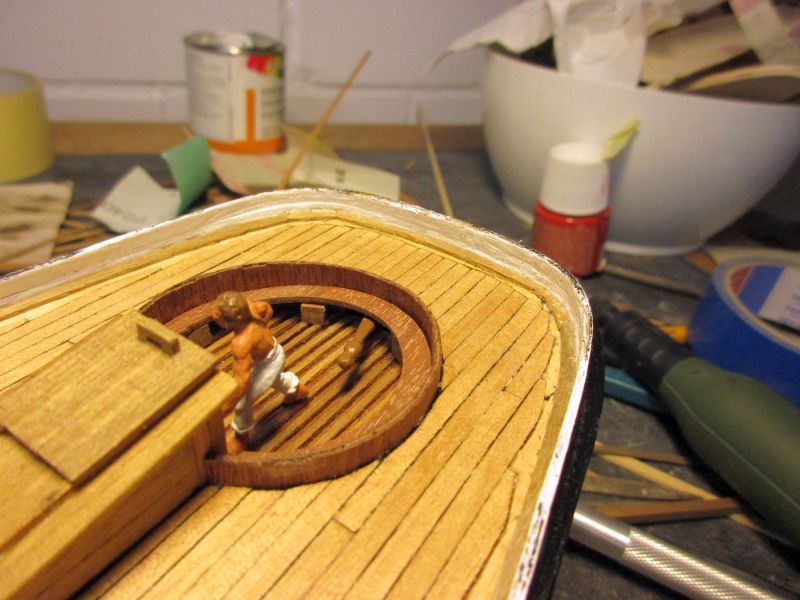
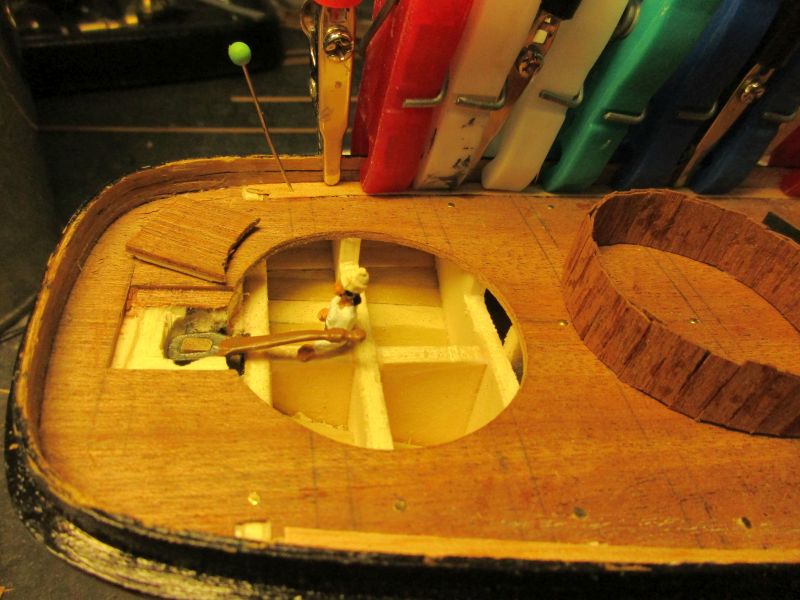
To insert the cockpit parallel to the deck I had to scratch away first some material on the bulkheads below. In the aft part of the cockpit a slit was cut out for the tiller.
Then the base of the cockpit was inserted, the rudder hanged and the tiller glued in place. The tiller arrangement which brings it forward below the bench seems a bit strange but I didn't find any examples with the tiller above the bench. This seems a cumbersome way of steering and could perhaps have favoured the installation of a wheel later on.
The companionway was built more or less according to the instructions. Two handles made from brass wire will facilitate the opening of the doors. While dry fitting it, I found I had to lift up its forward end a bit to get the doors at right angles to the cockpit floor. The gap will be covered by the base rail. The cut out part of the deck above the rudder head is in place again - only provisionally, you never know.
Now planking of the after deck can start.
false keel (1x5mm strip)
dry fit of rudder and tiller

slit for the tiller
I guess it would be easier to steer with the helmsman sitting on the floor...
the companionway is in place but not yet glued in
- GuntherMT, Mirabell61, riverboat and 4 others
-
7
-
-
The fore deck is completed. While dry-fitting the tiller before starting on the afterdeck I found that I need better access to the rudder head. I therefore cut out a section of the deck. The new building sequence is now: Waterways - cockpit - deck planking.
dry fitting the tiller
- Mirabell61, GuntherMT, riverboat and 4 others
-
7
-
-
Hi Hamilton
There is always something new in another build log of a known kit and you may open chances for other builders to avoid (or reproduce) possible mistakes.
Admiralty and band saw: Maybe if you try to convince the admiral that you absolutely have to use a chainsaw at the dining table she will compromise on a small Dremel or Proxxon tool. That's basically all I need for the kits - however you can produce a lot of sawdust with those and some hand-sanding as well.
Dining or ship building - sometimes it's hard to choose your priorities.

Take care
peter
-
Hi Hamilton
We all have that moments with broken spars, wrongly cut rigging, lost parts etc... Mr Murphy seems to like model ship builders (and I am quite sure real ship builders as well). But...
!Congratulations on the finished America!

Oh, and please reconsider your decision not to keep a log for Syren. Other people would like to admire your work.
Cheers
Peter
- Mirabell61, mtaylor and hamilton
-
3
-
-
The deck
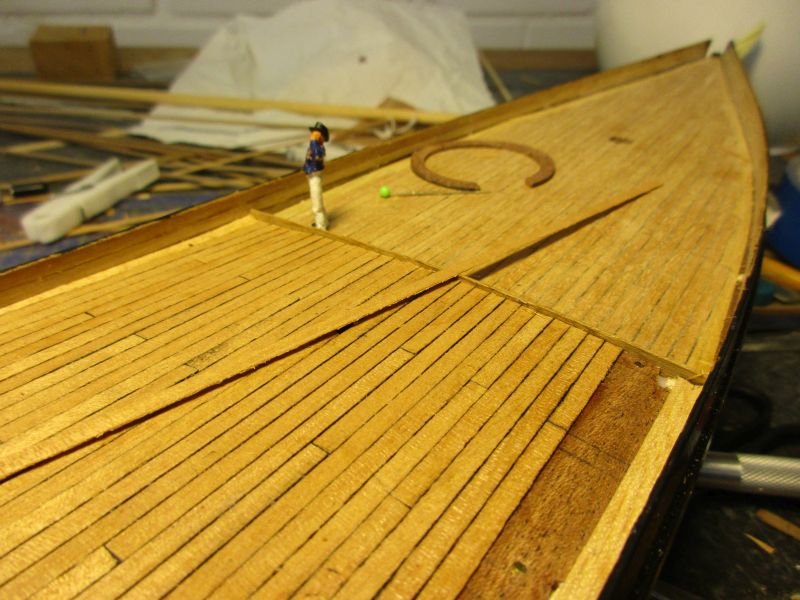
Back in the wharf I started deck laying. Although the quality of the wood provided by the kit was doubtful I decided to use it. I hope the imperfections in the kit will give a certain rustic charm (within small tolerances, of course). First A 5mm waterway plank was laid along the edges. The outer part of it will be covered by the spirketing. The heads of the deck planks are cut into the waterway 'on the go'.
Caulking is imitated by painting the planks edges with a black marker.
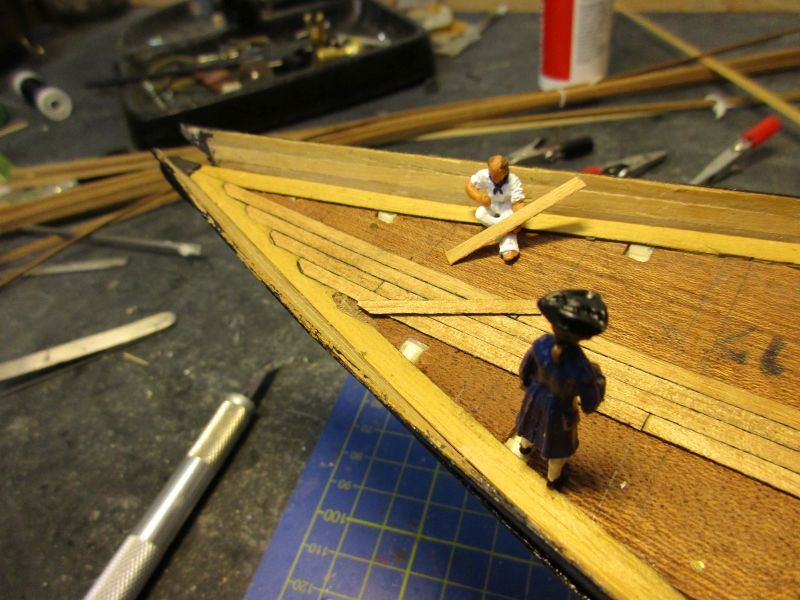
planking has begun
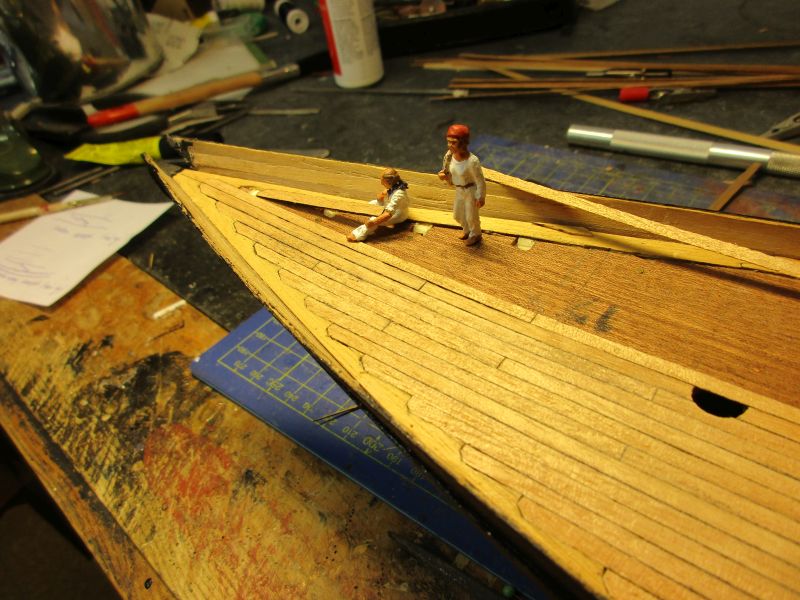
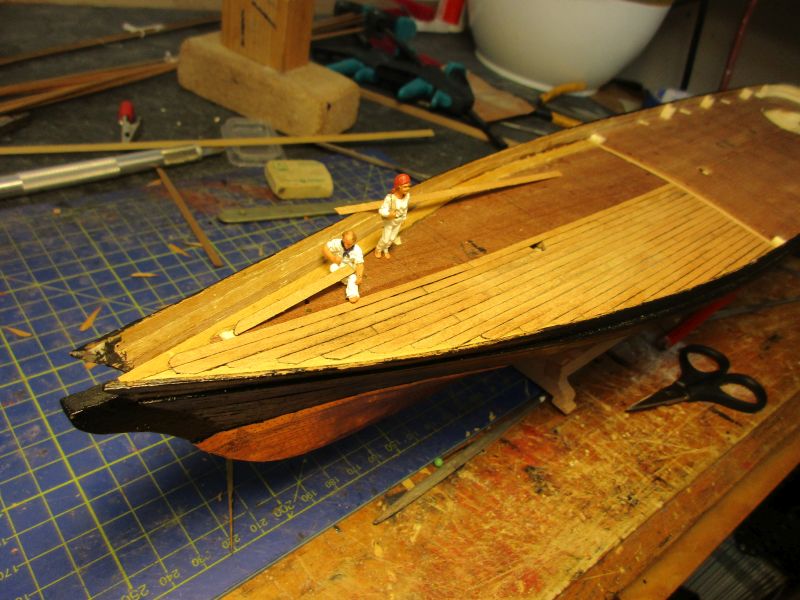
first half of the fore deck is covered
- Martin W, Mirabell61, jbford and 4 others
-
7
-
OK Martin, I went back into the alps for a week of voluntary work. A few short breaks to enjoy the scenery were possible.
(I know this is a bit off topic but just too beautiful not to share with those poor fellows which have to live on a seashore.
)
the Matterhorn is just visible in the background
- Robin Lous, Blue Ensign, Martin W and 8 others
-
11
-
Hi Hamilton
You could consider to glue the hems and pencil the stitches as I did on my Pickle. It's certainly easier than learning to be a seamstress and gives a good result. Somewhere in MSW you should find more information about glued sails. It would be a pity if your America should have to remain in harbour forever for want of sails.
Cheers
Peter
-
Hi Nils
Wonderful benches and chairs. That you are reluctant to smear paint over those little gems, I understand very well. However those brass parts could stand out a bit of the rest which is all in original colour. Don't you think that you could just brush them lightly with a nearly dry paintbrush with some matte wood colour (after thoroughly cleaning them, of course)?
Cheers
peter
- mtaylor, Mirabell61, Martin W and 2 others
-
5
-
Hi Martin
Very nice work. I like that chimney. It meets the standard of your galley stove and is even visible!
But I'm afraid you have a tendency to leave the safe path of kit building and come under the influence of the dark arts of scratch building. This could lead to an even more creative language with a tendency to startle yourself again. Beware!

Cheers
peter
-
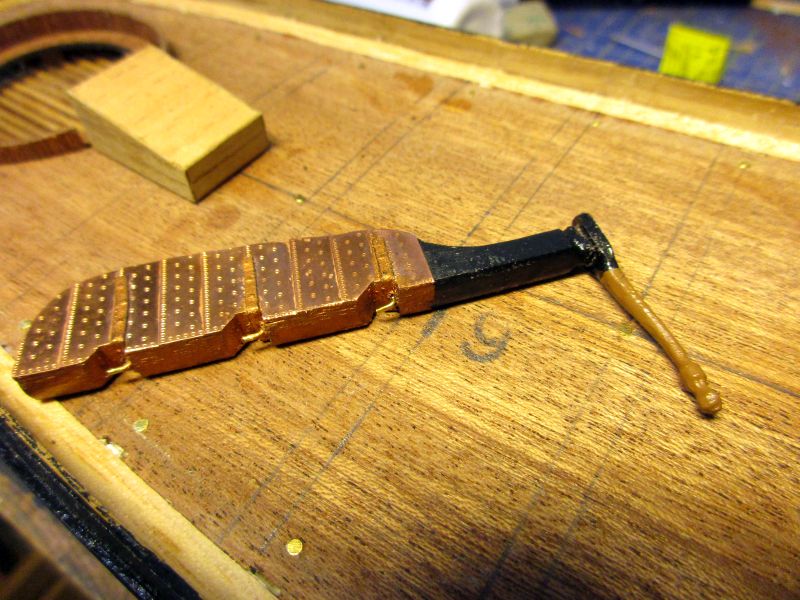
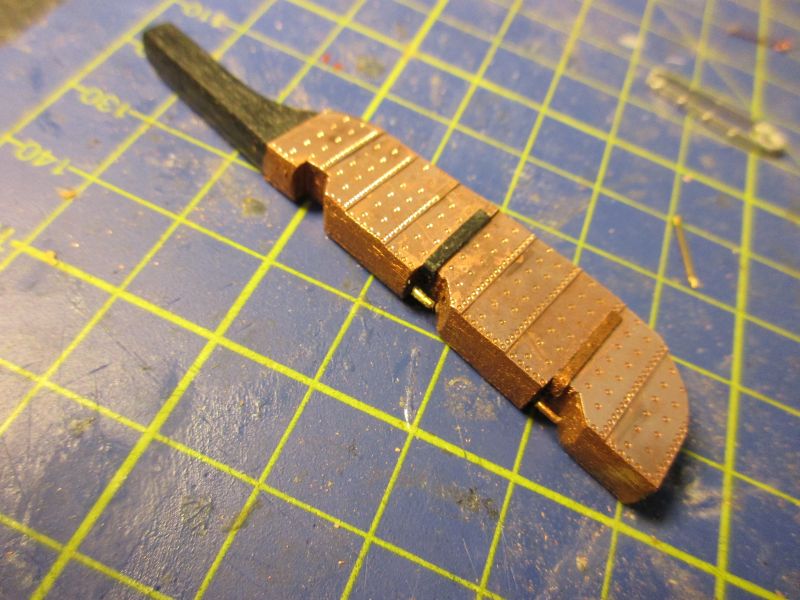
The finished rudder was used to mark the hinge positions on the sternpost. The hinges were made in a similar way with stripes of cartridge paper and eyepins. All was painted copper and the rudder provisionally hanged. In my opinion it looks as good as those cast parts from the kit and is quite easily done.
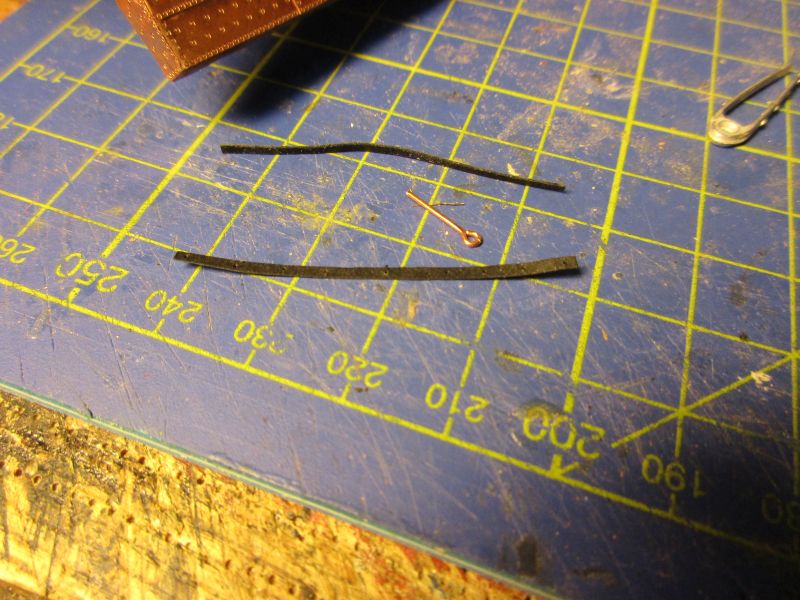
raw material for the hinge

first hinge in place
the provisionally hanged rudder looks ok
-
Thank you, Eljiah!
Hi Martin
Good idea, we could make equinox another holyday. Cheers! A reason to leave the alps? Just too many cow droppings on your paths perhaps and the hunting season will open soon. Most of the time they shoot venison but you never know - they don't always really like us lowlanders up there.
Hi Michael
Thank you.
Yes, if I want to fly I have to flap my own wings (my family name translates as 'bird').
I belong now to those happy retired gentlemen which have no time for anything. Honestly, sometimes I wonder where I used to find time for work.
Cheers
peter
-
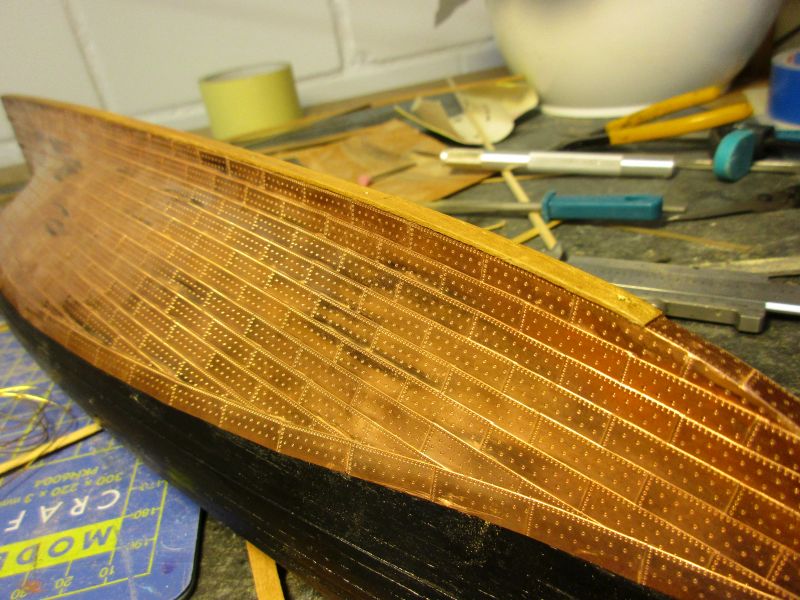
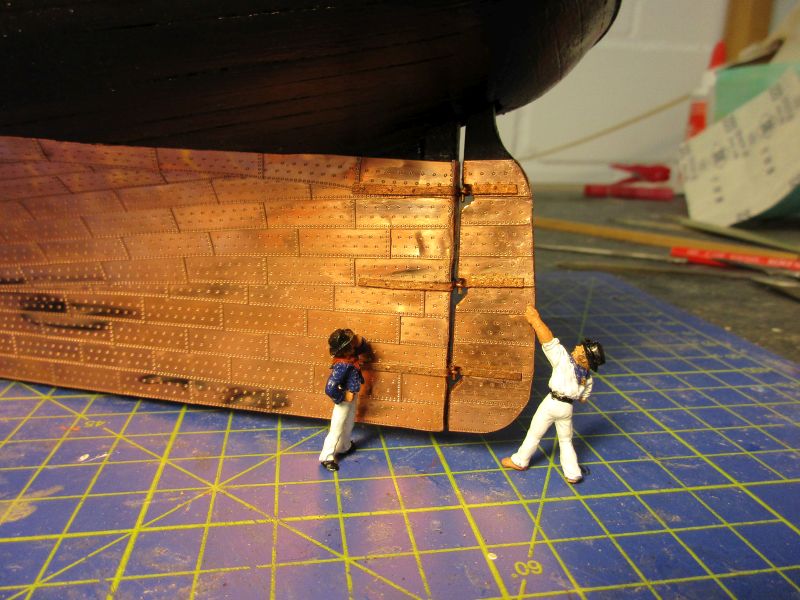
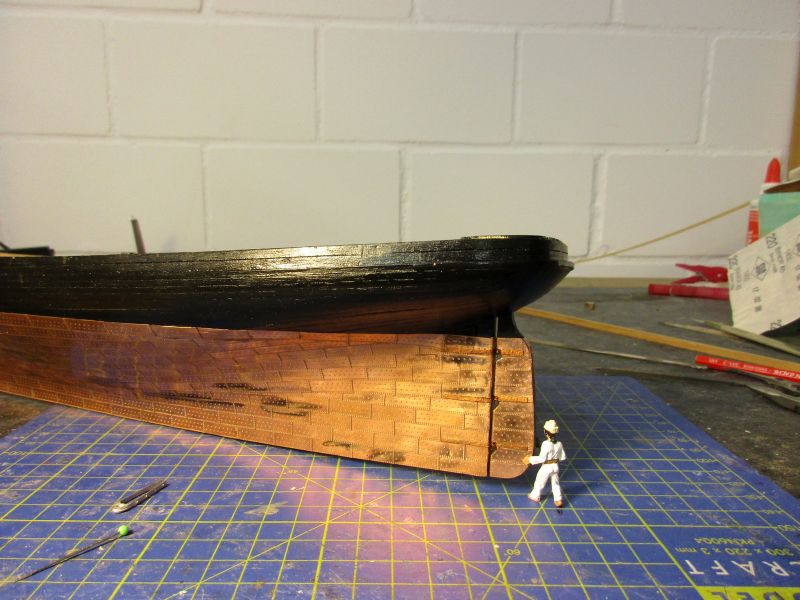
The coppering is now completed and the plates cleaned of glue stains and finger prints with a rotating brush. (A few plates were dislocated by the brush and had to be replaced - better now, when America still is in the wharf.) In the process the patina which is on the plates on delivery gives way to a bright shine but will be replaced over the months by a natural darkening through oxidation of the copper.
A false keel will be bolted to the keel, that's the reason why I left off the copper under the keel.
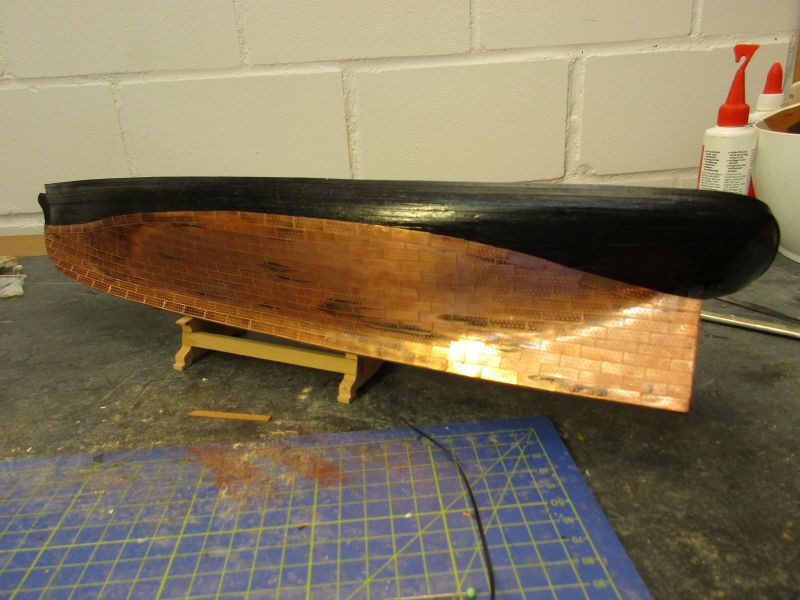
The copper will lose its shine over the next months
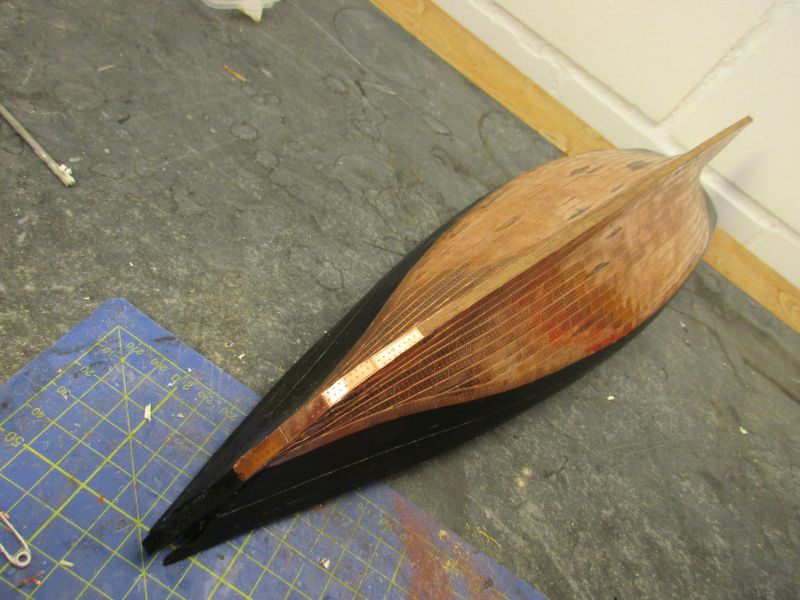
a false keel will cover the underside of the keel
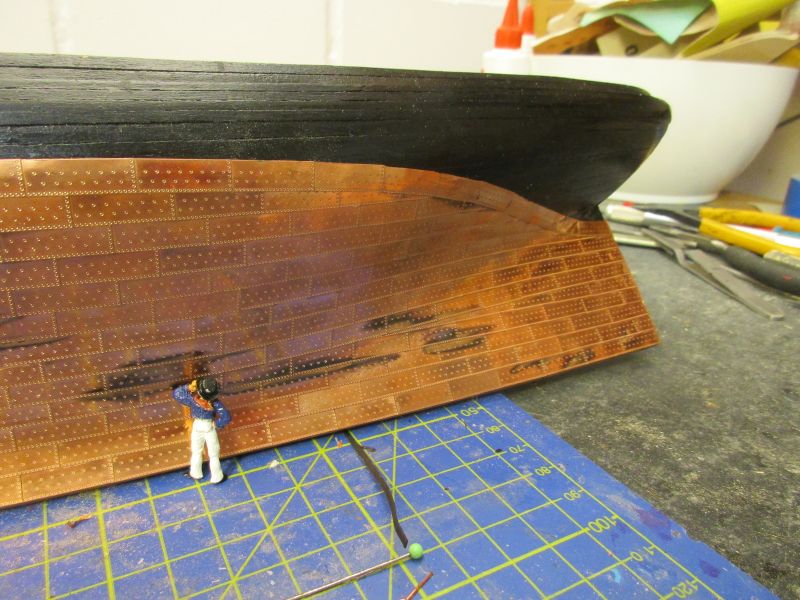
coppering seems acceptable
The Rudder
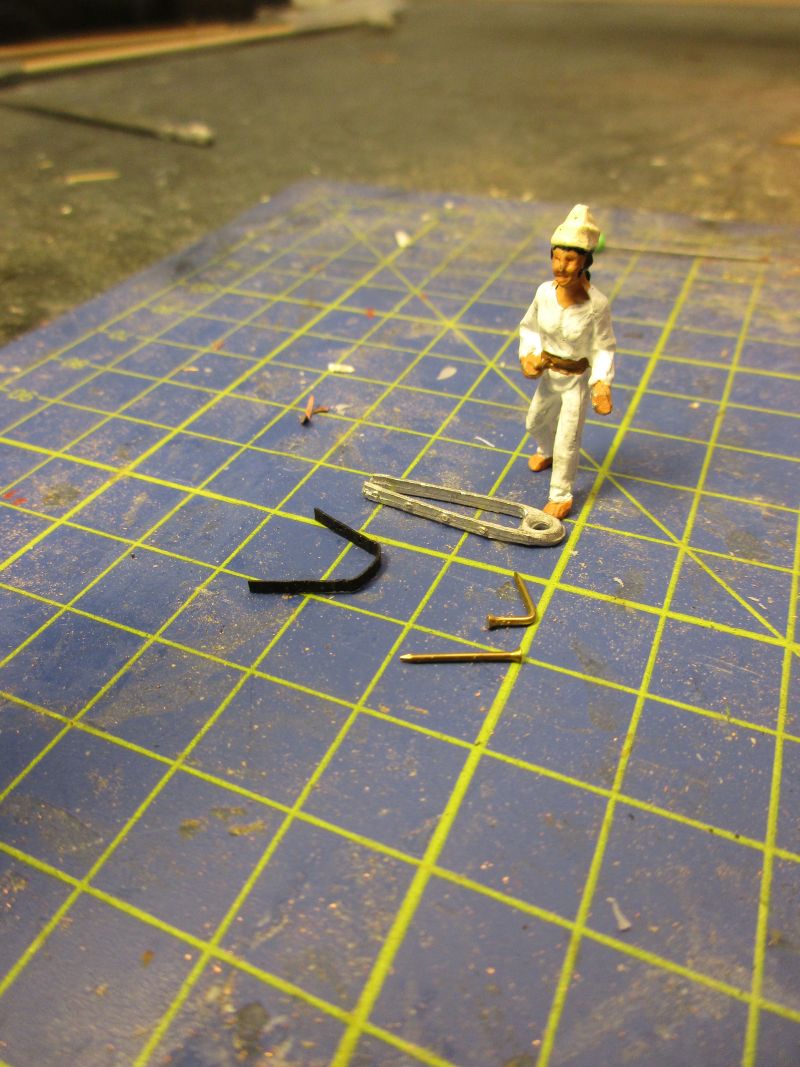
As mentioned earlier the kit's rudder was replaced by a scratch built one and then coppered below the waterline. The kit's rudder hinges were clean cast parts but the opening was only about 3,5 mm and therefore useless. I decided to make new ones according to the method used on Pickle. The hinge was fabricated with a strip of cartridge paper with the nail heads represented by pushing a needle lightly into the reverse side.
The pintle is made from a bended nail minus it's head. All is the glued in place and painted copper.
Presently I'm trying to decide if the rudder needs (a) pendant(s). One picture I found showed a single pendant hanging from the taffrail similar to that on Endeavour. On the other hand they are not found on the America replica and I have no idea when they went out of fashion...
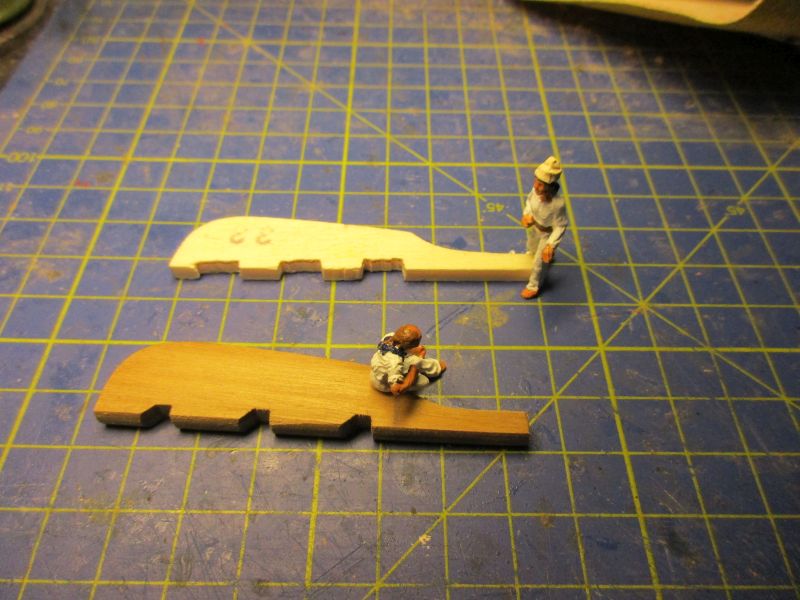
kit's rudder and replacement
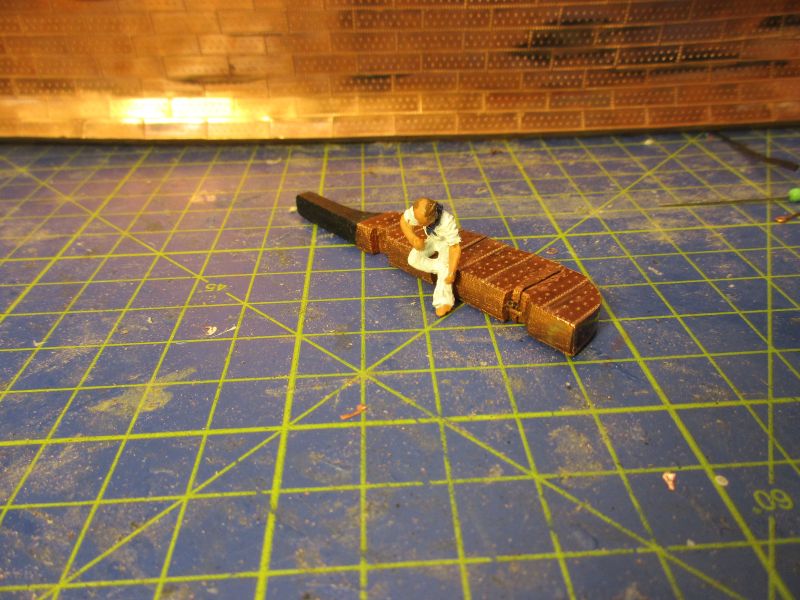
coppered with first hinge in place

kits hinge and parts for the new one: cartridge paper hinge, nail and raw pintle
second hinge not yet painted
- Martin W, Mirabell61, GuntherMT and 3 others
-
6
-
The weather is still too fine for long working hours and I spent some time travelling in Iceland and hiking in the Swiss alps. In both places the air is rather fresh and the beer fine. On Iceland most places are at sea level and easily accessible but the country is expensive and some flight hours away. In the Swiss alps on the other hand glaciers are at 2500m the air is rather thin (you need to cook your soft eggs for 7 minutes instead of 3 and hiking is a bit straining but I can reach most nice places with a 3 hours scenic train ride. But back to serious business...
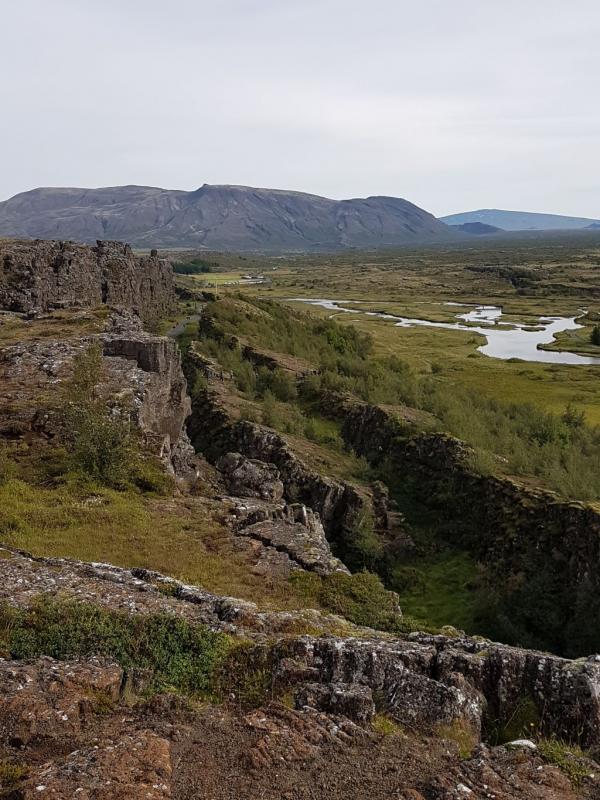
where America meets Europe...
part of the Mid-Atlantic-Ridge on Iceland
- Blue Ensign, dgbot, riverboat and 5 others
-
8
-
Thanks Nils.
Photo etched, yes, and they are also available in 1/72. BTW, your planking on KWdG looks fine as it is. I remember Queen Mary in long beach having quite prominent rivets as well.
Cheers
peter
- Elijah, Mirabell61 and Martin W
-
3

 Alles Gute zum Geburtstag!
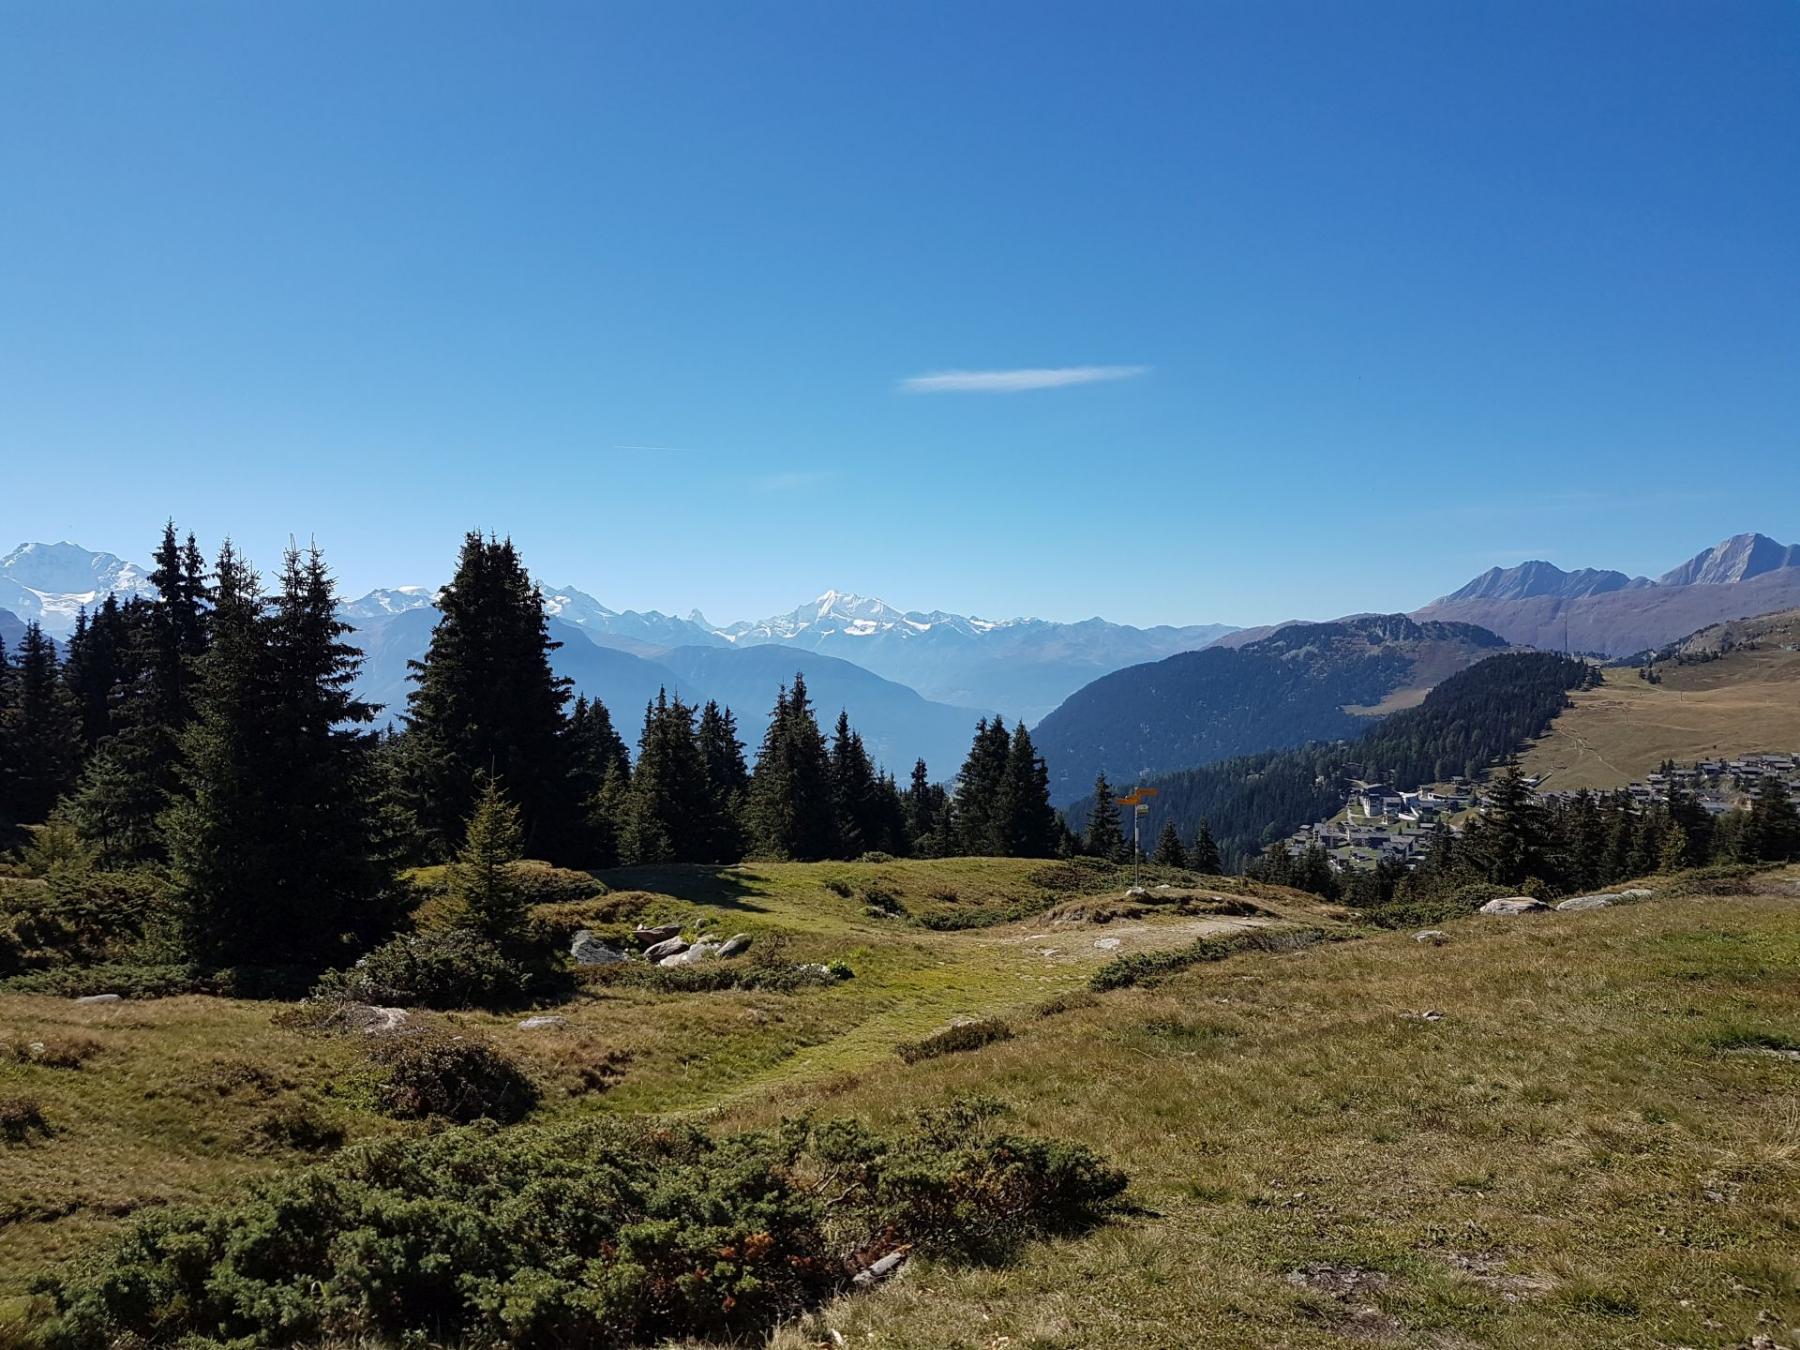

Yacht America by flyer - FINISHED - Mamoli - scale 1:66 - with some alterations
in - Kit build logs for subjects built from 1851 - 1900
Posted
Hi Hamilton
Or I was just lucky. Still 4 more of those deadeyes to install and the 2 spares already used...
Question: When attaching the lanyards to the deadeyes did you ever feel that those soft strops bent around the lower deadeyes could open up again by the pull?
Cheers (and how is Syren coming along?)
peter