


flyer
-
Posts
1,004 -
Joined
-
Last visited
Content Type
Profiles
Forums
Gallery
Events
Posts posted by flyer
-
-
Squirrels conspiring with deer to steal the peaches and some racoons lurking in the background -
you live in a treacherous neighbourhood.
Perhaps you could try to pick the peaches one day earlier. If they will get them again you may also have a mole in your house
Don't give up the harvest!
Cheers
Peter
-
Hi Martin
Nice progress on your flying horse. Just one question: Why don't you support your gangways with the same type of knees you use for the gang boards? That way you wouldn't have to plant those somewhat out-of-place pillars.
Nice picture of the new neighbours too! BTW, I had a running fight against the deer over my garden for the last 30 years or so. Fence, electric fence, higher fence just to keep a little bit of the vegetables for our own (and give some flowers a chance to bloom before being eaten). And I absolutely don't like fences (or walls) along borders. Trying to train our housecats to hunt deer didn't impress neither cats nor deer. Good luck!
Take care
Peter
-
Hi Martin
Why fix the guns immovable in place at all? On my last 2 armed projects (Granado and Pegasus) the guns are only hold in place by their rigging, by breach ropes and tackles. Thus they have a little sideward and longitudinal play of perhaps 2 respective 1 mm. Having some play and being not too rigidly fixed I think they take the occasional nudging quite easy. So far none broke loose despite some quite hard knocks.
I know it's too late to consider for the already fixed guns but you could try it in the waist.
Keep up the good work.
Peter
- Landlubber Mike and Martin W
-
 2
2
-
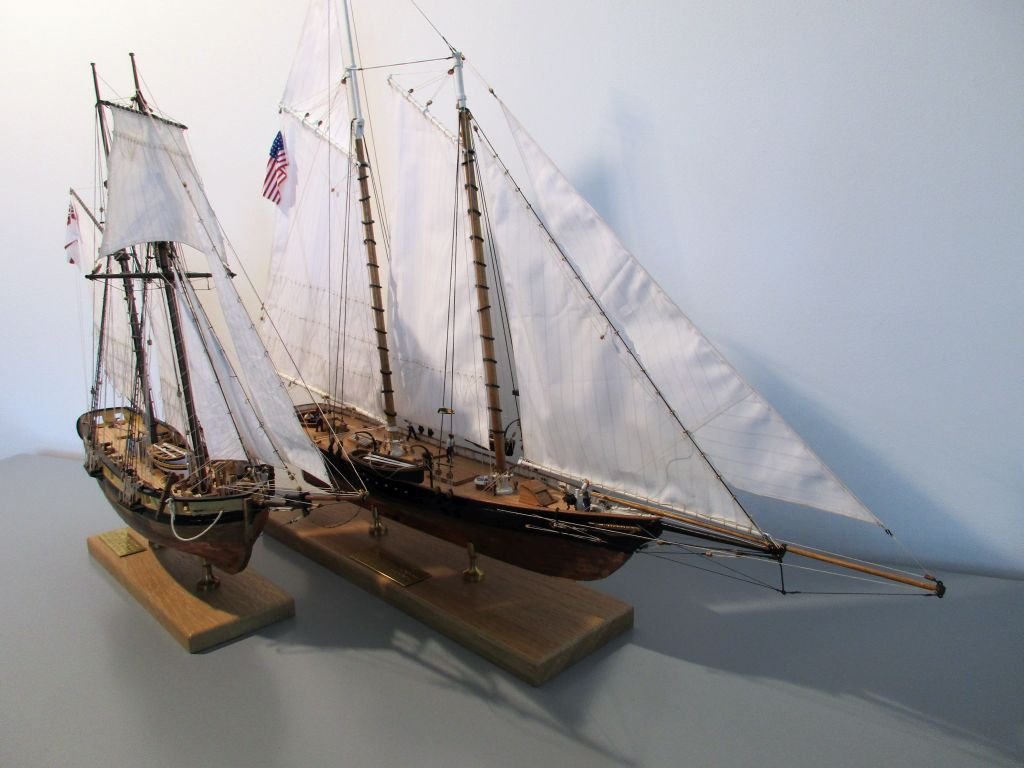
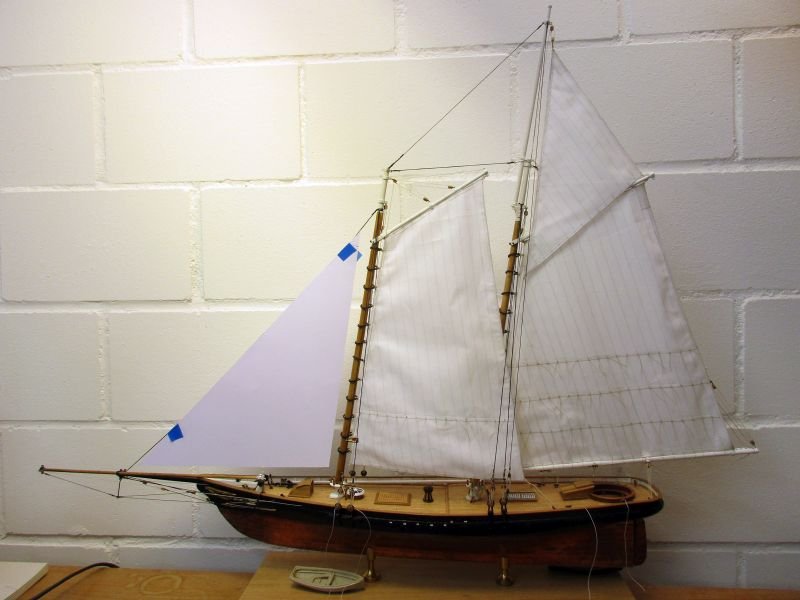
final photo session
The last 2 projects were put side by side for a photo session. They are built in roughly the same scale (1/64 and 1/66).
I find it quite interesting to compare those two schooners, Pickle from about 1800 and America from about 1850. Although they were built for different purposes both were built as seaworthy vessels and for speed. Although Pickle may have needed about 20 sailors alone to serve her carronades she had with a complement of about 40 still a much more numerous crew than America with about 7. It seems that the deliberately kept simple rig of America gave a better speed and was easier to work.
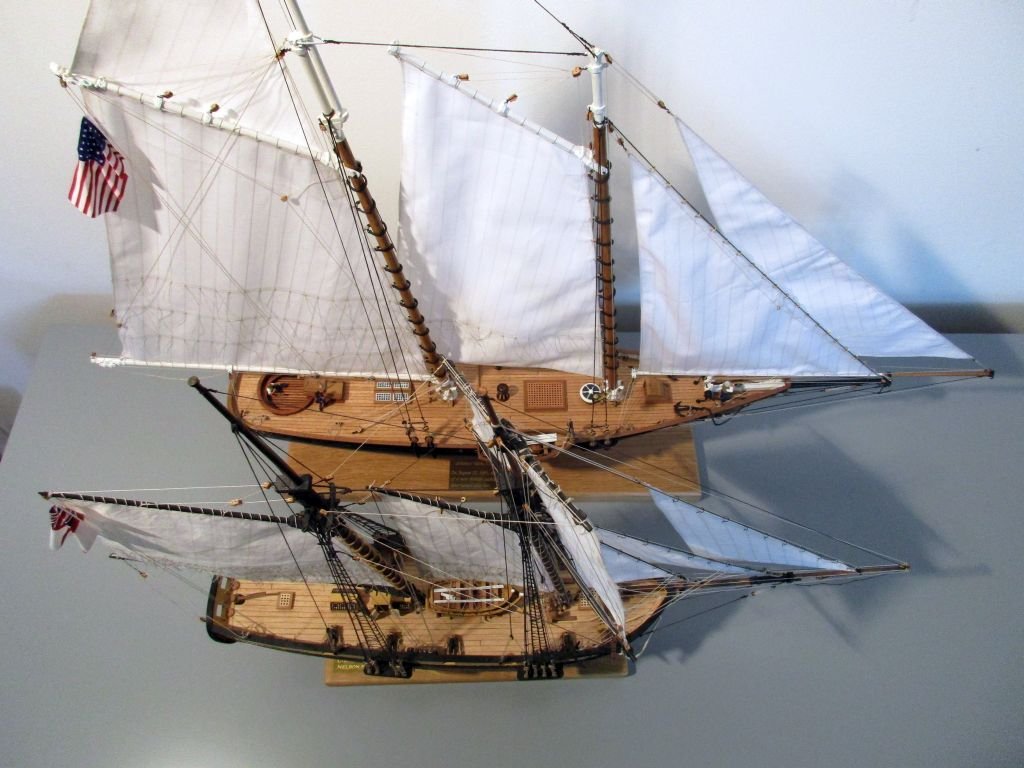
the widest part of the hull is about 30% further aft on America
Pickle must have been cramped: less hull volume and six times the crew of America.
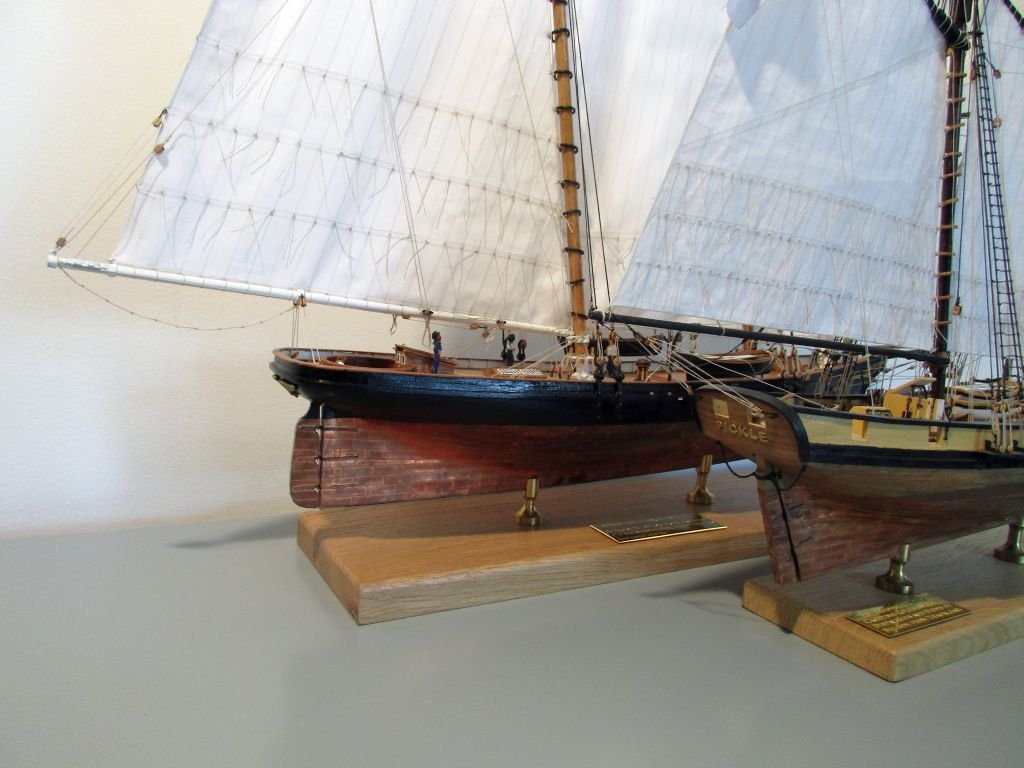
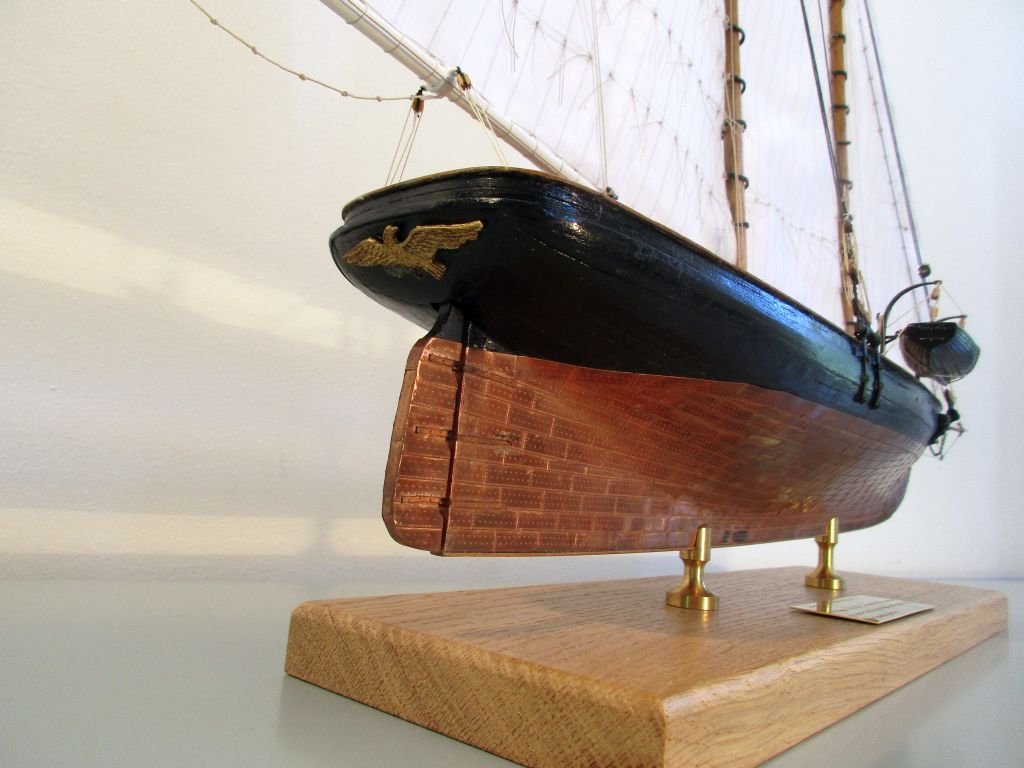
round stern versus square stern
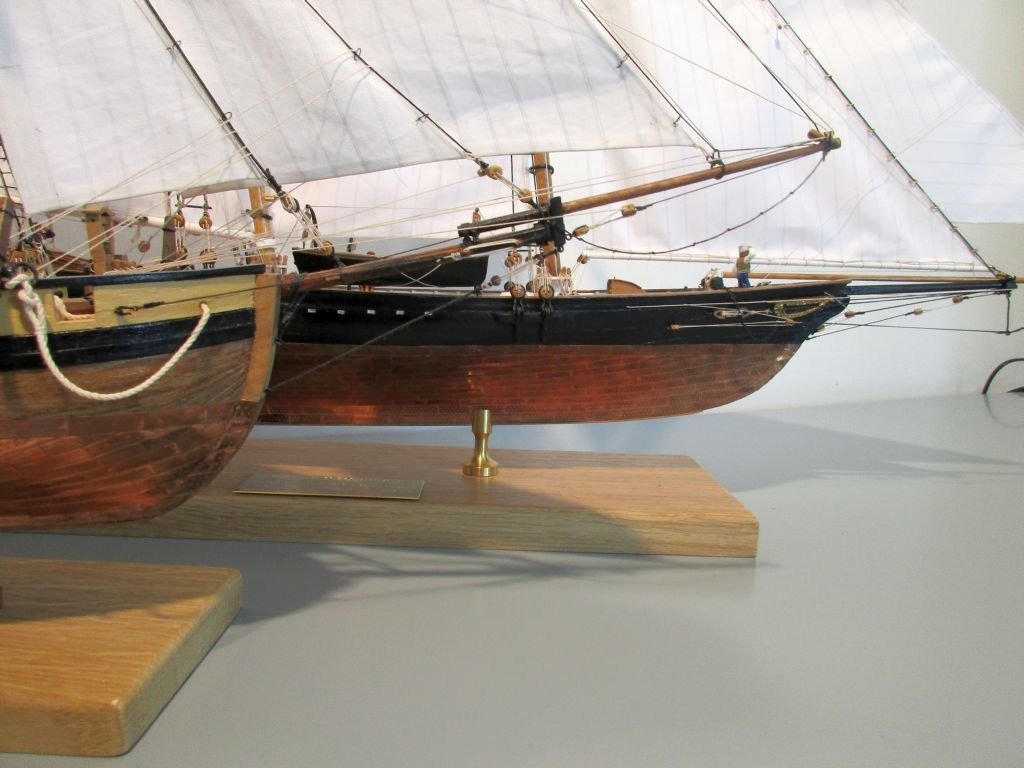
a sharper bow for speed
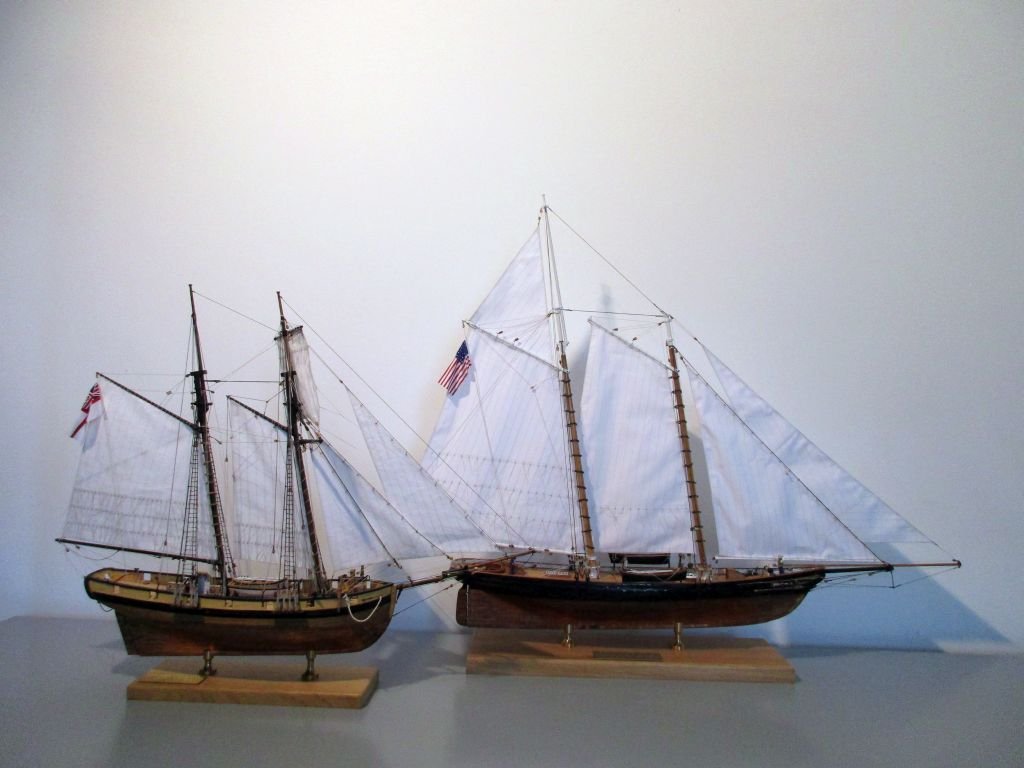
about double the sail area on America - no wonder she went ahead
- hamilton, GrandpaPhil, Mirabell61 and 2 others
-
5
-
Hi Nils
Wonderful work again.
You put so much work and detailing into the lifeboats - it would almost be a pleasure to sink with your ship!
") Peter
Peter
- Piet, Mirabell61 and Omega1234
-
3
-
Thank you very much, Martin.
Next will be a ship of the line - although I have no idea where to place the finished model. On the other hand I will have about 3 to 5 years to solve that problem.
Favourites are Agamemnon and Bellerophon - leaning towards the later. The direct connection not only to Trafalgar but also to Napoleon himself fascinates me. She will also need a bit less space and the different (1/72) scale should still be near enough to 1/64 to enable the use of all the practical experience from the last projects.
Cheers
Peter
- Martin W and Mirabell61
-
2
-
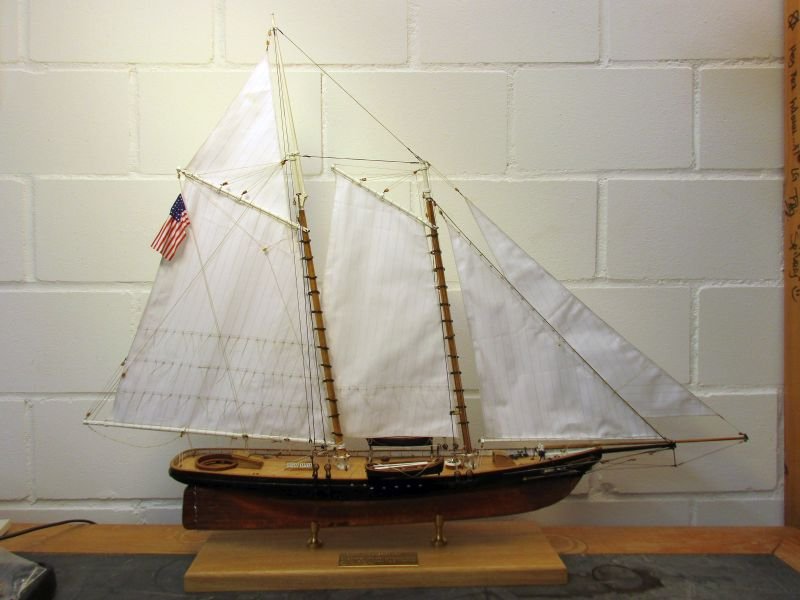
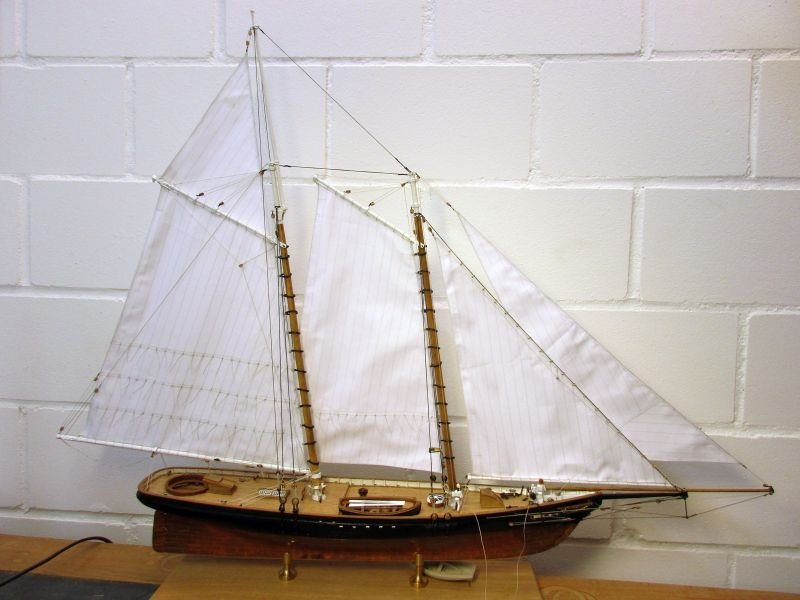
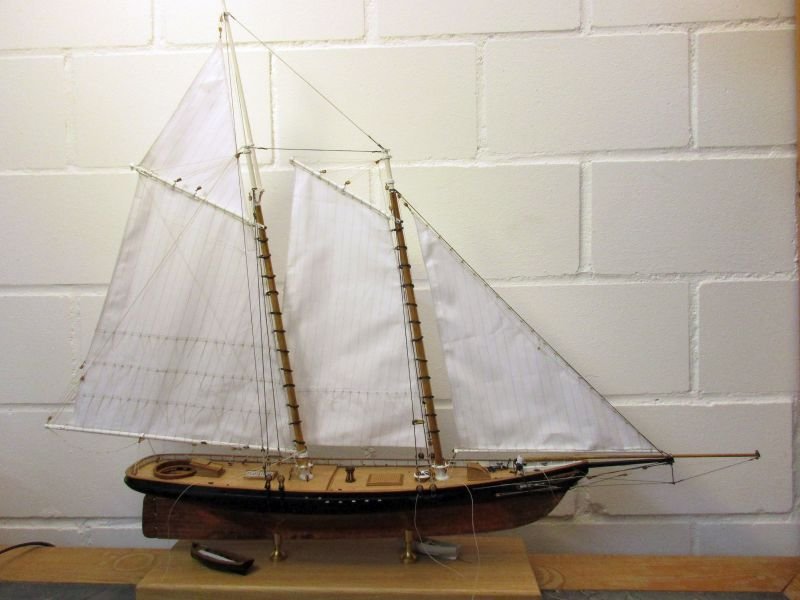
finished!
Before America could set sail for her maiden voyage she was the object of a photo session:
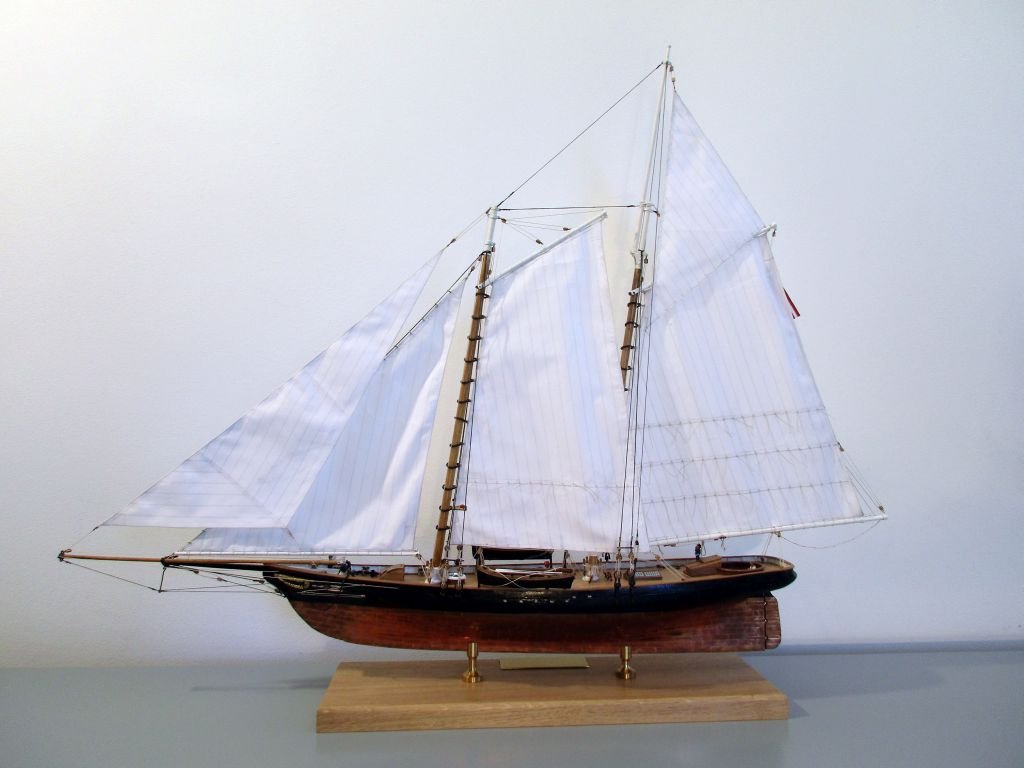
conclusion
Despite several shortcomings definitely a interesting and rewarding kit. I would very much appreciate a reissue e.g. by Dusek. The general kit conception is ok and the scale 1/66 (even better would be a standard 1/64) is a good choice for America. Building with the actual documentation could be difficult for beginners and clearer and more detailed instructions would help.
Among the other possible improvements could be real copper plates, better deadeye strops and a general rethinking if white metal parts could be replaced by photo etched brass parts. The layout of the rigging, especially the standing rigging of the schooner topmast, should be rechecked. Also the construction and exact form of the stern could be clarified. And I still don't believe in areas of vertical running short planks on the stern as they are used here or also in the Cutty Sark kit.
- hamilton, GrandpaPhil, modlerbob and 2 others
-
5
-
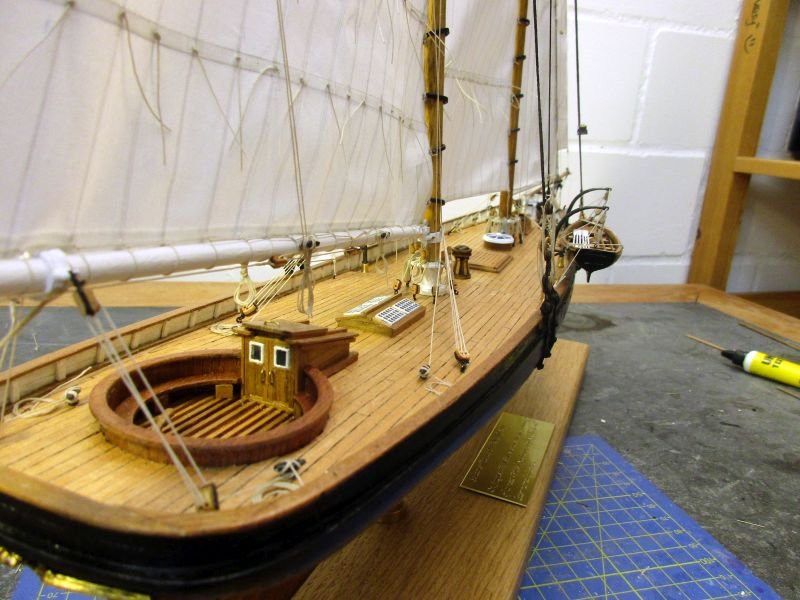
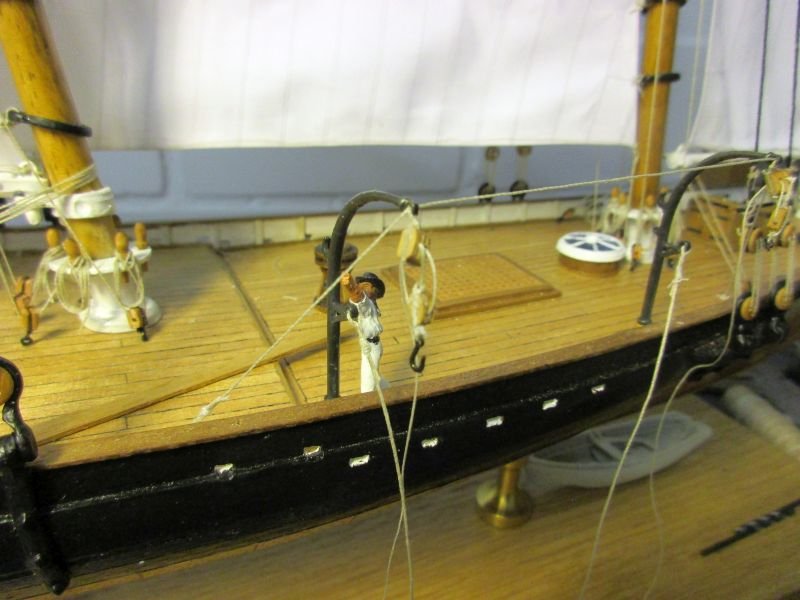
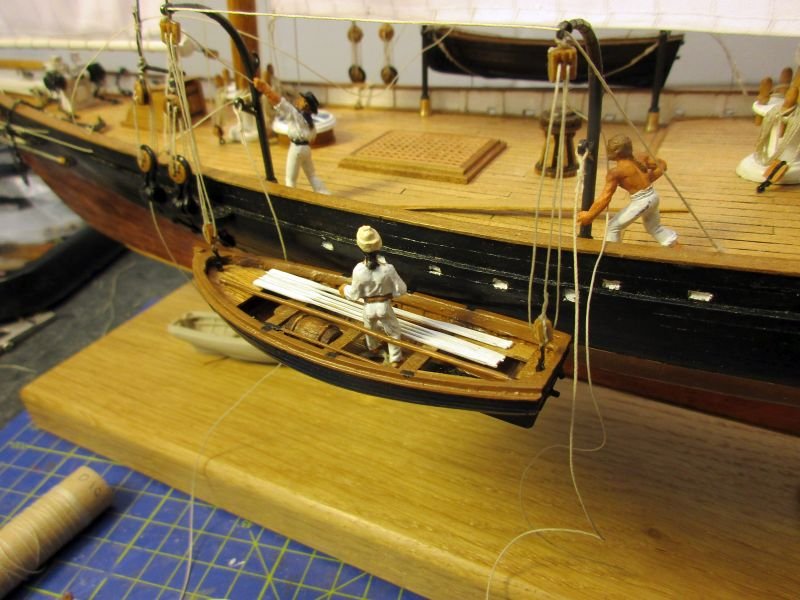
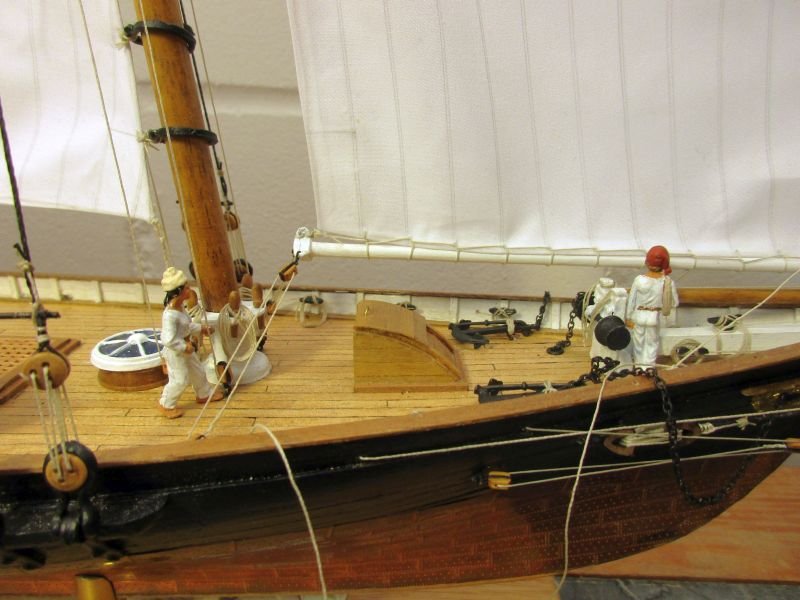
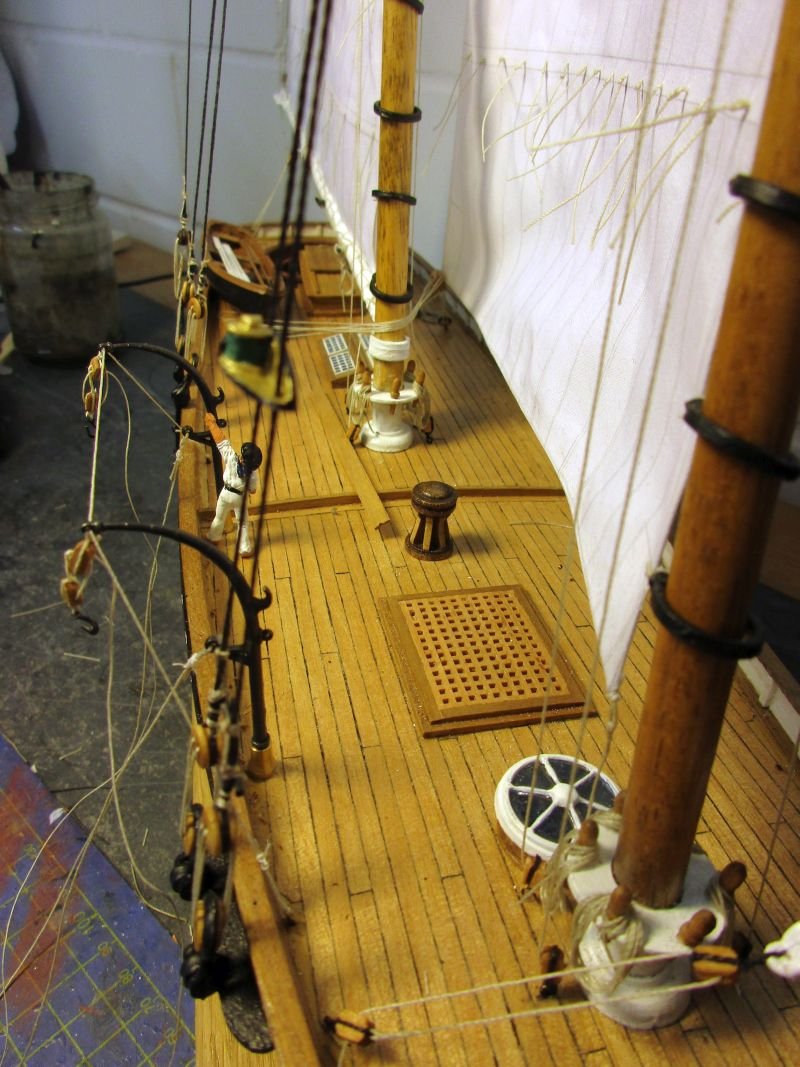
the crew
I wanted America to have a crew. Not to overdo it I thought about 5 sailors could be on deck. A helmsman and a skipper or first mate should be among them.
I hired some candidates from Amati and Mantua. To fix them on deck I drilled a 0,5 mm hole into one foot of each figure and glued a short length of brass wire into it. A discreet 0,5mm hole in the seams between the deck planks is then sufficient to hold a figure in place without additional glue. (Only the sitting sailor, doing duty as tiller man, had his hole drilled in a different place. Since that operation he seems a bit angry and refuses to listen or to speak to me.)
The figures were painted. They all get blue trousers, white shirts, blue jackets and black shoes. Not being under the strict navy discipline they immediately added some personal items, such as woollen caps or coloured bandanas and some took their jackets off. But still they look reasonably smart. After placing them on deck I only have to set up a stage for the final pictures before America sails.

Raw crew figures
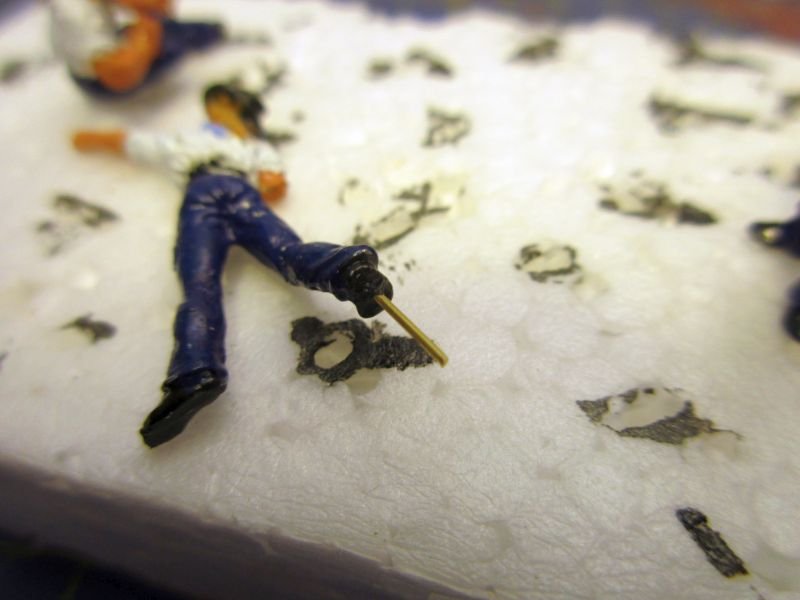
brass wire in the foot
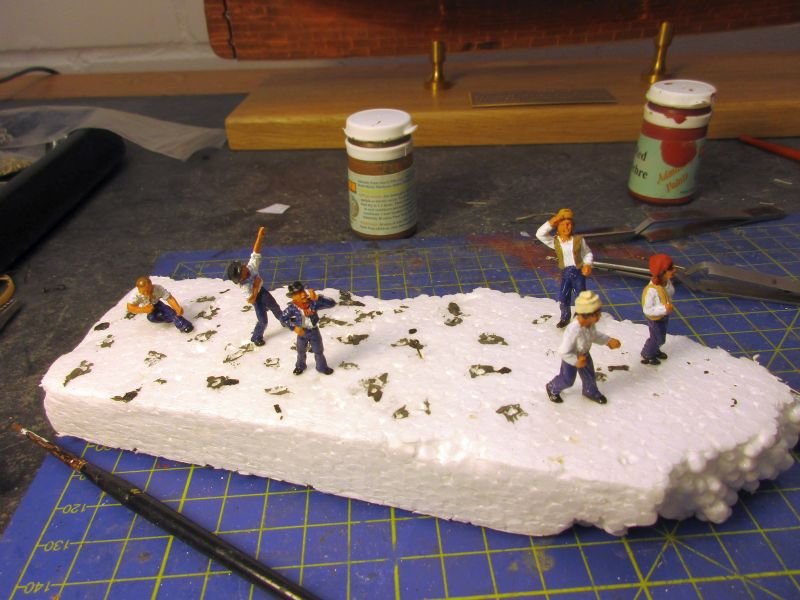
crew ready to board
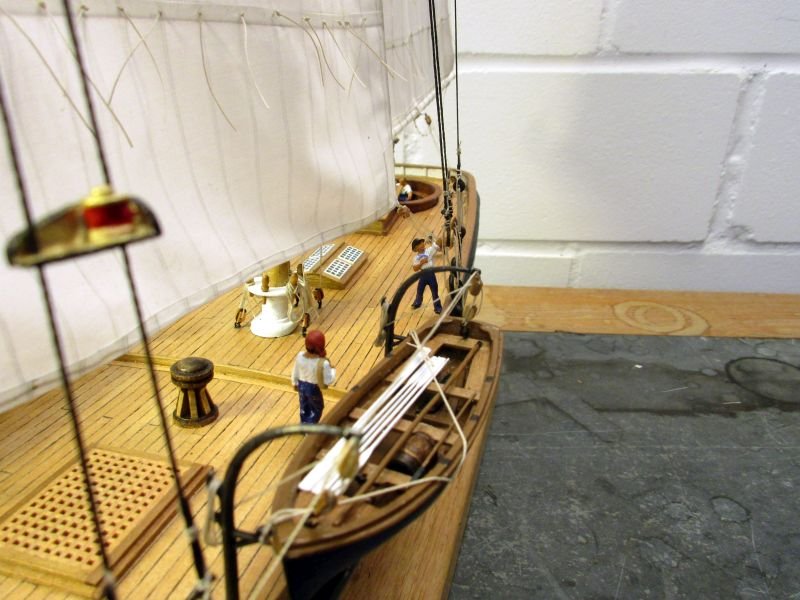
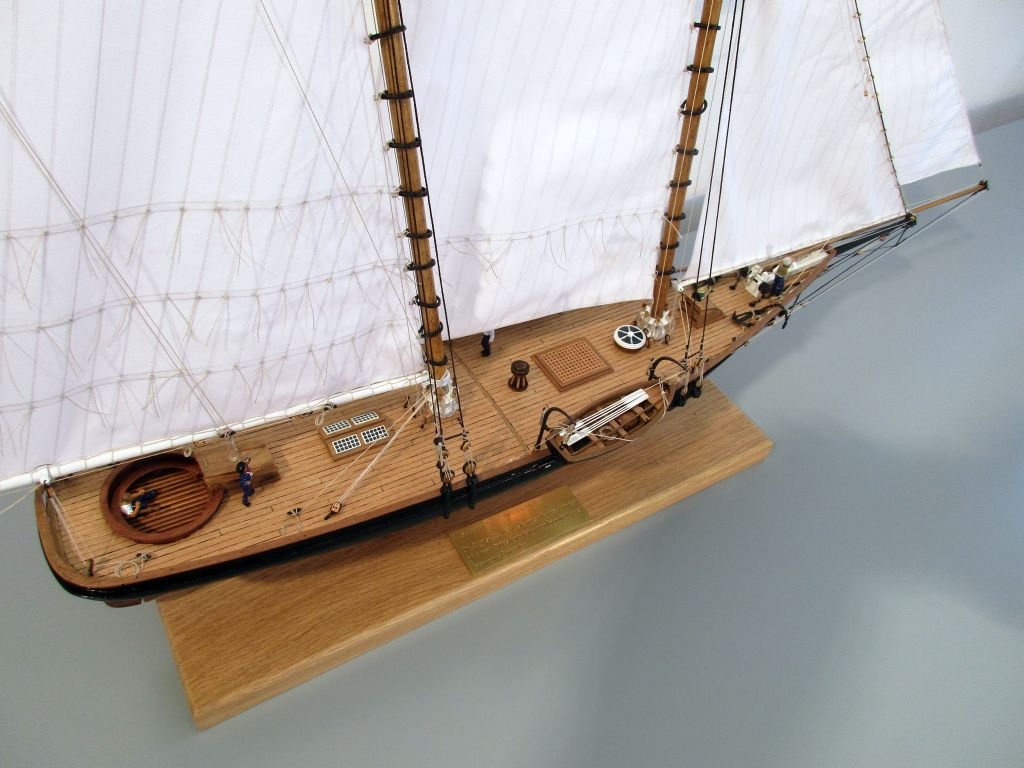
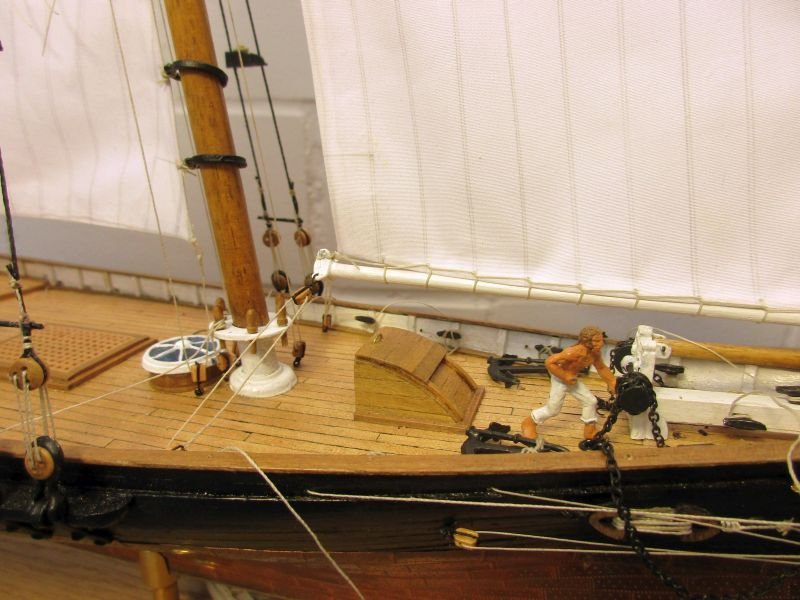
a fairly busy deck
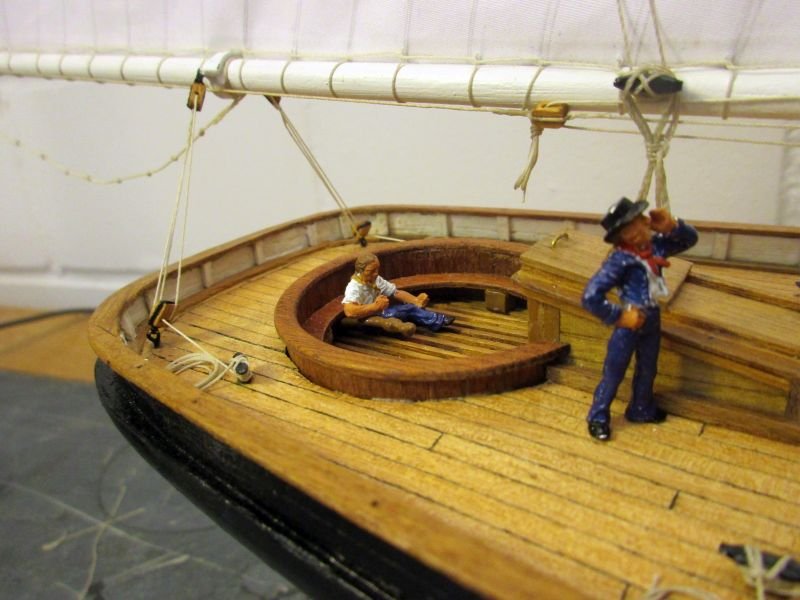
a (still sullen) helmsman and the skipper
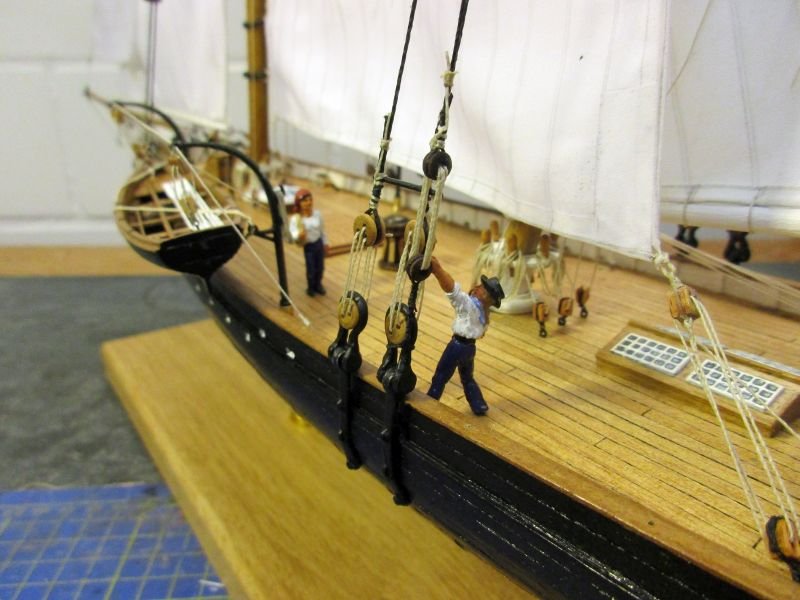
the first mate adjusting the rigging
the lookout in the bow
- Martin W, GrandpaPhil, hamilton and 1 other
-
4
-
Thank you, B.E.
A thought worth to consider - on the other hand I heard that my friends cleaning lady sometimes lacks a bit in subtlety.
peter
-
Thank you, Martin. No, I will give her 'in the raw' to a friend as a dust collector for his office. I will try to convince him of a case.
Sure Nils, glad to help, if possible. It is a Quaycraft boat cast in resin. I bought it from cornvallmodelboats and they have something in 1:144 - but alas not covered by a tarpaulin.
http://www.cornwallmodelboats.co.uk/acatalog/quaycraft-boats-1144.html
Cheers
peter
-
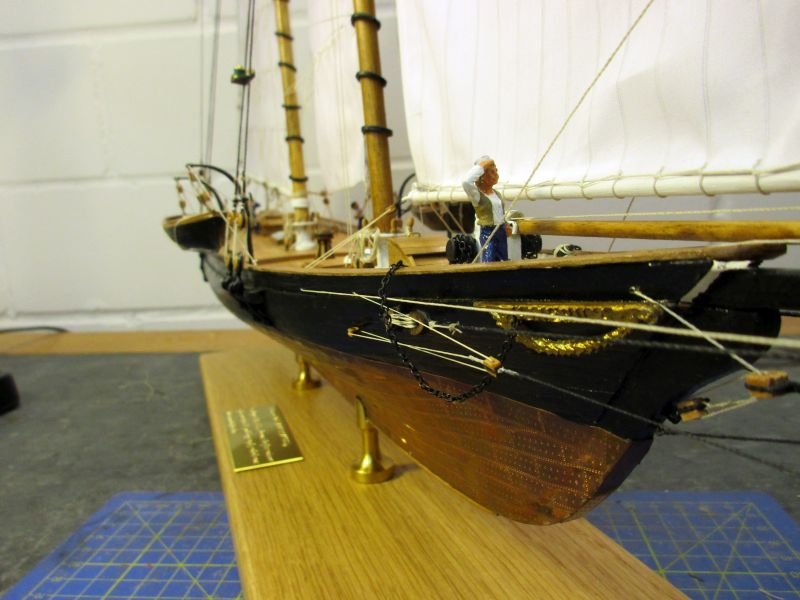
Back in my wharf I had the boats stowed and the loose ends trimmed. America was almost finished.
I also had a brass nameplate made with the engraving:
Schooner Yacht AMERICA (1851)
On August 22, 1851, she was the first winner
of a new British yachting trophy which was
later named after her.
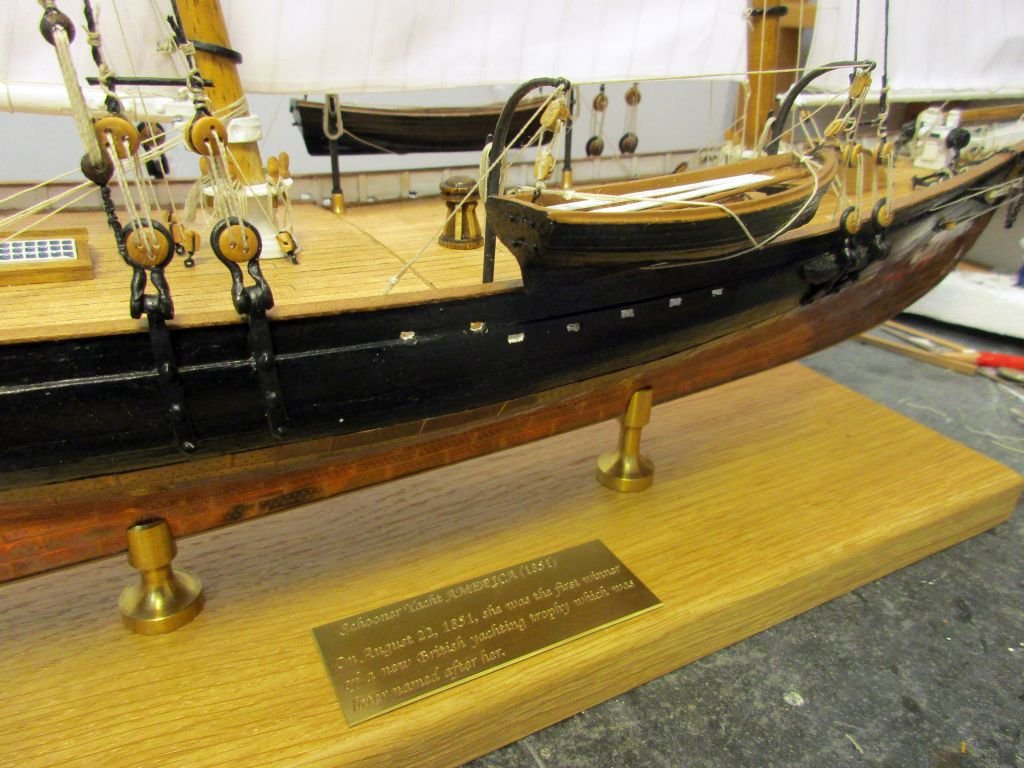
stowed boats and nameplate
boat on portside
almost ready to sail - only the crew is missing
- GrandpaPhil, hamilton, Martin W and 2 others
-
5
-
Hi Nils
Thanks. Unfortunately that boat had to be stowed for good and the picture shows only a passing moment. I think with all sails set on America a boat in the process of being hoisted - or lowered - wood look somewhat false.
Hi Martin
Yep and not only a beautiful coast but also inhabited by delightful people.
A visit to the grand old lady in Boston unfortunately was omitted this time but Bath really compensated for that.
I found some Sam Adams' beers at least drinkable. The seasonal summer ale was quite good although their IPA was rather a bit bitter.
The Admiralty and her mysterious ways - too bad about that missed museum. Perhaps the next few pictures may compensate a bit...
Cheers
peter
a model of the clipper Snow Squall built in 1851 (!)
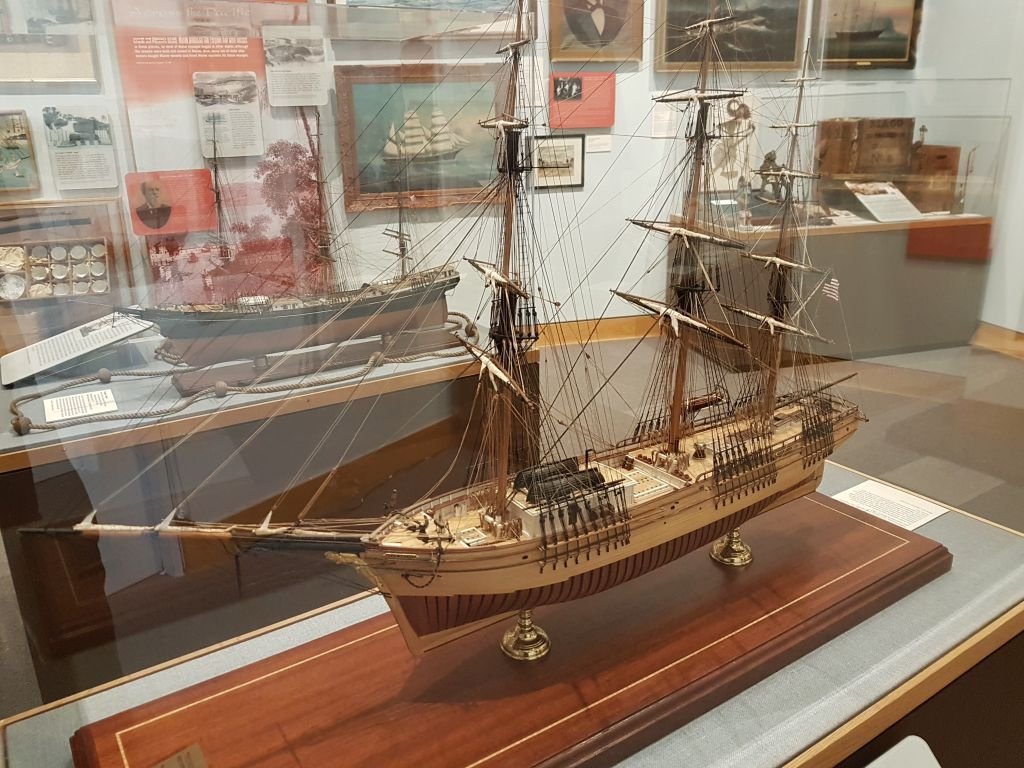
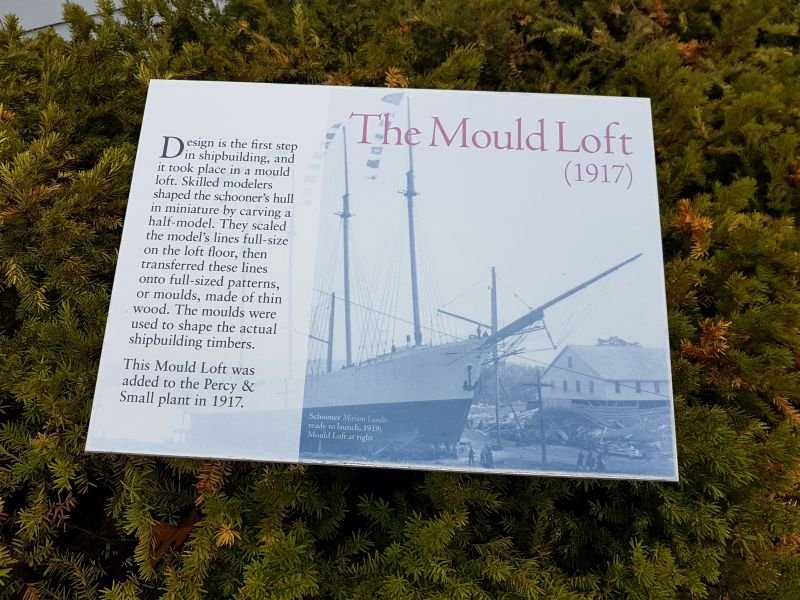
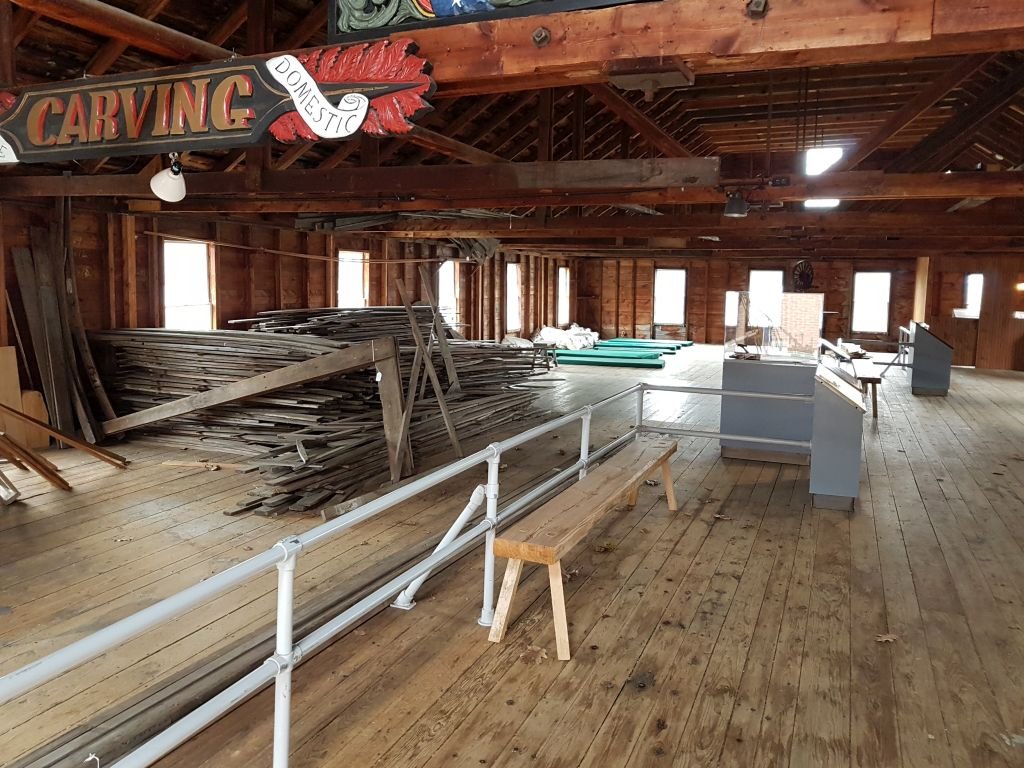
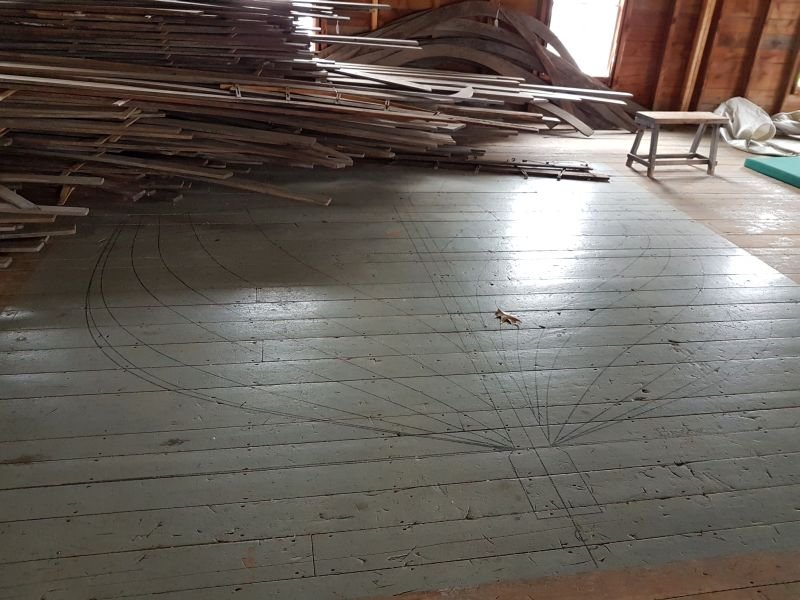
The following pictures show the interior of the Mould Loft - one of the several buildings from the time the Museum still was an operating wharf. The Mould Loft's function is explained in the first one.
I found this very informative and interesting.
- Martin W, Mirabell61 and hamilton
-
3
-
The work on America (the schooner) was suspended for 2 weeks, while I visited America (the continent).
We made a trip from New York to Boston and up the coast of New England to Bar Harbor - a wonderful region and truly wonderful people. As we visited before the season begun, we met hardly any tourists (except us) and it all was very peaceful and only occasionally a bit cold or wet or both.
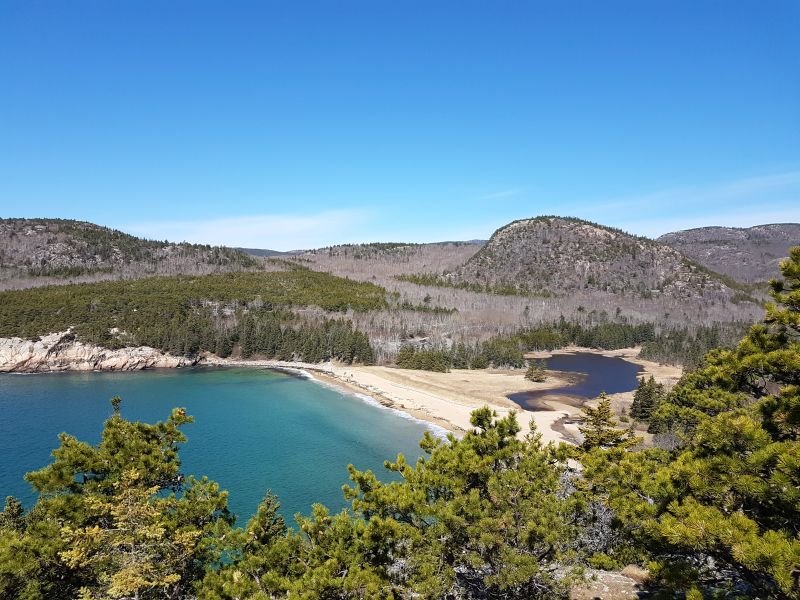
near Bar Harbor (Maine)
In Bath I had the opportunity to visit the Maine Maritime Museum (meanwhile the Admiralty was successfully scouting the town for a decent pub). A great location with very interesting exhibits.
It seems that altogether several thousand ships were built in Maine and among them hundreds or thousands of schooners. A truly astonishing example was the wooden schooner Wyoming, launched in 1909, with 6 masts and an overall length of 445ft or 135m.
A museum and an area well worth a visit.
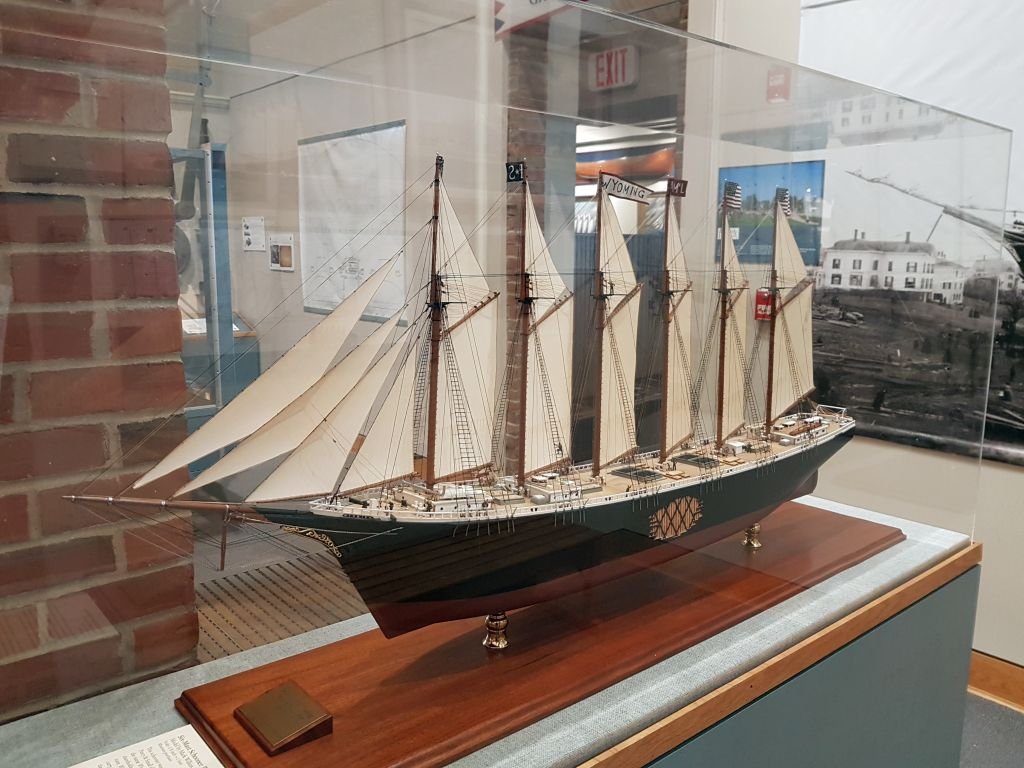
a fine model of the Wyoming in scale 1/8 inch = 1 foot or 1:96
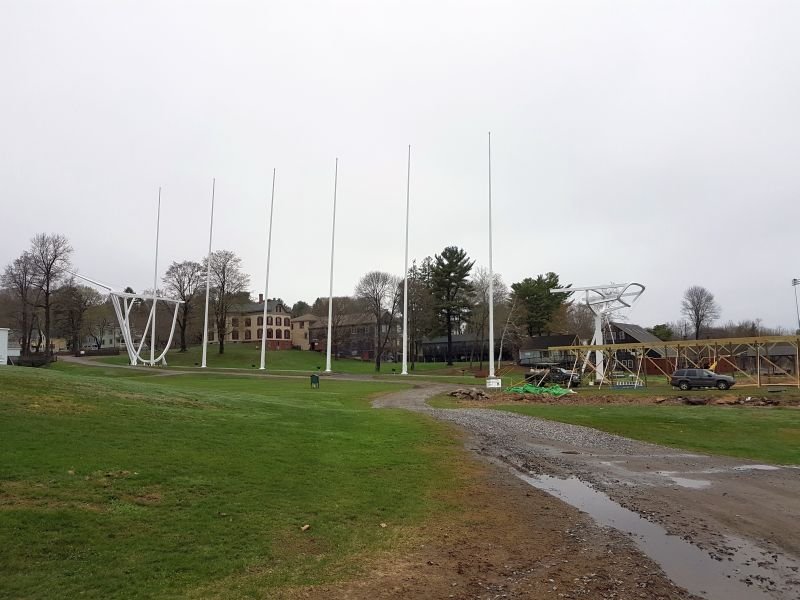
a sculpture depicting the real size of the Wyoming - look at the cars!
- Mirabell61, hexnut, hamilton and 3 others
-
6
-
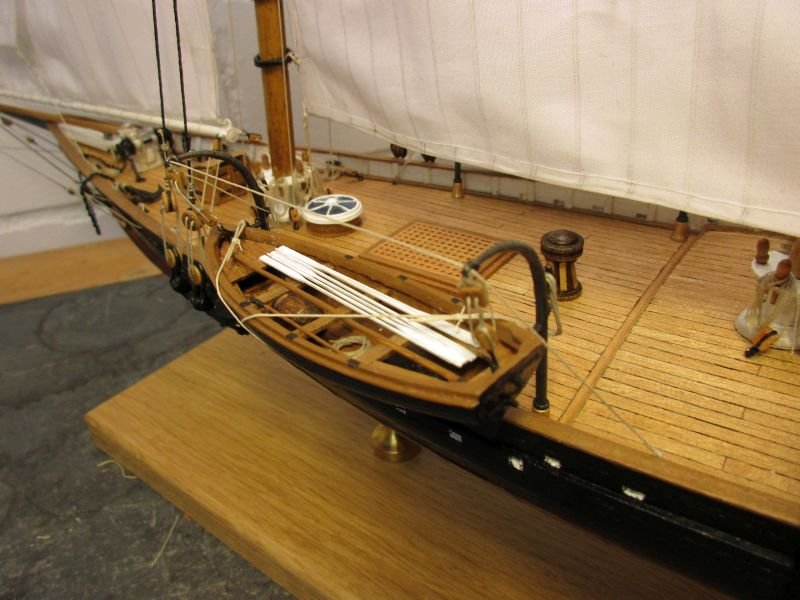
the boats
In my clever books and the web I was looking for installation details of the davits with their boats. A clear example of "how to..." wasn't to be found and I had to revert to some more or less educated guesswork.
The davits most probably could be turned inboard and you would then have had the option to stow the boats on deck. However the paintings in John Rousmaniere's book seem all to show the boats hanging outboard. Most period davits show some stays from the davits head to the deck and one between the heads. Those were probably for stabilisation as well as a help for turning the davits.
The tackles for the boats are straightforward usual ones with a double and a single block with a hook.
One of the attaching points on the davits I use for the straps and will wind them diagonally around the boats. Originally the probably used some sort of tape but I took 0.5 mm thread instead.

davits on starboard side installed
the boat is pulled up into position on the port side
- Blue Ensign, Jack12477, Martin W and 3 others
-
6
-
Hi B.E.
Thank you for taking us along on your exciting 7-year-adventure (and for rebuilding that outstanding log).
You created a real work of art and a reference for other builds and builders.
I'm looking very eagerly forward to the next adventure.
Cheers
Peter
- Barbossa, mtaylor, Blue Ensign and 1 other
-
4
-
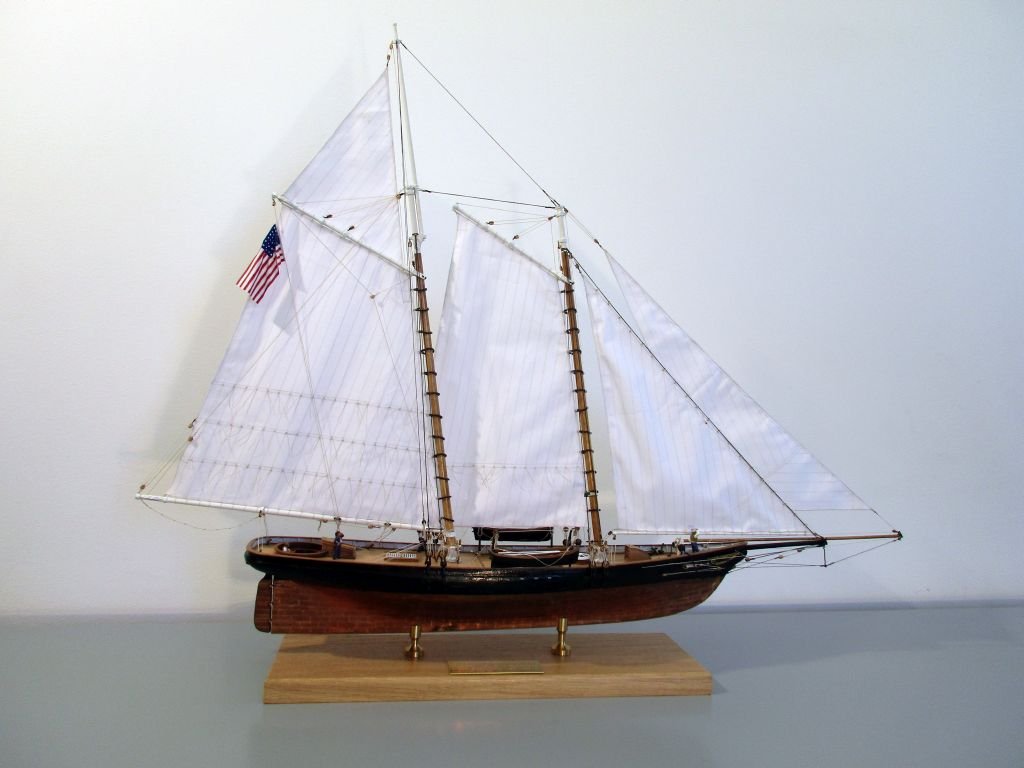
showing the flag
The flag coming with the kit was too coarse, stiff and historically incorrect. During 1851 the flag changed from 30 to 31 stars with the admission of California as a state. Although I love the Californian Republic I made only a 30 star flag because it seemed simpler and America perhaps only had this on board when leaving the US for Europe.
The flag was hand painted onto the same fabric as I used for the sails. The stars are just small, irregular dots and the 'hand made' clearly shows but I like it.
It was then hoisted according to the kits drawings. Attaching the flag line to the boom always seemed the logical solution to me, although I had to learn, while rigging Pickle, that the navy way was again the complicated one by attaching the flag line at the rail and having to adjust it with each shifting of the gaff.

printed template and hand painted flag compared to the kit's flag
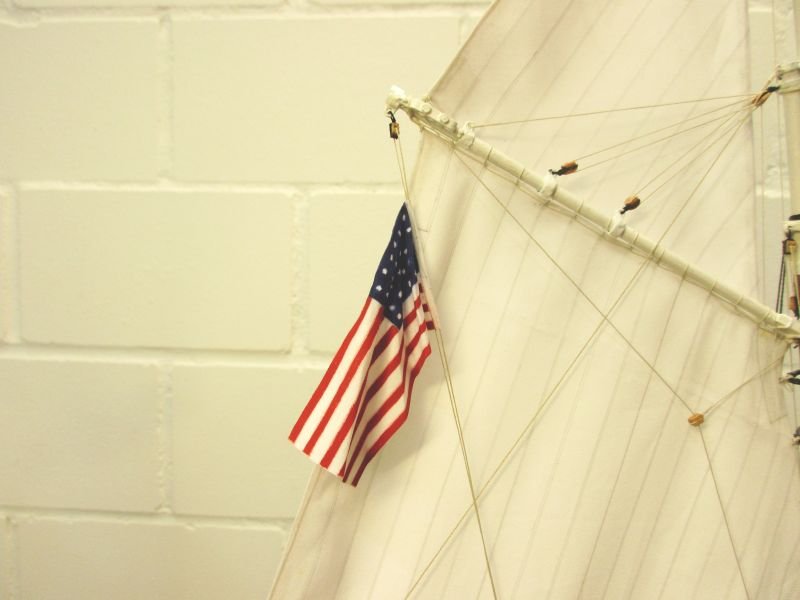
looks acceptable
- jbford, Mirabell61, Jack12477 and 5 others
-
8
-
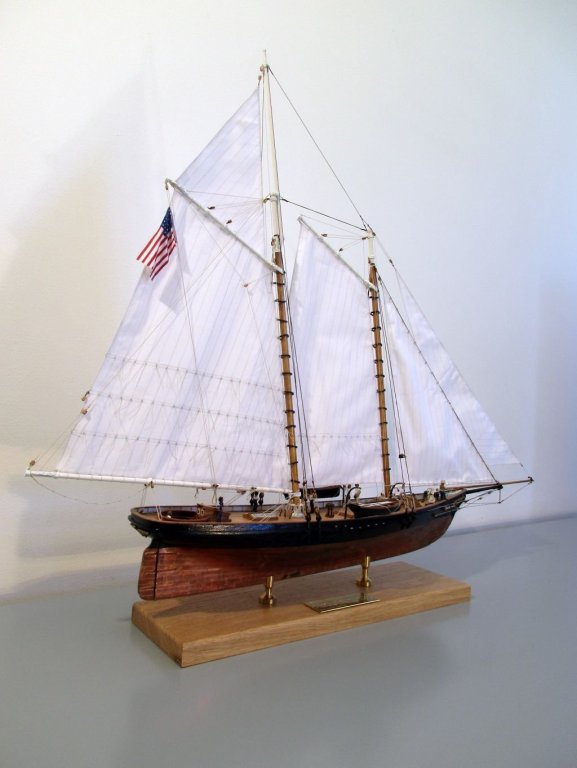
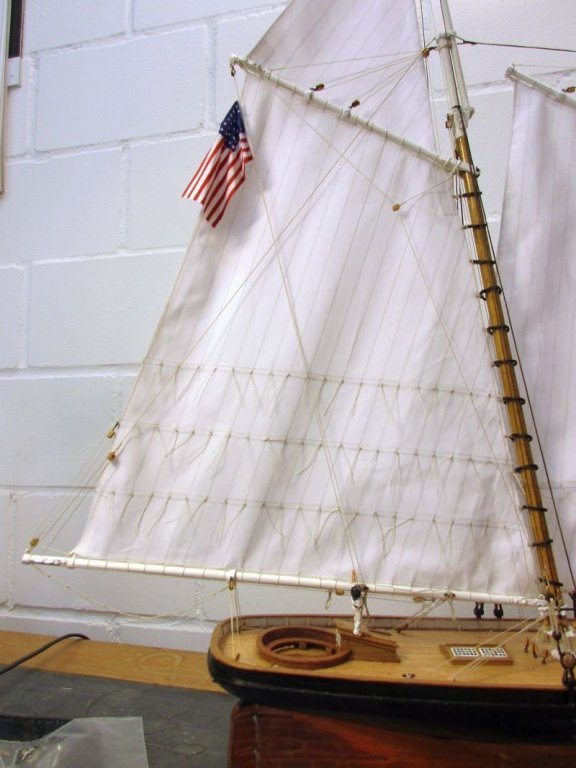
The outer jib was the last sail to be hoisted. The making was similar to the other sails. I used again the lighter Amati rigging hooks to set it "flying". The sheets were lashed to the sail according to a picture found in Lees.
i decided to thrust the kit's instructions and added the disputed block for the gaff topsail's tack. Although I still wonder about its usefulness the rig looks better with it.
There remain still a few loose ends to be stowed. Next will be boats and the flag.
all sails set (and the gaff topsail tack runs now through an additional block)
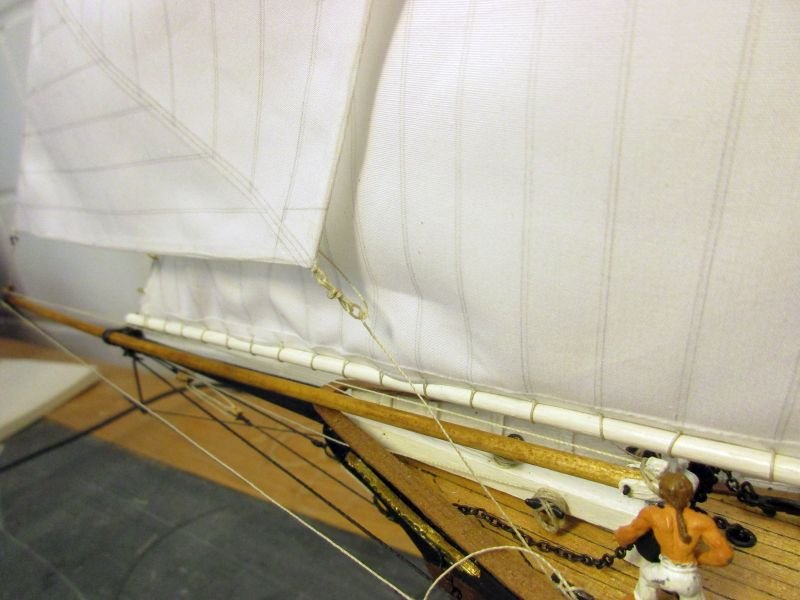
sheet lashed to the outer jib
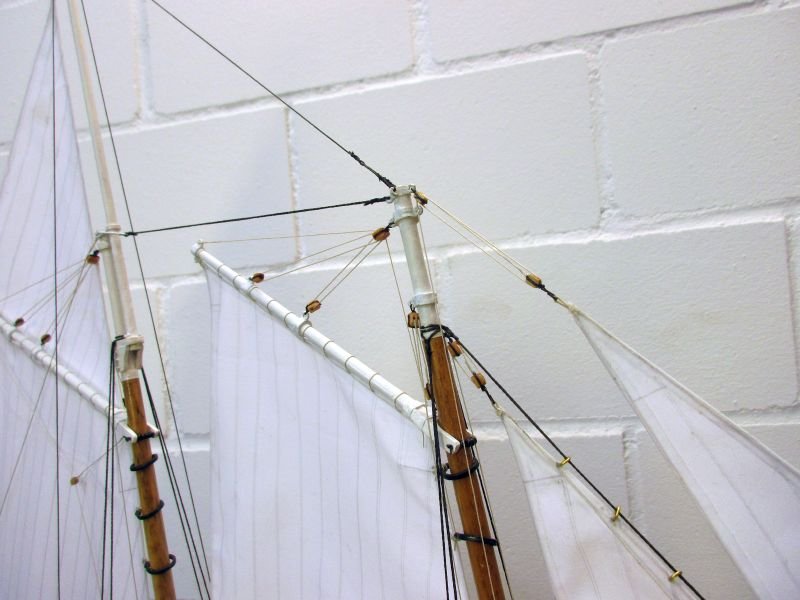
mast tops
still a few loose ends to stow
-
Hi Dave
Thank you.
")
BTW: If Wikipedia is correct then 1/8” scale is equal to a metric scale of 1:96. Now the Amati plates are 1:64 or 1:72. If you would build in 3/16" scale you could use all those myriads of fittings in 1:64.
I'm looking forward to your build log in whatever scale you decide on!
Cheers
peter
-
My dear Martin and B.E.
Please be aware that you may leave yourselves open to an accusation of "murmuring" and you could be requested to bear the consequences according articles 20, 21 and 22 while Martin also most probably committed an offence against article 2 of the Royal Navy Articles of War.

Martin, very nice detail and it will always be visible - at least to the thousands, or so, of followers here in MSW.
Cheers
Peter
- Blue Ensign and Martin W
-
2
-
Hi Hamilton
Thank you. I would like it if you tried that simplified sail making. Sails add much to the beauty and are the raison d'être of all that masts and rigging of a sailing ship.
About that block: I agree with you, however it seems not to change much in the way the tack arrives at the mast foot - it goes to the block on deck anyway but needs more pull because you have to overcome the friction of an additional block. On the other hand, reconsidering it, I see that it helps to lead the tack well clear of the flag line. Perhaps a reason for the particular arrangement. Well, I still can install it.
However, after my botch job on the tack of the jib sail I'm still looking for possible improvements of that situation. In the meantime I will have fun with the outer jib.

Take care
peter
-
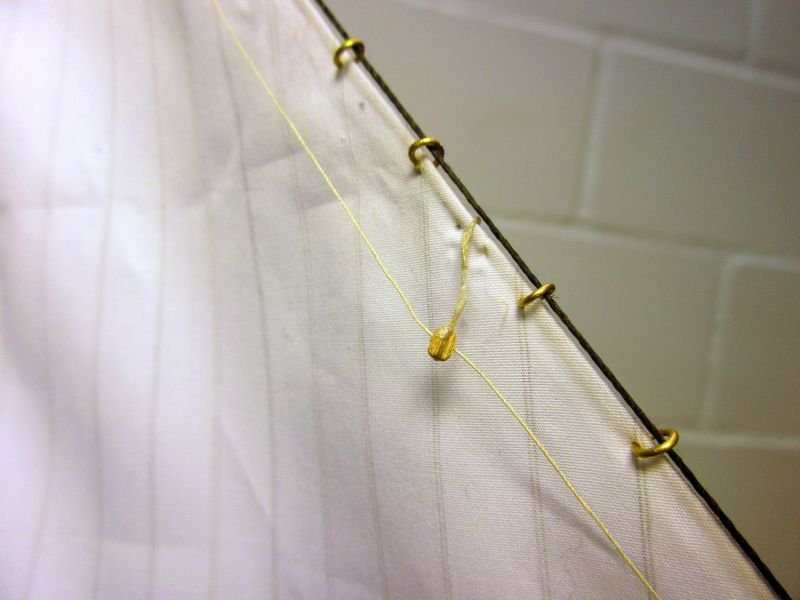
The jib was pencilled and glued the same way as the other sails. For the hanks, attaching it to the jib stay, I used the kit's brass rings. Several alternatives similar to the Pickle's hanks looked less convincing.
Due to the altered stay I had fix the forward clew a bit differently. I'm not happy with the way it looks now - next time I build this ship I will take the stay through the bowsprit in front of those rings.
The eyebolts for the lower blocks of the sheet tackles were set into the waterway. The kit's instructions have them on the rail. I didn't believe that.
Then I had to tighten the already finished lanyard of the stay tackle. Fortunately it was fixed with diluted white glue only and could be loosened with some water. Lesson learned (again): don't coil your ropes before the stable door is closed - as Jack Aubrey perhaps could formulate, using another one of his inappropriate sayings.
jib is set
a small leftover 2mm block leads the down hauler
forward clew - looks a bit dislocated
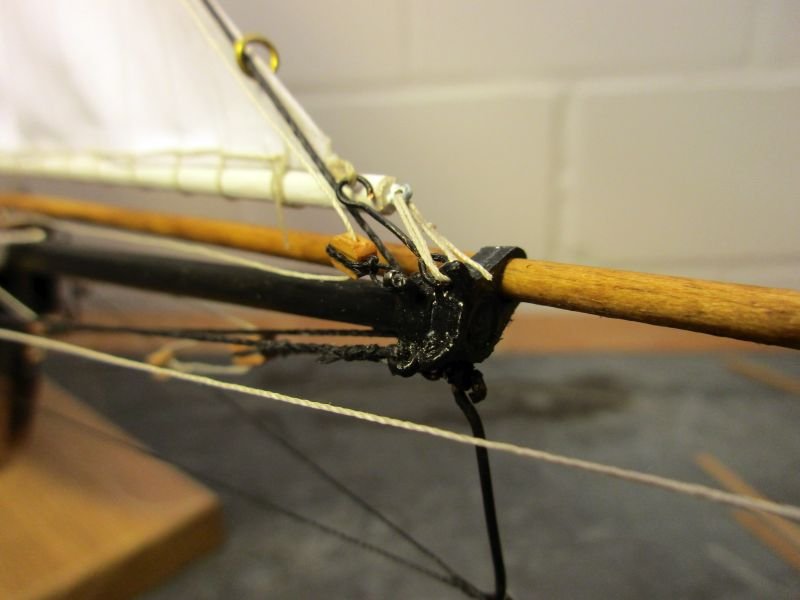
boom end with sheet tackles
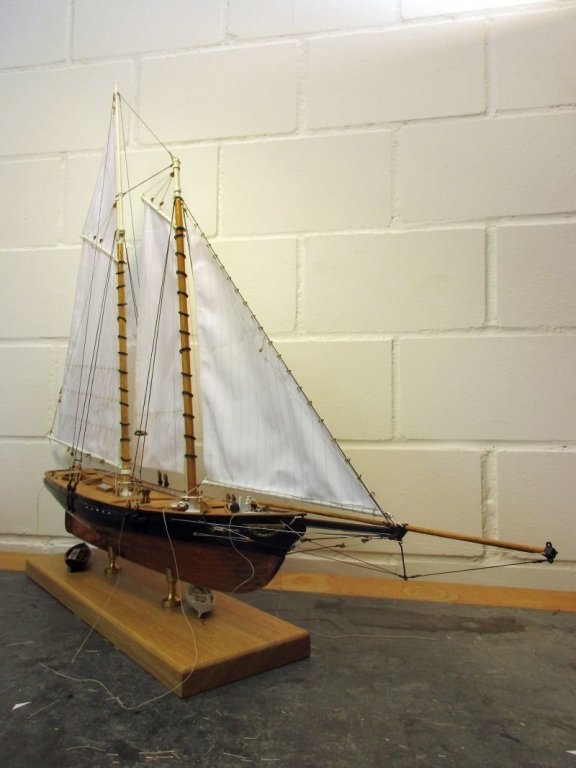
almost in racing condition
- hexnut, VACorsair, Blue Ensign and 1 other
-
4
-
Hi Martin
Yep, perhaps. Right now I'm considering 7 projects, from Revenge or a bettered Wasa to Agamemnon, Vanguard, Diana, a rigged Confederacy and Cutty Sark. The big question is where to berth the finished ship. Perhaps you heard of that problem - even the best of all admiralties has limits.
Cheers
peter
-
The next sail, the jib, needs a bit more planning. By changing the rigging of the fore stay, I was bringing it more inboard and changed the sail size as well. The sail from the kit plan was adapted to the new stay. Then I cut a paper template and checked it against the model. After resizing it twice I had a fitting sail template.
The boom had to be shortened as well, of course.
paper template for the jib sail
-


HMS Vanguard by RMC - FINISHED - Amati/Victory Models - scale 1:72
in - Kit build logs for subjects built from 1751 - 1800
Posted
Being a long time silent admirer of your Vanguard build I'm glad to offer some small help about the main braces.
The plans are correct but not easy to read. According to James Lees 'The Masting and Rigging of English Ships of War' the standing part of the brace is made fast to the side of the ship by an eyebolt and the running part runs from the yard back through a sheave in the side of the ship to a cleat (or a post) on the inside.
Having just started on my own Bellerophon kit I hope to be able to occasionally shamelessly profit of your excellent build. Thanks and keep up the good work.
cheers
Peter