HOLIDAY DONATION DRIVE - SUPPORT MSW - DO YOUR PART TO KEEP THIS GREAT FORUM GOING! (Only 20 donations so far - C'mon guys!)
×


captainbob
-
Posts
3,498 -
Joined
-
Last visited
Content Type
Profiles
Forums
Gallery
Events
Everything posted by captainbob
-
Louise is a nice looking boat. It will probably be a fun build. Bob
- 26 replies
-
- 2
-

-
- louise
- constructo
- (and 1 more)
-
Here are the Lettie G. Howard plans I used. Bob http://www.themodelshipwright.com/high-resolution-ship-plans/sailing-vessels/244-2/
-
She has such lovely lines and great work on the framing. The stern piece looks good I’ll have to remember that. Bob
-
Dan thanks for showing us this beautiful boat and how it was built. I’m always amazed, not so much by how modelers build things but more by the way they figure out what to build it out of to make it look correct. Well done. Bob
-
I know what you mean. One of the jobs I had was designing connecters. A contact .25 long and .04 dia. looked huge, scaled up on the screen, until I would watch it being made. Bob
-
Fantastic! We all knew you could do it. And she looks beautiful. Well done. Bob
- 120 replies
-
- 1
-
-
- mystic
- motor yacht
- (and 2 more)
-
Thank you one and all. It was a fun build and I enjoyed every moment but I have to say, I’m glad it’s done. Alfons, don’t worry, my friend, with this new “up/down” system I don’t know who does what anyway. Bob
-
Nice looking ketch. Bob
-
Springs are tricky, yours look great. Bob
-
I tried to build a metal boat several years ago. This is the best article I could hind. http://www.modelboats.co.uk/news/article.asp?a=480 Good luck. Bob
-
I used to build ans sail 'one meters'. They're a fun boat to sail. Cover the hull with fiber glass and you should not have any problem. Bob
-
Because the chine is longer than the keel as you approach the bow the planks will start to angle and may have to be tapered. Bob
-
I like the new avatar. That’s the Popeye we all know and love. Bob
- 956 replies
-
- 4
-
-
- andrea gail
- trawler
- (and 1 more)
-
Frank, glad you’re back and hope you enjoyed the trip. Walter, A book with foldouts is probably a first edition, nice find. The book with the rigging is, “The American Fishing Schooner”. Bob
-
Keith, I had Chapelle’s book in my hand the whole time I did the rigging. (It’s hard to rig with one hand.) There is a lot of information in the last half of the book, but you need to be a scholar to dig it out. We of poor brains need to go through it over and over and then go through it again. In one place he talks about the gaff and how this or that is done, then when he talks about the cross tree there will be information, in writing or in picture, about the gaff that was not mentioned before. I tried to make a table of contents for the rigging. There are at least 17 different places that have to do with the mast, 6 for the booms, 5 for the fife rail, and any one of those may turn on the light bulb. Feel free to ask questions. I’ll be here. Bedford, Thanks for the complement but it will never sail like your three master. Elia, If she were as beautiful as your Arethusa she would at least have a case. Glad the pictures help. Like I told Keith and I’ll tell anyone If I can help, ask. Thanks Popeye. (although with the new avatar you are more of a Denis.) The wind blows past the door not into it. I hope. I hope. I hope. And thanks for the many “LIKES”. Bob
-
Go for it. We'll all sit here with our mouths open if you do. Bob
- 120 replies
-
- 1
-
-
- mystic
- motor yacht
- (and 2 more)
-
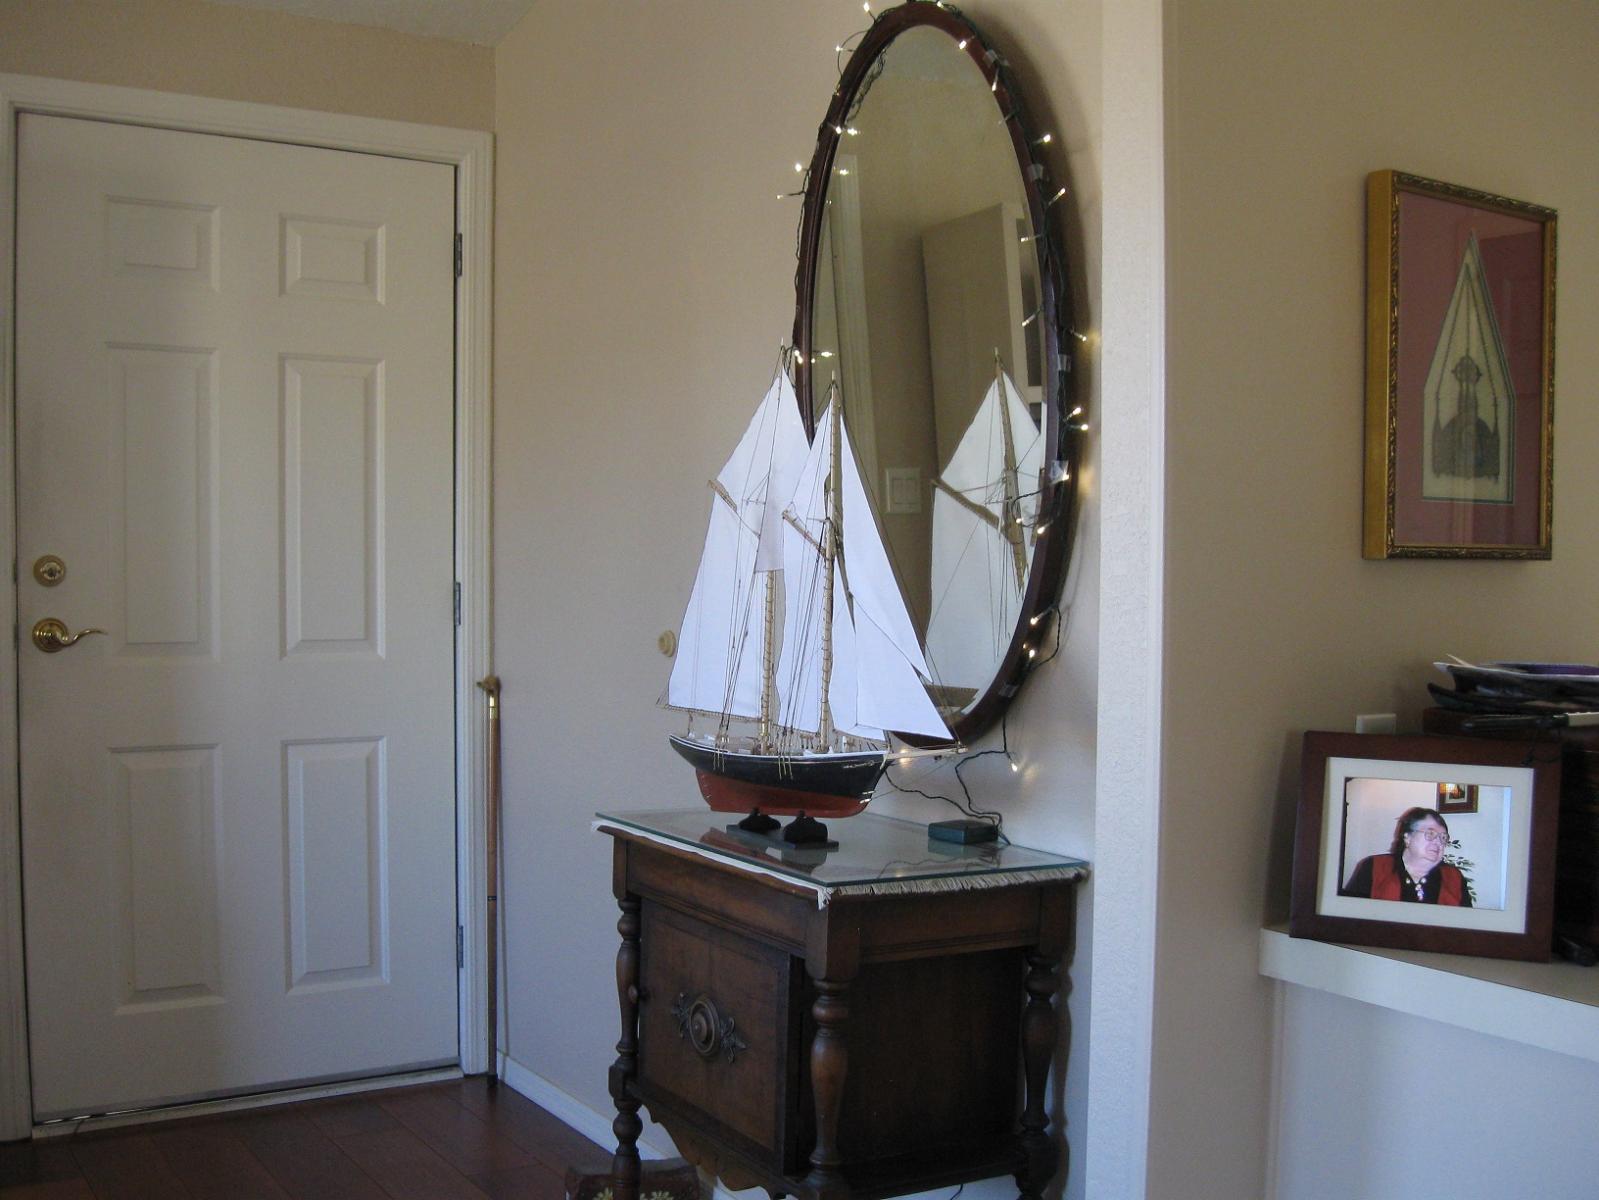
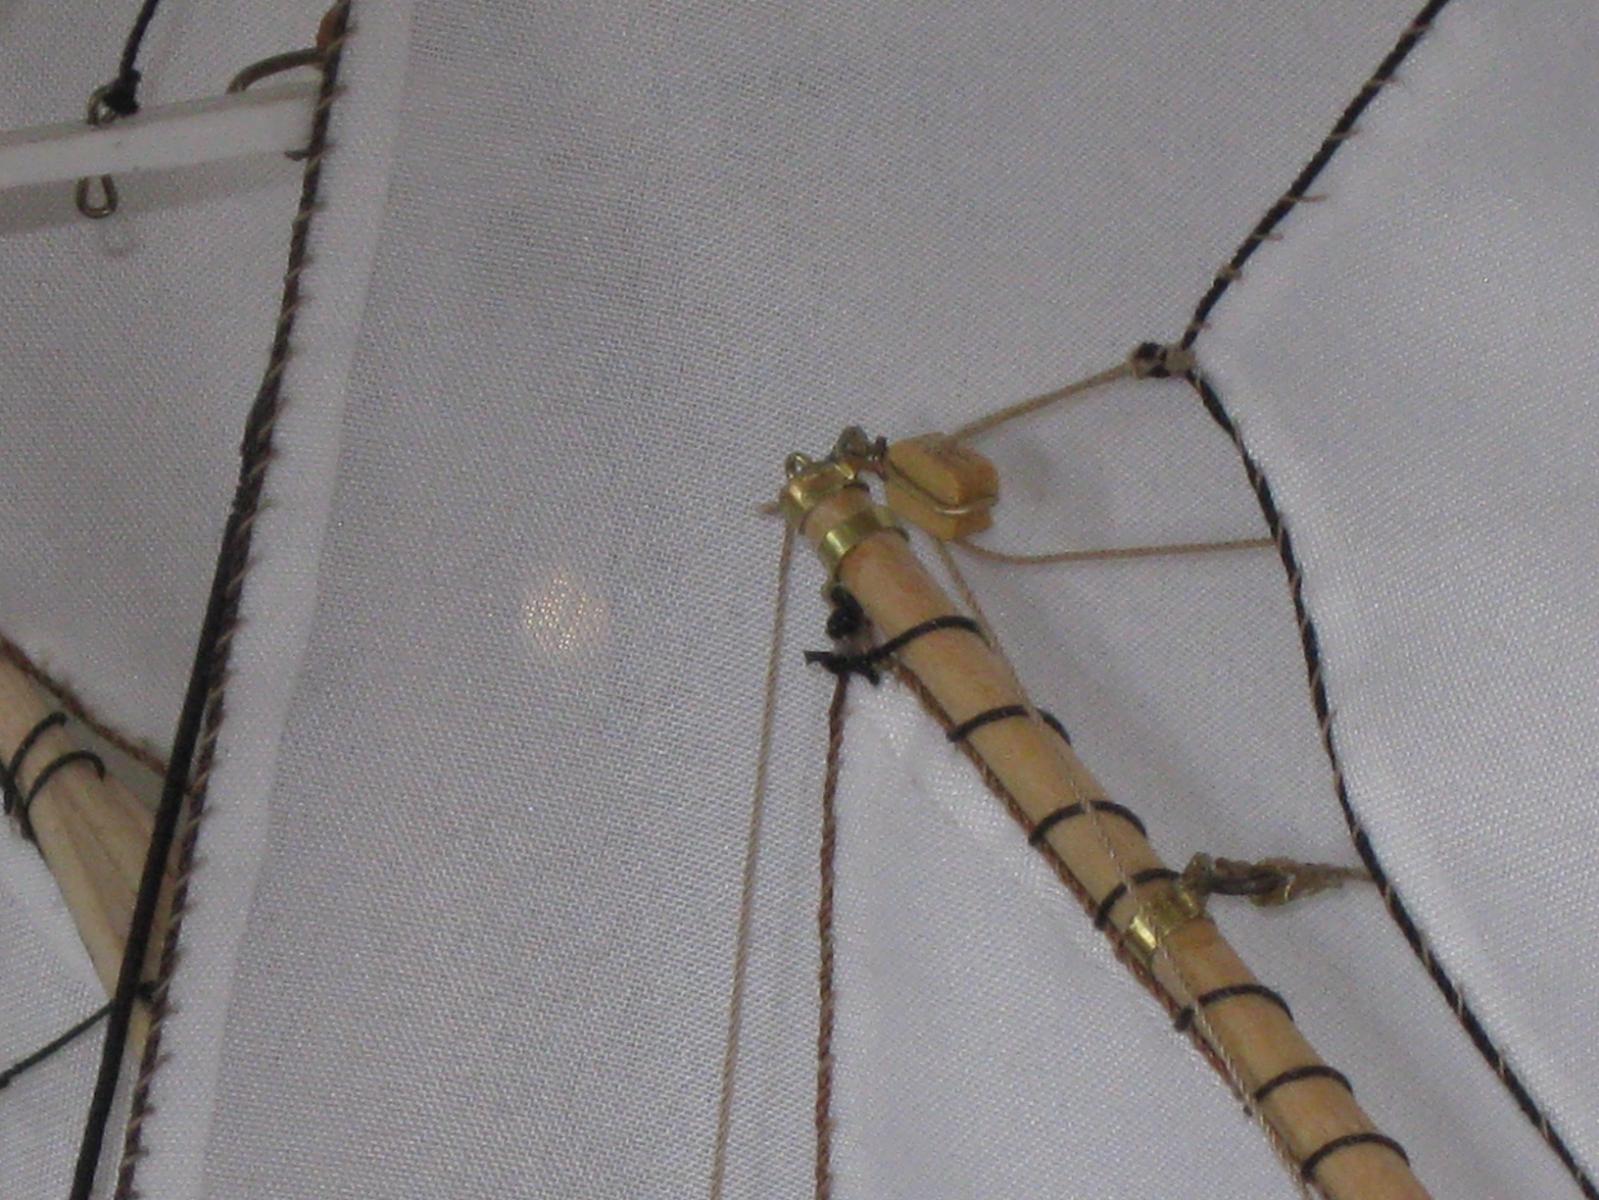
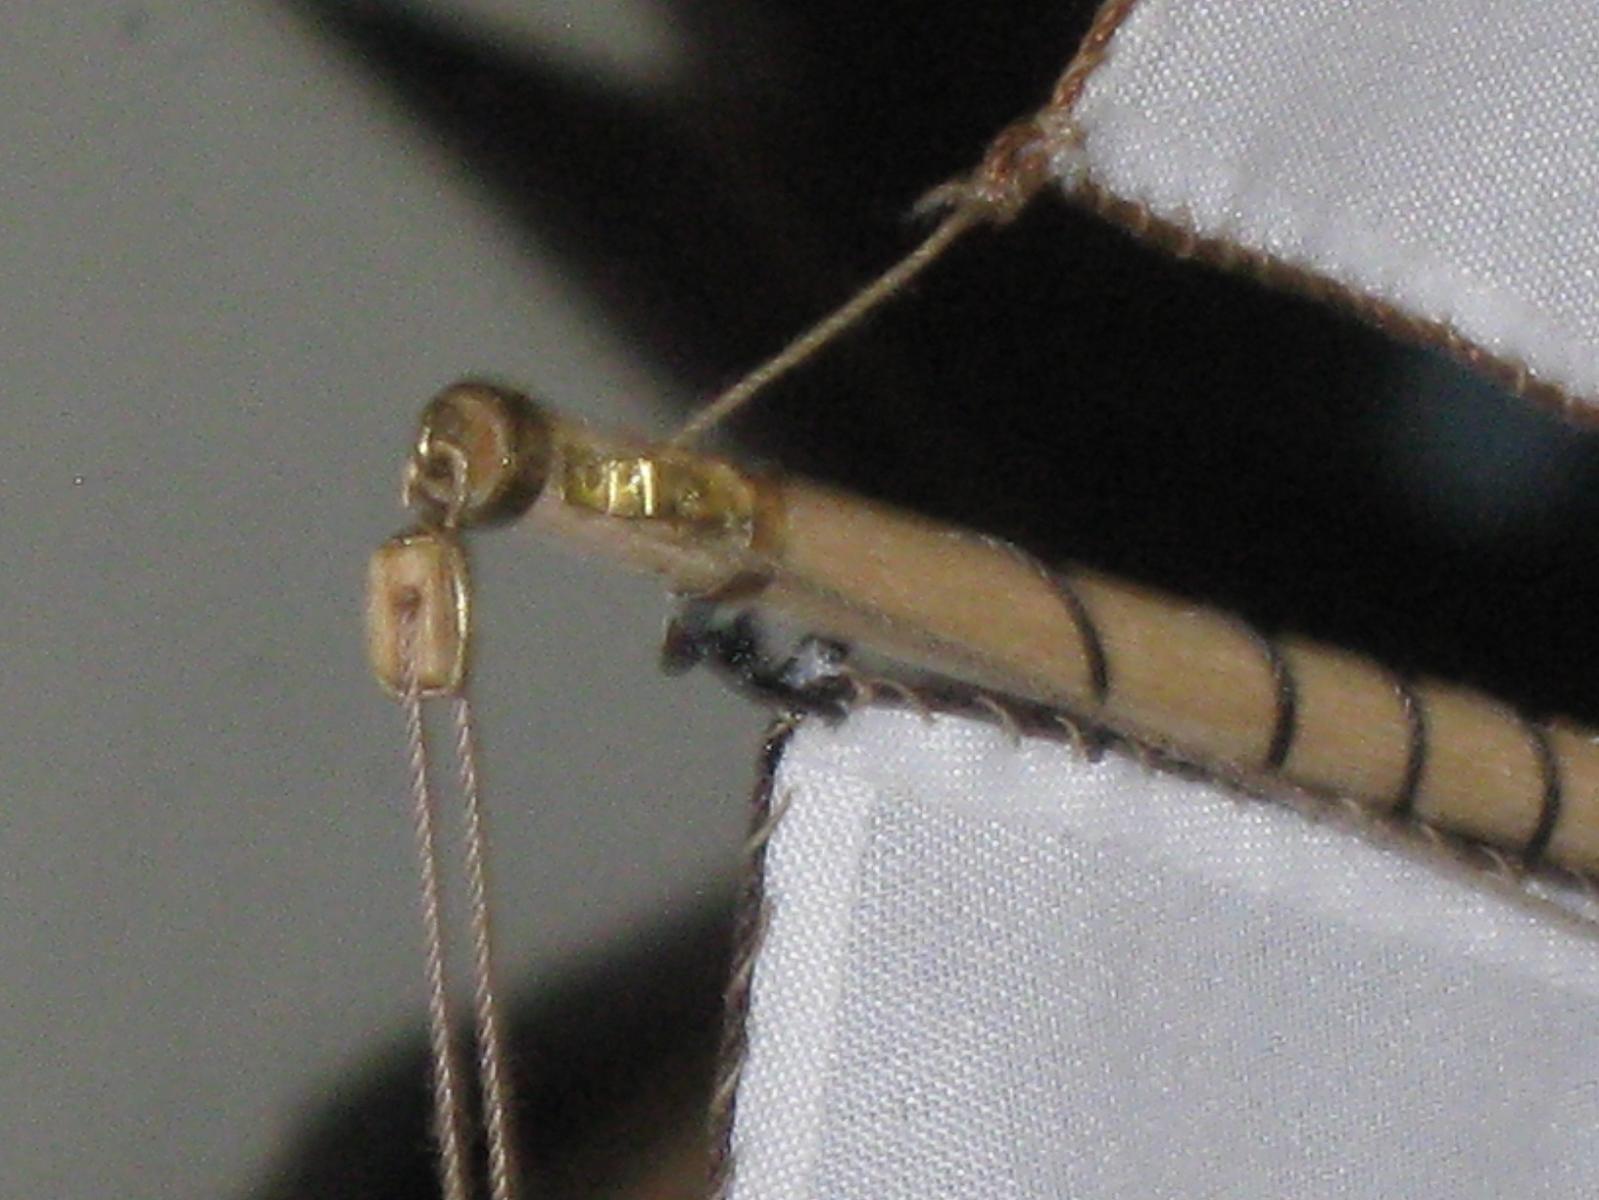
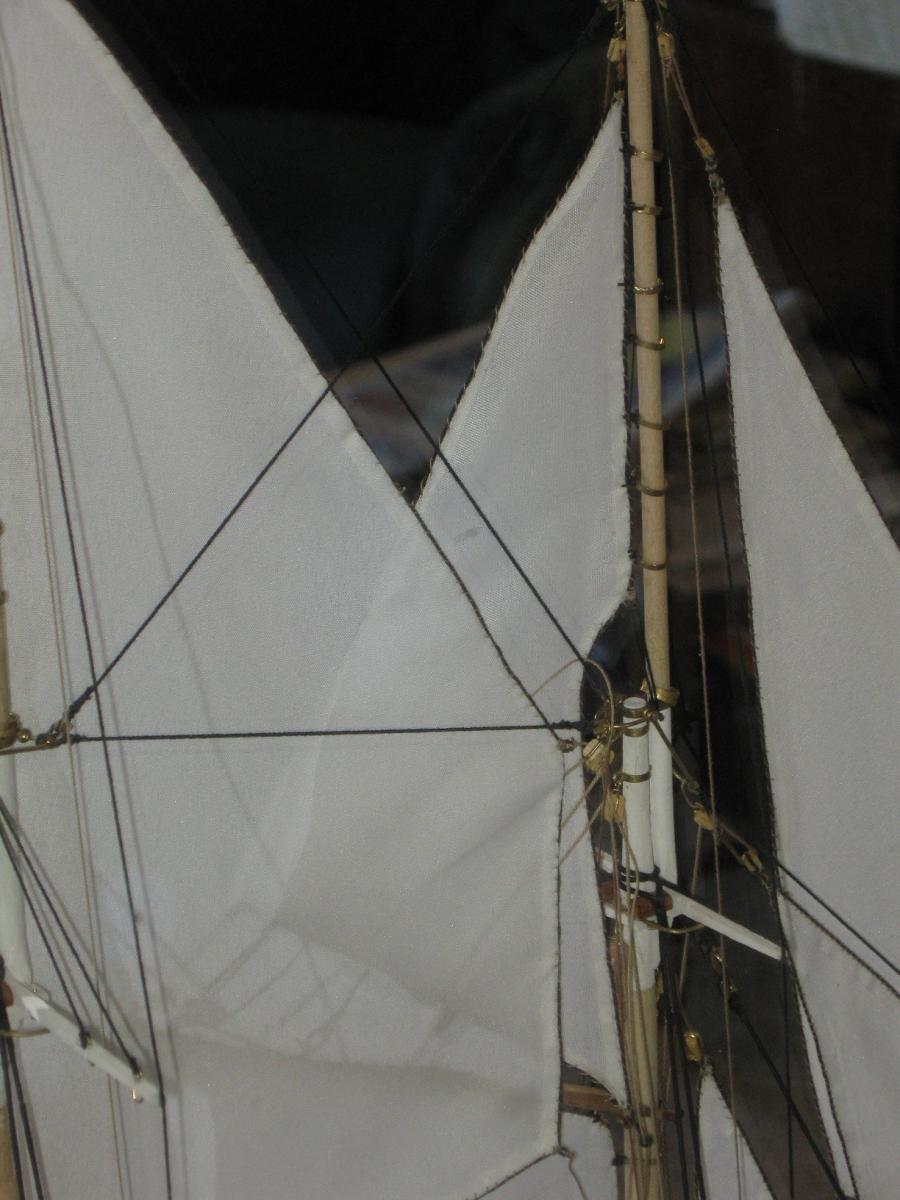
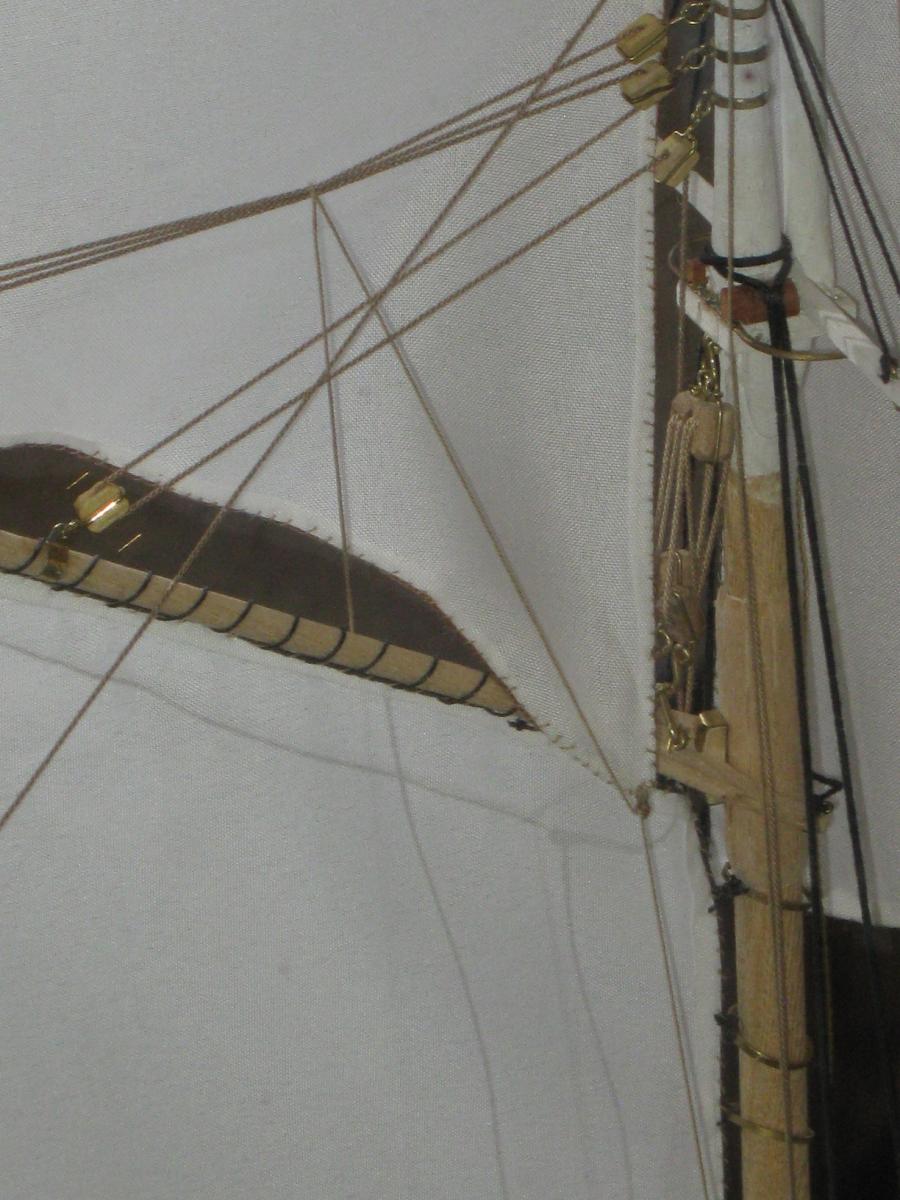
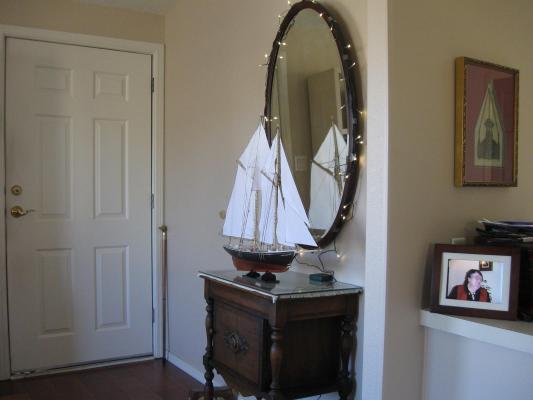
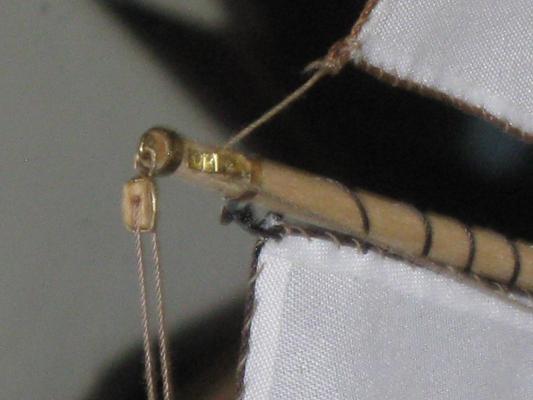
How do I answer so many? Let me answer the questions and for the well-wishers, thank you, thank you, and thank you. Keith here are some pictures of the top sails, the rigging was taken from Chapelle’s book “The American Fishing Schooner”. The top sail is held tight at the peak and clew, but the tack is brought down on what appears to be the wrong side of the gaff, this is to hold the loose tack close to the mast instead of flying out. There are two ways to rig the top sails. The most used seems to be single halyards with the main top on one side and the main top on the other. The other which I used is with double halyards so the sails can be set so they do not rub against the peak halyard. To put the sail over it must be bundled and passed over the peak halyard and reset on the other side. For the main top sail clew there is only one halyard, so I used a cheek block on the gaff. The fore top sail need to be brought between the spring lines also. To aid in this there is a clew line that goes around the edge of the sail and bundles it against the top mast where it can be pulled through by the halyard. I did not add the clew line. The clew requires two halyards, so a double block is used at the gaff peak. There are two sheets attached to the tack the one in use holds it on the windward side of the gaff. The other goes up next to the sail, over and to the outside of the peak halyard lines, then down under the peak halyard lines and over the gaff to be belayed on the other side. The lady in question, (Admiral, Wife, “She who must be obeyed”) is disabled and wanted it where she could see it all day. So it is in front of a mirror, on her special table, just inside the front door, with no case. So be it. The launch I am looking for is a Victorian clipper bow excursion boat. Could be steam powered. I don’t foresee another schooner in my future but who knows. The difference between the cod fisher and a mackerel seine schooner (as it turns out this is neither) is the cod schooner would be carrying several dories on board. The cod is a large fish and are fished for by men in the dories and when brought on board, are cleaned laid out in the hold and salted, and kept there until the hold is full. Mackerel are smaller fish and are caught in a net (seine). A boat called a seine boat takes the net out in a large circle and brings it to the schooner where the fish are brought aboard, cleaned and packed in barrels with brine. Bob


- 420 replies
-
- 22
-
-
soldering torch vs iron
captainbob replied to rtropp's topic in Metal Work, Soldering and Metal Fittings
In a mechanics tool box are many wrenches. Ratchet, open end, box end, etc. Each has it uses. Resistance soldering is great for some things. The advantage of the resistance solder machine is that it is fast. At the spot you touch the metal and solder will get hot enough to fuse in about a second, but if you leave the tip or tweezers there too long the heat will radiate out and get the whole part hot just like any other heat source. I saw a jeweler resize a ring without removing the stone because he could solder the spot before the heat got to the stone. On the other hand, if you want to chase the solder down a joint it is no better than any other heat source. As for the heat shield, I usually use an old asbestos tile I’ve had since the 50’s. But I also have fire bricks. The reason I used the bricks this time is the part looked like a toy top and I placed the shank between the bricks to keep it square. I do not use tiles because if I get one small spot of it hot without getting the whole tile hot it stands a chance of breaking due to thermal expansion. The space shuttle tiles are a different type of ceramic which would be absolutely the best, if you could find one. Bob -
soldering torch vs iron
captainbob replied to rtropp's topic in Metal Work, Soldering and Metal Fittings
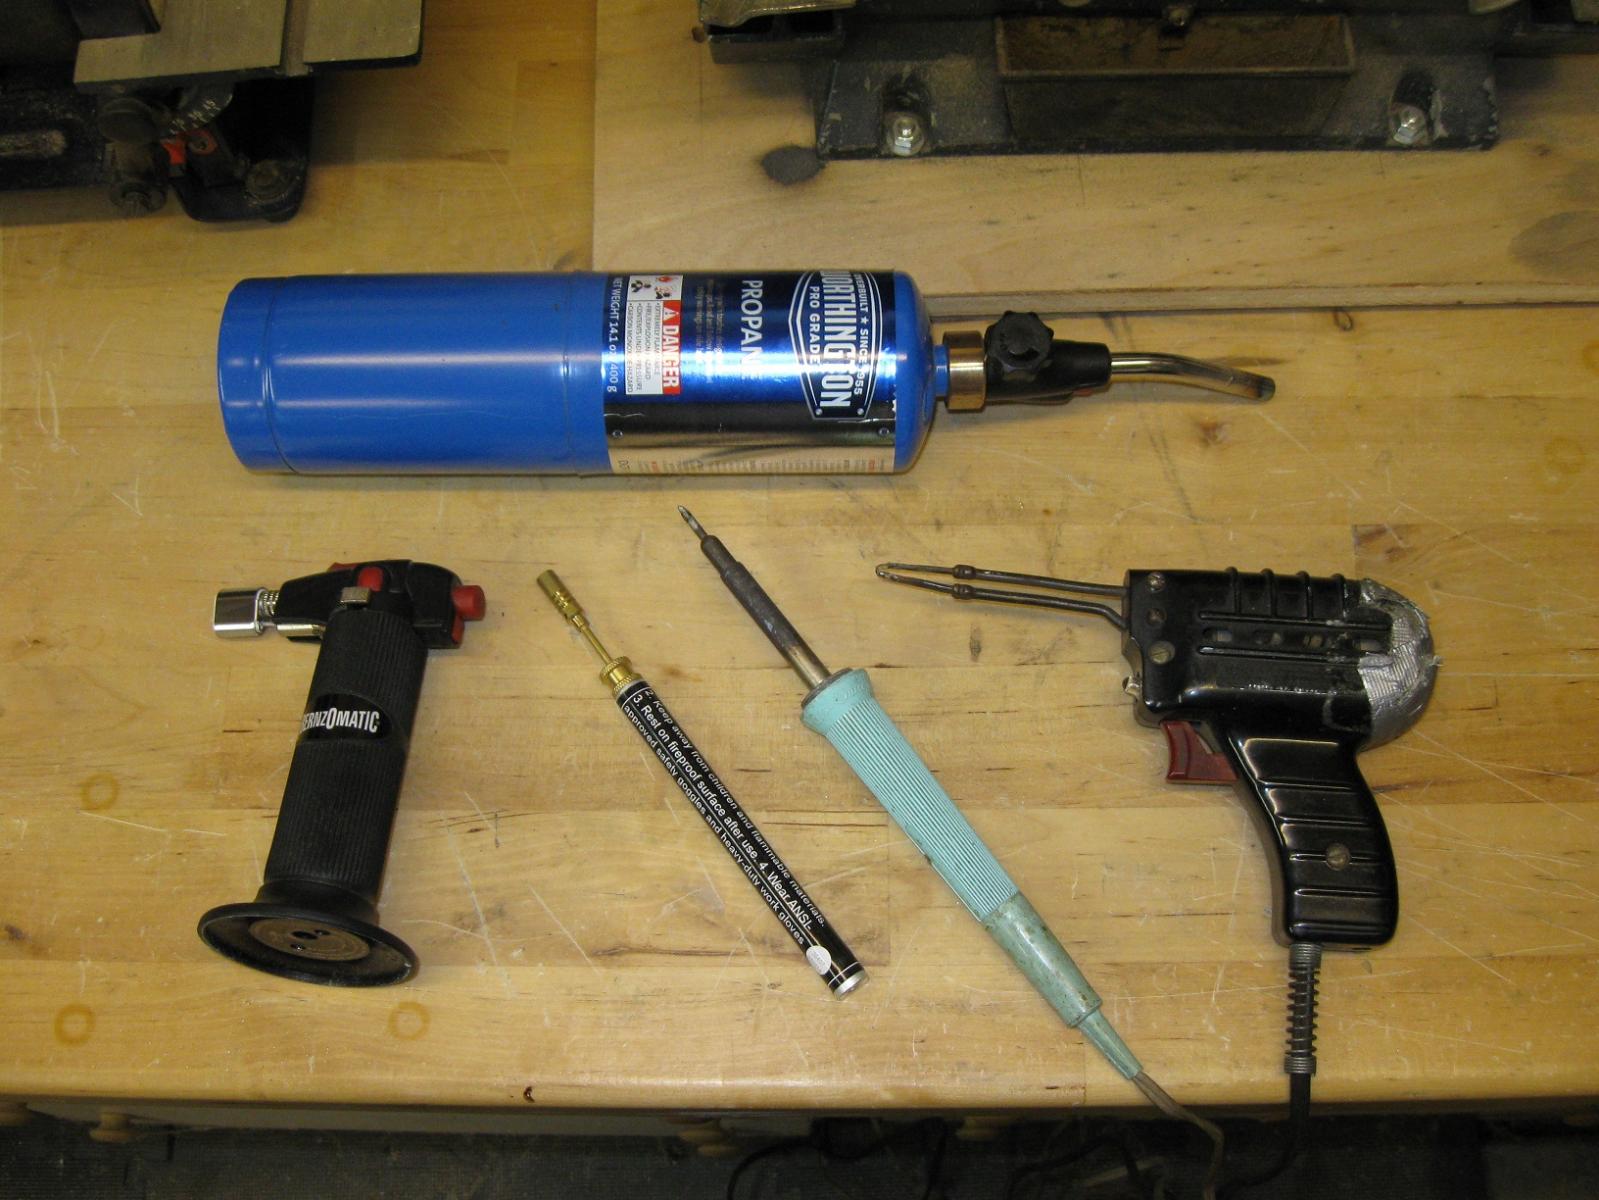
Richard, Here are the irons and torches I use. All were bought at the local hardware. But as you can see they are old and well used except for the little pencil torch that I haven’t tried yet. The iron is an Unger of 50 Watts and the gun is probably about 100 Watts. The soft solder I like is about 1/32” diameter lead/tin and I use a liquid flux of unknown brand. As for temperature, I don’t know. In some cases temperature and torch size depends on what the part is resting on. Yesterday I silver soldered a 3/32” bar through a hole in a 1/16” X 3/4” dia. disc. Normally the Bezomatic would Have done the job, but I had it on a cold fire brick and the brick was soaking so much heat away from the brass that I had to use the large torch. Bob
-
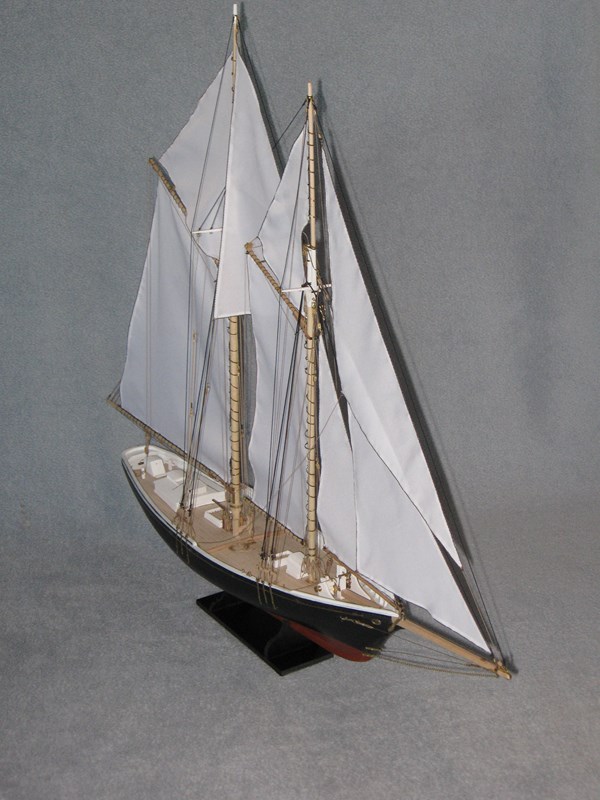
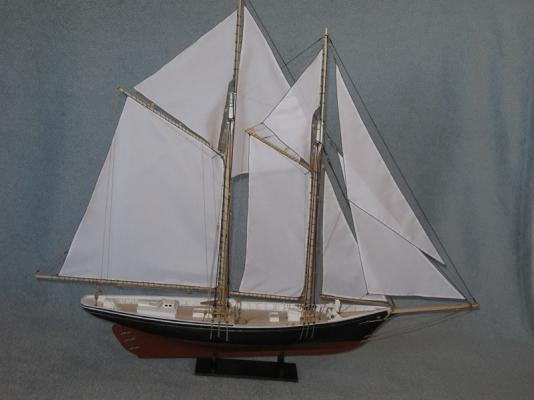
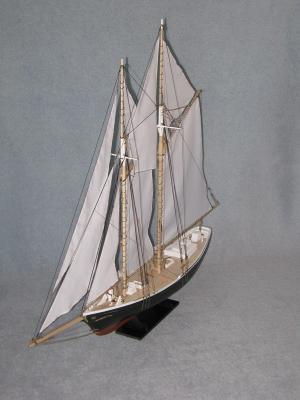
Sorry it’s been so long since my last pictures. It’s been one of those times when everything that could go wrong did. Let’s leave it at that. I have however finished the Lettie to the admiral’s delight. She is now dressed in all her sails and rigging. So here she is in all her finery. Don't know what is next. The admiral likes to see sails but I'm leaning towards a launch. We'll see. Bob

- 420 replies
-
- 26
-
-
I've said it before, I'll say it again. She's lovely. Bob
- 120 replies
-
- 1
-
-
- mystic
- motor yacht
- (and 2 more)
-
soldering torch vs iron
captainbob replied to rtropp's topic in Metal Work, Soldering and Metal Fittings
If you buy a Weller soldering iron like the one shown on the opening picture of the first video, you dial in the heat (wattage) you need. No changing of heads, no open flame, no tarnish of metal that needs to be cleaned. On the other hand if you like playing with fire that's your choice. For soft solder I’ll use an iron every time. Bob