HOLIDAY DONATION DRIVE - SUPPORT MSW - DO YOUR PART TO KEEP THIS GREAT FORUM GOING!
×


jud
-
Posts
1,171 -
Joined
-
Last visited
Content Type
Profiles
Forums
Gallery
Events
Everything posted by jud
-
 Like a highway, the crown is specified for the nominal width. Narrow the road and not adjust the crown will result in a very high crown. You wish to move water from the deck, pick the widest part and determine how much crown you need. With the chord distance from outboard to outboard and the perpendicular distance up at C/L to the crown, you can compute the radius of the circular curve needed, now use that radius for all your deck beams, just use shorter segments of that curve as you move forward and aft from the widest point in the deck. The rate of change will remain constant the length of the hull and there will be no twisting of the deck boards as you plank that deck. That is how I would do it, but keep in mind, I have never built a ship, but I have designed and staked for construction lots of roads during my time as a Land Surveyor. jud
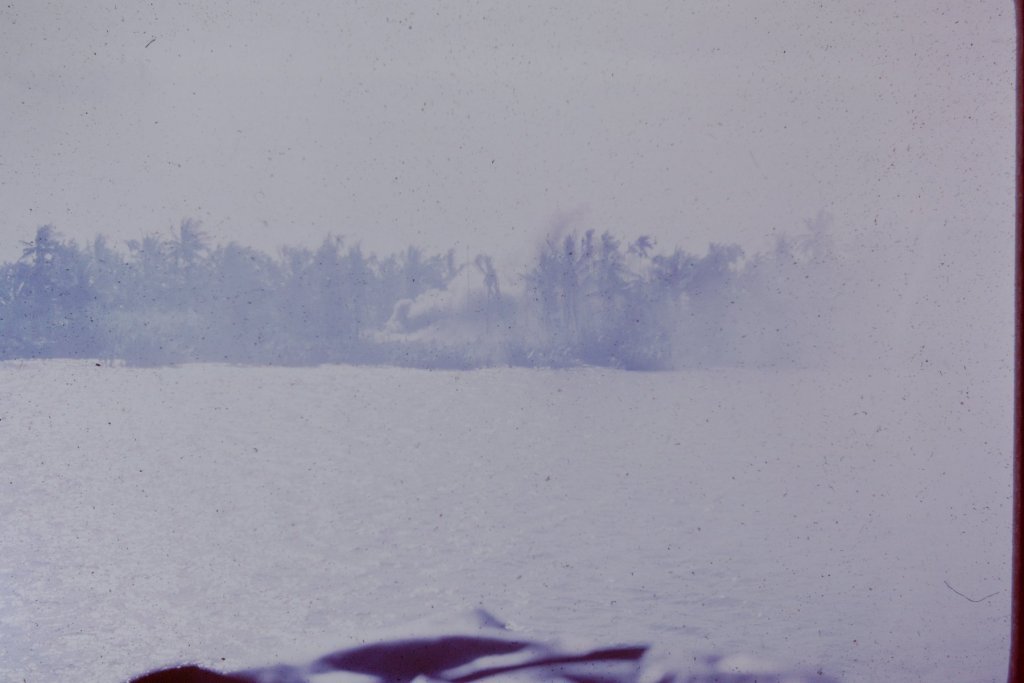
-
If the existing eye bolts are to scale, you have the perfect example for size. Just measure it.
-
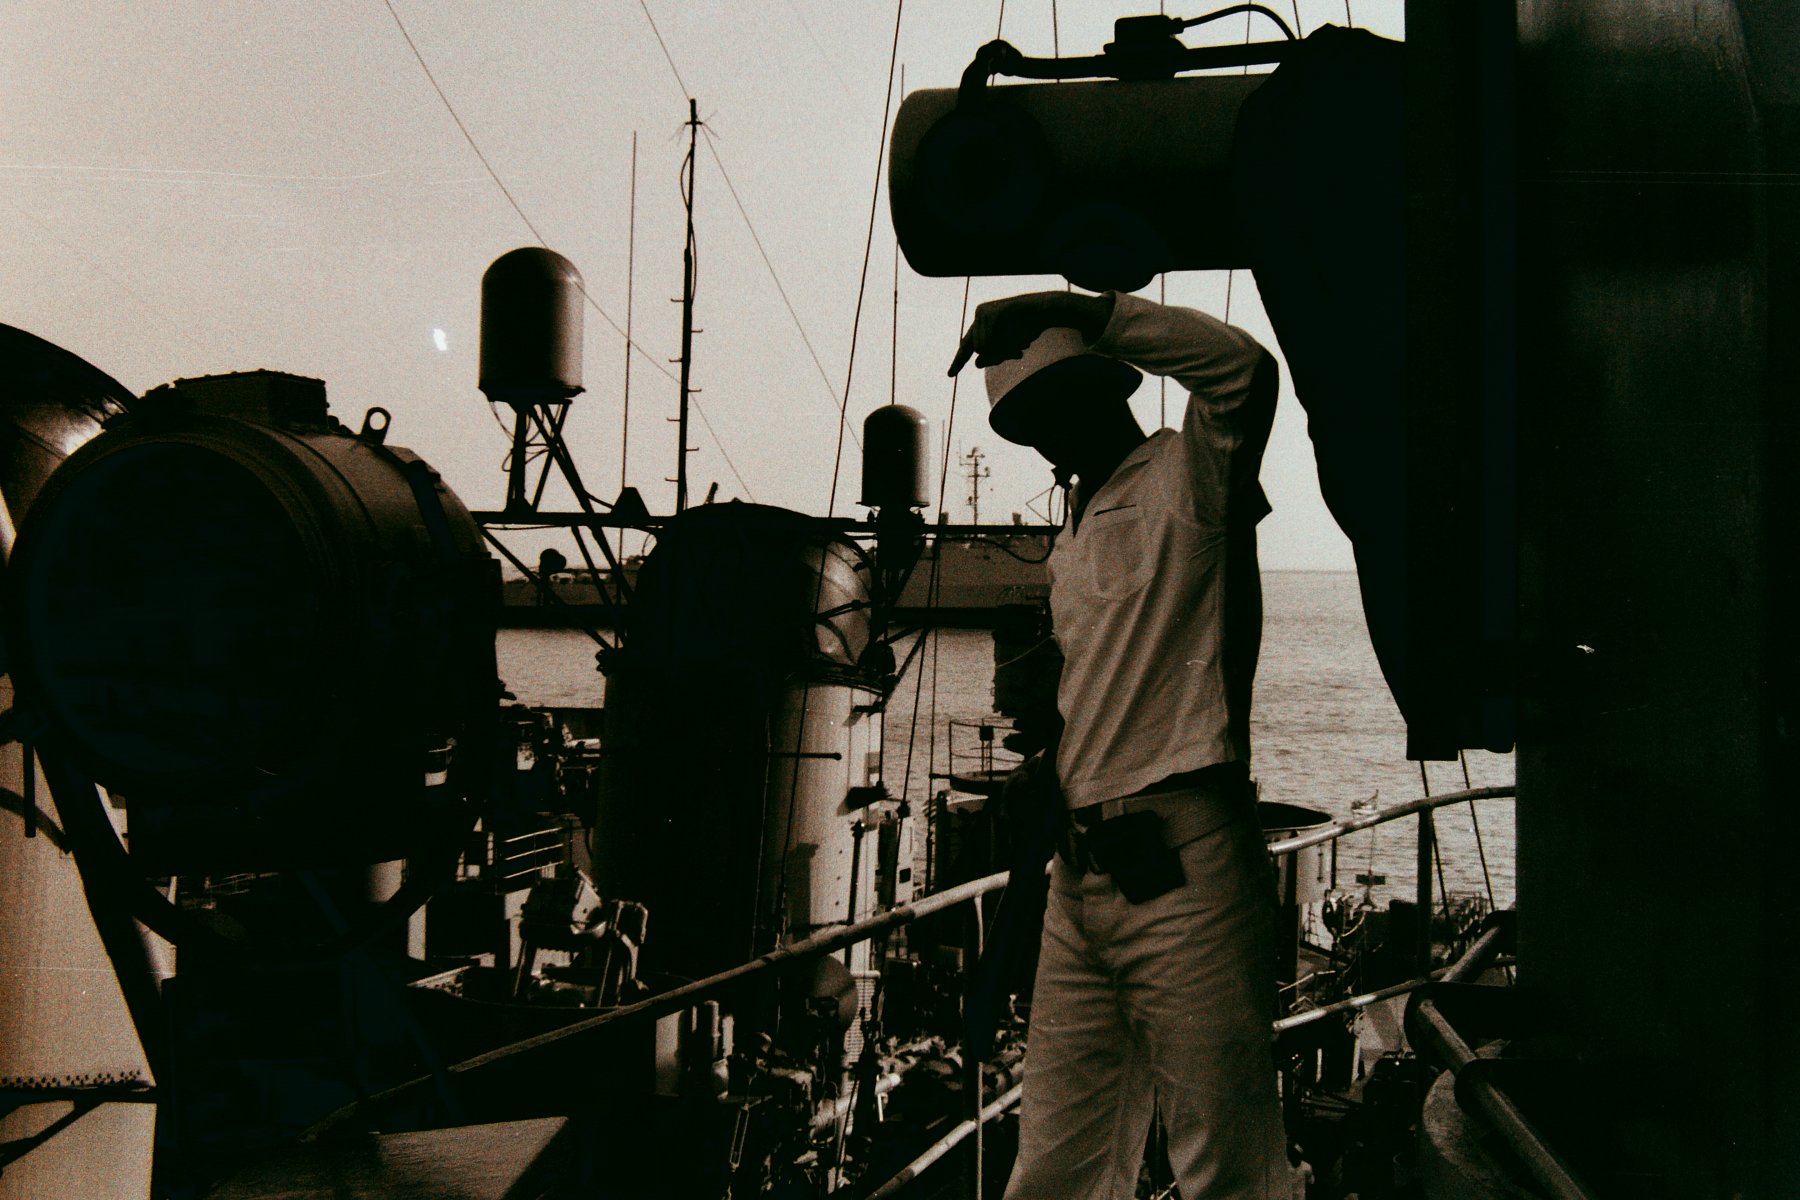
Looking again at the Haul-out and noticed how the leads to the outboard Capstans was lead to the outboard side, thereby minimizing the angle at the fair-leads. All Capstans turned clockwise except for the one where the duds and do it backwards men, were utilized to their full potential. Do it backward, reminds me of an early adventure I am going to make you suffer through the telling. Photo showing the path of a snack potato, I had grabbed from the spud locker and slipped when getting rid of it, bounced off the overhead director hatch, and clattered around the bridge wings generating some verbal expressions, while I closed the hatch and trained the director back amid ships. That spud being the loyal buddy it had became, unerringly struck the Captain on the head. Had to own up when the repair party was going to be restricted until the guilty came forward, repair party was stationed near the Spud Locker on the 01 level. Didn't injure the Captain and it was laughed off when all found the guilty one and what had happened. Never swiped a snack spud again.

-
Using Holly for decks
jud replied to Jim Rogers's topic in Building, Framing, Planking and plating a ships hull and deck
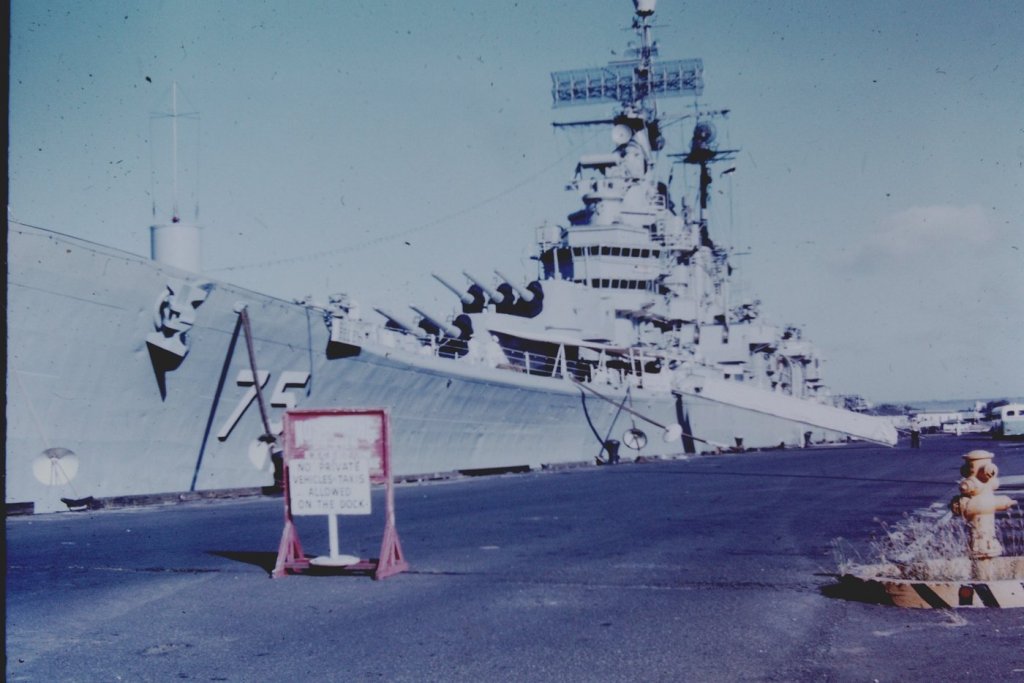
The Teak decks on the Helena and other navy ships were Holy stoned once a week using a concoction of boiler cleaning compound, scouring powder, salt water soap and bleach mixed the evening before in a large galvanized garbage can and left to bubble and burp over night. Shined the can and bleached the decks, sometimes they were almost white. This photo was aboard the USS Helena, CA 75, Port side amidships, compartment behind crewmen was a gun director radar room, above it was a 3" 50 magazine and above that a 3" 50 Gun, 'Mt 34 '. To the right was a deck house with a 5" 38 loading machine on top and the Whaleboat on the left was the duty lifeboat underway. These decks are due for a scrubbing and holy stoning. Blowing BoilerTubes would darken any deck.
-
I used my 2D surviving software to generate data and rectangular coordinates in the following format, Alpha Numeric Point Numbers, X, Y, Z and descriptor to produce DFX drawings of Each Frame for my LST. I obtained my Z coordinates by rotating my drawing and manipulating the X and Y coordinates using different point numbers to keep it separate, then manually entered the Z component in my main data base. Question, these coordinates are useful to me using my 2D software, were I to upgrade to 3D software, is this data base and resulting 2D DXF drawings usable in such a program or do 3D programs use something other than a rectangular coordinate system for endpoints? jud
-
Now, just leave her and her crew in peace.
-
Ageing Decks
jud replied to Old Collingwood's topic in Planking Techniques's Click Here for Topics dedicated to planking!!!!
Amazes me to see this idea of ageing decks, most of the models are of warships with large crews that need to be kept busy, so sweeping, washing and scrubbing supplemented by Holly Stoning was common. Saltwater wash downs acts as a bleaching agent and merchant ships had painted decks. These decks are on a Heavy Cruiser, kept white by salt water scrub downs with weekly holy Stoning using a cleaning agent made up of salt water, scouring powder, bleach and boiler compound, mixed the night before in a garbage can, which came out shinny. The decks in these 2 photos are 3 years old, they are not gray. The one looks like the decks have not been cleaned up after blowing tubes, they were seldom that dirty.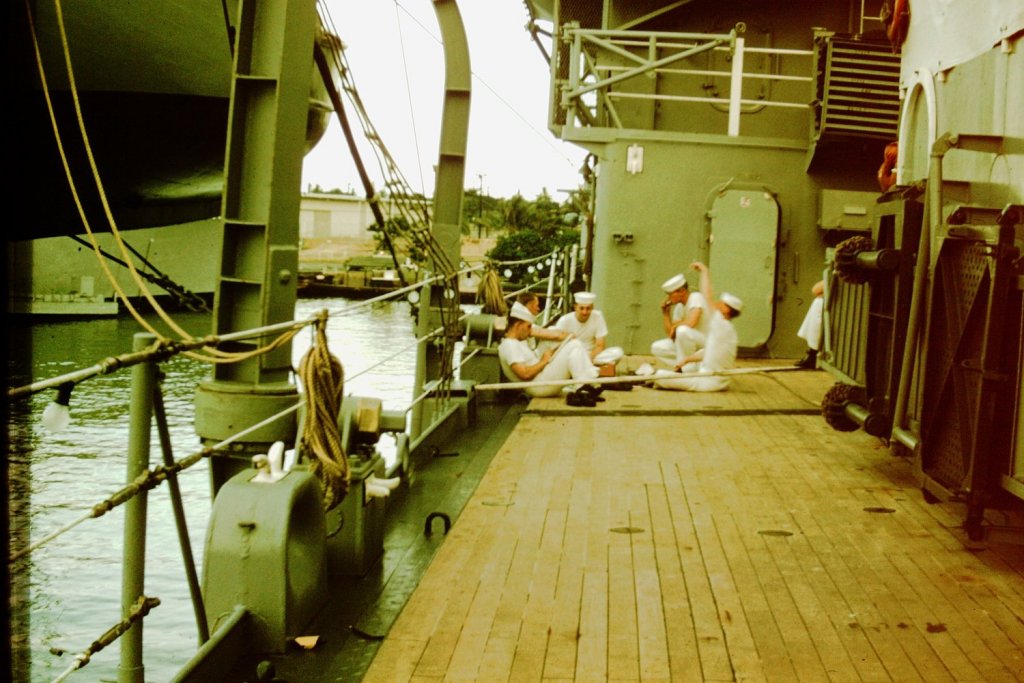
-
Suspect you are measuring the chord between the bulkheads, then using that for your planks, but the planks need to span the arc of the curve, a greater distance than the chord from bulkhead to bulkhead. Seems small, but is accumulative, especially as the curve radius decrease around the bows and stern. jud
-
Should be fine. I suggest that you add some length to the open end with a reverse curve in the last bit of it. Hooks that were slack then quickly put under tension tended to jump out of eyes, so small stuff like Marlin was used to mouse the hook to prevent that, few modeler do that, they should. The Seamen of Old all carried knives and used them as tools, so lashing or Mousing almost everything did not slow things up a bit. Would expect to see the Grab Hook style on Guns. Your work on this Display is exceptional. jud Figure 6-23.-Chain sting. Grab Hooks Grab hooks have an inside curve that is almost U-shaped so that the hook will slip over a link edgeways and not allow the next link to slip past. Grab hooks have a much more limited range of use than slip hooks. They are used exclusively when the loop formed in the chain is not intended to close around the load. Mousing a Hook As a rule, a hook should always be moused as a safety measure to prevent slings or line from coming off. Mousing also helps prevent the straightening of a hook but does not add to the strength of the hook. To mouse a hook (fig. 6-25) after the sling is on the hook you should wrap the wire or small stuff 8 or 10 turns around the two sides of the hook. Mousing is then Figure 6-25.-Mousing a hook. completed by winding several turns around the wire or small stuff and tying the ends securely. Inspection of Hooks

- 82 replies
-
- 5
-

-
- naval smoothbore
- model shipways
- (and 1 more)
-
Powder monkey by gun of U.S.S. New Hampshire off Charleston, S.C.

-
Cathead Angles
jud replied to allanyed's topic in Building, Framing, Planking and plating a ships hull and deck
The aft Port Lids look like they depict the swing resulting from the shape of the aft hull. Cat Heads, need more of the plans to make the call that is a Cat Head, you probably have good reason to identify it as such and what is there is not a part of the forward rig. Cat Heads have some necessary considerations, one; where the Anchor could be let go from to clear the Hull, two; where it could be hooked by the Cat head falls when hoisting through the Hawse Hole and the Cable relieved of the Anchor weight, three; where the supporting timbers are attached to the Hull considering Deck layout of the Deck furniture necessary to work the ship. The drop point is somewhat fixed by the Hull and Hawse Pipe, how the Cat Head is attached is controlled by the layout of deck fixtures and construction of the ship, put it where it is secure and clear of sailing rigging, Different construction layouts will force change. If it works, remember the saying, "More than one way to skin a Cat". The Star of India is using her Cat Head for two purposes as can be seen in this photo. jud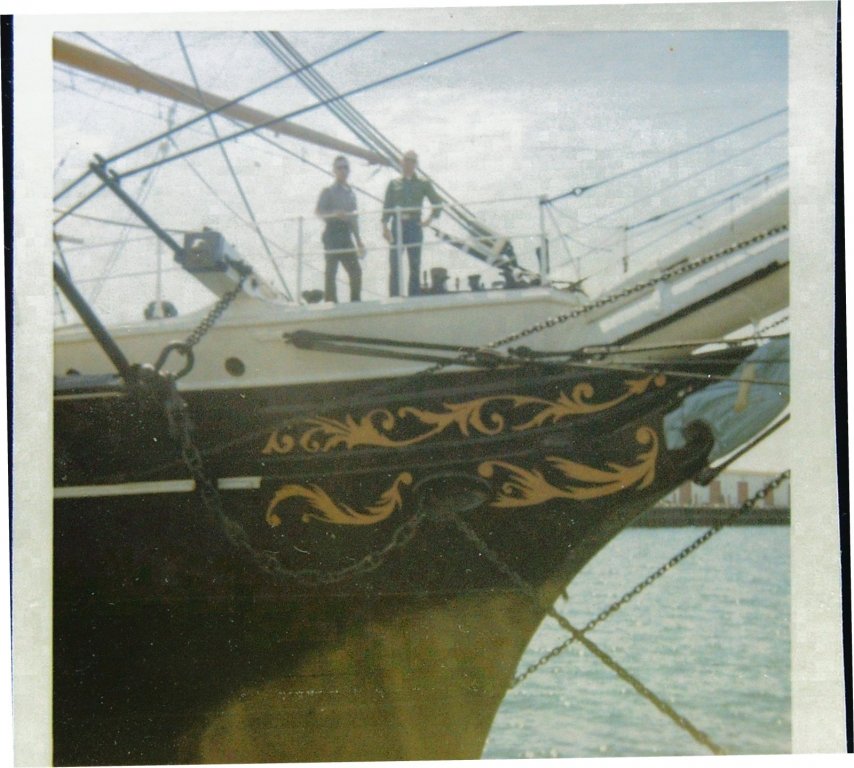
-
3 Torpedo hits rolled her over, the 4th might have hit the magazine, no one knows. Less than a 1/3 of her crew survived.
-
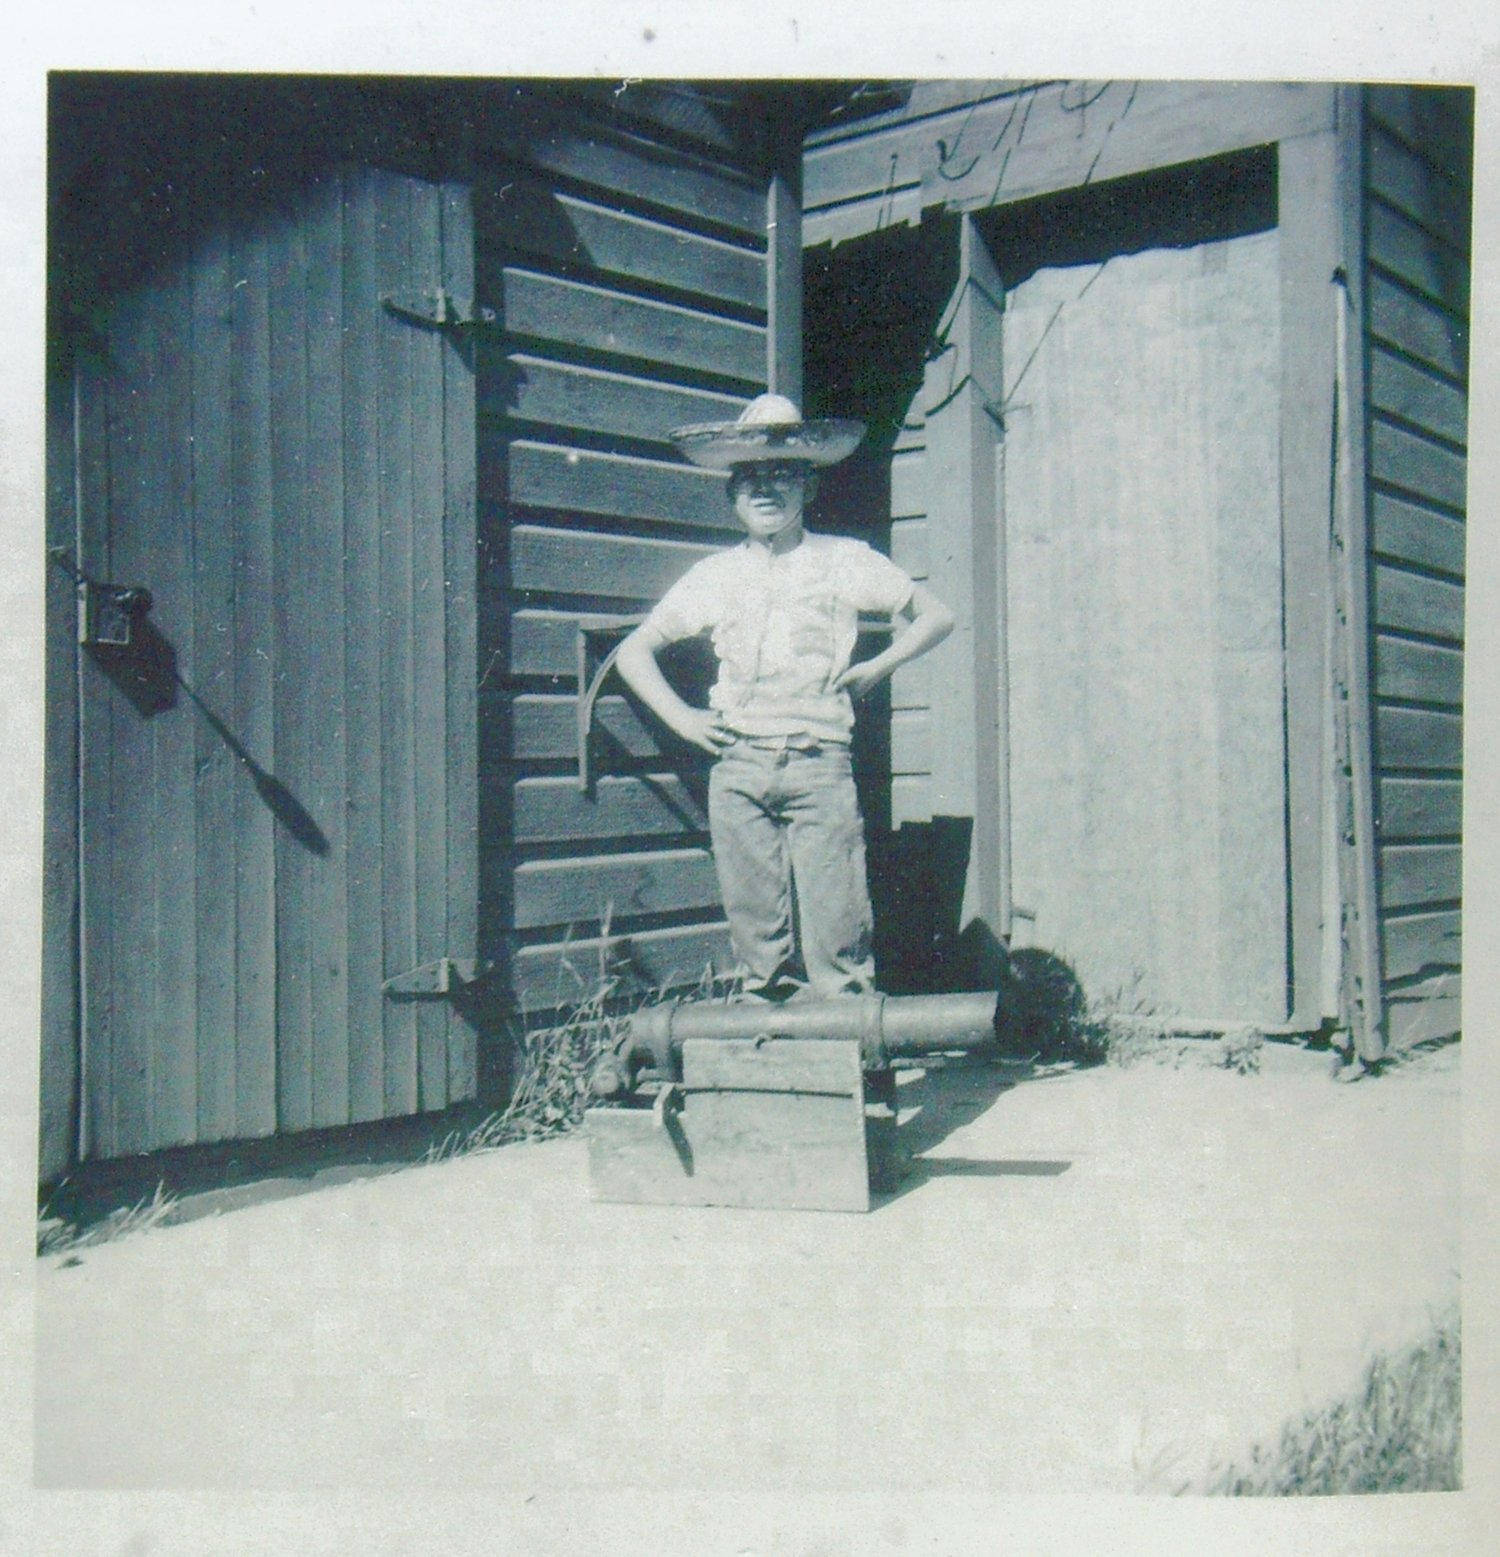
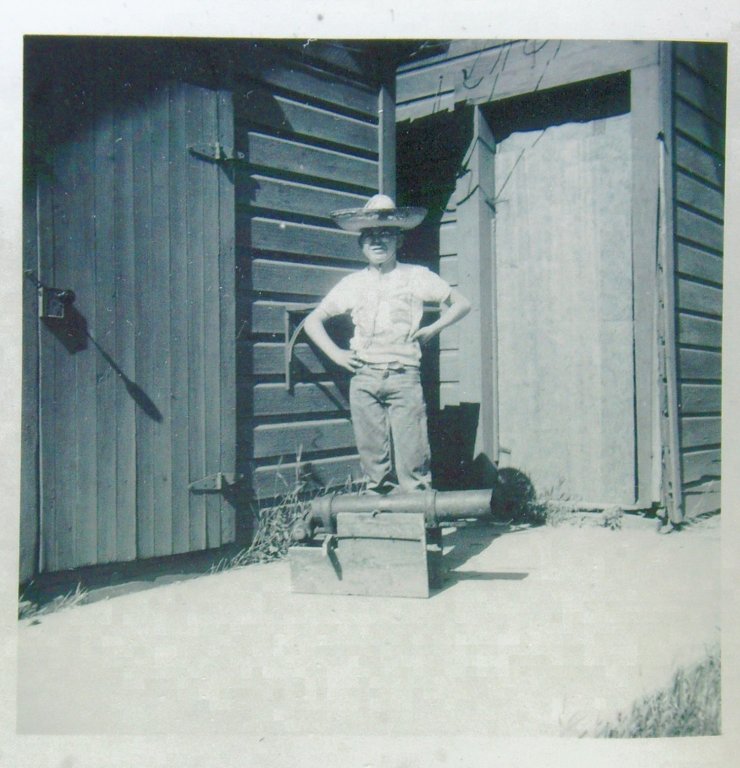
Thought you might enjoy this Naval gun. Was 13 when I made it, '62 years ago', from an old hitch. Pillow Block held a roll of caps, after drilling holes a carriage bolt and hammer made a fine bang and produced some gun smoke. Will remove from your build log tomorrow. .
- 30 replies
-
- 3
-
-
- model shipways
- finished
- (and 1 more)
-
What I would expect to find aboard such a vessel would be a rotating and quickly removable stack with maybe a half grate hatch cover with the other half lying alongside the hatch or lashed to the mast. Might find some lines and poles for an awning over the open hatch. When you batten down, you want water to stay out and the covers to be secure, not having the galley stove lit, would be of little concern, eat biscuit and drink grog. jud Part of a day in the Brown Water navy, 1968.

- 31 replies
-
- 3
-
-
- ventilator
- flue
- (and 4 more)
-
Think were I doing this for real, it would be two pieces. One cone shaped with the hole for the vent through the center and nailed to the hatch grate. The other piece would be attached to the vent, also cone shaped to fit over the first cone and allowed to rotate as needed. Rigged to come apart quickly and the vent and grate replaced with a hatch cover that could be tarped and battened down. jud
- 31 replies
-
- 2
-
-
- ventilator
- flue
- (and 4 more)
-
Rotated to draw properly, that changes with each change of Tack, on a power boat speed, wind velocity and direction also requires the ability to rotate or a wind cap that can handle wind from any direction. Fuel, stove type all have different needs.
- 31 replies
-
- 3
-
-
- ventilator
- flue
- (and 4 more)
-
Looks like you secure your line to the movable pulley bar and wind the rope clockwise around the pulleys and on out to the capstans taking the strain clockwise. If you have taken the rope from the the coil properly, twisting will be at a minimum. Suspect the outboard lines and capstans were used to get the hull into position and held on the beach before the blocks were rigged. then used to control direction.
-
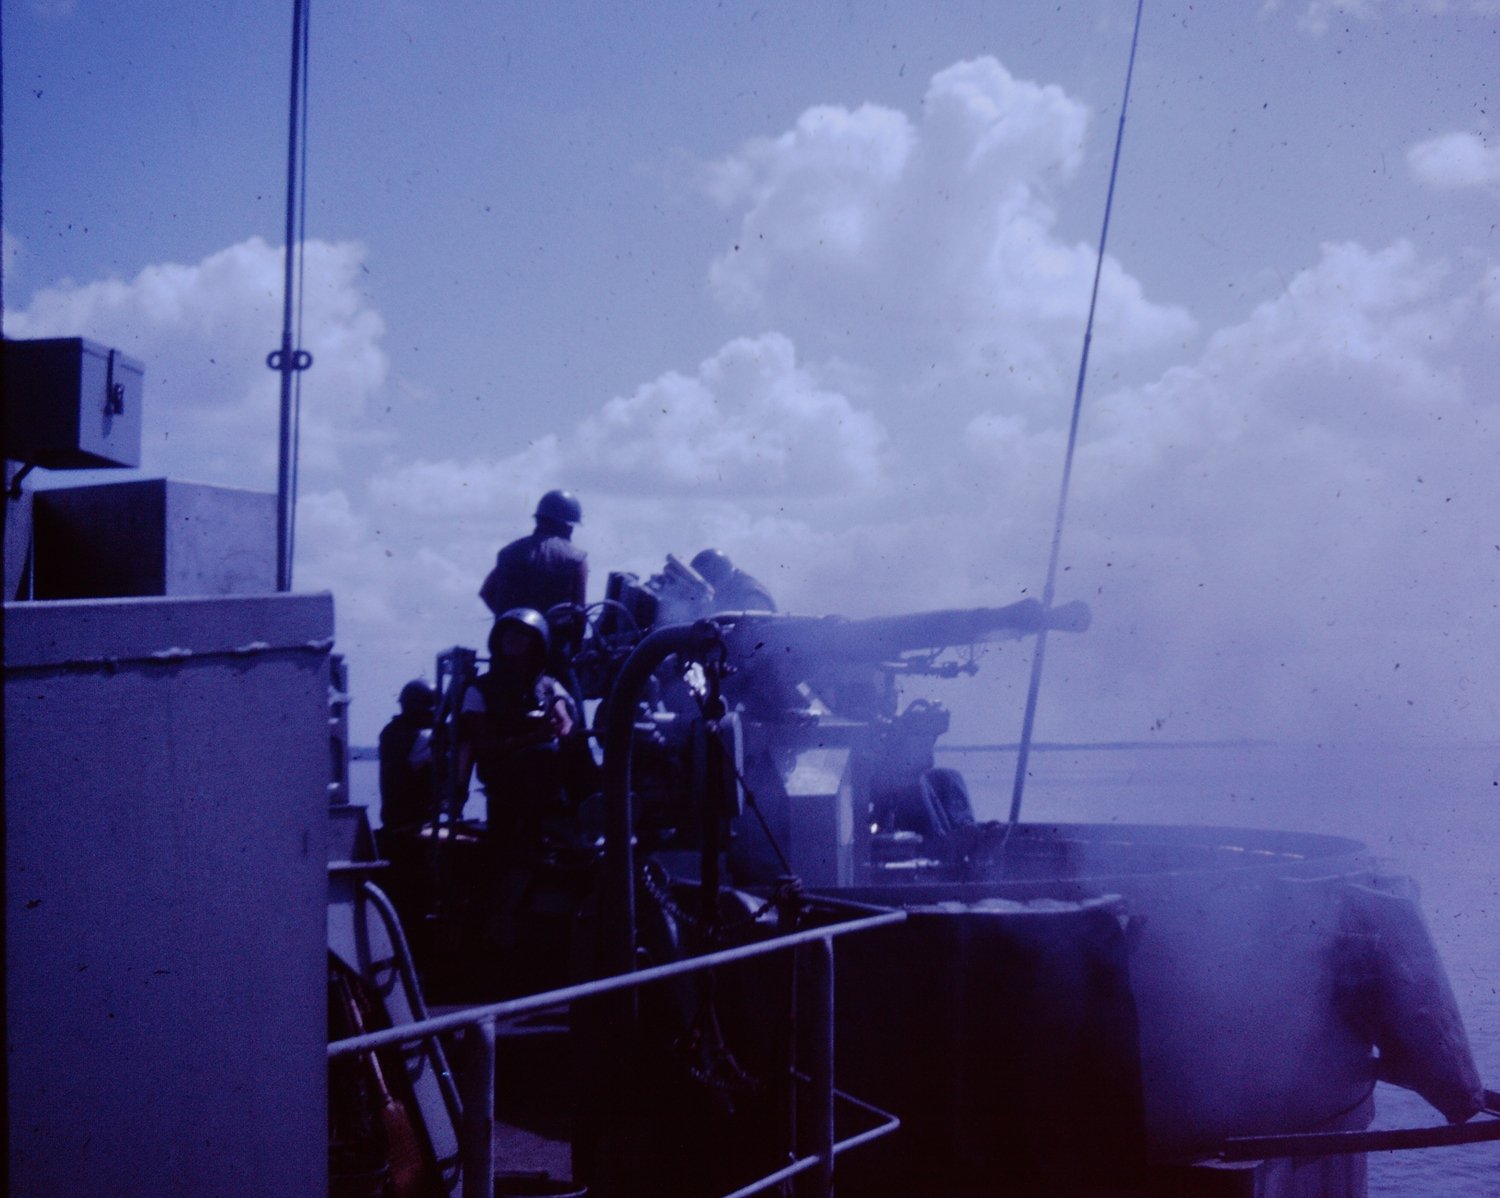
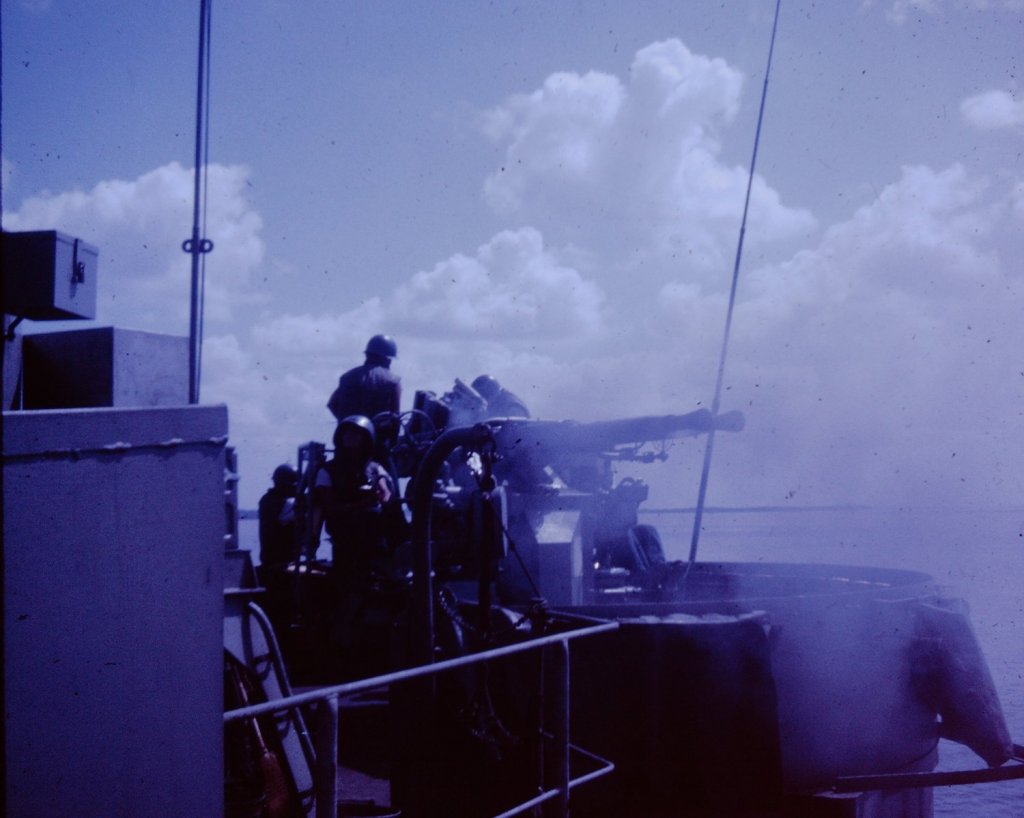
Nice job. Will throw this into the hat, do with it as you like, it goes against normal practice. I know what muzzle blast does, and how it acts and how objects react to it, having picked up first aid and phone boxes torn off splinter shields by it. Because of that I notice when gun port lids are not drawn clear back to the hull and out of direct contact with muzzle blast and held there. Models look neat with the gun port lids out at an angle to the hull, but the carpenters making repairs, would soon be stopping the practice making so much work for them. Want them out at an angle, then stop them from flapping by having a line holding tension on the opening rig, thereby stopping movement during blast, or pull them on up and tie them off against whatever is avable, Hull, Molding, Bulwark or Chains so they can't flap which was probably the normal practice. Again nice work, making me want to do something similar until I get start on my LST. Here is a little muzzle blast from a 40 MM, 1967 RVN aboard LST 821..
- 82 replies
-
- 4
-
-
- naval smoothbore
- model shipways
- (and 1 more)
-
Have you thought about a Coping Saw?
-
The reason I copied and posted it. Few except an old "T' Sailor would appreciate it. jud
-
I have brazed using brazing rods on sheet steel and cast iron, when I looked up the definition, silver soldering did fit into the definition I found. Requires higher heat, can be used for dissimilar metals and has high strength, requires a close fit up at small scales. My brazing around the Ranch using large rod and a full size torch, touching parts and a can of flux could fill gaps well, pre-fluxing would be required for close fits. When building up assemblies, I would think that the base structure would be better using brazing and then change to lower heat materials as the assembly progressed. All speculation on my part, based on my experience around the shop and what I have read. I expect and hope someone who has some first hand experience in using progressive lower heating joining products will step up with some comments. I have been slowly progressing towards building a LST at a large scale, " 1/50, be 6.4' long and a foot wide ', large so I can show detail, plan on using sheet steel for framing and hull using brazing rod or spot welding, followed up with silver solder for details. That is what I have running around in my mind for that project, might find that there is a good reason I have not seen anyone else using such a method on this site. Considering the use of all-thread with nuts and lock washers as rib stiffeners and spacers prior to any welding. Brazing is a method I happen to like and have the tools to use brass rods, but heat can create problems for small projects and Silver Solder seems to be the norm and upper end of the heat desired.
-
From; ' LST ROUGH RIDERS SITE '. Dave LaBar 11 hrs Now me and a buddy and a guy named Joe took off on a can from Sasebo, The chow was poor and the fuel was low, but that doggone can could really go. Now along about the middle of the night, we were steaming along with all our might, When a cruiser behind us blinked his lights, blew his whistle and pulled into sight. We had twin screws on that little old can, which might have you think we were in a jam, But to you swabbies who don’t dig that jive that’s 16 boilers and an overdrive. Now we were men who likely knew we could race all night until something blew. That fantail was deep from the turn of the screws, but through the waves we flew and flew. Over the ocean we did glide, flying along with the throttles wide. The skipper screamed and the crew they cried, but we and that cruiser stayed side by side. We looked o’er the fantail ‘cause we heard something coming: sounded like a jet the way it was humming. It was coming along at a terrible pace, and we knew right then it was the end of the race. As it streaked by our side, we looked the other way, but, the crew of the cruiser had nothing to say. For there going by was a Reserve JG, pushing a hopped up LST !
-
Ropewalk
jud replied to Worldway's topic in Rope Making/Ropewalks's Rope Materials and parts resources
Needed about a foot of line for a project I was working on, did not have what was needed so rolled my own by hand and the help of a vice. Cut 9 threads, put an overhand knot at the end of the bundle of 9 and clamped it in the vice. Gathered 3 threads and twisted clockwise until they wanted to kink, and tucked it in my hand until I had all 3 twisted to the kink point, laid them together and from the end twisted counter clock wise, had what I needed. With the addition of some more hands or holding devices you can make rope without a rope walk. I have done the hand thing before using bailing twine, but were I planning on doing much, would be building something, the only real problem would be choosing which one from the many different plans you can find on the net. There is no requirement for planetary gears for an occasional home setup. do each bundle of threads separately with a way to hold them with the desired twist, then put them together and form your rope, much length and a separator or two would be handy. I suspect that the early home builders made their own line with the help of their spouses or kids hands as clamps. -
Do it like is done on full size Block and Tackle, make your turns through the sheaves in the same direction as the lay of the rope after uncoiling and laying it out straight without twisting or kinks. Will still want to twist so put it under strain and leave it for enough time to train it, fibers will adjust themselves that way. Someone will probably be saying to soak in diluted glue when in position, secure it there until watered down glue drys.
-
The USS LST 542 was a Class 1 LST with elevator between the Tank Deck and Main Deck. Their Hulls were the basis of the 542 Class LSTs with main deck blowers moved from main deck, main deck reinforced so a larger and heavier deck load could be carried and a ramp to the main deck replaced the slow elevator. Point is, any class 542 LST model could easily be modified into the Class 1 configuration, photos and plans are available.