


Altduck
-
Posts
456 -
Joined
-
Last visited
Content Type
Profiles
Forums
Gallery
Events
Posts posted by Altduck
-
-
Good for her.
I hope her classmates who were poorer financial planners at least got degrees that prepared them with marketable skills.
- Egilman, CDW, thibaultron and 9 others
-
 12
12
-
1 hour ago, David Lester said:
They did bring me a gift however - a $100 gift certificate to the LCBO (provincial liquor store) so this was a win-win experience all around.
Extra Grog Rations all around.
🤪
-
21 hours ago, Jeff T said:
I've been working off and on with these cannons for so long that I have become a bit tired of them for right now, so I will set them all aside and work on some other preparation. It will be a bit of time before I get them onto the ship.
Very nice recovery from a major set-back, but the end result looks great, and will be a real enhancement to the model.
Well done
-
Very nice job, and I really like the lighting and the open side.
The interior furnishings and details to depict the features and uses of the riverboats, with the gambling hall, the stage for the 'Bur-le-Q", the stateroom, etc. really tell the story of these old boats.
And Chris - good catch on the stars on the flag.
I've enjoyed following this build.
-
1 hour ago, Guyuti said:
Joshua,
Thanks for the fast reply, but I will have to give this a miss sadly, would have no idea how to covert the power to the UK's 240 volts.
Thanks
Guy
Guy
I was a US expat there in the 70's and we all used transformers then for whatever we shipped over there. 1000 and 2000 watt ones were readily available. The solid state converters now available would be great, if they can handle the starting current of the Byrnes motors.
Bear in mind, the 60Hz motors may run slower and hotter on your 50 Hz power
-
Similar friction characteristics on small boat winches. It's the first turn or 2 (if the knurling is still in good shape) that carry the load. If there are 4 or 5 turns, the line doesn't start to slip until the first 2 from the load have some slack in them. Pays to be careful at that point, though, if just trying to ease a jib sheet a tad.
-
What is the material of your new fence posts?
They don't look like the usual wood posts.
Just curious.
-
OK, Found it (the memory is the 2nd thing to go)
It was:
James H, Adminstrator
- mtaylor, ccoyle and Keith Black
-
3
-
9 hours ago, ccoyle said:
You must have gotten me confused with another staffer. I don't handle NRG issues.
Hmmm - I guess I did, and now I can't find it.
Sorry 'bout that
- mtaylor and Keith Black
-
2
-
On 7/22/2022 at 8:59 PM, Knocklouder said:
thanks so much MSW, I join the NRG but I don't know how to put the logo on my page lol,
You can't do it yourself.
I Messaged Chris Coyle and he did it for me.
- mtaylor, Keith Black and Knocklouder
-
2
-
 1
1
-
-
Looks good, and I like the detail work on the bales, barrels, etc.
Are you "Me" or "Suzy"?
- mtaylor, Canute and Keith Black
-
3
-
-
-
-
Thanks.
I did find this article on-line, which has a photo of a modern replica under sail with the sail shortened from the foot, and interesting narrative on sailing these although they don't explicitly mention reefing:
https://www.vikingeskibsmuseet.dk/en/professions/education/knowledge-of-sailing/sail-and-trim
It gives us some idea of what the original lads had to deal with, as they explored their world.
- Louie da fly and Srodbro
-
2
-
Great looking model, but at the risk of displaying my ignorance, I have a question about how they reefed their Mainsails back then. In your build, and on the box Cover Photo, the reef points start at the foot of the sail, and I'd have expected them to start from the yard to bring the reefed section(s) up lashed to the yard, and lowering the yard as they set more reefs. As shown, it would seem like a rather large and bulky roll of material hanging at the bottom of the sail by the time they set the 3rd reef, although I assume they could still be lowering the yard if they wanted to reduce the overturning moment.
I searched for other on-line articles about this, and the images shown are all just like this - reef points starting at the bottom. I found nothing about actually setting the reef.
Would appreciate any insight anyone can share as to how they sailed these vessels in heavy weather.
Thanks
- Balclutha75 and Srodbro
-
2
-
Interesting article, including and featuring a contemporary model, about the Corozol and several dozen other Scottish dredgers built for and use to build the Panama Canal.
https://www.bbc.com/news/uk-scotland-59644117
-
I like the Optivisors, with glass lenses, and the optional LED light frame that has 6 LED's around the lenses (not the single forehead located "Cyclops" light that is also available for those who like to get that light tangled up in their work). Been using them for years for clock repair and other close-up detailed shop work.
I have several, of different focal lengths, #4, 5 & 7, but for general use, and for my eyes, usually choose the #5 lens. 4 gives a little more working clearance, and 7 more magnification but shorter focal length.
- Canute, mtaylor and thibaultron
-
3
-
Spoiler
Ron
re “The only down side I see to it is that the position marker on the slide is a dot, rather than a line, making it harder to set the correct angle.”
You might try stoning off the pip from the punch mark, screw or epoxy a piece of Al the same thickness as the arc close to it, set it as square as you can and then scribe a new index mark at “90”
Looks like a well made accessory.
-
-
2 hours ago, Bob Cleek said:
Good point! I always bring the cheap chopsticks from the Asian restaurants home with me for use in my shop. I've got tons of them. I miss the higher quality old fashioned big ones they used to use, though. The new ones that are just routed out of a single piece and you break apart for use aren't as high a quality of bamboo as the older and longer ones. I do like the rubber on the erasers. Perhaps I'll try to find some of the old larger pencil erasers that slip over the end of the pencils. I'll have to be careful to avoid "shrapnel," though! (I never, ever, stand in line with any sort of spinning saw blade.)
Just checked. They're on sale for $1.68 a gross, just slightly more than a penny a piece!
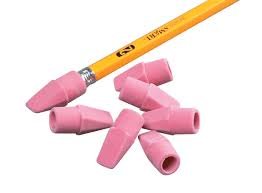
How about putting those erasers on a length of dowel and get rid of the metal eraser band?
-
-
I was curious about the photos in Merchen's last post so I took the liberty of running his comments through Google Translate and got:
My visit to the most beautiful marine museum in Istanbul, where I am preparing for my new model. It will probably start in two years. I have selected two
blueprints for the ceremonial barques, one of which I will build. I am very excited about the museum and the people who work there. I have never seen
such an exemplary appearance of people and I can only recommend everyone to visit the Naval Museum in Istanbul.
I'll look forward to seeing the model.
All our problems are solved: post your dodgy solutions
in Modeling tools and Workshop Equipment
Posted
Carbon Tetrachloride itself is non-flammable, and at one time was used in small fire extinguishers.
In a brief search, I couldn't find anything on a 50-50 mix with gasoline, but the authors of the above piece claim it won't burn.
It will, however, damage your liver and kidneys, and other nasty health issues, and if exposed to high enough temps, decompose and release phosgene and hydrogen chloride gasses.
Carbon tet used to be used as a dry cleaning fluid, and other uses, but I think that it's been effectively banned in the US for consumer products.