


popeye the sailor
-
Posts
16,007 -
Joined
-
Last visited
Content Type
Profiles
Forums
Gallery
Events
Everything posted by popeye the sailor
-
 young at heart Bob..........very nice bit of progress
- 359 replies
-
- 3
-

-
- prince de neufchatel
- model shipways
- (and 1 more)
-
amazing looking model........nicely done rigging as well!
- 467 replies
-
- 6
-
-
- mikasa
- wave models
- (and 1 more)
-
thanks Carl.......I thought about filling the corners in, but bending that stuff would be hard to do.......and it would look terrible in plywood. I will likely line the inside with tulle, and obscure the view that way. the admiral cautioned me about the weather tomorrow - rain...........so I went out and picked up all the grass clippings thanks Kevin!
-
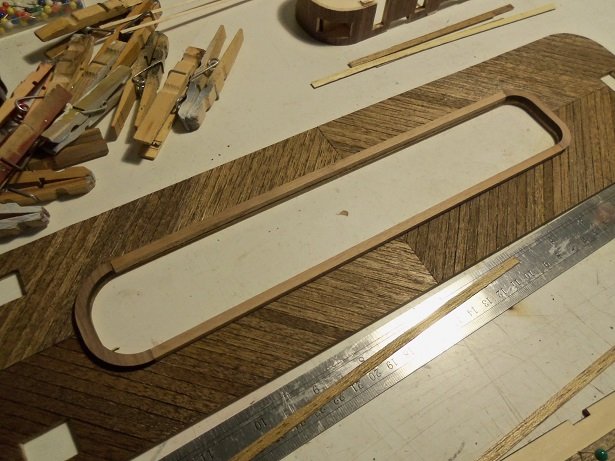
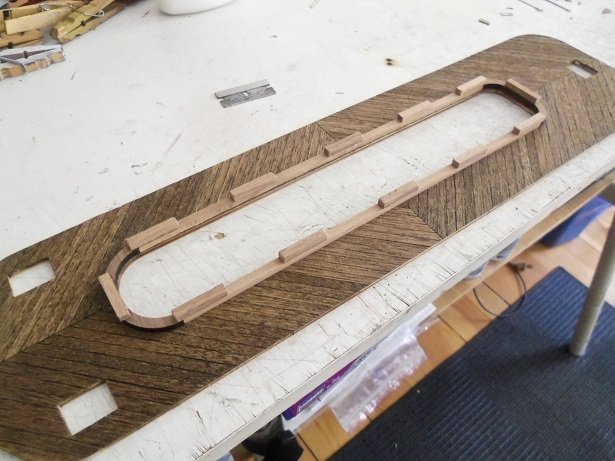
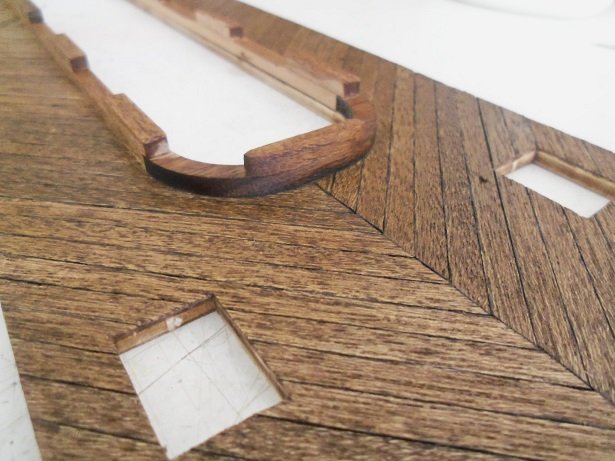
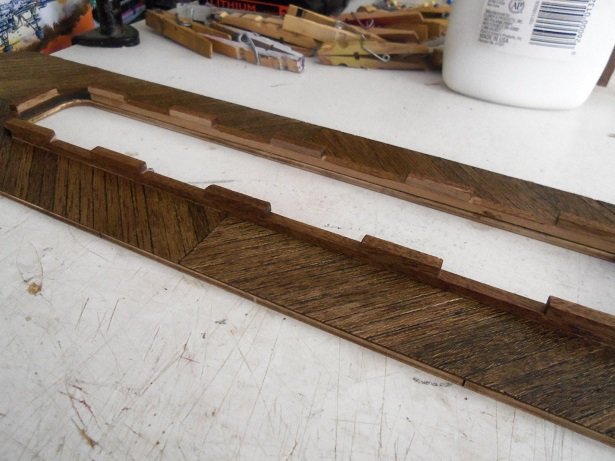
I stopped for lunch guys..........aside from taking Gibbs out, I've spent all morning on the T.D. even the camera needed a refueling! Brian had asked about where I'm going next with the build, so it starts there. the opening in the center of the third deck has a rise from the structure below, and it must be built up. there are vents that line the upper part of the rise...but I'll get to this later. I'm not doing what they instruct me to do. so it starts with the base layer of wood....the two ends and the sides. so while this was drying, I figured that I'd plank the deck that serves as it's roof. as I got to the outer edges, I saw that a full width plank wouldn't fit..........so I used a 2 mm plank strip to finish it off. there are two holes I need to open up when I'm able to. I went over it with a wash of stain, wiping it off quickly......all I want it to do is cover over any unstained spots that may have shown up. it matches well with the below deck. later........to drill out the holes, I clamped it to a piece of junk plywood and drilled them out with the same size bit. on this deck is a smaller cabin structure....above that, is another smaller deck. I planked this one next, staining up a couple more strips when I ran low. they are all trimmed and sanded around the outer edges. back on the third deck, twelve short pieces were cut from the same wood, the base frame was made from. they were arranged on the rise giving them spaces in between......one on the fore and aft ends as well. the one on the fore end juts out from the shape of the base frame, and needed to be trimmed and sanded to match the shape. as you can see, it was stained over to mask the sanding marks. since the wood used didn't match, the entire rise was stained. it looks much better than to leave it with two different hues of wood. I recall running out of that particular shade of gray, that I used for the undersides of the lower decks. since the underside of this deck will be unnoticeable, I stained it. checking to be sure I drilled out all of the holes, the two smaller decks were banded with thin strip mahogany. I washed my hands to loosen up the caked on CA, on my fingers. I left the banding that overlapped the slots for the structure, just in case it would be needed. as for the third deck, the other holes were drilled out, leaving a couple of the slots closed, and it too was banded. I still need to figure out what to do about the underside, since this deck is more like the lower decks and should be painted gray.......I need to get more paint I found some spare thin strips that I had stained in mahogany, so I also finished the small cabin structure too. I didn't bother to cut out for windows.....the lavatory doesn't need them! privy must be the shortened word for privacy ok....my musing is over......lunch is done........guess I'll go find something to do

-
cannon looks good Michael....dolphin is a term I'm not familiar with. are they the two loops you added?
-
the way they show in the instructions is not that great........they don't give too much in the way of measurements either. I was up early this morning and got right to it. this project is first.........I'm going to try doing a bit on other projects too. I kinda liked how it went last week. I have one of the stairs almost fitted......I'll need to do the other side. of course, I goofed and made them both the same.......they needed to be opposite of one another. once I can arrive to where I left off, I can then attack the problem again. that will likely be when I start making the windows.
-
I was off and runn'in at 6:00 AM.......started on one project and beginning to make the rounds got a movie date tonight with the admiral, so I will have to scramble!
-
I dunno Greg,,,,that PE may send you too far down the rabbit hole! here........gimme your hand .....I'll try to pull you out! to add most, if not all of it, will definitely produce a highly detailed model
-
that red has pretty much the same tint as the red primer I like to use. I have a small compressor that I got with my 'spraycraft' set up.......but when I have to do the big jobs, I hook up to the 25 gal compressor in the garage. I made a special adapter for the airbrush, and I can adjust the output low enough. I do a lot of big hulls she's look'in really nice!
-
work'in my way back to it. I also want to do something with the windows and doors......I really don't want to use those metal parts. I see them in the instructions, and I think .......yuck! I still need to finish the cabin on that level as well....one end still needs to be planked. more to come soon thanks for look'in in
-
yepper! I'm here too tired during the week.........look'in for a productive three days
-
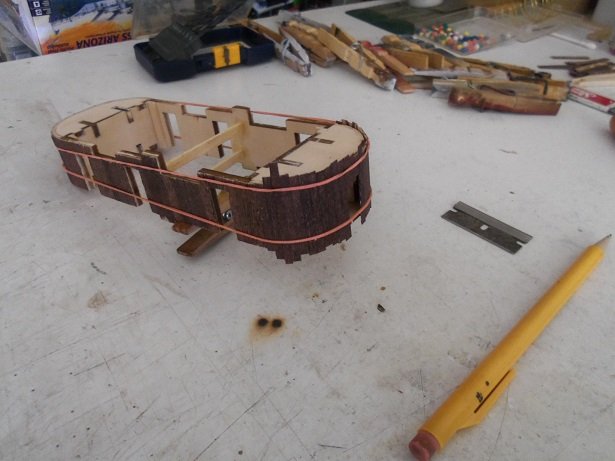
hello Lawrence the Progress is based on the Nordkap hull........once the hull is planked and some of the work is done on deck, then I can start modifying the cabin structure to create the Progress. I even had a thought to do something different with the bow.....do a forecastle deck. the only thing about this, is I would need to build up the bulwarks for it, and then it would change her looks. you'll see a few pictures of the first Nordkap, but only for showing what I will be doing at that particular point. I still haven't traced the margins yet.....that will be done in the next session. I have high hopes of getting the deck platforms put in as well. sorry to hear you folks are under the weather......if the weather's been yucky 'round here, it must be worse where you folks live glad to have you look'in in! hi Zappto.......welcome to the log. it's still a bit slow starting off, but it should get interesting pretty quick.........I had a really good time building the Nordkap. this one should be even better, now that I found the plans for her, when I found all this other info. I hope you enjoy the project
-
I'm working with a new drill bit........slow speed I think will be my best defense when I start the hole. just got done with the work week......felt like hitting the table, but figured I'd better mow the lawn. we're going to have one day of nice weather tomorrow {we had one today, but I was at work}, and then it goes down hill......chilly and rainy first, I gotta replace the bad piece...then I will drill the others. man! I wanna get paint'in thanks for the comments.......I hope to get a little further on this one.
-
Yamaha MT-01 by Dan Vadas - CARD - FINISHED
popeye the sailor replied to Dan Vadas's topic in Non-ship/categorised builds
yup...that would have sent me scream'in out of the room they look awesome! -
great looking model Danny
-
hello Brian.........there is a cap that fits over it.......then there is a small structure that sit on the cap. it appears to be a vent of some sort.... I will be assembling it likely in the next session. it was a bit of work, but I like this pattern........too bad the last of these decks will be straight planking. thanks for the good word..........and thanks all for the likes
-
thank you good sir I already glued them all on though.....but I'll sure try that with the one I will be replacing
-
I started to assemble the hull towards the end of September. it was actually a very nice treat to find out what the box looked like......I never knew, since I didn't have nay luck the first time I searched. I knew Billing's made a kit of this vessel.......I was even more surprised that there were two kits, instead of one. the kit I'm using, is another old........older kit of the Nordkap. makes one wonder how many of these kits are still in existence, for billing to sell the fitting kit for it. rest assured that there is plenty of building fun to go
-
looks very good Glenn
-
you'll find that some kit have parts that appear to be a little out of scale. how the kit is designed, and what the manufacturer keeps in stock as far as fittings go, are just two of the factors. if they had chosen to design this kit in a larger scale, there wouldn't have been as much of an issue. I also mentioned about the thickness of the plywood used to assemble the frame........they could have gauged it down to 1/8th and the construction of the frame would have been strong enough. looking through the logs, you'll see folks replacing parts for something that either more to scale, or looks more like what would be seen on the actual vessel. sounds like you've everything in hand if you find smaller anchors, let me know......20 mm was about the smallest I found too
- 105 replies
-
- 1
-
-
- thermopylae
- sergal
- (and 2 more)
-
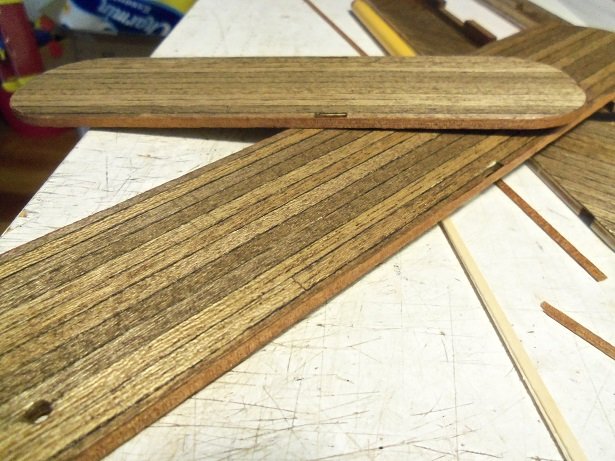
thanks OC.......once I do all the other stuff, band it, and get a coat or two of lacquer on it, the wood grain should show up nicely. thanks for the good word thanks Pat this one has been in the works for a while now.........do you mean the one I just started? no matter........it's still a treat to kow your following along
-
chill you guys.....your mak'in me hungry 'an I just ate. for what it's worth.......I don't put anything on my seafood......I want to taste it WOW! your moving quicker on 'er now, or is it me?!?!? both masts.........look'in sweet! 👌
- 467 replies
-
- 2
-
-
- mikasa
- wave models
- (and 1 more)
-
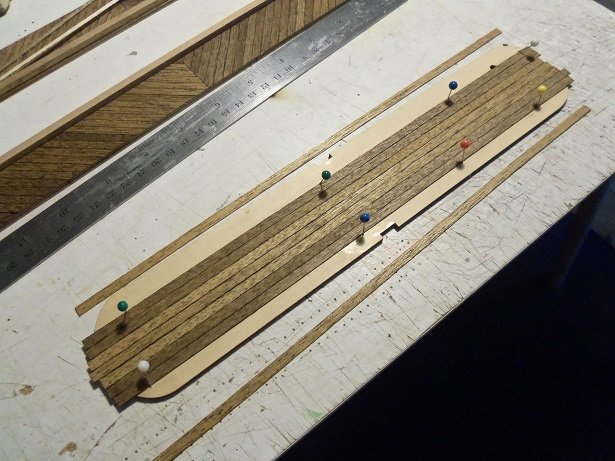
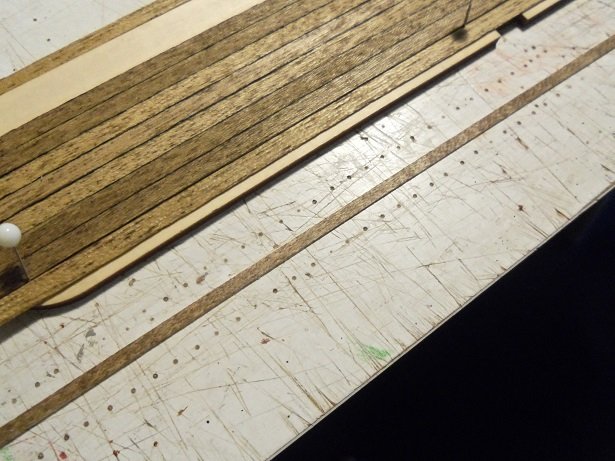
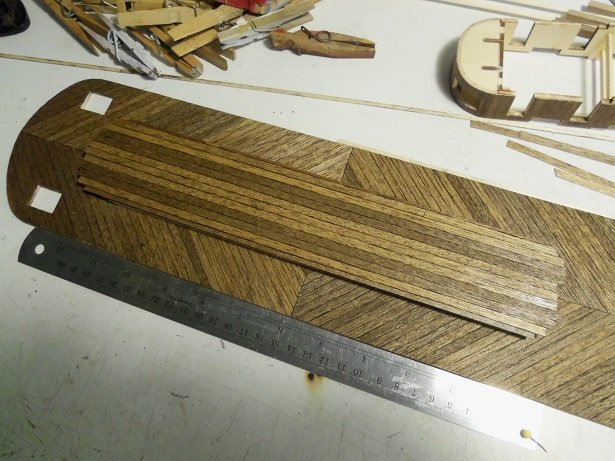
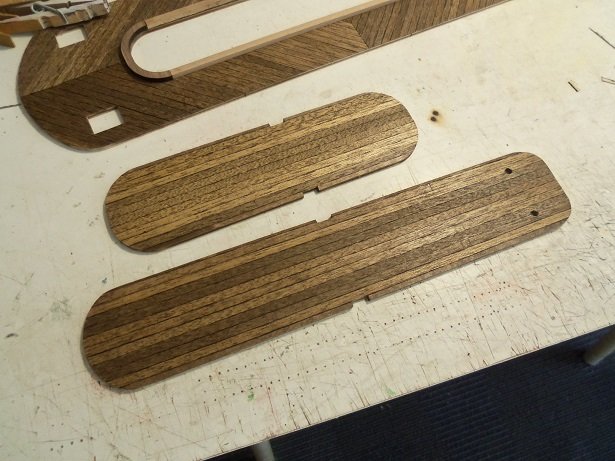
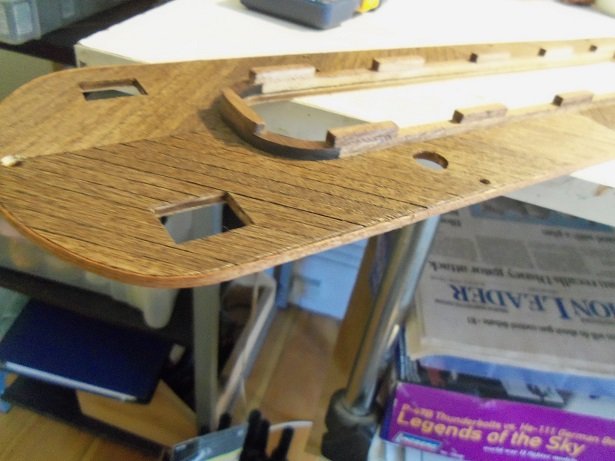
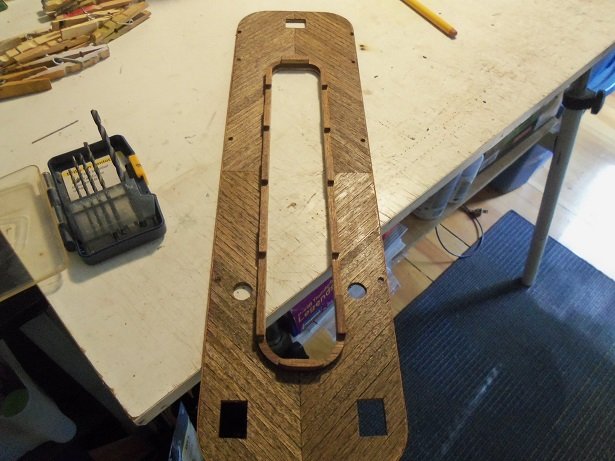
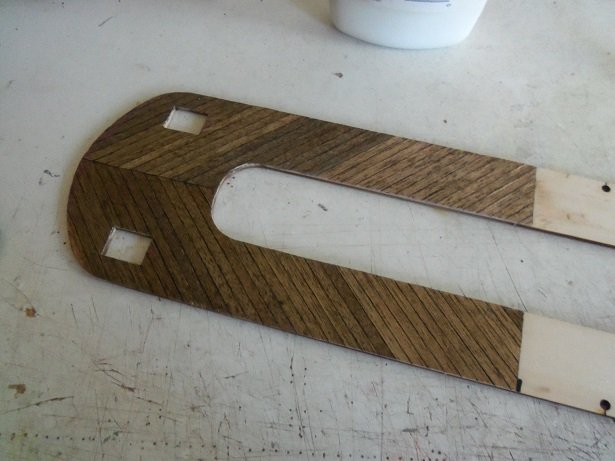
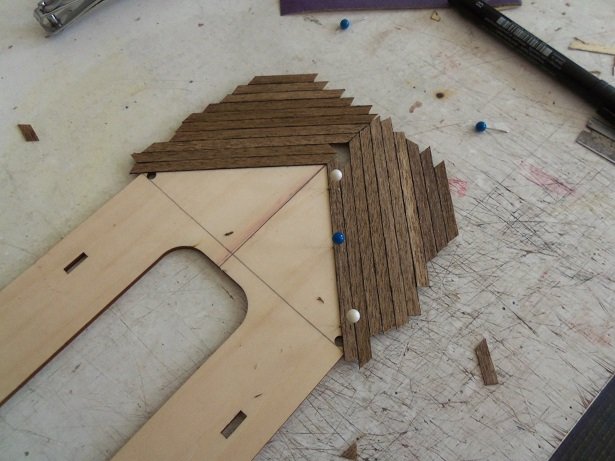
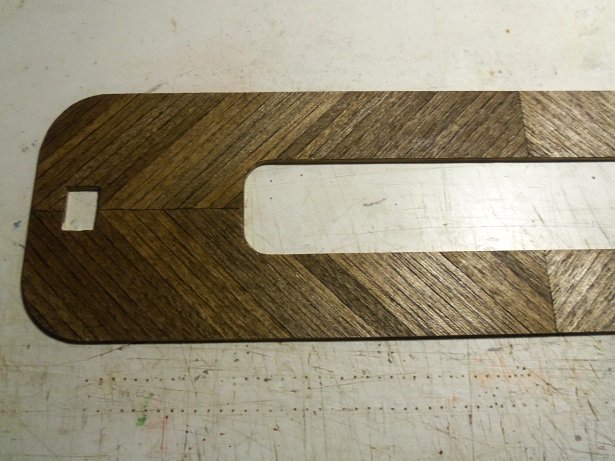
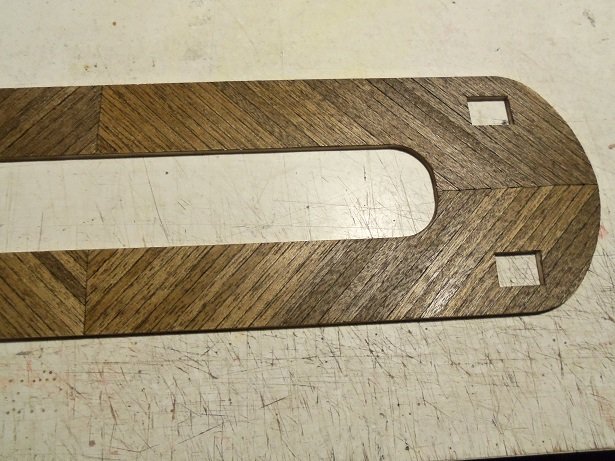
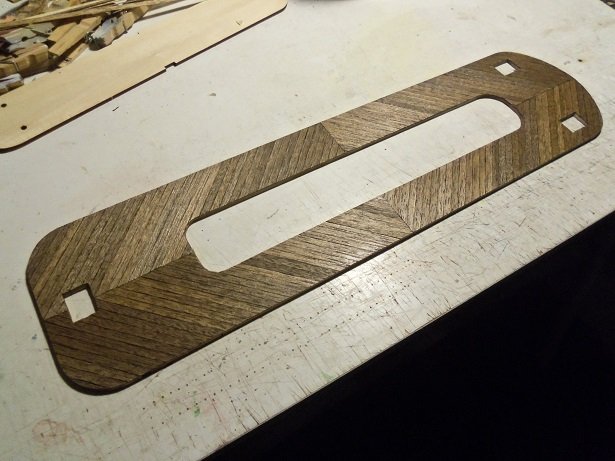
see.....now wasn't that quick with the system I use, I can import the pictures, size them down by 30%, and set them up in a folder. after I'm finished posting them, they go in the main folder for the project, to be stored on a memory stick. the ones I use are 32GB, so there is plenty of room. anyway.........I got half of the deck done. I trimmed it and cut out the stair wells...I still need to do all the slots and holes. then I started on the other end, in a reverse pattern. I had to stain a couple small bunches of plank strips to get the job done. all the edge trimming is done, the single stairwell is done, and I went over the deck with another application of stain to get rid of the nicks. I do around the stair wells and holes later, when they are all punched out. I still need to do the edge banding too........all in good time though I'm getting warmed back up to 'er. more soon.....thanks for the good word all and thanks for the likes!
-
hello there Mike and Michael........I can't even count how many Michael and Mikes I know I played bass with a fellow named Mike...he had a band called undisturbed earth...................and Michael, well he's my best friend who lives in Florida.......been best buds since elementary school {punched a kid 'cuz he was mak'in fun of 'em...he wears glasses}. yea.....I'm back with 'er on the table....the one in the spare room. .....all because of some spare bits of planking on the table. I was cleaning up the table, so I could do some tracing for some parts........one thing led to another. I'm hoping to get back to 'one armed paper hanger' speed.......I miss the days when a build from start to finish, took months rather than years. but it's not about speed, is it ?!?!?! I got a lot further with the planking of that deck........I'll try to get 'er up here for you folks to see. I like the way it looks enjoy you two and I hope yas follows along
