popeye the sailor
-
Posts
16,007 -
Joined
-
Last visited
Content Type
Profiles
Forums
Gallery
Events
Everything posted by popeye the sailor
-
 thanks OC....my only distraction of late has been work...........so many changes, that I'm not sure if I'll still have a job down the road. but I'm trying to change the way I look at it.......sometimes it makes me pretty angry. actually, I felt so good that I spent some decent time at the table ...tooth wise. I'm looking forward towards getting the rest of 'em removed.......it's going to help me overall. high time I dealt with it hopefully, I'll be able to get a lot more done! thanks again............and thanks to all for the likes!
 -
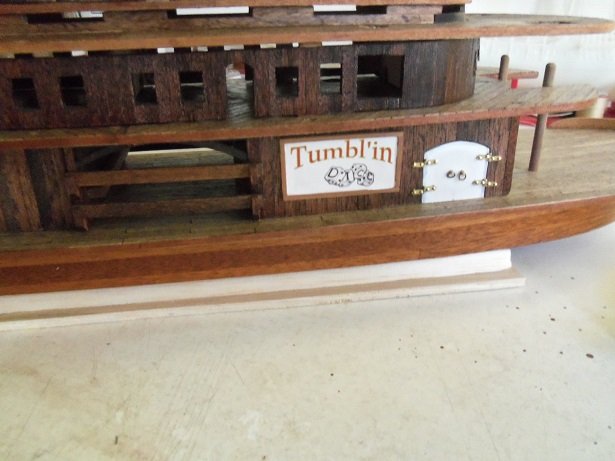
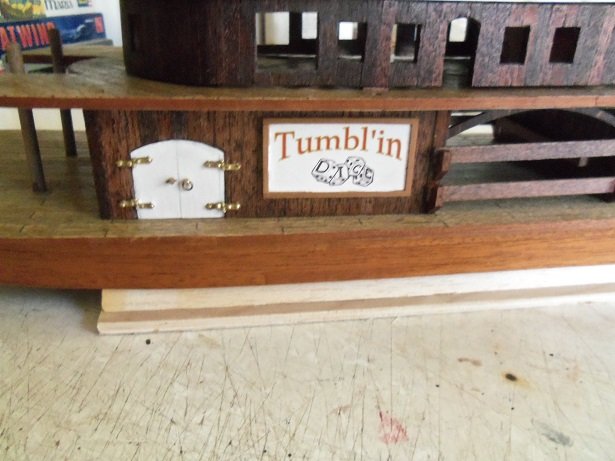
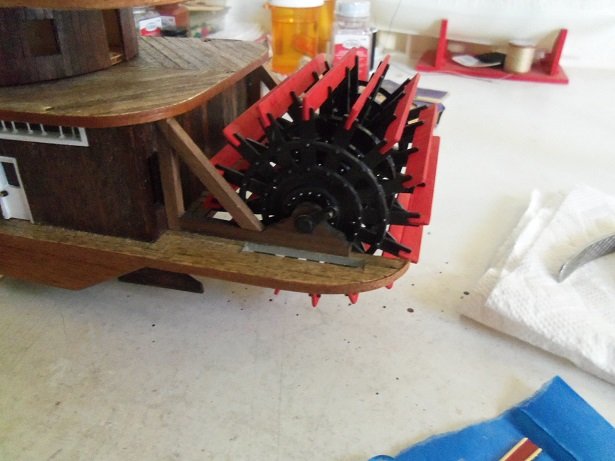
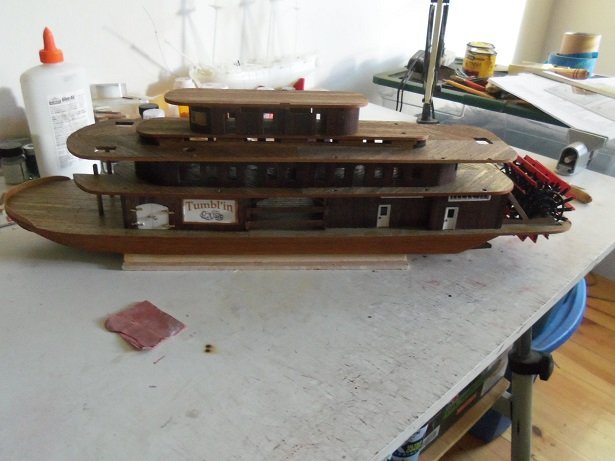
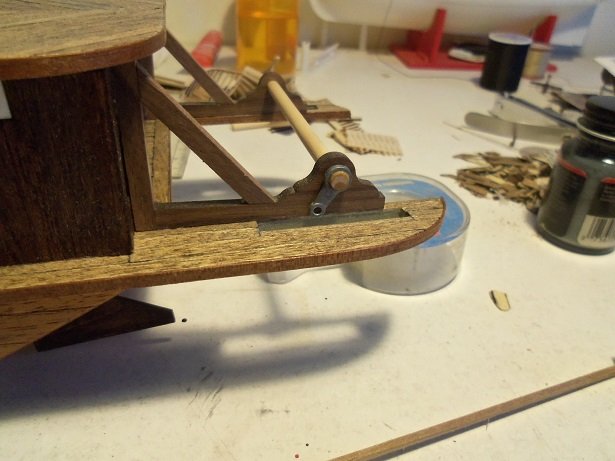
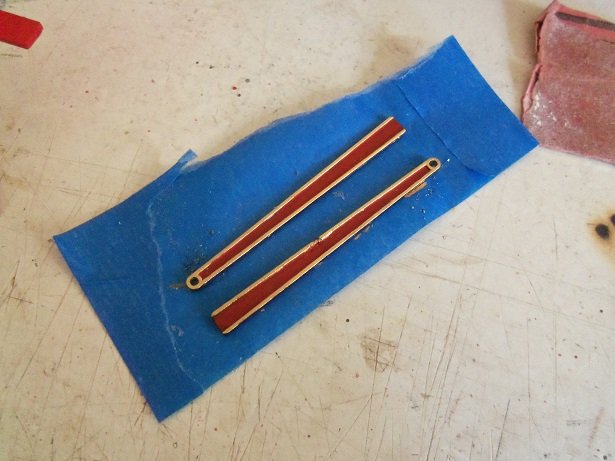
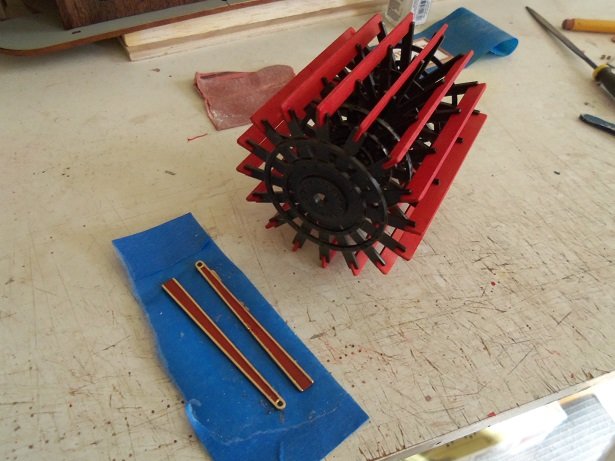
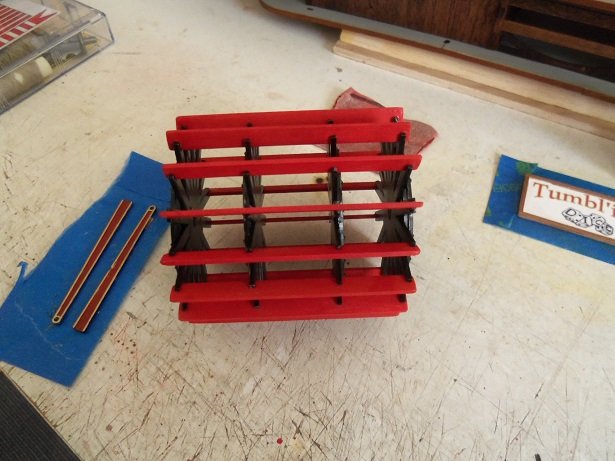
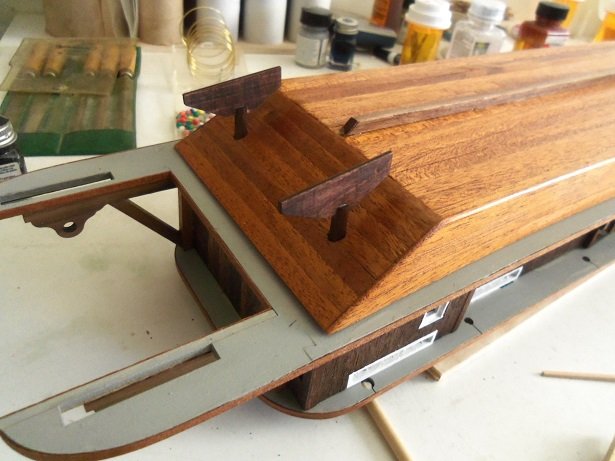
the rudders were trimmed so they would fit closer to the hull. I still need to give them a coat or two of clear lacquer.........I failed to snap a picture of them in place. the signage is up........the Tumblin' Dice has it's name! the paddle wheel is in place too.........the connecting rods aren't in place yet though. I wanted to give the gold plenty of time to dry.......it's one of the worst colors in relation to drying time. any metallic is, in fact....in some cases, I'll give it a coat of lacquer, so it will attain a hard finish. I made sure that the other connecting arm was opposite of the other...... for most of the time being, the model remained in the dry fit condition.........stacked up as you last saw it. I was surprised to find that the admiral hadn't seen it........I said "really!?!?!?!" so, to remedy the situation, I set the model back up for her to see. as mentioned, she never even noticed that I used different decals for the signage. I do believe it looks like I made some progress I am pleased! I'll see what I can come up with in the next update.
-
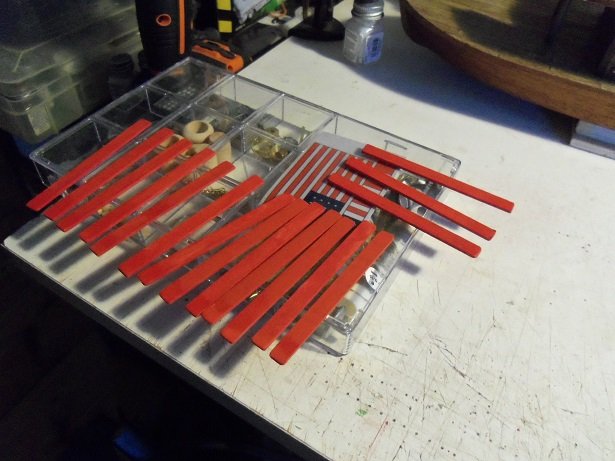
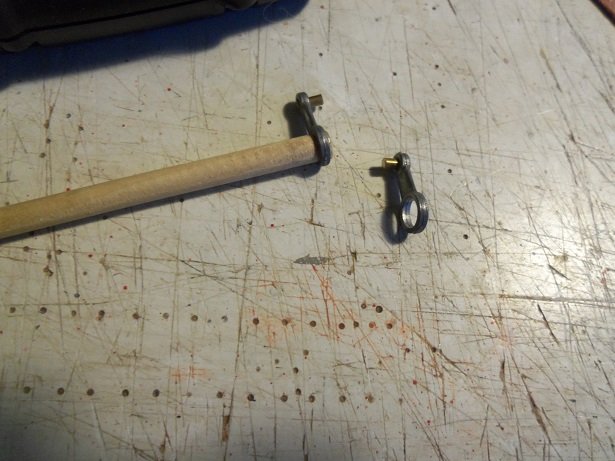
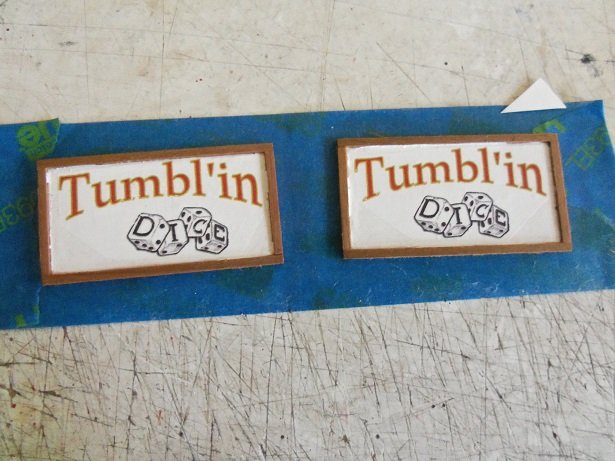
I'm feel'in much better today.......the admiral thinks so too..........I'm eat'in everything in the house! .......and I've been busy! even with all the distractions, I've managed to amass quite an update for ya folks! it all started with having to recut the shaft for the paddle wheel......darned if I knew where it went. ....and then I thought........is that the piece of dowel that the wheel frames are drying on?!?! no matter......I have plenty of dowel one of the connector arms was cemented on the freshly cut shaft still thinking of what to use the connect the two arms together........while I was pondering the matter, all of the paddle blades were painted. the smaller holes were all drilled out to 5/64 ths.........I used a brass rod to fit them......then cut and filed to length. the longer arms were in the paint booth being painted flat black. they were brought to the table and drilled out as well. off to the paint booth went the shaft and the other connecting arm. the signage was another aspect that was in the works. these were painted white and later sanded around the edges. I had some darker wood, a 1/16 x 1/16 strip.......I think it's walnut........I started to build the frame around them. the outer sides of the longer arms is indented...........I painted inside the indention with flat red, and detailed them with gold yea.......nice imperfection.....huh?!?!?! oh well.....it's metal and I can't do anything about it. turning back to the signage, the frame was trimmed and sanded .......then I went over it with a clear lacquer. Murphy had to get his dig in......there was some residual red paint still in the brush.......I'm sure you can guess the rest even though the damage was minor, they had to be repainted. with a CLEAN brush they were repainted.........and when they were dry, the decal was applied. sorry to say.......it wasn't the decal that everyone chose......ohhhh no........Murphy I guess got miffed because I thwarted his plans, and decided to ruin one of the chosen decals........stain or some spatter of paint....not sure. they still look good......I used the decals that didn't have the border around the dice. the admiral saw them later.......she didn't even notice the difference the bow fender had been sanded........I cemented it in place on the bow. I think I'll better be able to gauge the fairlead holes with it in place. with everything pretty much dry, the paddle wheel was assembled. the paddle boards cemented in place with CA {just the outside frames}, and then touched up. I still need to touch up the black.......forgot to do that before assembly.
-
nice........looks like the hull was well done hopefully you got all the parts to finish her. I haven't ordered this one yet........but I have been tempted to. being a Billing Boats nut.........I'd love to follow along. if you can, try to break the rub rail free at the bow and drop it down equally along the bulwarks........only thing I would change
-
I'm almost to the point of restarting it. a few more deck fittings to go, and I can begin on the masts. it's a bugger finding the ship's boats for it, I have some that will suffice. the anchors are another problem........darn things are at least three scales larger so I'll likely need to scratch build a pair.
- 1,208 replies
-
- 1
-

-
- great republic
- clipper
- (and 1 more)
-
I've never tried a gravity feed before. I hardly used an airbrush in my early days...relied on the good 'ole rattle can. when I did my first wooden ship, I stumbled on the 'amazing air' kit in the local Hobby Lobby. I adapted it to run on my 25 gal compressor.....the only thing I had where the air could be regulated. they were designed to run of the cans of compressed air, but I couldn't see sticking the can in a bowl of warm water, every time I wanted to use it {the can would freeze if you didn't}. the last thing you'd want is something that can create it's own moisture problem. I also like to use lacquers, so that was another strike against it. I've been using the airbrush in the house with the Spraycraft compressor.......darn thing can fit in the palm of your hand. I might as well go out and buy an aquarium aerator one of these days, I'll have to try out the brush that came with it. the Testor's airbrush kit goes for around $25.00 bucks or so, and comes with caps that screw on the 1/4 oz Testor's bottles .......they even sell the empty bottles to use for mixing. I just buy the little bottles of thinner and dump them into the 3/4 oz bottles, or the larger size cans........so I save that way
-
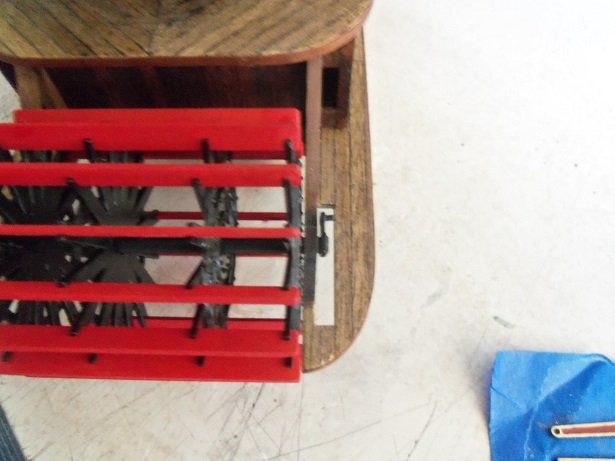
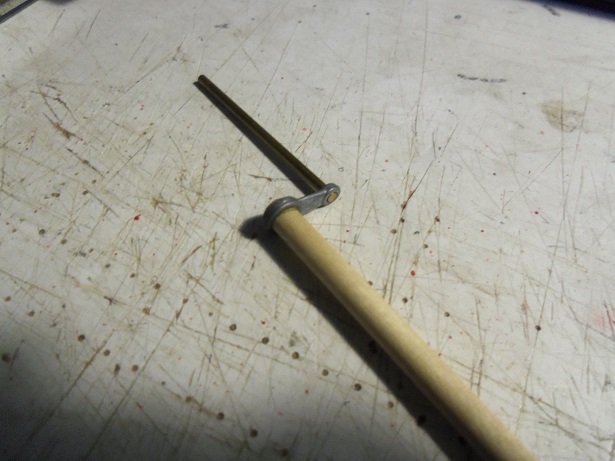
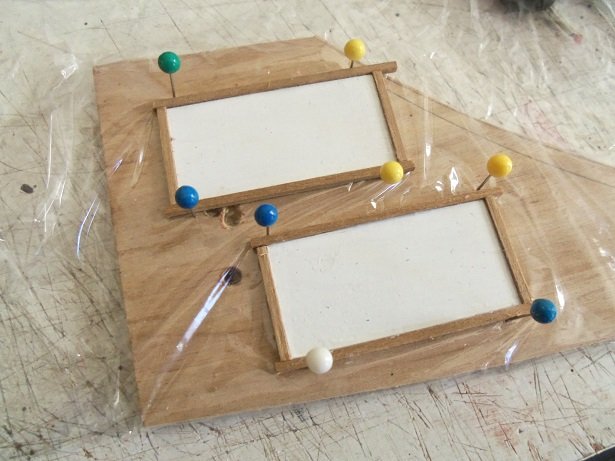
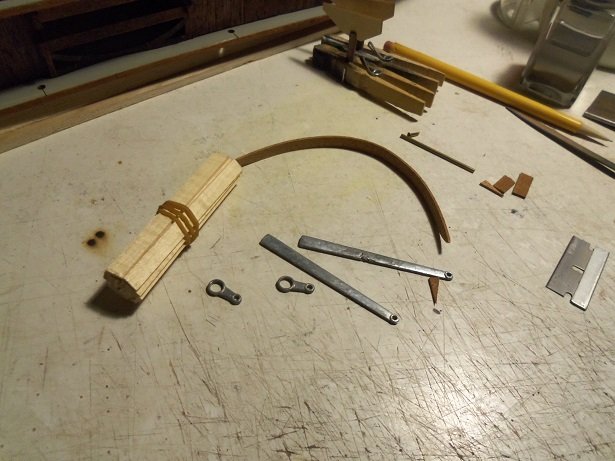
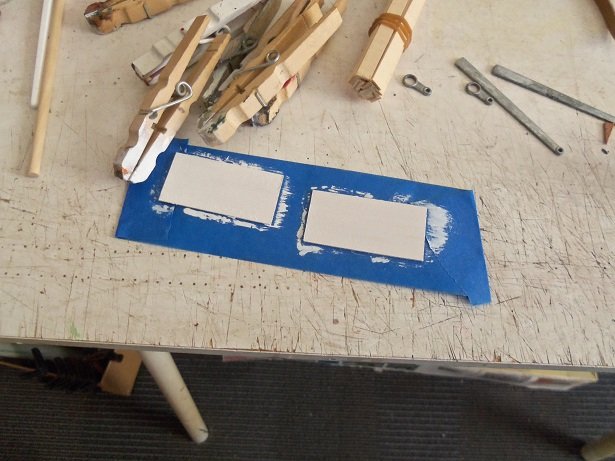
an update on the small stuff.........the admiral got me the can of flat black paint. fist thing was to spray the frames for the paddle wheel. here are the parts for the paddle wheel.......the rods.....and the wood I had cut for the paddles. the rudders were assembled and set aside to dry. the only thing I couldn't find were the pins to connect the rod parts. I'll have to improvise. the bow fender has been trimmed and sanded to shape.....I still need to drill the holes {fairleads}. I also began the assembly for the signage.........two rectangular pieces of 1/32 basswood, painted white. I'll sand them later and give them another coat. the rudders were stained in mahogany and test fitted in place. I'll be trimming them so they sit closer to the transom. errands are done.........I've been doing more on her. another update soon
-
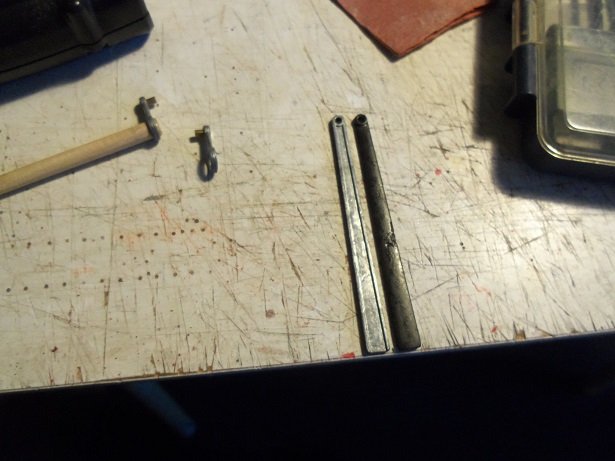
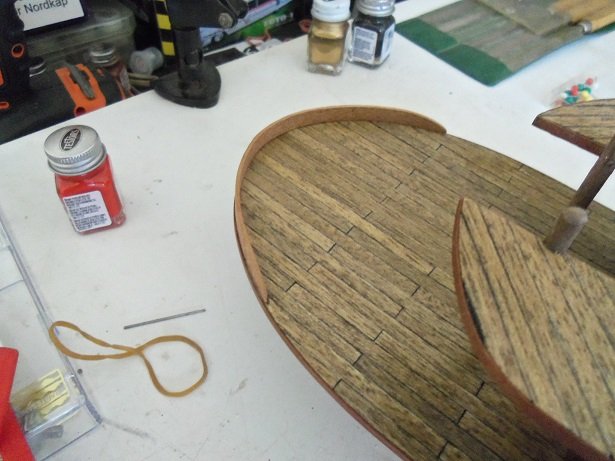
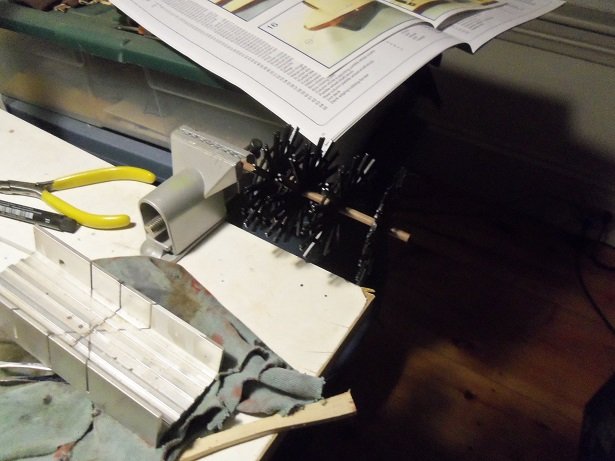
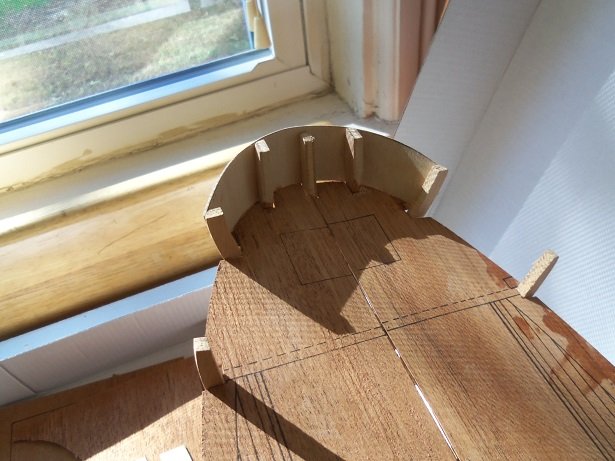
I just got done developing the pictures.........tough job they show what I did for the two stern posts. you can see on the port side, the tab that broke off........I haven't reinforced them yet. I saw that I forgot some crucial planking......the stern transom part is about 30 mm wide........I should have ordered 1.5 x 10 mm planking to cover this span. if I were to use the 1.5 x 7 mm......it isn't hard to figure out that I'd be 2 mm's short. so, I had to order them. BB USA {Ages of Sail} is pretty quick in filling orders....I should see it relatively quickly I'still can do some stuff while waiting for the delivery. I was going to use the mahogany planking, but I see that I used some for the T.D. ..........I only have three of them left. more on her soon

-
Hobby Lobby carries hose....I think. the one here does. I've been using a cheap Testor's 'amazing air' airbrush........works fairly well with easy clean up. I have two others that I haven't tried yet.....a Spraycraft gravity feed, and an Aztek 320 siphon feed. the Aztek is a complete system too...I have two of each nozzles, extra bottles and stuff. she's look'in good.......the waterline is fine
-
hello Robert thanks......I'm feeling better. I'd better be.......I have to work the week end!
-
the Sergal kit is a beast......there are instructions, but I found it better off to just scratch build everything, aside from the planking. I've already started it, but I put it aside for the time being to work on other projects. I figured it would give me the time to scare up parts that could be more easily fashioned. I have a good supply of 2 mm blocks....even got some double blocks for her {can you imagine a kit not supplying them}. the log is on page 21.......which means that I should get my butt moving, before it reaches the vortex
- 1,208 replies
-
- 2
-
-
- great republic
- clipper
- (and 1 more)
-
I know what you mean.......I have the Sergal Thermopylae, and I need to make yard fitting for it. nothing comes premade in the kit. how long is the Great Republic's hull? the Thermopylae is at 1:124 scale and the hull from bow stem to stern is around 19 inches. if this model was at a larger scale, I would think it would be a lot easier to make the fittings like your making. I'm using the model built by Cyril Humes http://www.powerhousemuseum.com/collection/database/?irn=211834&img=132358 to build it. his model is based at 18" to 1 '...not sure what scale that would be. I have placed an order at Billing USA.......I saw some fittings that might do the trick for the lower yards. I'll just need to figure out the upper yards. I have some small chain.......but I know that cyril used quite a bit, and I see that you have as well. I just wished that this model was a larger scale I do believe that I have Cast your Anchor bookmarked.....I'll check it out. thank you for letting me know
-
thanks John.......I did a little more on her today I was play'in with the linkage for the paddle wheel.........I can't find anything in the kit to assemble the rods to the arms on the paddle wheel shaft. gonna have to improvise I guess....I'll figure something out I've also been working on the few things I skipped over........try to get them out of the way. should have an update tomorrow thanks all for the likes!
-
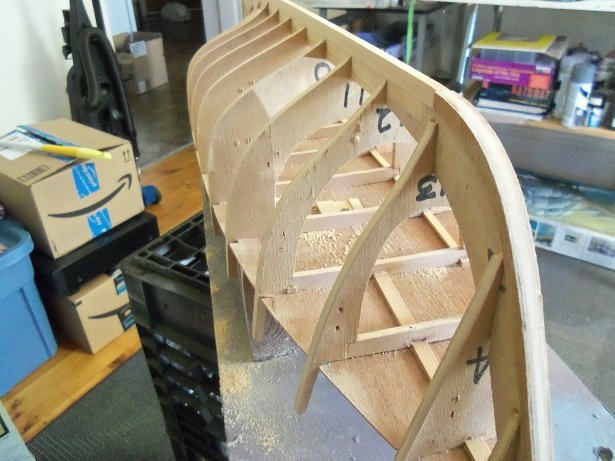
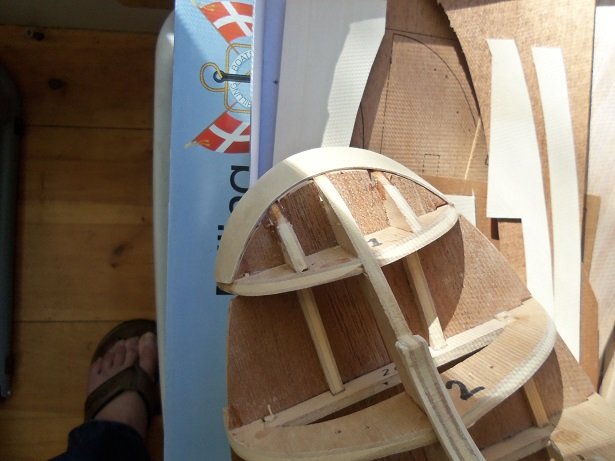
thanks John........but I guess I'm glad it happened. I need to have this done. a bit of an update..........there are a couple of sad parts. I have both sides close to being ready for planking. things were going good until just about the time I stopped working on her........or.......that's what made me stop. remember me say'in that you can reinforce those tabs between the bulkheads........ .....well a couple of them did break. I glued them back on, but I think I will do the reinforcements before I finish faring the frame.....just so I don't break any more. then, faring around the stern, the two bulwark posts closest to the stem broke. they too have been cemented back in place...to reinforce them, I cut out the wrap around part and cemented it in place. this was done after making sure that they were fared as well as they could be. I did some work on two other projects, before I called it a day......still feeling the effects from yesterday. not really upset about how it went.......this is old wood.....I expect stuff like this. I have other wood........and I'm not afraid to use it! after all....it's Progress
-
I see you finally sized up got some good bones there........should make for a really nice model when your finished. your doing a great job so far. now I'm REALLY glad I poked my head into the scratch build forum
-
ohhhhh.....so now your throwing PE into your projects.........well played orange! very nice progress since I last looked in...........look'in my-t-fine!
-
amazing work...........very resourceful! where do you find such small chain?
-
....just looked it up...........quite a subject to undertake should be one pretty ship!
- 692 replies
-
- 2
-
-
- eagle of algier
- chebec
- (and 2 more)
-
superb workmanship Michael.......looks great looks like you'll need to refinish the deck, with the modification. later, I'm sure it's in the plan
-
you've made some really nice progress.......the decks look very good. haven't seen a plastic ship kit that uses bulkheads in quite a while. most I've seen, the decks just lay inside the hull halves.
-
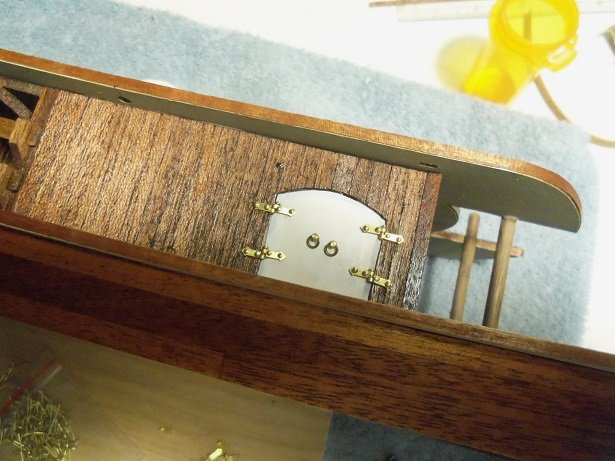
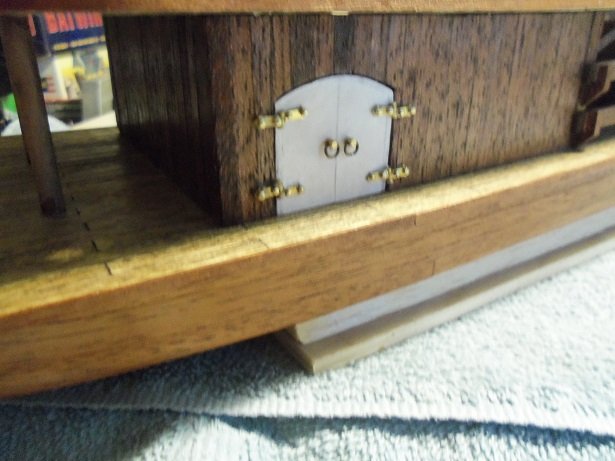
thank you Michael there will be more, once I start making the windows. there are some steps......parts of the lower level, that I skipped over. I started to assemble the paddle.......painting the metal parts reminds me why I dislike these parts. seeing as I was down for the count yesterday, the admiral went out and bought me a spray can of flat black........should make life easier. I put the hinges on the aft section doors.........not happy with how thick they look, but they are on none the less. I'll be pick'in away at these skipped assemblies and parts as I go along. in the meantime, I will also start to make the windows and doors. more soon!
-
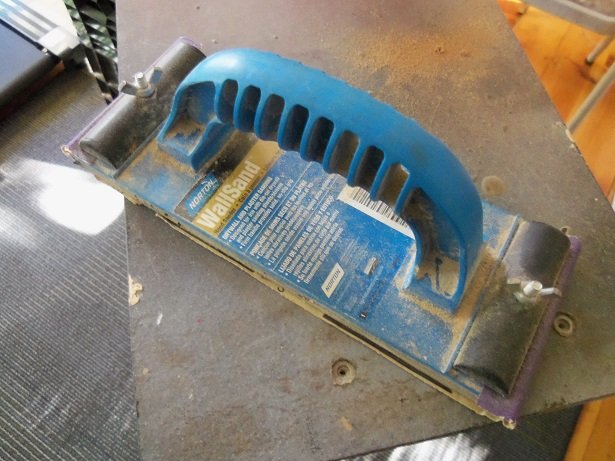
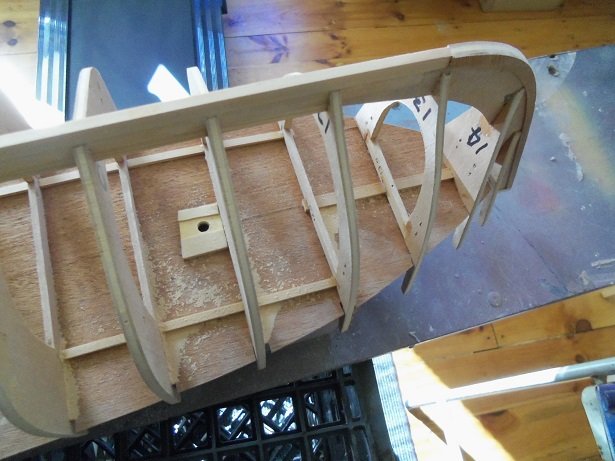
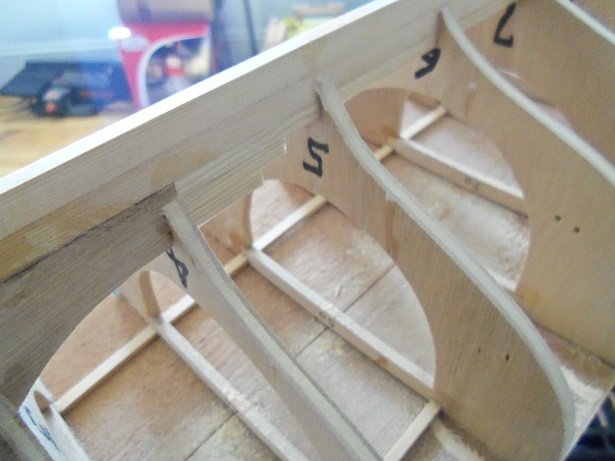
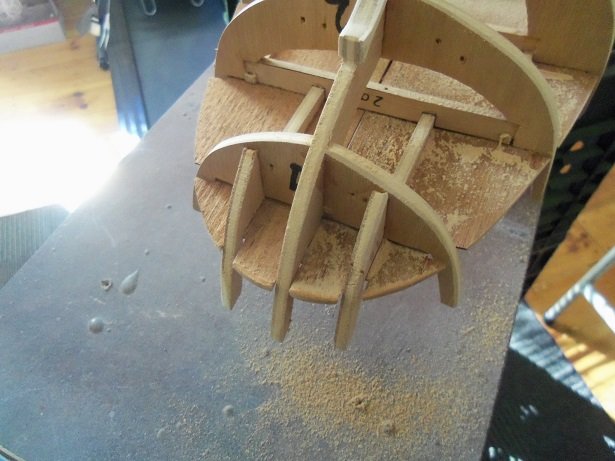
sorry I didn't get back to finish the post........got a bit evasive once I got into the dentist chair I ended up having two teeth removed! this is long over due.......this needs to happen..........I've been putting it off long enough. in a couple of weeks, I will go back and have the rest removed......and the next step will be dentures. I've had bad experiences with past dentists........more obstinate than afraid, is what kept me from having this done. even my primary suggested that I do it, to stave off future problems. the admiral is pretty happy too anyway..........I started to fare the bulkheads and define the contours. on the first model, I don't recall if I glued on the rabbits.......looking back in my logs, it appears that I didn't. this is a good thing.......I didn't need to worry about nicking them with the sander. I have to be careful here, since I cemented on the bow and stern rabbits. I didn't add the rabbit strip along the keel bottom....good thing I suppose, but the mid ship won't be altered as much with the sanding. for those who are new to the idea of faring the frame, this is very important. to fare the bulkheads, your evening them out and giving them the taper to fit the contours of the hull. you want the planking to lay flat on the bulkheads, and not sit on an edge....to speak. this will cause a number of problems, like bad adhesion and the planking taking on a clunky look. the bulkheads will jut from the planking, giving really hideous lines where they sit. faring is synonymous with tapering........your defining the contour so the planking will flow over the bulkheads, allowing curves and a really smooth skin.......the kind of smooth skin chicks die for the best way to adequately fare a frame, is to use a block that will cover more than two bulkheads. this way, you won't run the chance of one being lower than another and cause the planking to become wavy..........an indention in the skin of the model. small hull frames are easier to do...you can use a smaller block......larger models call for a larger block. for this model, having a bulkhead width of 53 mm, I use a wall board sander. it has an overall length of 9 inches......I can hit three.......or even four bulkheads. when doing around the turn of the hull frame though, I try to 'roll' it around as much as possible {more diagonal that straight across the bulkheads}. I usually have to do this outdoors or in the garage, because of the noise it makes....it's like fingernail;s across a blackboard! the weather has been up and down here........cold in the mornings with not a lot of warn up during the day. the admiral has been pretty tolerant..probably because of this reason........she's even allowed me to run my scroll saw in the house! so I started on the port side, contouring the bow section. the bulkhead roots around the stem will take some finesse...likely trimming them with a razor blade. I've also gone down the front face of the bow stem, squaring that off as well. the noise it makes {I call it music}, will die down as the bulkhead become more in sync with one another.......I use it as a fair barometer that they are sanded to the point of where they need to be. cementing the platforms in place can be a good thing too. it allows you to sand the bulwark posts flush to the platform.......but take care not to break them since they are really nothing more that tabs, unless you cemented in small pieces of wood to support them. sounds like overkill, but I've done this before.....it's not a bad thing along the mid ship, it's not so bad........it takes very little material removal to get the bulkheads flush with one another. as said, without the rabbits in the way, it's easy to taper the roots to the keel. the stern has a small problem.......even though the keel spine strips were cut to the proper lengths, the frame does seen to fall short of the decking platform. this is likely due to some shrinkage, or how I had to make the adjustments to the assembly surfaces of the bow and stern stem parts. it's minor in scope.........probably around 3/16 off the overall hull length. for a model that is over 32 inches long, it's not a big deal rounding this off will be fun. more was done on the port side until I had to leave. I would have liked to have gotten back to her when I got home, but I wasn't in the mood to play my musical instrument. perhaps tomorrow.