


popeye the sailor
-
Posts
16,007 -
Joined
-
Last visited
Content Type
Profiles
Forums
Gallery
Events
Everything posted by popeye the sailor
-
 I don't recall seeing this........is this for real? you could alter it according to the Peregrine plans.
 -
there is a rigging diagram sheet......it shows the two bob stays for the bow stem and the ones I mentioned that locate on each side of the bow. there is also a pair on each side to keep lateral movement in check.
-
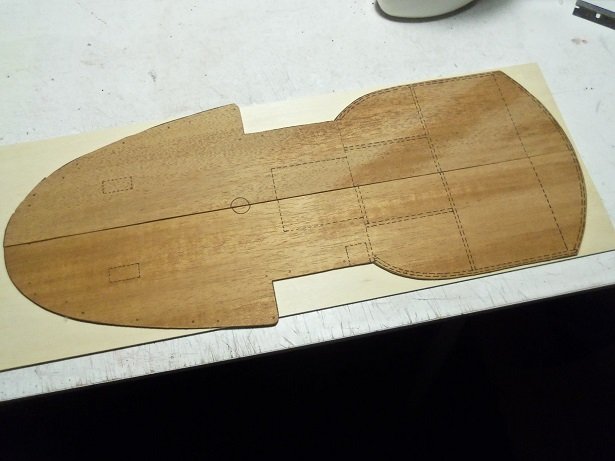
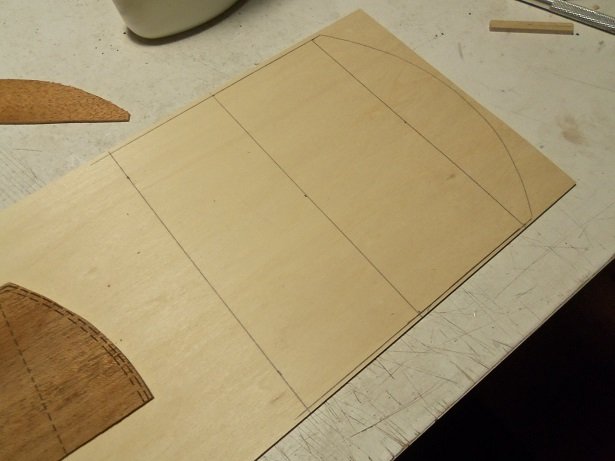
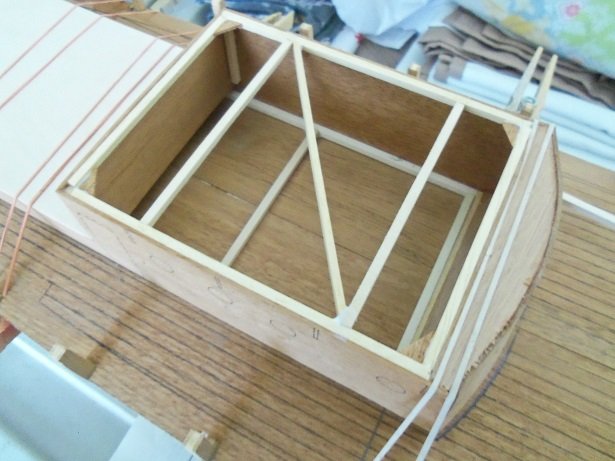
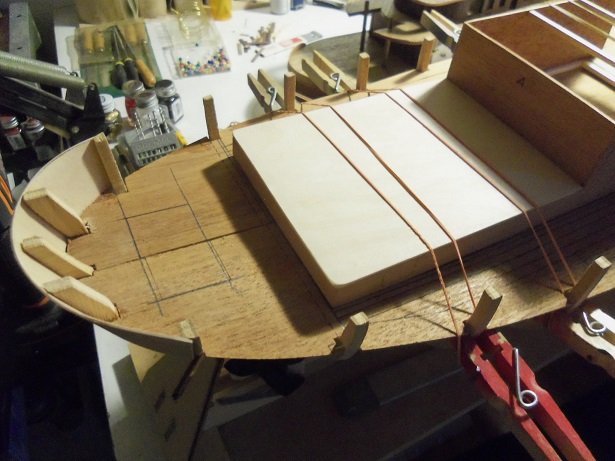
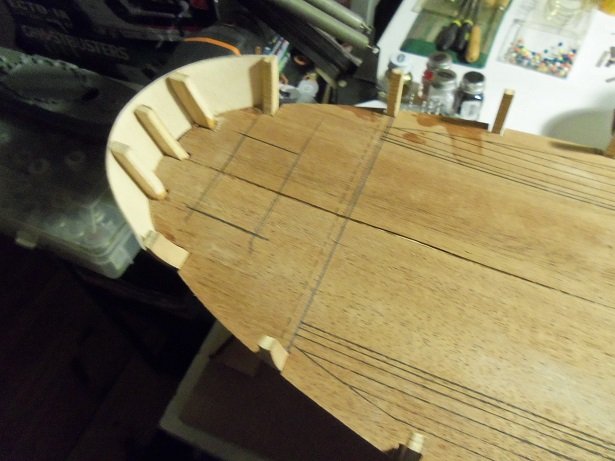
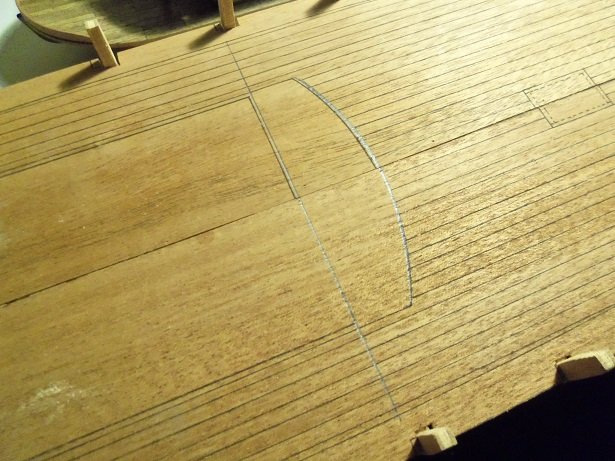
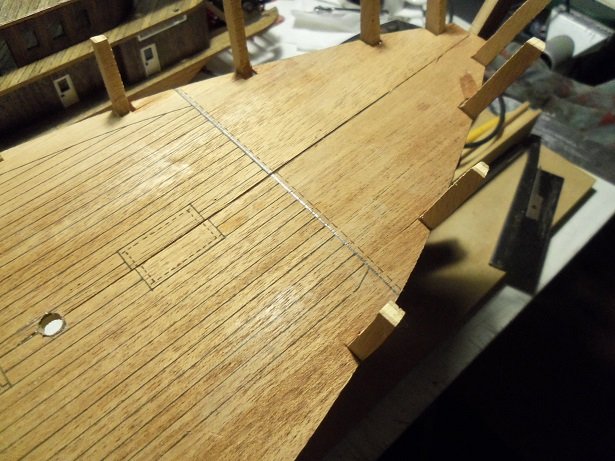
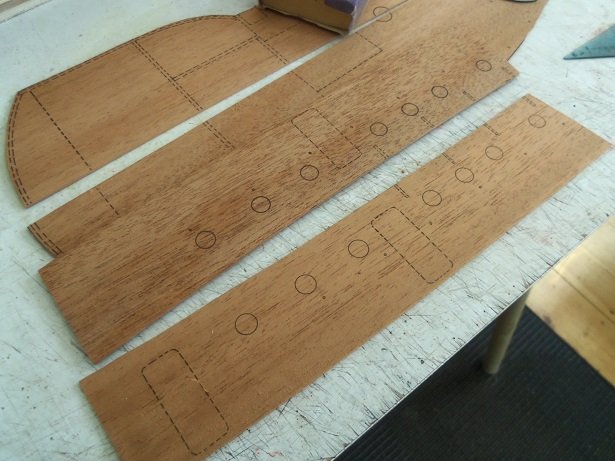
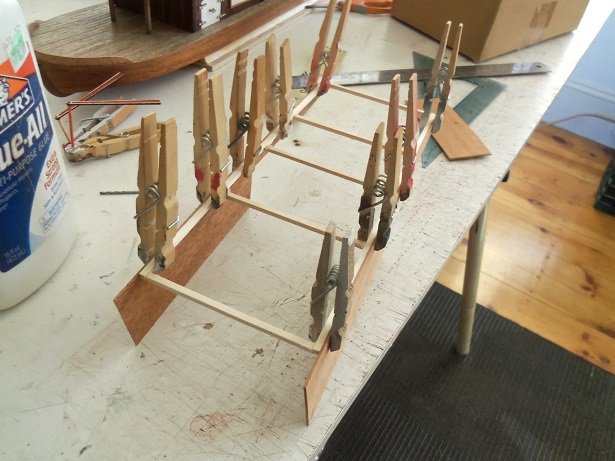
I got busy early this morning.........5:30 AM. I woke up with a bad case of crazy leg.........had to get up and walk around we've already said goodbye to warmer days, so I put the heat on to take the chill off and got the coffee brewing. in the closet, I have two more sheets of the 1/16 x 6 x 24 basswood........I was hoping that it would be wide enough to do the job. it was, with 1/8 inch to trim off. the first double dotted line marks off the back wall for the helm room........the smaller double dotted off square, is for the aft cabin. the single dotted square marks off the funnel area. the cut will be made at the back wall of the aft cabin. ...would have been good if I got to use this one, but a bad cut later, and I had to redo it. not to worry......the other piece won't go to waste........it just turned into a smaller sheet of flat stock once the edges were sanded, it was dry fitted on the lower cabin assembly. next was to frame up the fore cabin in prep for cementing on the deck platform. to help further with the warp issue, I put corner brackets and center support bar to the assembly. I'd have gotten technical with it, but none of this will be seen, so I didn't bother to follow a pattern. with this part of the structure assembled, I see no reason why I shouldn't start the planking. trimming the first plank on the starboard side to fit the bow stem, I found that there isn't a lot of flex to make the curve of the bulwark.....10 mm wide is a bit hard to bend in this manner. I have most of it in place, but I think that I will soak the others, so that it might offer a bit more flex. I made up these brackets to hold the hull frame in place on the slip a couple of weeks ago. it sits in the slip pretty good now......it won't be needing it much longer anyways. I still need to add the two long strips along the keel spine.......gonna try and hold off until I do the garboard planks. by this time, I've taken to working on two projects, together at the same time. I'm working on the windows for the T.D. I'll post again when I have more
-
your doing some interesting work on this one the vents are a nice touch.........you probably should add two bob stays from the dolphin striker that will locate to each side of the bow. they will complete the support for when you do the fore stays. do you have all the plans for her? if your missing either of them, they can be downloaded from Billing USA http://www.billingboatsusa.com/
-
look'in great ....and who doesn't love hearing more guns?!?! a pedestal stand would have worked in your favor, as far as the handling problem is concerned.........likely too late by now I think the torpedo nets would dress her up much better. first class build.........you've really done some good work here
- 467 replies
-
- 4
-

-
- mikasa
- wave models
- (and 1 more)
-
unfortunately, that problem plagues us all.......building models with very little documentation or pictures. looks like your off to a very good start though wish I was that good with a computer.........luckily, I manage to get by building out on my head very nice hull frames!
-
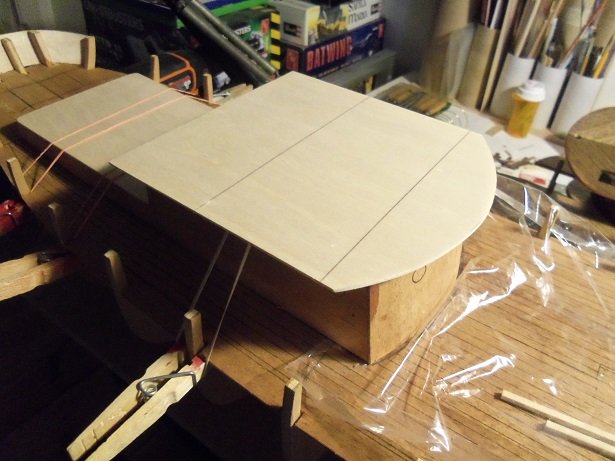
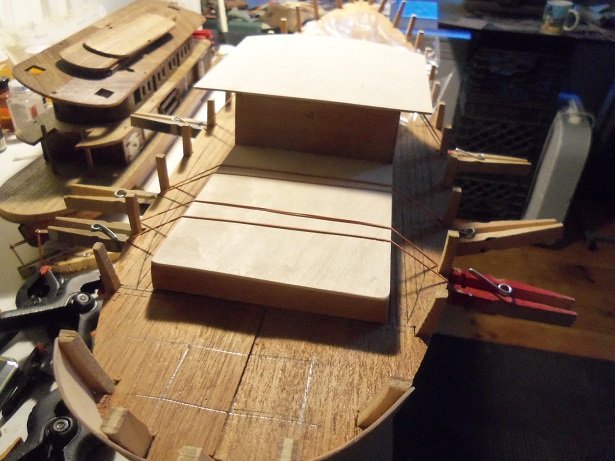
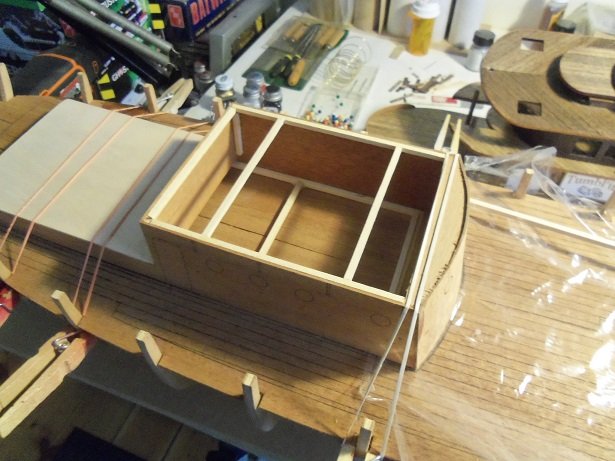
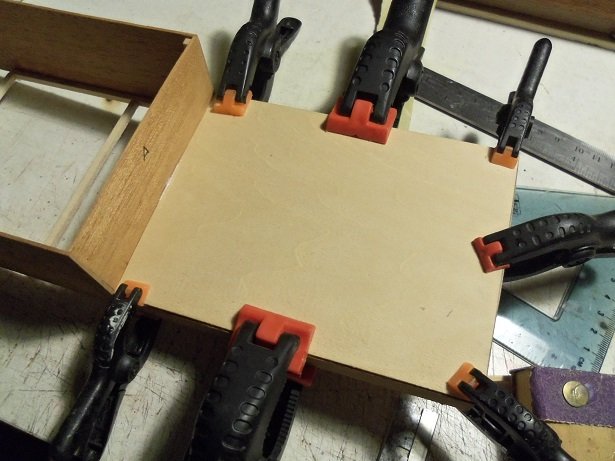
yea.....it's not a huge bit of progress.........but it's something. working on the front of the lower cabin structure, the bottom fascia frame part had already been cemented in place. I had it sitting on the deck for the time being, getting a sense of how much warp there was. using rubber bands, I centered the structure in it's place on the deck, and tied it down {in a sense}. I will add the rest of the fascia parts with it in place on the deck, and this should take some of the warp out of it........at least, I hoping so. there isn't a lot......most of it lies in sanding the bottom, so that it will sit flush to the deck. when I plank the deck, I will leave the cabin area open, and plank around it.....this will create a 'well' for the structure to sit in. I've done this to most of my models.......very few {if any}, I haven't done this way. I'm also juggling in my mind, which method I want to use in regards to the planking. it's still up in the air.......I want to get the hull planked first. so, after I tied down the structure, cut a couple spacers to keep the walls spread apart, the top fascia frame part was cemented in place. I was going to add a couple strip parts along the side walls, but to have them jutting out from the edges, they might interfere with the curvature. I was also going to sand a bevel to these frame parts, to better accept the fascia part, but that would mean removing the cabin from it arrested position. it not that dramatic a bevel anyway, so I didn't bother. the aft deck came out OK.........I may be able to install some portholes along the sides, as seen in some of the Progress pictures that I have. I hope I made it high enough to do them. after giving the top part a chance to dry, the fascia was cemented in place. later, I can drill out all the portholes. more to come

-
hello Lawrence.......feeling a whole lot better of late now that I'm over this past problem, I'm about ready to book the second phase. you won't believe this........but I came home from work today, and did a little to the model. I'll post the pictures in a moment.......no big thing, but after all, it's progress thanks for the good word! thanks also for the likes gents!
-
quite a bit of progress there!........she's look'in really good
- 258 replies
-
- 1
-
-
- harriet lane
- model shipways
- (and 1 more)
-
stunning looking vessel! the bits are filling in the blanks nicely swell job on the ship's boats!
- 467 replies
-
- 5
-
-
- mikasa
- wave models
- (and 1 more)
-
mast rigging looks awesome Rob! sails look great too
-
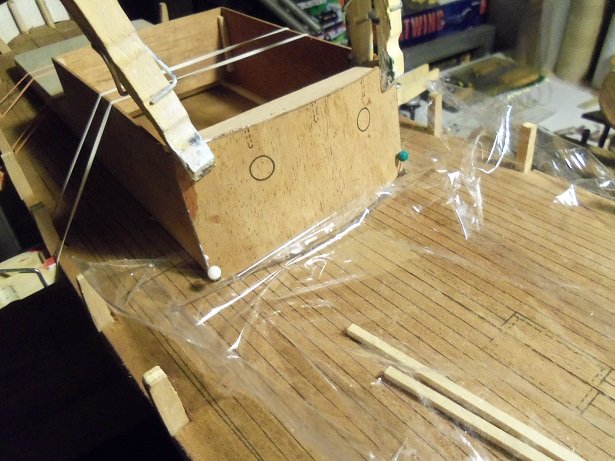
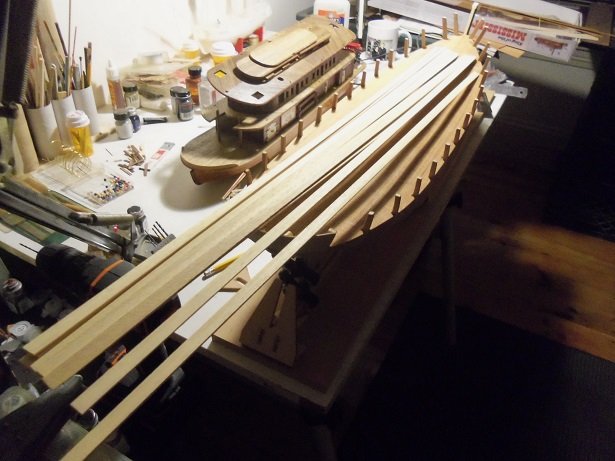
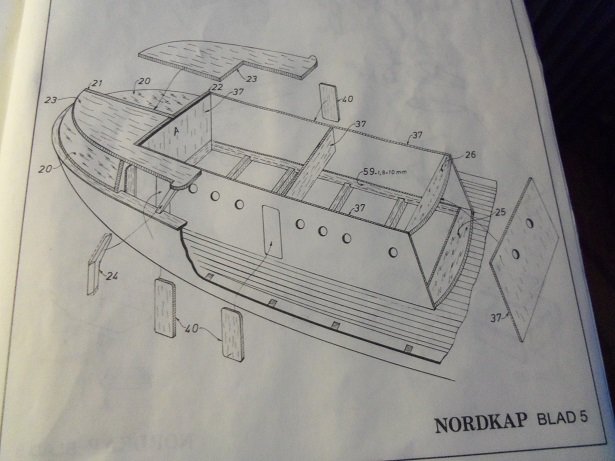
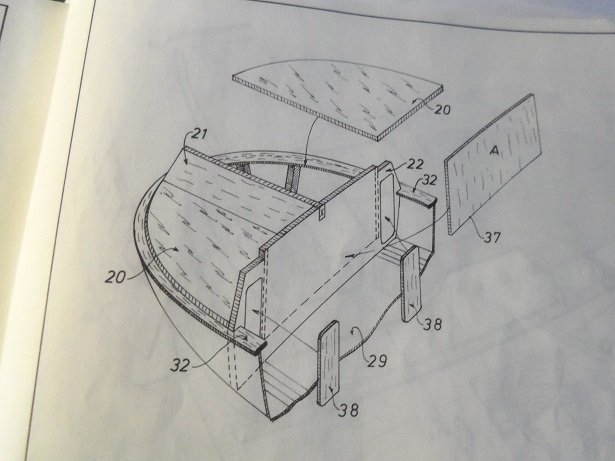
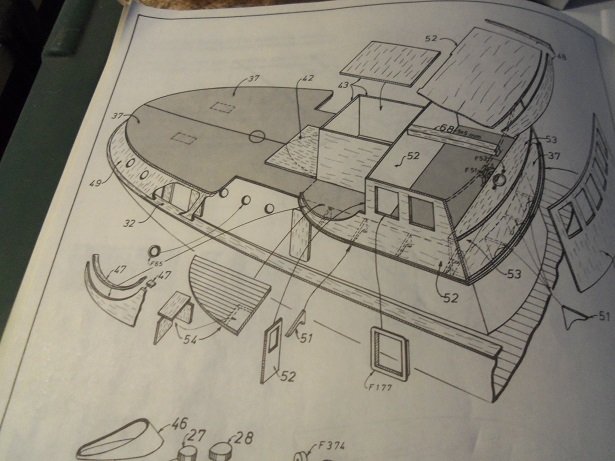
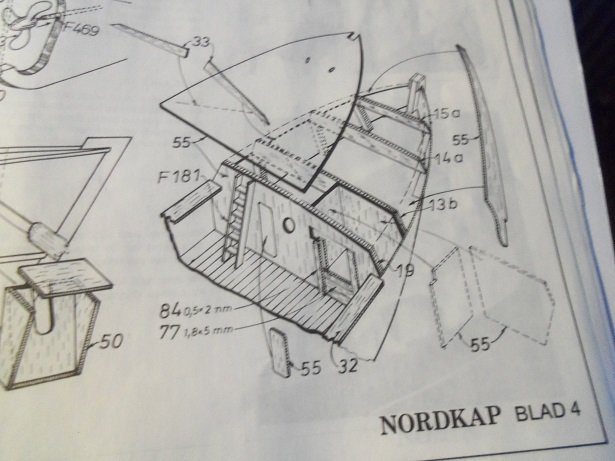
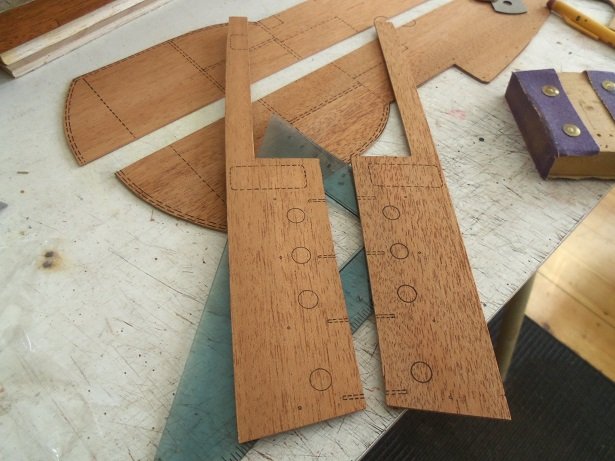
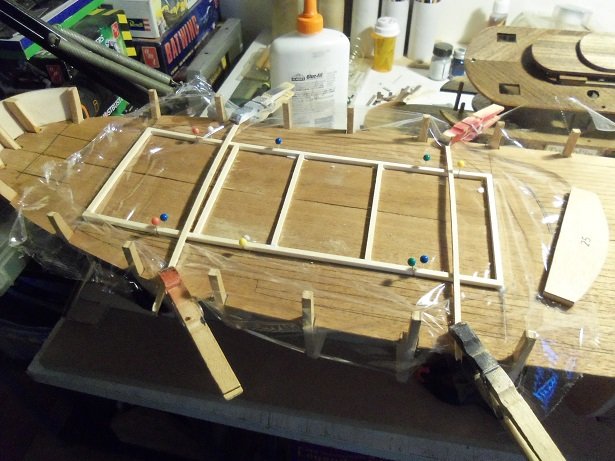
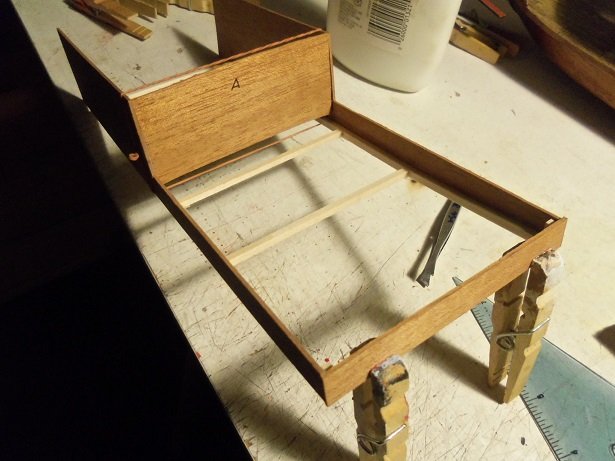
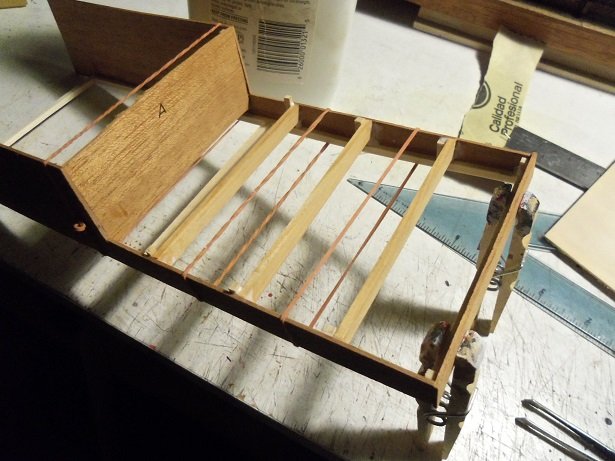
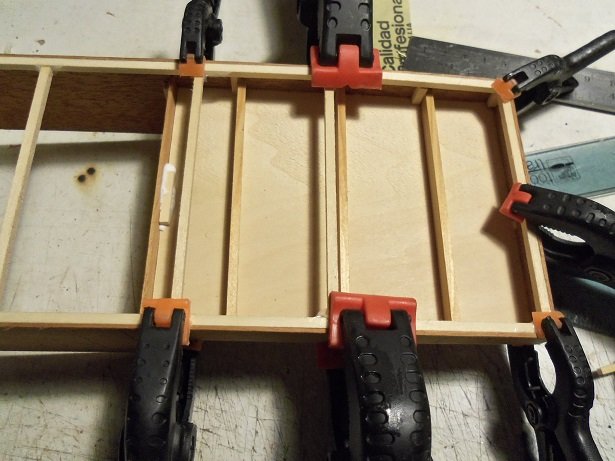
just so you don't get the impression that I was bogged down with honey do's all week, I have this update on some work I did on Friday. I got the 10 mm planking the day before, but it kind of bummed me out that I couldn't use it right away. first I had to mark off all of the printed lines that were out of sync. it would be tough to lay deck planking if I didn't. as for the holds, I can do them later if I run into trouble with them. I test fitted one of the planks and found that I needed to fare a bit more on the starboard side. just as I got it where the post was flush with the deck platform, one of them broke. some CA took care of it........I'll be very happy when I don't have to worry about them any more. the wood is brittle.........but I am patient after the fiasco.......I was doing some figuring in my head........I still can't do the bulwark planking. not at least, until I have the lower section of the cabin structure assembled. there is a bottom frame that is to be built. the structure can be lifted off of it in the R/C version. the open space for the structure would be cut out to allow for it, but I'm choosing to leave it closed. I made up the lower frame using 1/8 x 1/8th basswood strip. here are a few diagrams for you to see........they are pretty much the bulk of the instructions. the text part doesn't even come close, to giving you a blow by blow about the assembly. this is all I had to work with when I built the Nordkap.. the lower structure will need to be modified......this is how it looks for the Nordkap. there was a clue here......did you see it? the square at the stern in picture #2......why is it there. it definitely has no function in the diagram above. to me, it a small sign of proof that the Progress was cloned from the Nordkap.......or the other way around. for the Progress, these parts will not be needed......I showed them to you earlier. the upper deck will need to be modified as well. there is another vessel that I would like to do in the future..........I will need another Nordkap kit to do it. I'd love to try a more recent production though, and see how nice it would be, if all the parts were laser cut the stern is the same as the Nordkap......I will be able to use all of these parts, but the bow is different......it has a fore castle deck. most of these parts would be forfeit. on the progress, the opening is centered more and there are two ladders......more on this later. I'm far from playing with this at the moment. I was back on the scroll saw a bit later, cutting out the second level deck platform halves, and the rest of the lower cabin structure parts. hard to believe that I cut out most of these parts for the Nordkap........with a box cutter. pictures of the Progress were printed off the printer to use as a reference. ohhhhhh.........where to cut.......where to cut?!?! I didn't make a second copy of these two part......so if I mess them up.......it's the walk of shame for ME! {fully clothed of course } {you game of throners.....get your minds out of the gutter}! my only guide was the starboard side door way..........there ya go! there's no going back now! taking the frame and marking which end is the front, the sides were cemented to it. I had soaked and bent the frame wood to mimic the curve of the deck.....note that these parts do the same. when dry, I added the aft wall and the end cap for the aft deck section. I cut up the rest of the 1/8th strips to use as reinforcements behind them. there was some pieces left of the pine wood that makes up the keel spine......I used it to make the beams to support this small aft deck. reinforcements were added..........when dry, the excess bits were trimmed off and the surface sanded. 1/16" basswood flat stock was used to make the deck platform. I added a reinforcement where the new deck platform meets the aft wall. I made sure that it was tall enough for a door. this has been sanded.....I got as far, as to add the bottom support part for the front wall, at the forward end of this structure. I need to cement the top support in place, and then sand the edges at an angle. happy to say that I can plank the bulwarks now......all that I needed to do, is now done I did make one observation.......I may not be able to use the second level deck platform. with the helm, there are the curved casements on both sides of the structure.......in the case of the progress however, these areas are straight. I've cut the platform halves with the curvature.....I might have to scratch build a deck platform. another update soon
-
the deconstruction would have been worse, if you found out much later. PE looks pretty darn good
-
I'm glad your back I was just wondering.........I know....I take a picture, then I end up from another angle, because the first one looks wonky for one reason or another. I should have known........your just getting warmed back up
- 258 replies
-
- 2
-
-
- harriet lane
- model shipways
- (and 1 more)
-
the mizzen isn't glued in is it? seems like quite a bit of rake there. usually, the fore stays and main stays are installed first to help set the rake. the shrouds are done next.....not to the same tension of the stays. they will help keep the masts perpendicular until the back stays are added.....they will take over and render the shrouds with hardly any tension at all {a tiny bit of slack is allowed}. the mizzen looks good with the boom and gaff...got it painted and detailed quite nicely. your jig idea is pretty cool too
- 258 replies
-
- 1
-
-
- harriet lane
- model shipways
- (and 1 more)
-
looking really good Glenn
-
thanks Carl.......my 'signature' only shows half of them waiting for the planking to come in........I had a 'pull' when I got home, to play around with the cabin structure. I didn't get around to doing it though......tomorrow is a new day thanks for all the likes folks.......glad to have you following along