


popeye the sailor
-
Posts
16,007 -
Joined
-
Last visited
Content Type
Profiles
Forums
Gallery
Events
Everything posted by popeye the sailor
-
 I'll treasure it always
 -
thanks Chris..........I know, I've been neglectful. even though I have a couple of projects that I absolutely need to get done, I will try to at least keep the process going......even if it's a little the admiral's happy too.........hasn't yelled at me lately I did a bit more.......update soon
-
the boom set up looks really nice...well done on the rigging I'm a clam chowder man myself we went to the seafood festival this year and the admiral was amazed that I didn't eat any I hung around the fried clam hut 👍
- 467 replies
-
- 6
-

-
- mikasa
- wave models
- (and 1 more)
-
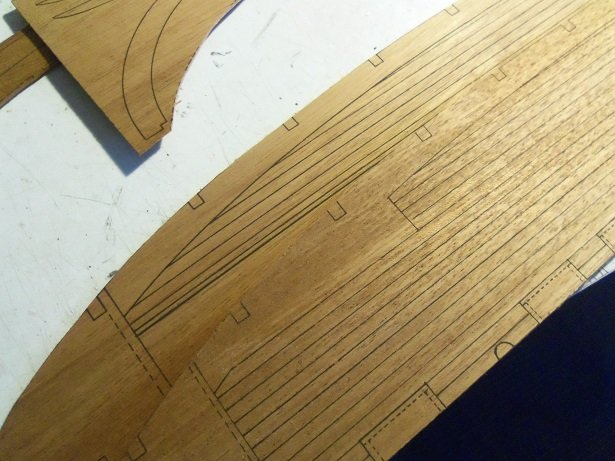
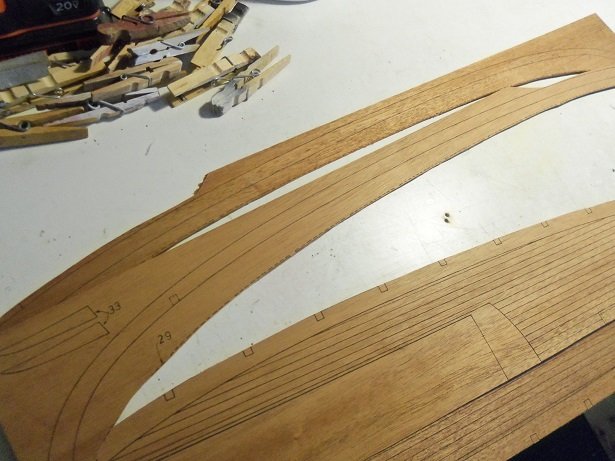
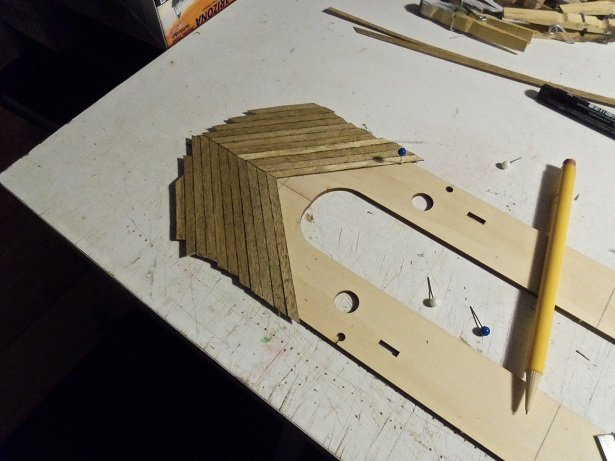
there is a bit more to the last I didn't add last night........I must have been in a hurry. I didn't add this picture. here I did some sanding.......more is still needed. the kit came with mahogany planking, which I won't use.......I ordered some Obechi instead. most of the sheets that the part are printed on is mahogany. the deck platform is sheet mahogany, printed with the details for the planking and fixtures. this might be the reason for the problem I've been having. when I built the Nordkap, I intended to plank the deck. along with this, I would have to create parts to overlay the margins along the bulwarks. the deck platforms were of basswood......light colored wood where the printing showed up good enough to be seen using printer paper. I traced the margins and cut them from 1/16 basswood strip. logical, since I planked the deck using 1.5 x 5 mm strip. I never gave a though to thickness, or an alternative to use thin strip instead. here is a picture of the margins I made. not to confuse folks, I will toss in a picture here and there of the Nordkap build to show the differences. I keep thinking to myself that I really should redo the original log, but I've likely forgotten so much and it would be quite an undertaking to do.......it was a huge log I did a separate build log of her on Blogger....if your interested, do a search for 'seymoregutz' and you should find it easily enough. getting back to the problem at hand........there could be other reasons why I was having a hard time in trying to trace the margins. perhaps I was using a paper that wasn't as dense, as what we have now. I dunno..........I did have an idea........tracing paper. I went to the local Wal Greens, but they didn't have any. I went to the local Wal Mart.......they had paper products strewn over four departments....and they didn't have any. we asked some kid to help us, and the 'lil bugger disappeared on us! we ended up at the local Staples and bought the last pack of tracing paper they had. as for the bow and the stern.......there won't be much to see of the bow, as it's a boxed in cabin of sorts. it's mainly for storage and the mechanism for the anchors. the stern will be planked over, since the aft cabin is eliminated and will be open. there will be some major modification for the main cabin structure..........the upper decking will be gone as well. still more parts to be cut out too.....
-
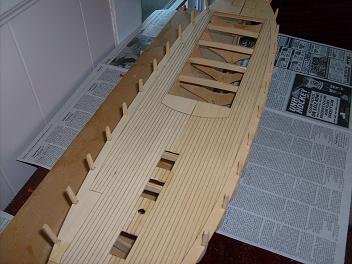
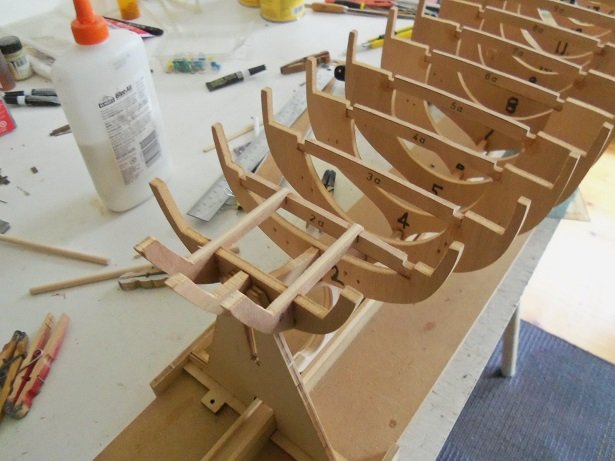
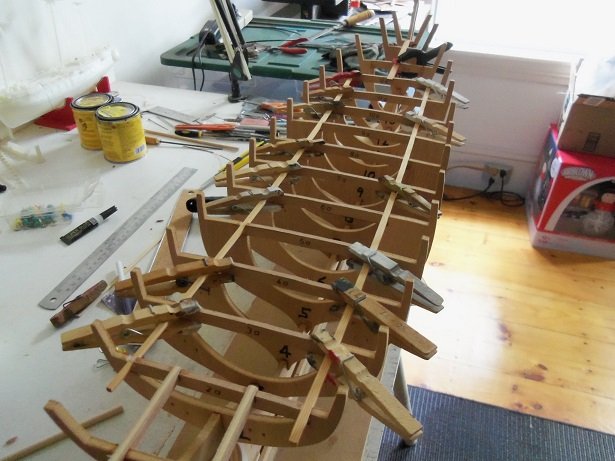
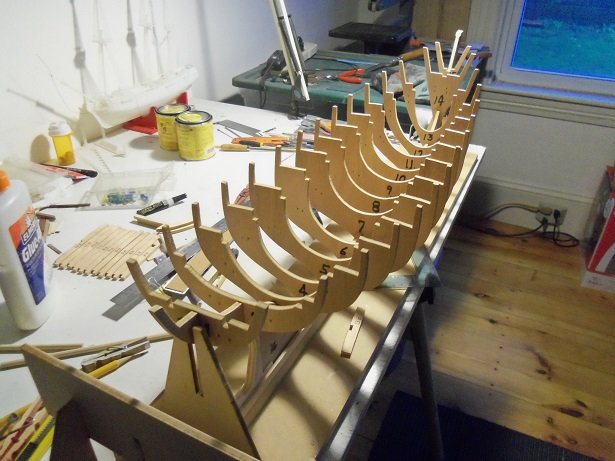
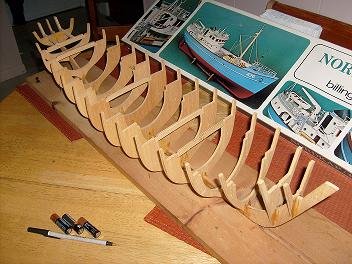
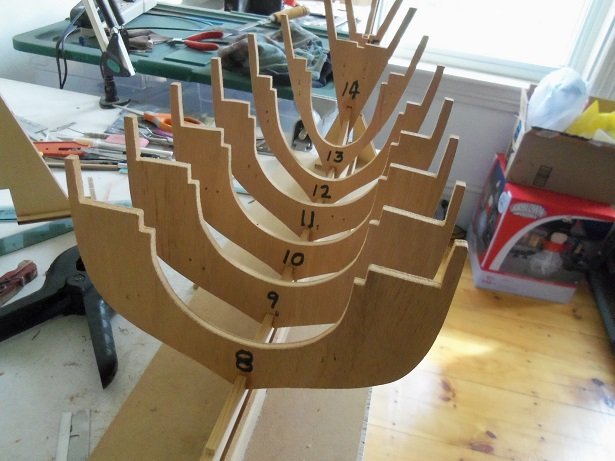
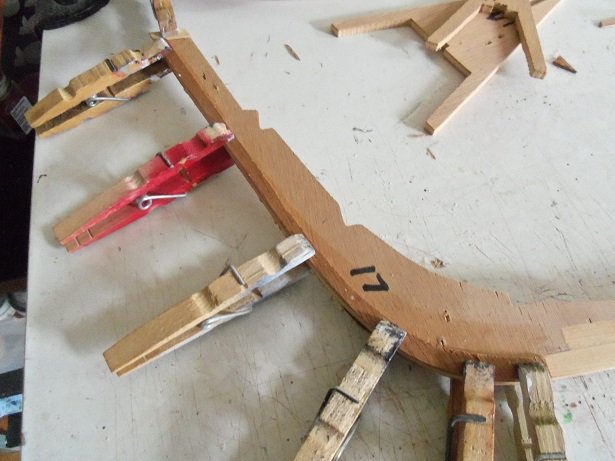
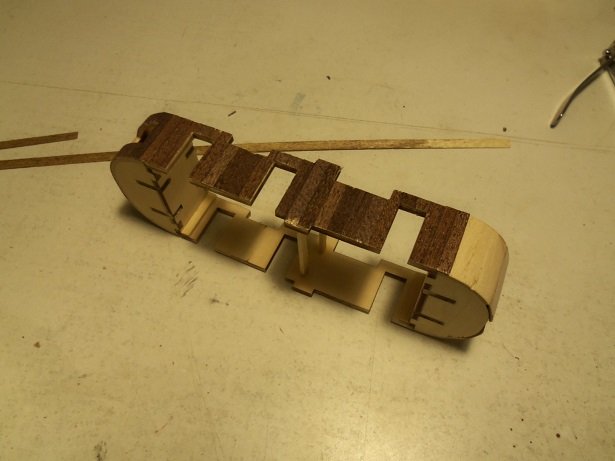
the next step here, is to fit and install all of the deck beams. following the numbers, they were all cemented into place. two additional part were added to the stern, once the beams were dry. sanding was required to fit them into place. the rest of the sanding can be done when it's time to level the frame for the false deck platforms. stringers were added to the frame. at this time, the bulkheads were checked and adjusted to the upper increments.........53 mm from center to center. a single stringer for the bow, and two running down the sides in the slots provided. when dry, the ends were trimmed........I could leave 'em......but I like a neat job I did some sanding to level the deck frame surface....I still have a bit more to go. besides, I need to go on an errand before that happens not much more to go anyway, before I'm caught up to where I am with the project at this point. see you in the morning
-
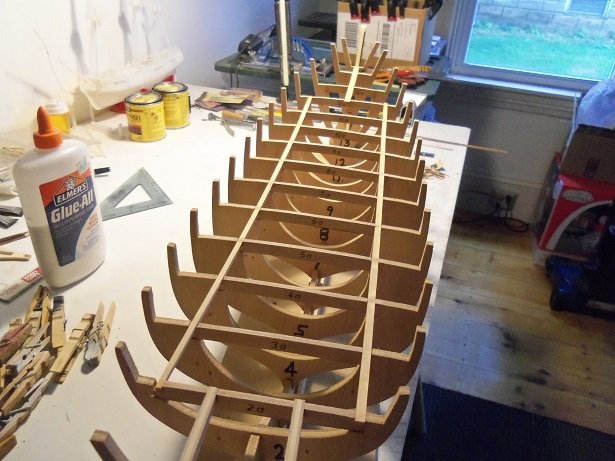
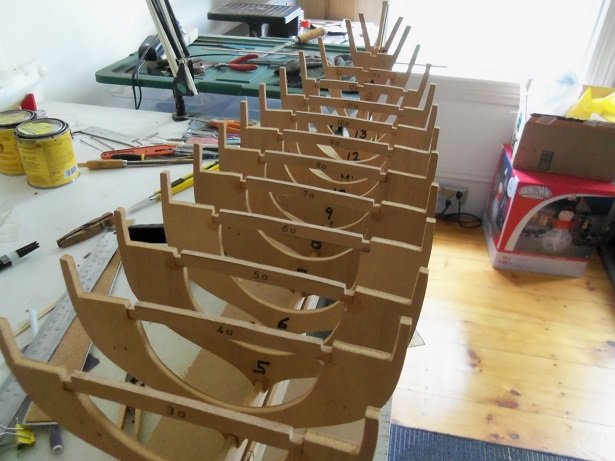
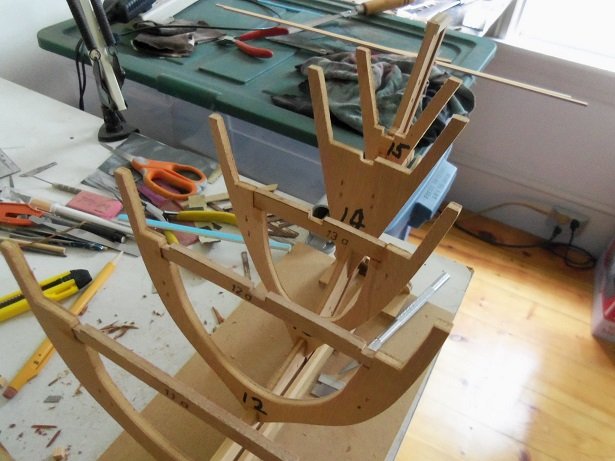
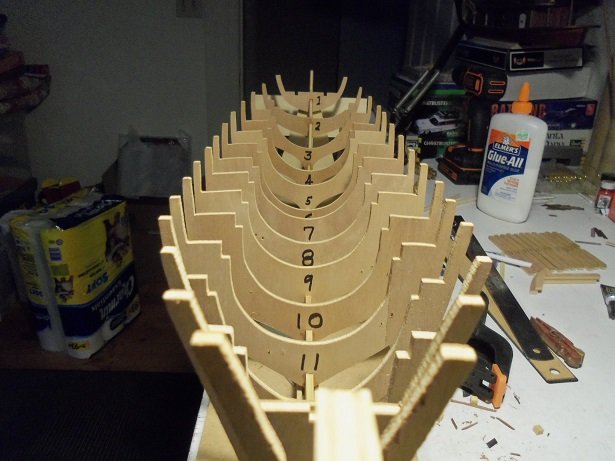
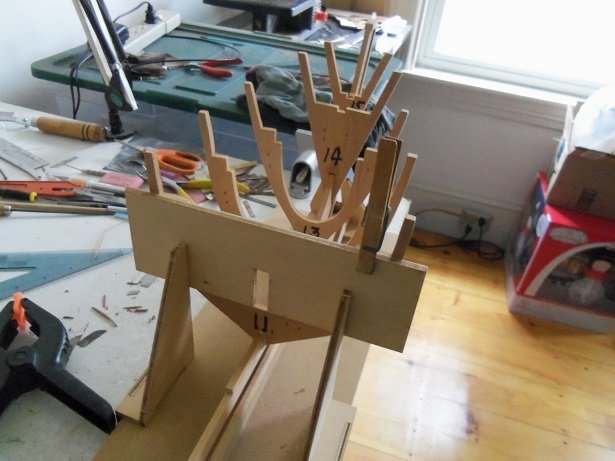
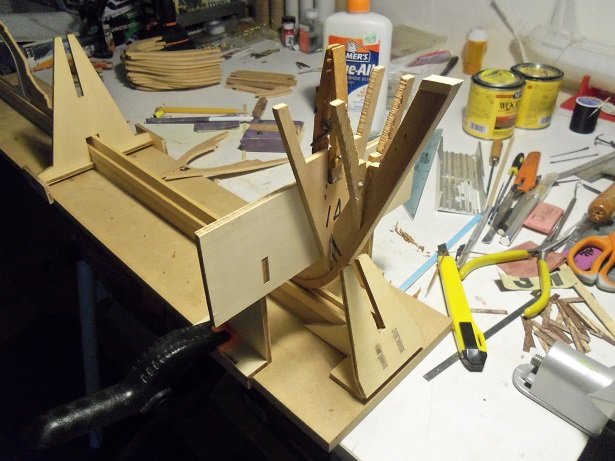
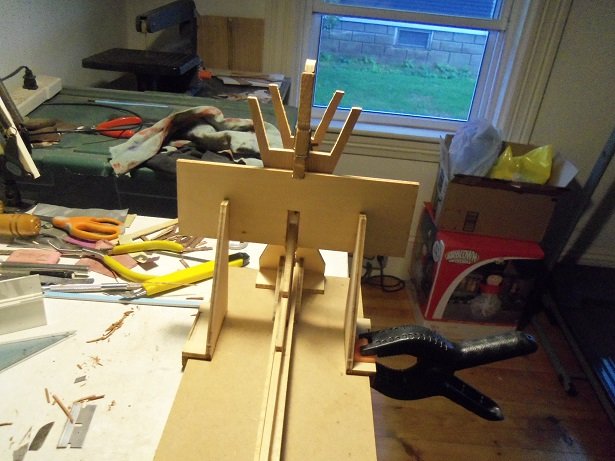
by the 24th of September, almost all of the spacers were in place........the second of the two 50 mm spacers was being put into place. #6 was being cemented in place.........#5 was next.....a slow process. it wasn't to bad keeping the frame on an even keel.......I was using another part of the build slip to keep it perpendicular. there! I said it......Perpendicular..........upright!........not vertically challenged! the rest will be added to the stern stem now. #4 will sit in the notch at the beginning of the stem. I cut another spacer to aide in holding it in place and give the bulkhead a better root. by the end of the day, the rest were in place. they required no special supports to be added. looking down the barrel, all of the bulkheads appear to be fairly straight.

-
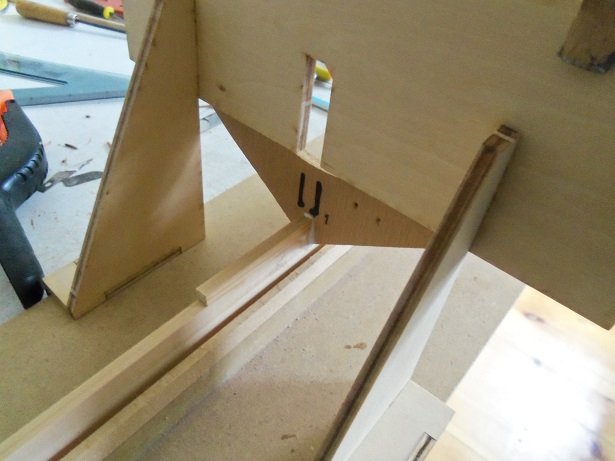
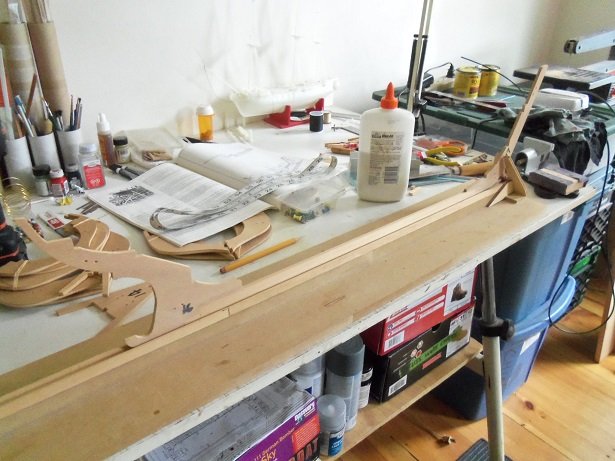
hello OC........this is the type of build slip that Billing Boats sells. it's really not designed for the older kits, but I used it anyway. you may have noticed the one that I assembled the keel on.......that one is home made. I used to make my own slips before I got the one I have now........one board that I have has three different slips on it. it does make life easier welcome aboard ⚓ welcome to the log CDW plenty of room
-
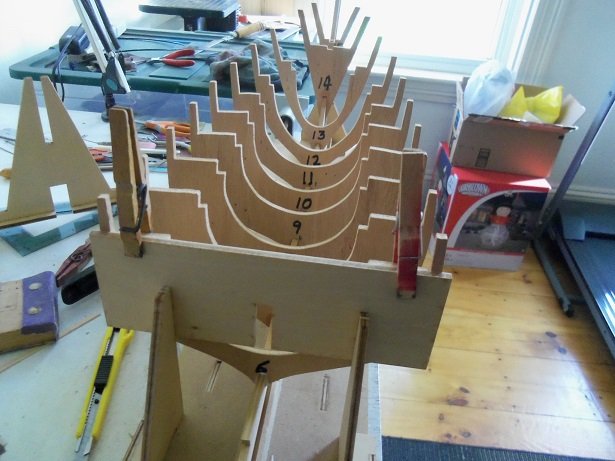
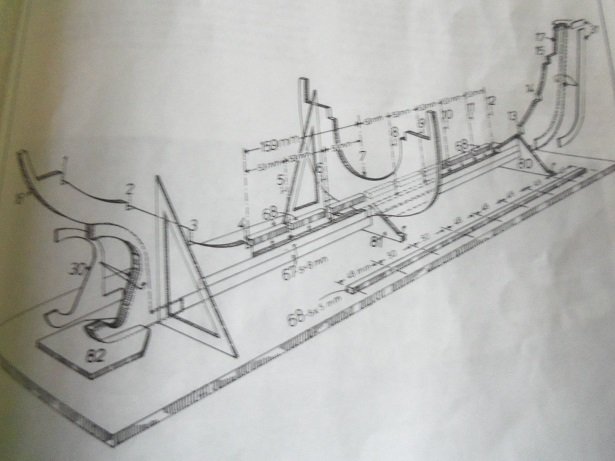
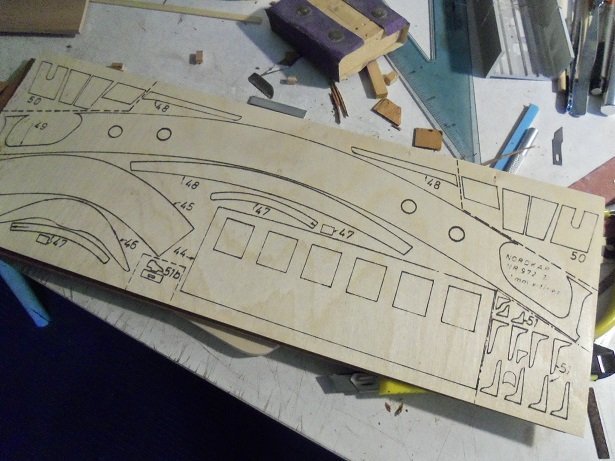
usually, I'm pretty good with reading Billing's instructions....but I almost made a mistake here. with the first kit, I didn't assemble the hull frame. this is how I got it back in 2010 I brought home a skeleton! pretty comical was the look on the admiral's face. the diagram is a bit blurry..... the increments along the top is 53 mm from bulkhead center to center. that is what I cut the spacers to. this is also what the build slip would look like, using the supplied chocks. looking at the base of the slip, is another bar with a different set of increments.......5 @ 48 mm, 2 @ 50 mm, and 1 @ 48 mm. these are the actual increments that I needed to use. bulkhead #12 was cemented in place, along with a spacer. when #11 was cemented in place, I became suspicious. lining the rest of the spacers in their places, I found that I could not fit them all. good thing I realized this quickly! #11 was removed, along with the spacer that wasn't dry yet, and cut down to 48 mm. to remedy the spacer that was already in place and dry, I merely measured and cut it to 48 mm, removing the excess piece and cleaning up the mess. #11 was cemented back in place, along with the spacer that I had trimmed. after that, four of the others were trimmed to 48 mm, and the last two were trimmed to 50 mm. problem solved. my mistake.......I proudly own it the spacers were arranged to mimic the order that they were to be used, so I wouldn't forget that either. this was allowed to dry and others were added in this sporadic time frame......this took a couple of days. this is where I was on the 21st of September
-
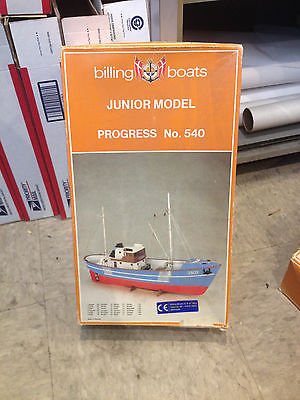
welcome to the log Channell and Elijah....I hope I don't disappoint in this day and age Channell, I would imagine there is a collector's market. although, plastic rules the roost because it holds up better to time...decals don't though decals didn't for this one either....but that's OK, I can try to make some. wood does have a shelf life...it depends greatly how the kit is stored. one of the deck halves has ripples, so I would imagine that it was likely stored in a cellar. the first kit came from an attic.....Harold assured me of it...all the sheets were reasonably flat. I have a couple of plastic kits that I should put away, but that would ruin the purpose of the kit. the one thing that would add value to a wooden kit is rarity......if I had an actual kit of the Progress, then I would be inclined to look at it's condition. naaaaaa, what fun would there be in that thanks Elijah.......it will look better once I knock the ugly duckling out of it that's the funny part of modeling.....most plastic models look OK while your building it, they just look incomplete, while a wooden kit looks disheveled until you put a finish on it....paint or clear sealer I hope you enjoy the log......who knows, it may entice you to bring out one of the old kits welcome to the log Jack
-
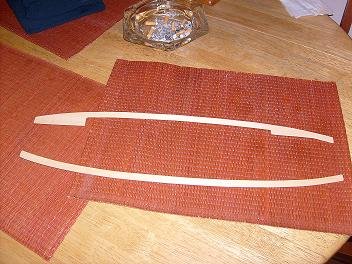
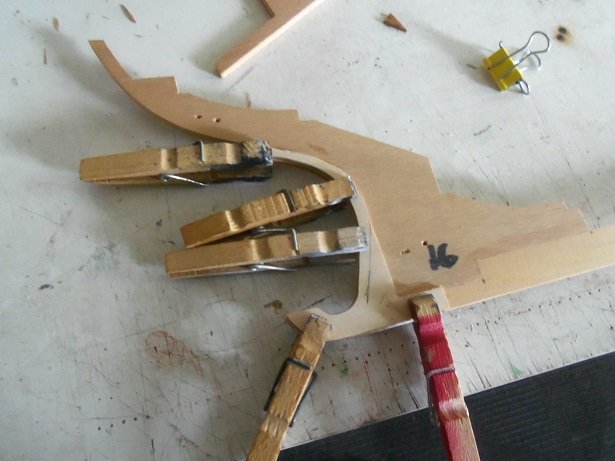
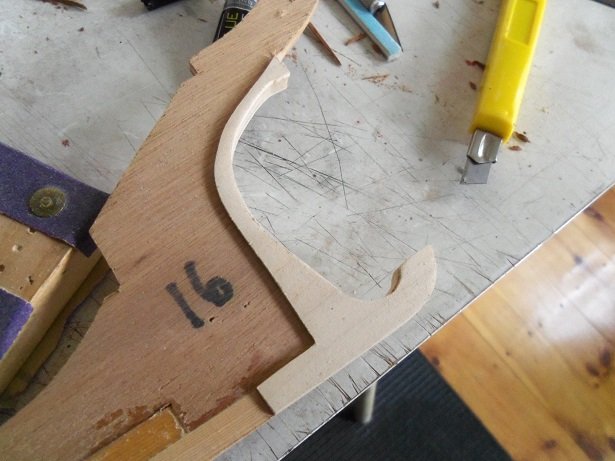
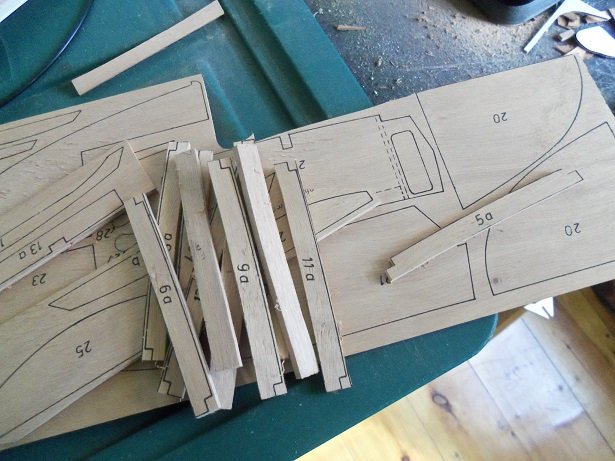
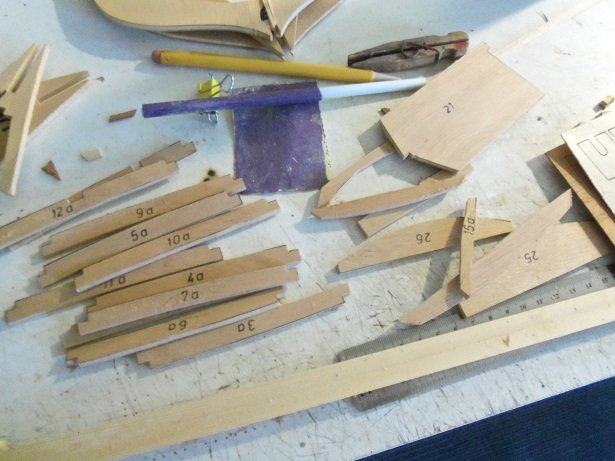
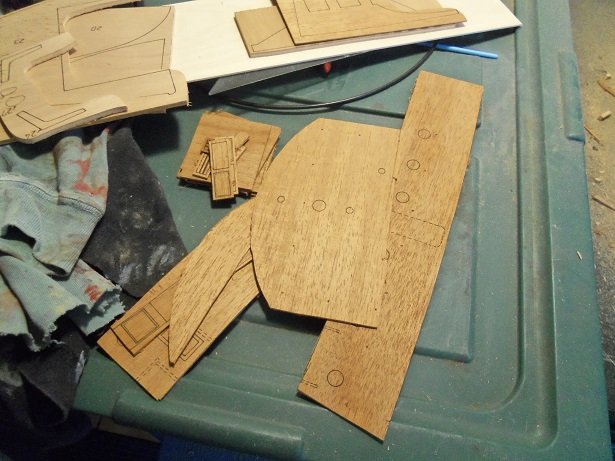
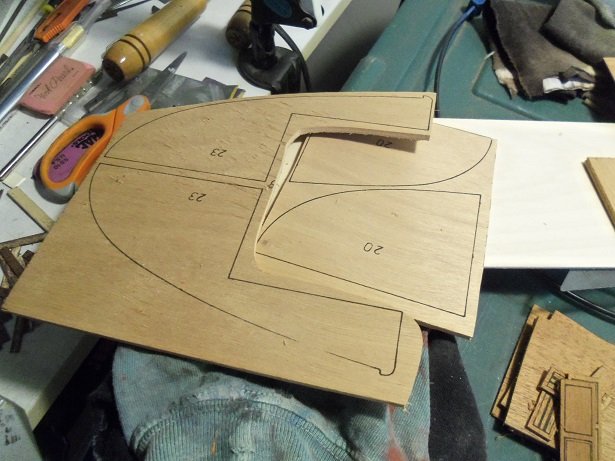
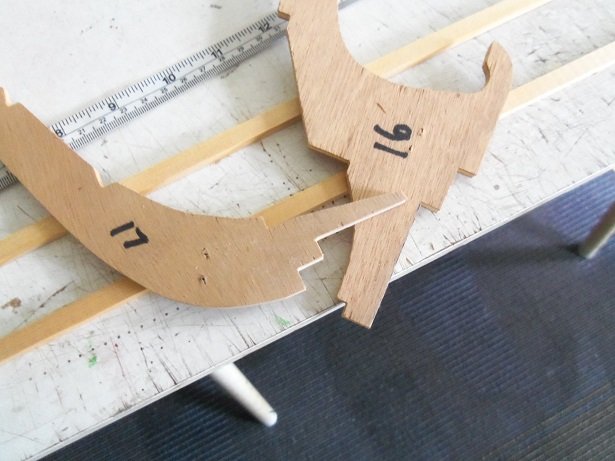
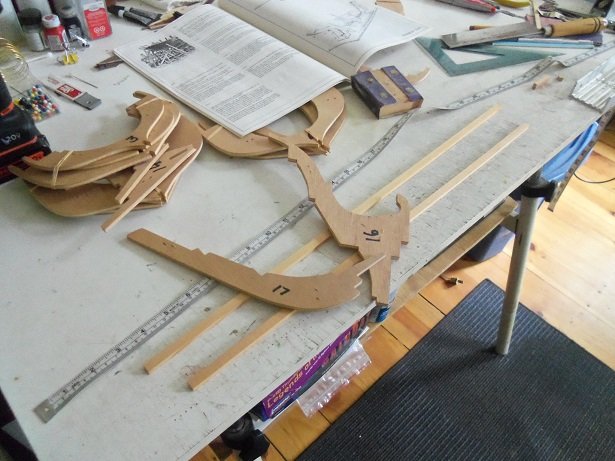
back in the day, there were no build slips for these models........the stops were supplied to make your own. I decided not to use them and use the build slip that Billing Boats later developed. at this point of the build, it fits fine.....but add the rabbits, and there would have to be modifications made on the slip. it can't be put in at the stern end due to the rudder shoe. at this point, it was time to start cutting out the parts.....the rabbits were first. the bow rabbits weren't too bad....I only had to repair one of them, but for the stern, they were a total loss. I made a pair from basswood stock, 1/16 inches thick.....they were fitted and then fine tuned later, when they were cemented to the stern stem. as mentioned, the bow rabbits fared much better. there was a small cap rabbit that fit at the top of the stem....they were replaced by 4 mm strip stock. this is not a good start........I want to use as many kit parts as possible.........for the Nordkap, I used about 90% of the original wood........one of my goals in building an old kit like this. it's not petrified wood, it's just dry beyond comprehension. being mahogany {they call it Mahonie in the instructions}, it is very brittle. while these parts were drying, I went on my cutting spree. first were all of the deck beams... some of the mahogany parts... these parts won't be needed... haven't tried to cut any of the 1/16 plywood parts.......some of these parts won't be used either when dry, the keel was put back on the slip........that's when I found out the slots weren't wide enough. rather than try and adjust anything, I just kept making sure that it sat correctly in the slip. the bow bulkheads were cemented in place first. these didn't require spacers..... once I arrived at the flat of the keel, the real fun started
-
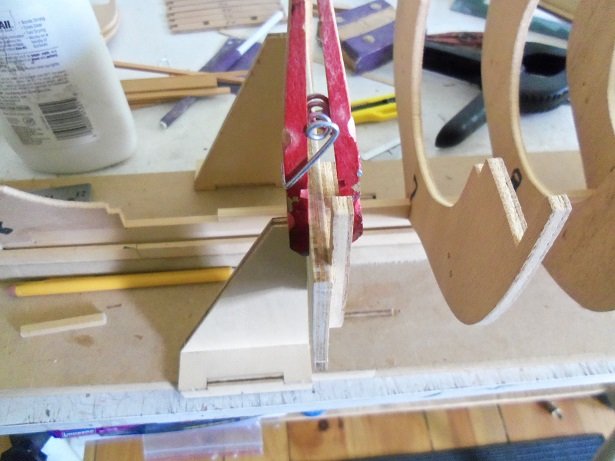
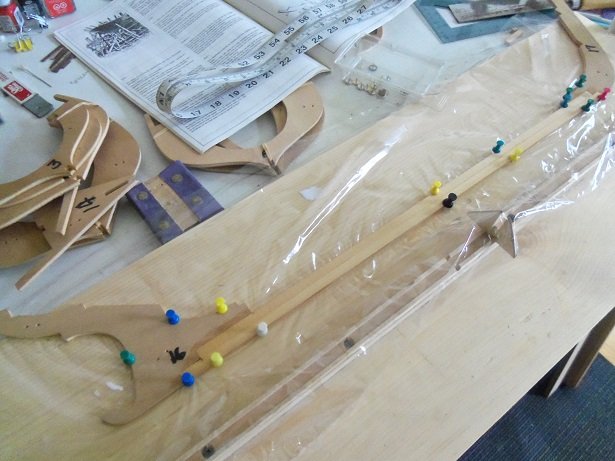
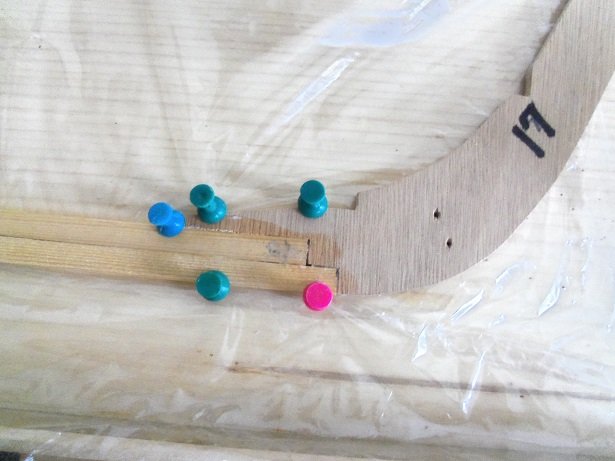
it all starts with assembling the keel.......the bow stem and the stern stem are pre cut out. the keel spine is made up of two strips of pine, cut to accommodate the stems. at the base of each stem, there are the steps that the pine strips need to fit into. there is some sanding requires to get them to fit snugly. plastic wrap was laid out for the assembly to lay on as it was cemented together. to what small gaps remain, they were filled with glue. this sat for the day.

-
thanks for the good word John.........the admiral is as well
-
thanks John........there's more I need to add. I'm so glad you popped in..........I hope your going to follow along. you were so helpful with the nordkap and all. I forgot to add this, but there won't be a remake of the Nordkap. I was going to replicate the parts, but I thought of all the extra work and changed my mind. I figure that I'd wait till later and order one of the newer kits.........see what it's like to work with laser cut parts the admiral said I could oh.........I hope you're doing well....as I recall, you were getting a tune up
-
you've made such fine progress....the funnels look superb and the mast look great too New Hampshire is a great place........you gotta like snow though
- 467 replies
-
- 4
-
-
- mikasa
- wave models
- (and 1 more)
-
so this is what you do, beside moving the equator and creating Bermuda triangles?!?! I just got a new set of bits myself...as soon as they hit the table, I'm on the look out for more.....I know what will happen......sooner or later ...and I thought I had patience.......does it come with the bits? look'in good though!
-
you invite.........I come I have an idea for your length dilemma........if the kit your modifying has a three piece keel { bow stem, stern stem, separated by a keel spine, you can likely do it from the mid ship. you will need the measurement of the bulkhead spacing to figure out the length, and the number of the center bulkhead. say the center bulkhead is #5........create a second one #5a. factor in the spacing for the bulkhead......if the spacing is 48 mm.......you will be adding 48 mm to the overall length of the keel. I did this when I built the hull for the trawler Syborn.......you can check out the log on page ten, here in the scratch build forum. I don't have a lot left to do on her........seeing her that far back....WOW, I gotta get her back on the table and finish her you gonna have fun............it's almost necromantic! BWAAAhaaahAAAAA! 😈
-
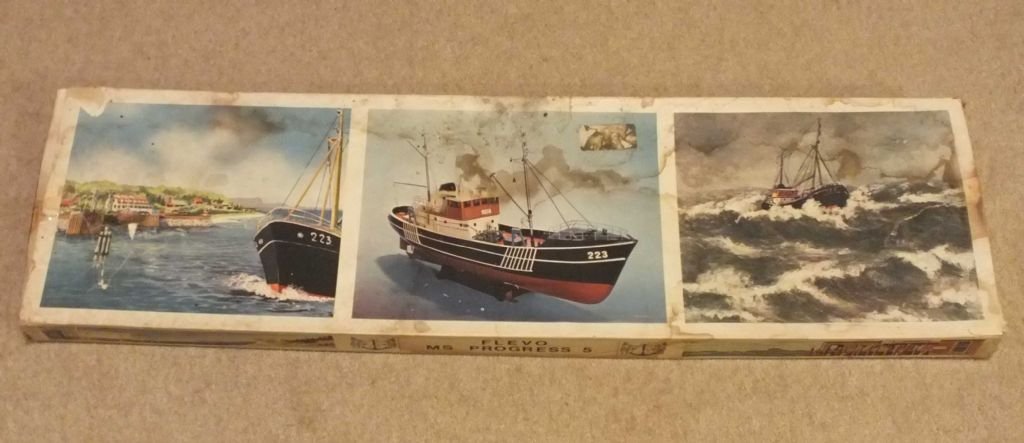
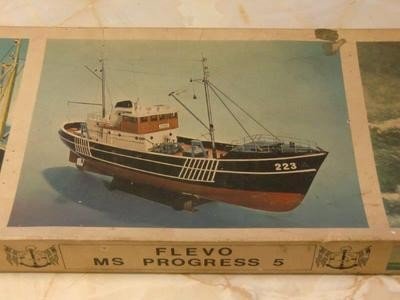
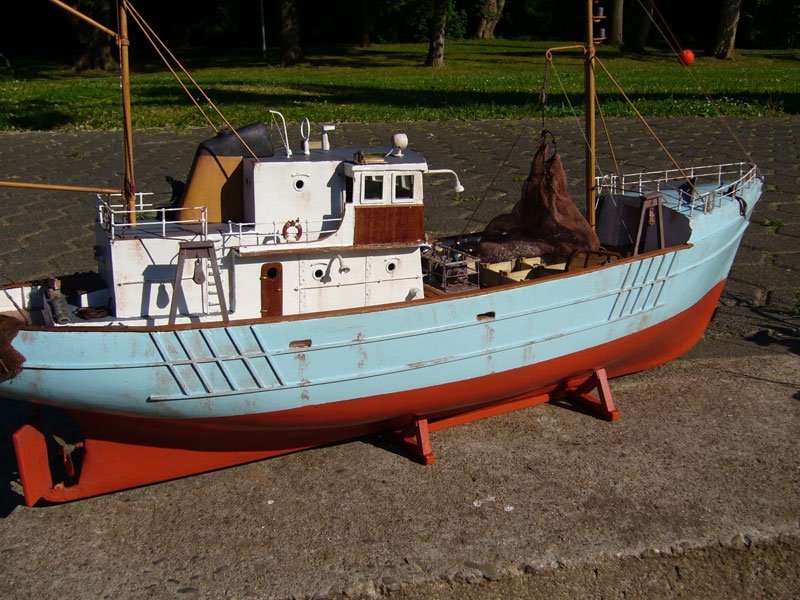
back in the day when I built my first wooden ship, the Nordkap, I happened onto pictures of this model. noticing how closely she resembled the Nordkap, the idea was burned into my mind to build her one day. I have some pictures of the finished model.......I've adapted through time, the knack of building, using pictures to guide me. even in regards to the Nordkap, I have never seen any actual pictures of these ships.........I've been told that the Nordkap was a real vessel........the origin of the name means North Cape. finding information to confirm that this was an early Billing's offering was hard to come by.......even my friend Tom was unsure about it. so, all the while I was building the Nordkap, I would take stabs at finding information about the model. the folly of a lost opportunity was later realized, when I was experimenting with parts panels from other model kits.........that the hull parts could be replicated from them, creating other hulls to outfit differently, creating other vessels. it was lost anyway.........there were no parts panels to save, since all the bulkhead parts were pre-cut out, so it seemed. all of the bulkhead parts had these characteristic holes in them, as if they were stapled to a board or pad and cut out. I should mention that this was an old kit, produced well before laser cutting came into the picture. a few of these older kit have been built on MSW......some before the great crash, gone and never to be seen again. this past Christmas was very good to me.....the admiral got me another Nordkap kit. this one was much older....by how much I can't really say. the significant sign that the kit was older, was in regards to the wood used to print the parts....not being laser cut either. again I found it odd that the bulkhead parts were all pre cut out.......right along with the same characteristic staple holes, strangely it seemed, in the same places in the wood. Neither kit came with the fitting hardware, as this was sold separately....the norm of the early Billing Boats kit. I have a thread in the nautical forum that will explain the two kit further: it seems like such strange luck that Billing Boats added the Nordkap fittings kit to their product listings. in the beginning, this was my biggest problem.......I didn't have the fittings for it. by the time I had the hull planked, they were comm'in out of my ears!....Harold found his kit, and I had gotten one {or a reasonable facsimile} from Tom! took a while to use them up.........they were quite handy I enjoy old kits........plastic, wood.... no matter. dunno.....I think it's kinda nostalgic to assemble something...........kinda like finding the old bones, and then put the dinosaur together. I also like to find out the history of things....although for this model, it seemed like pull'in teeth. well low 'n behold........some searching yesterday pulled up some interesting stuff. I can confirm that "yes Virginia, Billing's did make the kit.........not one, but two! it all started with these sites.... https://www.modelboats.co.uk/forums/postings.asp?th=94284&p=1 http://www.modellbau-web.de/galerie/progress/progress.html I have some of these pictures.........originally, I thought I had gotten them from the Hull Motor Boat Group website. Billing's carried a junior version of the vessel in !:60 scale: it comes in a blue box as well and a 1:50 scale kit, Nr101 I did see another vessel that looks similar....a big difference was that the cabin structure was all the way back to the stern. an even better turn of events, was that I was able to find the main sheet diagrams {front and back}. a lot of this info was dated 1978........the model or kit was sold and long gone. I will venture to say that these kits were likely sold in 1950 / 1960.....of course, this is my best guess. as with the Nordkap, I hope to be able to come up with a worthy model. I was so green back then.......but there were plenty of folks here that helped me along the way. I hope you enjoy this log as much as I will creating it
-
looks awesome! congrats on a great finish OC..........visibility speaking........it would look better in a regular case the main thing is.....no dust will get on it, and that's all that matters! super great job.....nice camo paint and all!
-
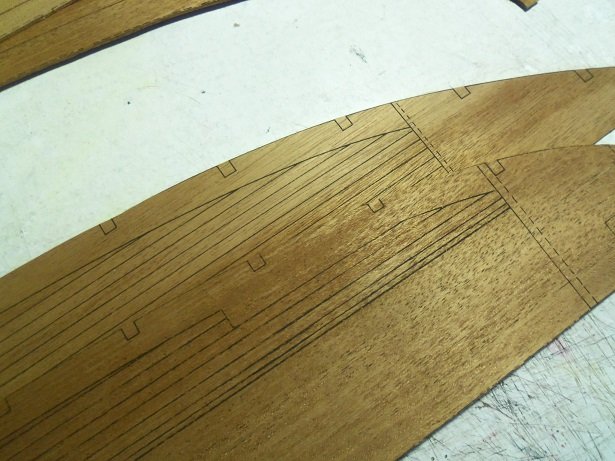
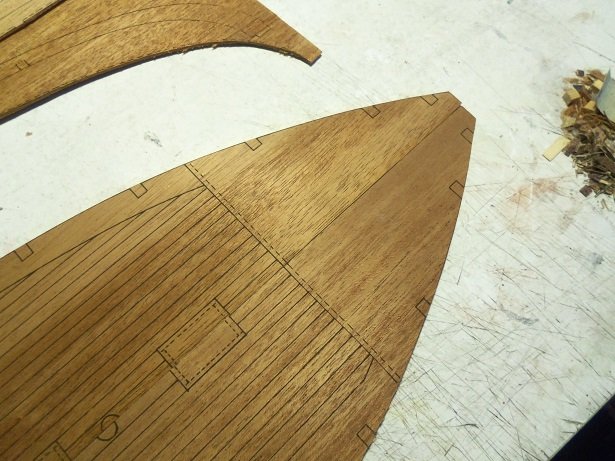
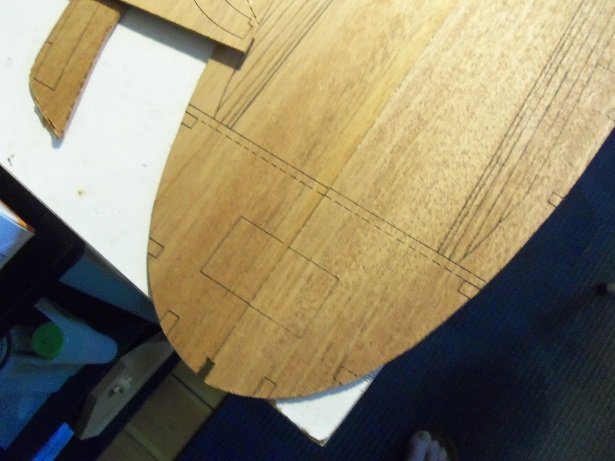
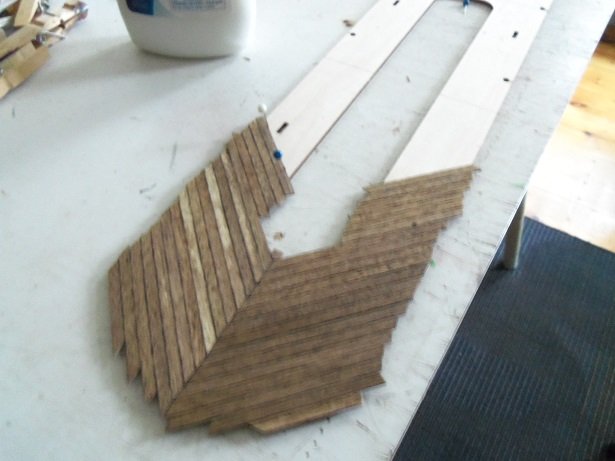
BOOO!!! hope I didn't scare you.......thought I'd visit an old haunt {after all.....it is October} . great month for beer too. as I mentioned in another log.........{I must be on fire}........I haven't been doing much of late. fingers crossed to change all that. I had cut pieces of planking on the table, gathering dust, while I played with other projects. in pick'in stuff up, I picked up some of the planking and.....and I dunno, adding glue into the mix came to mind. I was in the process of planking the outside of the upper level structure and began continuing with it. I need to stain some smaller planking to do the end fascia. what I did was later trimmed, but needs a little stain touch up. while this was drying, I marked off and started to plank the third level deck. the lighter colored ones are no real concern........I'm going to go over this deck with stain, as I did with the other decks. I'm using the archive pen for the simulated calking. I'm going to plank this deck the same way as I did the second level deck. the midway point is visible in this picture........I will add the center strip along the line as I get closer to it and border it off. the other end will go in the opposite direction, and then I can open up all the holes and stuff......... I got further along, before I got called away. I will get back to it tomorrow staining more planking is definitely in my future
-
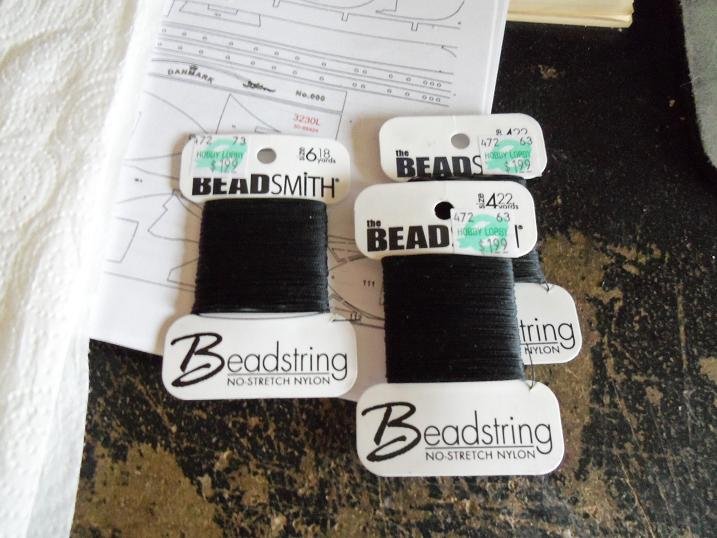
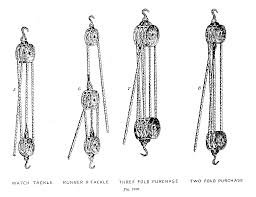
good to hear you've made progress with the dead eyes....what size are you going to use? due to the scale of this kit, it is logical to go with something smaller than 5 mm. spoken like a true modeler........don't settle for anything less than what will make YOU happy thread color is a personal taste really.......you've likely seen what I meant about the way companies gauge the diameter of their thread. here is the stuff I use: a few folks use what is called EZ line.......there is enough stretch where you can have it taught, but still loose enough that it won't distort the masts or yards. this is important, because if you rig the lines too tight, it will bend them and make the ship look terrible. I've mentioned this before {I don't mean to sound like a broken record} about how to find 'absolute zero'. keeping the lines taught within this parameter will help to prevent other lines from fowling what is already done as well. take a piece of the thread your using and hold it by both ends {doesn't have to be a big piece}. while concentrating on it, pull it so it is taught.....as taught as you can without snapping it. slowly relieve the tension you've put on it, until it goes limp.... ....then pull it tight again and repeat. do this as many times as you want, to see what happens to the thread. the point where it just begins to go limp is absolute zero. you'll get an idea of how much tension the thread will handle, before it distorts the masts and yards. standing rigging should have more tension than running rigging...after all, standing rigging is the support for the masts. the natural order for taught-ness is stays, shrouds, and then running rigging..........to me, the stays are the main supporters......the shrouds are too, but can be slightly less, and the running rigging have the least, with the exception of those that have pulley assemblies. what I mean by pulley assemblies, are those that are of a pennant, two block configuration: there are many tutorials and books out there on the subject keep going, your doing fine!
- 105 replies
-
- 1
-
-
- thermopylae
- sergal
- (and 2 more)
-
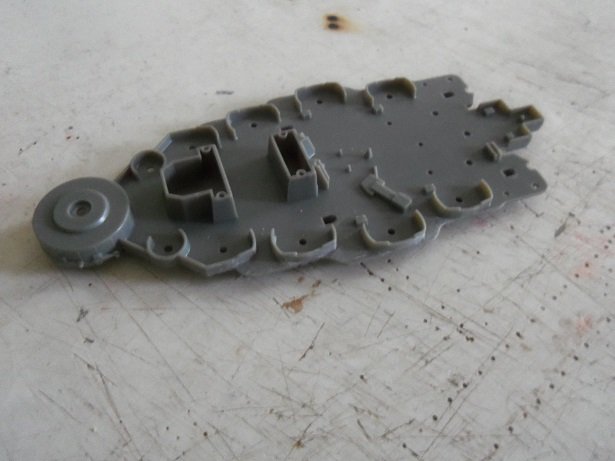
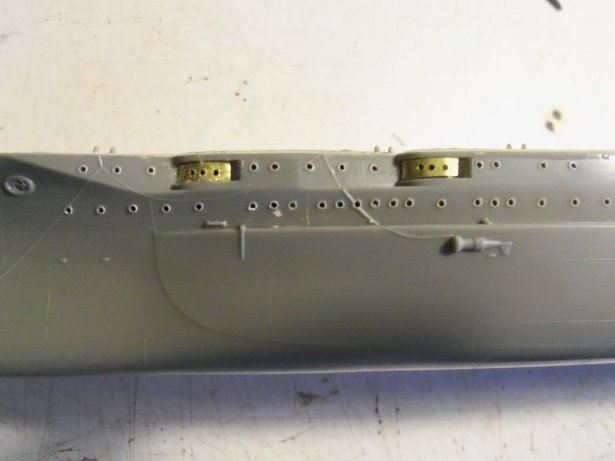
that's true Lou..........it would also depend on how much fertilizer is added compost anyone????? hello Sam actually........I'm still up in the air. I'll continue with this kit.......should I go to Hobby Lobby in the future and see another one, I may pick it up. the kit is cheap enough to expand on I think. thanks for the birthday wishes........it's not too bad being another year older no.....the project is still on-going.....I've just been lost in my own thoughts. even though the outlook may still be cloudy, there's no reason why I should let it spoil my fun. >here, here.........well spoken Bruce< >rule No #1.............NO POOFTERS!!!!< I was pondering over the kit one afternoon, when I began looking at the second level to the main structure. some of the pictures I've seen do not show casements all around it. I decided to leave the gun casements in place, and whittled away the ones between each one. the ones on the fore end were left alone, but is subject to change. as for the two guns and casements I mentioned earlier, I'm going to leave them.....I like armament the way that the forward casements are shaped, is the reason why I kept them. then I started to drill out the portholes in those modified hull gun placements. the port bow went ok............. .....but the stern, I goofed on the second one. I will have to put in a new piece and redrill it. once these are done, I can start on painting the hull. I've also been looking at other stuff molded on the deck....what can be removed and replaced with PE. other than playing with some of the PE, trying to decipher the TMW instructions, this is as far as I've gotten. I hope to have more soon. thanks for hang'in in there with me.........

- 259 replies
-
- 10
-
-
that would be taking a giant step into the dark side. I've used Billings plans for the Andrea Gail. I'd never sell her. recently, I learned how to resize the parts panel diagrams in the back of the instructions, and capture it using the snipping tool. this will be very useful for models that I'd like to do in a larger scale than presented in the kit...I have two of them in mind.
-
really cool what you did to the hull....the rivets make for some really great detail. looks great primed over good news on the new job
- 193 replies
-
- 3
-
-
- wilhelmina vii
- fishing
- (and 1 more)