


popeye the sailor
-
Posts
16,007 -
Joined
-
Last visited
Content Type
Profiles
Forums
Gallery
Events
Everything posted by popeye the sailor
-
 interesting jig.........with some really nice results! rails look great!
 -
very nice Tom.......chain plates and dead eyes look super. never worry about the speed of the build.......the fact that your making progress, is good enough for most folks your able to take time out to have a little fun........that's what counts! black is a great color to mask over the minor stuff........
-
looking forward in seeing your progress Marc
-
awesome progress Bob........the tree nailing really pops the deck layout is coming along nicely.
-
I saw the other day that you had another build going.......but during my work week, it's hard to spend time here {i'm usually dog tired}. looks like a great kit.......bet your think'in of doing some weathering to 'er. do what you do best! glad i've finally found your build.....be pleased to watch 'er grow! warpage is a problem........most of the time, it's a matter how long they've been in the box, and how it's packed. the deck stringers {beams} are a good way to straighten them out....especially since you've sen the problem early.......before you glued the stringers in well played orange!
-
nice to see an update..........even if it's just to say howdy I'm sure you'll find a good solution to your problem........does it impact the assembly? will it show in the finished model? {just thought I'd throw these questions out there}
-
is this a kit, or do you have access to a laser cutter? very nice work......especially with the photo etch detail
-
such a splendid looking display be VERY proud of your accomplishment....you two definitely deserve to be congratz!
-
Cutty Sark by NenadM
popeye the sailor replied to NenadM's topic in - Build logs for subjects built 1851 - 1900
the model looks great.......you and your son did a splendid job! for some reason, I can't post a like on them. I could today though!- 4,152 replies
-
- 7
-

-
- cutty sark
- tehnodidakta
- (and 1 more)
-
looks great Rob.........painting the discolored wood will never be seen. copper........plate or paint?
- 1,208 replies
-
- 1
-
-
- great republic
- clipper
- (and 1 more)
-
sweet looking ship's boat
-
nettings look great Sjors.....Anja did a sweet job with them
- 1,616 replies
-
- 7
-
-
- caldercraft
- agamemnon
- (and 1 more)
-
really coming out looking great Rob! is there to be a second planking, or are you going to 'plate' the hull, to give it that steel look? the hull frame has a nice form.....very nice!
- 1,208 replies
-
- 1
-
-
- great republic
- clipper
- (and 1 more)
-
I do apologize for the late reply.........I was on here the other day after work.......and I was actually falling asleep as I was writing {if that's possible} . getting back to work after a vacation really stinks........I'm looking forward to the day when I can have the full time vacation gonna be a bit broken with the progress.......gotta work a couple nights at the airport, but I'm sure I can gain some ground during the day. I appreciate the kind comments and thanks to all you fine folks who hit the like button. the big thing now is to make some sense out of those two pieces I added to the cabin bulkhead. more progress soon.........
-
I know what you mean about cleaning the workshop........I finally cleaned my table.. I got tired of stuff getting pushed off the edge and hitting the floor! us mad men gotta stick together the galley badge and decorations look super! I wonder what the model manufacturers do in production lining their kits........they must have flare ups like that quite often. has to be expected though.........you get right down to it, this is a variant to wood burning really nice work there.........and a belated birthday wish to ya.....my admiral has the same thoughts about me and my toys
-
thanks Mark......and that to all who hit the like button first day back at work...........I wish I had some gusto left....... I hafta say......I don't like the 'lag' when one first gets back to the normal routine...........but man......one loves everything in between! once the progress gets past the hull........there's more.. I'll try and make it interesting thanks again!
-
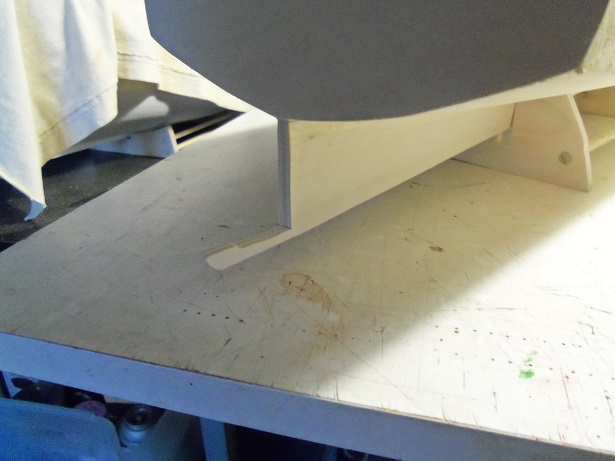
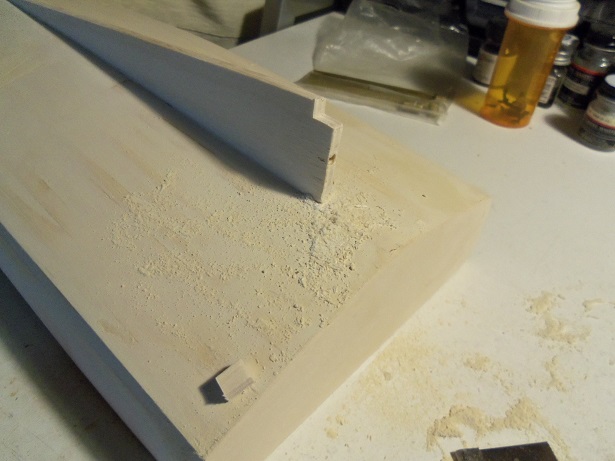
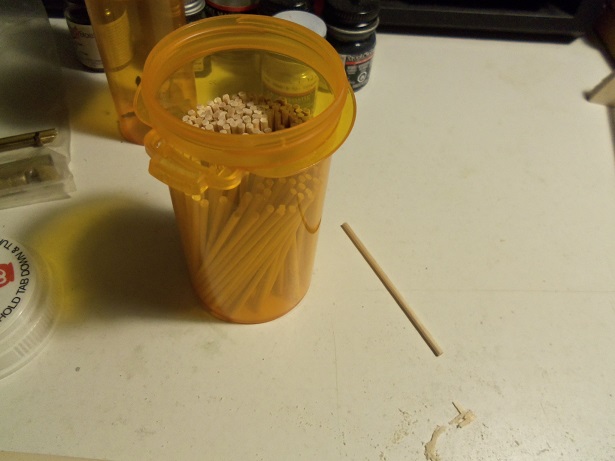
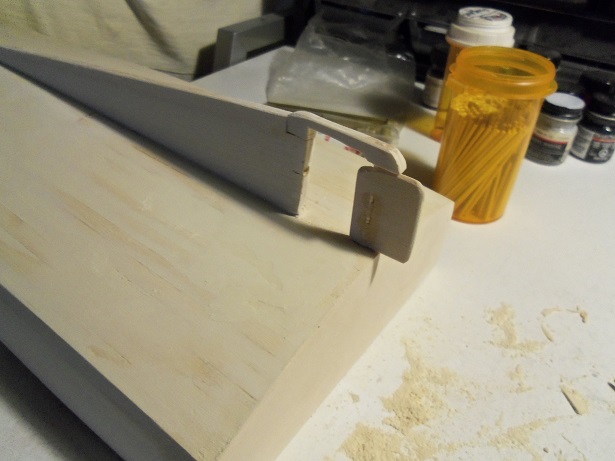
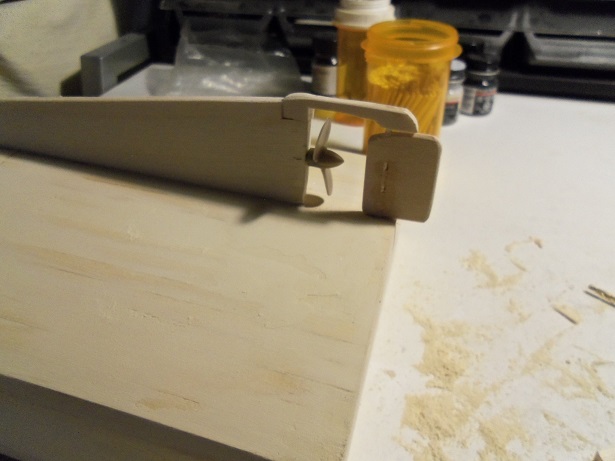
well, thanks Patrick.....and thanks as well Piet. glad to know that I did something that resembles a tri-hull. the thing that is noticeable on them, is that the bow is a lot broader, and doesn't come to a point. I think the only way this worked as well as it did, was my lack of tapering the planks. it turned into a blessing I still haven't done the resin......I'm not sure it will affect it....but it rained here and now it's humid as hell. I may still get a chance to get out there...although it's 8 PM right now. I did manage to do something on her........ thanks again for your kind comments so......with the looks improving, I thought I'd take care of the mal-positioned shoe. since a rudder would be useless out there in never-never land, and would require a tiller and an upper shaft bracket {so cool.....I'm making the parts up now } ........I gotta bring all this back into perspective. the first thing I did, was chop a section out, with the shoe still attached. it still boggles my mind it hasn't broke off yet...I have had that hull 'three ways to first night'. {well......that's what they said in that book I wuz read'in} another notch was cut out to transplant the shoe. liberal elbow grease there too Dr. Howard, Dr. Fine, and Dr Howard will be assisting me at this pint........errrrr....point! the shoe was transplanted onto the patient. while they were here....we grafted the prop........only a two blade lefty folks......'tis all I got on hand. I guess I should add the rudder at this time too........the hole was drilled in the shoe and the bottom of the stern. a rudder was fashioned from some 1/8 scrap stock. I still have a bunch of those small dowels....a whole bottle full. I won't need any of these dowels for quite some time I don't know how I did it, but I managed to drill the hole through the rudder without ruining it........shows you how small these dowels are. the rudder's ready......I'm ready..... the rudder was pinned into place. I removed the prop so it would be out of the way.......and to see if I can remove it for painting purposes. it can be done! OK..........put it back in place, and here is what the final assembly looks like. I might add some brass parts here and there. for now though, it still need to go back to the garage. I'm hoping that the next time I get back to her, I can even do some painting. first things first.........get the hull back in order....the few touch ups and sanding.....and then the main event

-
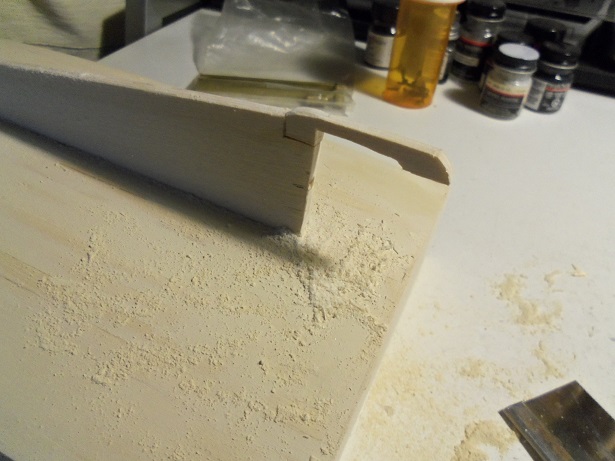
thanks Patrick........little did I know there would be a few errands this morning. get done with them.......and it's raining....not a very productive day. there's still hope though thanks for the good word personally, I thought the last photo was a bomb.......thought it would be hard to see the contour of the bow. I'm gonna go get my eyes checked glad you like where this is going.
-
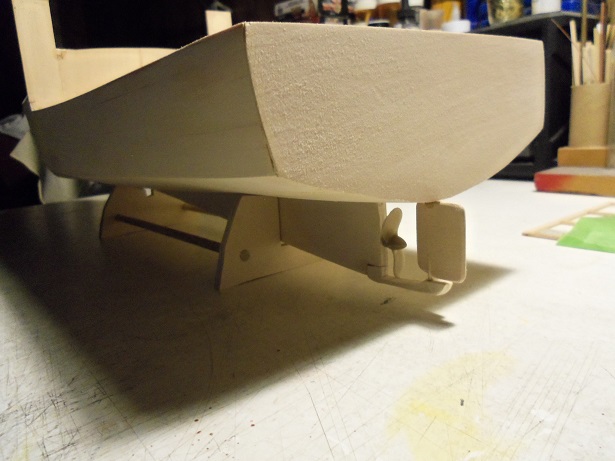
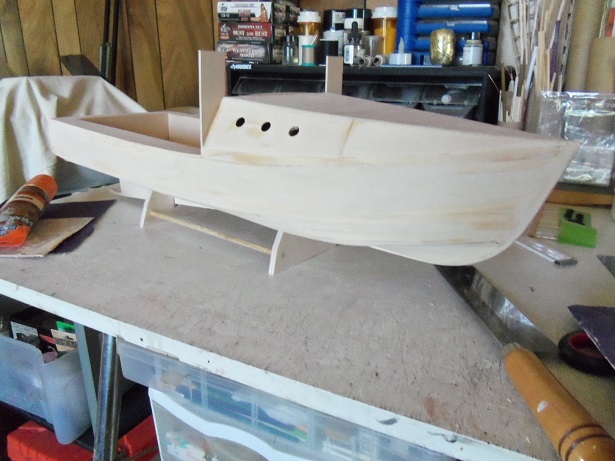
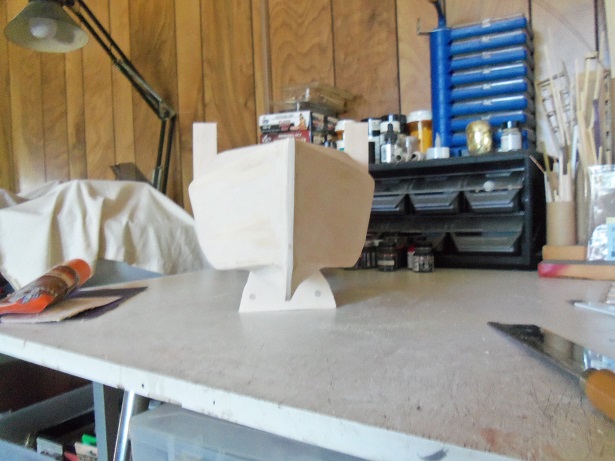
the filler work cleaned it up rather well..........looks more to contour. here's a picture of her in her new stand.......the initial fit is really good. I just have a few touch ups to do before I can start with the resin. it should fill in the rest.......at least, that's what I'm banking on. now I need to get my painting stuff from out of the cellar....hard to believe I haven't done it yet. this will be a good thing........I can use the 25 gal compressor again! the small compact one is OK.......but I can regulate the pressure with the Craftsman a lot better. I'll make those side boards too.........Gibbs goes a bit crazy if I use the dremmel in the house. I can trim those two pieces for the windshield. this one is not too flattering..........perhaps you may be able to see the contour of the bow. I've touched up the hull again.........when dry I can finish it off. then the resin......really interested to see how this works out
-
I never knew we were the same age?!?!?!?! I'll be 60 in August! I hope you had a great day........I hope you spent it on your new build here
-
that's the trick, isn't it? fresh out of the box, it may look daunting. but soon, you find the direction to go "follow the yellow brick road."
-
I took a tip from a few folks here, who use archive pens. these pens use India Ink. I buy the medium tip pens and they work great......I even bought a bottle of India Ink and refuel the pen from time to time the only trick I find, is don't go too slow..... I currently use this method. I've used the crayon method......that works well too, but the surface needs to be scraped a bit before sanding. crayons are messy and leave crumbs. I used to scrape off some of it though and blend the rest in through sanding.....gives a nice tone to the wood. another method I've tried is the thin mahogany strip.......I had a Billing's kit that directed using this. I like this method as well, although it's very time consuming.. if I use a practicum at all.......I only look at the technical stuff. the artistry, I go by experience perhaps that's why I like Billing's kits so much.......there's not a lot of text
-
awesome job Piet!