


popeye the sailor
-
Posts
16,007 -
Joined
-
Last visited
Content Type
Profiles
Forums
Gallery
Events
Everything posted by popeye the sailor
-
 I'll keep my eye out for a log from either of you..........I hope there might be another joint venture in the future don't be a stranger here........either of you your good folk!
 -
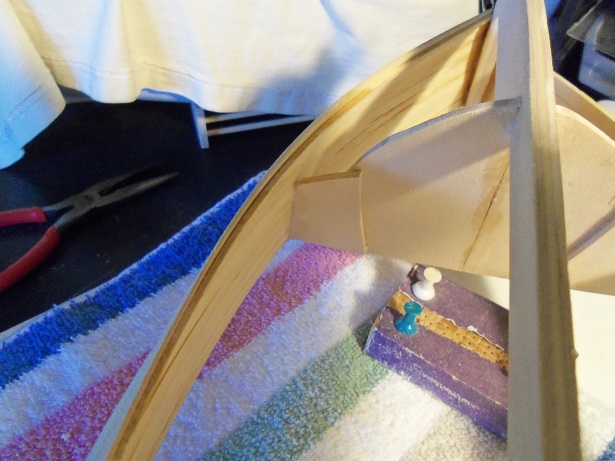
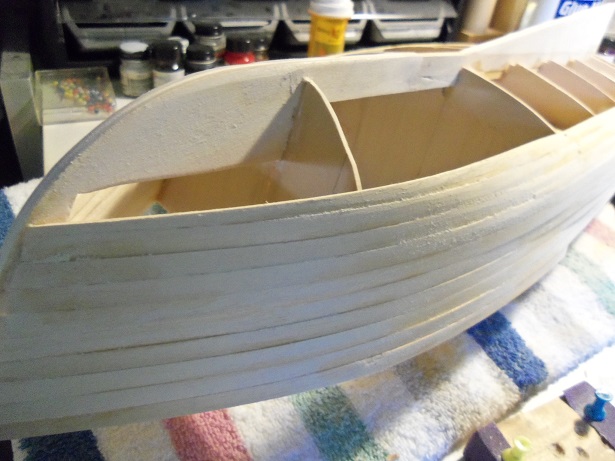
a lot of folks like to detail the complete build.......even the parts that can't be seen. it's all a matter of taste really........the prowess of knowing that 'it's in there' is a real testament and a boon for experience and knowledge. I sometimes will do it.......but for moving the build along, and relieving some of the stress, I will focus on what will be seen instead. I pray that I don't come across anyone with a flashlight and a microscope however you wish to build your ship, is totally up to you. I am also building another United States........this is the fifth model of this series that I have done. I've built up such a backlog of in progress builds, that the poor ship has been stuck in the closet. I hope that the wooden decks have unlimited shelf life {the first set I made for it didn't}. sails or no sails, it's up to you as well. I did nothing to the sails you see on my first go - around with the model, but for my second build of the Cutty Sark, I painted the sails a light gray. I had to order a new set for the model........got shorted on the order to Revell....and the replacement ones were of a beige color, rather than the off white that originally came with it {I still have quite a few sails from that ordeal}. there is one thing I did try with the deck sections, that gave me some control over fit. I did a dry fit of the decks and saw which side of the sections lifted more than the other..........cemented a 1/32 {thin is best} strip under the offending section so it stuck out slightly {like a tab}. when the sections are cemented together, I didn't have to concentrate the glue on the edge, so it would ooze out from between. there was a dual benefit. I look forward in seeing more
- 7 replies
-
- 1
-

-
- united states
- revell
- (and 2 more)
-
WOW! nice bit of progress so far Dave. really super what you've done so far.......although your ordeal with the section joint made me remember some of my turmoil with them. after building four of these kits {various}...you'd think I'd have a good remedy for you. the only thing I can say is that the deck, as a whole, fits loosely in the hull, so perhaps a 1/16.......or even 1/32 strip of styrene can be added to the end of the center section, and sanded to fit. {you've probably already taken care of the situation}. stunning work my friend.........keep going!
- 601 replies
-
- 1
-
-
- constitution
- revell
- (and 1 more)
-
looking great Bob........you added in some really nice detail. the structure fits well on the deck
- 348 replies
-
- 2
-
-
- pequot
- cable ship
- (and 1 more)
-
the beard is a nice touch very nice bit of progress
- 131 replies
-
- 5
-
-
- bottle
- the old man and the sea
- (and 1 more)
-
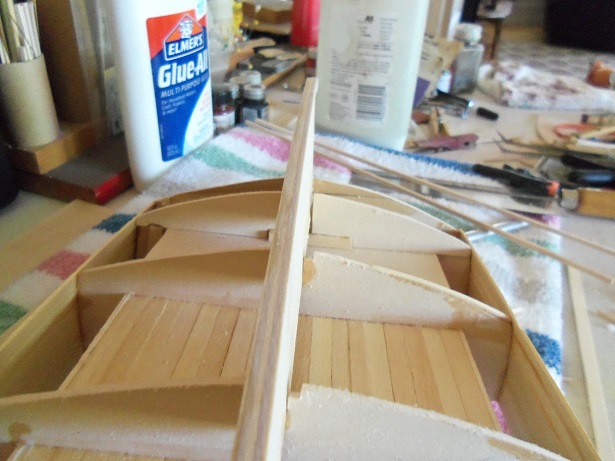
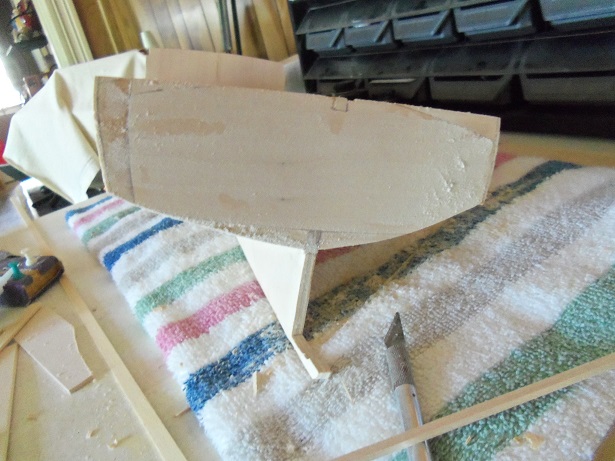
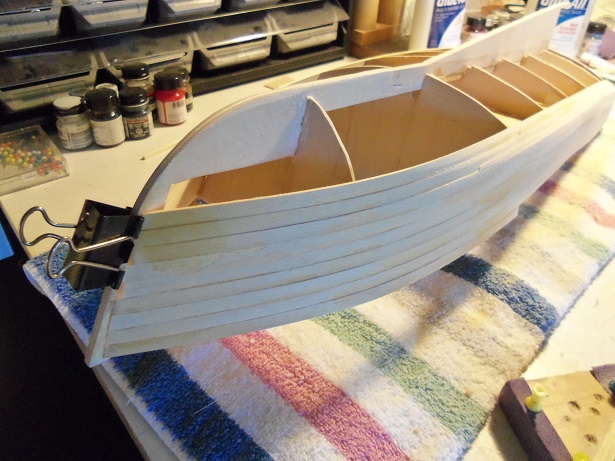
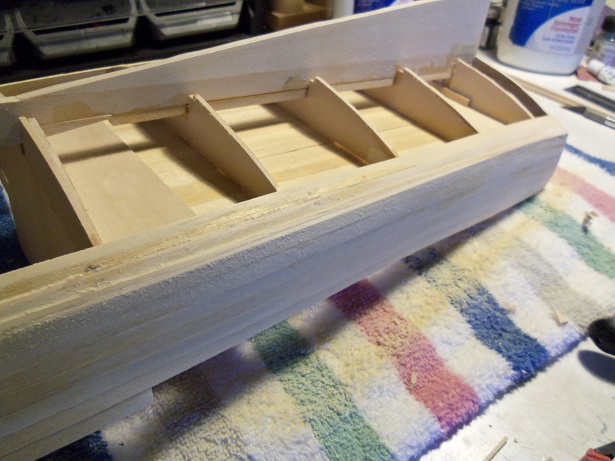
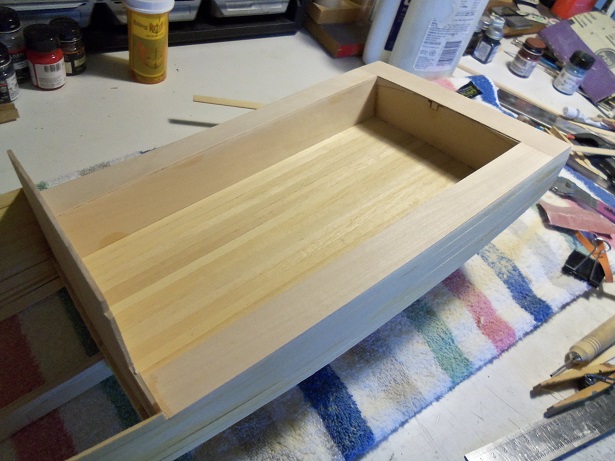
I promised these to you the other day.........but the allure of being at the table {and of course, errands}, kept me at bay. I have also been trying to catch up on all the scuttle butt here as well..........I have to say, you folks are far more busy, than I am so........here is where I am.....where I last left off first, I figured I'd get all the ducks in a row with the aft bulkheads. it took a little sanding, but they are now close to even....all the way back. the transom looks a bit better too... the cabin bulkhead wasn't conforming well with the contour. since none of the interior will be seen, I add fillers for the bottom planking. adding two rows to begin the bottom on the starboard side, I failed to pay attention to the bulkheads meeting with the edge.......you'll see that I add a length of 1/16 strip stock to fill in the nonconformity. I did some sanding here to see how it would even out.......I do want to keep the edge. one thing I didn't do.......that I should have done........was some tapering at the bow. this in turn caused most of the planking problems at the cabin bulkhead. it does have a plus though........it gives more to the hull sides, instead of transitioning to the turn of the chine. where I didn't install the framing that would create the chine lip {what a way to describe it }, this might be harder to do. I'll have to rely on the hull sides to create it. now.......I want to do something different with the bottom bow section. this is where the whole problem is. not tapering the bow planks is causing the sides to bow outward. I did taper one of the bottom row planks, but it's not enough.....I should have started sooner. I had a thought to cap off the bottom.......but there is still room on the bow stem for a few more rows of planking , before the garboard is laid. I took a 1/16 strip and cemented it inside, as a shelf for the bottom planking. I later abandoned this as a bad idea. so, I'm stuck with this at the moment, until I find a suitable remedy. thoughts of cutting the planking away from the stem and adjusting it there.....comes to mind.........but ohhhhhh, think of the stress. it may even distort the contour of the bow. I have another idea that I'm working on.......I'll see if it works out. I needed a moral boost....so I cemented the sheer caps on the aft end, around the cockpit bucket. I did some sanding after these were in place.........I can bask in the little ray of sunshine speaking of which.......ya know, it's been really cool 'round here of late. the temps have not been that high. cripes........last week, we were dying with the heat weather.........she is fickle........AKk--k--k-k-k-k-k-k-k-k! Note to self : "hey moron! why don't you add the last two pictures! folks wiill think your nutz!" yea......that would help, now wouldn't dugh! >never a dull moment at the Wharf


-
Cutty Sark by NenadM
popeye the sailor replied to NenadM's topic in - Build logs for subjects built 1851 - 1900
too bad you can't simply fashion wire with an eye bolt on the end. I found these at the jewelry dept of my favorite craft store..... run these though the pin rail and into the deck, positioned in such a way that will allow the dead eye to pivot and make room for each other. they will find their own center and hopefully solve most, if not all of the problem BTW.........I can get these in any metal style........copper, steel.........antiqued........and at different lengths too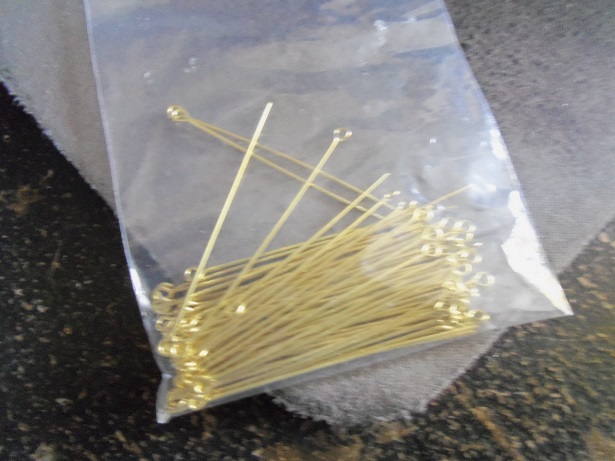
- 4,152 replies
-
- 5
-
-
- cutty sark
- tehnodidakta
- (and 1 more)
-
awesome looking boat Gerhard! those are some good looking plans too I'll enjoy watching you build this one.
- 72 replies
-
- 5
-
-
- bootlegger
- speedboat
- (and 1 more)
-
happy ta say I 'as been to the table today.......some is good........some is not so good. I yam mak'in progress though and should have a report fer yas ta read soon

-
super looking deck planking I'm surprised that no one mentioned that you could have planked down to the waterline, and continued with the copper from there. you would have had enough kit supplied walnut planking this way. do you have enough now? I never heard of the manufacturer.......so far, it looks like a nice kit. looking good
-
the tree nailing is something I hardly do. most of the kits I've done were smaller scales..........it would be the flip of a coin if they'd be seen or not. it's good to see your back at the table. you could try using a syringe to fill the tree nail holes in. most fillers are water based.........a wipe with a damp cloth and you'll never see any staining.
-
you reminded me what to do Sjors........but all I had to do was look to the right of the forum page I hope there is still some room....... she going to be as large as the Aggie! very nice job of framing her up.
-
very well done Kees......reminds me of the star trek bridge sadly my friend........that's the drawback to small windows. you can go nutz in there, and perhaps half of it can be seen. we as modelers wear it as a thorny crown............"but we know it's there". thank the model god for the camera
- 434 replies
-
- 5
-
-
- pelikaan
- beamtrawler
- (and 2 more)
-
shark got'em already?............why he's not even in the water yet I'm sure you'll fix 'em....good as new.
- 131 replies
-
- 6
-
-
- bottle
- the old man and the sea
- (and 1 more)
-
very smooth look to it very nice!
-
sorry to hear........no like for that one from me either I know how you felt my friend.........been there had that done to the same ship >twice< ! even has the masts and bow spirit on it.........only received minor damage. that's the model god telling me I had better get the lead out and get 'er back on the table! you'll get her back in shape, I'm sure. after this one, I hope to hear that any more transportation to and from the table, is done with a cardboard box, or something with sides on it {like a tray of sorts}. you've put too much into this one, to lose it this way........I kind of like them to fall apart gracefully good she getting back to square one.......hope you have the piece for the bow. that looks to be the big repair steady 'er she goes!
-
so glad to hear you did well with the surgery Jerry........it must have been hard to persevere with the bounty, but she turned out to be a beautiful ship. you two should be very proud of what you accomplished what brand of Bluenose did you settle on? I have the Billing's kit, given to me from a friend.....he couldn't continue to built it....sadly. if you could, if you should find any interesting tidbits in your travels, could you PM them to me as well? I would really appreciate it Charlene will do well with Nina..........I'm sure of it! so glad your on the mend!
-
have never done anything with R/C...........this is very interesting nicely done!
- 339 replies
-
- 5
-
-
- dumas
- Chris-Craft
- (and 3 more)
-
wonderful progress Tom...........I'm scrambling like crazy trying to get caught up! small parts can be such a bugger........but they add so much to the build nice job on the capstans.......the extra detail will stand out well!
- 1,350 replies
-
- 1
-
-
- constitution
- model shipways
- (and 1 more)
-
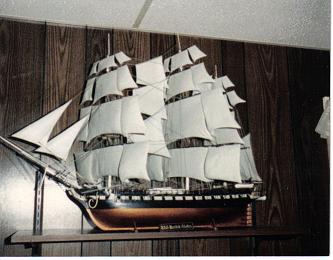
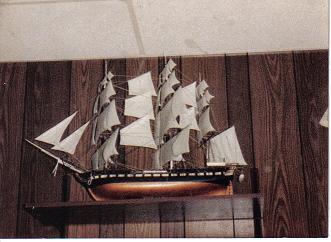
I have this kit. sadly it's been in the closet for a while now.........afraid to look as to how long. I built it before when I was in my thirties.......such a nice model when finished. here's a couple of pictures I have of her........I wish I had more. since I found this site.....I learned a lot........even a mistake I made on her. the studding sail booms are not connected to the yards as they are supposed to. they are suspended by the rigging.......don't ask how I did it, but it was very easy to do. the kit does have some inconsistencies with it, but out of the box, it builds well. you will also hear that some folks did not use the plastic eye bolts and blocks. it's probably a good idea, but I used them with little trouble. keen to note that this kit is a spin off of the Constitution kit........the only additions are the extra badge galleries at the stern {you probably found them in one of the bags, thrown in as an after thought. I got my second kit off E-Bay.........a friend alerted me to it's existence. I got mine for $50.00, shipping included......you got a much better deal than I did! lucky devil! I have built other kits of this series, put out by Revell........I think they are Revell's best offerings the one thing that always bugged me, was the three section decking.......the seams are a real bugger to line up. with this second build of the United States, I did the decks in wood....all 1 piece. it's as far as I've gotten so far. I have a log around here somewhere. I'll look forward in seeing this fine ship come together! glad to meet you Denis >Popeye<
- 7 replies
-
- 2
-
-
- united states
- revell
- (and 2 more)
-
oh crap..........I have to laugh..........that was Jerry that posted last, and not you Jerry id going to build the Bluenose........and you will be doing the Nina. I also have a Revell kit of the Santa Maria 1:87 scale in the closet..........the kit dates back to the late 60's. it's why I bought it........I love old kits! congratz again............
-
congratz!!! I'm glad to see that you two finished, in spite of all the problems you've encountered. this is a special piece..........you built it together....there's something really cool about that! Charlene....perhaps you can put a bug in my admiral's ear....... {just kidding}. sorry to hear about Jerry's surgery.........my fingers are crossed as well that they remedy the problem and he has a speedy recovery. the bounty is a beauty and she darn well deserves a case! the Nina is a great kit........and so it the Bluenose.......I have what there is of a Billing's kit in my closet. out of the box, they make a very attractive kit........but I'm sure you'll do some research and mod out some of the inconsistencies {there are not many kits that are replica worthy}. I did have to smile when I read that Jerry thought that this was the worst kit he had ever seen........really gives a good testament to your abilities, since you mastered it so well. I'll look forward to your next one
-
I tune in to catch up on my viewing, and I see you've finished her. congratz, my friend......you built a fine looking ship there! sorry to hear about the home woes.........I'm sure you'll make a fine transition with the rebuild. will look forward taking a seat on your next one!