


popeye the sailor
-
Posts
16,007 -
Joined
-
Last visited
Content Type
Profiles
Forums
Gallery
Events
Everything posted by popeye the sailor
-
 WOW! I miss so much! I finally get off my duff to look at new builds {other than my watch list}........and I find yours! {I am so happy to see you back}. you've done a really great job on the hull........nice shape and contour. {yea.....like I know the ship.........but I do know a thing of beauty when I see one}. catching up, I see you've already had to ship out........sad to hear......those bottles will get very lonely a few more weeks to go, and you'll be back to work on Diana...then you can blow the dust off those bottles good to see you back at the table...looking forward in seeing more
 -
it's so nice to see new folks getting into this medium...very good to meet you Brian. I'm not sure if a solid hull is the best for a beginner.......I was given an expert level Billing's kit for my first. to me, it makes no difference what level the kit is........if a person has the desire to build it, he will see it through you did a super job with your first
- 17 replies
-
- 2
-

-
- st. helena
- constructo
- (and 2 more)
-
this past week has been a bit of a let down for me.........I haven't been able to get back to the Tree Boat. I am finding that shaping the bottom the way I want to is going to be a bit of work......I will hopefully get back to her this week >fingers crossed< thanks to all your kind comments........leave it to me to pick a subject like this. my choice of hulls wasn't the best either....I think I should have thought of 'application' , rather than what I could do with these hulls still..........I'm glad that you folks enjoy the build, even though it's turned into more of a trilogy, than an actual build log. I dunno John.......I think it's a toss up on the exhaust issue.........vent it to the open air, or vent it below the water line. venting it in the water .....one would think that it would not only pollute the water, but the bubbles rising to the top would burst and vent to the open air. I've only seen venting below the waterline with pleasure boats and larger outboard motors. then again....what do I know......I'm a land lubber hello Marc....glad to have you aboard if you think this is interesting, wait till I roll out the Bluenose project. I'm actually itching to start it, but the admiral got me the Sergal Thermopylae for Christmas. she'd be hopping mad if I started to mess with it before then. thanks again everyone........and all who hit the like button. there is more to come!
-
Splendid!.........I can't wait to see some color on her! top notch work......the detail is fantastic!
- 434 replies
-
- 4
-
-
- pelikaan
- beamtrawler
- (and 2 more)
-
decking looks awesome Nils good to hear you caught murphy when you did........damage could have been worse. glad to hear only minor damage
- 2,625 replies
-
- 5
-
-
- kaiser wilhelm der grosse
- passenger steamer
- (and 1 more)
-
Cutty Sark by NenadM
popeye the sailor replied to NenadM's topic in - Build logs for subjects built 1851 - 1900
dead eyes look great Nenad..........looks like you might have enough- 4,152 replies
-
- 5
-
-
- cutty sark
- tehnodidakta
- (and 1 more)
-
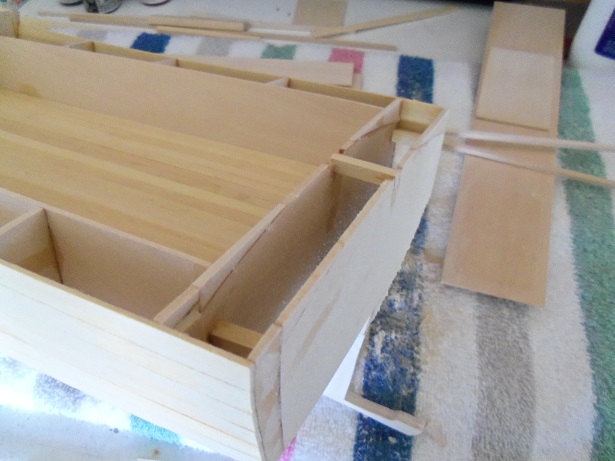
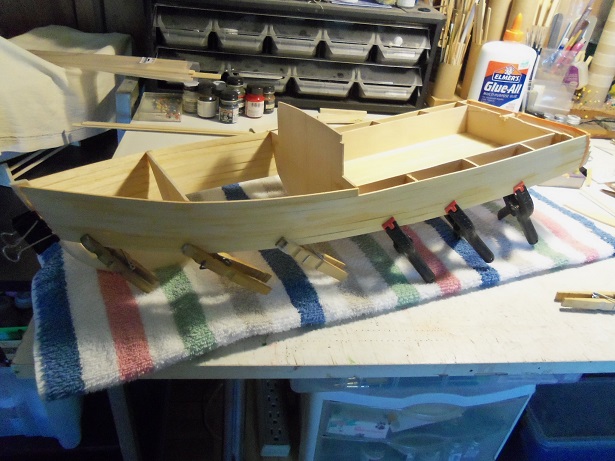
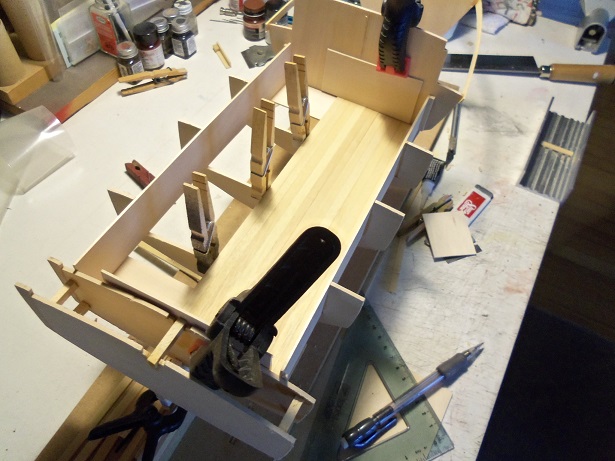
I do apologize Mobbsie.....I don't want to confuse anyone. it's just that the direction that the other hull was taking, I find it better to just let it go, to turn out the way it's going to. I think I picked the wrong hull to portray the subject. I'm not losing a Tree Boat.......I'm gaining a fishing boat I think once the hull is assembled, it will make more sense so I looked in the camera finally........dismayed to find only these three pictures though.......I thought I had taken more. I've done some work to the stern / transom, bringing it more to the shape it needs to be. when I get it closer to what's required I can even every thing out and get back to planking the bottom. the top line of the transom is leveled out. later I can cap this out.........I'll most likely plank over it as well. for the bottom, I made fillers using one of the proceeding bulkheads, fitting and cementing it in place. the same was done to the other side as well. still a bit more to do here...........sanding and shaping
-
in my younger days Nenad.........one of my nicknames was 'Dennis the Menace' another of my favorites too
-
it was 'the outer limits' Greg...one of my favorite shows back in the day. the twilight zone, night gallery, and the avengers ran a close second I was really flipp'in the coin on this one.........I was trying very hard not to make any more hulls, until I finished with these that I have. I think what made me do it, was I was weary of working on a boat, that had no resemblance to what I had seen of the Christmas Tree Boat. ....and yes, to have built the Andrea Gail from this hull.......my initial thought when I built the original frame........I found it quite satisfying keen to note........I didn't do much jumping 'round once I started it either........ahhhhh, such a good tangent I thank you all for your kind comments....and to those who hit the like button. I've made some headway on the transom.......it looks much better now. there is a little more to do before I plank the bottom part of the hull. I also roughed out the sheer sides....still to do the transom. I don't want to put them on yet.......in case I need an access to the interior. then I can do the bow cabin......I need to see if there are any more pictures of this boat, so I can see how it is laid out. I do have some pictures, but they are still in the camera.........when I can, I will post them more progress soon
-
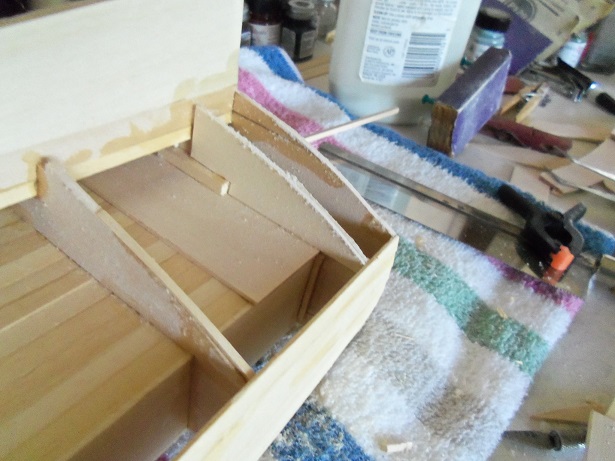
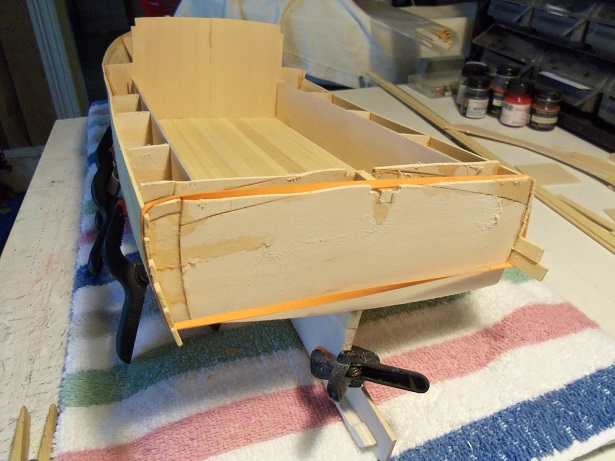
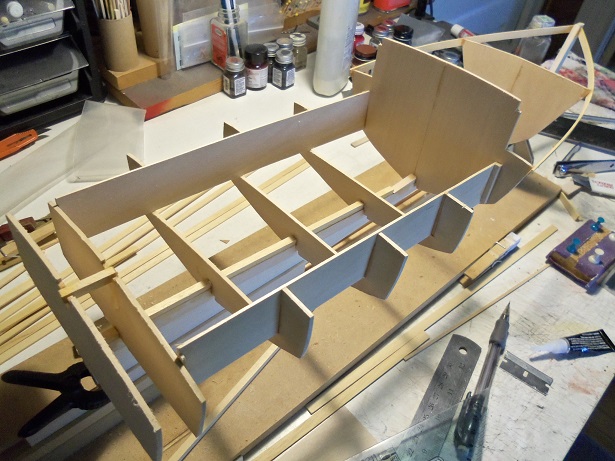
yesterday, I did manage to reinforce the hull planking to the cabin bulkhead. it was nice since it's the first time I could use white glue. I got some more of the scraps from when I cut the bulkheads out. one side of the stern has been trimmed off and sanded. I also hope to lose that notching at the center. realizing another measurement that I did not take into consideration, was the width of the hull from the keel. thinking that the keel might not be centered, I measured it.........and was relieved to find that both sides measured 3 1/4. the entire width of the transom is 6 3/4 {1/4 being the thickness of the keel itself}. good to know these were in the camera........glad I checked. hope to get more done today

-
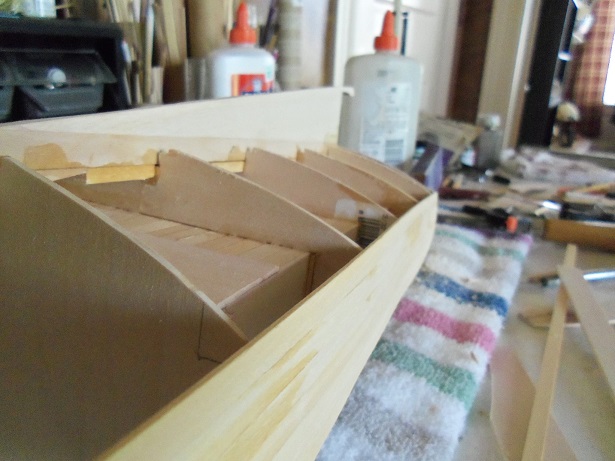
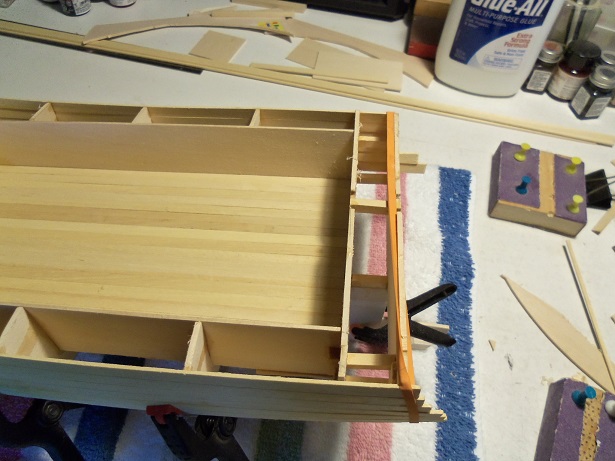
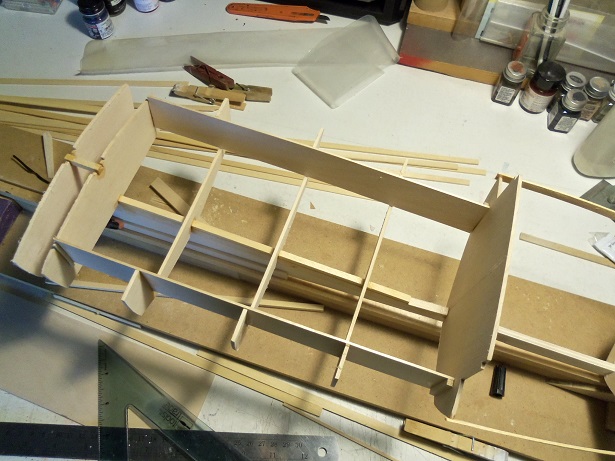
the stern is in for more adjustments............then the big 'sand down' to shape it. you may see add-ons here and there....I probably will forget one or two. I plan on overlay panels for both sides {cockpit and transom} to hide the noncomformaties. you will notice that the hull planking doesn't conform to the cabin and bow bulkheads........that's OK. this will fan out the hull, for when I do the bottom planking. I will cobble in some scrap pieces to better attach and hold the form. the sides are comprised of six plank strakes......seven for the bow. I am going to alter the cabin bulkhead to create the cabin......there will be no bow sheer. I have a picture of another boat I'd love to do.........it can be based from the lobster boat hull as well. it's interesting, because there is no sheer on the entire boat. it's called the Nora Jo. if I can find the picture, I'll show ya.....it was given to me by Tom Richardson back in the day. it's still a pipe dream it can be seen how it allows the hull to fan out towards the bow stem the stern under went more modification.....yes, it looks scary, but once shaped, it will look better. covered, one will never know. another thing I plan to do to this hull, is give it a couple of coats of resin, to eliminate the plank lines and really smooth out the hull. I'm going to try and not use a filler, but it's doubtful. so.......here's the Frankenstein stern ....and the double wall that I spoke of earlier...... the deck planking is finished too........according to the pictures, there isn't much that comprises the helm. I think I have a few ideas left in the 'ole brain box. we'll see

-
Cutty Sark by NenadM
popeye the sailor replied to NenadM's topic in - Build logs for subjects built 1851 - 1900
look'in good Nenad!- 4,152 replies
-
- 5
-
-
- cutty sark
- tehnodidakta
- (and 1 more)
-
so true........nothing is more fragile, than one's health. you had mentioned being ill a while ago.......is this ongoing? I wish you well my friend, and hope there is a good outcome. the sumwings look great.....I'm sure you'll have no problems dealing with the other thing
- 434 replies
-
- 7
-
-
- pelikaan
- beamtrawler
- (and 2 more)
-
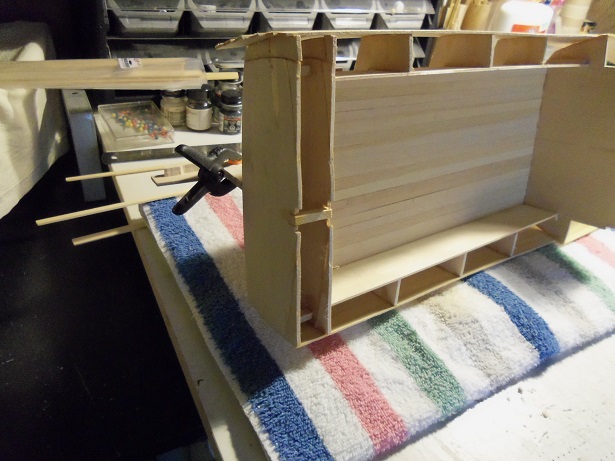
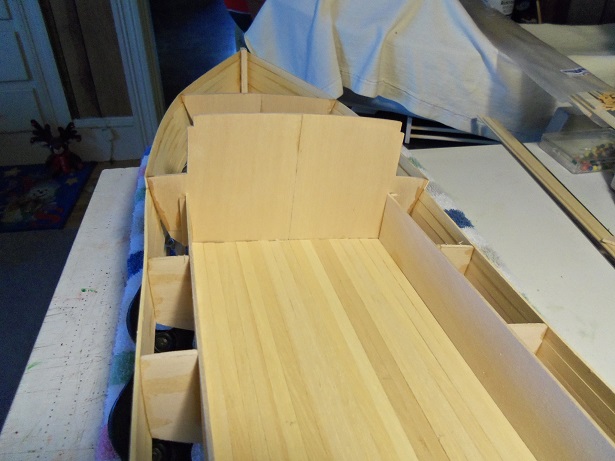
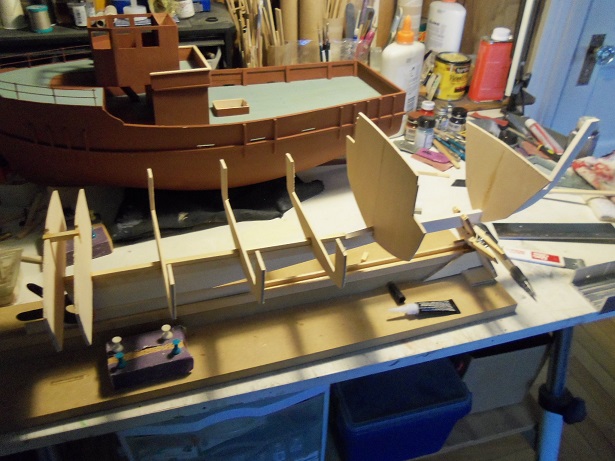
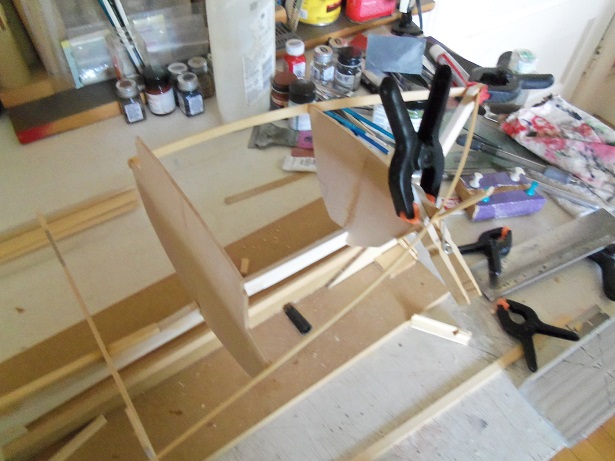
OK.........that was fun.....NOT! I also got enlisted to clean the shower and the bathroom floor.........looks like KP is in my future. it's Ok.....small tasks hello Bob glad your here.........you can watch me butcher another hull back all this up a couple of weeks........can't believe it's been that long since I last posted anything. pulling out the lobster boat plan {Midwest has it all on one sheet}, the keel was traced out. instead of cutting all the parts, I combined as much as I could. the center spine is two strips of 1/8 flat stock, cemented together. I tried to use the scroll saw to cut planking from 1/8 flat stock, but it didn't go as planned. the shoe and the bow stem is 1/4 plywood. the first blunder I made, was that I cut all the bulkheads from the 1/8 flat stock.........there is not much to pin anything to. I resorted to using CA for most of the assembly. making two stern bulkheads will allow me to alter the cockpit deck, making it longer. there is also an added rib to support the deck. second blunder I found, was in setting up the stern......it looked like it wasn't going to follow the contour of the hull. I remedied it by flipping these two parts upside down. it made the sheer line look better, but I saw later that it made the bottom way out of whack. then, i guess, it depended on the angle that it was viewed..........this is when I saw that I had my work cut out for me. it was still early..........I could have changed it back. but I'm not big on ripping things up........I'll make it work. the first plank was at the bow.......the wood thickness was a real hinder here. I got it in place though. then, to square off the cockpit bucket and add the sides. you can see the rise of the sides towards the stern.......I have to add material there to bring it up. I'll use the scraps from cutting out the bulkheads, to do this. I had some pieces of 1/16 flat stock.......I cut the m to make the fore and aft plank sills, and started to plank in the cockpit deck. I decided that I wanted the transom to be squared.......like a stern trawler {I got them darn things on the brain}, so I added a piece to one side of each bulkhead. just as well........I was a little off on their centering too. this will also make up for it. there's more..............


-
I like your enthusiasm.........thank you gentlemen I will either start another build log for the ex-tree boat, or I'll continue it here.......makes no never mind to me. as long as I don't confuse anyone. disclaimer: this is not the way to build a hull........proper instruction should be followed elsewhere. it's really not as bad as it looks, but it does have a form of necromantic appeal. at this point, the sides are planked.......I'm going to shape the stern bulkheads and set it up to plank the bottom. I want to do an indented 'V' bow......it might not be dramatic {I'll take what I can get at this point}, but it will get away from that rounded hull, that I got with the original kit build. I'll post the pictures.........first I have to go and take the living room curtains down. DOOUUUGGH! >stupid manual labor.............*
-
looks awesome Michael.........I've not done one this way......interesting to see. I like that picture of the engine in the hull......very cool concept
-
I can't believe I'm saying this..............I've sunk to a new level of lunacy. after looking and dwelling on the tree boat at the point that it is, I really can't see her as the Tree Boat. everything I think of........anything I want to add........will take it further away from the subject. it wants to be a fishing boat.....so be it.........*POOF!*...........you are a fishing boat. sorry to do this.........I feel bad. I just think that continuing with this hull........would be a terrible waste. I sat there at my desk......pondering what the next move will be. all I have now is an over grown party boat {the Jingle Belle}. all is not lost though.....or is it? after I had posted the last group of pictures, I was musing........mulling over some options. it all came down to this one option.......I would need another hull to replace it. oh........before I get into this further, the displaced Tree Boat will continue........I am NOT trashing it, in any way, shape, or form. it will become a fishing boat.......I have a name for her soon. anyway.........I recalled the pictures I had posted a while ago.........errrrr...quite a while ago. I'd love to know where these pictures were taken.....I got 'em off the internet. there weren't than many.......mostly about the Rouse Simmons........lots of photos of boats with a tree stuck in the middle, out in the open water. this boat looks like a lobster boat........so to cut the chit chat short........that's what I went with. I still have the plans for the Midwest Maine Lobster boat. so......I'm going to do what I probably should have done from the beginning. I'm going to mod the bow a little...not so much of a tapered 'V'. I decided to cut a few corners to speed up the assembly.........all the best of intentions, but not so great as an idea. there are so many problems.........the stern bore the brunt of it. one look and you'll clearly see why I nicknamed the boat 'the Frankenstein boat'. I gave the hull a longer cockpit deck........that meant that the stern transom was made narrower. I even double walled it. it didn't look right, so I flipped them over {it's OK........you can laugh at any time}. the result gave me a very odd looking stern.........I cobbled and filled in most of it.....I'll shape it later. I'll cover both sides with some flat stock after.........so it's not a total loss. I have pictures.......not a complete blow by blow, by enough to make your eyes water {I'd bust out crying too, if it wasn't so funny}. so if ya want to see 'em, let me know....if not, I'll introduce the boat when it looks more presentable. but if you were the kid that enjoyed sticking pins in your sister's dolls........just say the word


-
nice job on the port side gallery.........the windows look so delicate I'm sure you'll do well on the carving. the closest thing I even got to it, was wood burning.
-
nice to see her in the assembly stage Gerhard. that's a large hull your build'in love it!
-
I started in the plastic medium..........I'm sure it was around then {HO scale trains and such}. it was probably at the hobby store I used to haunt......never seen it. that was back in the days when I was hack'in and slash'in car bodies and sprues. when I first came to this site, it seemed like plastic was the big bad wolf for wooden ships........I never thought that........just that some of the parts weren't right for the aspect they were made for. plastic has the ability to meld joints and give a better seamless assembly for most applications. Kees demonstrates this very well it's a learning curve Bob.........but for you, it will be a very small one skylights look very good
- 348 replies
-
- 6
-
-
- pequot
- cable ship
- (and 1 more)
-
with the caliber of craftsmanship I see you do.........I'll wait and let you surprise me nice progress on the sumwings...........garlic?!?!?!.....got anyone willing to hang 'round you while this is going on? . actually, I found some netting material in a craft store.......good for the larger ships. for smaller ships I find that they sell bunched up bath sponges {only word I know to describe them} work well. yea......I know.......we find our supplies in our travels rest assured that no vampire will be mugg'in you in the next week or two
- 434 replies
-
- 3
-
-
- pelikaan
- beamtrawler
- (and 2 more)