DONATION DRIVE - SUPPORT MSW - DO YOUR PART TO KEEP THIS GREAT FORUM GOING! (91 donations so far out of 49,000 members - C'mon guys!)
×


popeye the sailor
-
Posts
16,007 -
Joined
-
Last visited
Content Type
Profiles
Forums
Gallery
Events
Everything posted by popeye the sailor
-
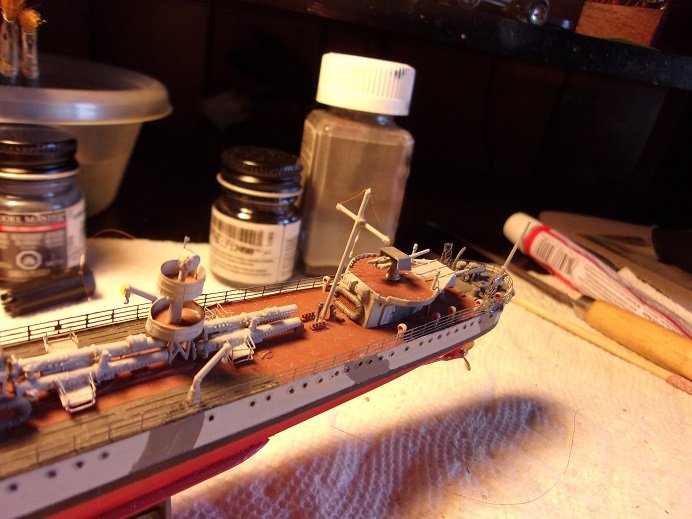
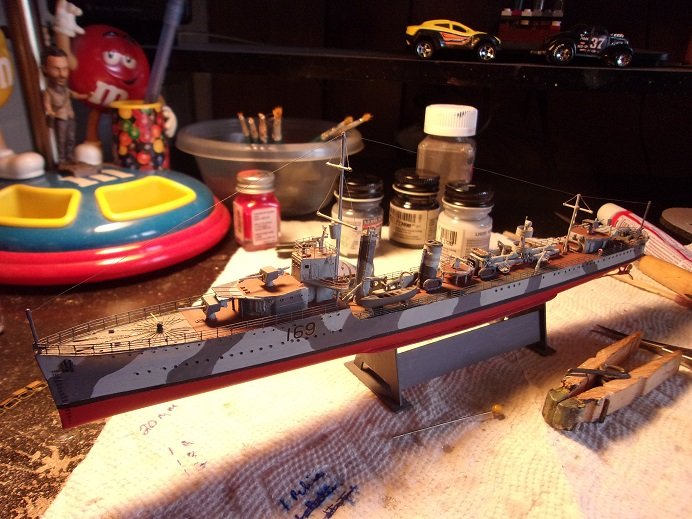
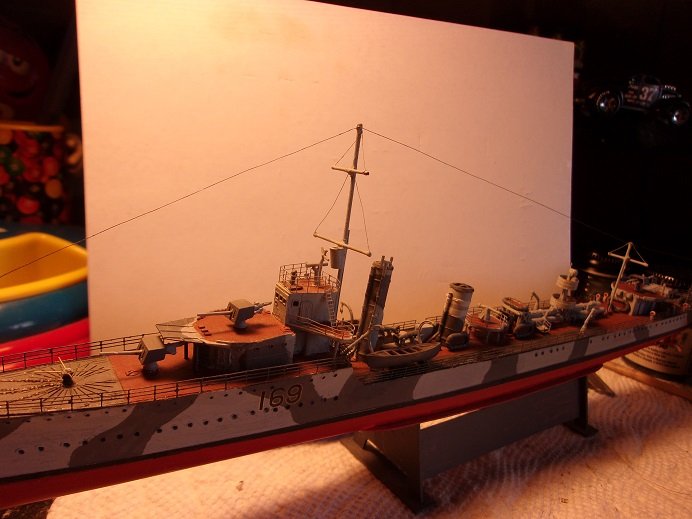
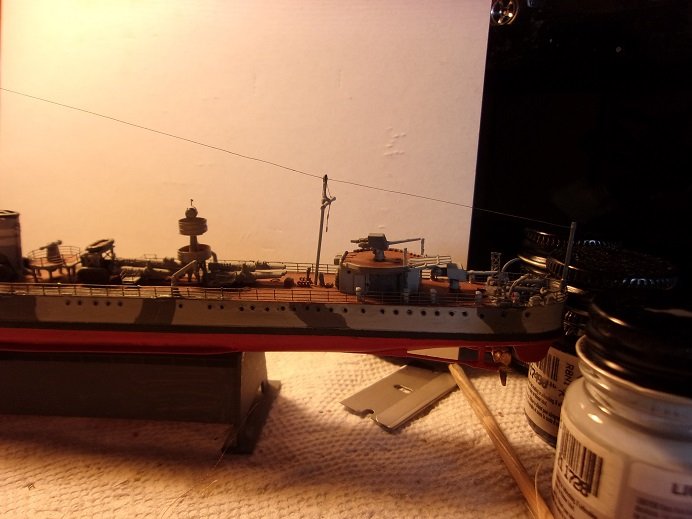
 ..........now that I've had time to clear my head....... ......sorry.........lost my mind for a minute there...... my sense of humor does require some getting use to the mast had been broken before. pulling the rest of the mast out, the overall length was taken and cut from fresh rod. the yards were removed from the old one and added on, then the look out basket. I too some of that thin wire and also did the yard rigging. the ladder was added and then the mast was painted. I also rigged the aft mast. still need to do some touchups around the deck area. the mast was reinstalled and rigging was added......not sure as to how far I will go with it. it looked a bit busy on the desk, so I went for a neutral background ....just a tad more to go.........
- 1,090 replies
-
- 11
-

-
- showcase models
- vendetta
- (and 2 more)
-
chocolate? love Dutch chocolate! I was going to post a small update yesterday, but I got carried away.........no......not by the white coat people. more reno to the spare room........ had a small mishap with the fore mast...it's being reworked. I dozed at my computer and crunched it with my head of course, I had replaced it with brass rod, so it had a bit more resistance than if it were the original parts. the prick mark in the middle of my forehead has healed nicely.......I've added the ladder and painted it this morning, and should have it back on board later today. then I can put the finish to her and get her off the desk before anything else happens. gotta go cut some wood
- 1,090 replies
-
- 5
-
-
- showcase models
- vendetta
- (and 2 more)
-
quite a parts count for such a small scale........the detail must be enormous! sitting in for this one.......I brought a lawn chair
- 168 replies
-
- 6
-
-
- Scharnhorst
- Flyhawk
- (and 1 more)
-
the stand looks very nice........though the supplied stand seem generic from company to company, I find that they lean more to personal taste I've used them mostly as the build stand, and made one for the display stand. nice job on the rigging so far........the use of different size rope and the shape of the blocks. the tiller is interesting too......would there be an opposite on the port side? is there a principle? superb paint.......very well done!
- 39 replies
-
- 2
-

-
-
- Billing Boats
- Finished
- (and 1 more)
-
thanks all ....I'm very happy to get her to this point. of course, this next week is going to be wet, so it might put a damper on getting another coat on her. then again, if the sanding cleans her up good enough, I might forego another coat, and go right to the paint { I do like the mellow wood grain since the resin coat}. once I can get the hull the way I want it, I can then decide on a clear direction for her........there are so many choices I've done a little referencing already, but nothing in stone yet. the hull is dry to the touch now {I just had to come home and give 'er a stroke}....the admiral's loving referral to 'a man and his pet! she's even been in there look'in it over she likes it..........I know she does. I'll hit 'er up again to get more stuff.....I'll see ......
-
thanks Mike.......was hoping to hit the finish line, but didn't get back to it. not much left to do
- 1,090 replies
-
- 6
-
-
- showcase models
- vendetta
- (and 2 more)
-
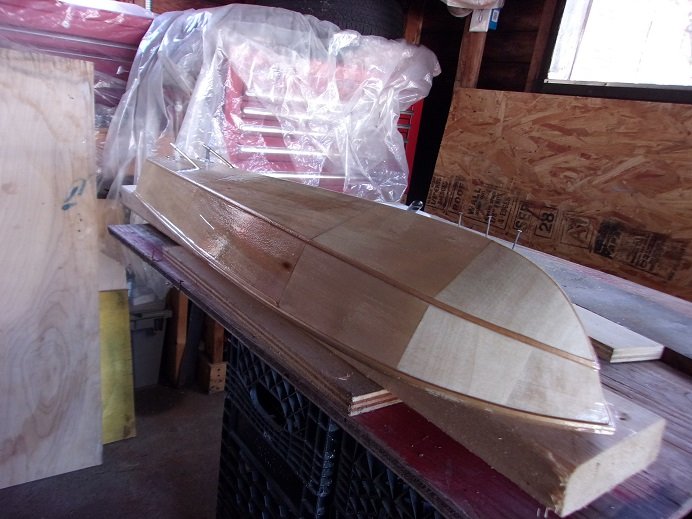
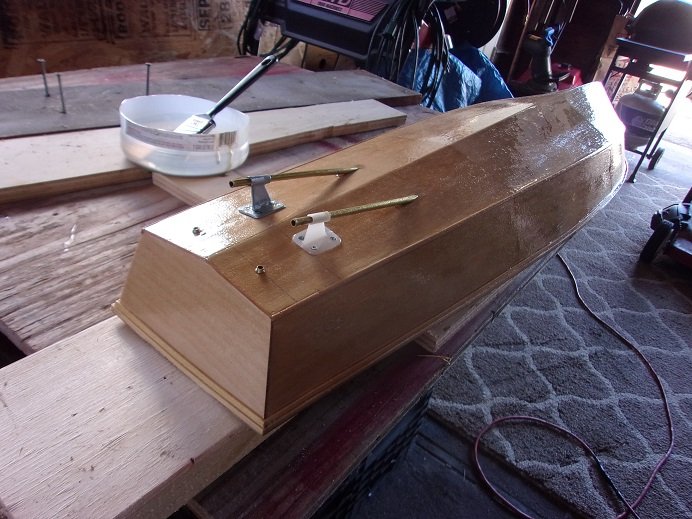
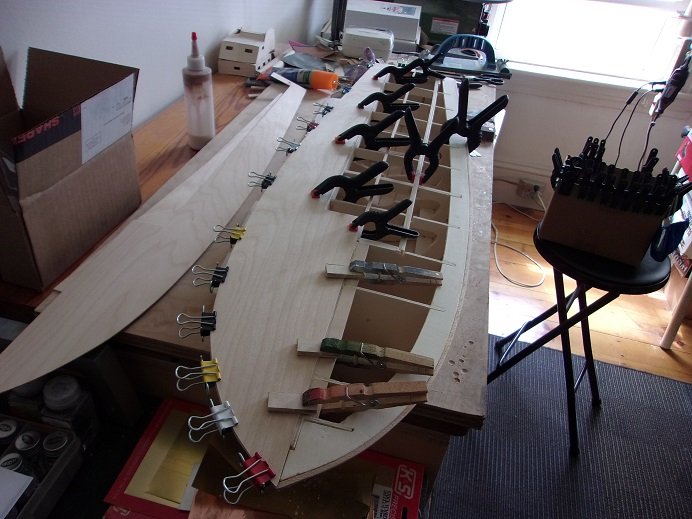
today is the big day........just waiting for the temp to warm up out there. both windows are open now........got some positive flow through after wiping her down with a clean cloth, she got her first coat of resin she is still wet.......gonna be really shiny applied with a brush in loooong strokes WHOA!!!!! what is that..........it seems a brush hair is ruining the first coat. I got a pick and removed it........went back over the offended area. my tool boxes are covered over because the roof leaks. told the landlord, but he hasn't done anything about it. better without the hair so as this cures, it should smooth out some. it will also perk up the wood hairs, so a light sanding will be in order. I like the way it filled in around the tubes. just as well....it's errand time anyway ........it will have plenty of time to dry. ......early evening----> I'm grill'in supper, so I brought her in the house. don't want her to take on a smoky barbeque flavor. I did take a quick look at the deck platform, and there is very little on it. I tried not to. I took these a short time ago.......as I was posting this batch of updates. she is slightly tacky to the touch, only in certain areas. she'll have four days to fully cure before I will do anything more to her. the small gaps along the gunwale filled in nicely....the finish is a little rough. the panel joints look good.......I'll know for sure when I can get some paint on her


- 221 replies
-
- 13
-
-
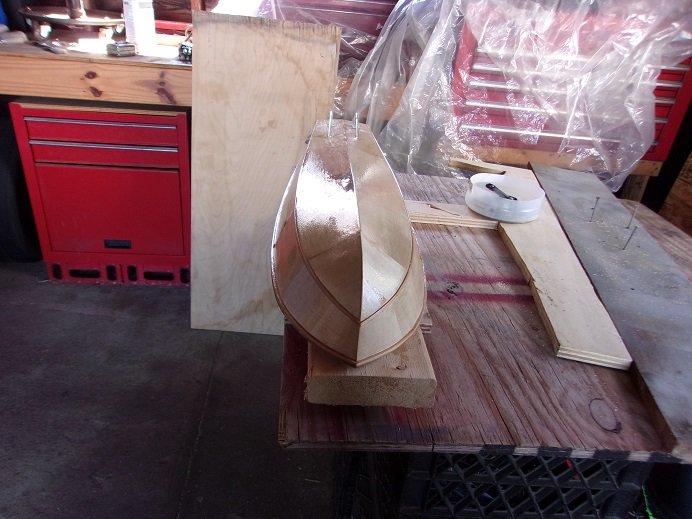
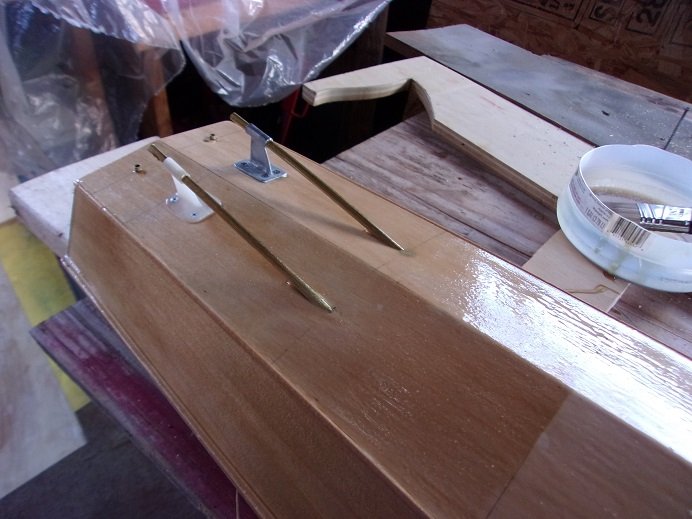
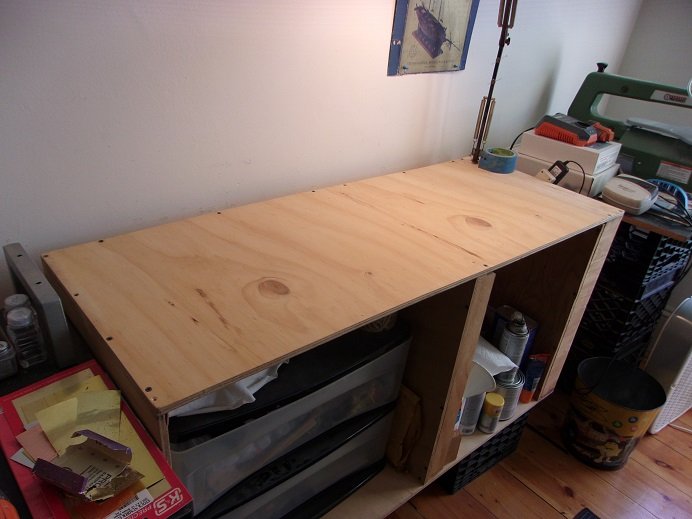
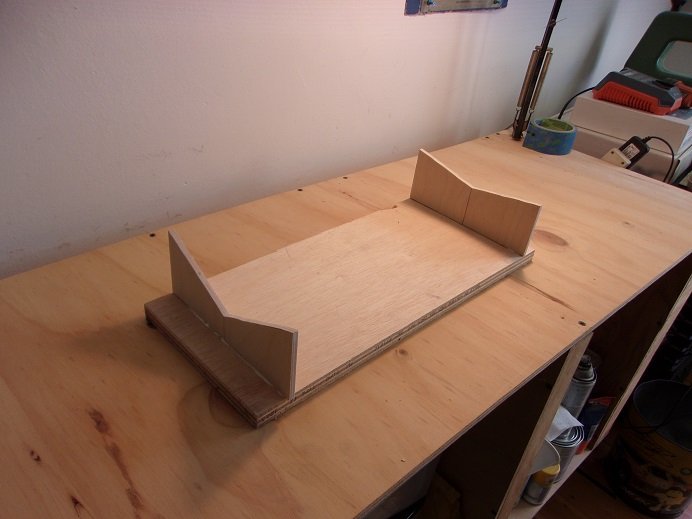
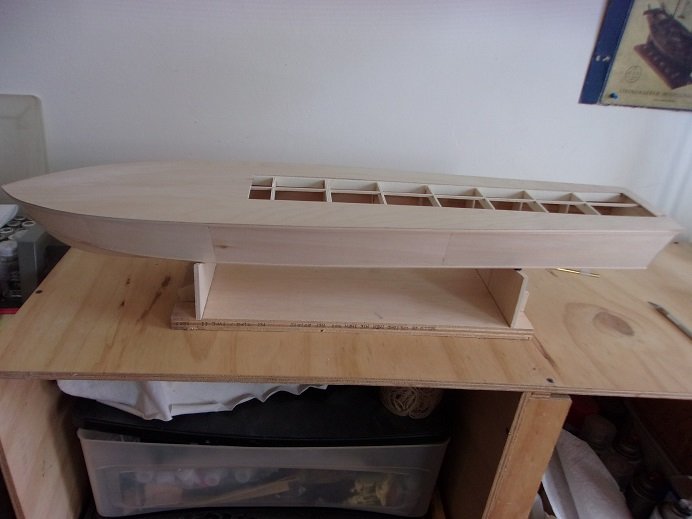
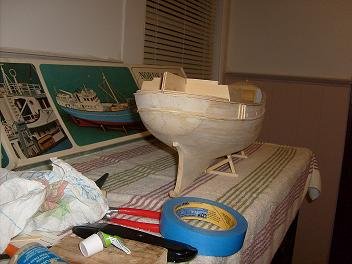
thanks for the head's up Al, but I have the instructions for the .50's as well I forget how I found them.......likely the same way I found the one for the 20 mm. I haven't done anything with them yet........for those, I ordered two sets {perhaps a pirate fishing boat?} the sky is the limit! anyway.........something strange........ what happened to my table? the big hunk of beech plywood is gone......I don't need it anymore, since cutting the hull from it. before removing it though, I took measurements of the stern {before the tubes}, and near the bow........spaced around 15 1/2". I also spent some time tiding up the garage, and cutting a smaller slab of beech plywood 18"X8". time to make the stand that will hold her for the rest of the project. of course, it just wouldn't be cricket, if I didn't show her on her new pedestal. for the time being, I used felt buttons to keep her from getting scratched. I'll replace them when I make up some more permanent ones. I added some brackets on the ends to help strengthen it. now that this is done........the garage is tidy.........the temp is going to be around 70 degrees tomorrow........I think it's time

-
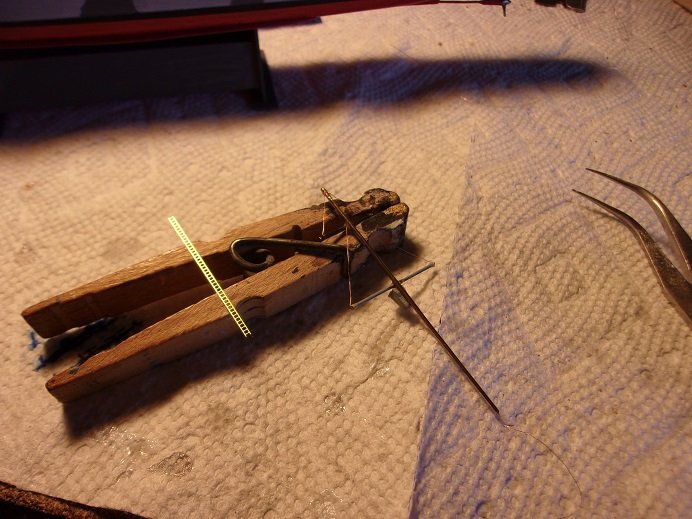
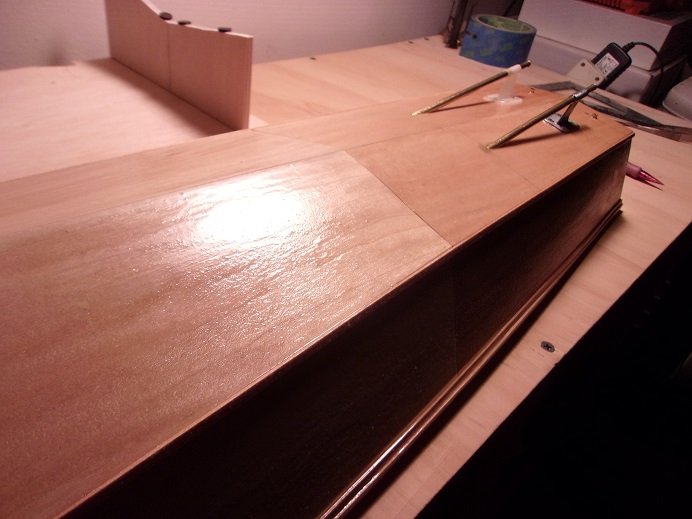
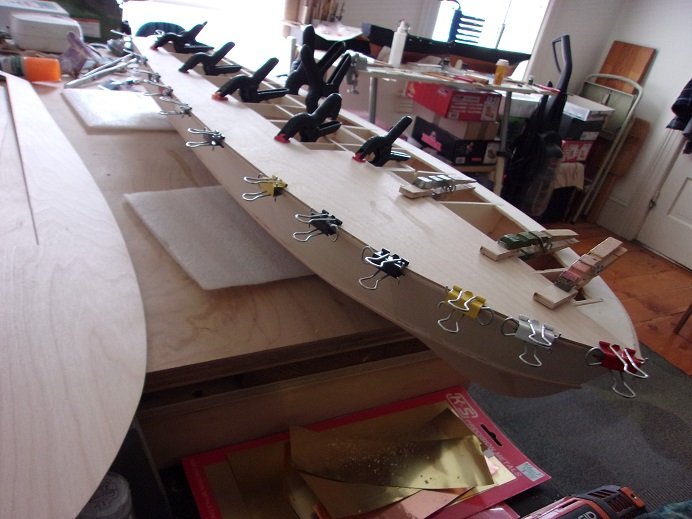
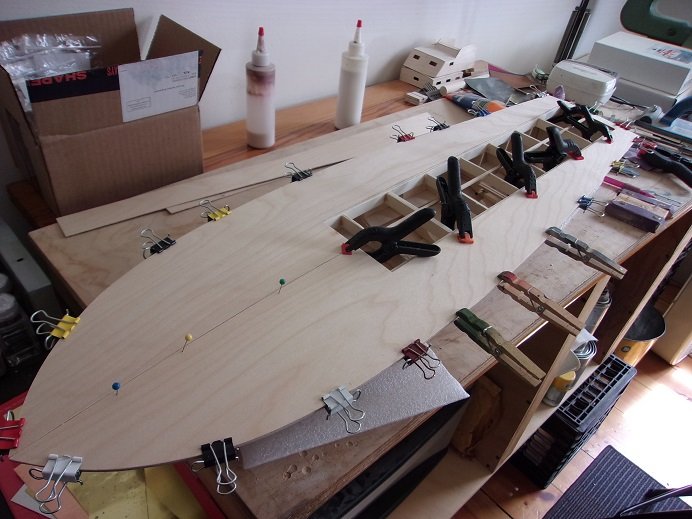
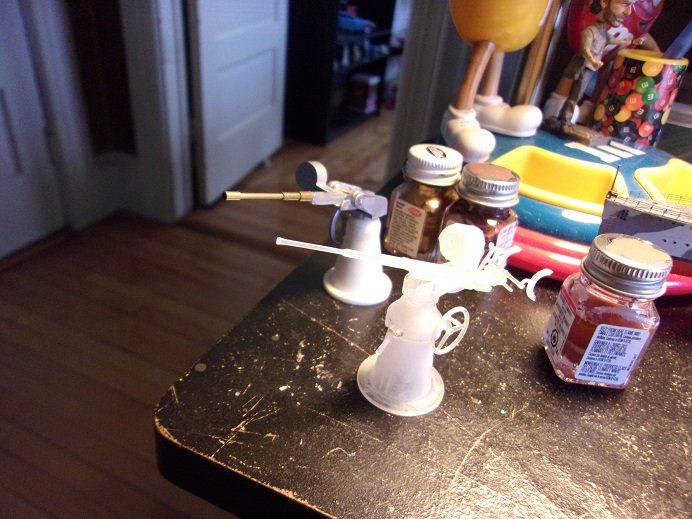
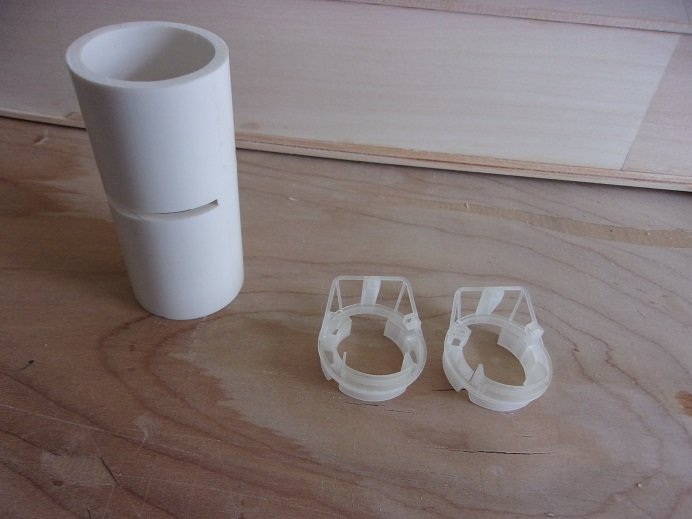
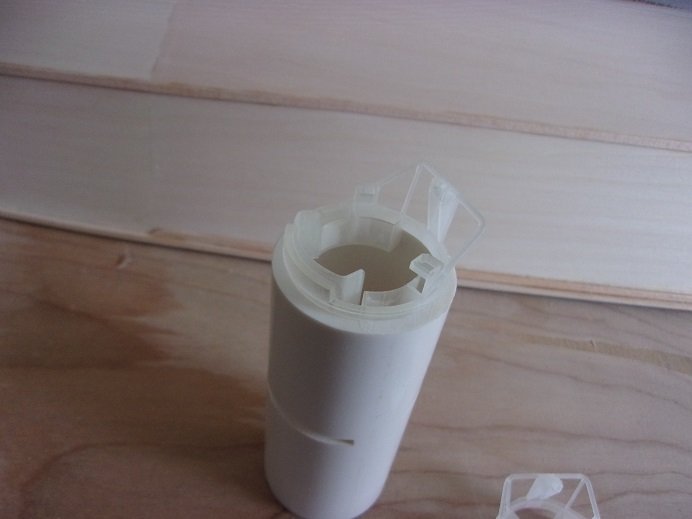
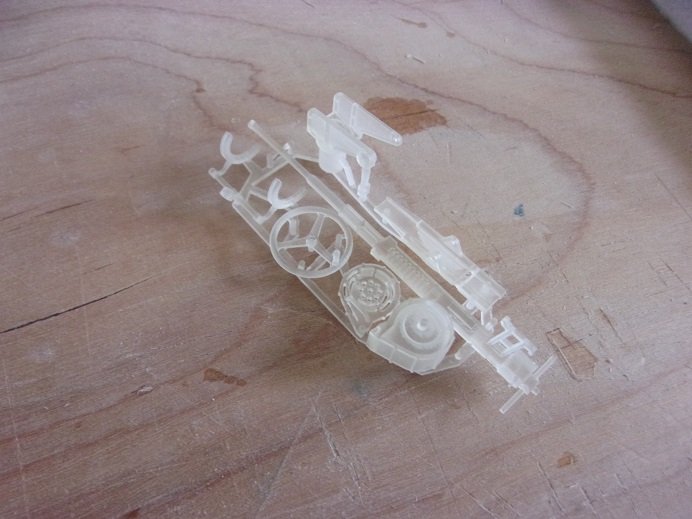
oh yesssss.....my weekend / your week {however you want to look at it}. it comes to a close, so I'd better release it from the bonds of the camera. more sanding was done.......more filling of the joints as well......prep for the big day. I run my fingers over the panel joints, and I don't feel a thing. the deck frame surface was sanded as well........looks good enough to begin laying the deck platform down. I'm just going ahead and doing it....I'll have more than enough room to assemble the rudder set up. you can see that I added some short strips along the center frame.......the better to cement the deck platforms onto......... when the starboard side was dry enough, the port side was laid down. there was an errand in there somewhere, but it was given time to dry. I did occupy my time on other things.......like assembling the 20 mm gun. the instructions stated that this is actually 1:20 / 1:24, which scared me a bit.........until I realized this was where I found the instructions in the first place.. noting the color of the plastic, is an indication that this is virgin plastic. it is a UV cured acrylic plastic. I looked into one of these machines, and wished I could own one...way out of my league. nothing I read said that it was recycled plastic.......but the color also indicates that nothing has been added to it. the milky color comes from the wax to prevent sticking...injection molding. I use to work at a facility that made automotive bushings, seals, and other products and parts for hydraulic.....caterpillar comes to mind. they also made timing belts. I used to run what they called 'hot runners' ....meaning that machine didn't stop for a second........every min and a half, it would spit out parts.....in different denominations, depending what it was set up for at the time. it would open, spit out the parts and close again.......over and over. the only pause was when I would wax and wipe........and inspect the parts to insure that there are no defects. there's a lot more to it....but it irreverent, since I don't work there no more........not for quite a long time ago........it's where I met the admiral as mentioned.....the parts are brittle......just like clear parts {I know you've found that out at least once in your model building existence }. I broke one part assembling it. odd, but the instructions say that regular model cement won't work on this plastic.......so I used CA. compared to the supplied gun.......what a difference! of course, I haven't added anything else to the original gun, but the detail this one has is really nice. the instructions does list the aspects that can be added to it to make it look more realistic. I tried adding a pin in the locking lever in the front so it could be movable, but when I went to trim off the pin sticking out, it snapped part of the bracket. so, it is glued.......this dashes my hopes to put a pin so the gun would be movable. I rather not make the same mistake twice. the rest of the day was devoted to sanding along the edge of the gunwale / deck platform, to make it flush and fill in the gaps.

-
yes, they will John..........virgin plastics come at a cost. #1.......they are brittle. I wish I could post the instructions for them.......there are some do's and dont's as far as painting goes too. they suggest Acrylics, but I'll try enamels on the sprues to see if the paint will stick to it. I may need to use a primer first. I'll get into this more later.........but first.................the week's update! {ominous organ sound}
-
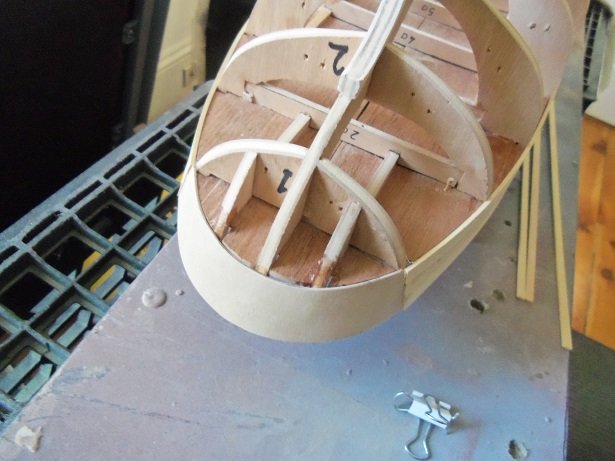
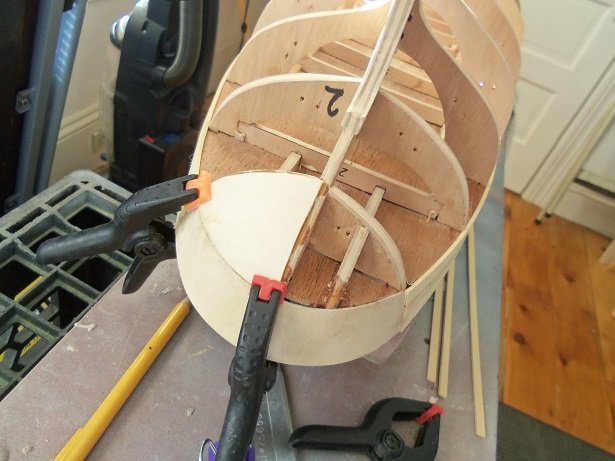
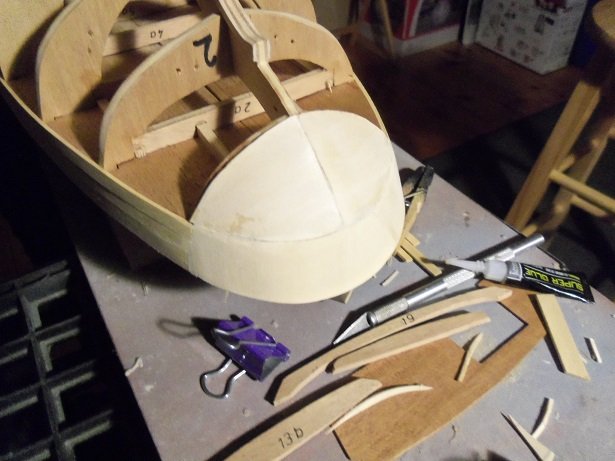
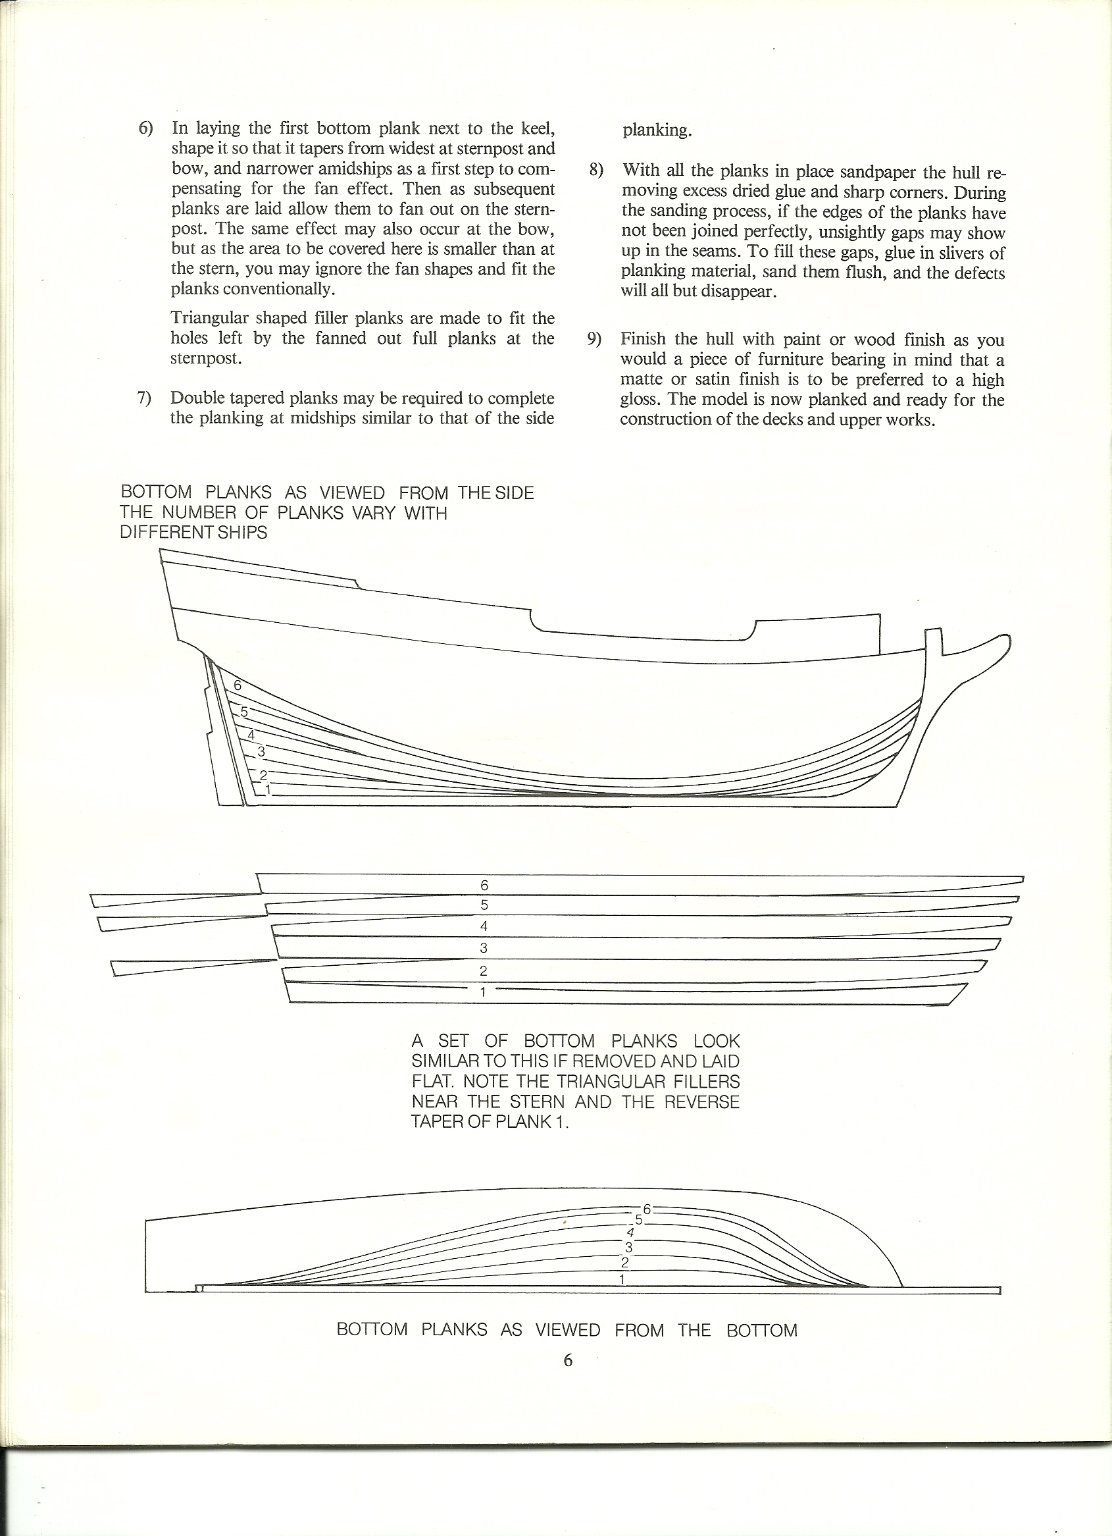
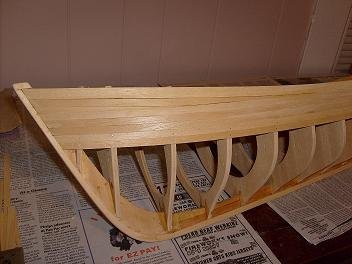
try wetting and bending planking around a glass to get the curvature for the stern.......you may need to trim them flush at the #1 bulkhead. I know your just starting out......so did I when I built the Nordkap. I'd look at these kits and shy away..........I'd think to myself that I could never build one. I made mistakes.........oh boy..........did I make 'em! but one thing I did that helped me out a lot, was to think outside the box.......I scratch built what I couldn't use in the kit. now the Nordkap was an old kit....nothing was laser cut. I got it from a friend......a skeleton on a pine board. he had stopped working on it and stored it in his attic for 30 years or so. I do a lot of scratch building now...I've gotten so comfortable with it, that I can't do a kit without doing it. I ran into the same problem as you have here.....that curved stern. to taper, bend, and curve to create this counter / transom, is probably the hardest thing to do {some may not agree, but I do}. as I mentioned, the one thing to keep in mind, is holding a straight line with planking. here is a picture of the Nordkap...what I did at the bow. looking close, you'll see the stealers I added in there.........shouldn't do it this way {two together like this}, but as I mentioned.......what did I know but you can see how I maintained the straight line. the stern is the other Achilles heel........I planked it, but it took a lot of effort. done in a herringbone pattern, was the best way to plank it over.......sanded it looked like this... sanded and with a coat of filler, it looks like this... I gotta take the pup out and go to the store for now.........I want to help. I hope these pictures will give you an idea or two. I'll be back

-
McLaren M8B by CDW - Accurate Miniatures - 1:24 Scale
popeye the sailor replied to CDW's topic in Non-ship/categorised builds
coming along very nicely since I last looked in again....your paint work is amazing! -
you could take some pictures of the sky {perhaps from some high place}, scan them and then make up a card backing for your display cabinet. that would look really neat
-
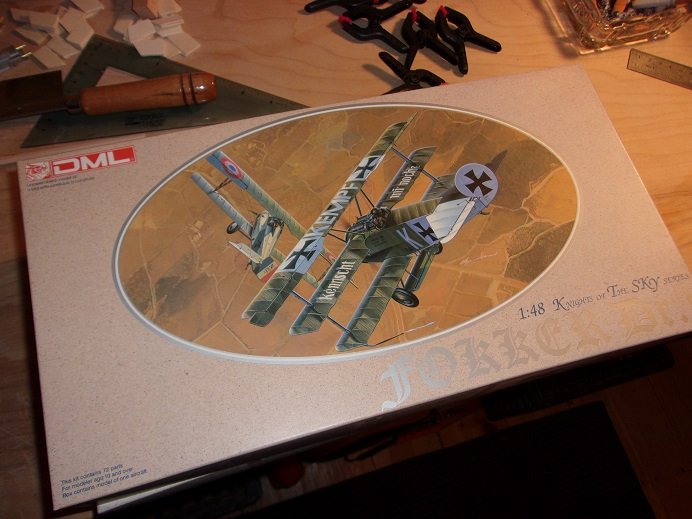
yes......they are I have the Dragon models link in my bookmarks. they were produced around 1993...so no, they aren't older models in the sense, but with the included PE, this gives you an idea when model companies began including these additional parts and options. it actually began much earlier, but they were the three 'n one kits and customizing kits, that gave you options, but the add on parts were mainly plastic and weren't metal. there was a select few models out there at the time that offered a metal body and {or} bumpers. ......I digress......
-
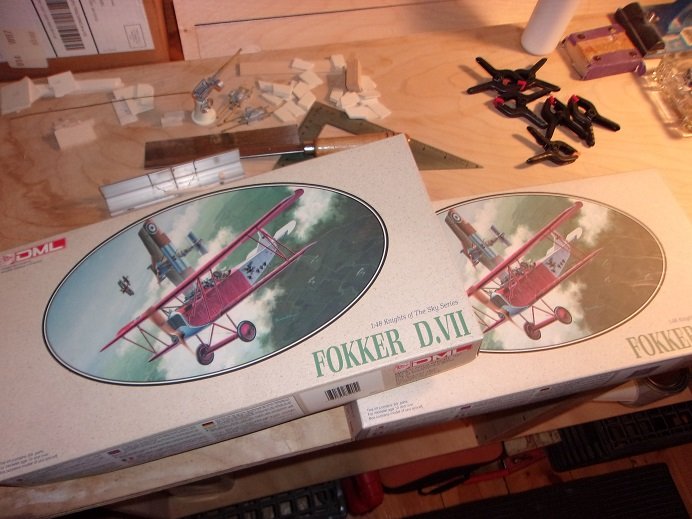
pretty neat way to display them Carl the you tube planes came out great as well! such an amazing Jasta you have there. Christmas was good to me.......I got three more planes. the admiral was a bit confused I think........I had three different planes on my wish list, but she goofed on one of them. so I got two D VII's that are the same, and a Dr 1. they say 1:48, but they look to be 1:72....never heard of this company, but the kits are really nice. they have a little PE and even supply thin wire for the rigging. I just ordered a book on the different Jastas, but I may just do Raben's or Berthoud's, since I can readily get the decals I need.
-
that's an interesting way to do a selfie glad you found and corrected your problem.
-
Porsche 934 restoration by kpnuts 1/12 Tamiya
popeye the sailor replied to kpnuts's topic in Non-ship/categorised builds
hardcore man......... -
M29 Weasel family 1/72 (scratch) by Backer Finished
popeye the sailor replied to Baker's topic in Non-ship/categorised builds
awesome progress.........your unit is coming along -
super job with the finish of this one Mike..........super nice!
-
looks good to me too Chris hope your feeling better.
-
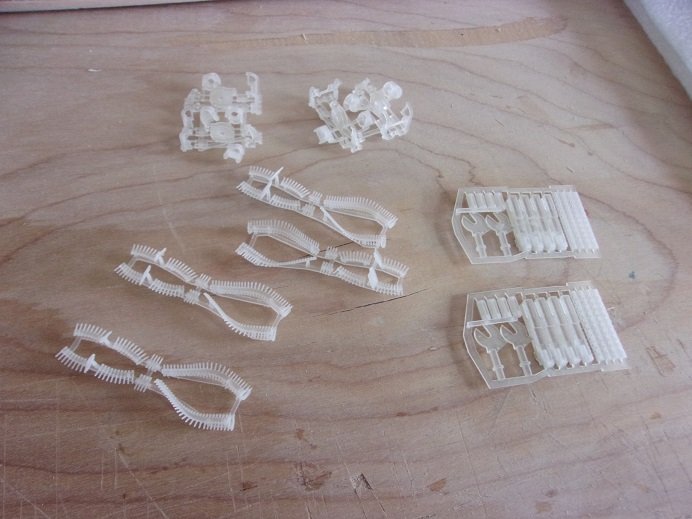
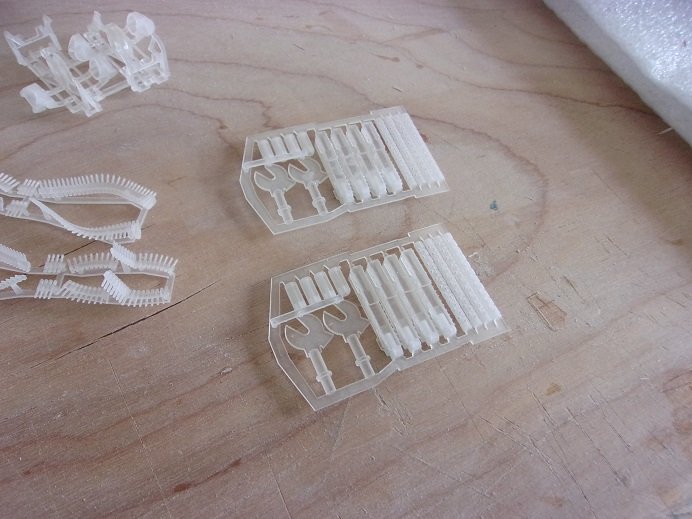
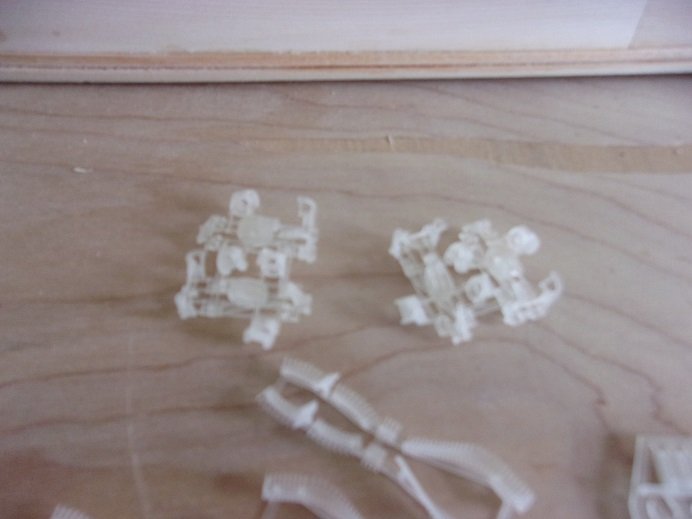
the .50 cal parts........I got extras for these, just in case. the plastic used is suggested that it is somewhat brittle, and care should be taken to remove the part from the tree. the carriages, the ammo / belts, and the actual guns these are the .50 cal tub parts and the turrets tubes supplied in the kit. these are the 20 mm gun parts. more to come

- 221 replies
-
- 12
-
-
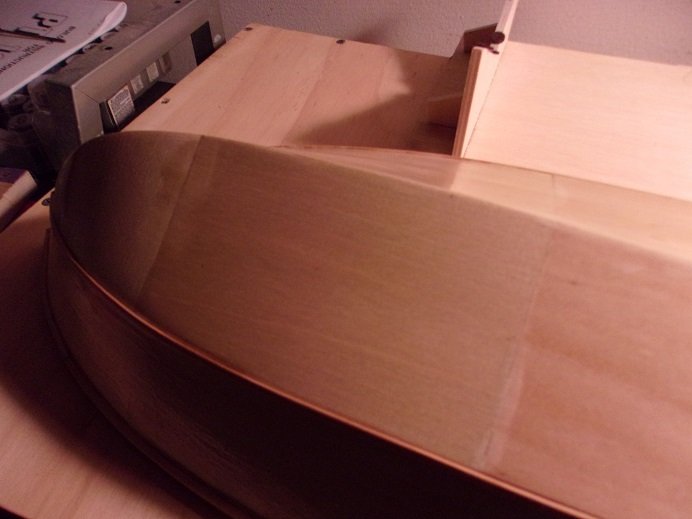
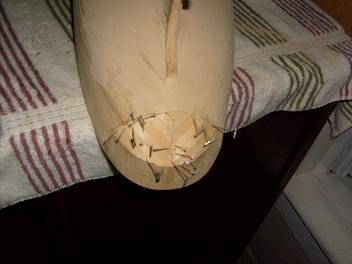
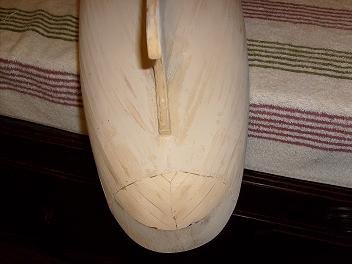
the stern is going to be the tough spot here. this contour is common with fishing vessels. as I have done with quite a few of my fishing vessels, I took sheet basswood and created panels to cover this area. the Nordkap.......the Progress......the Cox 87 and the mary Ann, I've pretty much done the same thing. with my build of the Progress {which is a clone model of the Nordkap} this is the area that I will cover. this is an area that is great stress for planking. I do all this freehand, so I have no templates to show. here I created the stern bulwark. planking the side bulwarks isolates the next strake, which will run over this area. to bend the planking over to the stern stem, without tapering, it will clinker. I will fill in the transom. filling in 1/2 of the area, it is trimmed so the other side can be added. with the other side added, it tidies up the contour of the transom, and makes it easier to plank. you'll still need to taper the planking to keep the line straight......this is the key to planking........create a straight line and maintain it. you will find that some methods work better on different styles of hulls one aspect that will never change, is that the mid ship is always wider than the bow and stern. tapering, stealers, and jogging planks are common tools to use in every form of the art {call it what it is}. planking is an art...........just look in on some of these logs and you'll see how other folks accomplish it.....some are very good! the banding method your illustrating is good......a lot of folks use it with great success. one thing I find with it though, is that it harder to keep the line, and tapering to fill in is more common. I usually start planking from the bulwark down......laying the planking until 'it' tells me that I need to start tapering. to taper the end, establish where the taper begins, and don't exceed 1/2 of the plank width. if the planking wants to go the other way {away from the plank line forming a gap}, let it........this filler is called a stealer. if you want to get away from adding in a stealer, establish where the stealer will begin, and simply notch the plank at an angle and fit in a short section of planking, essentially doubling the width of the plank. as a rule, this occurs mostly at the bow....but it can occur at the stern as well sorry for getting carried away......there quite a bit to the art