popeye the sailor
-
Posts
16,007 -
Joined
-
Last visited
Content Type
Profiles
Forums
Gallery
Events
Everything posted by popeye the sailor
-
 you have the sea side.........if I did, I'd flaunt it too the admiral and I daydream about moving out toward Hampton.....or even Rye, or Wallace sands. since she became disabled, we never go to Hampton Beach anymore.......I really miss the seafood festival. don't do it Adam.........the last thing I want to see, is a picture of you holding a box with nothing but brass and plastic in it ............but, if your intention was to build it......well, that's OK
 -
wow......it really made a difference! looks super Adam never heard of using mud as filler, but it is to be painted, so who would know the wiser was this kit designed to be a second plank build? sad to hear that you need to get more planking.......but when the wales are in place, you'll be very happy. the Gothenborg wasn't either...I wasn't happy with all the glue blotches. I even got a call from Tom {when Billing Boats USA was around} apologizing that I had to do it. I hope I didn't come off that way.......I think your somewhat like me...I would have painted it, done more work on her......all the while becoming dissatisfied with how that came out. of course, this would have happened when the ship would be next to impossible to flip over without breaking something. I've been there. now you won't have to back track.......now you can do the wales and get her all dolled up! I can't wait to see it you've done a great job!
-
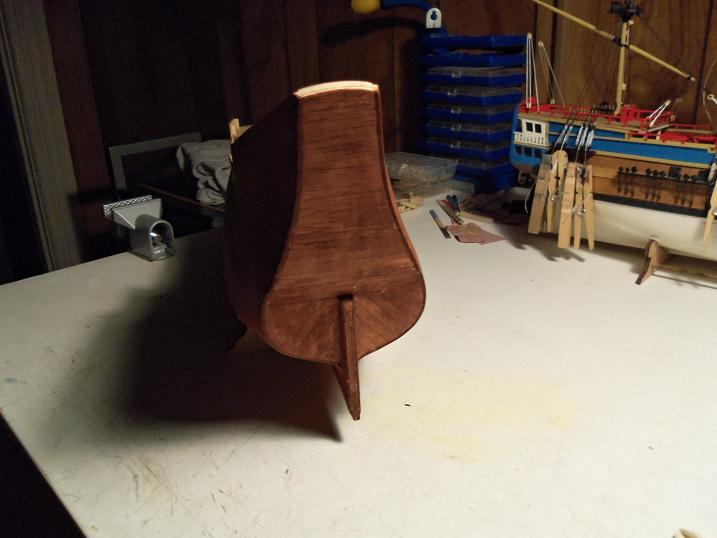
thanks Adam you see......I am in a much different dilemma with my wales. I want to paint them a darker color before i put them on, but I was also curious about this stain......I've never tried it before. it looks a bit on the red side......but I am pleased to see the glue blotches are very few. as I had mentioned on your build.....the hull would not have a uniform appearance.....weather and 'patchwork' would have a lot to do with this. the wales may even hide some of them thanks for the good word thank you Robbyn...... this is a bold step. the last time I stained a ship, I ended up renaming her. I think that this one though, will be good I have to bite the bullet and start somewhere thanks for the good word.
-
thanks Mark and Edwin...........no.......I'm far from an expert. sometimes I wish I knew everyting there was to know.......but I still find myself digging up more info on them. thanks for the kind word thanks Bob Anja and Patrick........I'm going to try to keep up on this build.....can't believe I left her idle for this long. thanks for the good word!
-
that's some tedious work Danny.........but it looks super!
-
Cutty Sark by NenadM
popeye the sailor replied to NenadM's topic in - Build logs for subjects built 1851 - 1900
I have the same problem Nenad.......I'll be working on my table, and I'll come across these long white hairs. They are from my dog, Gibbs. I have no idea how they get here......the table is just over 4 feet tall! he is an Americam Eskimo, and has thick fluffy hair. when he sheds, it is everywhere! I saw a show one day.......a woman made a sweater from their hair...looked warm as hell! I fixed up the old Toyota for one more year...........I let my son drive it. I figure, he bangs this one up, I won't feel so bad. we have our share of nuts on the road.......I can remember when driving was fun- 4,152 replies
-
- 2
-

-
- cutty sark
- tehnodidakta
- (and 1 more)
-
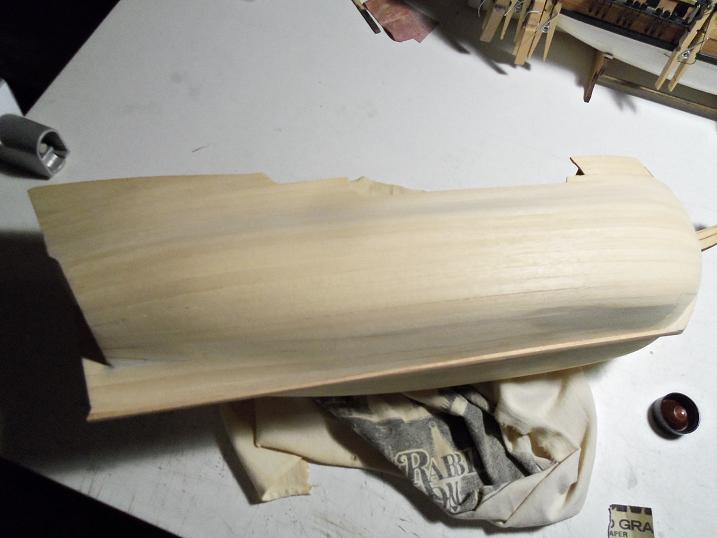
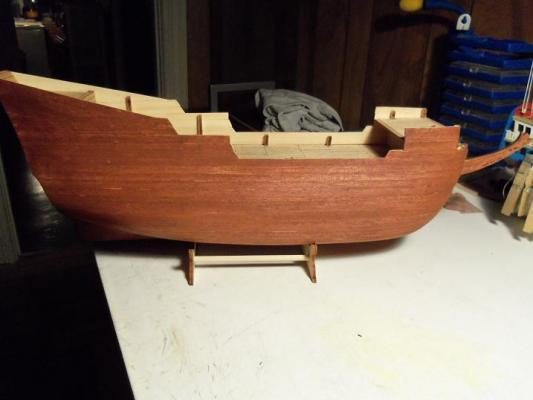
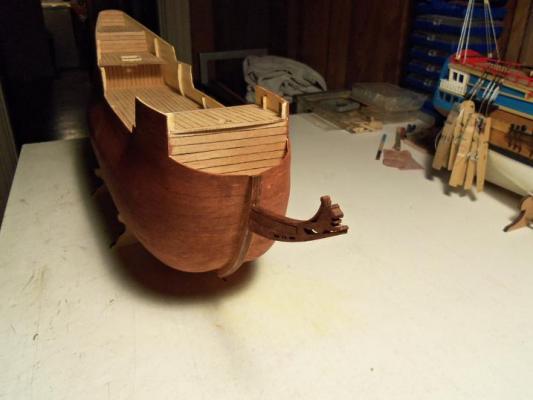
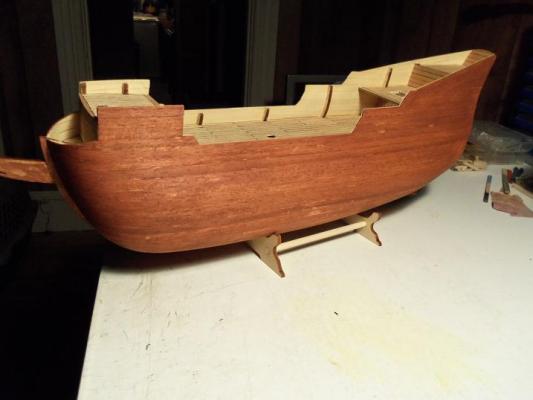
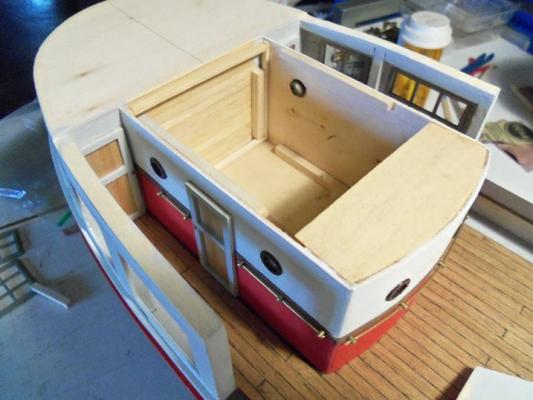
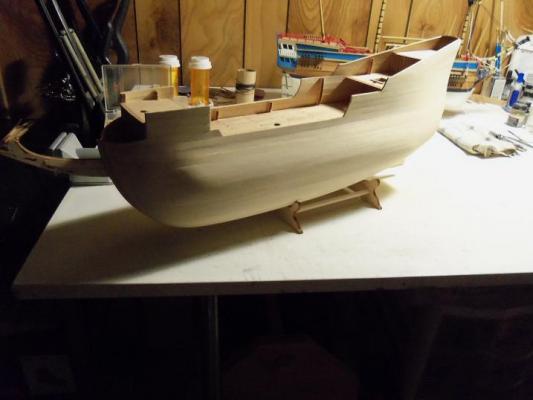
I was thinking about this the other evening, after I had finshed what I was doing on the trawler. I have the wales for her already to go, but I couldn't decide whether to stain the hull first, or just throw caution to the wind. sooooo........... I finished sanding the hull.......I didn't have much to do. then I used the Billing's Mahogany stain......... when I get the other cabin bulkheads done, I will stain the interior of the ship


-
what is this..........did a fault line shift? nice to see you finally brought her down from the shelf I see you have some work to do with the chainplates........I had no Idea that many dead eyes were in the way of the guns. I'm sure you will figure it out
-
slightly sticking out of the opening is good, seeing as they have the hinges on them. if they didn't, I would say to indent them, and give them a door jam treatment.
-
very interesting pictures Wayne...a nice back drop for the H.L.
-
some nice looking progress there Augie...the beakhead looks very nice one of these days, I'll have to try treenailing.....
- 2,191 replies
-
- 1
-
-
- confederacy
- Model Shipways
- (and 1 more)
-
not a problem ...... I hope it works well for you.......I will be eagerly watching
-
nicely done Draggz
-
looks right to me........I second the avatar
-
looks like your all set now for the big finish.........nice looking grate
-
I'll be sure to do that good sir..........I will definitely let you know
-
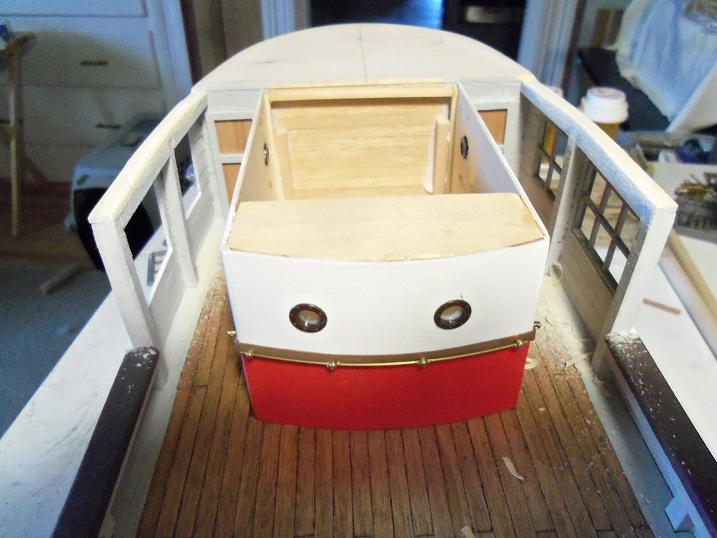
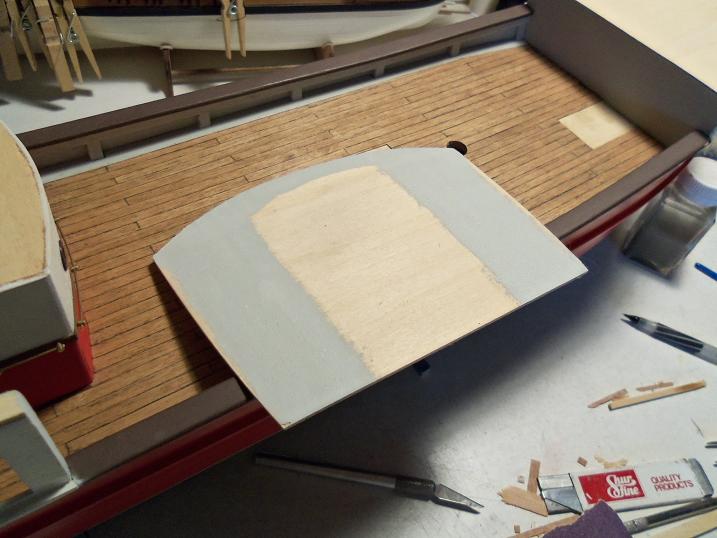
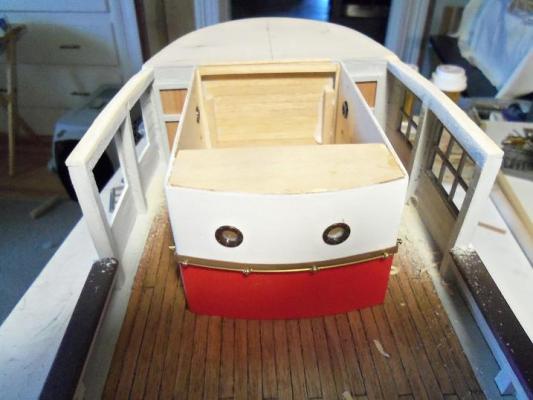
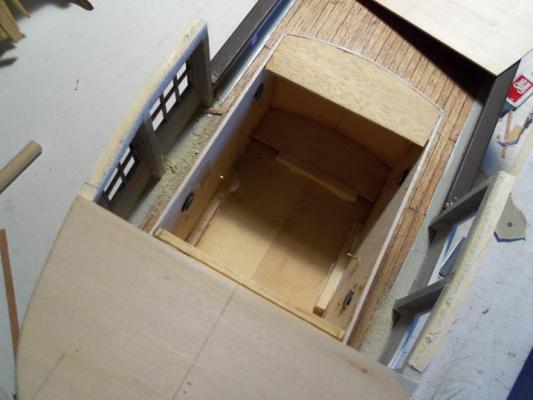
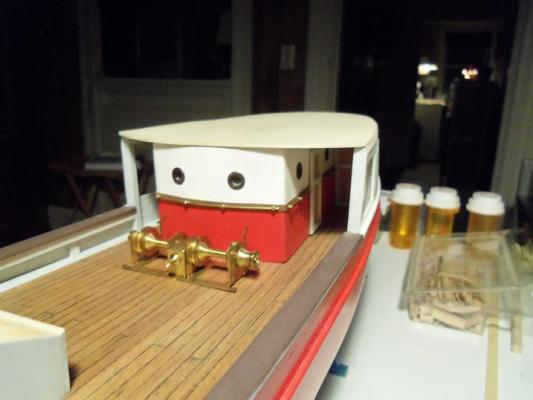
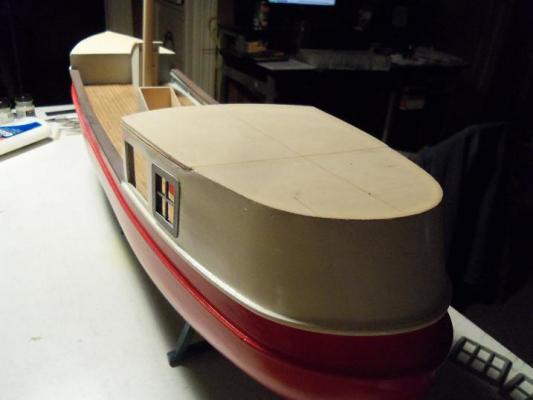
had to run an errand to get a special tool for the Izuzu SUV....too long a story to get into. the brief of it all is the simple addage: "that'll teach you!" {they don't have an emoticon for this} anyway.....when I got back, it was close for supper. I did some baking, so I'd have snacks for work tomorrow.......and I made my famous steak and cheeze subs. I played with the food budget and bought some frozen peppers and onions............for these though, I bought fresh veggies. I'll never buy frozen again! I instructed the admiral to kick me, if I ever put stuff like that in the cart again!!! wind back before I left................the shims were dry enough to sand, so I shaped them ......mainly on the inside. I'll get to the outside after the deck platform is cemented on. the lower structure is cemented in place. I used some odds and ends to strengthen it. the underside of the deck platform was painted. when I got back from my errand, I checked and saw that the glue had dried fairly well. so.........on went the platform! I used whatever I could get my hands on to weight it down. After the baking.........feeding Gibbs {who incidentally, likes brocolli}.......and making supper {a repast that couldn't be beat}, all of the weights were removed from the decking. it ended up as a very nice flat surface with this complete.......I can now turn to the decking, and how I'm going to do it. I'm going to plank it....I think it will look really good. it's going to be a feat to mimic the main deck, but I remember that I used crayon, so half the battle is won. I want to move on to one of the other builds, but now I can work on something, without hauling her back onto the table. I think I will keep her nearby. without my other table, it will be hard........but in it's place, I have a small book case.....the Half Moon and the United States already occupy the two upper shelves. the bottom shelf is reserved for the shoe boxes that hold the parts for these ships......I will allow

- 747 replies
-
- 11
-
-
thanks John........I hope to have a bit more of an update soon {hopefully tonight}. I was looking at my folders of pictures that I have on her........the last one I did was in may of 2012. I find that hard to believe.......but I date my folders. all this is telling me, is I had better move my butt.....and catch up! thanks for the good word. "I promise......no more peach brandy before a build.....I swear!"
-
good to see you back at the table Robert. you could do like a half cap and the stanchions, and then cement the pin rail strip to complete the cap. be sure to leave enough room for the dead eye shrouds. I noticed you removed the upper rub rails...are you going to put them back?
-
oh....by the way.......where were thos blotches you were talking about earlier? I didn't see them
-
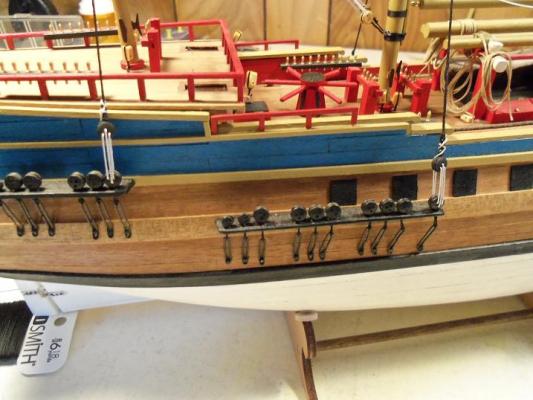
AUGIE!!!! I thought you were on MY side :D :D :D man do you and I think alike......cripe! after cementing the upper deck platform on the trawler........I made 2 half dozen of two different flavors of muffins..........feed Gibbs with his dog food and brocolli mix.......and made supper........my favorite: steak and cheeze subs {chunk}, w/green peppers and onions. {I'm on my second sub}.......I am one fat / happy camper right now! you have done a superb job on the planking!..........I almost choked on a bite when I saw her! the color is fantastic......and the treatment you applied really makes the difference! I like how everything blends together......but I would suggest palnking all the way down to the keel. your upper wales is going to sit on top of the planking......but where is the lower one going to be? either on top of the last two rows of planks, or used to terminate the planking {the waterline}.....there will still be quite a lip there. for example: when I did the second planking on the Gothenborg, I used the .5mm planking. here I could play with the thickness. planking down from the bulwark, the first wale was laid. planked down from there, and the second wale was laid. the rest down to the keel was planked to termination. the difference between the two woods, still allowed the wales to protrude. both wales are equal to proportion to the hull wall. now on the Half Moon, I am going to try my best not to double plank. these wales are going to protrude the full 1.8mm......they will be more prominant. but, then again, the other rub rails are going to compliment them. the hull face will be even all the way down to the keel. in both of these ship, that is what I was shooting for. again......I hope I'm wet behind the ears, but the hull should be uniform all the way down to the keel. I wish the wales were on the H.M. so you could see the differences. I just measured the strips I'm going to be using......1.5mm is what I see...but they list it as 1.8mm {probably some of the palnking used is exactly that}. I like the idea of embedding the wales like I did on the goth....it made the rise more subtle. don't think for a second, that I'm suggesting ripping up planking....far from it. my thoughts are on how much of a rise there will be at the second wale. please don't shoot me........
-
I don't think there is a firm rule about sails before rigging.........kind of like the chicken or the egg. but in this case, there had to be a chicken to start the ball rolling :D :D sure looks good with the yards and sails on her though
-
thanks Augie.......that must have been the door that leads to the twilight zone...... keep telling myself to slow down....but you know how that goes
-
yup!!!!! and anything else that isn't battened down properly! :D :D
-
thanks Bob........there's more to come once all this is done.........there will be plenty of baubles to go on! thanks for the good word.