
HOLIDAY DONATION DRIVE - SUPPORT MSW - DO YOUR PART TO KEEP THIS GREAT FORUM GOING! (Only 36 donations so far out of 49,000 members - C'mon guys!)
×


popeye the sailor
-
Posts
16,007 -
Joined
-
Last visited
Content Type
Profiles
Forums
Gallery
Events
Everything posted by popeye the sailor
-

AMT Body Snatcher - 1:25 by Fright
popeye the sailor replied to Fright's topic in Non-ship/categorised builds
looks nice! sweet look'in vehicle -
engine looks really nice
-
Hawker Typhoon by Asat - Airfix- 1/24
popeye the sailor replied to ASAT's topic in Non-ship/categorised builds
very nice progress Lou........engine is really neat! -
if we had premonitions Andy, we'd all have perfect lives you seem to be doing quite well on what you have and memory. it's refreshing to see a train piece made from scratch.......like what was done before scale classification came to be used. very nicely done!
-
super progress EG.........sweet look'in ride
-
silently following along Jack........nice choice on the tank great looking tank! if your looking for extra infantry and personal, old model kits has sales on groups of accessory kits {3 or 4 kits to the bundle} at a decent price.
-
I do the same thing Joe.........with the exception, that of late.......things have gotten away from me a little {putting it mildly}. it also gives me time to think of solutions should I run into a problem.......work on something else and think it over the spit is look'in good. there are lots of kits out there that have these small nuances......specs that are a bit off. most of it due to the research done at the time. some are keen to address....easy, but the ones that require a lot of modification can be a coin toss.......is it really worth it. you can start a log any time really, especially if you have pictures to show the progress up to this point
-
pretty knarly chopper you got there KP the interior looks really good......looks like you've done the paint to the exterior as well. a very good start
-
is that the supplied ship's boat? looks really neat your progress looks real good too! I haven't even made the rudder yet........I'm currently working on the cap rails
- 211 replies
-
- 2
-

-
- agilis
- steingraeber
- (and 1 more)
-
that's one amazing beat up ship Greg..........all you need to do now is to 'wring' 'er out awesome job!
-
the guns look great! very nicely done.........even more amazing when it's only part of the deck still more to go !
-
AMT Body Snatcher - 1:25 by Fright
popeye the sailor replied to Fright's topic in Non-ship/categorised builds
I have two Ecto 1's..........I've done some modification to do both -
Hawker Typhoon by Asat - Airfix- 1/24
popeye the sailor replied to ASAT's topic in Non-ship/categorised builds
perhaps a a trimmed piece of thin leather would cover them over. nice start on the air frame -
sure is........really great shots of the Fokker in flight couldn't find the movie anywhere........ one day, I found it as a two pack..........along with another hard to find movie I was looking for....Bat 21
-
nice progress........PE can be a coin toss. sometimes the actual part looks just as good
-
AMT Body Snatcher - 1:25 by Fright
popeye the sailor replied to Fright's topic in Non-ship/categorised builds
this has to be a spin off of the Munster mobile.......I've not seen this one........and I've built a number of Barris beauties I watched them both........TV back then was so much better -
chassis looks really nice
-
I've never seen a remake of the Blue Max.......but yes.......a day without george is like a day without sunshine I just watched the review from Flory.......huge kit!
-
good start.......very nice detailing
-
sure Robert........the mask set is made by KV models. I ordered it from scalemates.com so I thought........the darn thing came from the Ukraine. I think that it was made for the older kits. I'm checking them out now OC.......
-
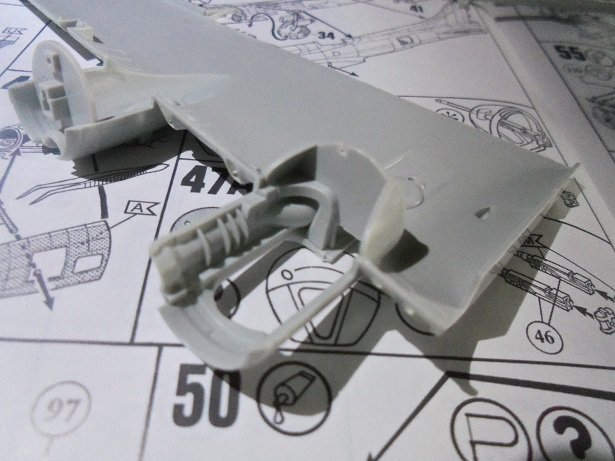
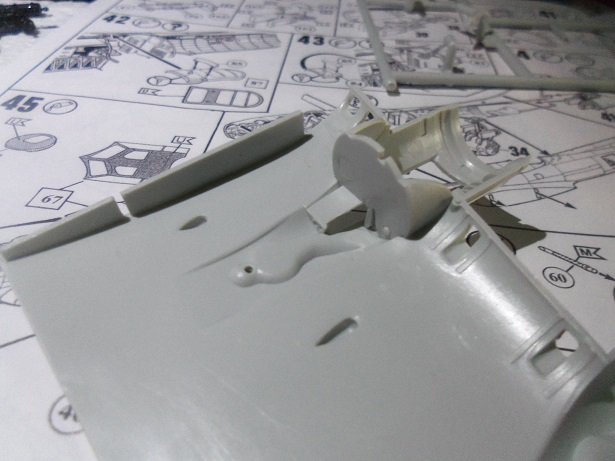
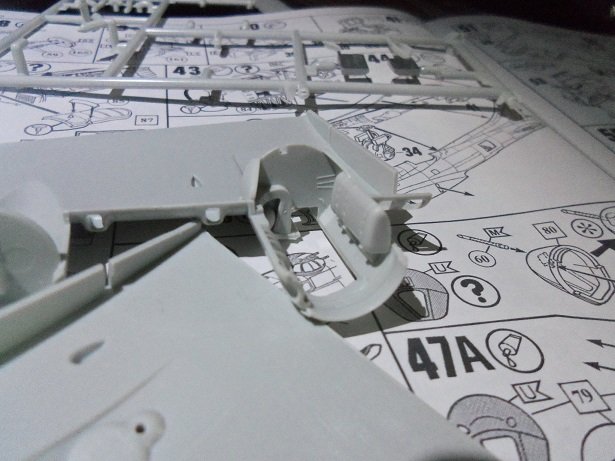
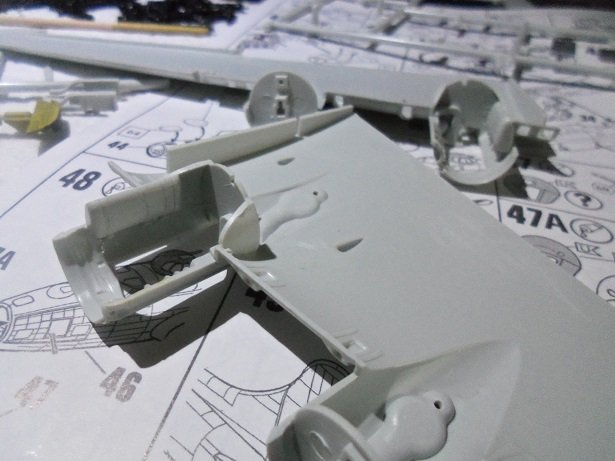
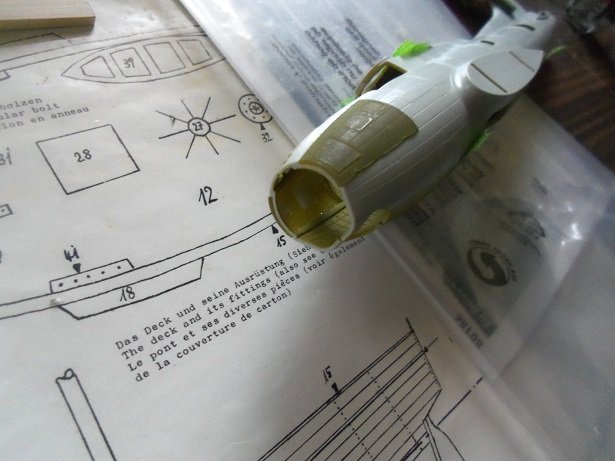
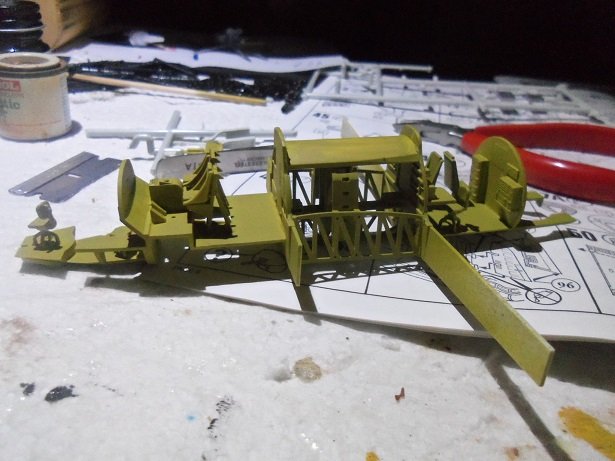
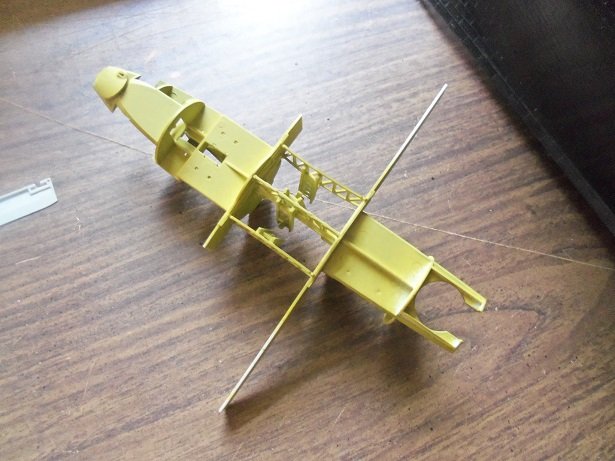
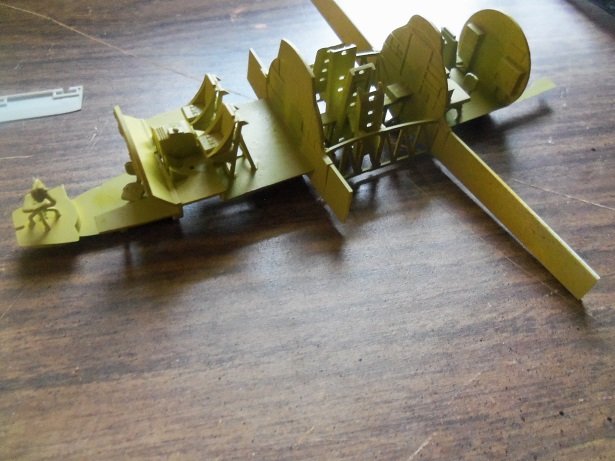
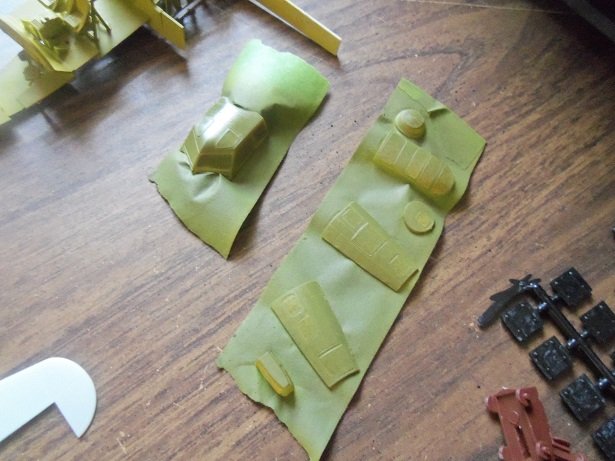
harsh.........very harsh........I'm glad I have a merciful admiral the fun continued.........on with the bottom wing halves! I thought I was going nutz.... this one certain part.......the rear bulkhead for the inboard engines would not fit. the landing gear connects to these parts, so they have to sit flush. looking the parts over, I did notice, what looked like flash on the elongated part that covers the rear section of the landing gear opening. no.........it looks too thick to be flash.........but a small curved bulge was evident at the base of the elongation. rear bulkhead and side manifold parts cemented in place this elongated part in the back of the bulkhead was the problem check fitting again made me decide to cut the extra plastic off and expose the small curved area. that did the trick! the part fit in place perfectly! the outer bulkheads were fitted in the outboard engine narcelles. the inboard has them too, but there are a couple more parts to add. there are these two tanks that needed to be added.......until the rear bulkheads were in place, I was baffled how they fit. I had a couple of pictures with the outer bulkheads added, but they were too blurry, so I dumped them. with the two side panels dry, they were cemented to the openings in the fuselage. they will be painted Olive Drab along with the outer surface of the fuselage. I need to mask them so to keep over spray out and off of the interior I wasn't impressed how these fit.... the bomb bay area of the interior assembly received it's inner hood. still more to go........more painting to be done with the interior. still plenty of parts too!
- 247 replies
-
- 12
-
-
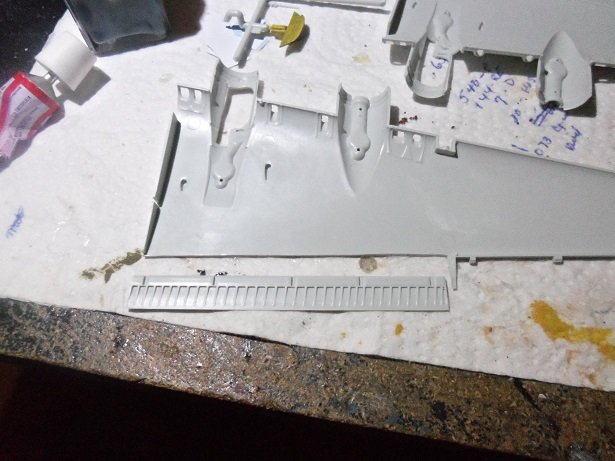
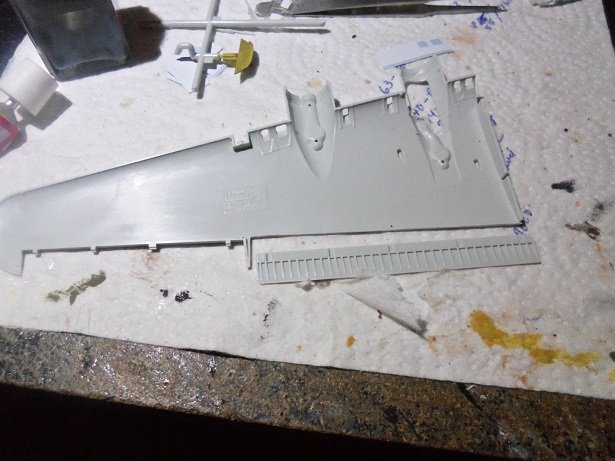
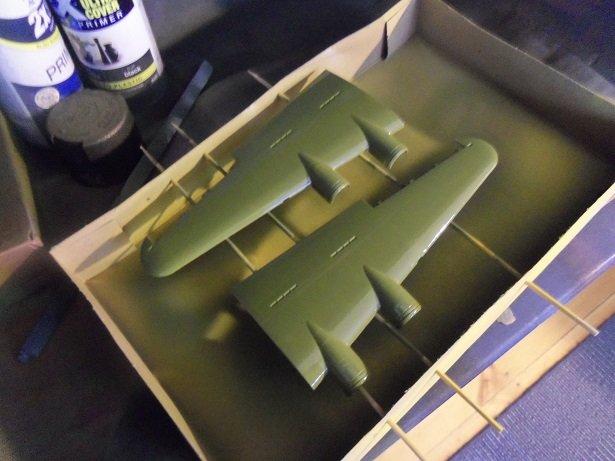
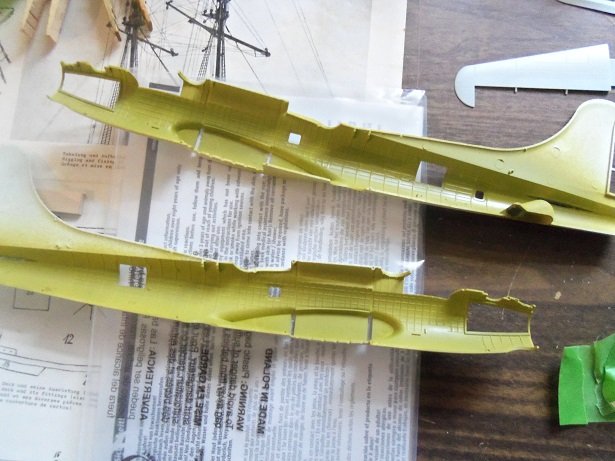
more progress on the Memphis belle. to cut.....or not to cut......that is the question. unlike the bomb bay doors, there are no indent lines in which to guide the razor knife, in order to cut the flaps from the bottom wing halves. I'm around 50% concerning doing this........some good....some not so good. I opted not to have them operational on the Nine o Nine due to lack of detail parts {the kit could have been more detailed due to it's scale}. I didn't do it to the Wulfe Hound either for the same reason........and that it was an early Revell kit with few parts. given the opportunity and the parts to flesh them out......I did it. minor shortcomings, but for the most part, with them open, the defects might not be readily noticed. the separator bar between the flap and the ailerons could have been a lot more rectangular. I cleaned them up some........they look better than they do here. there is more to be done with the bottom halves, particularly with the narcelles. painting was the next order of business. I painted the interior assembly first..........then the interior of the fuselage halves........and then the top wing halves, after changing the color to Olive Drab. they are still a bit on the wet side.......a second coat is needed. here are the fuselage halves.... I thought I would see areas that I missed on the interior assembly, but after close inspection, I see that the only places that are scant, are on the underside of the assembly in places that might not be seen. there is a round area at the nose that will need to be painted gray I did a light coat of the chromate on some of the clear parts. I wish I noticed the lifting of the masks...not sure if it was caused by the paint, or was like that before I painted them. I hope it was caused by the paint. ah....hmmmmm....these were the ones I was talking about.......now I am concerned I had to do some mix 'n match on the top turret ........the ball turret halves are scant on the masking. there wasn't enough there to do them completely. I did some mods with them......they will have to do. I'll find out wiah type of clean up that will need to be done when the masking comes off.

-
hello Robert..thanks for the good word there is no PE for her...the defense fund is somewhat limited.........I ran a covert act to get the mask set.........the magistrate was very lenient though {only KP with partial time served }. the mask set is somewhat limited.....a bit more than I originally assessed. the update to come will outline the shortcomings. thanks all for look'in in and the likes
-
congratz on finishing Jack........took me awhile to get to your log....but boy!..........it was so worth it! great looking bevy of tanks........look'in forward to seeing your next log......which ever makes the cut first
-
that's the problem with this decal program.......or any program for that matter. I don't mess with it a lot. I don't get to discover more 'ins' and 'outs' with it. a while ago { a year or so} I heard that there was an update for it, so I ordered it. come to find out, it was just additional decal images to work with. I was already importing all kinds of stuff into it......I didn't need that.....I wanted a solution to the transparency issue with it. so far, I've been able to thwart it by using white decal paper for some of the images......as long as they either had white in them, or a white background. for a few other instances, I'm able to change the background to the color of the model, but the model needs to be done in a solid color....basic color spectrum. this is where something like photo shop comes in handy.......the color spectrum for these programs are a bit wider.