glbarlow
-
Posts
4,135 -
Joined
-
Last visited
Content Type
Profiles
Forums
Gallery
Events
Everything posted by glbarlow
-
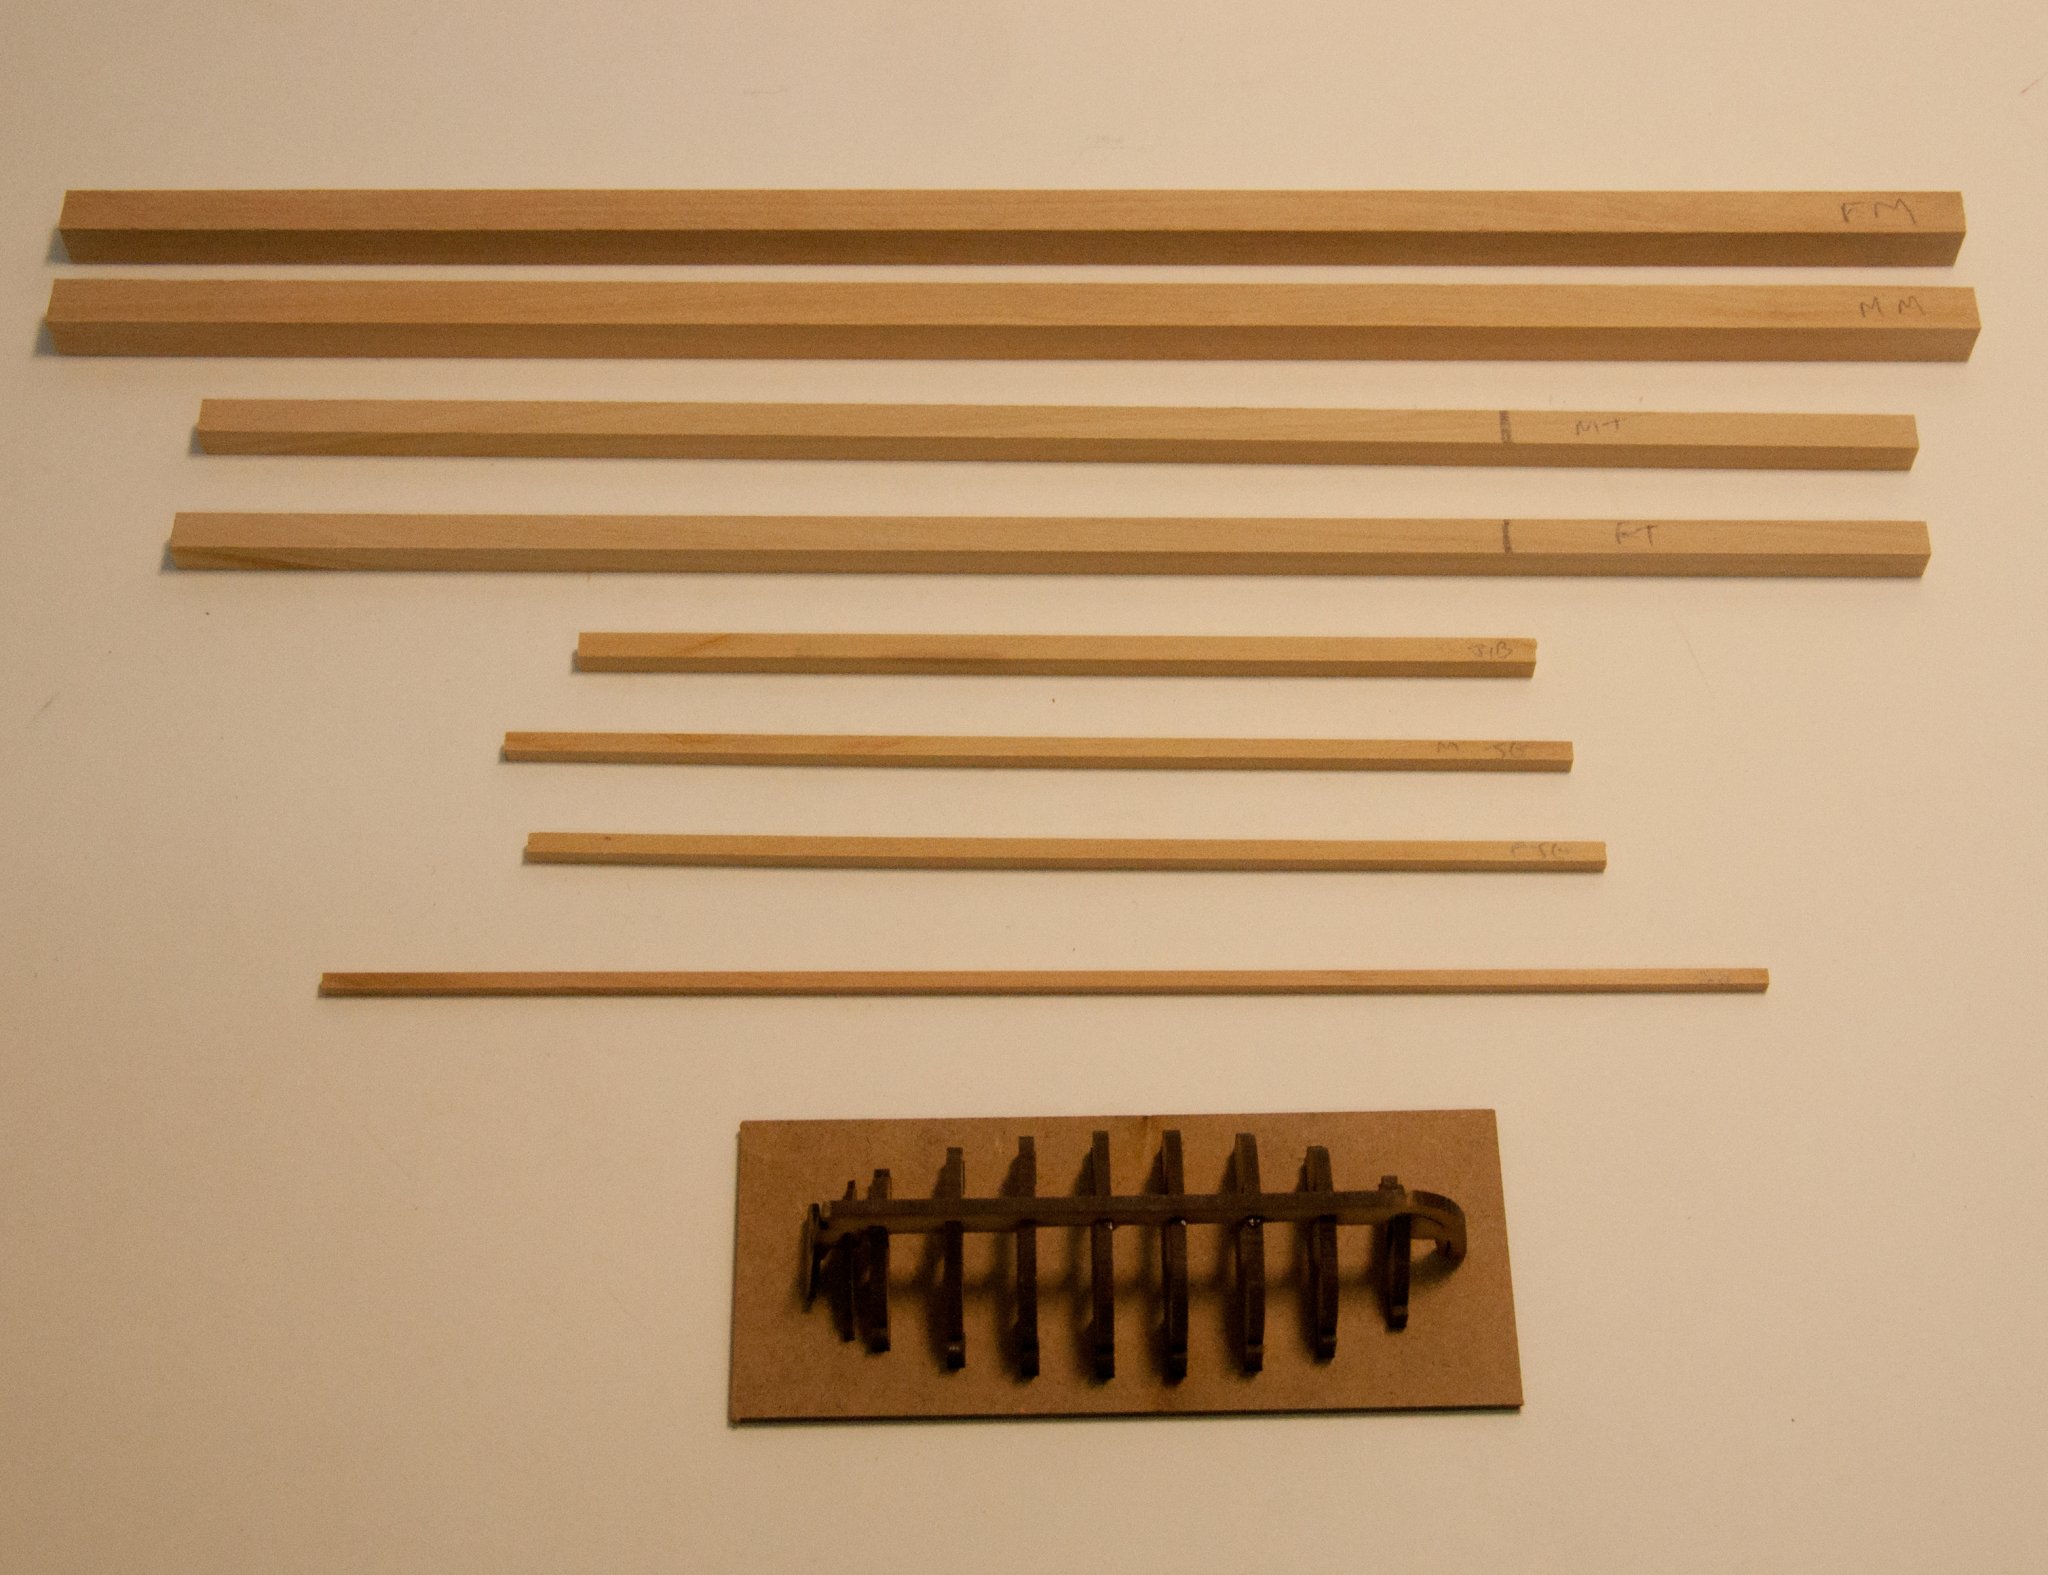
 I think I’ll next try to write a post on what I’ve learned on ripping planks. I have the micrometer but in this instance it’s no help. I’ll expand on this later but I set the cut depth either with some brass gauges I have or in this case with one plank already cut the proper width between the blade and the fence snugged up tight, but no so tight I can’t pull it through. Step one is having a great saw with the right blade - In my opinion the Byrnes saw has no peer. Though I’m new to ripping planks, I’ve had this saw for ten years and used it for countless things in building my models.
- 778 replies
-
- 7
-

-
- cheerful
- Syren Ship Model Company
- (and 1 more)
-
Thanks Rusty, I’ve been helped by so many others myself, including you in my plank ripping education.
- 778 replies
-
- 1
-
-
- cheerful
- Syren Ship Model Company
- (and 1 more)
-
Sometimes I worry I share too much...............
- 778 replies
-
- 5
-
-
- cheerful
- Syren Ship Model Company
- (and 1 more)
-
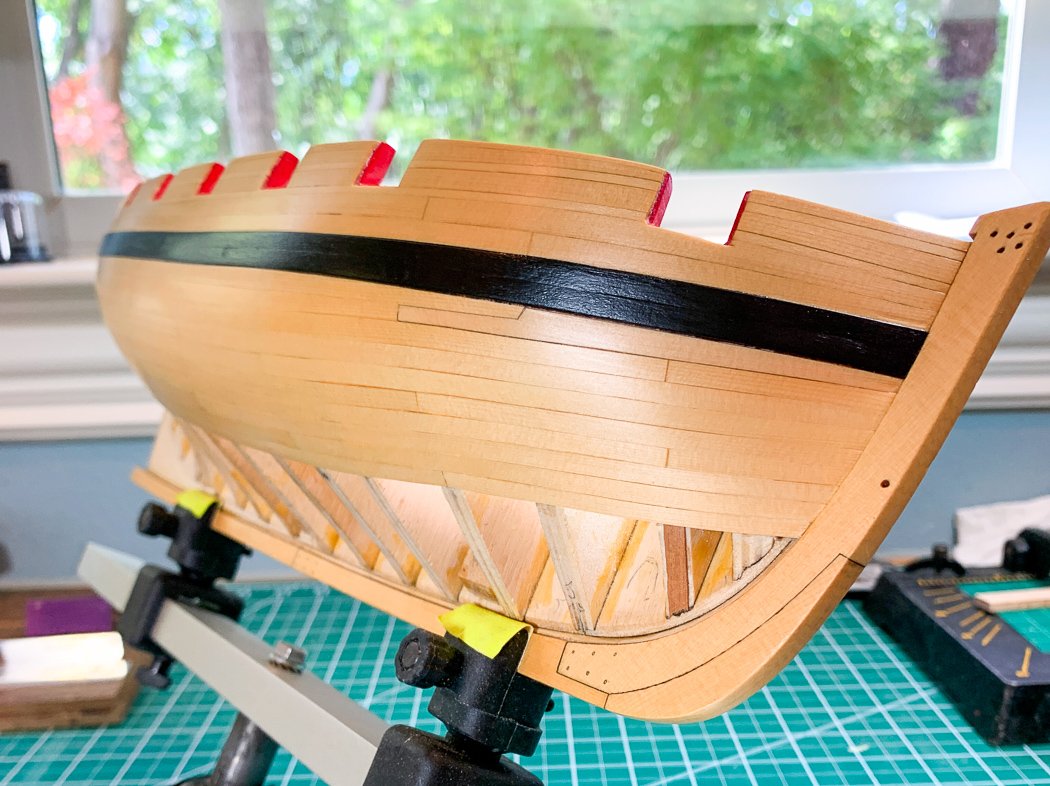
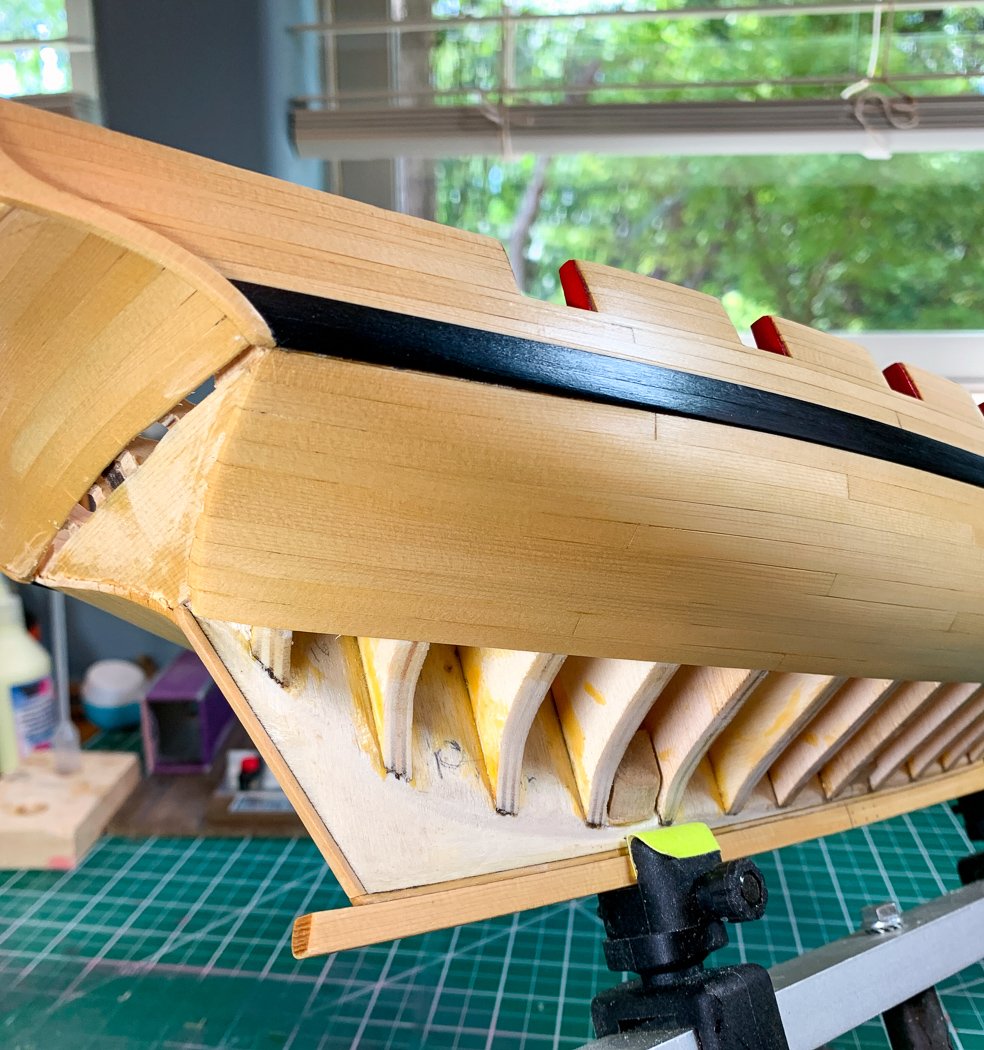
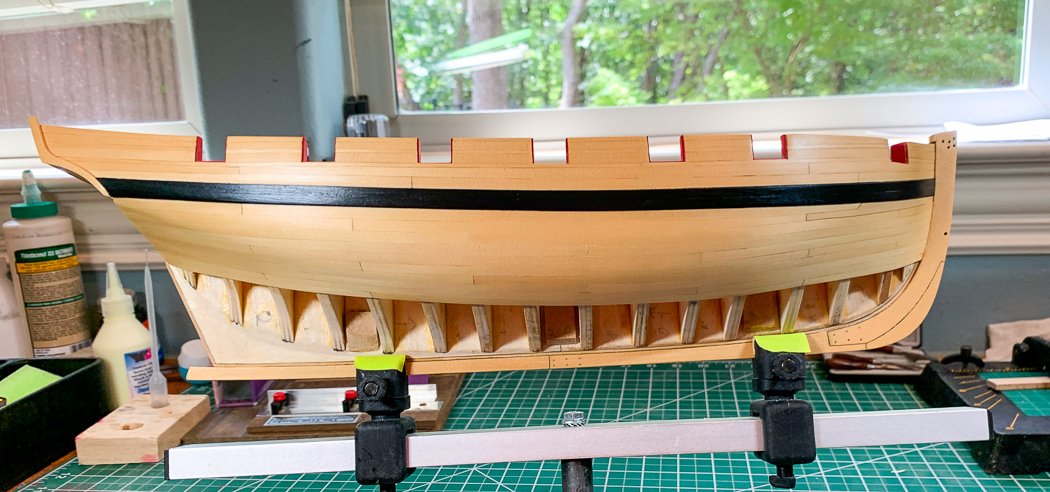
In my last post I said if my model had 3 sides the third side would be better. Turns out I elected to prove that point. After finishing the port side I looked to finish the remaining 4 rows on starboard. I was already concerned because I had a thin spot where I had over-sanded. I looked, thought about it, looked some more, shook my head a few times, looked again, thought about it. Then ripped off the whole side (after doing two more rows, only two from being finished) all the way to the bottom of the wales, including those first two rows I’d put on multiple times already. So I did the starboard side again, all 10 rows including the drop plank (which fortunately Chuck provides a couple of extra). I’m much happier with the result, I will not be seeing if I get better if my model had four sides. There are still imperfections, but I’m wrapping that up as character and the acceptance that as I am an imperfect person, so then should be my ship. Here, at least for me, is what I found made the difference. It may seem small but in my work I found it to be important. First, as I mentioned at the beginning of the log I had no experience ripping planks prior to starting Cheerful. Now with the help of others and doing a lot of it I’ve gotten better. The key difference now is I can rip planks a consistent thickness. I’ll show what my steps are in a future post. It’s not that they were wildly different in fact all measured 3/64th with my digital caliper. But as I mentioned the difference in millimeters ran from about 1.18 - 1.32. Clearly that’s not much but it meant more sanding to get them evened up, hence the thin spot. Secondly, I determined I was happiest with thicker planks. With plank bending the thickness wasn’t a problem - so I cut a batch of about 48 planks (enough for the remaining rows on the bottom too) at about 1.38. - almost 1/16th thick. With them all being much closer to the same width and thicker I got better results with much less sanding. This is probably because I’m just an average modeler and certainly because in my life I’ve now single planked three sides of a ship, but it’s what worked. This may all seem obvious to most, my discovery is that if I’d only measured it using imperial, they were all 3/64ths, perhaps my digital caliper may not be as precise in imperial as it should be. By cross checking that in millimeters, and the variance in thickness that showed, sent me on an unrecoverable need to start the starboard side over. And here I am. I’m really hoping I’ve solved this. It would be much more difficult to rip off the bottom rows, I don’t want to do that again. In case you’re wondering - it wasn’t fun. Now I get to figure out why a square tuck is actually a triangle - this may take a while. Oh, and I’m going to need more 3/16ths wood for the deck…:-)
- 778 replies
-
- 19
-
-
- cheerful
- Syren Ship Model Company
- (and 1 more)
-
Thanks! I appreciate you're remembering. I don't have an immediate need now but I'll try getting some to see how it looks. It would be nice to have a US source.
-
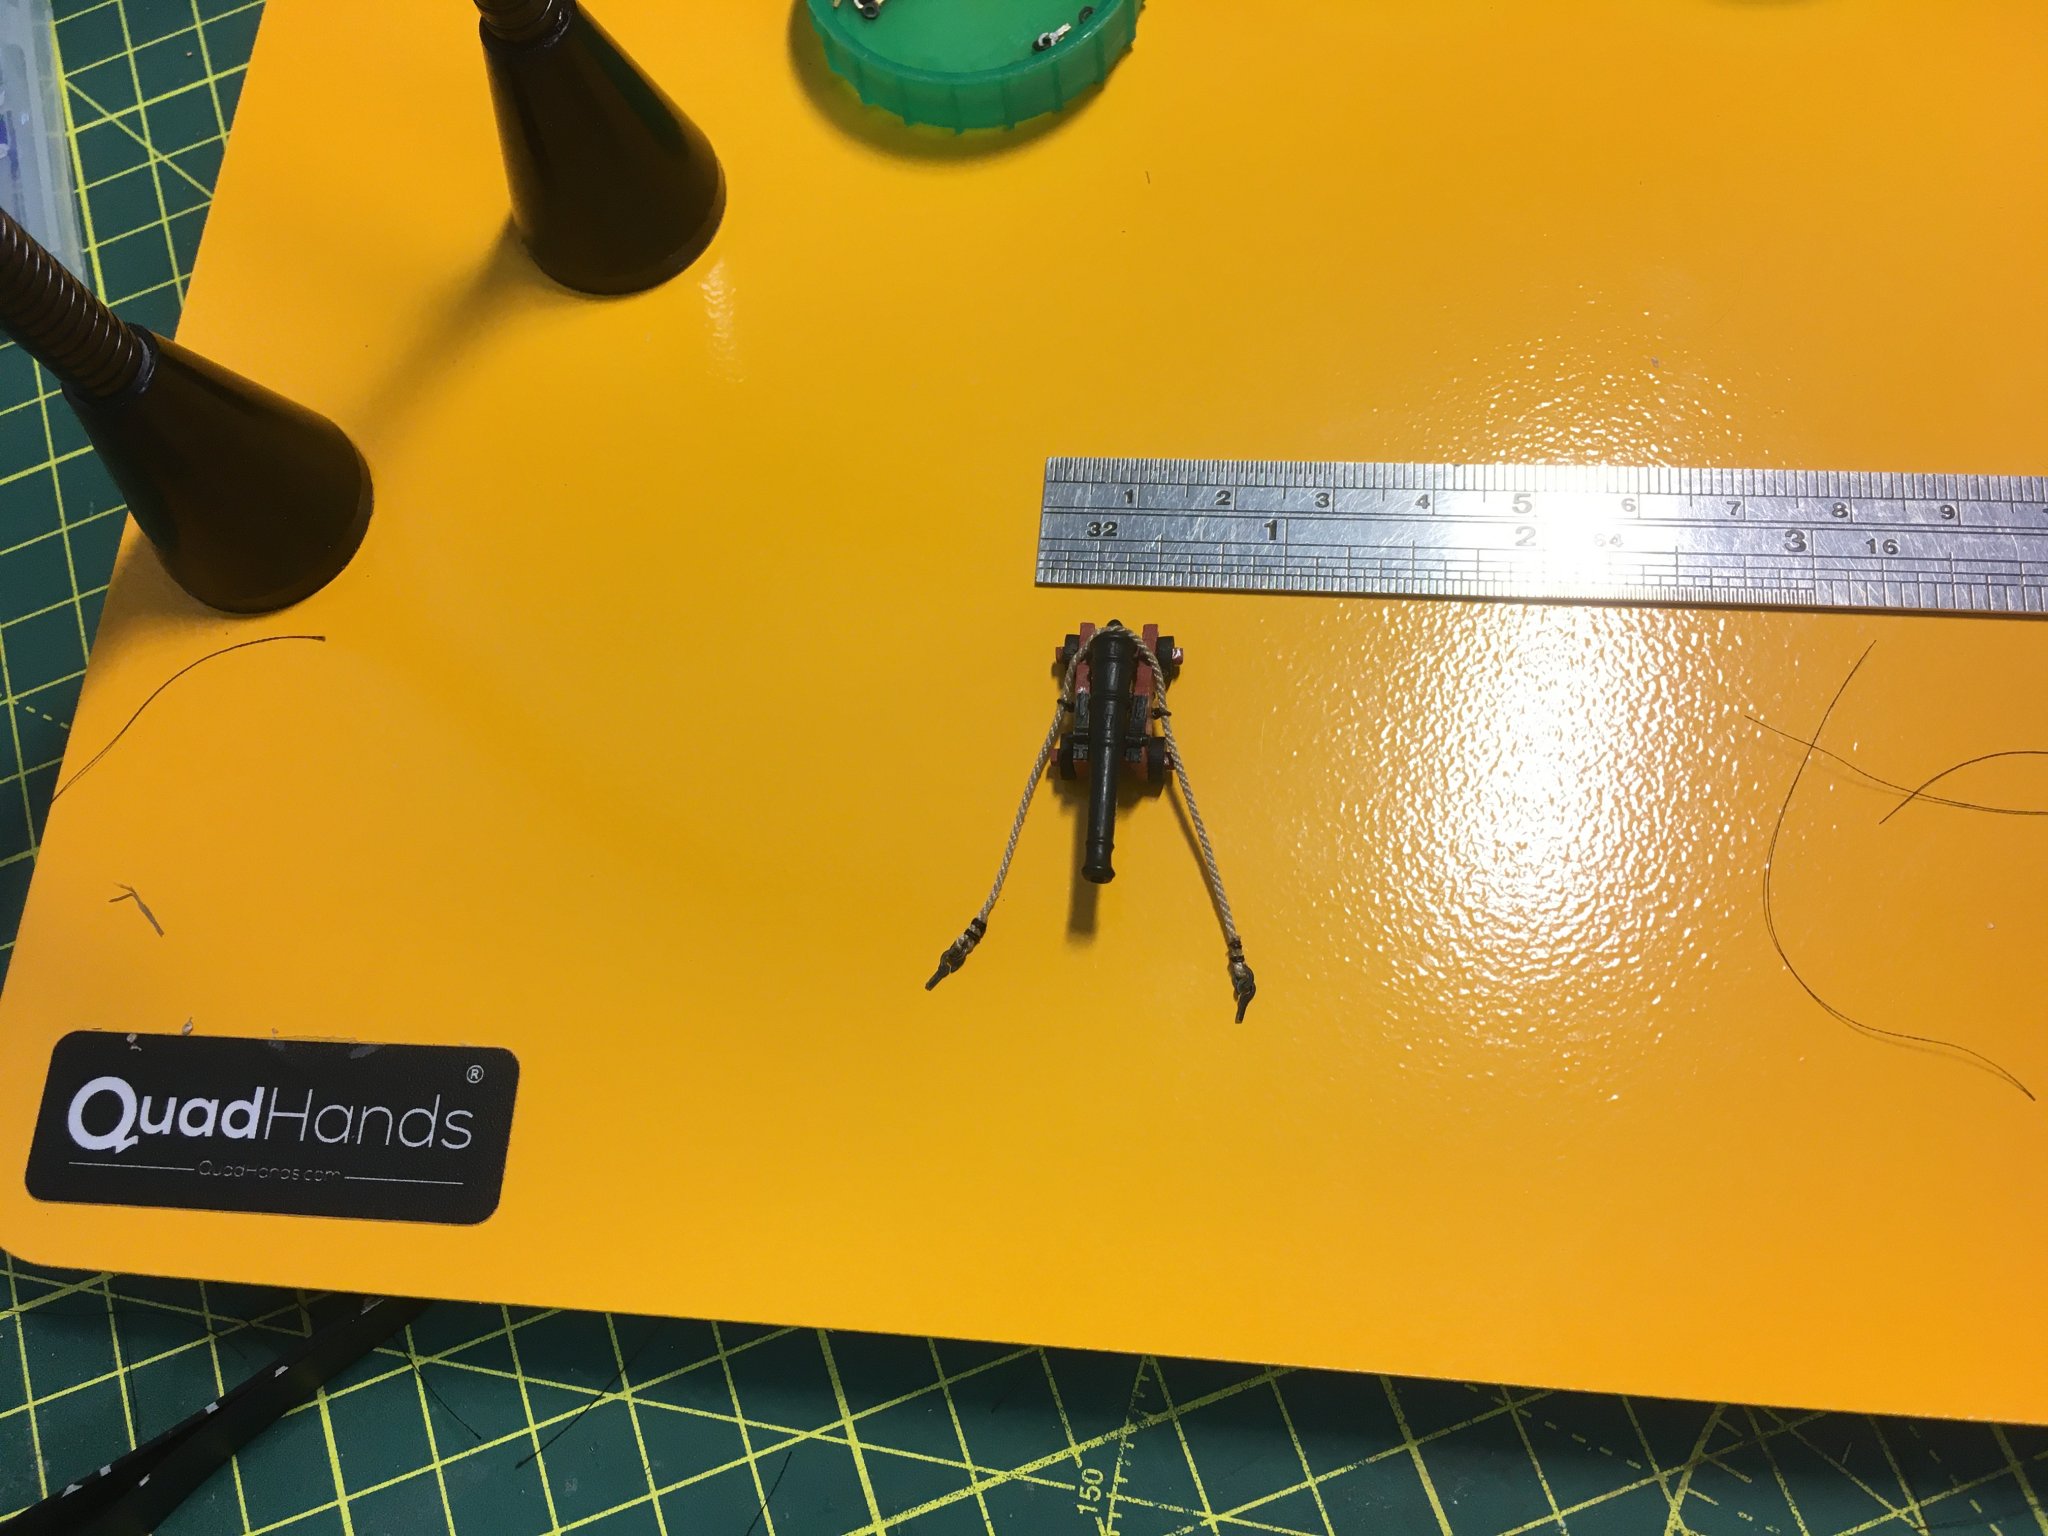
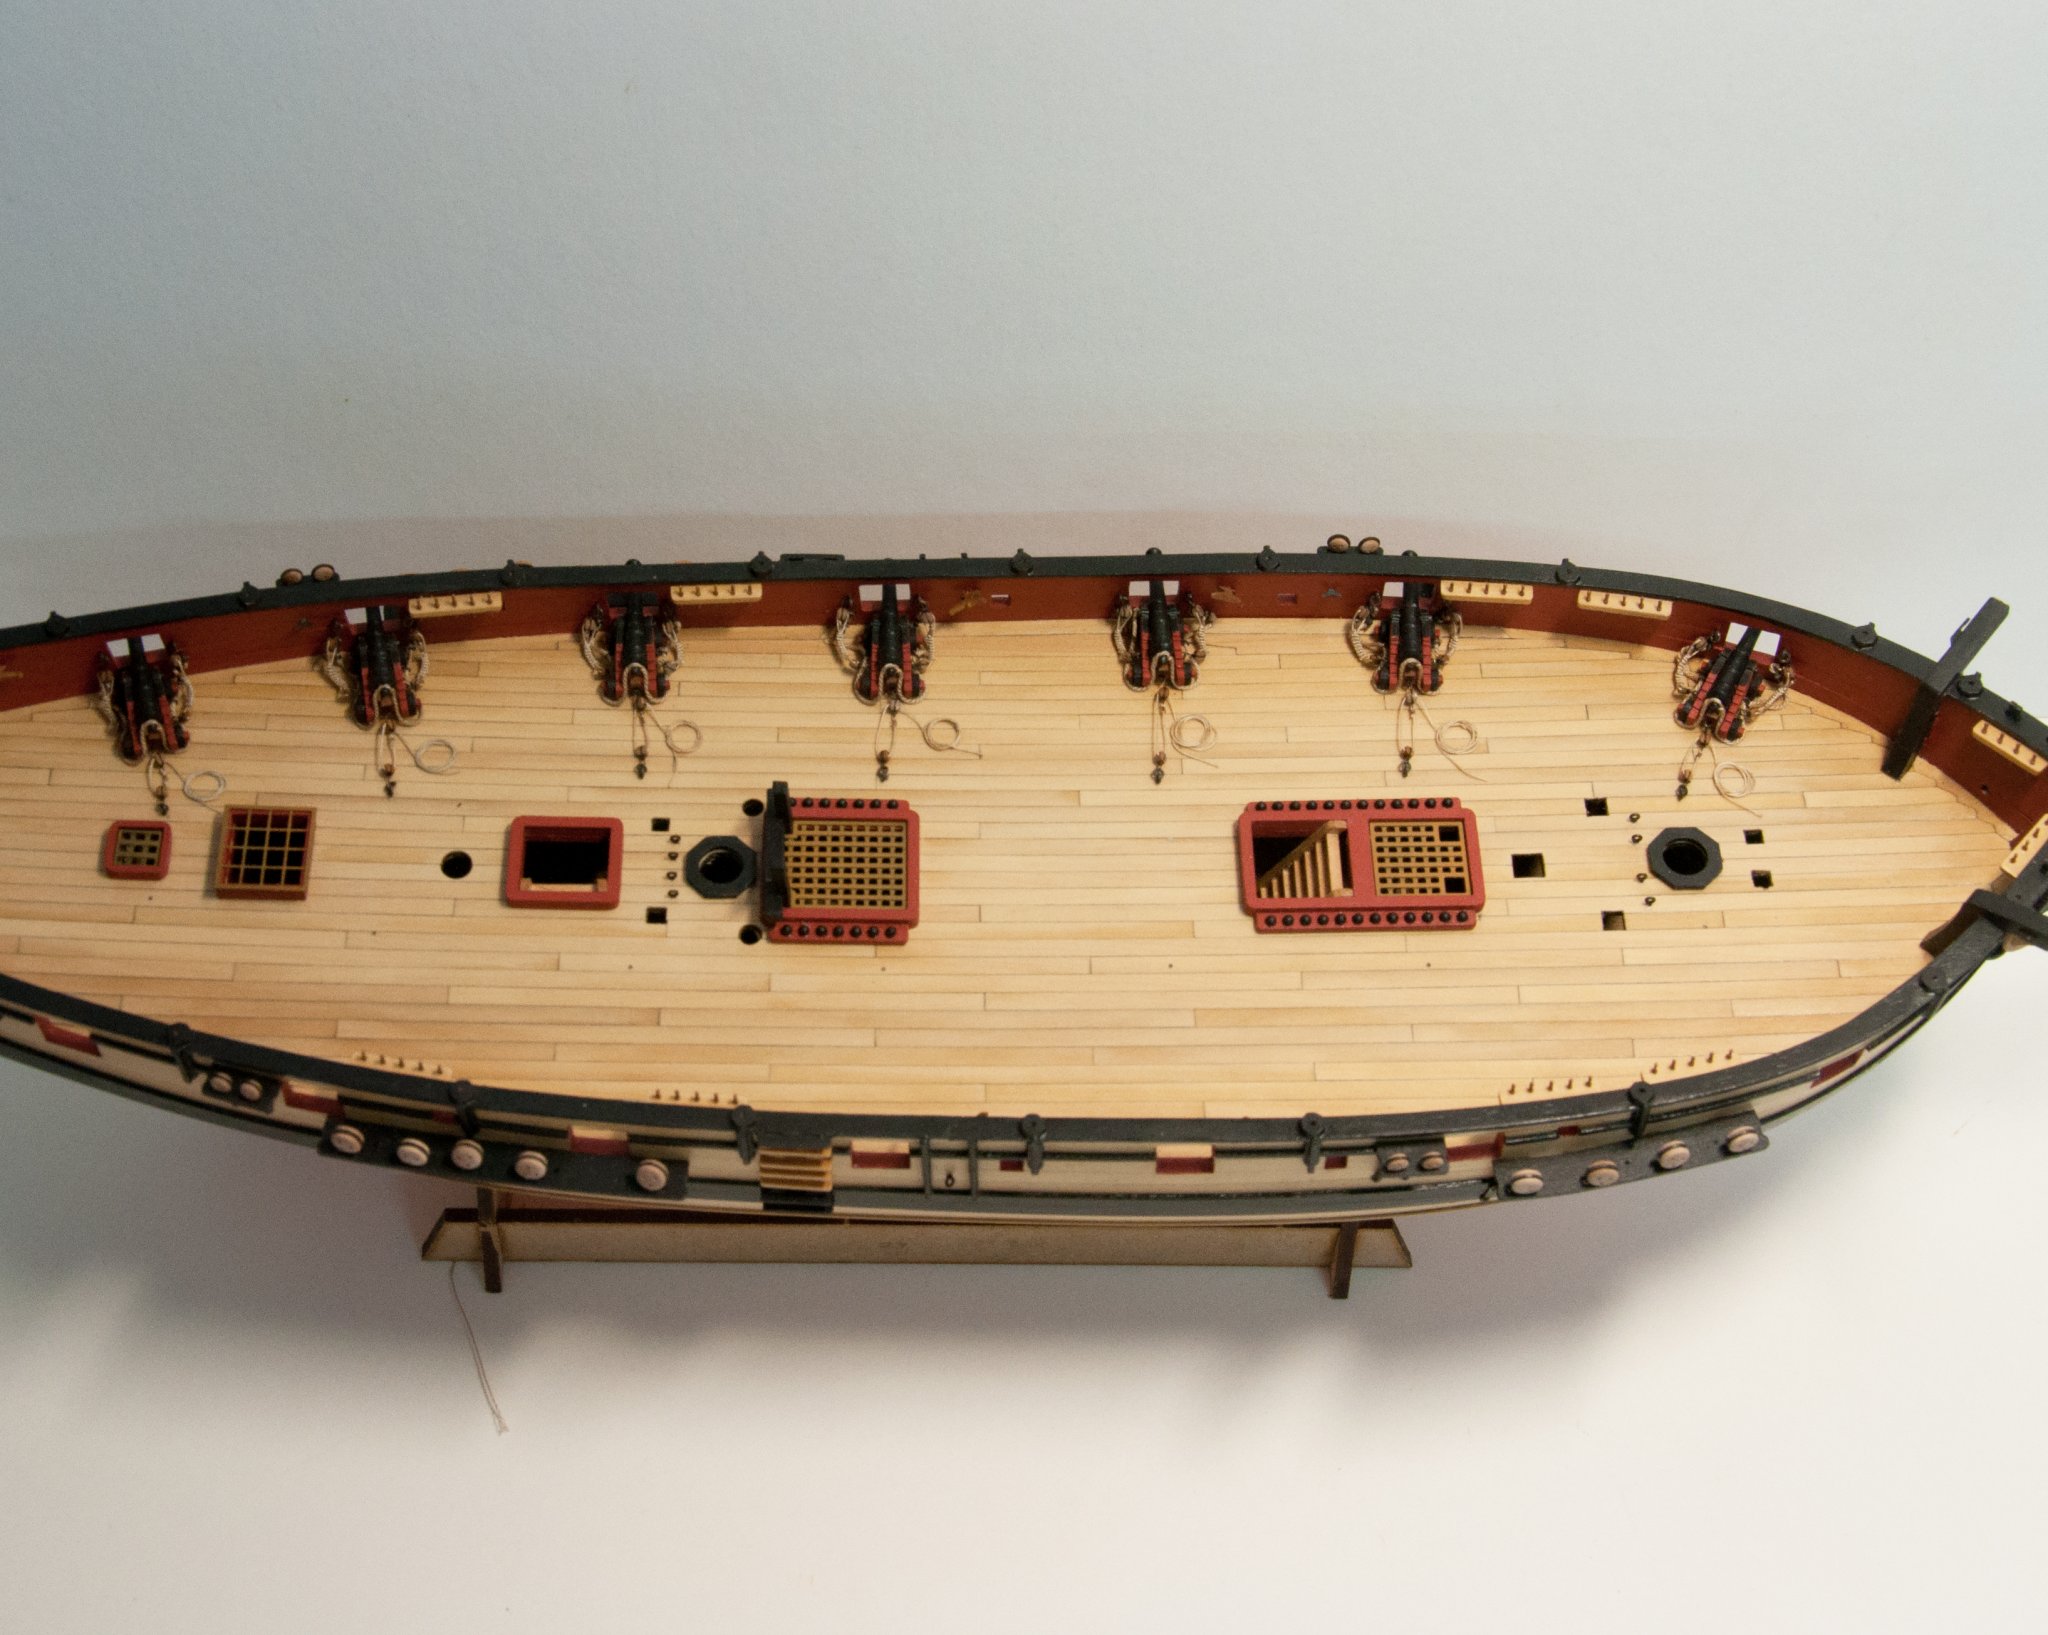
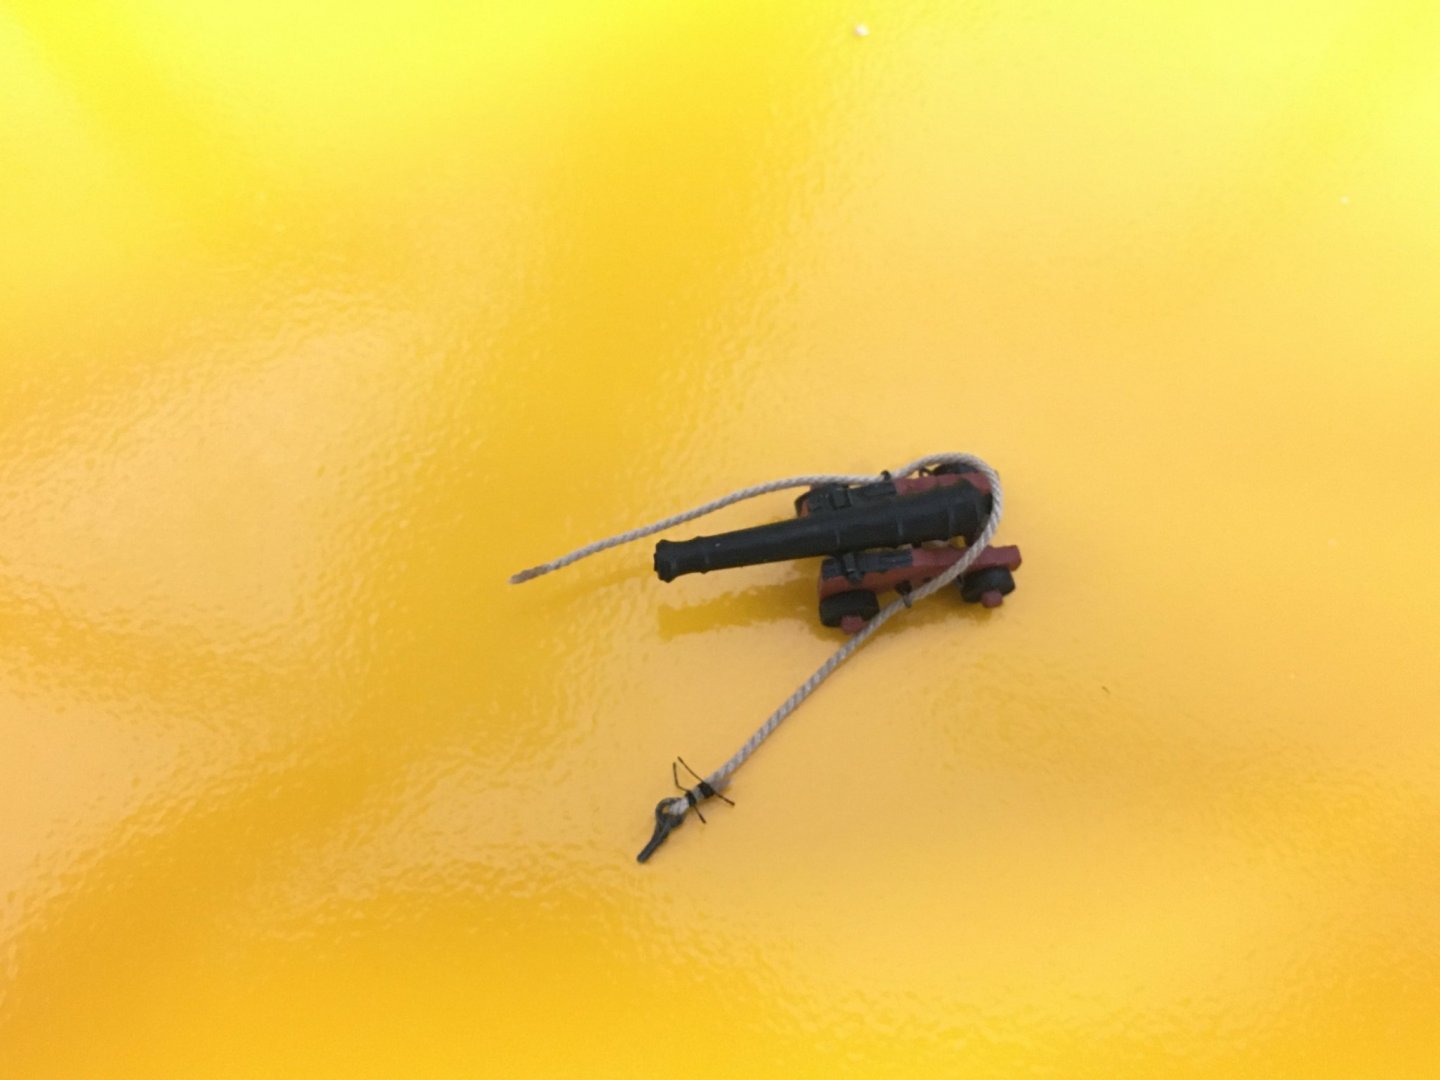
Thank you, it is one of my best results and took a couple of years to build (working almost every day), just the frames took 6-8 months. It was a semi-kit, I got the basics from Bob Hunt of Lauck Shipyards, but bashed it heavily with woods from Jeff of Hobbymill (I miss that guy) and other parts here and there. Unfortunately he sort of went under (he still sells practicums) and none of his ship models are still in production. Actually he sold the rights to some plastic modeling company then they never did anything with them. The cannon were my true test of no paint and no blackening, because that's kinda paint. I debated a while before leaving them just as they were. I appreciate your looking - and compliments from someone of your skill are appreciated.
- 725 replies
-
- 2
-
-
- vanguard models
- speedy
- (and 1 more)
-
.7mm 😊 I think the planking fan Chuck provides must take that into account somehow. It was surprising to me it comes out as well as it does. It isn’t perfect, I’m not that perfect in transferring them, but it’s close.
- 778 replies
-
- 2
-
-
- cheerful
- Syren Ship Model Company
- (and 1 more)
-
Which is why they have so many new designs since you left, as in none. Whatever happened to HMS Surprise for example. I liked Caldercraft,...until their factory operative left 😂🤣
-
If you’re thinking about it at 2am, welcome to the obsessive modelers club I recommend planking your deck in the usual way, on the ship a plank at a time. Fit for one reason, but the bigger one is that edge gluing generally isn’t a good idea, hard not to wind up with glue stains You should try to true up the frame. Would putting thinner wood blocks close to the bulkhead frame do it? The way you have it, warping a bulkhead would likely cause an asymmetrical hull once it’s plank and a far less desirable look than the bow being off 1\16th. The bow being off that little probably won’t matter, definitely not as much as the hull not being equal. The rabbet at the keel should be enough that the first planking fits flush, but you’ll probably need to bevel the second planking to fit at the bow and keel. I’d leave the keel and stem on for planking but not the sternpost, much easier to run the planks bow to stern and cut them flush at the stern. The key step for the rabbit is at the stern. It needs to be thin enough so both first and second planking fit flush to the sternpost. Of course some of that is achieved by thinning the planks. Since you bought it used, if you haven’t already it would be a good idea to go through the parts list to make sure your not missing anything. I don’t recall any reference marks on my kit so I can’t help you there. I built this ship a long time ago, it’s a nice learning exercise, I hope you enjoy your build
-
I’m not at all precise about it. I soften the top back edge of the entire plank, beveling may be overselling it. I don’t put a hard 30 degree edge on it or anything, I find just rolling off the back edge works. I’m probably doing it wrong, but I don’t have any gaps and I would if I did nothing. I do check the fit as I go, the greater the curve (as in the roll of the stern, not the bow) the more the bevel. This plus the time bending a plank that almost lays to fit on its own before gluing has made a big difference for me.
- 778 replies
-
- 3
-
-
- cheerful
- Syren Ship Model Company
- (and 1 more)
-
Nice work, I agree with everyone. What a great job for a first time build!
-
Amazon I already checked.
-
Dang it, now I have to buy another Vanguard model. 😂🤣
-
Hey Garthog, In the past I sorted guessed by where the plank stopped lying flush with the one above it, that’s still true but I’d often guess wrong by a few millimeters either way which led to an inconsistent curve, I was always catching up on subsequent planks. Lining the hull takes out the guess work. The tick marks showed bulkhead 6 is a full width plank but from bulkhead 5 to the bow the tick marks showed sequentially less than full width, hence the taper start point. That may change on the second, lower belt of 10 rows, another good reason for the two belts, but it was true of the top eight. I also found by starting the taper at the same point, bh 6, I kept a nice curve. Not sure if that’s true for every model, but it is for Cheerful, the tick parks supported that. I am not perfect on my cuts. Every other plank I recheck the distance (in mm) from the last plank to the bottom tick park, my original tape mark for row 8, and divide by the number of remaining planks. Just me validating the tick marks, the measuring is more precise than just the pencil mark, a little perfectionist overkill probably. It doesn’t change the width of the plank at the bow much but it does some, it’s better to adjust as I go than to have a very wide or skinny plank 8. I really like this method. It’s tedious to do all the prep but it pays off. Hope that helps.
- 778 replies
-
- 7
-
-
- cheerful
- Syren Ship Model Company
- (and 1 more)
-
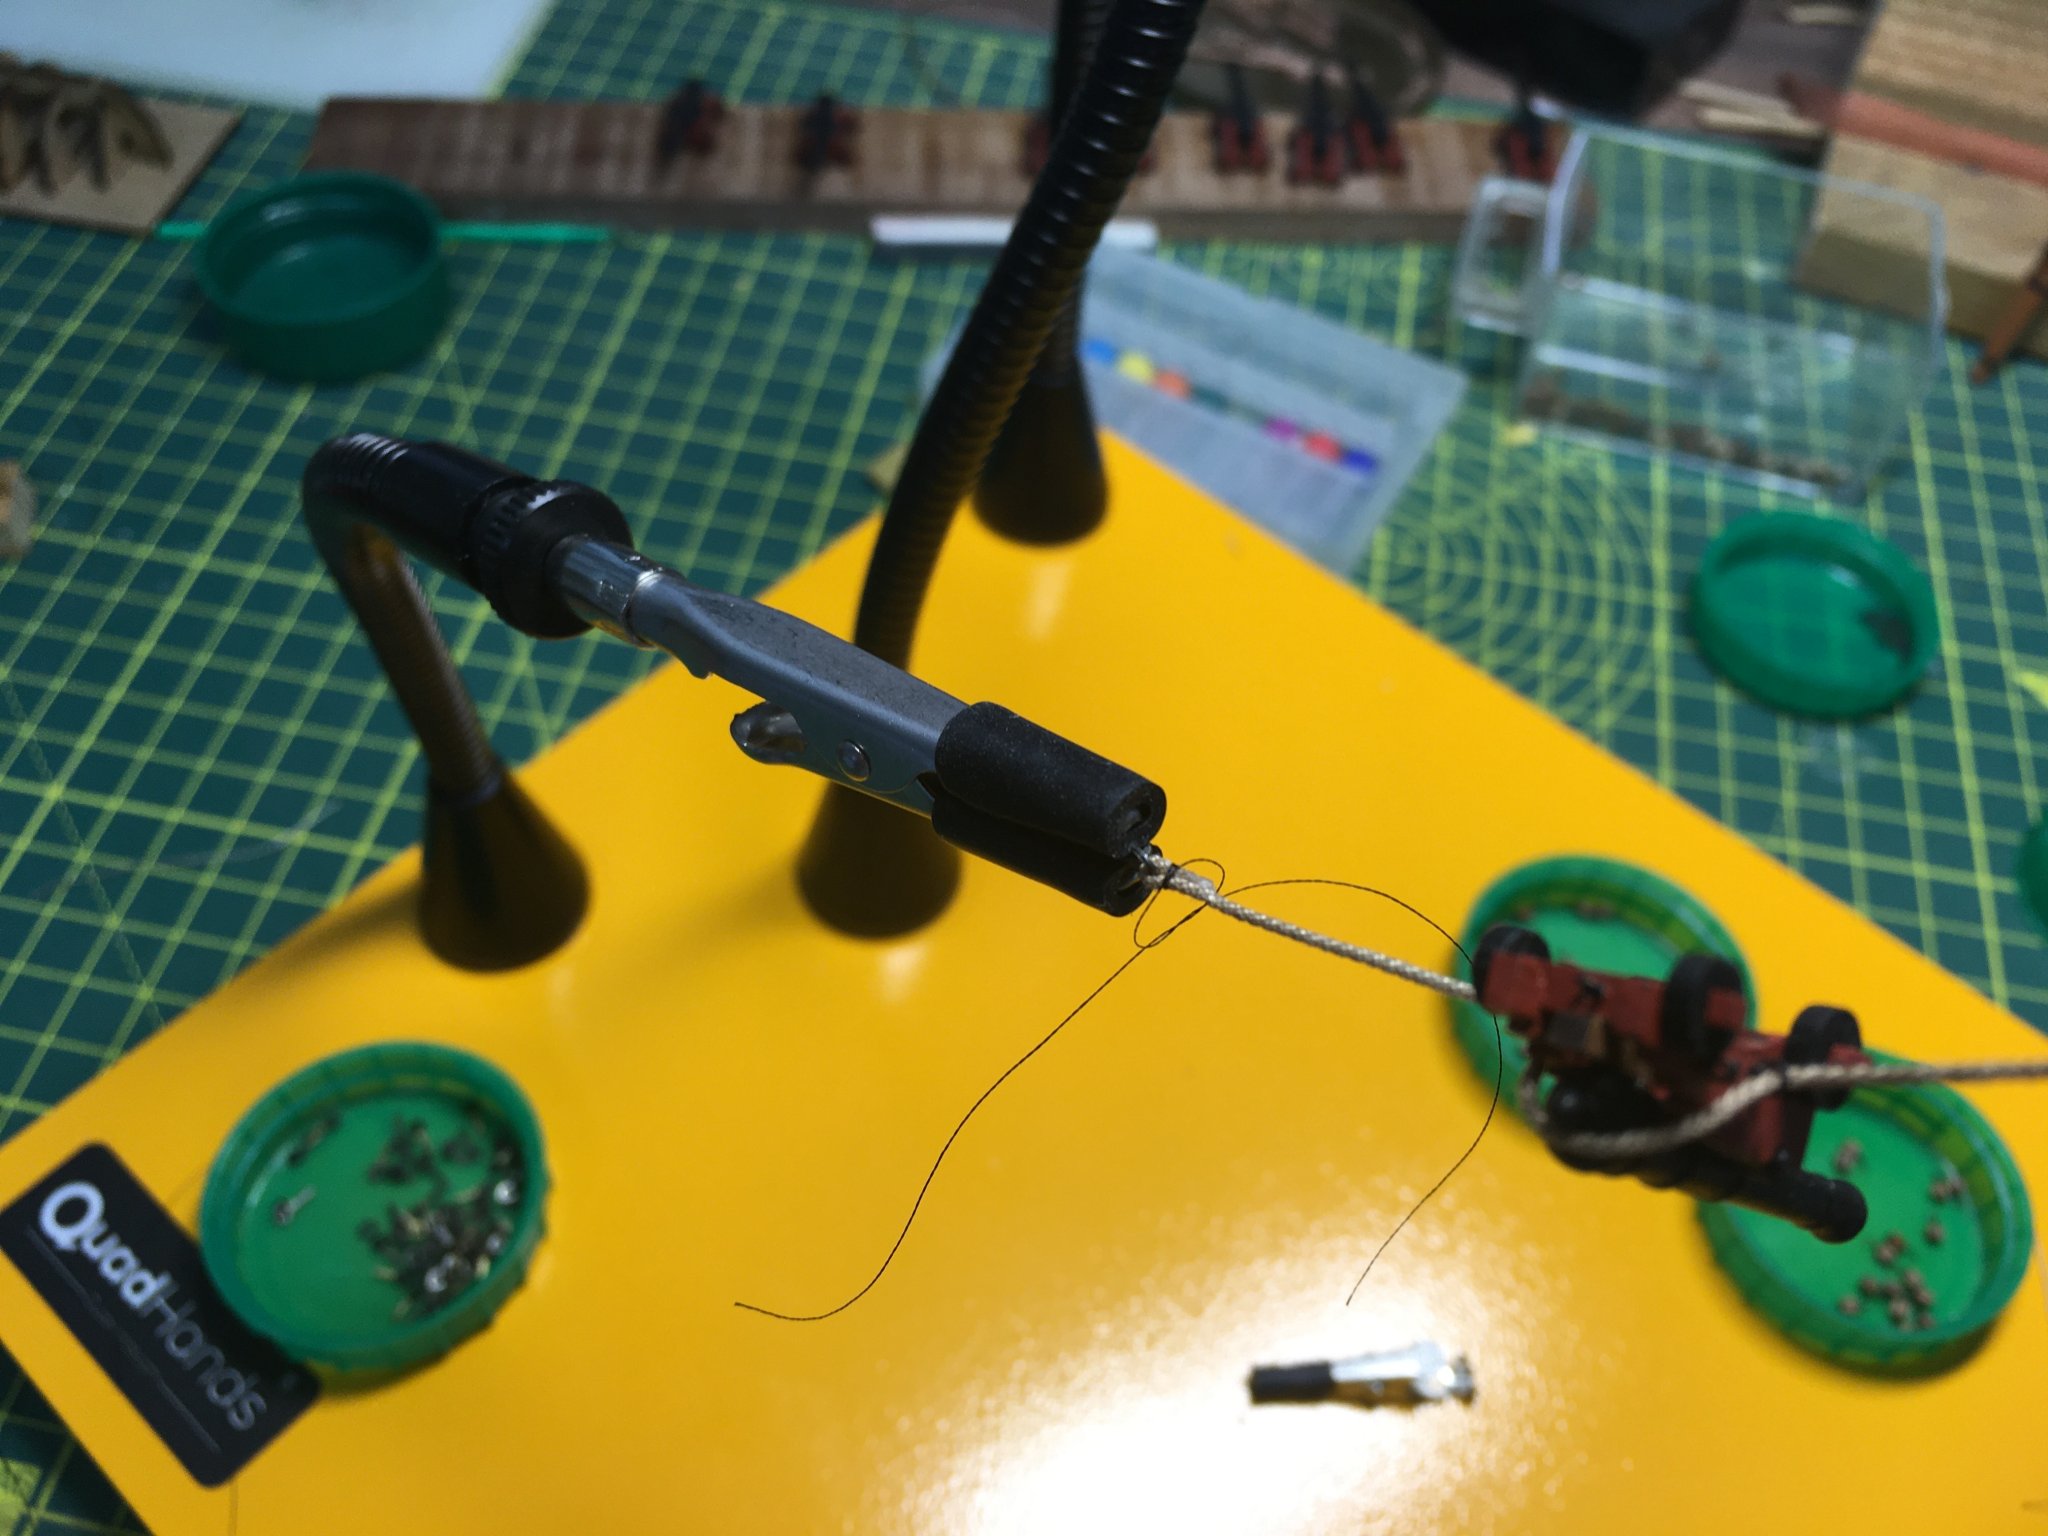
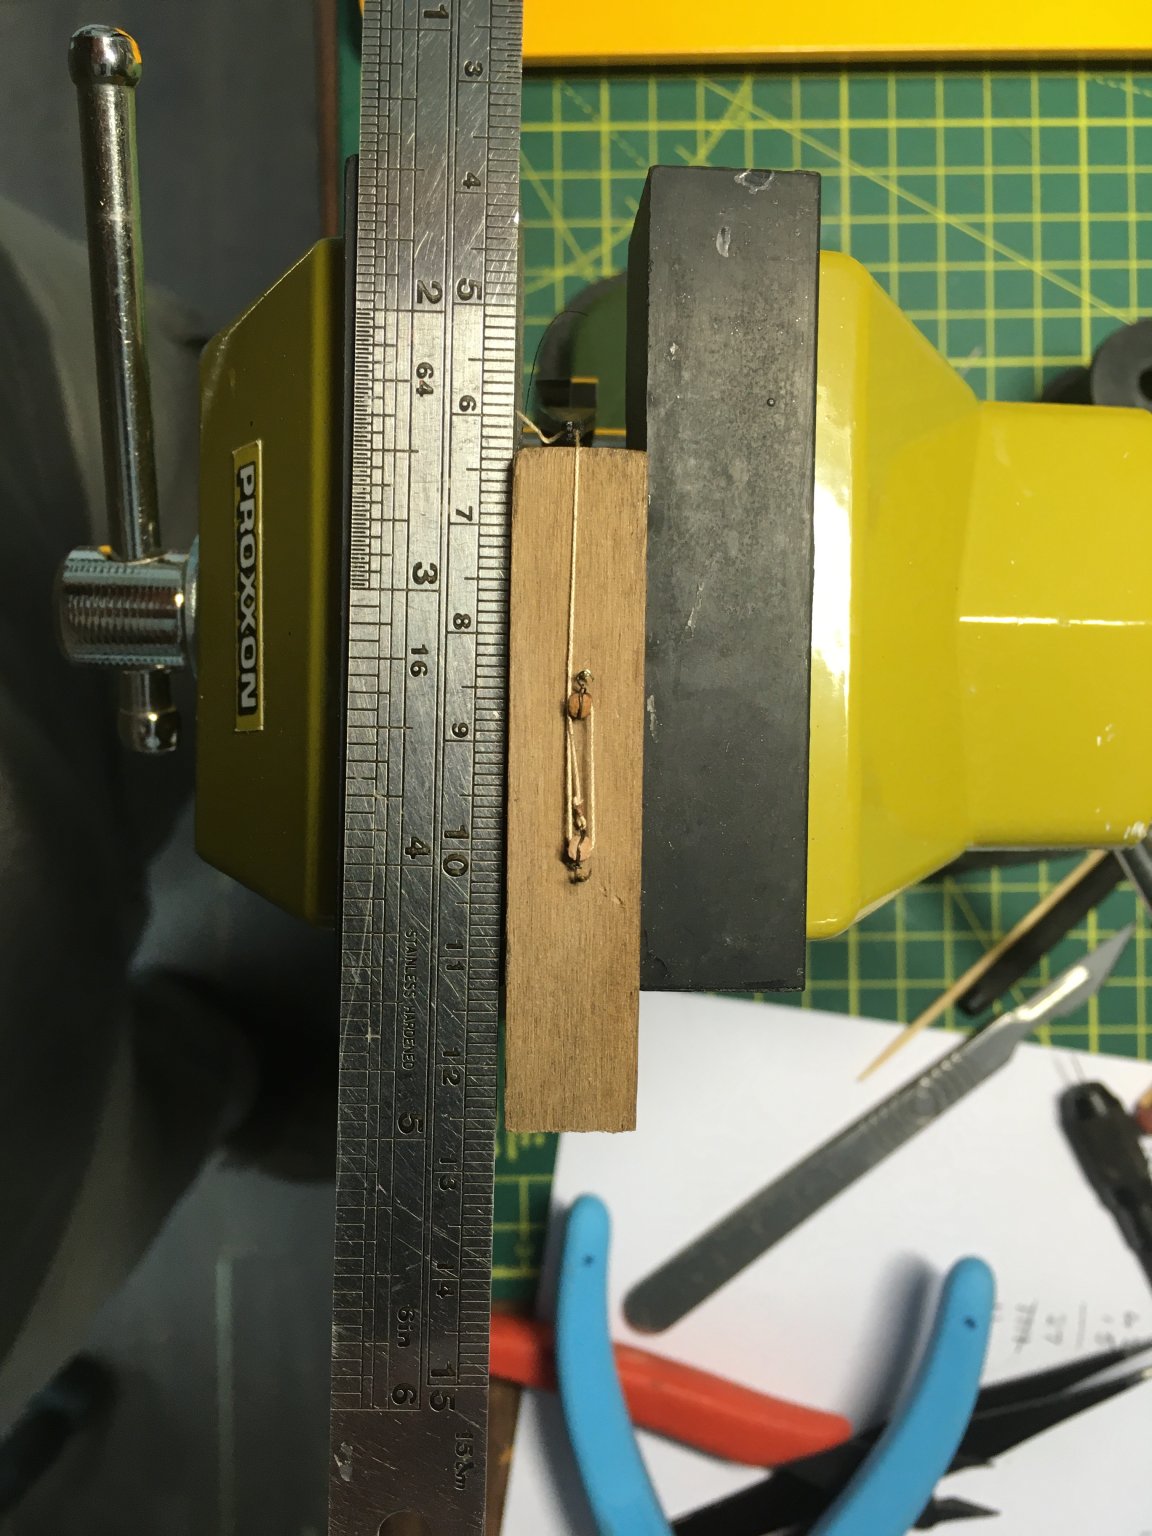
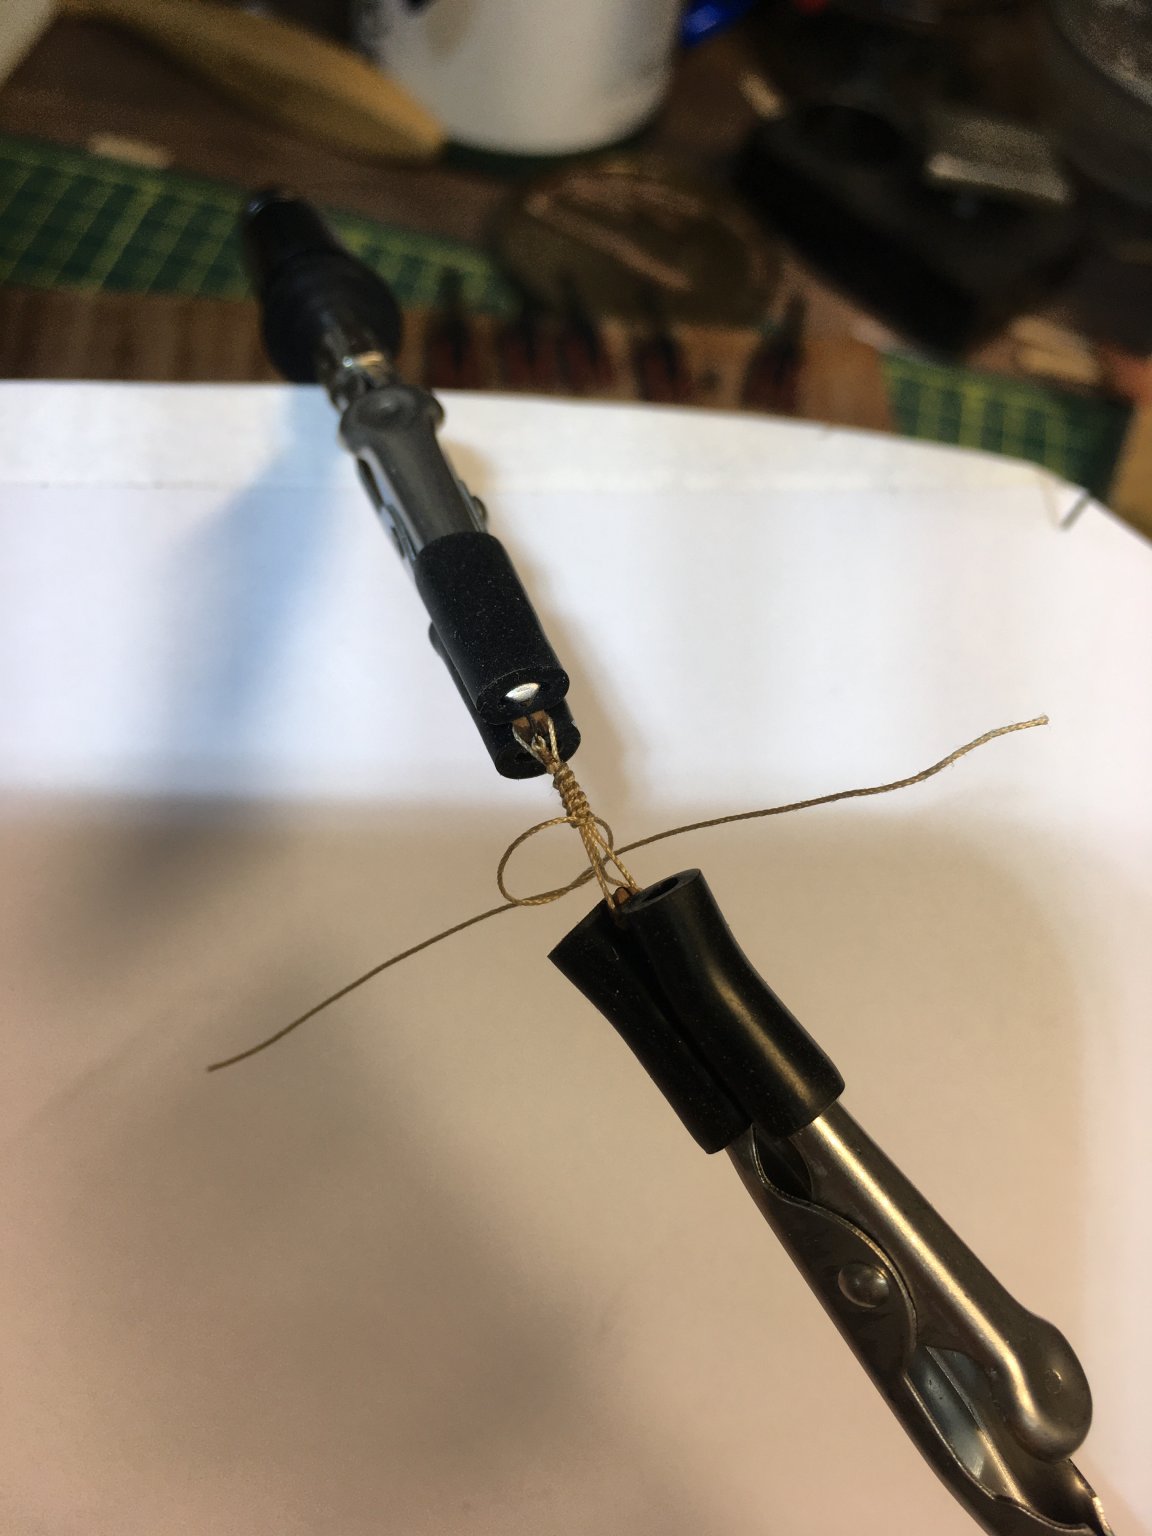
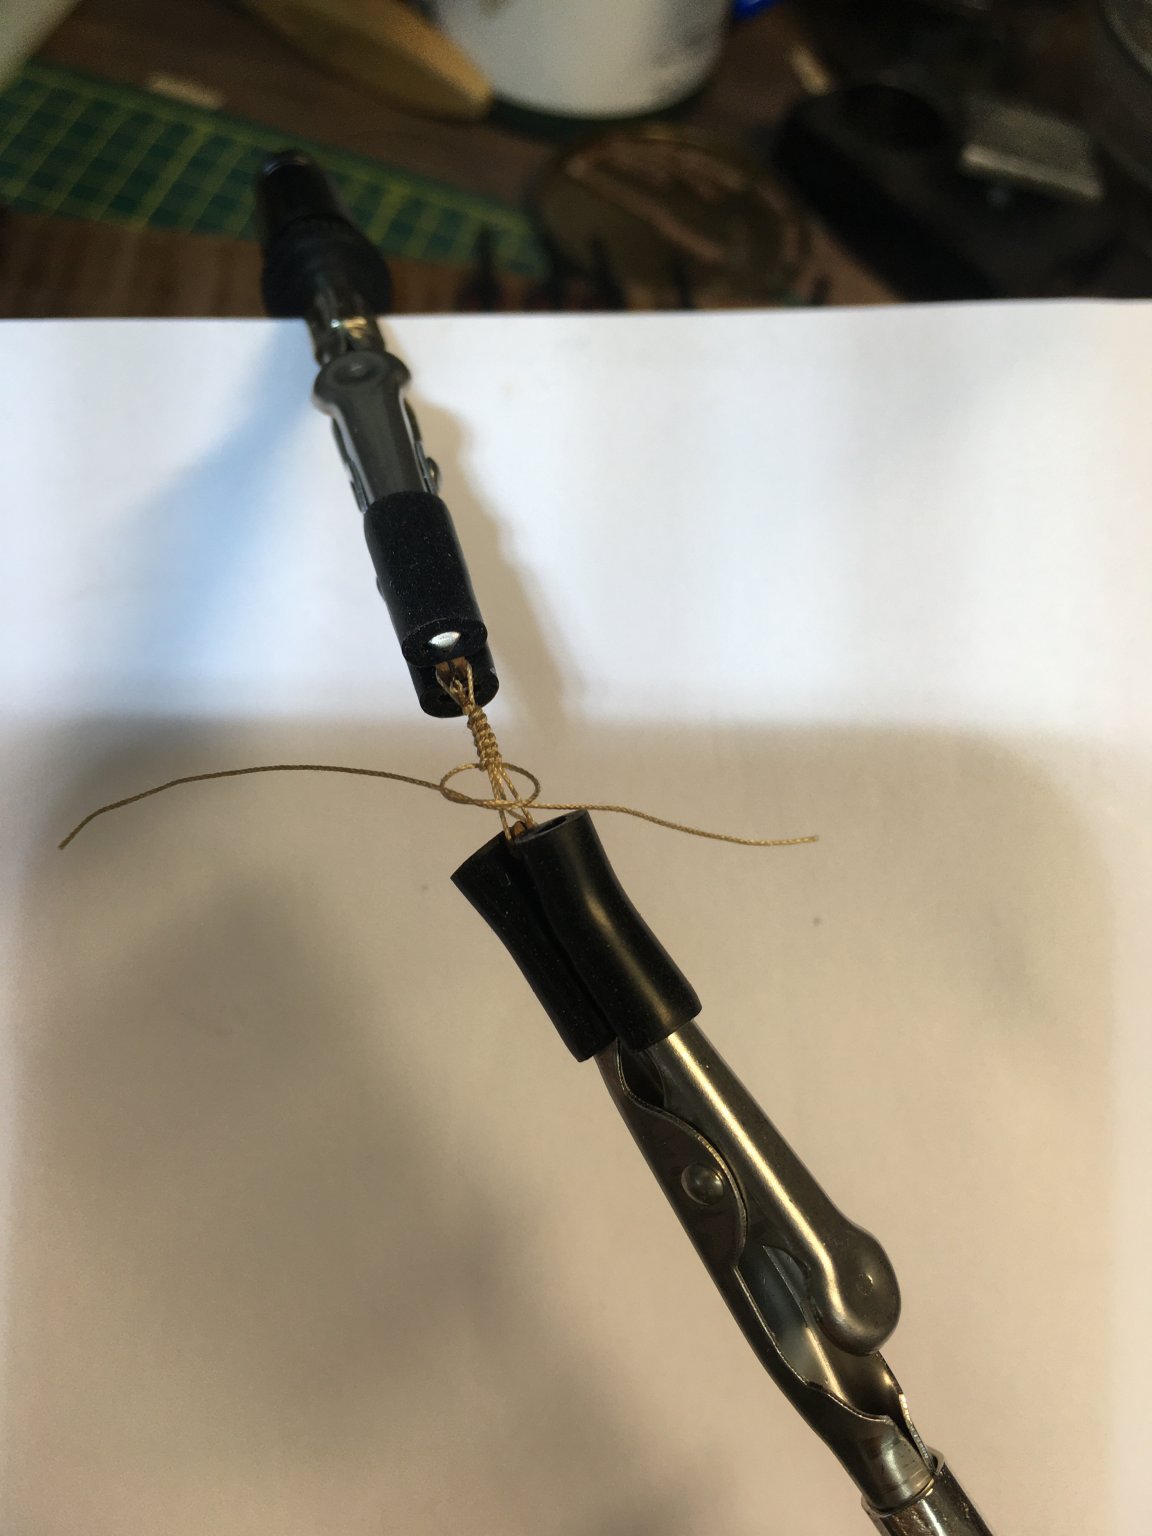
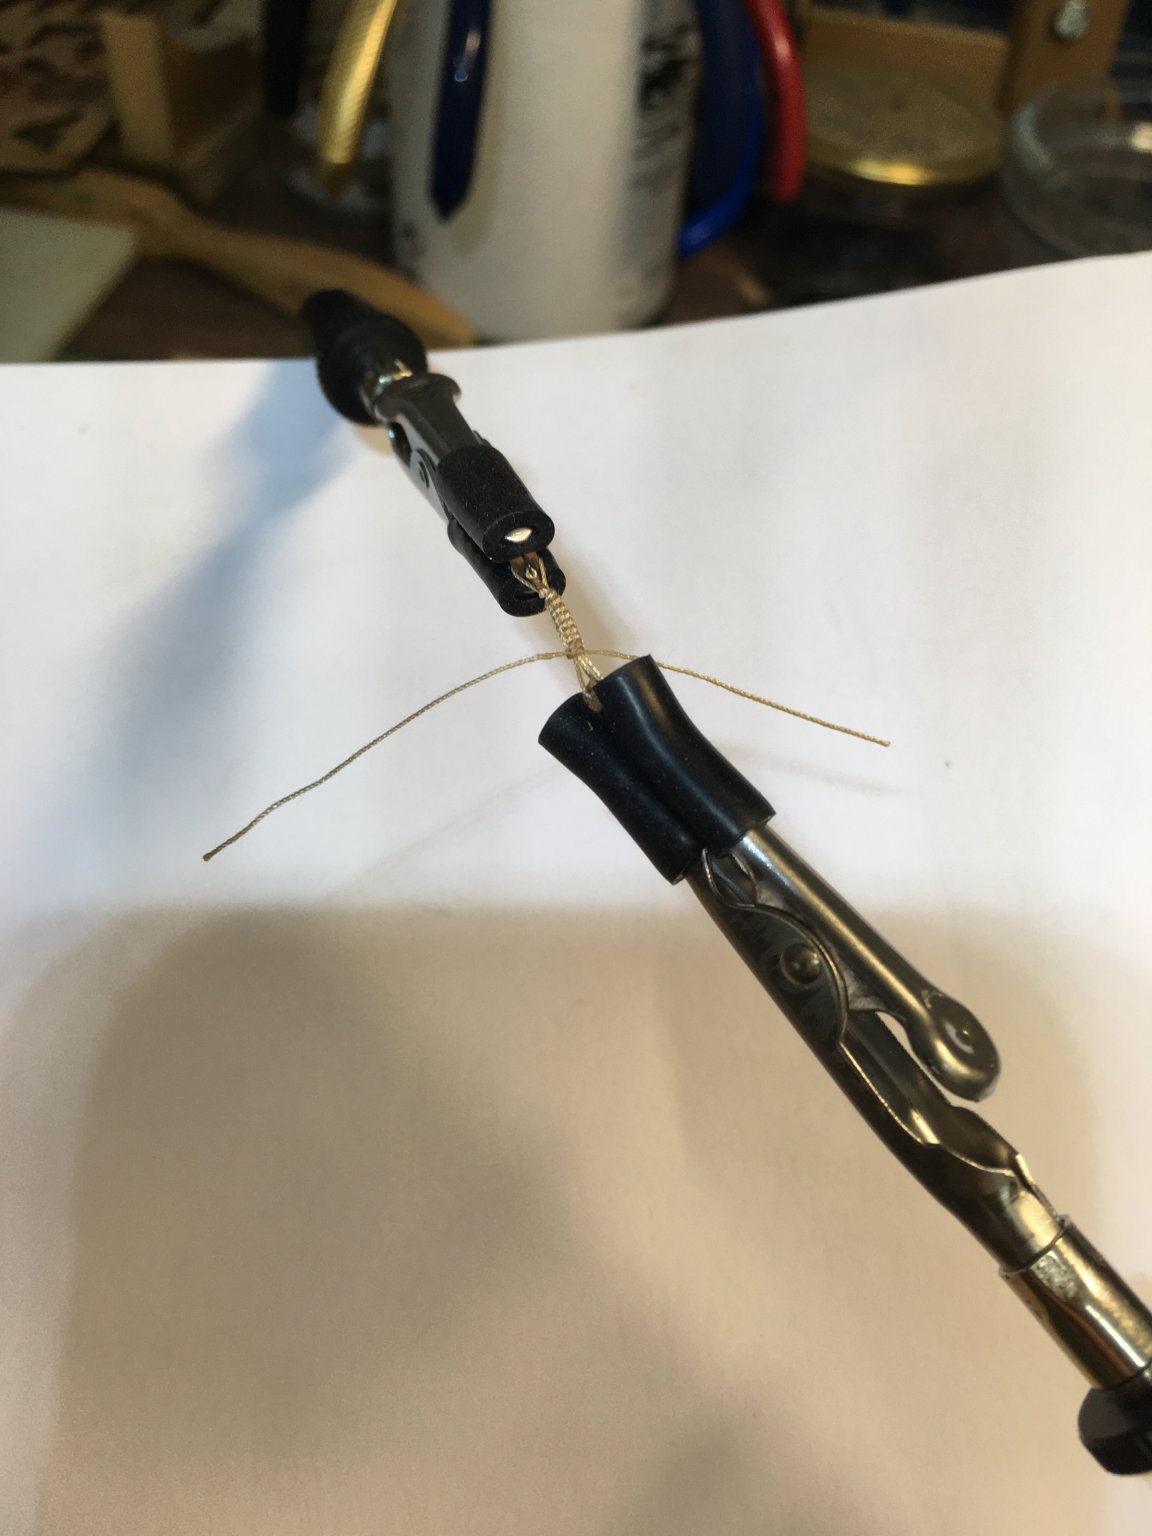
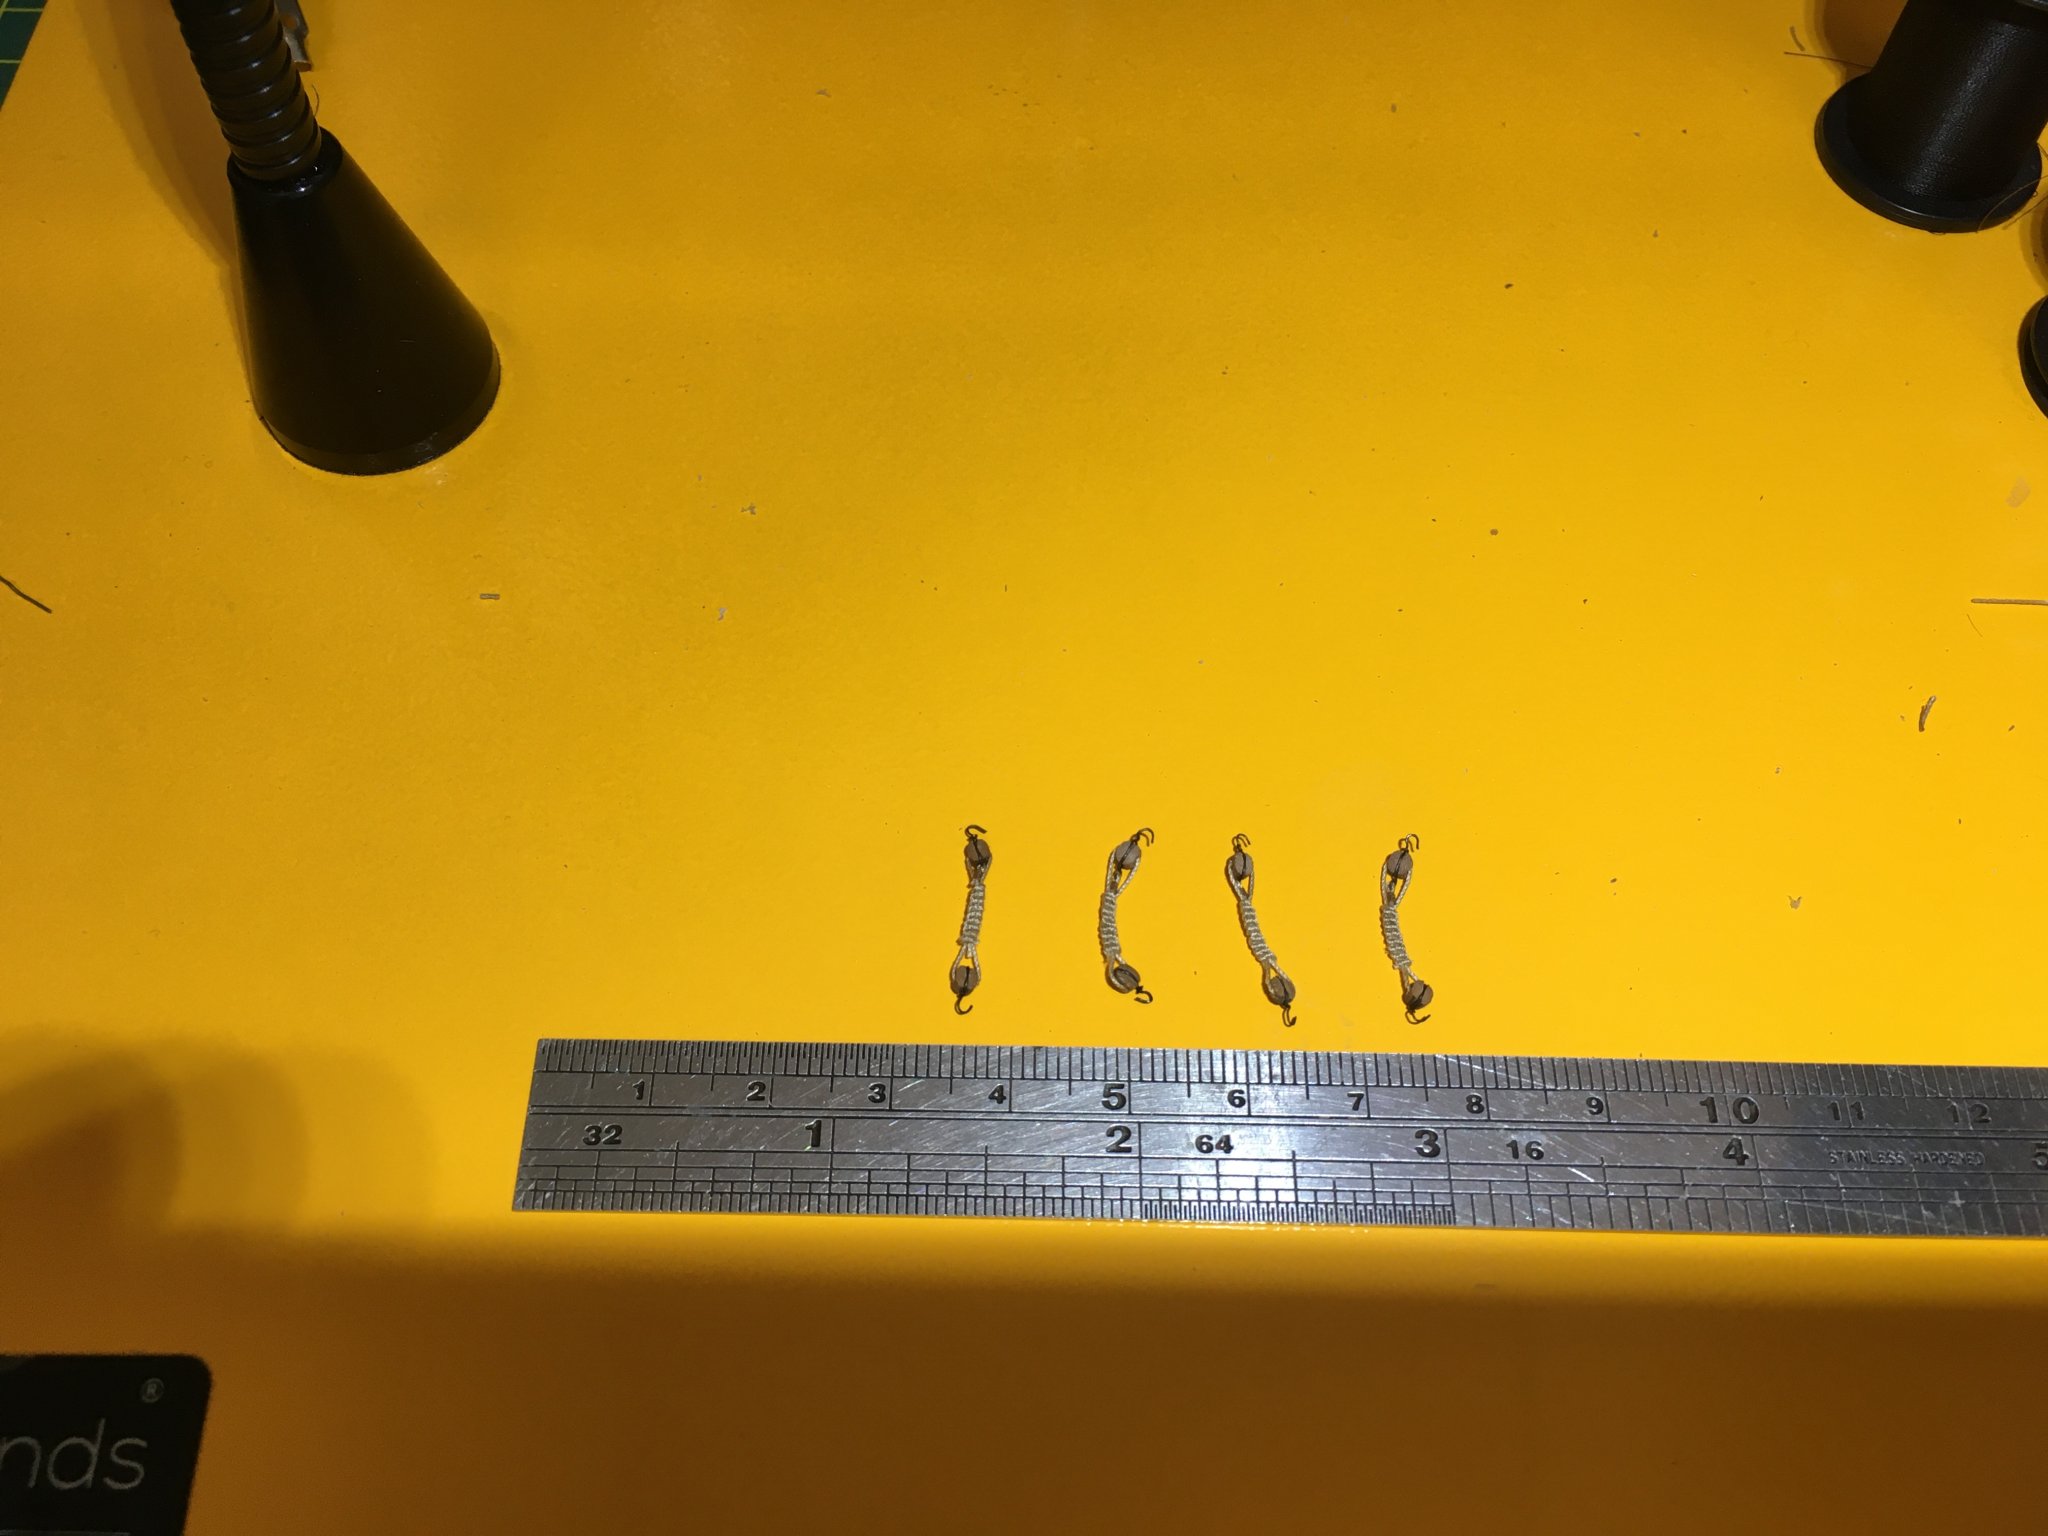
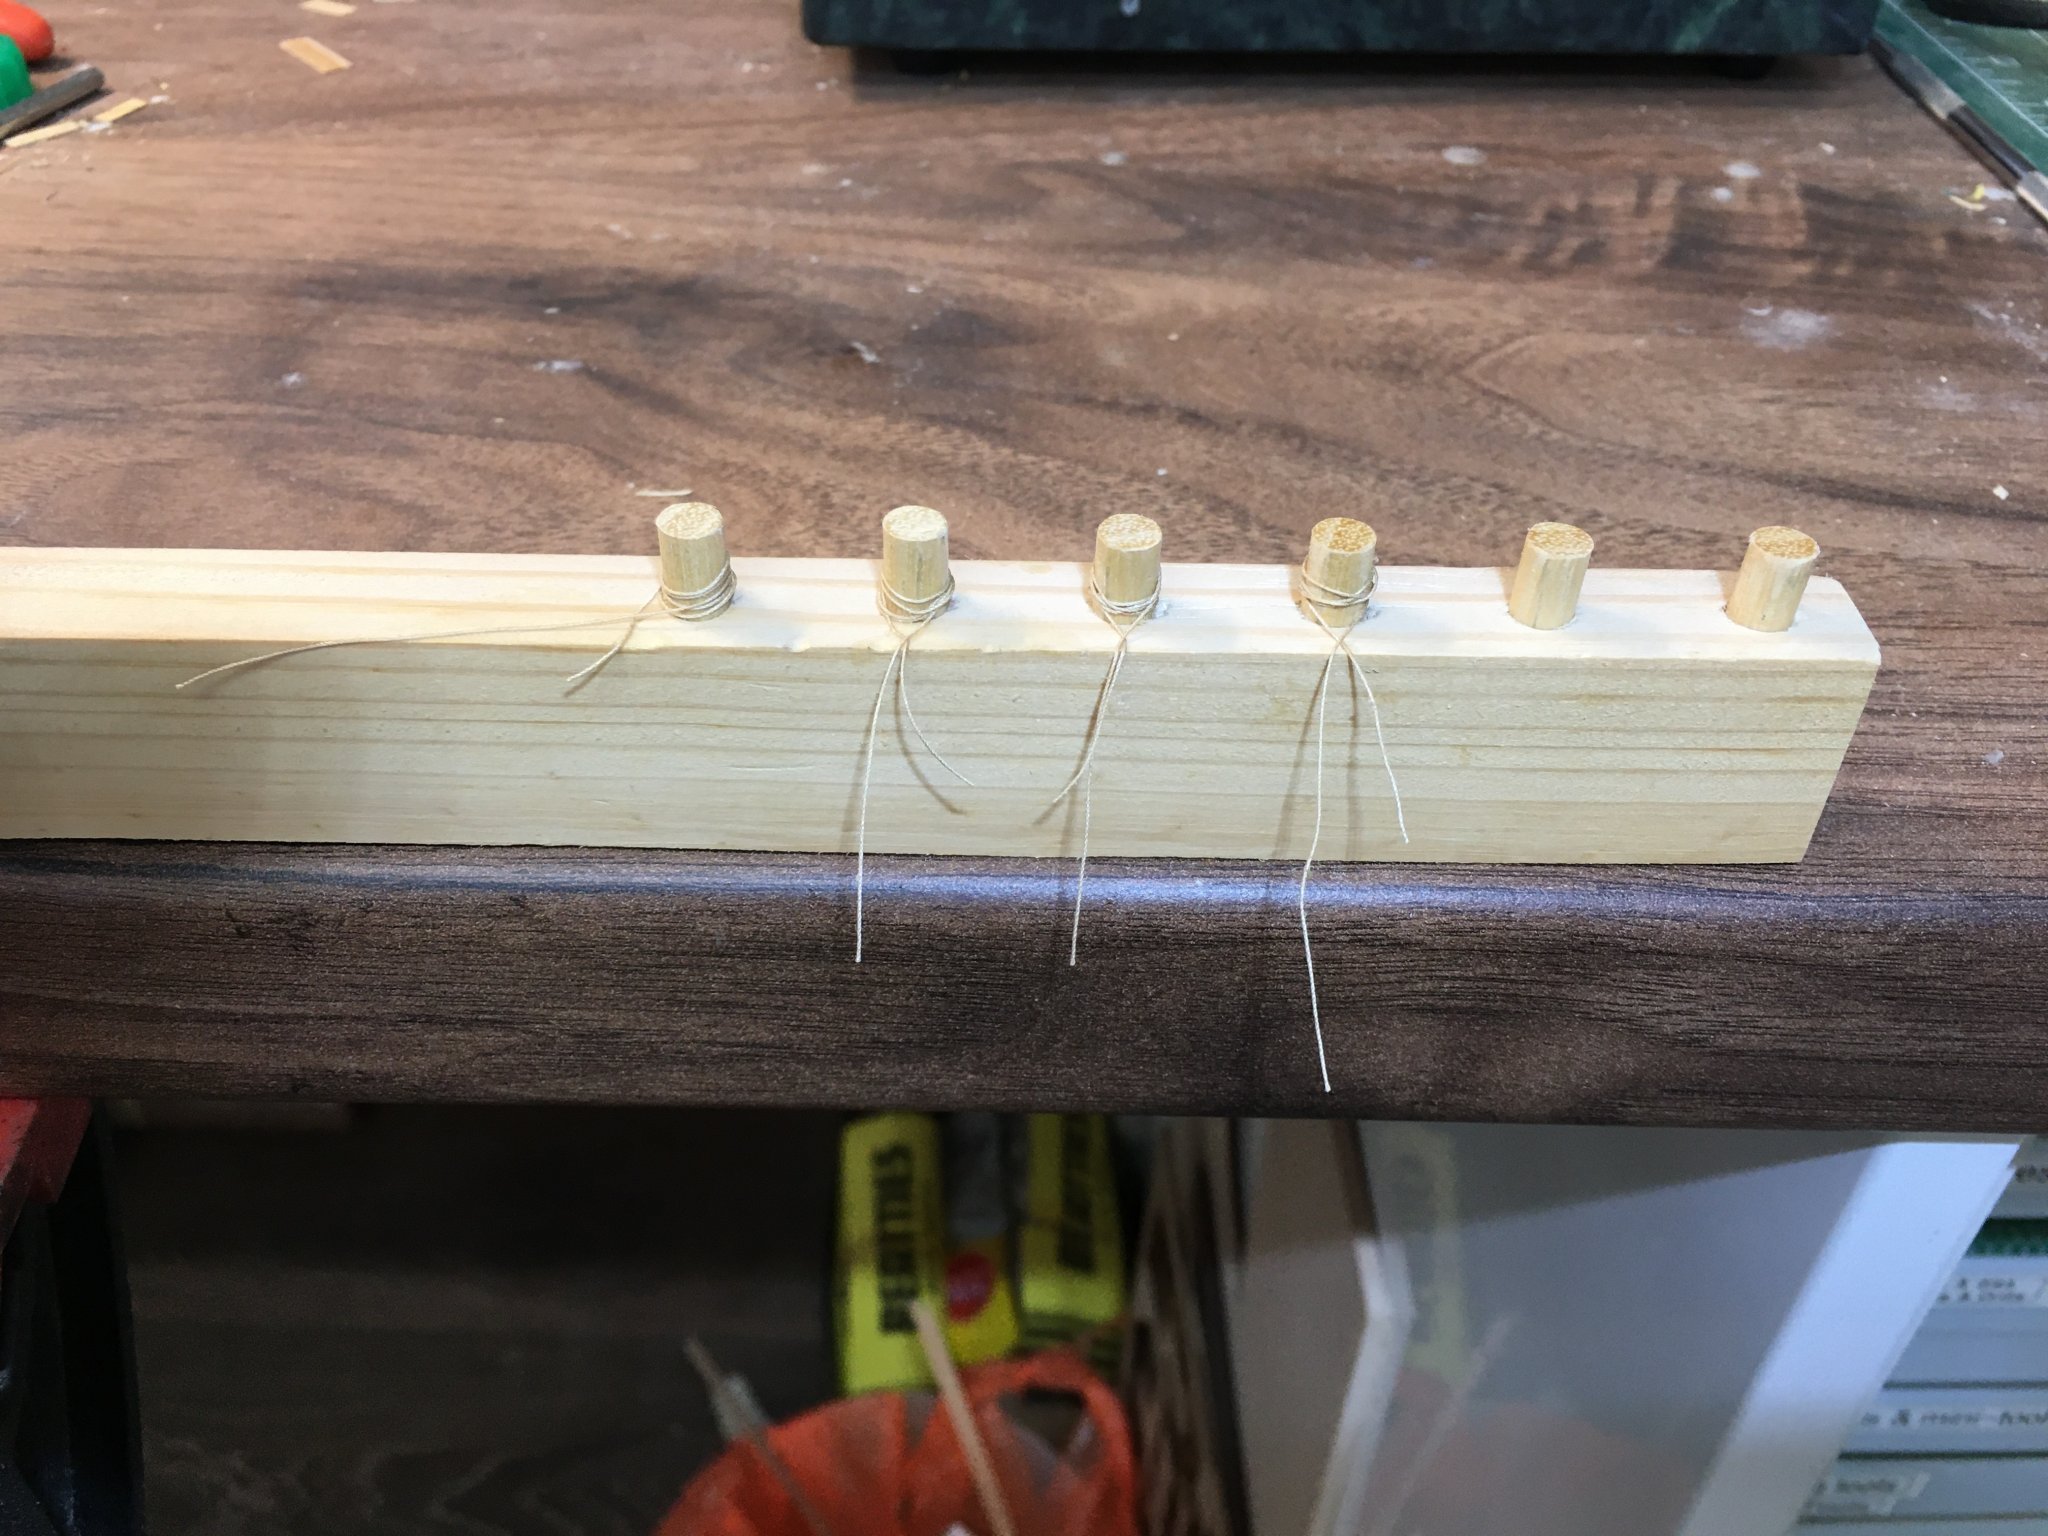
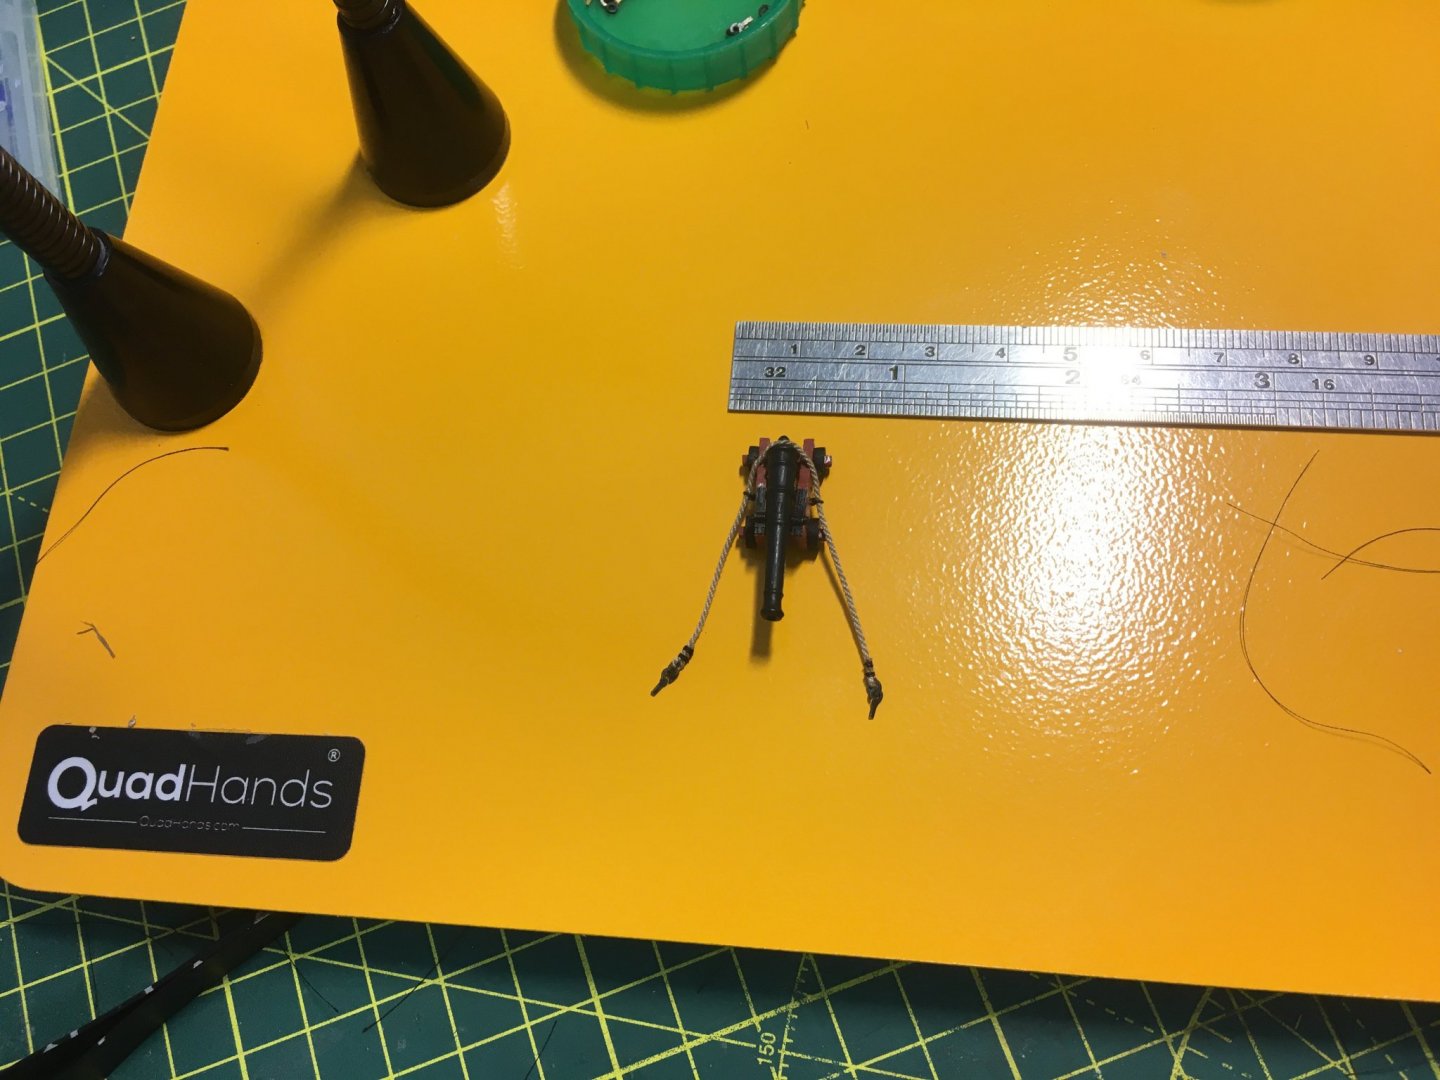
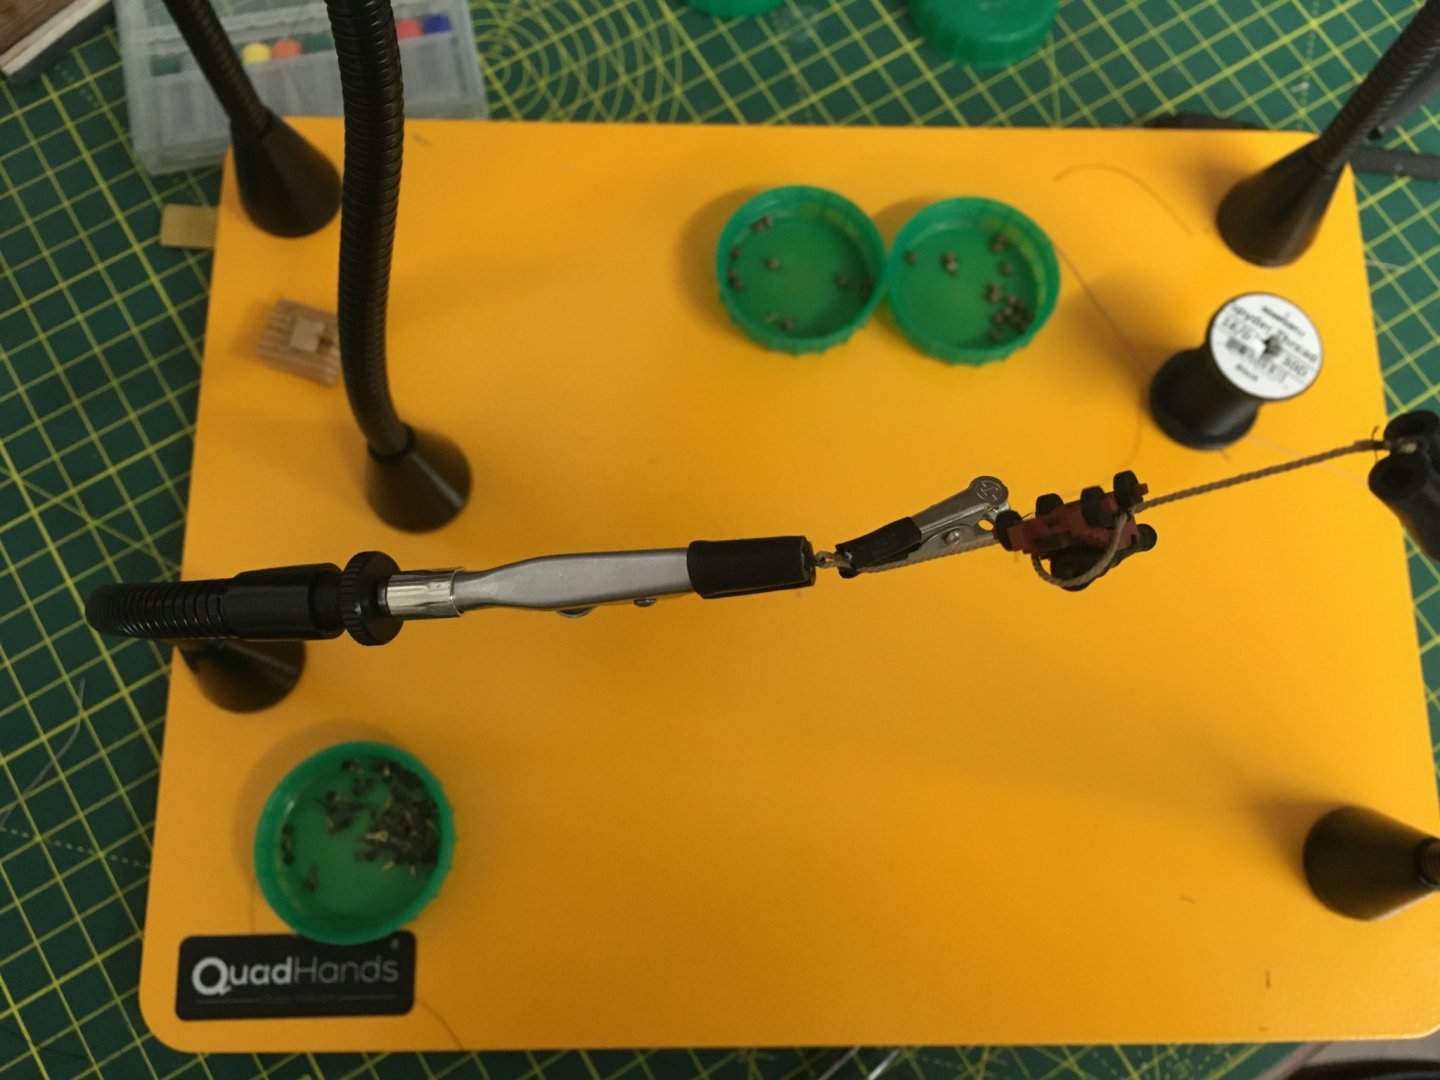
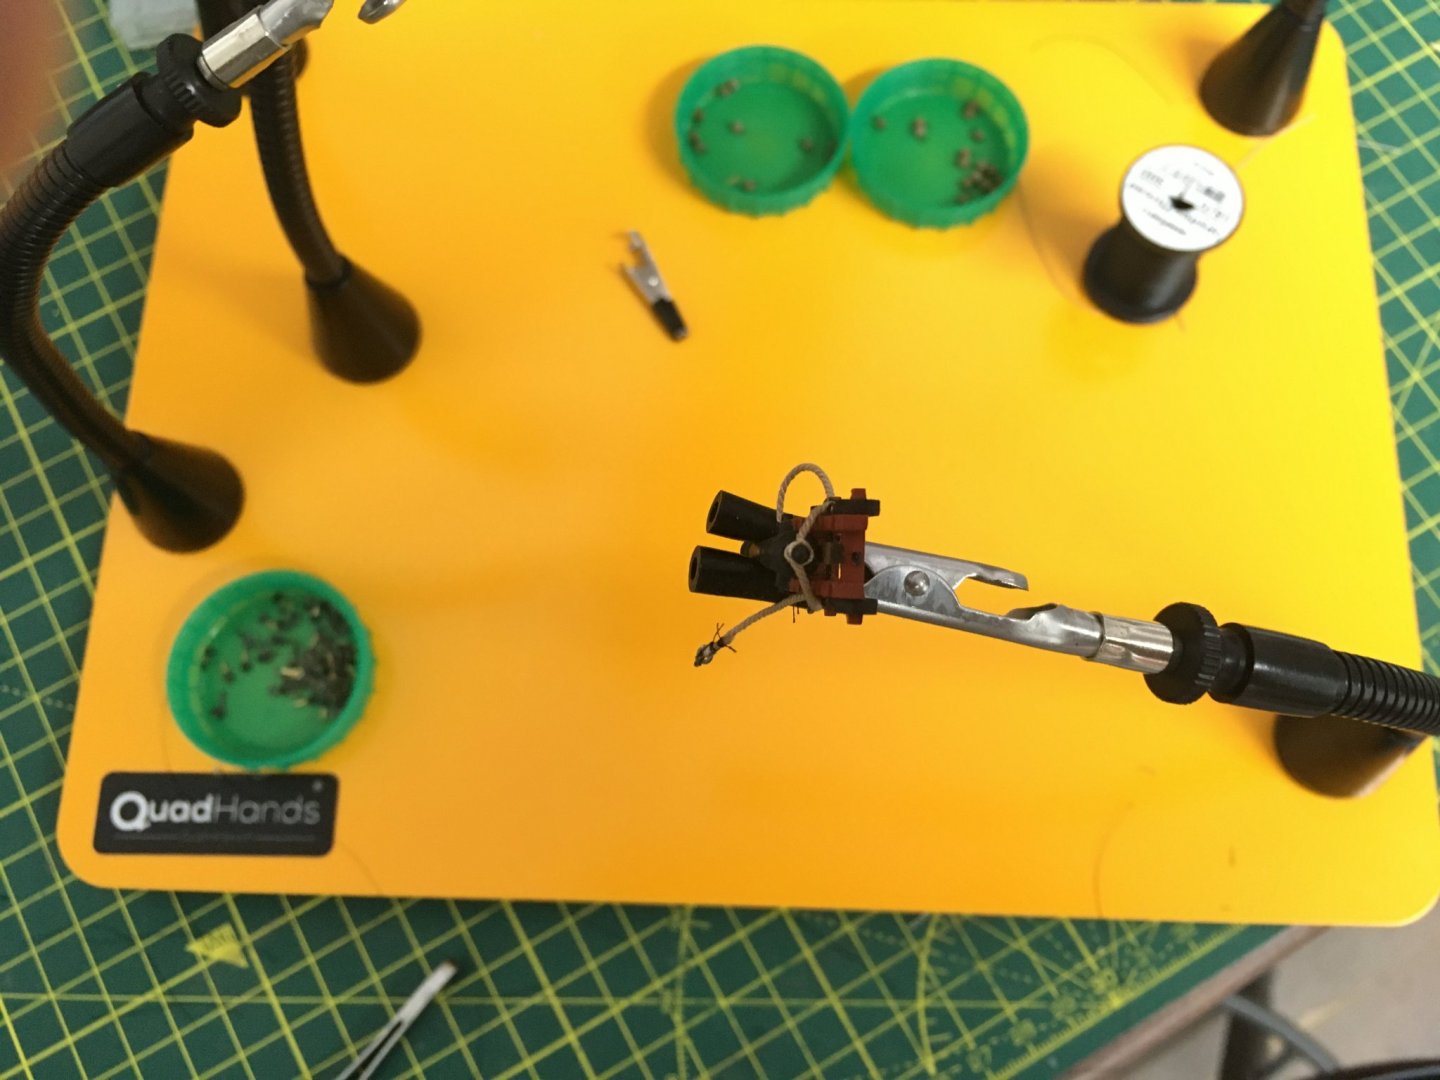
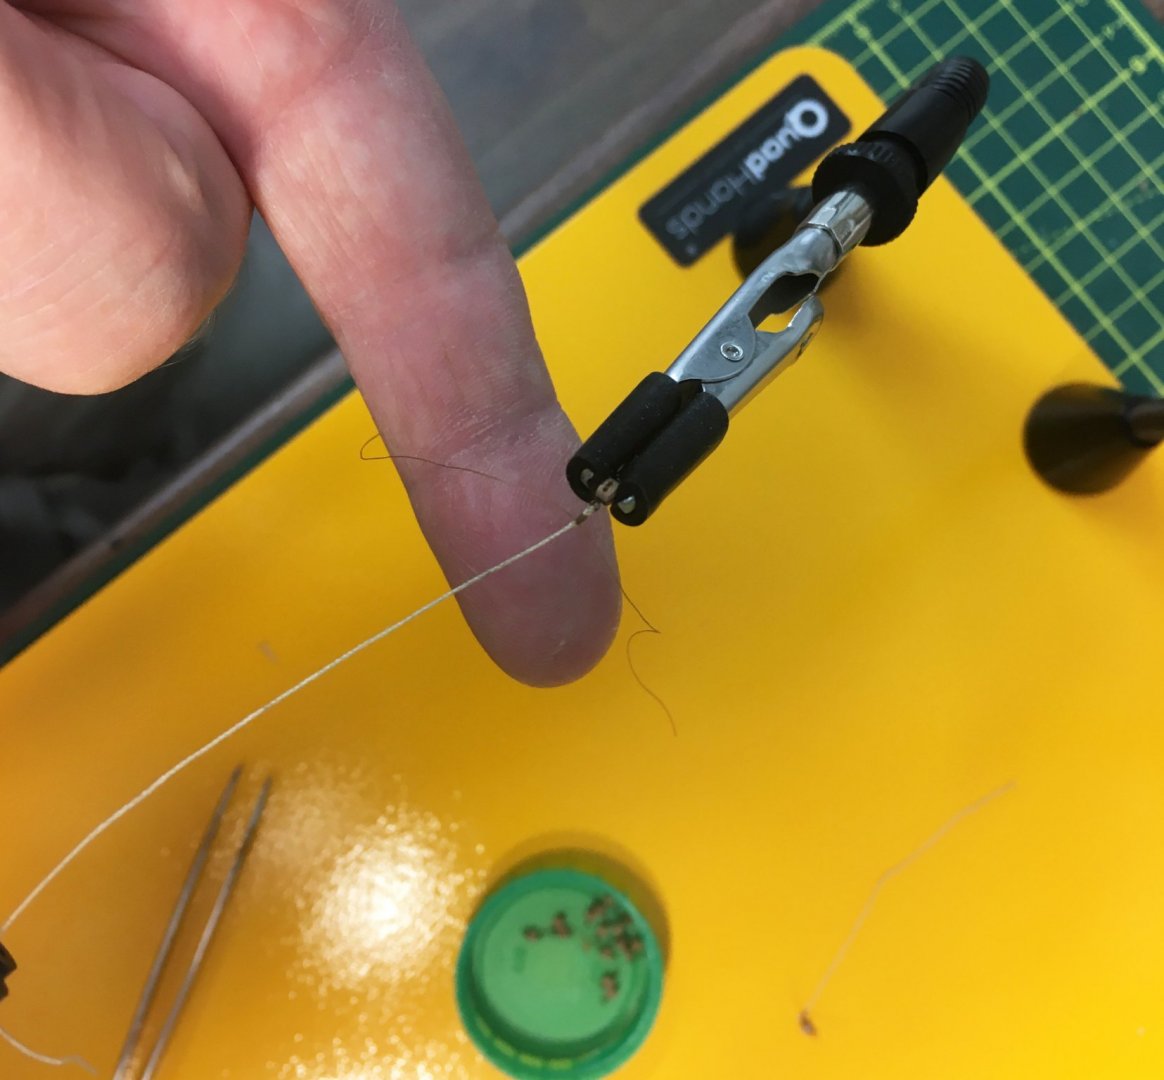
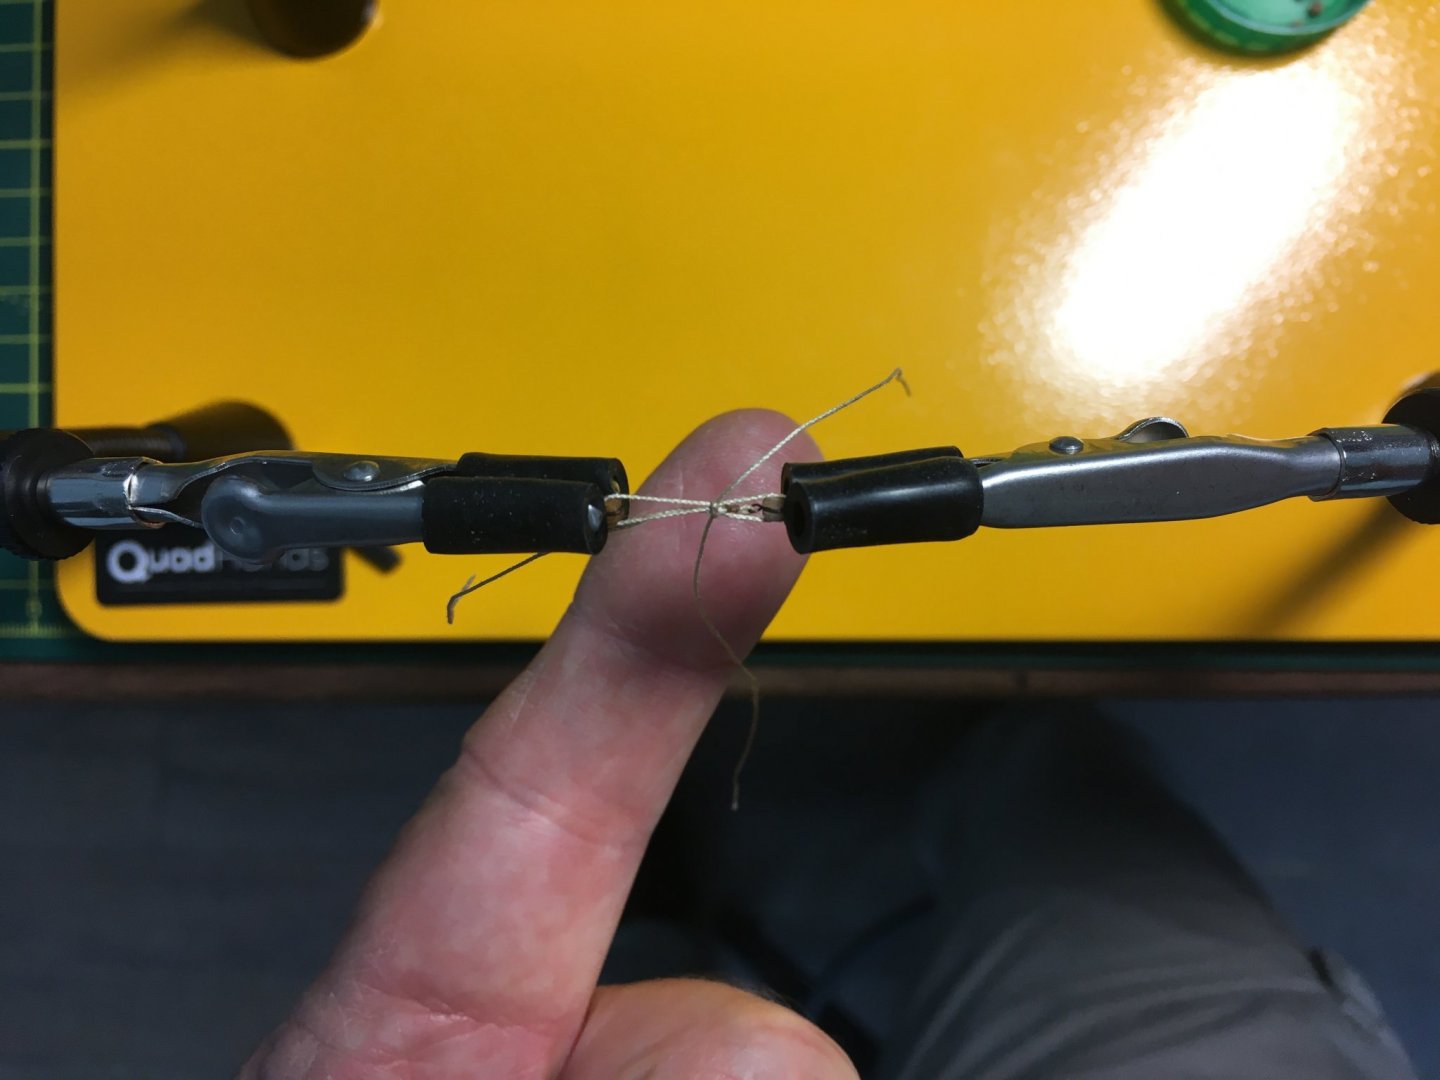
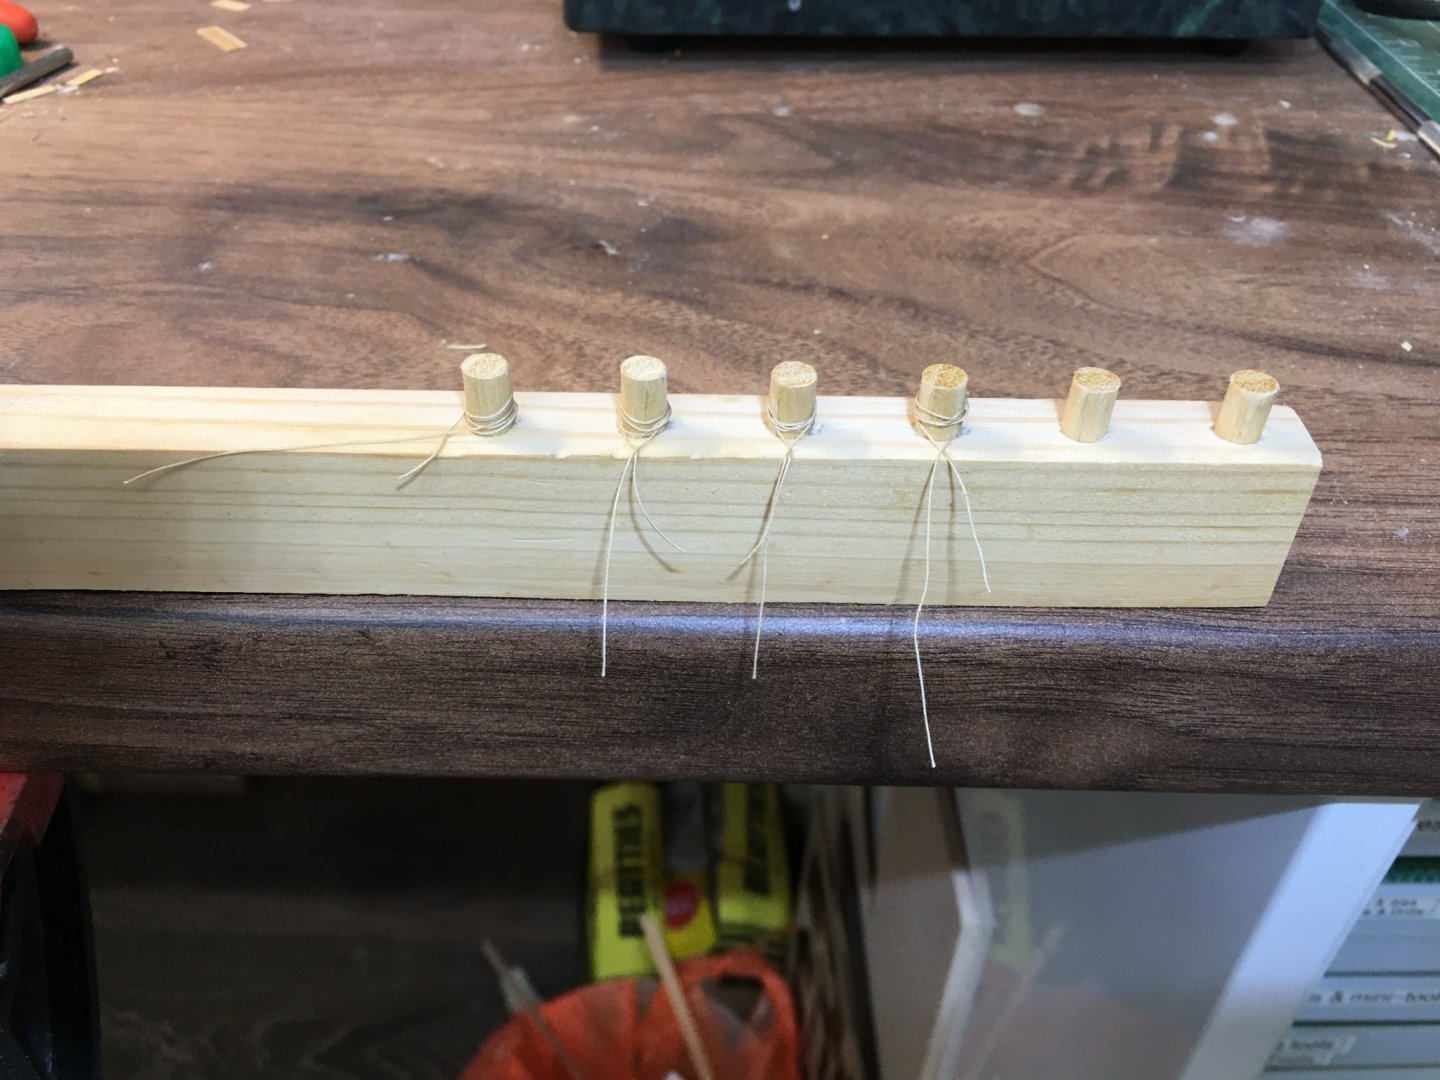
Whoops, crossed posts. I have added this to my reference folder. Any reason for fly fishing thread vs the common thread I steal from my wife? Great and informative posts. I’ve rigged lots of cannons, but this puts steps in a new light with clever techniques.
- 725 replies
-
- 1
-
-
- vanguard models
- speedy
- (and 1 more)
-
Truly excellent and the reference model for the rest of us. This is where I’ll come to see how to do mine.


- 725 replies
-
- 1
-
-
- vanguard models
- speedy
- (and 1 more)
-
Thanks Rusty. It could hitch a ride as cargo on your Winnie 🙂
- 778 replies
-
- 4
-
-
- cheerful
- Syren Ship Model Company
- (and 1 more)
-
I love frigates, I’m heavily on the 20-32 side. The bigger gun platforms don’t hold much charm for me. I can only rig so many cannons. I’m voting for Sphinx, one of your four choices, not an unlimited wish list.
-
I don’t think lime wood is much of a differentiator, but that’s just me. I’d pay (and have;-) for something better than what other kit manufacturers offer.
-
It’s all about the entrance 😁
-
I appreciate all the comments for my mis-labeled post. But let’s assume I’m a grown-up and understand the basics of machine shop safety. Also, I have no intention or need for any metal work. The two vices I have are specifically designed for my Proxxon mill and are highly rated by it’s users so I’m ok on that front too. I now have good examples of two ways, and can use both for more than just a trim ring - very cool stuff I agree I just need to get in there and cut something. Or maybe fly across the pond and buy a few beers at the pub for Derek -after- he shows me a few things (see, shop safety right there;-) But for now my focus is on finishing planking on Cheerful, I ripped 40-50 more yellow cedar planks last night and will likely need most of them to finish the hull. I’ve bookmarked this thread and will keep it handy. If anyone want to follow Derek and No Idea’s tutorials (Maybe an actual mast cap:-D) with their own please do. We’ll all benefit.
-
I haven’t seen any of the Cheerful builds this way, I think I’ll go with the “trim ring” however accurate it may or not be.
-
That’s real skill Derek, very nice work. So much there you’d never see in a straight up kit. I learn a lot from your well explained examples.
-
Very nice. What is the history of a ship like this. Very different (and interesting) from warships (and most common models) as gun platforms with 6 cannon and more space dedicated to what I guess are cabins?