-
Posts
4,127 -
Joined
-
Last visited
Content Type
Profiles
Forums
Gallery
Events
Everything posted by glbarlow
-
Thank you! I just try to pass on what I’ve learned from so many on this forum and as a small tribute to my friend Dana that got me started In this hobby years ago 😊
- 778 replies
-
- cheerful
- Syren Ship Model Company
-
(and 1 more)
Tagged with:
-
Here we are...just sitting and waiting...money in hand...just need James to finish... just sitting and waiting...😂🤣😂
- 109 replies
-
- Vanguard Models
- Flirt
-
(and 1 more)
Tagged with:
-
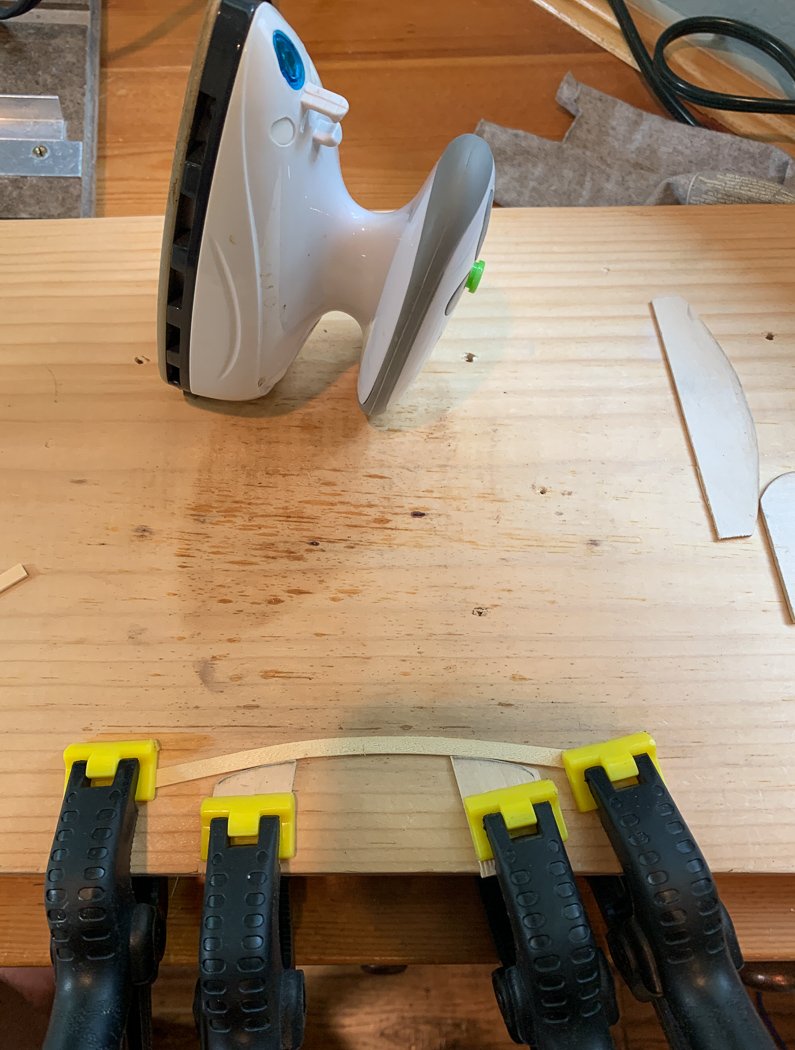
Hi Bob, I have and use both, my Lady Nelson has satin on the exterior and matte on the interior, for no real reason than that’s what I did. I prefer the matte as a painting base, but I doubt there is any significant difference between the two, I’ve also painted over the satin in the past. My little experiment did prove, at least to me, that water based poly is my preferred base. Yes I do also apply steam but have the iron on the lowest heat level for steam. Here again I’d do it without steam but the little travel iron produces it and I figure it can’t hurt. I let the board sit in the clamps for about a minute after heating and sometimes it takes two heating runs to get the curve I want. I only started this method with my last build, but it makes such a huge difference in my planking I’m only sorry I didn’t find Chuck’s tutorials sooner.
- 778 replies
-
- cheerful
- Syren Ship Model Company
-
(and 1 more)
Tagged with:
-
The water based poly effectively is my primer, I don’t think it would cover any char though. I’ve only painted cannon and etched parts with my air brush. I wouldn’t be confident using it on the model or wood in general. Not that you can’t... I think it varies by types and color of paint.
- 778 replies
-
- cheerful
- Syren Ship Model Company
-
(and 1 more)
Tagged with:
-
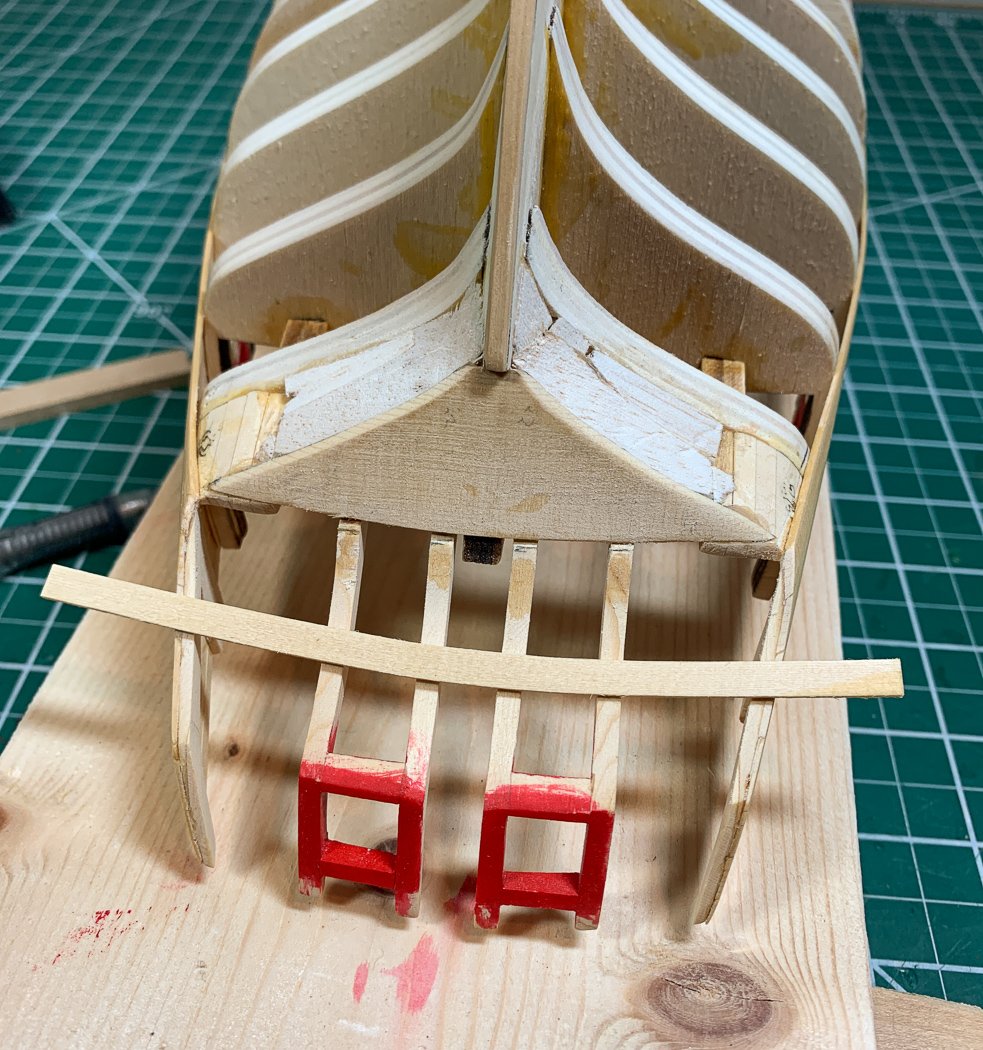
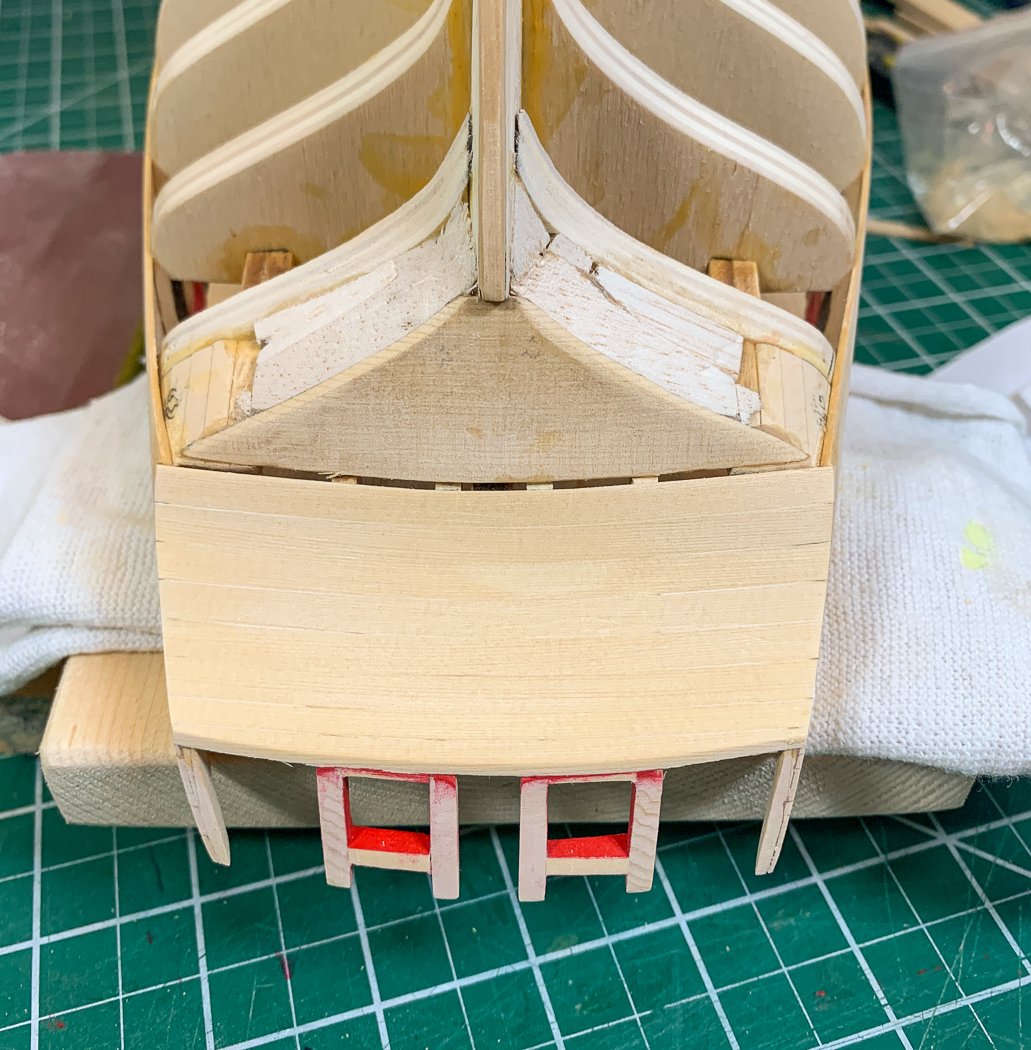
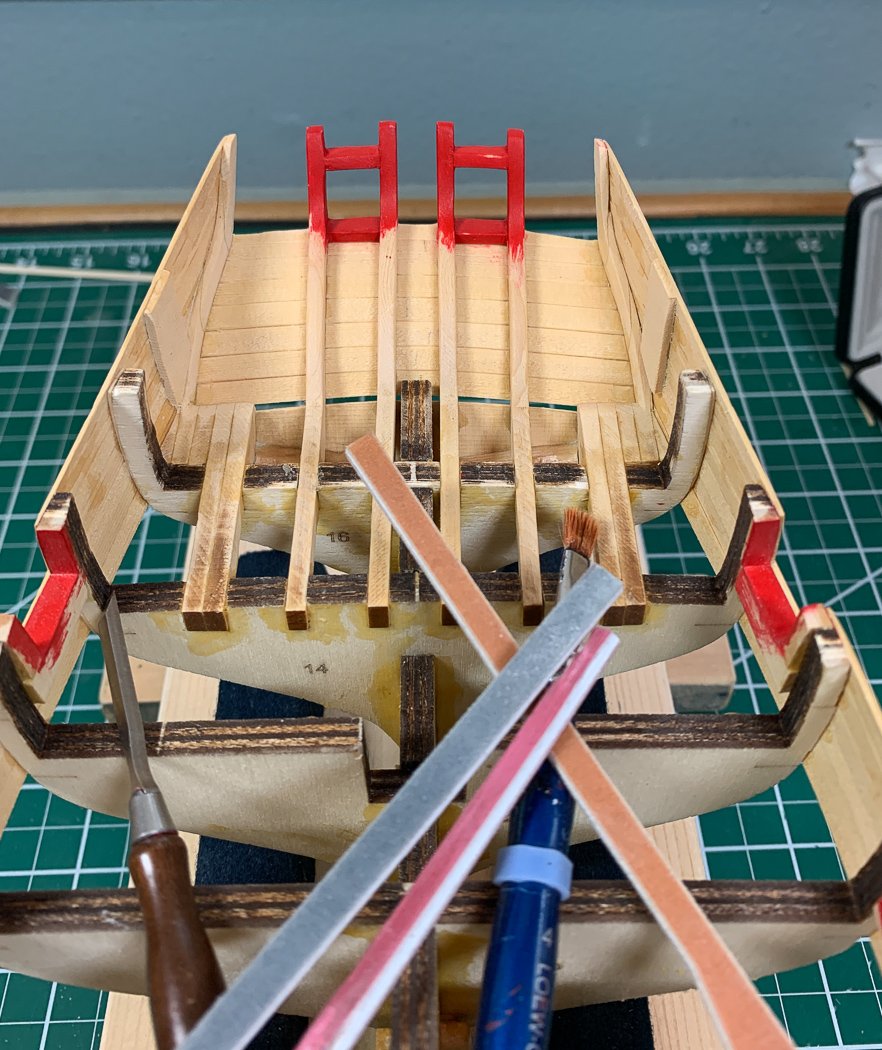
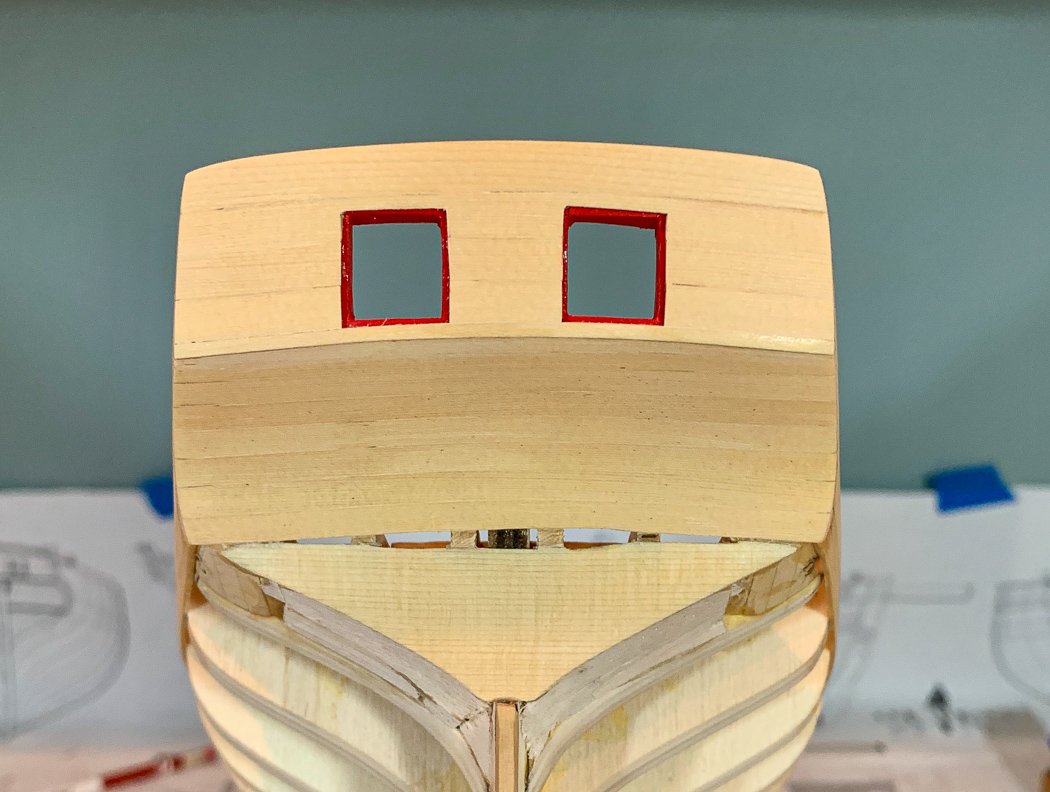
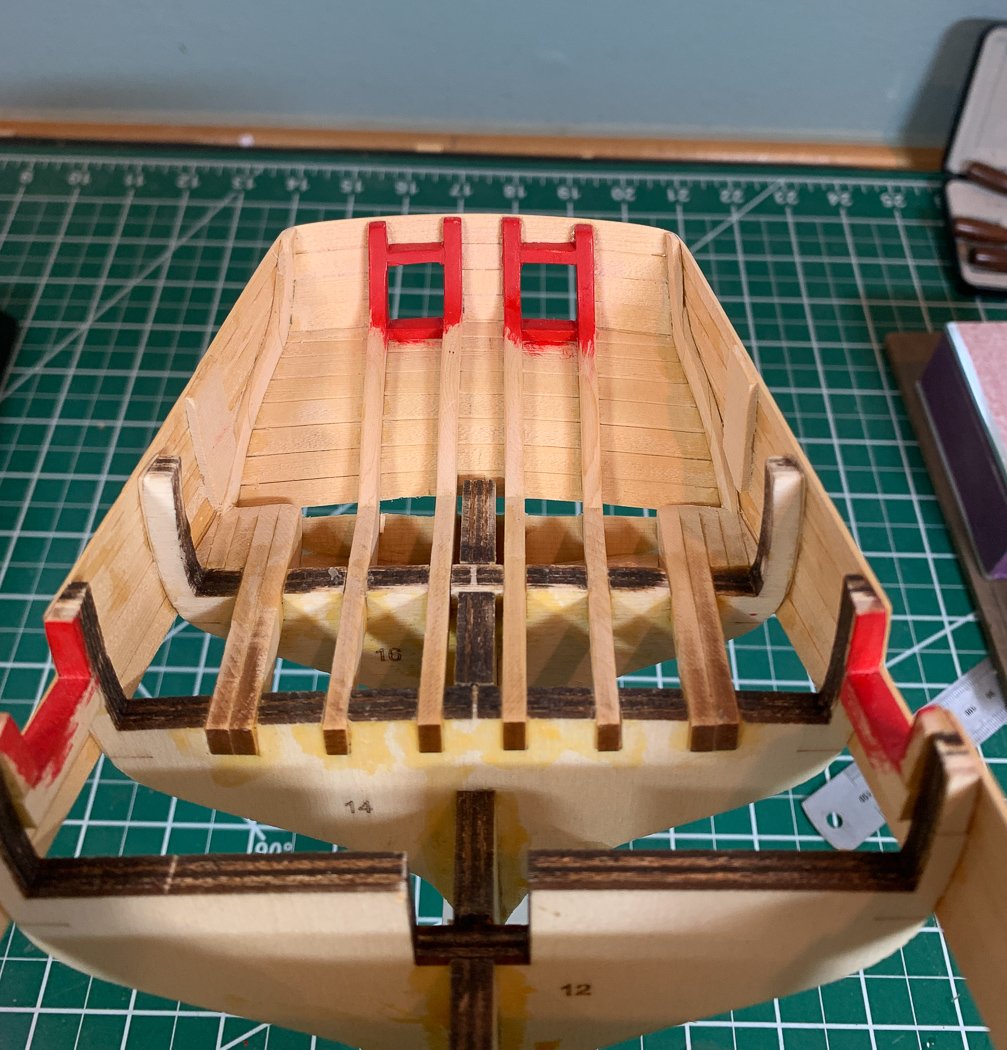
Every stern on every model I’ve ever done has been an adventure, they rarely come out the way the plans show, I have to improvise and adapt to make them work, and have fun doing it. I expected the challenge of the scratch built Cheerful to be no different - but I was wrong. This is probably the first stern that came together just the way it’s supposed to. Not that it was easy and I still had a few challenges, but Chuck’s design, for lack of a more elaborate description, - works as planned. But to be fair I haven’t figured out the square tuck yet, 😂 Reducing the frames in the last post was hold my breath time but wasn’t that hard with the process I described. Then it’s just a matter of planking up the counter. The first plank is a challenge because the counter is curved both in and down. But thanks to my Chuck Passaro plank bending station it’s a problem quickly solved. No way that plank was bending with out some help. The benefit of Chuck’s method is there is no soaking or its potential for warping. Rub a wet finger along the board and the steam travel iron and clamps do the work heating the bent board into shape. If you haven’t tried this method I highly recommend you search out the instructional videos here on MSW and give it a try. I gave a little more information and detail on using this technique in my Lady Nelson log if you’re interested. I’m a CA planking guy, no clamps to hold PVA for me. With the bent plank (and the lower side of each beveled for a tighter fit), a little CA, and 30 seconds of finger pressure… plank complete, on to the next. In no time I was up to the transom and doing some sanding. Here’s a thing to remember - the inward side of the counter is also a final product, it won't be covered, so be neat with the glue. The reverse side result of the beveling looks like Shiplap and adds a little character. It’s a good time to use some sanding sticks on the counter, much easier to get at it than after transom is on. The transom is a little more fun than the counter, having to fit the planks around the stern ports. Since I plan to have these closed I left a little larger rabbit for the port lids to grab onto, I may leave them, or one of them, open - I still have the option later to decide. The third row is fun since it has to be cut to fit over the top fourth of the ports. I elected to use a 7/32nds plank on the top instead of a fourth 3/16ths one. I liked the look better and it gave a little more clearance above the top fo the frames inside. Back to the inside of the transom to sand a little to remove any excess glue. Unlike the natural transom outboard, the inside will be painted red eventually so it doesn’t require extensive effort. I’m glad I sanded and shaped up the stern frames before they were installed, I’d hate to be removing laser char at this stage. I have already learned from building the winch my Cadium Red won’t hide laser char. Eventually I’ll be cutting a hole in here for the rudder, which should provide another hold my breath moment. Now to cut some fashion pieces having only a #11 blade, maybe the jewelers saw to do it. Anyone want to hazard a guess how many I’ll do before I get two I can use? On another note, I ordered a Proxxon MF70 micro mill today - I think Cheerful will provide me some opportunities to learn how to use it since I haven’t the slightest clue, though thanks to Delf for giving me some pointers. MSW is certainly a worldwide resource of talented people.
- 778 replies
-
- cheerful
- Syren Ship Model Company
-
(and 1 more)
Tagged with:
-
The comments about the use of sanding sealer encouraged me to do a little experiment. So I used the same paint and applied it to a stick of my Alaskan Yellow Cedar. The counter and bulwarks will be painted red and I wanted to see what worked best. I know it doesn't show well on the photo but there are very definite color differences and texture when applied to the different bases. Here’s what I tried from left to right using four coats of very thin Golden Cadium Red paint. Matte Water Based Poly Golden Open Sanding Sealer Nothing Gesso So based solely on my subjective view in order worst to best: 5. I quickly ruled out sanding sealer, it closes the grain of the wood and the resulting look is glassy. It also didn’t take the multiple coats very well. 4. No base is fine, but it absorbs so much into the wood the finished look was only ok, It works better if I use thicker paint. 3. The Golden Open product took forever to dry as a base (its more for acrylics on canvas as I read about it). It also had the most negative affect on color making the red almost orange. 2. The gesso was good, but as a base it has to be sanded, way too much work around gun ports for me. It also darken the color more than I liked. My favorite is using what I’ve always used, the water based matte poly (which is not to be confused with wipe on poly, totally different stuff). It dries quickly, seals the wood in a good way and provided the base for the best version of the Cadium Red color. Again, totally my subjective opinion, but at least I have my answer of what works for me. On a related note, I've always used Admiralty Paints, by far my favorite. However, it doesn't come in a RED enough Red for Cheerful (Go Red or go home) so I'm using the Golden Cadium Red. I can tell from the photo the colors appear different IRL so not sure it helps much.
- 778 replies
-
- cheerful
- Syren Ship Model Company
-
(and 1 more)
Tagged with:
-
Sorry I missed your question earlier. Yes the planking pattern is laid out on the plans. I didn’t worry about them for the lower level of the Wales (bottom two rows in photos. As a related point, I bevel the bottom edge of each plank to help keep them tight. I’m hoping not to be able to see through my ship once it’s done 😕
- 778 replies
-
- cheerful
- Syren Ship Model Company
-
(and 1 more)
Tagged with:
-
That is so true for any model, but especially in this case where it’s single planked. I can tell already on mine the time fairing was well spent.
- 54 replies
-
- cheerful
- Syren Ship Model Company
-
(and 1 more)
Tagged with:
-
Thanks Rusty. Yours is one of the build logs I frequently “consult” so I se how It’s done.
- 778 replies
-
- cheerful
- Syren Ship Model Company
-
(and 1 more)
Tagged with:
-
Thanks! The Alaskan Yellow Cedar is much more yellow gold than Boxwood. That may not show in the photos. The poly transforms it nicely. You should definitely put it on your list. It’s beautifully designed and is a real challenge to get each step right. I’m really enjoying it.
- 778 replies
-
- cheerful
- Syren Ship Model Company
-
(and 1 more)
Tagged with:
-
Good to see another Cheerful underway - looking forward to seeing your progress.
- 54 replies
-
- cheerful
- Syren Ship Model Company
-
(and 1 more)
Tagged with:
-
Great kit, I'm sure you'll enjoy it.
-
Not sure what later is either - I'd put them in sooner by my work process. Most deck furniture runs down the center, to me, other than hatches, its easier to put the cannons in and then the deck furniture - but either way they should go in before you start on the masts The hull should be completely finished before masting and rigging begins. It also might depend on how far you plan to go with the rigging of the cannons. Fully rigged could wait until balance of deck work is done, only the breaching rope can be done at any point t once the deck and hatches are in. I've built Granado, part of the Badger family. Caldercraft, because they were designed by @Chris Watten , used to be my favorite brand along with Amati, many also Chris Watten designs. Now Chris has his own company, Vanguard Models. Speedy and Alert are already out and more are coming. I'd highly recommend you go there for your next model. His designs, materials (all pear wood) and instructions are second to none.
-
I'm looking forward to this next step, it will be fun to see it completed.
- 778 replies
-
- cheerful
- Syren Ship Model Company
-
(and 1 more)
Tagged with:
-
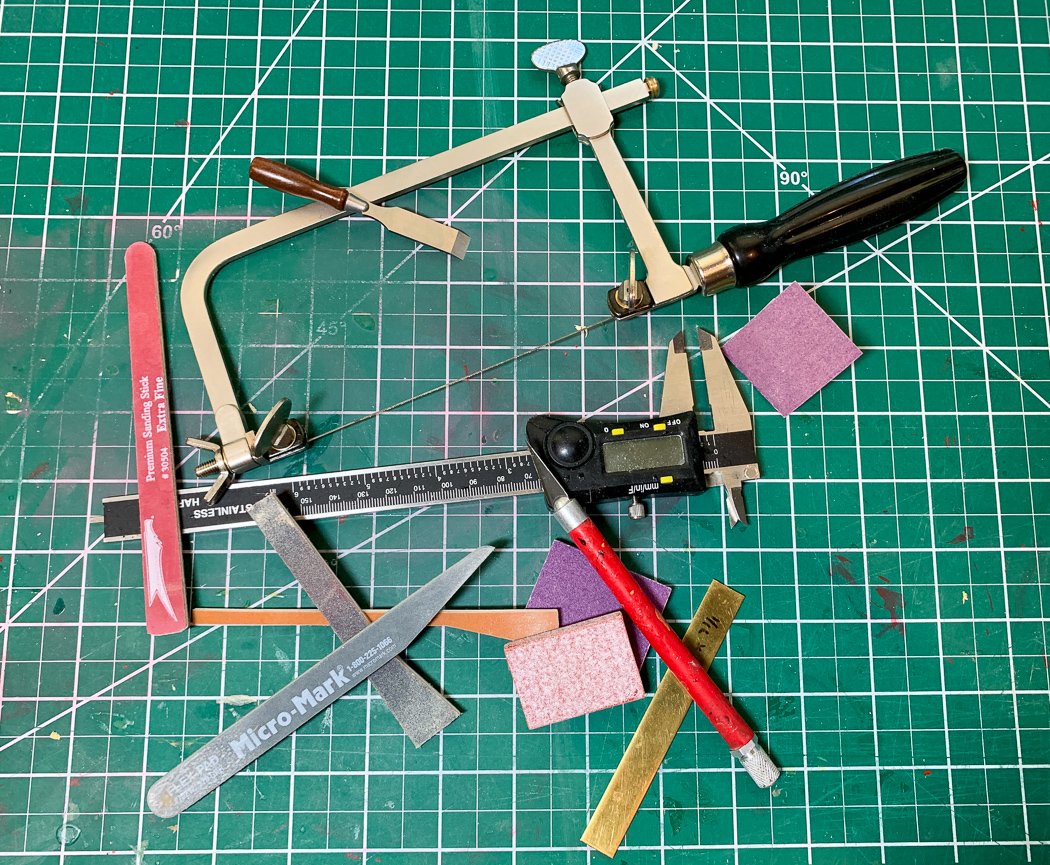
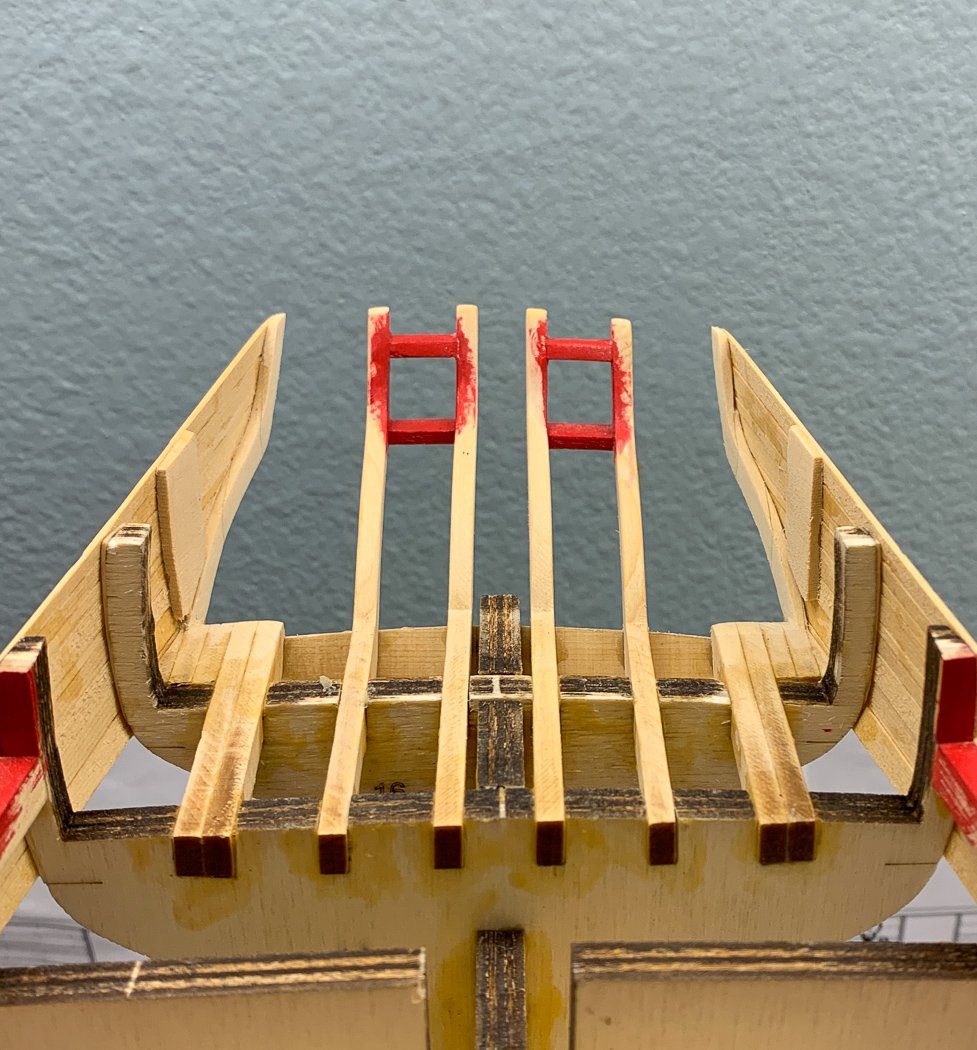
Well I did it, right at 1/16th with no broken frames and fingers intact. As advertised the Alaskan Yellow Cedar is soft and easy to carve and sand - as wood goes. I thought I’d share a little bit about how I did it in the event it might be beneficial to future Cheerful builders. For starters, here are the tools used in this task. I’ve never used a jeweler’s saw before, but I will again. I got it here on Amazon with 6 sizes of 144 blades, it worked great. I got it for this specific task because I really didn’t want to try it with a Dremel. In fact I took a shot with the Dremel on my busted hull and demonstrated to myself it wasn’t the way to go for me. I marked a 1/8th line down the outside of the stern frame to allow room for error. While the saw runs straight it is easy enough to turn, too easy in fact. The thing to watch is keeping track of the cut both inside and outside the frame, what looks good on one side may not be on the other due to the angles involved. I reversed the blade in the holder in order to cut inside out at the very base of the frame stopping at the 1/8th mark I’d made. Then when I reached that cut sawing from the top the bulk of the frame just dropped off. It was relatively easy, for me the key was not to saw faster, just be patient and let the blade do the work. With the bulk of the frame now gone I evened up the rough cut to a consistent 1/8th creating the proper alignment for the future inner bulwark planks. Then it was slow and careful application of my Veritas mini-chisel in concert with my trusty #11 blade and sanding sticks to gradually reduce the frame to 1/16th. I did as Chuck suggested and took multiple breaks, along with a few deep breathes here and there. I had two measurement aides, I had earlier added a 1/16th thick brace between the last two bulk head frames as I was planking because it got a little wobbly with such a long space between (and I read ahead in Chuck’s monograph where he adds them for the inner planking), now it became a thickness gauge along with my handy brass 1/16th saw gauge. I don’t recall where I got these (I have multiple sizes) but they often come in handy. So then it was cut, chisel, sand, repeat - maintaining the angle for future planks and keeping track of both inside and outside. Here’s a warning: The sides of the stern (note my exquisite knowledge of nautical terms:-/) had been very sturdy as I planked it, but once the bulk of the outside stern frames are cut away it quickly became fragile. In fact I cracked a plank with a moment of carelessness of too much finger pressure. It was just a very tiny crack on the bottom layer of the wales that will later get covered, but it was a good reminder to be gentle with all the cutting and sanding. Even small as it was I used a razor thin spatula and filled the crack with some Titebond to keep it from becoming a bigger crack. I had dreaded this step for a while, now it’s is done. The jewelers saw, plus the #11 blade, chisel and sanding sticks, is the way to go in my opinion. I might have pulled off the Dremel, but more than likely there’d be a gouge in one of the inner frames. These remain visible when the deck area is done so it’s important they remain pretty. Next planking the stern.
- 778 replies
-
- cheerful
- Syren Ship Model Company
-
(and 1 more)
Tagged with:
-
Thanks Chuck. Yes the perfectionist in me overcomes my lack of patience. I don’t mind how long it took. I think I developed a system on the third to last port 🤣 Thanks for the advice on the stern frames. I’m going the #11 blade and a jewelers saw, I’m sure the Dremel would get away from me. 1/16th is really skinny. Thank goodness for sanding sticks.
- 778 replies
-
- cheerful
- Syren Ship Model Company
-
(and 1 more)
Tagged with:
-
Thanks BE. The Alaskan Yellow Cedar really is nice wood - easy to shape and sands to as smooth as butter. Any gaffer tape will do, I have multiple versions and multiple colors. The distinction of gaffer tape is that it is as strong as duct tape but it leaves no residue when removed - as long as it's not left on for too long. I agree with both you and BE. I think sanding sealer has a different purpose, perhaps as a base for acrylic's. The wipe on poly is itself a sealer and adds a whole different dimension to the yellow cedar, it brings out the grain, provides a beautiful finish and changes the wood from a light yellow to a golden color. The photos, at least my iPhone photos, don't do it justice.
- 778 replies
-
- cheerful
- Syren Ship Model Company
-
(and 1 more)
Tagged with:
-
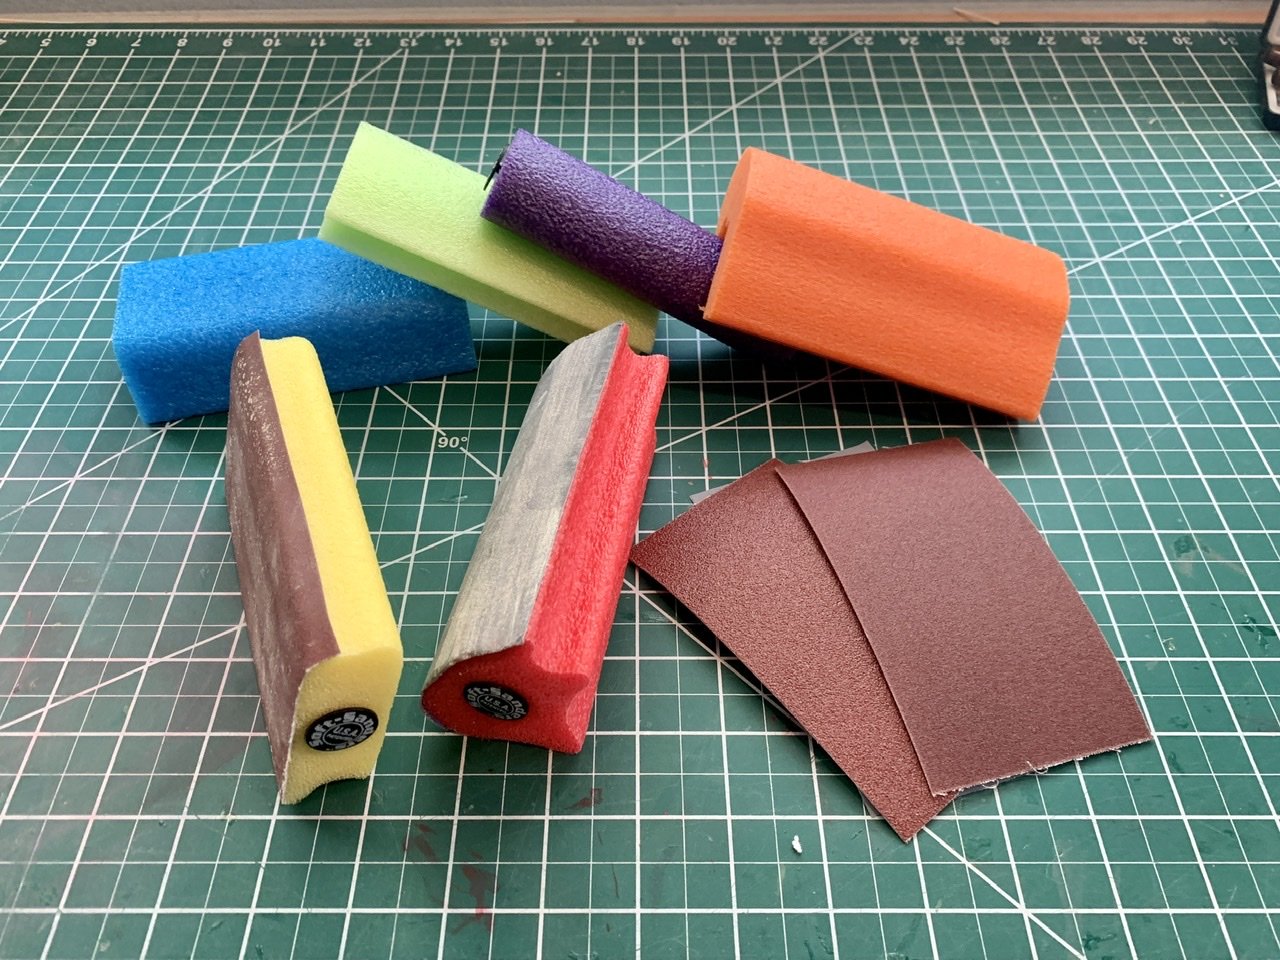
The port side is now complete. Cutting and measuring these 64 planks (more like 84 including the ones I rejected after cutting them the wrong length or angle) was an exercise in patience and perseverance, but I like how it all turned out. I will make a few adjustments to the sheer once I start the cap rail step and a few minor modifications to some sills after I thin the inner bulwarks, for now though I’m content to move to the next step. Which is thinning these outer stern frames. I’m not excited about this step, not that confident with a Dremel, small drum or not. While I can paint a 1/64th rabbet with a 18/0 brush without concern I’m hoping not to gouge one of the inner stern frames in the thinning process. I’m going to have to think about this a bit. I may first try a jeweler’s saw. I do have one unbroken frame on the first now crushed hull so I get one practice run. If anyone has any suggestions or advice on doing this other than don't screw it up, I'd be happy to hear it. I noticed the photos of the SB and port side appear to be a different color - that's purely the affect of my iPhone. They are exactly the same in reality. At some point I need to get my camera gear out and do it justice. I can’t do anything for a few hours while the poly dries - so I’ll just sit and stare at it for now. Oh, I can never have enough ways to sand things. This latest acquisition from here at Amazon are thanks to a recommendation from BobG. Good stuff.
- 778 replies
-
- cheerful
- Syren Ship Model Company
-
(and 1 more)
Tagged with:
-
Well done. I like that the cannon jig has its own stand:-D and thanks for providing a nice reference example for when I get to HM Flirts guns someday. I'm hoping the 1:48 scale of Cheerful will help make it a little easier, maybe just a little.
- 725 replies
-
- vanguard models
- speedy
-
(and 1 more)
Tagged with:
-
The AVS has always been one of my favorite builds. I had a great log here on it, but it along with my Pegasus log went down in flames in the great systems crash. I've backed up every log since, but not those unfortunately. I don't know if I had mentioned here the Bob Hunt Practicum on the AVS, which I believe is still available for sell. As far as you are in your build it would still be helpful for you when it comes time to do the rigging - its here https://www.lauckstreetshipyard.com/ if your interested.
- 108 replies
-
- armed virginia sloop
- model shipways
-
(and 1 more)
Tagged with:
-
Nicely done! That's a bold move having it on a single pedestal, great look.
- 138 replies
-
- glad tidings
- model shipways
-
(and 1 more)
Tagged with:
About us
Modelshipworld - Advancing Ship Modeling through Research
SSL Secured
Your security is important for us so this Website is SSL-Secured
NRG Mailing Address
Nautical Research Guild
237 South Lincoln Street
Westmont IL, 60559-1917
Model Ship World ® and the MSW logo are Registered Trademarks, and belong to the Nautical Research Guild (United States Patent and Trademark Office: No. 6,929,264 & No. 6,929,274, registered Dec. 20, 2022)
Helpful Links
About the NRG
If you enjoy building ship models that are historically accurate as well as beautiful, then The Nautical Research Guild (NRG) is just right for you.
The Guild is a non-profit educational organization whose mission is to “Advance Ship Modeling Through Research”. We provide support to our members in their efforts to raise the quality of their model ships.
The Nautical Research Guild has published our world-renowned quarterly magazine, The Nautical Research Journal, since 1955. The pages of the Journal are full of articles by accomplished ship modelers who show you how they create those exquisite details on their models, and by maritime historians who show you the correct details to build. The Journal is available in both print and digital editions. Go to the NRG web site (www.thenrg.org) to download a complimentary digital copy of the Journal. The NRG also publishes plan sets, books and compilations of back issues of the Journal and the former Ships in Scale and Model Ship Builder magazines.


