glbarlow
-
Posts
4,127 -
Joined
-
Last visited
Content Type
Profiles
Forums
Gallery
Events
Everything posted by glbarlow
-
 Nice neat work, and everything does fit…almost. I’m sure enlarging rudder port done easily enough with your skills.
- 857 replies
-
- 2
-

-
- Sphinx
- Vanguard Models
- (and 1 more)
-
I’ve used water based in the past, it works fine. It’s not as nice a finish as oil based and in some cases (I’m not sure what causes it) it can turn to a bit of a milky finish over time. In any case I’m a complete fan of the standard WOP, done right it leaves a great finish and really enhances the yellow cedar. There’s some guy who says it’s a “plasticity” finish, all I can guess is he’s doing it wrong, nothing plastic about it at all.
- 1,784 replies
-
- 3
-
-
- winchelsea
- Syren Ship Model Company
- (and 1 more)
-
I think the key is wipe-on-wipe-off Poly. Per what I’ve learned. From Chuck, I wipe it on and wipe it off as I’m doing it. Penetrates. The wood, leaves no shine and a matte finish.
- 1,784 replies
-
- 6
-
-
- winchelsea
- Syren Ship Model Company
- (and 1 more)
-
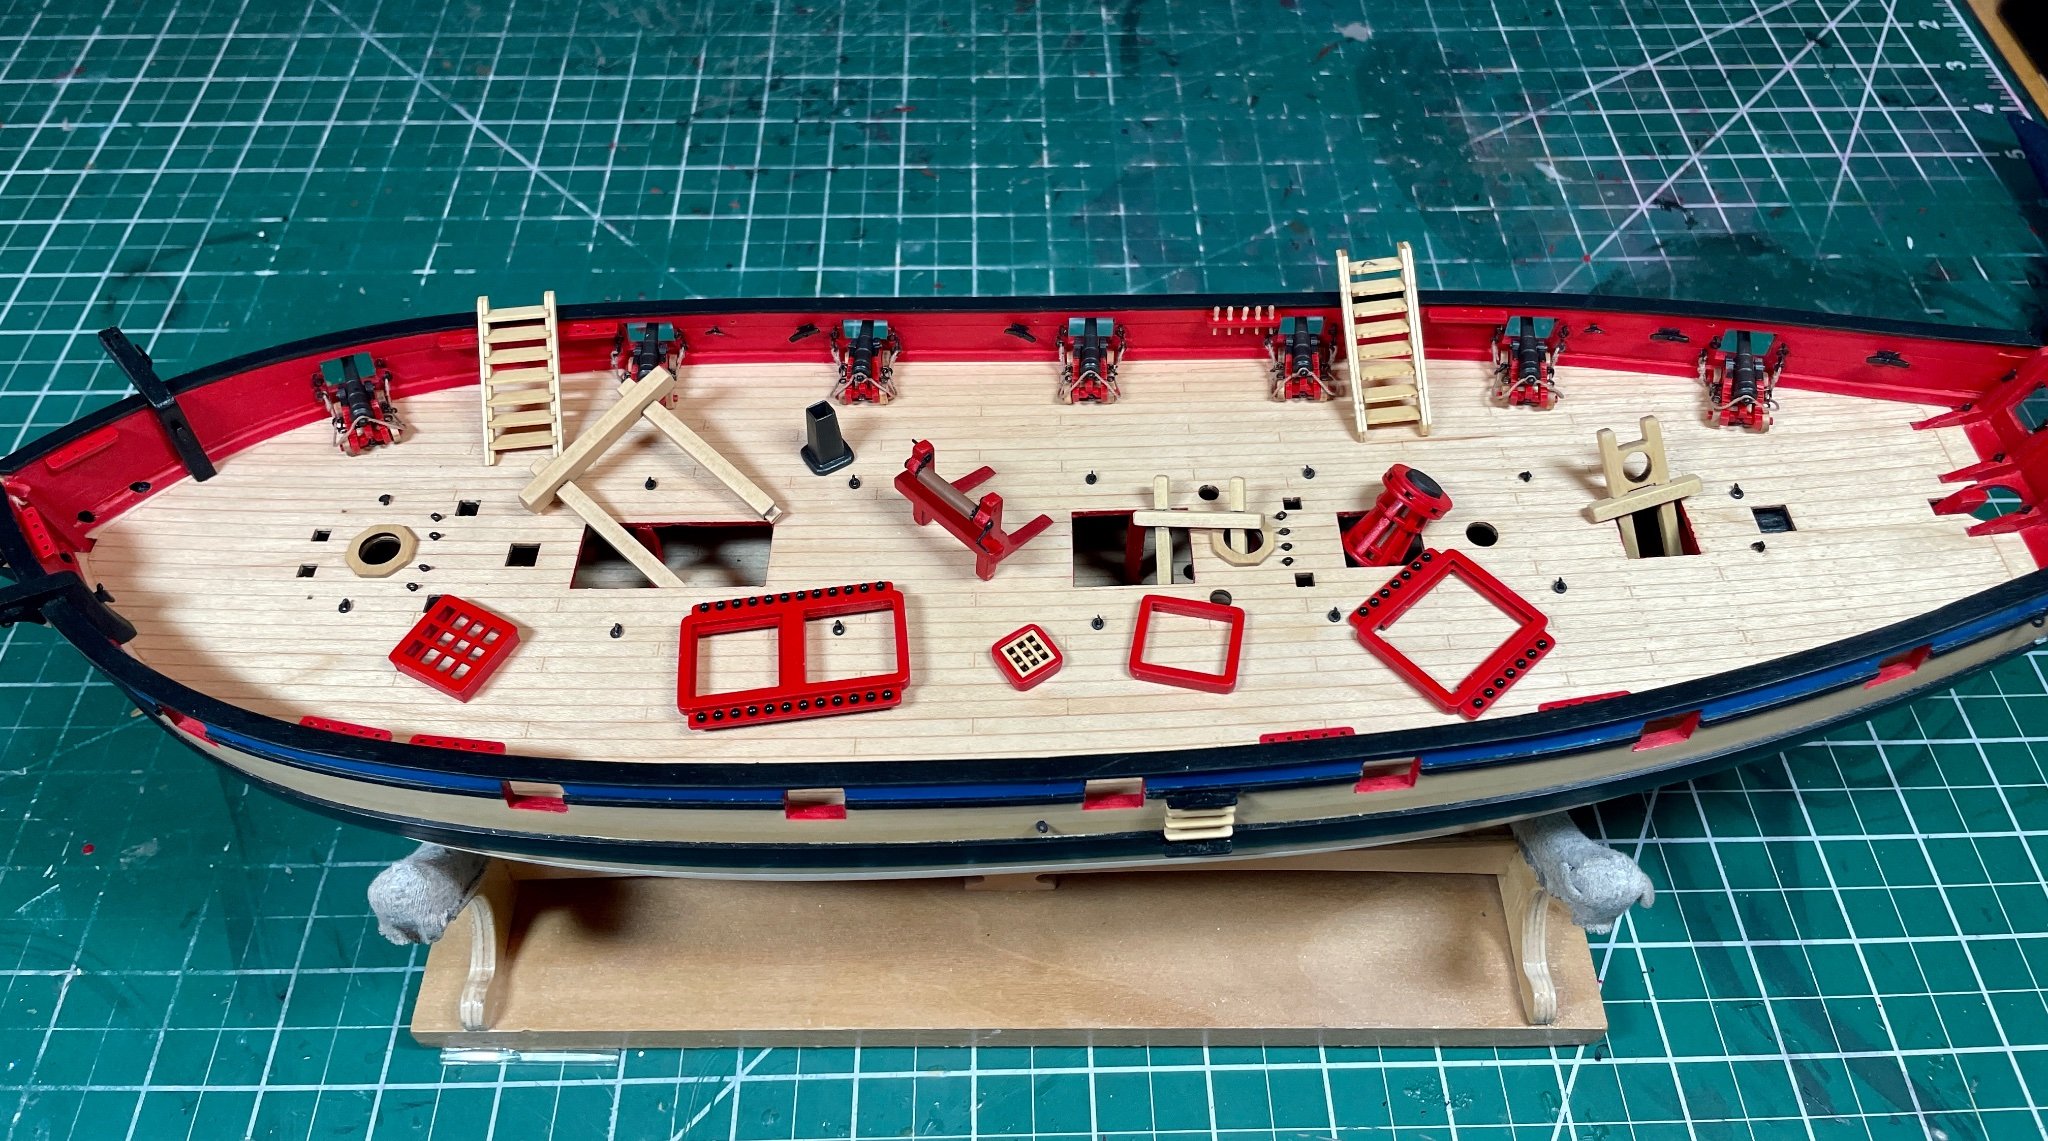
I don’t think this is where they go: After a week of watching our grandkids while their parents were out of town and then finally getting back in the field for my photography with a week in the Smoky Mountains, both weeks great fun, I got back to Flirt. Each small item takes time to do right. Removing char, especially for items I’m leaving natural boxwood, takes time. There are some very tiny parts involved. Before I mount all the completed deck furniture I have to install the port guns. I’ve put it off as long as I can. After that I’ll complete the hull with the channels. Yay. Thanks for stopping by.

-
That is a very well done square tuck - Nice work!
- 112 replies
-
- 1
-
-
- Cheerful
- Syren Ship Model Company
- (and 1 more)
-
This was also my first model, and I also learned a great deal by following Hunt’s practicum. Someone may reply here about Hunt’s cantankerous ways, I’d ignore that as it has nothing to do with this practicum he wrote long ago. Back then all I knew was to use the kit wood, I don’t agree with any “furniture” comments regarding walnut strip, it’s not the best but it’s fine for this model, especially given the hull is painted white. Holly may not provide much contrast to that, it’s a white wood already, you must have a stash, it’s hard to find these days. Enjoy this fun build.
-
The other approach to reduce sanding is the scrape the char with a #11 blade. A lot of it can be removed quickly leaving a lot less to sand. Of course holding these small parts in one hand with a blade in your other hand requires extreme caution and going very slow.
-
The caution is having enough axel for the truck to remain attached, I think you may wind up with a bigger problem than a slightly square axel.
- 857 replies
-
- 2
-
-
- Sphinx
- Vanguard Models
- (and 1 more)
-
Seems like twisting it off entirely is a good possibility. Can you define how you determine the size and more what you mean by brass collet?
- 857 replies
-
- 1
-
-
- Sphinx
- Vanguard Models
- (and 1 more)
-
Not that big a deal to do touch up with tiny brushes. Frankly it’s a lot easier than assembling separate pieces without having glue being a bigger problem than touching up paint.
-
Well done, thanks for sharing your technique for planning it out. What is a “boxwood color mix” to cover the char before painting?
- 607 replies
-
- 1
-
-
- winchelsea
- Syren Ship Model Company
- (and 1 more)
-
Just need a 20/0 or 18/0 Spotter brush and you’ll be fine. That gold looks pretty good!
-
Nice to see another Speedy underway, the sister to the Flirt I'm working on now. You're off to a nice start. I too am a convert to plank bending, its so easy to do and makes such a big difference. I started with the hold-down on my bending station but determined I didn't need it and like being able to apply the iron to the whole area being bent. Either way it's such a superior method. I taper planks with the ruler and knife, the opposite of you I can't handle the planer consistently. I'd be interested to see how you hold the plank while you're planing it to fit.
- 91 replies
-
- 2
-
-
- Speedy
- Vanguard Models
- (and 1 more)
-
I've seen that. The Winnie without that is more than enough challenge for me.
-
Virginia Tech Hokie I'm guessing, though don't know about EE substituting for the ie
-
I understand English isn't your first language, and it far exceeds the little German I know from my years living there. Rant implies and angry, attacking, or defensive tone, I'm sure not what you meant.
-
I completely agree, nor do I. Odd wording to use for someone like you who takes the time to share and explain his techniques.
-
Thanks Bob, but next up is Winchelsea. That will consume at least the next two years if not longer. Go big or go home 😄
-
I've had the wood kit for this cross section for years, just never motivated to start it. I'm sure following your log will motivate me to look at it again. I did manage not to break into the lovely boxwood that I have for some other project so it must stay on my mind some. The practice runs on the keel are a really good plan, taking it slow to get it right.
-
Your model looks quite nice, not rushed and finished well. You really should post a build log to inspire others to build this kit.
-
Clear acrylic or watered down PVA are best for rigging, it just takes what it takes to dry. Tie a knot and try the phatic. I’d guess it dries hard and maybe discolors the rope.
-
Can these be done really fast and without removing the char 😂🤣😂🤣
- 1,784 replies
-
- 4
-
-

-
- winchelsea
- Syren Ship Model Company
- (and 1 more)
-
Best of luck. I’m sure it will be an excellent learning opportunity. ….what’s a bench pin….?