glbarlow
-
Posts
4,127 -
Joined
-
Last visited
Content Type
Profiles
Forums
Gallery
Events
Everything posted by glbarlow
-
 I like to demonstrate my lack of nautical knowledge. I have no clue which boats are which and why there are 8 different ones...boat..oars...long...short apparently doesn’t cover it😂🤣
 -
Thank you for taking the time to tell me it was helpful. That has always been my primary goal of my logs. I have learned so much in this forum. I’m happy to try and help pass it along to others.
- 55 replies
-
- 3
-

-
- lady nelson
- victory models
- (and 2 more)
-
Have you tried the usual figure 8 seizing method, seems like that would make it a lot easier?
-
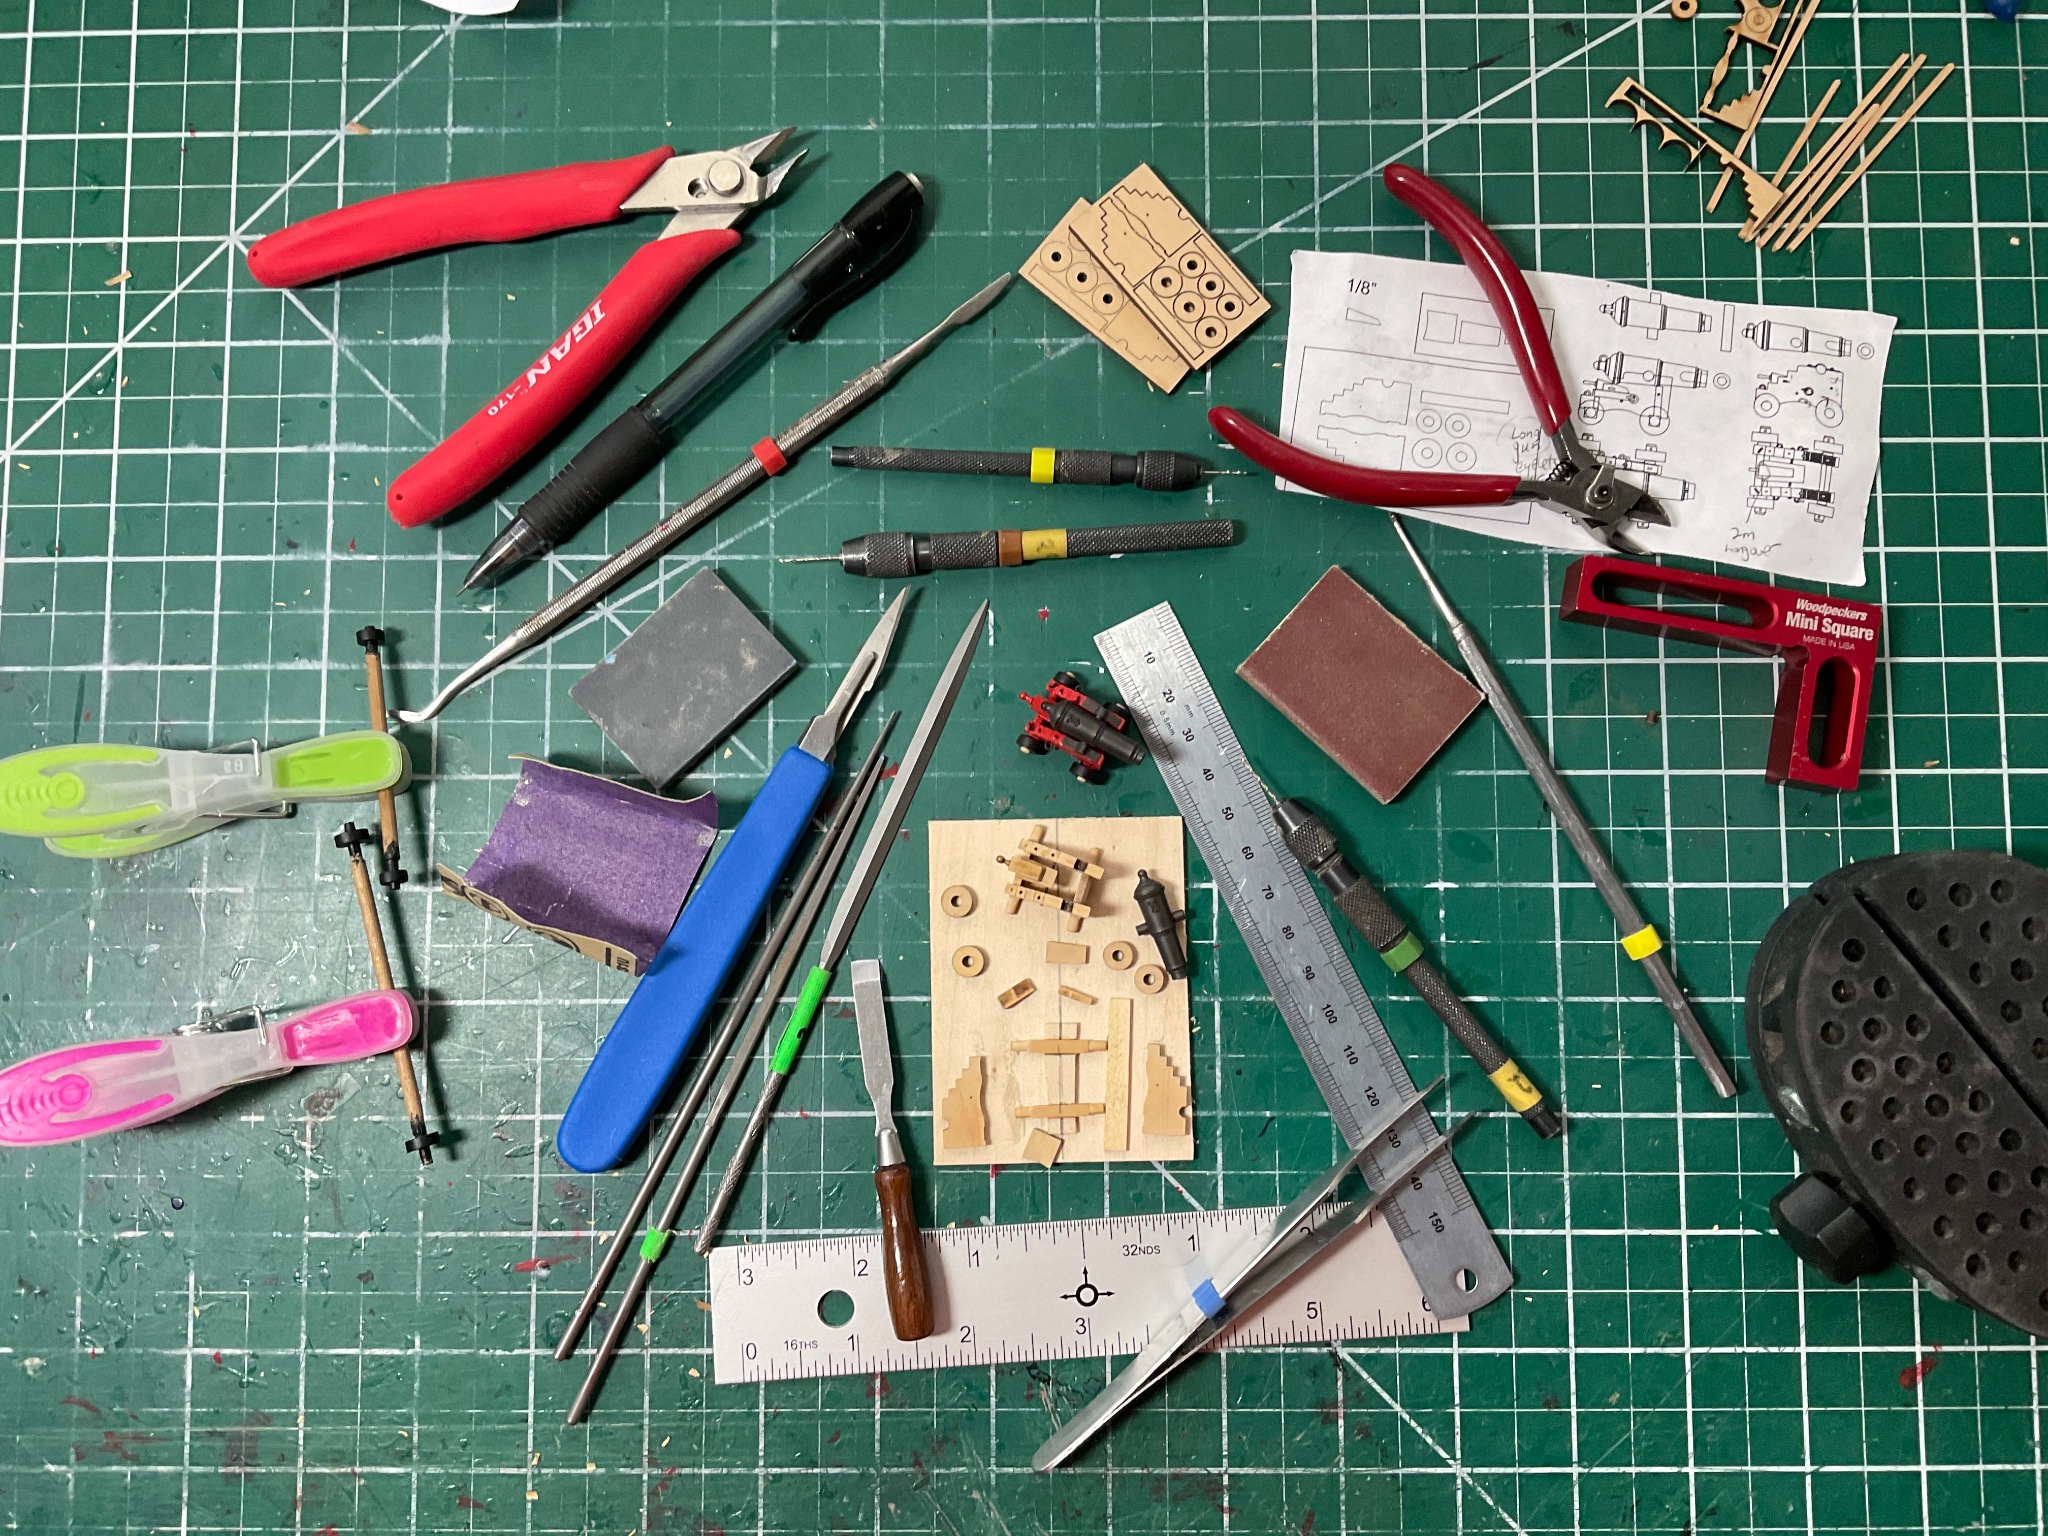
Of course😀I drill 3 different size holes to make up the gun carriages, so... Note they’re color coded too as are a number of my tools using these little rubber sleeves I got from a dentists supply website after seeing my dentist’s assistant use them to quickly recognize instruments. I actually have 5 pin vises, you never know😀
- 778 replies
-
- 4
-
-
- cheerful
- Syren Ship Model Company
- (and 1 more)
-
With the weather, electricity, and heat (lack there of) situation I decided to work on building my remaining 5 carronades. I described my process way back early in this log when I turned to them after my first frame was shattered in a fall to the floor so I won’t repeat it here. I like to use as many tools as possible it seems 😀. These I can do in the short intervals I have available to have ship time right now. Here’s hoping things get back to normal this weekend when it should warm up.

- 778 replies
-
- 12
-
-
- cheerful
- Syren Ship Model Company
- (and 1 more)
-
Just amazing work. Just as with any tool from a #11 blade on up, having the CNC means nothing without your artistic and technical skills to use it. I see nothing controversial with using all the tools available today to create such a masterpiece.
- 589 replies
-
- 1
-
-
- le gros ventre
- cargo
- (and 1 more)
-
We’re having rolling power blackouts here, 40 minutes on, 40 minutes off with no end in sight. -1 degrees may not be a big deal in the east, but it’s not happened here since 1949. Consequently I’m not getting much boat yard time in. Too busy trying to stay warm and grab a little internet time when I can. Hopefully by the weekend.....
- 778 replies
-
- 5
-

-
-
- cheerful
- Syren Ship Model Company
- (and 1 more)
-
You’re really flying building this. And doing such a great job.
- 201 replies
-
- 2
-
-
- Duchess of Kingston
- Vanguard Models
- (and 1 more)
-
I’m not sure I follow, are you asking for those only currently rigging, or anyone that wants it? I’d like to get what I need for Flirt, but not unless I can get all I need for that.
-
I think it’s ok to leave them off altogether. They were easy to move in reality. To me they seem a bit of clutter to the otherwise graceful look of the frigate. I didn’t replace mine on Pegasus, but I should have.
- 164 replies
-
- 2
-

-
-
- fly
- Victory Models
- (and 4 more)
-
Good that you caught the gun port, nice fix, very clever solution.
-
I’ve never understood the purpose of using white line then staining it with India Ink, a disaster waiting to happen. I always use dark line to start with. For what it’s worth I’ll never be good at tying rat lines, it is not the highlight of my modeling. Nice details in the rigging, you always add that extra something. Meanwhile I’m spending days on channels and strops.
- 725 replies
-
- 2
-
-
- vanguard models
- speedy
- (and 1 more)
-
Hoping to get one in Cherry before they’re gone. When will they be available to order?
-
Glad to see you back at it and making good progress. Excellent work!
-
Badly worded, of course I’d mill my own strips, nothing to it after Cheerful. I meant the wood to cut the strips from. I thought the second option was Pear, I see it’s now it’s instead Cherry. So if I chose Cherry, and mill my own strips, the Cherry to do that you can provide as well as all the Winnie version of mini-kits. I guess I can see this all for myself once the store opens.
-
When the store opens will you have all the past parts packages in stock including these? Do you offer the strip wood or planks for stripping in both boxwood and pear, or just in pear? I'm thinking about this after Cheerful, I love the project - just not sure I can go so big.
-
Amazing as always. What brown paint did you use? It’s such a perfect match to the wood. An interesting thing about this ship is the lack of a rail or high transom. It seems like the duchess could easily be blown off the stern during her morning stroll about the upper deck. 🤣😂
- 201 replies
-
- 2
-
-
- Duchess of Kingston
- Vanguard Models
- (and 1 more)
-
Can you mail me the three that will go with Sphinx 😂🤣😂🤣
-
Nicely done Tim, it looks great. I’m sure you are justifiably proud of your work. I’m impressed with how much you’ve learned and how far you came form your start. It’s a great model!
- 436 replies
-
- 2
-
-
- vanguard models
- alert
- (and 1 more)
-
Ordered on Jan 28, got it today Feb 4. Pretty quick.
-
Never seen any other version but that - or what else you'd other wise do. Best of luck in your search. I'm a bit surprised Chris doesn't include this in the instructions.
-
I describe the weathering powder process in my Cheerful log. It is Doc OBriens Rusty Red from MicroMart. It is done after painting with soft brushes. Nothing more than brush on brush off, but as it’s powder done off ship so as not to spread.
-
Breech rope is often enough, there’s plenty of visual appeal all around on this model. Crisp work as always. I should use more towels. congrats on the vaccination hub. I got my first shot today at the Texas Motor Speedway as provided by my county. Very efficient and fast.
- 201 replies
-
- 4
-
-
- Duchess of Kingston
- Vanguard Models
- (and 1 more)