No Idea
-
Posts
1,036 -
Joined
-
Last visited
Content Type
Profiles
Forums
Gallery
Events
Everything posted by No Idea
-
 Thanks clogger 👍 Thanks Greg thats very nice of you to say - would you believe I chose my screen name due to the first time I visited this site. All of the terminology and expert work that was going on made me realise that I had "no idea" what I was getting into!
 -
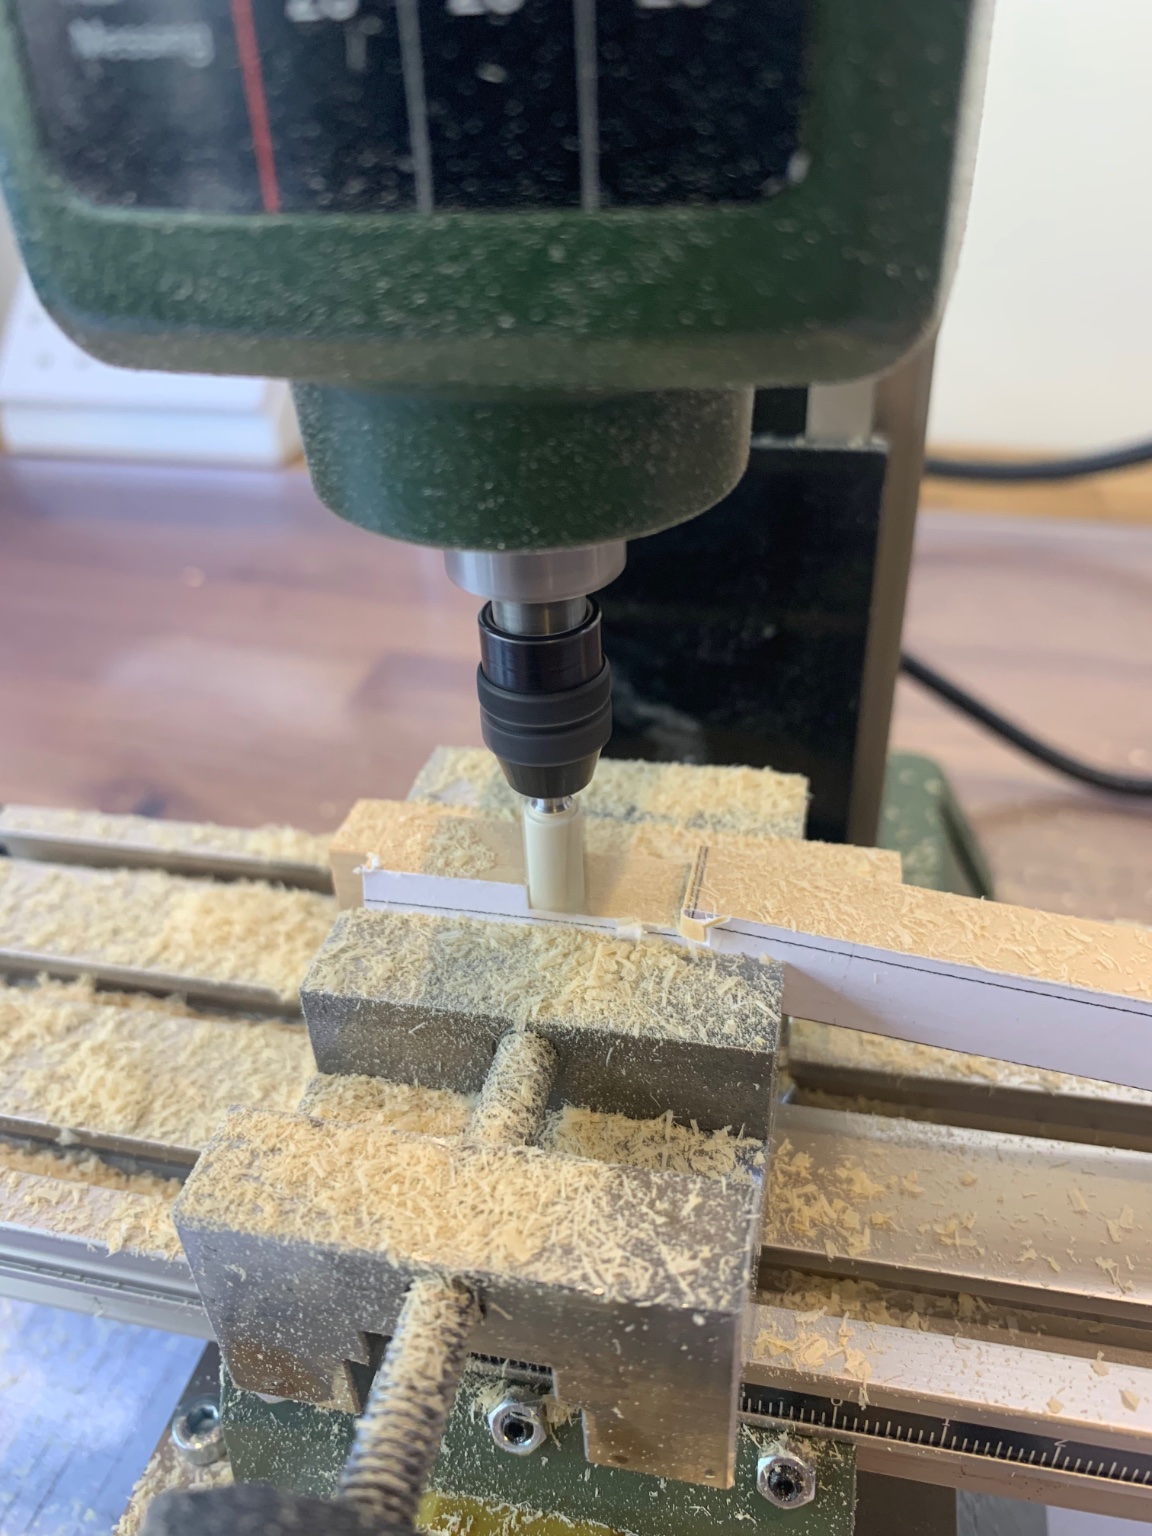
Hi Shipmate 69 I use the Proxxon MF70 mill and its quite a good little machine. The spindle speed is very fast and its quite accurate but it is tiny. Its designed for modellers work and is not designed for large pieces. I only have machined wood and brass which it has handled ok for its size. Could it do 1mm mild steel that you want to machine? I think that it probably could .........but you would need some really good tooling and also take extremely fine cuts. How you would apply cooling I am unsure about but there are bottle fed cutting fluids that maybe could be used. I have thought about upgrading my mill to something bigger and have considered Sherline and the larger Proxxon machines. But none of them have the spindle speed that I want for cutting wood cleanly and the size of them seems to be exponential if I moved up even a little. I have little space where I live so I am learning to make the most of the machine that I have. I buy the best cutting tools that I can and use my imagination when it comes to fixing the item for cutting. Sometimes I win and get the job done and at others I just have to accept that my little machine is just not up to the job. I don't think that there is a mill that does everything but mine does 85% of what I want and the rest I'll just have to get the hand tools out. I hope you find your solution - Mark
-
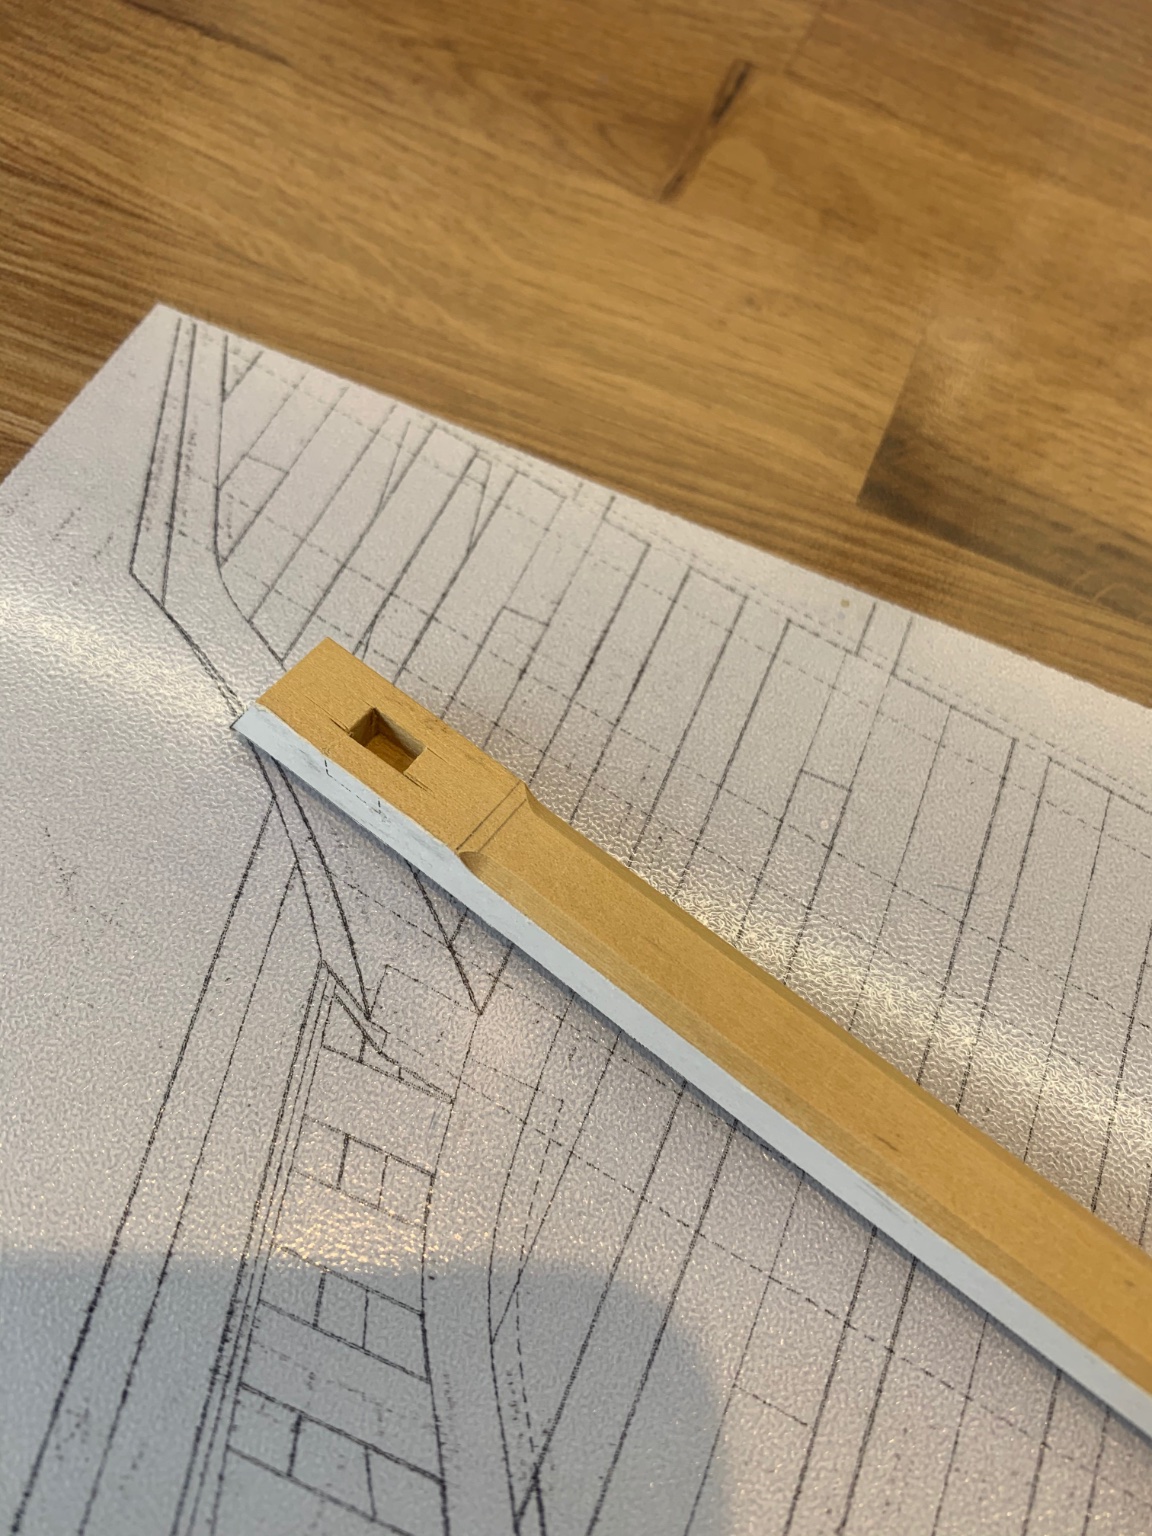
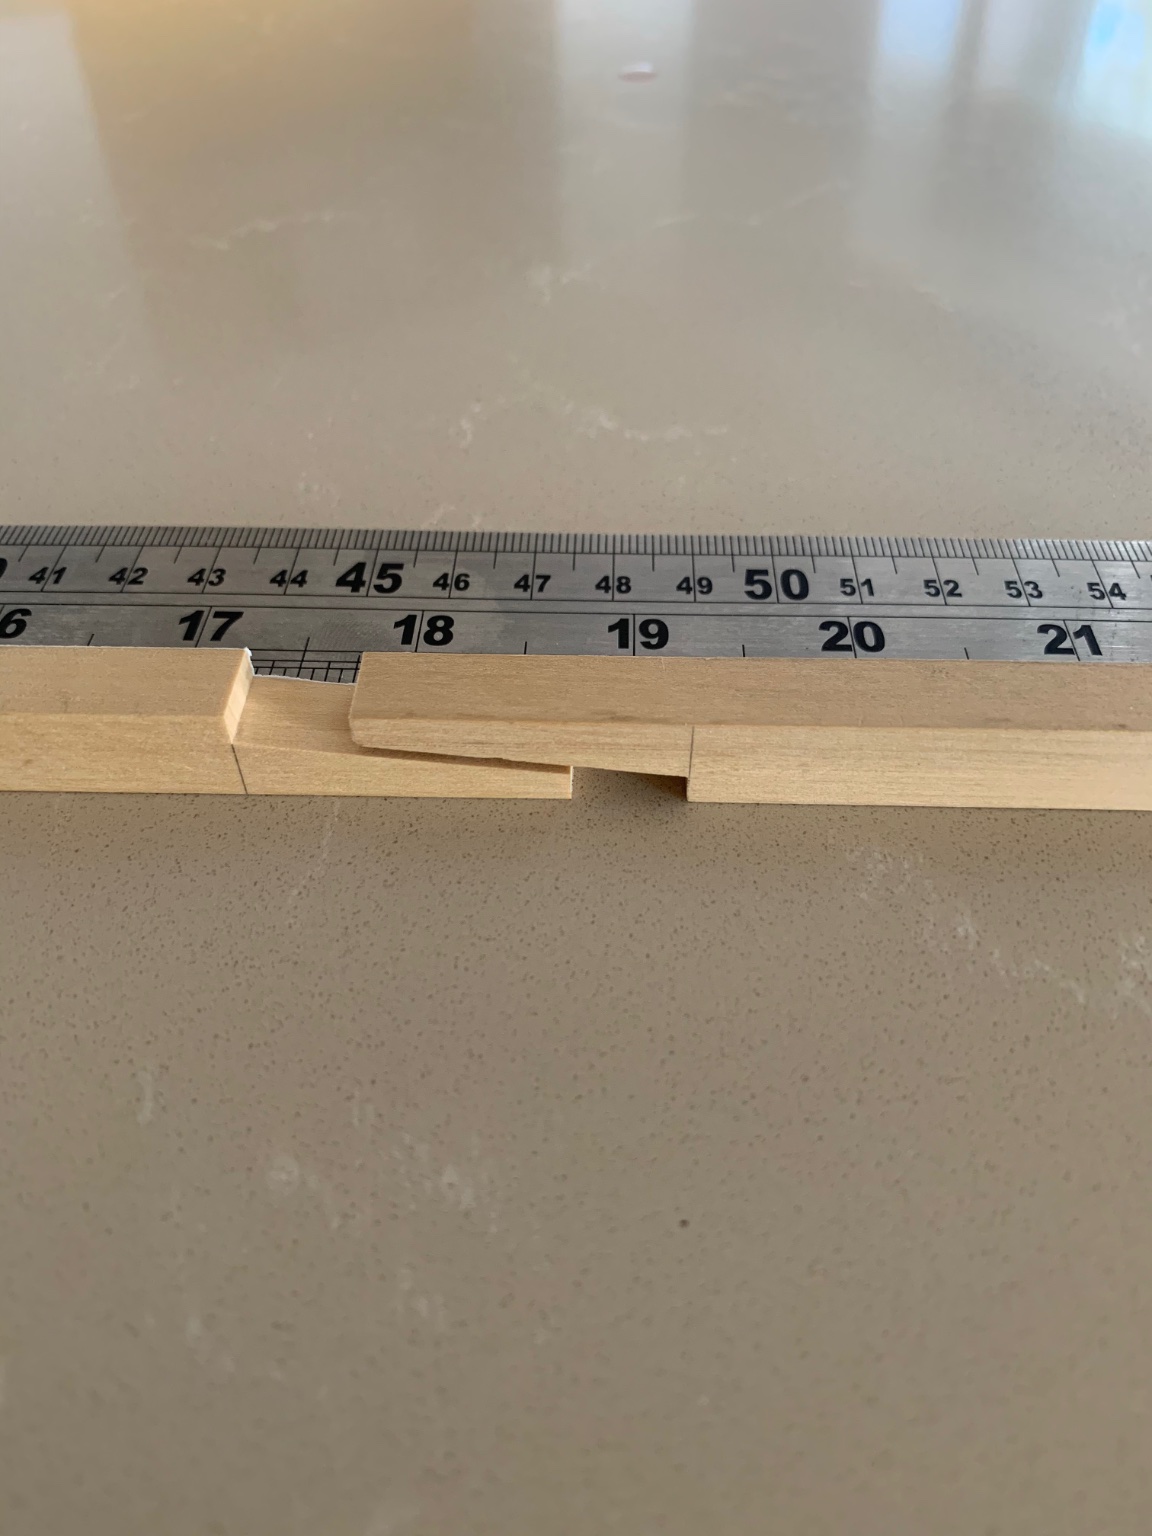
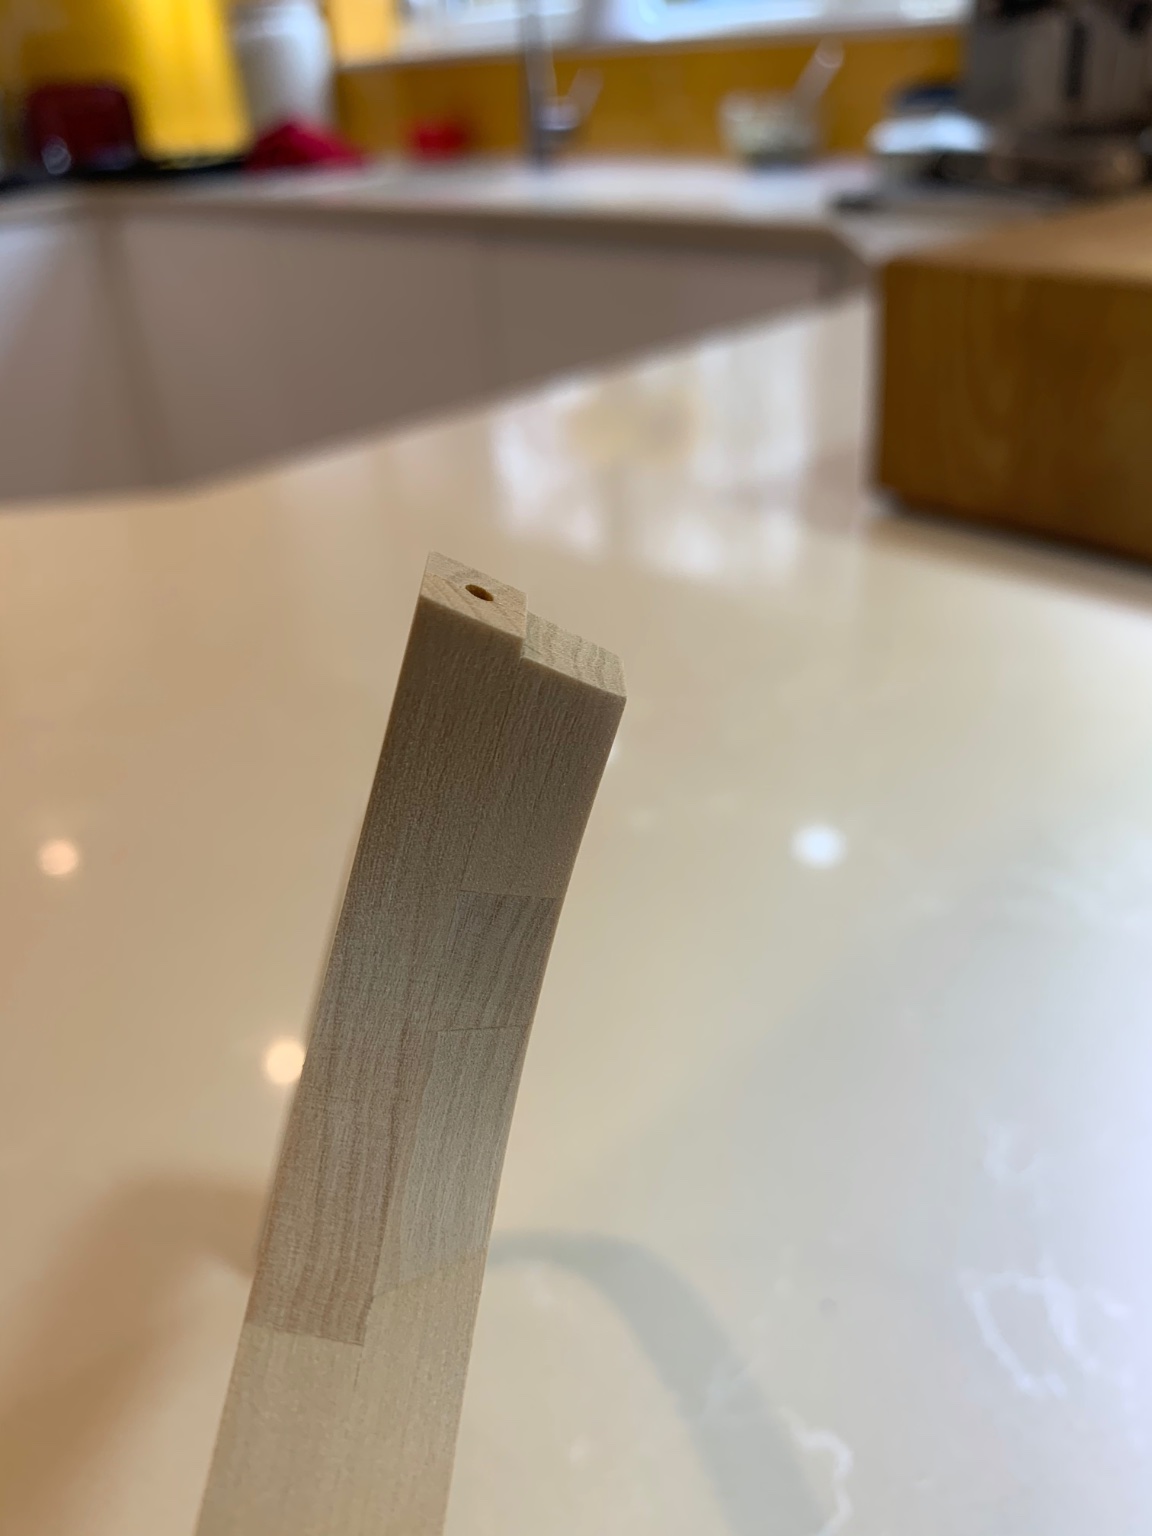
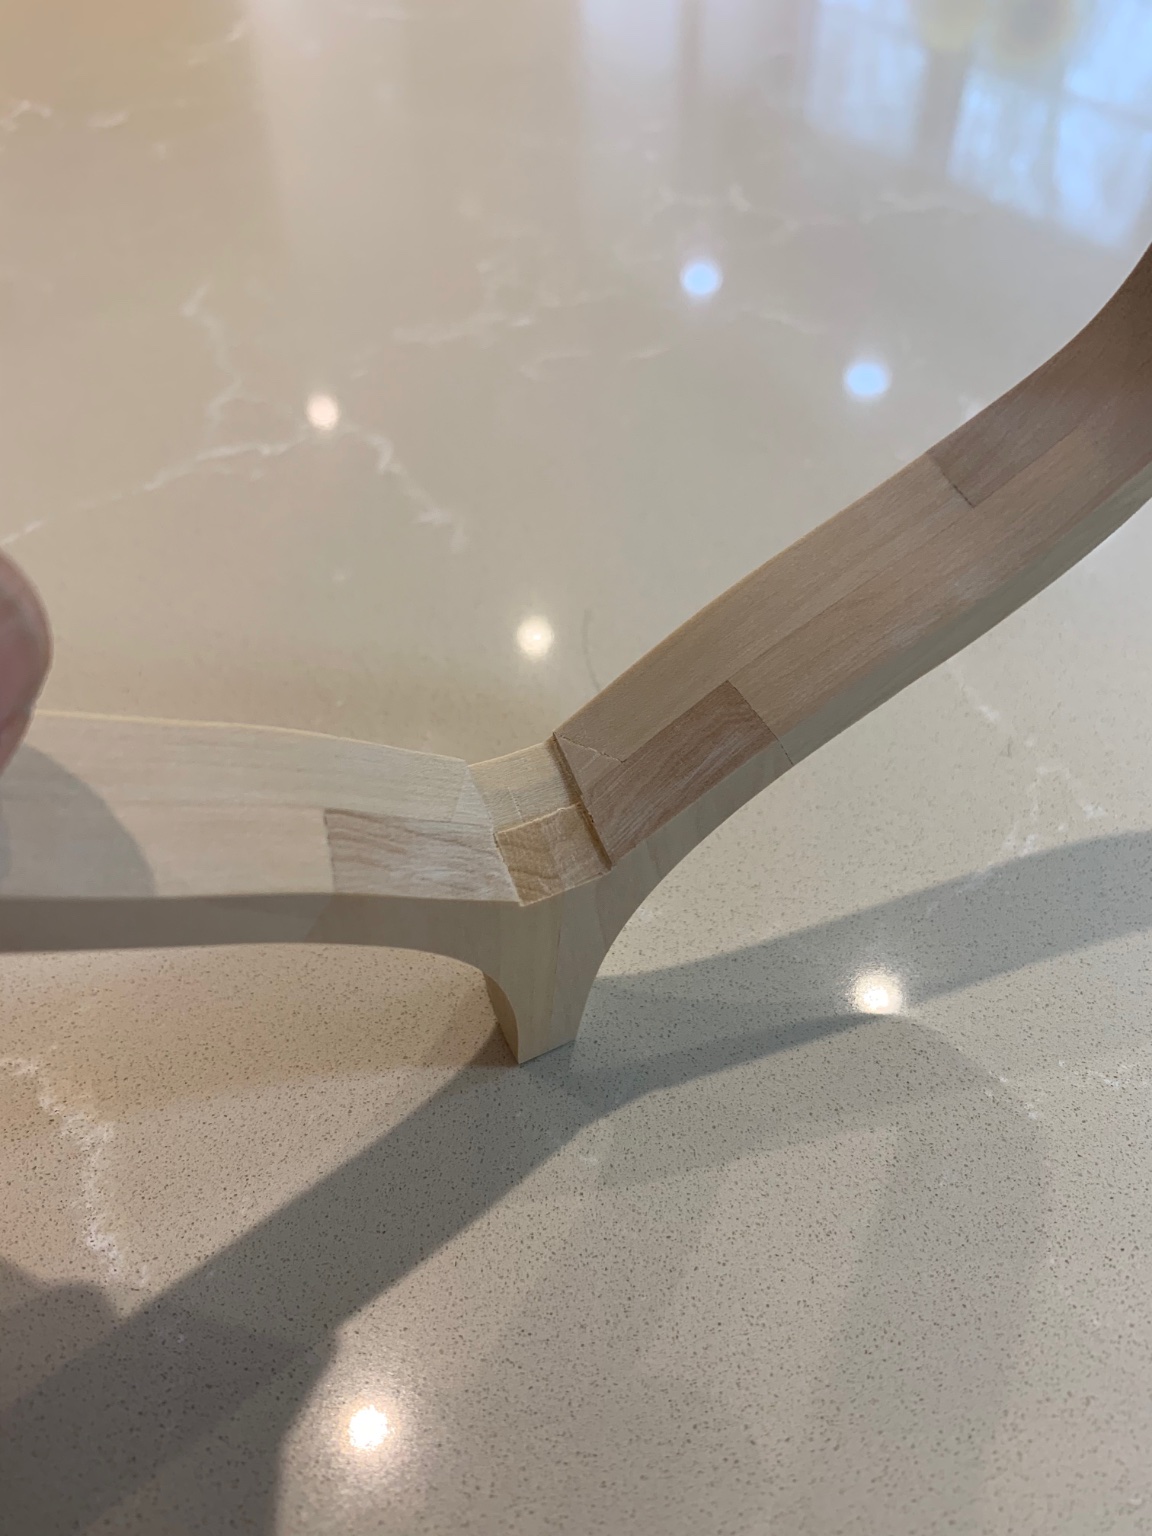
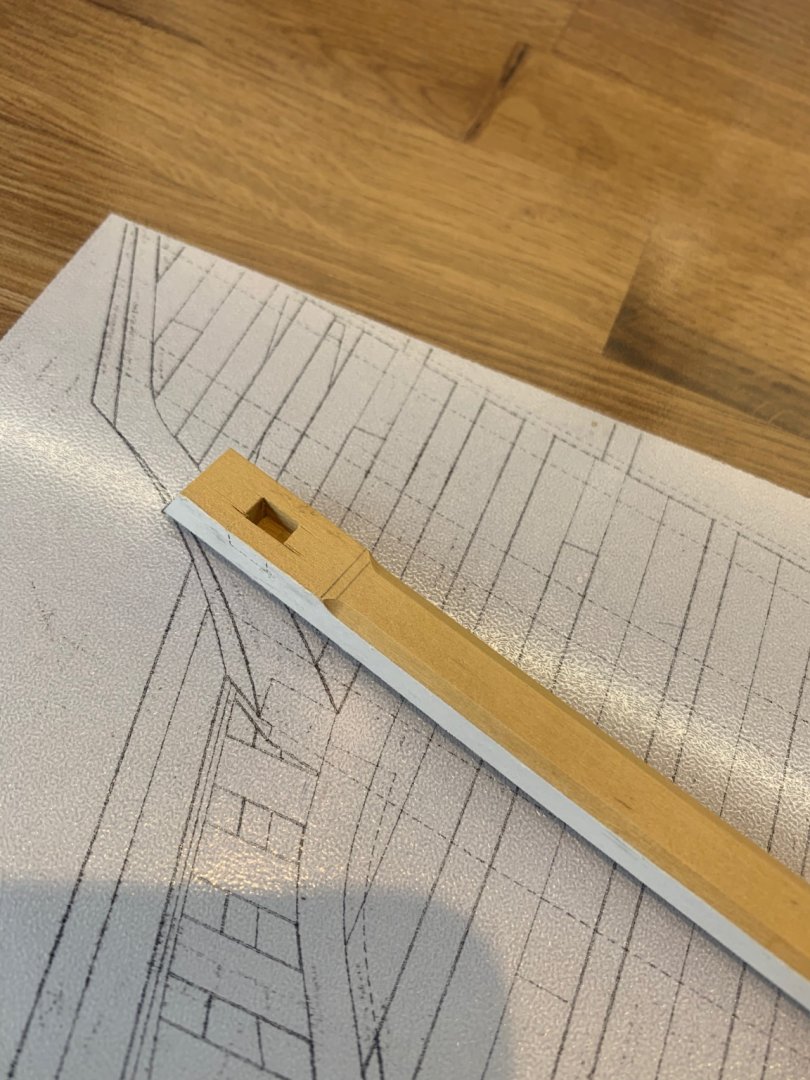
Another quick update The keel parts dried very nicely overnight so I drilled and inserted the treenails through the scarf joints. Next I made the stern post and also cut the mortice and rabbet in it. The false stern post was also made and its now all being glued to the keel. Tomorrow I'll clean it all up and move onto the rising wood hopefully.


-
Bob you make a really good point there that I hadn't really thought about. I don't actually do very much sanding at all - I use planes and chisels far more than I sand. I hadn't realised until you mentioned it. Most of my wood waste is shavings rather than dust and its really easy to just hoover up. If I need to do a big sanding job like fairing a hull then I take it outside regardless of the temperature. I only swapped to edged tools a few years ago but they have become such a way of life it just seems the normal way of doing things now. Far cleaner for in the home and a better finish too.
- 6 replies
-
- 5
-

-

-
- workshop
- best practices
- (and 2 more)
-
Hi Tom All of my wood working is carried out indoors as we live in a flat and have no garden. I use a Bosch Gas20 hoover on all of my power tools which is fitted with a Hepta bag. This works extremely well and captures I would say about 80% of the dust that I create. The other 20% would be extremely messy and quite dangerous so I work the following way. Bear in mind that I have a Byrne's saw, a 10" band saw, a Byrnes thicknesser, an oscillating sander plus many other power tools. 1. I'm really organised and only have out the tools that I need - my room is very rarely in a mess. 2. Making a mess is not a problem but leaving it is. So I spend about 30 minutes after everyday wiping around with a damp cloth and generally tidying up 3. I keep all of my tools and equipment away in cupboards so that they do not end up covered in dust. Its far easier to wipe the doors than all of the tools 4. I try and be thoughtful about when I'm working not just for the family but also for the neighbours. No one likes a hoover running at 23:00 I clean as I go along - I have a small Dyson cordless hoover on hand all of the time just to have a quick blitz. Most people would find my tidy, clean way of working a real pain but I have never had a complaint from my family ever. In fact I reckon that my work room is probably the cleanest in the house. Mark
- 6 replies
-
- 5
-
-
-
- workshop
- best practices
- (and 2 more)
-
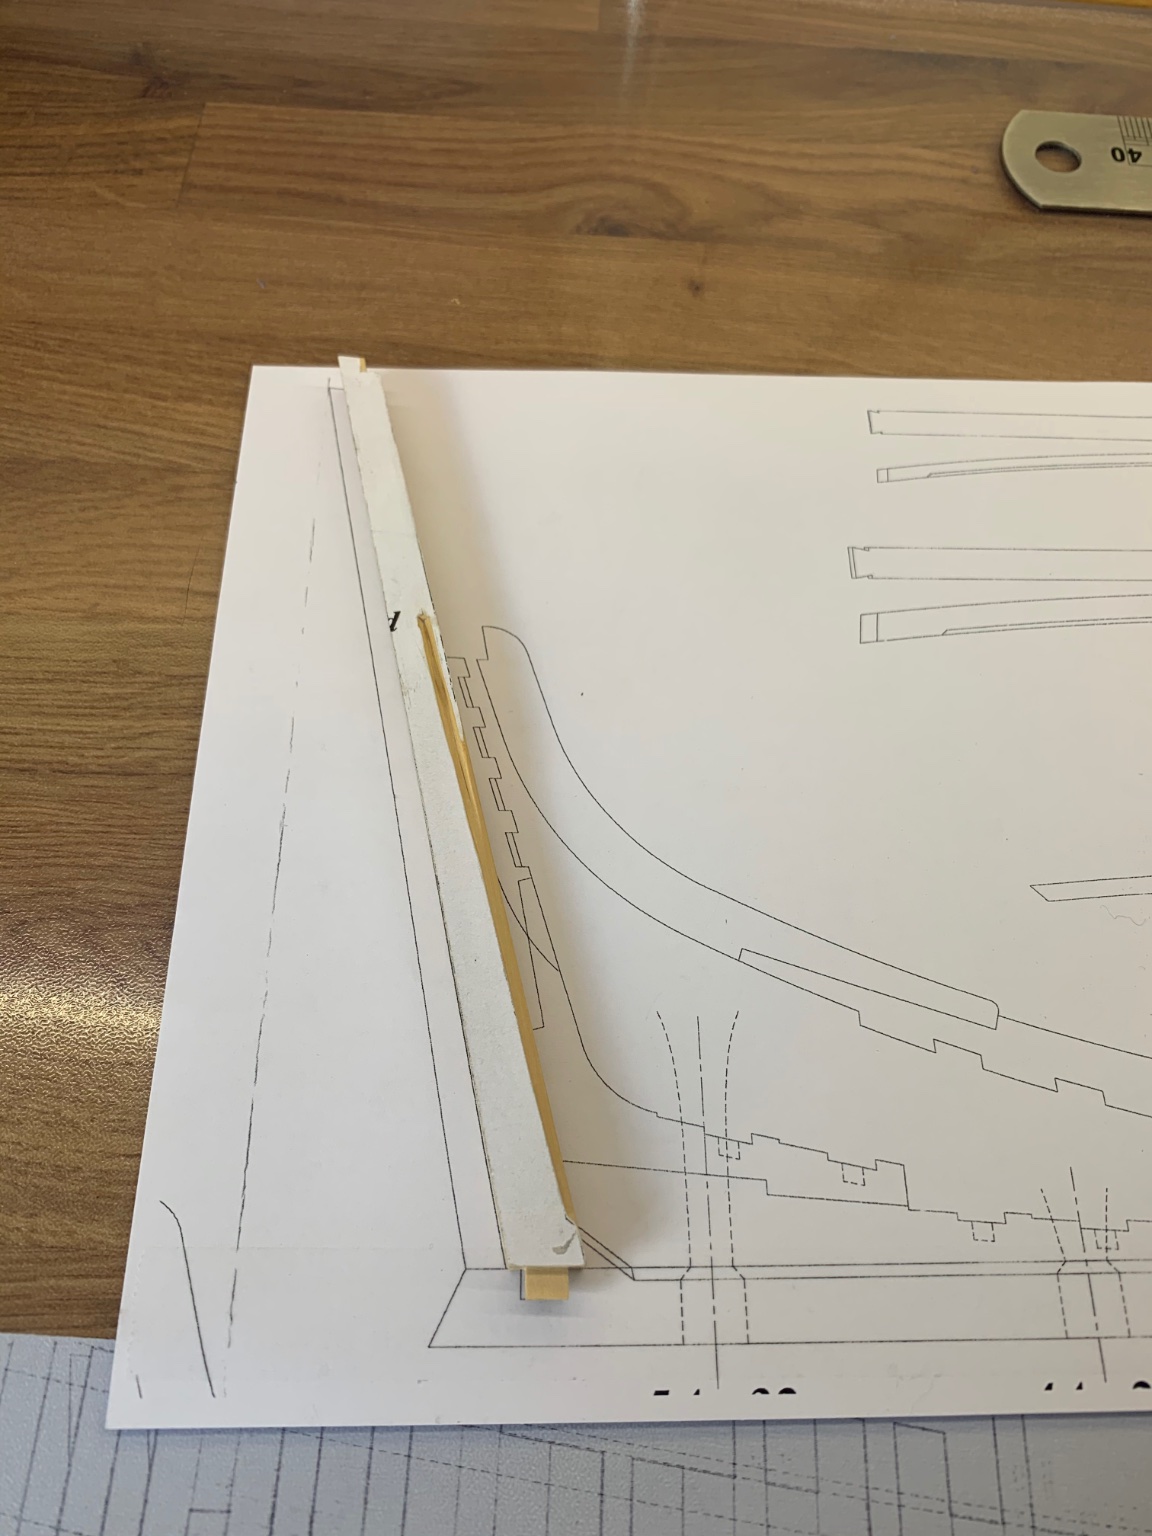
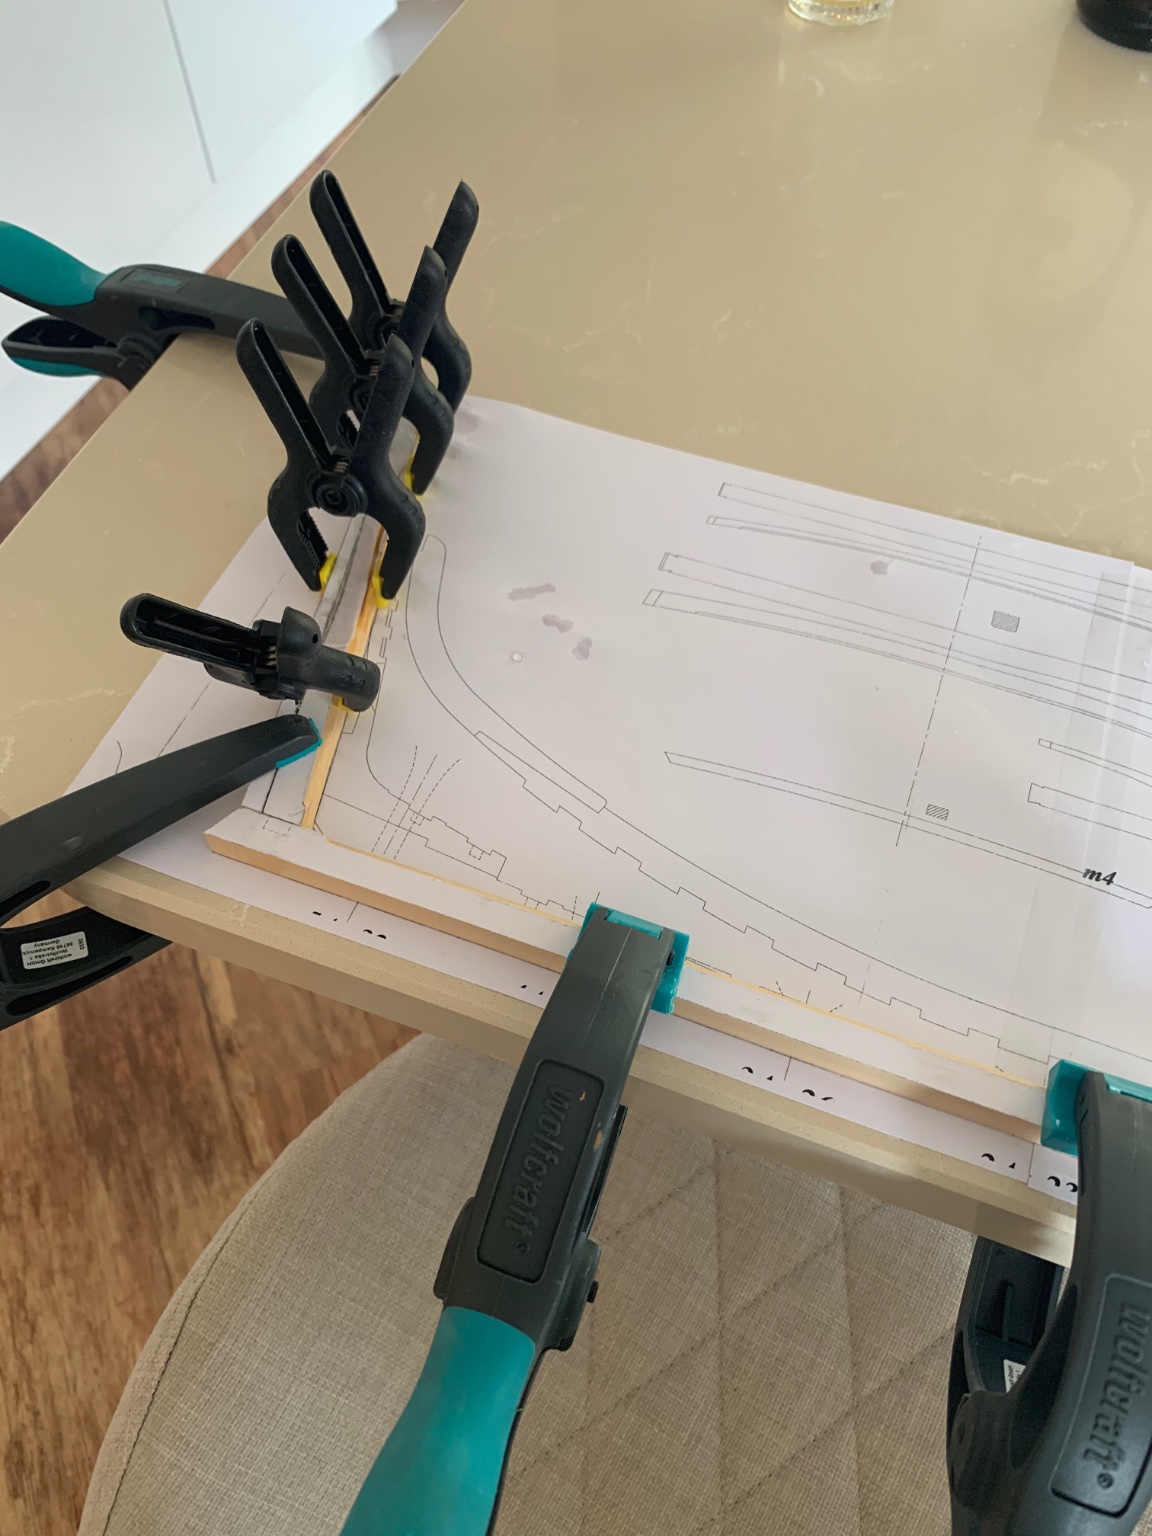
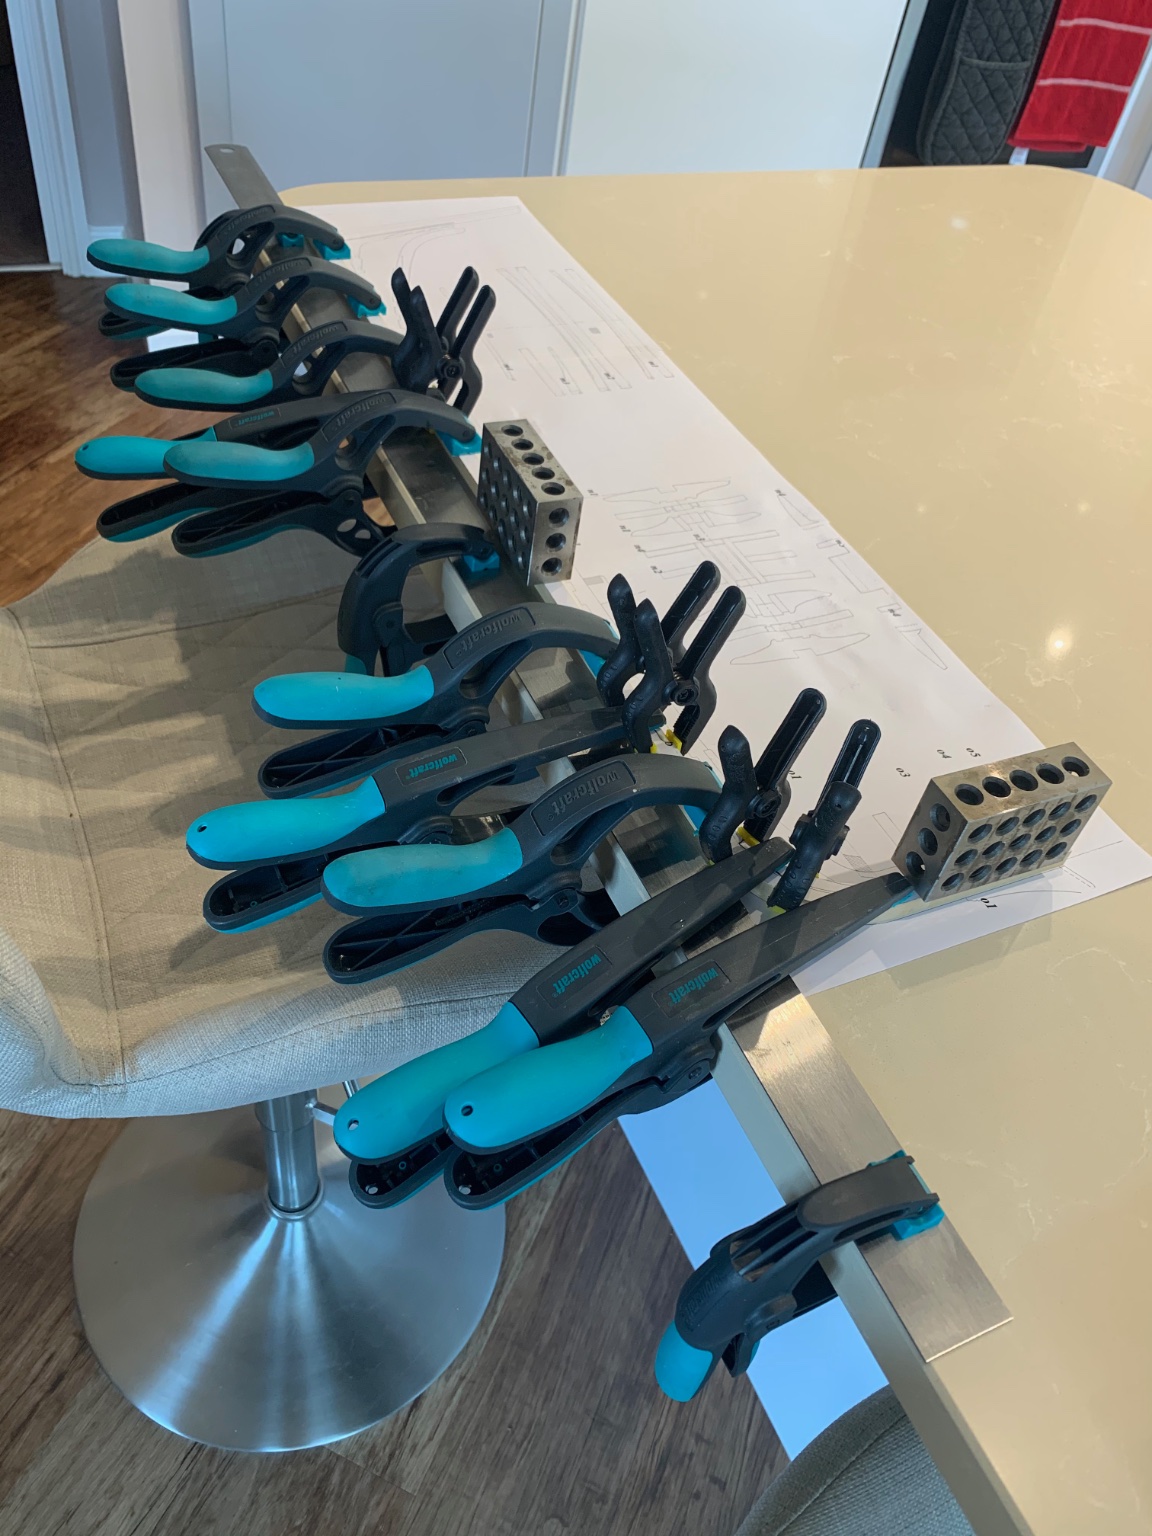
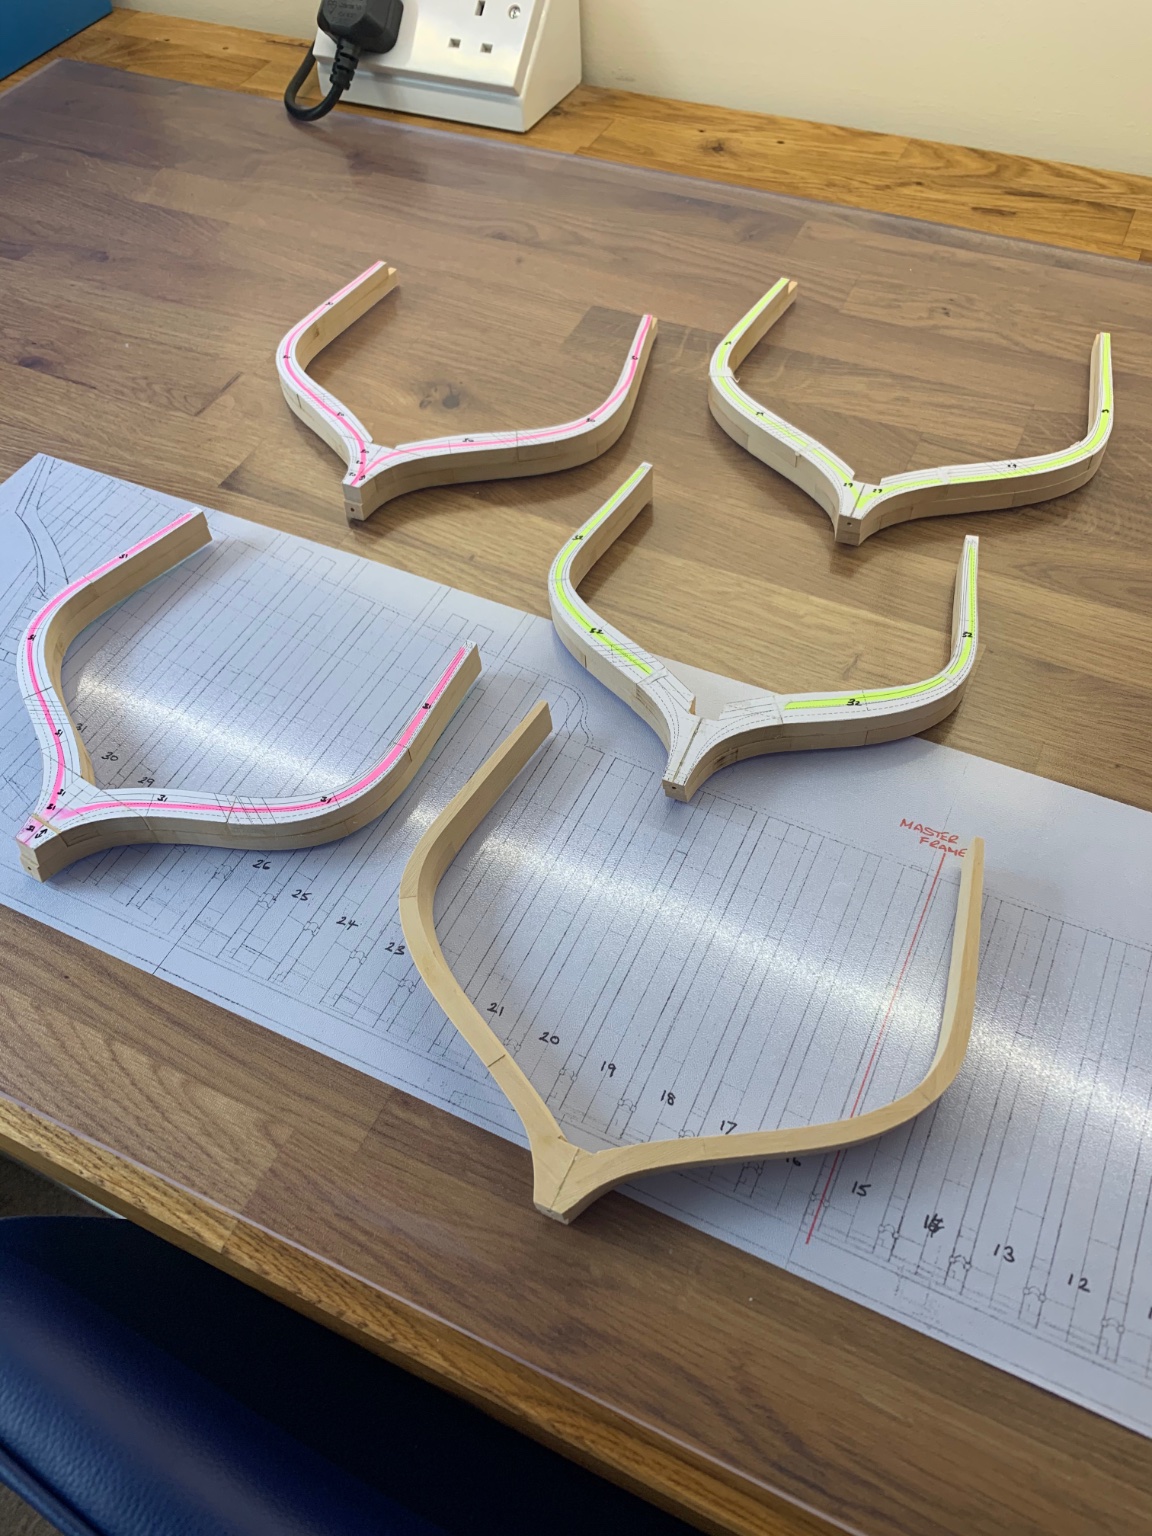
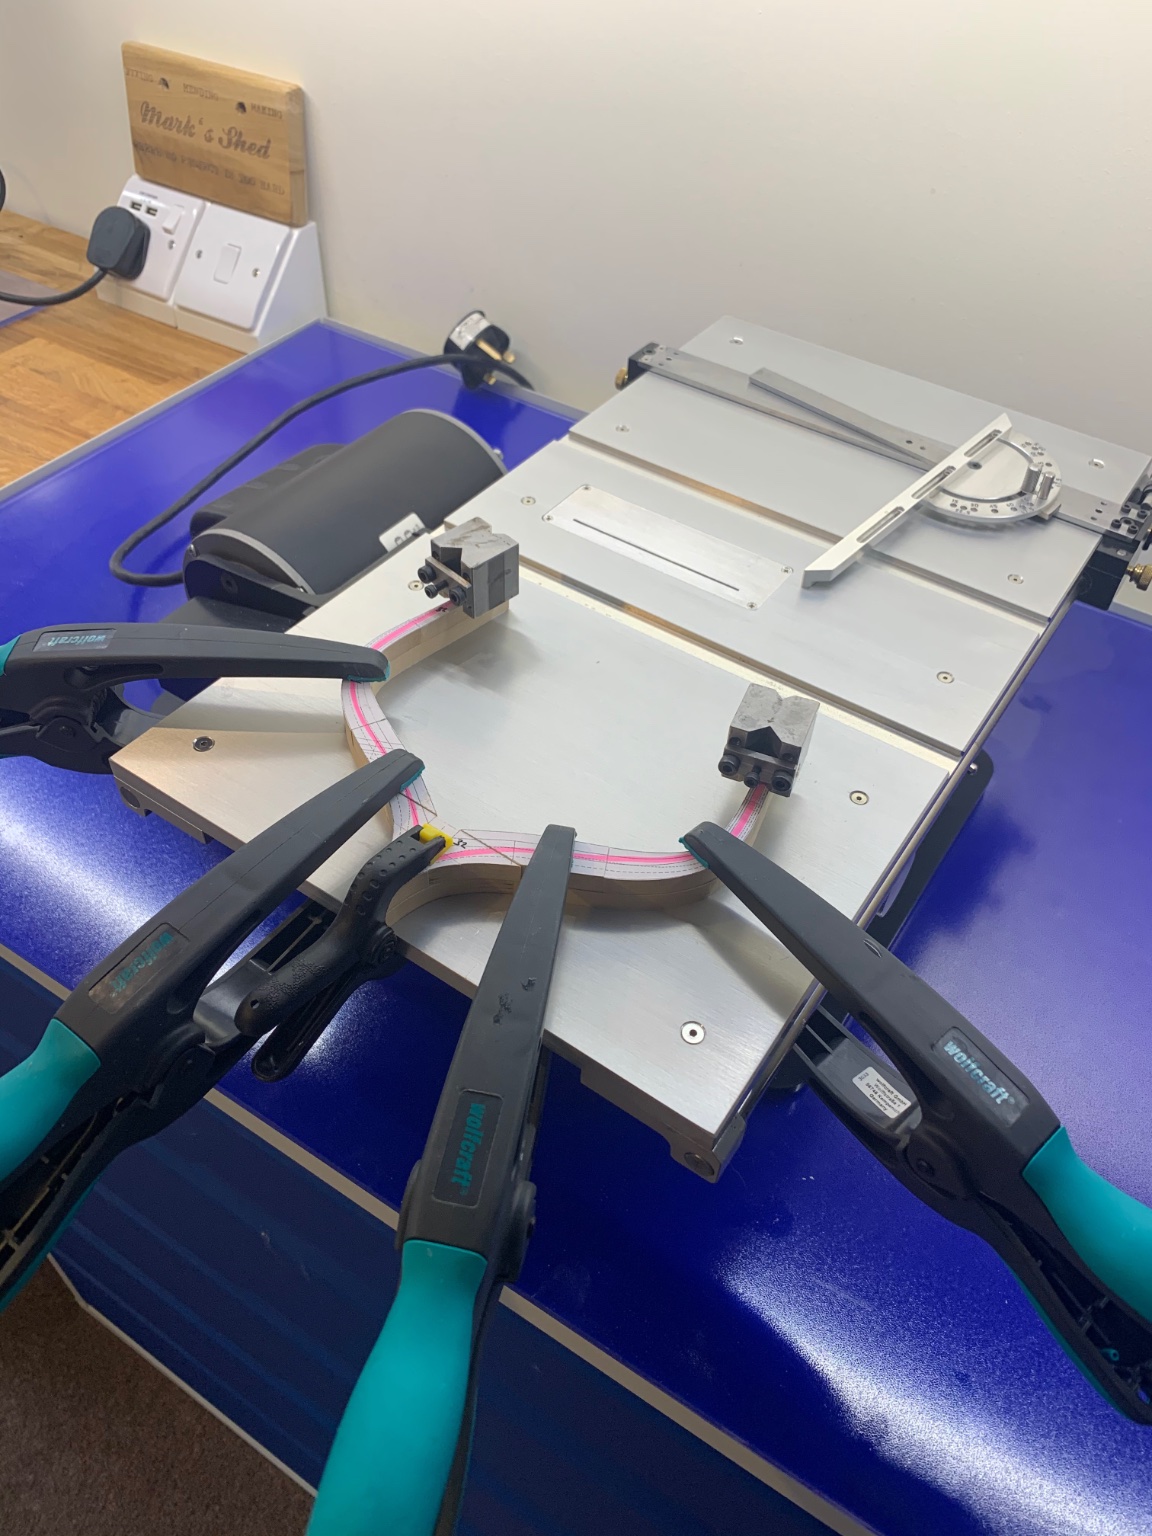
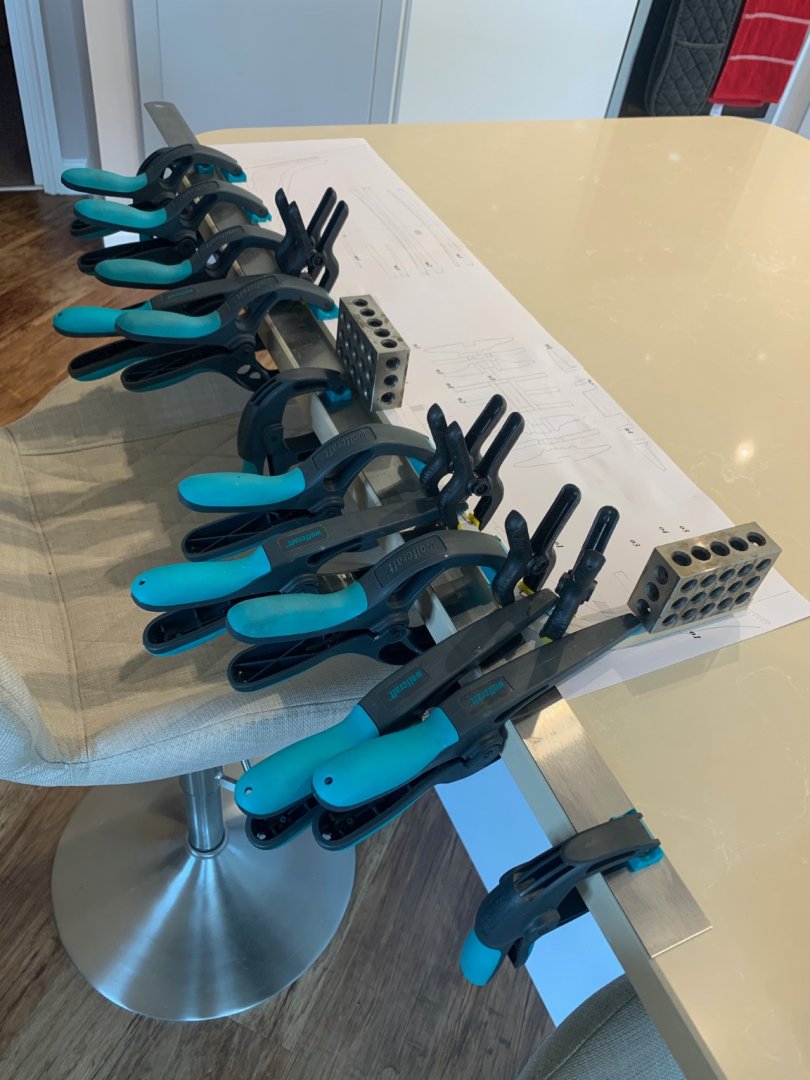
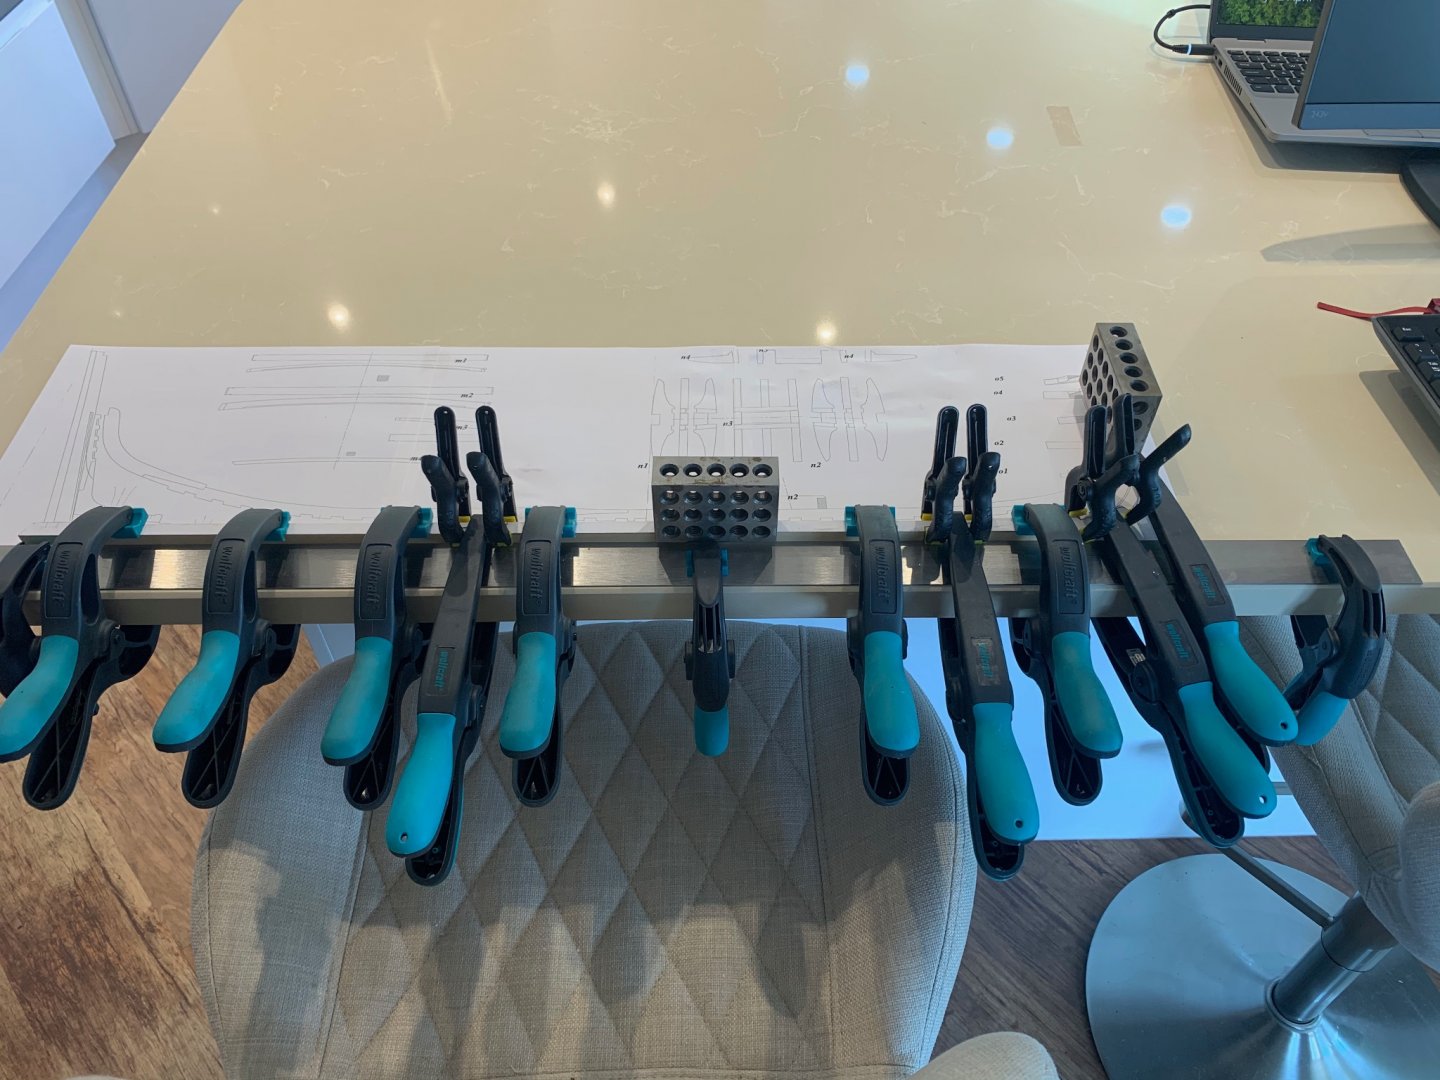
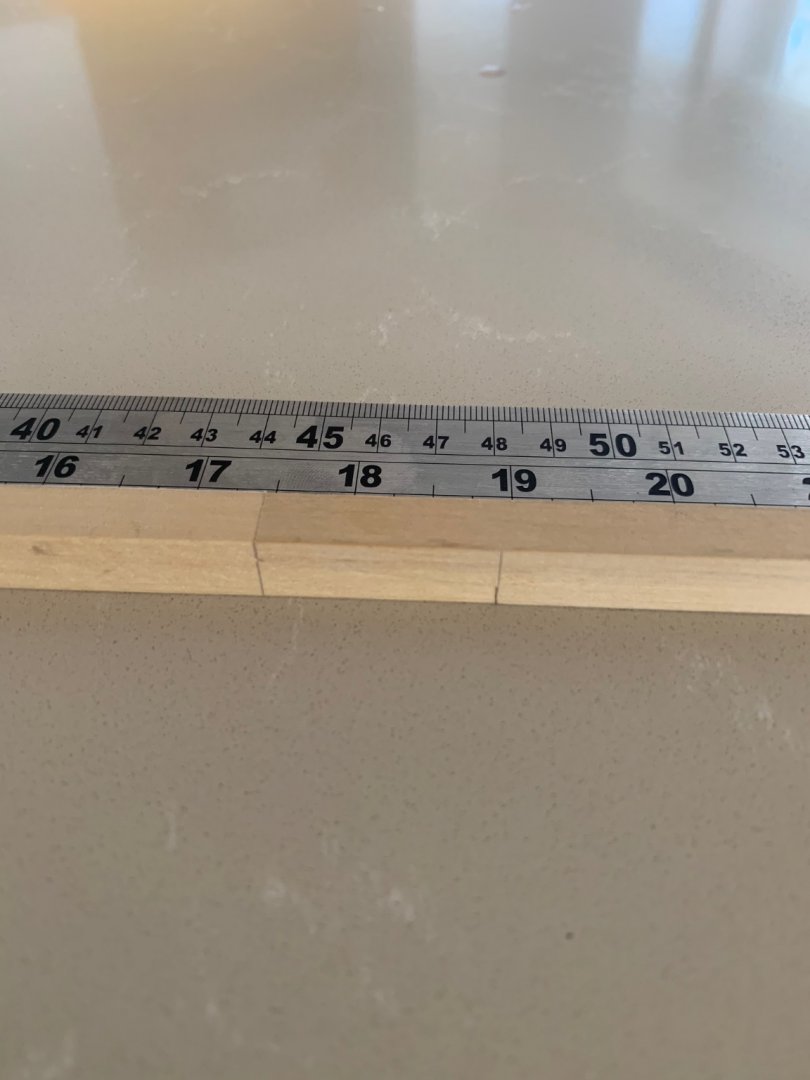
Hi Mark and thanks for the comment. I thought the same until I put it on the plan and then I can see that it needs a little altering but thats ok Today I cut the mortice for the sternpost and also the rabbets on the straight keel pieces. I then made the forefoot and the stem which went ok after I had thickness the required piece of wood. It then took me all morning and afternoon to adjust the scarf joints so that the keel sat exactly on the plan. It was slow work but I got there in the end. I thought that if the keel is not exactly perfect I will be making adjustments throughout the entire build so I took my time to get it as good as I could. Its now glued up and clamped - I've used our granite worktop as its nice and flat and a 1 metre metal rule to ensure that its glued straight. My wife is very understanding - oh and you can never ever have enough clamps I've also made my first ever tree nails for the scarfs and they came out ok too. They can be drilled and glued tomorrow.


-
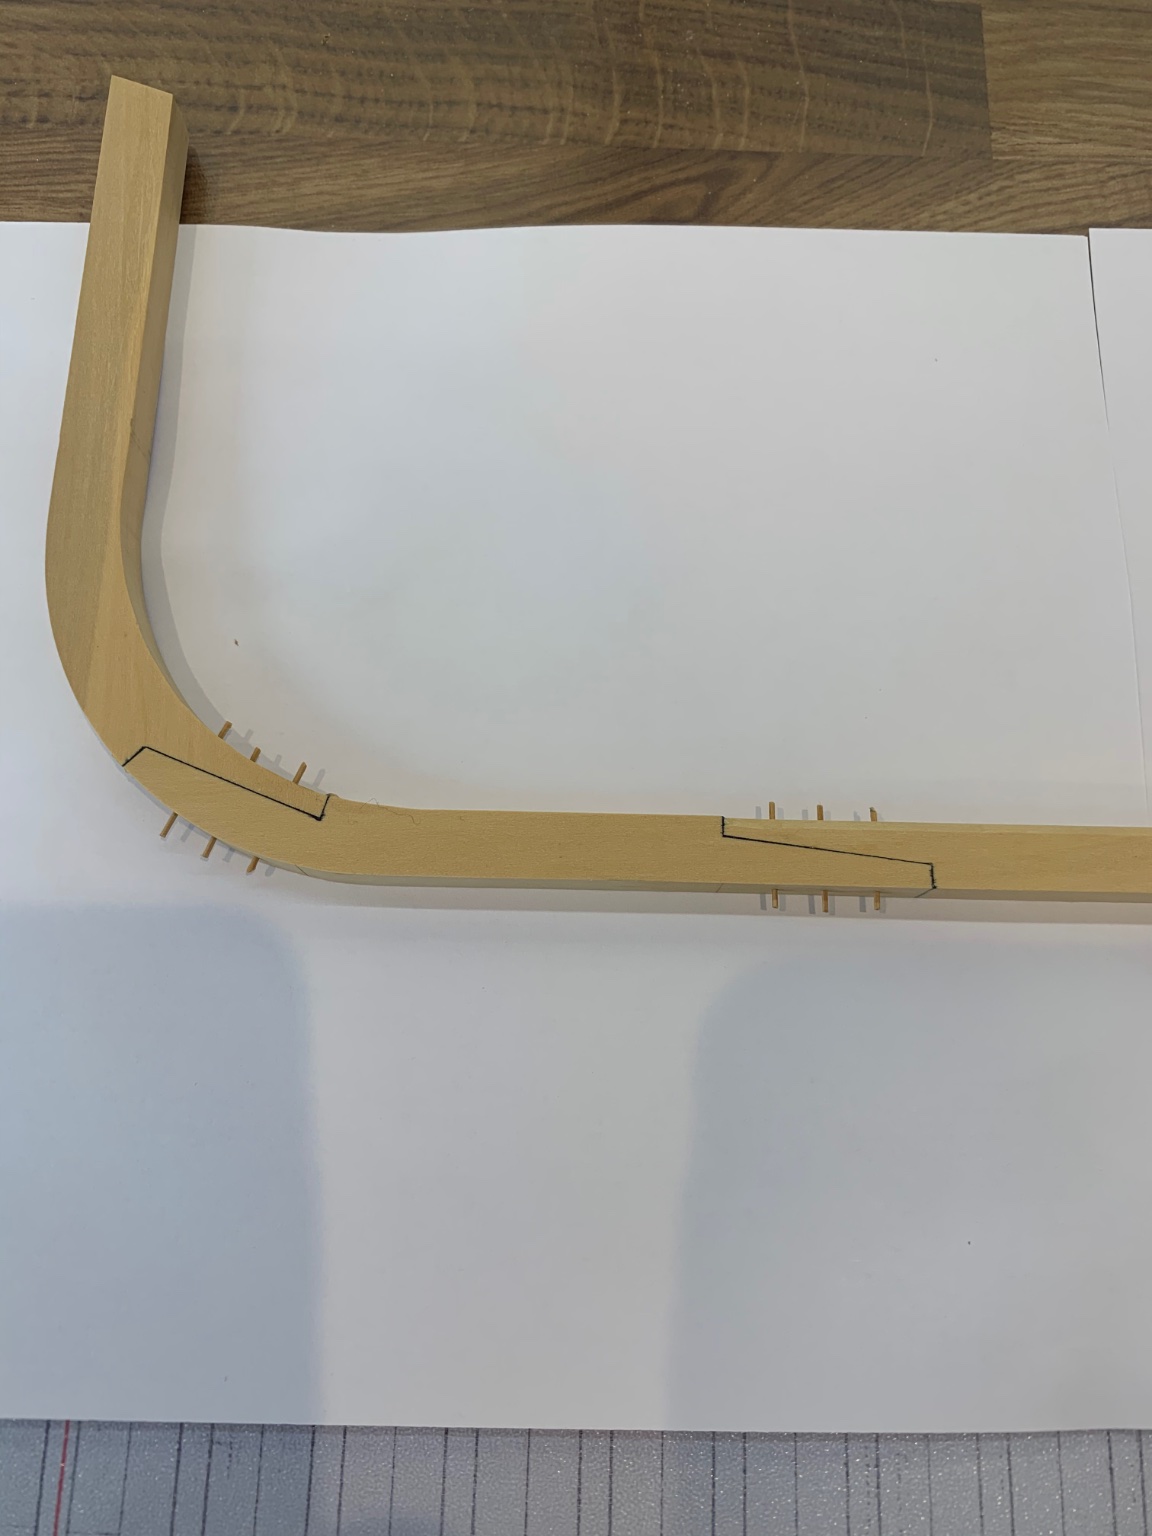
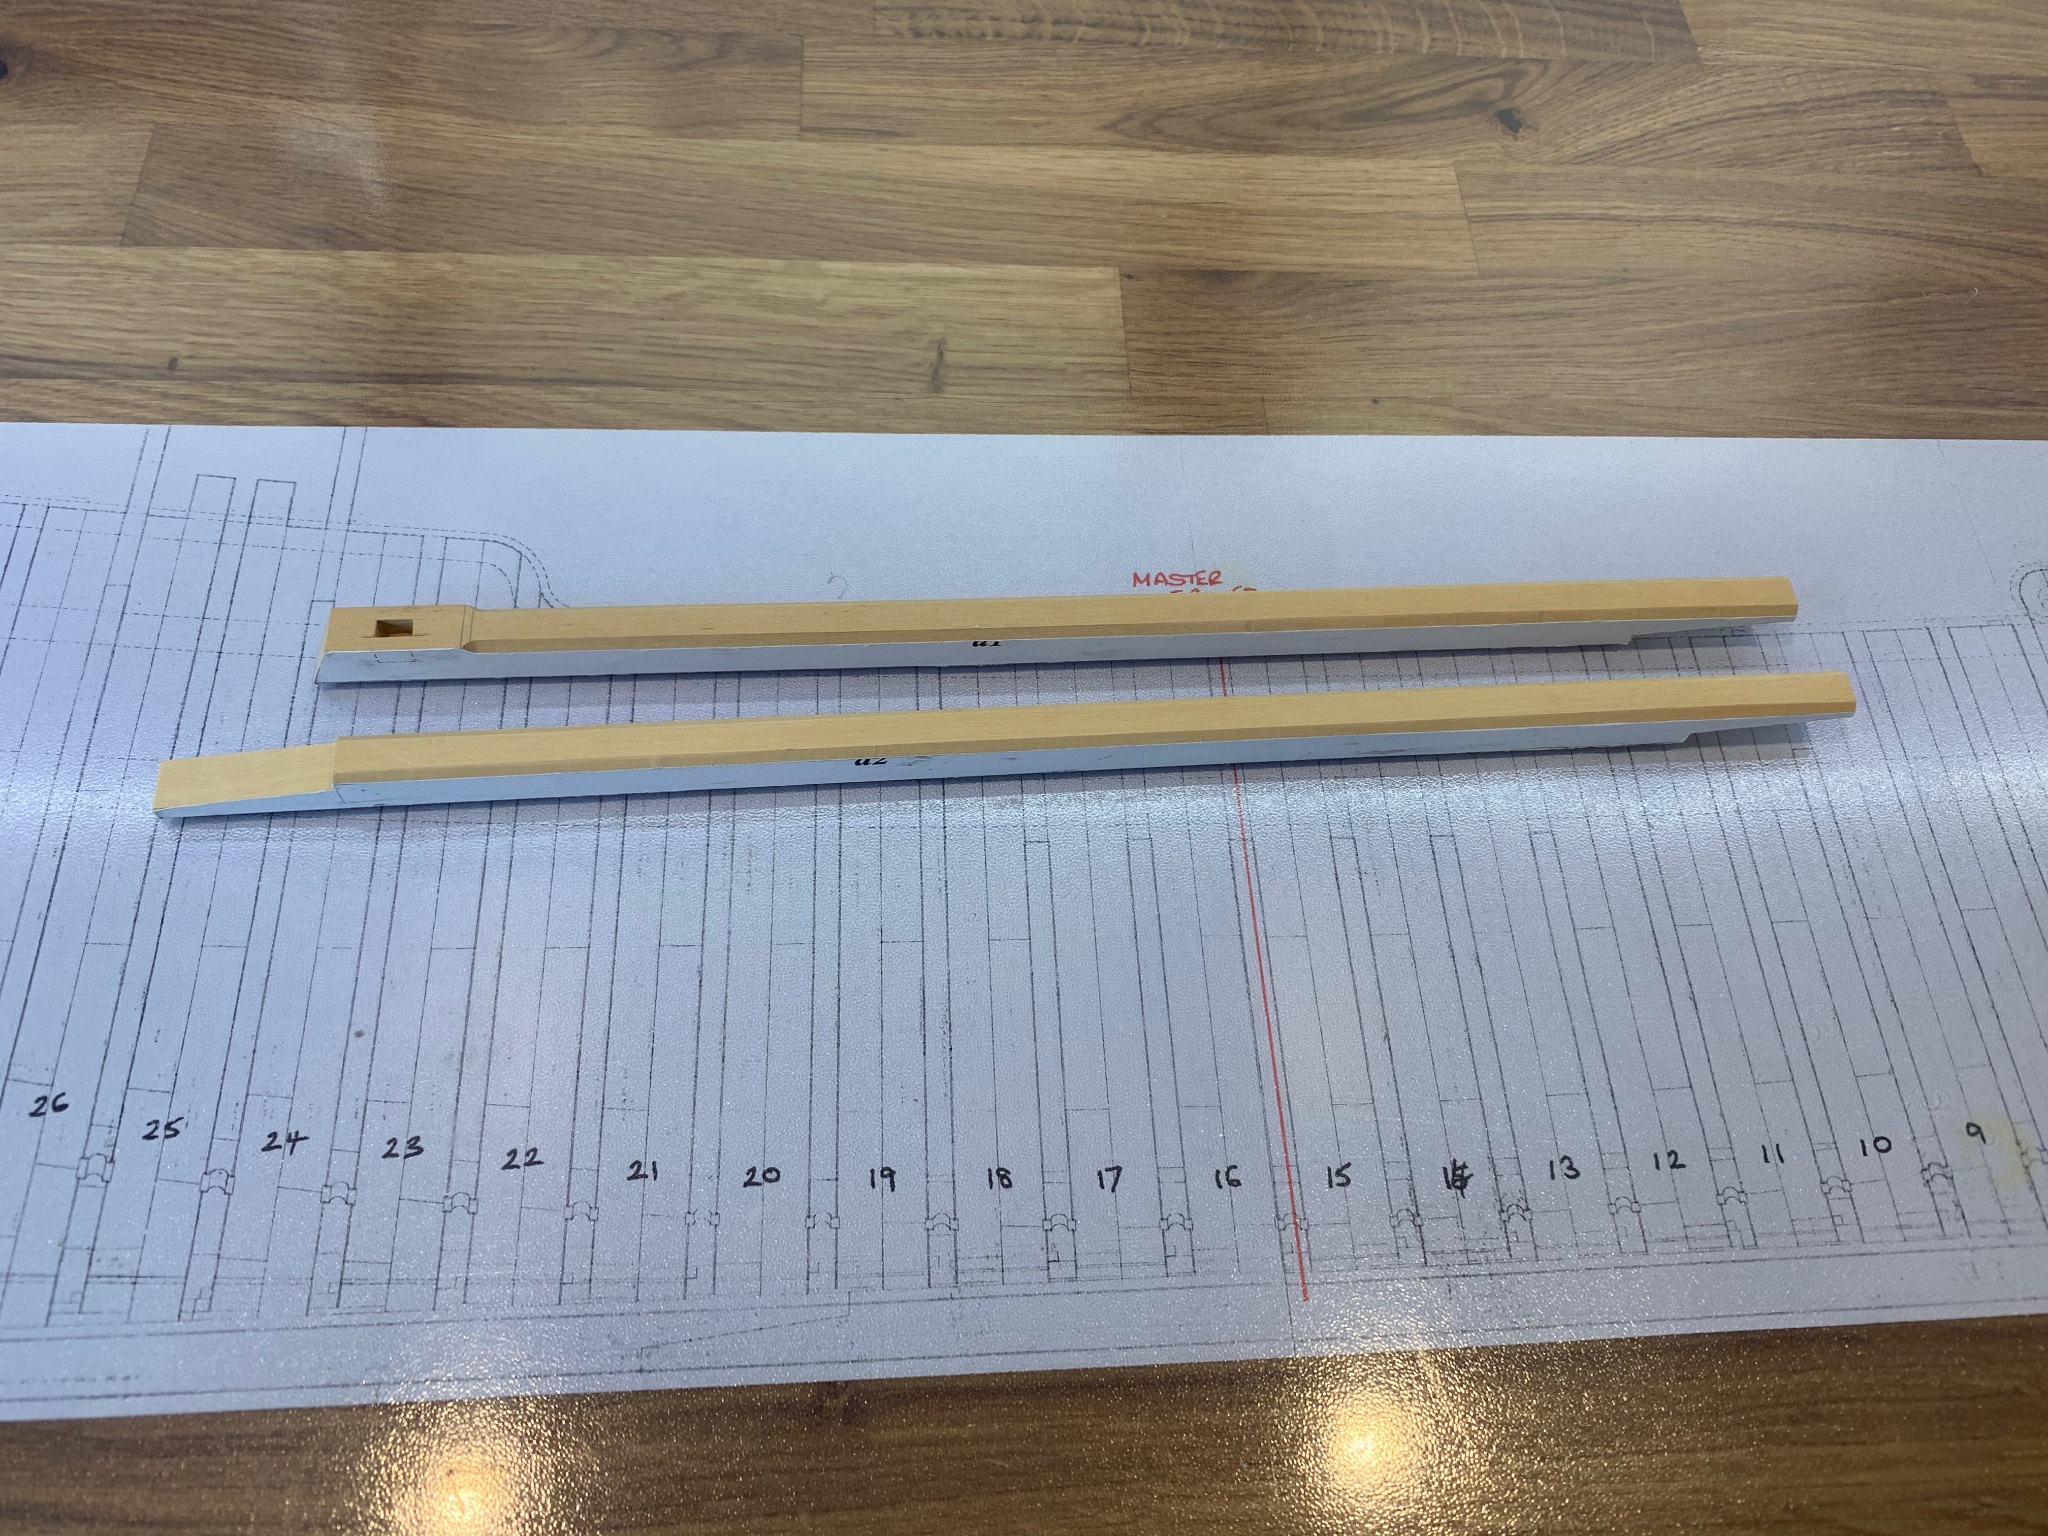
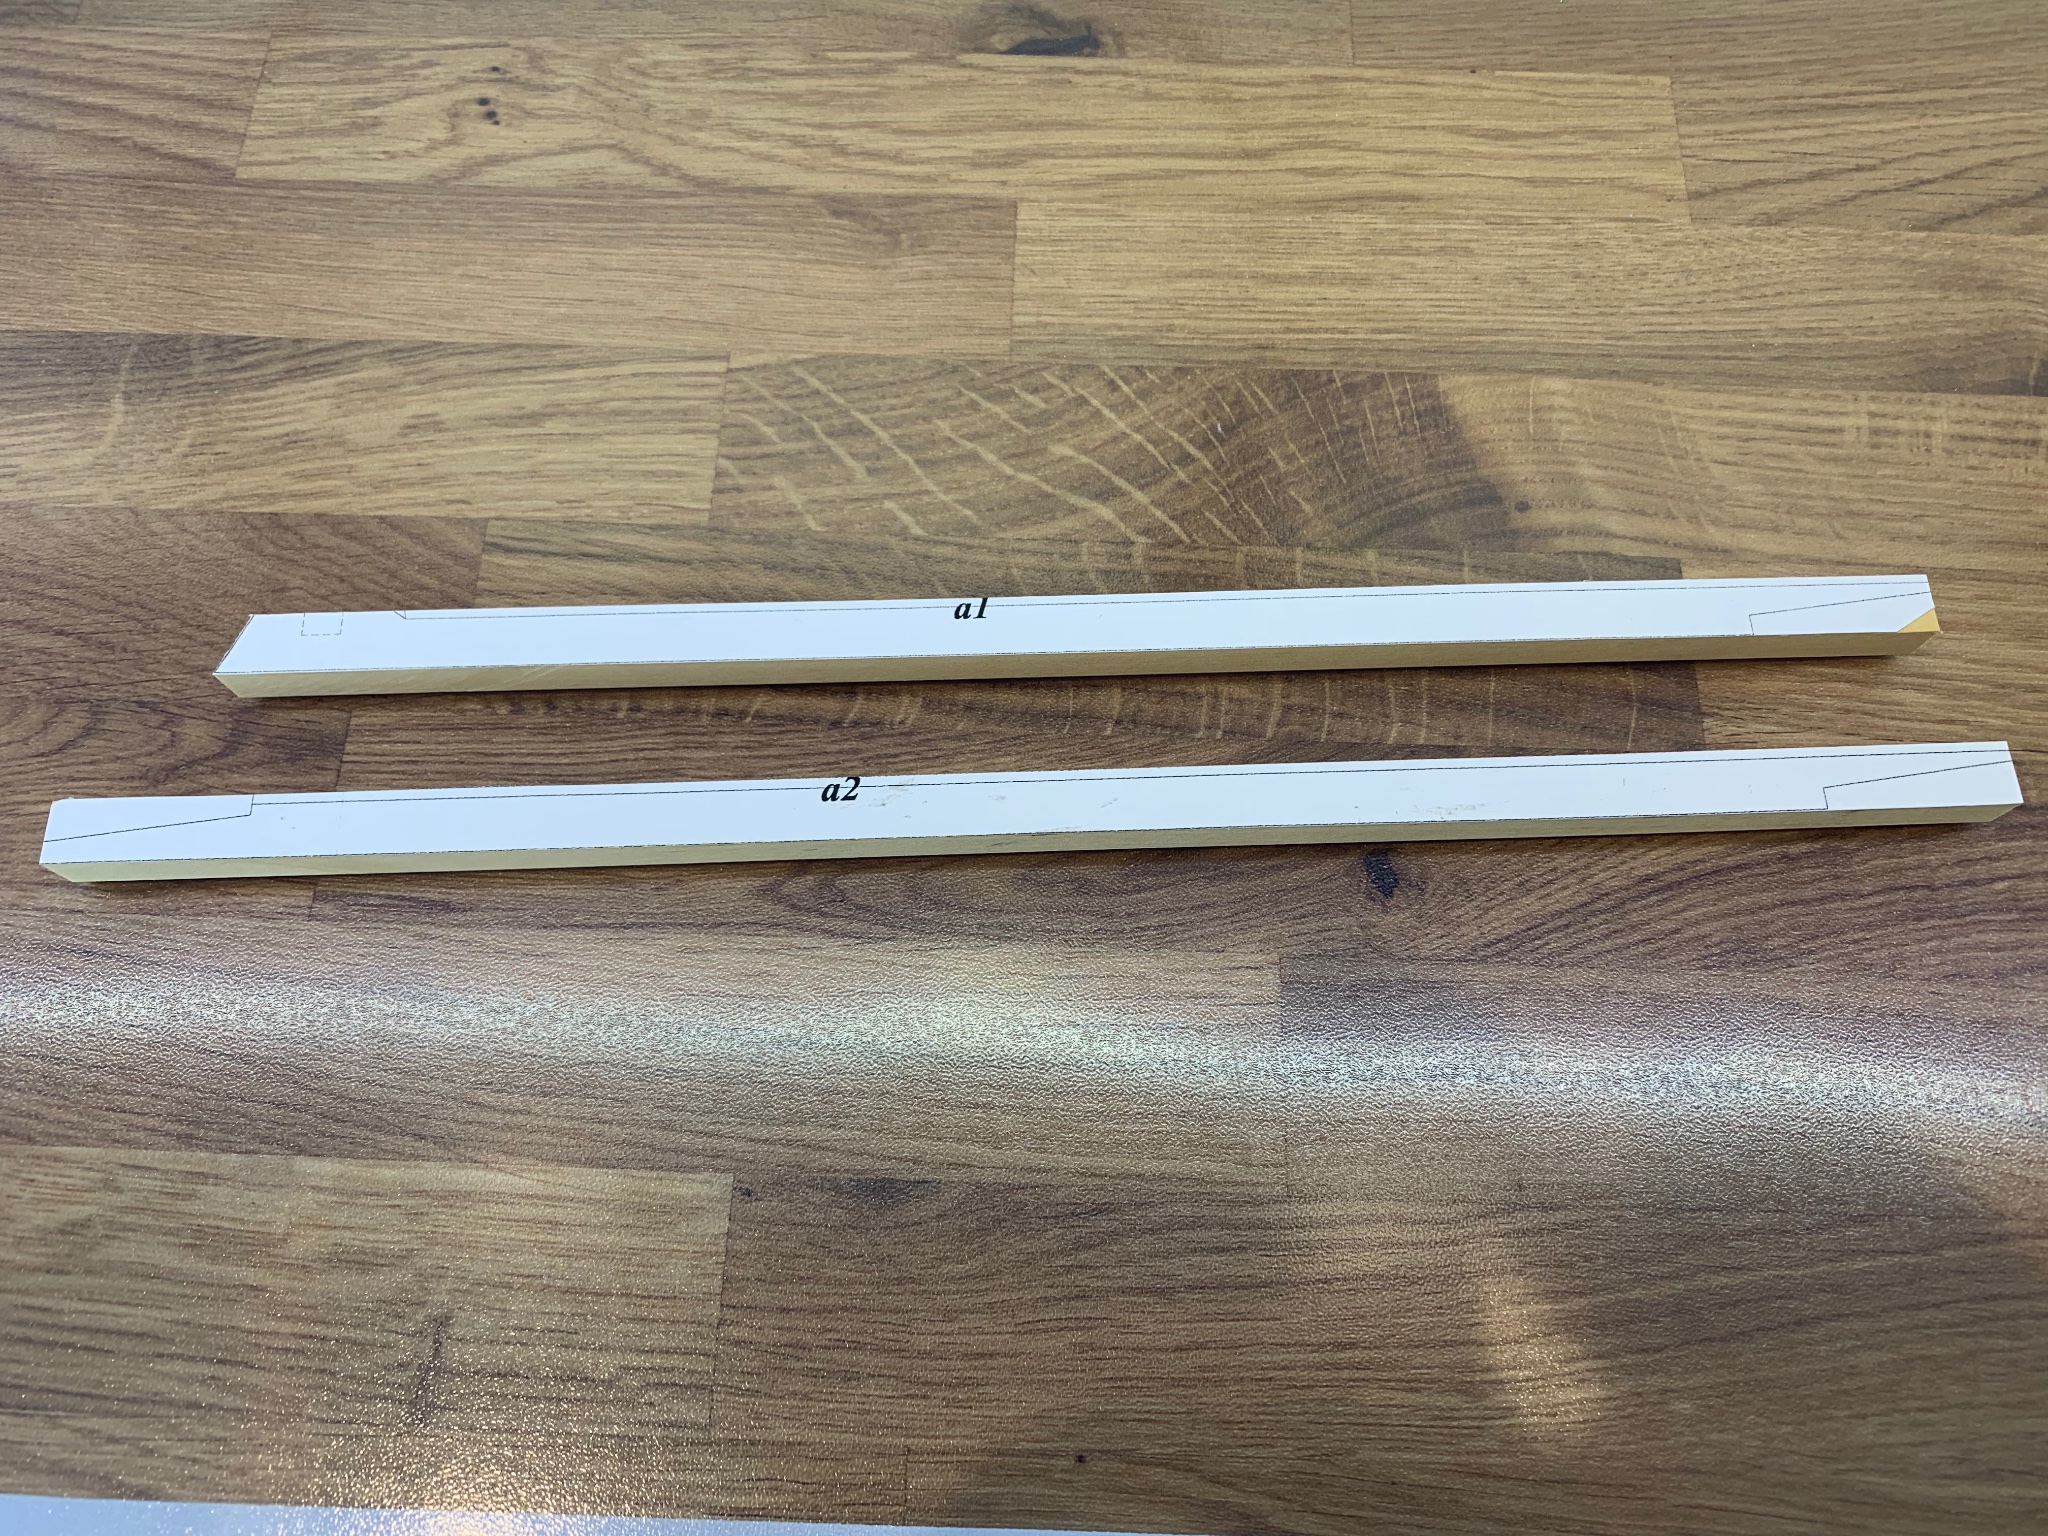
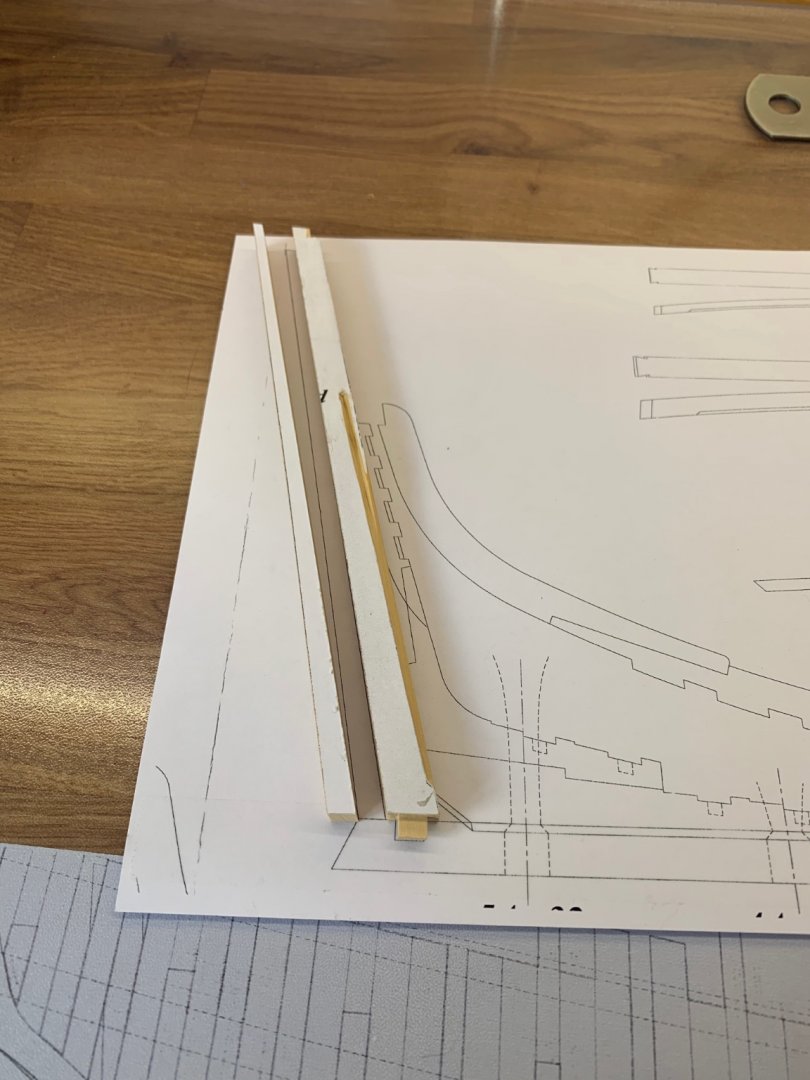
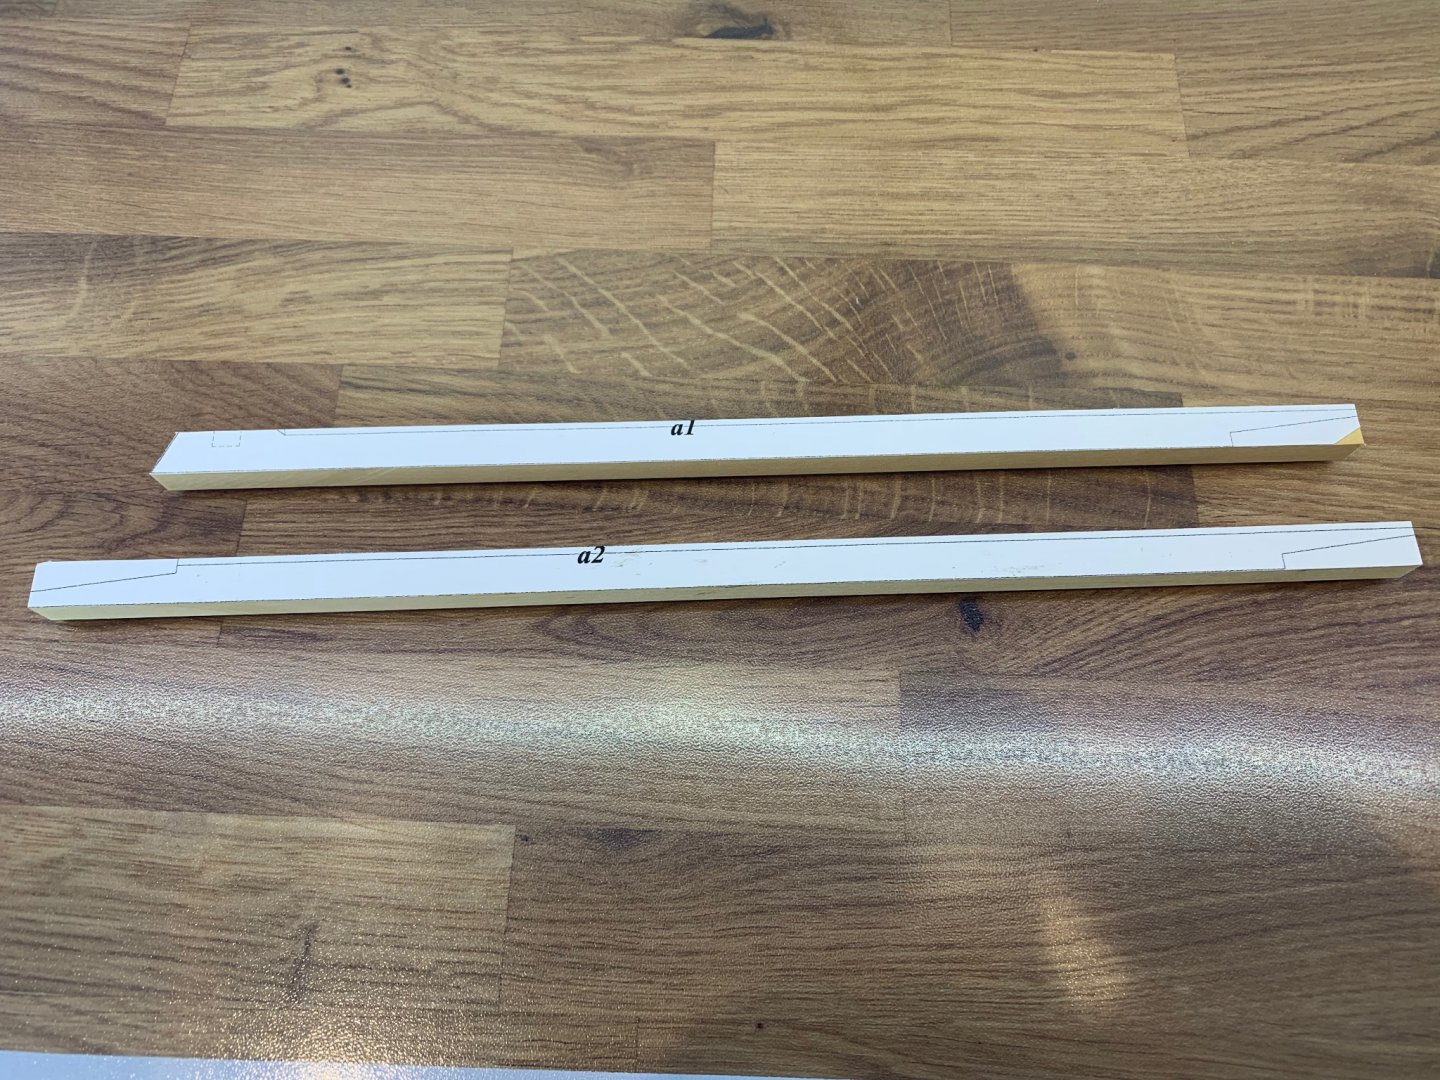
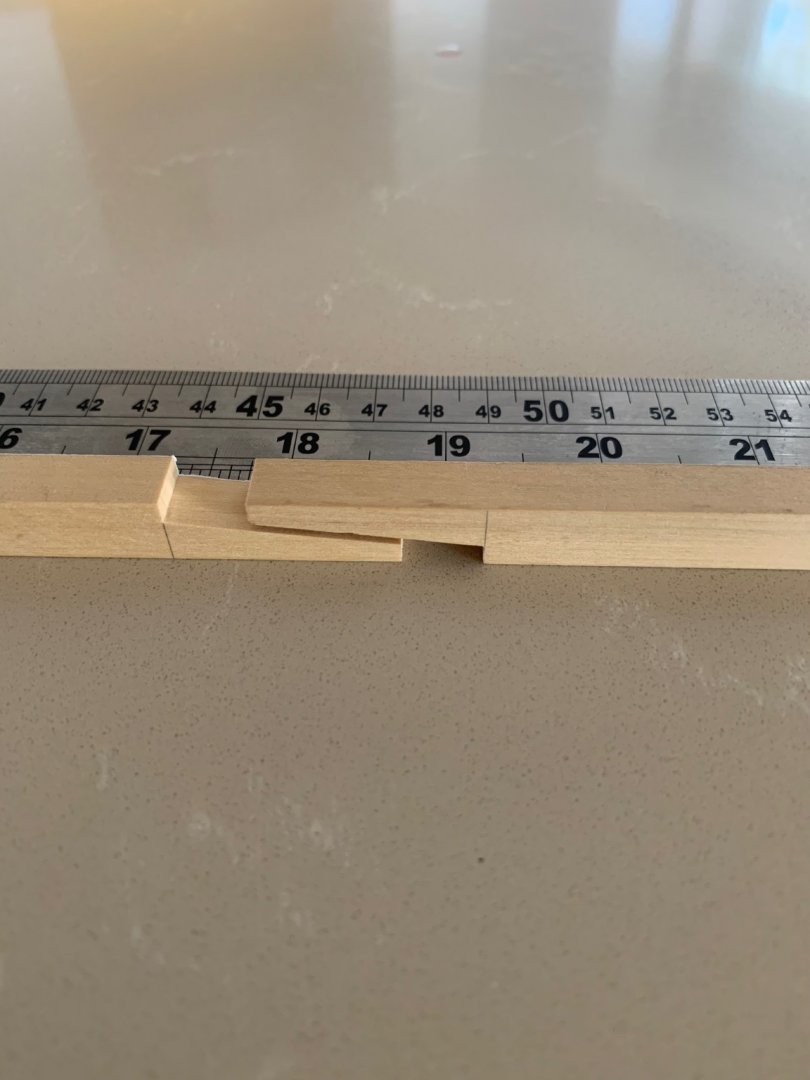
I've made a start on the keel today. So far its pretty straight forward but I did find that the long paper templates stretch a bit. It's not a problem I just needed to check the parts off the plan a lot to get them the right length. I've cut the first scarf which needs a little work before gluing but its ok. I'll cut the tenon for the sternpost next and then cut the rabbets. I'll start moving forward then towards the bow. So far so good.

-
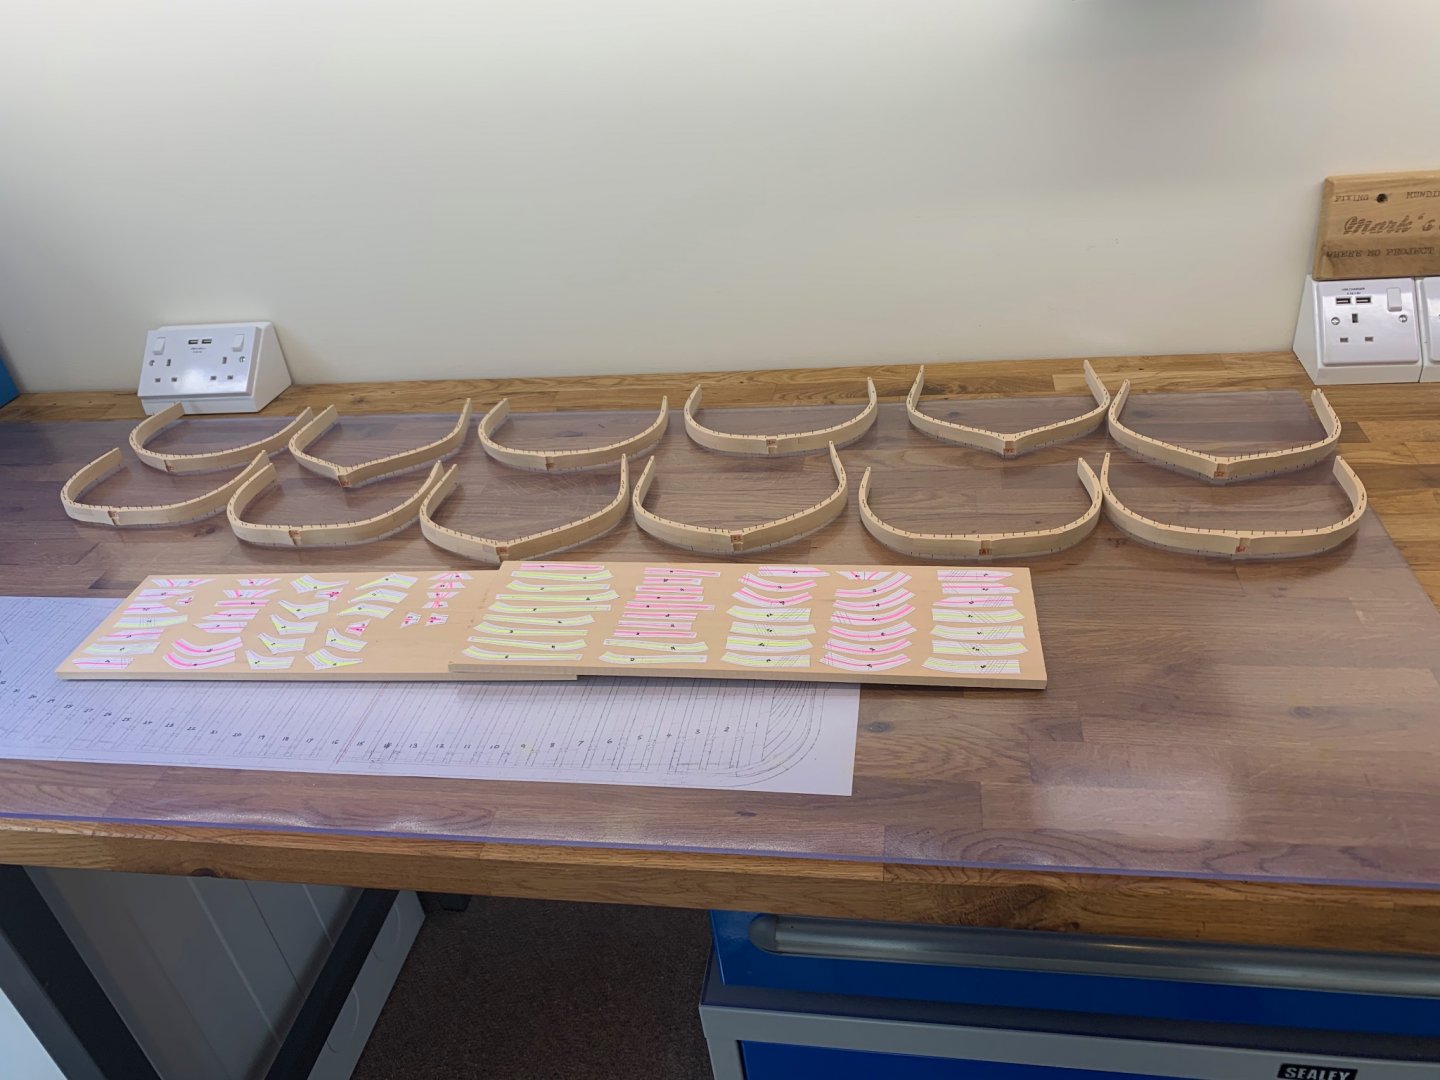
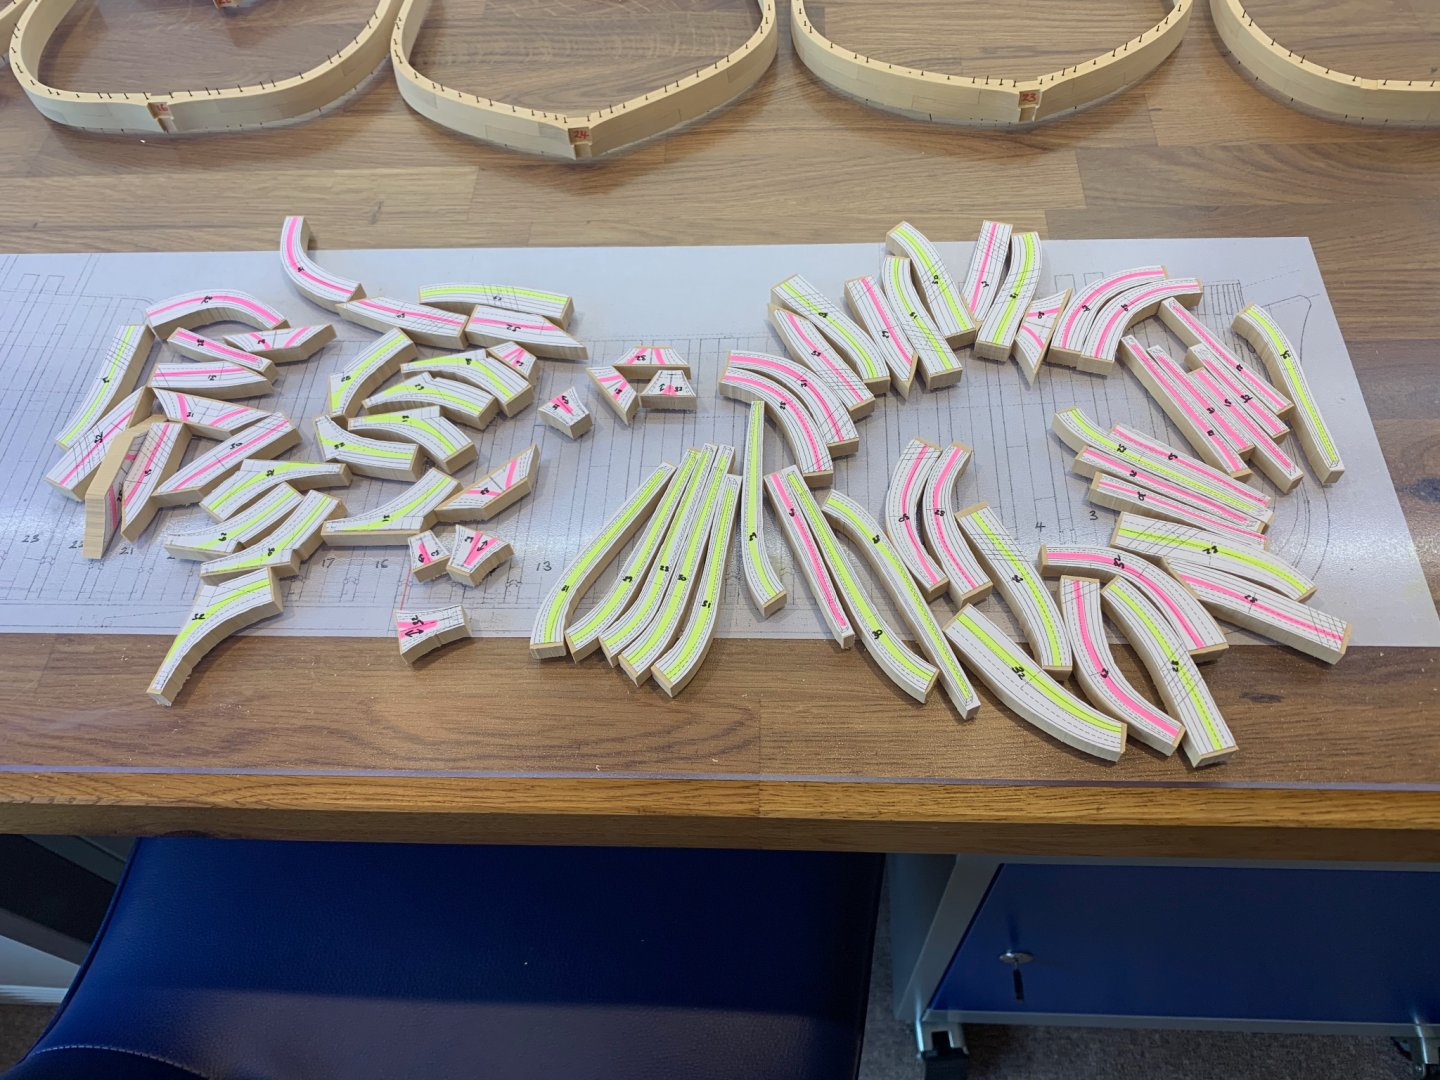
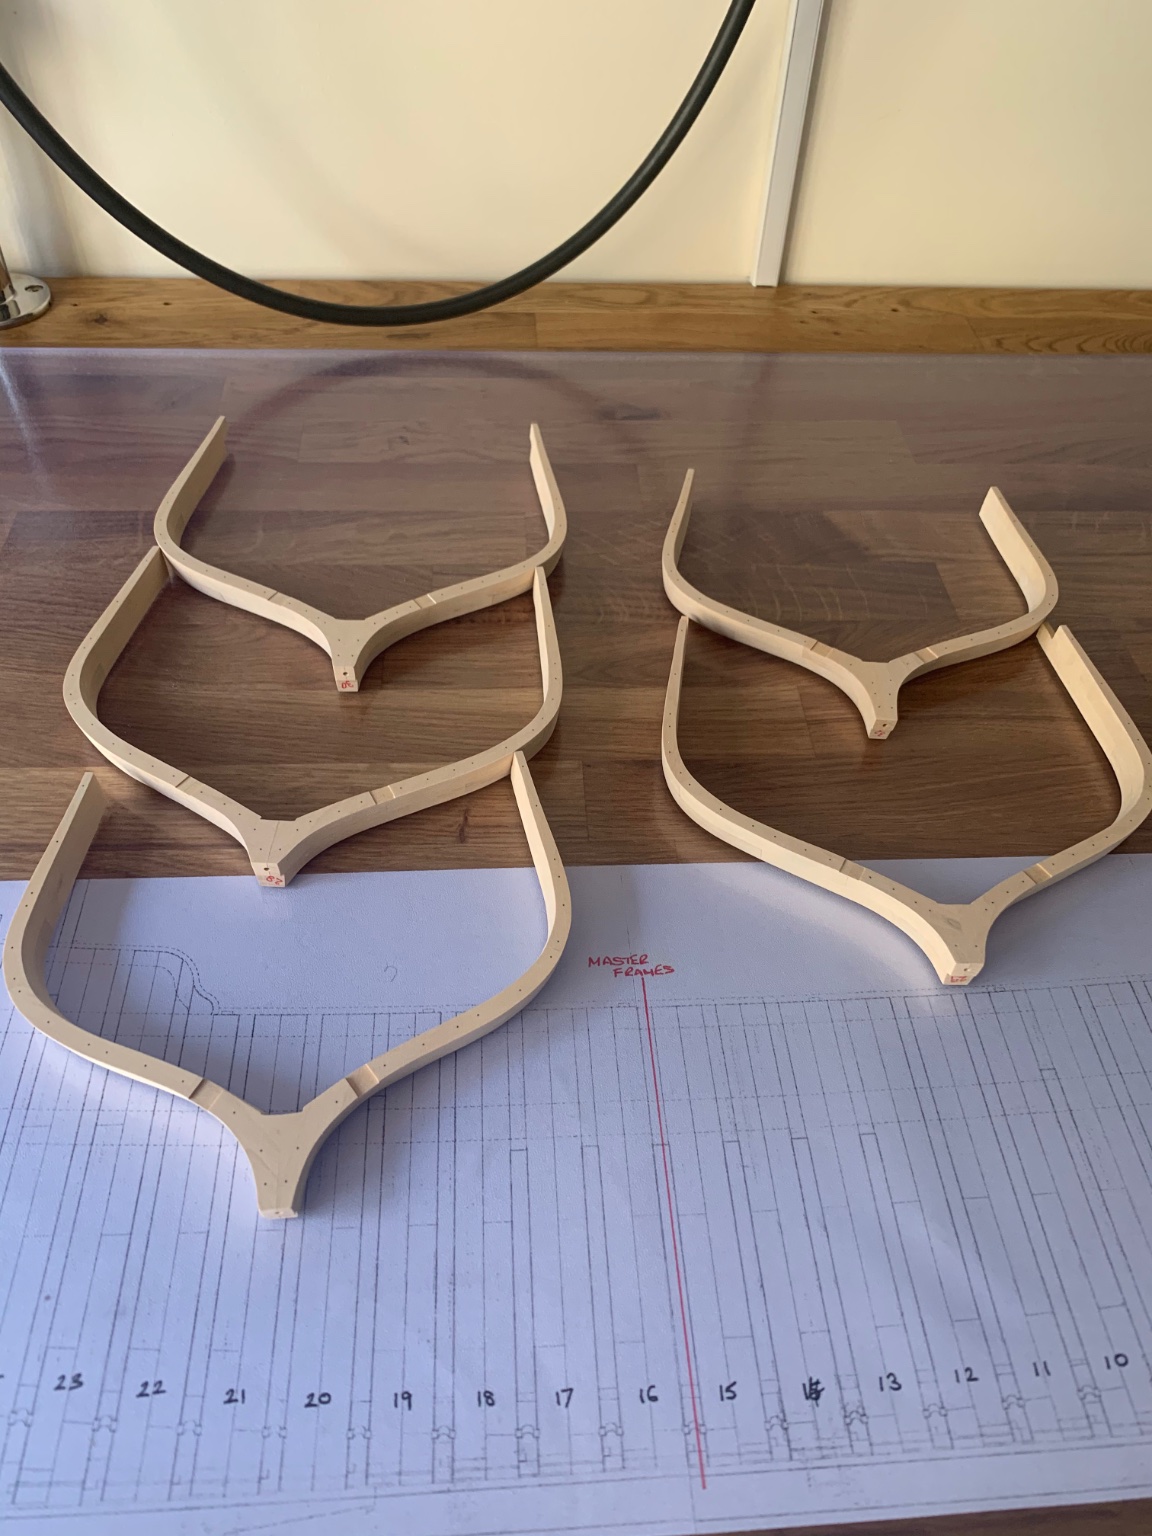
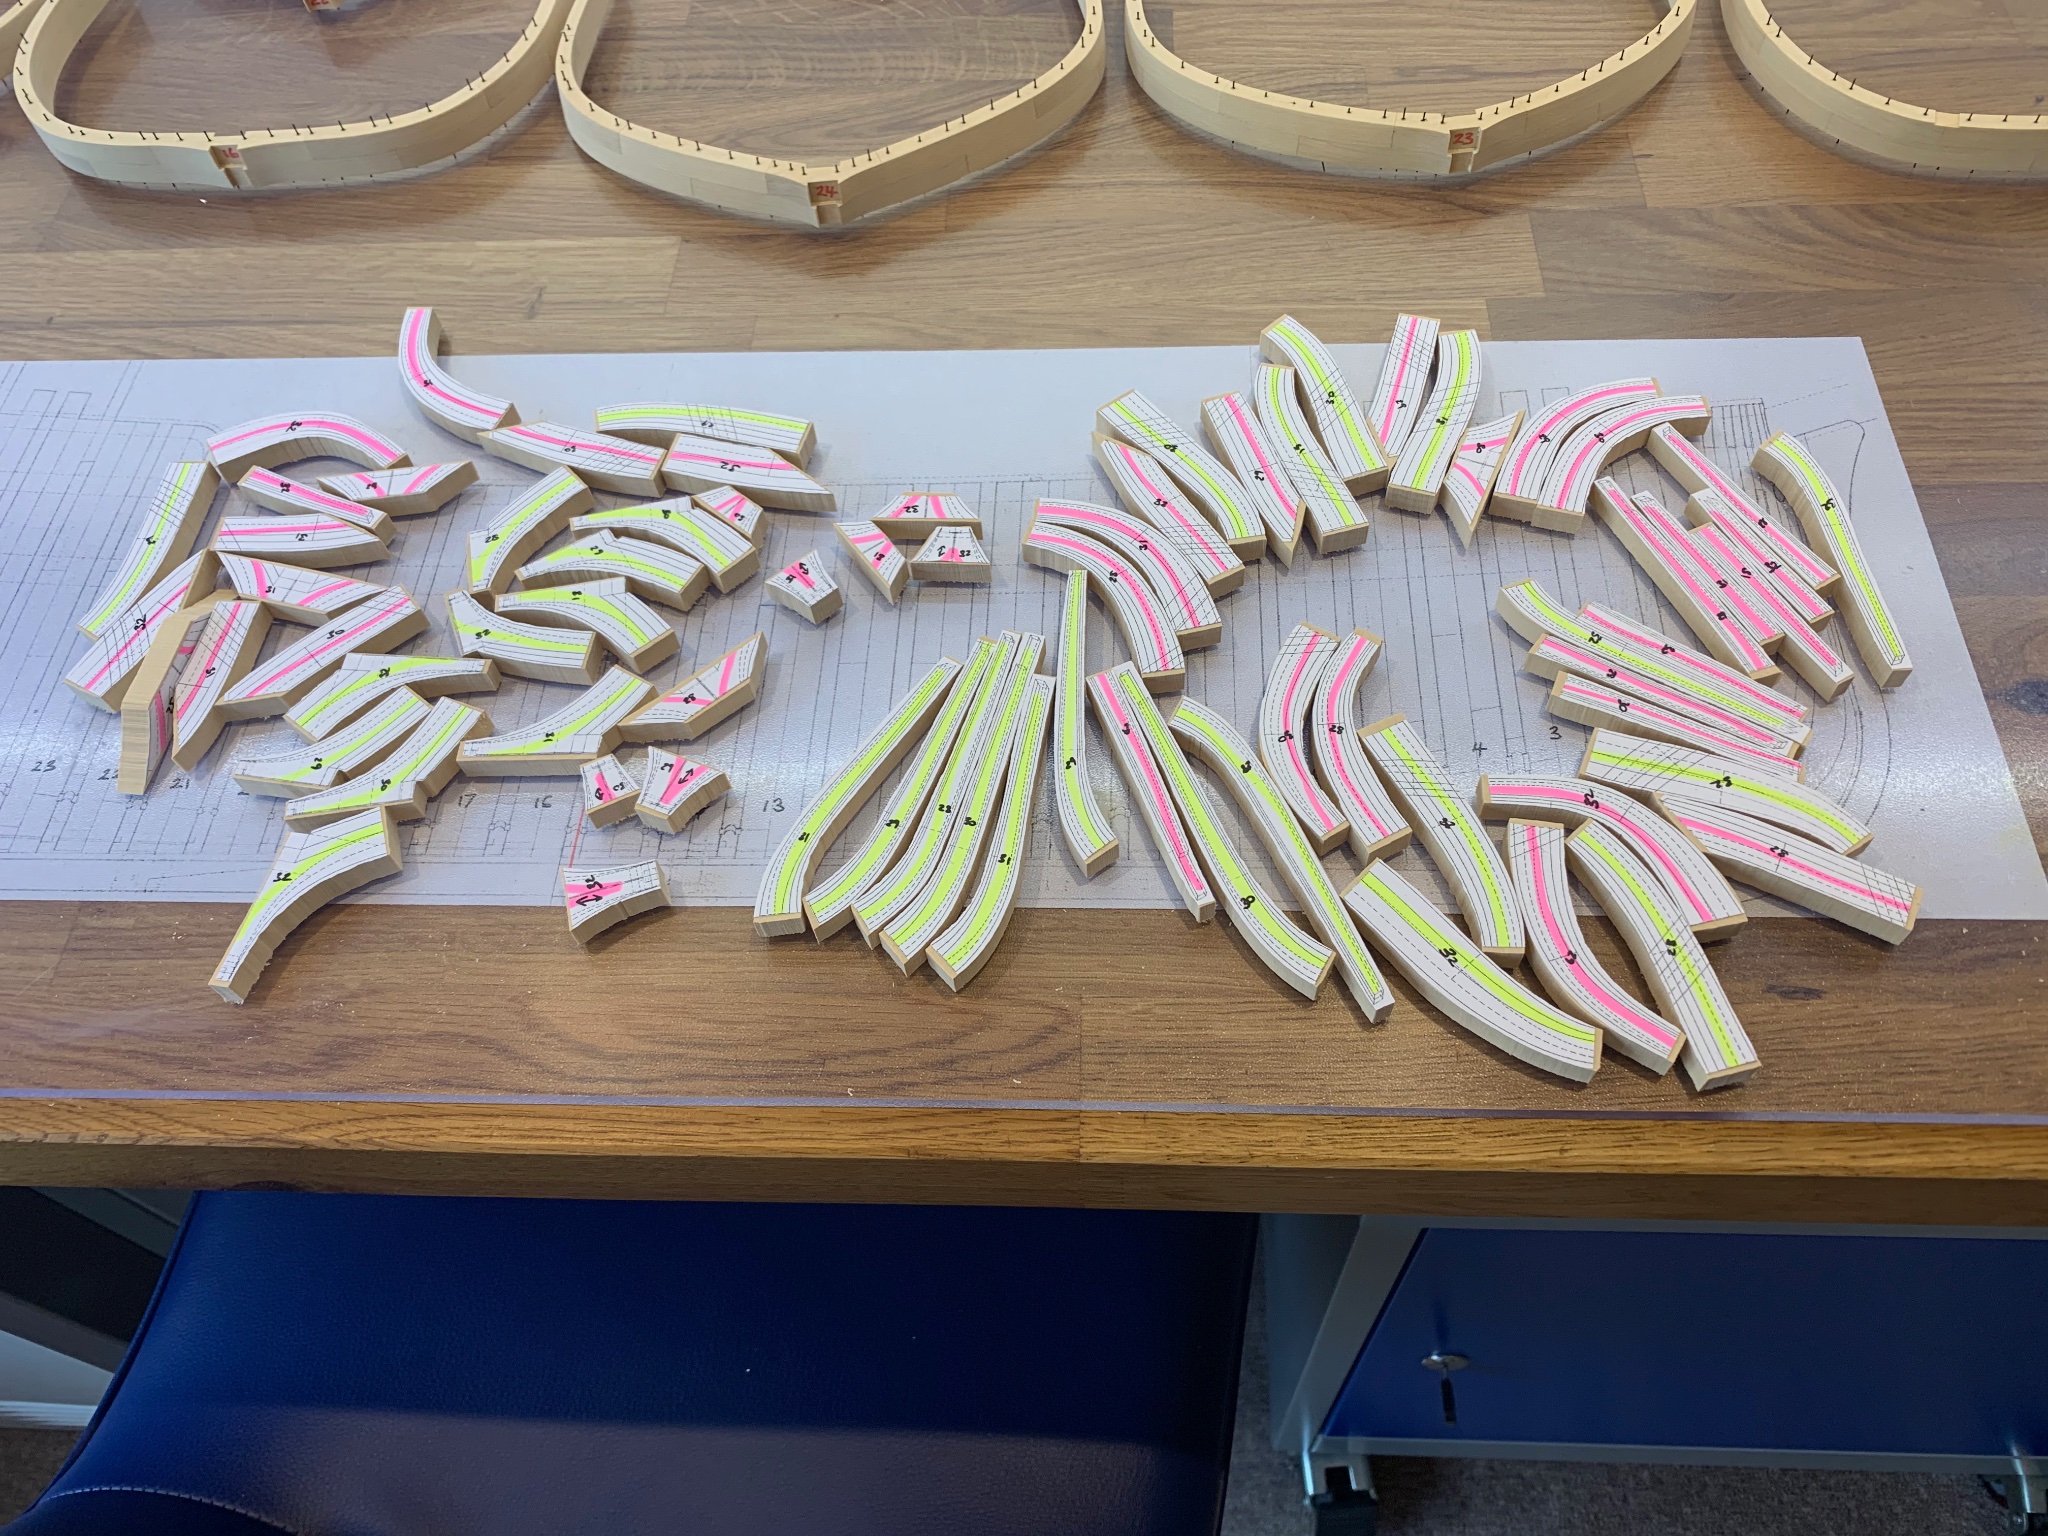
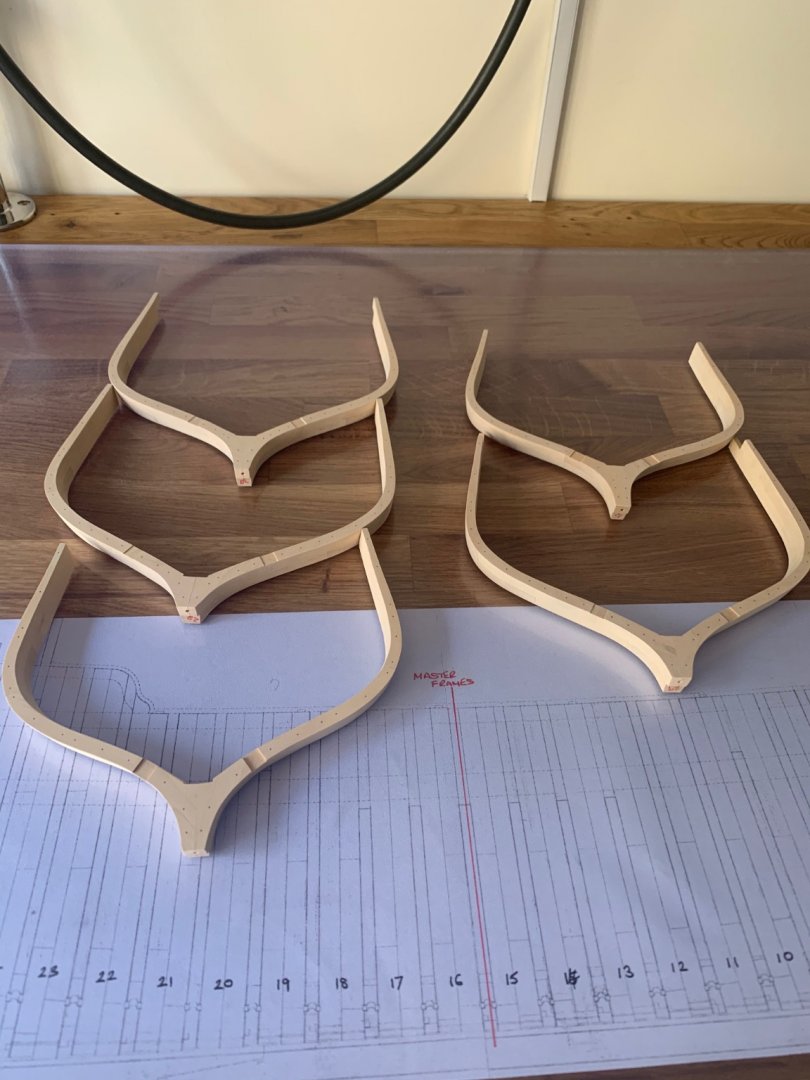
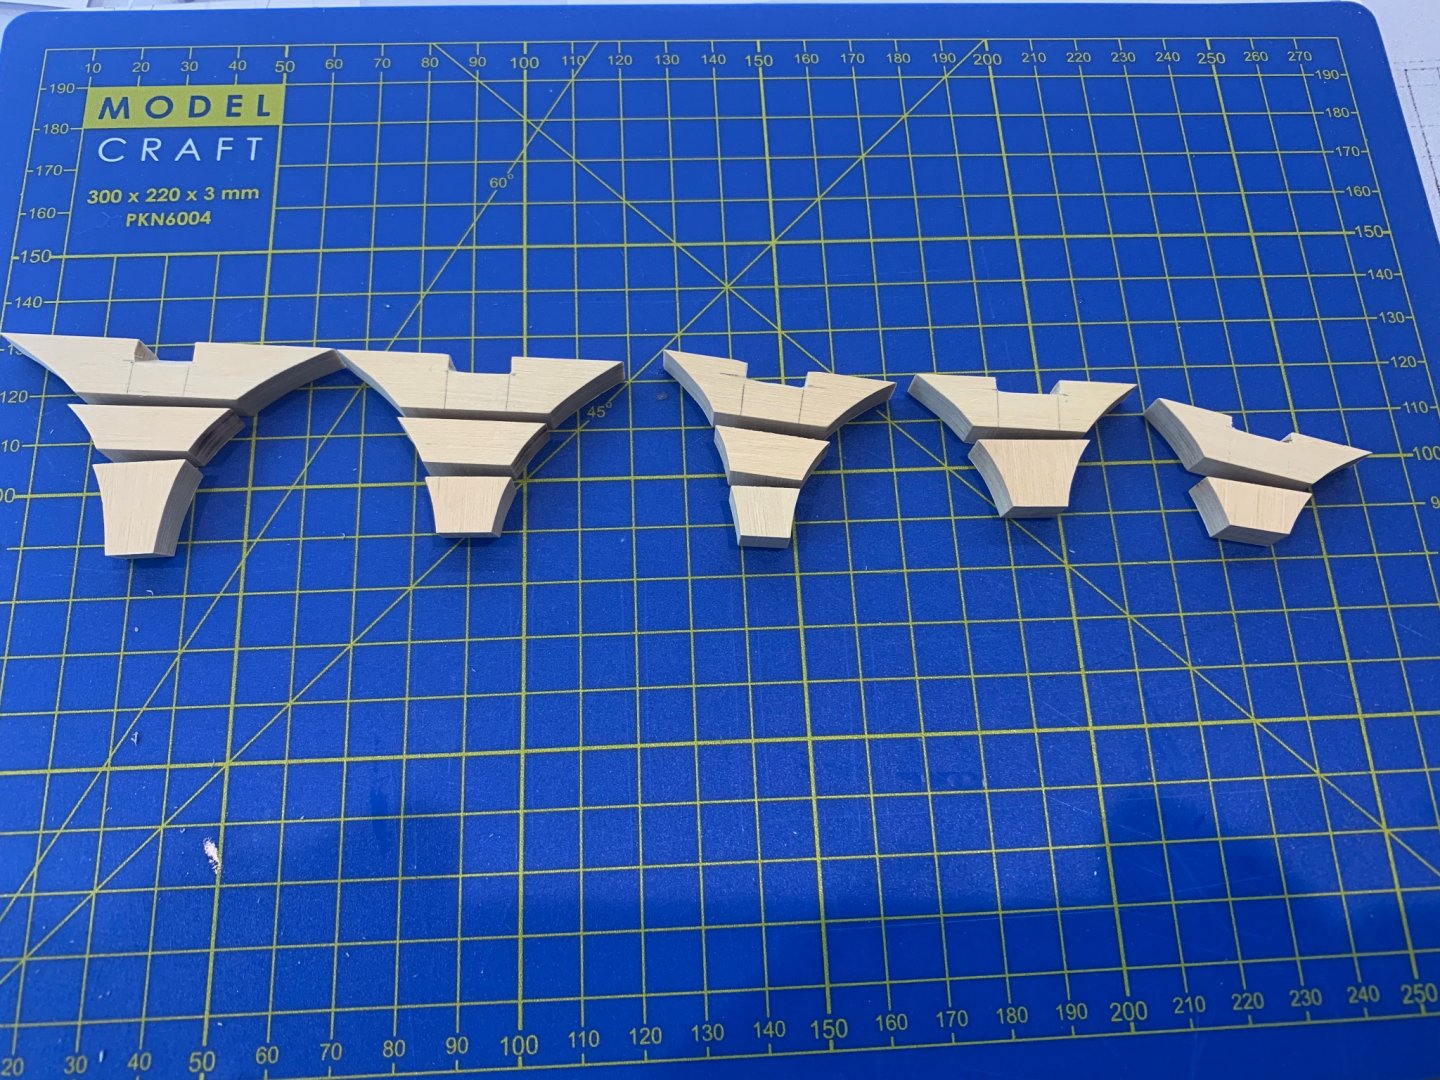
Hi Alan thanks for the comment I've now finished the final 5 frames as they have the bolts and notches in them. I've made some minor errors which hopefully will be ok when its time to install them. If not I don't mind remaking as many as needs be. So thats the frames finished for now so I'm going to make a start on the keel tomorrow. I just need to work out my wood sizes from the scantlings and I'm away. Please excuse the wonkey stack of frames but its the best I could do and after taking the pictures I noticed that frame 8 is upside down!!


-
Amati Riva Aquarama Transmission and RC
No Idea replied to tomsimon's topic in RC Kits & Scratch building
These boats are extremely sensitive to weight when converted to RC. Everything you need to know is here https://www.modelboatmayhem.co.uk/forum/index.php/topic,64276.0.html -
Miniature Russian carving tools
No Idea replied to druxey's topic in Modeling tools and Workshop Equipment
I have to agree with you here - I took a chance based on what I had heard on this forum and bought some myself. I found Mikhail to be very informative about what he sells and how to look after them too. I ordered my set and they arrived two weeks later!!!! They are simply fantastic and I love my set. The only place I have ever received such great service is from Jim Byrne's last Xmas. He sent me my order with no payment what so ever. I received it and got the bill in January. thats how business should be done. -
That really is some lovely planking nice one vaddoc. I've also used thick planks and I found that if I didn't bevel them right to meet the previous plank the error really stood out. The other problem I discovered was if I bevelled the plank too much it looked great when I first put it on, but not so good once I got sanding. The gap just got bigger and bigger. I have to be honest though your work looks pretty much perfect I can see just how much work that you have put into this. Looking forward to your next update.
-
Hand Saw Recommendations
No Idea replied to Jonathan_219's topic in Modeling tools and Workshop Equipment
These are great saws and I use them as my go to saw. Now here’s the thing - you can spend a fortune on some other types but then you have to sharpen them. I can’t be bothered to do that so I get these and when they are blunt I get a new one. Great saws at a reasonable price. -
Home made Drill Press Vise
No Idea replied to RichardG's topic in Modeling tools and Workshop Equipment
That is a beautiful piece of work thats practical too. That would look nice just sat on a shelf as an piece of ornamental furniture. -
Hi Tony towards the end of the monograph there is a page with the scantlings which gives the sizes of all of the parts. You just need to then scale the sizes given to the size that you want to build. As for the amount of wood in the various thicknesses I just guessed based on the building that I have previously done. I over ordered but that’s fine I can use it another time
-
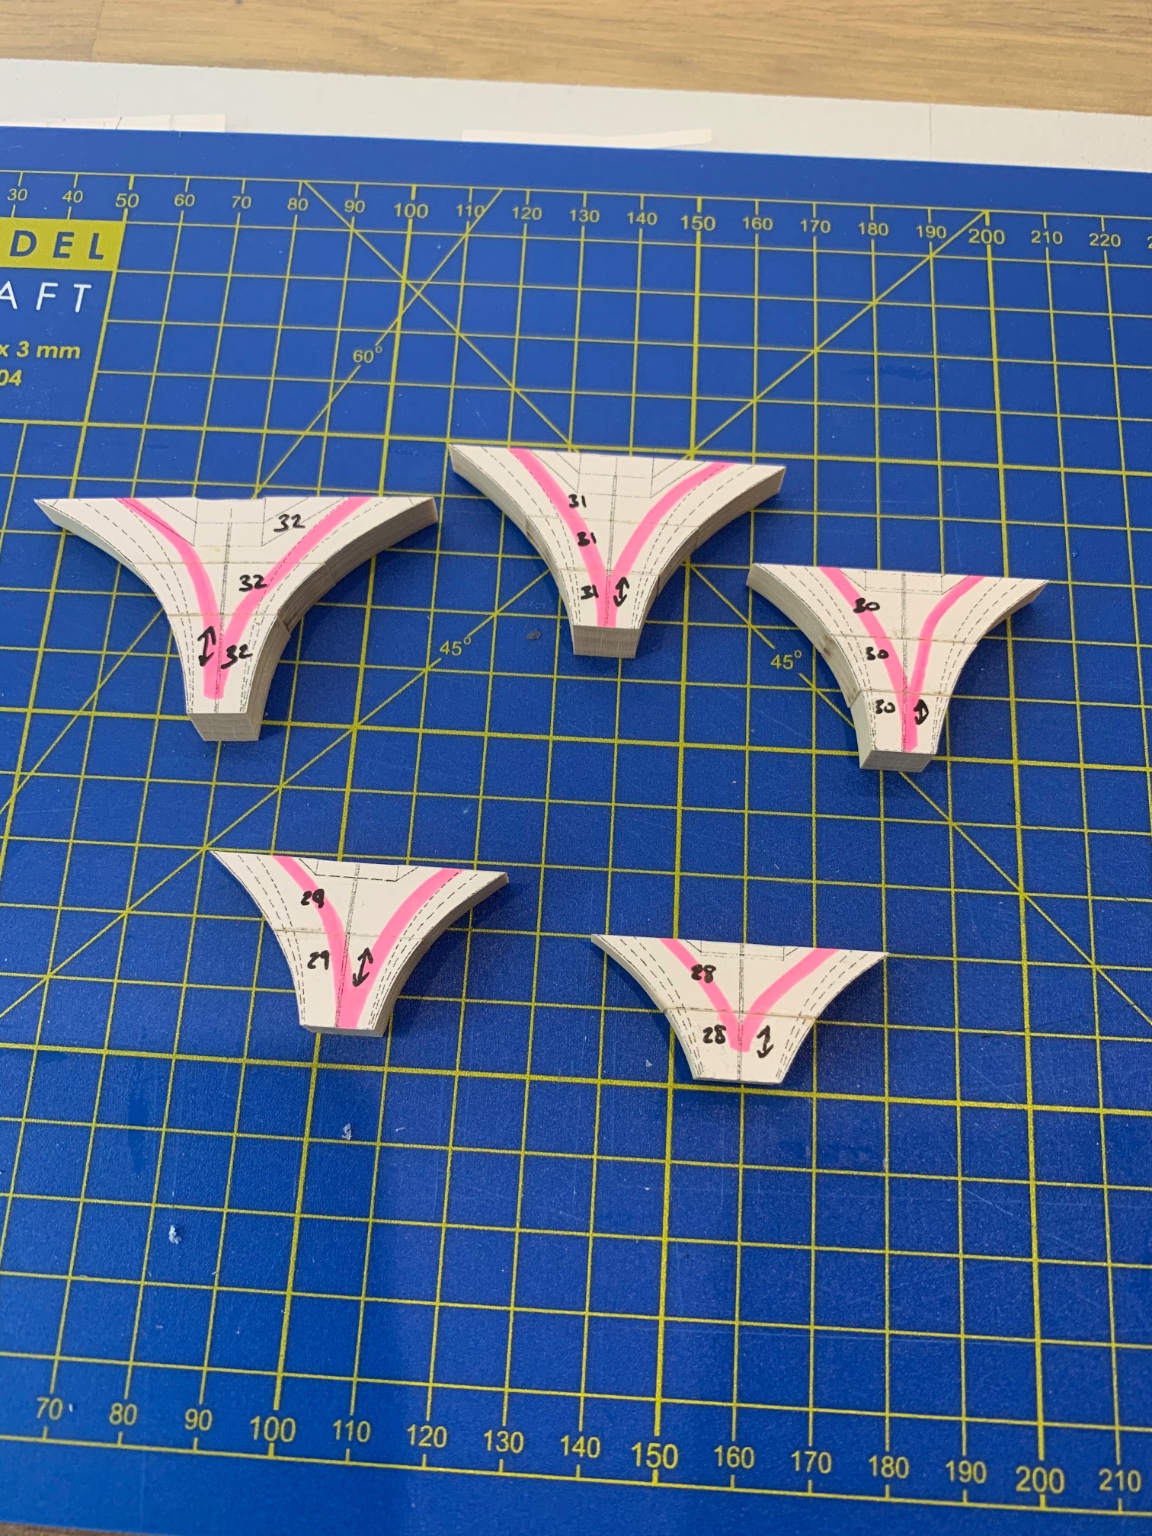
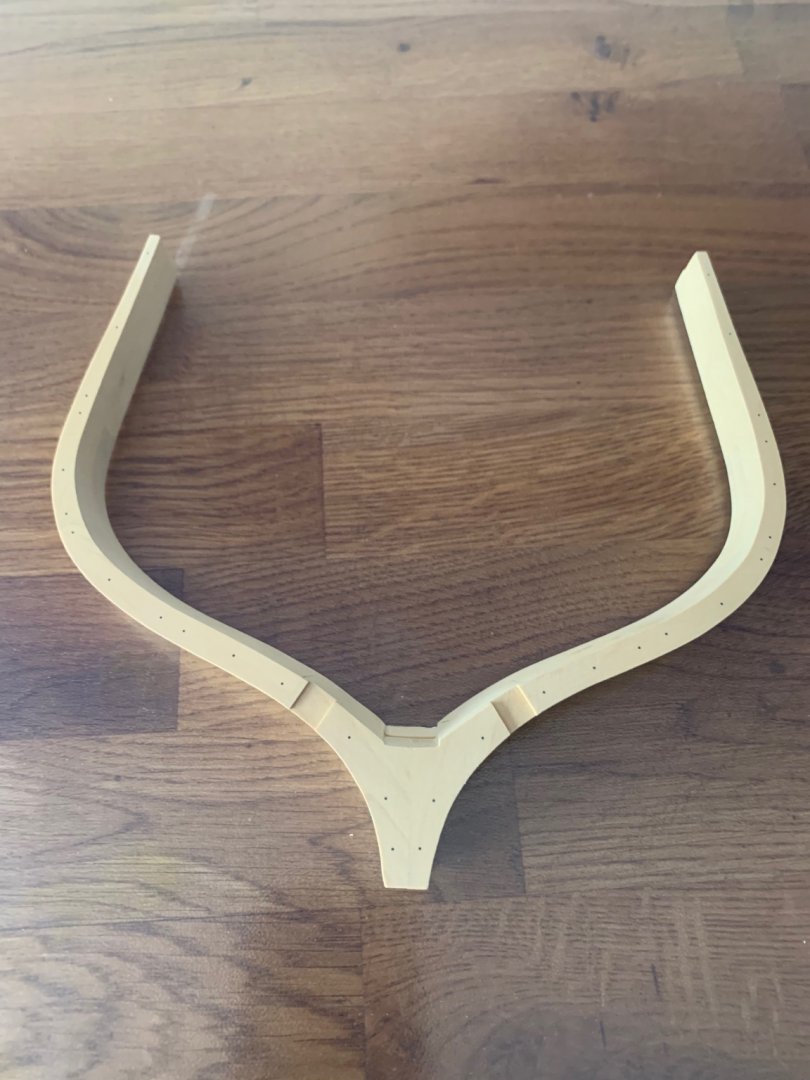
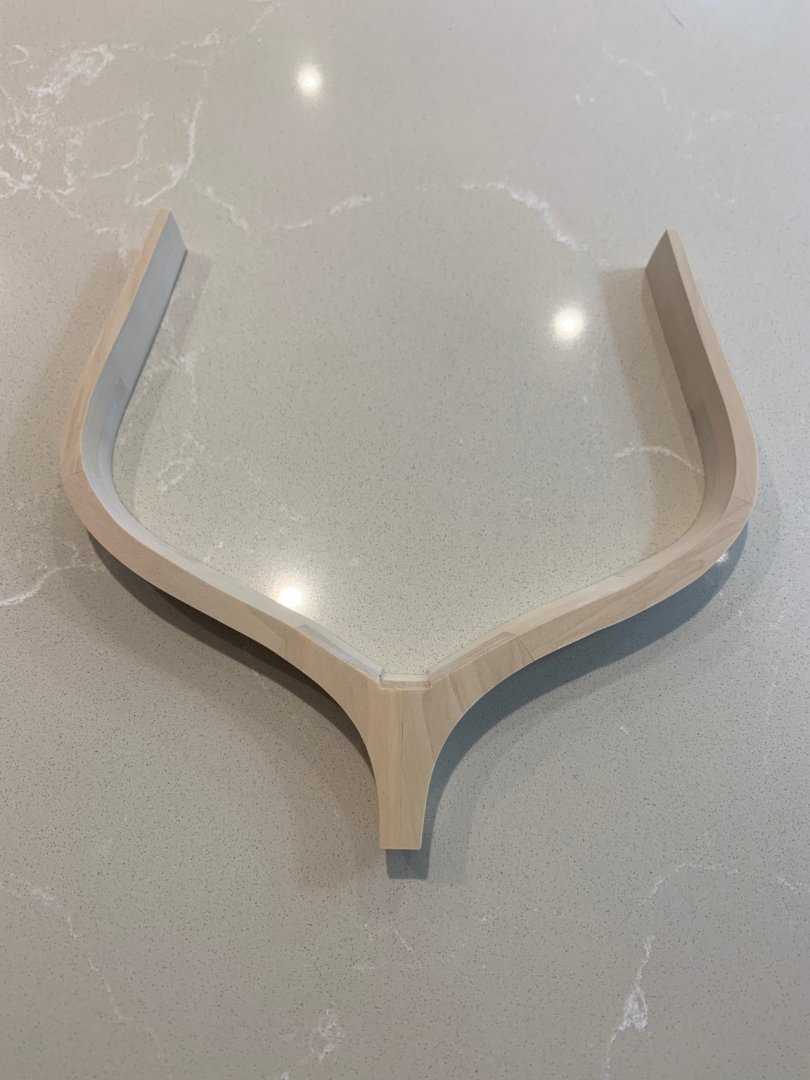
Just a quick update. The 5 frames are now glued together and I'm getting on with bevelling them. I've done frame 28 and the pictures are of frame 32 sanded to shape which I think has come out quite nicely. When I started this build I never realised that some of the frames would consist of 13 individual parts. It make things much more interesting even if they are not seen when it's finished.


-
Ha ha well it was a 50/50 guess - Hi ya Jim hope things are good with you and Donna I think if I bought another bit of kit at the moment it would be the end of me. It'll have to wait until I get the all clear later in the year 😁
-
Hi Greg and thanks for the nice comment. I mean who wouldn't use their Byrnes saw as a flat surface 😄 Its perfectly flat and wipe clean too! I reckon Jim would approve!
-
I just wanted to say thanks for the advice on this thread. I've taken the plunge and ordered a Foredom SR and I also purchased the drill press attachment too. I'm looking forward to having a lot more control over the speed of the bit and also no run out on the bearings.
-
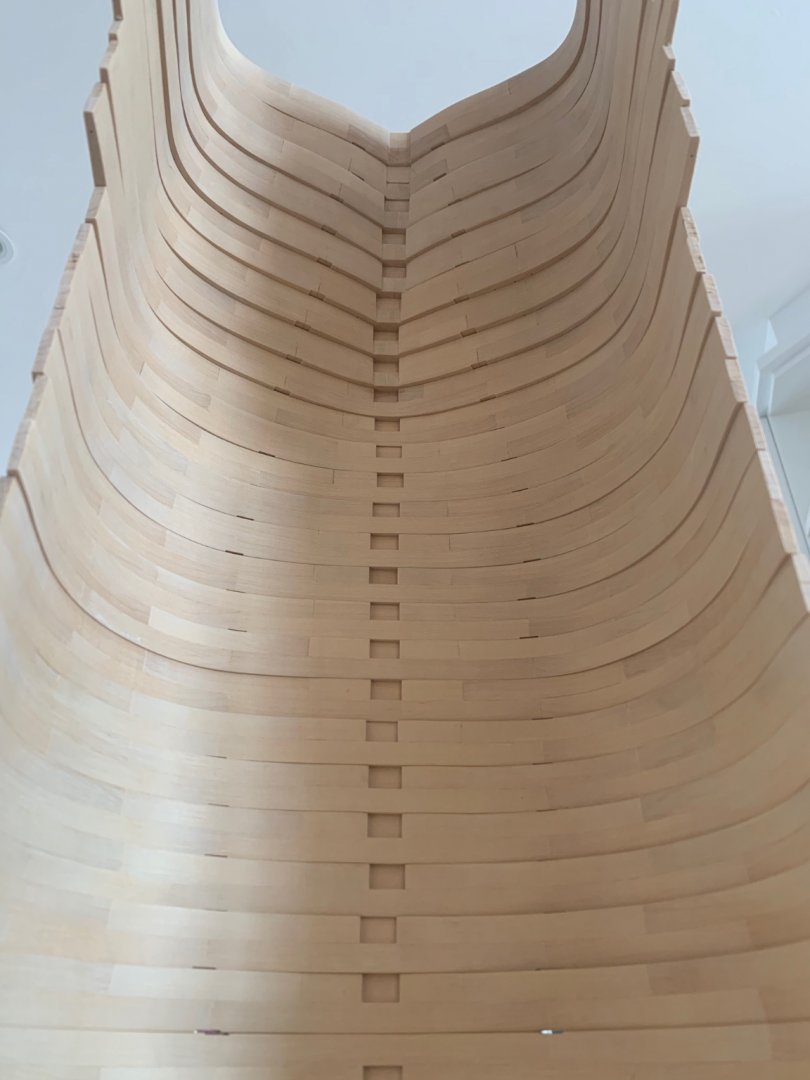
I'm making some good progress this weekend. The existing frames have now had all their bolts sanded down and they have been put away until a later date. All of the parts for the final 5 stern frames have been sanded to their final size too. I just had to remake 1 part on frame 32 as I wasn't quite happy with it The chocks are really nice to make but the parts are quite small. I think it would be very easy just to make them as 1 piece but then the grain of the wood would be running the wrong way. Its more work but I think worth it. I've now started gluing these frames together which I should get completed by tomorrow


-
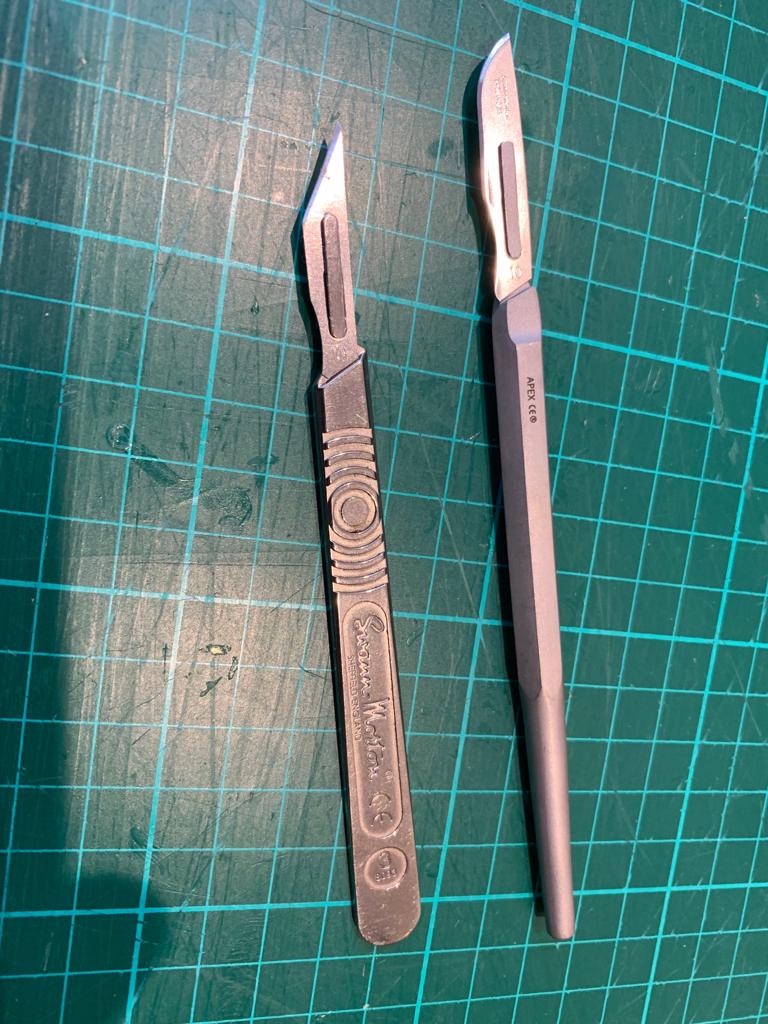
I use Swann Morton too but I use a different handle. Their one is on the left but my preferred handle is on the right. Much more comfortable to use and heavier too
-
Hi Bob this is what I meant but you are better with words than me. If you use a piece of paper to measure the distance due to a curve then a calculator is or planking fan I think should be your next stop for planking. This is my opinion too for what its worth. A simple job that can become very overcomplicated when there is a very simple solution as you have suggested.
-
I too use proportional dividers but how can they be used for planking on a model? The frames are curved so if you take a measurement on the frame it will be incorrect. Dividers only work in straight lines as I understand it so they are great for working on plans but not 3D models. Paper and a calculator are required which makes the dividers redundant. Great bits of kit but seldom used in my very limited experience.
-
Hi GuntherMT thanks for letting me know about your experience I had hoped that they would be a great tool Hi Roger - A friend of mine who is a very experienced modeller bought a knock off version. It lasted 2 days - yes 2 days before it packed up. He should have known better and I still enjoy taking the Mickey now! I have more monies worth out of it pulling his leg than he ever did in his 2 days of ownership Buy cheap - get cheap and steal from the manufacturer too.
-
Hi Bob I've been thinking about replacing my Dremel which I've had for years with the Foredom tool. Are they really as good as they look. I know there's a lot of Chinese rip offs available but if I did take the plunge I'd pay the asking price for the genuine thing. I've just never met anyone who owns one and has put it through its paces? Mark
-
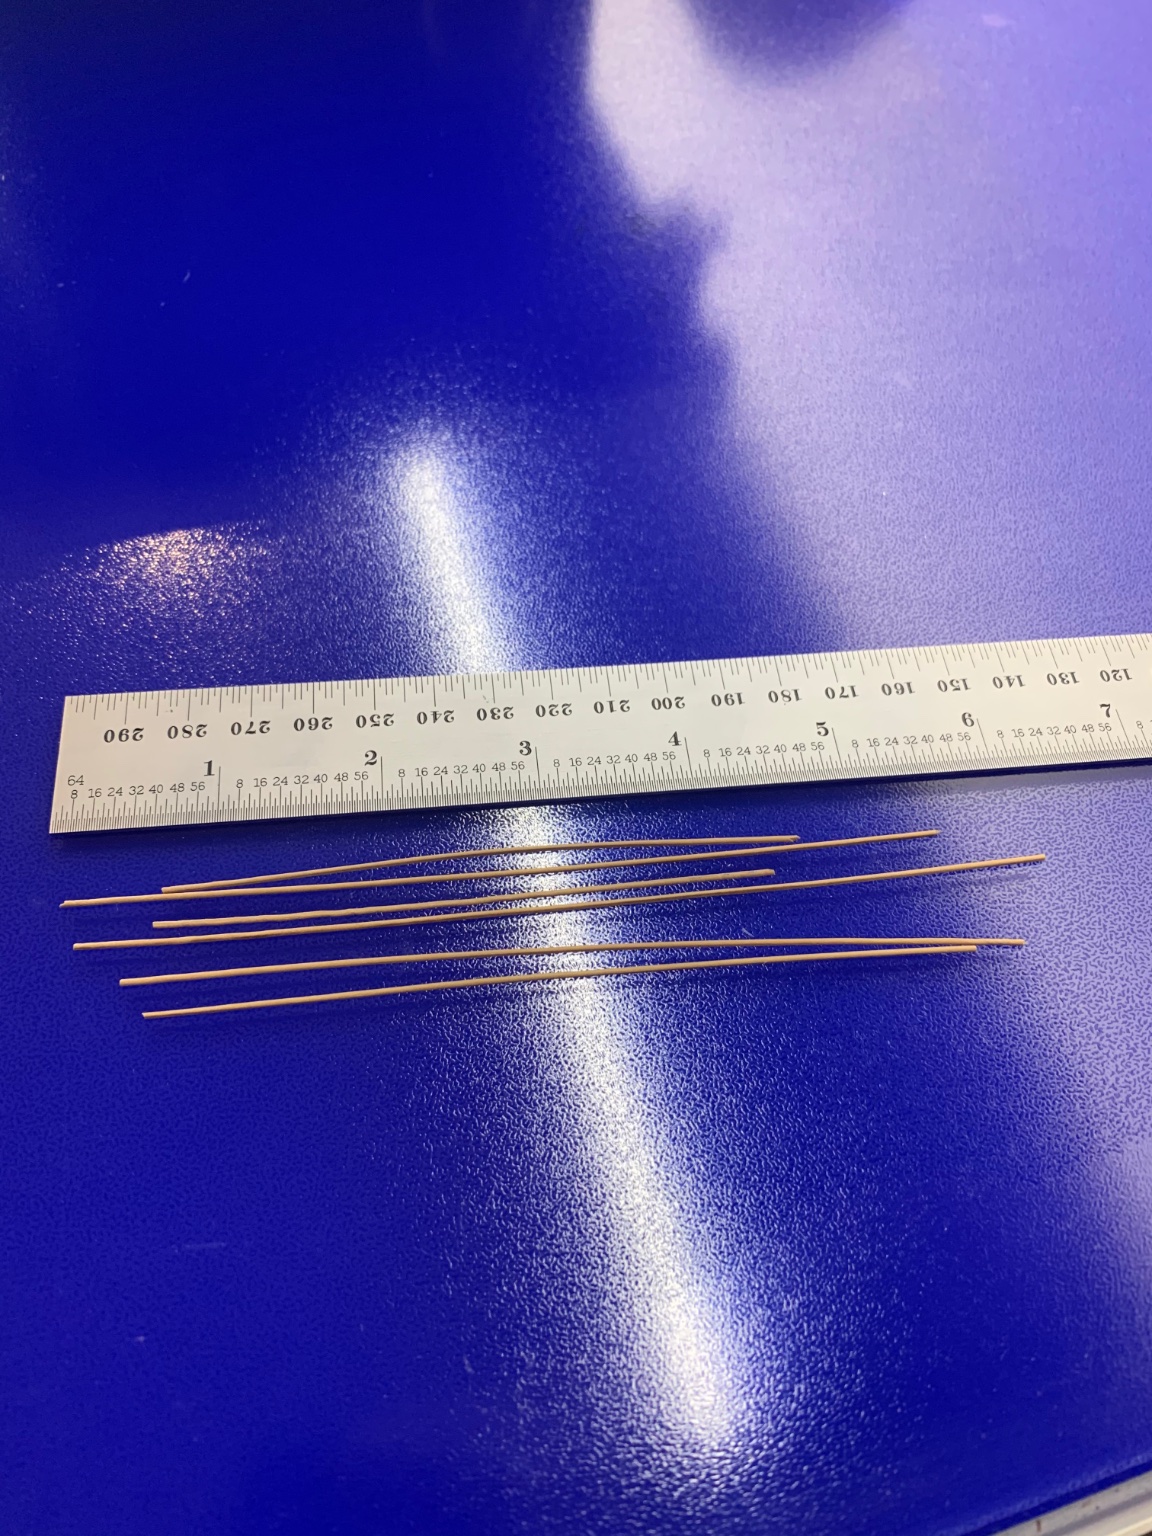
Some more done on Le Rochforte. Another 720 bolts drilled and glued in - I find this job strangely therapeutic and relaxing which is just as well. I've also thicknessed and cut the wood for the final 5 frames at the stern all of which are rising frames. These bring up a new challenge as they are built on chocks on the half floor side. It's been nice to look at the plans and understand them without scratching my head too. Tomorrow I'll hopefully get all of these parts sanded to shape and then start the assembly.