HOLIDAY DONATION DRIVE - SUPPORT MSW - DO YOUR PART TO KEEP THIS GREAT FORUM GOING! (Only 51 donations so far out of 49,000 members - C'mon guys!)
×


druxey
-
Posts
13,313 -
Joined
-
Last visited
Content Type
Profiles
Forums
Gallery
Events
Everything posted by druxey
-
 Certainly not a hatch-et job! Very nice indeed.
 -
You must be living right, Steven! Coming along nicely now.
- 110 replies
-
- 4
-

-

-
- Paddlewheeler
- Ballarat
- (and 3 more)
-
I can personally attest to the therapeutic effect of both model-making and music. And yes, it's also meditative and zen-like when one is 'in the zone'. Welcome aboard.
-
Another glazing possibility is mica. Any rockhound shop will have some.
-
Good start on your frames. Just a few more to go....
-
Oooh. Nicely fitted tabled joints, Alan! I didn't see that a couple were a little short, though....
-
You will need to soak and stretch the material on a frame to get the creases out. As it dries, the material tautens and it will flatten.
-
That was a lot of sawing!
-
Makes a nice, plump model, though, Ab! Very nicely done.
-
Nice drawing of the foc'st'le bulkhead. Surely there was a round up to the decks as well?
-
Hope it works out this time! The rest looks great.
-
Makes for a most attractive model, Chris! Very neatly done.
- 146 replies
-
- 7
-
-
- Speeljacht
- Seahorse
- (and 2 more)
-
Interesting. I don't recall any other builder having this problem. Are you sure that this is not the upper deck pattern?
-
A very neat solution, clearly illustrated and described, Keith. Thank you for the tutorial! Have a great weekend, Grandpa.
-
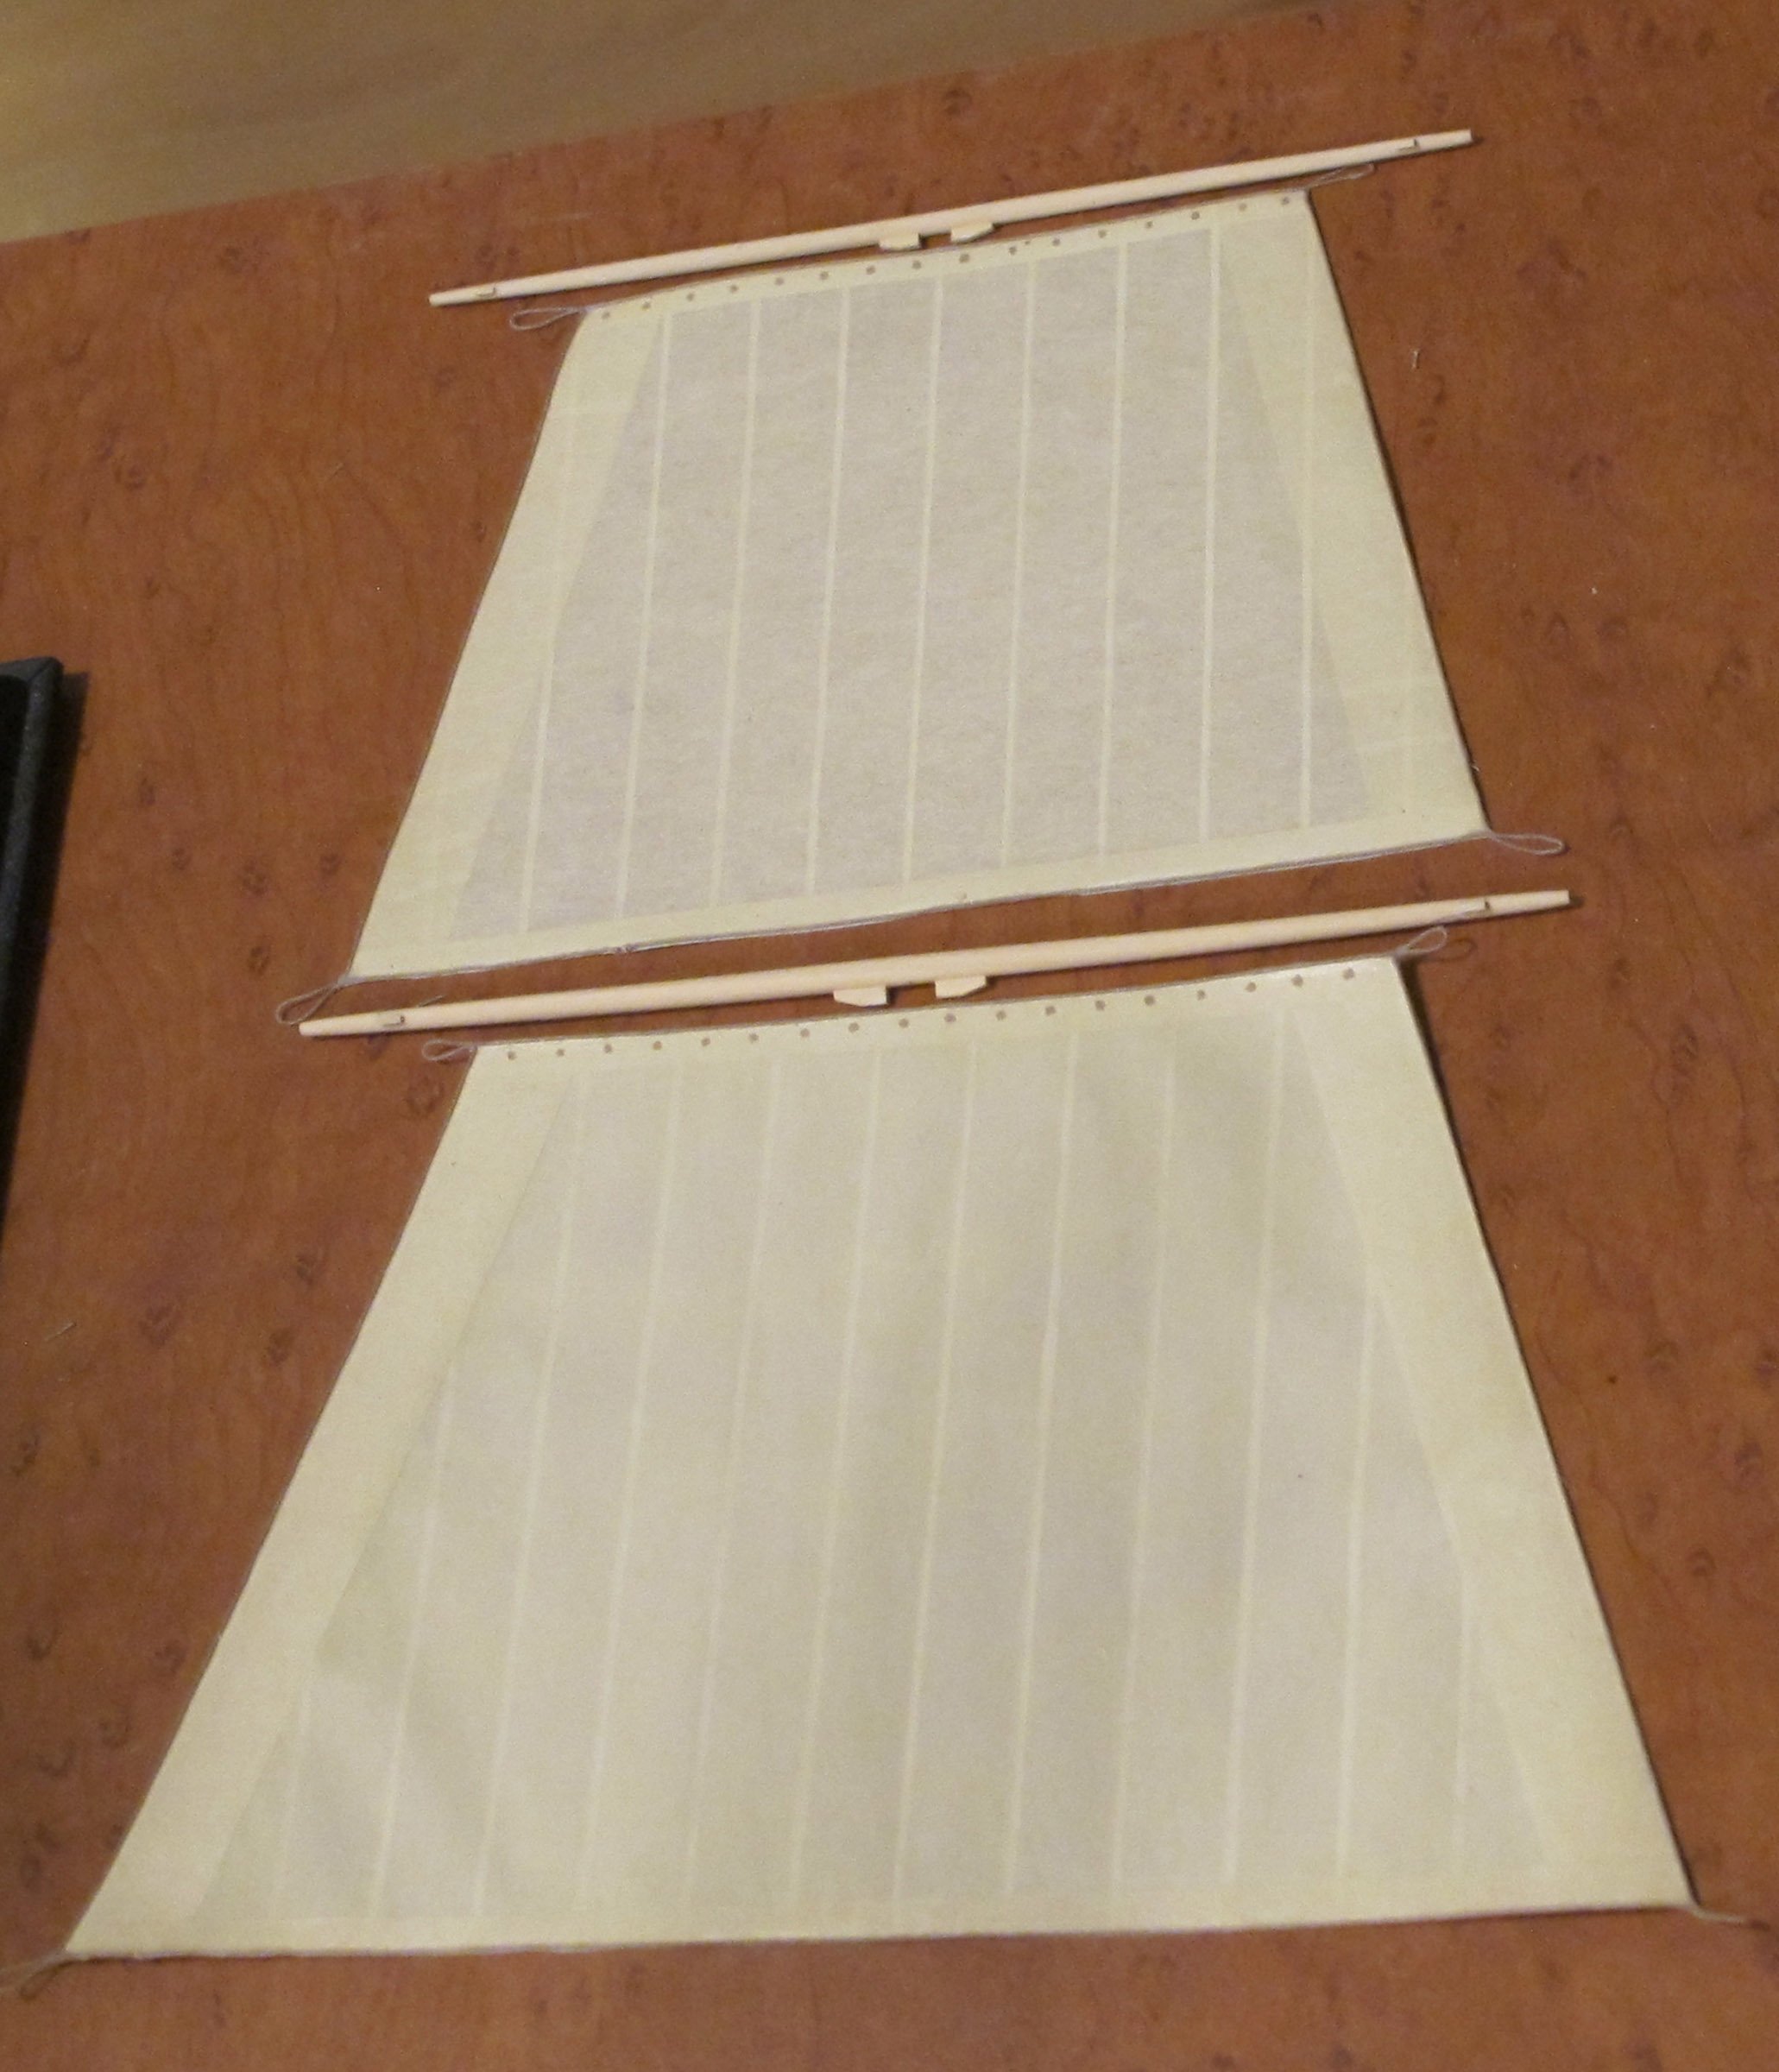
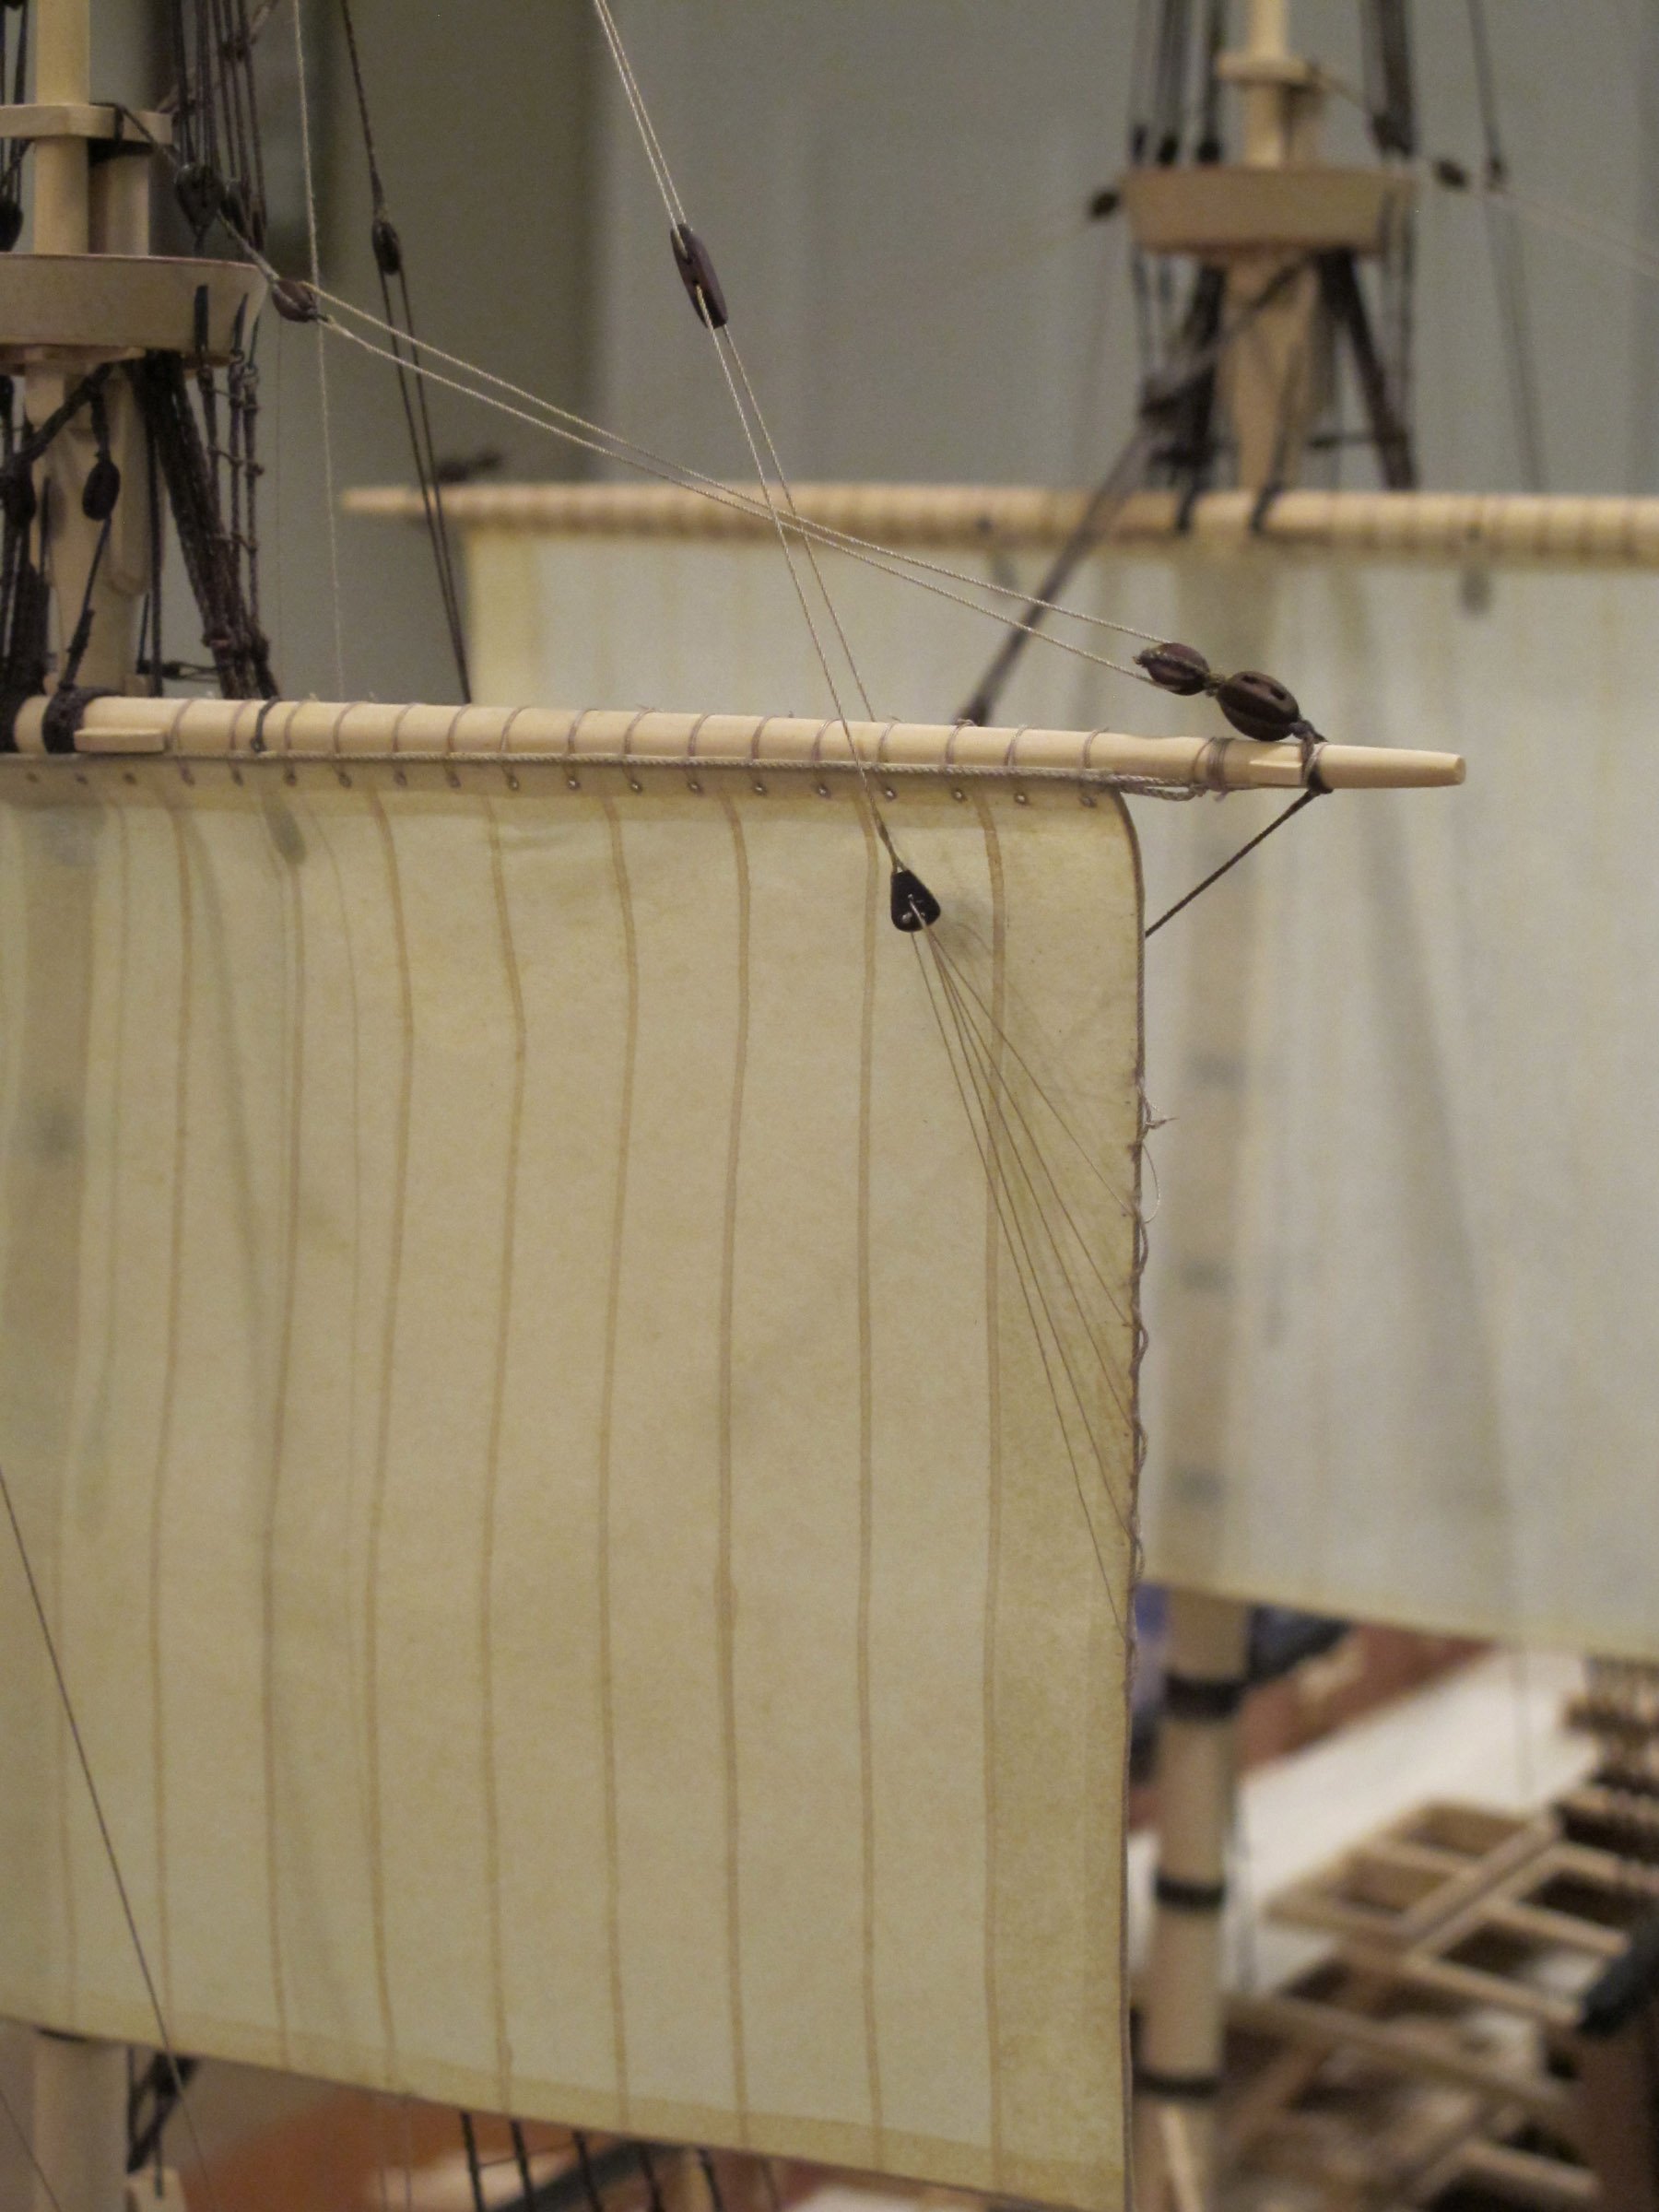
Actual sail seams do look darker against the light. The seams need to be of scale width and even along their length - not easy at small size. That is why I used a ruling pen instead of piecing the sail together,
-
Good luck with your do-overs. We have all had that happen to us - often repeatedly!
-
What did the instructions (if any!) say to do? That might help us help you.
-
Marc; by now you must be a qualified plastic surgeon. Well done on the figure modification!
- 2,696 replies
-
- 5
-
-
- heller
- soleil royal
- (and 9 more)
-
I rule on one side only with a thicker paint mix, but suppose that you could do both sides if you wished.
-
The uniform width of line is provided by the ruling pen. Its two blades are adjusted to the width apart of the overlap. The paint consistency needs to be experimented with for a smooth flow. Some practice is needed to get this right!
-
An alternative to gluing up separate strips is to paint the overlaps of the cloths using acrylic paint and a ruling pen.


- 50 replies
-
- 12
-
-
Love the slightly faded appearance of the colors you've used.
-
May I suggest not using tea? It is acidic and will eventually make the material brittle and crumble. A wash of either watercolor or acrylic paint is a much better choice. Andrew's sail ( Post #9) looks terrific!
-
Making significant progress since I last looked in. Very nice, Hamilton!