druxey
-
Posts
13,377 -
Joined
-
Last visited
Content Type
Profiles
Forums
Gallery
Events
Everything posted by druxey
-
Pin racks gained popularity as the bulwarks became closed in. While there were open rails, it was easy to belay lines to them. Once this option was no longer available - presto! Pin racks proliferated.
-

HMS Tremendous 1784
druxey replied to Alexandr's topic in Building, Framing, Planking and plating a ships hull and deck
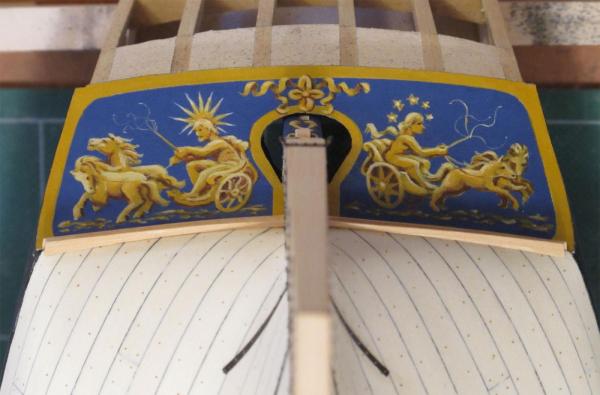
The figure is of a classical Graeco-Roman hero-warrior, as seen through 18th century eyes. You would have seen singers dressed like this in Handel operas. -
Best wishes and a safe voyage, Chris.
-
If the outside is painted or sealed, so should the inner side of the hull. That said, I once used acrylic paint instead of my usual solvent-based oil paint. I had some left-overs and thought this a great way to use up the can. Big mistake! The moisture content warped the planks and sprang several. It was hell's teeth to restore several weeks' worth of work. I had to actually replace a couple of planks as well. Lesson learned: economy is not always the best policy.
-
Sorry to read of the derailment being so close to you; but at least you did not have to be evacuated. The new block looks great.
-
Just stumbled across your log. I'm very impressed - particularly as this is your first wooden model. Well done!
-
One down, and many to go.... That first frame looks very nice indeed, Ed.
- 3,618 replies
-
- 1
-

-
- young america
- clipper
- (and 1 more)
-
Thanks for posting pictures of what the rest of us have missed!
-
ebonizing boxwood
druxey replied to Kurt Johnson's topic in Painting, finishing and weathering products and techniques
I would definitely cut in a demarkation line as insurance against bleeding. Masking tape alone will not prevent dye 'creep'. To do an experimental run off-model is a very good move! -
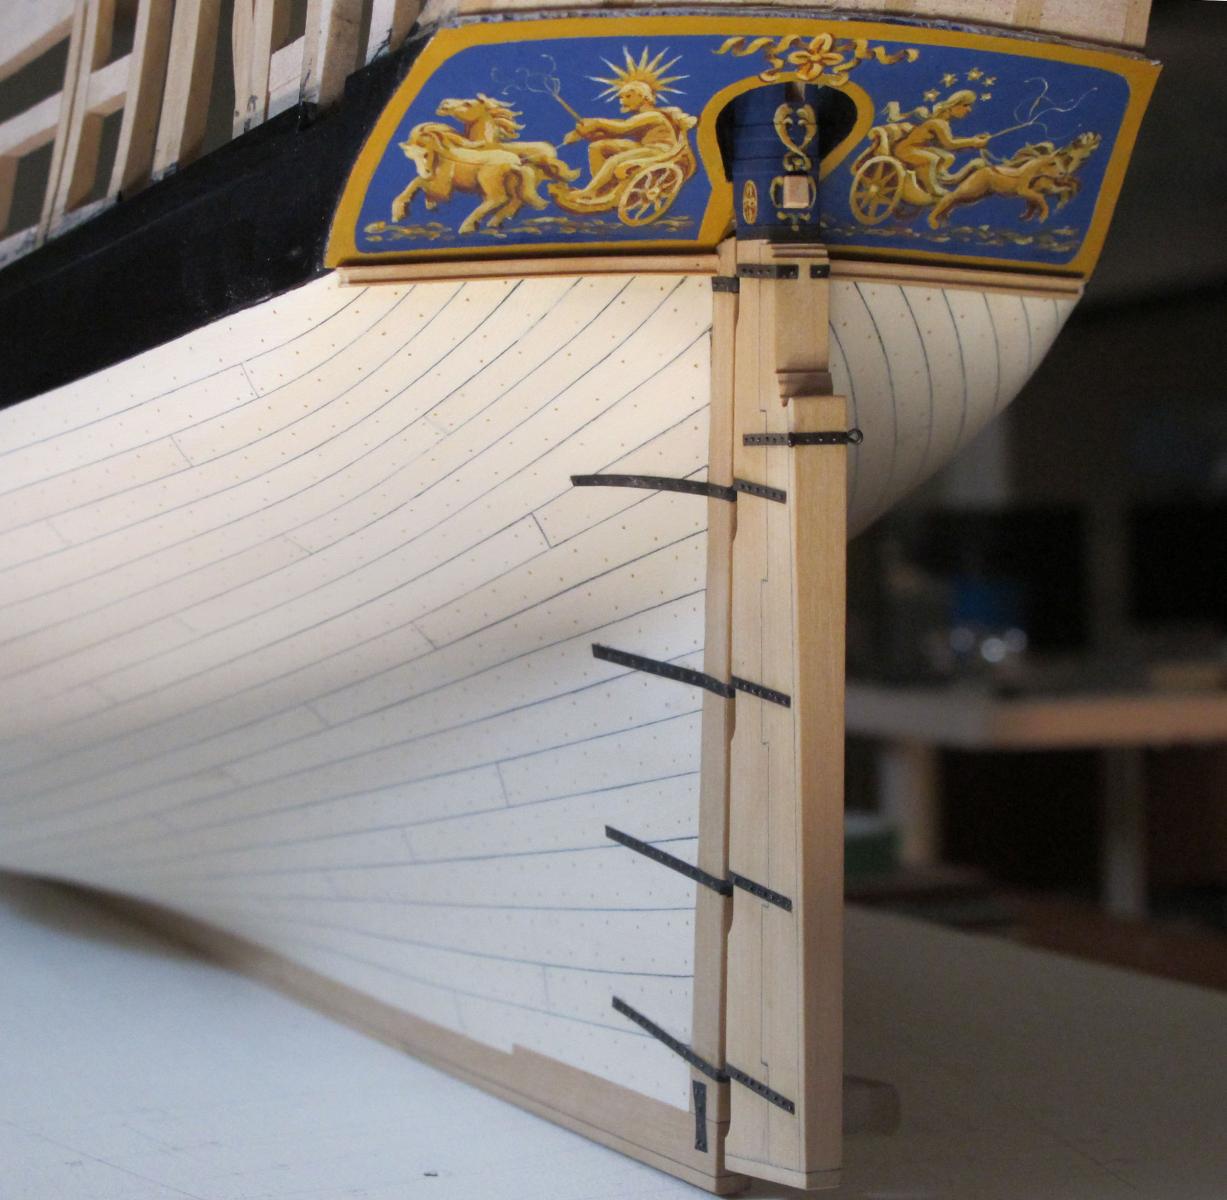
The narrow 'second line' is the the upper edge of the tuck rail. The heavier lines are the 'shadows'. If you look at the aft edge you will see the profile. From top to bottom: a rounded bullnose, A small vertical, a concave and, at the bottom, another rounded bullnose.
-
Spyglass: I think you may be mislead by the fact that some builders paint the black (first) strake above the wale, so that the upper cheek appears to land on the wale: it actually sits on the black strake.
-
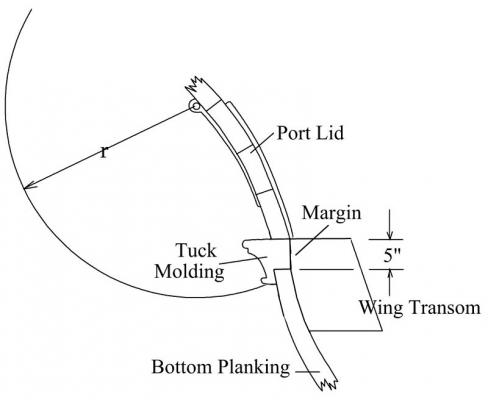
I believe from my study of the subject that this is correct for 18th century British construction. The width of the margin on the wing transom varies depending on the size of ship, of course. It is as much as 6" for 110 gun ships and down to 3" on small ships. For frigates it could be, as Allan shows, 4 1/2" or 5".
-
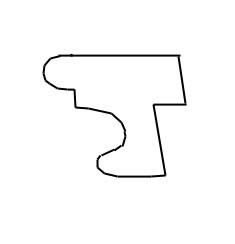
With all due respect, Allan, I think the actual construction was as in the modified diagram below. Do you have information to the contrary? A section of the tuck molding was attached to the lower edge of the port lid, of course.
-
ebonizing boxwood
druxey replied to Kurt Johnson's topic in Painting, finishing and weathering products and techniques
I do all the shaping and bending before using shoe dye. -
Now, that is progress. She's looking good, Ben.
-
Dorade Omega1234 - FINISHED - yawl
druxey replied to Omega1234's topic in - Build logs for subjects built 1901 - Present Day
Yup, that is small all right. Nice detail for the size, Omega. What is the scale, please? -
Interesting strategy for the channels, E&T. Have a fun weekend!
- 346 replies
-
- 2
-
-
- terror
- polar exploration
- (and 2 more)
-
The rail has more than an ornamental purpose, Sam. It protects the end grain of the lower hull planks from water penetration and premature rotting. Exposed end-grain was to be avoided anywhere on a ship if at all possible.
-
Have a great conference, folks. Sorry I can't make it....
-
If you are referring to 18th century British ships, it's not quite as simple as that. The lower aft edge of the wing transom has a changing bevel for the bottom planking to land on. The upper 3" or so is left vertical and the junction with the bevel is called the margin line. The tuck rail is attached to the wing transom along the margin line as well as overlapping the bottom plank ends by a few inches. This rail is very tricky to make, as the rabbet on its fore face changes angle continuously along its length. The photos should explain this better than words.

-
Well done indeed, John. It's been an interesting journey we've watched you on (with one or two unintended side-trips!), but the result is terrific. Congratulations!
-
Please protect those lovely models with plastic or glass cases!
-
While visiting Greg last weekend, I took a look at Volume II. It's every bit as lovely a production as Volume I. Well done, Ed and SeaWatch.
-
Interesting solution, Dan. I suspect that, as the quarter deck does not carry much weight, the hanging knee would have been simply omitted entirely. Only the lodging knee would be installed.
-
ancre Le Fleuron by cabrapente - FINISHED
druxey replied to cabrapente's topic in - Build logs for subjects built 1501 - 1750
I think this does not translate as 'lifeline' but 'preventer stay'. This is the back-up, should the main stay be shot away.