druxey
-
Posts
13,390 -
Joined
-
Last visited
Content Type
Profiles
Forums
Gallery
Events
Everything posted by druxey
-

My First and Ugliest Ropewalk
druxey replied to vvvjames's topic in Rope Making/Ropewalks's Discussions about Rope Making
The unravelling may be a function of the lay of the rope versus the lay of the strands - they need to go in opposite directions, Also, newly laid rope need to be hardened. This is done by stretching it on the ropewalk before cutting it loose. I damp the line as I stretch mine. Done correctly it won't subsequently unravel. And don't knock the look of the machine - if it works, it works! -
Is part of the deviation issues that you illustrate due to distortion of the original plan due to paper expansion/contraction or in the reproduction process?
- 49 replies
-
- 1
-

-
- Wildmanden
- Turesen
- (and 1 more)
-
Good 'Hobby Quality' Metal Lathes
druxey replied to tmj's topic in Modeling tools and Workshop Equipment
Congratulations! Long may you enjoy its use. I notice the very useful manual is included in your purchase. You may find, as I did, that a small shim might be required to align the head and tailstock. Some tool bits might also require shimming to be accurately on center. I never felt a more powerful motor was needed. -
Repurposing Pool Cue Lathes?
druxey replied to Rich Sloop's topic in Modeling tools and Workshop Equipment
Chacun a son goût: Each to their own. If you plan on lots of turning or have deep pockets, well, it's another nice toy to have. -
Repurposing Pool Cue Lathes?
druxey replied to Rich Sloop's topic in Modeling tools and Workshop Equipment
I simply pull a coarse sanding strip back and forth with the spar held in a vise. Rotate the spar about a quarter turn after every few pulls. Finish with fine sandpaper. -
Repurposing Pool Cue Lathes?
druxey replied to Rich Sloop's topic in Modeling tools and Workshop Equipment
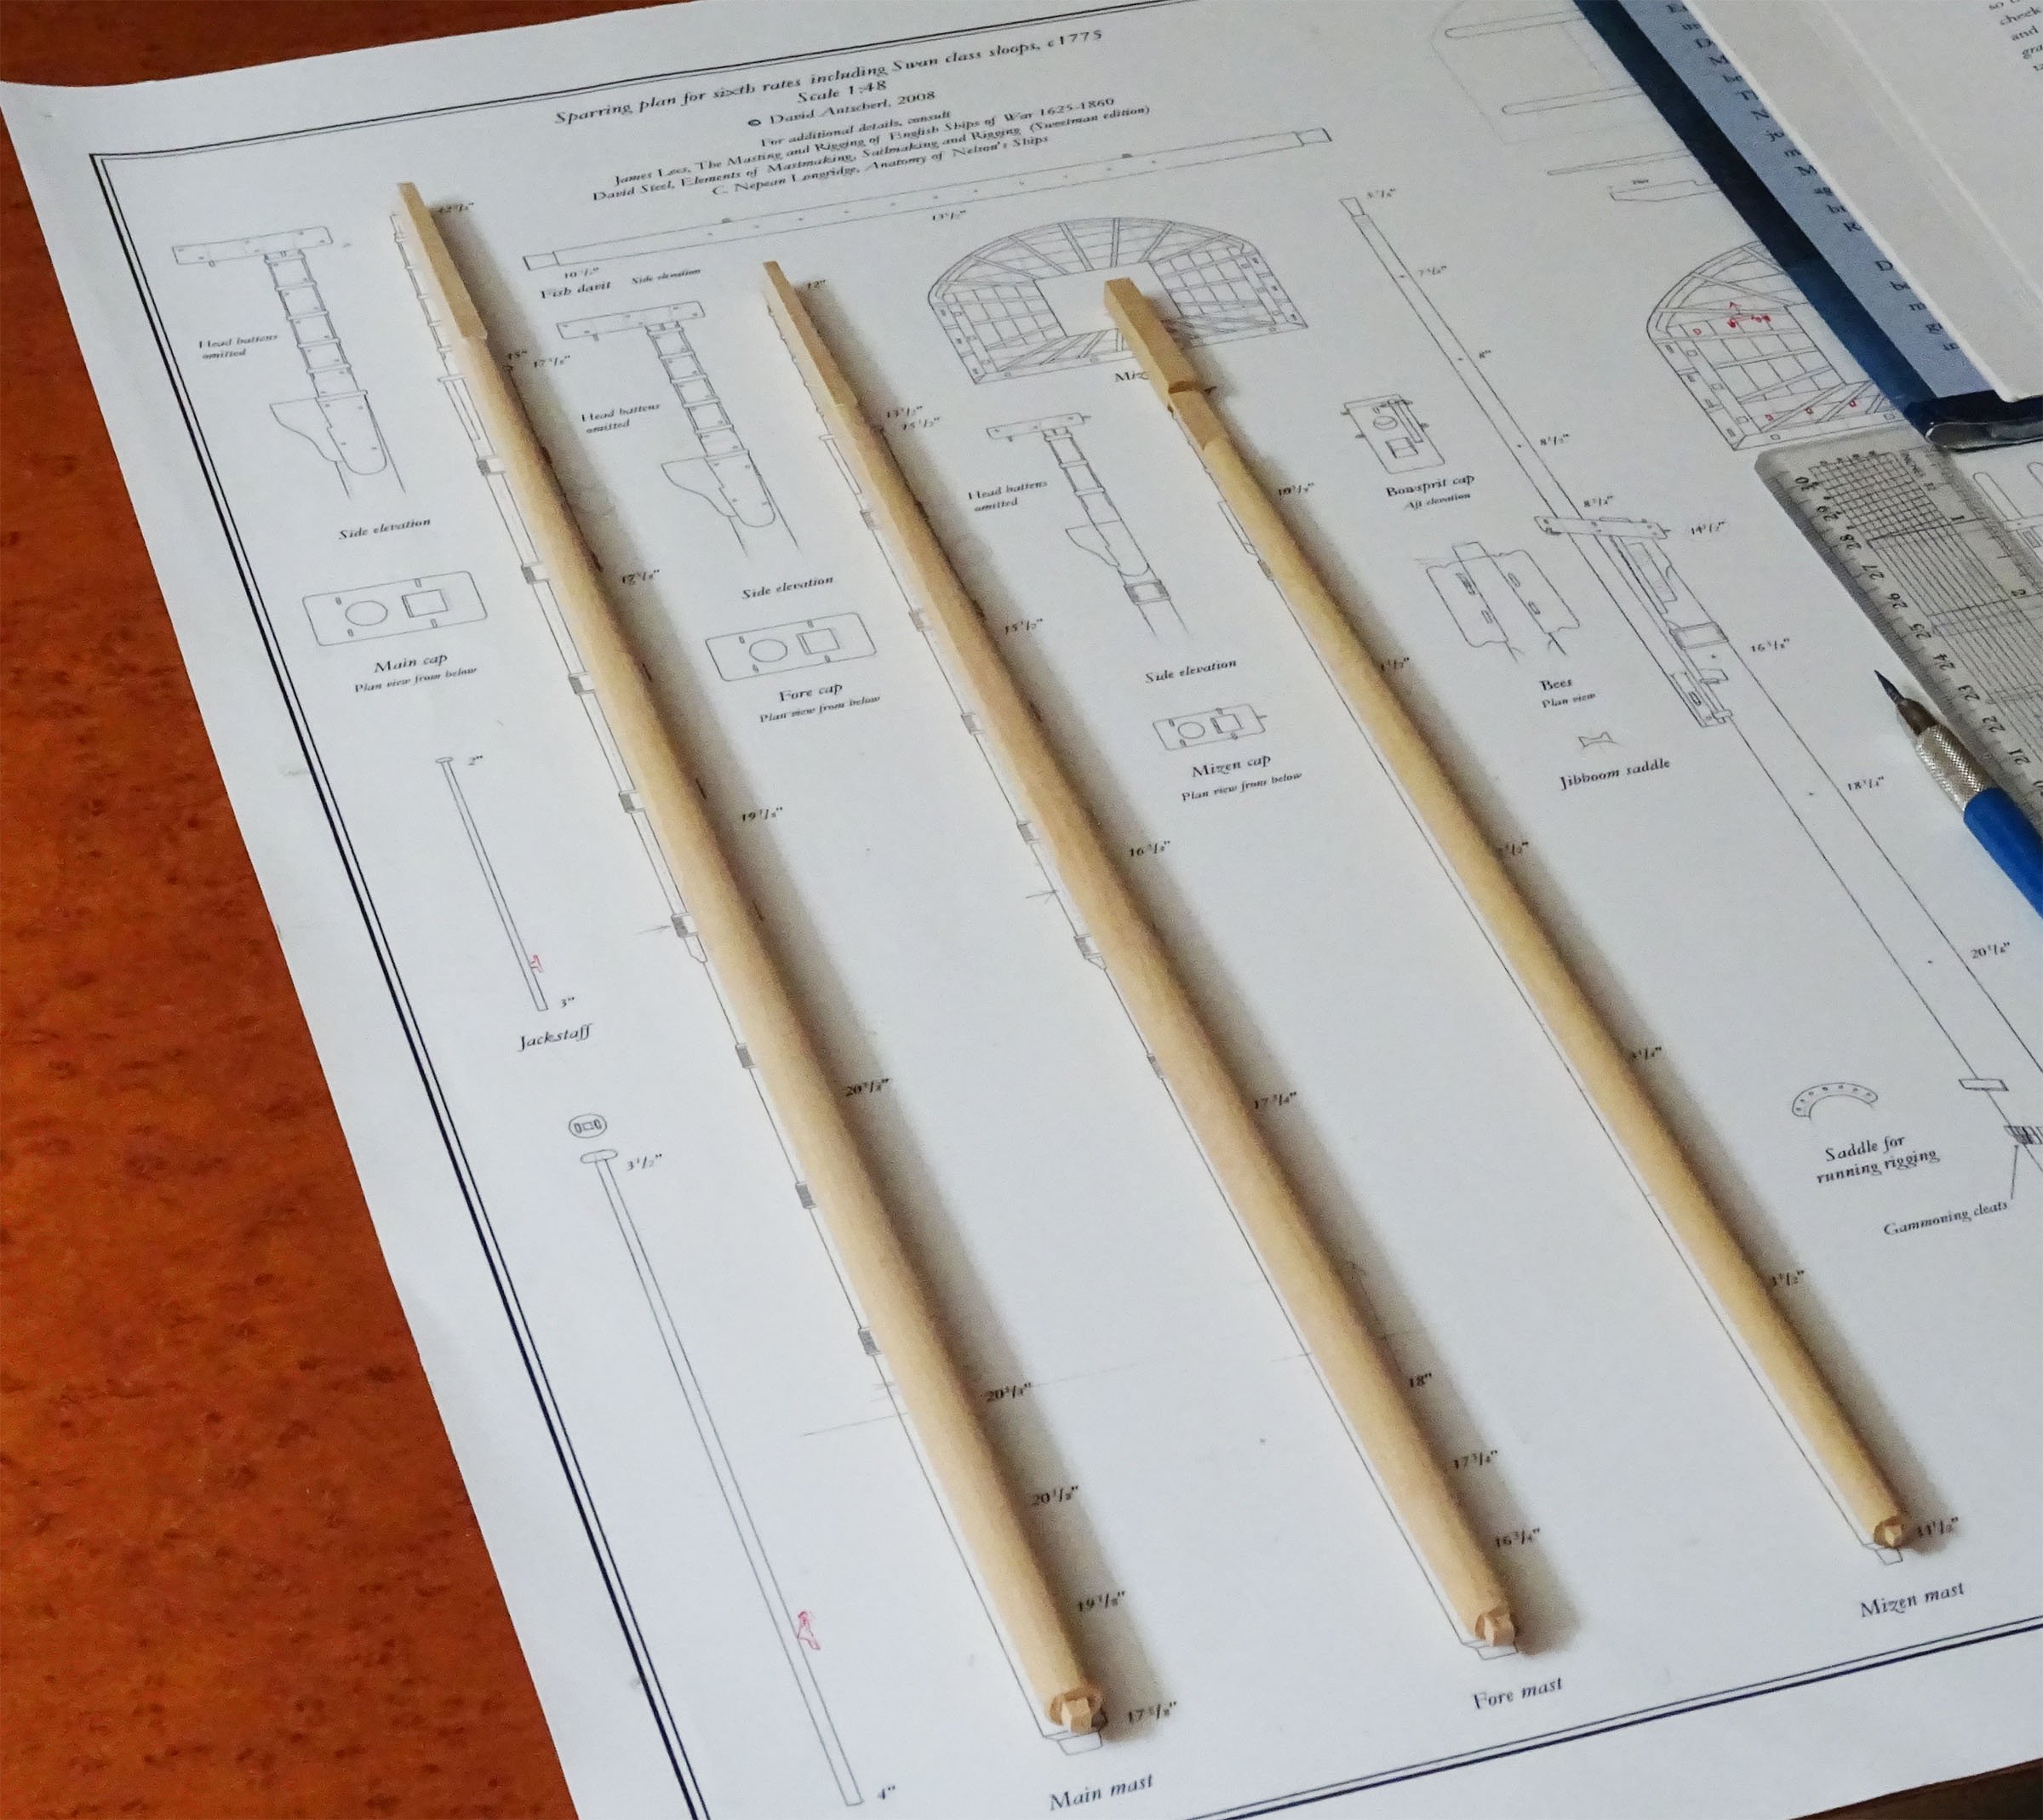
Why any ship modeler would spend serious money on a long bed lathe simply for turning a few spars mystifies me. For a start, parts of a mast are often foursquare in section, and sections of yards are eightsquare. You would also need a four jaw self-centering chuck for this. Real mast and spar-makers don't use a lathe. They cut the spar to a foursquare section including any taper, then eight. For models, it's then easy to round off the spars using sandpaper strips. The secret - if secret there be - is in accurate marking out and making a spar holder that will support the stick at 45 degrees. A lot cheaper than a lather, unless you plan on turning a lot of wood! Some samples of spars at 1:48 made without a lathe in sight: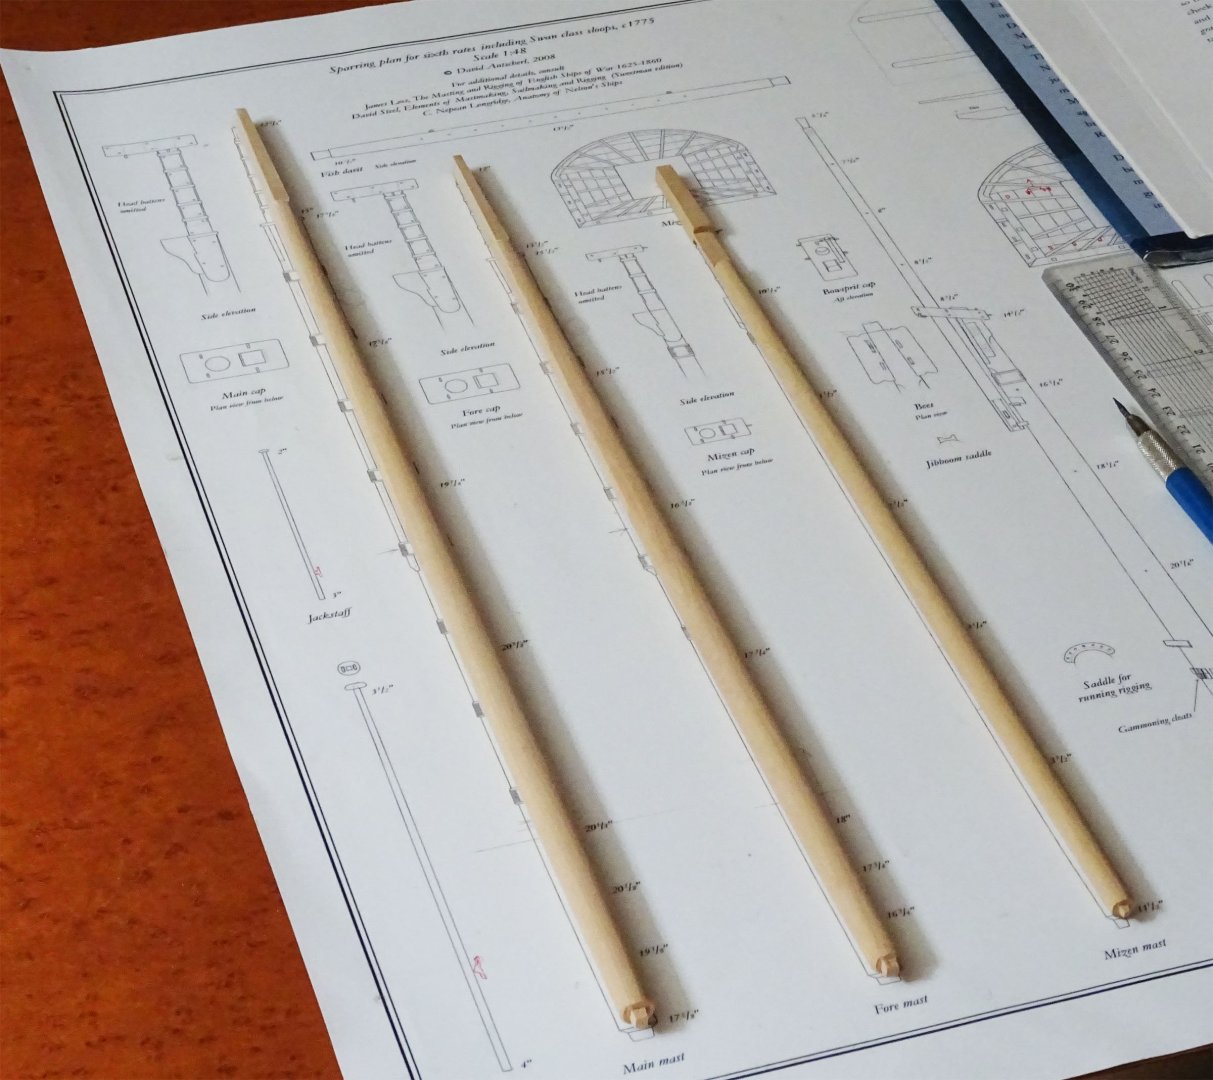

- 11 replies
-
- 10
-
-
I'd be amazed if you nailed those timbers the first time, Alan! Hopefully the second pair will go perfectly once the Christmas rush is over.
-
Congratulations and very best wishes, Chris. Nice blank canvas for you fill!
-
Good 'Hobby Quality' Metal Lathes
druxey replied to tmj's topic in Modeling tools and Workshop Equipment
The Unimat featured in post #43 is fitted with a cross slide attachment to traverse it longitudinally. When engaged it saves a lot of turning a handwheel! -
Good 'Hobby Quality' Metal Lathes
druxey replied to tmj's topic in Modeling tools and Workshop Equipment
My Unimat DB has done well for me now for over 50 years - used, but not abused. The only drawback is that taper turning is a bit awkward. The headstock needs to be turned, as the cross-slide is fixed at a right angle to the bed. The basic boxed set was $CAN99 back in '72! -
Completing such a complex project is a major achievement. Well done!
- 257 replies
-
- 3
-
-
- pegasus
- Swan-class
- (and 1 more)
-
Actually, I discovered just now that it has already sold. Sorry about that. 400,000 pounds sterling.
-
Well, if you would like an early Christmas present and you have deep pockets, this is for you!
-
Good 'Hobby Quality' Metal Lathes
druxey replied to tmj's topic in Modeling tools and Workshop Equipment
Slightly off-topic: wefalck; there are a number of Unimat thread chasers and patterns currently listed on eBay. It is surprising how many 'NOS' items pop up there, as well as used. -
Good 'Hobby Quality' Metal Lathes
druxey replied to tmj's topic in Modeling tools and Workshop Equipment
I would normally never dare to contradict wefalck, but the 'old' Unimat DB/SL had a (metric) thread-cutting attachment (no. 1270) available years ago. Examples are still available, for a price, on the second hand market. -
Nate's PANDORA in 3D
druxey replied to 3DShipWright's topic in CAD and 3D Modelling/Drafting Plans with Software
Whew! Quite the exchange of ideas and views, to which I can add but little. All I can say is that there are several contemporary models in frame that should also be seriously considered.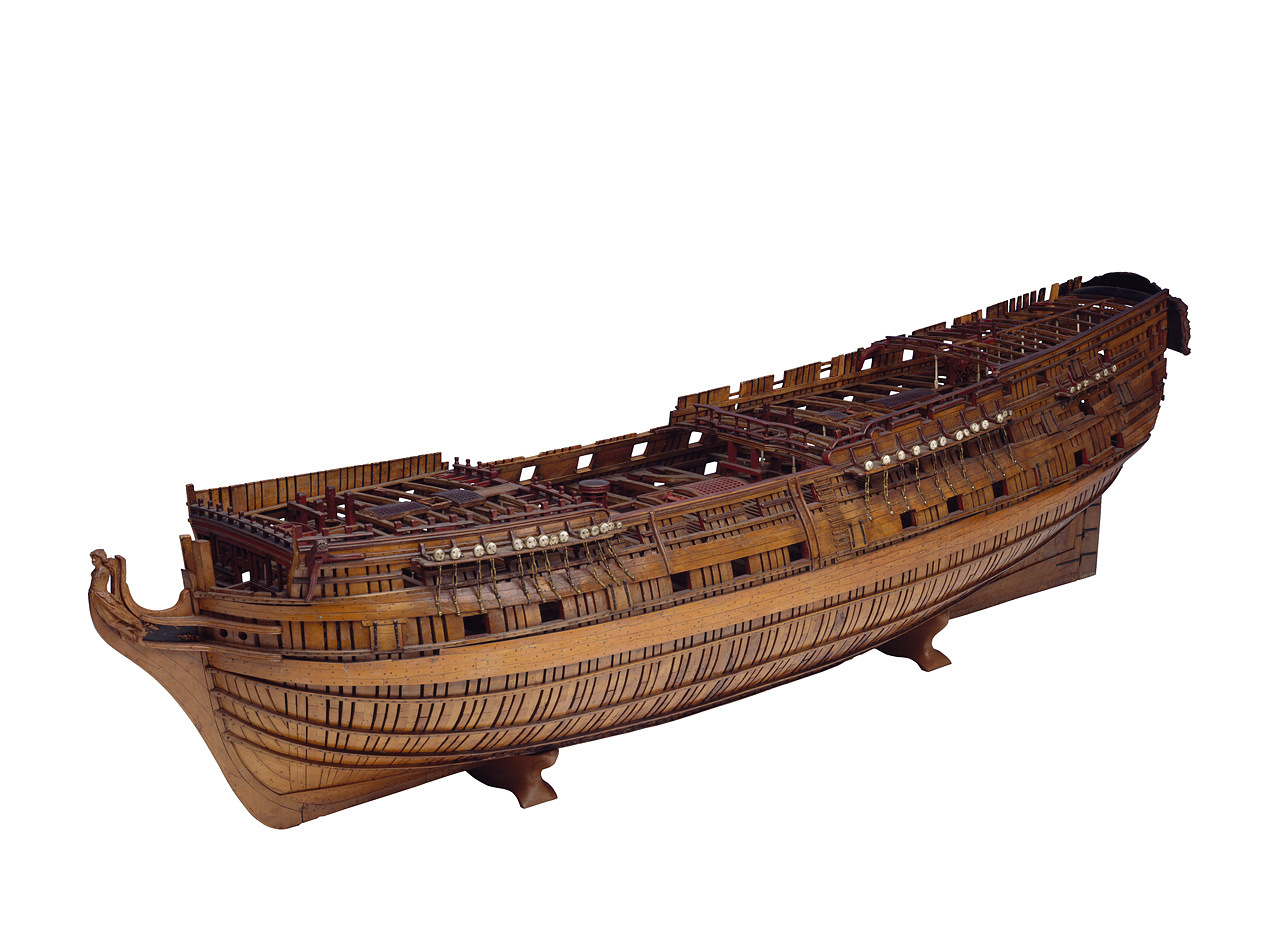
-
Good 'Hobby Quality' Metal Lathes
druxey replied to tmj's topic in Modeling tools and Workshop Equipment
Well, there have been many good points raised. The most pertinent being what is the range of items you want to make on this hypothetical lathe? If it's only occasional small parts of medium precision, an old original Unimat will so the trick nicely. Mine is from the early '70's before they went to plastic parts. High precision small parts? A well-kept used watchmakers' lathe. A Boley or Levin are good - I've used both. However, items like collets can run up the cost quickly. Serious model engineering? Sherline. Julie: those 19th century inventors and engineers are a fascinating study in themselves. Brunel Senior's block-making machines, for a start. -
A clenched bolt, under planking, would be very awkward to replace easily. Perhaps the idea of a 'heavy wood thread' is confusing this with a ragged bolt. This was more permanent, with arrow-like projections along the shaft that allowed easy driving, but prevented the bolt from being withdrawn again. Until relatively recent times - the early to mid 19th century - threaded bolts were hard to manufacture.
-
The burnisher needs to be pressed down hard as you run it along the scraper and at a slight angle, Mike. This raises the burr.
-
Sometimes a squirrel wife is very useful! (I have one of my own.)
-
Nate's PANDORA in 3D
druxey replied to 3DShipWright's topic in CAD and 3D Modelling/Drafting Plans with Software
The latter, alas. Many drawings in the AOTS series are unreliable. For a comparable ship's framing structure, look at this: There are no dramatic shifted or cast timbers at all! And there are no large gaps between toptimbers either. Whenever possible, look at primary sources - they are far more reliable. The RMG web site has a wealth of visual information. Sorry to pour cold water on things.
-
Like the photos? Love the model!
-
Through bolts, forelocked, were used for ease of replacement of damaged ones. The same was true of chain bolts, where the forelocked ends were on the inboard sides. Victory has been through so many repairs and replacements in a very long life that this feature was lost somewhere along the way after her active service.