.jpg.f26acc9a74319261612561bfa7da1303.jpg)
vaddoc
-
Posts
1,605 -
Joined
-
Last visited
Content Type
Profiles
Forums
Gallery
Events
Everything posted by vaddoc
-
.thumb.jpg.6fd4c1b78768bb3efd745ab810936005.jpg) I d go for Bismuth. Looks like a lovely material to have on your model! According to wikipedia Bismuth is a chemical element with the symbol Bi and atomic number 83. It is a pentavalent post-transition metal and one of the pnictogens with chemical properties resembling its lighter group 15 siblings arsenic and antimony.
I d go for Bismuth. Looks like a lovely material to have on your model! According to wikipedia Bismuth is a chemical element with the symbol Bi and atomic number 83. It is a pentavalent post-transition metal and one of the pnictogens with chemical properties resembling its lighter group 15 siblings arsenic and antimony. -
Welcome Zbigniew! Did the boats you built all these years ago survived? Maybe post a few pics?
-
Vintage unfinished speedboat model, any ideas?
vaddoc replied to LMDAVE's topic in Wood ship model kits
What a great ending to the mystery! Indeed, please start a log and share your journey. -
Very nice Vlad! There must be rough seas in you room, your photos are all over the place!😄 Love your painting on the golden decorations
- 200 replies
-
- 2
-

-
- cutty sark
- clipper
- (and 1 more)
-
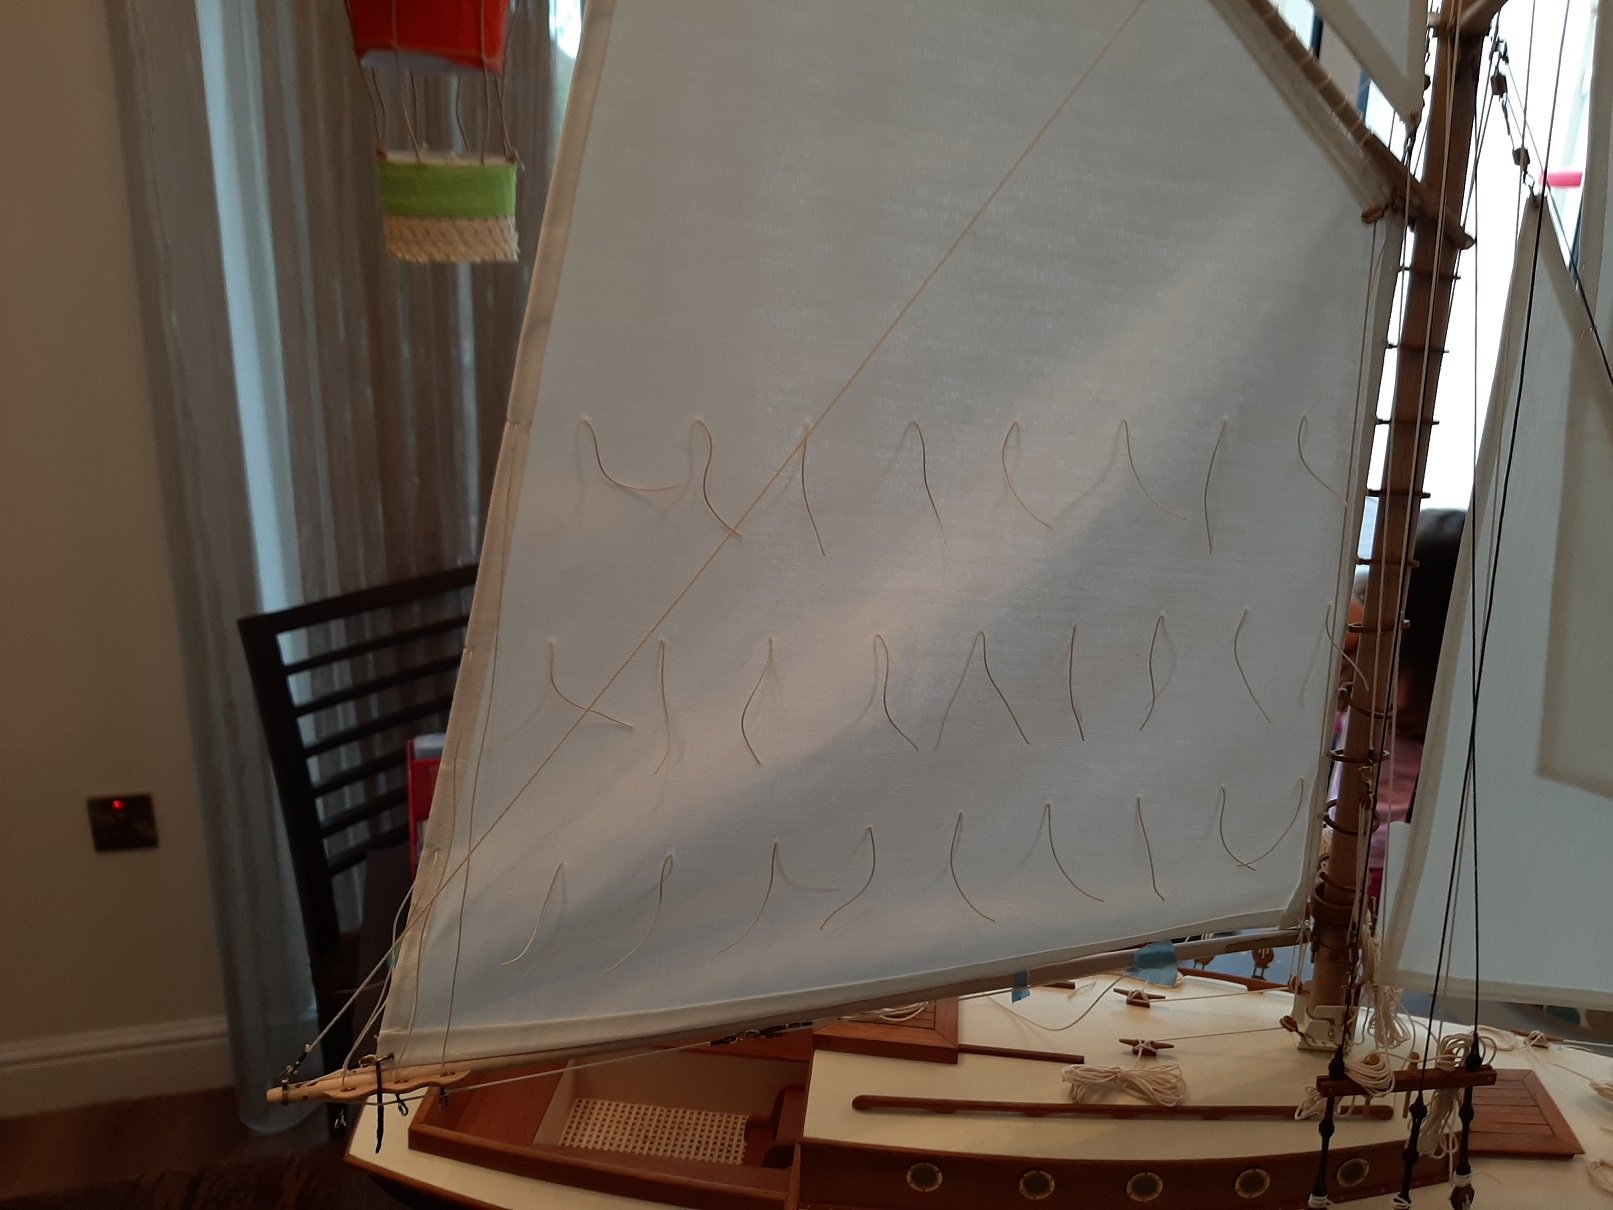
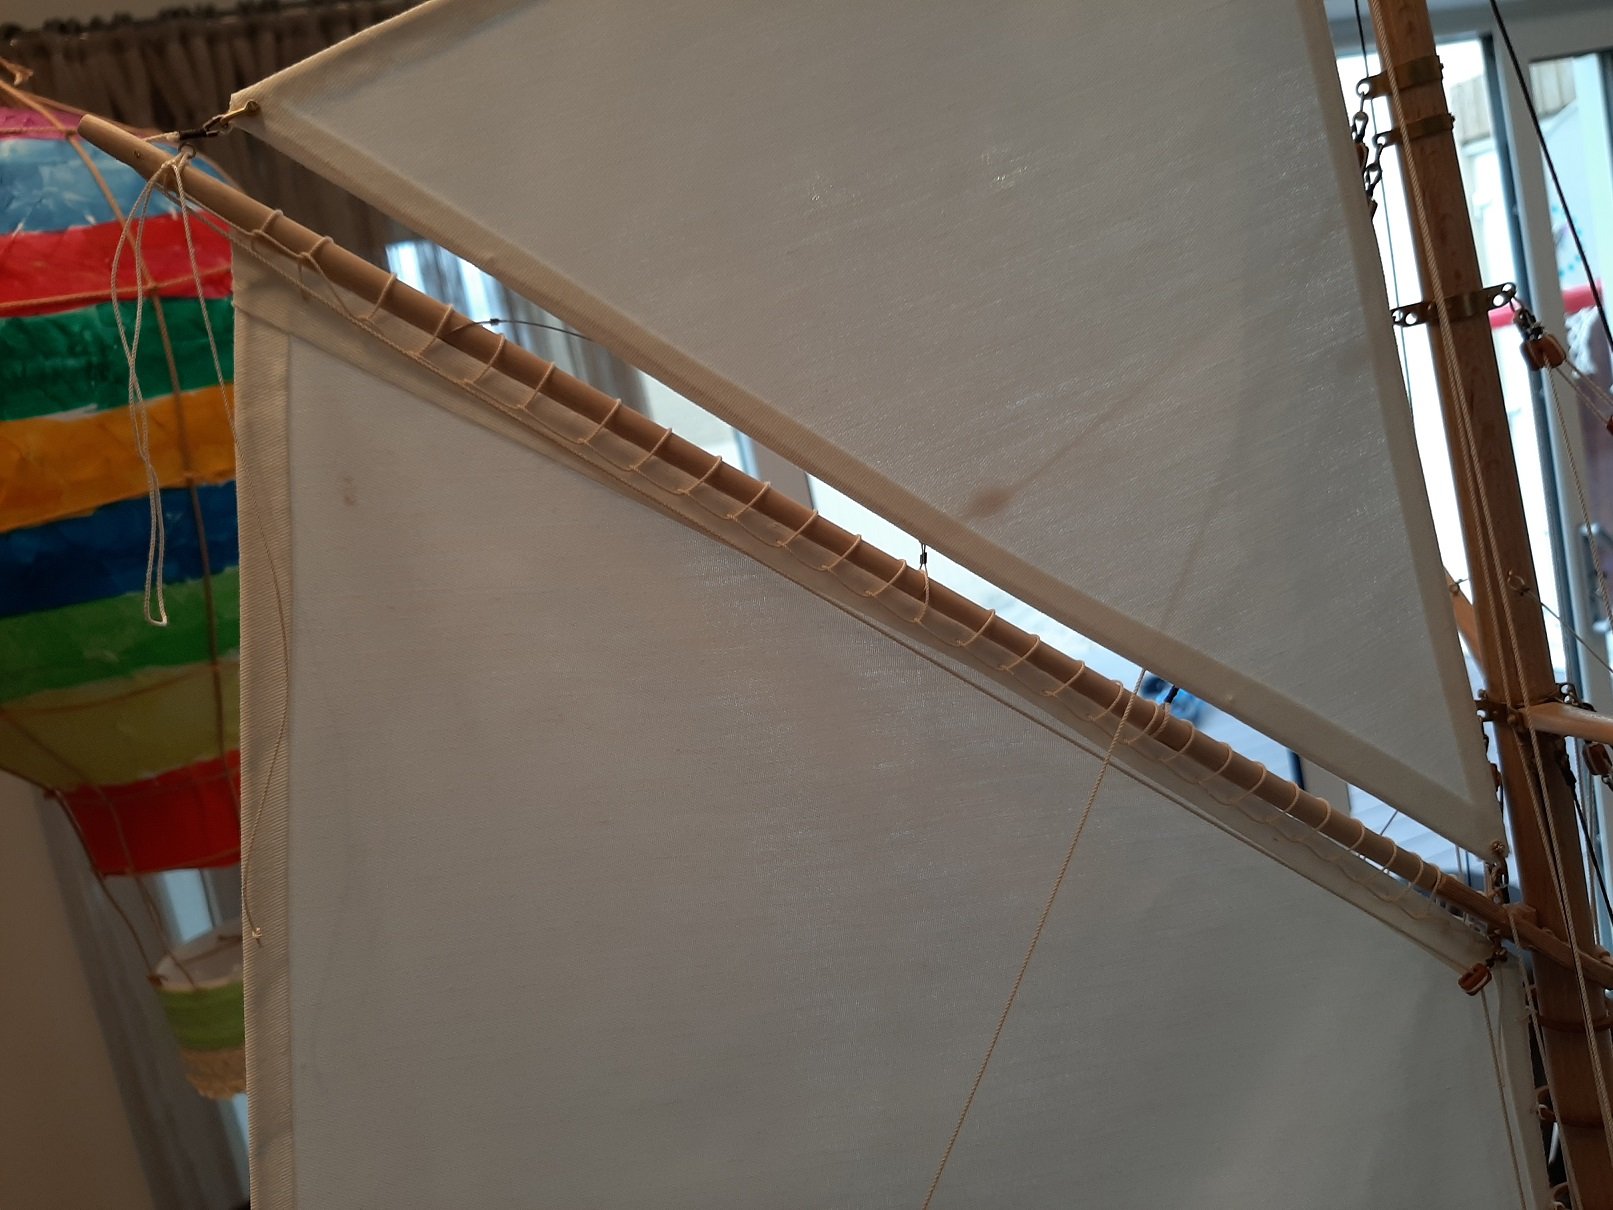
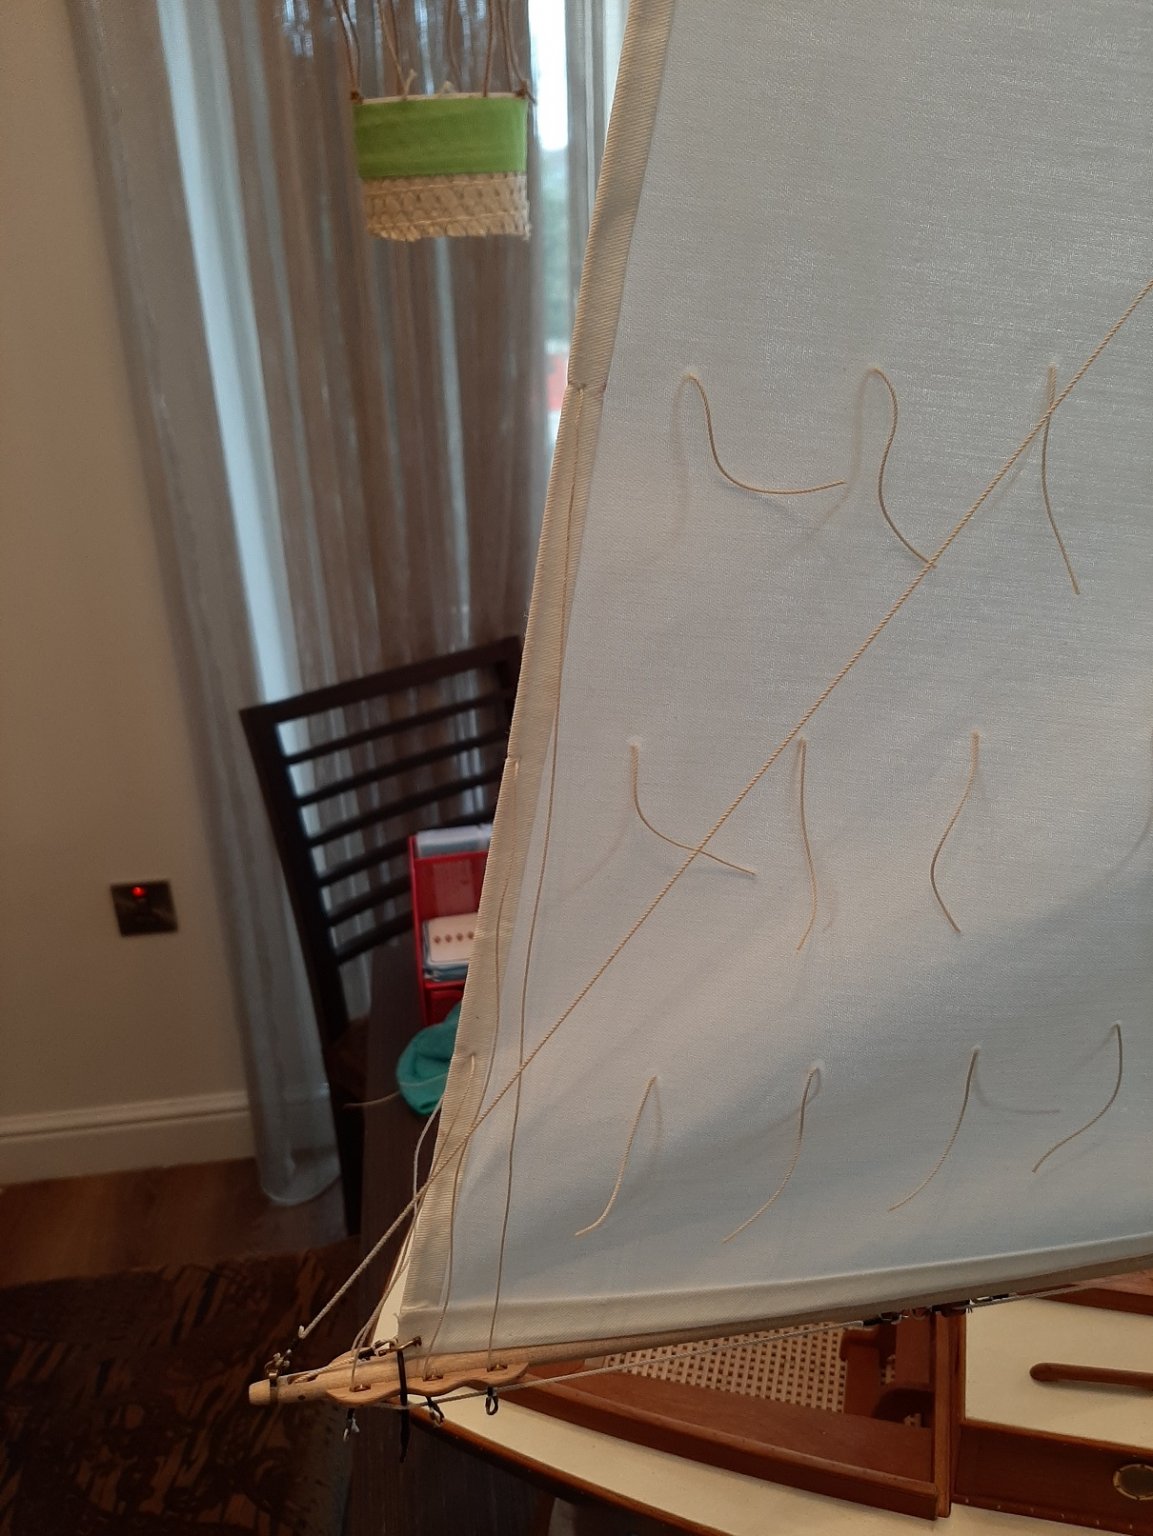
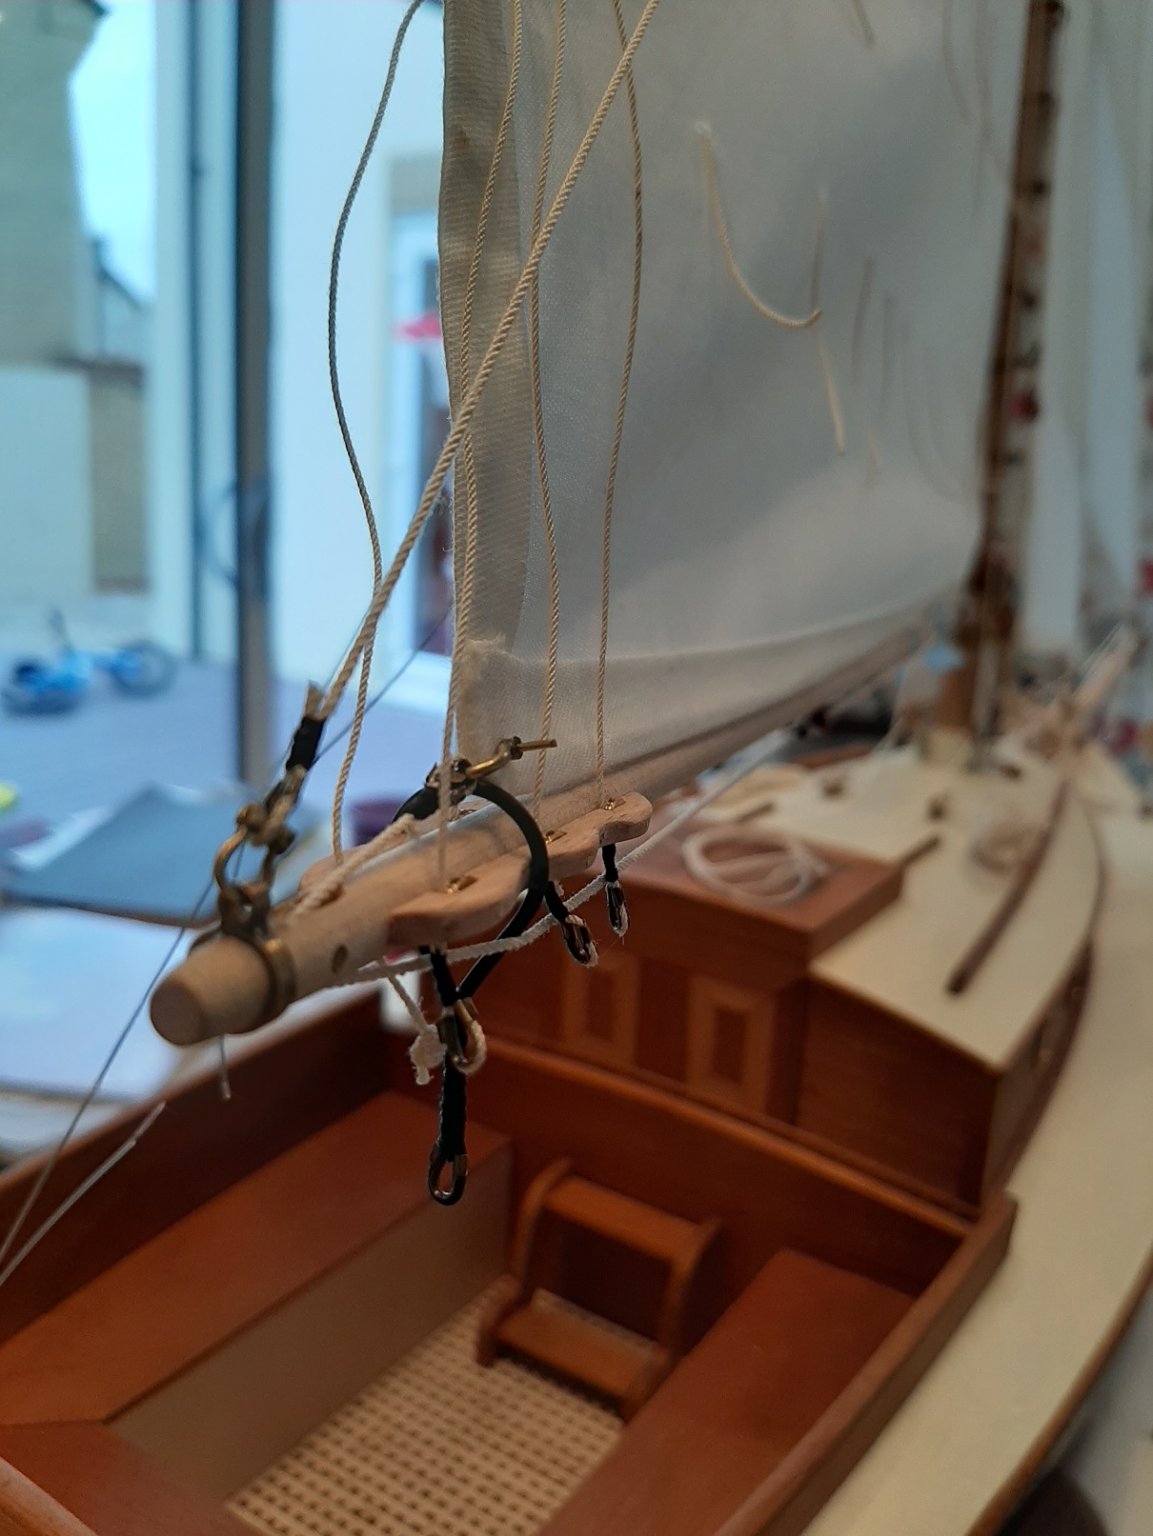
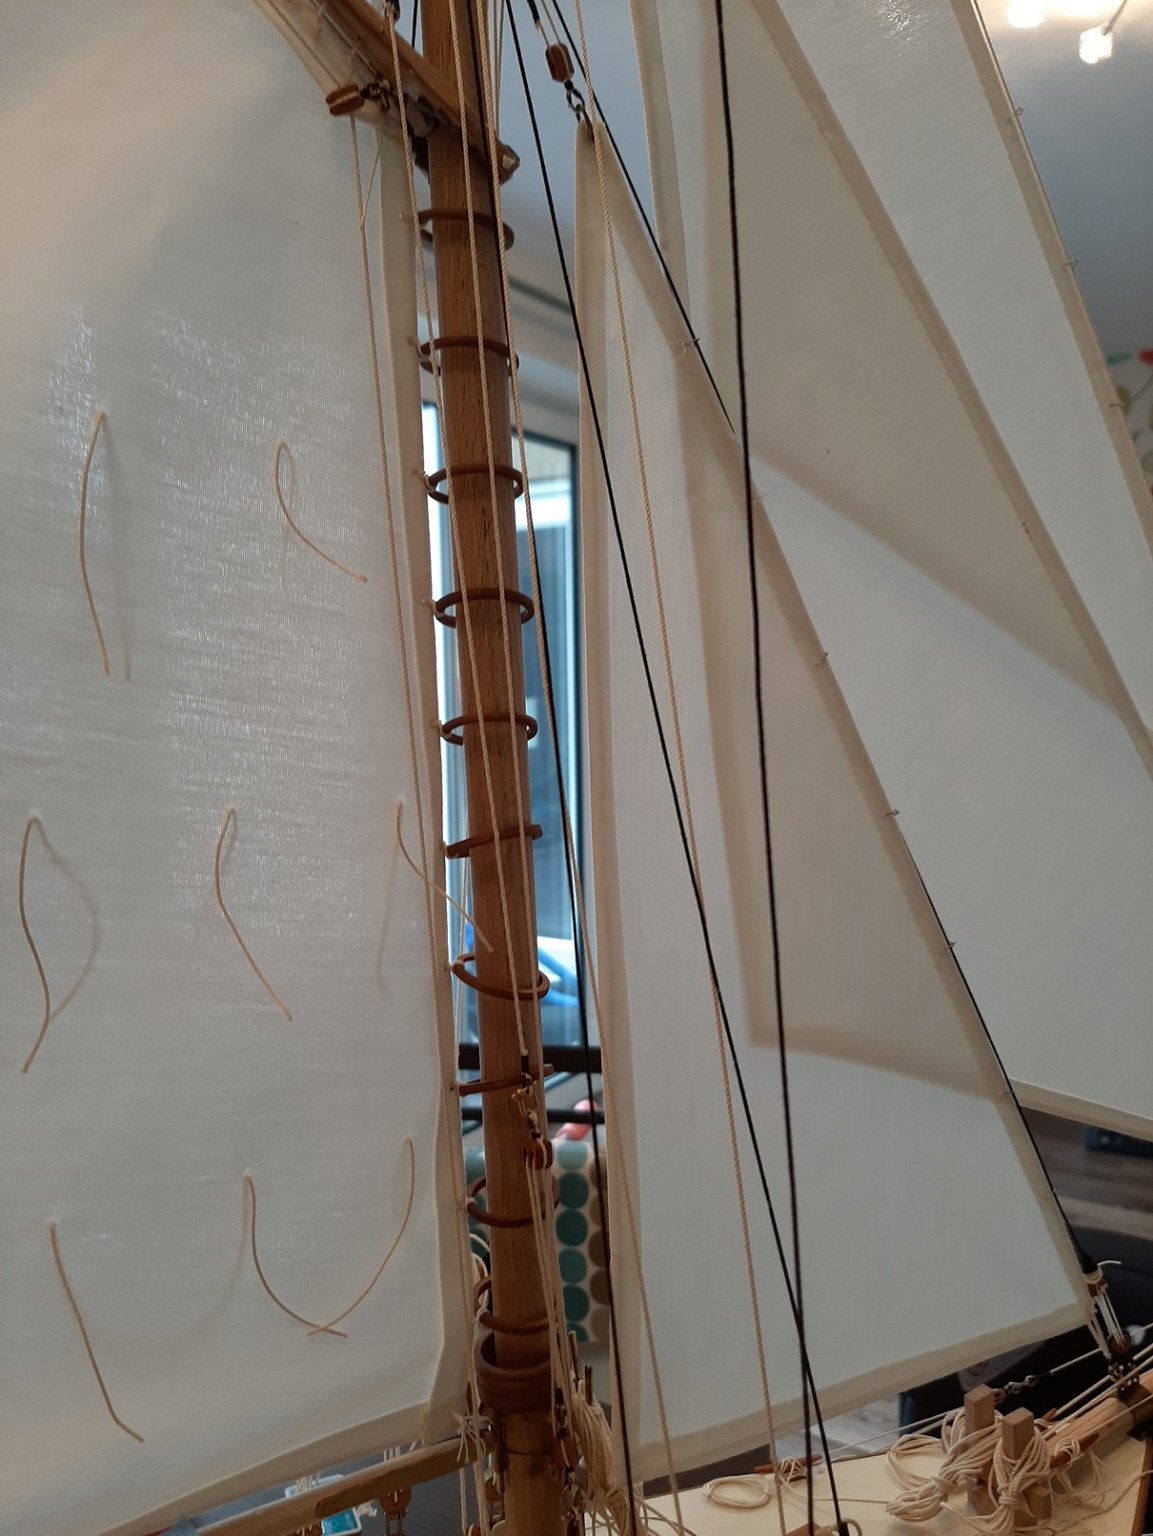
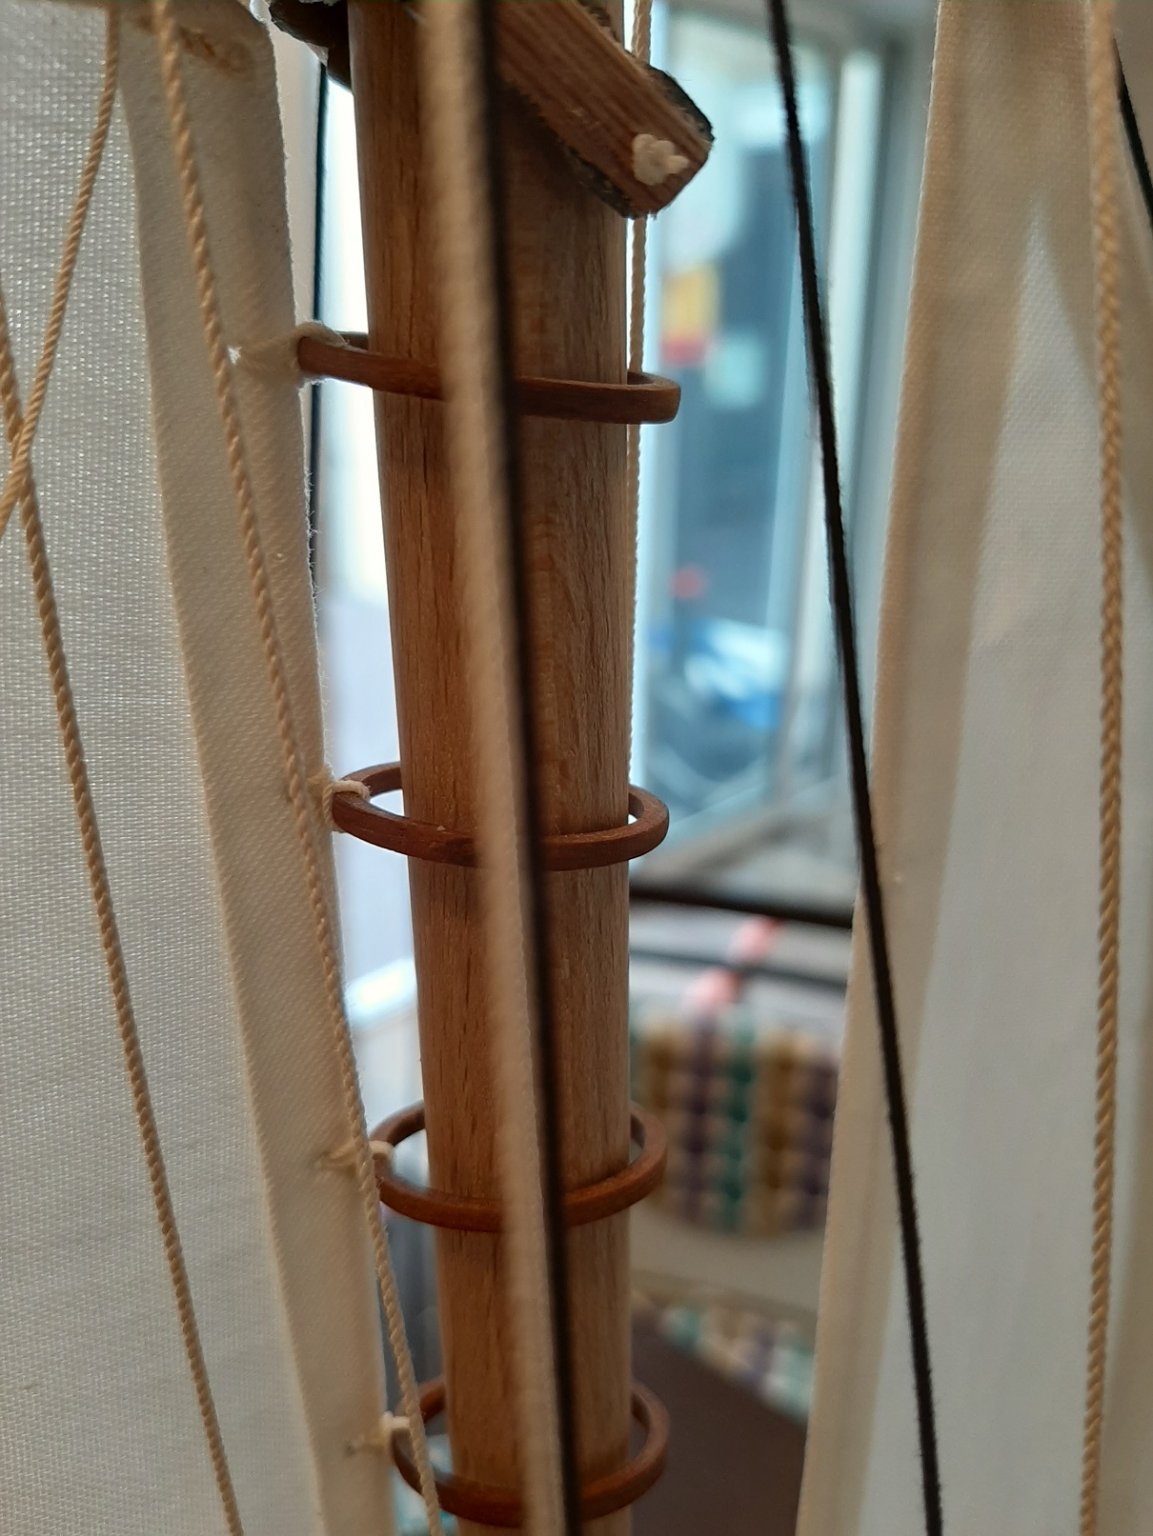
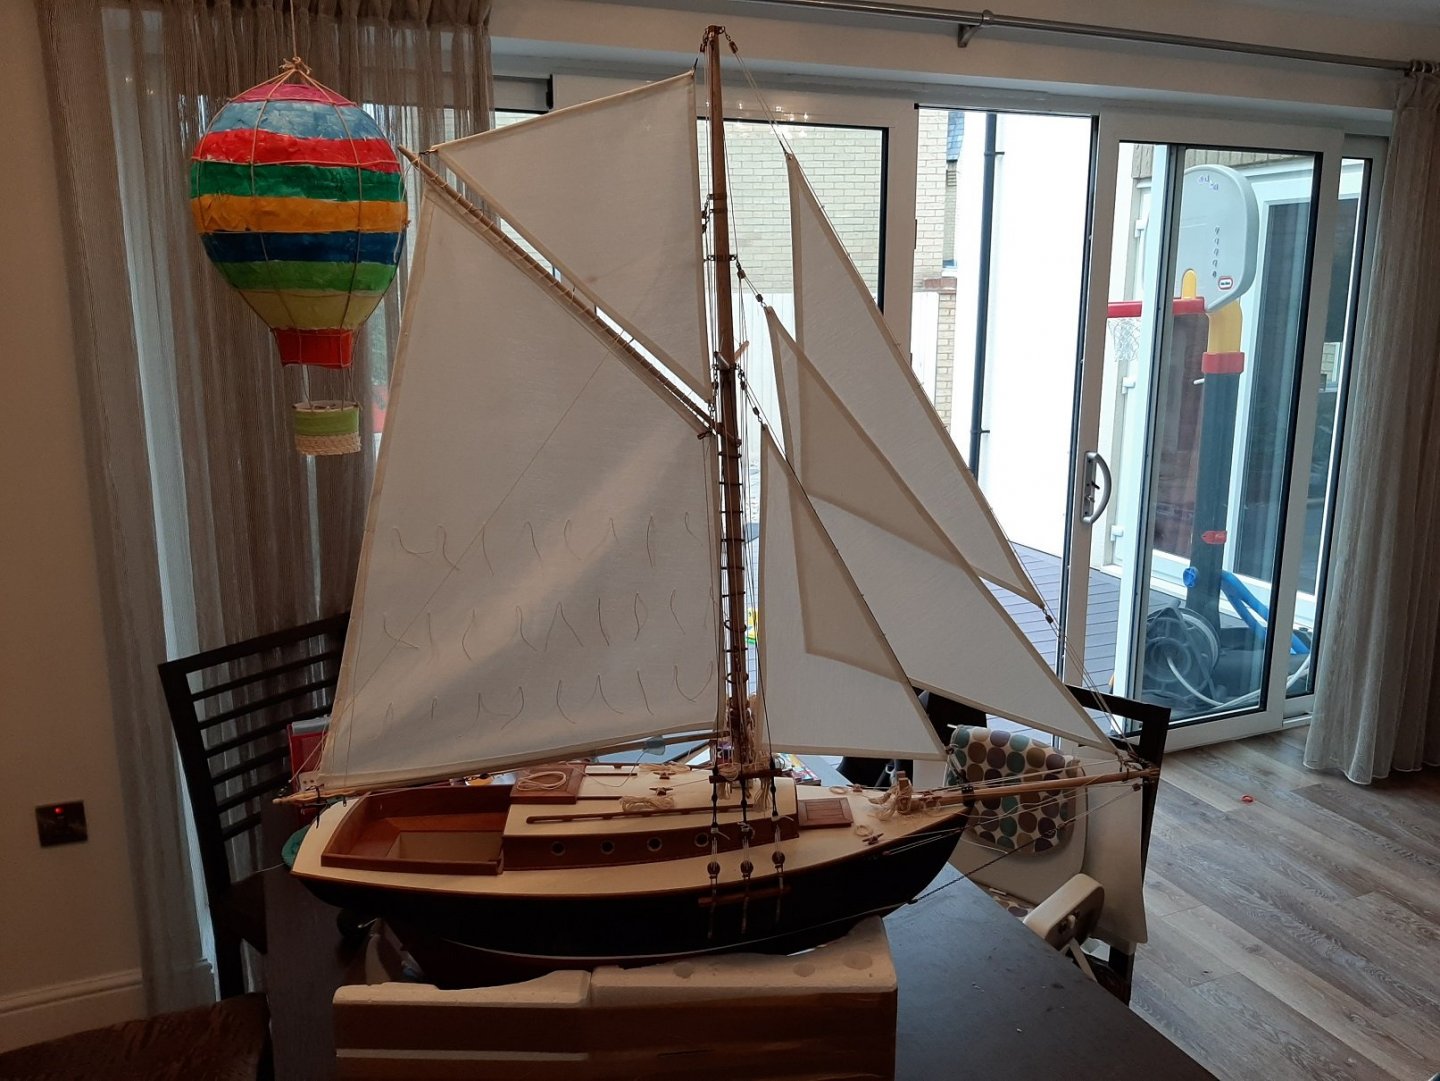
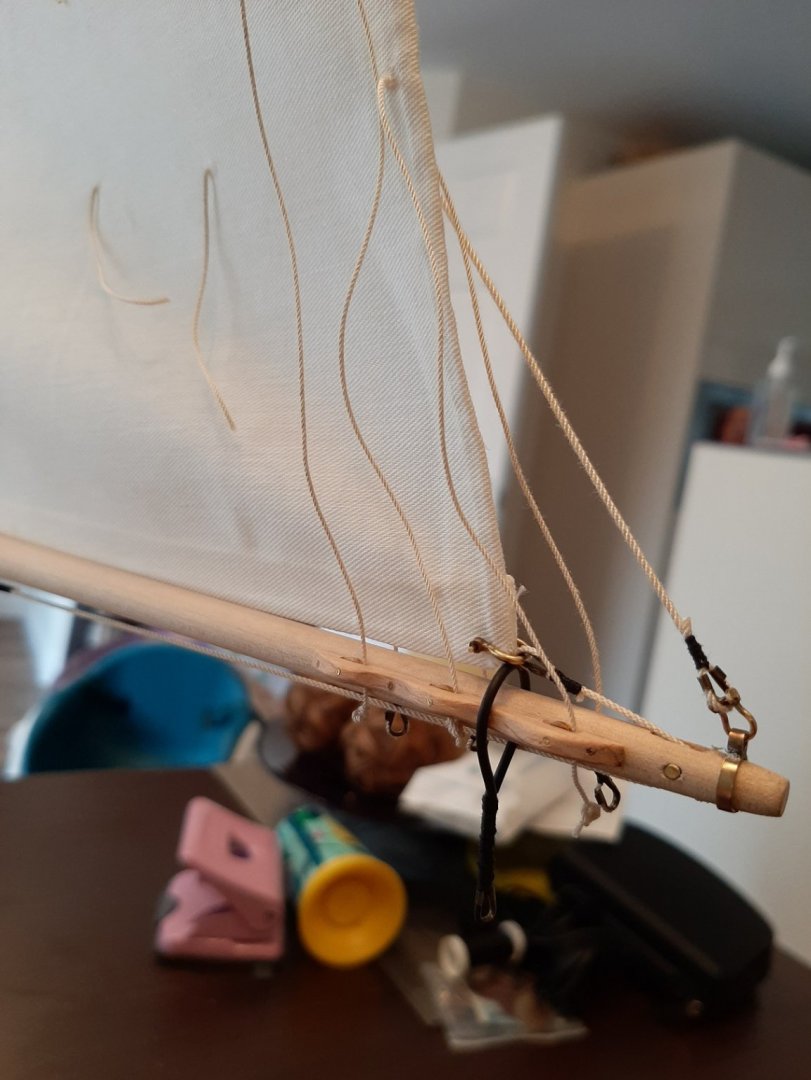
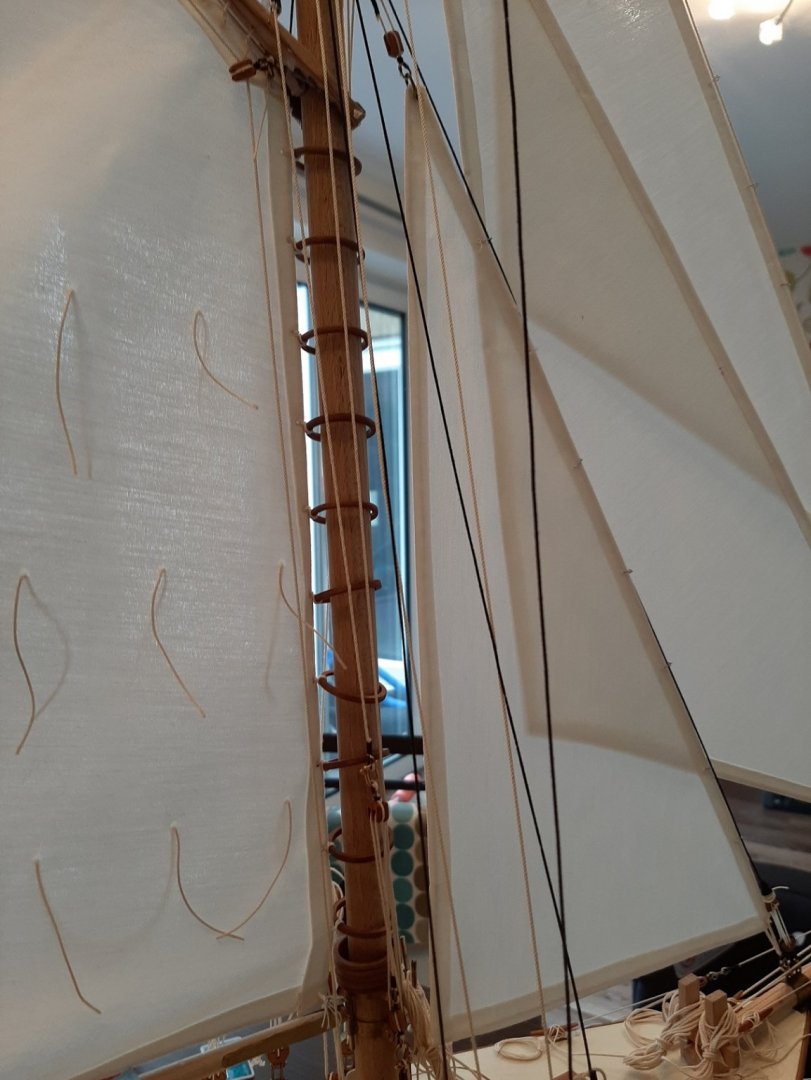
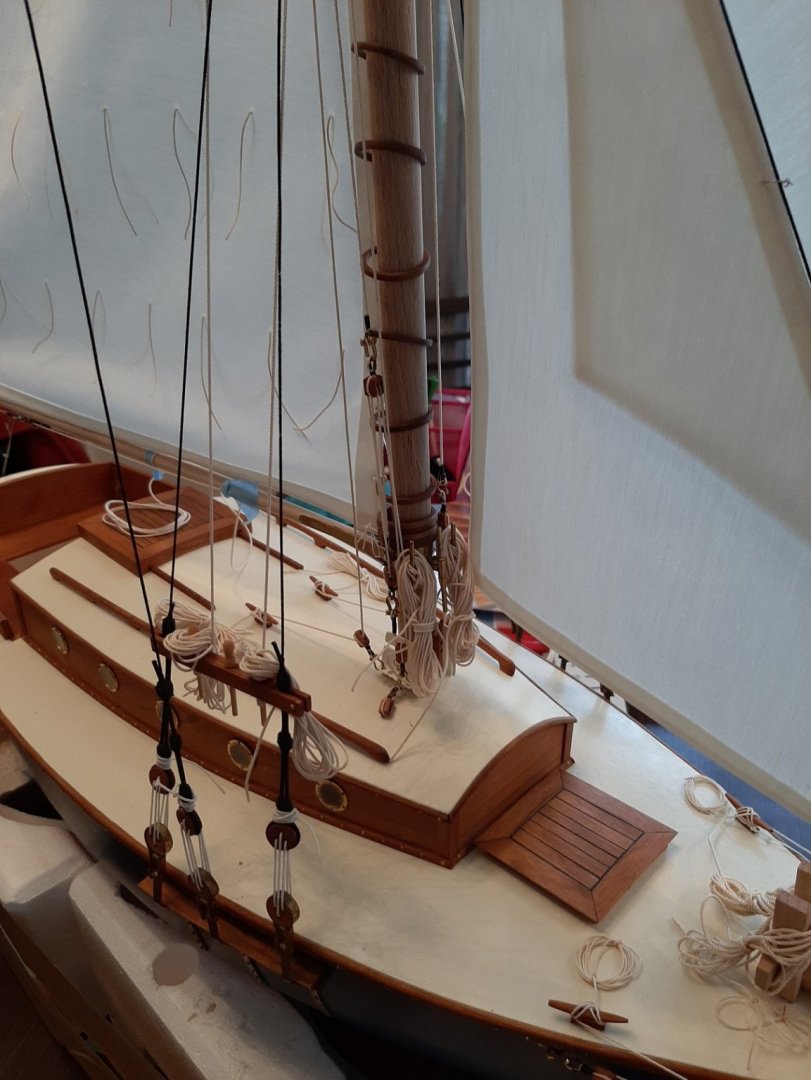
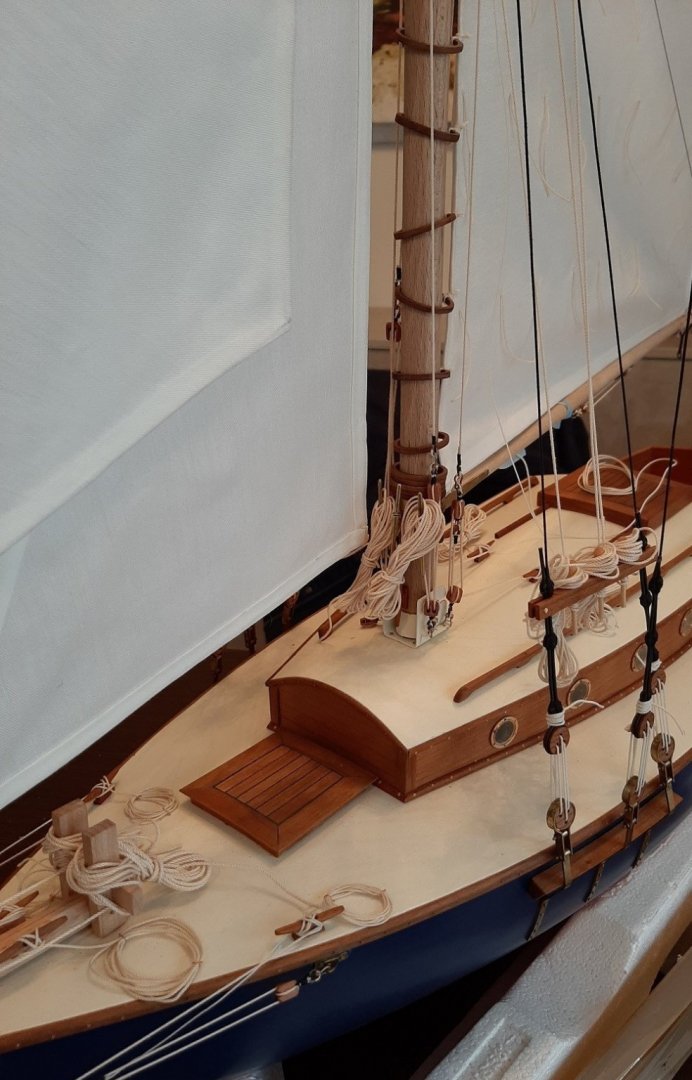
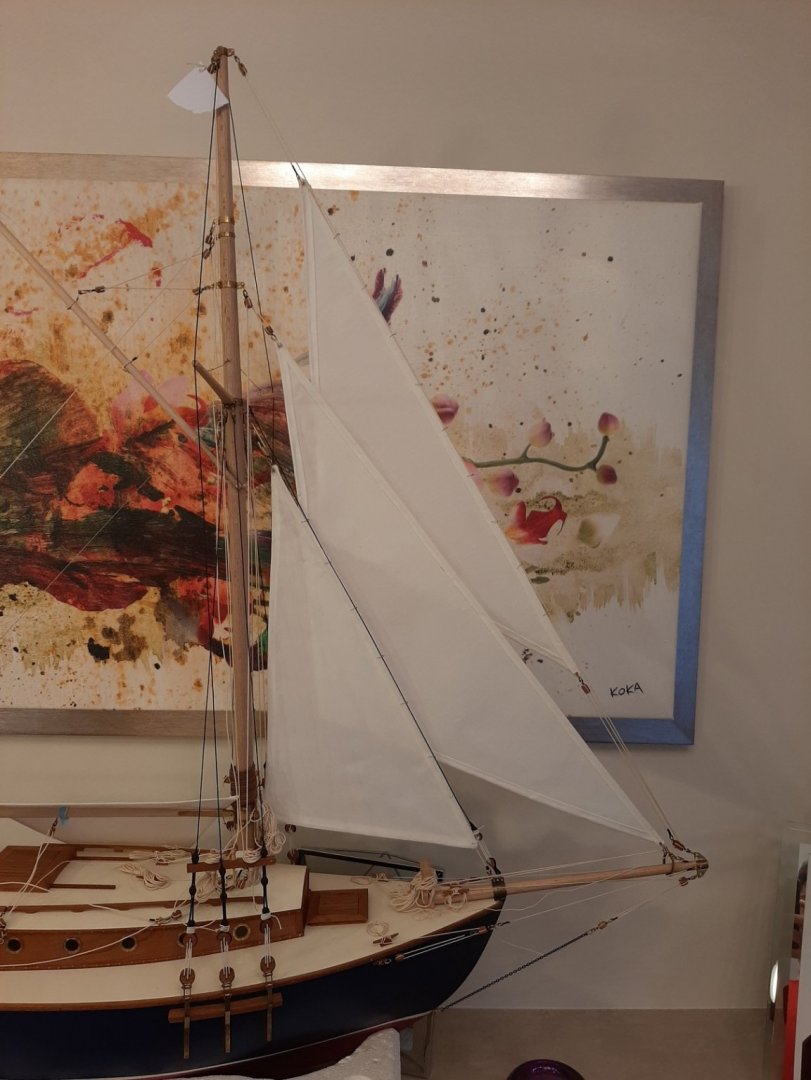
Some more work done so time for another update I finished the main sail and added the reef points. The quickest and easiest way was to use a continuous length of rope, secured with tape and use diluted PVA to the junction with the sail. Then I used CA glue to prevent the rope from being undone and cut to length. I then laced the main sail to the mast hoops which was a very satisfying job and then to the gaff, which was not! I also added to the underside of the gaff the block for the topsail outhaul and a simple line to just pull the gaff down. I also added the reef pennants There is some extra rope at the end of the gaff that I ll trim later, also a few extra hoops that I will also remove later. Bit of a shame to cut them as it took an awful lot of work to make them! Next to be done: The reef pennants need a cleat on the boom to take the slack and a couple of blocks to pull on the other end. I need to complete the main sheet outhaul and add a couple of cleats to the topsail to attach to the leader. Of course the main sail needs to be laced to the boom. Then I ll attach the sheets for all the foresails will all their block and cleats and bulls eyes. Then the rudder will be added and then somehow the mainsheet with its traveller, many blocks and cleats. EDIT: I also need to add the rails, the lazyjacks and the backstays! Then I just need a barrel of rum and I ll be ready to sail into the horizon! Vaddoc


- 536 replies
-
- 15
-
-
Welcome Rodolfo! Very nice work on these trains. Looking forward to your log.
-
To add sails or not? What is your preference?
vaddoc replied to Bill97's topic in Masting, rigging and sails
I prefer the model to have sails but they are difficult to make them look good. If they are furled it does not seem to matter if they are roughly made and seem to add a lot to the model. Also, indeed the sails do hide the details. However, the main reason I prefer sails is that I try to build the boats as close to real as possible and to replicate the rigging as closely as possible. Adding sails seems to increase the complexity of the build with more lines and blocks and cleats and pins etc needed. Rob, your models look fantastic! -
Get the cheap proxon drill press, it is great!
-
Interesting. I tried to have a coffee with my mask on, very difficult. Clearly a technological breakthrough is needed!
-
A drill press is a very useful tool, I use mine all the time. Carbide drills cut holes with surgical precision, no issues with wood splitting. You can get also drills at 0.05 mm increments which is useful some times.
-
Thanks Keith! After the boat is finished I ll bring the sails down and tie them as if the boat is at anchor. But after photos are taken for the gallery, I ll need to think what to do with the boat. No space to display. Here in Cambridgeshire some shops are open, schools have opened, parks have lots of people and overall I get the impression that if there is still a lockdown, it isn't very strict.
-
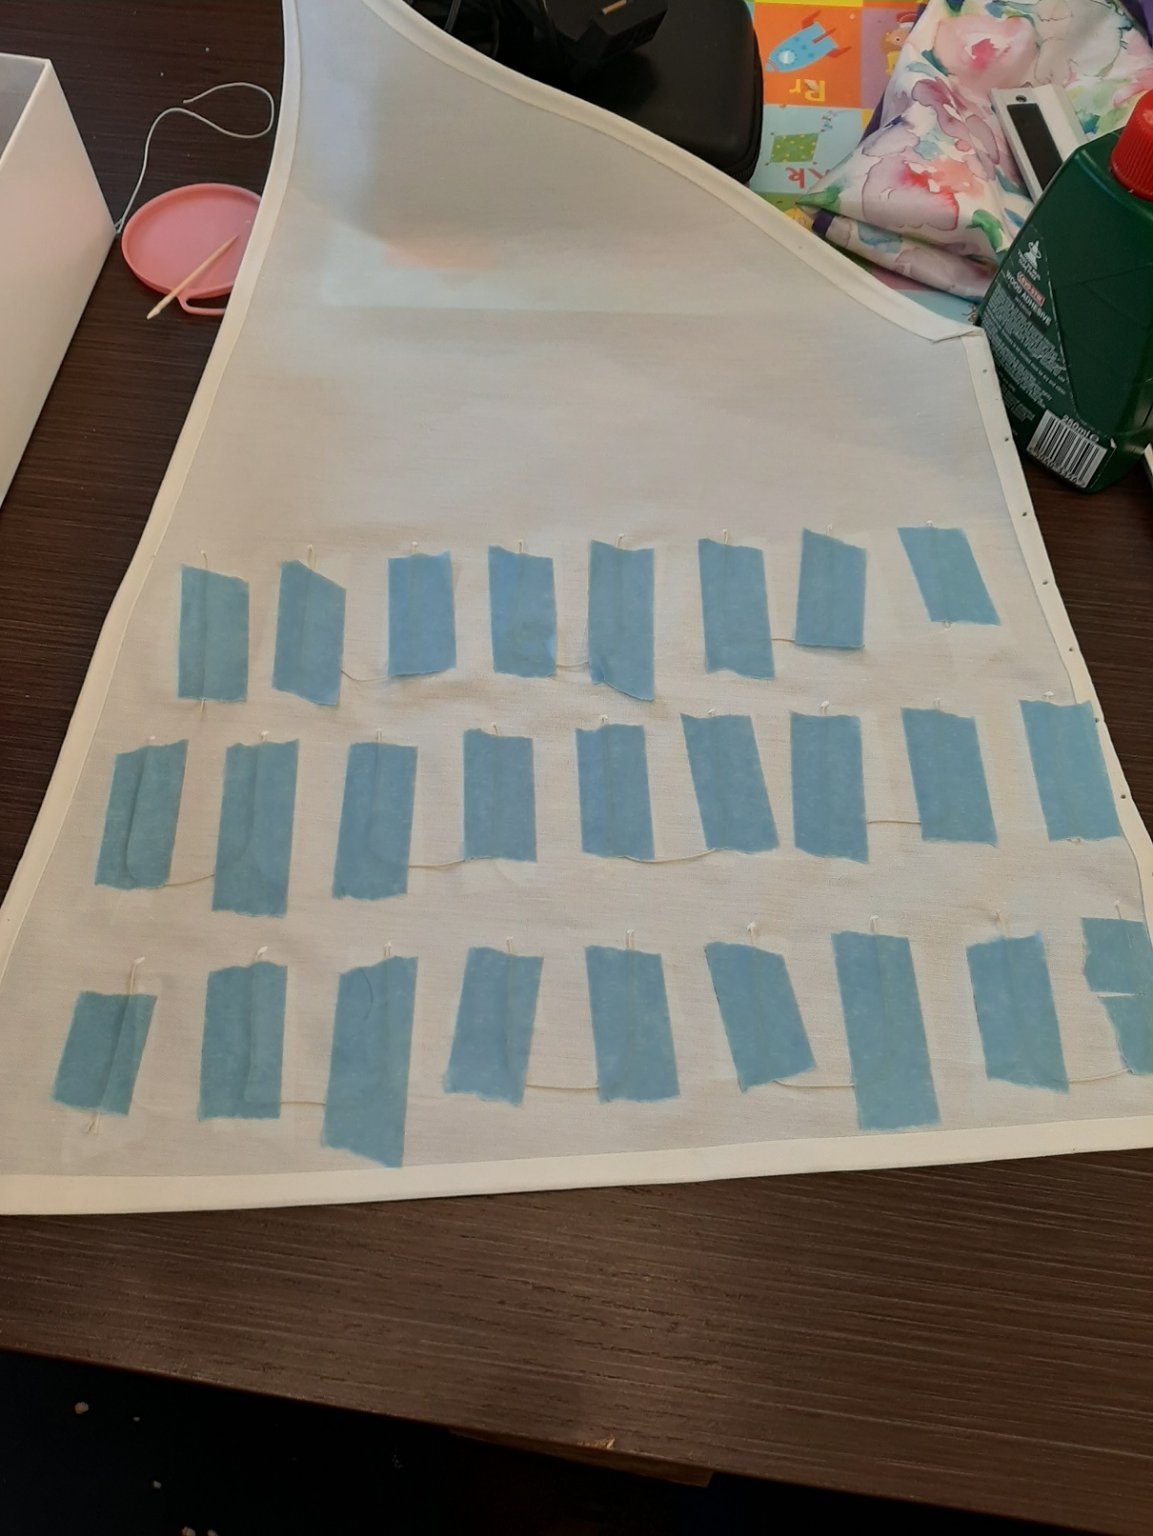
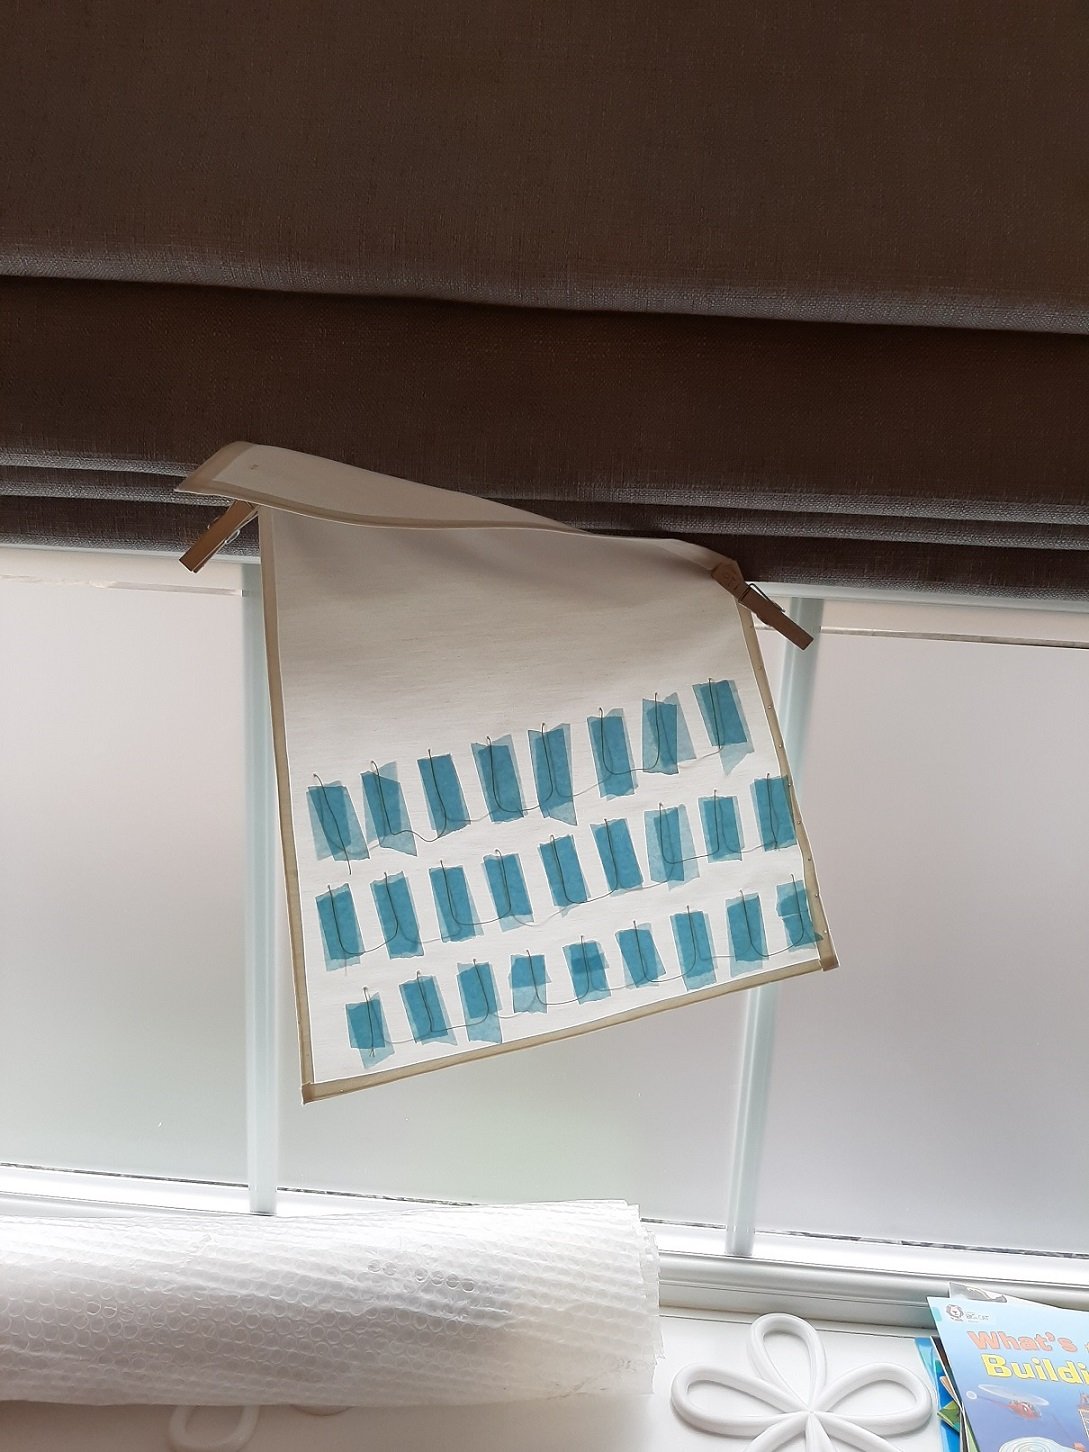
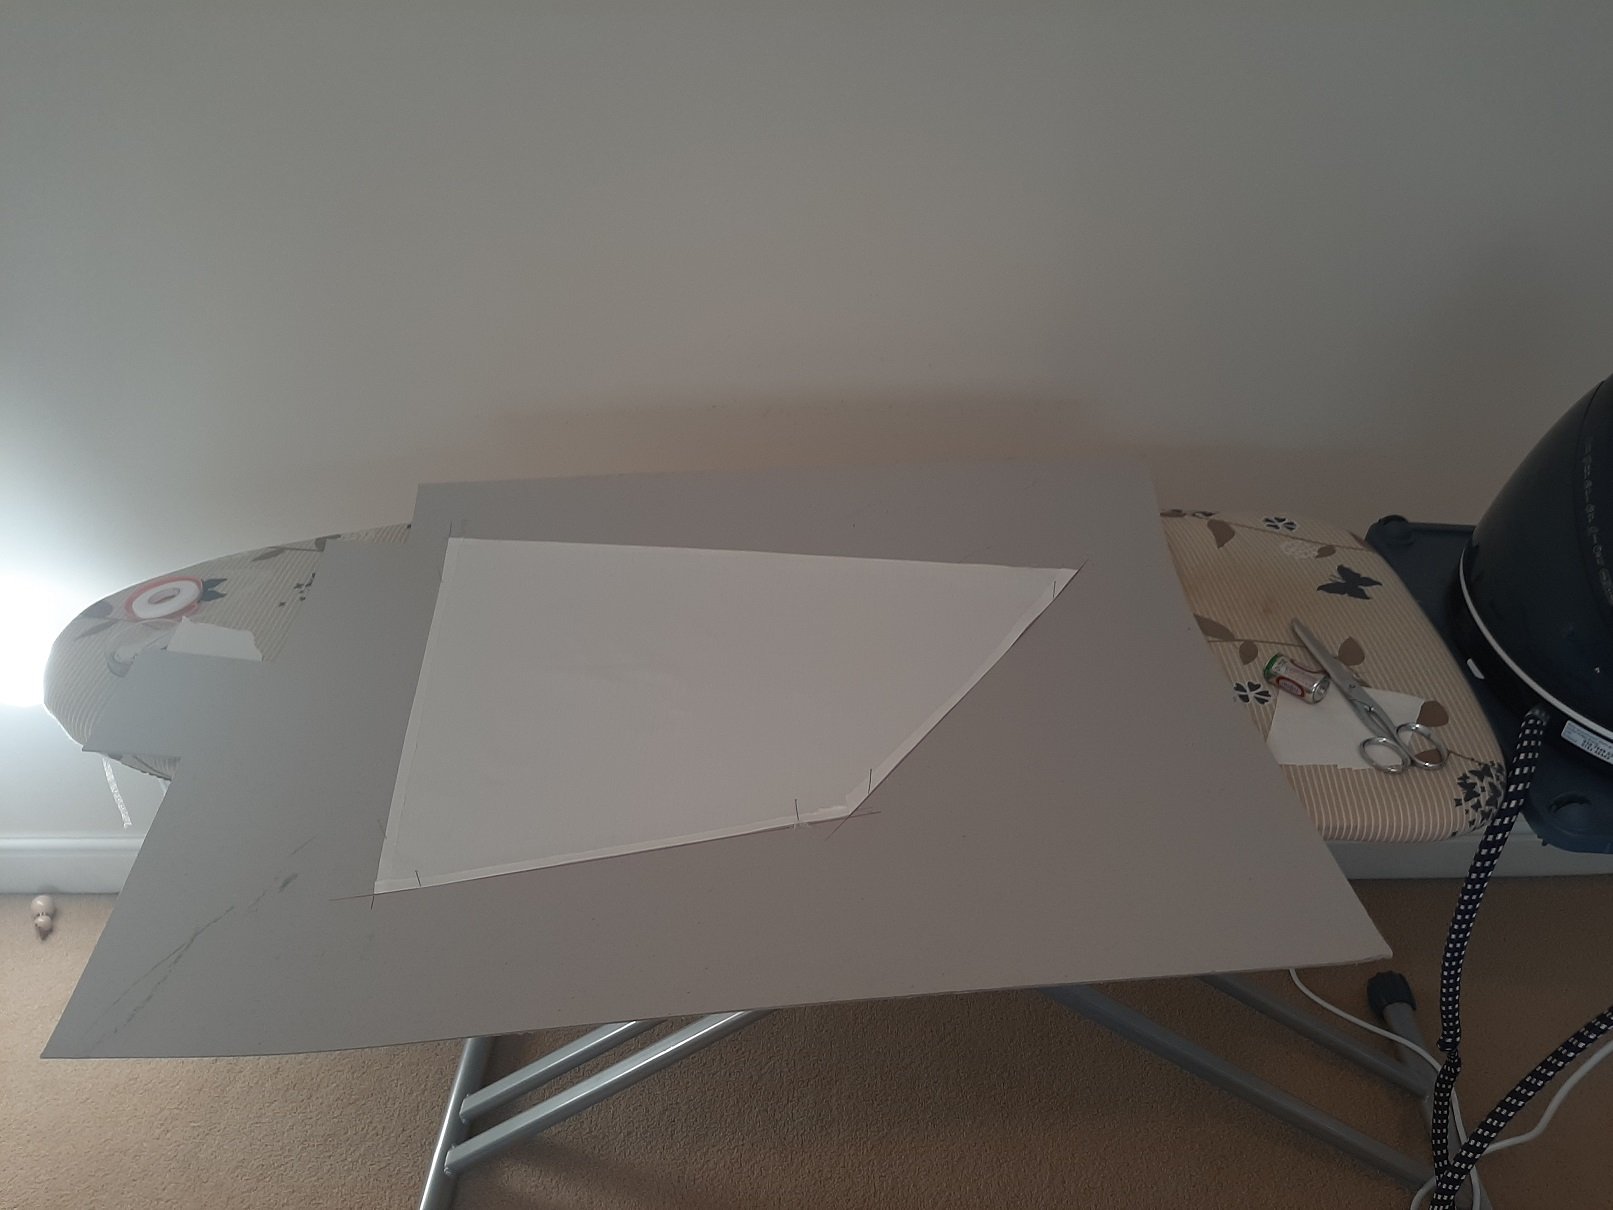
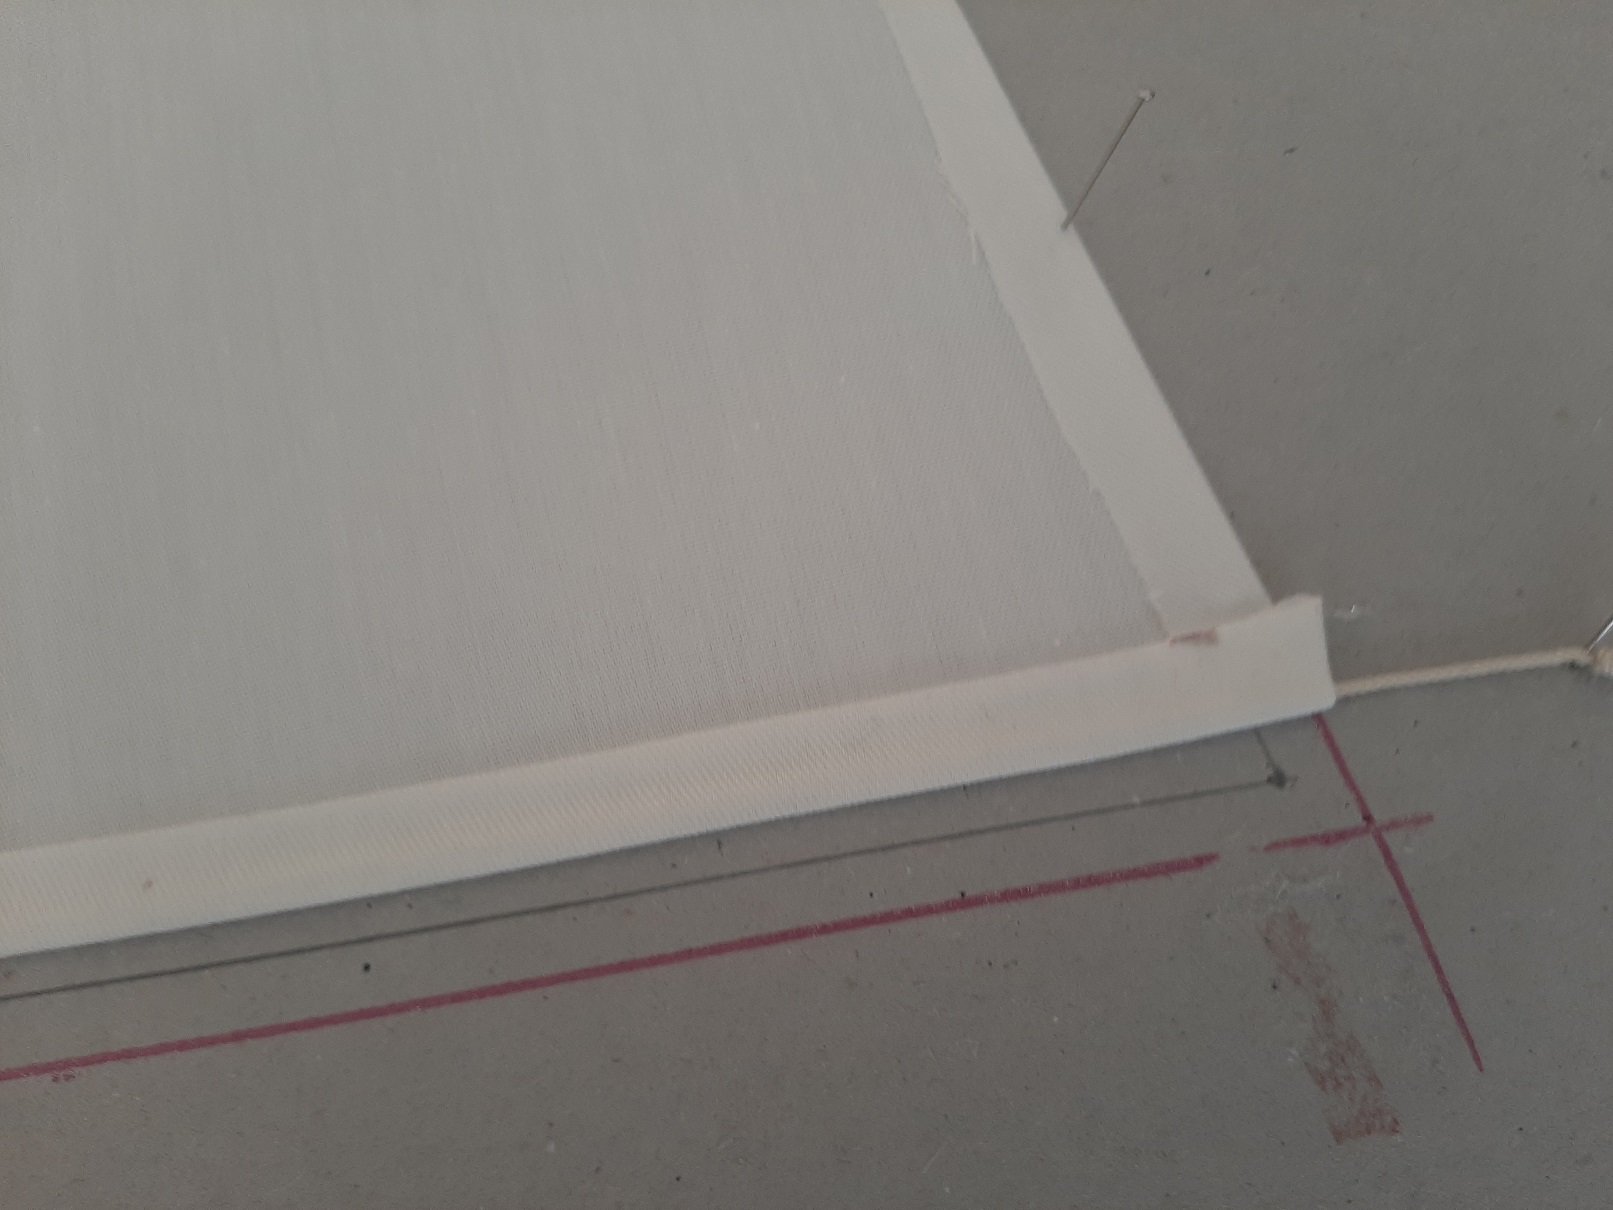
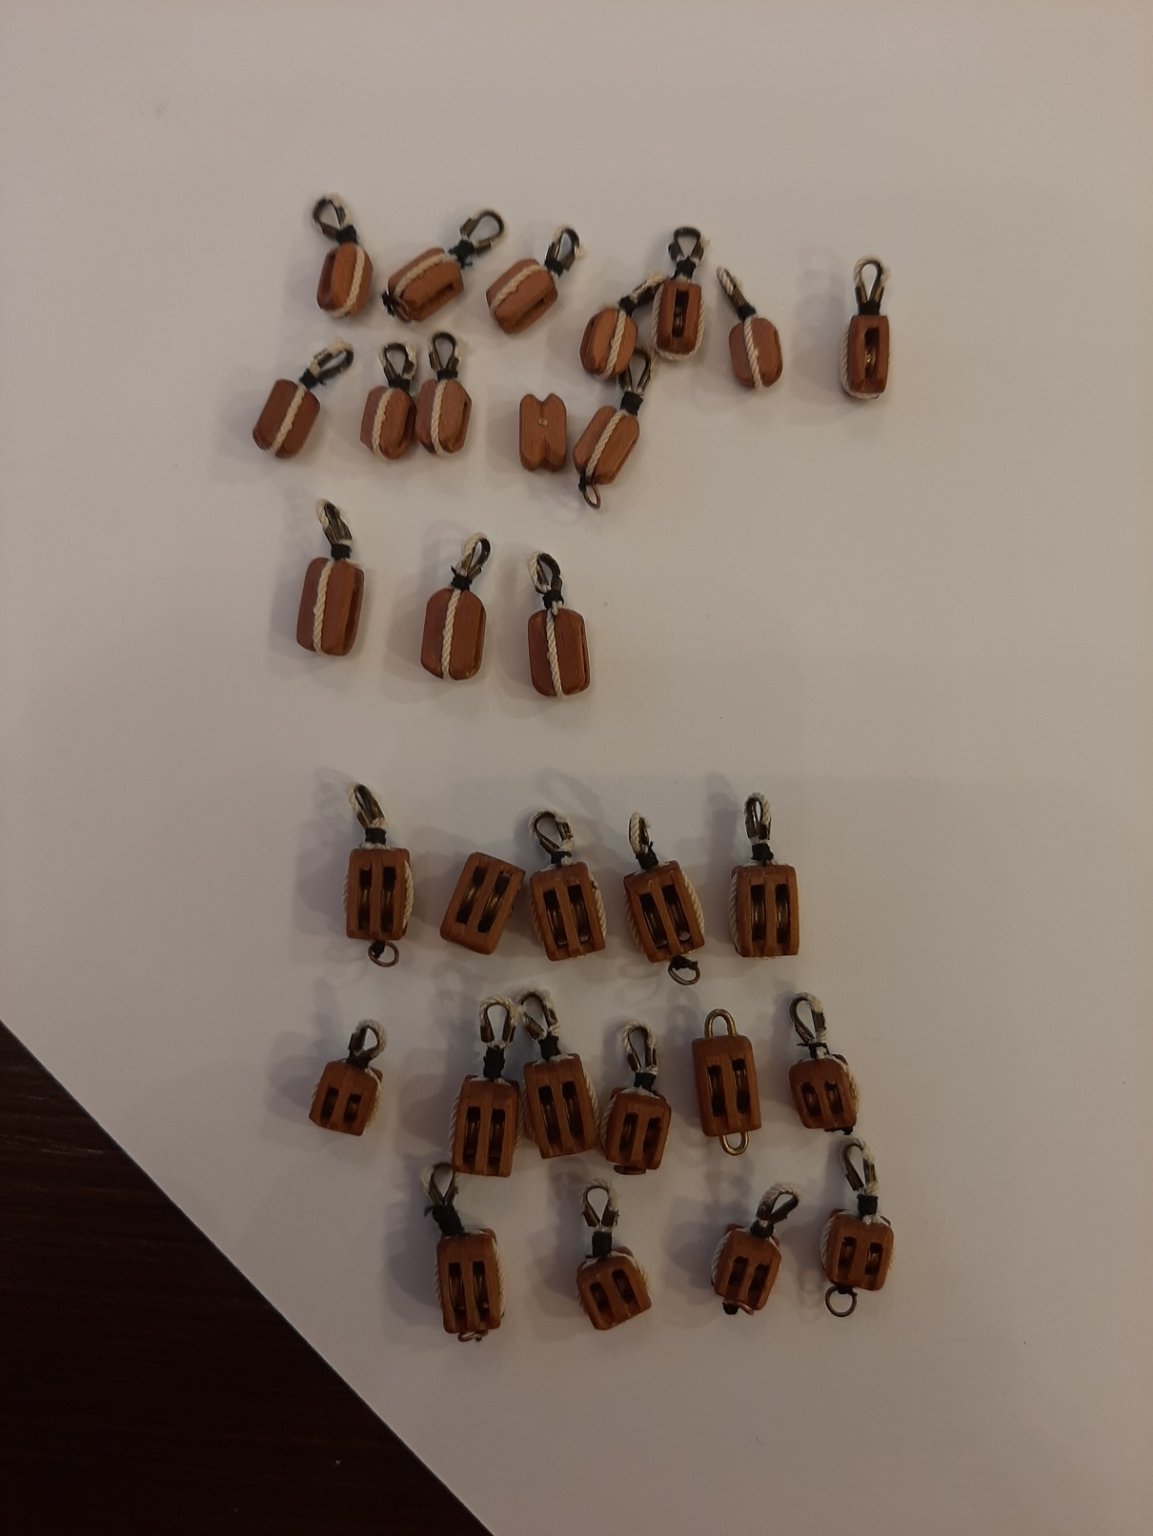
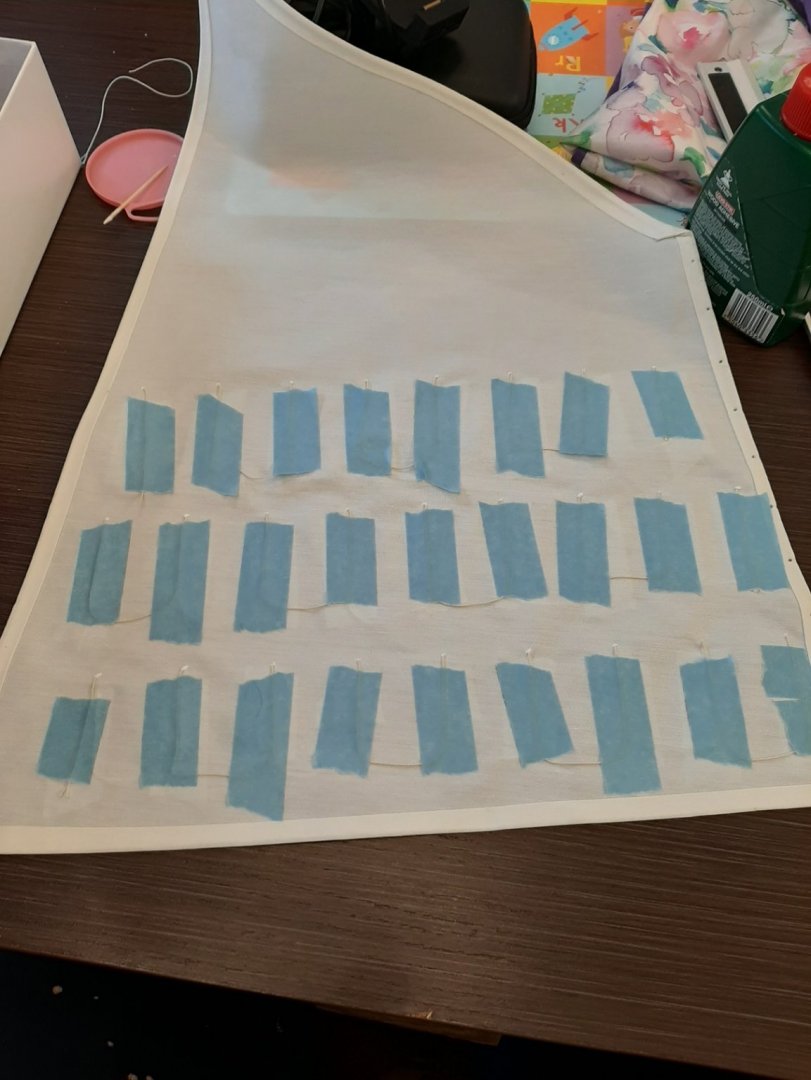
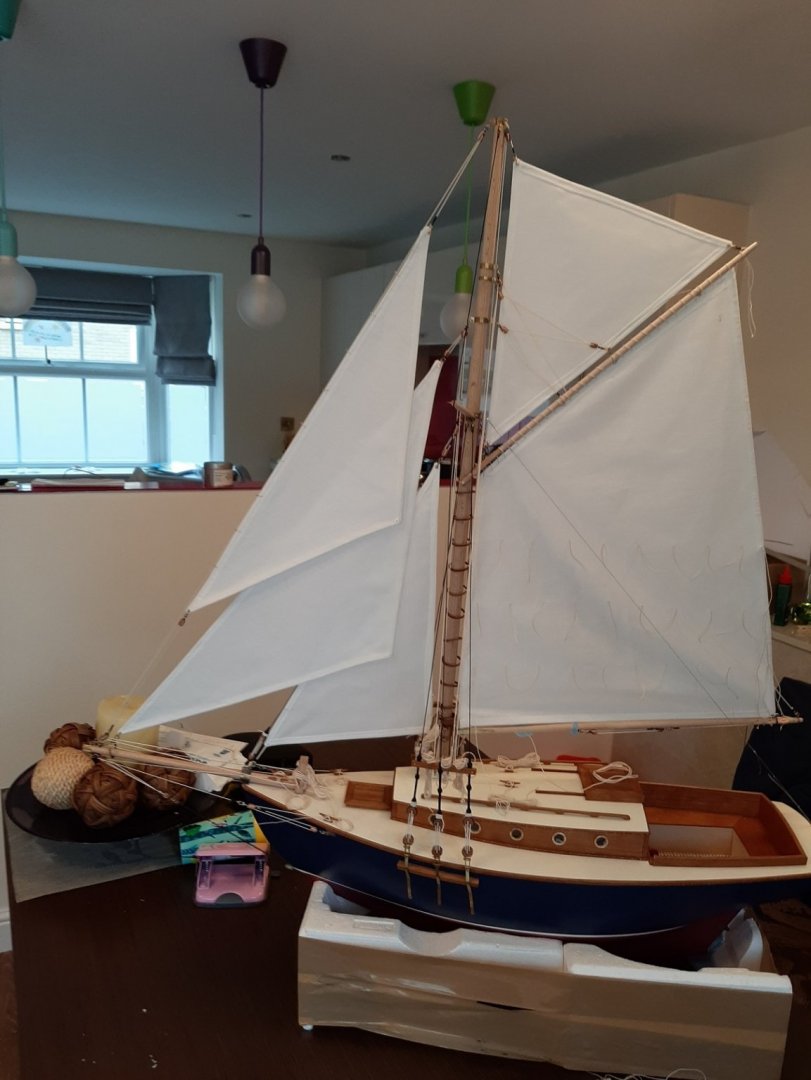
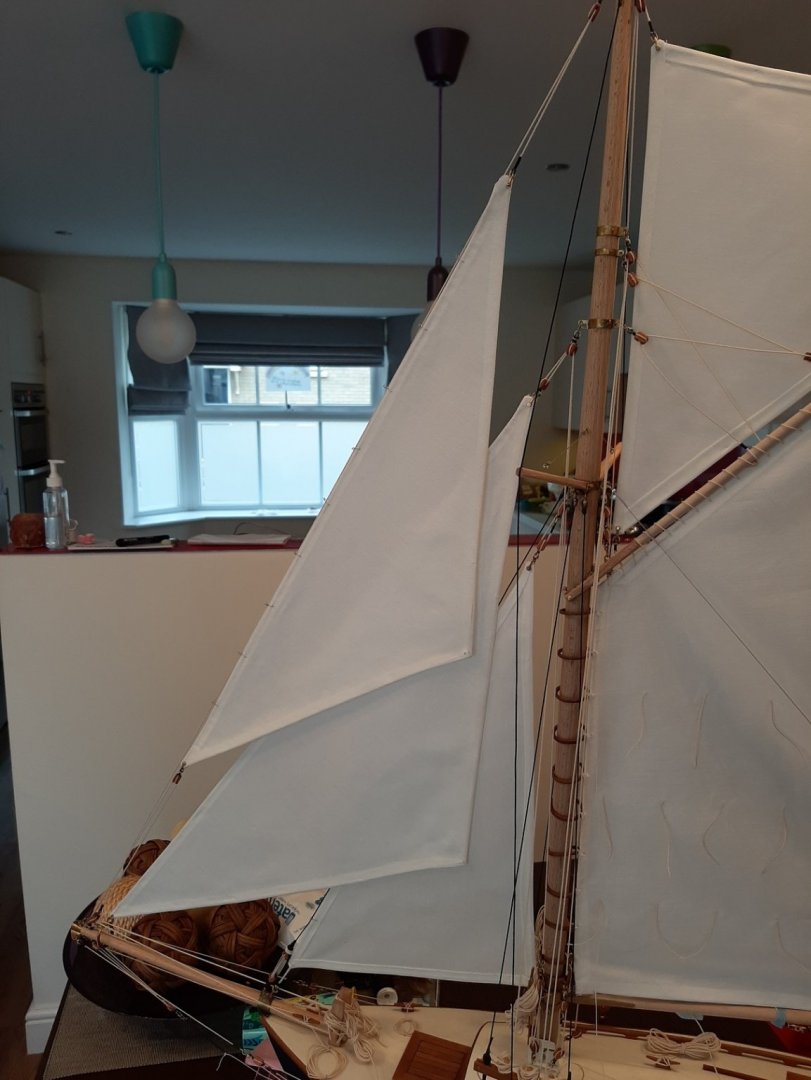
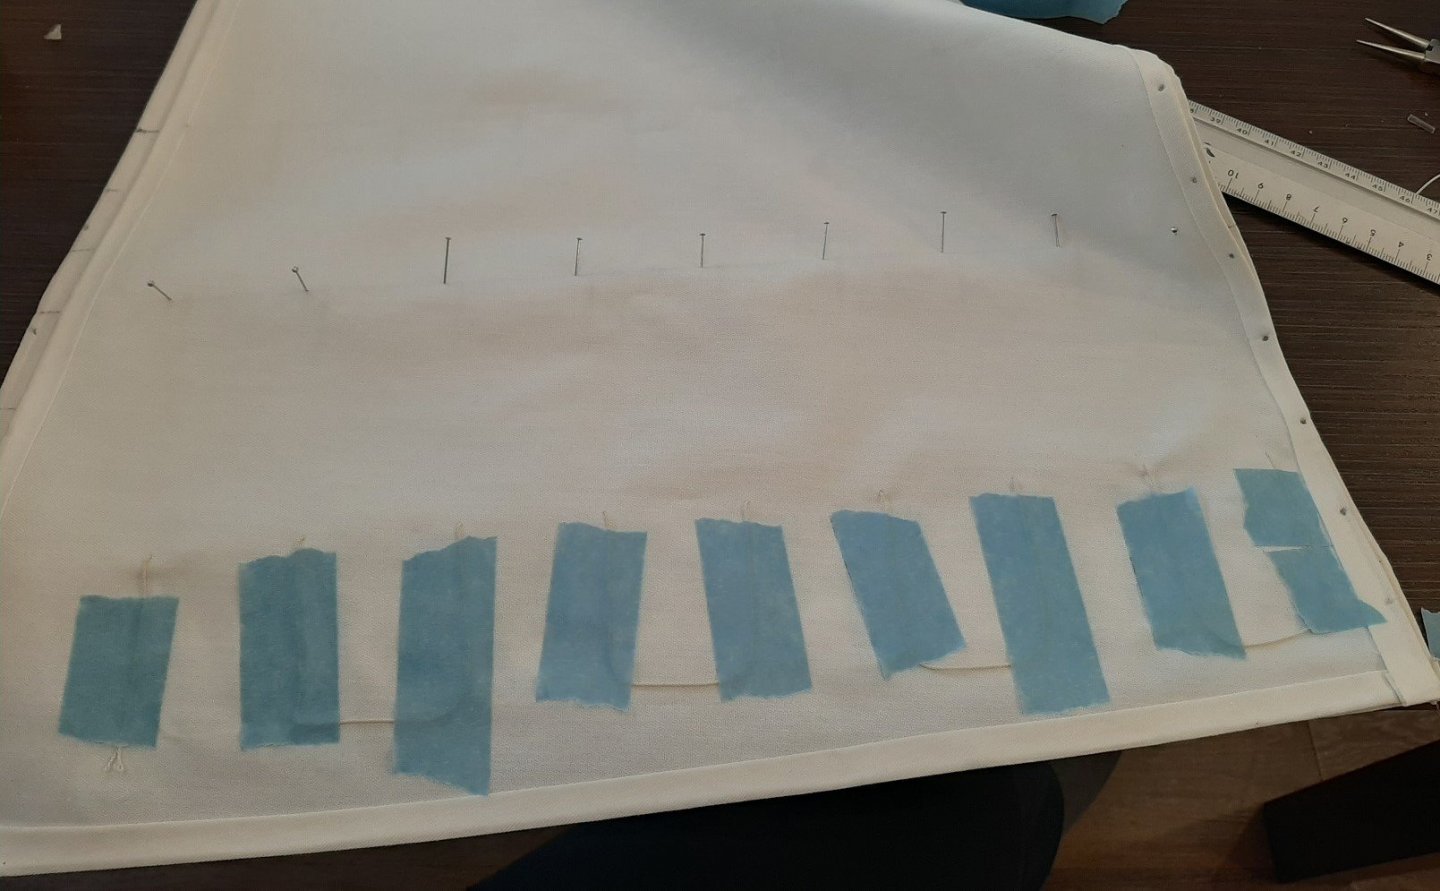
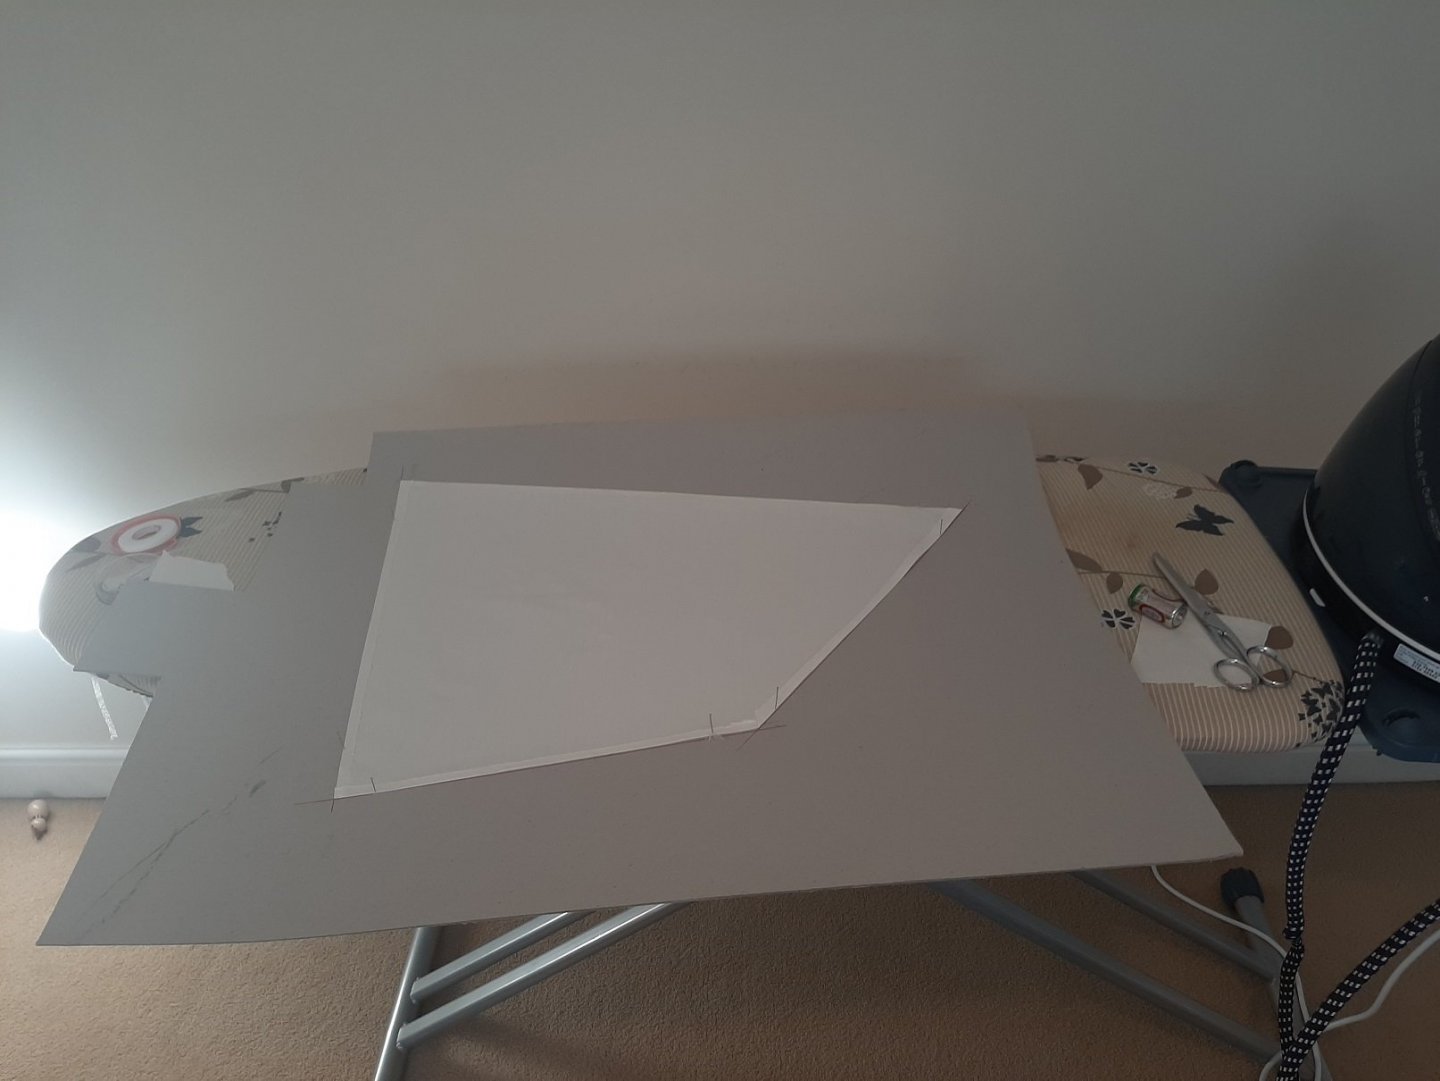
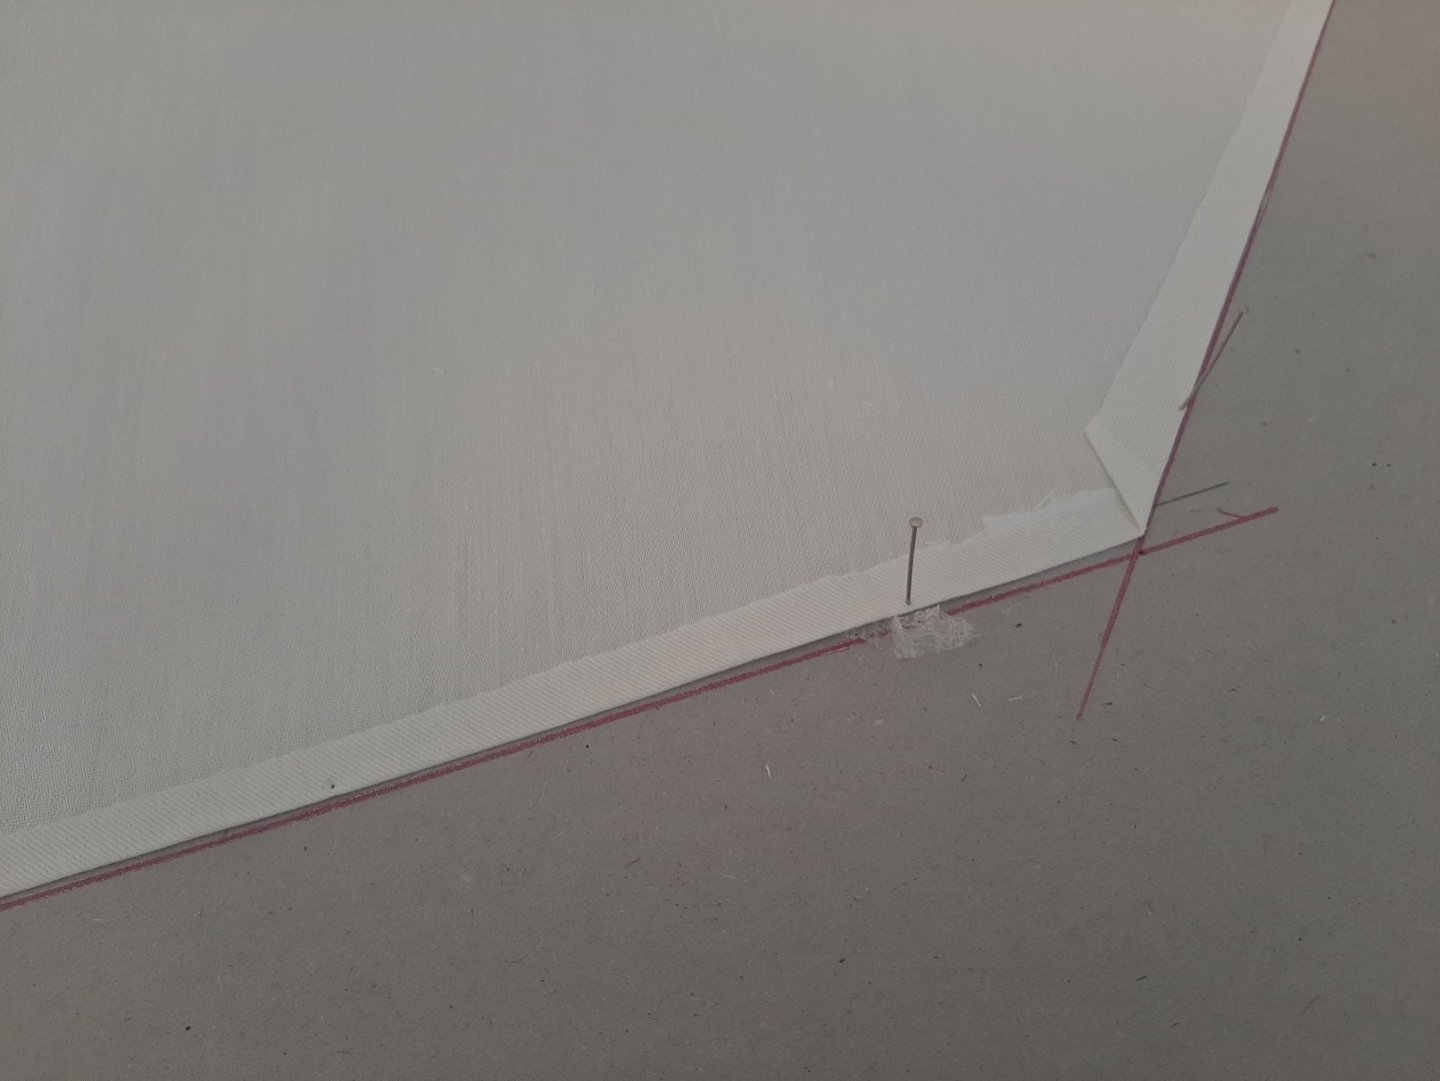
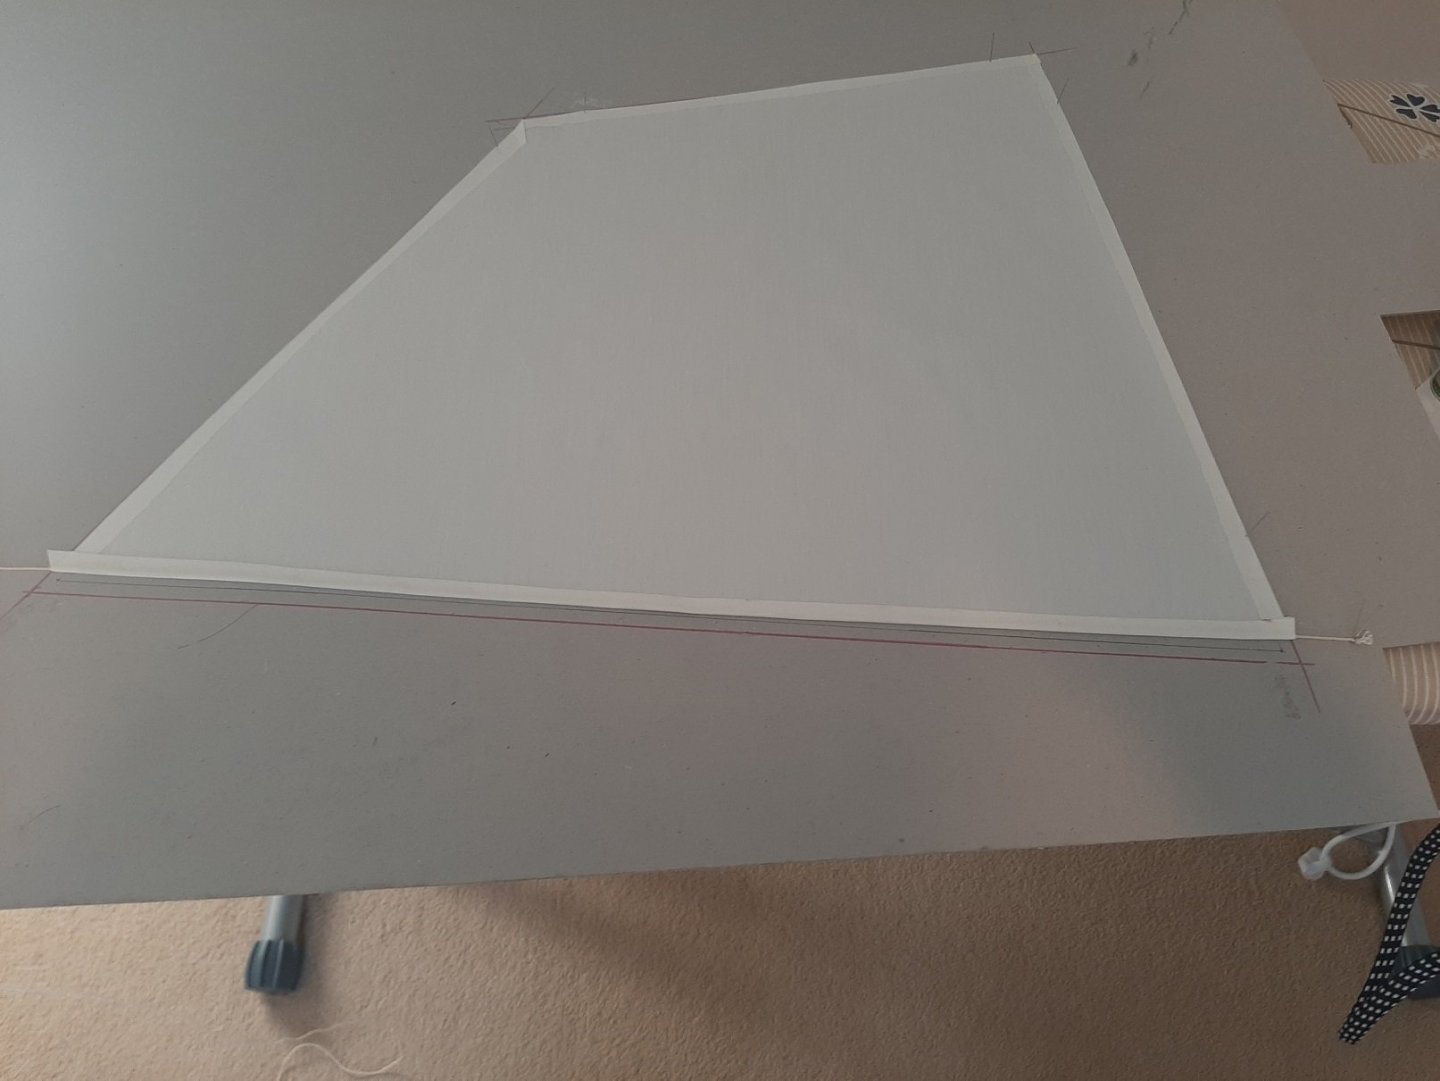
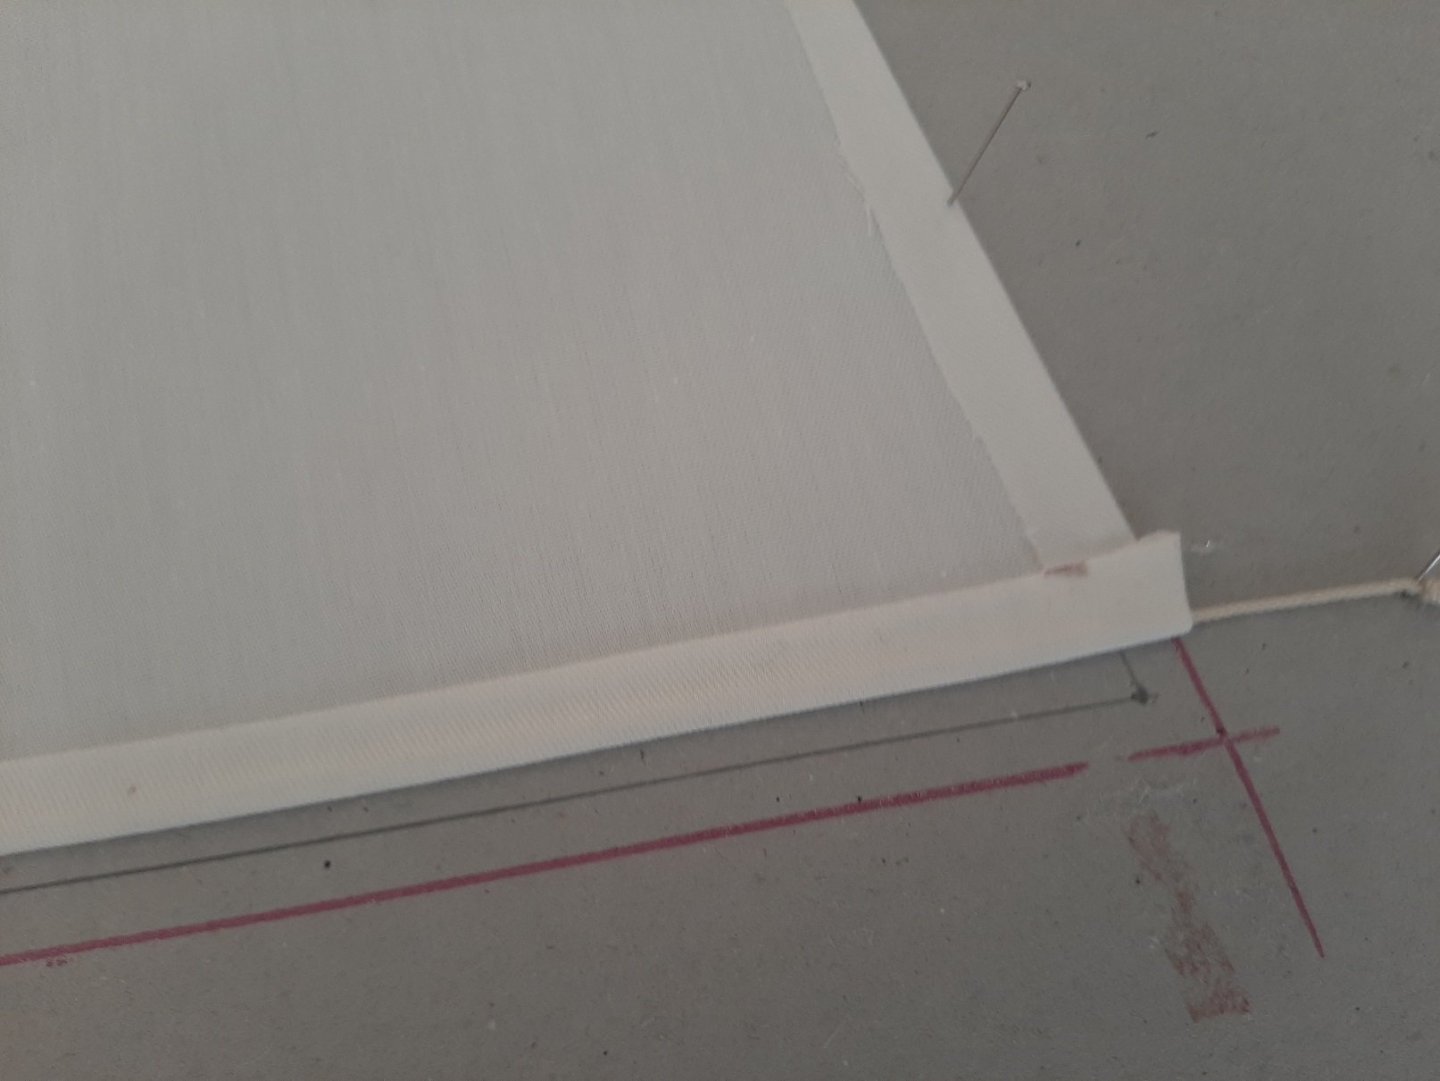
Thanks Gary! One problem is how clean it looks, following your log I ve been tempted to build something weathered and used. Some day... I ve been fairly busy over the last few days. I completed a big task: I made the sails! I do not have the exact dimensions and either way, I made the bowsprit longer as I wanted a more dramatic look so I had to eyeball the shape. The large scale allows proper fabric to be used, I got some cheap curtain liner actually the first day the lockdown was lifted here in England. I used a type of seam glue to glue the edges, folding twice. On the second fold I inserted rope. It took a while and I had a few failures. I also manage to rip the Admirals ironing board cover but got off lightly as it was due to be changed eitherway. I then unfortunately run out of single blocks. This was something I was hoping would not happen, making the blocks is serious work. I took a big breath and sat down and made a few, thankfully I had a few leftover pieces that were just enough. I also run out of sheaves but I think I have enough blocks now. For future builds, no more functional blocks! Then I started rigging the sails. The girls are very active so my presence is needed in the house, only solution to bring the boat in. I used stainless steel wire to make the cleats that bind the sails to the stays. These will be cut and removed when the sails are furled after the boat is completed. Best wishes to all Vaddoc

- 536 replies
-
- 14
-
-
60 years old in ID, 12 years old in the heart. You ll fit right in, a very warm Welcome Genocon!
-
Poly after gluing to deck...
vaddoc replied to mpk73's topic in Painting, finishing and weathering products and techniques
Could I ask, why not just leave the deck without any finish on? -
Like Bob said, difficult to know straight away which finish works best and will give you the look you want. You do need to test. Even if you know how finishes work, you might need to test for each different wood you use. Indeed, it can get expensive and you might never use some things you buy. We ve all been there! This is why modellers need a lot of storage space. If you plan to use any other finish, you will need to sand off the varnish from your deck
-
Best to try finishes and paints on scrap wood, not the model! You may have trouble gluing anything to varnished surface. I personally would probably sand the wood to 400 grit and leave it.
-
Welcome Gaffrig!
-
How about using very thin copper wire, wearing gloves pass it over 600 or 1200 grit sand paper, then use liver of sulfur to blacken it. No issues with scale and being very thin you can pull it pretty straight. Use CA to secure it maybe
-
Matt varnishes can be very temperamental. If the medium is not very well stirred, you could end up with "brush marks", which is essentially caused by uneven distribution of the media. The varnish itself can also cause brush marks. It can be done but not the simplest of tasks. Also on vertical surfaces it might create "runs". It depends what you like, you could try Tung oil, wipe on poly, Shellac, a sanding sealer or just leave it as is. I wonder if just finishing the deck will make all other wooden pieces look very raw and these gratings and gunwales will be difficult to finish
-
What finish to use is a very common problem. Lots of answers exist and there isn't really right or wrong, it is what works for each one. Of course, you should always test the finish you consider on scrap wood, not the model. When I started modelling, I tried lots of options and easily found what I like. It has also to do with the scale, what you can do in 1:10 may not be achievable at 1:64 scale. To answer your question: Danish oil is essentially a mixture of oils (Tung oil usually) and varnishes. Each company seems to have each own recipe. Danish oil may be good to use on your garden deck or chairs, however I never liked trade products for use on models. So Danish oil already has varnish in. Generally though, you should not varnish over oil-oil is enough. Also you should be aware that not all finishes go on top of each other-generally oiled wood will not accept much. For finishing wood, you have several options. Oils get absorbed into the wood which retains its "wooden" feel. Varnishes sit on the top and create a hard layer. Shellac is time honoured, easy to repair, thins with methylated spirits-never liked it myself but others use it a lot. Tung oil is a different thing, it penetrates the wood and then polymerises and hardens. I use it a lot, it brings out the beauty of the wood but seems to work better on darker woods. I do not like the effect on pale woods. I use a water based sanding sealer a lot to seal wood-i find it much superior to Shellac. Ultimately, it might be best to get a few finishes and try them on using pieces of cheap plywood to see how they work and what you like. How about posting a photo of your deck?
-
Beginner tooling list
vaddoc replied to Paul Gardner's topic in Modeling tools and Workshop Equipment
Indeed, it is a constant battle to prevent the admiral filling up the garage with stuff. One needs to be determined, cunning, adaptable and plenty of other words but it can be done. No insulation for me Bob, the admiral knows it and that prevents her sending stuff my way... -
Beginner tooling list
vaddoc replied to Paul Gardner's topic in Modeling tools and Workshop Equipment
I would suggest a second work bench. The one you have is for your boat, you may need space for soldering, for a scroll saw, a drill press, a disc sander, space for drawing...heavy solid benches work better for me. I use a couple of bar stools. You will also need a lot more light. It needs to be coming from all directions to eliminate shadows. Because of the detailed work we do, we need unusually strong light. Think of the number of lumens you feel is enough, then double it and then double it again and this will be your starting point. Your wooden walls will not reflect a lot of light. -
Byrnes thickness sander vs Micro Mark's
vaddoc replied to twintrow's topic in Modeling tools and Workshop Equipment
What about the Proxon? It is even more expensive but I think it uses blades instead of sand paper -
Poly after gluing to deck...
vaddoc replied to mpk73's topic in Painting, finishing and weathering products and techniques
Lovely model indeed, you ve done a great job. Make sure before you put anything on that you wont get a patchy appearance if the coating does not get uniformly everywhere, your deck is pretty busy. Maybe just leave the wood as is? -
Welcome Steven! Do start a log and indeed, show us some of your previous work. Vaddoc