Check out our new MSW Sponsor Innocraftsman
×


rlb
-
Posts
655 -
Joined
-
Last visited
Content Type
Profiles
Forums
Gallery
Events
Everything posted by rlb
-
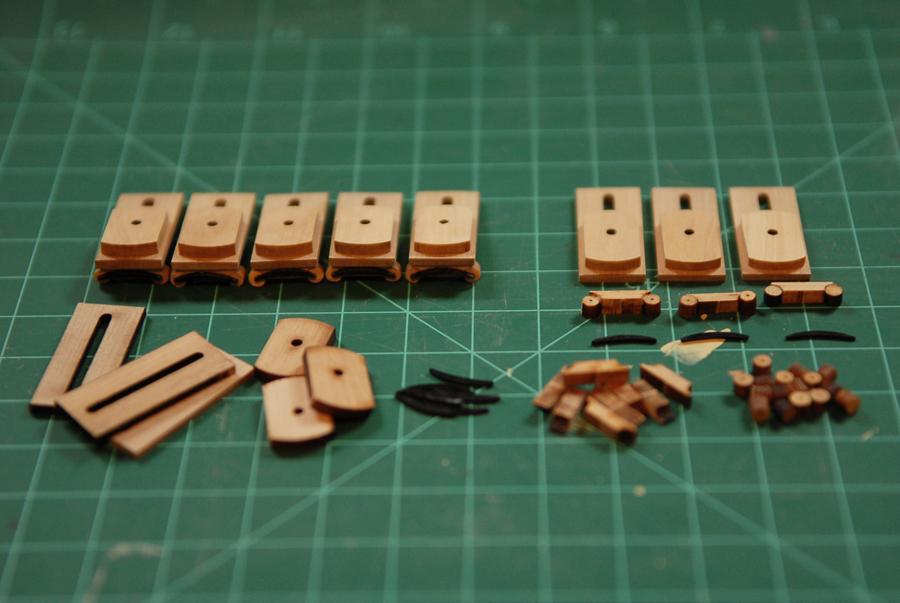
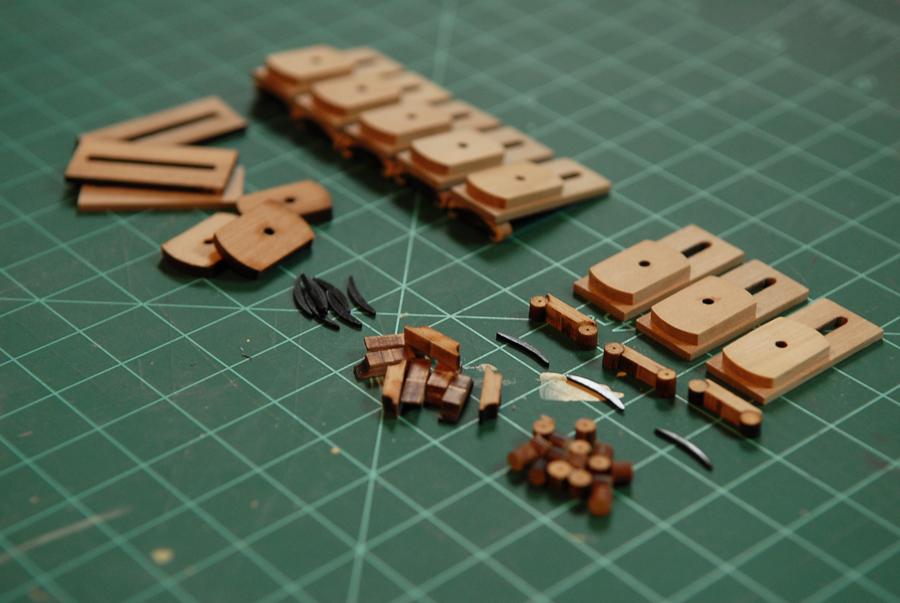
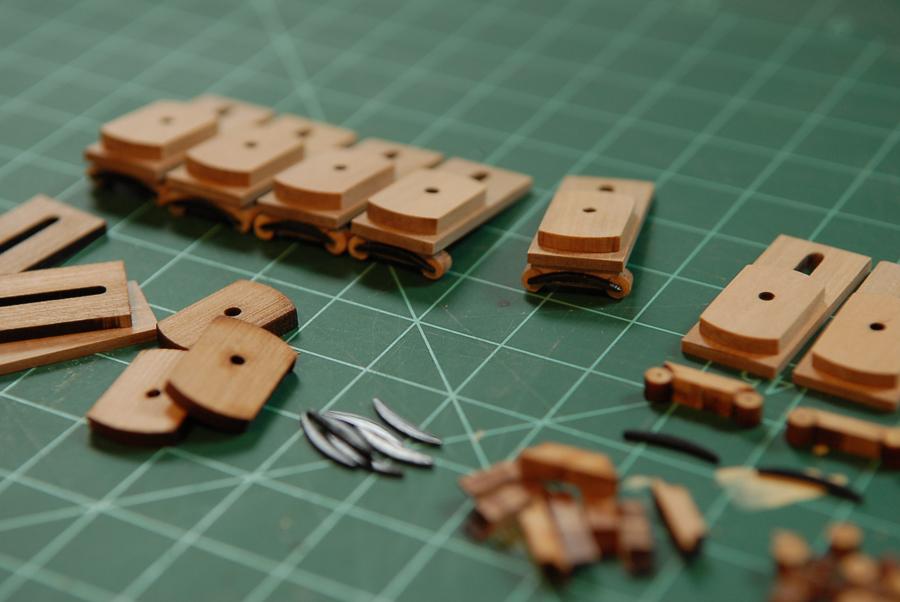
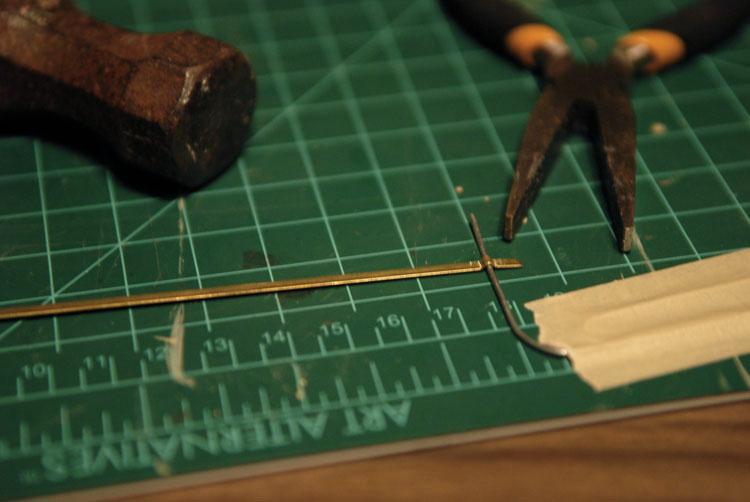
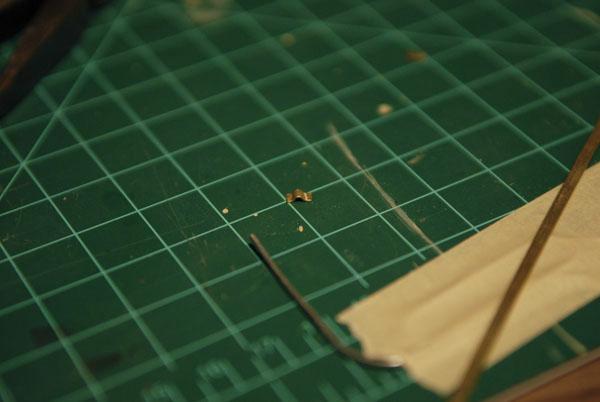
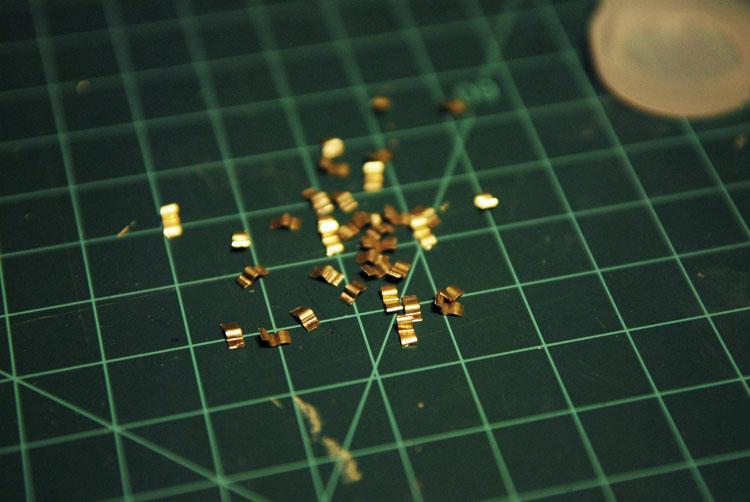
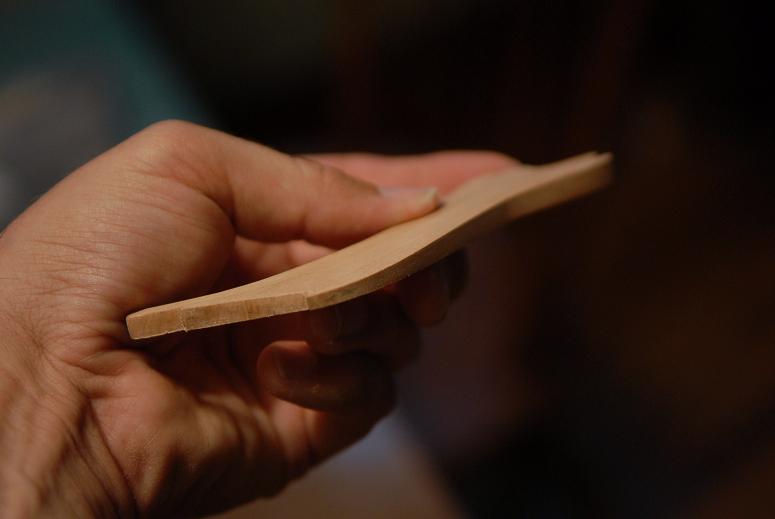
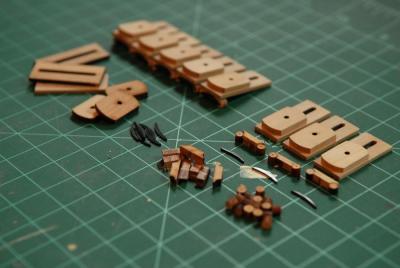
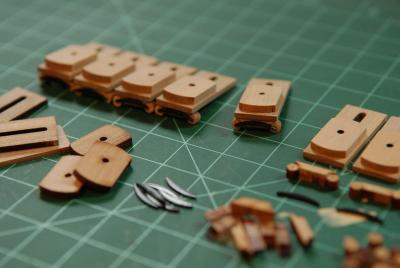
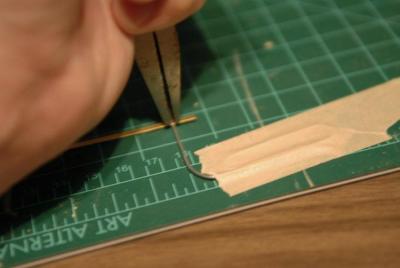
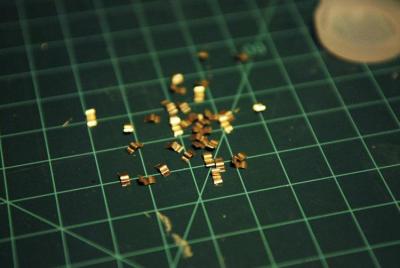
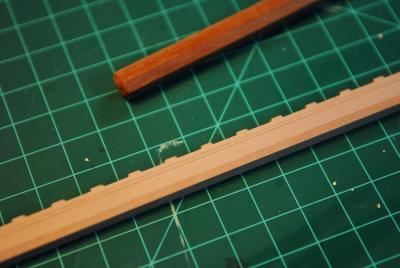
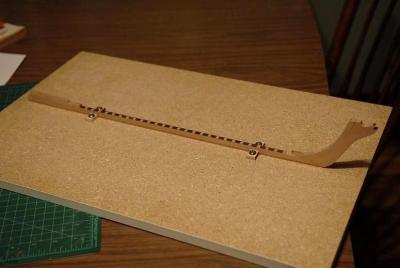
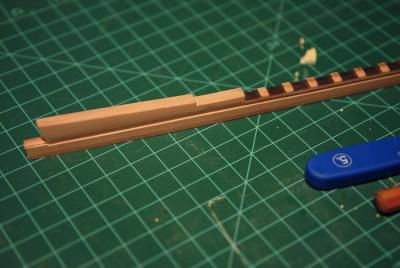
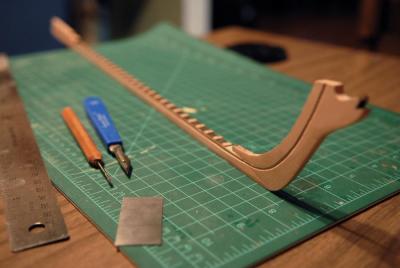
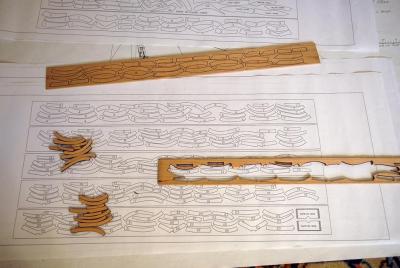
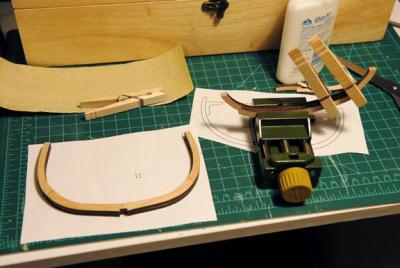
 August 4, 2009 I am building the carronade slides. Partly because it's fun, and partly because I want an assembled carriage to help fine tune the deck and cap rail heights-- The Carronade slides are boxwood, and this is the first time I've had the pleasure of meeting that hardwood. It sure cleans up nice! Following is my method for making the "iron" straps that hold the carronades to the carriages. (I'm being lazy at the moment and not looking up the correct term for either the projection on the carronade or the iron strap.) [trunnion and capsquare] This is not NEARLY as elegant as "Adrift's Thingy for making Thingies" (try searching that if you didn't see the thread), but it works. [we need this on the new site!] First I taped a paper clip down, and laid a brass strip over it. The diameter of the paper clip is less than the diameter of the gun part [TRUNNION!!]-- Held some flat tipped pliers open just a little over the brass strip. And pounded the end of the pliers with a hammer!-- Once I was satisfied that this would work, I pounded out a bunch of them-- I actually remembered a past lesson, and made a few extra, just in case-- Ron


-
What is your favorite hand tool(s)??
rlb replied to Modeler12's topic in Modeling tools and Workshop Equipment
Thanks, Michael. I have a sharpening stone borrowed from my father, I don't think it's a water stone--I'll see how well that works, and try the stropping. Ron -
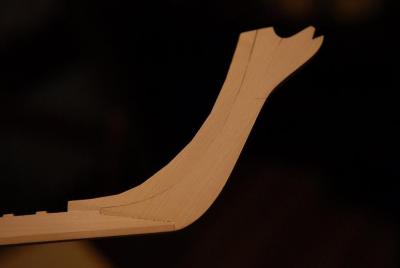
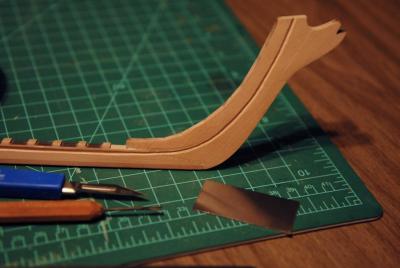
July 27, 2009 I worked today on the keel, and stem assembly. First I glued the false keel on-- After this set, I sanded a taper in the width of the keel at the bow and stern. I had previously glued up some pieces of the stem, and now I sanded a taper from top to bottom [i think now this taper should have carried up the stem, and may still try to work this in before I tackle the head rails]-- Then I glued the stem to the tapered keel-- Here is the taper of the keel at the stern-- And the current status of Oneida's "backbone"-- August 3, 2009 I set about cutting the rabbet in the keel. First I marked the upper and lower edges in pencil-- I started cutting the rabbet with a v-groove microchisel. My line wobbled all over. With patience and careful work I was able to even it out along the stem. Along the keel it was not good. I tried a small cabinet scraper, which seemed to be working somewhat to even the sides of the rabbet, but a few times it jumped the groove and put a nice deep scratch on the keel. After this I took the knife and using a straightedge cut a line on the bottom edge of the rabbet and was able to work toward that cut to get a reasonably straight edge. Should have done that line with the knife at the start-- At the stern I goofed. The rabbet should have stopped before the end. There is a groove extending all the way to the aft end, but it's not as deep as the full rabbet. I think I will have to cut the end of the keel down to the rabbet line and cut a slightly longer sternpost-- The stem looks okay, I need to work a little more on start of the curve down by the keel-- The rabbet will be filled in by the planking, and I'm hoping the slight wobbliness of the lower edge won't be as noticable. The upper edge is very uneven, but that won't be visible. It's also been a good learning experience in preparation for the port side, which will not be planked. I will cut the rabbet on that side, even though it won't be planked, because I like that look. Ron

-
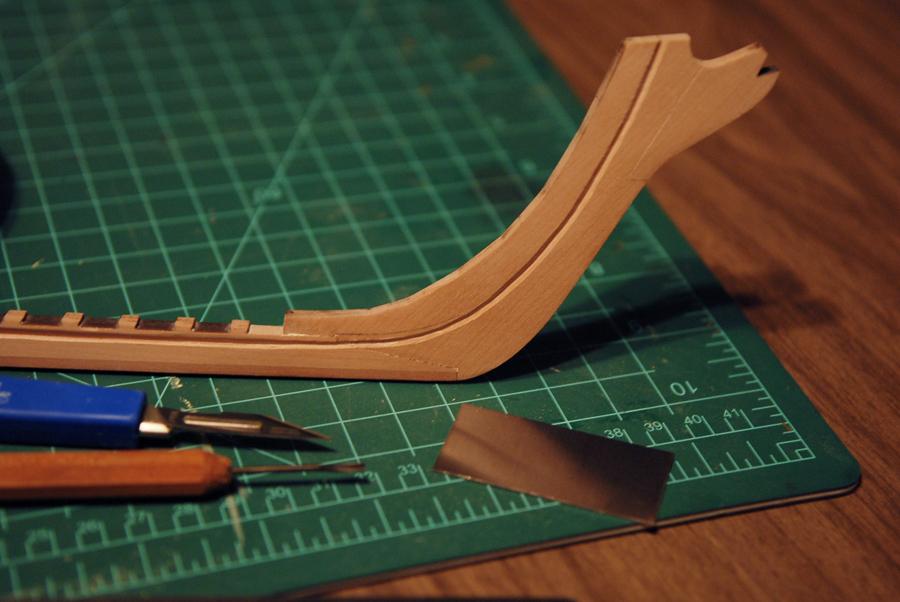
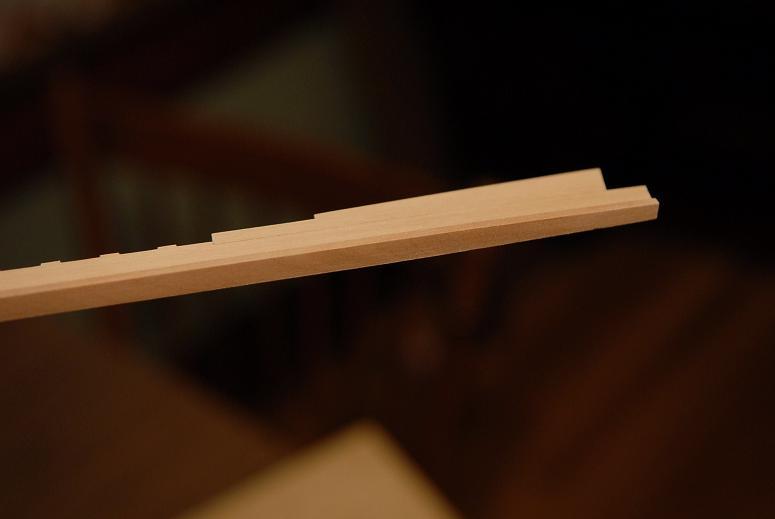
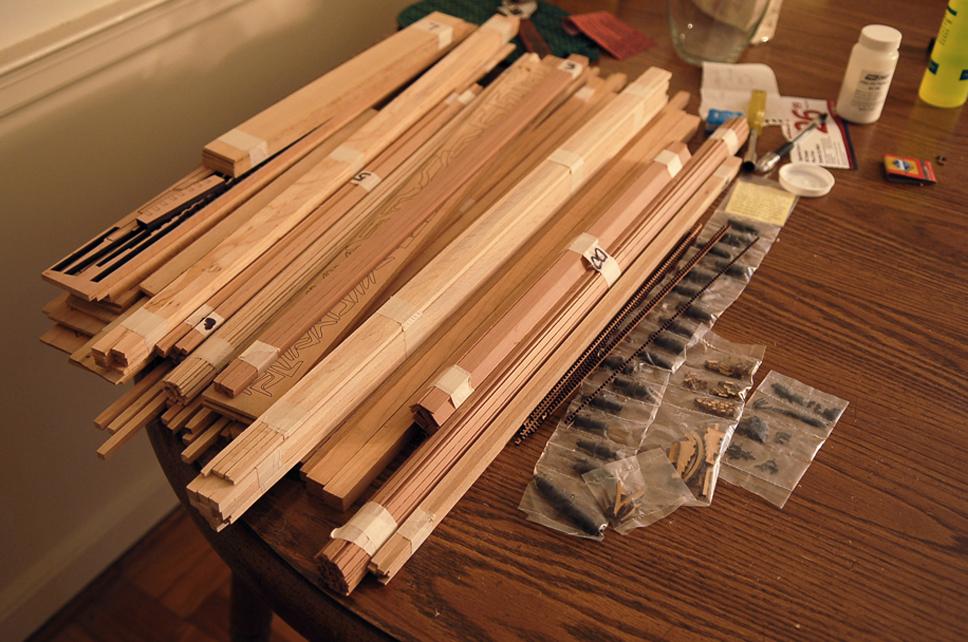
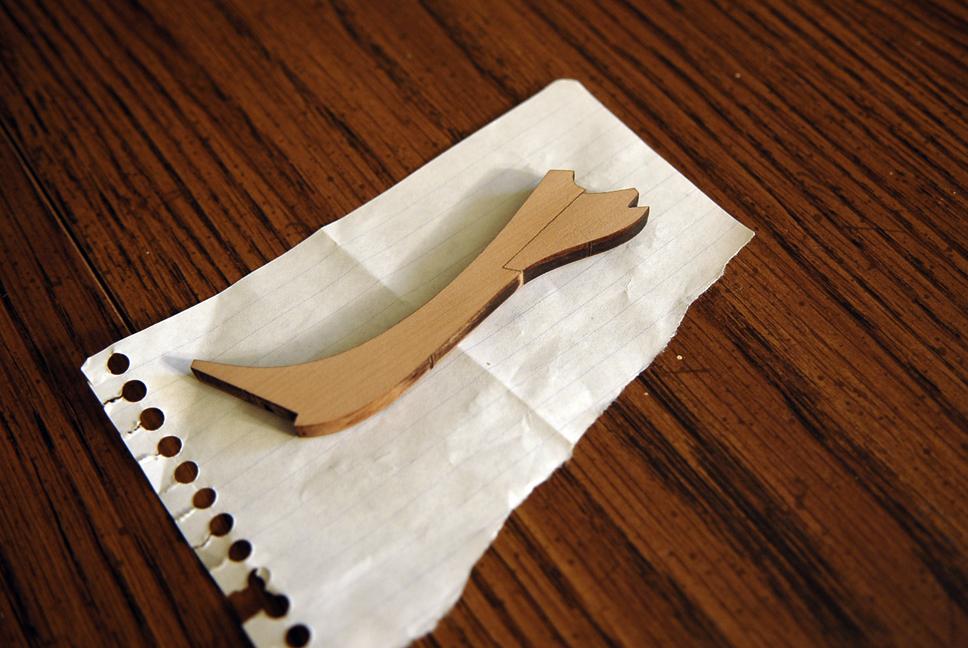
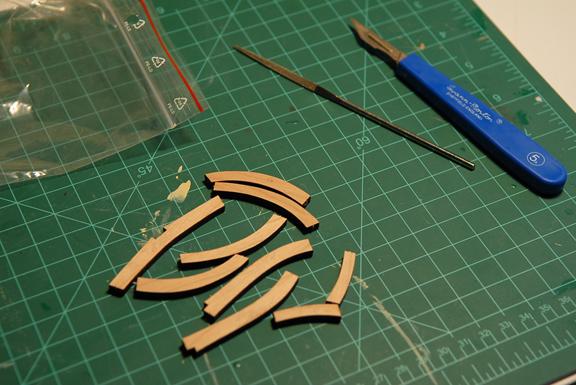
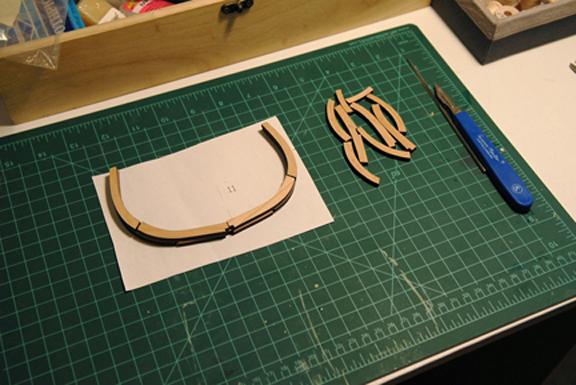
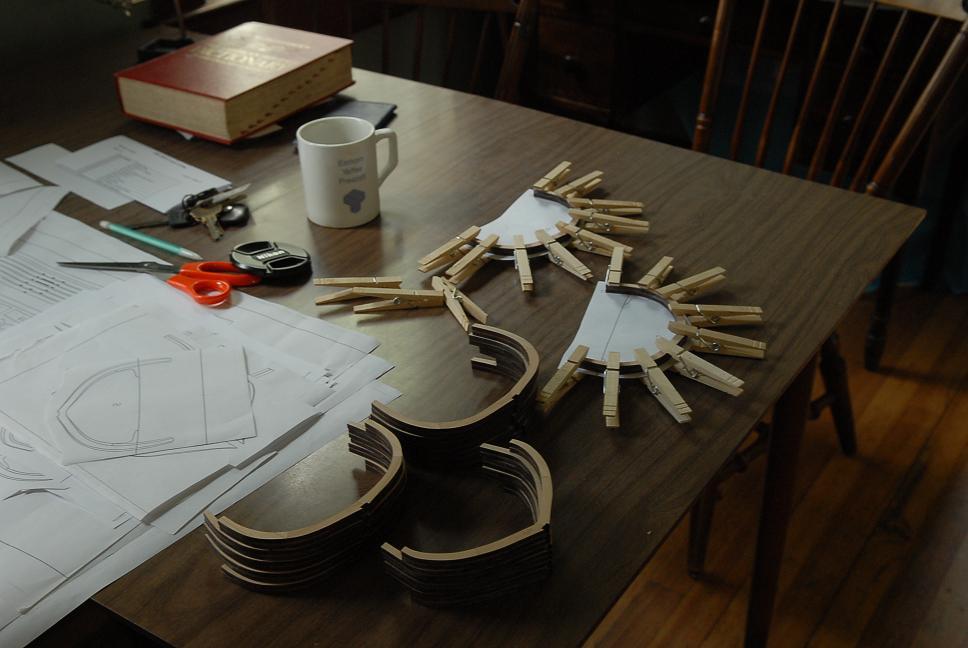
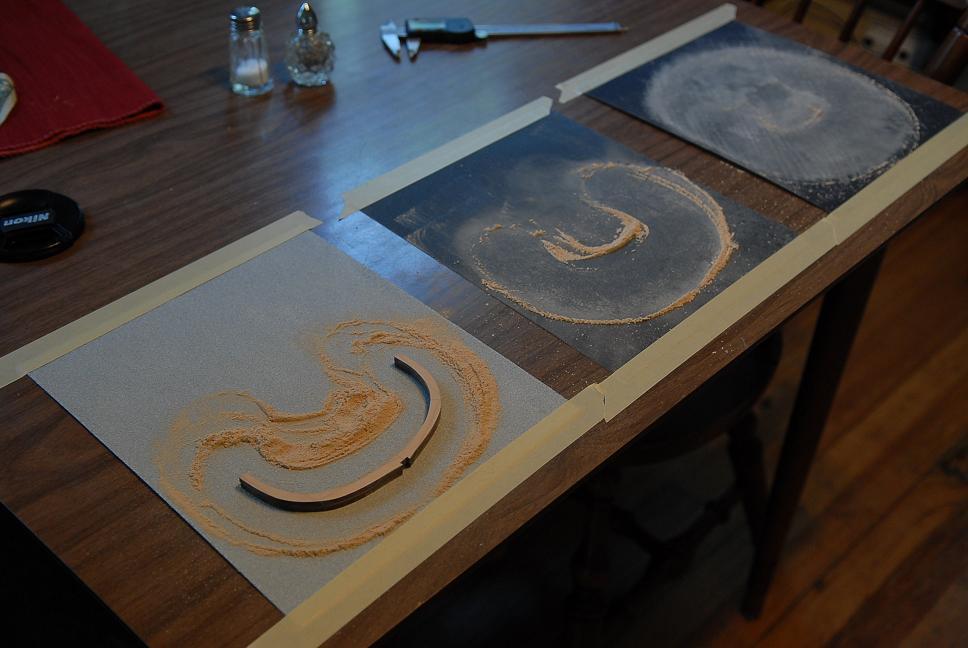
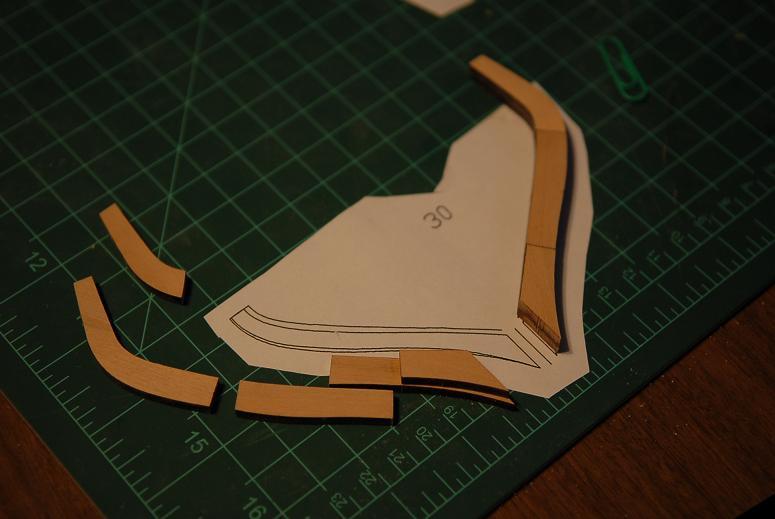
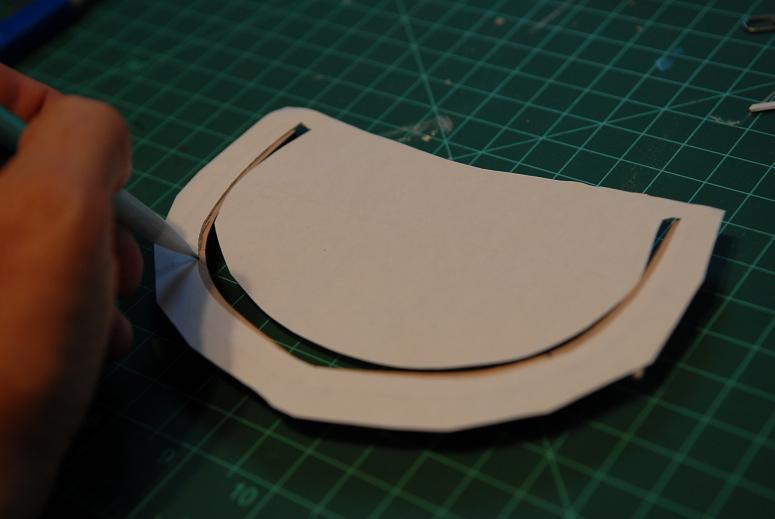
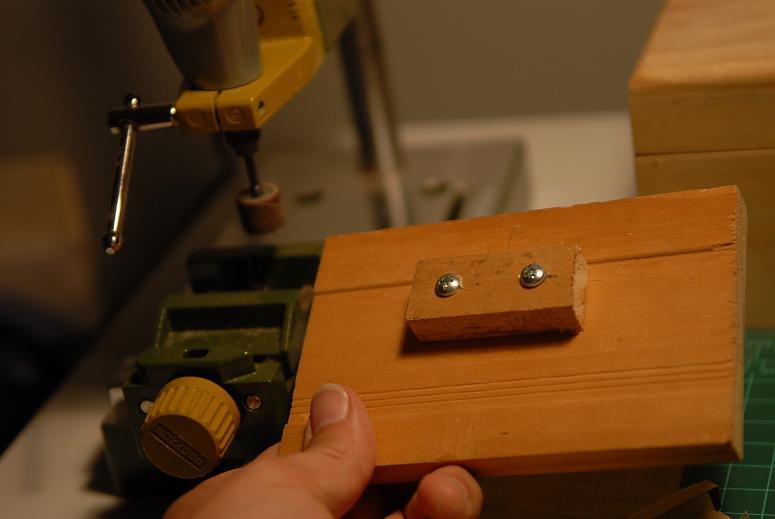
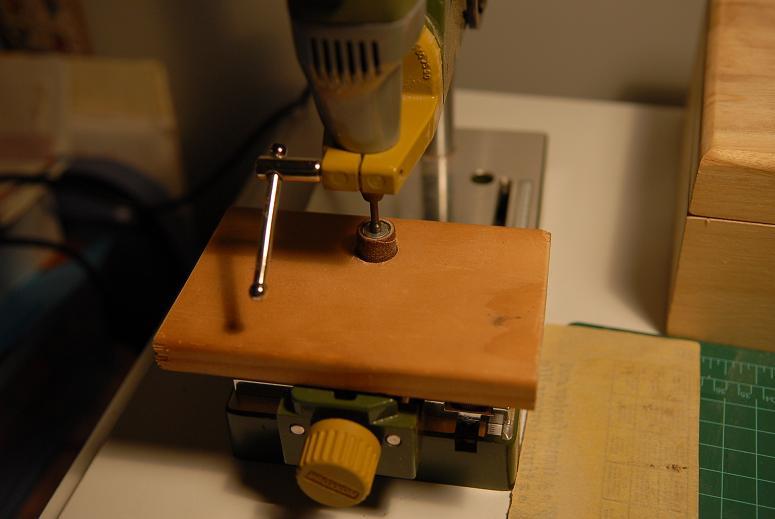
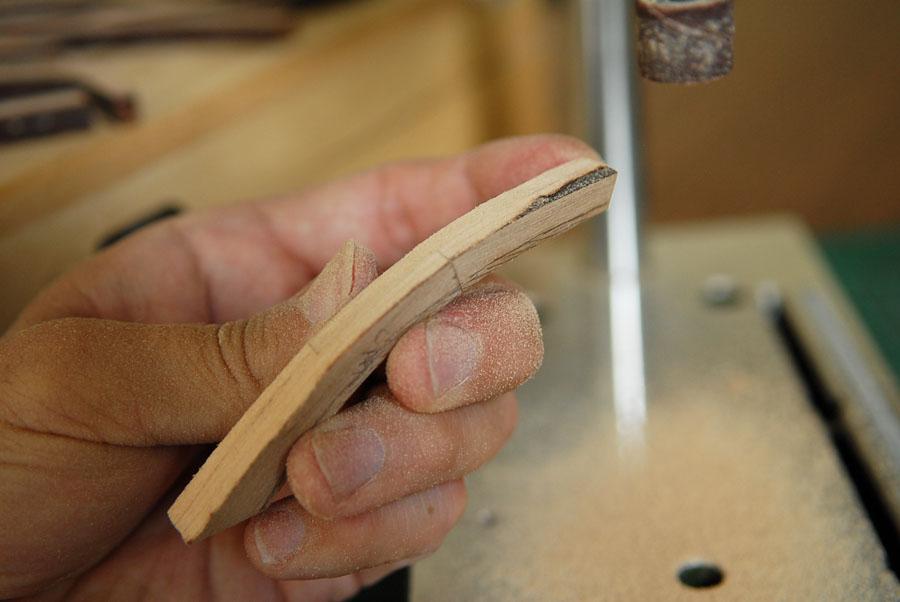
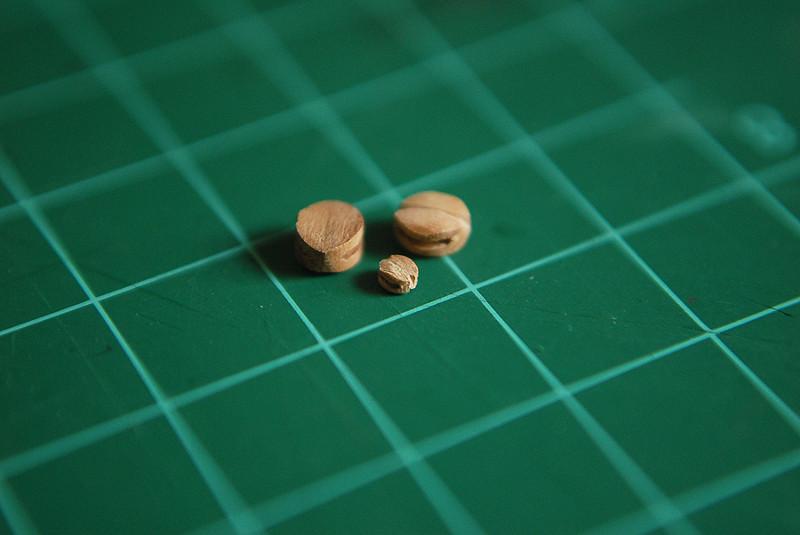
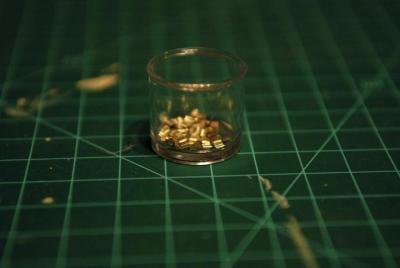
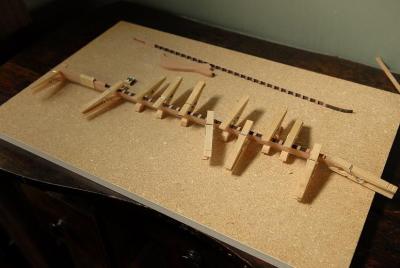
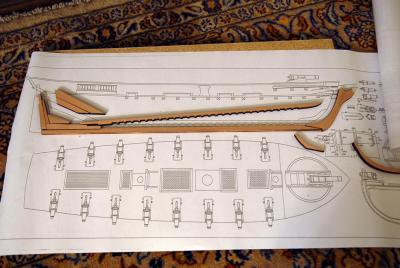
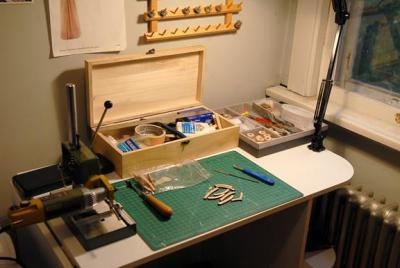
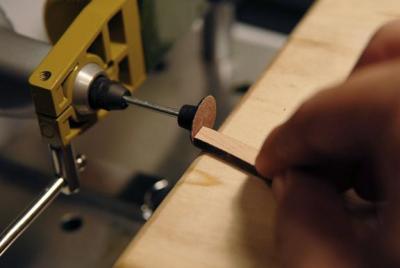
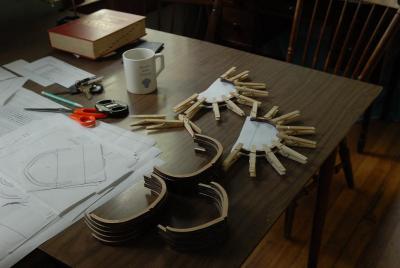
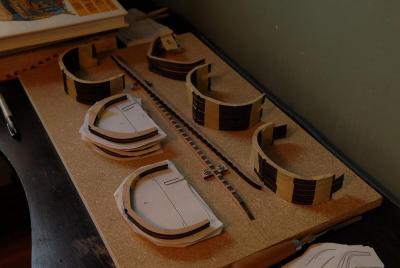
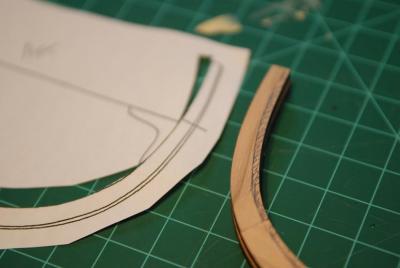
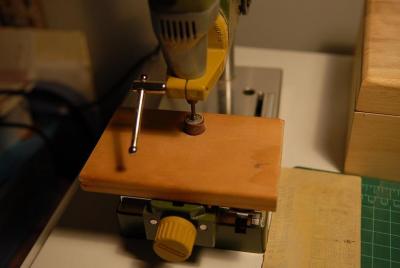
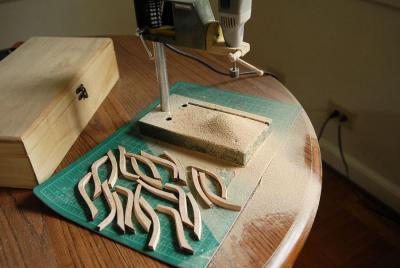
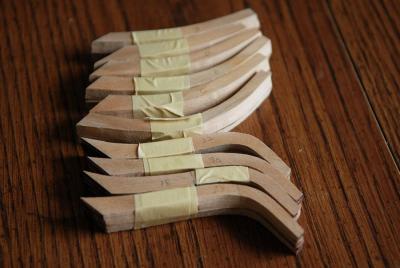
As is common in modern narrative tales, it's now time for a "flashback". This will be a long one--I didn't realize how many photos there would be. Fortunately, you can scroll through them at your own desired speed. The text is a mostly original, [some new,in brackets] and some material has been edited out. Old individual posts have been condensed into longer posts here. A date line shows the separation between the original posts. On with the show-- March 31, 2009 Oneida is on order from The Lumberyard. There will be a couple weeks wait for the laser cutting to happen, before the kit gets shipped to me. That’s because I chose to have the framing made with cherry instead of the standard kit Hard Maple. As far as the wood choice—Cherry as mentioned for the framing. Swiss Pear for the stem, stern, keel, wales, hull planking and most of the miscellaneous pieces. Maple for the deck planking. Boxwood for the gun carriages, head rails, and some miscellaneous trim. Masting and rigging is not standard in the kit, but I requested enough square stock to be included—I left the wood choice for that up to Dave, The Lumberyard’s owner, as I didn’t really know what would be best. I have also written to the Smithsonian Institution for copies of the plans. The hull plan might be redundant, but it’ll be nice to have; and I’ll definitely need the rigging plan. I believe they are the same plans that appear in Howard Chapelle’s “History of the American Sailing Navy”. [Yes, they are.] As I am raising the bar in many ways to attempt this ship, I have upgraded my tools some. I know power tools aren’t necessary, but I do have a Proxxon rotary tool, and stand, now. I ordered a drawplate. I have a Swann-Morton handle and blades. I’m also beefing up my library. I’ve purchased Harold Underhill’s two volumes. I have Lees’ and Petersson’s books on rigging on order. Plenty to read and pore over while I wait to actually start building! April 2, 2009 I think I will have my hands full with this ship. I wanted to build something with frames, but I didn't want to jump into complete scratch building yet. I considered the [Model Shipways] Emma C Berry, but I am more interested in Oneida. One reason is that she was built and sailed on Lake Ontario, and I grew up near the lake. As far as the Cherry framing, I understand that it is softer than Hard Maple (which is standard for this kit). I think there will be a lot of sanding and fairing of the hull, and trimming and adjusting of the deck framing. I'm hoping Cherry will be easier to work with than the Maple would have been. I think the Pear will go well with the similar tinted Cherry. Not a big contrast but still noticable. Cherry is also close in price to Maple (at least in North America). Maybe it is not as nice as Pear or Boxwood, but if I wanted either of those for all the framing there probably would have been an upcharge. April 23, 2009 Not much to update here. I'm waiting for the kit to be shipped. It's been almost a month now since I ordered it, but I was forwarned that there would be a few weeks lead time for the laser cutting. In the meantime I've been gathering resources: some tools, books, photographs of Niagara, which is a very similar, slightly larger lake brig. I received Oneida's plans from the Smithsonian. This is going to be a fairly big model! The hull is about two feet, and I was forgetting that the bowsprit adds about a foot more. So there's plenty to do while I wait. I've also been researching the rigging. I think I need to make lists of the standing and running rigging parts and pieces so I can determine how many blocks and how muchline to buy, what sizes, etc. No rush on that--it'll be quite a while before I get to the rigging, but it'll give me something I can do now. June 18, 2009 I'm still waiting for the kit, but I have been buying rigging line and blocks, and have spent a little time shaping the blocks as you can see below. On the left is a 6mm block as received, and on the right it has been rounded a bit, and grooves for the strop filed in. Below them is a 3mm block. It's so small! (There will be some 2mm ones as well.) My strop notch on the small one is a little too heavy, but I have about 200 of these to practice on. Hopefully, I'll have some better progress to report before too much longer July 2, 2009 [Three months after ordering the kit] After filing patiently (most of the time) about 50 or 60 of the 3mm blocks, I was beginning to think that was all my Oneida would ever be--a little bin of blocks and rigging thread. Then I noticed that my Credit Card had been charged by The Lumberyard. A few days later the box arrived! Unpacked on the table-- Everything is there, including the carronades and carriage pieces in plastic bags on the right. All the frame pieces are laser cut, with all the drawings to make sure you identify everything correctly. I'm starting with the widest frames-- The keel pieces laid out-- And my first glued piece, on the stem-- [such a humble start, and, much later, it needed to be unglued and fixed] July 2, 2009 I am currently split between two homes. Here's my tiny work area where I will be most of the time. I've brought most of the tools and just a few pieces of wood at a time to work on, in this case two of the frames-- My attempt to set up a way to sand a flat, perpendicular, smooth face to the ends of the frames. They are charred and have a slight bevel due to the nature of the laser cutting; and they have a ridge where they were attached to the rest of the wood-- One frame layed out, one in pieces One frame glued, one gluing-- I didn't bring enough clothspins with me this time, and I'm using PVA glue, so I can't really go very fast, but that's alright. July 3, 2009 Here I've taken over another table--current progress, most of the full frames are glued. It went faster than expected. I was able to spend all day on them as I did not have to go to work today. Now I have to take a step back and do some looking and thinking to make sure I handle the beveled and half-frames correctly. I also have to set up a board now to hold the keel, and get the keel assembled. July 4, 2009 It's a big step up from a Midwest kit. [John Aldens sloop--a link to photos of the finished model is in my signature] One thing I can say is that you have to be willing to forego the usual kit instructions (though those can vary widely in quality). The only instructions are some that you can download from The Lumberyard site, and unless I'm not looking in the right place, there seem to be some gaps. I'm hoping that with enough encouragement and help from the gang here I'll make it through the tough spots. Time will tell. [Absolutely true!] The big selling point for me on the kit was being able to to a framed ship with nice woods,and someone else doing the hard part of drawing and cutting all the frames out. Though you pay for that. Scratch building would be less expensive. That'll probably be the next one. I'm using Elmer's [PVA glue] for the frames. Once I got kind of a system down (by about the seventh frame) they went pretty quickly. About two thirds of my frames were not quite as tall as the ones drawn. I thought I was doing something wrong until a batch came out right on, and I hadn't changed anything I was doing. So I'm not sure what's up with that. July 6, 2009 Sanding is slowing me down some. All the full frames are sided a little too thick, so I'm reducing the ones I've glued so far. The salt and pepper shakers are not required for the build-- Here are all the full frames. The ones in the front on top of the pieces of paper are the full frames that need to be beveled before installing. In between the frames is the keel and the keelson-- All for now. The shipyard workers aren't working tonight. They worked hard over the holiday weekend, and need a rest. July 8, 2009 I am doing a variety of things now. 1) Assembling the half and cant frames. One particular frame really threw me for a loop. It's so obvious now, but for a while I was digging through the drawing sheets, making sure I had labeled my pieces correctly. They weren't fitting together at all like the drawing. Then I figured it out--the frame pieces were not shortened for the gunport on this frame, though the drawn frame is-- 2) On the glued up frames that need to be beveled, I'm marking the bevel lines. I made two copies of each frame drawing, and cut out guides to draw the fore and aft bevels-- 3) Tried out my very rudimentary (perhaps even laughable) engineering skills. I made a surface so that I could use my rotary tool as a mini drum sander-- July 17, 2009 The setup with the wood block was good for sanding the char, and evening up the faces, of the non-beveled frames. It did not help with the beveled frames. Even if I had some way of altering the angle of the wood surface, it wouldn't help much because the angle of the bevel is not constant. With the bevels, I just very carefully held the frame at an angle against the sanding drum, and slowly worked my way along the frame, working in "layers", and checking progress as I went. The char helped here, because it was easy to see when I was getting close to the bottom edge. That's not very clear, this sketch might help-- This seemed to work fine, and was pretty fast at getting rid of wood. As long as I was careful, it was fairly easy to control the amount I took off. There was one frame that got away from me, and I did sand away too much. The directions indicate that the frames are cut very full, and will need substantial fairing [so true]. We'll see when I get them glued to the keel whether the one that I overzealously sanded will be a problem. July 20, 2009 I was able to work on the ship for a few hours on Sunday. Here is the work of sanding the bevels on the six forward cant frames and some of the stern half frames-- I marked the bevels. This time I did it by eye, looking at the frame drawings. Also made sure I marked fore and aft on each side. I had to think twice about each one, as the side the bevel is on is opposite between the forward and aft frames-- Here is a series of pictures, more than needed, I'm sure, but they show the progress of sanding an outer bevel. With the laser char, it's very easy to see when I'm getting close to the lower edge, which should not be sanded. Also, I did use both hands to hold the piece against the drum-- Here is the under side, showing the thin strip of laser char that I leave at the very edge-- You get the idea, but here's an inner bevel-- Twenty pieces sanded, and a nice little sawdust pile. A sneeze would have had disastrous effects! After sanding the bevels, I sanded the sides to the right thickness, most of these frames were very close to what they needed to be. I didn't have to do nearly as much sanding as the full frames required. Finished and bundled up-- I still have about eight frames to sand, and then it's time to fasten them to the keel! Ron


-
Thank you very much for the suggestion, Larry. As it happens, I already have my other part on the way--it should get here tomorrow. But even better news!! Ilhan Gokcay kept a copy of my Oneida log, pictures and text, which I now have. Thank you, Ilhan!! I will post at the pictures and reconstruct the log as a timeline with my text. I'll leave out the responses and miscellaneous chatter. Ron
-
What is your favorite hand tool(s)??
rlb replied to Modeler12's topic in Modeling tools and Workshop Equipment
Thanks for the advice, Harvey and Jay; I will take it. I have a couple of inexpensive chisels I can practice with, and forgo the expensive (I just looked it up!) sharpening guide. Ron -
Ilhan, Your Mayflower is simply beautiful. Outstanding craftsmanship in every aspect! Thanks for posting it. The "In progress" line in your signature is blank---what's next? Ron
-
Bless you, garyshipwright. I'm so happy to see this coming back! Ron
-
Elia, This is going to be one beautiful model. The bluejacket windlass insn't bad, but how much more satifying to make your own! Ron
-
What is your favorite hand tool(s)??
rlb replied to Modeler12's topic in Modeling tools and Workshop Equipment
My Lee Valley 1/4" Chisel. I use it far more than the No.11 knife, or a fairly inexpensive micro carving set I have. When I got this, it was SHARP. But now, I think it's becoming only SHARP. I'm getting dismayed because I don't know how to sharpen it, and I don't want to ruin it by trying. I think I will be getting one of those roller gismos that holds the chisel at a set angle, and I'll learn how to sharpen. Ron -
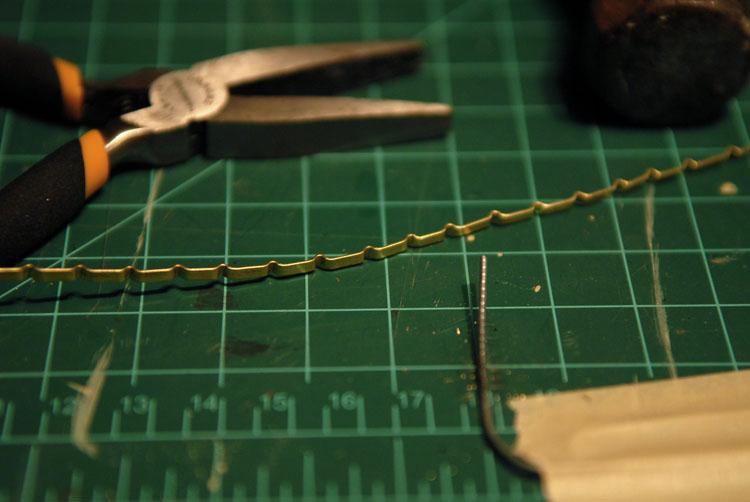
Thanks, Elia. It's good to be building again. Thanks, Patrick. The gluing and ungluing works well with pear, a very hard wood. I'm not sure it would work as well with something softer, like basswood, for example. With basswood filing and sanding go much faster, so it might end up being easier just to do them individually, in that case. I don't know. I'm working toward making and installing everything that needs to go on the inner bulwarks. Part of that task is drilling the rest of the carronade eyebolt holes. Marking the spots with a pin-- And drilling. For most of these, I need to work through the ports on the opposite side. It's also important to do this before any structures are built up on the deck-- I ran out of eyebolts previously, so it's now time to make some more. The smallest I found to buy are not small enough. I'm sure the right size is available somewhere, but I've not minded making my own. It would probably be better to work up a jig to do these, but (and this is bad) I'm usually very lazy when it comes to making jigs. Or maybe I have jig-phobia. In any event here's my method for these. I'm using soft brass wire, 24 gage. Grip the very end in round nose pliers, and twist all the way around-- Until you end up with this-- Take the wire out, and re-grip so you can twist back the other way-- Something like this-- And end up with this. This is the most crucial step. If I don't get this result, I just cut it off and start over. You need to end up with an off-center loop that is slightly open-- Grip the loop with regular needle-nosed pliers and carefully twist back to center the loop. If you do it right the loop closes up and gets even smaller-- Here's the finished eyebolt next to a purchased one-- These take me between 15 and 20 seconds apiece (I could probably do it in 10 if I was really trying hard), though I can only stand to do about 10 at a sitting. I need to make about 100 more. Ron
-
Elia, Glad to see you and Arethusa back on MSW! She's a beauty, and I'll be following your build. Ron
-
I second that, Alex. Probably your model has inspired me more than any other. Thanks for re-posting your Sphynx log. Ron
-
Robert, Your Mars looks great. I'm envious of your scarf joints! Keep up the good work. Ron
-
Priceless!!
-
Russ, if one had a milling setup, this method could work even better. By hand, in my imagination at least, it saves some time! Don, Oneida is a great kit for someone who would like to test the waters of scratch bulding, but may not feel confident about jumping in fully (that describes me exactly). For another thing, if you don't have a power jig-saw, the laser cut frame pieces, deck beams and knees will save you a ton of time over cutting them out by hand. The plans, on-line instructions, and laser cut framing are adequate to complete a basic model, but if you want to take it a step further--as many Oneida builders seem to do--be ready to invest a lot more time in research and yes, scratch-building. In that case you will very quickly leave the kit plans and instructions behind. I'm very thankful to Dave for making this kit available, and he's been very willing to customise it for whatever woods you'd like to use. Just be aware that not everything is spelled out in the manner of a Chuck Passaro kit!! Ron
-
Caroline, It's fun to revisit your build of SF. After that little (not at the time!) setback at the start, and trials with the ships boat, we can see your confidence just take off! Thanks for re-posting. Ron
-
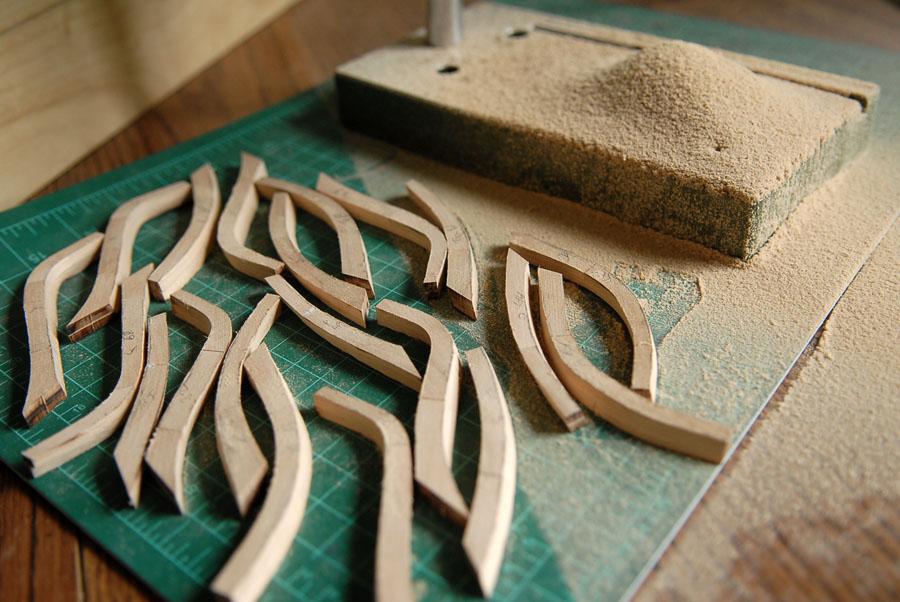
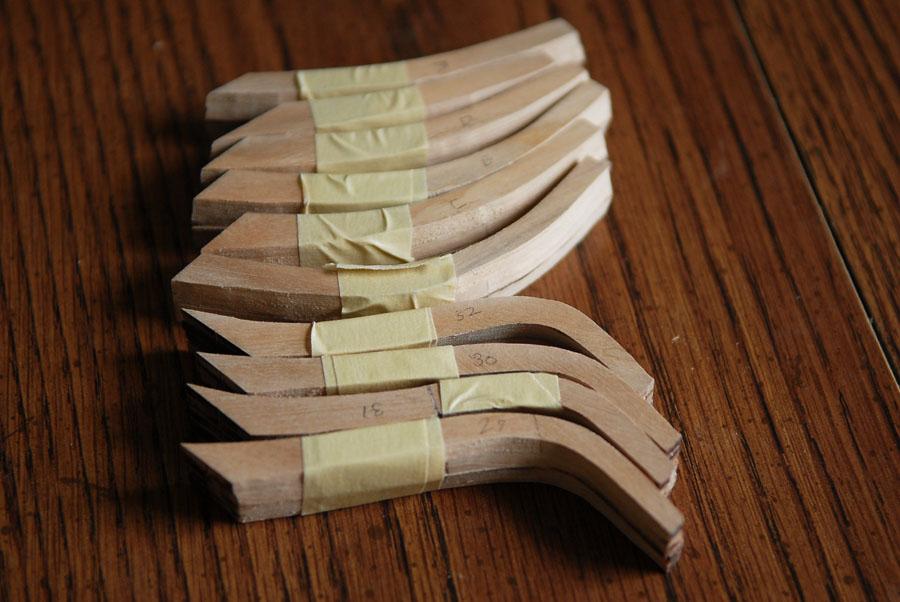
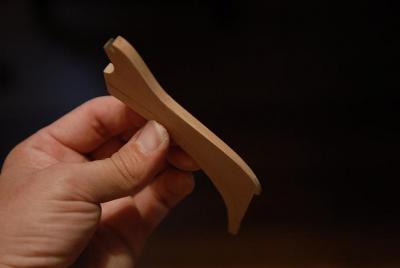
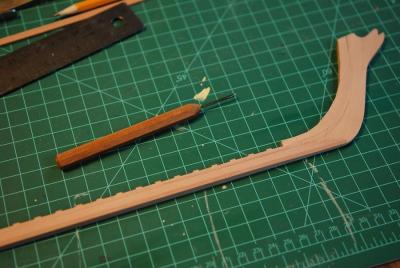
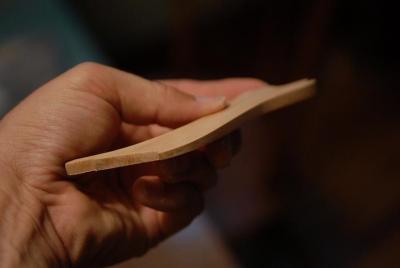
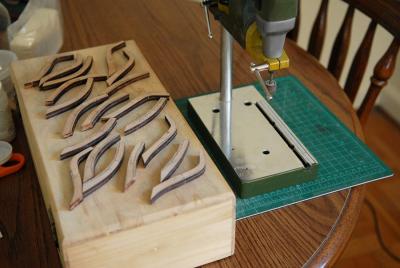
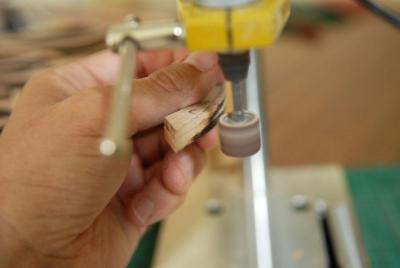
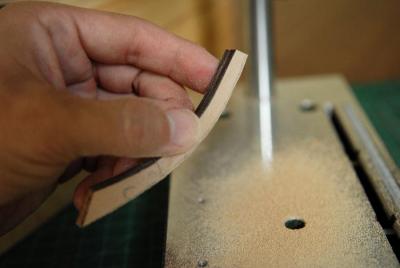
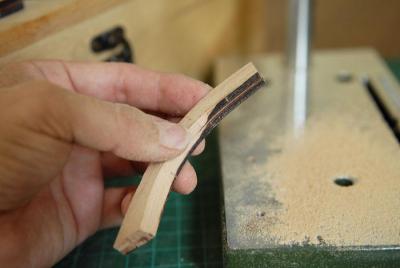
Thanks, Robert, Patrick, and Clay! In between checking out everyone else's "new" logs this afternoon, I managed to make some cleats. Hoping to make it easier to get them somewhat uniform, I tried this method: I cut a spare strip of planking stock into appropriate lengths. These were glued up (with Elmers white glue aka PVA) into "blocks" of six at a time-- The block of cleats was then shaped to the basic profile using sandpaper, chisels and files-- Isopropyl alcohol weakens the glue-- And they are separated back into individual pieces for fine-tuning with a file-- I need two different sizes--here's a shot of some of the rough "blanks" including two finished cleats-- Ron
-
Clay, Good to see your Euryalus back on MSW. I look forward to watching her come along. Ron
-
Remco, It was fun to look again at all your past photos--some I did not remember, such as the tiny key! Your craftsmanship and detail work is just amazing. Thank you for putting these photos back on the site. Ron
-
ancre LE BONHOMME RICHARD by Jeronimo - FINISHED
rlb replied to Jeronimo's topic in - Build logs for subjects built 1751 - 1800
Karl, I am very glad and thankful that you go to the trouble to post again your fantastic model. Ron- 662 replies
-
- 2
-

-
- bonhomme richard
- frigate
- (and 1 more)
-
Thanks, Chuck. Thank you for your dedication to MSW, it's amazing how quickly it's rebuilding! Ben, John, Christian, thanks. I do hope to be able to put back at least the pictures, from the past. Remco, Håkan, I was very nervous about this fix. In my post I mixed photos from the port and starboard sides, but I did the port side first--that is the side that I expect to be toward a wall when the model is done and I figure out where to display it! I tested out my method on that side, all the way to applying finish, and learned a few things, to try differently on the starboard side. The two things I was most concerned with were keeping a crisp straight line with the cutting away, and the stain bleeding into the bulwark planking. The stain wasn't a problem as long as I took care with the brush. But the straight line was difficult. There were sections where the wale was glued seamlessly, and I had trouble maintaining a good line there and sometimes where there were the end joints in the wale planking below the line. Ron
-
Looking forward to the rigging, John. Can't wait to see the rest of the mast, the boom, etc. Ron