

catopower
-
Posts
1,615 -
Joined
-
Last visited
Content Type
Profiles
Forums
Gallery
Events
Posts posted by catopower
-
-
-
Always feel free to ask questions! Asking them inside a build log is perfectly fine, particularly if you have people following it.
Occasionally, you may need to go outside of your build log, as sometimes, it's hard to find answer from just those who follow your build.
Good luck with your first build!
- ccoyle, VTHokiEE, Scottish Guy and 2 others
-
 5
5
-
Beautiful work, Chris! I think this puts you, Chuck, and myself roughly at the same stage. Only, I've had a lot of unrelated issue get in the way that's pretty much halted my progress for the past month or more. Hope to get some progress going again, so I don't fall too far behind you guys!
- ccoyle, mtaylor and Keith Black
-
3
-
-
Sorry for the lack of progress on the kitamaebune. I've been going back and forth on the method for making of the sails, but I think I'm going to settle on sewing the seams, but making 4 distinct panels, and lacing them together.
On the fore sail, or yaho, I'm considering leaving it off the model. I noticed that all of the drawings that depict the yaho, show it in profile, as if it is turned sideways. This works out fine, because the bottom of the sail is shown below the main stay and its tackle. If the sail is facing squarely forward, the stays would be in the way. So, I'm wondering if that sail was really used primarily for beating or reaching, to use sailing terms?
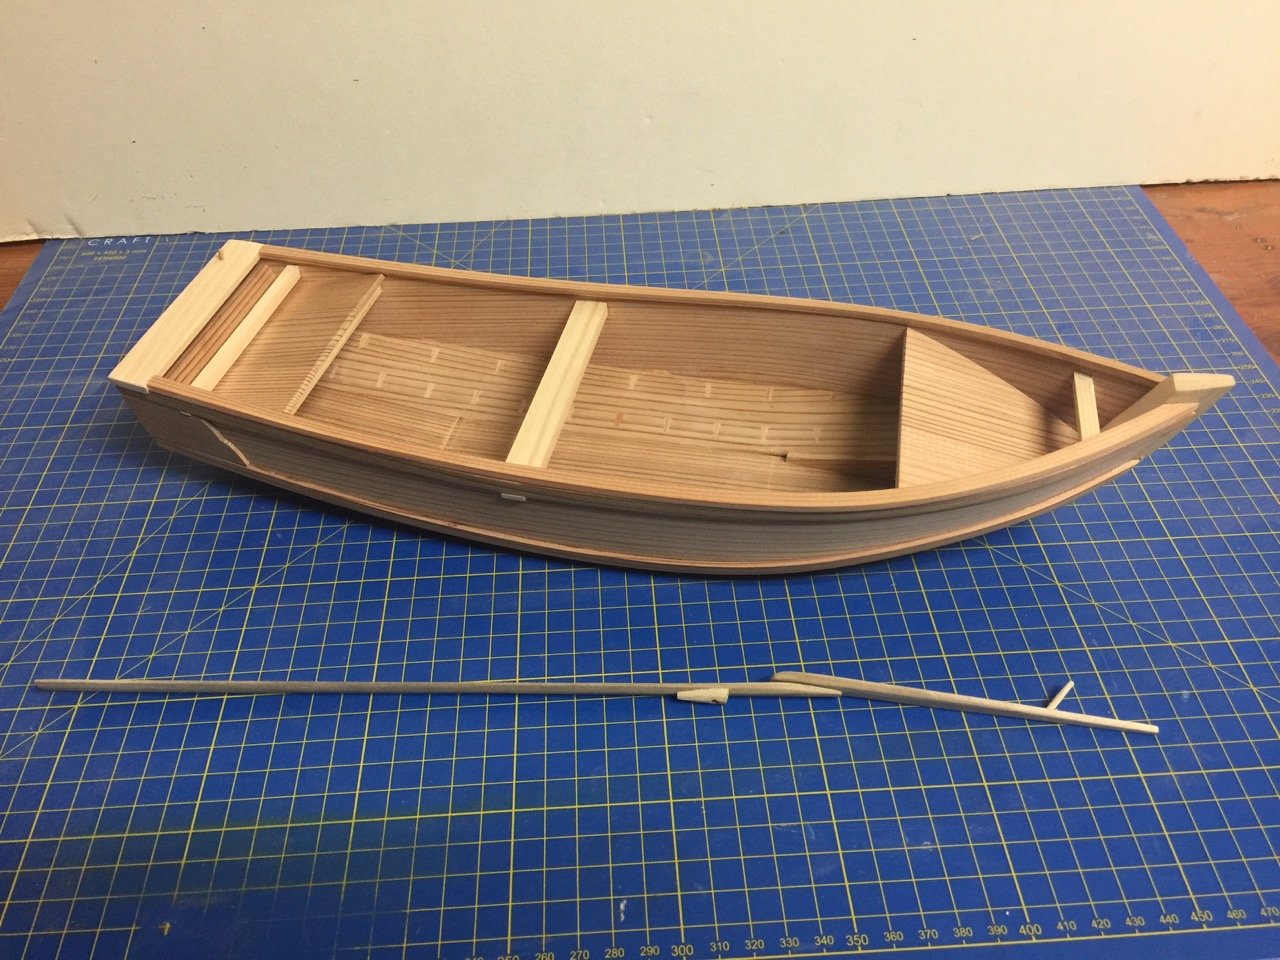
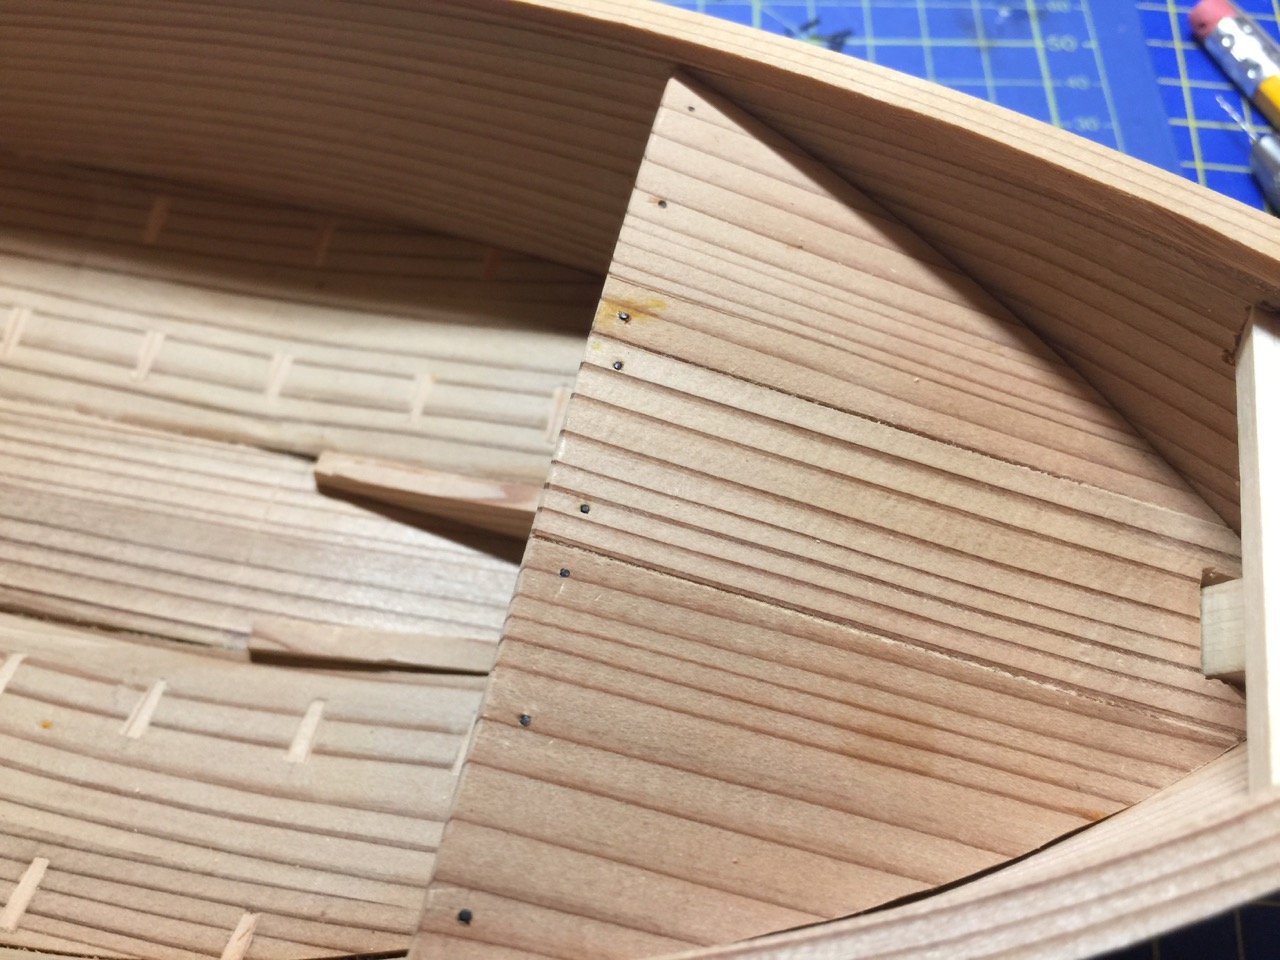
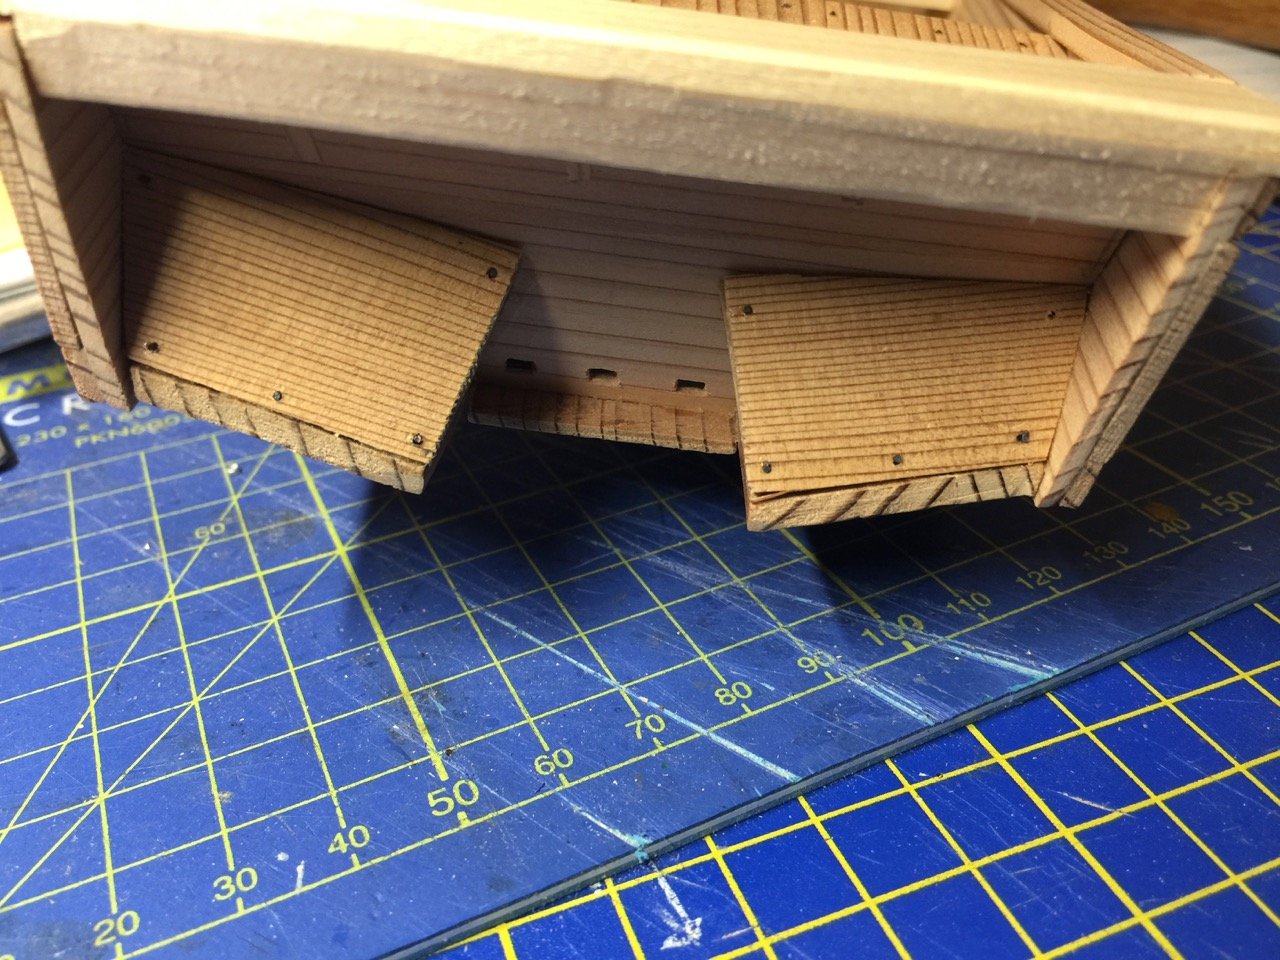
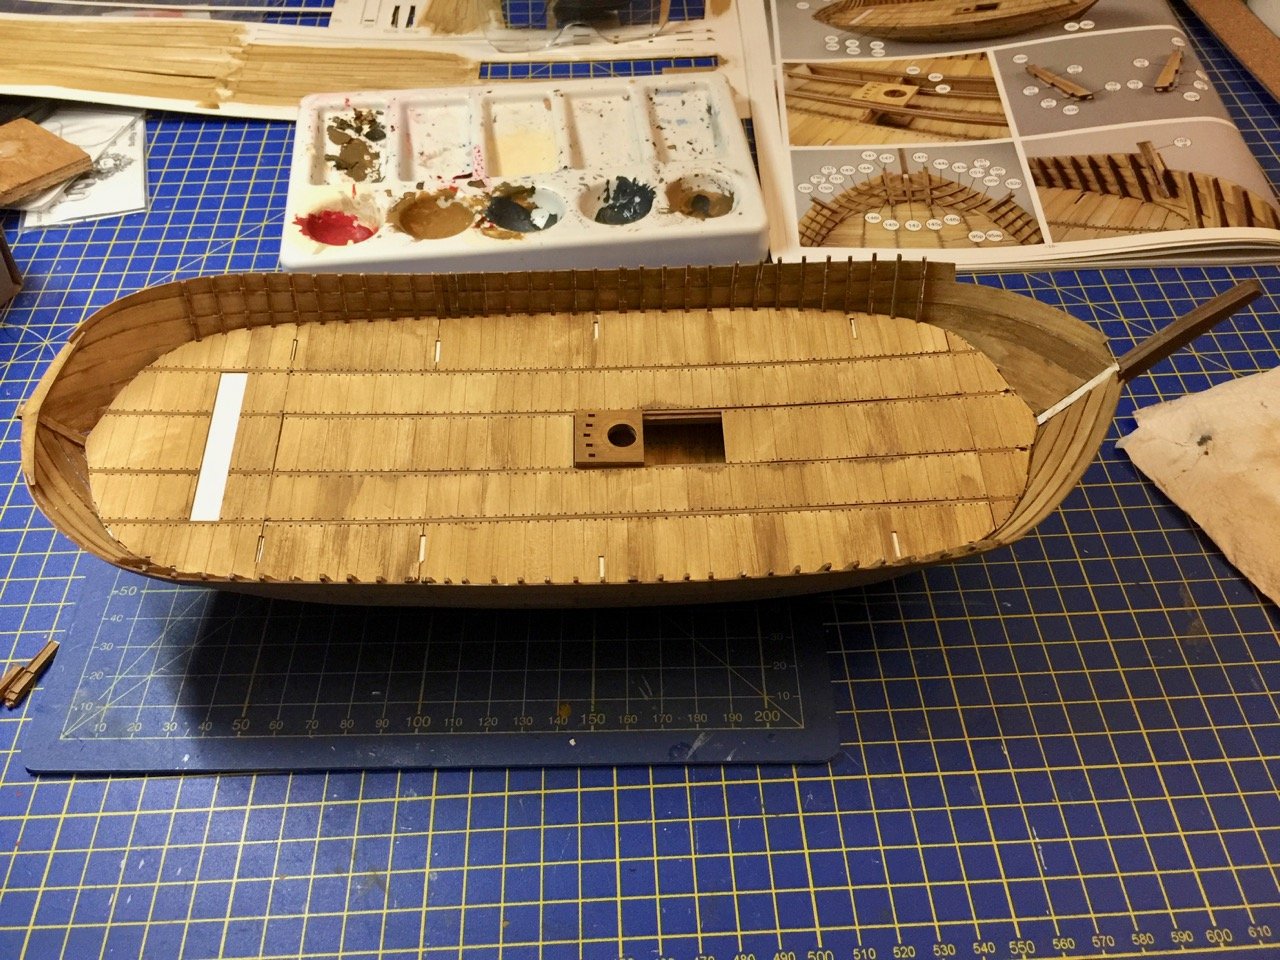
Meanwhile, the big delay is due to work on a model of the boat that Douglas Brooks built last years with Nina Noah and Japanese boatbuilder Mr. Mitsuaki Bansho in Toyama prefecture last Fall. The boat is called a tenma, and is a small, general purpose boat about 13 foot long. My model is close to complete, I just have to add a beam across the top of the bow, and two pairs of half-frames, noting that in Japanese boats, frames are usually added after the hull is constructed.
I just finished building a sculling oar and adding simulated nails. Like on the kitamaebune, the nails are copper wire that's been blackened with liver of sulfur.
This weekend, I think I'm going to do a little sewing...
-
Hi Chris,
Just saw you started your wooden Wütender Hund build. Looking forward to following your progress.
I have some other work getting in the way at the moment, so I haven't made any new progress on my Shipyard card model cog, but I hope to be back to it shortly.
Nice start!
- ccoyle, mtaylor and Chuck Seiler
-
3
-
I think Don Dressel's book is a great addition to any ship modeling library too, but I always thought it was strangely titled. Given that there is so much more beside planking, I always thought it should be called something more like Planked Hull Construction Techniques, though it would be a more awkward title.
The book is still in publication from McGraw-Hill Books, only in soft cover.
-
-
Hi Chris, you're going to have a crowd of people forming a line, waiting to see your Wütender Hund build...
- mtaylor, ccoyle and popeye the sailor
-
3
-
Thanks Moab. As I mentioned to PD Sergeant, it's been a fun build, but it does have its challenges.
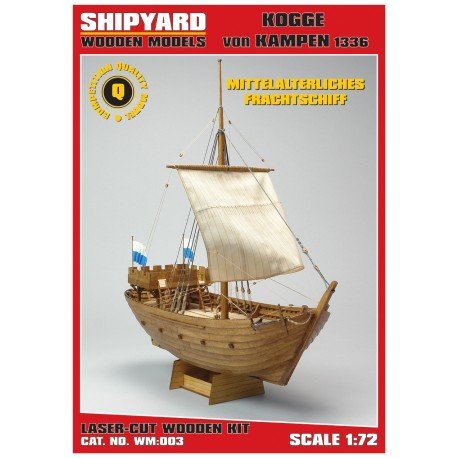
Chuck, funny you should ask. The order for both wooden kits, the Wutender Hund and the new Kogge von Kampen, just shipped from Poland this morning. Not sure how long it will take to get to Ages of Sail, but they're on their way now. Probably be 3 or 4 weeks before they show up online.
Interesting that the new kit looks identical to the Hanse Kogge kit I'm working on, but has a smaller, simpler stern castle, and has a plain sail.
-
8 hours ago, PD Sergeant said:
Based on your thread I just ordered this from Ages of Sail. I’ve never put together one of these because building most wooden ship models you have to steam/bend planks. I’ll be following the rest of your build. Wish me luck!
Hello PD Sergeant, good luck with your build. Most important thing is to take your time, test fit the parts, try out painting and gluing on scraps before you try it out on the real parts. Look ahead in the instruction book, so you know what the future steps are. You'll want to uderstand how the steps you take will affect later steps. Also, it's a good idea to take photos and start a build log here, so you can get help here on MSW.
So far, it's been a fun build, but it has it's challenges!
- mtaylor, Ryland Craze, PD Sergeant and 2 others
-
5
-
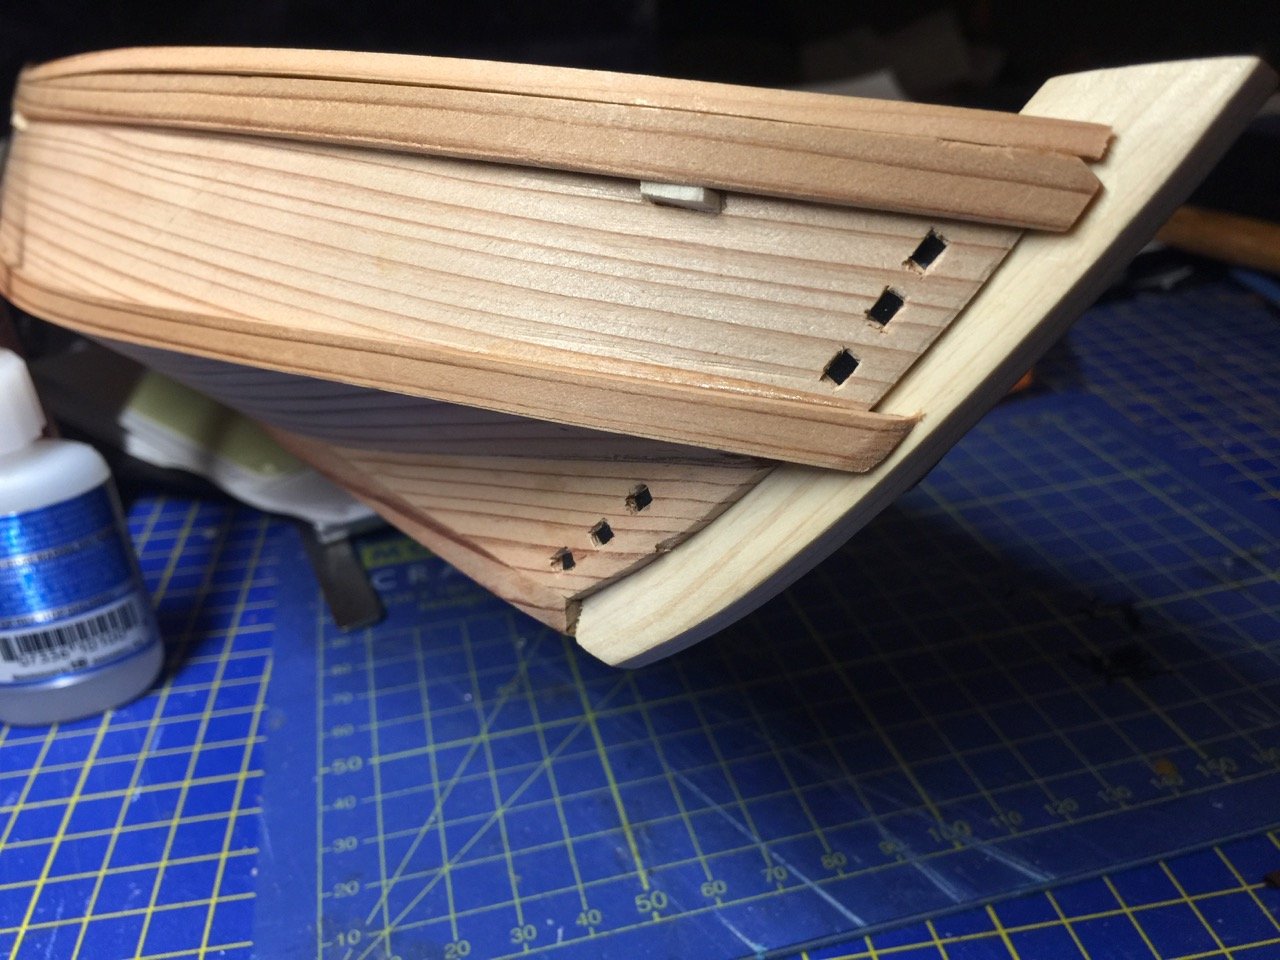
I decided it was time to make some more progress on the Hanse Kogge today.
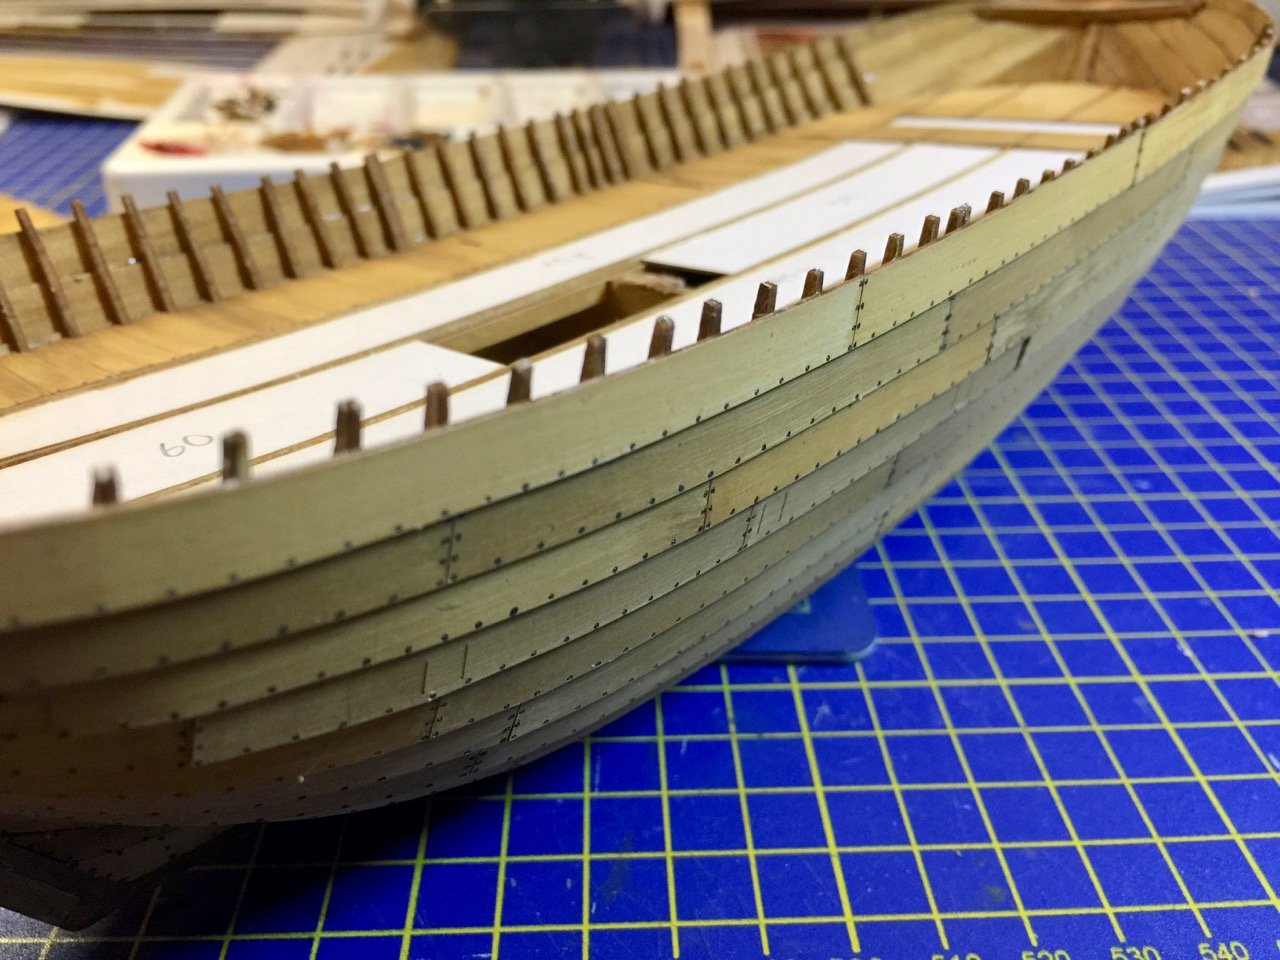
Actually, last week I added the upper planking strake to the hull. In the process, I discovered that my planks were running a bit too low, particularly towards the bow. I'm not sure how this will affect the build in the end. For now, the timber heads look like they will stick up too high. Later on, I may just have to trim them down. That's a bit hard to do with card stock, so I treated each of them with a shot of thin CA to stiffen them up.
It wasn't a problem, but I noted that when I hit them with CA, there was some kind of chemical reaction. I know this, because every time I did this, there was a waft of smoke! I watched carefully to make sure my card model didn't burst into flames, but I needed the CA to stiffen the cardboard. The only think I can figure is that it was reacting with either the paint, which I think is unlikely, or the contact cement. Now, I've used CA and contact cement together before and never had this issue. So, I don't know what was going on. Anyway, it's done and I and my model survived.
Anyway, today I started adding the deck, beginning with the sub-layers...
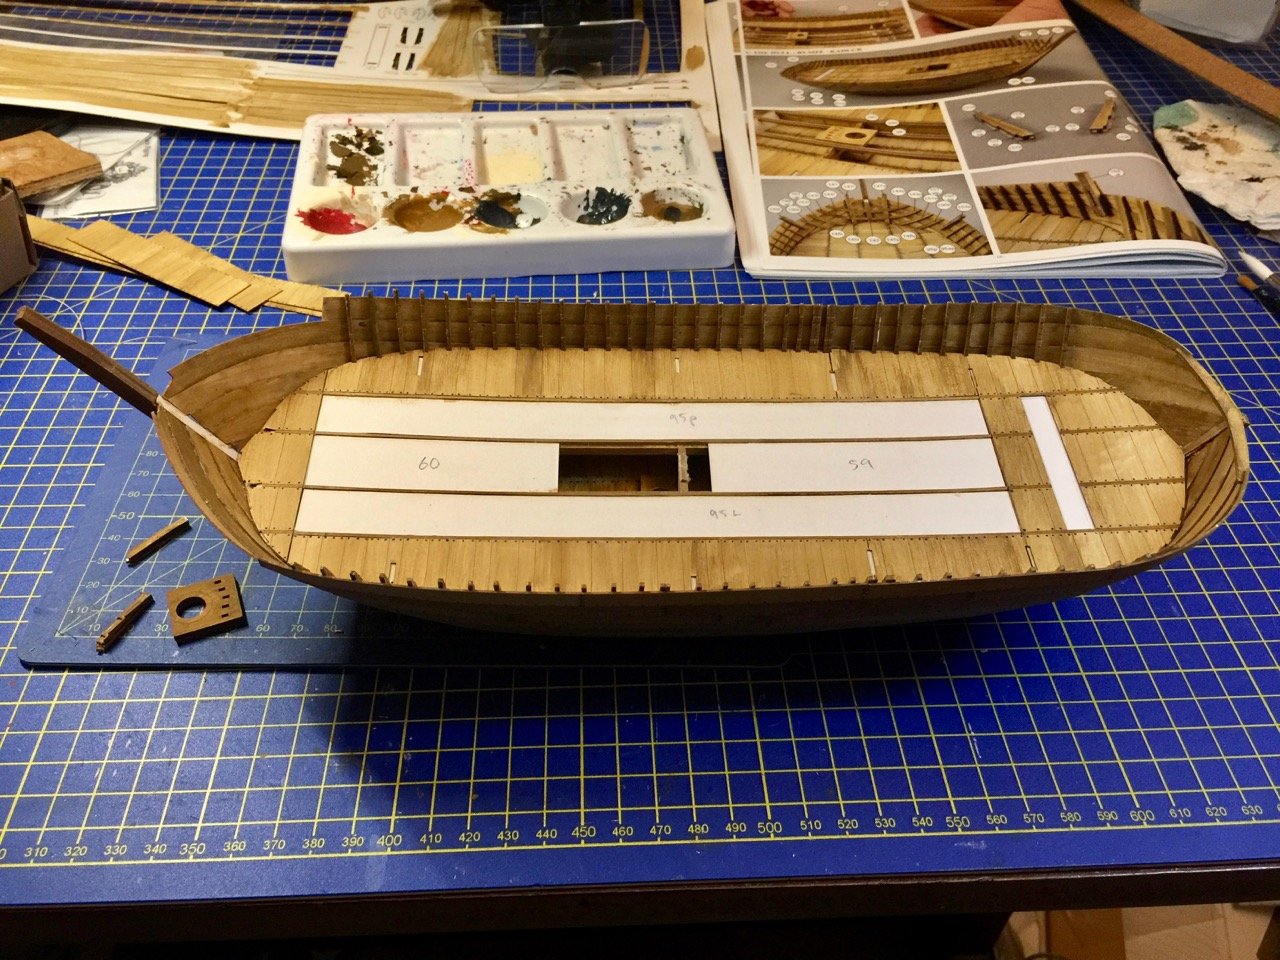
I finally got wise and started writing the part number on the piece in pencil.
Below, you can see how much the timber heads stick up. The instructions show them flush with the upper edge of the planking. I'm not sure how I got this far off. I guess I was worrying too much about covering the black reference lines printed on the hull planks, which serve as alignment guides. I placed the planks so as to cover these lines, but I guess you're supposed to only line the plank to the edge of the line, even though it means the line may be visible. It's in the joint between the clinker laid planks, so I guess it wouldn't be noticeable anyway.
Below is the deck after adding the strips of planks.
As you can see, the deck planks ended up a little splotchy. As Chuck mentioned, it's a bit hard to paint these pieces that make up groups of planks, side by side, without the splotchiness.
The next step has me a little nervous, given the issue I had with the bulwarks height. Next, I have to add all the visible framing, of which there is quite a bit.
-
Hi Chuck,
Yeah, my multi-plank pieces look splotchier. I'm just living with it. What I found was that if you don't get it in one thin coating, you have to wait and let it dry over night before you go over it again. Basically, after it's all dried, you can then go back and apply a very thin wash on selected planks, so you get some kind of variation.
When it's all done, I think you'll find it looks better than you think it will.
- mtaylor, Canute, Chuck Seiler and 1 other
-
4
-
Hi Tim,
Thanks for the comments. I use a lot of reference materials including books (mostly in Japanese), websites, personal photos, plus the Higakikaisen kit that I built a few years ago, and have posted many of the sources here. Which reference info are you referring to?
Also, there are some very fine builds of similar ships here on MSW.
There's this scratch build by guraus.
And, there is this Higaki Kaisen by BRiddoch.
-
Though I'm still dancing around the issue of how I want to construct the sails on the kitamaebune, I realized there were other areas I could work on in the meantime, so moved forward in other areas.
It seemed to me that the next logical step would be to set up the main stay. Calling it a main stay seems a bit weird, as on a ship of this type, there is only one stay. It took me a while to figure out this is called the Hazuo in Japanese.
So, to recap or introduce some of the relevant terms for those who are interested:
Hazuo - Stay
Ho - Sail
Hobashira - Mast
Hogeta - Yard
Yaho - Fore Sail
Yahobashira - Fore Mast
Still trying to figure out the terms for some of the details, but these are the main ones regarding the masts and sails.
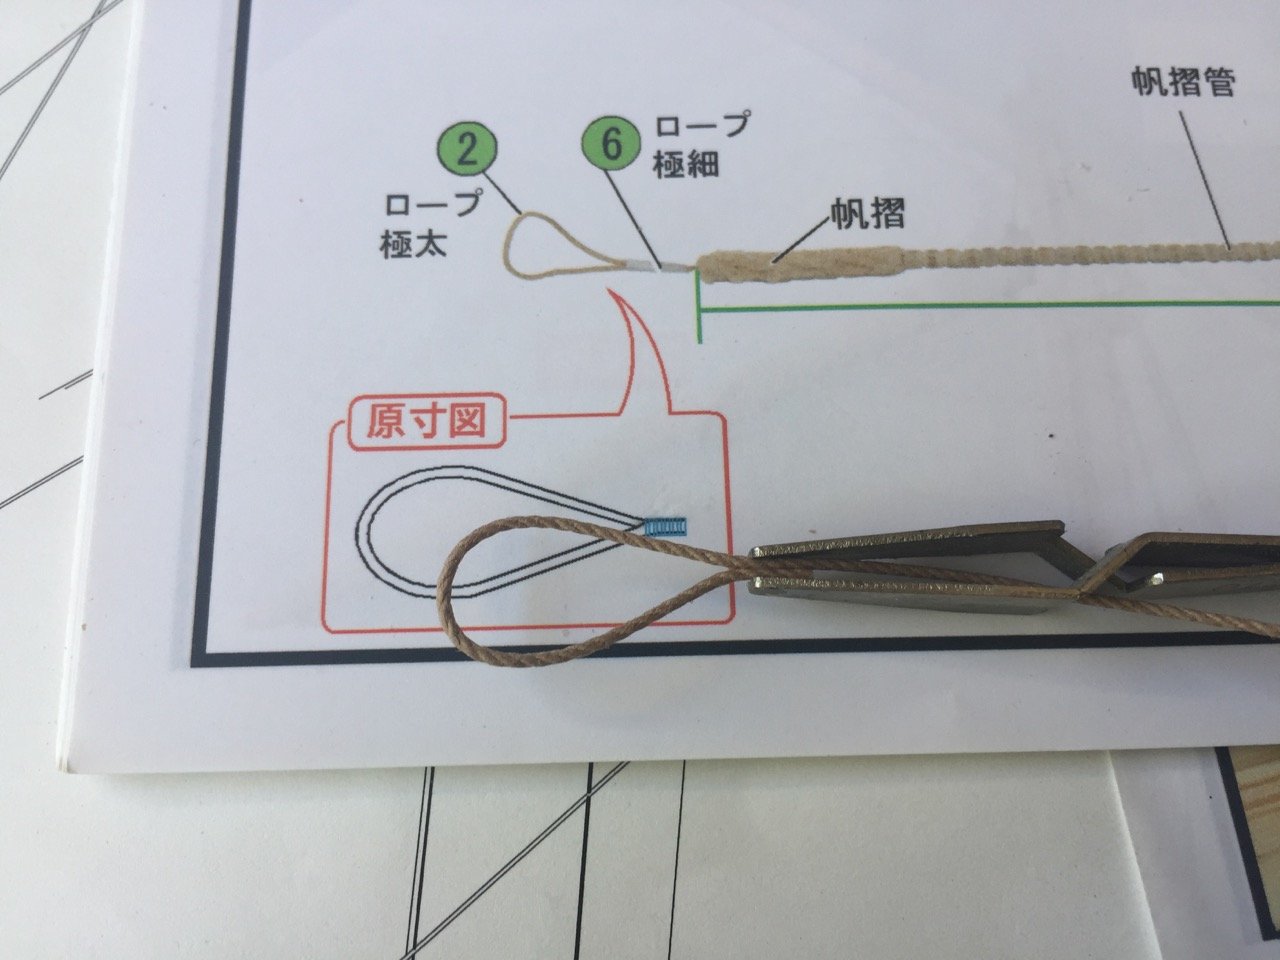
Anyway, dealing with the stay, or hazuo, requires making/rigging four different parts. Here's the section of the instructions that deal with this.
.thumb.jpg.33ca1c38a76264882e6607c5bdd0bd8b.jpg)
Writing about the stay is a bit difficult, as I don't know what I would call these parts in english. Right now, I'm thinking they might be: Stay, stay pendant, stay laniard or tackle, and stay collar. If you have any suggestions for the terms, I'd be happy to hear them.
I don't know the Japanese terms for all of these items. They would be pretty specific terms, and the only one I know for sure is the one I mention above for the stay – hazuo.
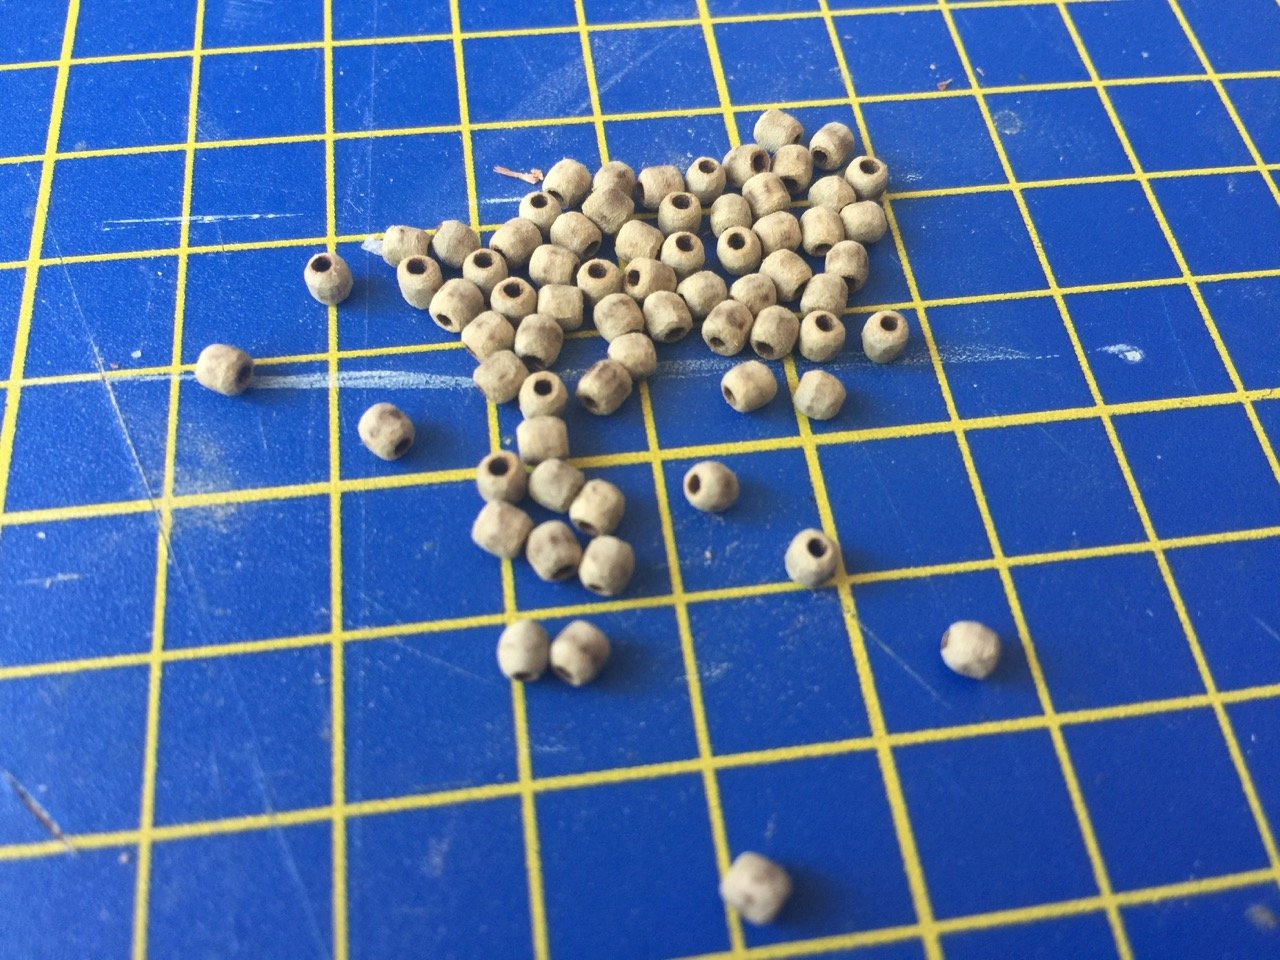
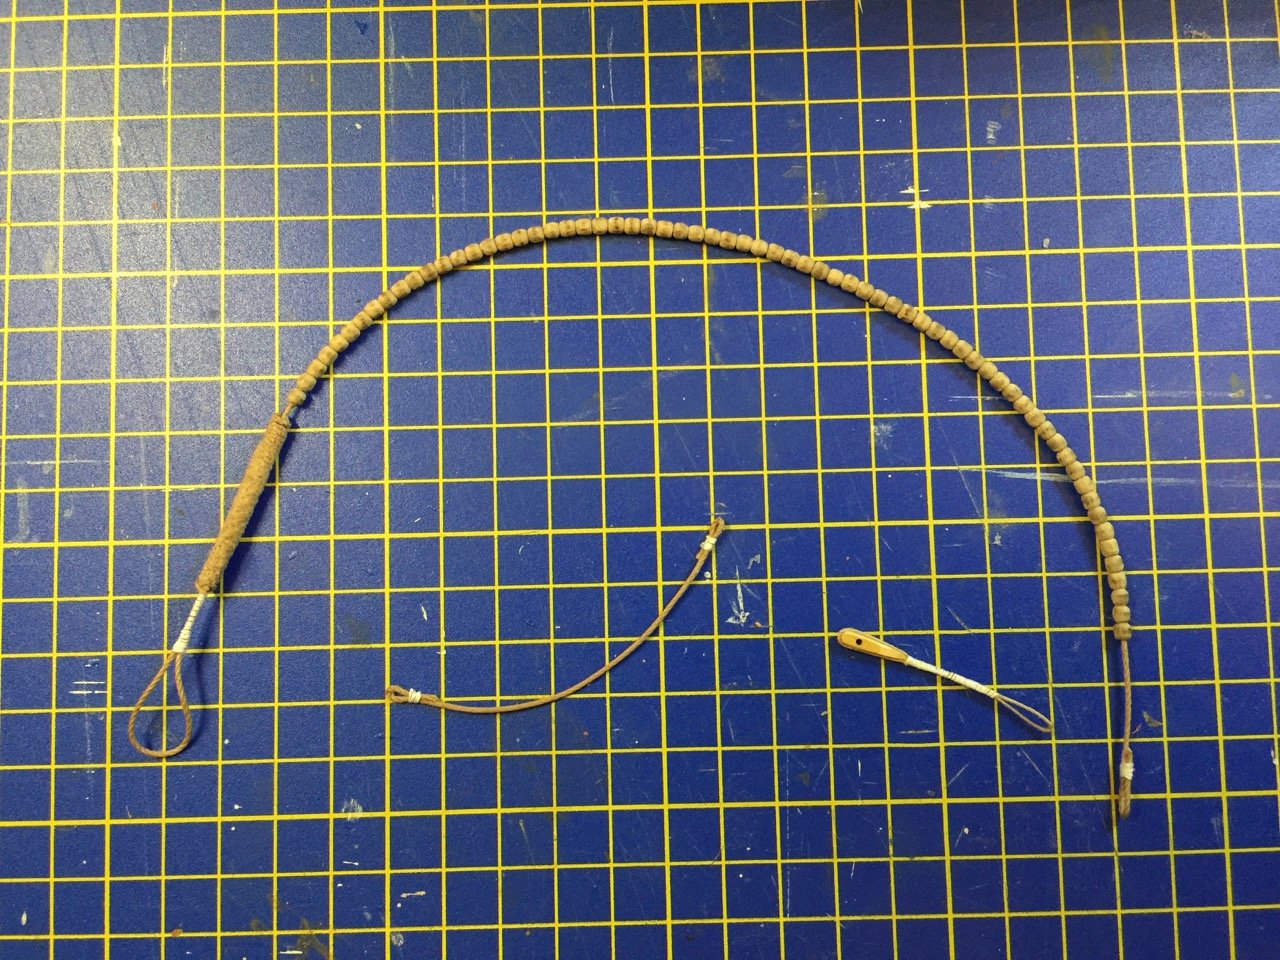
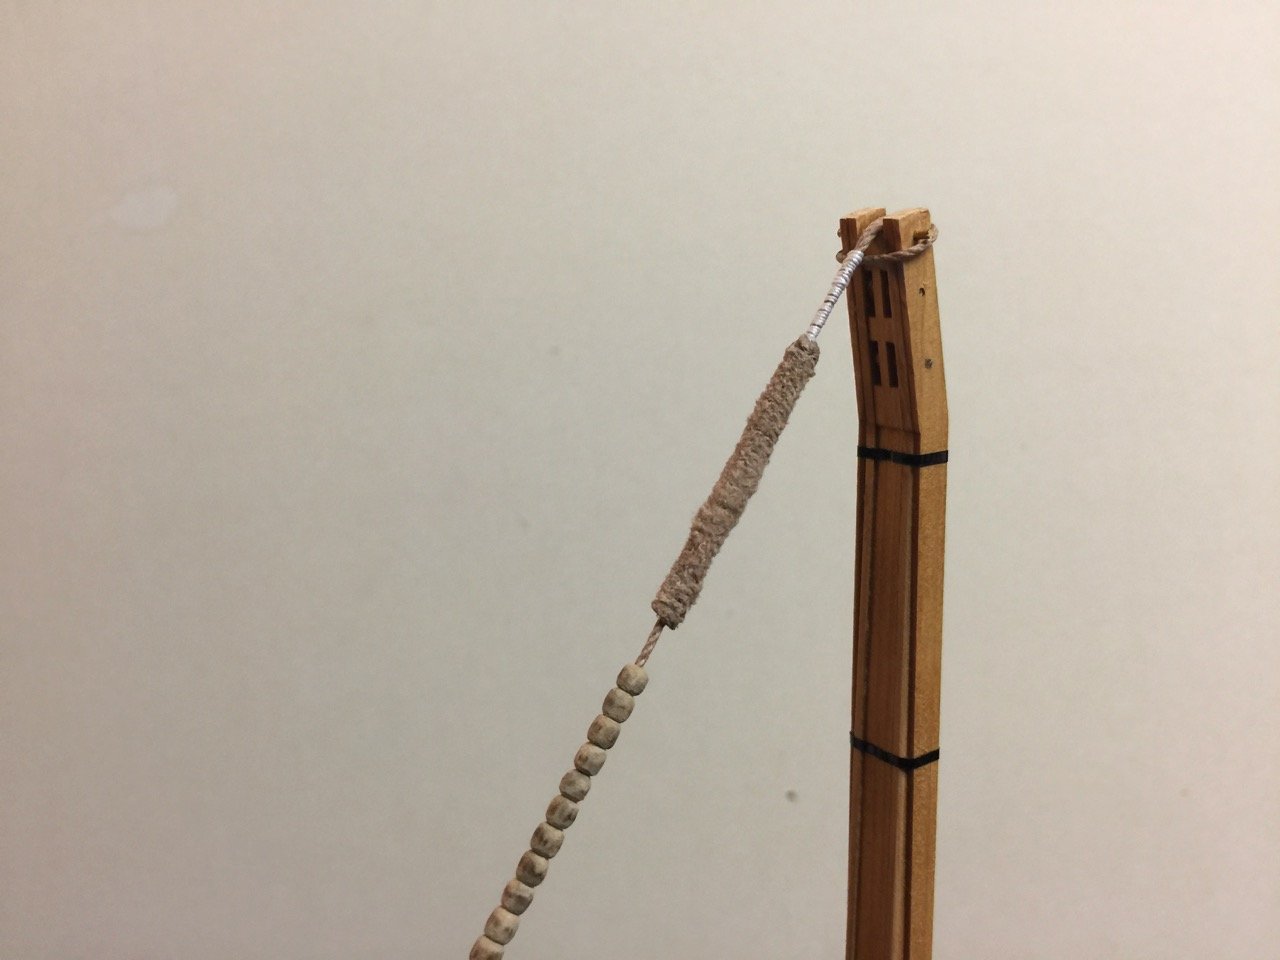
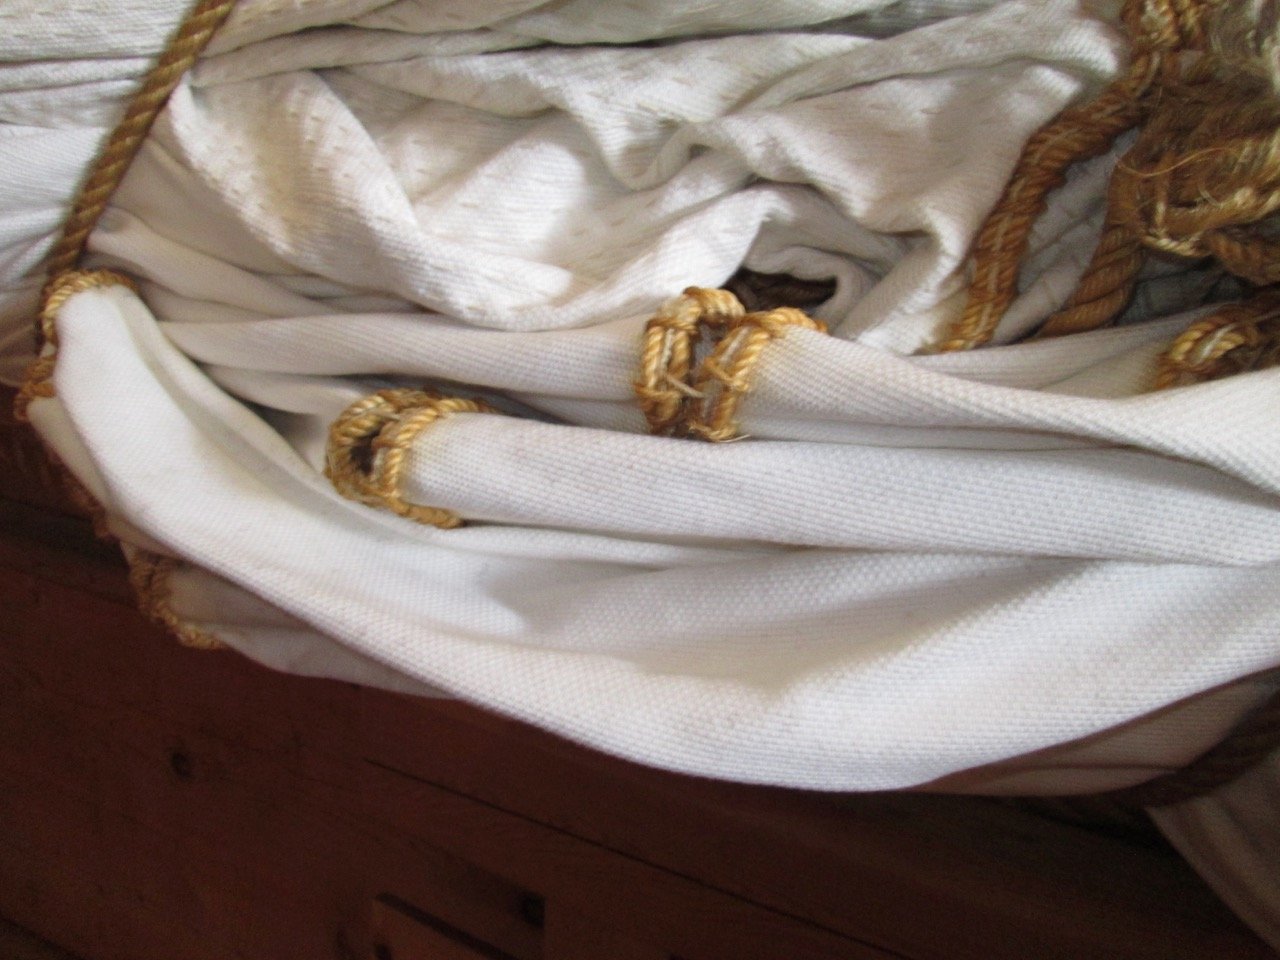
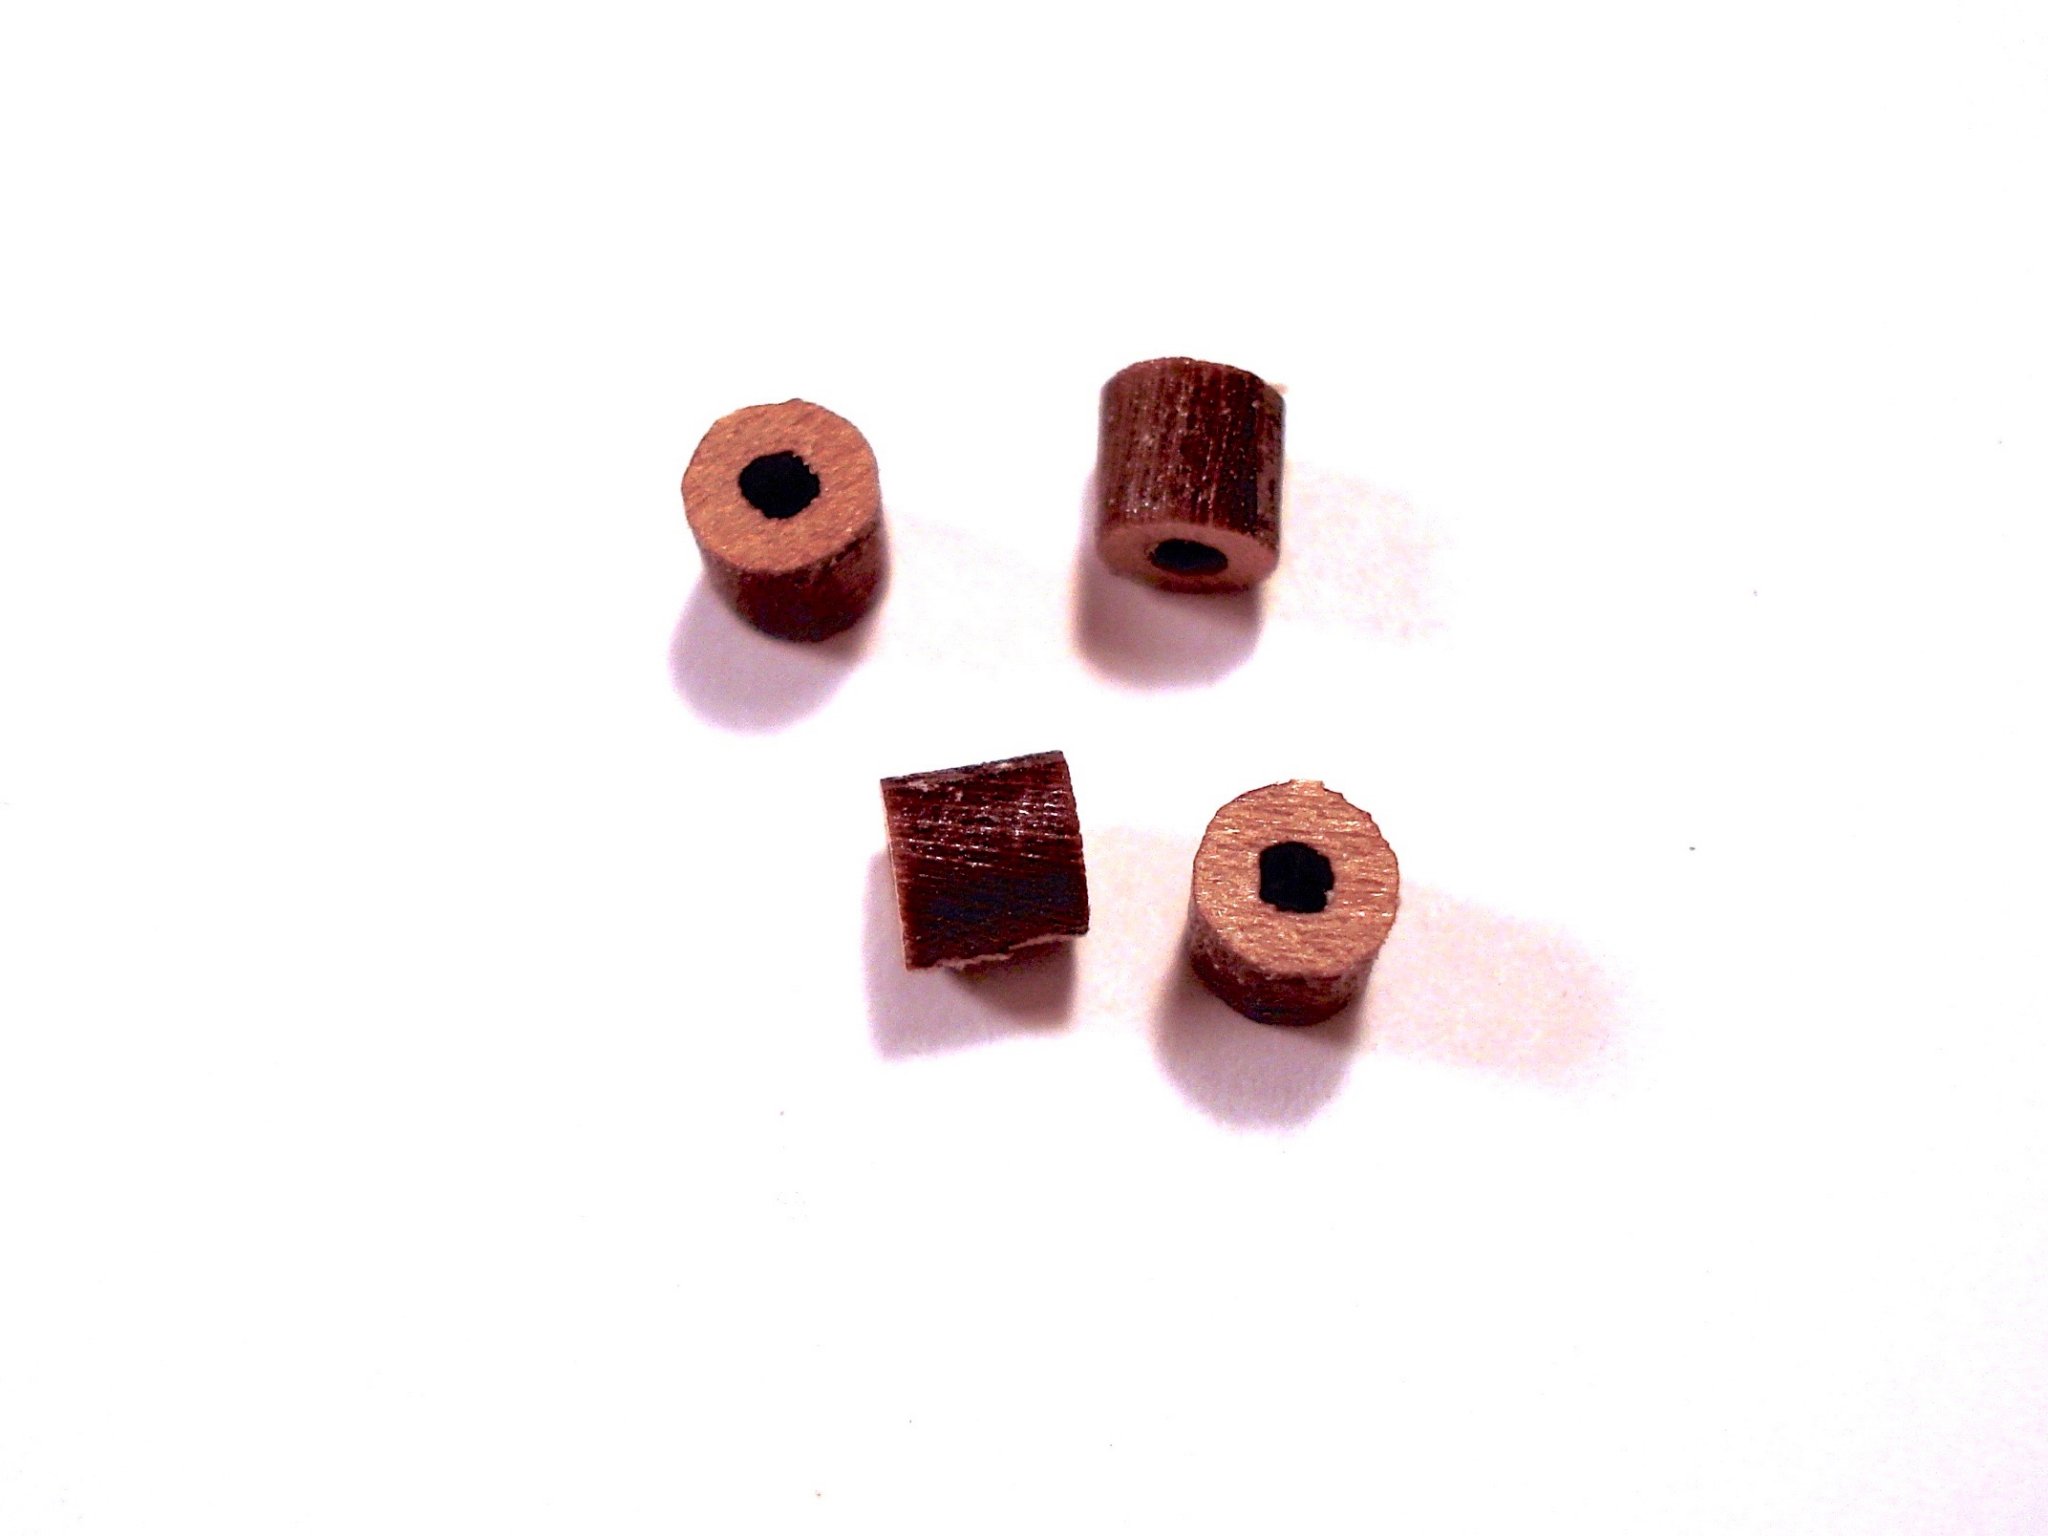
The stay itself is fairly easy. It's just a heavy line with a loop at each end. On it are threaded the baggy wrinkle and string of wooden beads. I presume these beads help keep the stay from vibrating in the wind. To some extent, they probably also prevent chaffing. But, that's what the baggy wrinkle at the top end of the stay is for. So, the wooden beads must serve some other purpose.
Woody Joe provides some instruction for making the baggy wrinkle, which they refer to as the hozure (ho-zu-ray). Wrapping heavy line around a piece of provided brass wire. the line is glued up with white glue. When the glue is dry, a hobby knife is used to make cuts across the surface of the rope. A piece of sandpaper is then used to fray the surface of the rope.
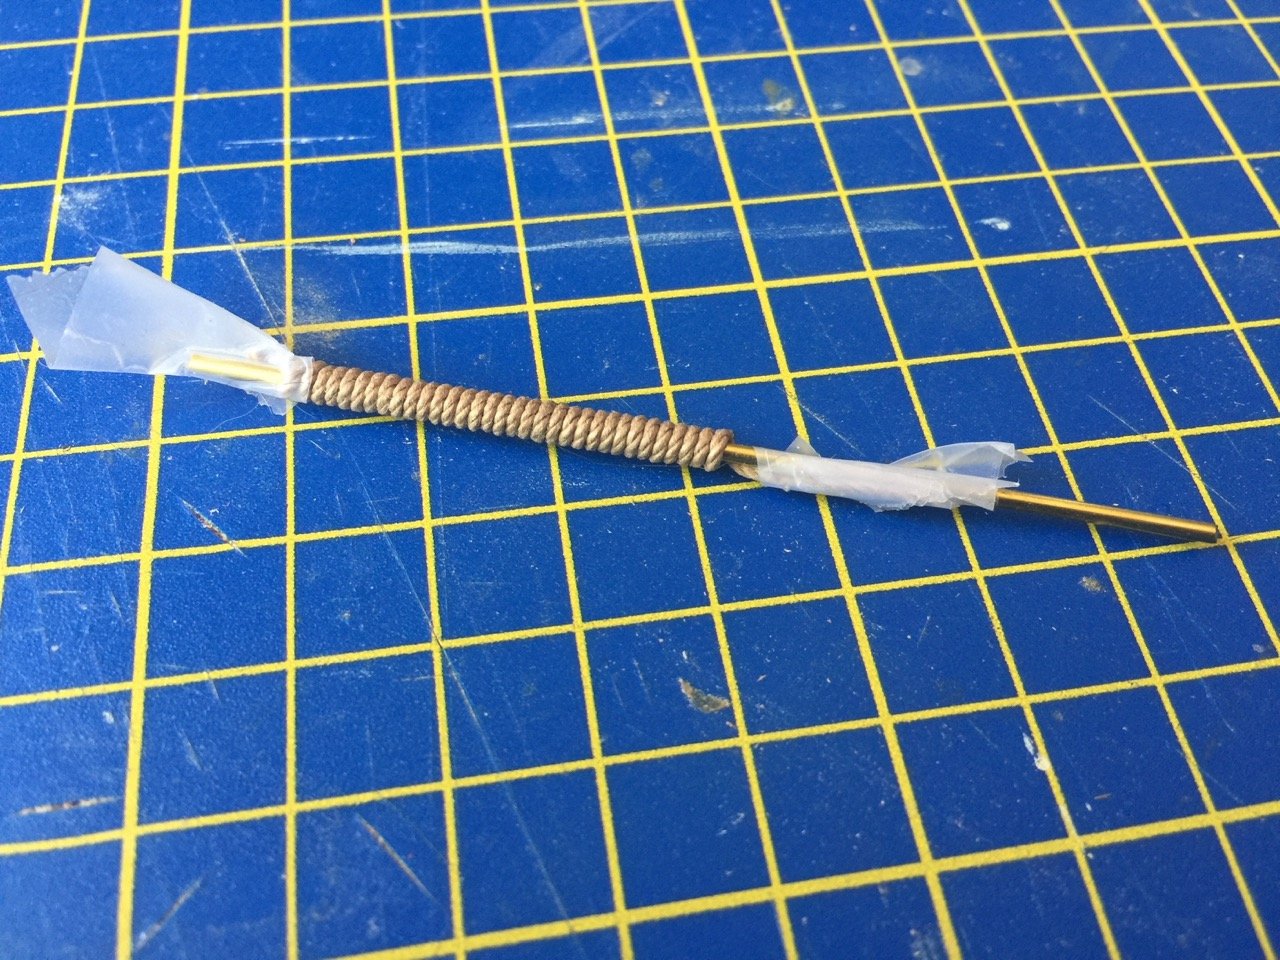
It took me a while to get this looking something close to what I expected the baggy wrinkle to look like. You can see the final result in a later photo of the completed stay.
Next are the beads. These come as laser-cut... wheels, that you have to round off. The technique given is to mount them onto a pointed stick and sand down the edges. This actually worked pretty well for me, though it might be possible to use one of those Model Expo Block Busters.
For photos, I had to cheat a bit, as I didn't take any "before" photos of the beads, so I stole a couple from my past build of the similar model, the Higaki kaisen...

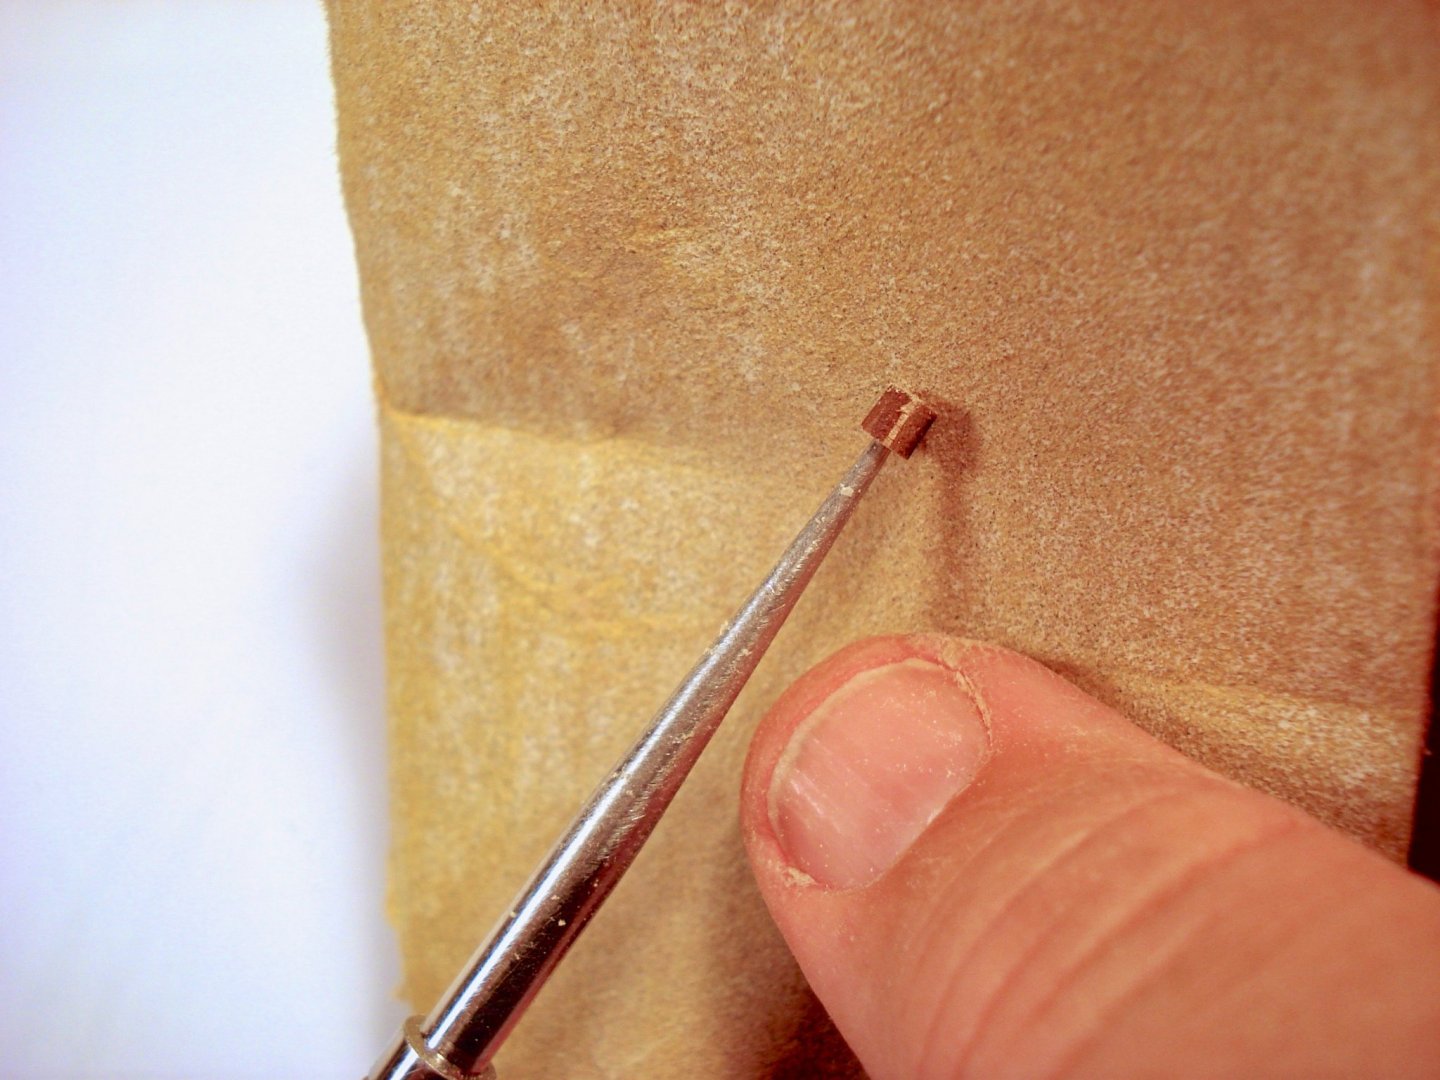
But, the results were about the same in the end.
I assembled the stay, but didn't take any photos of it by itself, so here are the photos for all the stay construction.
Meanwhile, I also rigged the line that runs across the top deck and is used for securing the sheets of the main sail.
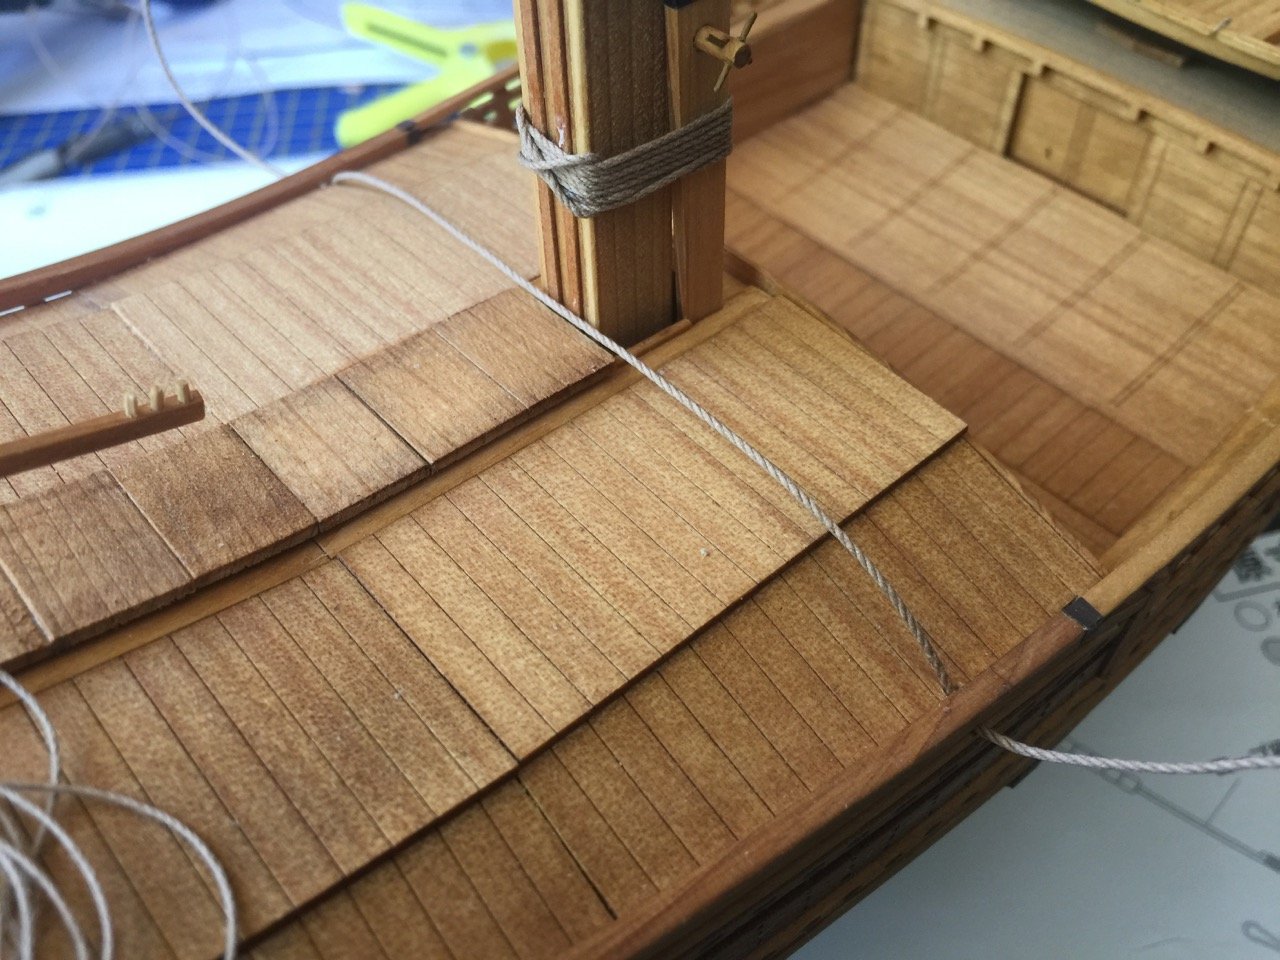

And, finally, the stay is rigged...
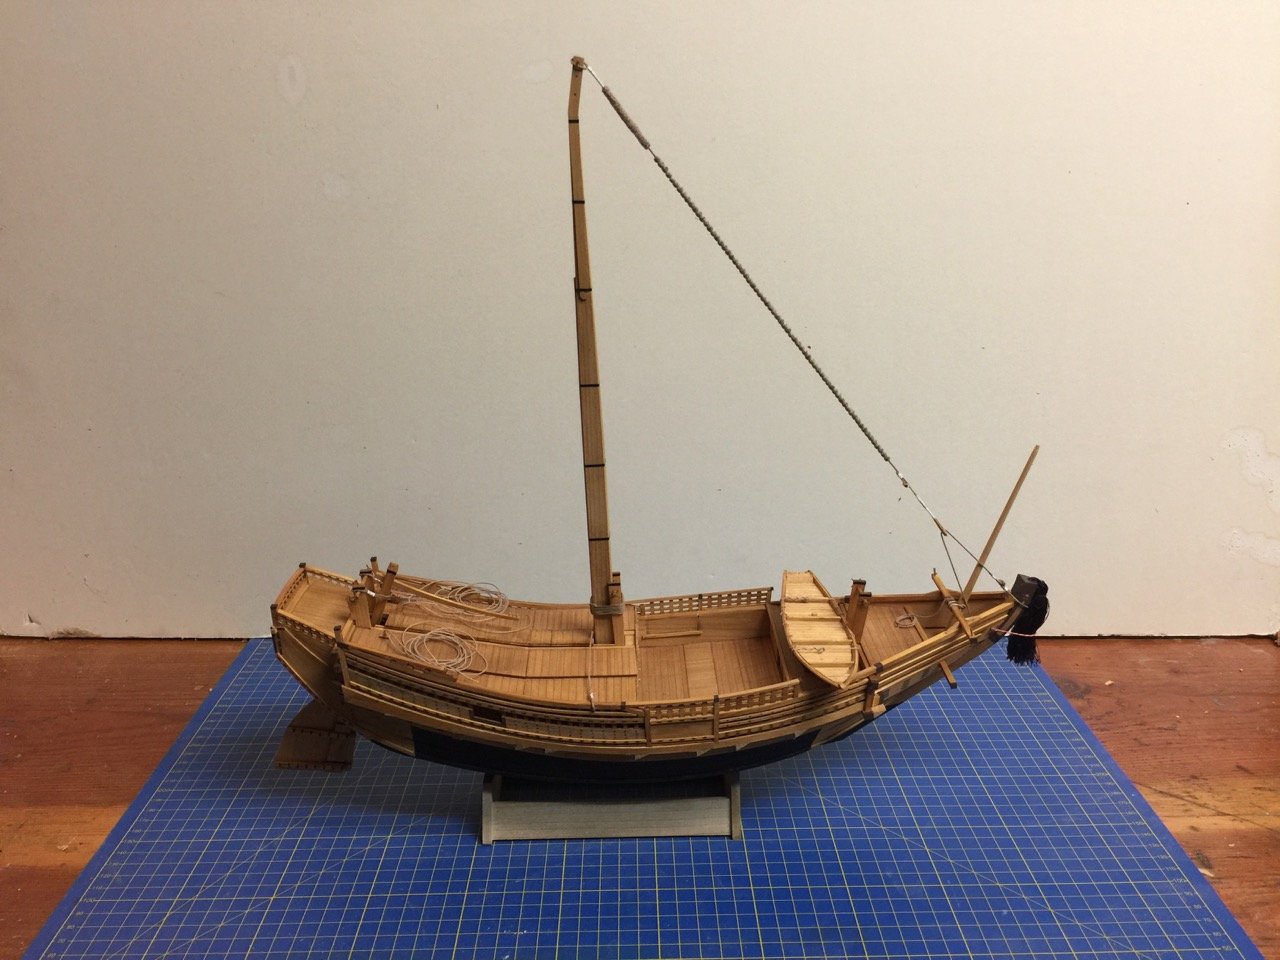
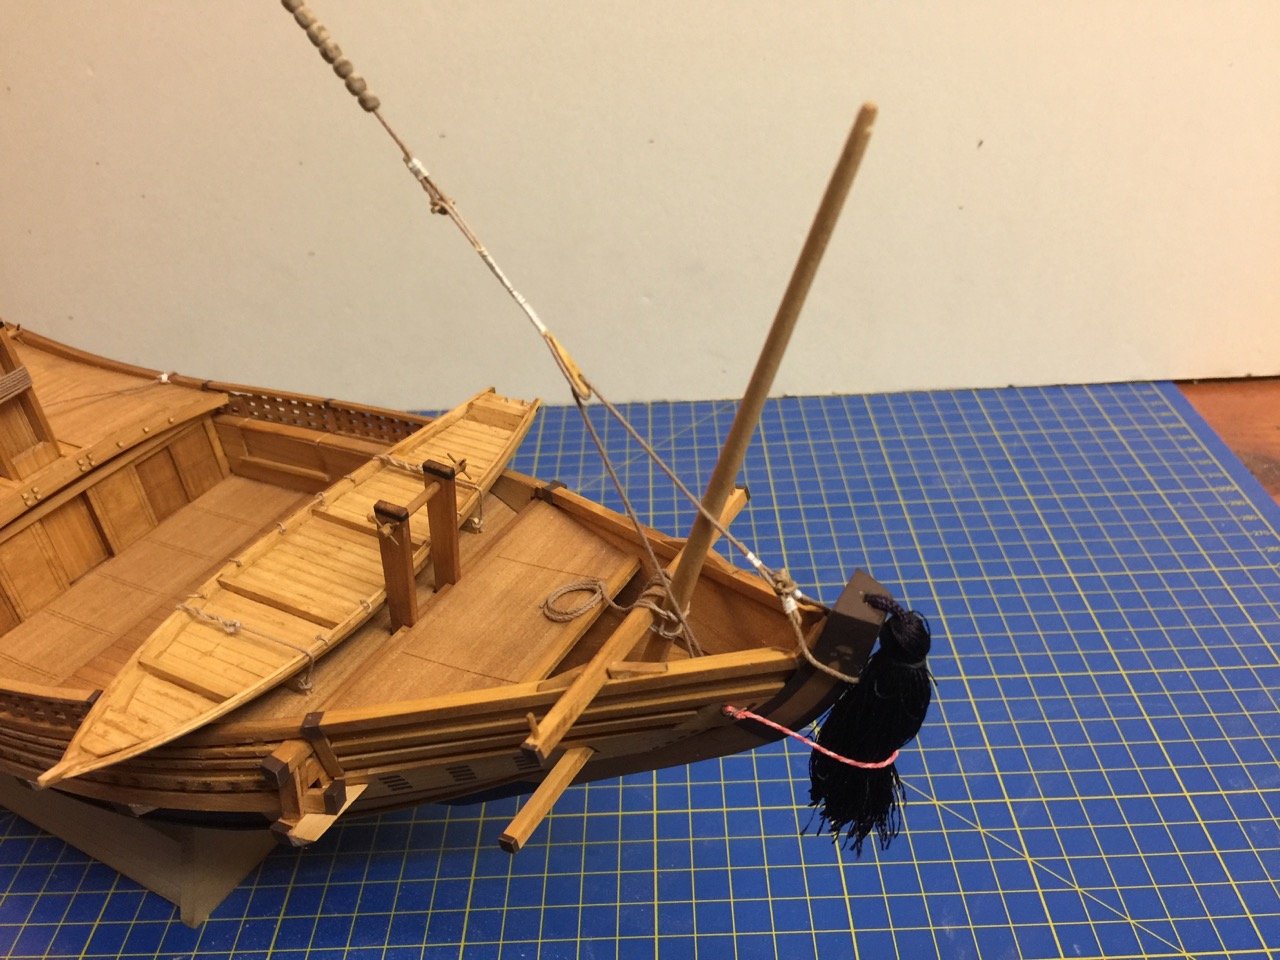
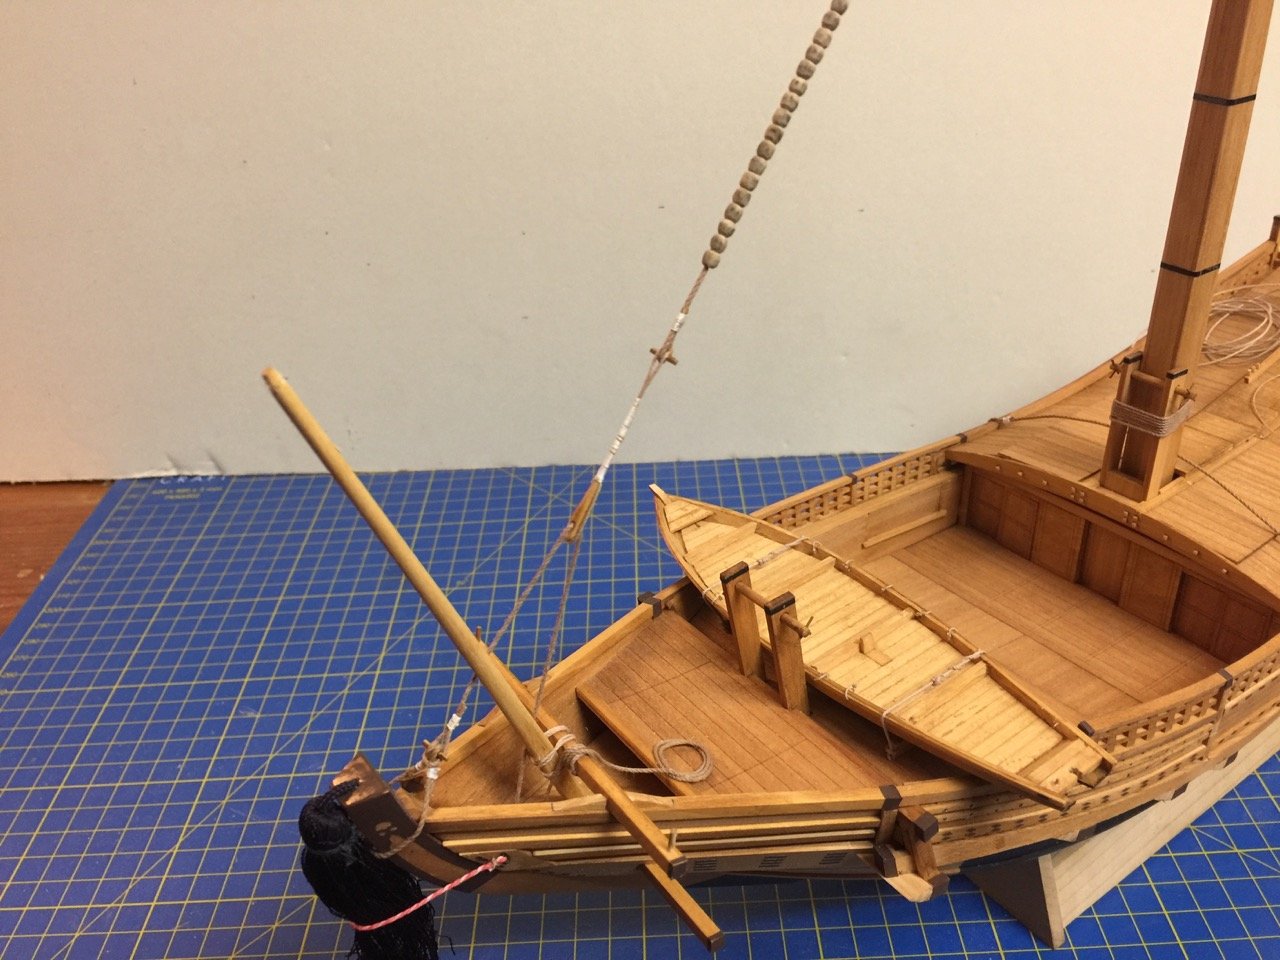
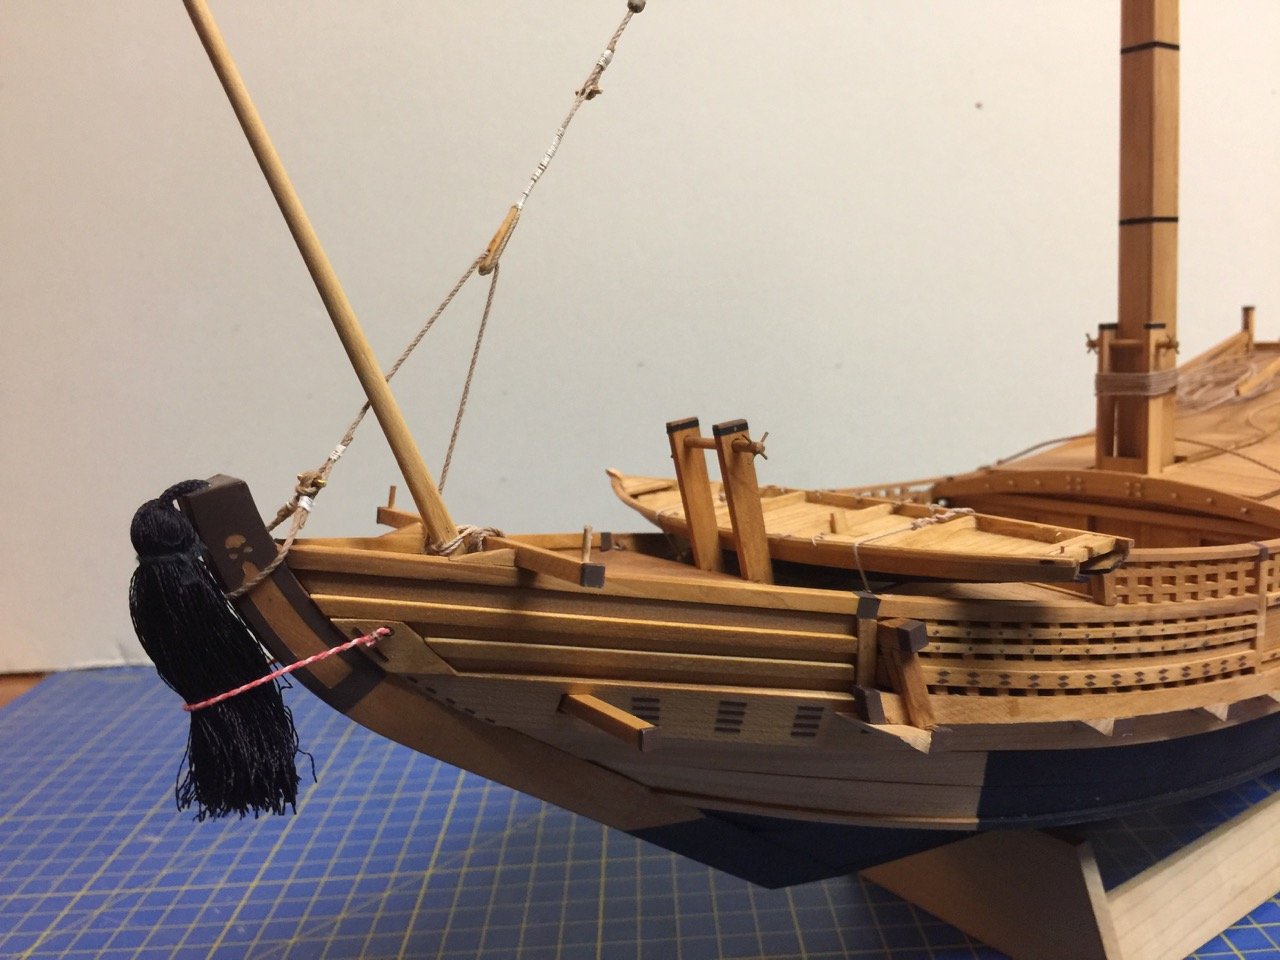
I didn't like the way all the tackle was bunching up around that fore mast, so I shortened the stay by about 1/2" and also shortened the collar by about 1/4". The stay tackle is easily adjusted to make up for the change.
I've seen photos, possibly of models, that show the fore mast lashed to the stay. I may do this for additional interesting detail. It should be noted that the fore mast was removable, as was a second larger mast that often appears behind it. But, for that matter, the main mast is removable as well, and is often lowered when the ship is at anchor for a long period of time, lowering the center of gravity of the ship, and making it more stable.
Now, the one issue with the stay being rigged, is that this is not the order of the build in the instructions. And, from my experience with my Higaki kaisen build, I know that rigging the main yard might be a little tricky with the stay rigged, as the halliards are fixed into place and can not be adjusted. So, when they are tied to the yard, the yard has to be in place, high up on the mast. That can make tying the ends of the halliards a bit tricky with the stay in the way. However, if worse comes to worse, I can loosen the stay tackle and temporarily remove the stay. Also, the pins that hold the different parts together have not been glued into place. So, they can be removed, if necessary.
There are still a few things I can work on before I absolutely have to have the sail ready, but we're getting down to the wire!
-
Hello Alexandru,
Thank you for updating your blog. I'd forgotten all about this lovely project.
You've done a beautiful job with the model and you've given me quite a lot to think about here regarding the sails. I have been working on my own model based on a Wood Joe kit. Same basic type of ship, which is generally referred to interchangeably as a bezaisen or sengokubune.
I am particularly impressed that you were able to do so well using the Paris drawings, since they don't really explain how the planks fit the structure.
A wonderful build. I hope I'll be taking on a similar scratch build in the near future. I will certainly come back here for inspiration.
-
No real progress to post on the kitamaebune. I'm still struggling with ways to make the sails in a realistic fashion. If I can't make something work well, I can always use the kit provided main sail and leave the forward mast, called the yahobashira, bare poled with just the halliard rigged. But, I'm still hopeful.
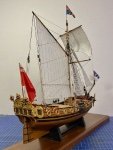
In the meantime, I thought I'd post this update on a boat that I posted pics for back in February called a Honryousen (hone-reo-sen). The model was commission by Douglas Brooks as a gift for generous donors who helped fund his project in Japan last Fall. The boat was one of two that he and his crew built, in this case under the guidance of Japanese boat builder Mr. Nakaichi Nakagawa.
The model was completed and sent to its new owner up in Washington state, after which I received a very nice phone call thanking me for the model. I also was given a photo of the model where it is being proudly display, so I thought I'd share that here.
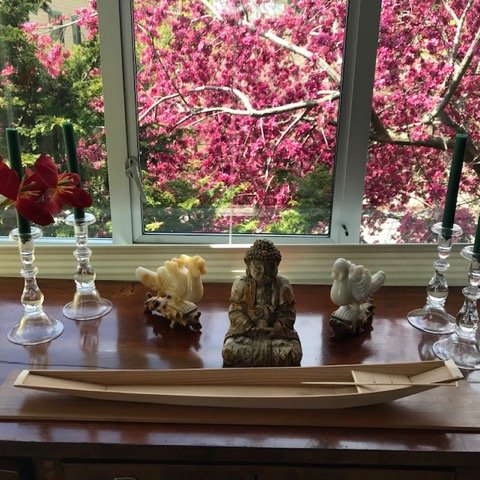
Nice to have some real closure on that project.
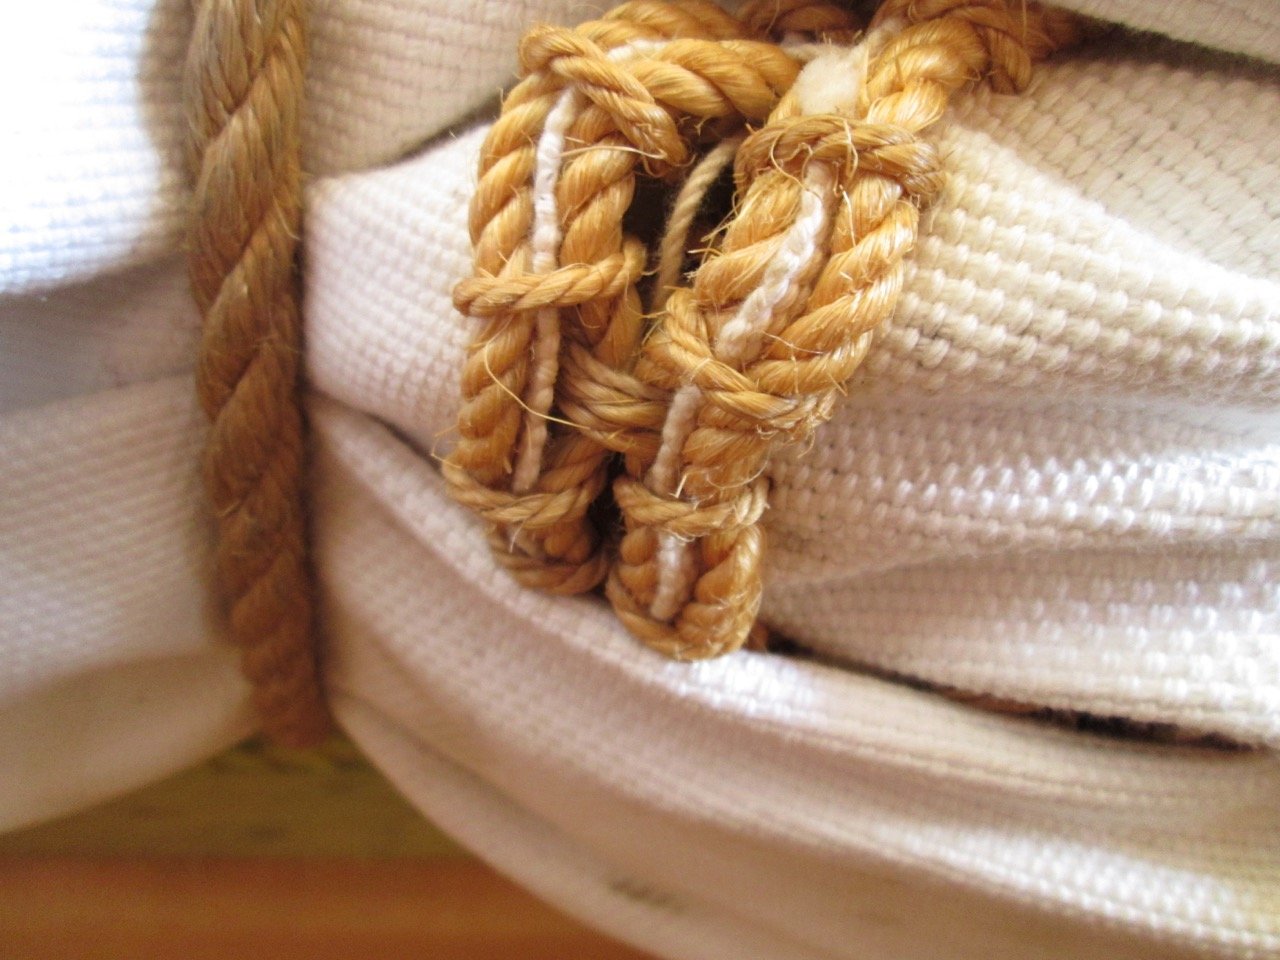
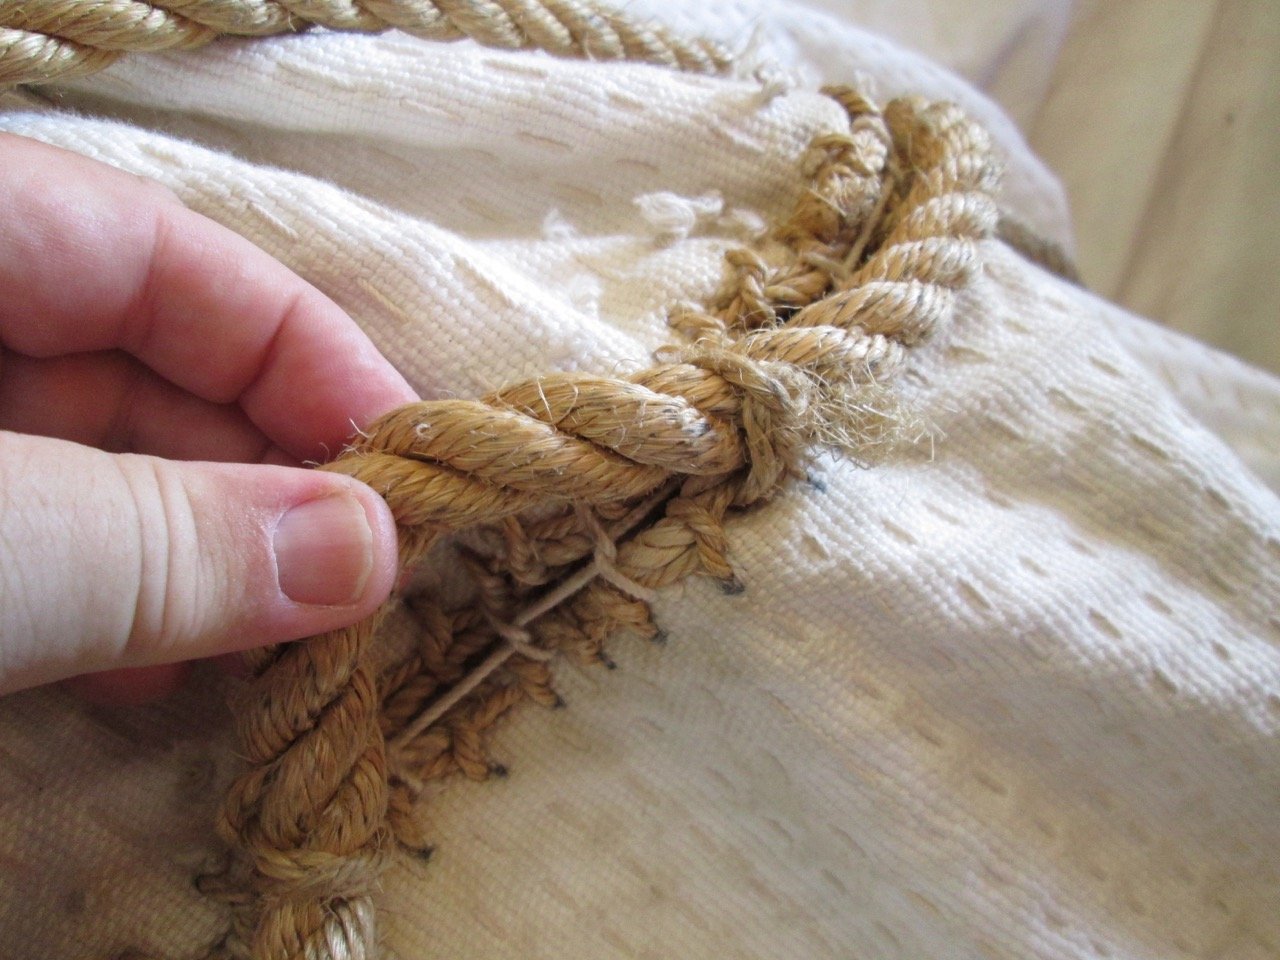
By the way, I found I have a few good close-up photos of the sails of the Hakusan-maru, which is the kitamaebune replica ship on Sado island. I'm hoping they will help me with my sail development, but they're more likely to complicate things further – a little knowledge can be a dangerous thing...

- JpR62, Ekis, GrandpaPhil and 6 others
-
9
-
Hi Chuck,
Another thing. I found that with the paper and acrylics in particular, if you brush it too much, it will look splotchy. I had the same problem. If you just brush the plank in one stroke, or minimum of strokes, it will look much more even. When painting the cargo deck, that's really hard to do after it's installed, which is why I don't like the look of mine. Good thing it's all pretty well hidden inside.
After that, I was more careful with the painting and always painted in the direction of the imagined wood grain. I'm happier with the results now.
- tkay11, Canute, Ryland Craze and 3 others
-
6
-
Hi Tony,
I've only had to use CA to stiffen the cardboard in a couple places on this model. So, I haven't had to worry about CA glue economy. On this model, my main cement has actually been contact cement. Which works fine of the CA'd parts.
For my HMS Alert model that I built several years ago, I used wood glue for much of it.
I'm no paper model expert, so I can't say which one is absolutely best. But, I've been having good luck using the contact cement so far. You just need it fresh, so it's doesn't get stringy. Plus, rather than using the brush that's attached to the lid, in most cases I just use a thin scrap of wood as an applicator.
Chuck,
I've been sidetracked trying to get some other work done for the past couple weeks, but I think I'll get back to it this weekend. On applying the color mix, the number of coats I used depended on how much I thinned the paint, and if I was happy with the coloring.
Once I was confident with the color mix and technique, I painted the whole sheet of planks at one time. After it dried for 24 hours, I did go over much of it a second time with a thin wash. Also, I chose random planks to either skip or do again, to get a little color variation between some planks.
I say, go with whatever looks better. Darker is fine. In fact, one question I've seen asked about the color scheme is "shouldn't it be darker?"
- mtaylor, Canute, Ryland Craze and 3 others
-
6
-
Marc, congratulations on the completion of your first wooden ship model!
She looks great, you should be proud. you did a nice job tying those ratlines. How did you enjoy that part?
I like this Woody Joe kit – I have one started, waiting for me to get back to it. A lot of nice deck details and such.
Well done!
-
Actually, I think the default language may be english, as I've never seen the site in another language. And, there is a currency selector now, so you can see the prices in dollars or euros, etc. Personally, I like seeing the prices in yen, so I can feel that much better when I convert the cost into dollars.
")
Yeah, Amazon. When I first found Woody Joe kits, Amazon sellers were trying to charge 3 times the cost of the kits because they felt they could get away with it. I contact Woody Joe to help find a seller in Japan, which is how I found Zootoyz. Took a while for the Amazon sellers to adjust downwards, but they eventually did. Prices aren't as bad as they used to be, but Morikawa-san at Zootoyz is a simple family man who runs the shop and provides fair prices and very good service. He is VERY conscientious about it!
- Canute, FriedClams, RichardG and 1 other
-
4
-
How about a super tiny paint-by-numbers frieze?
- JeffT, Duanelaker, mtaylor and 2 others
-
5
-
-
Chuck, I don't see this happening any time soon. Issues with non-english instructions and also Ages of Sail being a distributor/dealer and Woody Joe being a Japanese company whose operation doesn't fit with distributor operations. A bit like why Ages of Sail probably can't sell Vanguard Models kits or Syren Ship Model Company stuff. But, zootoyz.jp offers great service and very fast shipping. So, I think they're the best way to go anyway.
Thanks for the kind words Captain Hook. I'll do my best. It's a bit tough trying to make them with special detail. It would be easiest to simply sew the seams on the kit provided sail. But, then I the bow sail would look a little out of place as it wouldn't match the main sail, unless I just have the bow mast, which no sail attached.
I did sew all the seams, but now have to simulate the separation of the four main sail panels. I'm hoping it will look natural. If not, then I have to scrap the sail and come up with a different plan.
- Chuck Seiler, mtaylor and Canute
-
3
.jpg.6f309c3f101192a721592f64d94ff1e1.jpg)

Blocks for Endeavor J Class
in Masting, rigging and sails
Posted
Hi Jeff,
The Amati kit has gone through various changes, but I'm not aware of it being out of production. I do a lot of work with the Amati importer Ages of Sail, and it's still being sold, though now with tools. I think the same kit used to come with a resin hull, and that's no longer available, if that's what you mean.
As for blocks, Amati just uses standard Amati wooden blocks. Might not be very accurate for a 1934 boat, but wood is pretty. The kit should come with a parts list in the instructions that identifies the needed blocks. If you want more accuracy, I think the metal blocks that BlueJacket sells might be more correct, though they have to be painted.
If you can't find the parts list, I can see if someone in the Ages of Sail shop can dig up the info.