
SGraham
-
Posts
538 -
Joined
-
Last visited
Content Type
Profiles
Forums
Gallery
Events
Posts posted by SGraham
-
-
Thanks j and Grandpa Phil!
Chris, that is indeed lovely beach-front property in the pic! We were paddling in Monterey Bay. That's Cannery Row and the Monterey Aquarium of the Pacific in the background. Great day last spring with harbor seals and sea otters everywhere.
Roger, I'm a big fan of the old folbots. Ours is an early seventies folding 17 1/2-foot-long Super. How cool that you built one! You live in some prime paddling country, I would imagine.
-
Hi there J and friends! I went and got married, can you believe it? She's a gal I went to high school with just after Noah's Flood. So, there's a new admiral around the shipyard now. The photo I have appended shows me taking her for a spin in the admiral's barge along with the Captain of the Fleet.

We're approaching the end of a year-long remodel of our home. The last thing to do will be to set the shop back up. It's been used as a storage locker since last April. I hope to be back to working on the waterboat soon.
Steve
- GrandpaPhil, G.L., ccoyle and 2 others
-
 5
5
-
On 3/4/2020 at 2:20 PM, JesseLee said:
I have been looking at pictures of waving flags and I also fly flags at my house. I've been studying the different ways flags flap and fold as they fly in different wind strengths and forming the flags.
Jesse, what an accomplishment! Your build is literally breathtaking! This quote of yours sums up why I love the art of ship modeling. It makes us look at and notice things with new eyes. That's a gift to us from the art. And you succeeded in passing it along.
Congratulations on your finished Syren, and thanks for sharing!
Steve
-
-
-
Sam, those are some pretty sisters!
Steve
- mtaylor, Old Collingwood, lmagna and 3 others
-
6
-
-
-
The shrouds look so trim and good, Sam. I'm glad to hear they found what the problem was. Why is it that whenever work slows down, everything goes off half-cocked?
Steve
- cog, popeye the sailor, src and 2 others
-
5
-
-
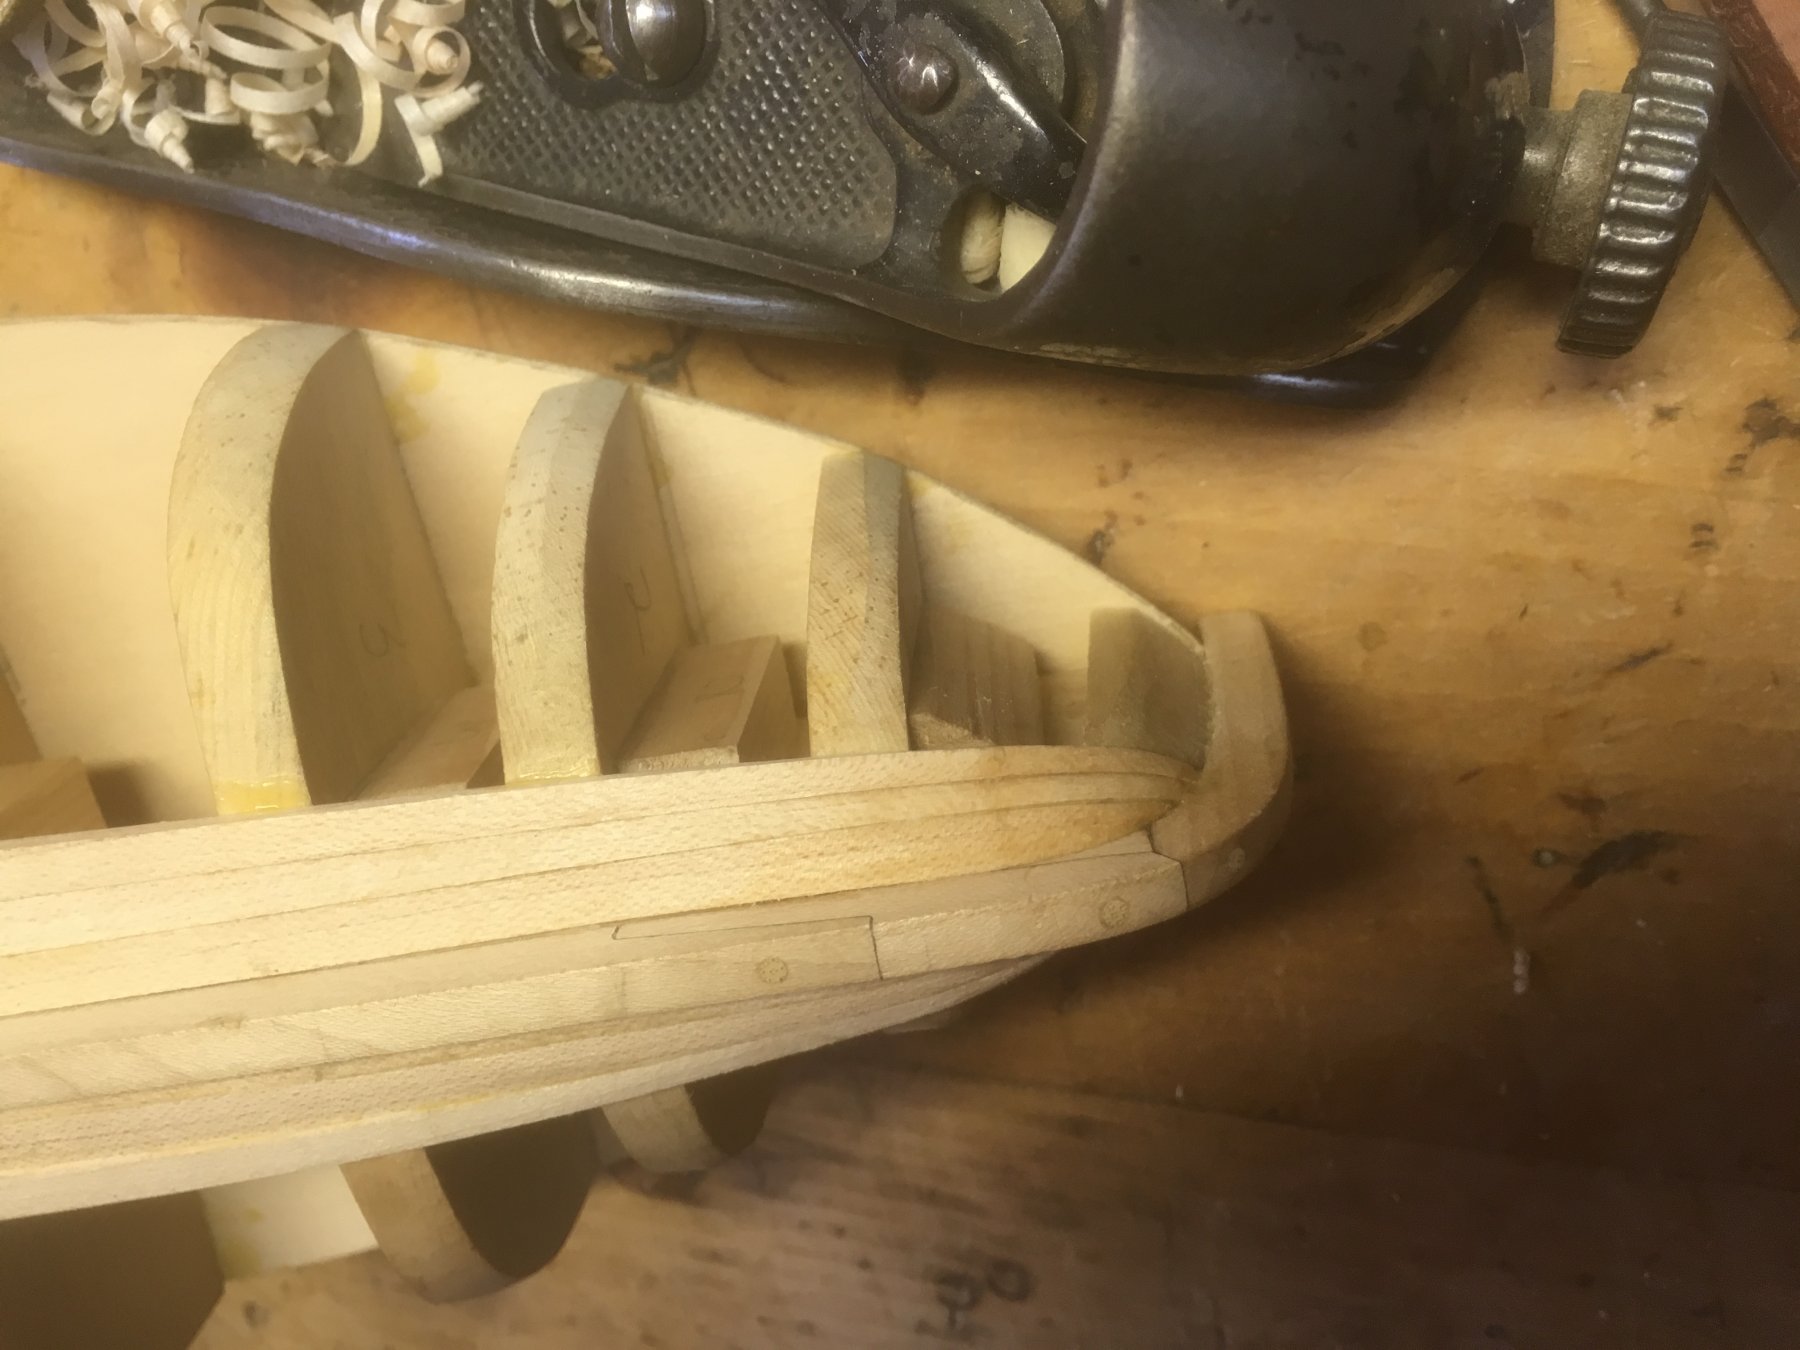
I got a little bit more work done on the waterboat. I covered the aft part of the false keel (not sure what it's called) with some thin maple...
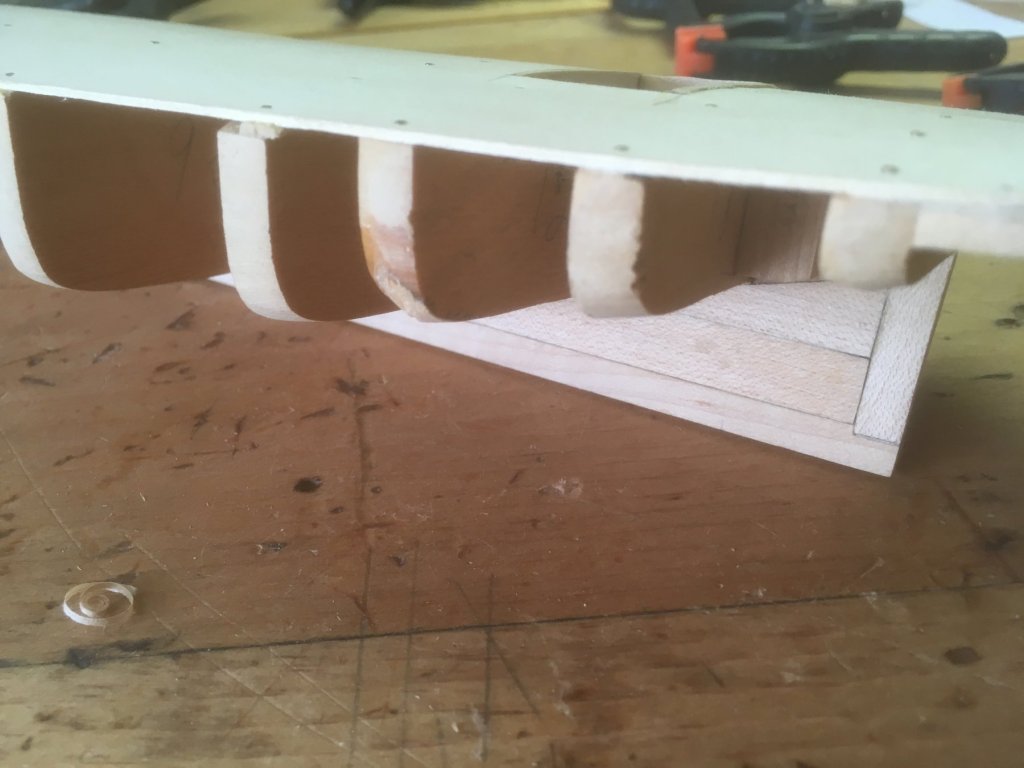
...ran up a bunch of maple planking...
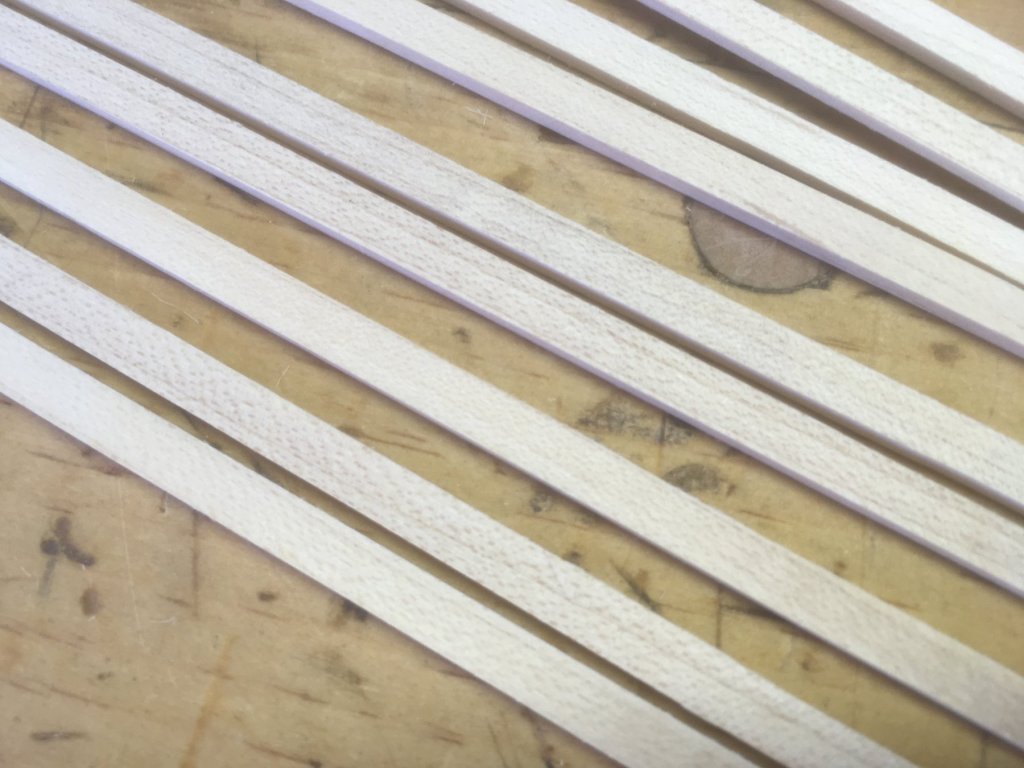
...got out the bending iron I use on instrument sides...

...and started shaping and bending planks. Here are the first three on each side installed.


The planks are not completely flush with each other, but I left them pretty thick so there should be plenty of material available to get them nice and fair. At least that's the plan.
The bending iron is kind of overkill. It bends the plank ends almost instantly, but it's pretty big and bulky, definitely made for bending bigger stock. I'm wondering what other people use for bending planks.
Steve
- G.L., mcpwilk, Tigersteve and 10 others
-
13
-
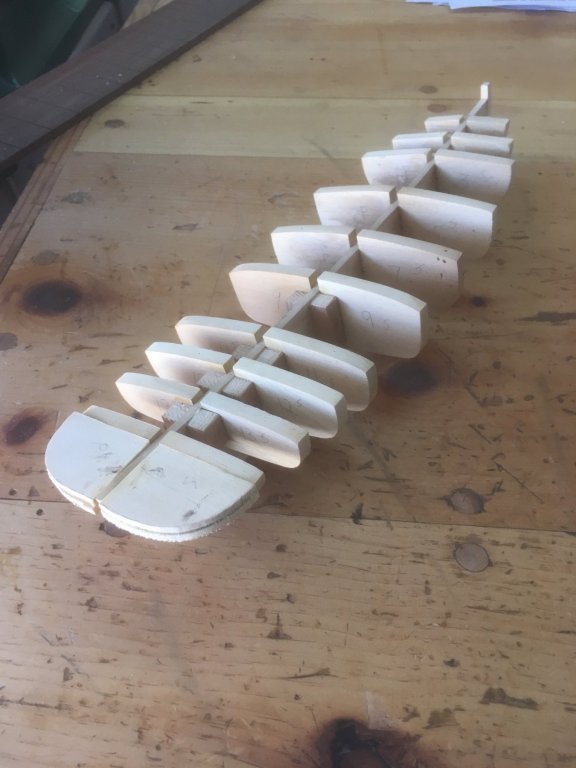
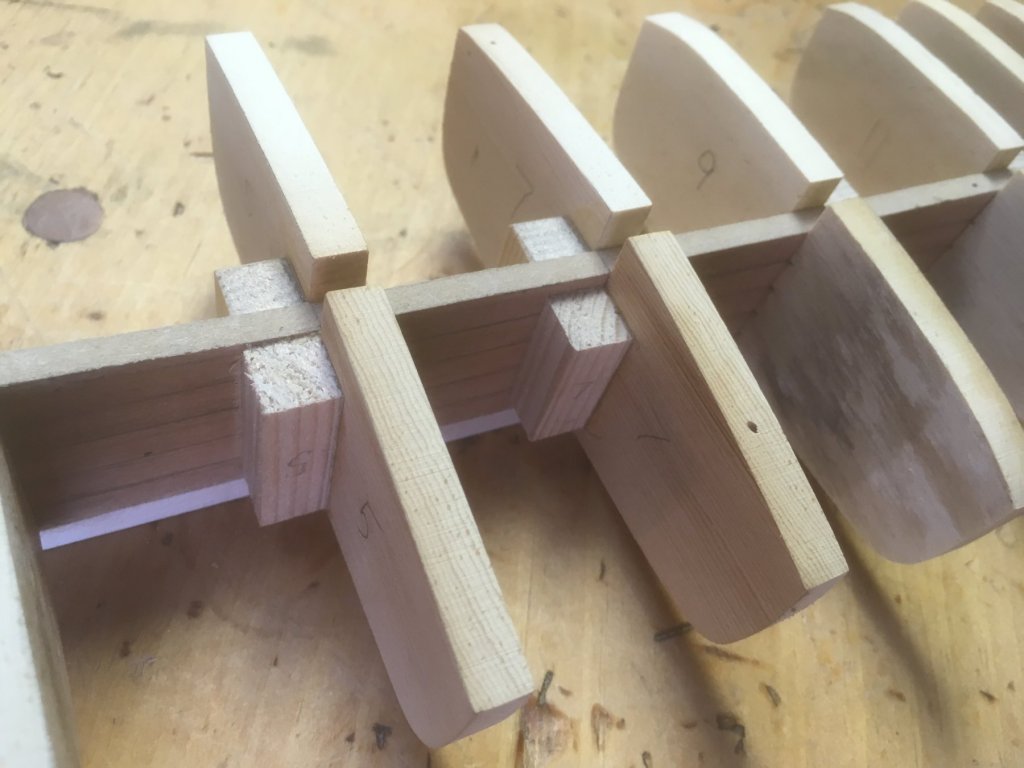
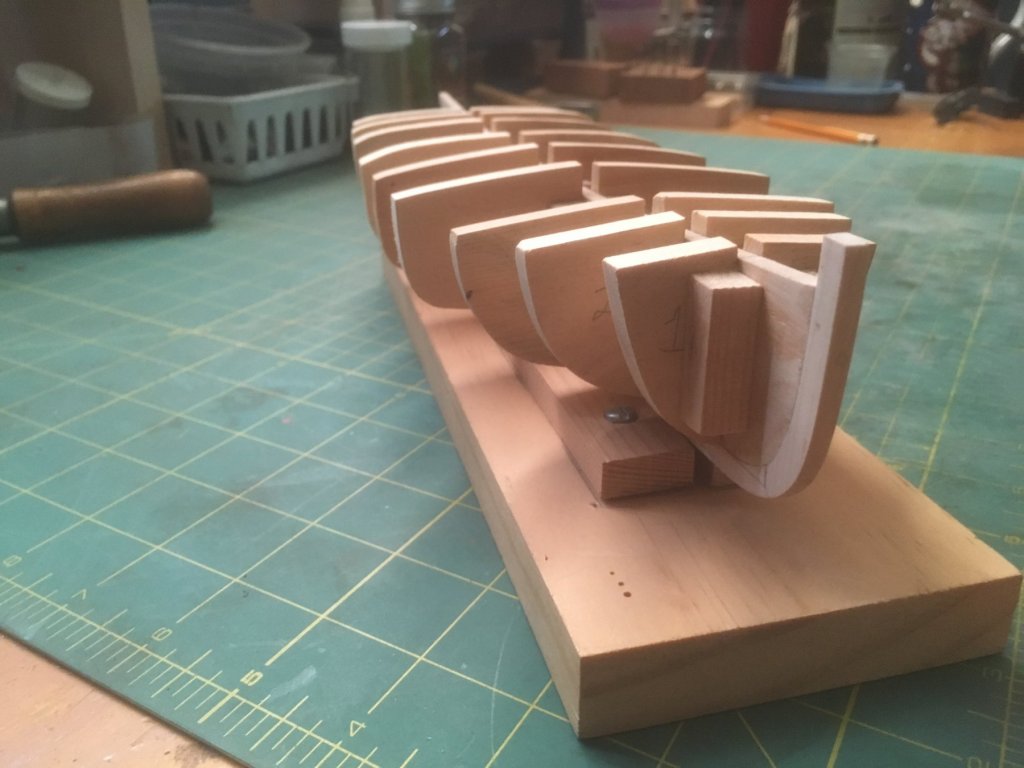
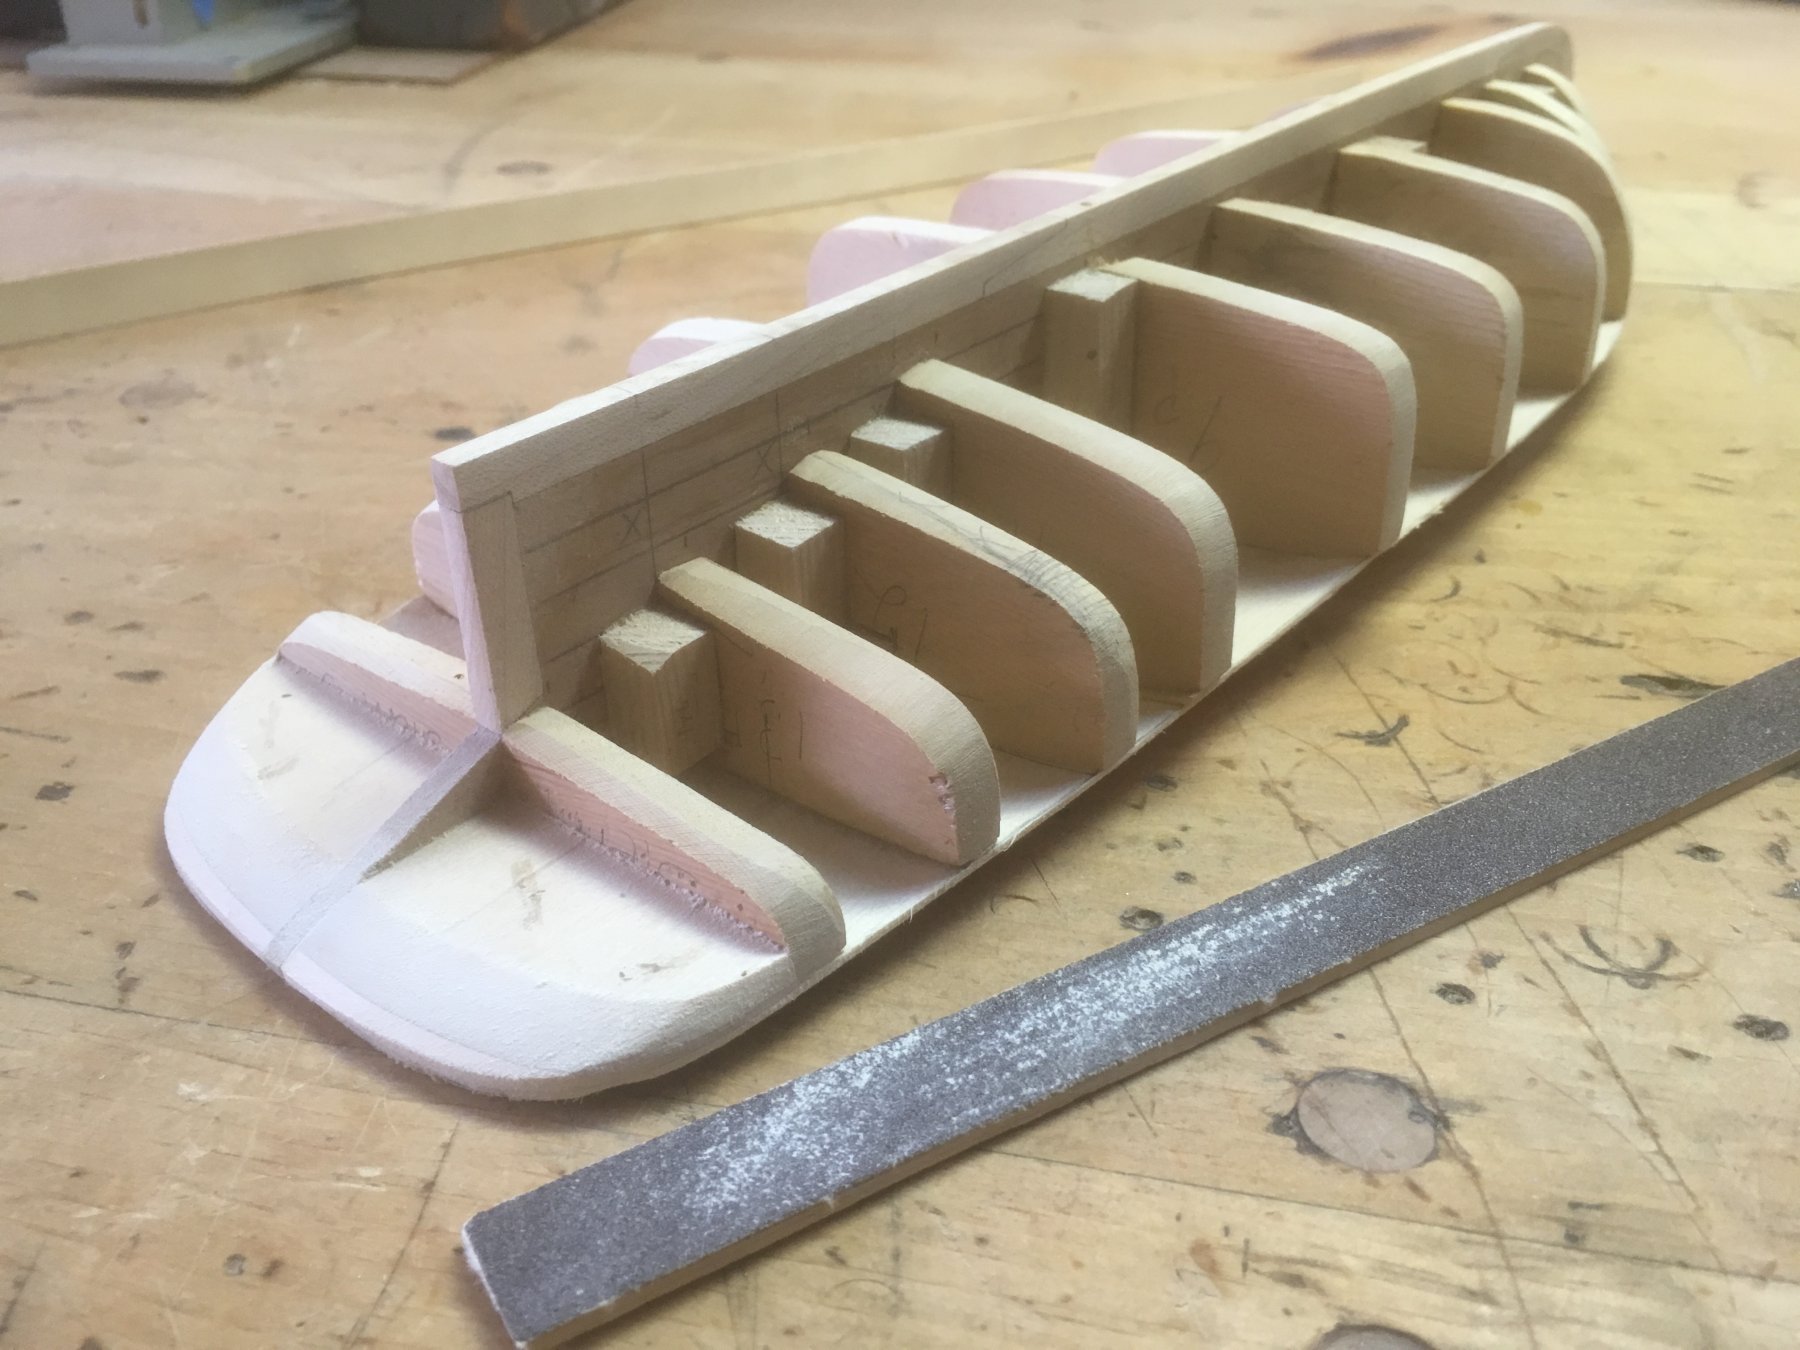
I did some fairing of the bulkheads this morning while it was still cool enough to work in the garage. Actually, fairing bulkheads as the sun comes up with a mug of strong coffee on the bench is a nice way to start the day. I recommend it.

If you notice, the third bulkhead forward of the transom has pencil marking on it. I need to add a little bit of wood right there on the turn of the bilge to enable the planking to have a place to sit. I cut that corner a bit too lean on the saw.
I'm doing the fairing with a flexible batten with a strip of sandpaper attached to it with double-sided tape. Mark Taylor clued me in on that trick on my Shenandoah build.
In the background you see a long basswood batten. I'm using that to check the frames for fairness as I go.
I'm going to add a piece of basswood filler material right next to the stem on either side, in order to give the plank ends a secure resting place.

I removed some material from the bottoms of the bulkheads that sit right next to the keel to make room for the rabbet, which I think will be the next thing I'll do.
Thanks for looking!
Steve
-
-
Today I did some very basic construction on the waterboat's small cockpit. I used maple which will be stained later. The sides are all sticking up high and oversized. I'm planning on sanding them off flush with the subdecking after I install it. The floor of the cockpit will be planked but with the edges of the planks not quite touching, leaving enough room for water to drain out between them, I assume. The planks will sit on narrow risers.

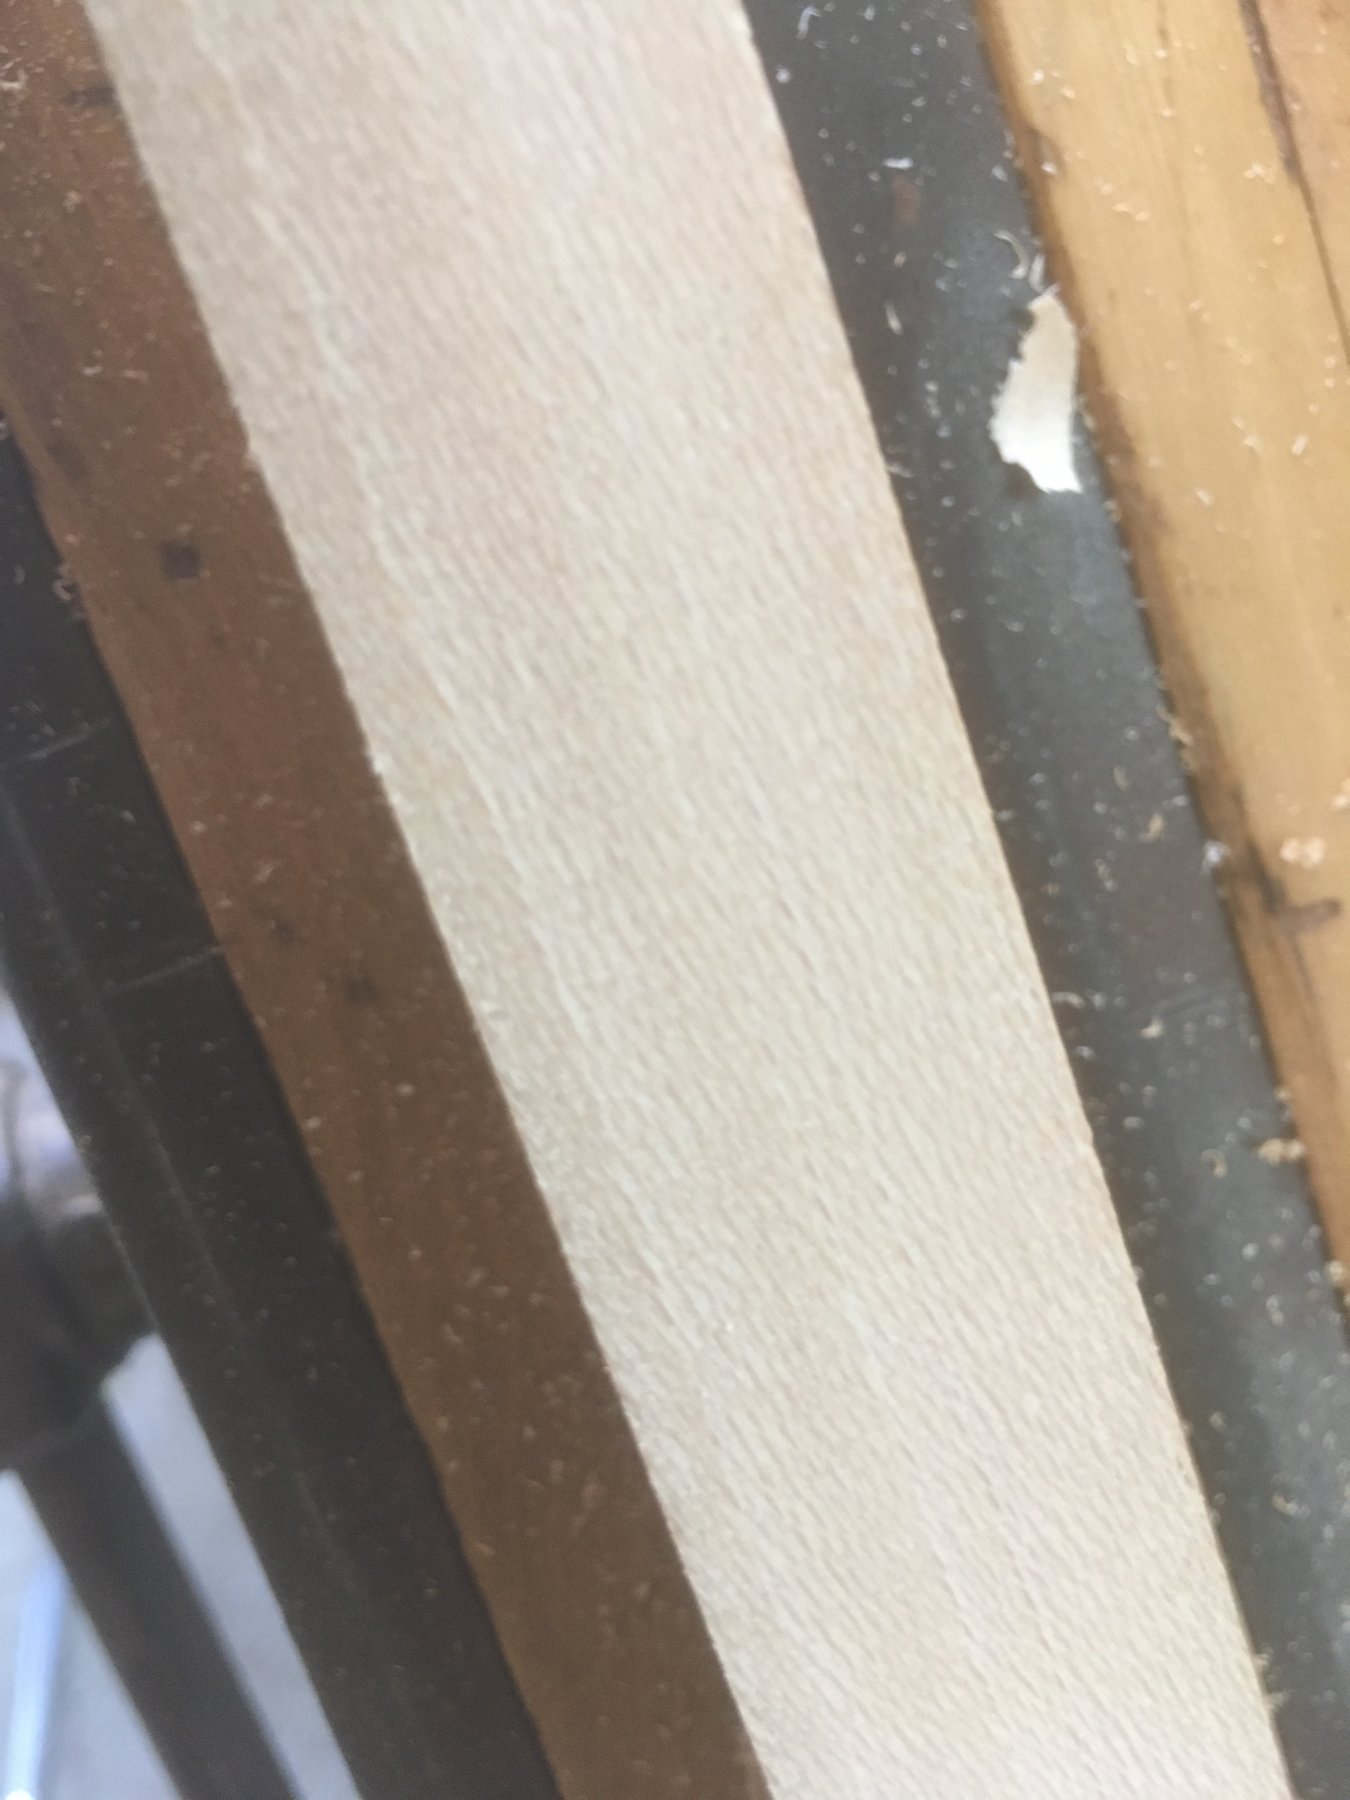
I'm thinking of doing the planking of the cockpit sole in sycamore. It has an interesting grain pattern. Here's a photo of it. I'll have to see if the grain pattern is too garish when it's been lightly stained/dyed.

Thanks for looking!
Steve
- Jack12477, kees de mol, hexnut and 4 others
-
7
-
Thank you, Michael. I've seen your beautiful work. It's an honor to have you.
Thanks for thinking of me, Sam. Yeah, Azusa Canyon is directly behind the hills in front of my house. People go up there and and start fires just about every year. And as I type this, they're just finishing putting out a brush fire at the mouth of the canyon.
Anyways, back to the catboat...
Steve
-
-
-
-
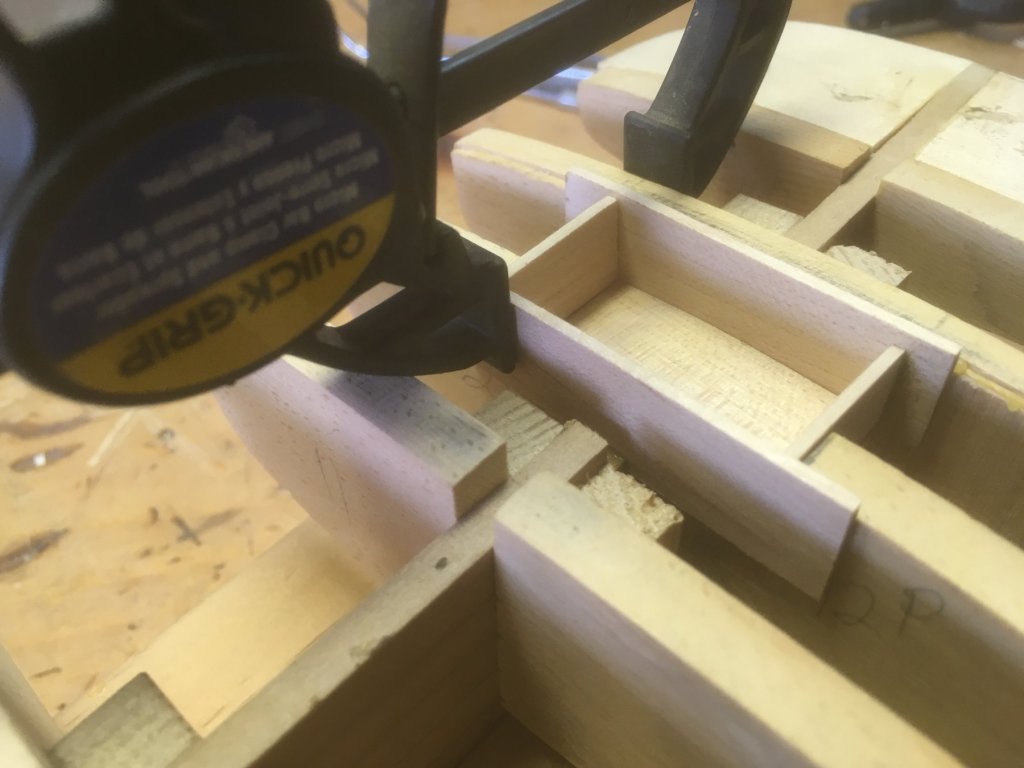
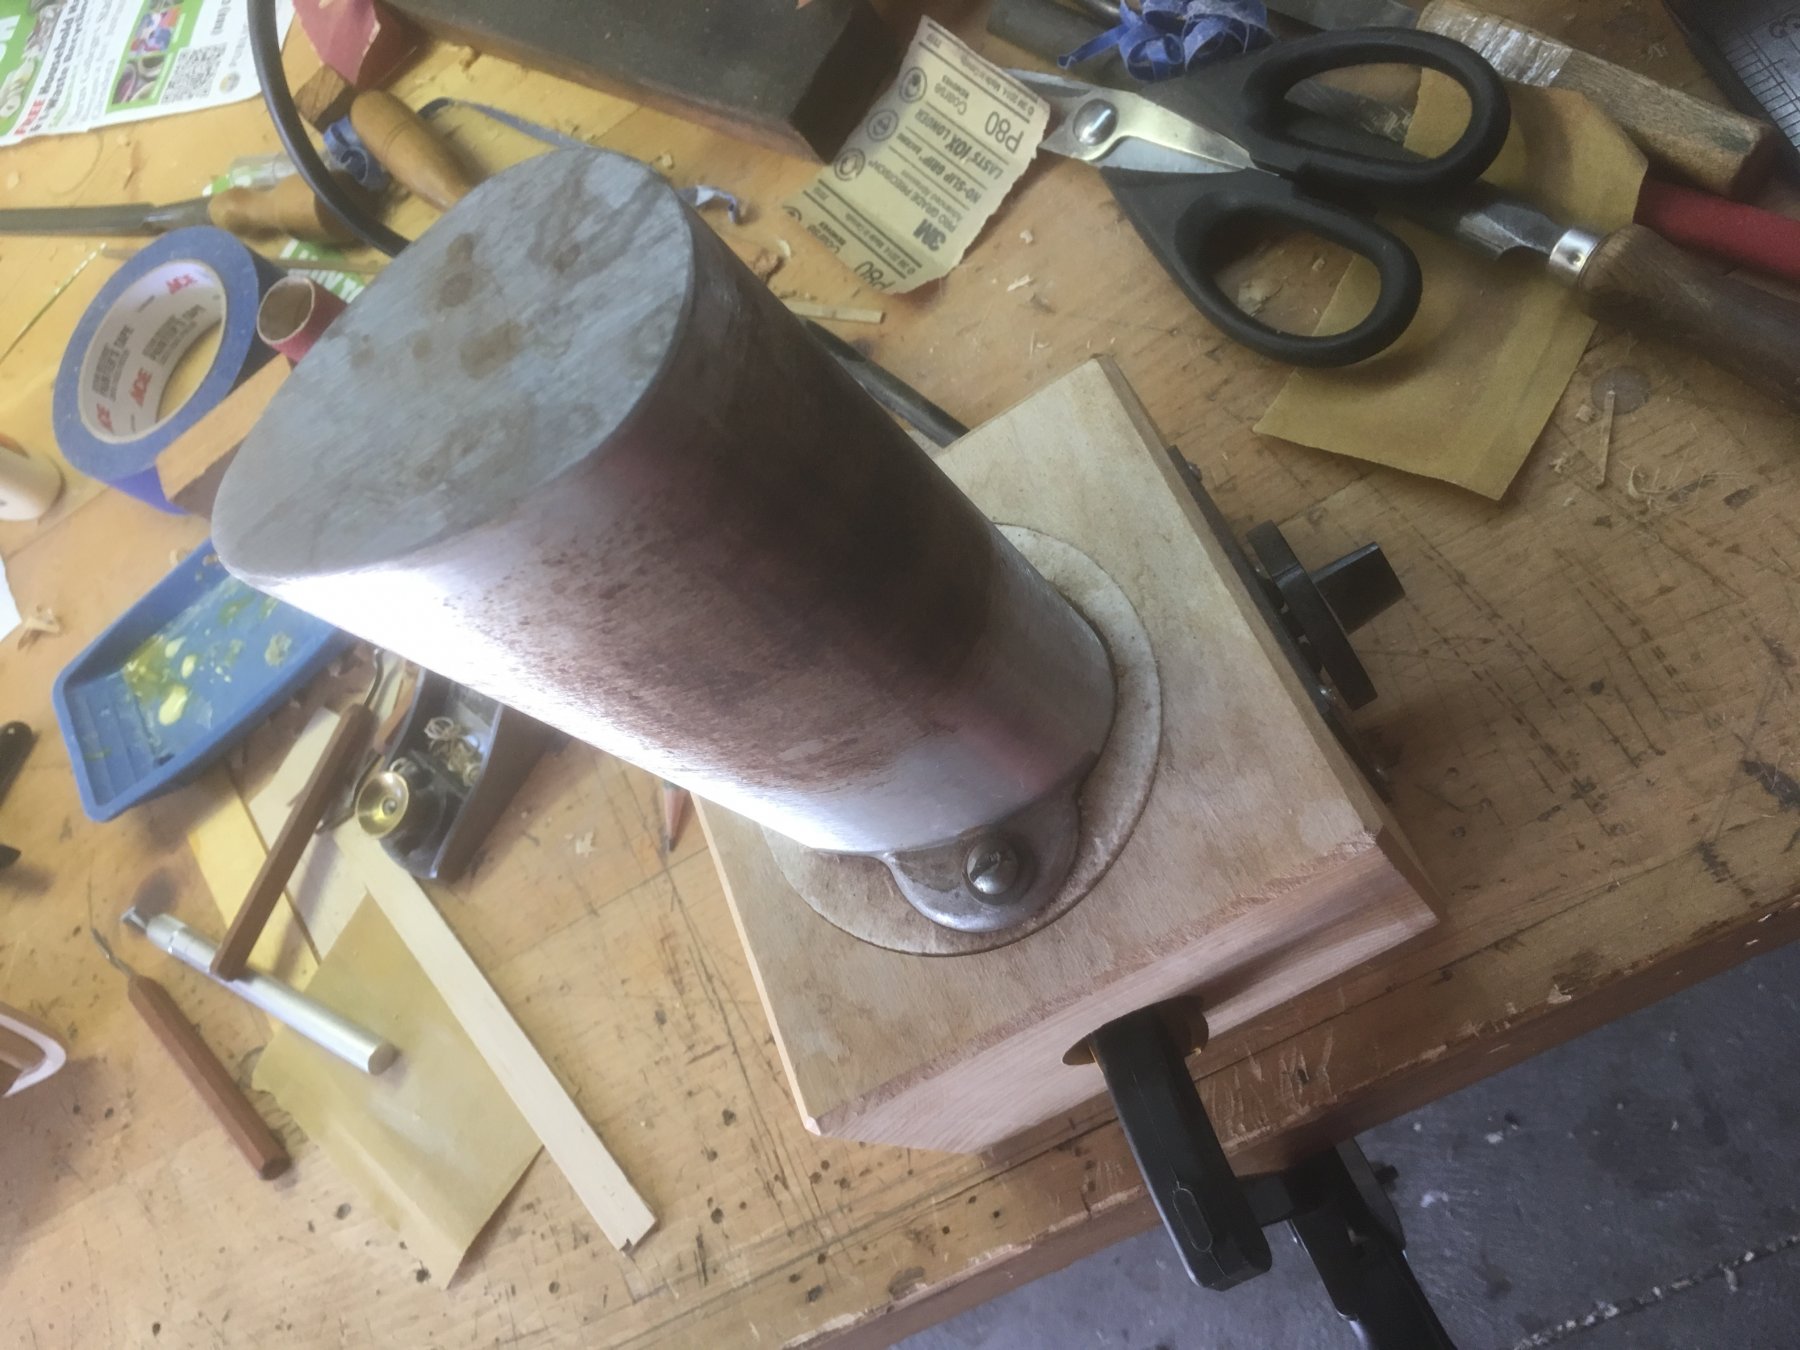
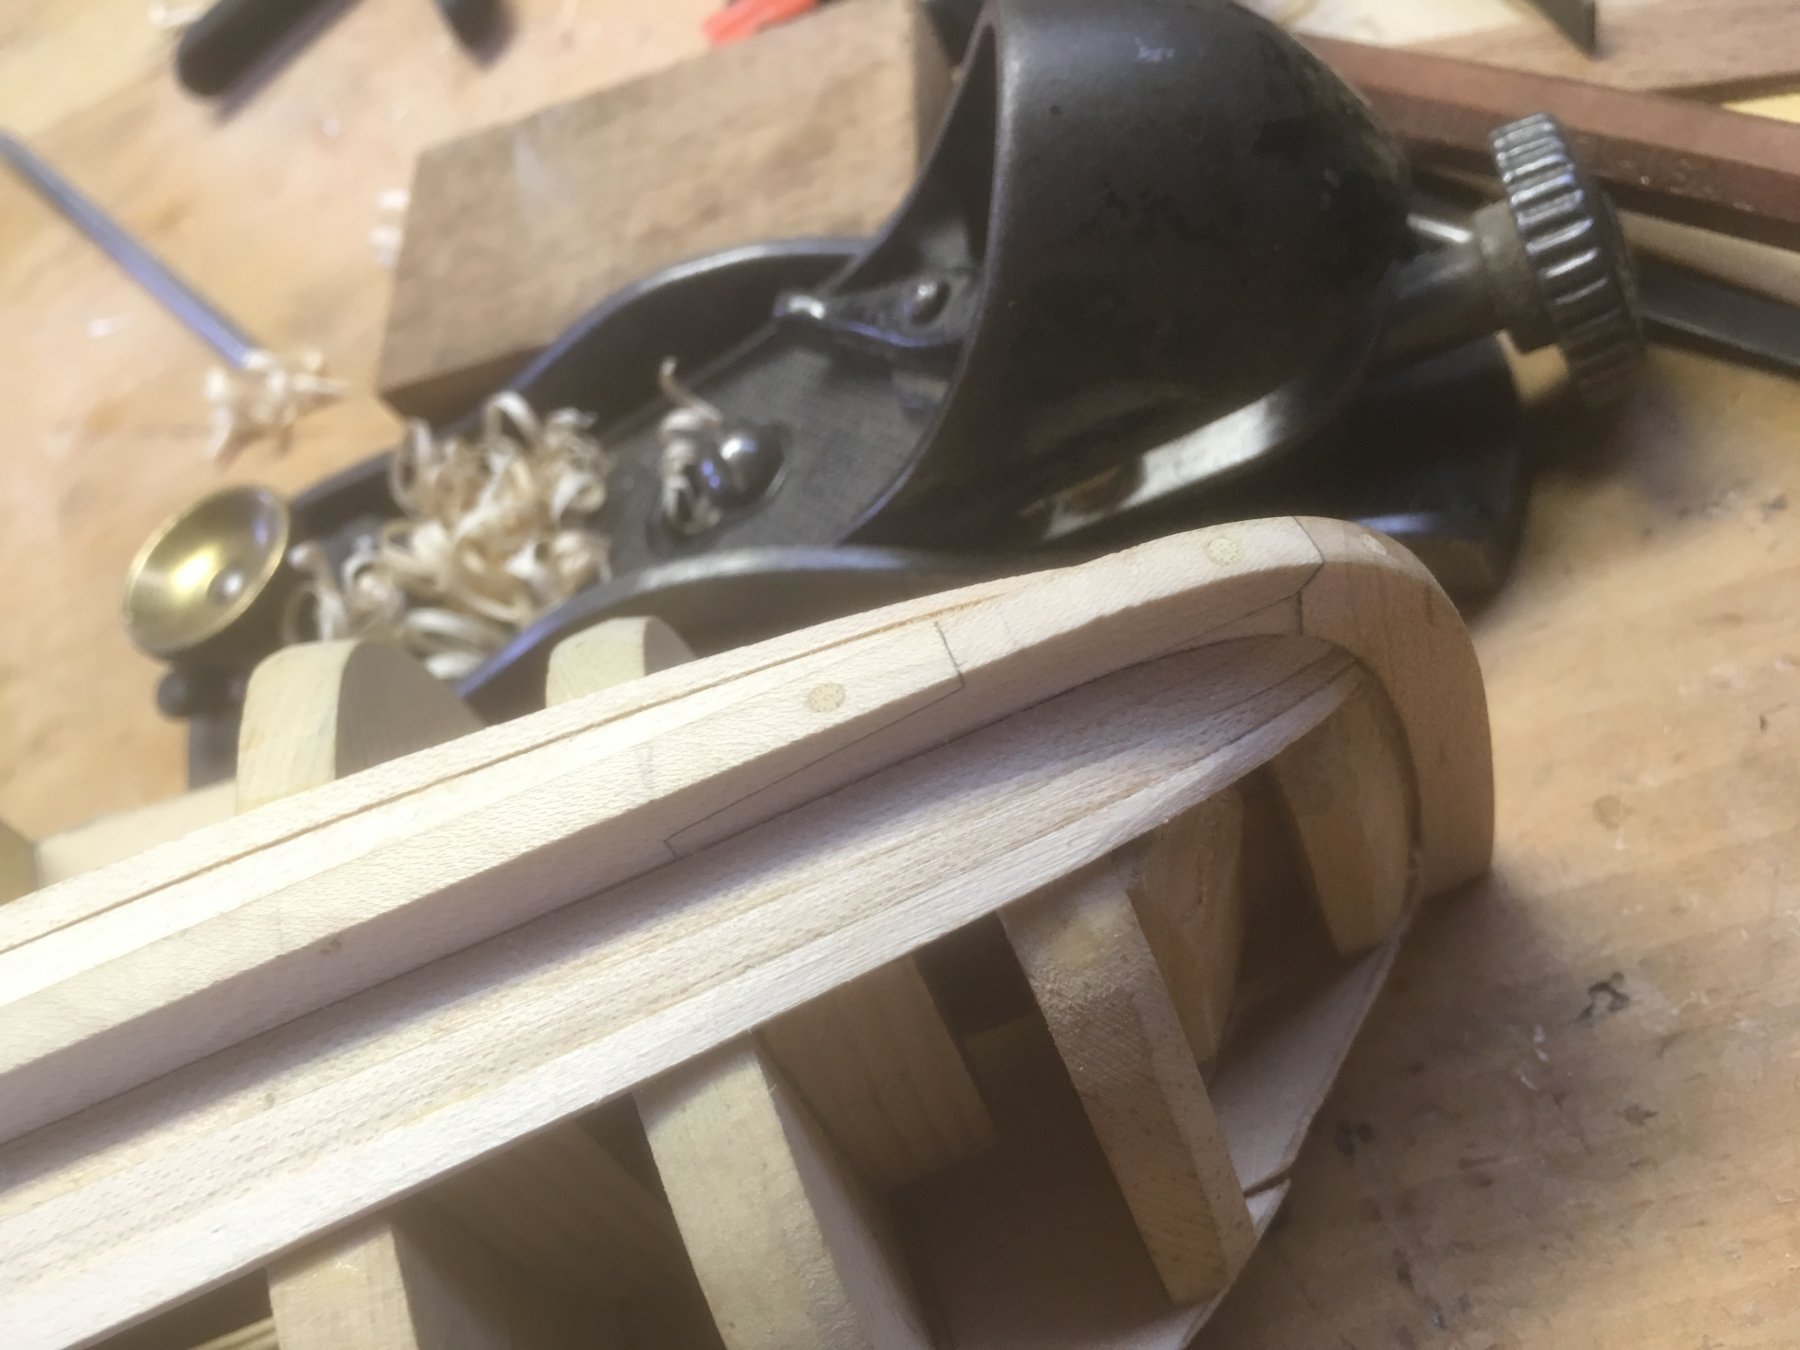
I was trying to figure out how to cut out a nice even space for the small cockpit when I remembered the Dremel router I use to cut the ledges for edge binding on ukuleles. It worked pretty well. Now I have to frame up the cockpit. Later though; we're in the middle of a heat wave and it's way too hot out in the garage right now.
Steve

Here's the space I routed for the cockpit.
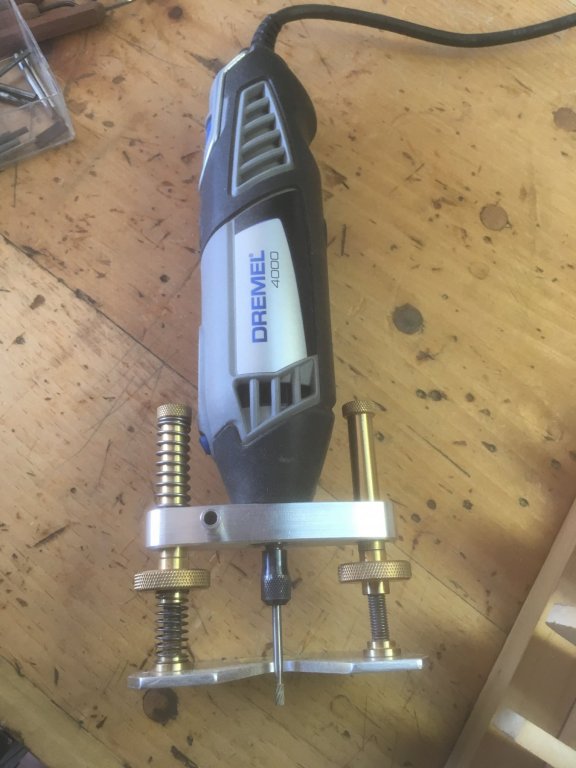
Here's the router attachment.
It cuts pretty cleanly, and it enabled me to maintain the camber of the bulwark tops on the cockpit floor.
Thanks for looking.
-
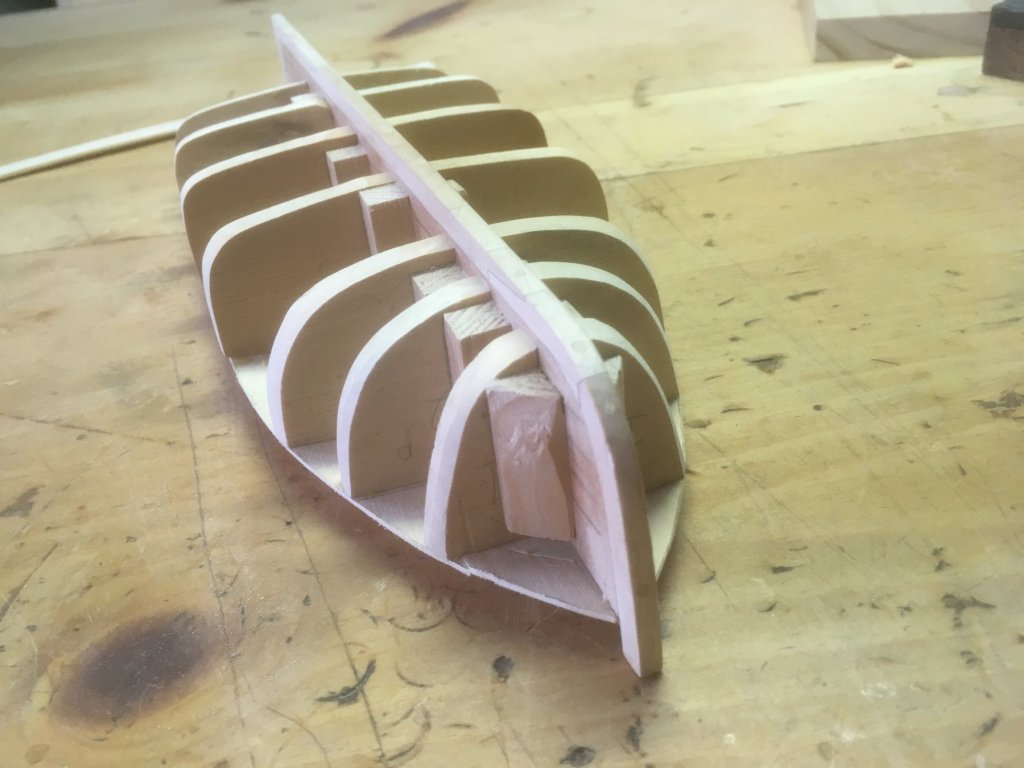
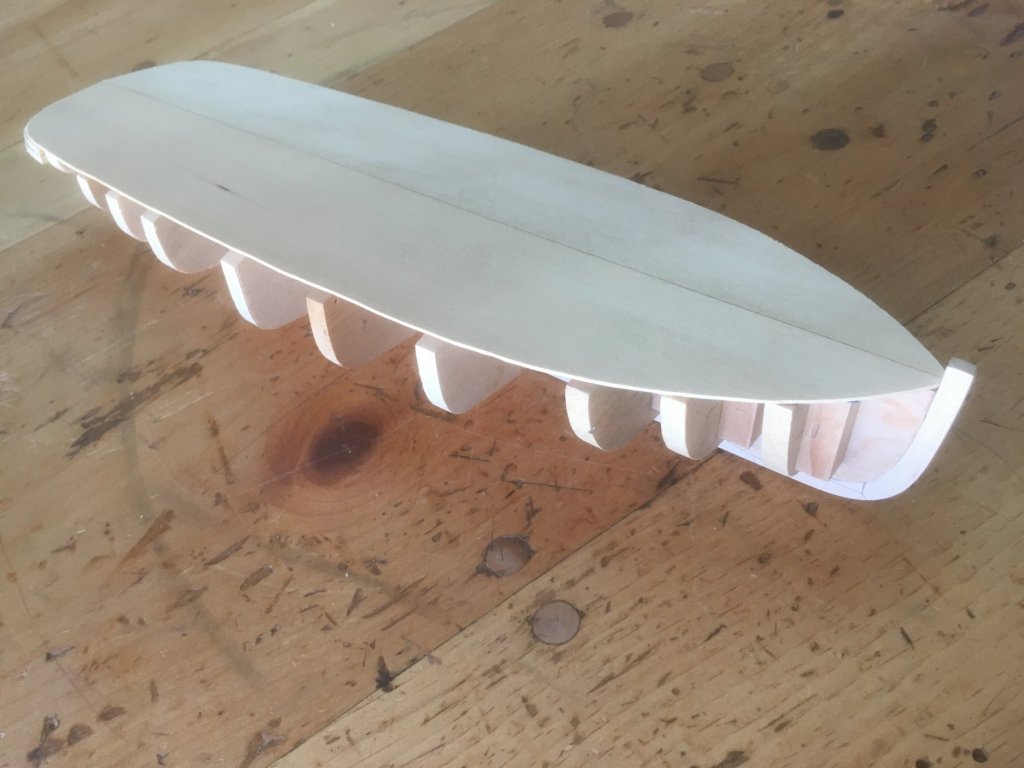
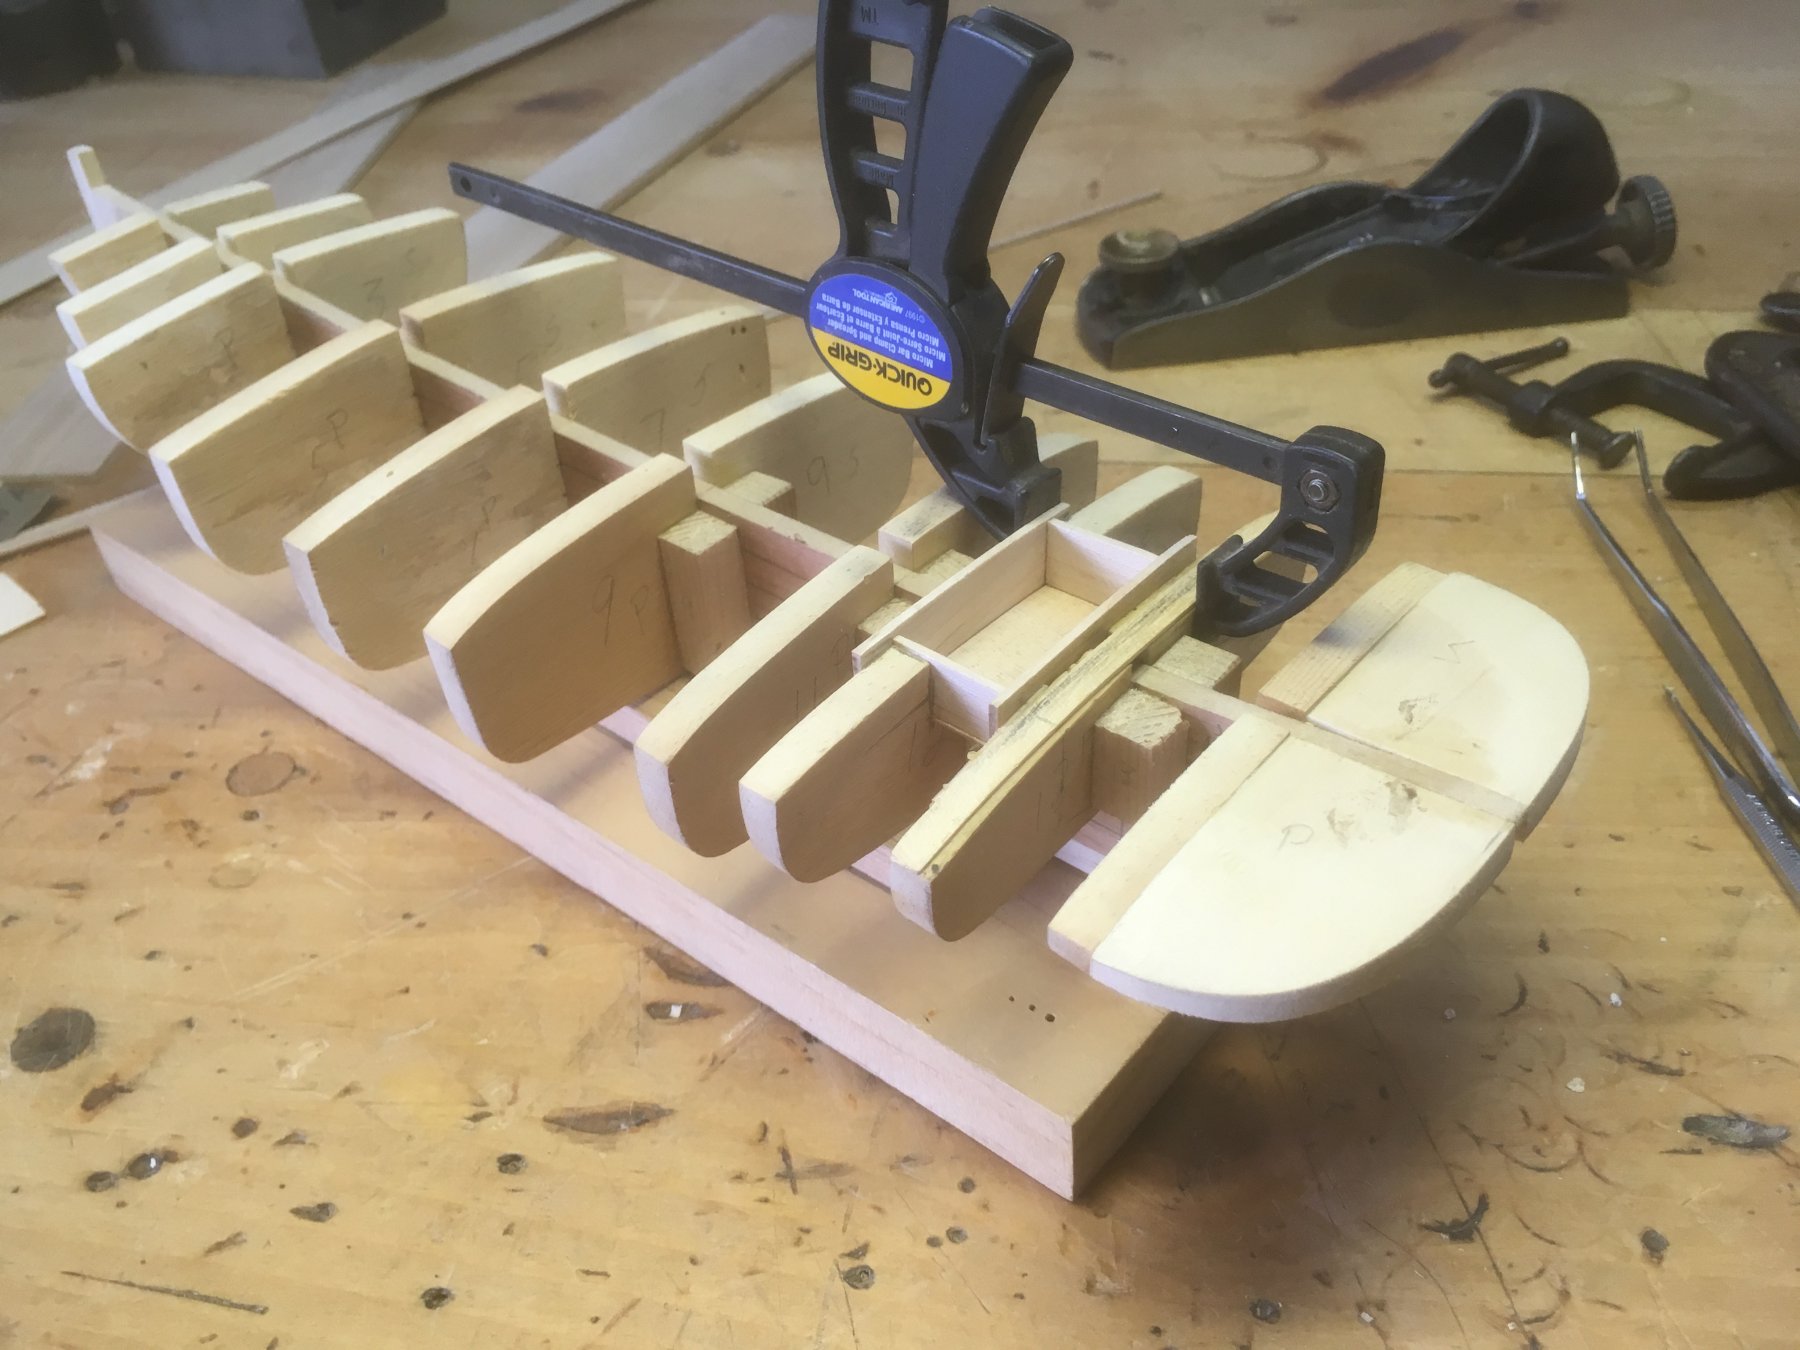
A tiny bit more progress today. I put in some pieces to roughly simulate the shape of the stern, which is rounded at the corners, almost like a fantail. I also cut out a couple of pieces of 1/32" basswood to serve as a layer of sub-decking. I'll glue those on after I fair the tops of the bulkheads. In the photo they're just resting lightly on top of the bulkheads. One thing I forgot to do was to create a space for the small, rectangular cockpit. I think I'd better do that now since it'll only be harder to do if I put it off until later.
Thanks again for looking!
Steve

-
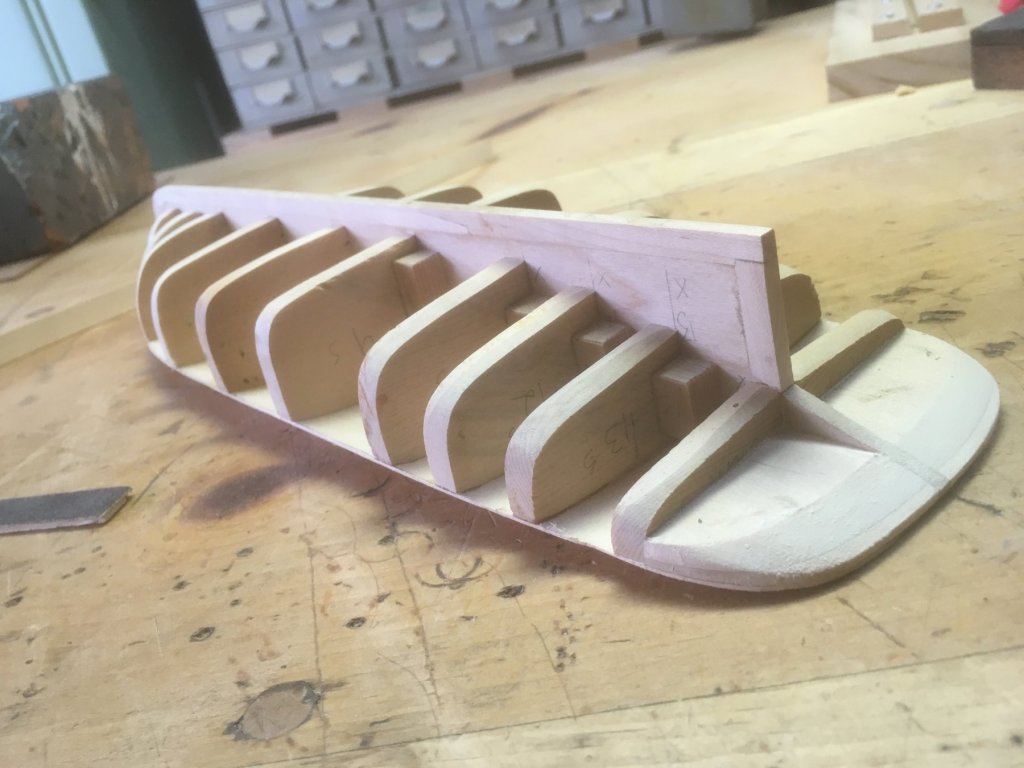
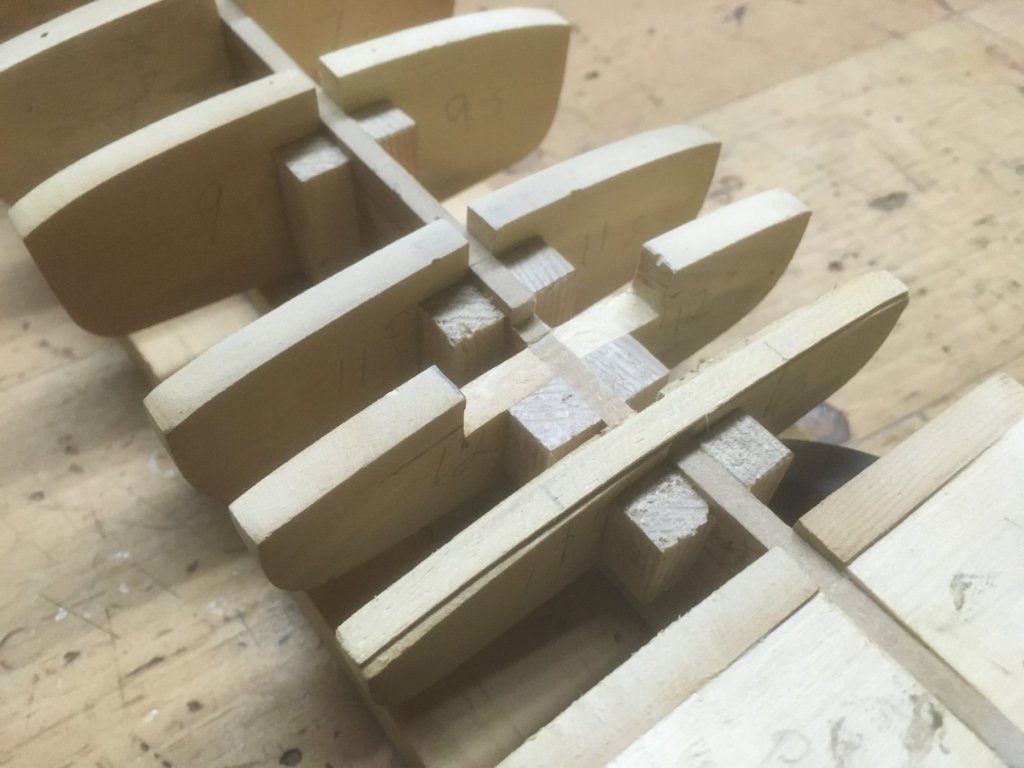
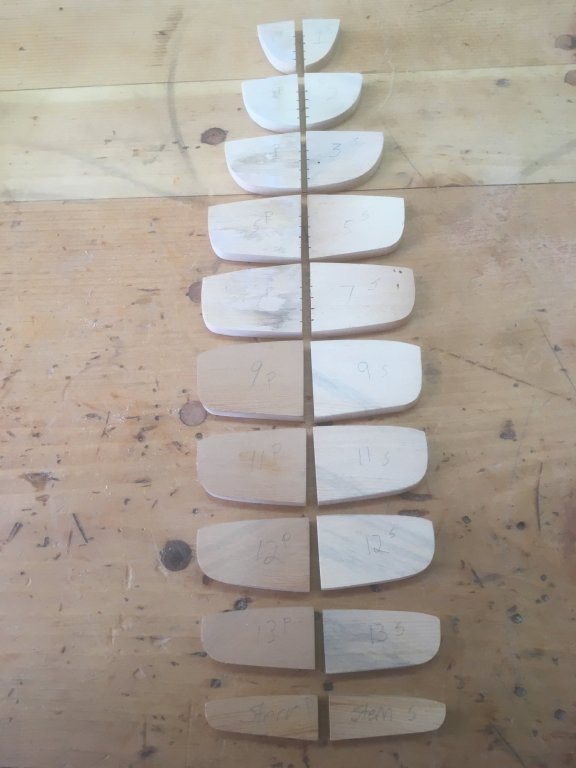
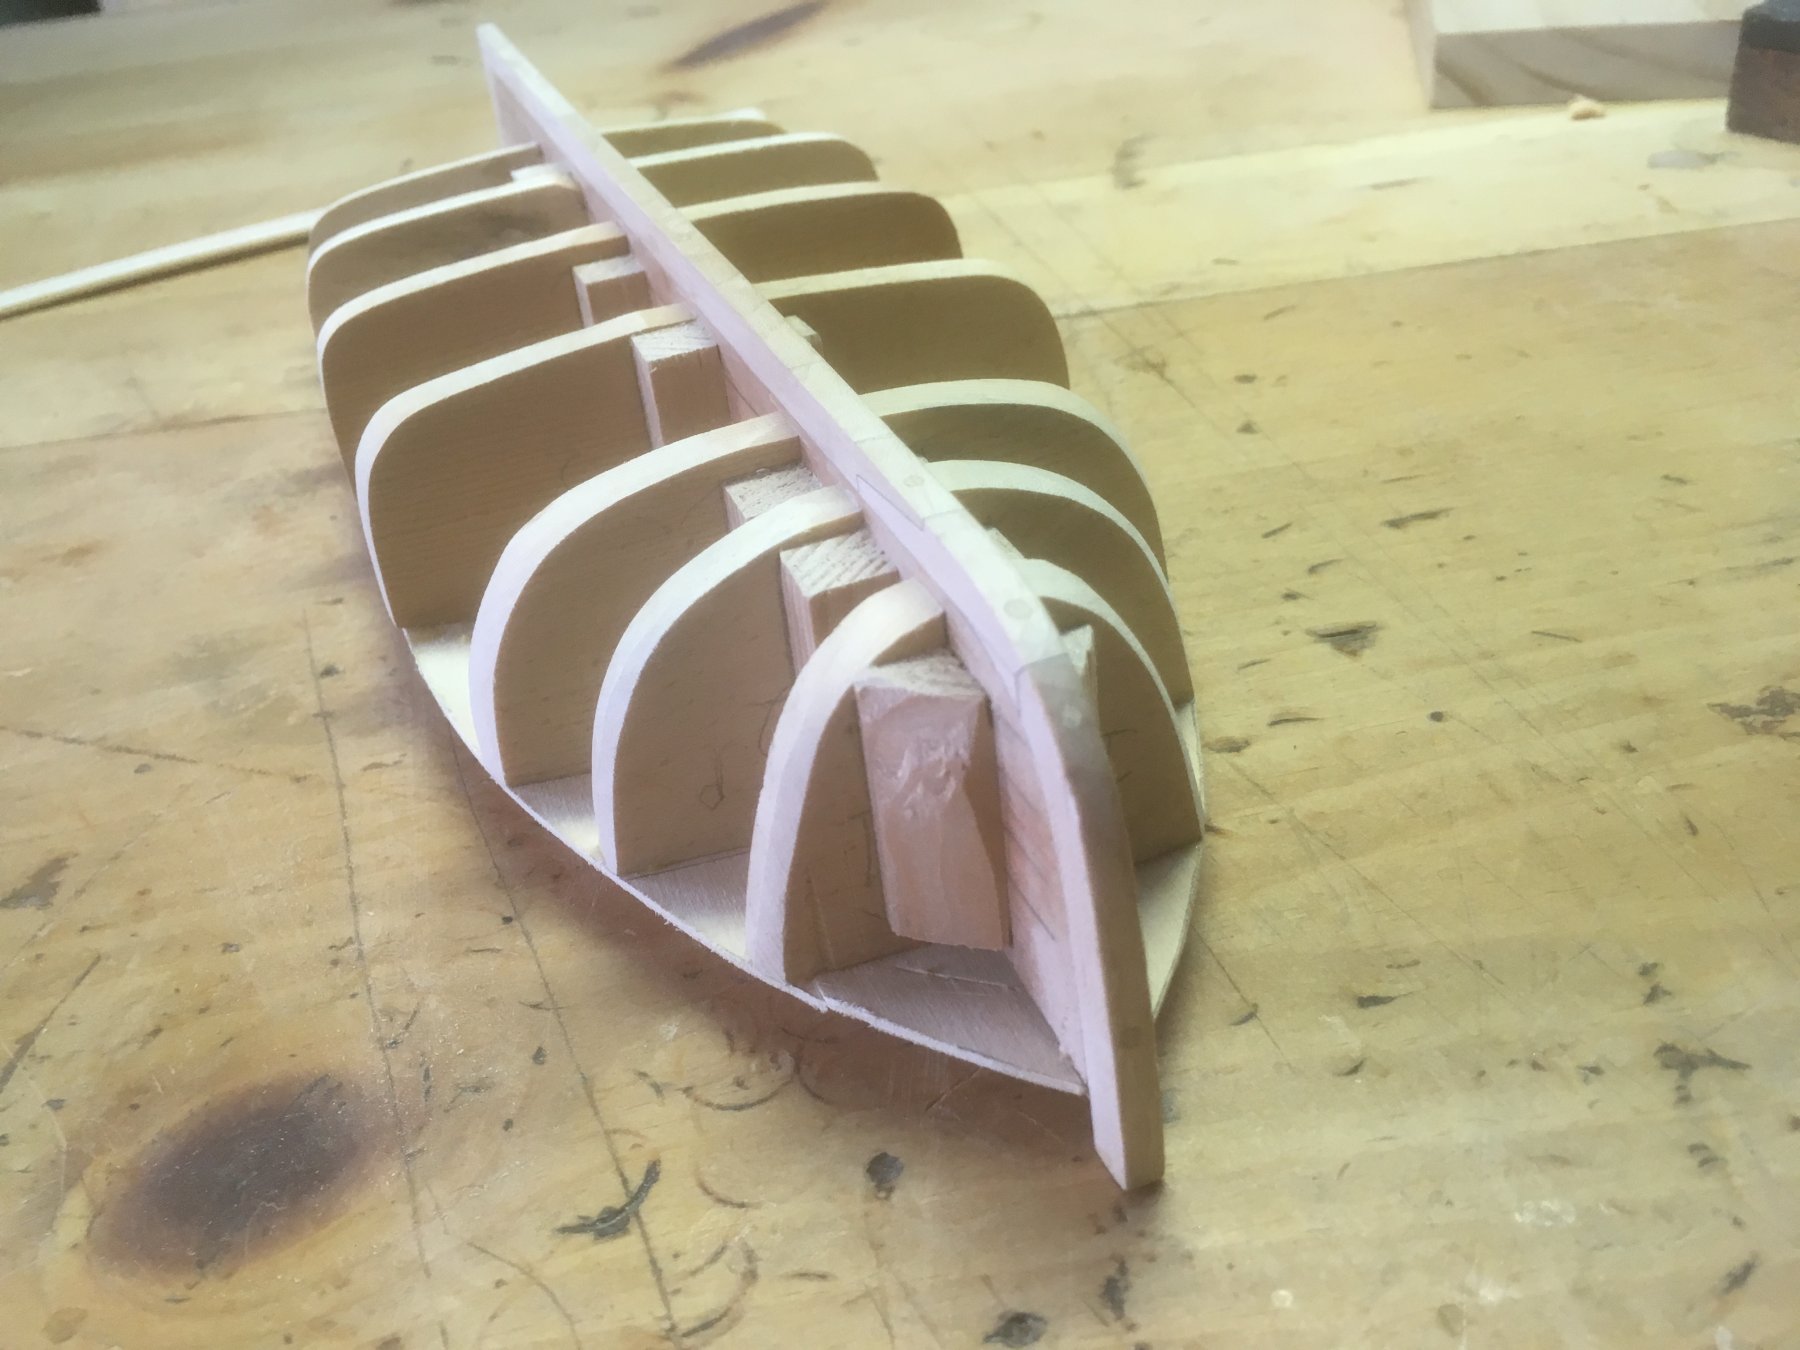
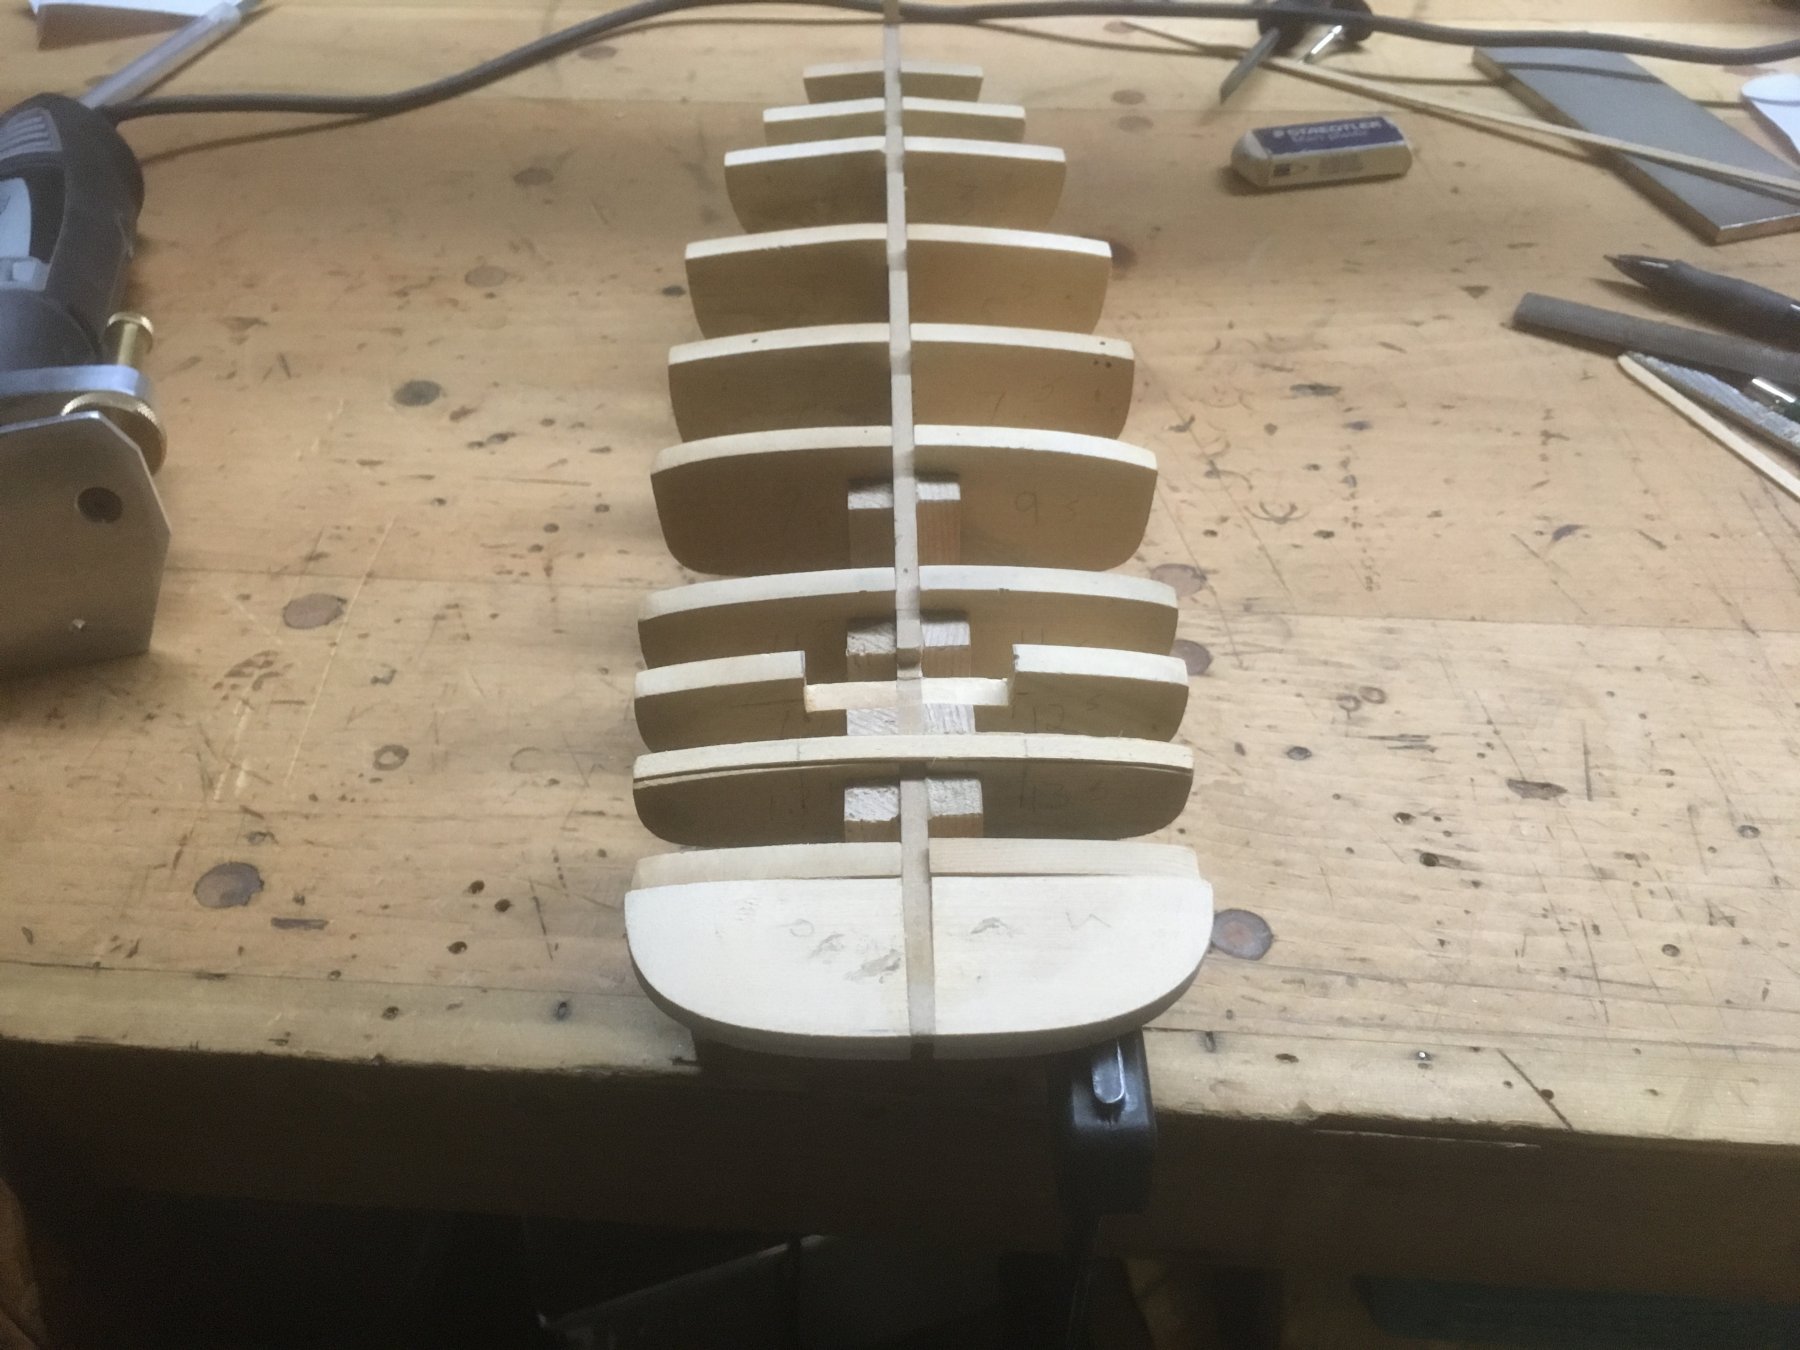
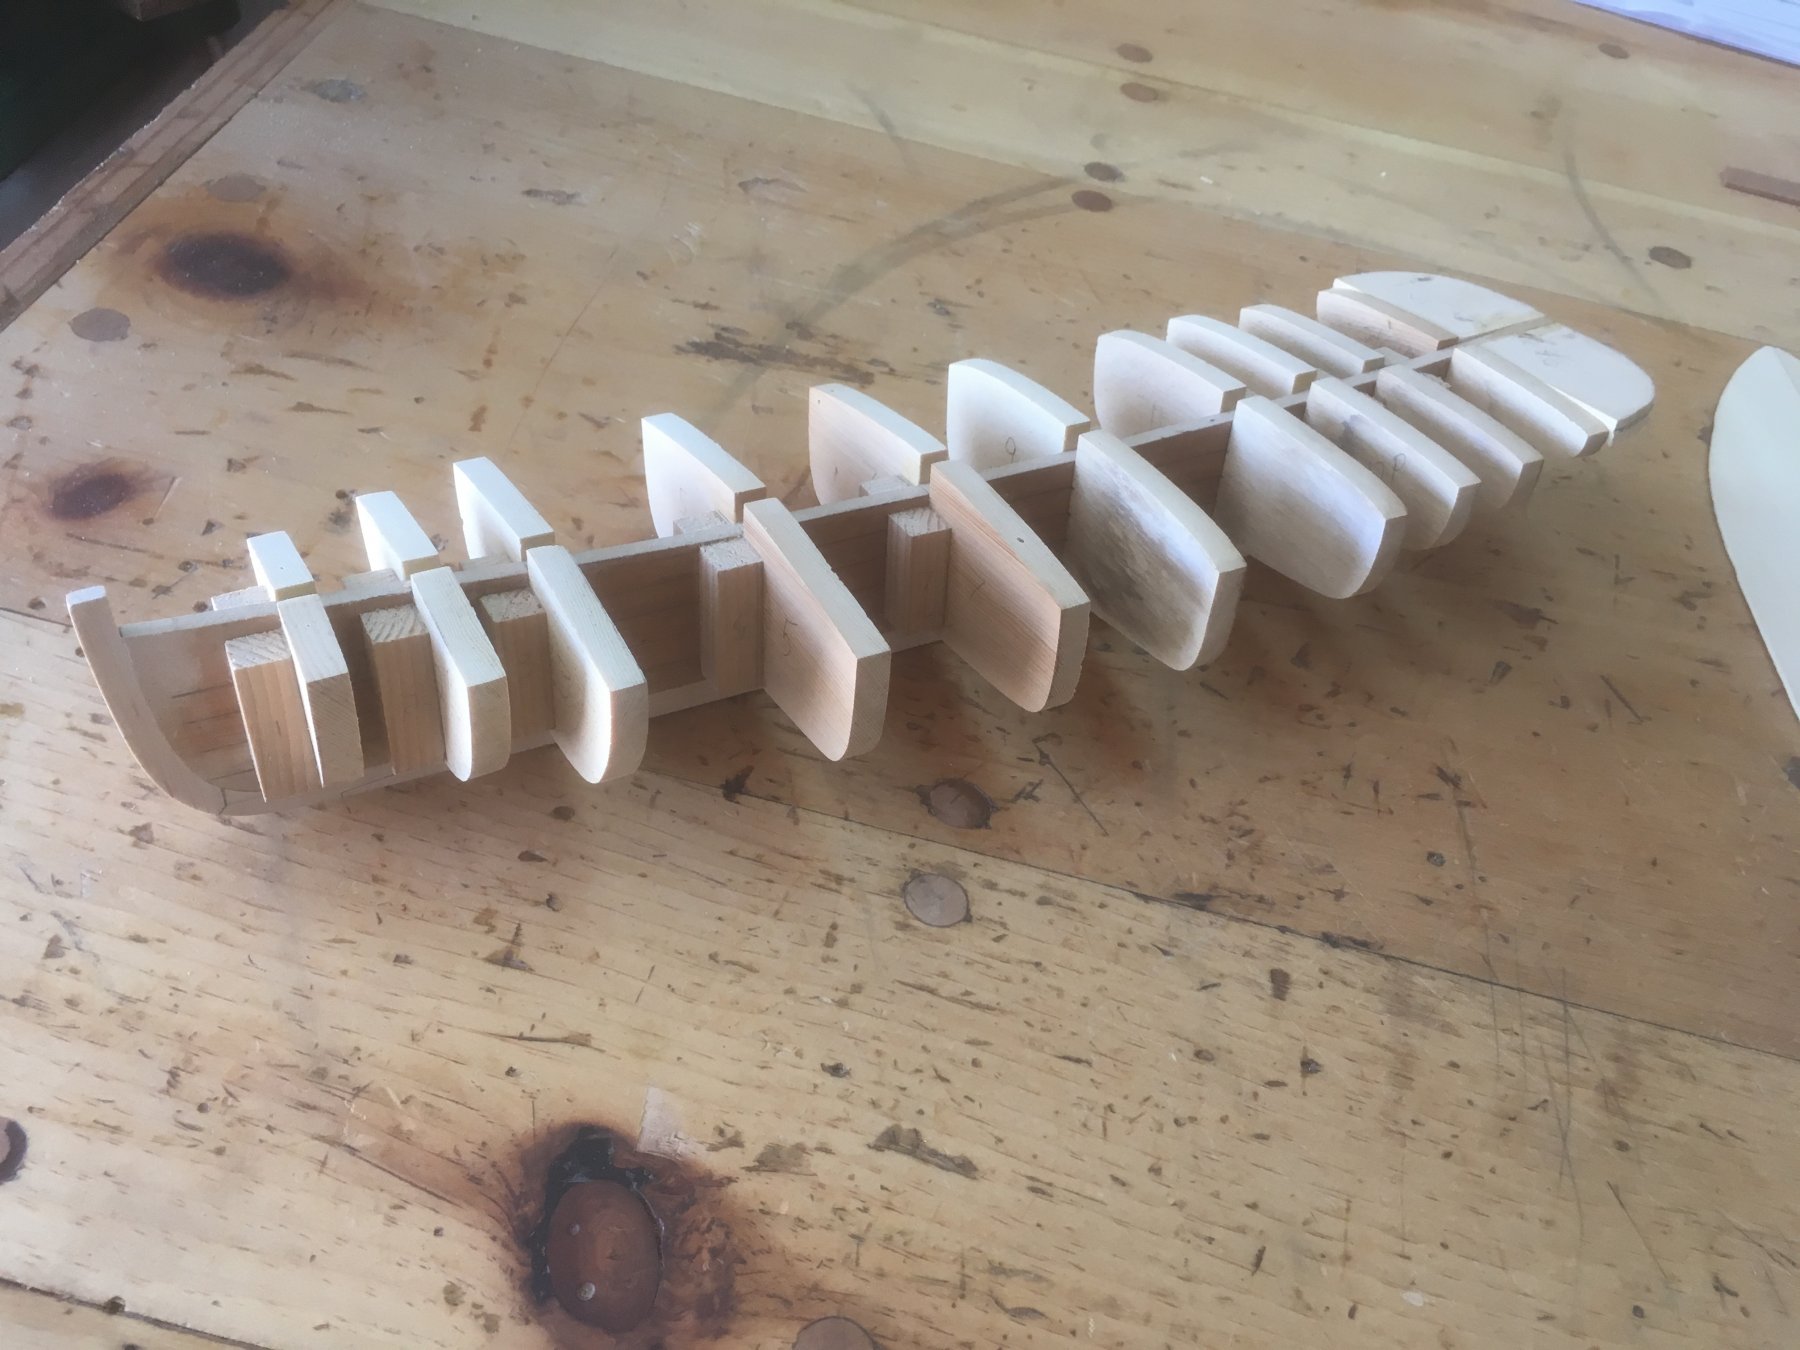
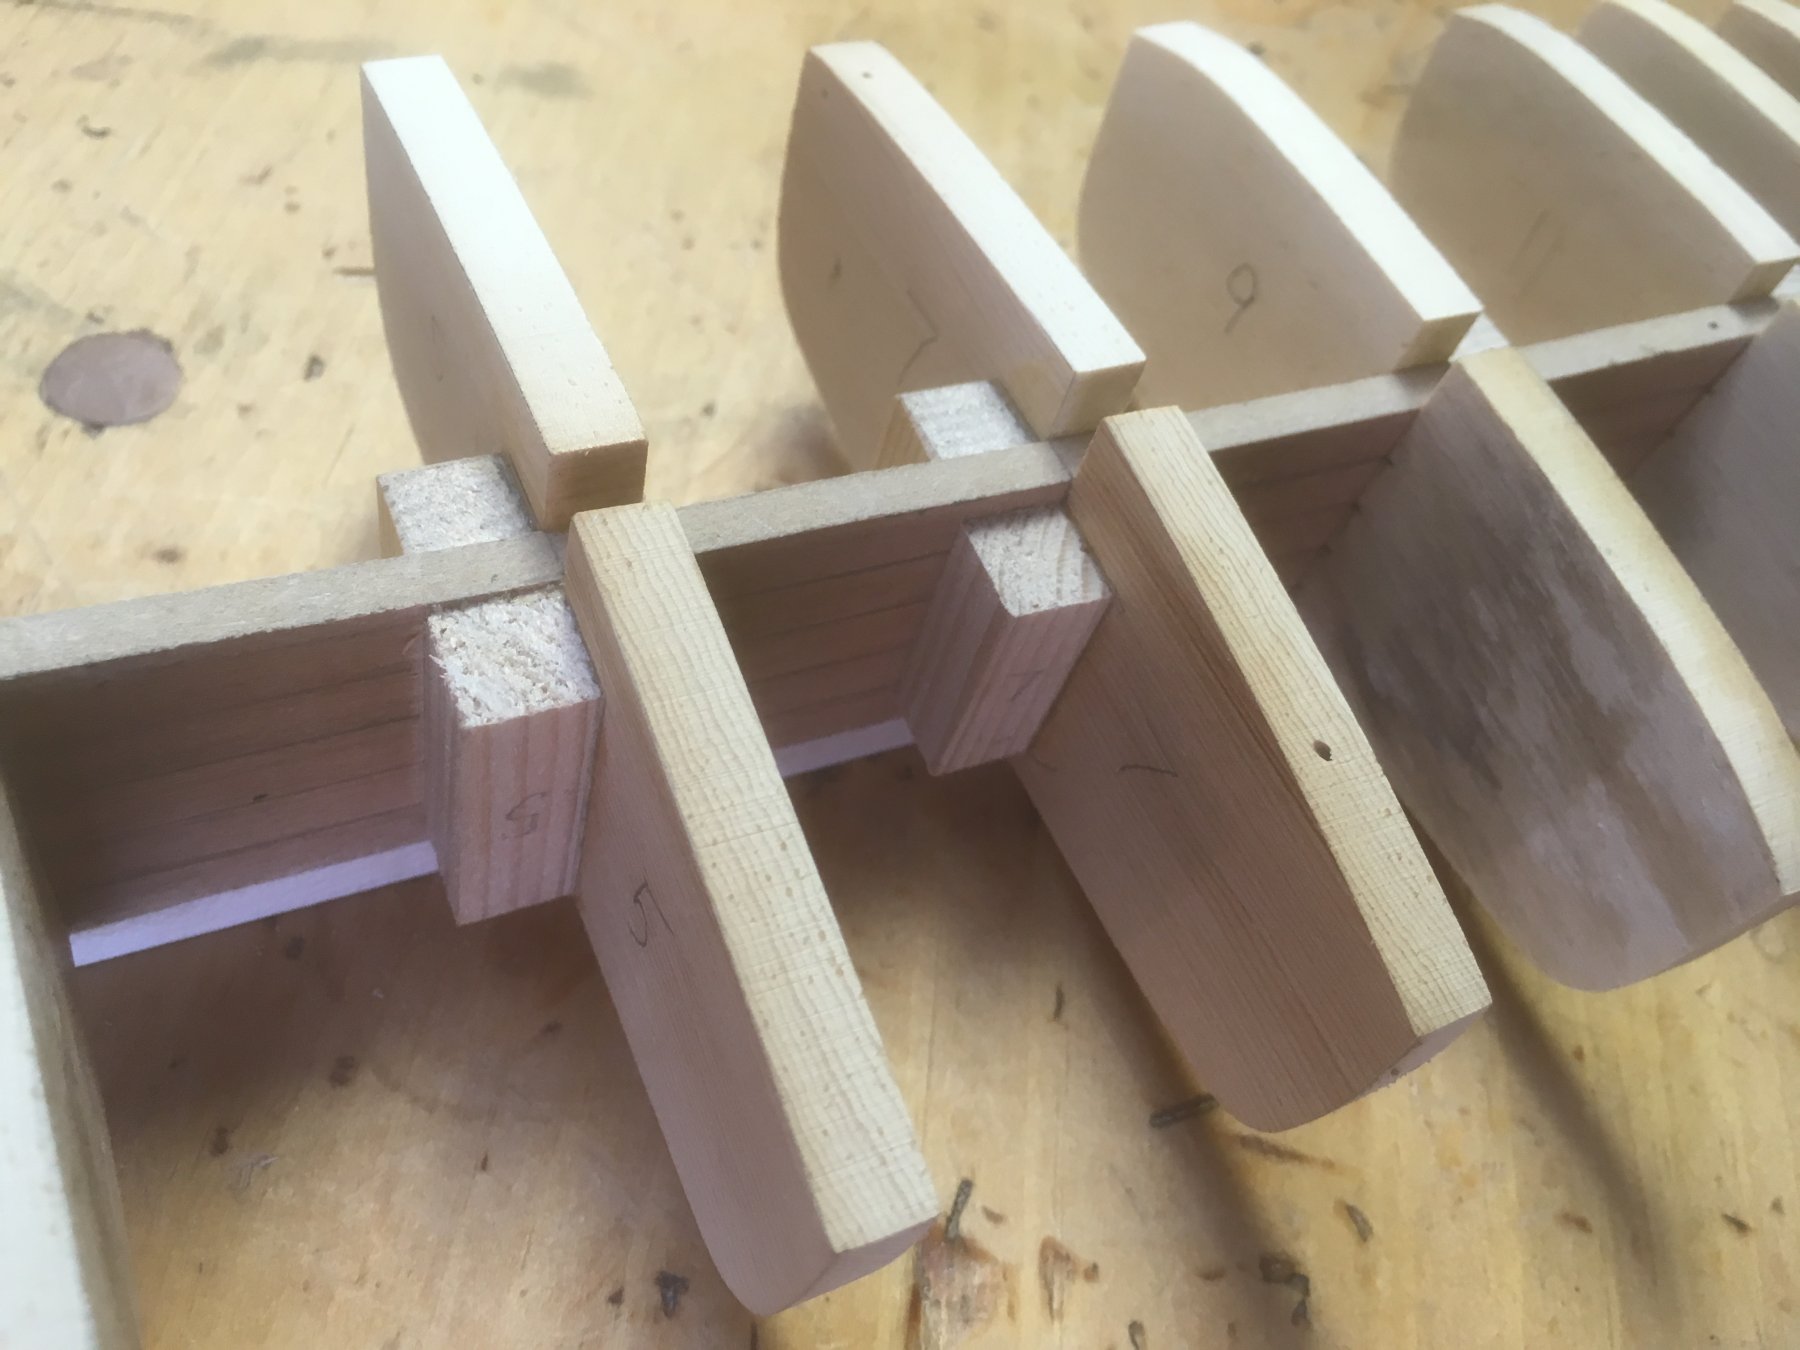
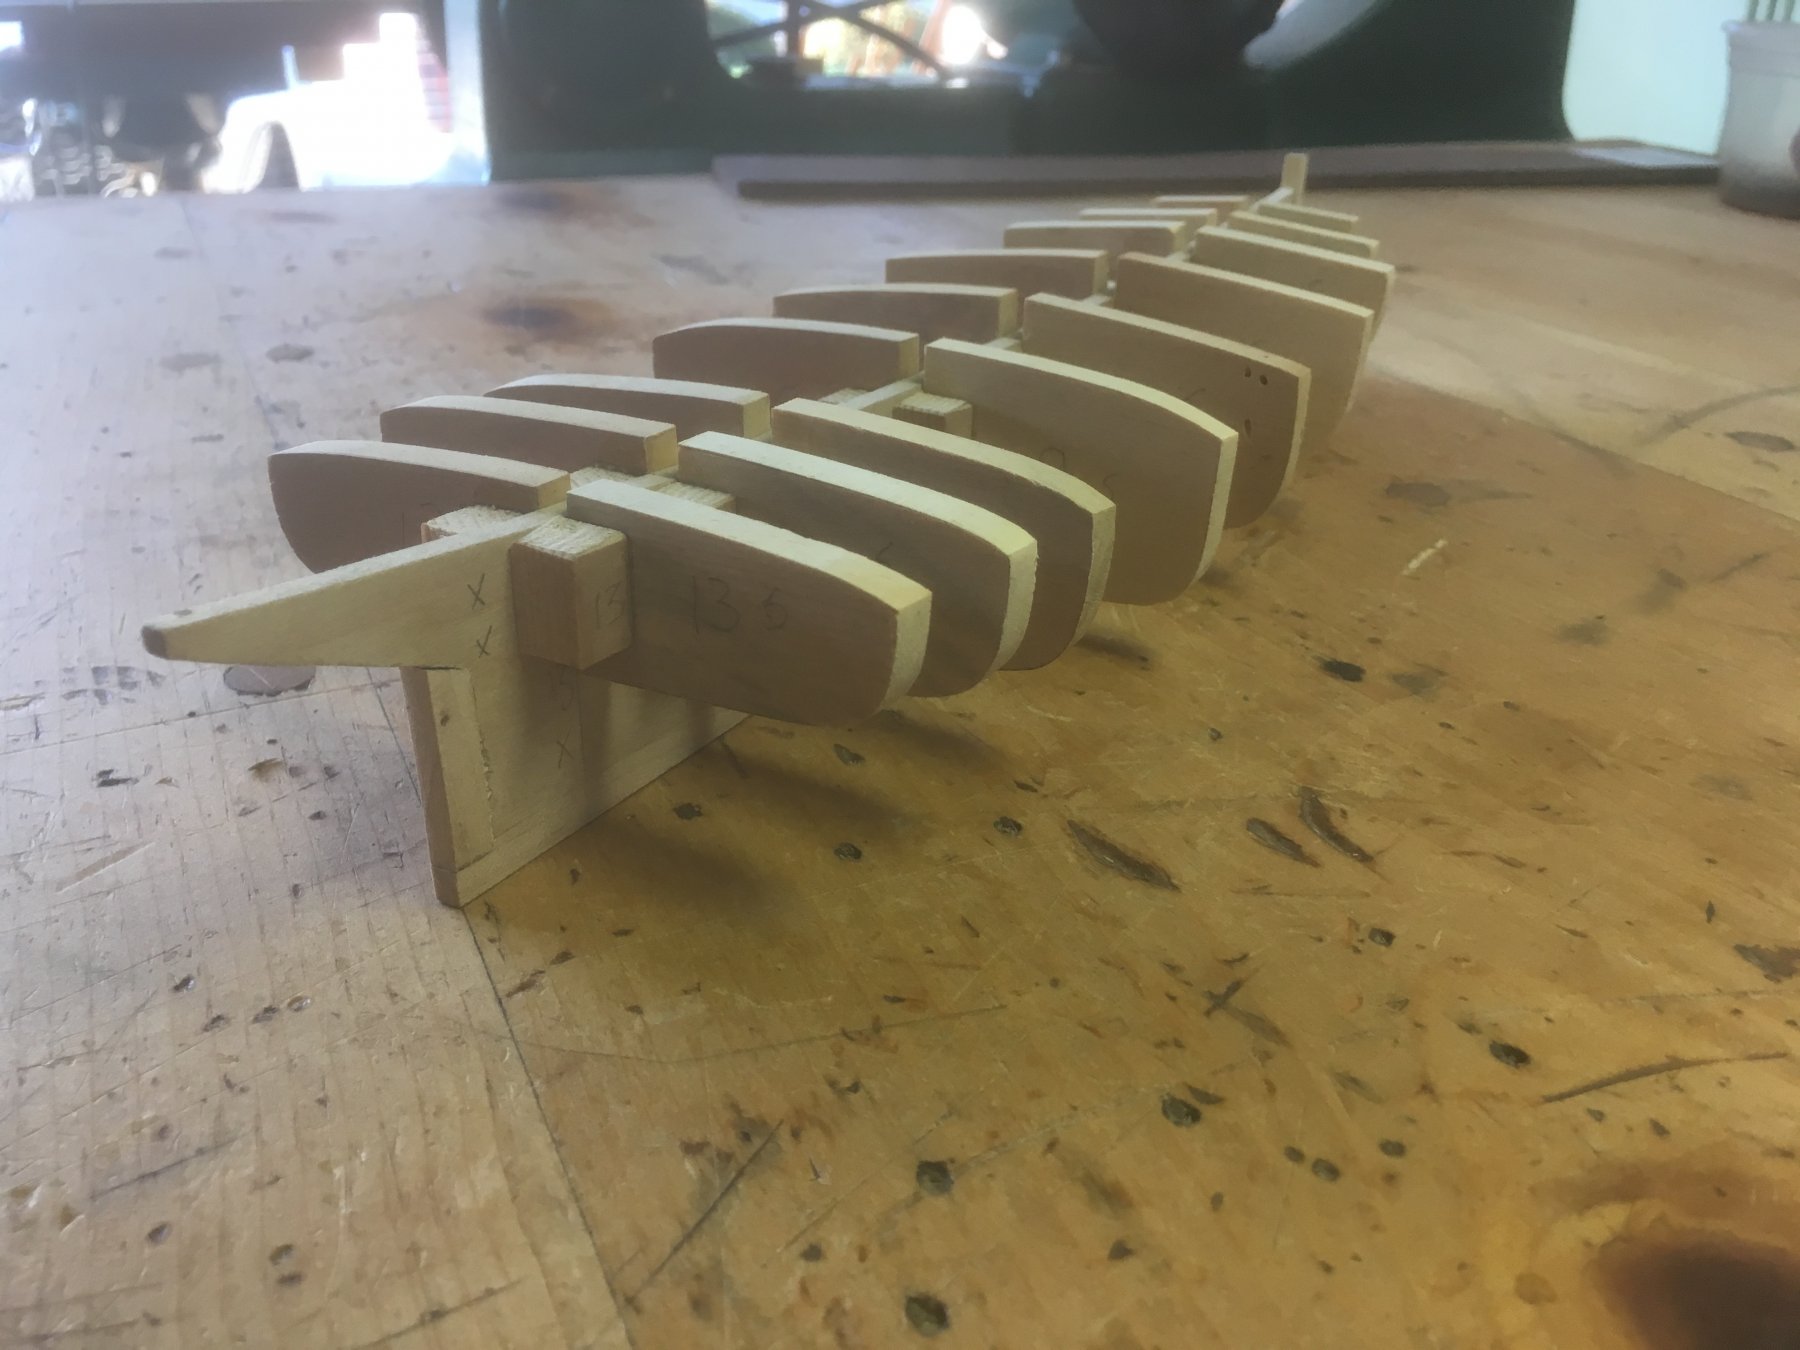
Well, I have all of the bulkheads except for the stern glued onto the false keel. I put some pretty beefy blocks next to them to keep them in place while I fair the bulkheads. I'm going to have a lot of fairing to do, but the bulkheads are basswood and pretty soft.

-
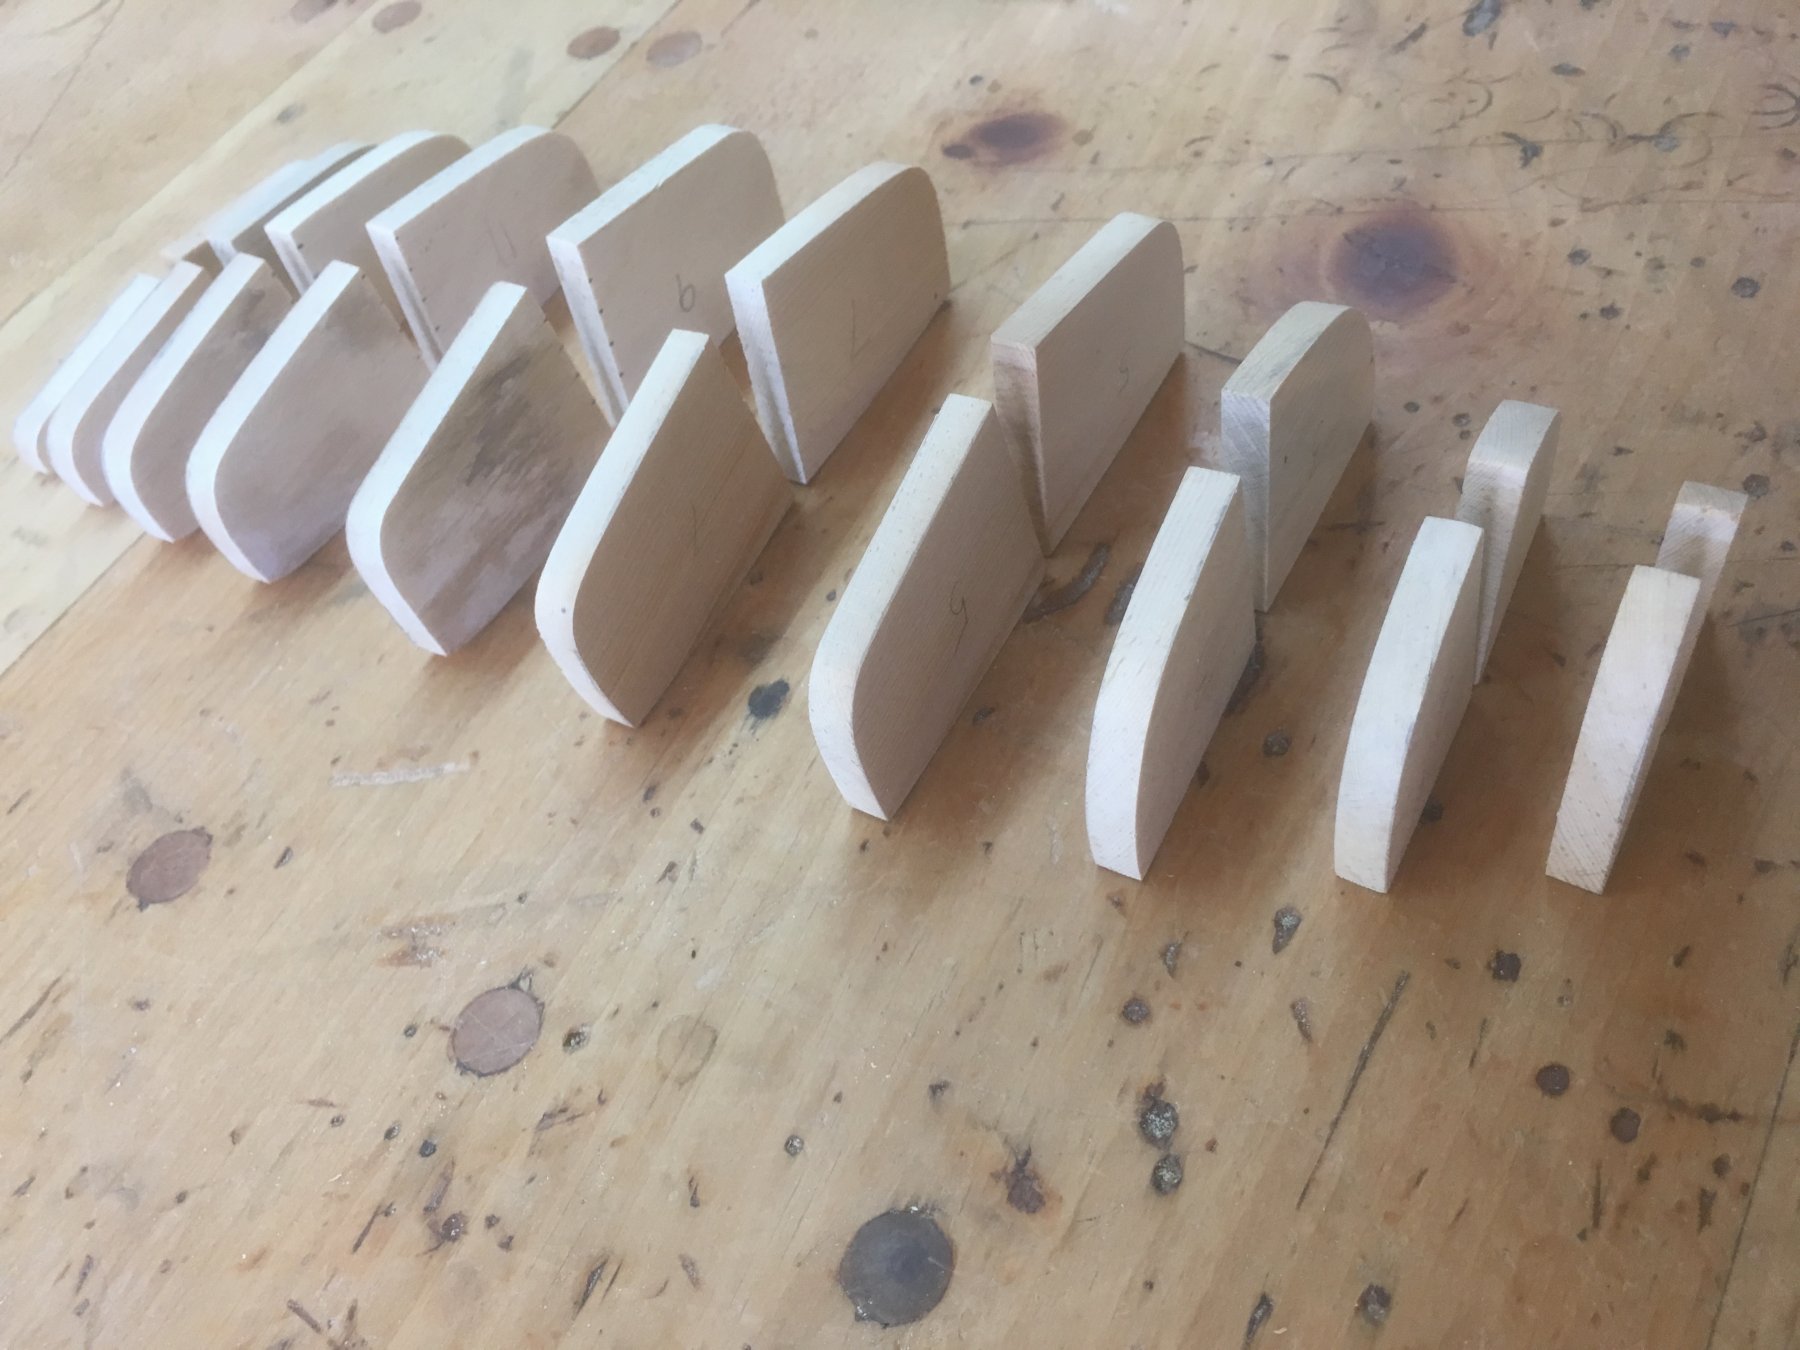
Here's a tiny bit more progress on the waterboat. I've got the bulheads cut out, shaped, and ready to mount onto the false keel. That will hopefully happen later today. I decided to make the bulkheads pretty thick to give the planking a nice gluing surface, and to give me a generous margin for error.
Thanks for looking!
Steve

-
Wow, J, Harriet's really coming together. The rigging looks first-class.
Steve
- popeye the sailor, jct and thibaultron
-
3
-


Fictitious Waterboat by SGraham - Scale 1:30 - SMALL - based on 1871 Gloucester waterboat Aqua Pura - first scratch build
in - Build logs for subjects built 1851 - 1900
Posted
I think those old wood/canvas canoes are some of the most graceful watercraft around. How cool to bring a couple of them back to life! Good to meet another folbot fan!