


Bob Cleek
-
Posts
3,374 -
Joined
-
Last visited
Content Type
Profiles
Forums
Gallery
Events
Posts posted by Bob Cleek
-
-
29 minutes ago, Dziadeczek said:
Right or wrong, I don't know?
Oh, come on!
 You can't be serious.
The galleon has Dacron lanyards and their overly-long bitter ends are tied off ludicrously, wrapped around the shrouds. They'll serve their purpose just fine and won't require the maintenance natural fiber cordage would, but they are not historically correct in appearance. (Black synthetic line is readily available, so there's really no excuse.) Neither are the bronze ring bolts. For an "historical recreation" of a vessel the appearance of which can never be more than an educated guess, I suppose we shouldn't be surprised. (The electrical cables running down the shroud and into the cabin side are a nice touch, too.) But what difference does it make? The tourists will love it. "A real pirate ship!"
USS Constitution, the only commissioned ship in the U.S. Navy to have actually sank an enemy vessel, and an actual historical artifact responsibly restored and conserved, is completely correct.* And her lanyards are black.
* Except for the "kiddie proof" netting they festoon all over her, as between the cannon barrel and the port jambs.
As I said, one can use any color lanyards they wish. Those who are interested in historical accuracy will make sure the lanyards on their period models are black.
-
11 hours ago, mtaylor said:
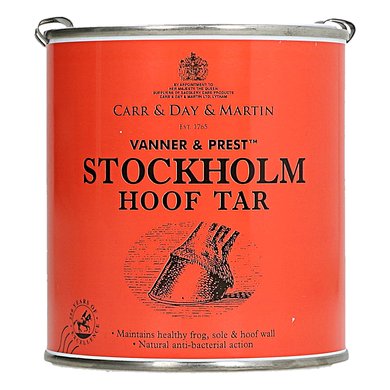
One of the issues here is "tar". Tar today is an oil based product and black. Way back when it was resin based and when fresh was anything but black (amber as I recall). So color choices could be made on the shrouds and lanyards.
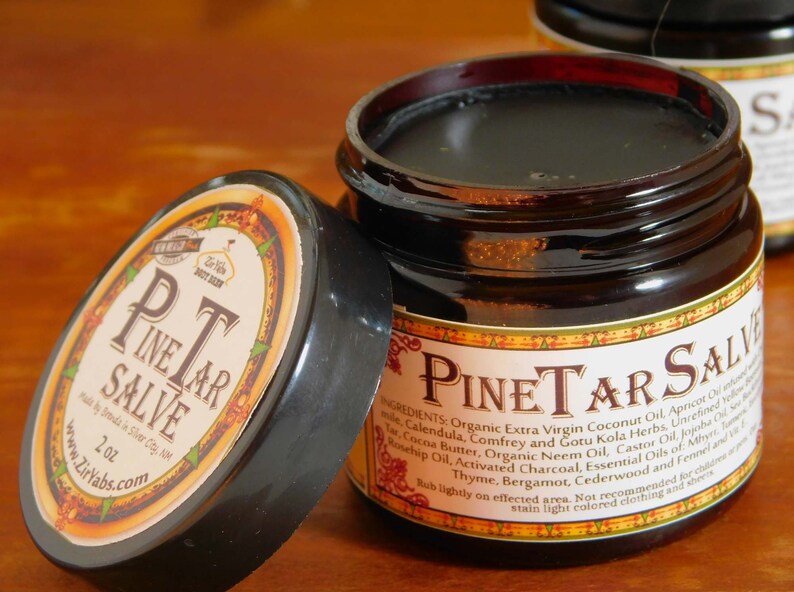
It's only "amber" when it's been thinned like all get out, as in when it's applied to fibers when making rope. All the "Stockholm" or pine tar I've ever used around boats has been very, very dark brown, virtually black, before thinning. The more it is thinned, the lighter it gets. Hence, when repeated coats are applied, the amber color deepens to black as the coats build up.
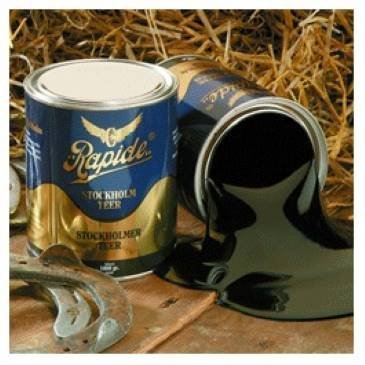
Pine tar is widely used for dressing horses' hooves and for veterinary medicinal purposes:
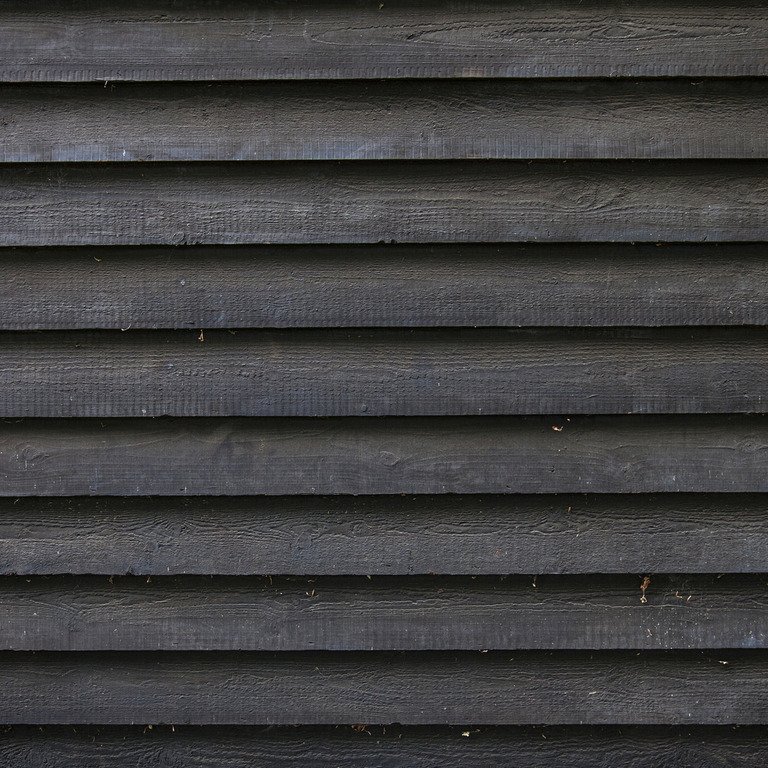
It's also traditionally used as a sealer on bare wood in Scandanavia:
And it's the traditional method of treating wooden baseball bats to provide a sticky grip for the batter:

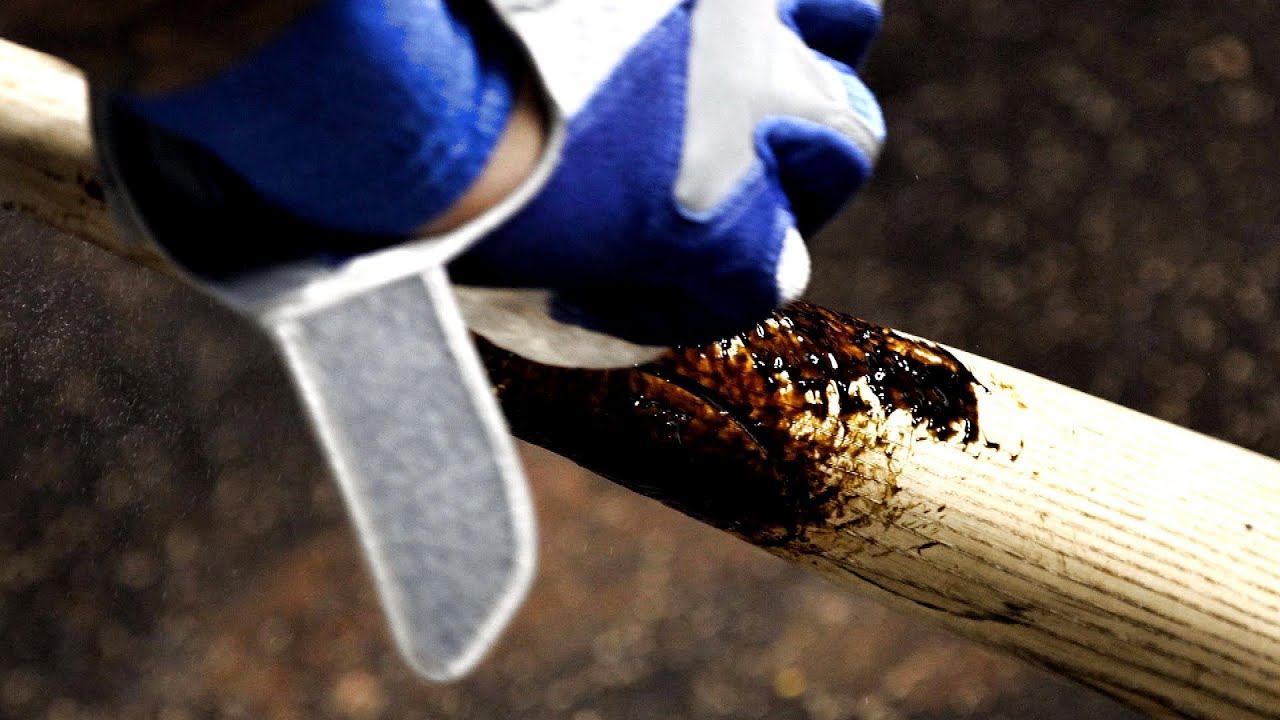
Dark, dark, dark brown... virtually black.
And because it is sticky and gets all over everything, after a good coating of tar for preservation was applied to rigging, it was painted over with black paint to further seal it and provide UV protection. Were this not done, a ship would have "tar tracks" from stem to stern in short order and be quite a mess. As most know, the sailor's "middie" collar, the square of cloth attached to the back of the collar on a sailor's blouse, evolved from a scarf tied around the neck to prevent the pine tar from the sailors' pigtails from staining their shirts when they tarred their pigtails to preserve their hair as it grew out uncut on a long voyage. Upon their return, they'd cut off their tarred pigtails and sell them to the wig makers, who'd rinse them in turpentine to remove the tar and clean the hair for making the wigs so popular in past times.

I could care less what color people make their rigging, but if anybody's asking what color deadeye lanyards were in the Age of Sail, I'm going to say "black." And if people insist on "two tone" deadeyes and lanyards with black shrouds and tan, or even white, lanyards, they're certainly free to do so.
-
15 hours ago, Dr PR said:
Several years ago there was an excellent and extensive discussion - expressing many opinions - about the "proper" color of the dead eyes and lanyards used to set the shrouds. The suggestion was made that someone create a separate topic for this information, but as far as I can tell that didn't happen. I have been researching this topic recently and decided a separate topic was needed to make it easier to find.
CAUTION: This is a very debatable topic. In other words, different people have different opinions, and some are very forceful in defending their opinions!
No. It's not a "very debatable topic," notwithstanding how much it's been debated. There's a big difference between something which is "debatable" and something which is "debated." Just as there is a big difference between an opinion and a fact. As the saying goes, "We have a right to our own opinions, but not to our own facts."
When a fact is easily ascertained under conventional standards, such as "the night sky is dark," opining that the night sky is light is not the fair expression of an opinion, but, rather, an erroneous statement of fact, which, when propounded seriously as fact is often colloquially referred to as "BS." When one expresses their opinion about an ascertainable fact, it constitutes the proponent's admission that they actually don't know what they are talking about, in which case, when they assert a position, they are said to be "BS-ing." Given the obvious olfactory limitations of the medium, it's sometimes difficult to easily discern whether someone is "BS-ing" on the internet. It is generally a dead give-away when, after having been soundly proven wrong, the proponent of "BS" continues "BS-ing" with deflecting comments such as "Well, I suppose we'll just have to agree to disagree," "Well, I have a right to my own opinion," and, "Well, I'm afraid we're way off-topic at this point."
Vessels rigged with deadeyes and lanyards today will frequently have lanyards colored other than very dark brown or black because their lanyards are today frequently made of synthetic cordage which does not require treatment with old-time tar-based coatings to preserve it and the vessels' owners don't care about authentic period appearances. If a model depicts a modern deadeyes-and-lanyard rigged vessel, the model should obviously depict the lanyards as the color they appear on the prototype vessel with allowances for "scale distance viewing." If a model depicts the deadeyes and lanyards on a vessel during the "pre-synthetic cordage era," considering scale viewing distance, they should be black. That's a fact which was never in dispute until some ship modelers started putting light colored (sometimes even ecru or white) lanyards on their models and asserting that light colored lanyards were correct "in their opinion." There's no need to opine. Deadeyes and lanyards continue to be used on vessels of all sizes to this day and when natural cordage is used, it continues to be tarred and painted black to ensure its longevity, just as it was in earlier times. This isn't an opinion, it's a fact. (I once owned and maintained a ketch traditionally rigged with deadeyes and lanyards and I've done my share of full-scale traditional marlingspike rigging on more than a few other vessels. I know the difference between black and any other color and the difference between natural fiber cordage and synthetic.
)
Interestingly, now that high-strength UV-resistant cordage [Dyneema (tm)] is becoming popular in the high-tech racing machines, we are seeing modern deadeyes and lanyards and cordage standing rigging replacing turnbuckles and wire cable standing rigging on modern sailing vessels across the board. The lanyards pictured here aren't black because they don't require tar and paint to keep them from deteriorating in the elements.
Today's cordage comes in an unlimited range of colors. I'm sure somebody will rig a deadeye with a fuschia lanyard some day, but that's not going to make fuschia lanyards correct on a 18th Century ship of the line. I suppose if you are modeling a modern day vessel with deadeyes and lanyards you can correctly make them any color of the rainbow.

-
15 hours ago, TBlack said:
Bob,
I appreciate your lengthy and in-depth reply. My source of information is the book Master And Commander. The Sophie, unlike the Speedy, had a quarterdeck and a captain's cabin. She was, in fact, the former Spanish brig Vincejo (Trans: swift) which, in real life, had a quarterdeck and a captain's
cabin.
What I have done is buy the Speedy kit from Chris Watton and intend to alter it to allow for the changes to the aft portion (this is a little like taking the Mona Lisa and painting a mustache on her). And I think I will handle the stern like the Fair American, that is, the outboard windows will be fake.
Tom
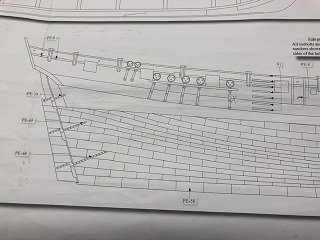
Good luck in your endeavor. I remain curious as to how putting seven windows in the transom of HMS Speedy, together with a quarterdeck and captain's cabin will be possible, if for no other reason than there does not appear to be sufficient depth in the stern of Speedy to accommodate a great cabin with even minimal standing headroom. She's just not that large a vessel. Note in the drawing below on the right that the compartment indicated does not run all the way aft. That's because there's no room back there, given the tuck of the stern. What space there may be in the compartment indicated would have quite a minimal sole area, being useful perhaps as a sleeping cabin with pilot berths on either side, but certainly not for anything serving as a captain's great cabin with a table and chairs, etc.
If Speedy wasn't the prototype for Surprise, as some commentators have concluded, any other vessel of the size described in the book would have to have a radically different hull shape and deck structure to provide space for a cabin with seven windows across the transom, negating the usefulness of Speedy as a basis for a kit bashing.
I wouldn't give all that much weight to the descriptions in the book, nor in Geoff Hunt's cover illustration. Hunt's depiction, as you have noted, is inexplicable when critically examined, no matter how convincing it appears at first glance. On close examination, the side of the ship and the shape of the windowed stern in Hunt's illustration simply don't match. He's basically painted an optical illusion. As for O'Brian's descriptions, it must be noted that, by all indications, he knew diddly squat about ships and the sea, save what he cribbed from old Admiralty reports. O'Brian was a technical writer and translator by trade who, despite his published claims to the contrary in one instance, later betrayed himself to have had little, if any personal nautical background or experience. His Aubrey/Maturin series was written at the request of a publisher who wished a Napoleonic Era "Hornblower-type" period sea novel. As an excellent technical writer, he based his stories on the Admiralty action reports of the time researched in the National Maritime Museum, Greenwich, primarily basing his Aubrey character on Thomas Cochrane (1775-1860) the real Master and Commander of the sloop HMS Speedy. (See: Thomas Cochrane | Royal Museums Greenwich (rmg.co.uk) ) In all of his writing, O'Brian was noted for his uncanny ability to present himself as sounding as if he knew far more about what he was writing than he actually personally knew, this being the hallmark of a great technical writer. That said, in a body of work as extensive as the Aubry/Maturin novels, and particularly in his very first effort in the gendre, he's entitled to a faux pas now and again. He was, after all, imagining the features of vessel upon which he'd never set foot without the slightest background in naval architecture, let alone such as was particular to the period. In short, I think he dropped the ball on this one.
Still and all, have fun with your build and do keep us apprised in your build log. It's a bit of a "square peg in a round hole" challenge, but a fascinating one nonetheless.
-
Thanks a million, Ron. That was very helpful.
- thibaultron and mtaylor
-
 2
2
-
Wow! Those are some fantastic looking sails, Ron.
Did you show how you accomplished this in a build log? I'm interested in picking up some tips on this technique.
- druxey, mtaylor and thibaultron
-
3
-
Yes. Some canvas was "sent up" and "sent down" at sea and not left continually bent to spars, but this was generally light air stuff. In port, where it would often take weeks to unload a vessel, or months, if it was necessary to wait for favorable winds, canvas would be sent down and ashore for repairs and/or storage. When I was a kid, the was an old sailmaker and canvas shop on San Francisco's Embarcadero, Simpson and Fisher, that had been around since the sailing ship days. They had a big painted sign on the wall of the building advertising "sail storage." Ships which anticipated being laid up for a period of time would store their canvas ashore in dry storage where the rodents could be kept at bay more easily than aboard ship. Salty cotton sails were a delicacy to the shipboard rats.
- Dave_E, Keith Black, BenD and 1 other
-
4
-
On 8/30/2021 at 12:50 PM, Laggard said:
Dude, I’m cutting corners on the block because I physically can’t seize a block that small the historically proper way. I don’t know why. Ask a doctor as I am not one.
I have all the tools I need. Clamps, third and fourth hands, a half dozen hemostats, magnifying glass, etc. I simply cannot get my fingers to work with that small a line. I’m happy you can.
I managed to seize a block today. Under magnification it looks accurate to me.
Dude, why didn't you say so? When I had that very same problem decades ago, that's exactly what I did... I asked a doctor. A microsurgeon, to be exact, and he showed me how. Now, with the magic of the internet, you don't have to ask a doctor. Just study the medical school instructional videos on YouTube. These are basic essential ship modeling skills that aren't in the kit instructions.
-
The only explanation would be artistic license taken in Geoff Hunt's cover art for Master and Commander, I suppose. I never noticed it before, but there's definitely something fishy about that stern. He's omitted the overhang and curve of the gallery, which would accommodate the width for the windows, but even then, it's just wrong. Hunt appears to have painted the right vessel, a 14-gun sloop, and then added seven windows where there were never ever any windows at all, apparently in order to cover for O'Brian's confusing HMS Sophie with HMS Surprise. Sophie had no windows in her stern at all. It's Surprise and her prototype, the 24-gun HMS Porcupine class, that had seven.
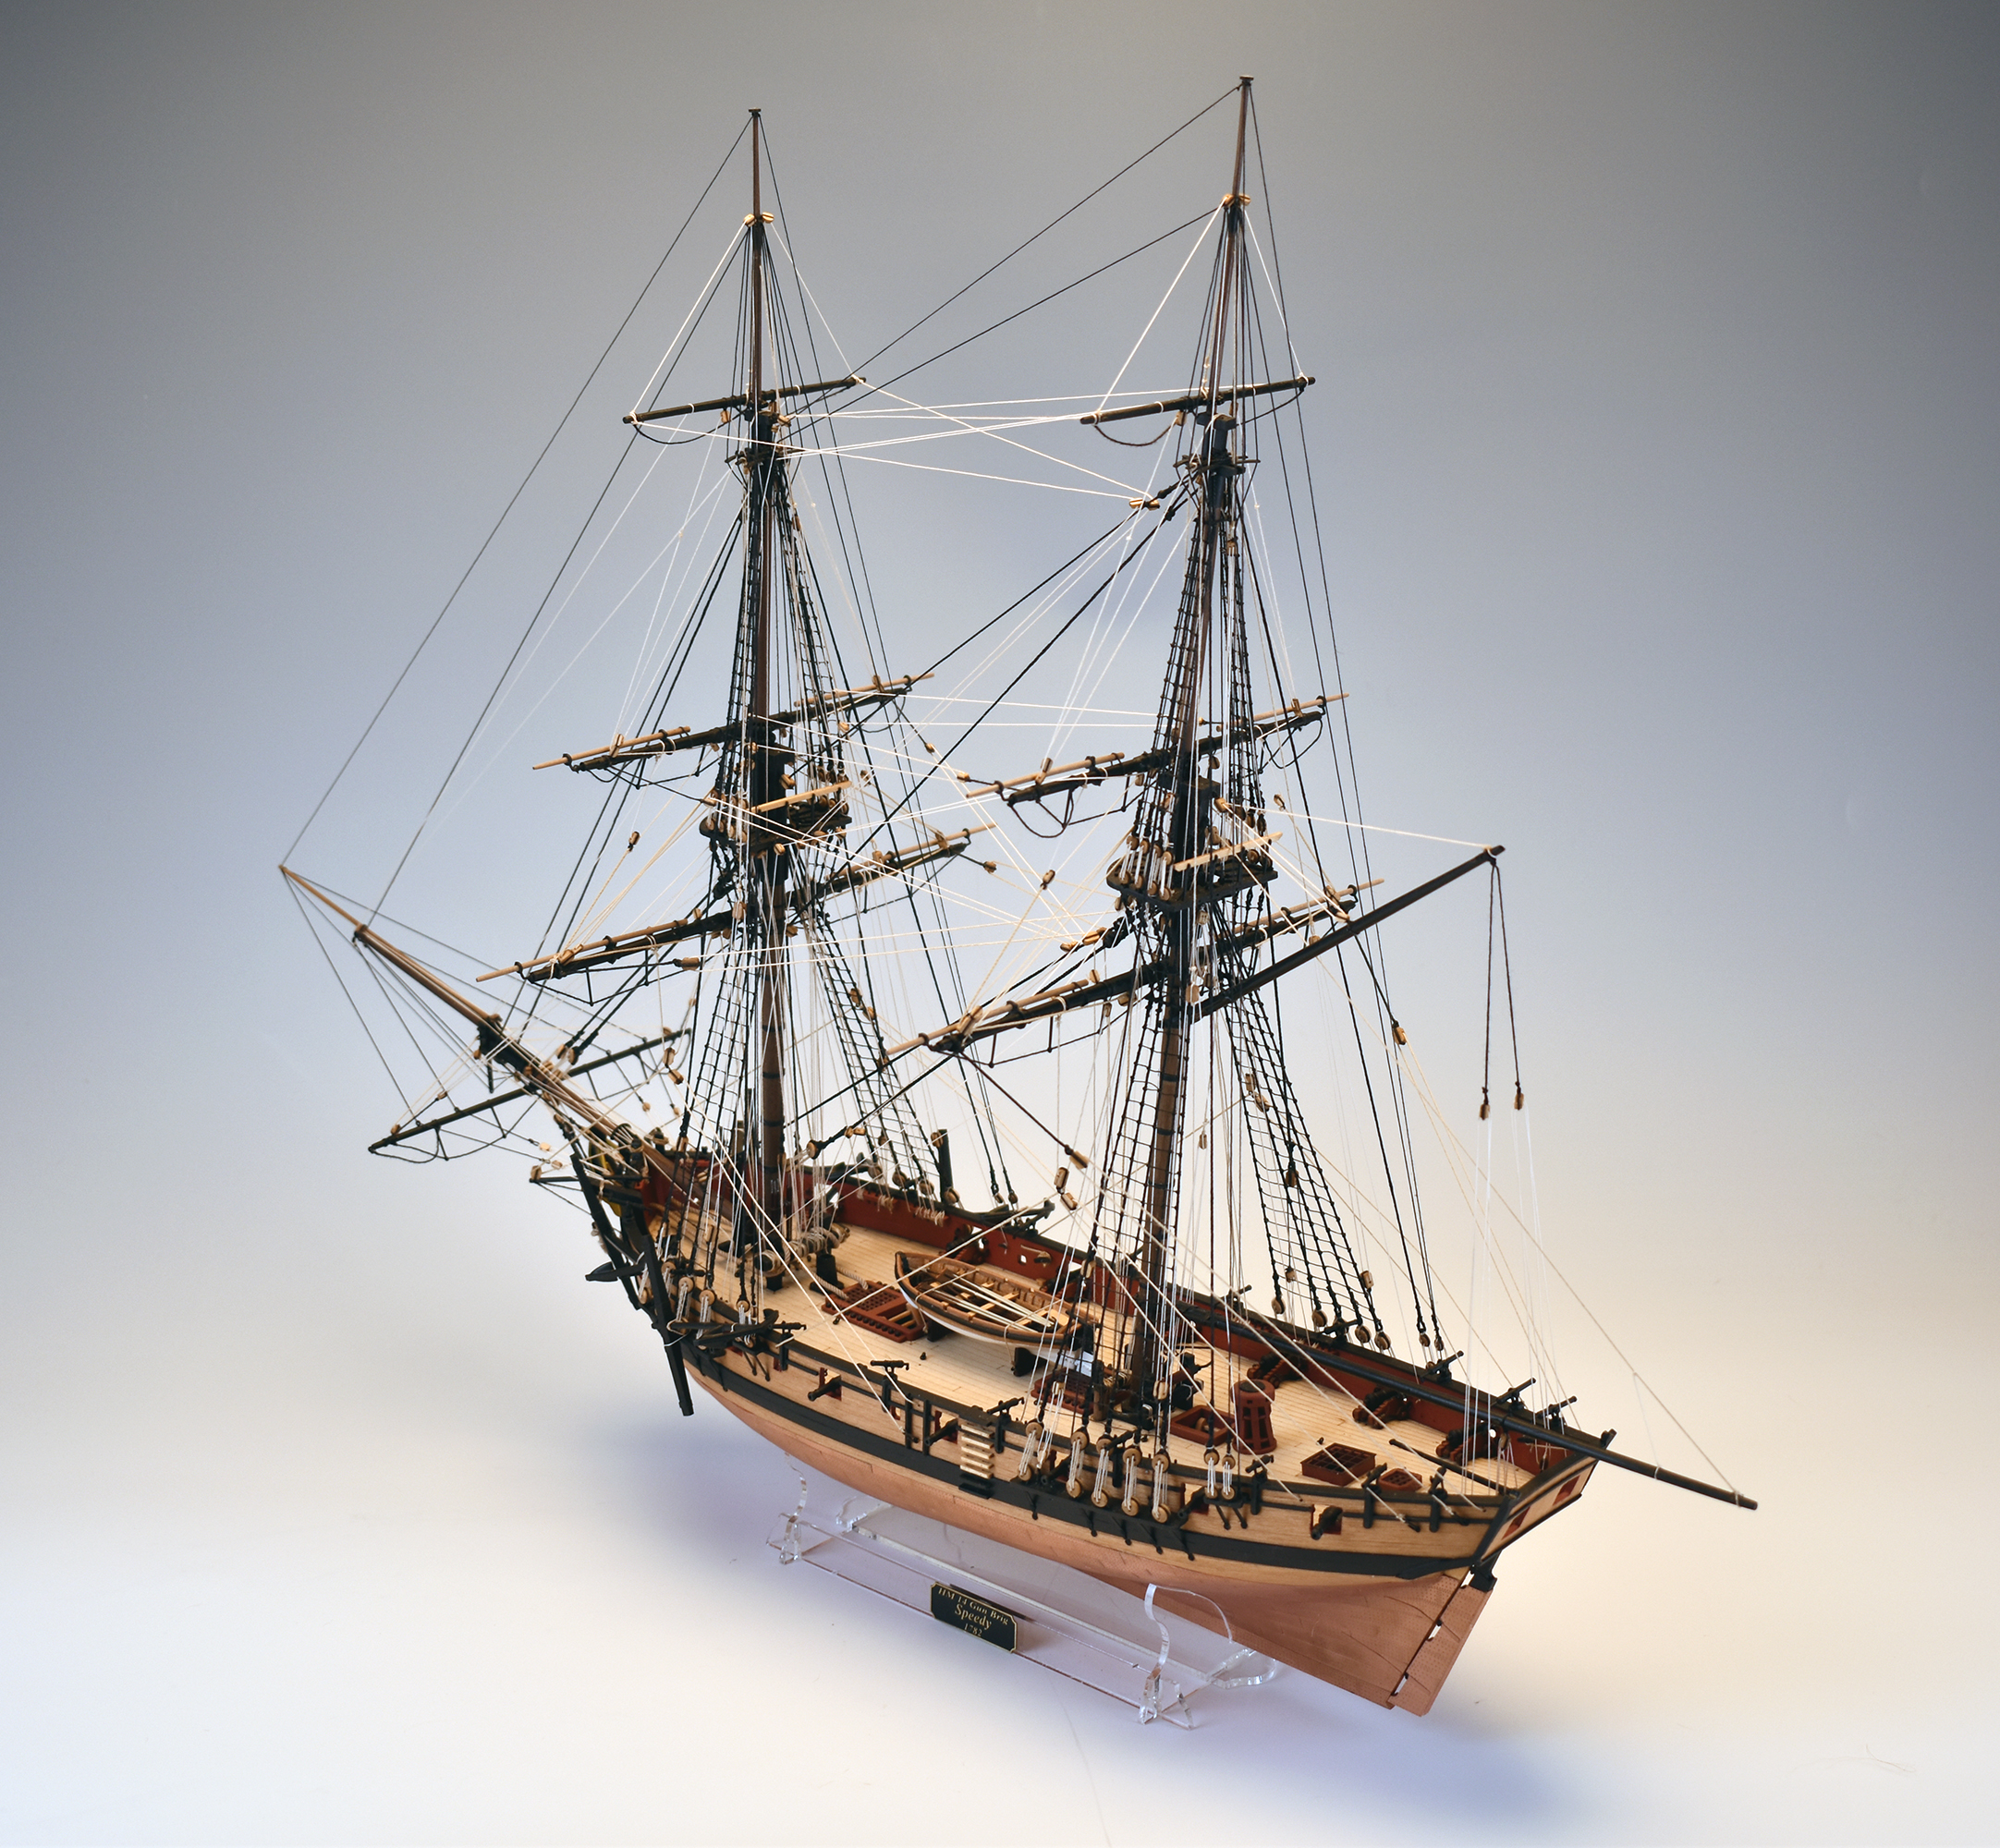
O'Brian based his HMS Sophie on the 14-gun sloop, HMS Speedy. (Vanguard Models offers a well-respected kit model of HMS Speedy.) No kit bashing required, save painting the name "Sophie" on it. Order 1:64 HMS Speedy – VANGUARD MODELS
(What may appear to be two windows on Speedy's stern are actually gun ports for deck cannon. She has no aft great cabin.)
If you want to build a model of HMS Surprise, you should be building a model of a 24 gun Porcupine class Royal Navy frigate, which was, I believe, HMS Surprise's sister-ship. I suggest you get a copy of The Anatomy of the Ship series, The 24-Gun Frigate Pandora. The 24-Gun Frigate Pandora (Anatomy of the Ship): McKay, John, Coleman, Ron: 9780851778945: Amazon.com: Books You'll find the complete plans in there for the actual vessel upon which O'Brian based his fictional HMS Surprise. Here's the stern of the actual vessel created for the movie, a conversion of the HMS Rose replica. I wouldn't trust Hollywood's accuracy, but you can see that a seven-window great cabin wouldn't ever fit on tiny little Sophie.


HMS Pandora went down on the Great Barrier Reef after rounding up some of the HMS Bounty mutineers. Her wreckage was discovered, 30% intact, in the late seventies and extensive archaeological excavations have been done on her. Consequently, she's very well documented. Here's a photo of the Constructo kit model of HMS Pandora, seven windows and all. HMS Pandora | Model Ship | STEPHENS & KENAU™ (stephensandkenau.com)
- FriedClams, mtaylor, GrandpaPhil and 1 other
-
4
-
This may be an obvious observation, but you can use double your table saw's depth of cut by cutting one side, then turning it over and cutting the opposite side. The two cuts should overlap a bit and double the effective depth of cut. If that is still not enough, cutting a kerf on each side on the table saw and then cutting the remaining distance between the two table saw cuts by using the table saw cuts to guide the cut of your band saw will result in a very accurate cut particularly in paring off thin cuts from a billet.
-
If we order custom blades one by one, I'm guessing that's going to be a pain in the butt for you and a pain in the wallet for us. If you are interested in production runs, you might consider connecting with Jim Byrnes of Byrnes Model Machines who makes the "industry standard" modeling table saw. Byrnes Model Machines Home Page If you can reproduce the old Thurstons, I bet he'd buy a bunch of them to equip his table saws, as before, and we'd all happily buy replacement blades from him. Bulk orders by Jim could reduce the production costs and "leave a little meat on the bone" for everybody.
-
6 hours ago, Jaager said:
Will this work to help with fine detail color application?
I saw a video featuring an experienced boat/yacht finisher. I think he was advocating a rather vigorous technique for varnish application.
(I think he favored organic solvent based varnish). The key factor that I took home was that he advised wrapping "masking" tape from over the heel to abut half way to the tip. The wrapping was fairly tight. It reduced the flopping arc of the fibers - stiffing them - and it makes migration to the heel a longer journey in a compressed region.
Cleaning solvent can neutralize any bonding between the tape and fibers to remove it during cleanup.
I expect taping would work to stiffen some small brushes, but, all things considered, using a very small, short bristle brush (a "pointer" or "dotter") would be preferable.
Some pros do wrap the bristles closest to the ferrule with masking tape for the purpose described and it works quite well. It improves the performance of regular brushes when the brush isn't as stiff as the painter would like. The proper technique for varnishing is different than that for finish painting. Varnish is applied more thickly in order to build the depth of the coats and so is said to be "flowed on" rather than brushed repeatedly to spread a thin coat evenly. The less you brush it, the thicker the coat will be and the less likely for bubbles to occur in the varnish coat. A stiffer brush which can carry more varnish makes this easier to accomplish.
Actually, there are specialized brushes made for varnishing and lacquering. They are high quality brushes with shorter bristles and are hand made with badger hair. Originally, they were made with bristles set in vulcanized rubber in a special ferrule which minimized getting the coating in the heel. (In fact, most untrained painters dip their brushes too deeply into the coating which is a major contributor to it working into the heel.) The old fashioned hand-made real badger hair brushes were quite expensive. Grumbacher made the best of them, but no longer makes genuine badger hair brushes. A Grumbacher size 4 artist's pure badger bristle brush used to sell for around fifty bucks and last I heard thirty years or so ago, a three inch badger varnish brush was pushing $100.
There are now synthetic "badger" and blended real badger/synthetic badger varnish brushes with the bristles set in epoxy, which does not require the fancy ferrule of the old style, but I've yet to use one. They still cost quite a bit. The three inch synthetic badger varnish brush, pictured below, retails for close to seventy bucks. The one inch one runs around $40. Obviously, wrapping tape around the heel of a decent standard brush is a good compromise, but I must say there is nothing sweeter than varnishing with a real badger varnish brush.

Paint Brush Highlights: Badger Flowing (dynastybrush.com)
-
To the extent possible, paint should not be allowed to run into the heel of the brush. This makes cleaning a nightmare and meticulous cleaning is imperative for fine finishing. If even the slightest amount of paint remains on the bristles, when the brush is next used, the flexing of the bristles will cause the dried paint to crack and flake off the bristles and contaminate the job.
Natural bristle brushes are to be used with oil-based paints and varnishes and should be stored clean and oiled with mineral oil to hold their shape. They shouldn't be used for water-based coatings nor washed in soapy water. Water softens natural bristles and soap removes the oil that natural bristles require to remain "healthy." (A "tired" natural bristle brush can sometimes be rejuvenated using hair conditioner.) Synthetic bristles are for water-based coatings. They don't absorb the water. They can also be used with oil-based coatings, but they won't hold as much paint in use. Natural bristles have the ability to carry more paint than synthetic bristles.
Detail brushes can be quite expensive. A squirrel or sable sign painting brush (called a "quill,") can easily set you back thirty bucks and there really aren't any substitutes for freehand lettering. Three excellent videos on conditioning brand new brushes and cleaning brushes for water based and oil based paints can be found here: Brush Care 101 | SIGN PAINTING SUPPLY CO. (bigcartel.com) The use of quality brushes and oil paints were the way the modeling masters painted topsides and bootstripes in the days before airbrushes and masking tape.
Fortunately, "dotters" and "spotters" and other very small brushes have become popular due to the ladies' fingernail painting fad these days. Consequently, there are a lot of inexpensive synthetic bristle "dotters" and "quills" for sale on eBay under "nail painting brushes." These you can abuse and throw out when their are shot. See: nail painting brushes | eBay


5pcs Nail Art Liners Striping Brushes Fine Line Drawing Detail Painting Blending 853506008793 | eBay
- Ryland Craze, Canute and mtaylor
-
3
-
3 hours ago, Steve20 said:
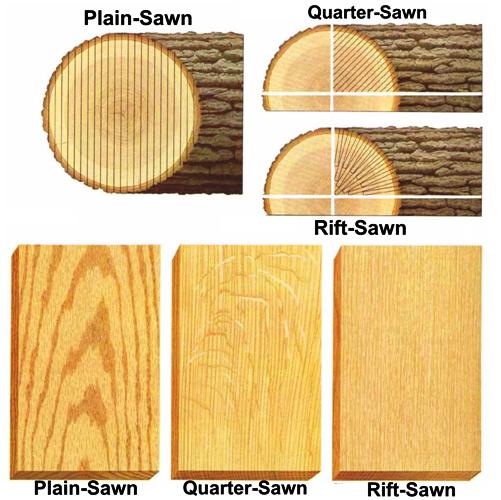
From these should I saw the wood in such a way that I end up with the edge of the timber becoming the face of the cut planks (edge cut, I believe) or should they be from the face.
That would depend upon the way the plank you are cutting from was originally sawn. The question is really what do you want for grain orientation in the plank? In full-size construction for carvel planking, you want the grain running perpendicular to the wide face of the plank ("quarter sawn" or "rift sawn") and for lapstrake planking, you want the grain running parallel to the wide face of the plank ("plain sawn.") This is because dry wood swells across the grain when it becomes wet, so that the carvel planks will swell so that the plank edges at the seams will press tightly against each other, while lapstrake plank faces at the overlapping plank seams will swell against each other. There are a number of regionally popular terms for saw cuts, as well, but basically it's all about the way the grain runs in the plank.
This will depend upon how the log is sawn:

Quarter sawn plank:

http://blog.carbideprocessors.com/wp-content/uploads/2013/04/Sawn-Lumber.jpg
The grain orientation is of less importance with models, where the appearance of the plank faces, where the grain appearance of bright finished plank faces is an important consideration in achieving the proper scale appearance. For a model that will be finished bright, you want as little grain showing as possible and preferably none showing at all. This will generally favor rift-sawn stock, as can be seen from the picture above. (And, as rift-sawn stock is the most labor intensive and the most wasteful, it is also the most expensive.) This consideration is mitigated by the lack of visible grain in some select woods, such as castello boxwood and Alaska yellow cedar. Pear will also provide areas of select unfigured stock, but the strong color variations in a single piece of pear will often demand that only a limited portion of matching wood can be gotten out of a single plank. For example, you may get some suitable light-colored plank lengths cut from the sapwood on the left side of the pear plank pictured, but it's unlikely you'd get evenly colored planks from the heartwood on the right side of the pictured pear plank.
Structure is also important. Given the stock you've pictured, I'd be cutting plank strips from the long edges of the planks you have. As for the pear, however, the piece doesn't appear particularly "straight grained" and you don't want to cut planking strips in a way which will yield planks with grain running across the plank strip such that the strip will easily break at the grain crossing when you try to bend the plank to fit the curve of the hull. That said, it's hard to tell just looking at the top edge of the plank pictured. A test strip or two should confirm if it's suitable for bending without breakage.
There is a good treatment of milling modeling stock in Volume II of the NRG's Ship Modeler's Shop Notes. You may find this article helpful as well, although it addresses milling with full-size woodshop tools. https://thenrg.org/resources/Documents/articles/MillingScaleLumber.pdf Most modelers use larger shop tools to cut smaller billets of select wood from which they mill their modeling stock with smaller saws such as the Byrnes Model Machines 4" table saw.
- thibaultron and Saburo
-
2
-
You should have no problem finding an electrostatic ("Xerox") laser printer at your local copy shop. These operate by creating a "picture" with static electricity and then blowing black powder across the surface, which the static electricity makes stick to the paper. The black powder is a sort of ground vinyl powder which, when heated, melts and bonds to the paper.
If one makes a laser print, particularly one with the "darkness scale" adjustment turned up high, This piece of paper can be laid print-face-down on a surface, such as a sheet of wood, and ironed with a clothes iron. This will transfer the printed image to the adjacent material when the heated iron causes the black printer powder to re-melt. This, of course, produces a mirror image, so that has to be taken into consideration and a "mirror flip" done on the printer in one fashion or another if the mirror image is a problem.
As for veneer, I would be very hesitant to use it on a model for most purposes. Grain orientation is a problem with most all veneer because it isn't sawn off the tree, but rather it is peeled off the tree with a sharp knife as the tree is rotated in a lathe. The stability of the sheet is in great measure dependent upon the adhesive holding the veneer to the substrate.
As for thickness, shaving off the edge of a plank or billet with a plane can yield a nearly transparently thin shaving for use as scale planking stock. I'd consider 0.48mm quite thick for 1:96 scale if one were using any sort of underlayment. At that scale, it's often a matter of faking the appearance artistically rather than duplicating full scale construction practices. I'd give great weight to Eberhard's advice above. He's one of the masters at what I call "artistic modeling" when the skills of an artist are brought to bear on the skills of an engineer to create a compelling impression of reality in miniature.
-
It's not an "either/or," but rather a "both/and" kind of thing. These volumes are simply collections of reprints of the "Shop Notes" section of the NRG Journal over two spans of time. (They should be due for another volume one of these days soon.) The subject matter is not highly organized in terms of distinguishing between highly sophisticated techniques and those which "will help the newbie most." (All will eventually be helpful to a newbie, but some will appeal primarily to the more experienced builder.) These books are goldmines of useful how-to-do it information, but step-by-step tutorials for newbies they are not.
Each volume can be purchased for $35 from the NRG Store online. Nautical Research Guild (thenrgstore.org) Used copies in good shape cost perhaps half that on average, but, by the time you cover shipping, you might as well spring for a brand new copy in good shape. If buying Volume I used, try to get a later printing which is spiral bound. It's helpful if the book will lay flat with the covers turned all the way back, reducing the space the book will take on your bench and making for easy copying of pages if that is desired. My Volume 1, purchased many years ago, was the glued paperback binding and it sheds pages, a problem I've solved with a couple of binder clips. If cost is a limitation, used copies of both volumes are readily available on eBay and Amazon used books. See: Ship Modeler s Shop Notes 9780960345618 | eBay and Ship Modeler's Shop Notes: Edson, Merritt, Lankford, Ben, Mueller, Edward, Rubin, Norman: 9780960345618: Amazon.com: Books
To answer your question directly, if you can only afford one, I'd suggest Volume II, since it is the more recent selection of Shop Notes articles. Some of the material in Volume I, while still useful, can be somewhat dated. The level of sophistication in ship modeling has increased markedly in the last couple of decades. You can then buy Volume I later, as both remain in print.
If you pursue the hobby for any length of time, you will quickly discover (and apparently already have) that an adequate research library is an essential tool for the ship modeler. Beware: IMHO, most of the newbie "how to do it" books advertised as such are not worth what they ask for them. Use the forum search engine to find threads on which books to buy for a decent reference library and start by buying the classics in your area of interest which you will find identified there. It's a good idea to develop the habit of making a "budget" for building your reference library and stick to it. By committing to $25 (or more) a month, which in today's money is no more than the old "three martini lunch" plus tip, and scouring for used books on line, you will be able to painlessly buy a book a month or so.
-
That will do it, for off-model rigging jobs, at least. A similar effect can be achieved by simply blowing for a couple of seconds on a knot dampened with shellac. The alcohol evaporates very quickly. The same is true if one thins their white carpenter's glue with denatured alcohol. It's the water content in the thinned glue that slows the curing time way down.
- mtaylor, Canute, thibaultron and 1 other
-
4
-
I presume you are familiar with spiling plank for hull shapes. (See:
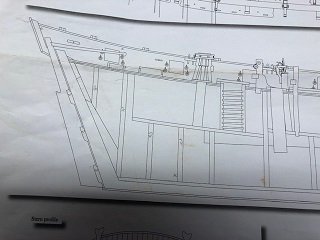
Planking decks is done using the same principles as planking hulls, but, being as decks are more or less flat (discounting the deck shear and camber which at smaller model scales is usually so negligible as not to be a consideration,) it's actually easier. To plank a deck, however, there are several layouts. Primarily, the options are to 1) run the planks of equal width and parallel to the center line or 2) run the planks curved to the shape of the covering boards. Then you have the options of 1) nibbing or hooking the plank ends at the covering boards (and king plank in one version) to one another avoid pointed ends, which are to be avoided because of the difficulties they pose in caulking a tight seam. These options will be determined by the vessel you are building. Generally, curved planking dictated by the covering board curves is "fancier" and more labor intensive and would not generally be seen in larger vessels. You will have to research the planking method employed on the vessel you are modeling. The plan you pictured is, on my screen at least, difficult to see in detail, but it appears that it is a "sprung" plank deck that generally follows the curve of the deck edge at the hull, but forward, where the curve is sharper, accommodates the plank ends by a notched covering board. In full-size practice, the deck planks would be straight and the entire plank bent (or in this case, "edge set") to the curve desired. In modeling scales, the deck planking can be "bent on the flat" with a plank bending iron or clothing steam iron, as in this video:
Once the type of planking is determined, I find it easiest to draw a paper or card template of the deck (or each level of deck, as the case may be) and draw the covering boards, king planks and planks on the template and then trace the template to make patterns for the planks, etc. Generally, whether planking is laid straight or curved, the the planks are generally not tapered. In cases where tapering deck planks is done, they can be spiled in the same manner as hull planking and cut to shape.
The use of a template also allows the deck framing to be drawn on the template so that the "schedule" of plank butts can be accurately represented on the model, making sure that butts fall on frames where there is some "meat" below to which they can be fastened.
Particularly in smaller scales, some modelers find it convenient to use stiff card (or in larger scales even thin plywood) for the deck template and glue thin deck planks directly to the card (or plywood) template and then glue the entire "planked" section of deck to the model. It's a lot easier to work with thin "planks" and covering boards that can be cut to shape with a scissors or knife and glued to the deck template underlayment than to fiddle with scale thickness planks one at a time on the model. Such "faux" deck planking may be gotten out by shaving long, thin, strips from the edge of a piece of suitable stock with a sharp, properly tuned hand plane. In this fashion, it's easy to produce long curled shavings of any length desired, limited only to the length of the stock you shave them from. These curled shavings can be placed in hot water for a few minutes and then, while still hot, uncurled and laid flat between a couple of flat surfaces (e.g. sheets of window glass) and they will cool and dry flat and uncurled, like veneer, suitable for cutting to shape as planking, covering boards, deck furniture trim, or what have you. The edges of the planks can be blackened with a pencil to simulate the seam stopping, if desired and the decking, once dry on the underlayment can be stained to the finish desired. For those who use "wipe on" finishes, it is far easier to obtain a good wiped-on finish on a flat, unobstructed deck built in this way before it's installed on the model.
But, as said, you have to ascertain how the planking was laid on the prototype, or may have been laid on the prototype if that is otherwise unknown, so you know what planking layout you will need to devise. It seems you have a plan which may have that information on it, so copying that deck plan will easily give you the template you need, particularly the covering board notching, and your deck frame spacing.
-
16 hours ago, Nemo1966 said:
@Bob Cleek If thinning down gloss Poly varnish gives a satin look, then Minwax Gloss wipe on poly is NOT simply thinned down Poly Varnish as @Gregory stated... if it was it would be Satin. 😋
No, Nemo. I don't think you are quite clear on the concept. If you wipe on a "gloss" finish, it's not going to be glossy... at least not until you hand rub a whole lot of coats and build some depth and then rub to a very high degree of smoothness. Canned "satin" finishes, as marketed by manufacturers, are simply gloss finishes (and all oil finishes are "gloss" finishes) to which a "flattening agent," generally a fine dust of some time, has been added so that the coating dries with a less smooth finish due to all the dirt in it. The purpose of these canned "satin" finishes is to mimic the look of a gloss finish that has had some of the gloss knocked off by hand rubbing with pumice and rottenstone.
-
4 minutes ago, mtaylor said:
Blame it on fuel costs and the fact the trucking industry is hurting for drivers and rigs.
I'm with the economists who explain that people who didn't spend money during the Pandemic lockdown and retailers who slowed production and didn't stock up with product adequate to meet the hugely increased spending now that the Pandemic is easing up occasioned the supply and inflation we are now experiencing. "Just in time" production and inventory warehousing backfired on us this time around. Now we've got big demand and small supply. We don't have the infrastructure to move the products. Whether that be to unload the hulls now anchored offshore waiting for dock space or the truckers and trucks to move it from the docks to the distribution centers to the retail shelves. Hence, inflation. The only solution is to stop buying stuff right now! You win both ways doing that because 1) you don't pay temporarily inflated prices, and 2) less pressure on the manufacturing and supply chain means less inflationary pressure. Things will be back to normal soon enough. Oil prices have already started dropping as production which was stopped during the Pandemic due to low demand is now catching up with the recovered post-Pandemic demand.
-
1 hour ago, mikegr said:
Even talking about static models i am concerned about weight distribution, for an unknown reason i want my projects to be built not top heavy.
I would expect this to be an issue easily addressed by adding some inside lead ballast to the hull.
- thibaultron, mtaylor and mikegr
-
3
-
18 hours ago, wefalck said:
Carbon fibre is probably going to be very expensive and likely to be an overkill for a static model, where the tensile strenght provided by carbon fibre is not needed.
In my experience, resin bonded carbon fiber is one of the nastiest materials I've ever seen worked. When fairing it smooth, the sanding dust is indistinguishable from sanded pencil lead dust, and lots of it. It gets everywhere on everything. You end up looking like you've been working in an old-time coal mine all day. Clean-up is a nightmare.
- mtaylor, mikegr and thibaultron
-
3
-
3 hours ago, Roger Pellett said:
In my (not so humble) opinion, the model is later than the 1920’s. Maybe c 1930-1050. In the mid 1930’s, L. Francis Herreshoff designed a double ended yacht to contend for the America’s Cup. She was eliminated in the trials. Maybe she or one of Herreshoff’s other double enders inspired the model.
Roger
The jib-headed main with battens would also suggest a date later than the 1920's.
- Keith Black, mtaylor and Dobro23
-
3
-
What Roger and Toms said... You will find that "old 'arn" is by far the best bang for your buck if you can find one in good shape. I have my father's 1950 Craftsman bench top full-size drill press made by King-Seeley. It does all I've ever asked for it, keeping in mind that side-loading a drill press with a Morse taper chuck runs the risk of loosening the taper and having the chuck fall out at speed! (Light work on wood can be done, if you are careful. I use sanding drums on mine without a problem.)

The same model was also offered in a floor standing model with a longer post.

When buying a used (or, these days, new...) drill press, be sure to check the quill runout with a dial indicator. The lack of runout is critical if you plan to use the press for accurate work with small bits. Even a small amount of runout will break the small bits. With any sort of stationary machine tool, the heavier the better. Weight equals accuracy, as well as durability. (Note that on the pictured machines, the only bit of plastic on them are the phenolic knobs on the quill lever arms.)
If you want to buy new, I'd take a hard look at the quality offerings from Grizzly. They have decent quality control and warranties. A good drill press should last longer than your grandson. They don't sell those at Home Depot or Harbor Freight.
- JeffT, thibaultron, mtaylor and 2 others
-
5

Shroud lanyard color
in Masting, rigging and sails
Posted
Precisely so. And a host of other factors, as well.
I have little investment in what color somebody makes their lanyards, but the discussion illustrates what I believe to be a much greater problem of the manner in which quite significant errors worm their way into the historical record. Already, in this thread alone, we see assumptions based on incorrect perceptions and reasoning, obviously erroneous historical recreations, and even inaccurately re-rigged contemporary museum models offered as "authority" for modeling depictions which are simply historically wrong. On this point, again, we can see how assumptions by otherwise technical masters of the craft and inaccuracies in often modernly re-rigged contemporary models find their way into the canon of present-day "historical authority." As an historical research wonk, I've too often struggled with inaccuracies which may have found their way into the historical record by way of a 150 year old erroneous newspaper account which was cited as gospel over and over by later historians who assumed it to be true without any further research or historical analysis. Just as with "fake news," an assertion forcefully asserted often enough makes for "fake history." Three hundred years from now, will museum curators and researchers be misled by then-surviving inaccurate models being built today, as we may have been misled by assuming the accuracy some of those left to us by our ancestors?
In his masterful work, The Fully Framed Model, Building the Swan Class Sloops, Volume IV, David Anscherl opines that because deadeye lanyards had to be frequently adjusted, they are running rigging and were light brown..." (or words to that effect, this not being an exact quote.) In my own experience sailing vessels equipped with deadeyes and lanyards, the deadeyes, once set up, aren't ever adjusted at all, or, at least, very rarely and when they are released, as when unstepping a mast for maintenance, tarred and painted lanyards, which are at that point quite stiff and hard, are not infrequently simply cut away and replaced anew when the mast is restepped . Now, I'm not saying they weren't ever adjusted at sea and maritime adventure writers describing "tightening the lanyards until they screamed in order to squeeze the last quarter of a knot out of the old girl" in a sea chase does make for exciting reading, but I do know for sure that traditional standing rigging generally does not need to be adjusted after being set up and doesn't need to be all that tight in any event.
A traditional keel-stepped mast is quite capable of standing on its own, supported laterally by its partners. The purpose of the standing rigging was not to hold the mast vertical, but rather to evenly transmit the forces of the sail through the rigging to the hull. (The engineering of the modern "Marconi" rig being an entirely different animal.) The purpose of the deadeyes and lanyard were not so much to provide a mechanical purchase in the manner of a block and tackle, but to provide a method of fastening the shroud to the chainplates in order to transmit the stresses from the sails to the hull. Tying a knot in a shroud so it might be fastened to a chainplate is not a practical exercise. The deadeye provides the necessarily large diameter around which the thick, stiff, shroud-laid shroud can be turned and lashed. Moreover, as a practical matter, there's very little mechanical advantage in the deadeyes and lanyard because the tighter the lanyard becomes, the greater the friction of the lanyard going through the deadeye holes, greased or not, and a point of diminishing returns is quickly reached. As for tightness and stretch, masts bend somewhat and, in so doing, the windward shrouds fetch up tightly while the leeward shrouds become slack and once the windward shrouds have taken up, they are as tight as they need to be to efficiently transmit the power of sails to the hull of the ship. (Pre-stretched, four-strand shroud-laid cordage sacrificed tensile strength in exchange for lack of stretch, in any event.) I certainly wouldn't contradict Anscherl on any other point I can think of, but on this one, I think he jumped to the wrong conclusion. The definition of the term, "running rigging" is perhaps too broadly applied in this instance. Lanyards do little, if any "running."
Similarly, anyone who has done any amount of traditional rigging using "Stockholm" or pine tar can attest that if it is thinned greatly, it is indeed amber colored, but in the form it is usually applied to standing rigging, it is so dark a brown as to be seen as black, and that's a fact, not an opinion.