md1400cs
-
Posts
2,868 -
Joined
-
Last visited
Content Type
Profiles
Forums
Gallery
Events
Everything posted by md1400cs
-
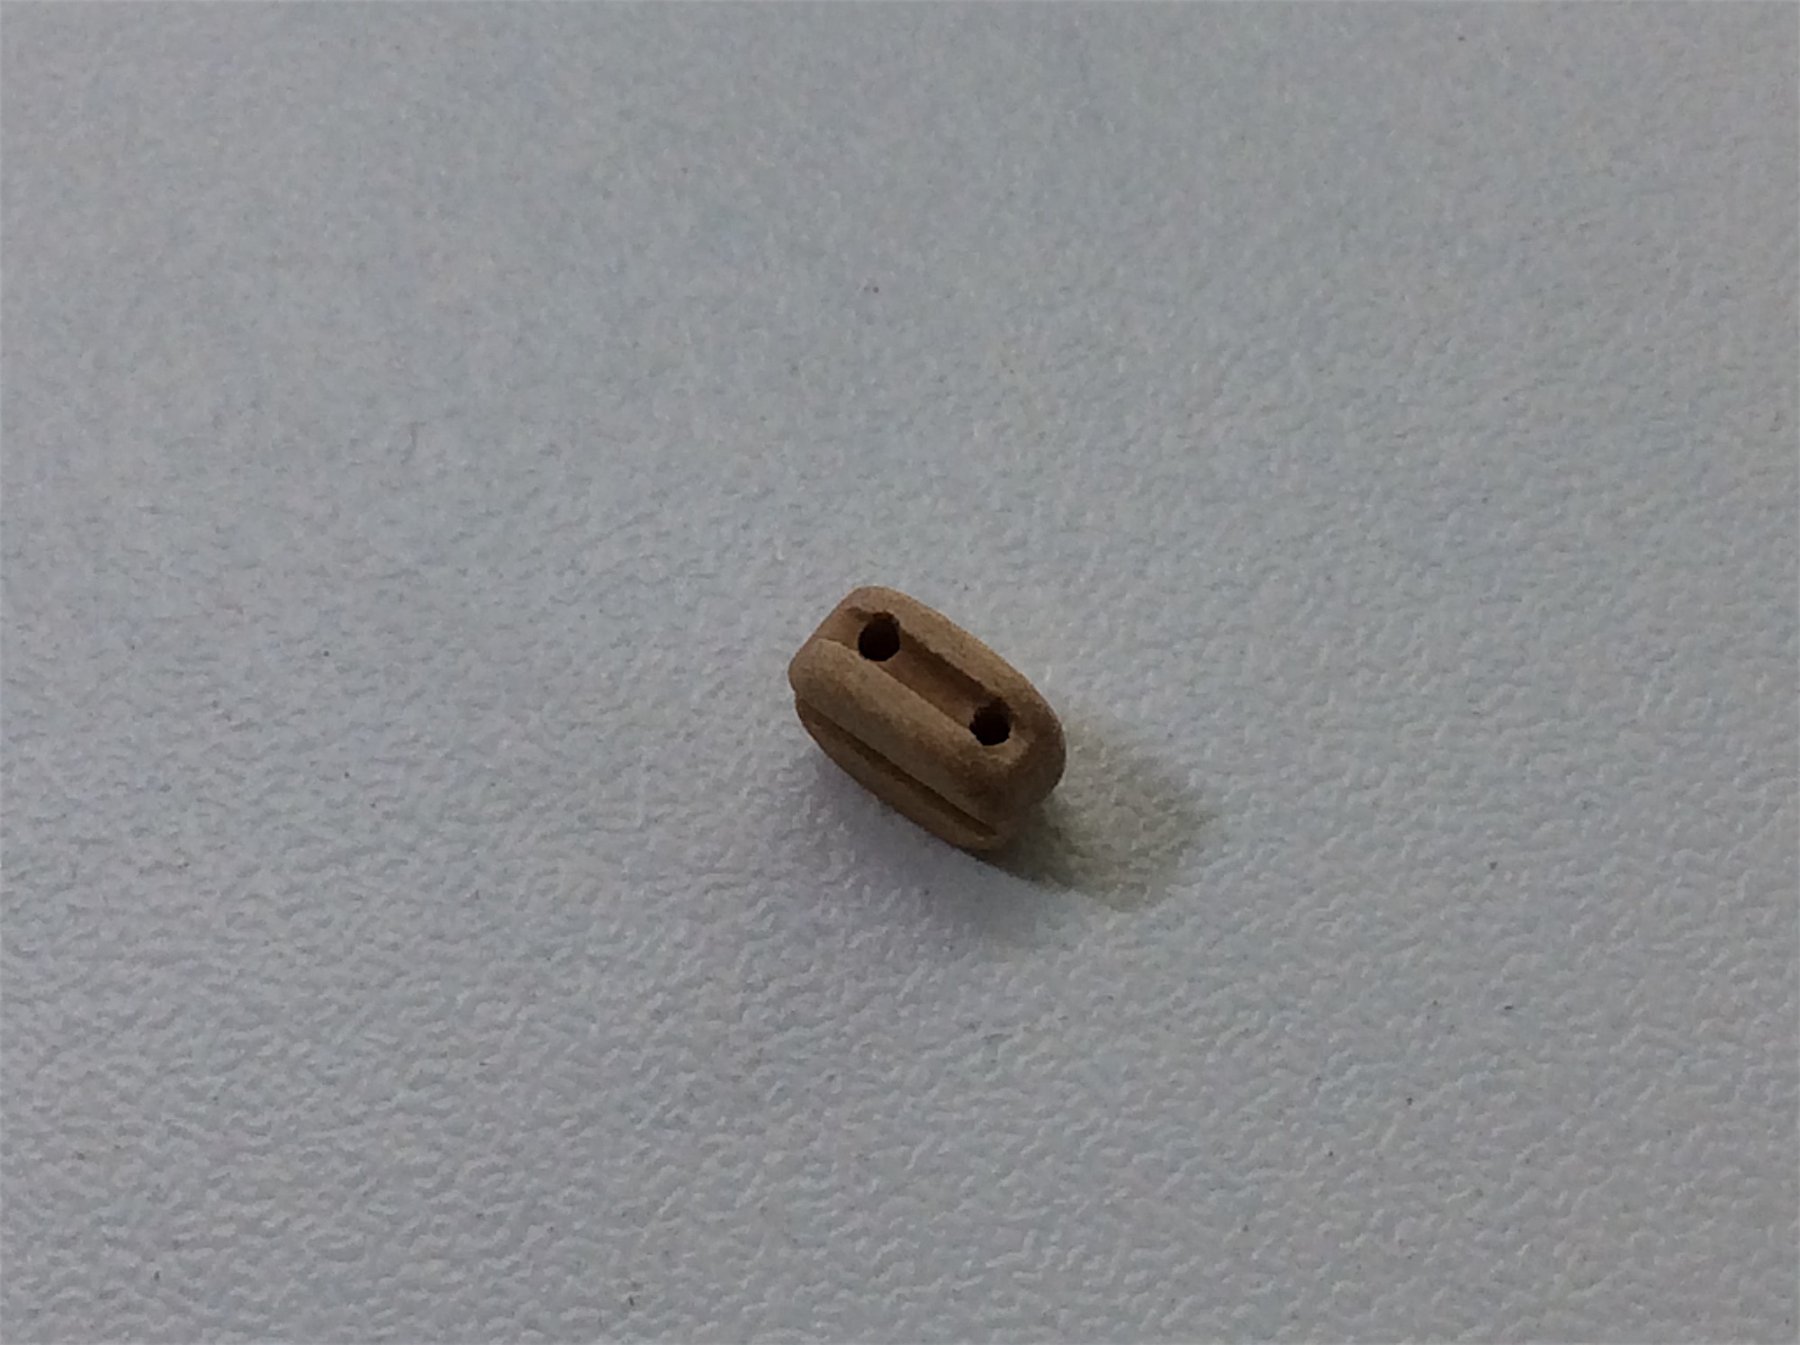
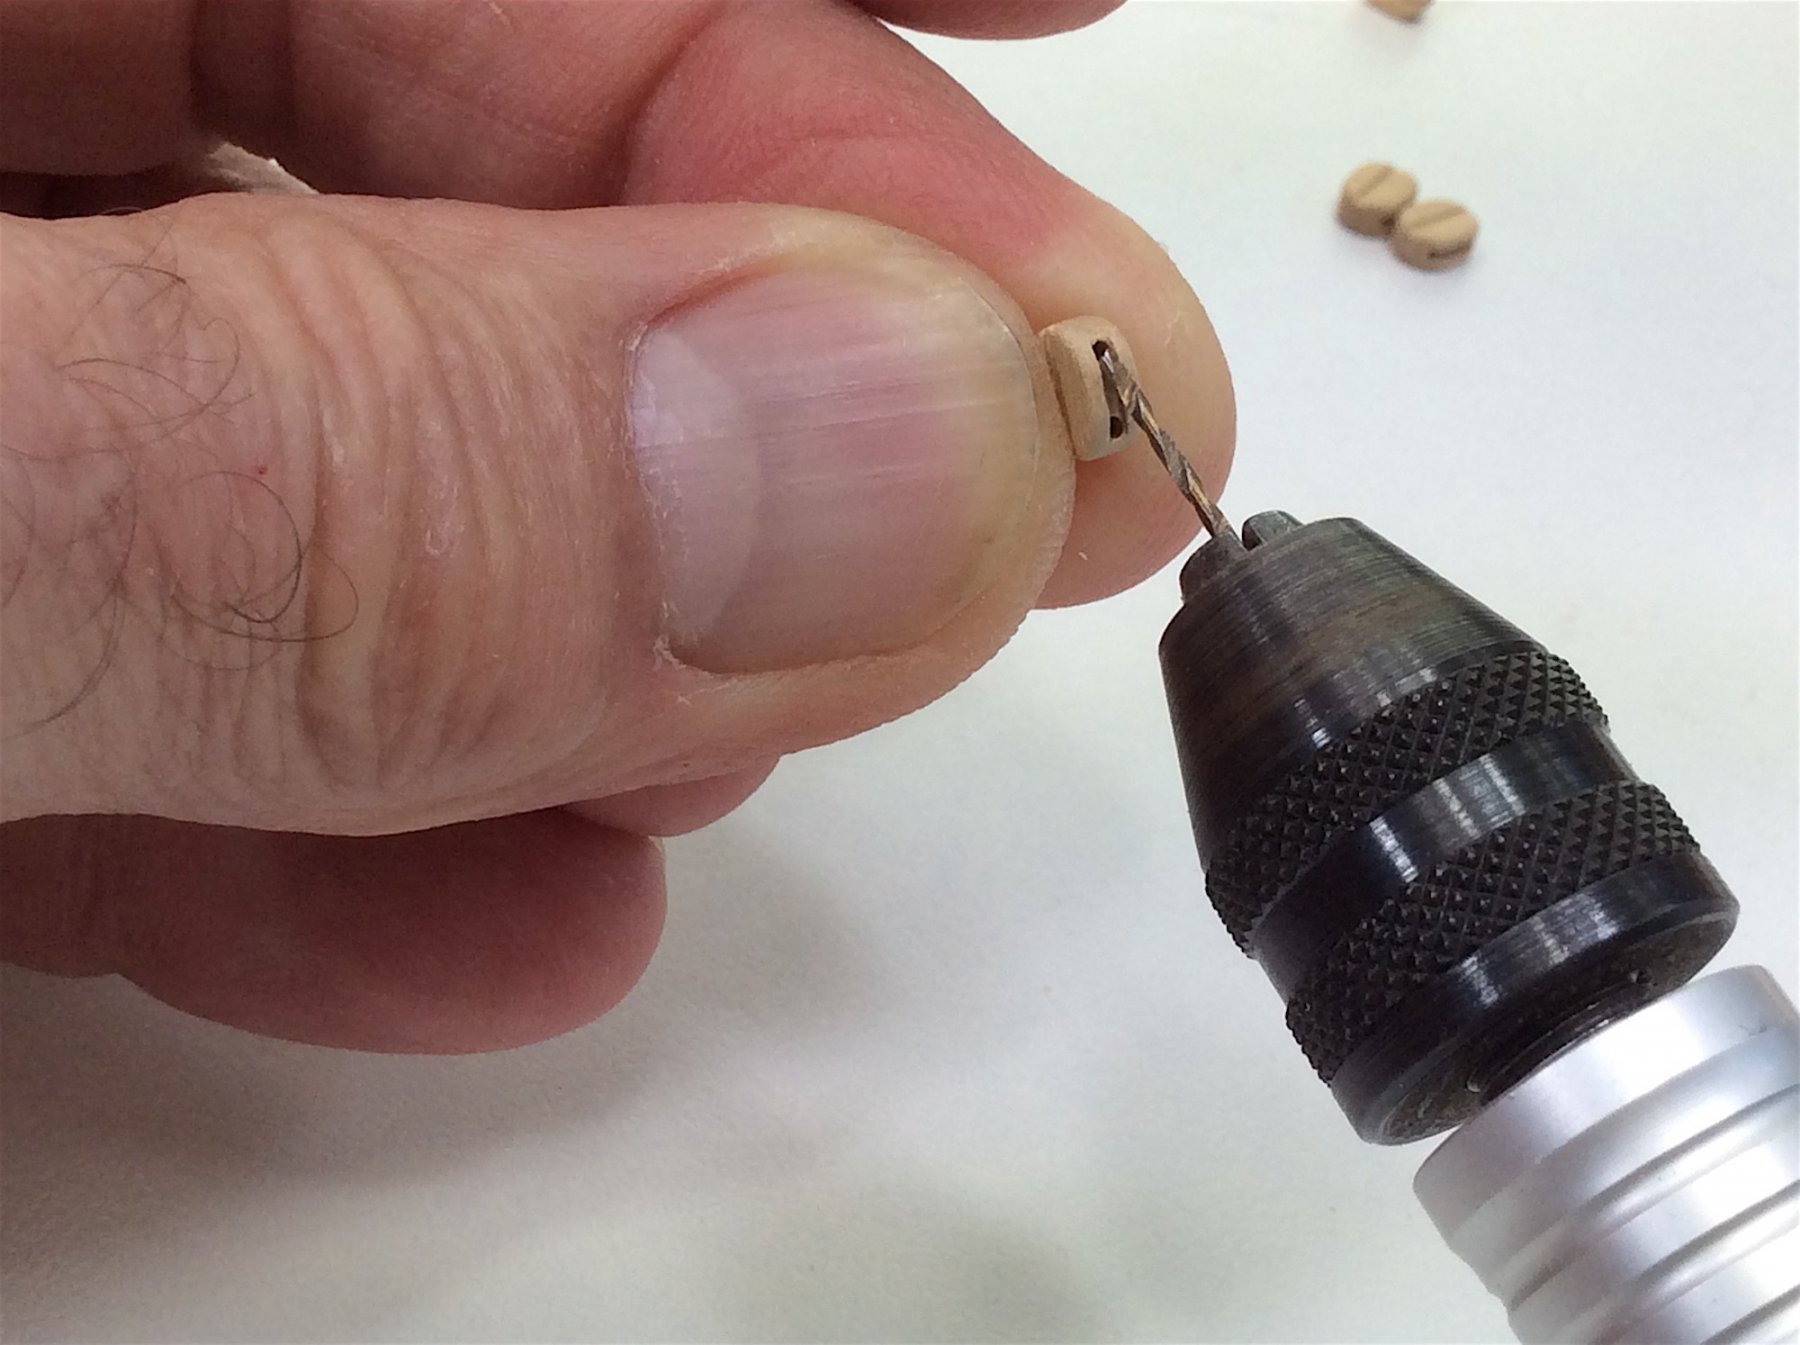
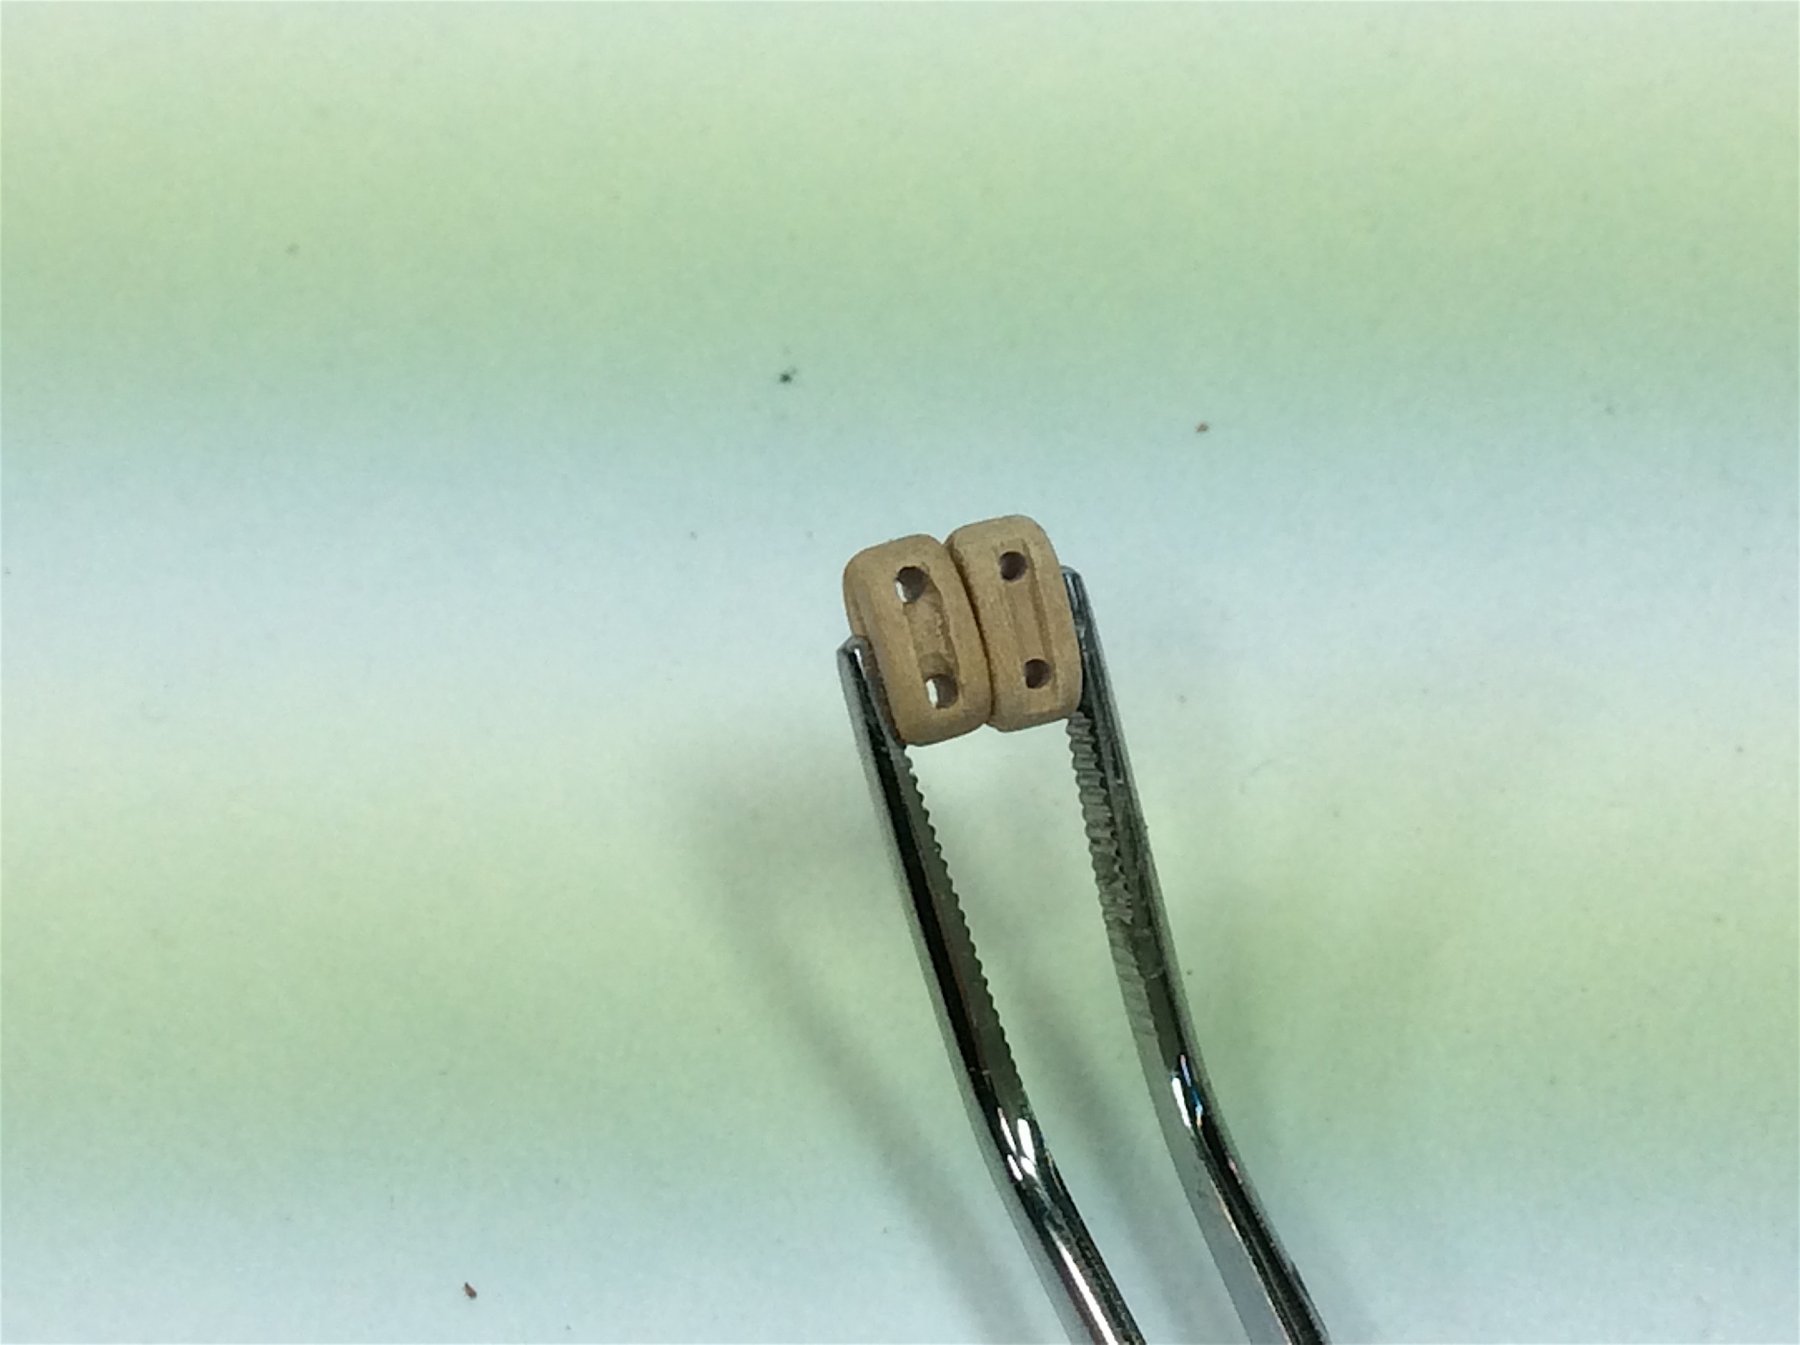
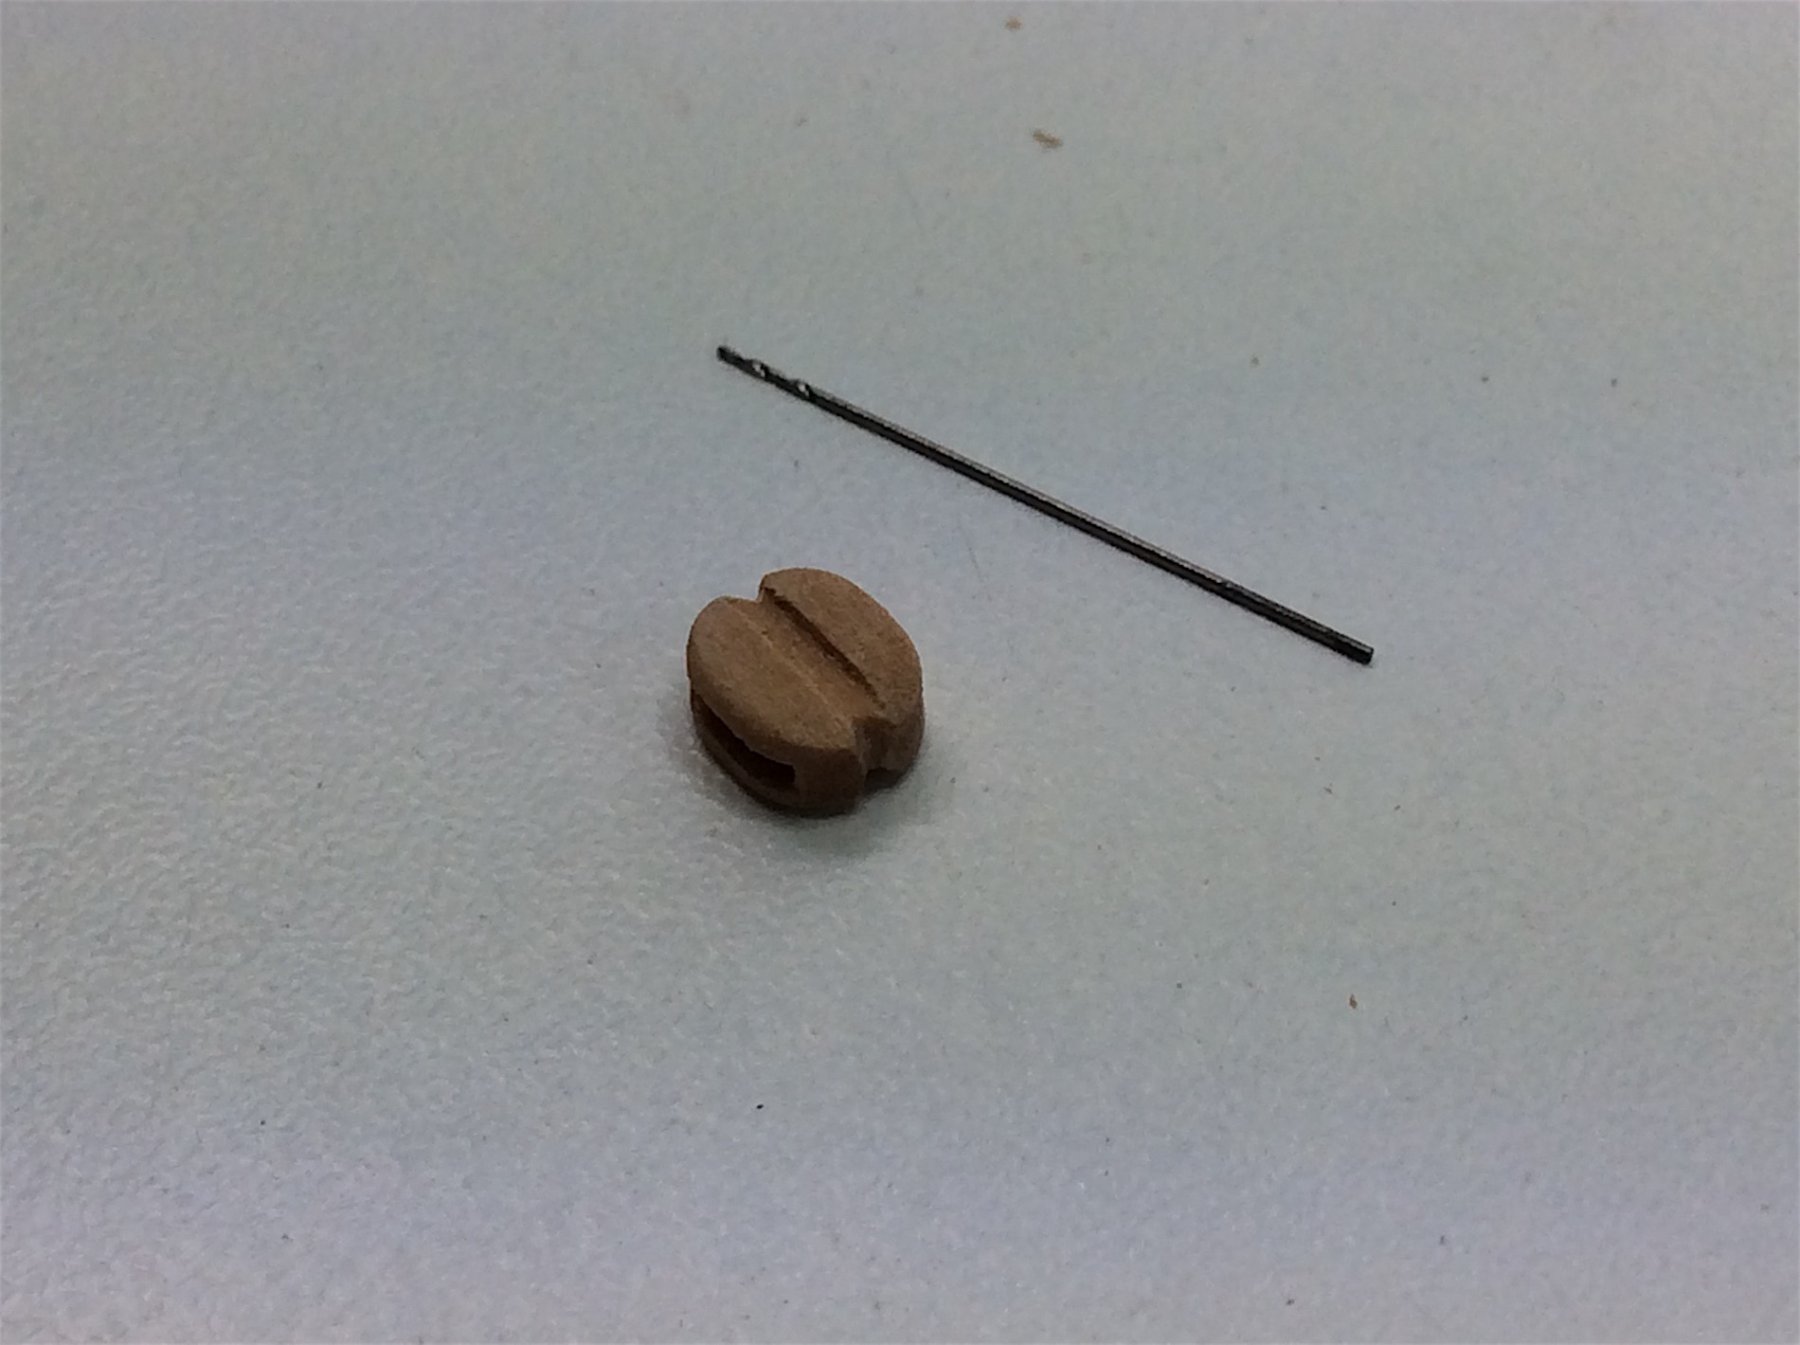
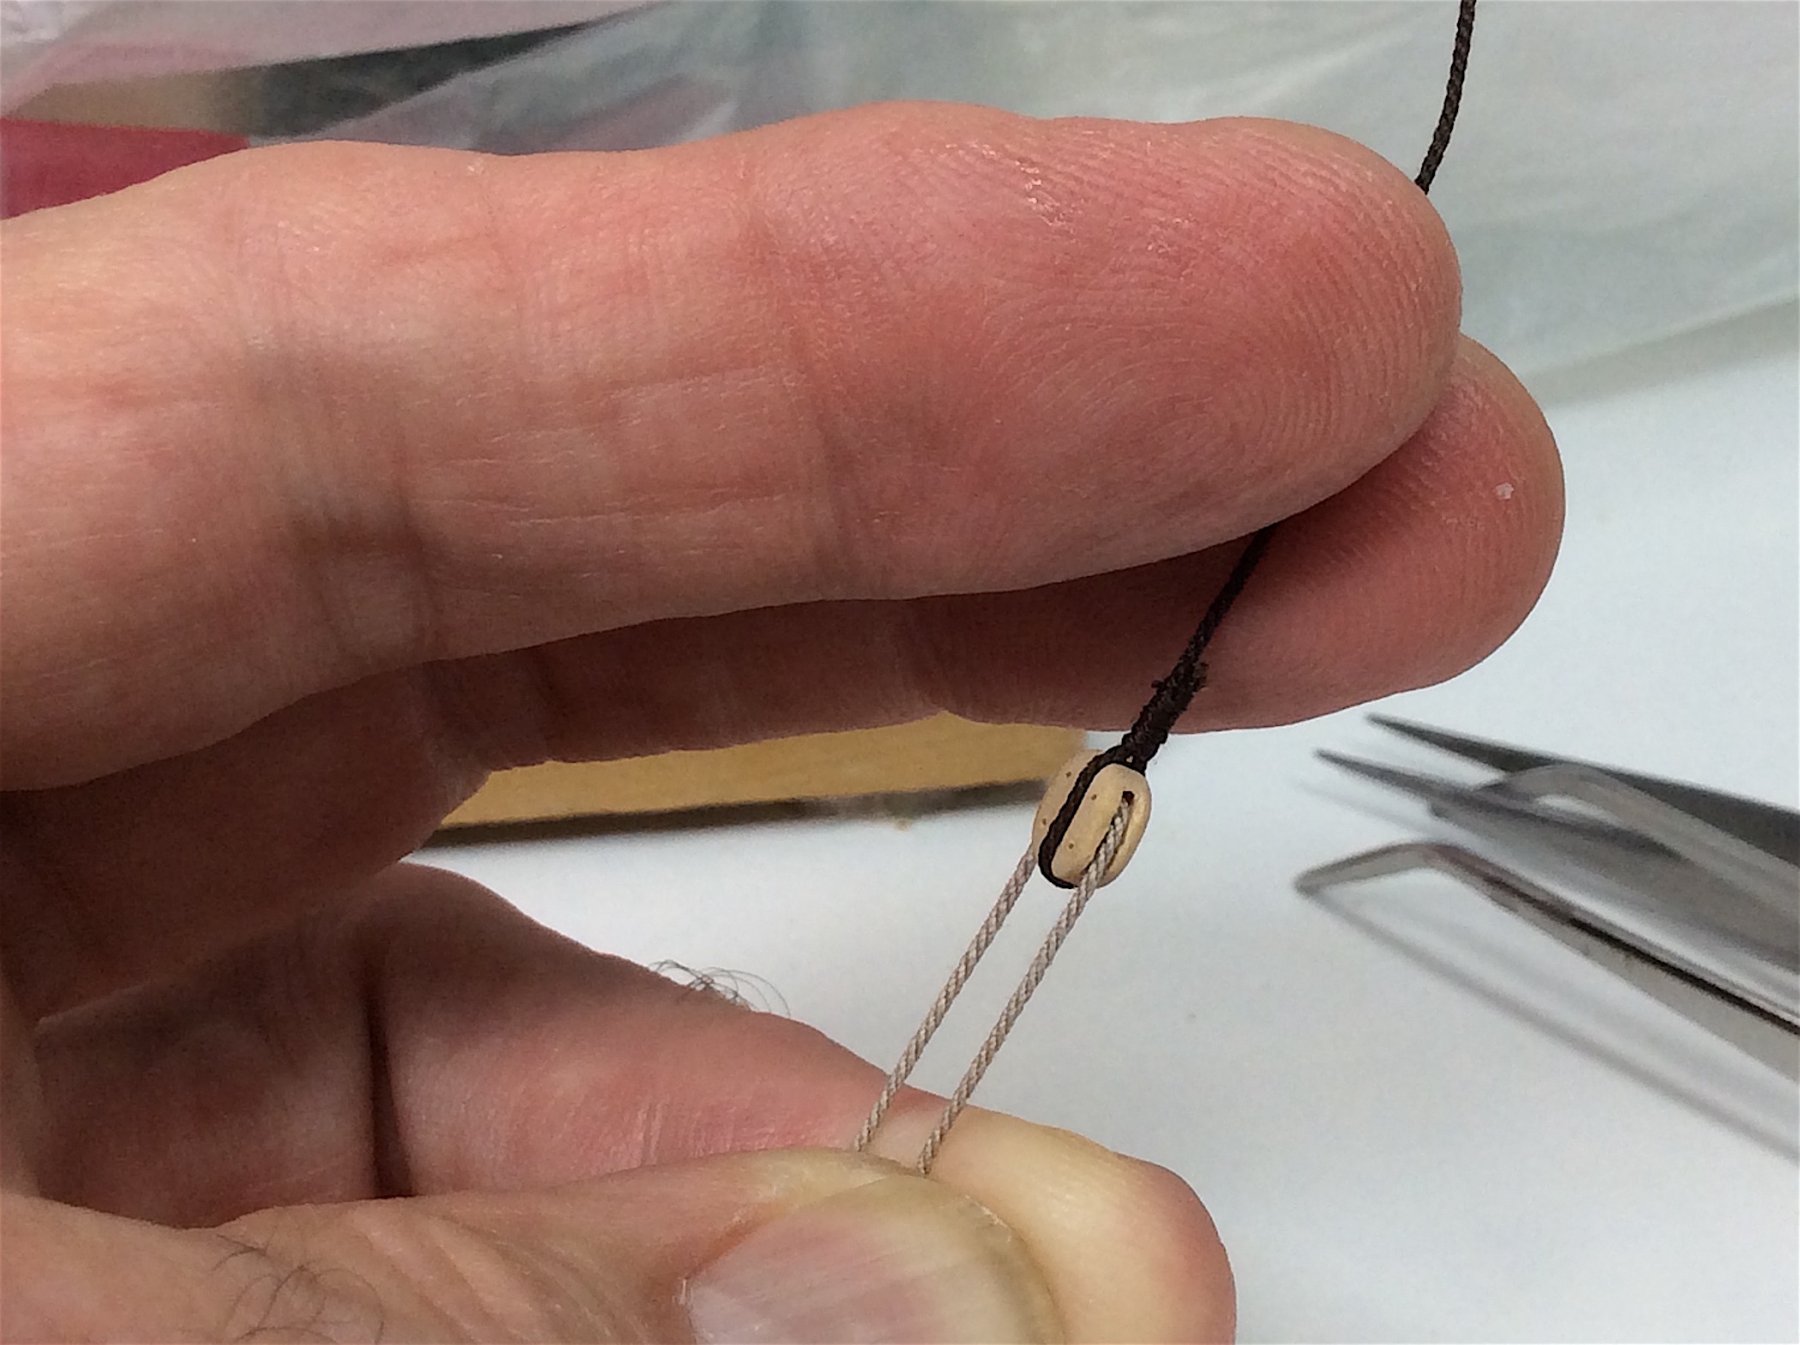
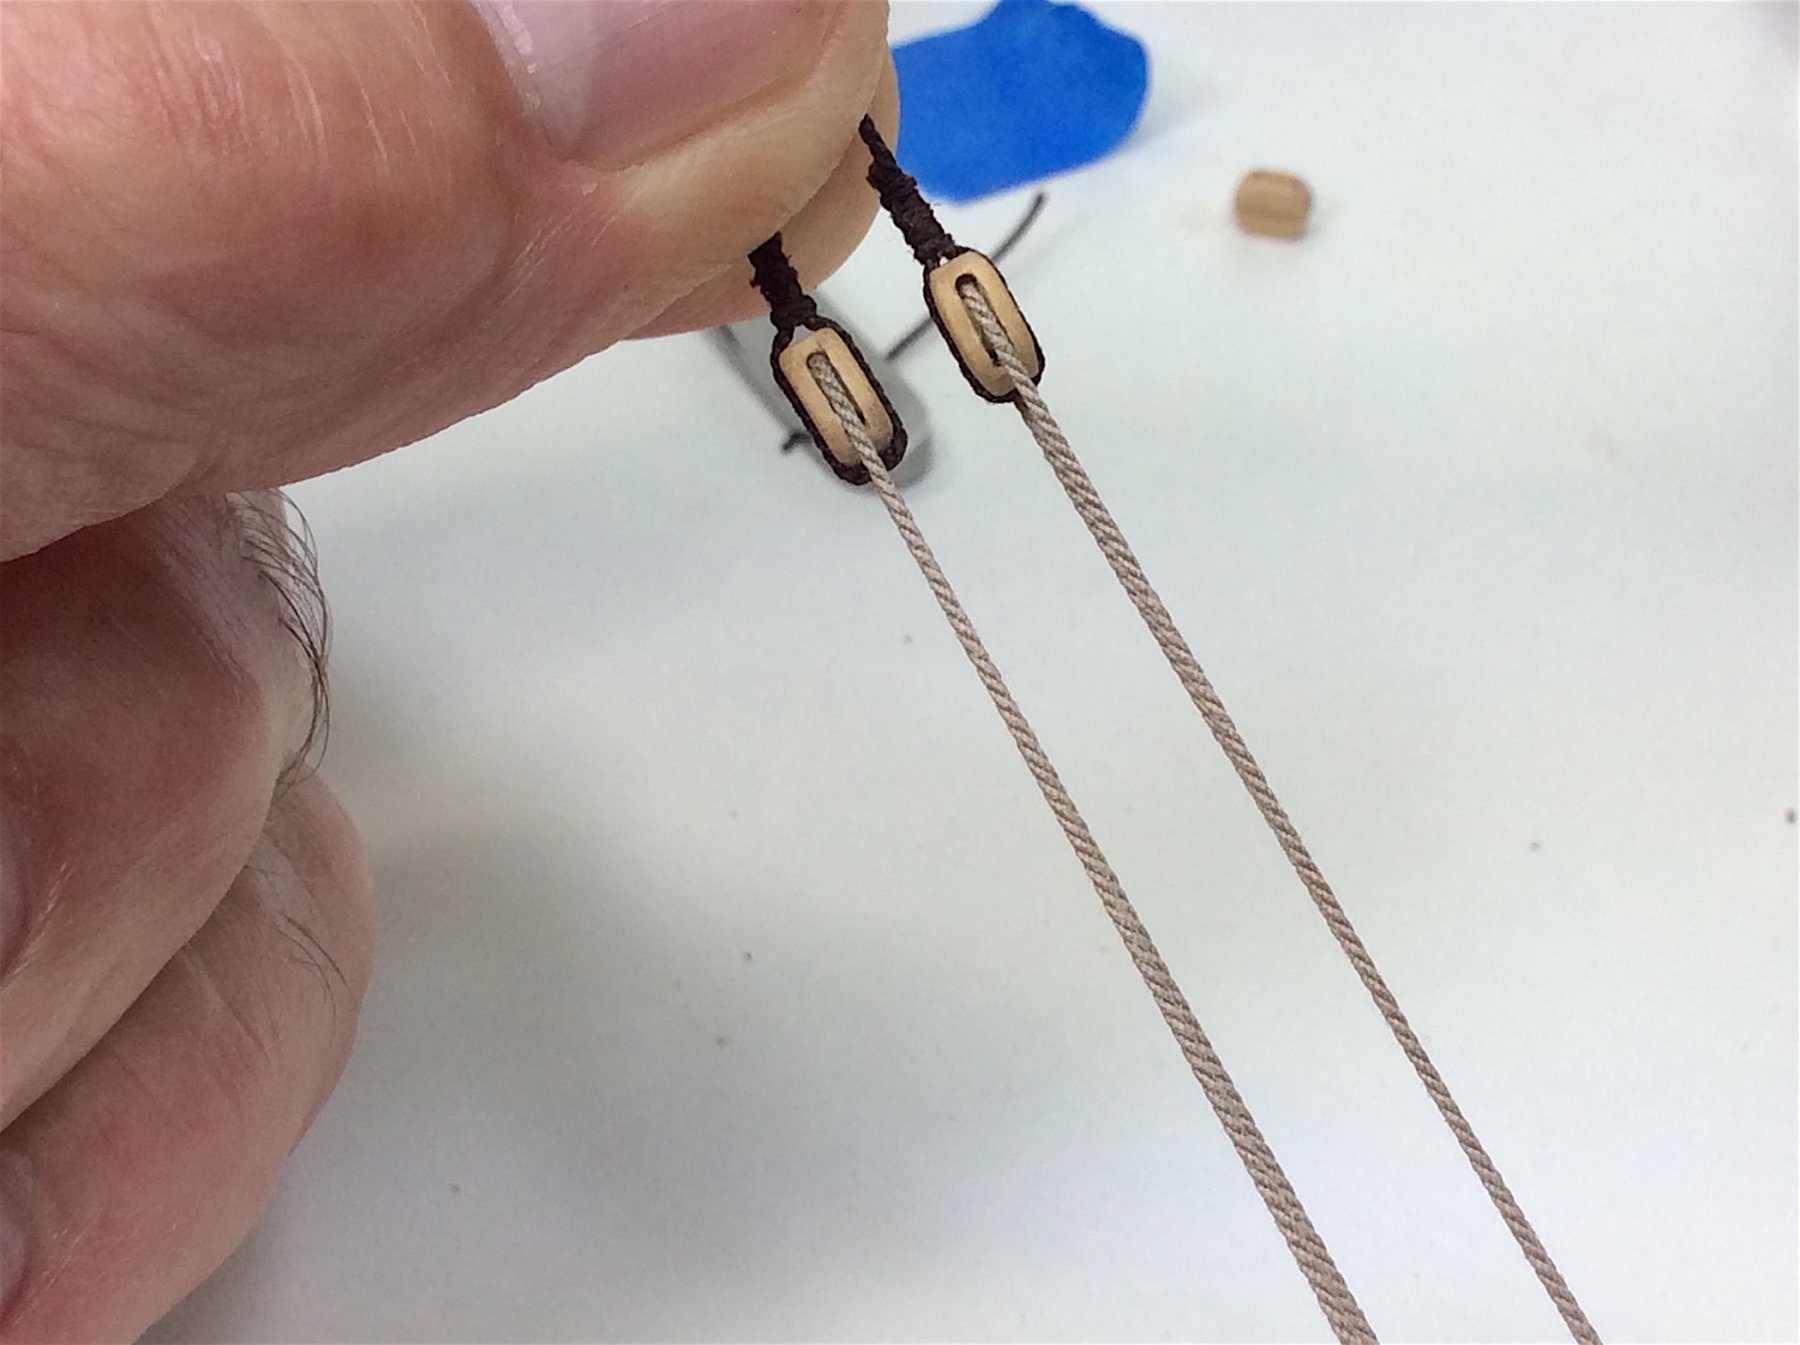
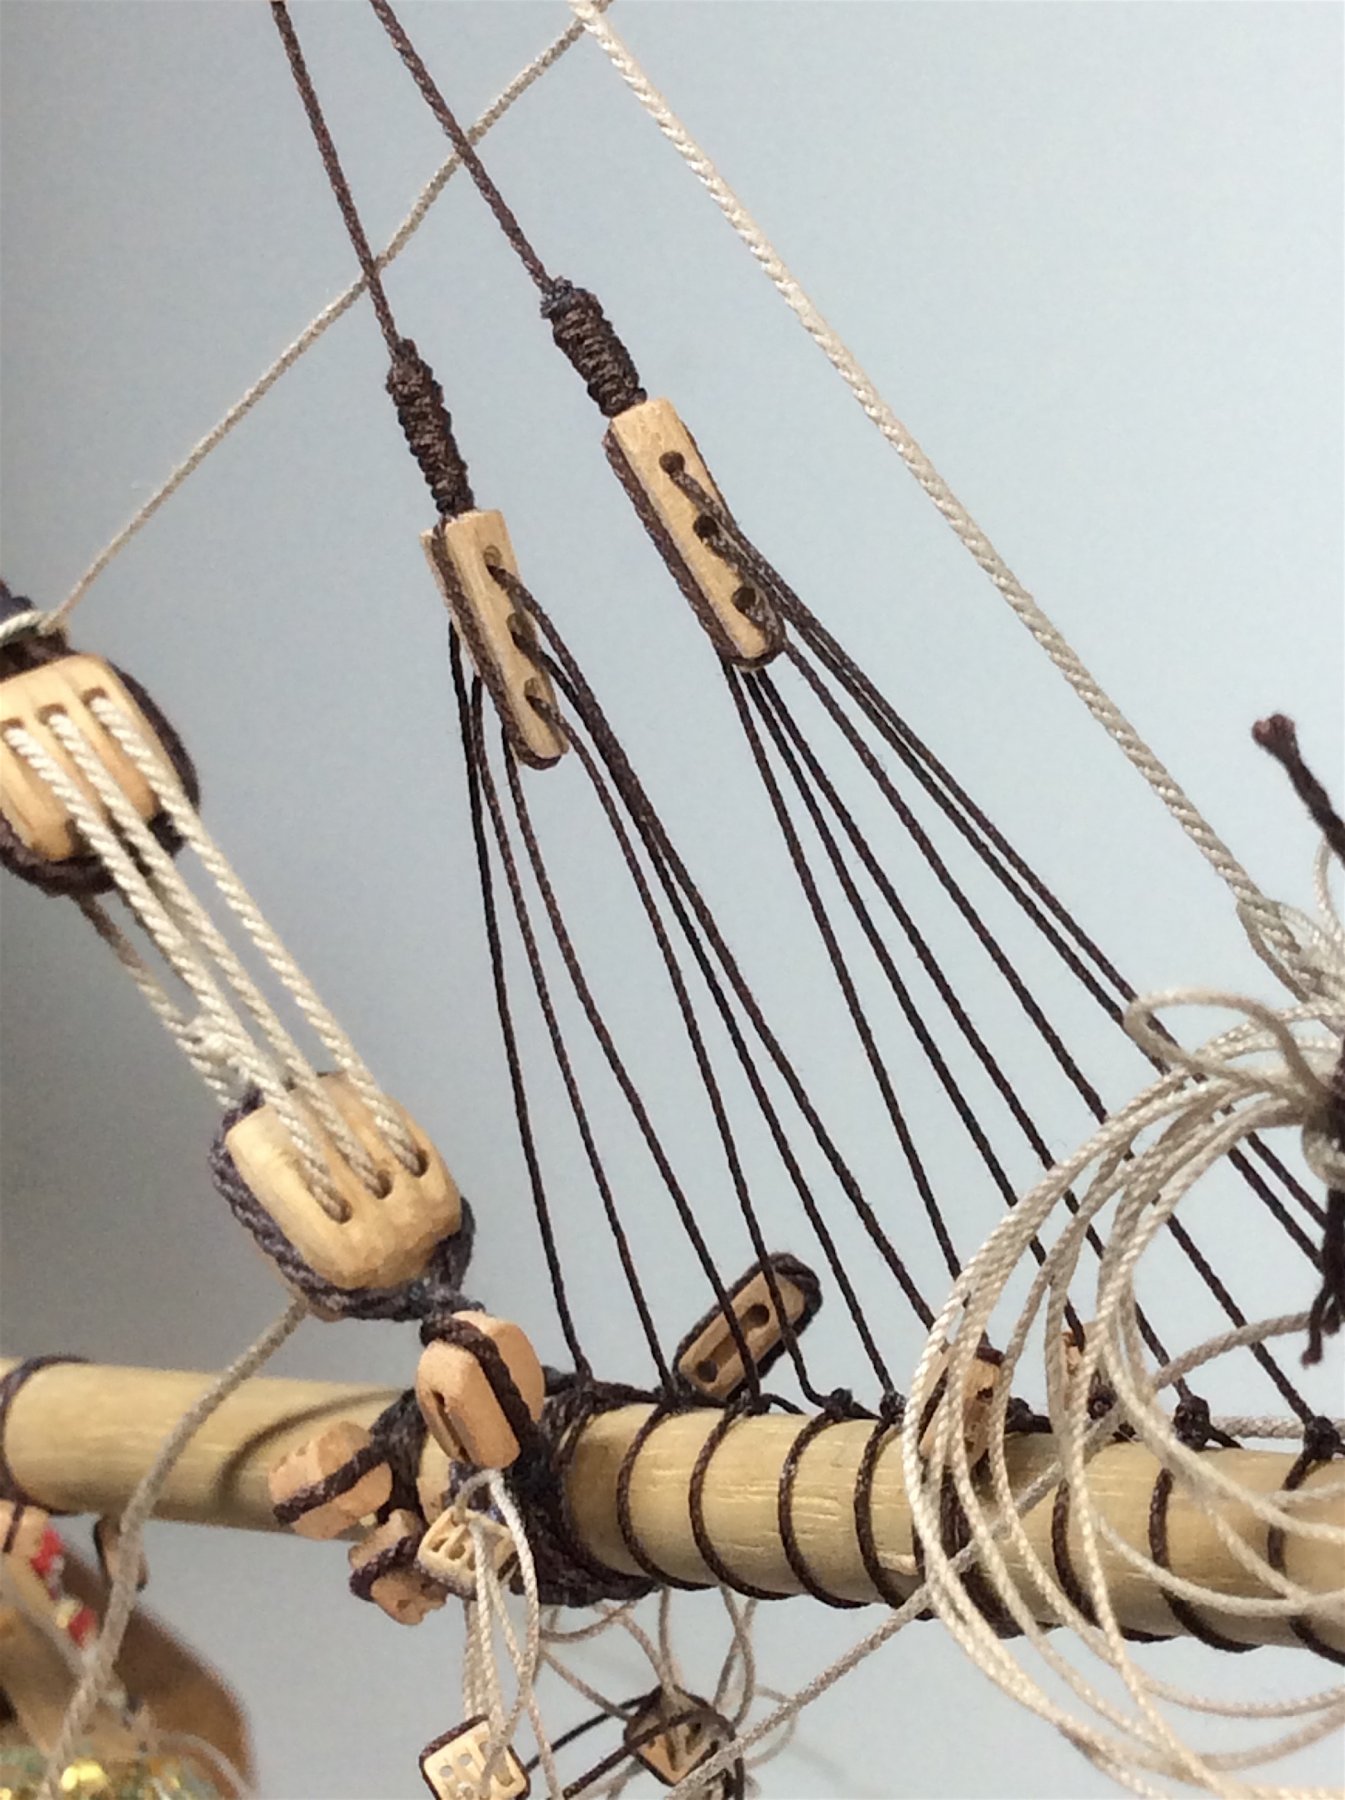
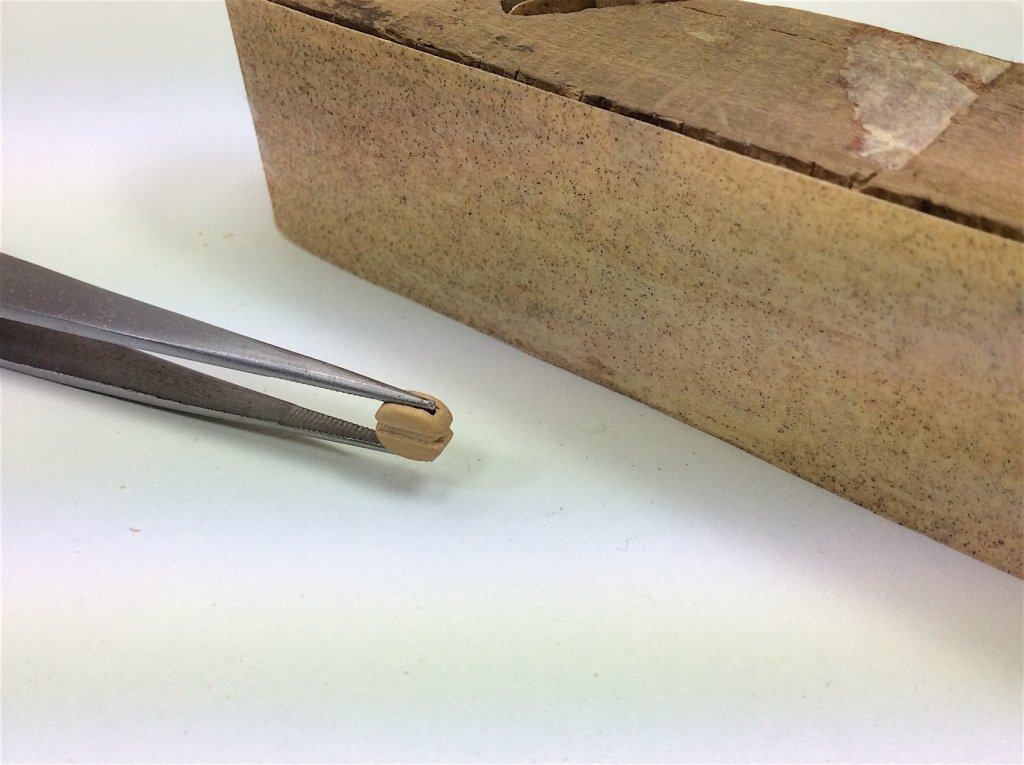
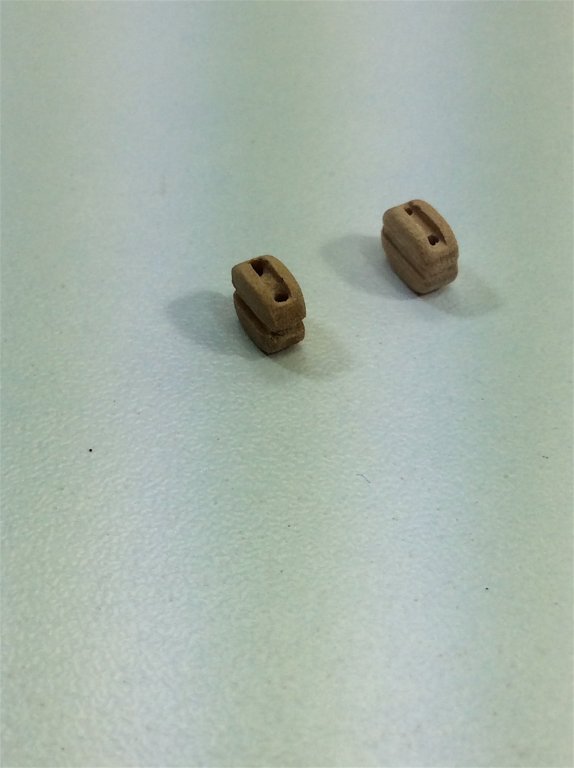
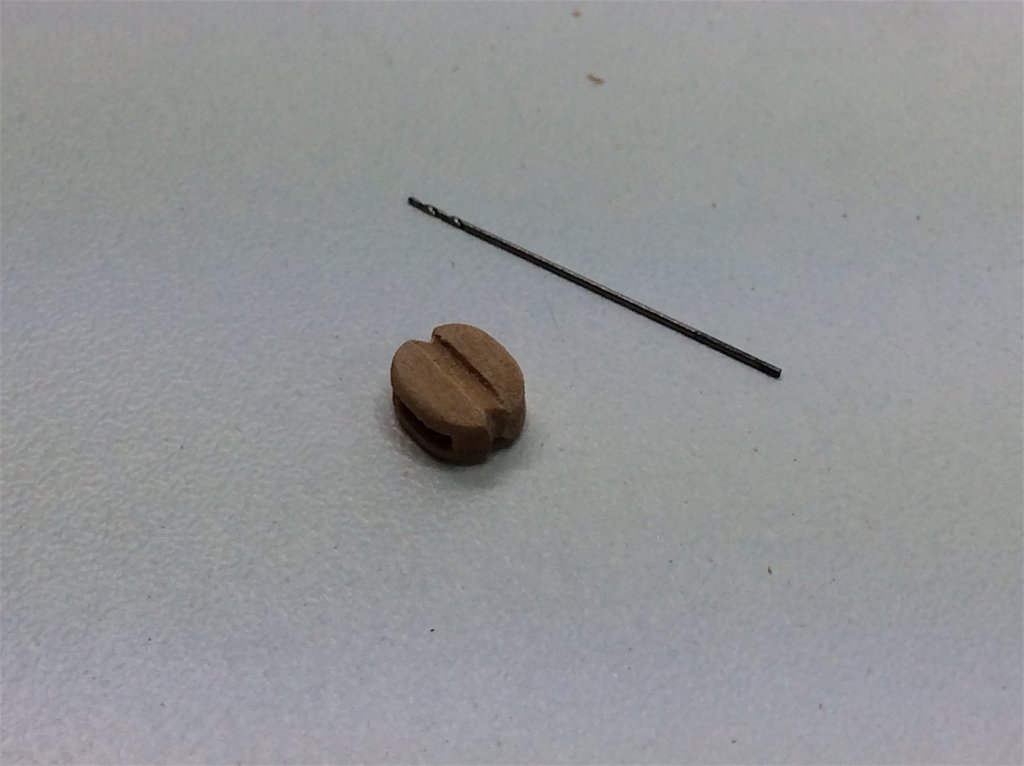
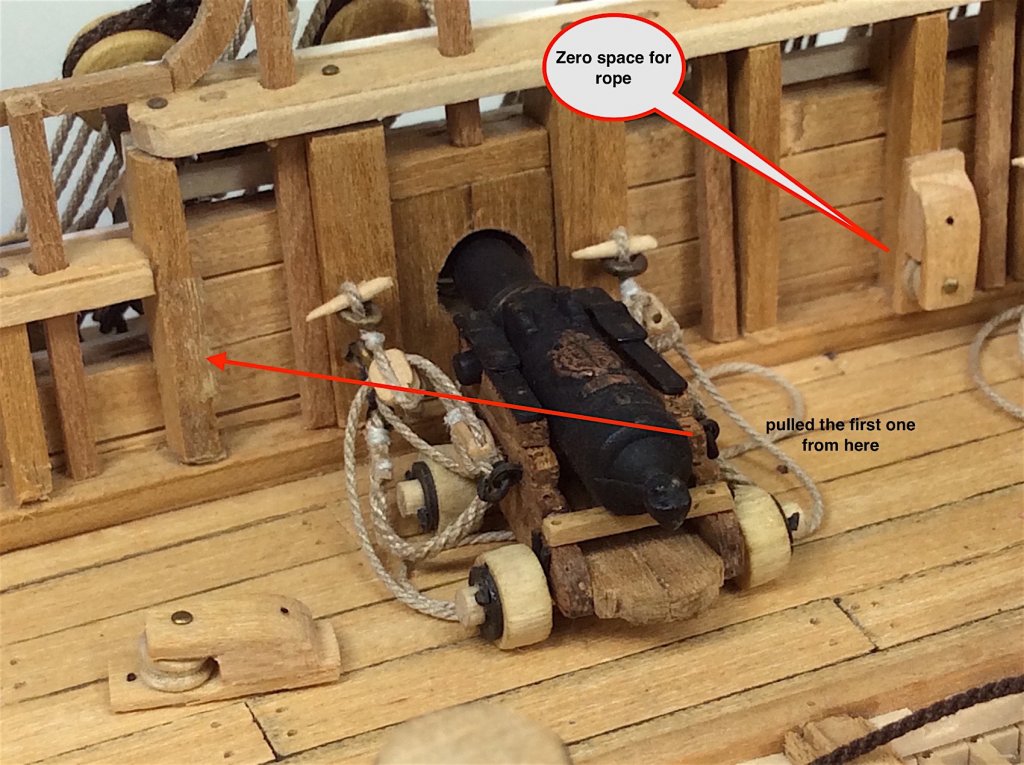
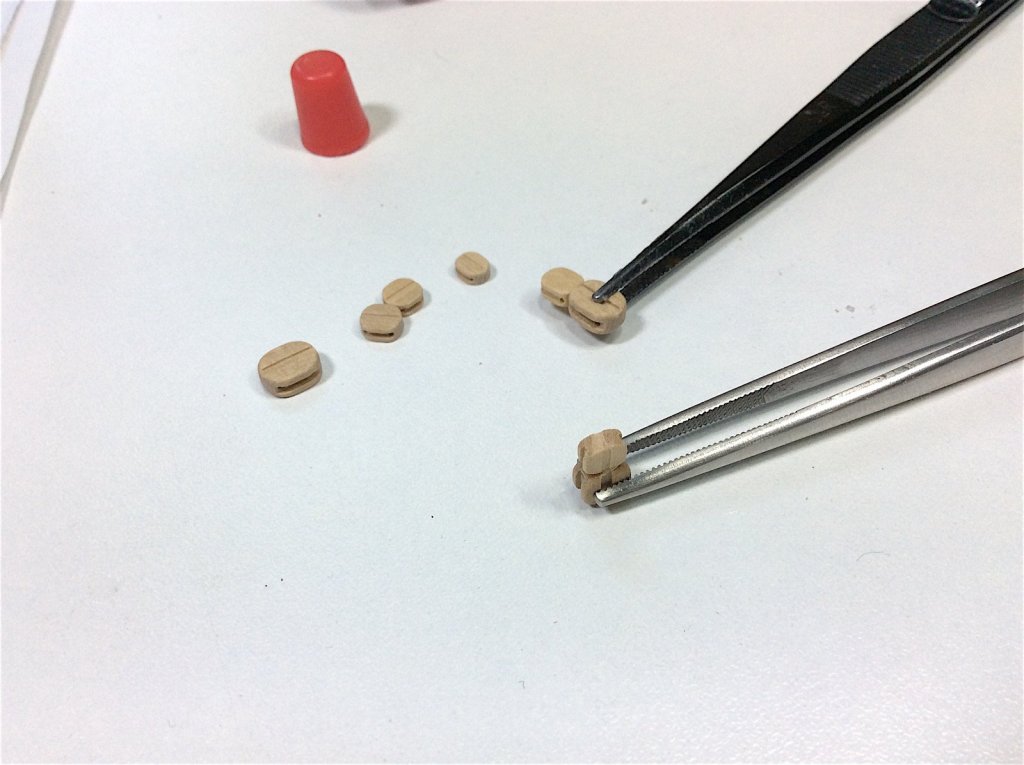
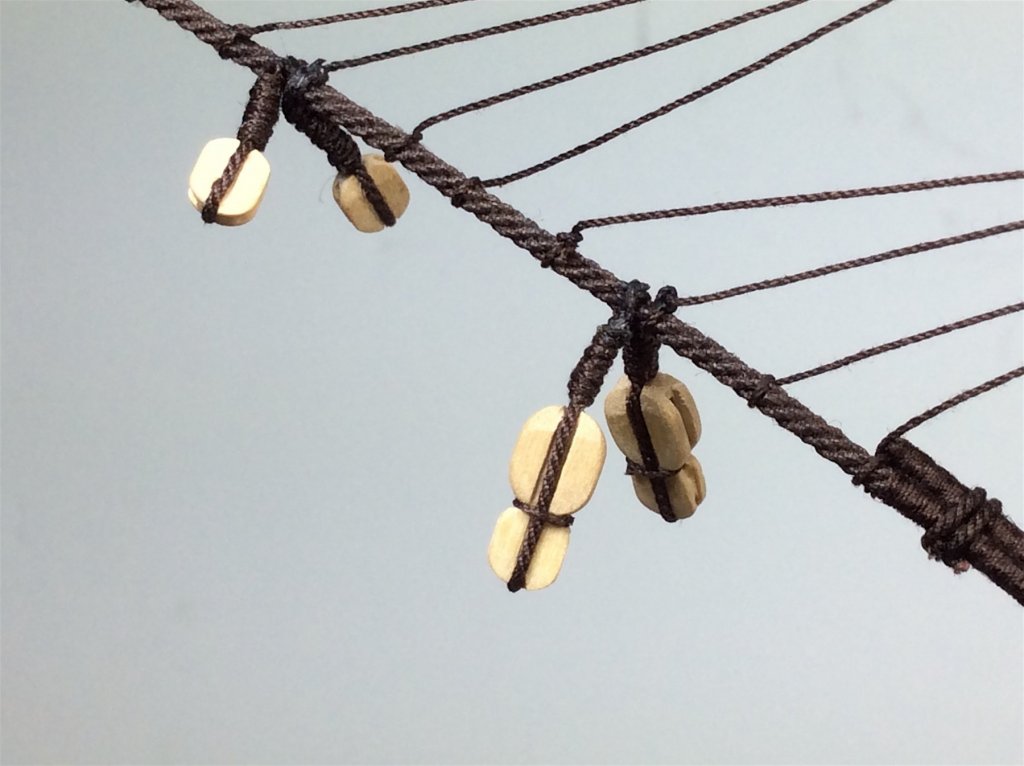
 Hi Mates, I had mentioned that I slightly tweak Chuck’s (Syren) already super excellent blocks. This how I do it. The changes are very subtle, but for me make it worth it. 1) enlarge the pre-drilled holes (I’m sure most of you already do this anyway) 2) using the same drill bit I now angle it to “round out” and deepen the pulley look further. Using a file I add grooves to the upper and lower edges Using a small sanding block I sand the four side edges a bit inward. Last bit I just started “now” after going to Chuck’s site to order more rope I saw his new blocks that included the four pins that attach the two block sides together. Hmmm – that looked so great. Granted his blocks are larger but nonetheless wanted to add that look as well. Using a tiny drill bit just drilled eight holes. Here are some comparisons. AGAIN absolutely NOT implying anything at all missing regarding Chuck’s super perfect blocks down to the smallest scale. This pic is a perfect example of how amazing his super small blocks actually are without any of my obsessive tweaks (;-) PS: whatever these are called I have to pull them all off. Again a novice with rigging when I made those it did not occur to me to be sure that ropes will be able to loop through – well they can’t – did not leave enough space grrrr. Cheers,
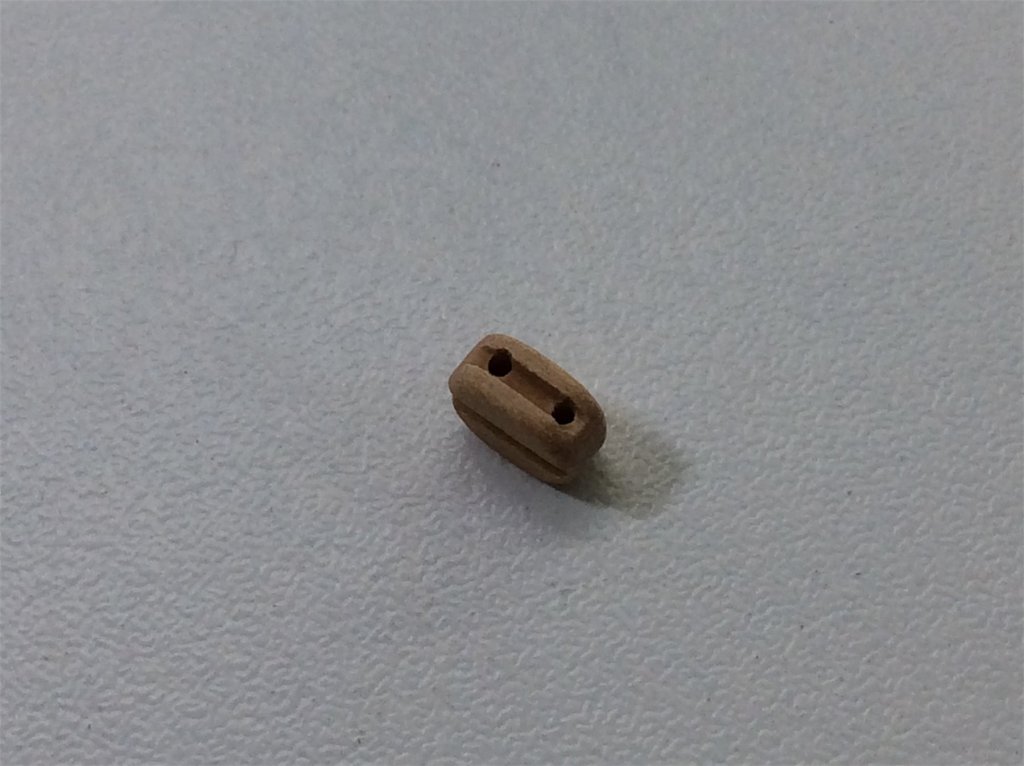


-
Mark, YES brilliant work indeed. Great to follow along. Cheers
- 525 replies
-
- 5
-

-
- cutty sark
- mantua
- (and 2 more)
-
Tim. Just found your build log. YES your life boat is excellent work indeed (along with its Scottish Maid). I will bring a chair and follow along as well. I am so impressed with builder skills with such small scale detailing. PS: Love that coin. Your country is on my list for visits (:-) Regards,
- 115 replies
-
- 1
-
-
- Scottish Maid
- artesania latina
- (and 1 more)
-
Dennis, Funny - no she's just a local sweetheart. Super talented. She also works in the movie industry doing costumes. She told me some funny stories when she had to check fits with certain "stars". Thanks for your kind words. Yesterday I finished all of the yards, then wanted to start bolt ropes Hmmm needed to send an order to Chuck. In the meantime I will prepare all of the needed blocks. I also use Chuck's but do some slight detailing to each. Cheers,
-
MONTAÑES by Amalio
md1400cs replied to Amalio's topic in - Build logs for subjects built 1751 - 1800
Amalio, Just catching up - Incredible work!! -
Ken, Those crows feet and euphroe block are perfect, well with the rest of the rigging - of course.
-
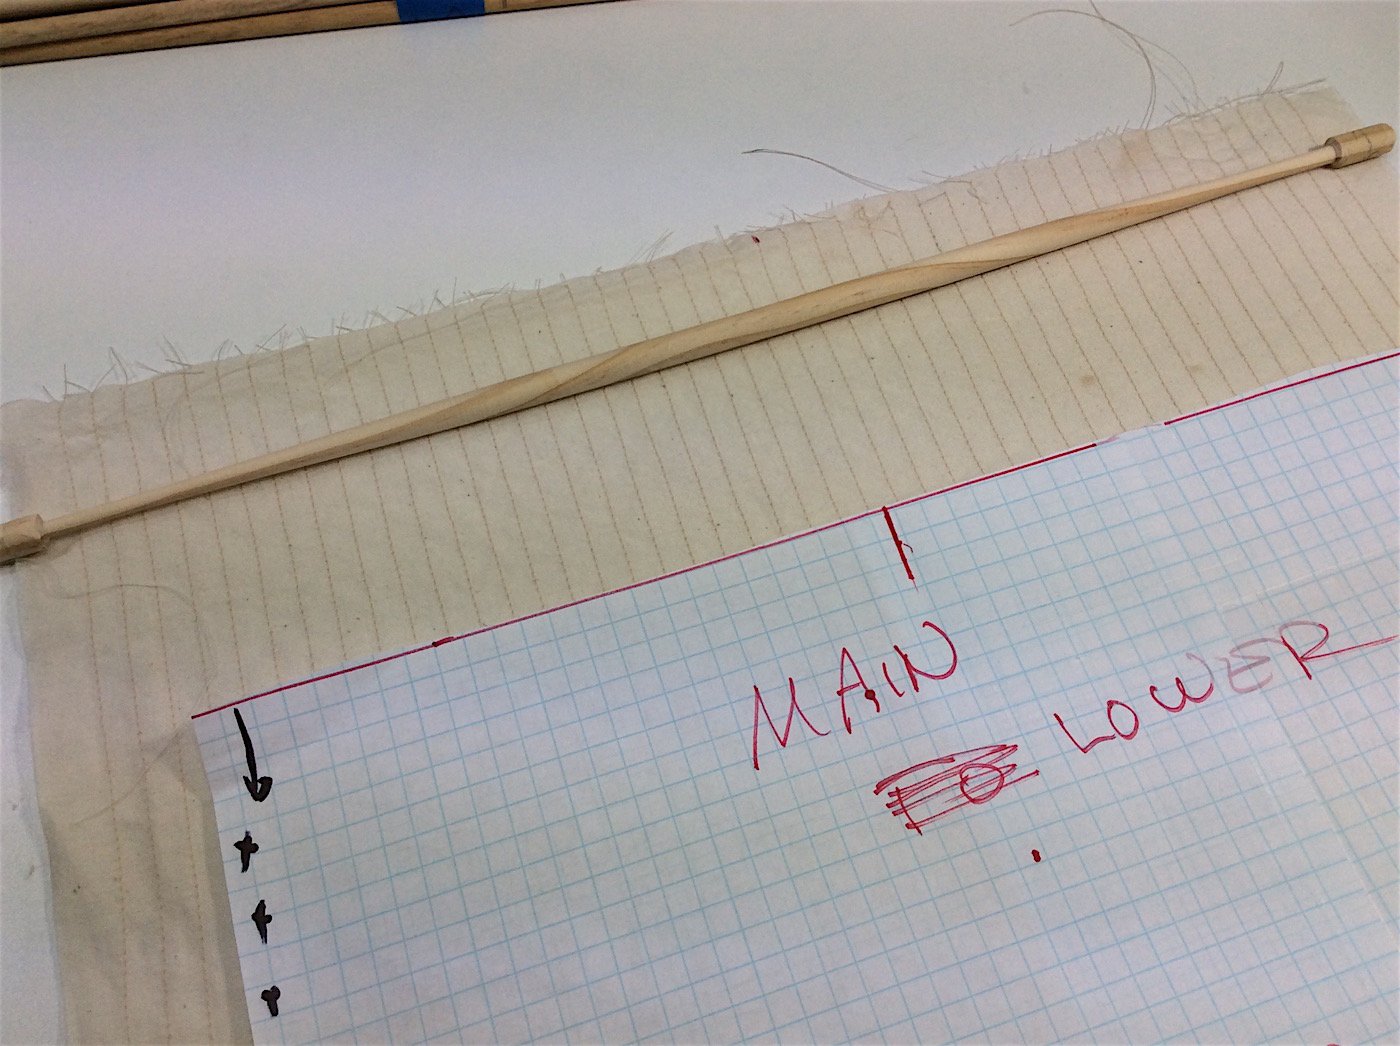
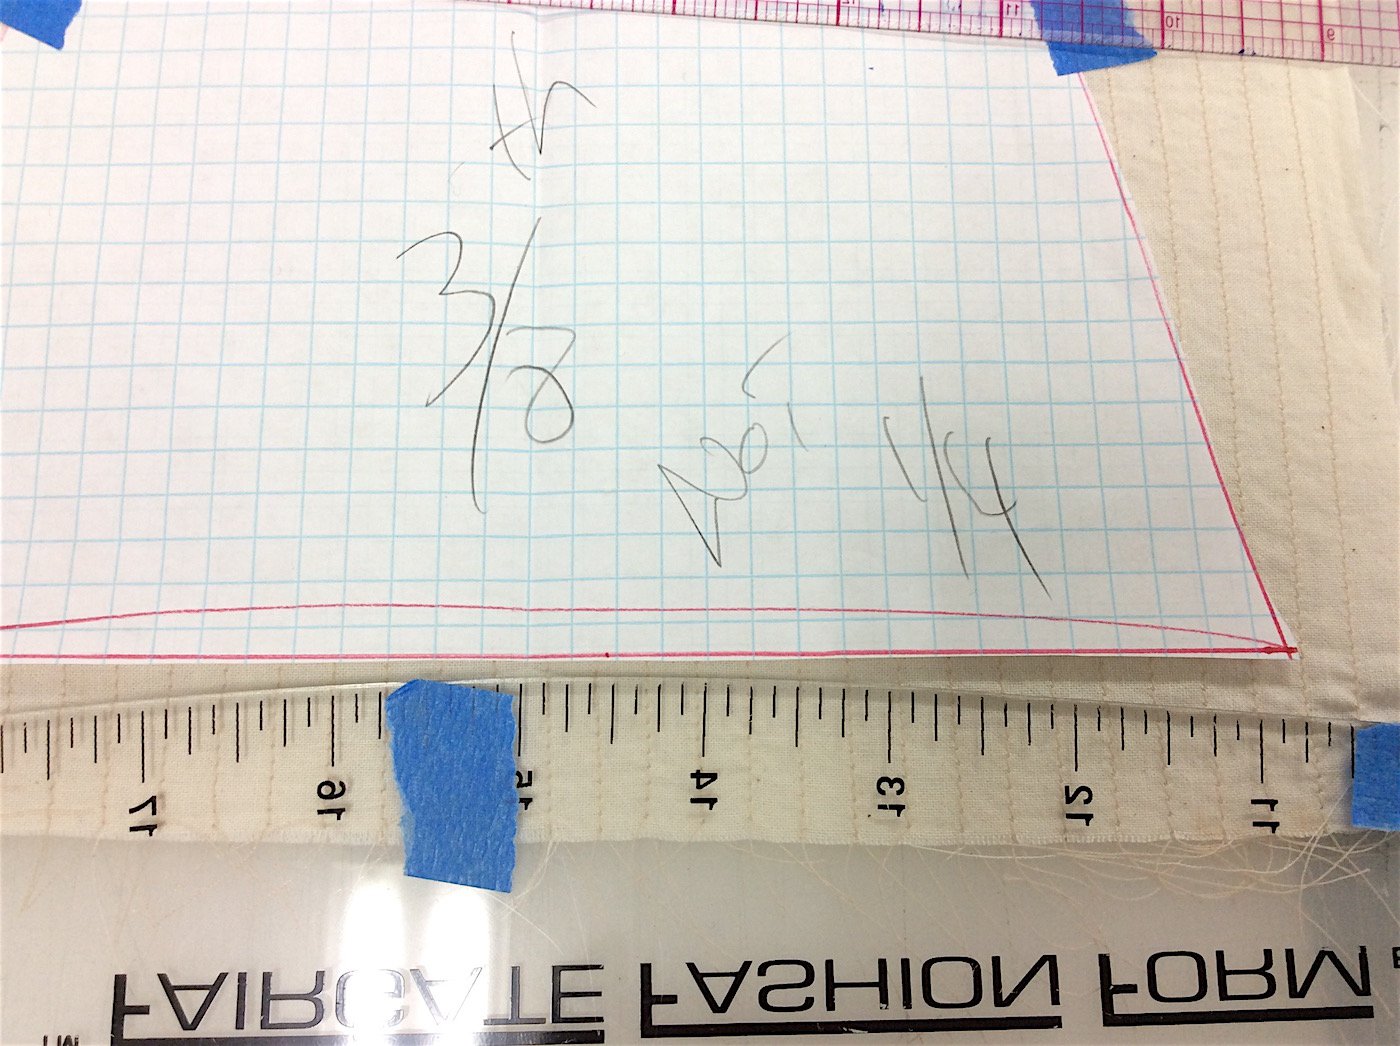
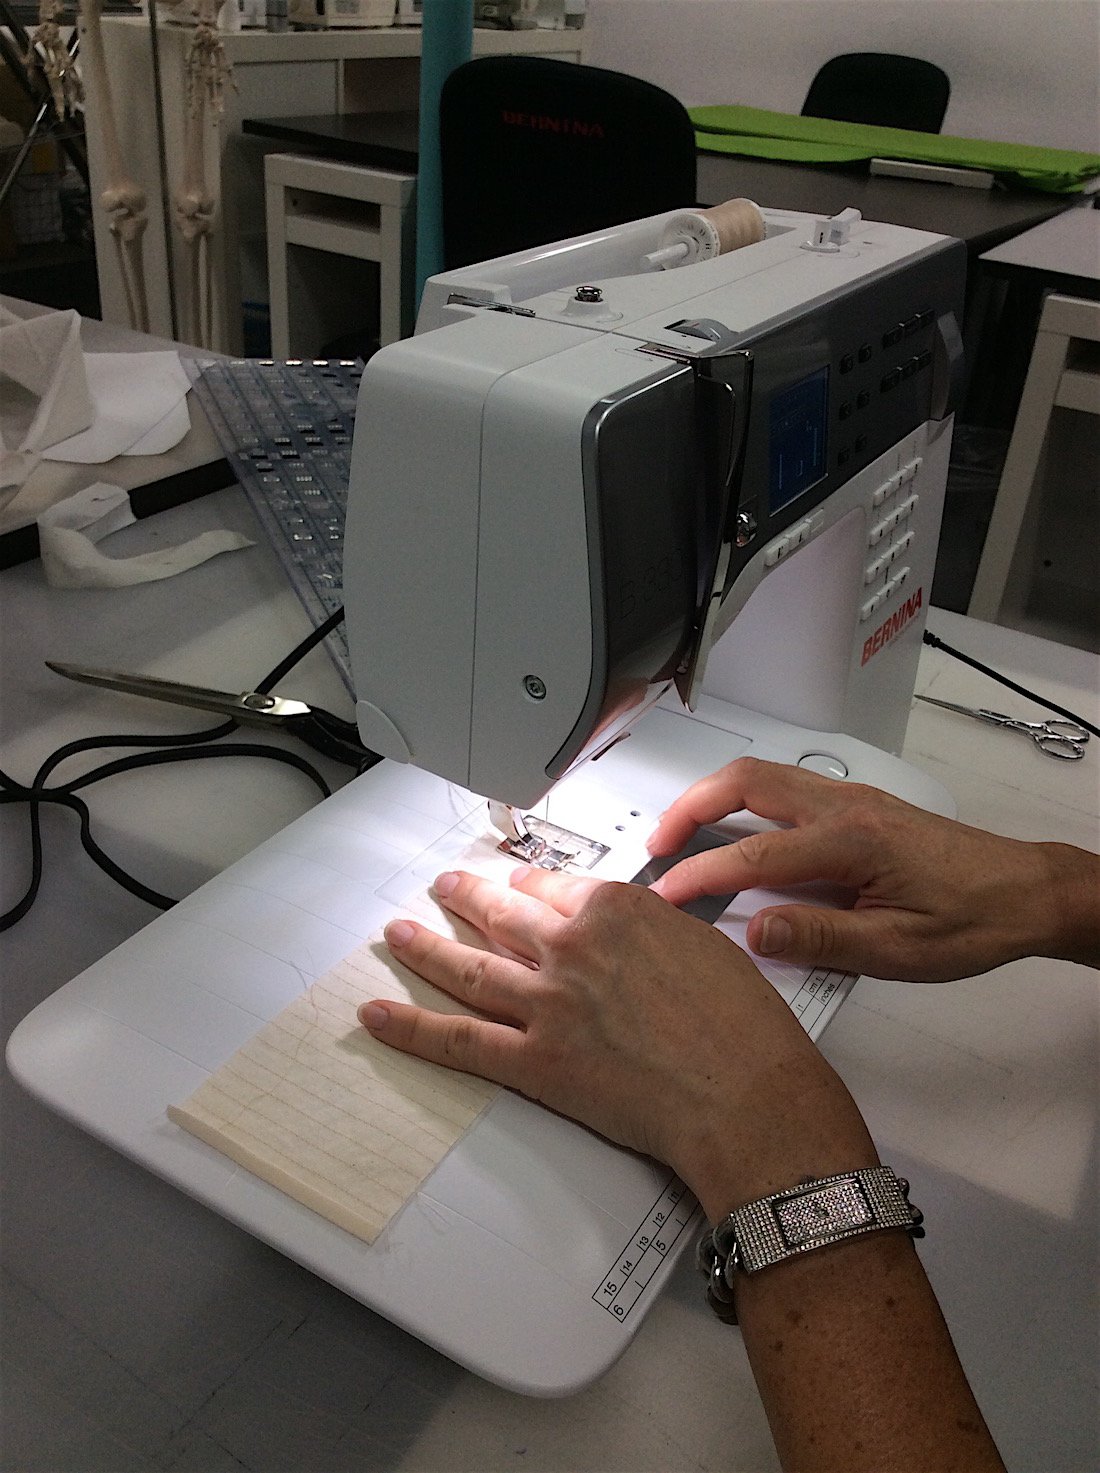
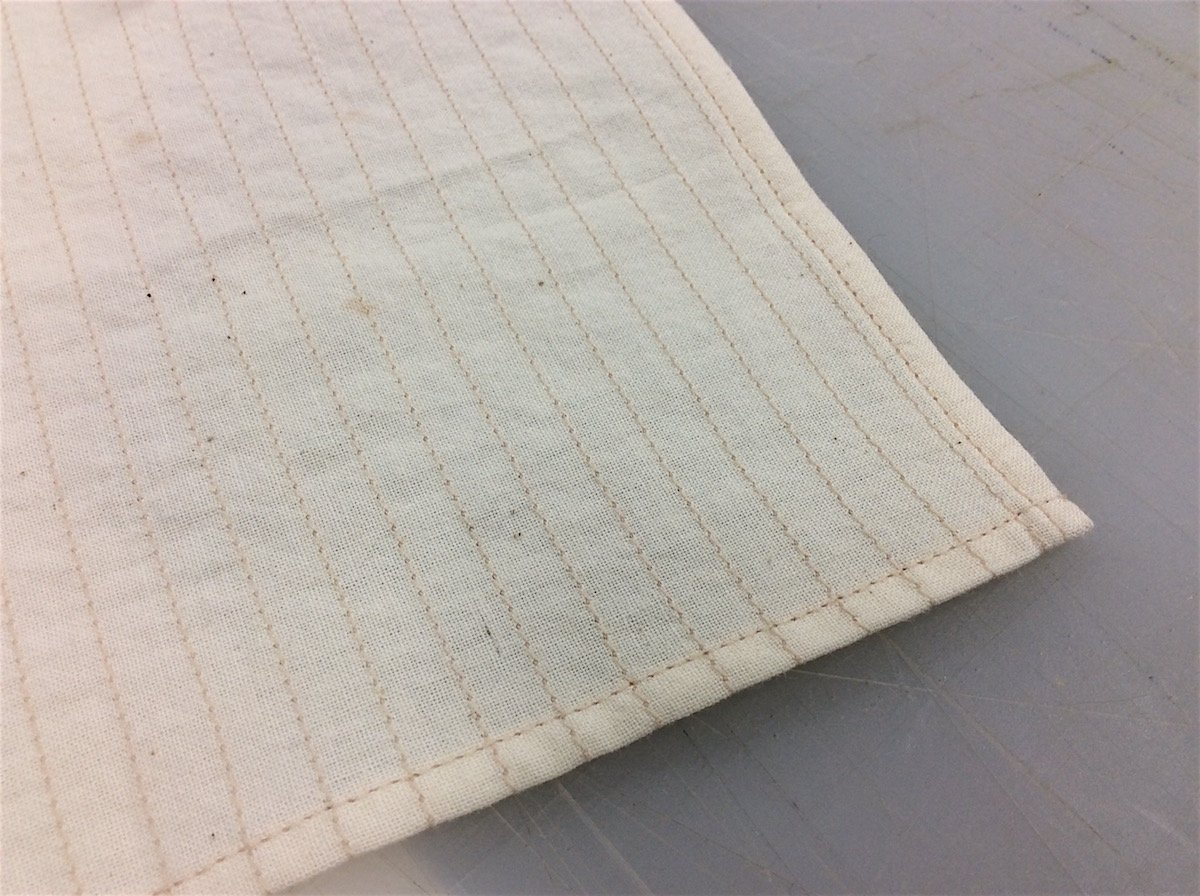
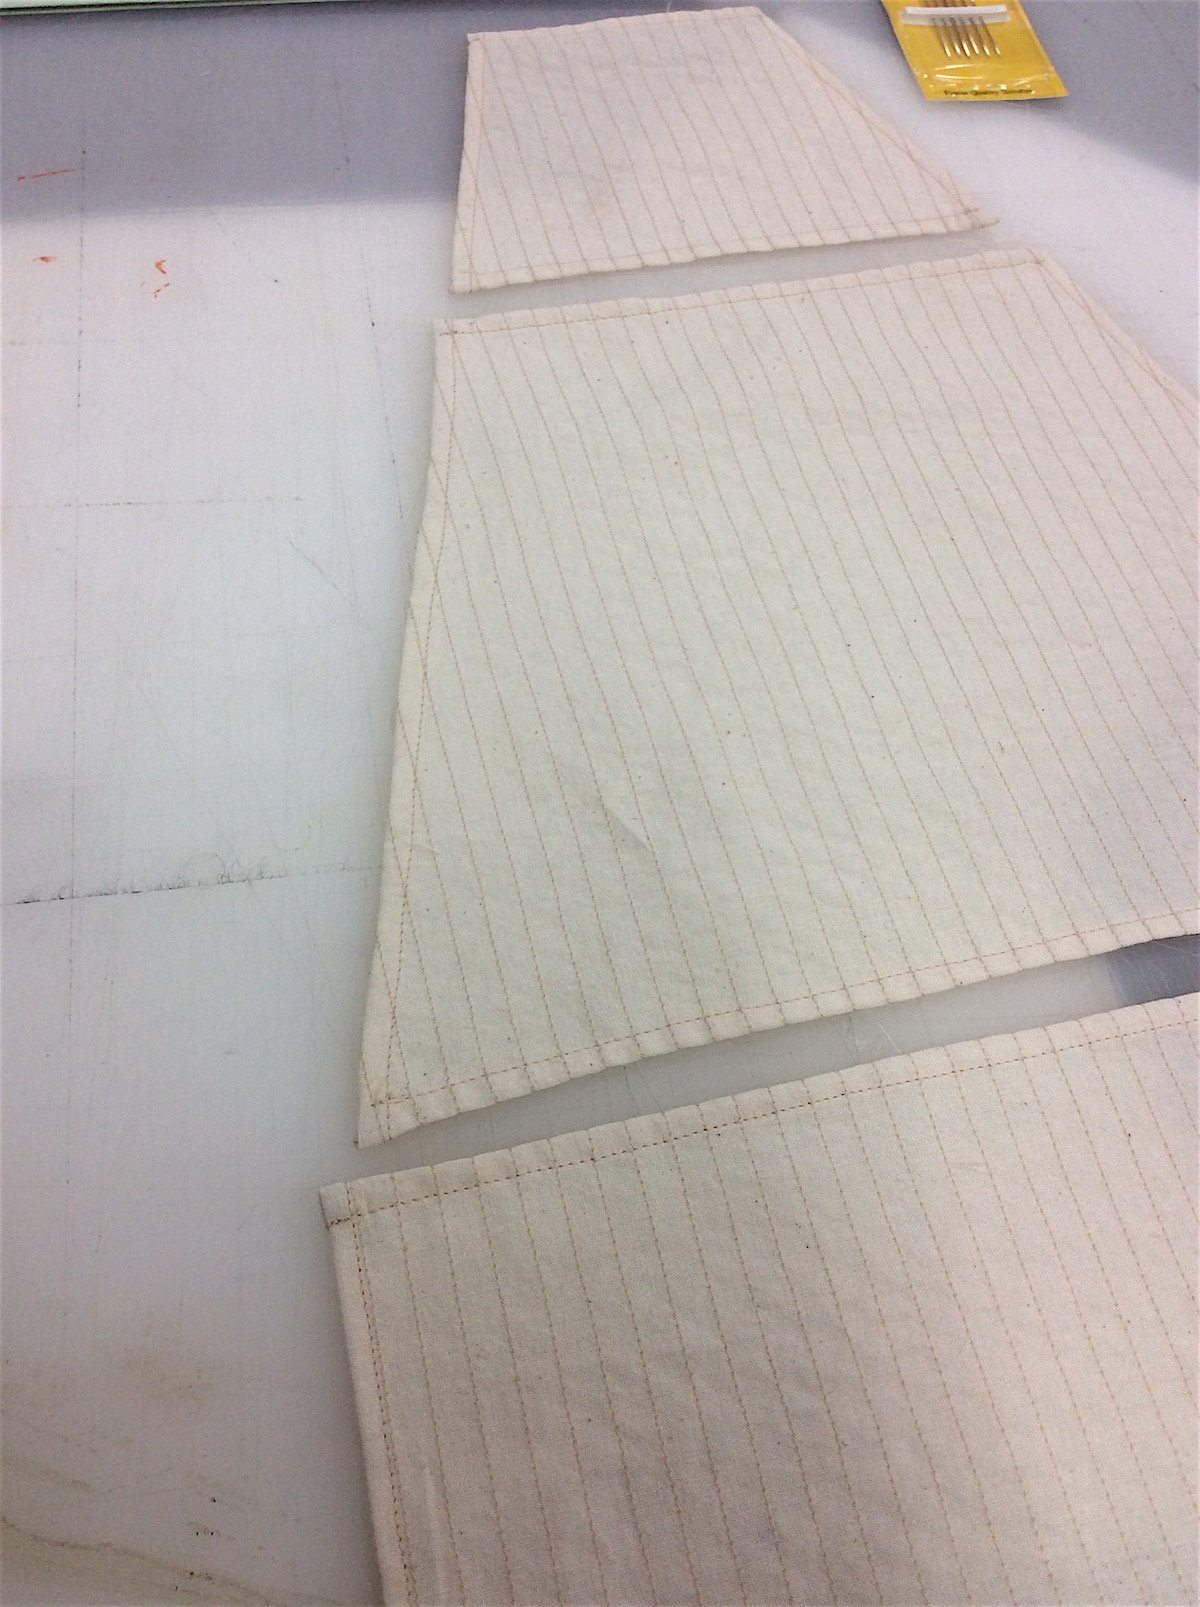
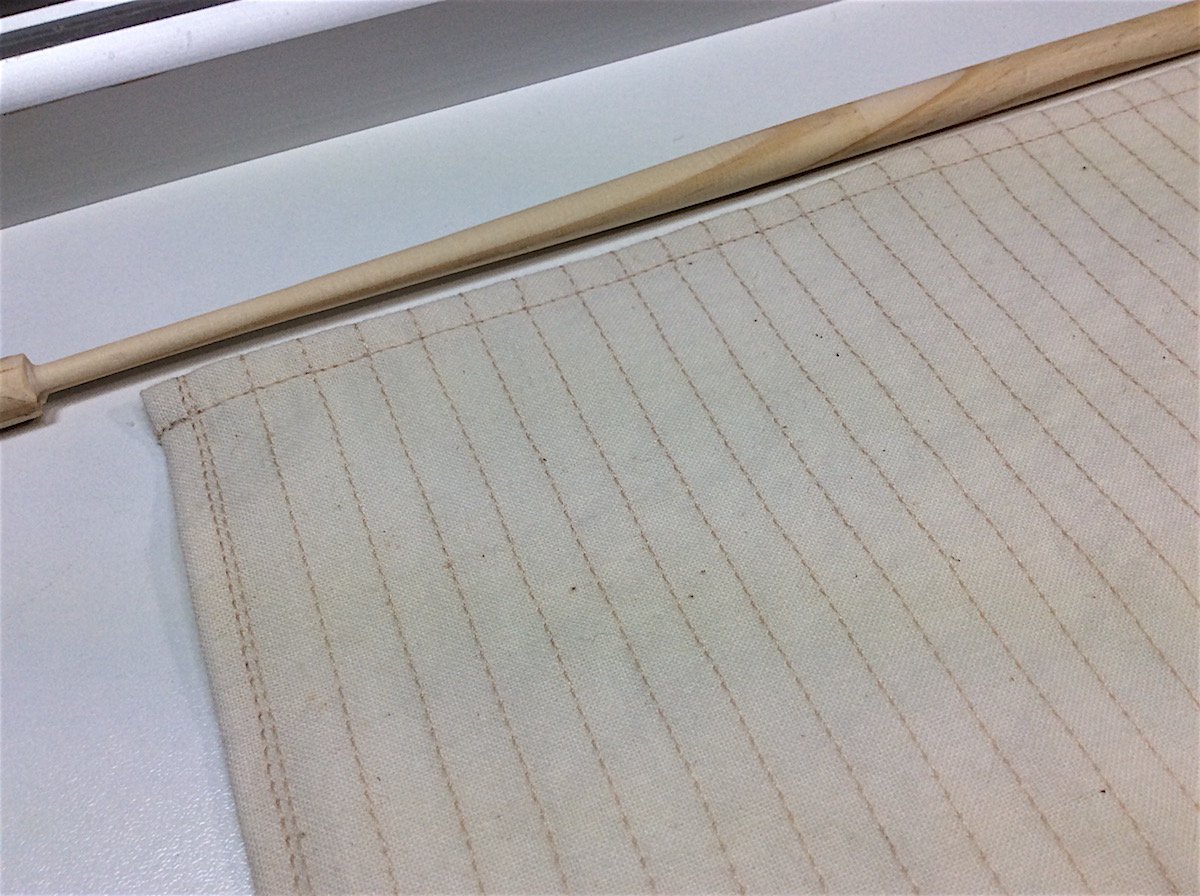
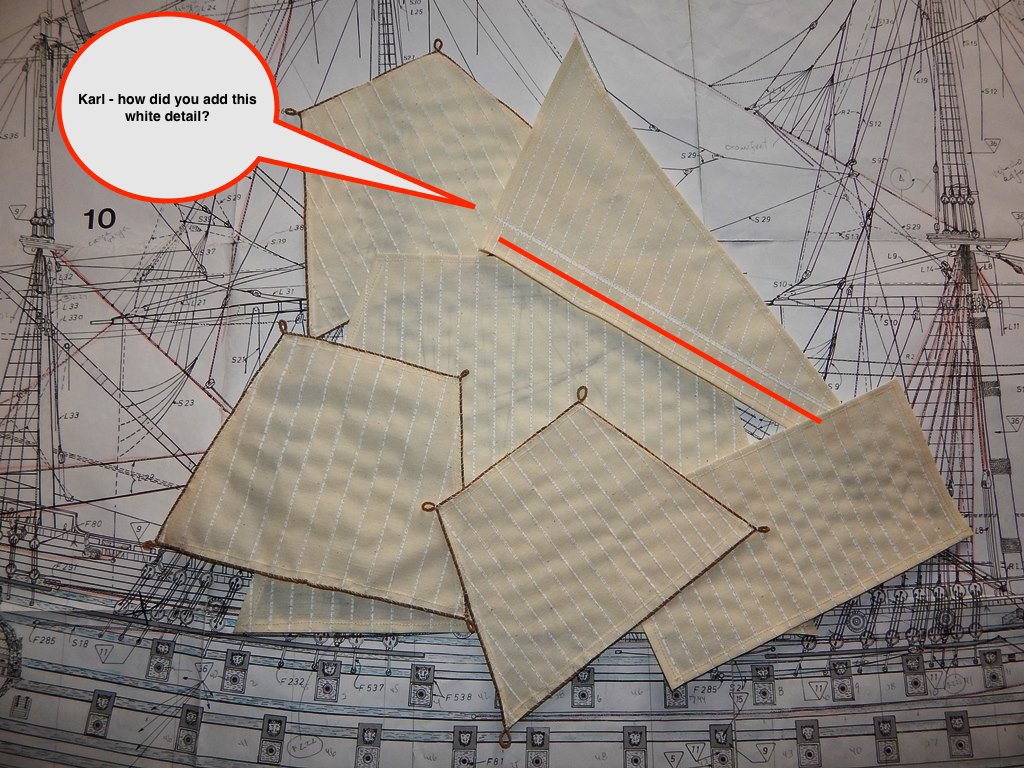
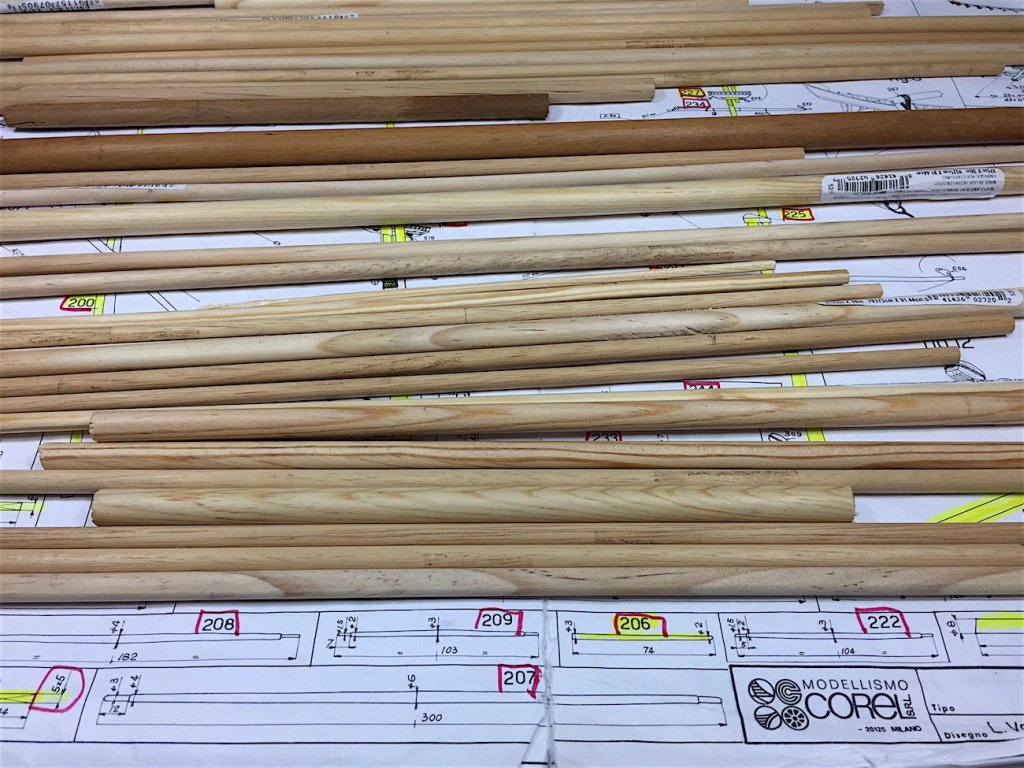
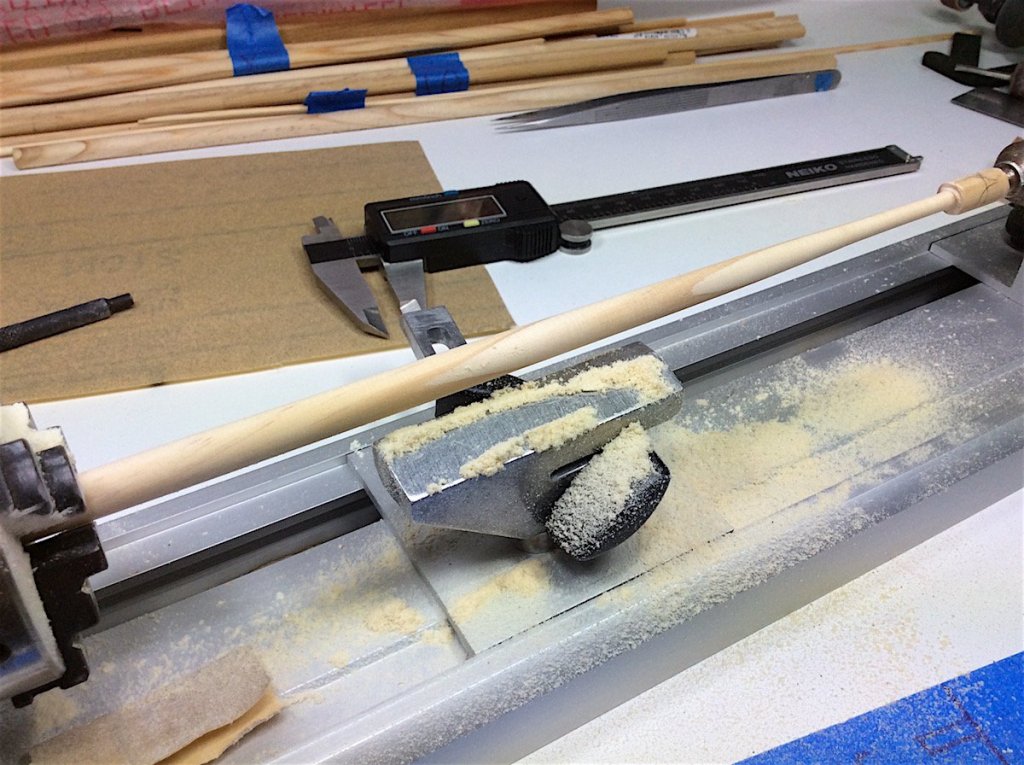
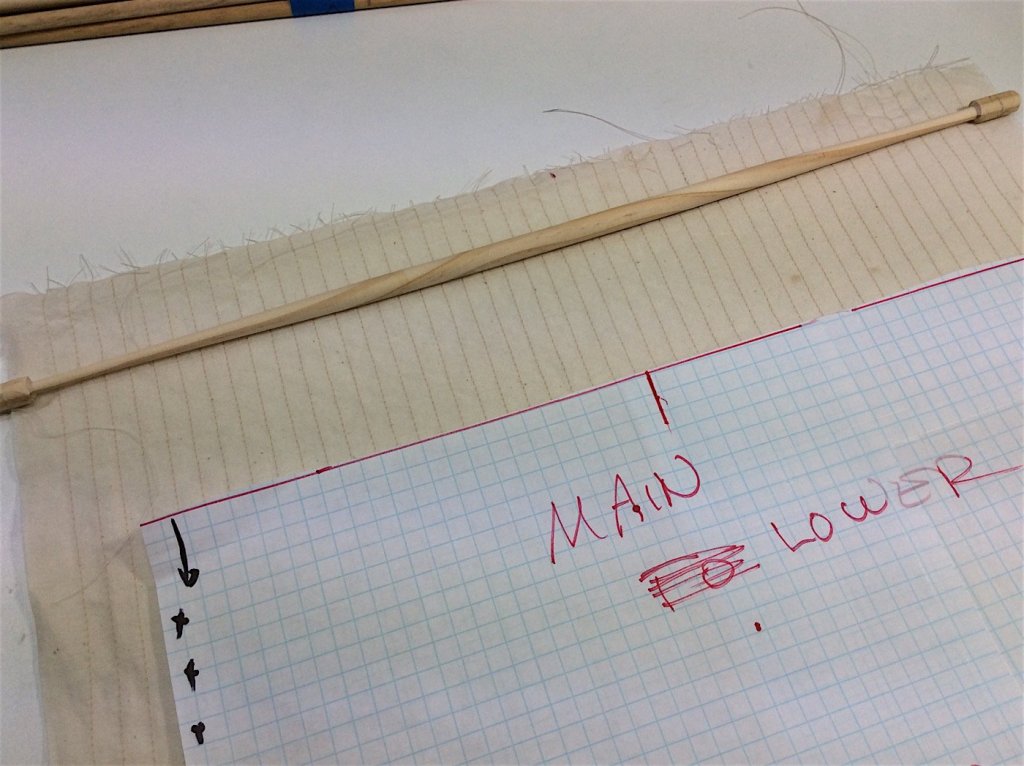
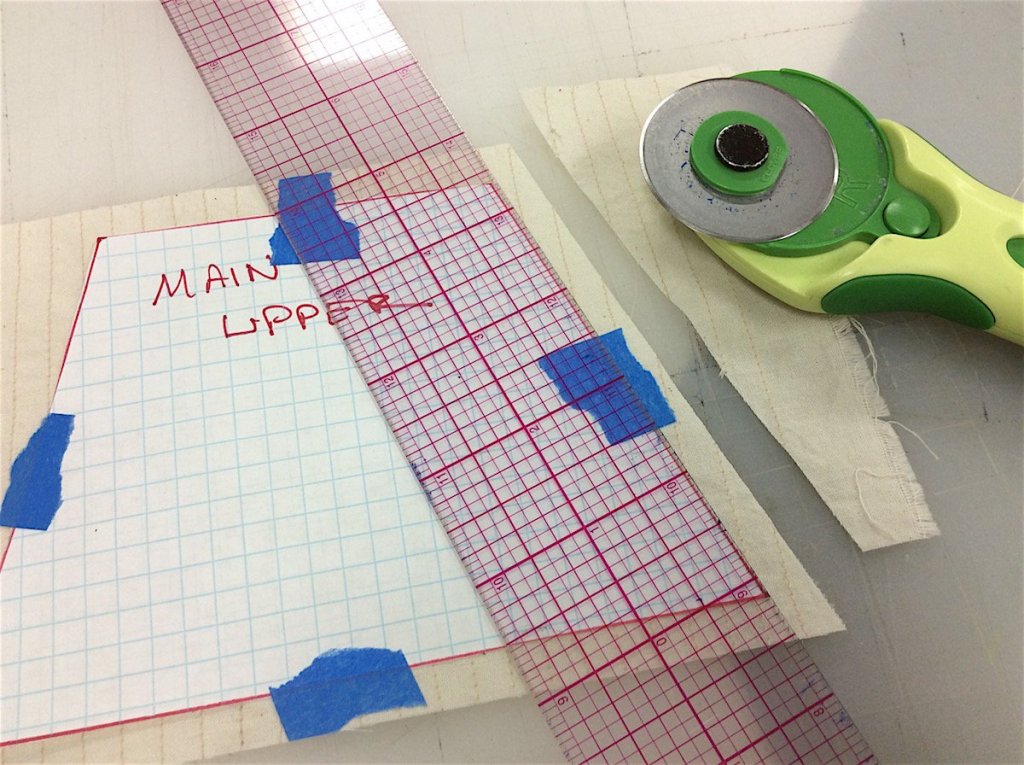
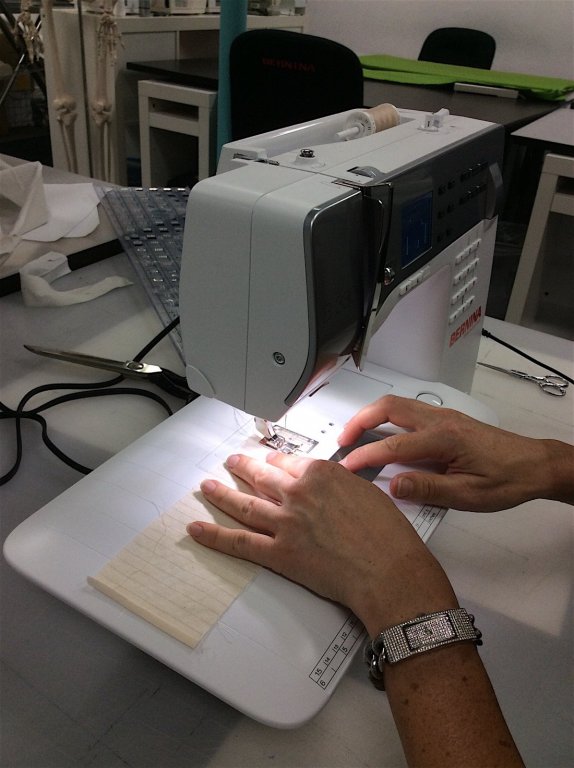
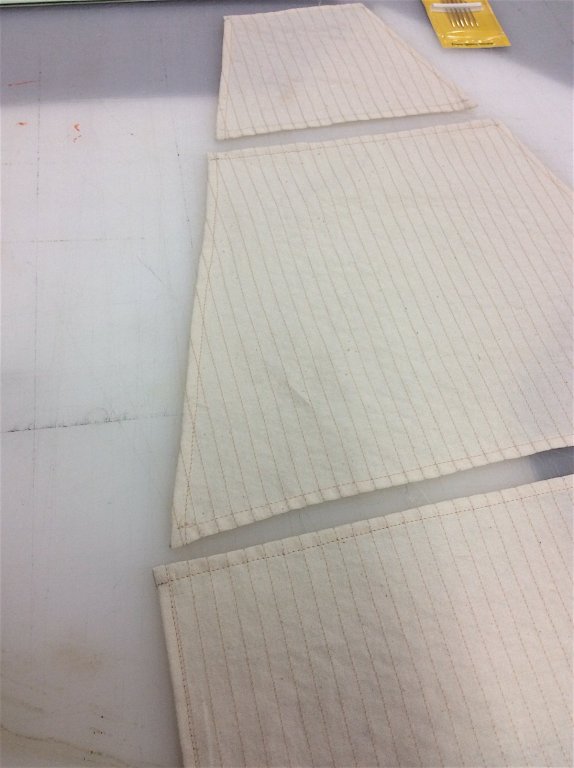
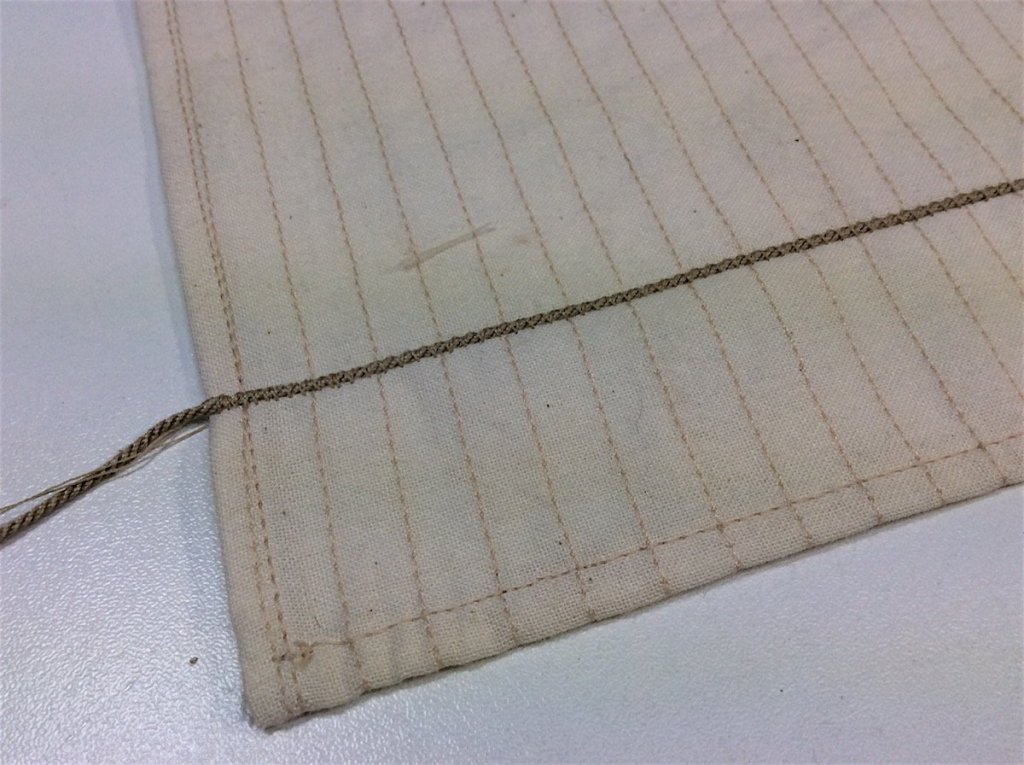
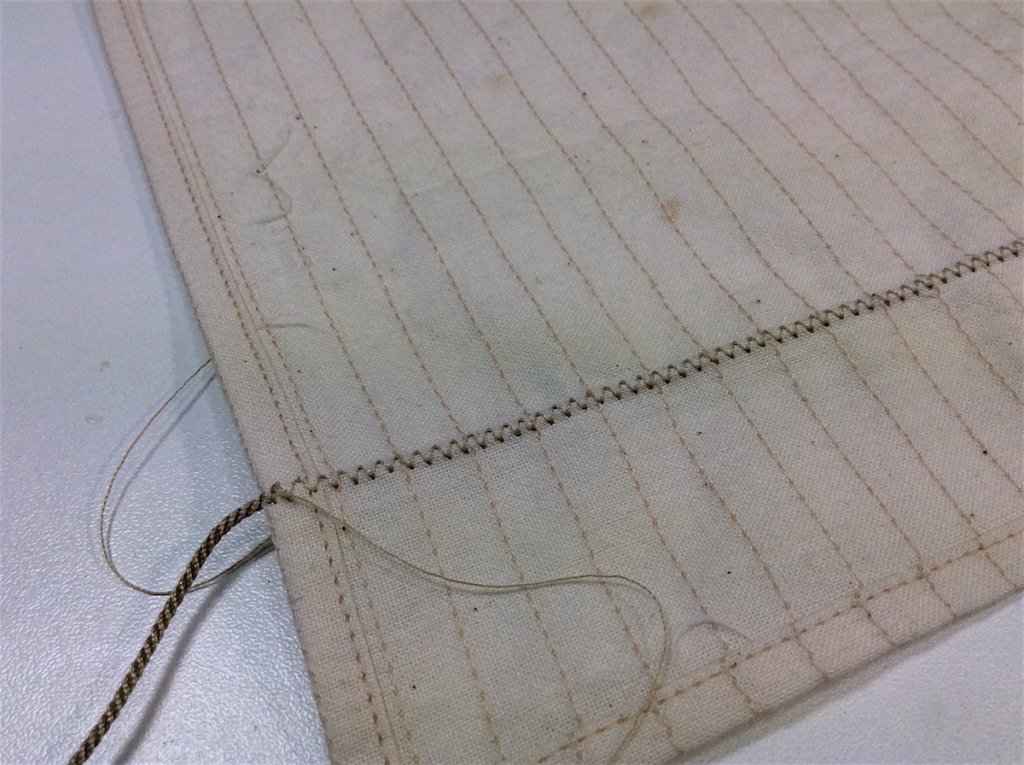
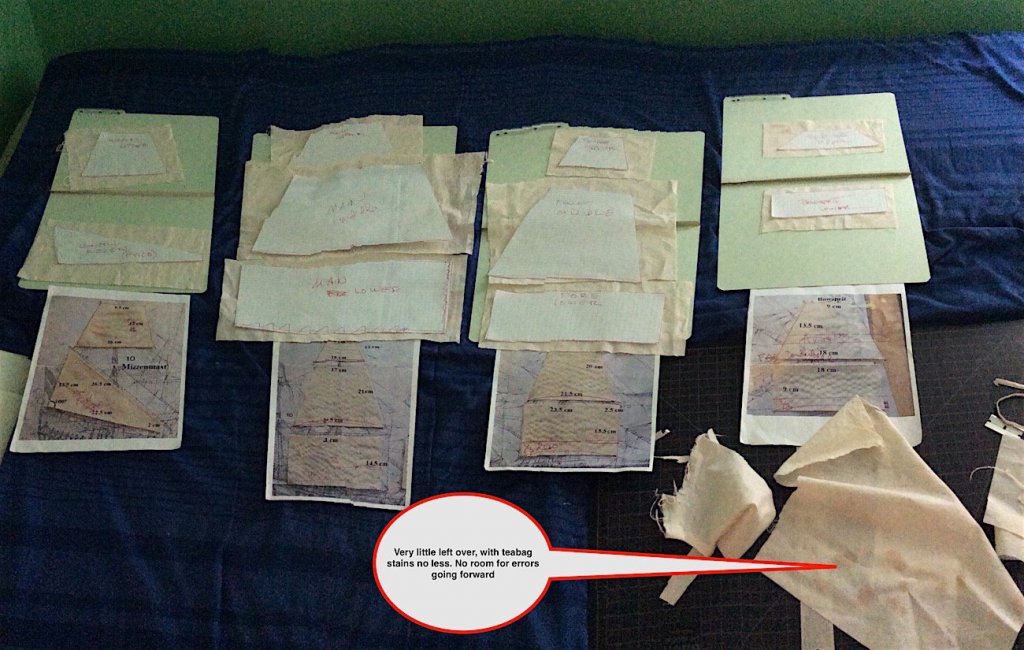
Update; Moving onto lathing the yards. First looked for dowels that had visible rings, in order to better replicate the yards looking as if they came from in scale real trees. Example of sailcloth and initial stitching, as well as first turned yard. It looks thinner than 8mm – but it is as Corel sized it. Returned to sewing center to finish up the sails. I’m so glad that I met Ivy – she was awesome. I did the cuttings. She (thankfully) did all of the machine work. The resulting stitching, and the hemming is 100% her great work. She also used an industrial steam iron to fold the double hems, then perfect stitching. Came out so well. All of the following photos highlight her great work. Sewing center also had perfect cutting tools I used an unbleached cotton muslin, that has those little black specks here and there - adds to the unrefined look too the sailcloth IMO - Last two are how I decided to add the reinforcement to the lower main sail. Copied what I saw on the 1/10th - As always thanks for dropping by Cheers,


-
Hi Mates, Buck - yes I do plan on as seriously as possible bash the Oseberg. I am already building up files with as much info as I can. I have lot's of photos and I have two new Viking ship books. Thanks for asking. I also appreciate your confidence. Vasa update. Went to that sewing center today. Ivy, the instructor, was super helpful - all 12 sails have been sewn. On Wednesday I return for the cutting and hemming. I think that they will look quite "ok" Karl "outstanding" well? - you are so kind thanks! Never thought that I would be near the actual end. Sails, yards, rigging and she"s done - I am also motivated to start the Viking ship - I have no space for two at a time like some of you lucky builders. Cheers,
-
Ulises. Yes nice work with the long boats - Good luck with your move as well
- 786 replies
-
- 2
-
-
- Royal Louis
- Finished
- (and 1 more)
-
Ken, As always such a learning treat following your log.
-
Nils, I have followed, from the beginning, your SS Kaiser Wilhelm - Astonishing art indeed. AND there are so many more !! I will never reach your achievements - that said what a pleasure to have followed your work. So many inspirations for me as a novice builder. Regards,
- 2,625 replies
-
- 4
-
-
- kaiser wilhelm der grosse
- passenger steamer
- (and 1 more)
-
Russ – Thanks for your kind words much appreciated – thanks for dropping by as well. B.E. Noted – I am now on your page understanding your posts, thanks. Eventually I may need to add these. I did actually follow how you included these on you last build. PS: I’m still learning the vocabulary (:-) ====================== So moving forward to the sails. Karl thanks SO much for your log sail measurement details. Super helpful indeed. Frank I have decided to follow your sail presentation – I will also furl all lower sails, and have reduced the sail sizes per your log suggestions. Karl and Frank your build logs will also continue to be invaluable when it is time to add blocks, rig the yards and sails all together. Monday the sails get started in earnest; I go to the sewing center for stitching. Cheers,
-
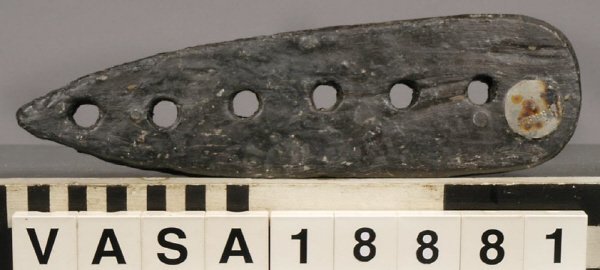
B.E., Thank you - as always - for your kind thoughts. For me this is such a compliment as well given your absolute mastery of this hobby. (:-) Regarding the crows feet (I assume you meant those ropes used by sailors to straddle yards?) - I have looked into this, checked with Anderson, checked on the Vasa specific site per Fred Hocker, it seems that Vasa did not rig these. Now I am indeed thankful. Also all of the models that I have seen, including the museum's 1/10th preclude rigging these as well. That said your advice will stay with me for future reference. Thanks for your post. So searching (too much) tend to bring up things that I did not want to really know about Grrr ha ha Regarding those euphroe blocks that I was so proud of - well this came up. So much for my accuracy (will not go back to revisit this) below from Fred Hocker (copied and pasted) We have three different sizes of euphroe found on the ship, a 4-hole, 5-hole and 6-hole. The number and find location of the 6-holers indicates that they were used for the martnets on the fore and main courses. The locations of the others are less clear, but could have been used for the dead ends of a number of different lines attached to the stays, or for crowsfeet at the forward edges of the lower tops. There is no sign on the main tos of dedicated holes for the legs of a crowsfoot, but they caould have been tied to the rim or railings. Again Mates thanks so much for all of your encouraging comments, likes, and visits. Cheers,
-
EJ - Glad to be of help (:-) Patrick - thanks for the hint, but I'm committed to try to do sails. Booked a sewing lesson for next week. Met the teacher - she said that this would be her first teaching lesson for some "dude" making model ship sails. This should be fun. I hope. Super cool sewing machines indeed. Cheers,
-
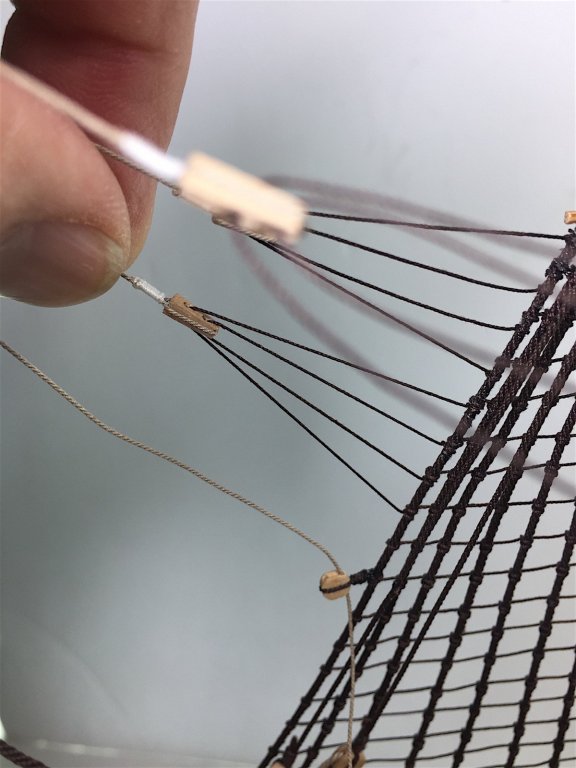
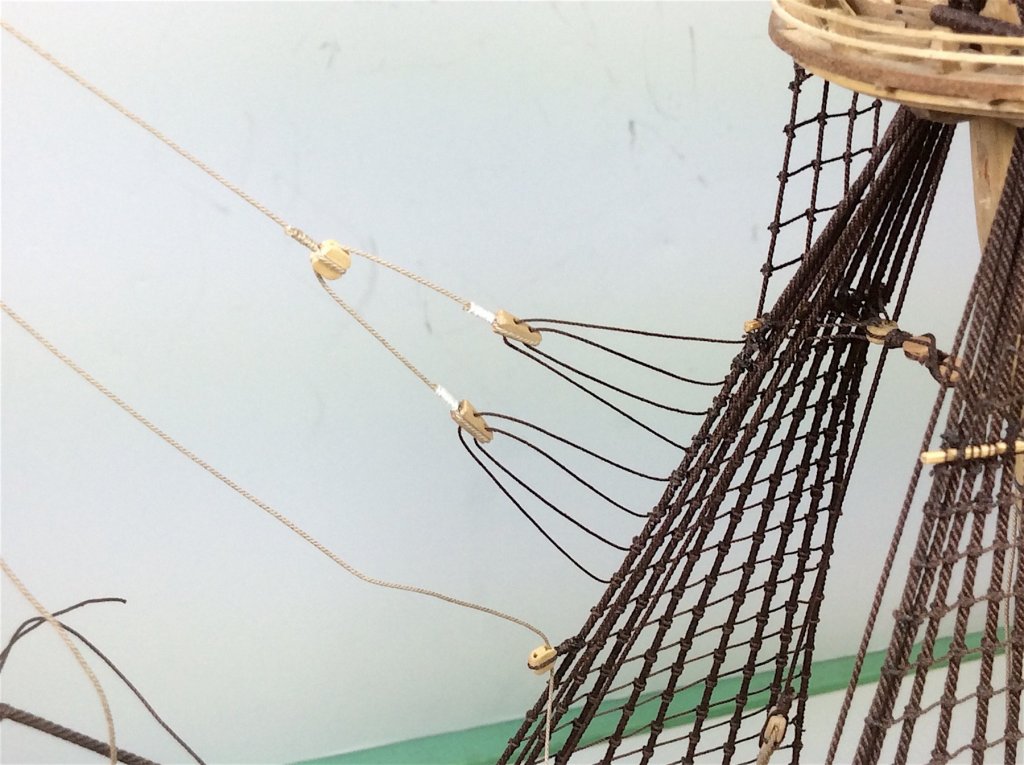
Denis – thanks, yes that does now look as it should. Also thanks for your continued support and kind thoughts. Yup sails keep me up at night J Would definitely add a big “bang” to this project. EJ – just a thought; I had difficulty trying to properly scale the euphroe block threads taught. A bow seemed to always stay visual coming from each side of the blocks I went from Chuck’s .018 to his .012 and that helped a bit. But the real solution was to use a routing bit and add indented grooves to the blocks themselves. This allowed the rope bends to be better hidden within the block. Now when pulled the ropes take on a better scaled toughness through the blocks to their respective shrouds. Cheers,
-
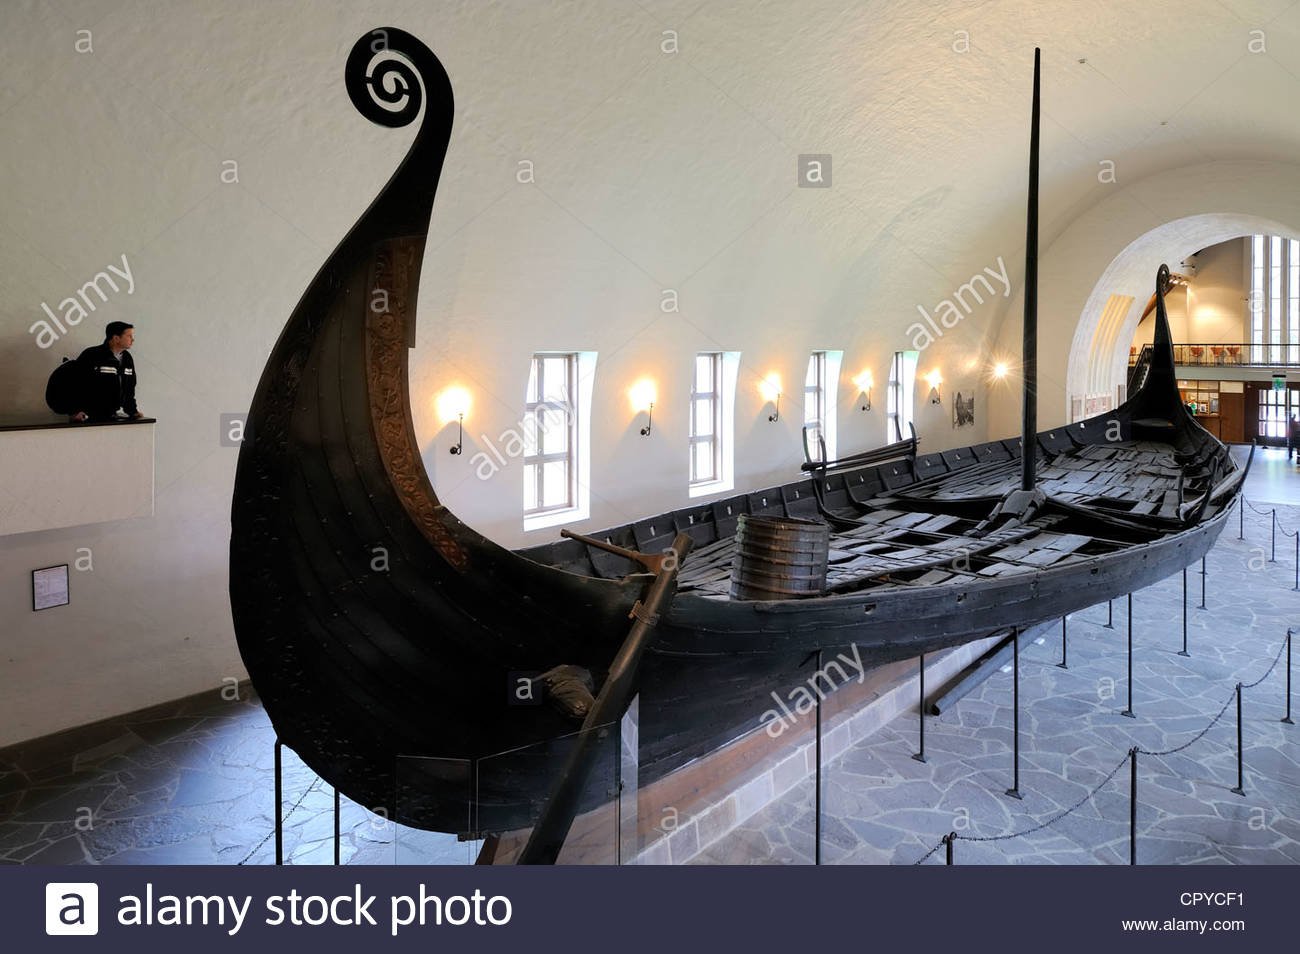
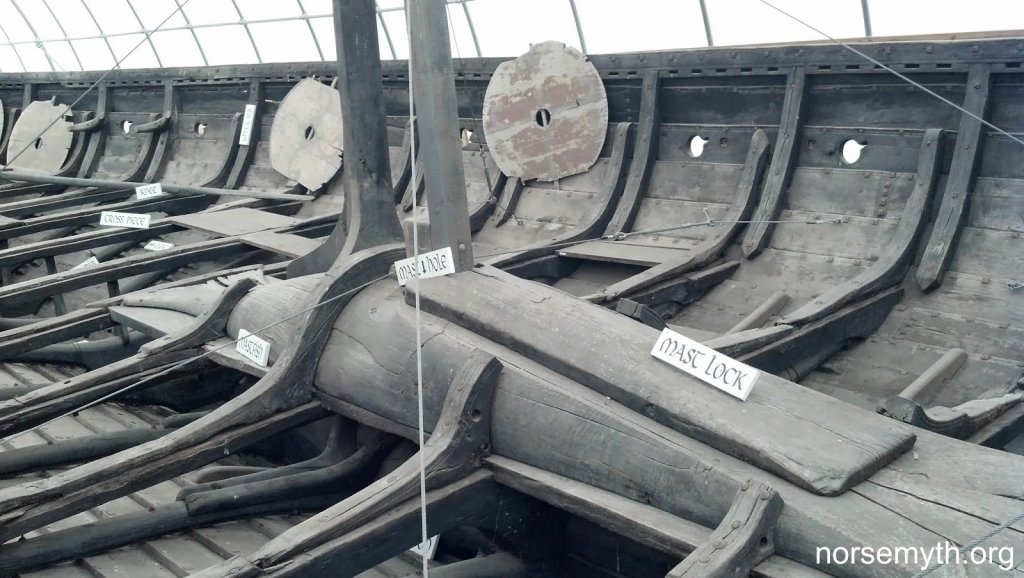
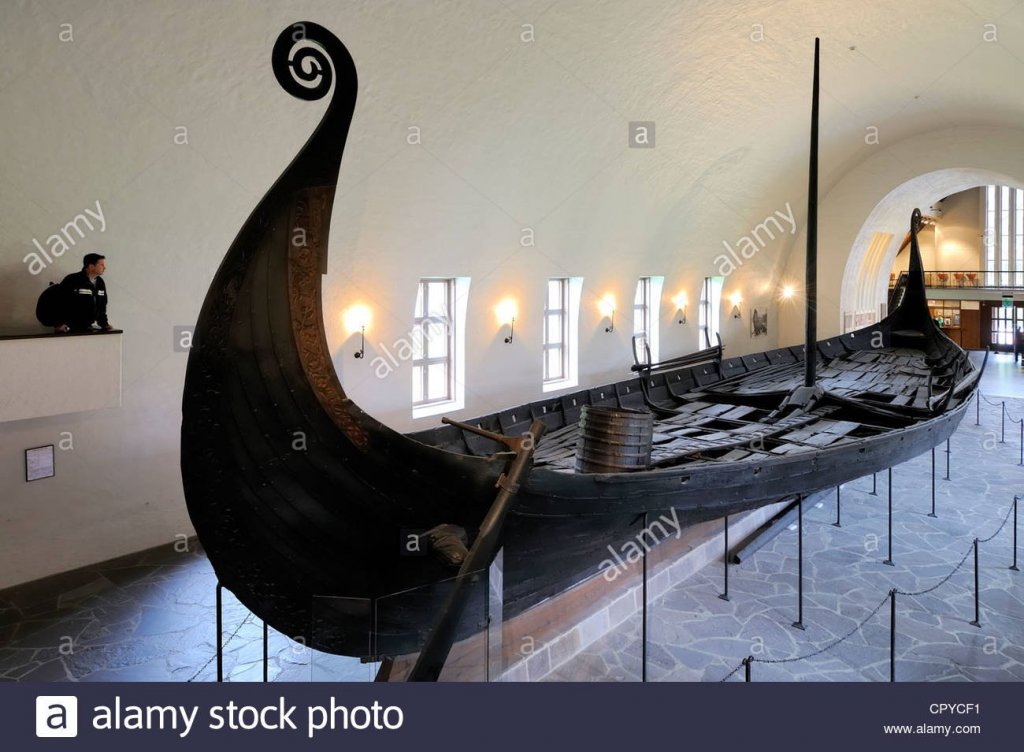
EJ, Thanks for your nice comments – Yes your advice is well taken. This happens to be something that I have the foresight of understanding. Most of the standing rigging won’t be secured until much latter. I also assume that I will need “reaching room” when attaching yards, sails, and required running rigging. It is my goal to complete the Vasa in 2017. ============================ And then move backwards to 840 AD or thereabouts (Oseberg) I will, for that one, leave several sections open, including part of the deck, and the hull on one side – making visible construction details that would otherwise be all covered up. So the extra work will be with wood. An area that I like to work with. Probably won’t add the sail, nor its simple rigging, but instead truncate the mast for a partial display. So it will be just basically a hull model. I was just going to ignore this one (too big1/25th scale) but have reconsidered this in hindsight. And so many actual photos of the Oseberg are available making the structural accuracy easier to replicate correctly. Below is a replica of the Gokstad detail view– (the Oseberg was built as a burial shrine). But these two give great insight into their construction. Oseberg is the full view photo.
-
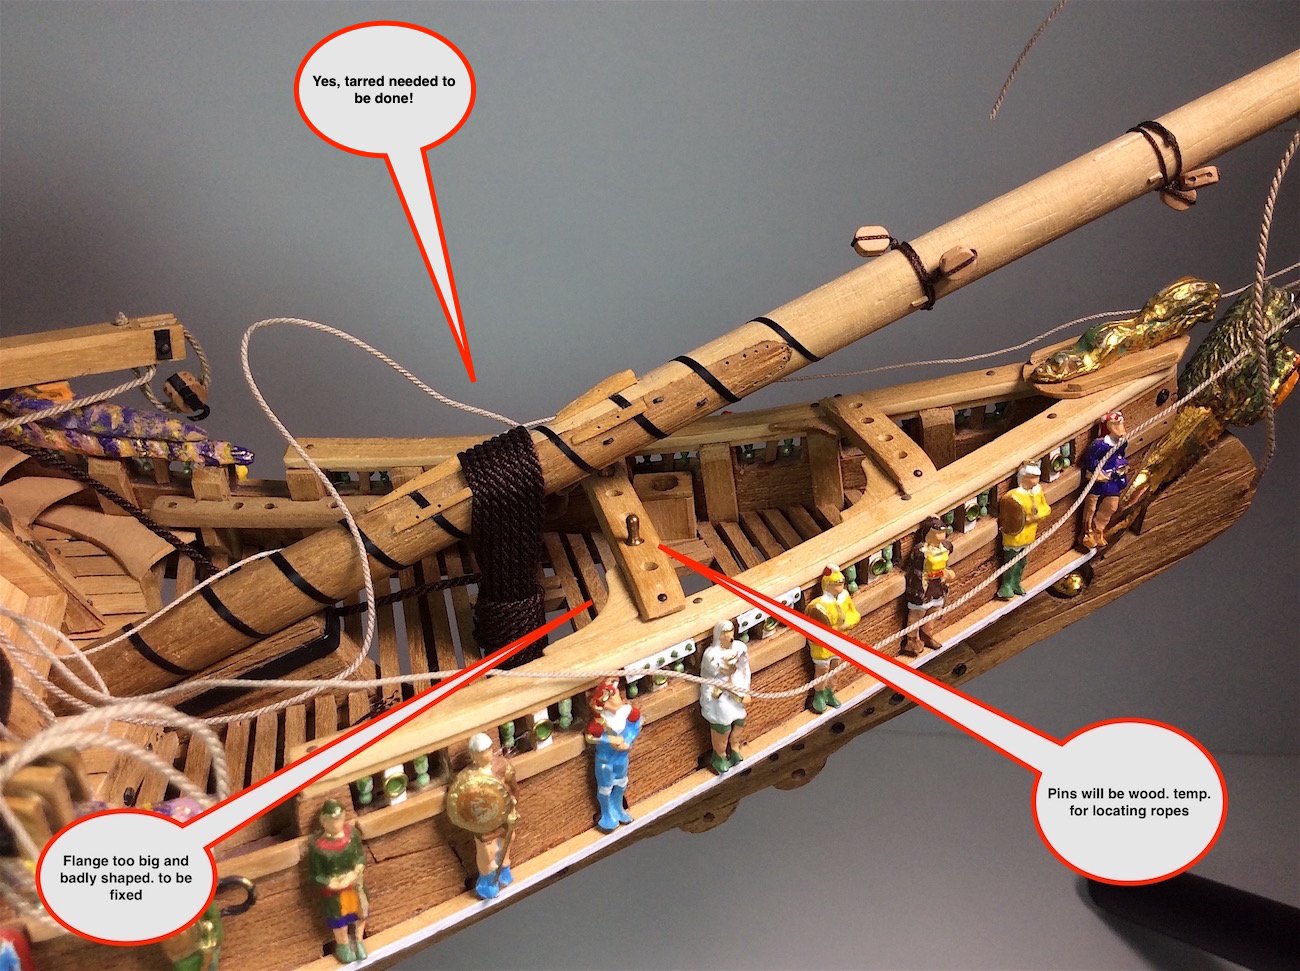
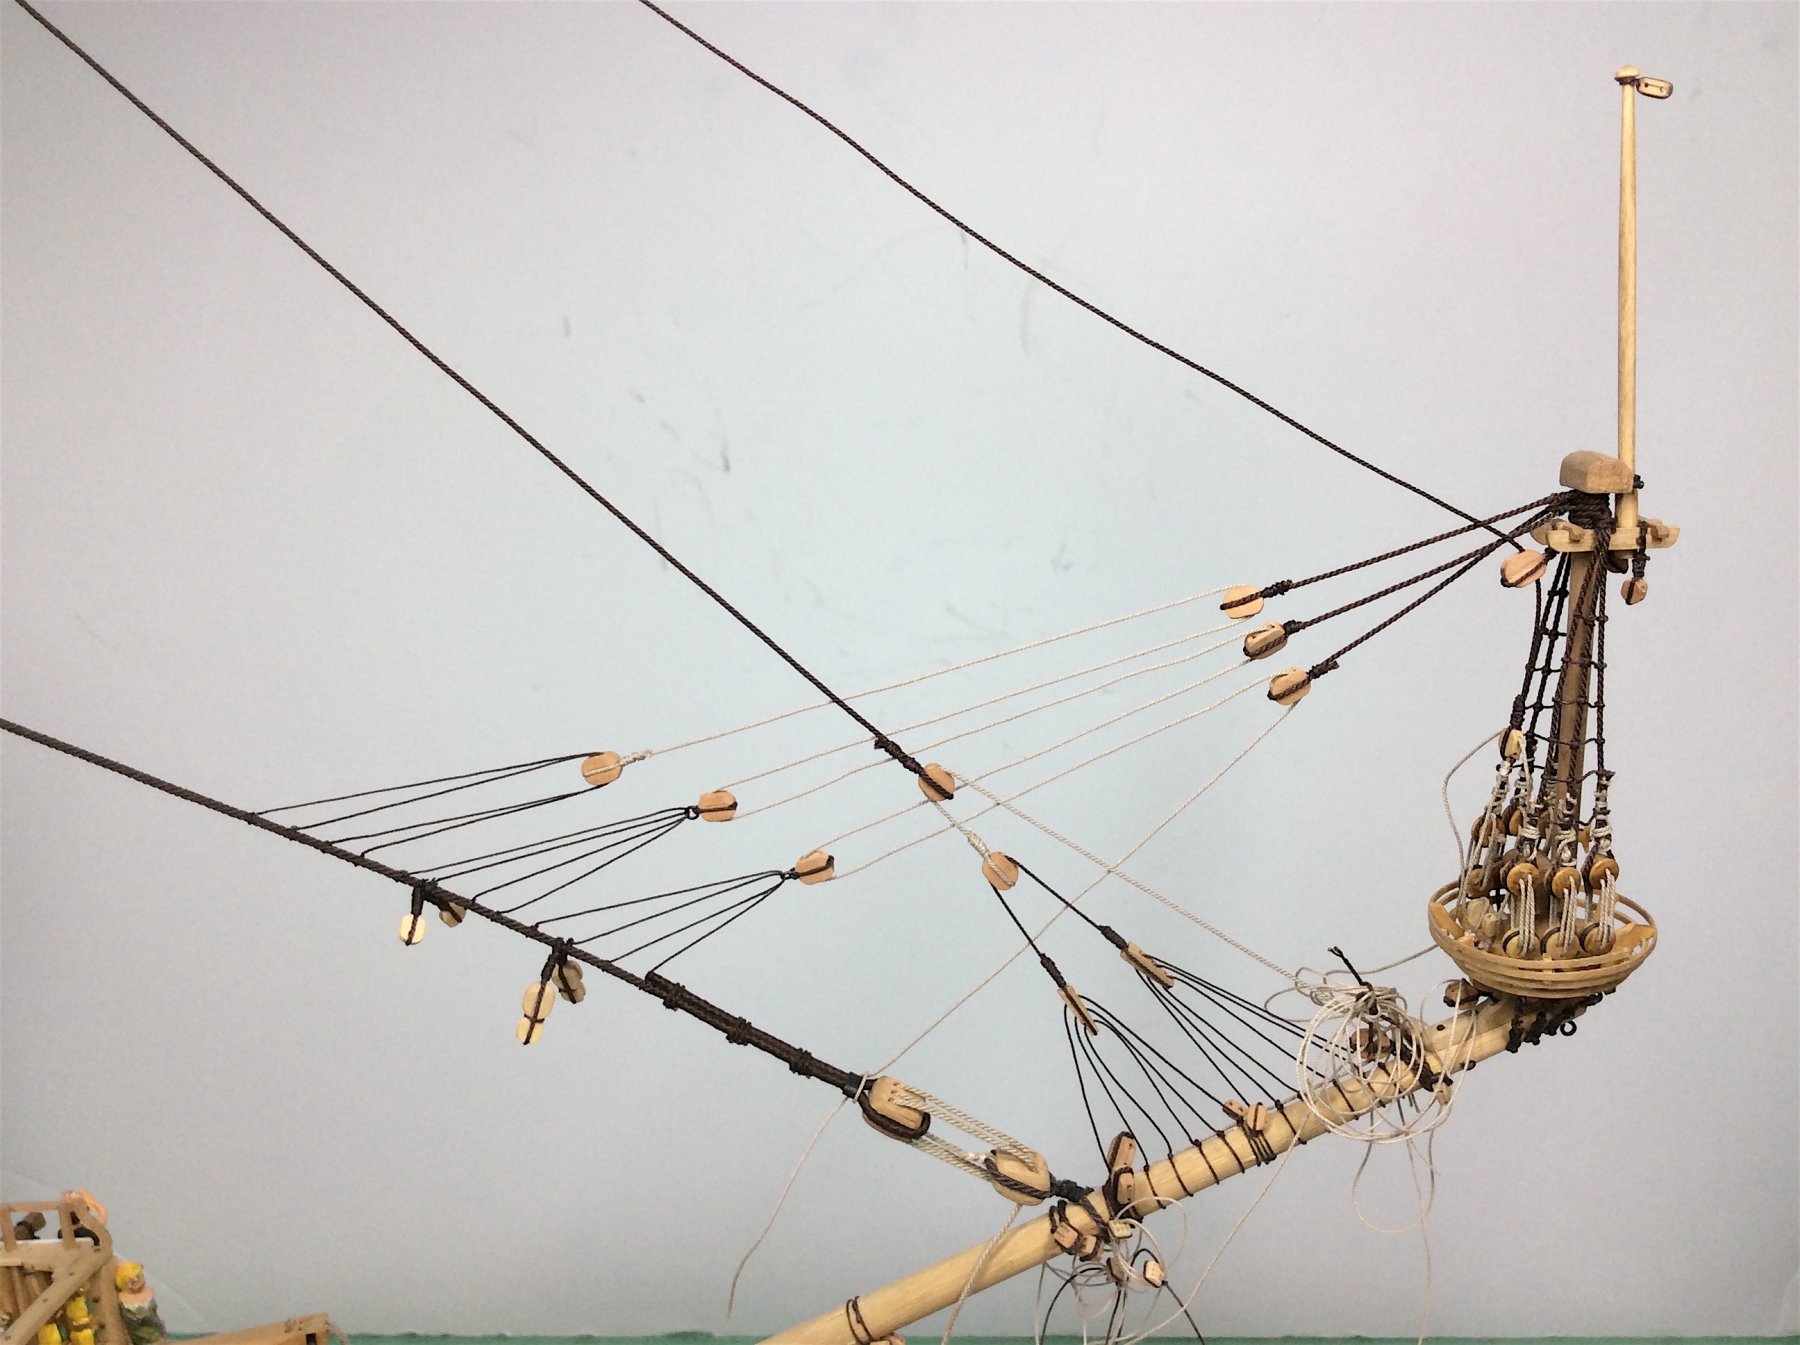
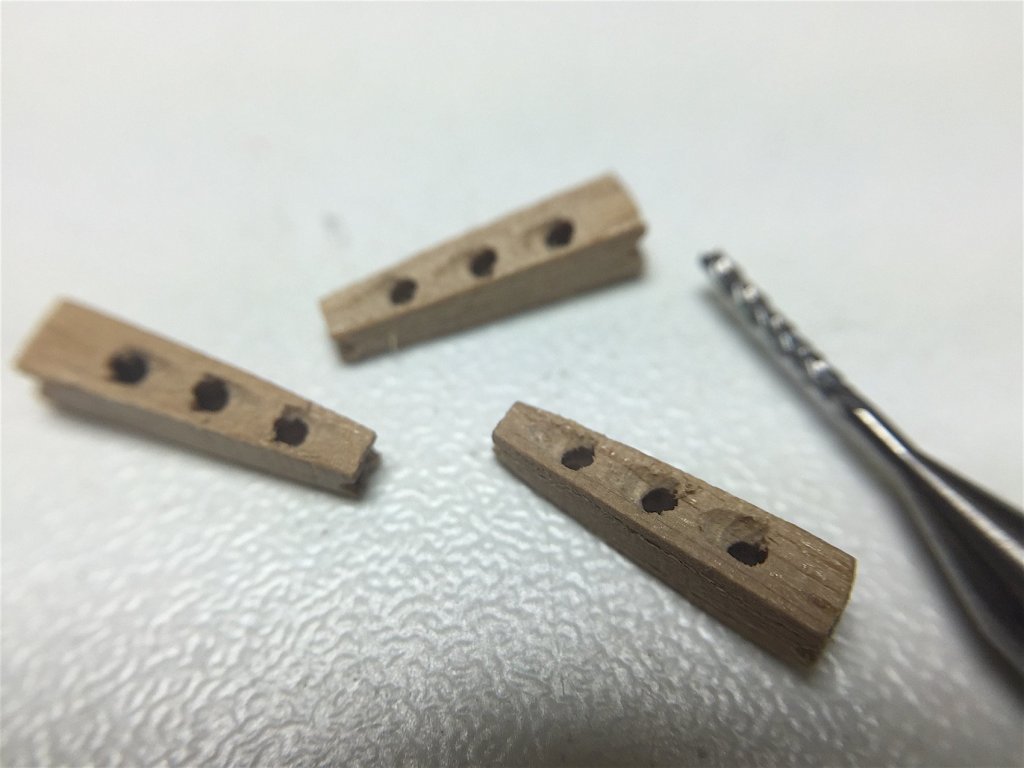
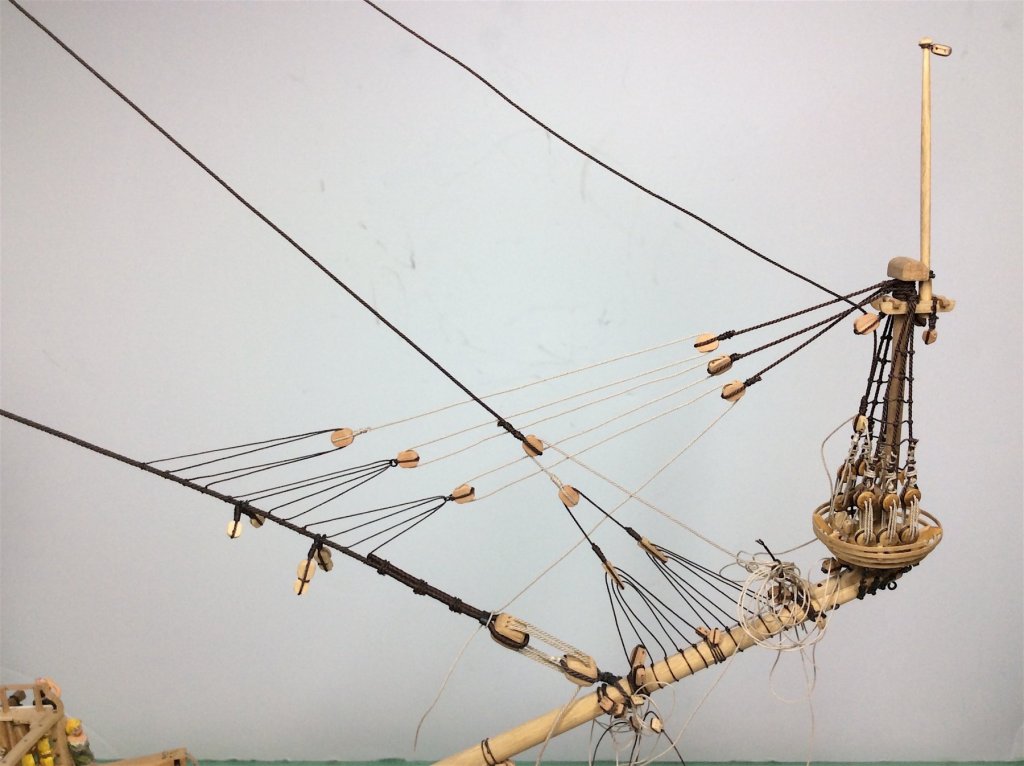
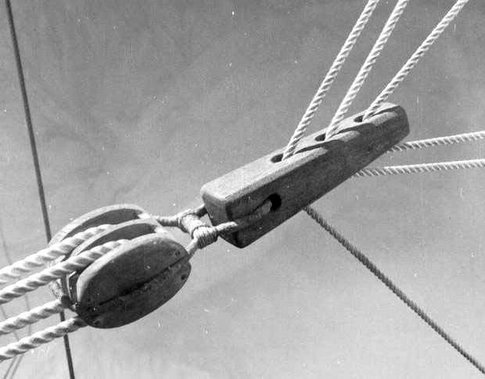
Hi Mates, Continuing with standing rigging; • Changing out the bowsprit lashing to correct – tarred ropes •First attempt at making Euphroe blocks, Found a more contemporary looking example online. May also incorporate blocks with needed Euphros for mainmast backstay (as seen on that photo) Funny PS; Word saw spelling error and wanted to change spelling to euphoria or euphoric ha ha •Also making more fiddle blocks Pics are self explanatory – so brief text here. I can see that eventually tensioning all of these lines against each other will be complicated to get them all looking “right” That bridge is for later. Cheers,


-
Cog LOL - Not true - Brazilian Portuguese is so beautiful, as compared to Portuguese from Portugal IMHO. With the exception of Cape Verdean music aria Evora as an example of traditional music -- LOL AND Brazilian Samba. (Yes you were making a joke (:-) ) I am very lucky in my life I speak French, Spanish (from Mexico), Portuguese (from Brazil) and english. In my ear Brazilian Portuguese is music indeed. PS: I am married to a Brazilian - that could help this subjective post PS: NO I am not so smart but as a child and a teen my dad moved us into countries that required learning languages- So I learned the languages. PS 2- Fr. Sp Por. - all latin rooted- made the transitions into those obviously easier. Cheers,
-
Anton -Interesting regarding how the Aussies have put a proud label on some of their ancestries. Your background is also very eclectic - Nice Again your long boat is so so excellent - especially in that scale - your attention to the smallest of details is superlative indeed.
- 322 replies
-
- 6
-
-
- sergal
- sovereign of the seas
- (and 5 more)
-
Karl, Don't know how I missed these updates. Brilliant work !! And yes as Bob just said bowsprit is superb work indeed. Cheers,
- 164 replies
-
- 2
-
-
- Model Shipways
- Finished
- (and 1 more)
-
Karl, Thank you I understand - great- I will be going here next week(see below) to start the sails - If I think that they look good, and don't take away from the details that I have added to this Corel kit - then I will add sails. Yours and Franks are what I am hoping to at least achieve. Both of your Vasas (with added sails) look so great. The sails really add to your builds. I will, in any case, sew all of the trim around the sails. here is the place. https://www.sewingarts.com/ I will try myself or hire someone at the school who would be an "expert" details to follow, Cheers,
-
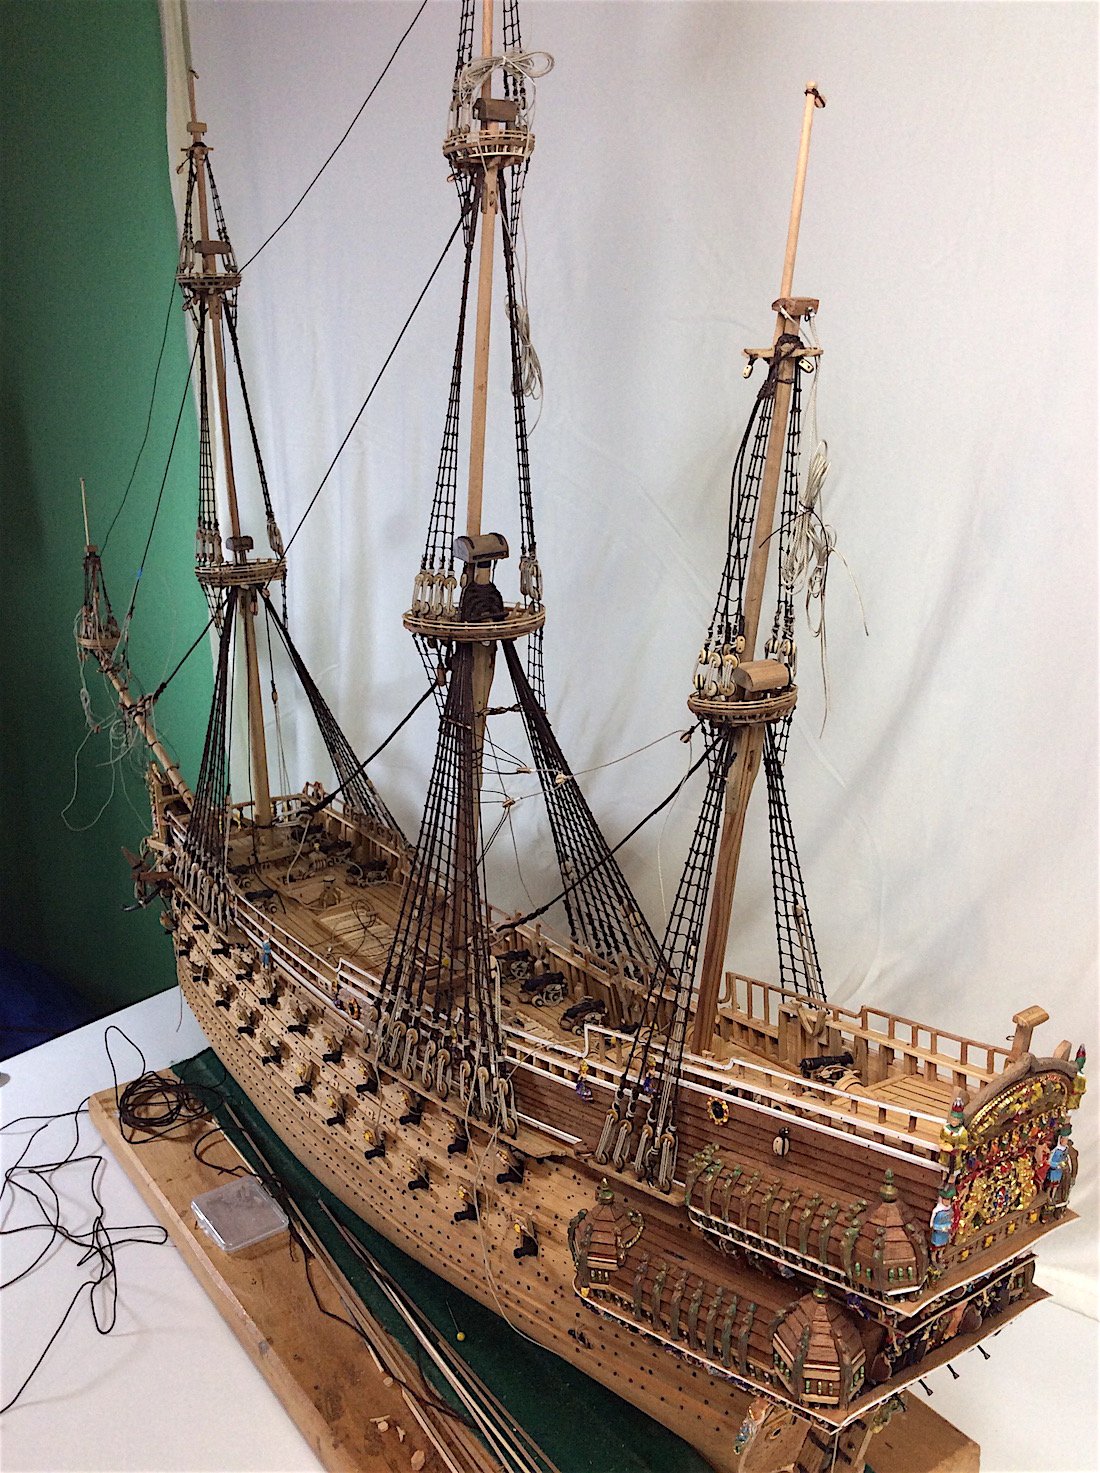
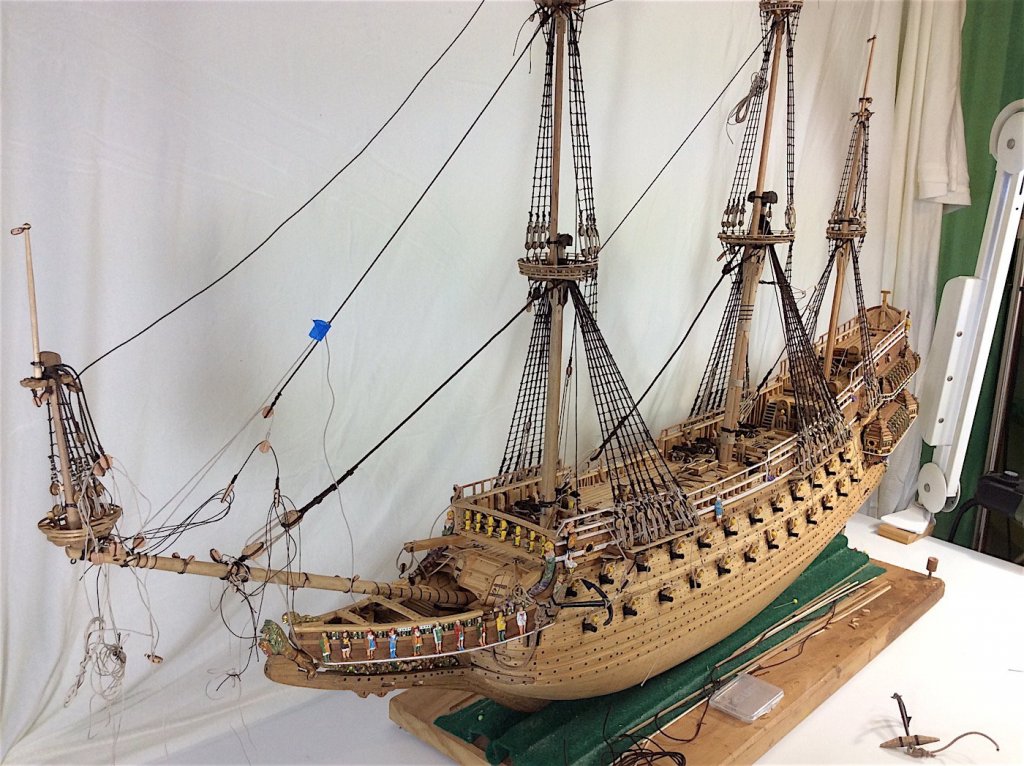
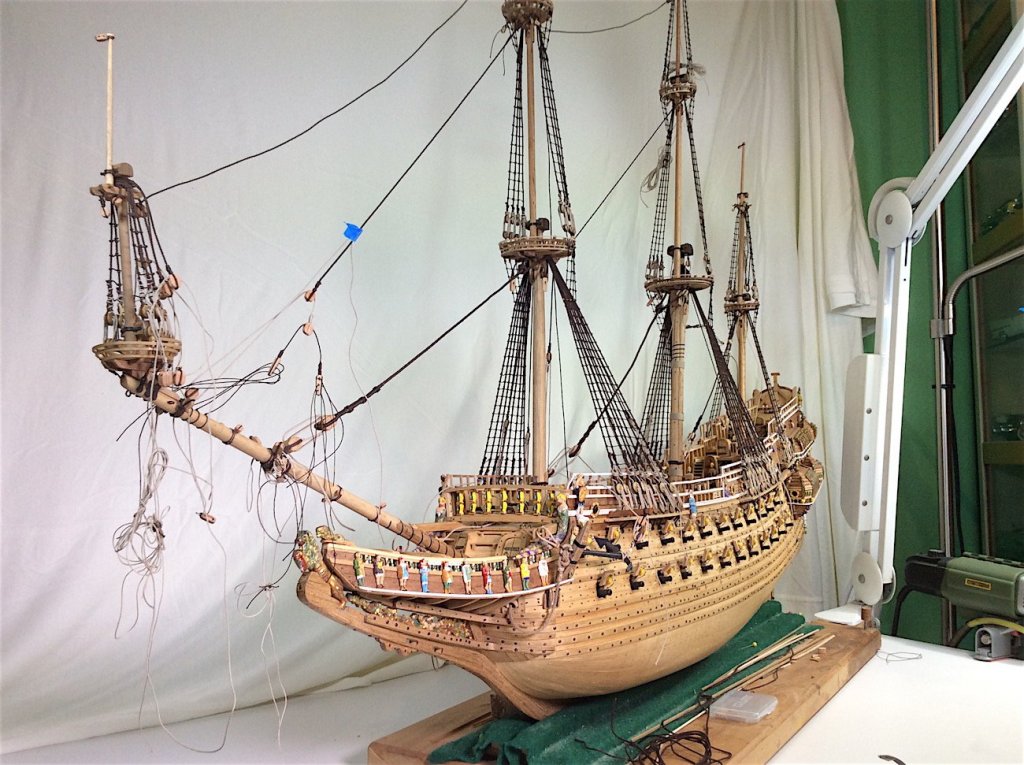
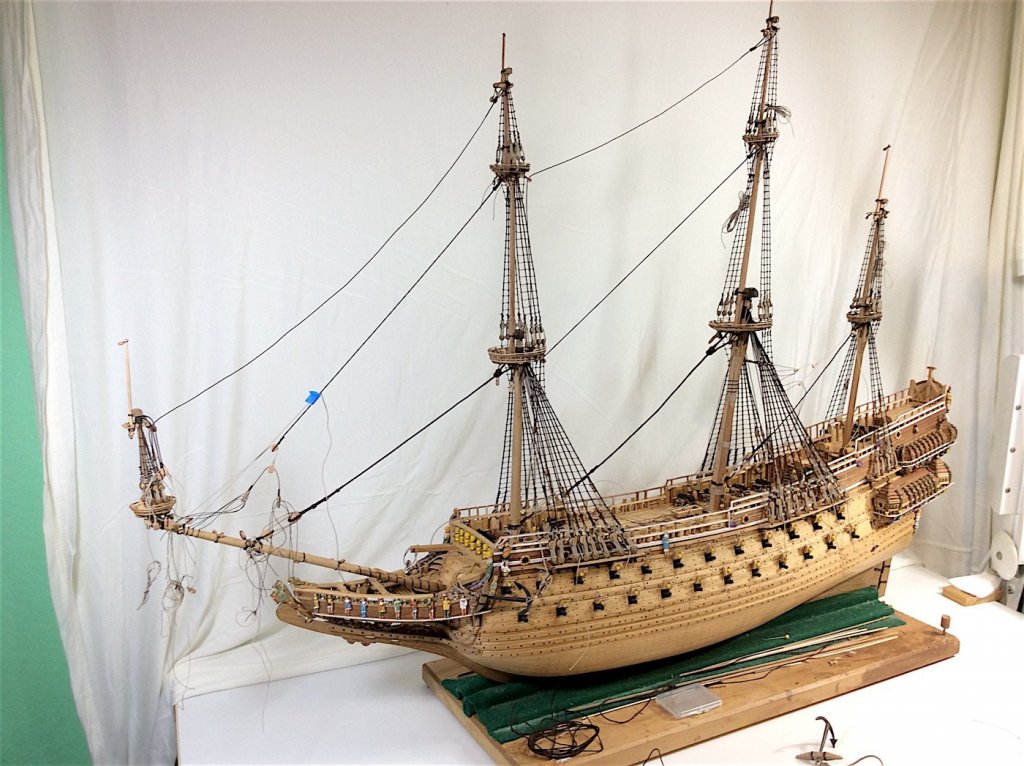
Hi Mates, He are some updated full views as of today. Always thanks for dropping by.

-
Ken, You're updates are so excellent. Brilliant work indeed. PS: Looking forward to a grandchild - my wife and I are still in a "holding pattern" (;-) Cheers,