HOLIDAY DONATION DRIVE - SUPPORT MSW - DO YOUR PART TO KEEP THIS GREAT FORUM GOING! (Only 24 donations so far out of 49,000 members - C'mon guys!)
×

md1400cs
-
Posts
2,839 -
Joined
-
Last visited
Content Type
Profiles
Forums
Gallery
Events
Everything posted by md1400cs
-
 Bob, Don't know how I missed THIS build log. Beautiful work indeed. I will go back and visit from page 1. I promise not to bury your in-box with "likes" ha ha -. My next project will be a cross section, I will then visit your Triton as well. Cheers,
 -
Thanks Steve, here; https://www.amazon.com/gp/product/B01FDD79AW/ref=oh_aui_detailpage_o00_s00?ie=UTF8&psc=1
-
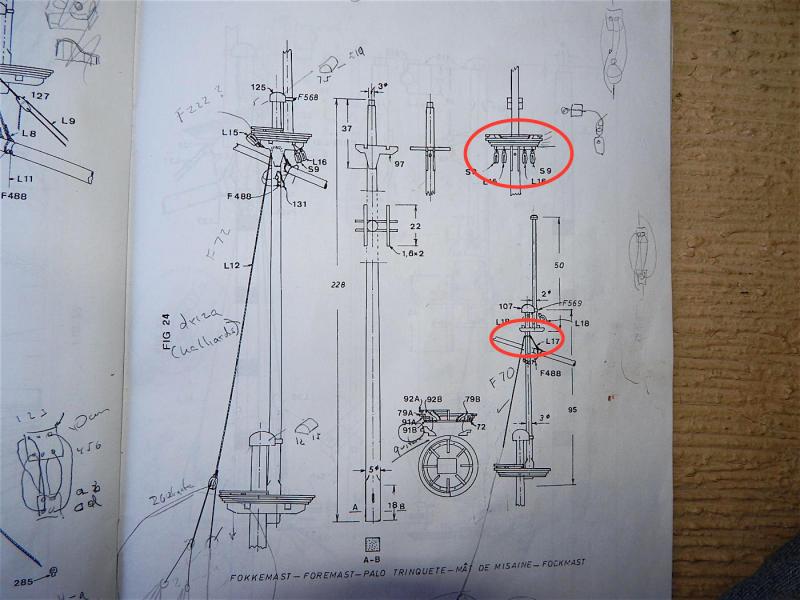
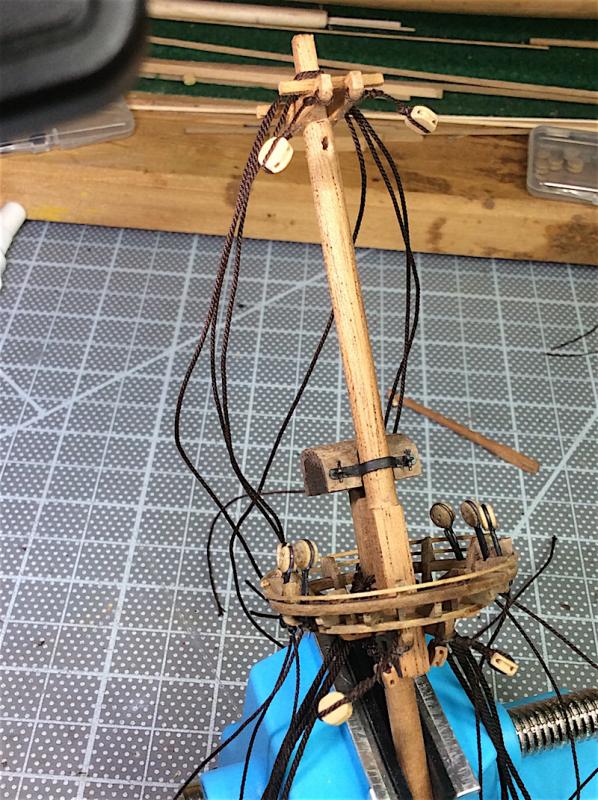
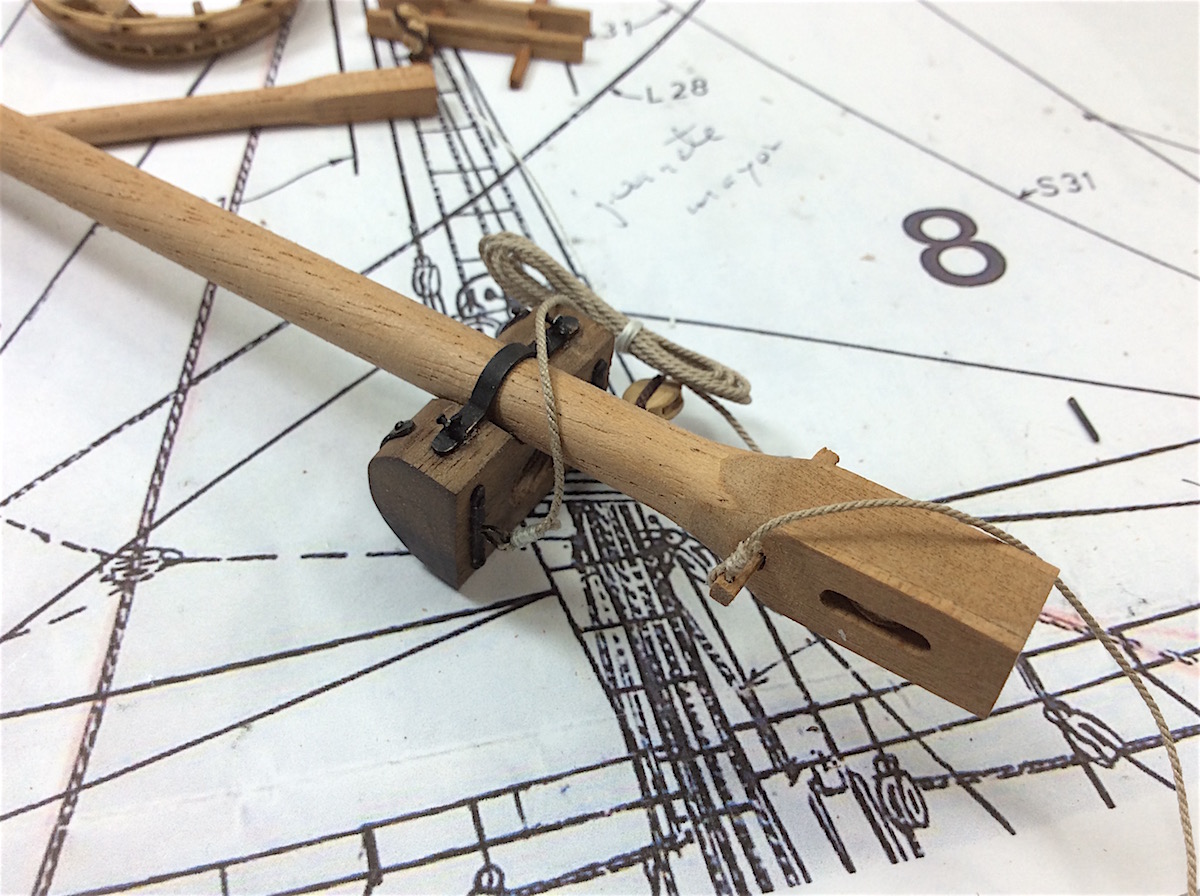
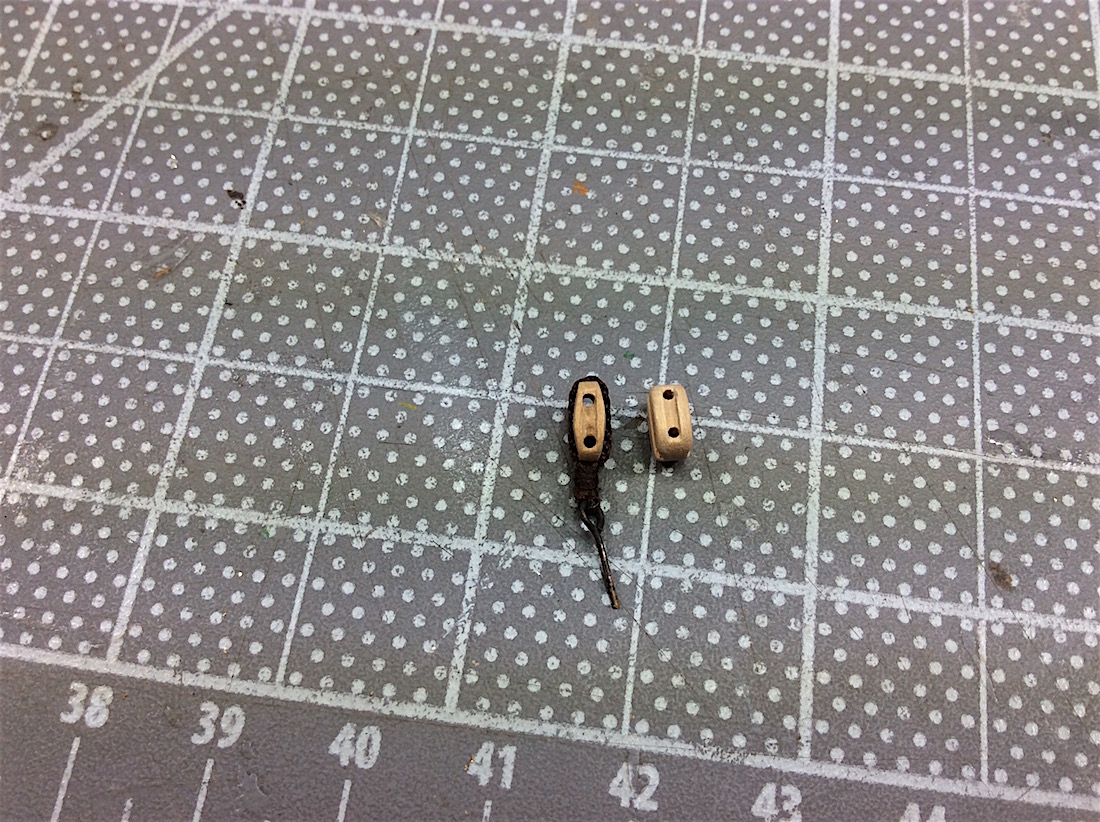
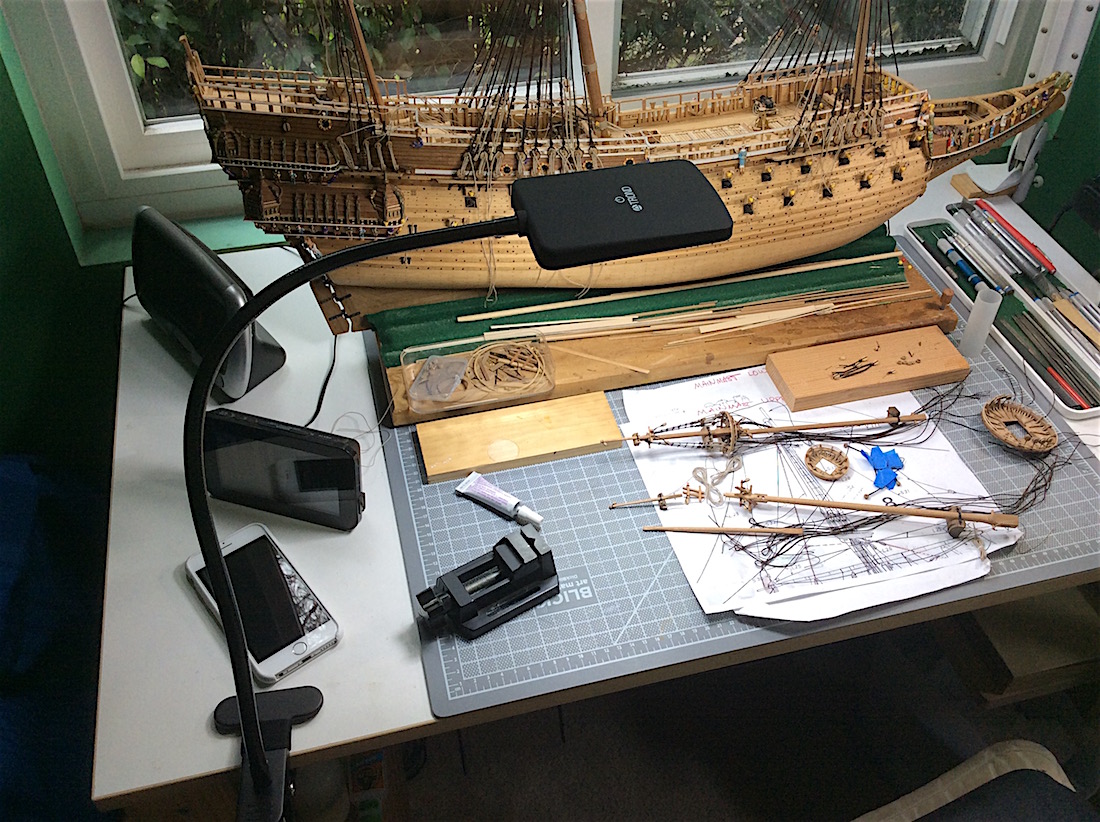
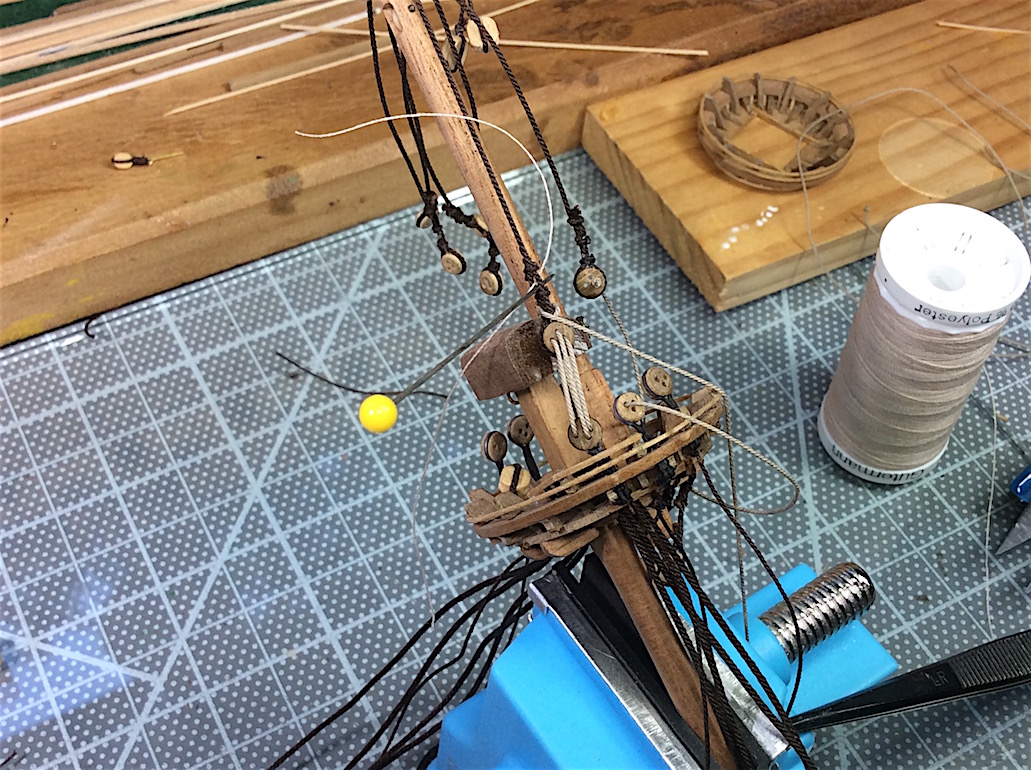
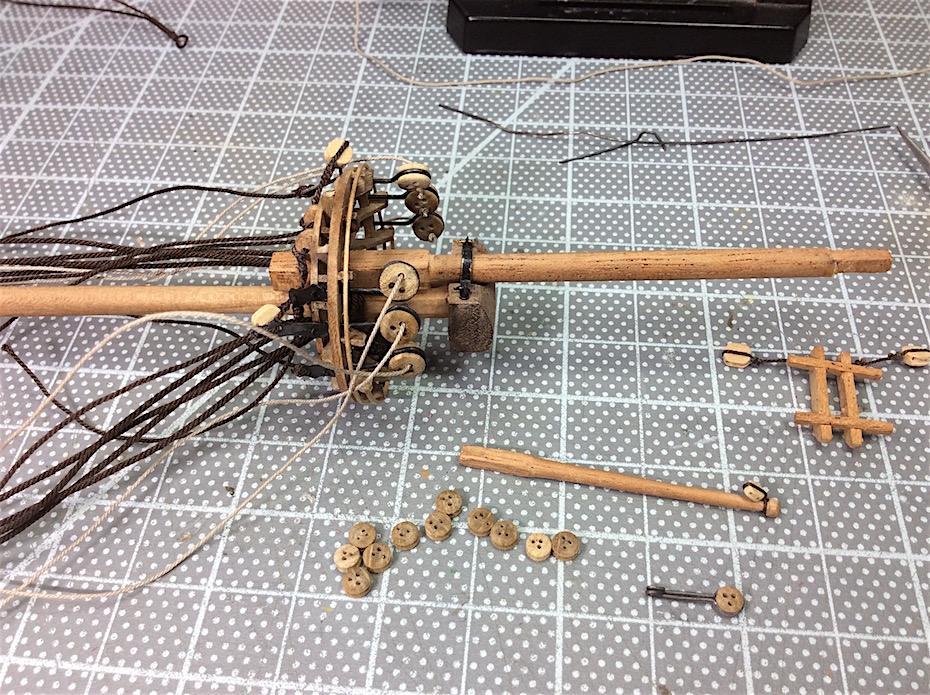
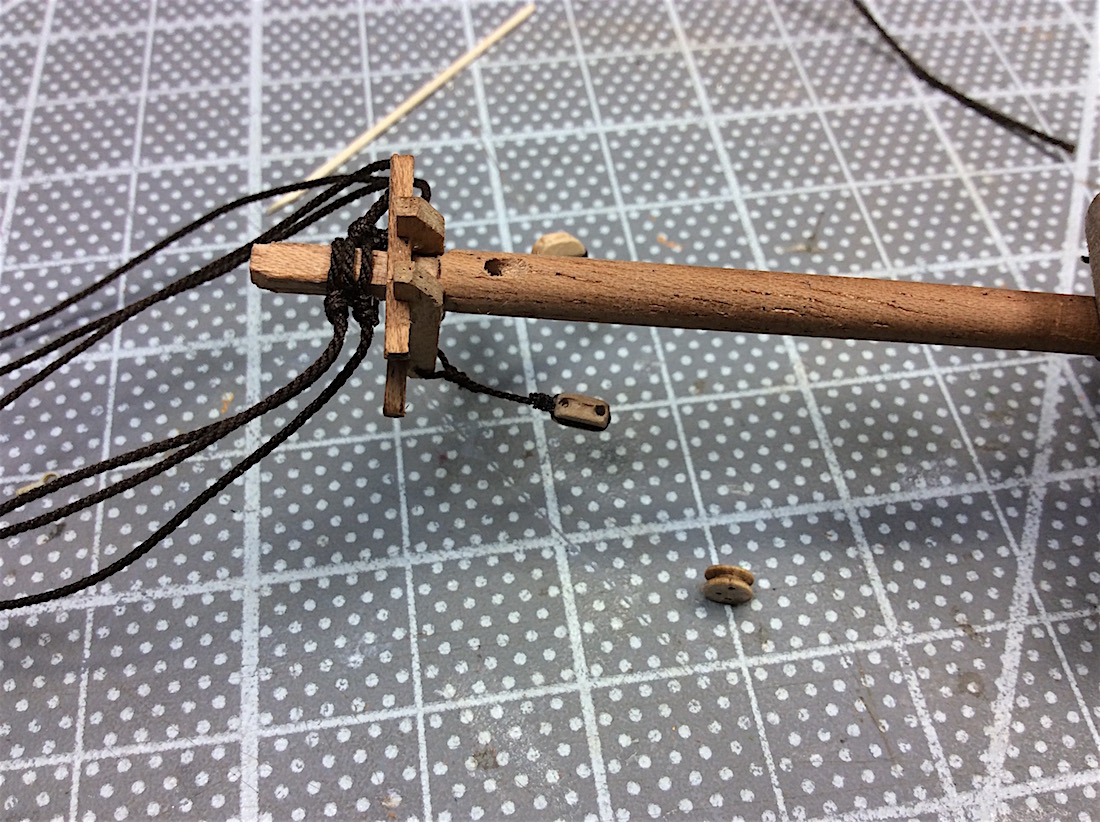
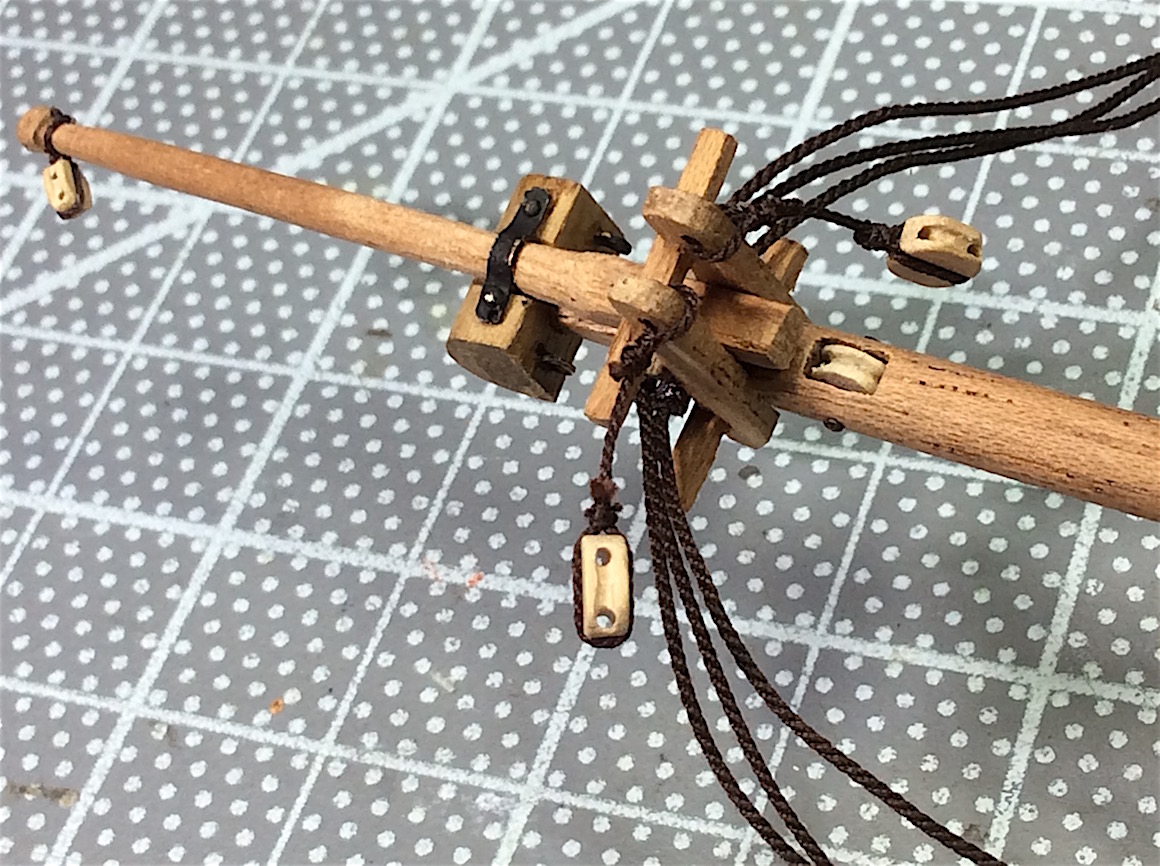
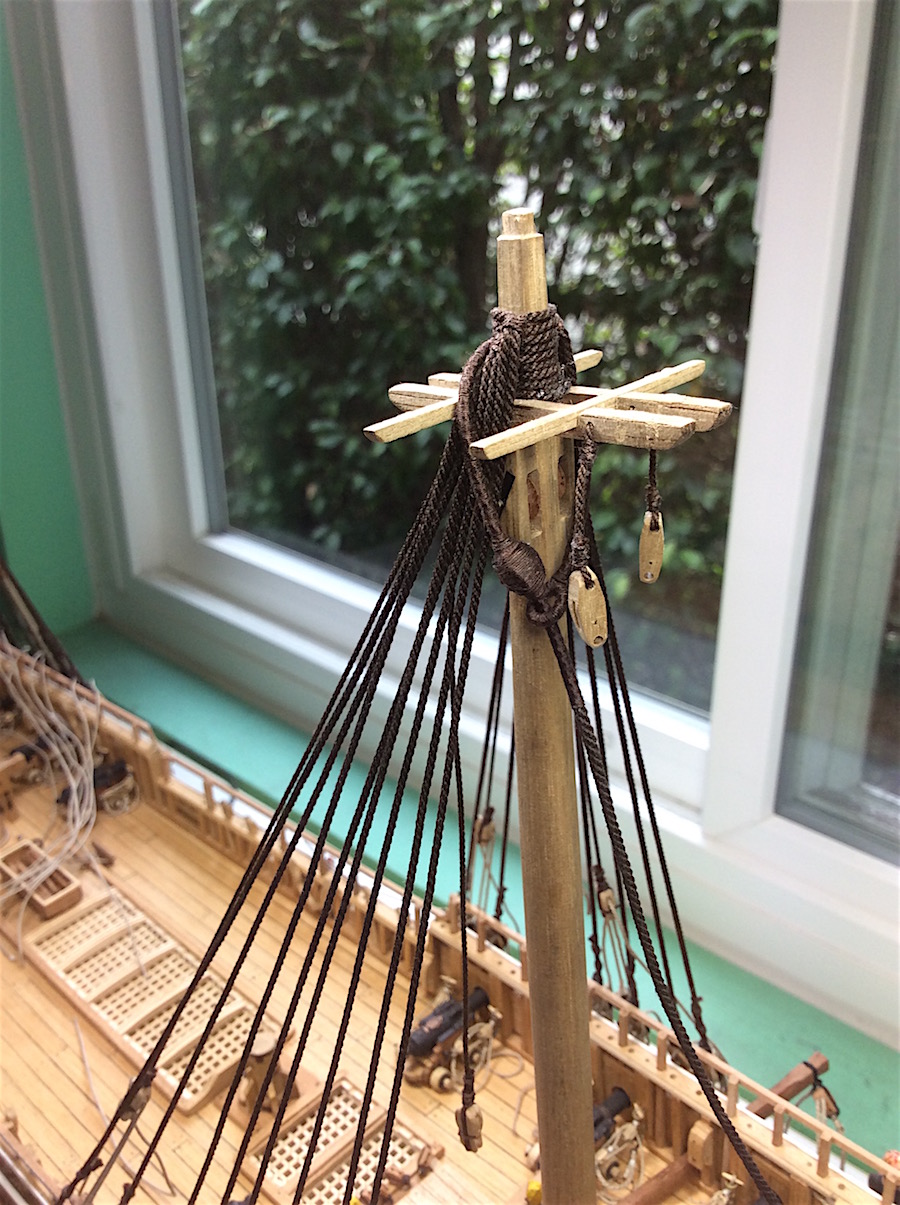
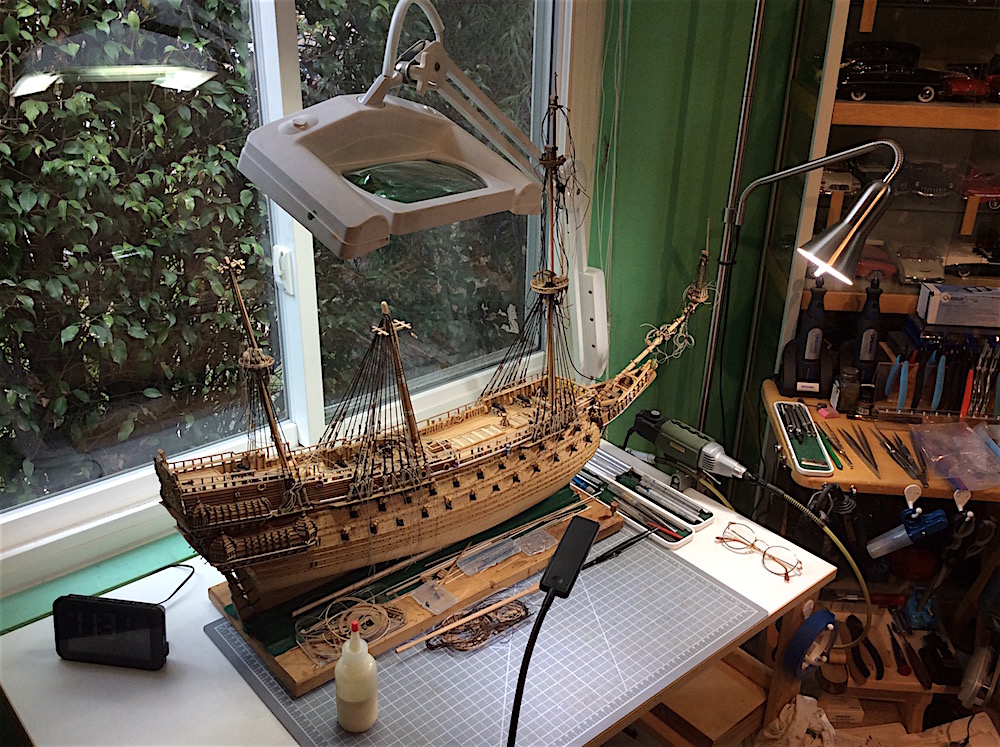
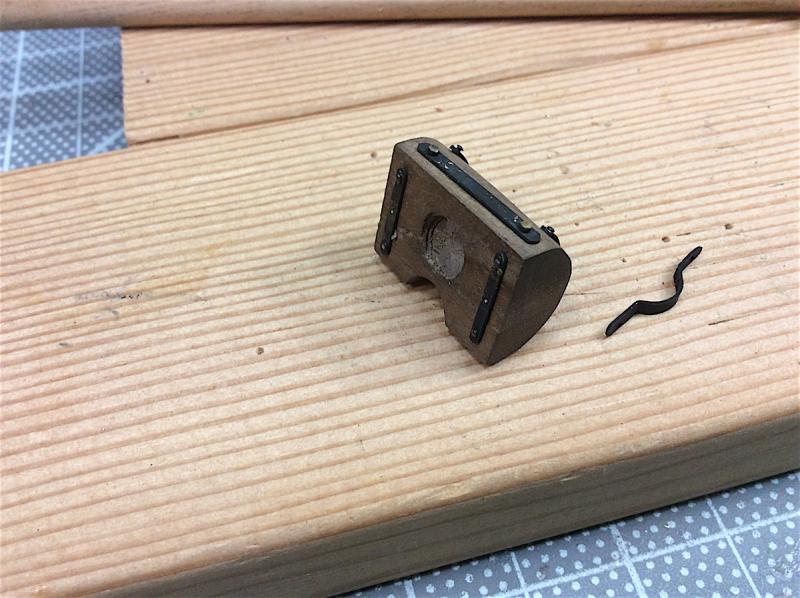
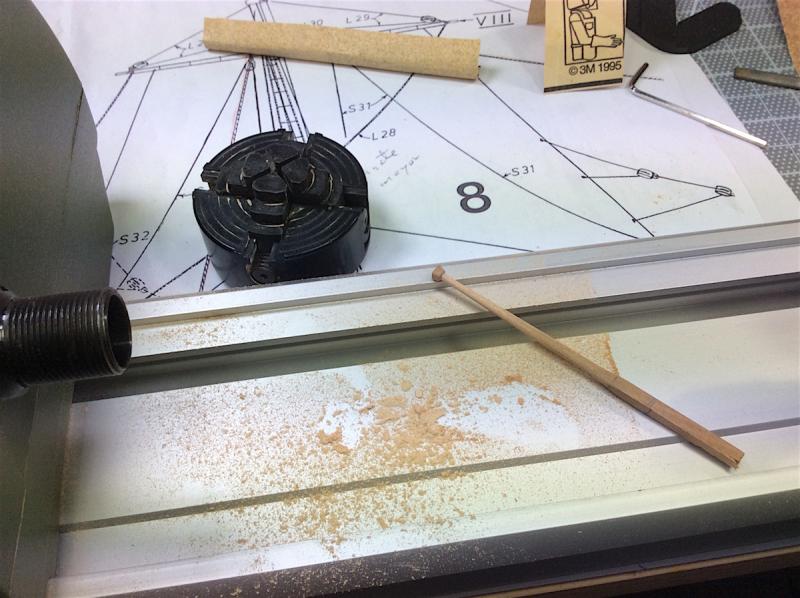
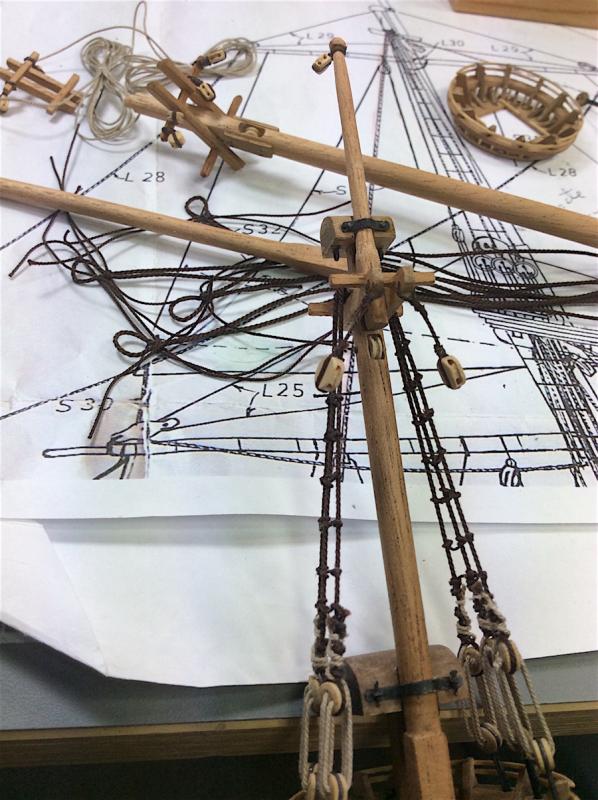
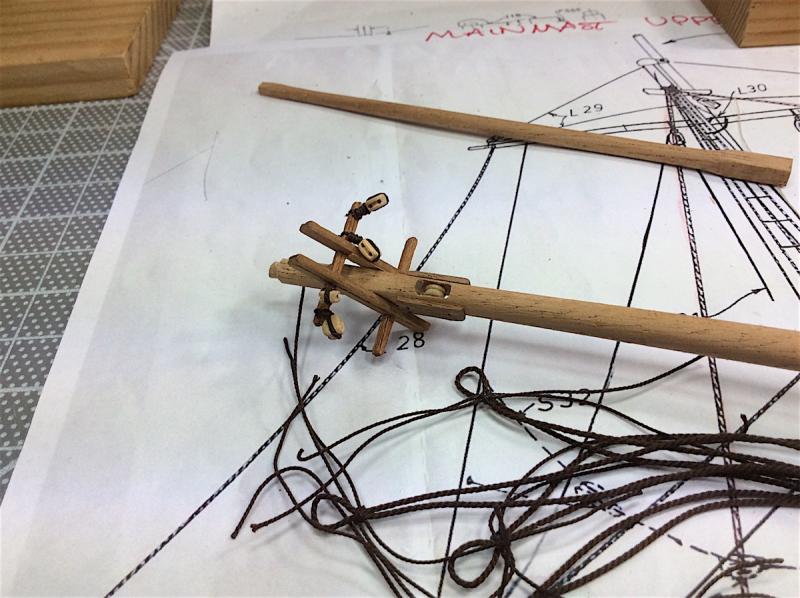
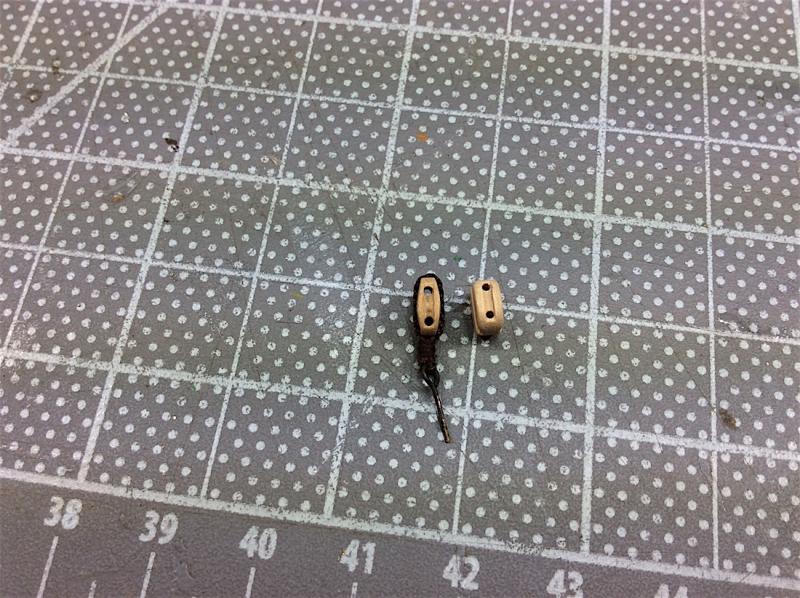
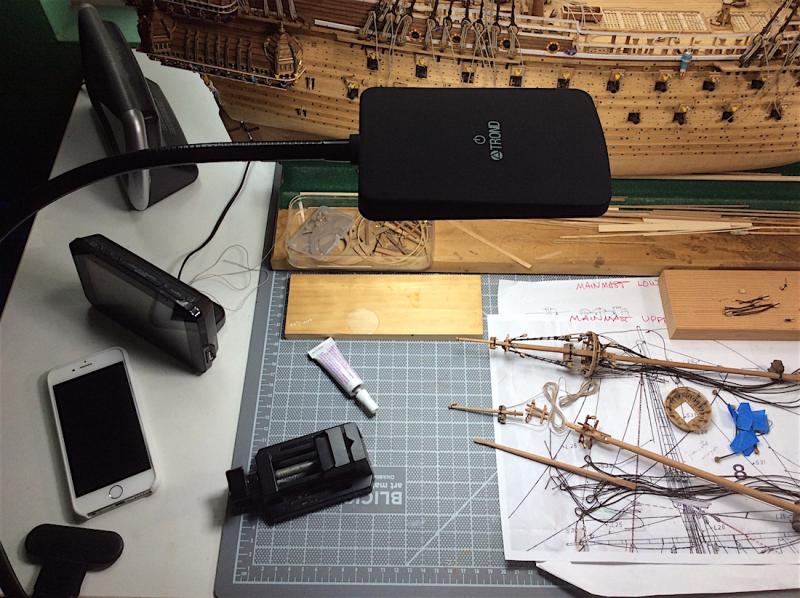
Hi Mates, Continuing work on the upper main mast, putting all of the bits together, time consuming work that seems as if nothing is really moving forward. But enjoying this part of the build. I found a photo (can’t seen to locate it now) but on this model the fid had a rope attached to it and was then attached to a shroud at the platform. Hmm made sense. So, decided to follow that idea and did the same for the main upper mast. The sheaves that I added near the tops of each mast were very out of scale. It looks as if I took too much “meat” out of each mast when adding the sheaves. So decided (incorrectly) to add side reinforcement bits on the sides. Same problem with upper foremast – but too late for a “fix” Thought that I would also do minor reshaping of the blocks, I have seen models that actually have blocks that appear narrower on the upper and lower sides. FYI’s bought a new lamp. Excellent. It has three levels of brightness. LED, of course, and 6000k daylight. Very light repeated taps on that circle at the outer top adjusts the light; from Amazon. As always thanks for dropping by, the likes and your kind posts. PS: Really enjoying the last season of Black Sails…… Cheers,


-
Karl, Just catching up - very nice detail work !!
- 164 replies
-
- 1
-

-
- Model Shipways
- Finished
- (and 1 more)
-
Very nice update - well done indeed.
-
Bjønar Welcome. As a member you will enjoy many more benefits. And YES nice of you to be aware of, and discussing with your members the problem of pirated/banned kits (:-) Cheers,
-
Dave, Great update - love the lighting details. Cheers,
-
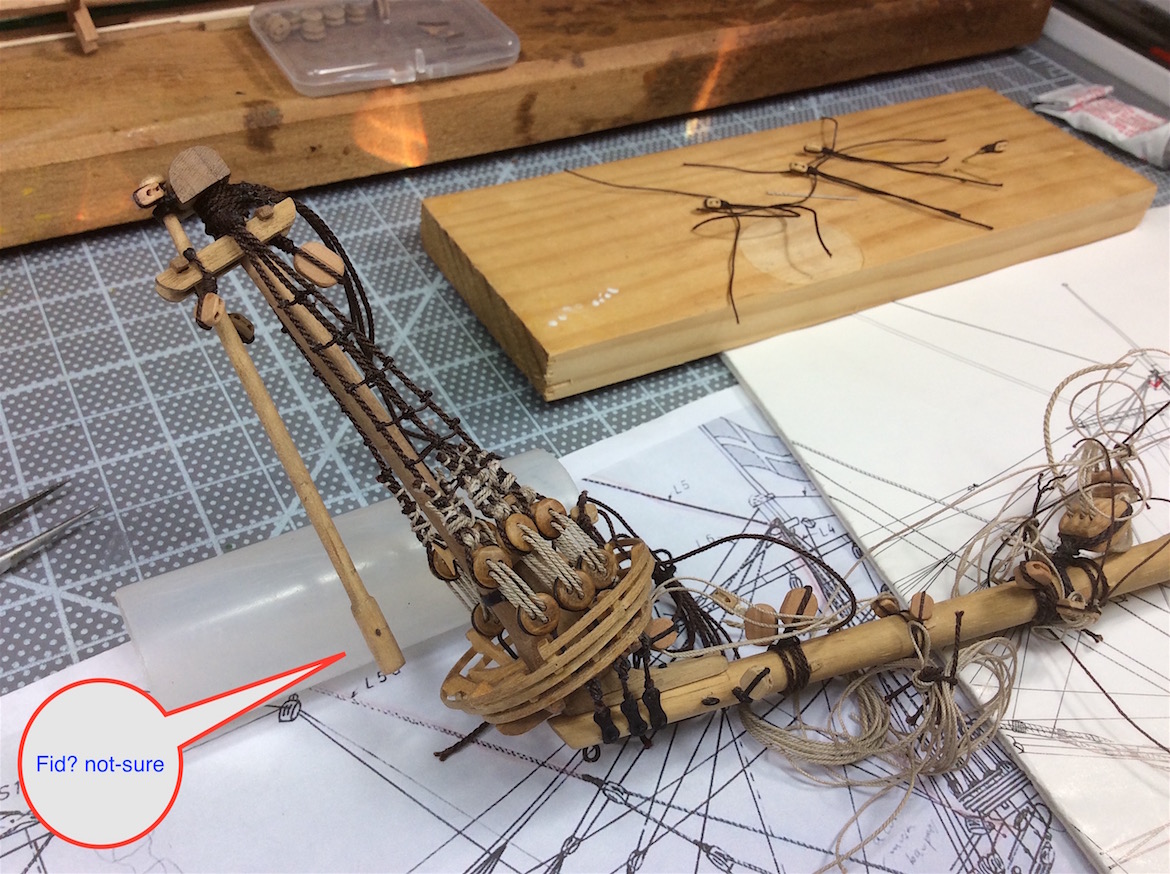
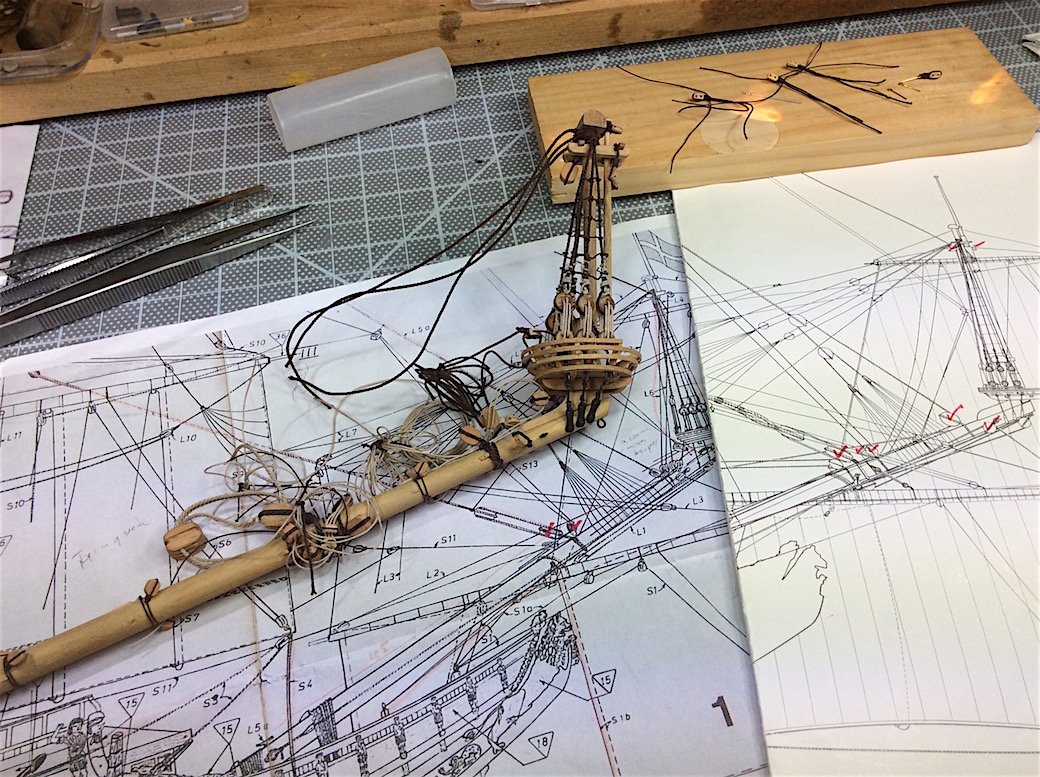
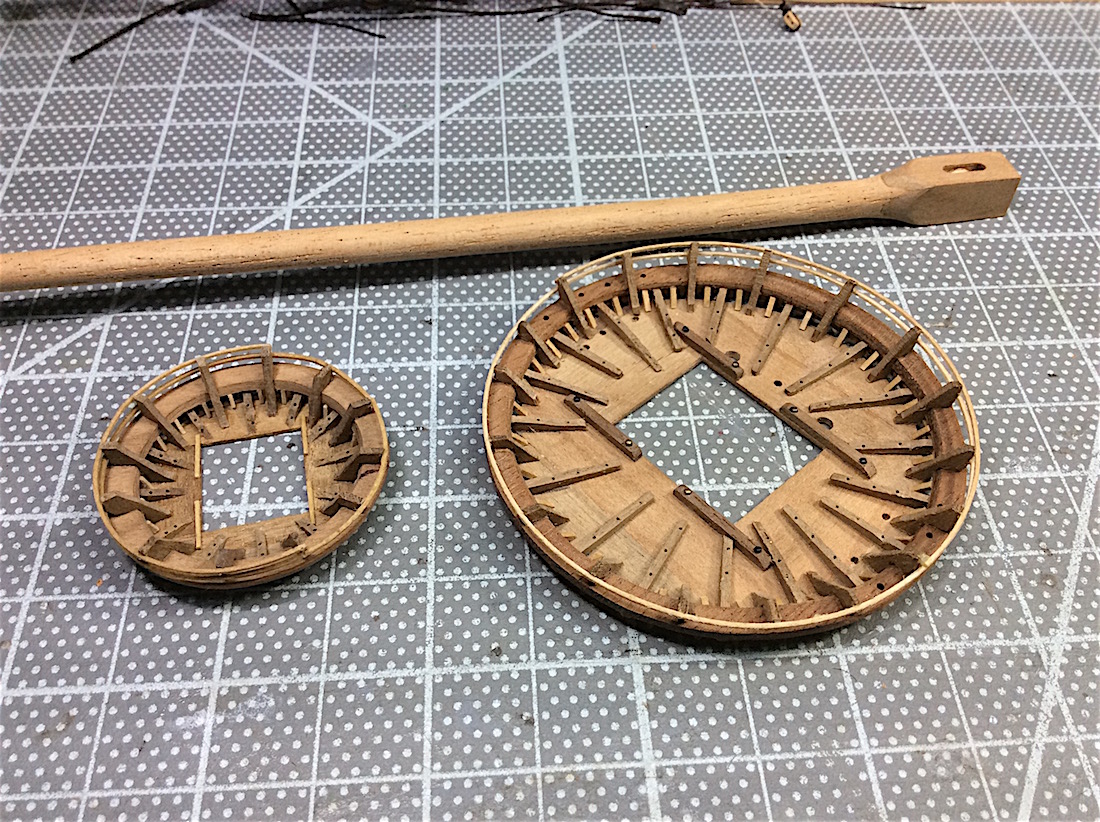
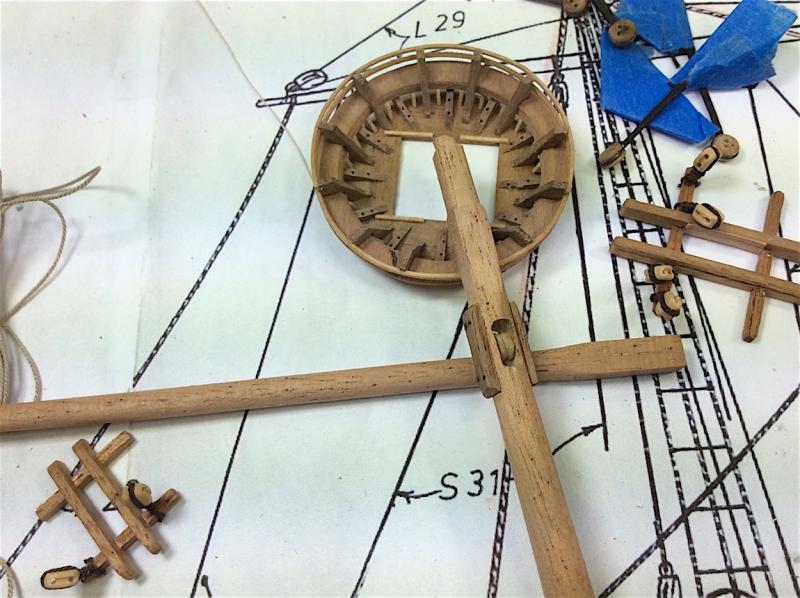
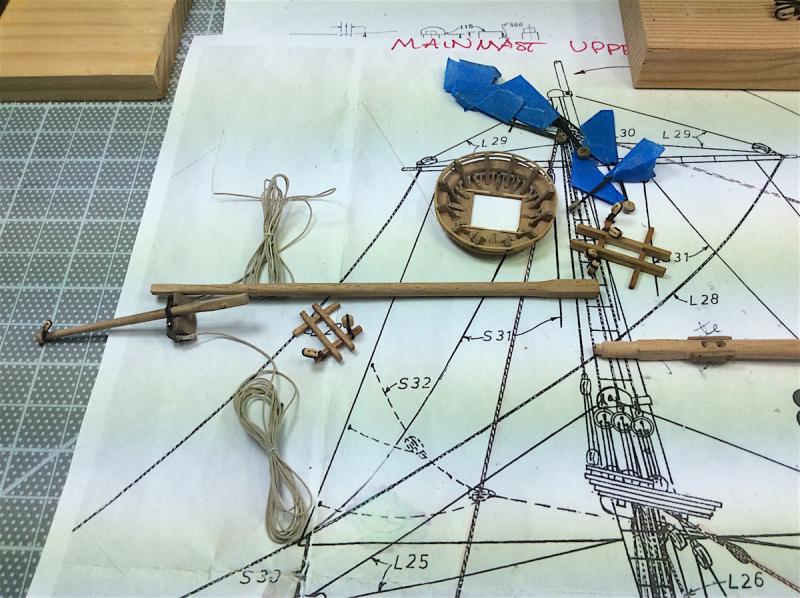
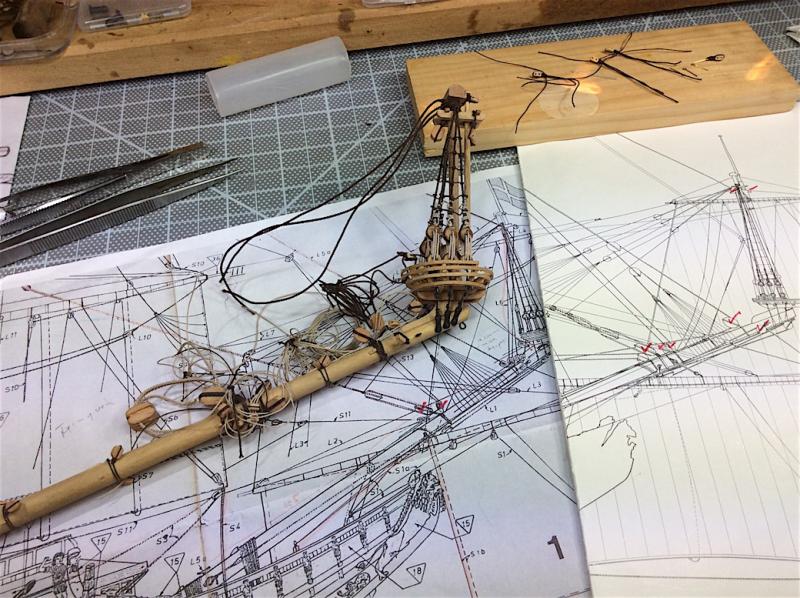
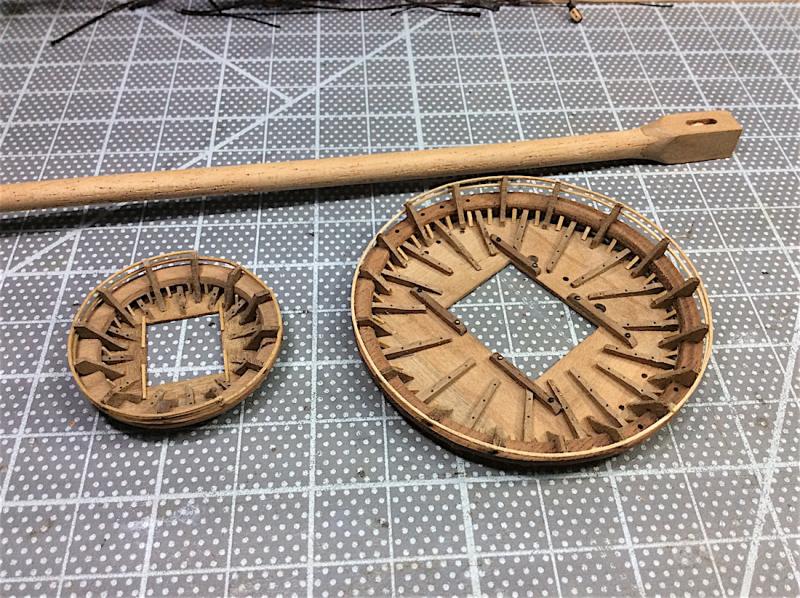
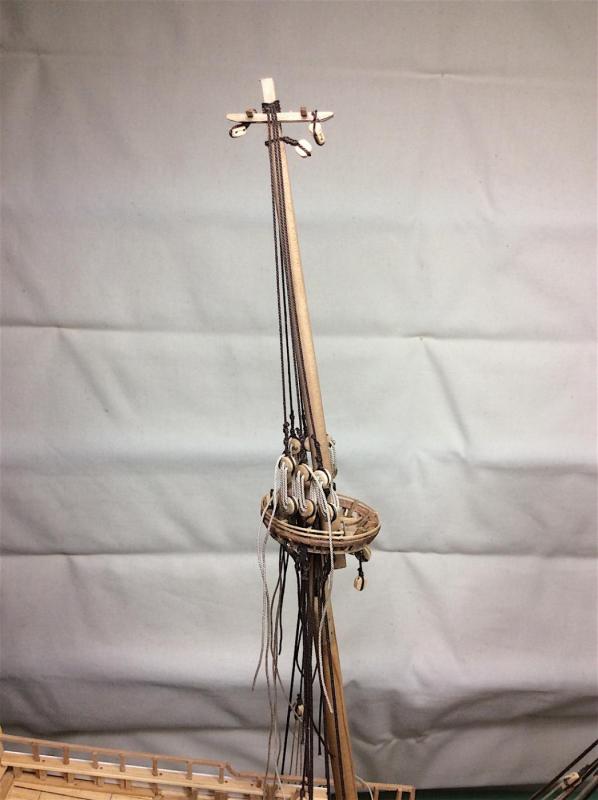
Hi Mates, Well I am partially “confused”. Returning to the bowsprit area, for my first attempts at securing the deadeye ropes, and then actually starting the ratlines. THEN - JanV was right – way back – when he posted, “how will you remember where all of those pre- attached bowsprit mast ropes are supposed to go”? Now working from the Vasa museum rigging sheet, the Billings sheet, and the Corel -no sails - sheet just don’t know what I’m doing right or wrong ha ha .. AND Fred Hocker recently posted that the Vasa Museum rigging plan sheet is wrong and is no longer being sold. The Vasa II book will have the correct rigging plans within – a book that is already two years beyond its promised publication date L Updated pics. Need to add a fid for the flagpole? Probably. As a novice, I thought that pre-attaching the blocks and lines would be easier before securing the mast to the bow. That said I am actually moving forward – now that part is satisfying. I did finish the upper main platform and added the rat lines (crosstree blocks are missing – I just realized as well) well at least those will be easy. Finished the mainmast upper platform, and discovered that several blocks are also missing at the already installed crosstree for the lower main platform– grrr These learning experiences are actually valuable as often as I include -grrrr - in my remarks, The next build will benefit from these learning experiences. Cheers mates,


-
Eric, Nice start. It will be interesting following along. FYI Really wonderful 12 part series that ran a couple of years ago on American Television. It is about the actual construction from drawings to - of course - it sailing off at the end of the series. https://www.amazon.com/Titanic-Blood-Steel-Jocobi/dp/B009AVCAE4 PS: You may need to purchase an EU formatted disc if you are interested.. Cheers
-
Andy, Nice to see you back - just saw your updates looking nice indeed. Will also add my name to your shipyard bench. Cheers,
-
Vince, Thanks I sorta thought as much - given that the rat lines need to support the "same" weight whatever mast is being climbed. Just wanted to be sure.
-
Hi mates, Could not find an answer within this topic. This is my first multi masted ship. Should all of the rat lines be of the same diameter rope for all the masts (lower & upper)? Just started working on the very top of the foremast and was wondering if I should (correctly) increase the size of the crossing rat lines as the shroud diameters also increase at the lower masts. Thanks in advance for your thoughts. Cheers,
-
Mark, Those last three views just tell it all - superb work. What a beauty you are creating.
- 652 replies
-
- 1
-
-
- royal william
- euromodel
- (and 1 more)
-
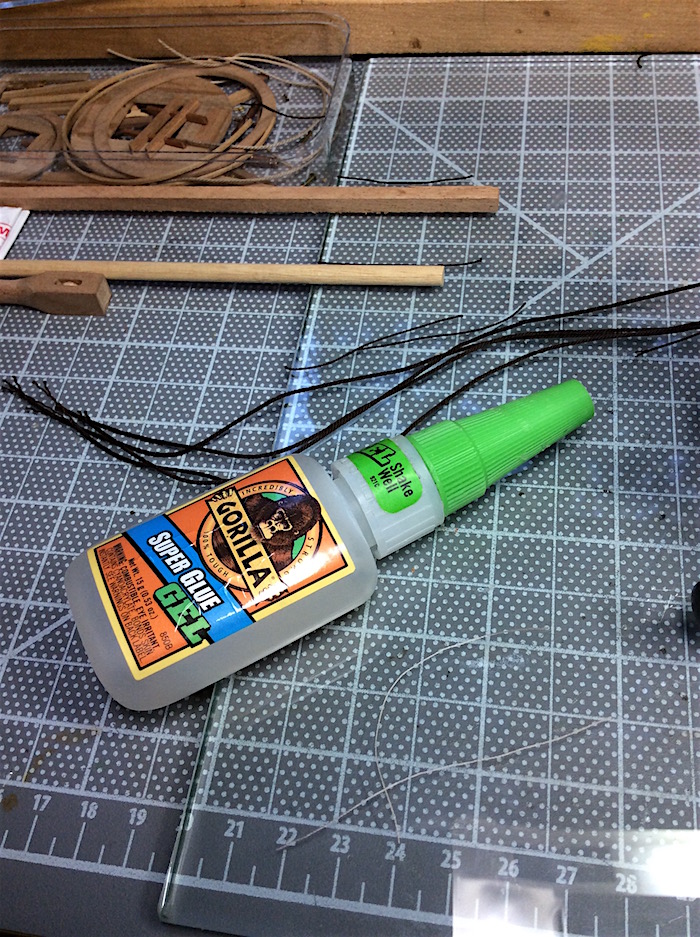
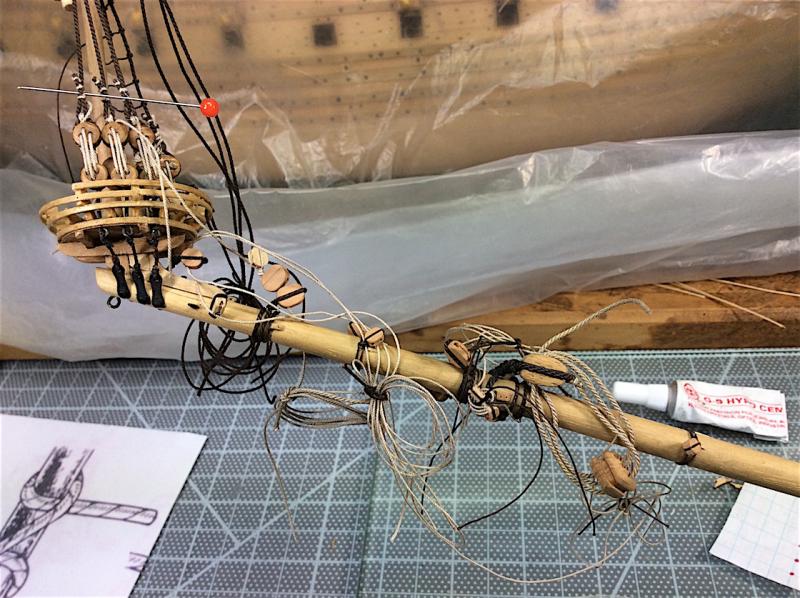
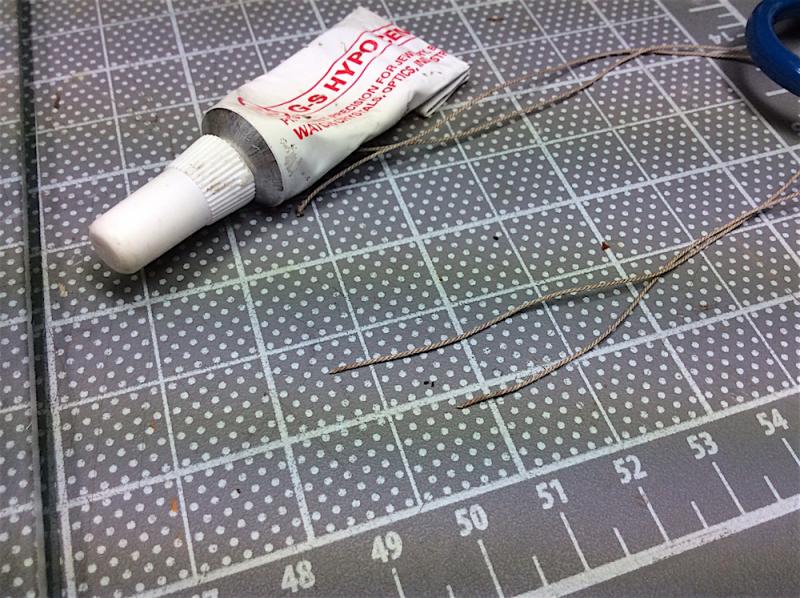
Hi Mates, Thanks for the likes much appreciated. Tigersteve thanks for your kind words. Dave We shall see – thanks – I am enjoying the learning of how these ships were made to function – sort of “state of the art” technology of their days. Which as ours does today changes as more is learned. Parenthetically, we are certainly, today, spoiled by comparison. When I was working and having to cross the Atlantic from LAX to LHR in a 747 at 36,000 feet. Champagne in hand CD player [yes CD player J] and Sony headphones around my ears, looking down at the ocean –it struck me that C Columbus in his wildest magic mushroom dreams could NEVER imagine - ever – this reality of a crossing. The joke is now, of course – that in a 100 years from now travellers will look at antique digital flashes of history and laugh about people having to spend 16 hours, packed with 450 others in an Airbus A380 just to get to Australia ha ha …… My father was in the airline business for most of his life – I followed and worked as a pilot for quite a few years. (Champagne was when I was just sitting doing nothing) ============================== Back to business: I’m sure that I’m “preaching to the choir” here, but wanted to share some techniques that you prob. are already using – but here goes. 1) For threading deadeyes (or any rope for that matter) I first use Gorilla Gel, and run a bead at one of the ends of a rope. Then as I clean off the excess glue (thumb and forefinger with a cloth), I twist the rope ends tighter into their turns - as I’m pulling the rope through the cloth. This results in a hard “needle like” - tip after the glue dries. Then nip the ends to create a thinner entry point making threading deadeyes much easier. It also allows using ropes that are larger and possibly more to scale. The big eye needle (I have not tried) it would seem would require a thinner scale rope because as you pull the needle out the inserted line then doubles over as it is pulled through the deadeye –?? To secure the deadeye ropes First I insert (in this case) a thread between the doubled tied shroud, looping it twice. Then, twice wrap the deadeye rope around its shroud; hold it in place, and securing it with a bit of G-S Hypo Cement. Let it set then. The last bit is then very simple just run the left over rope through the two thread spools, tighten and nip. OOPS mistake – should have done this work for the mizenmast before securing it to the ship. Hmmm grrr - Still learning protocols. Learned that not all deadeyes are created equally. In the future need to look through more carefully making sure that eyelets are more equally spaced before attaching to shrouds. Yes I did finally realize that rotating them does help. Also the upper mast rigging work is easily done at the bench – I have not yet tried working with the other shrouds already on the ship Hmmm? OH !!! Ferit, as I have mentioned before you are the one that introduced me to G-S Hypo Cement SO perfect. Thanks again. Apologize about the long opening personal notes in this post J Cheers,


-
Hi Derek, Welcome - you will have 1000s of wonderful teachers here. - I did and still have (:-) Hmmm- Lots of great builders in Canada. Rumors are that you may build a wall to keep USA - MSW builders from invading your country. FYI - My first kit was a Santa Maria - simple enough and very basic rigging - fun build. Cheers
-
I learned this technique from BE's incredible build log for his HMS Pegasus. Though I have not tried it out yet.
- 652 replies
-
- 1
-
-
- royal william
- euromodel
- (and 1 more)
-
Jan, Good luck with your move. Congrats on the new house. BTW Your long boat is an excellent image from the original. Nice work. Cheers
-
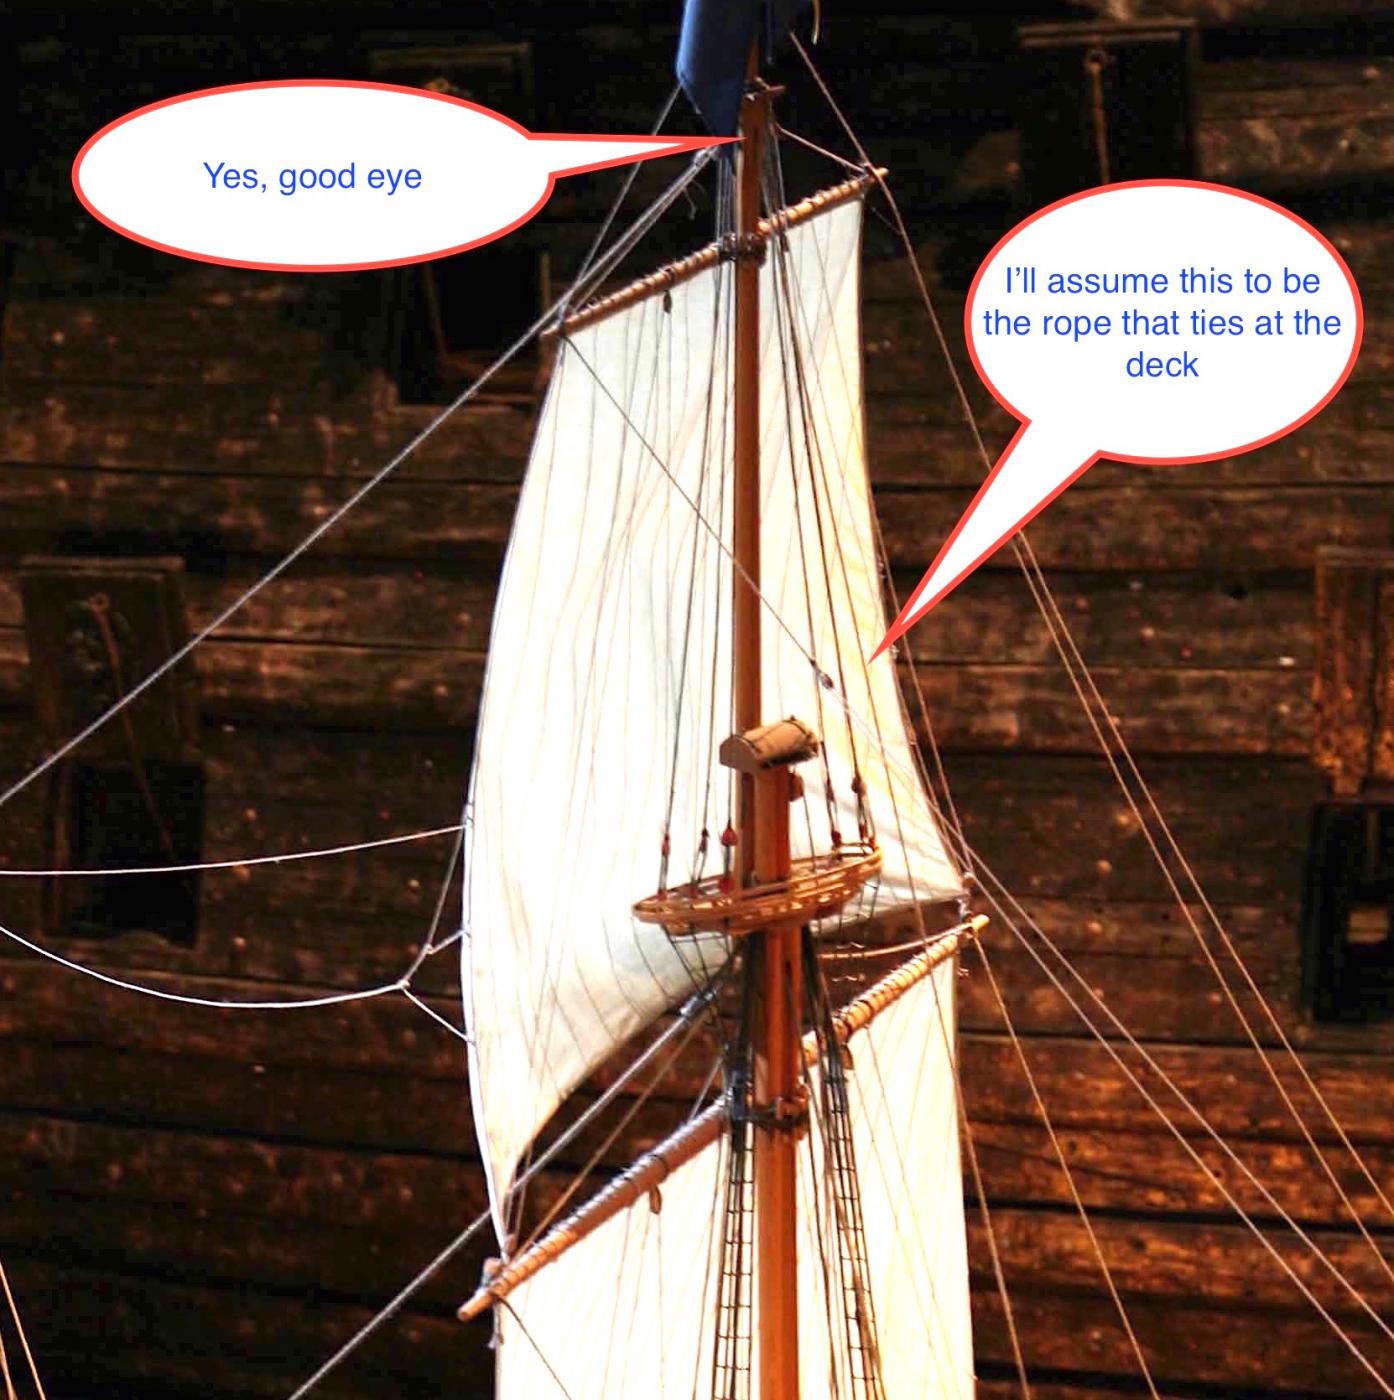
Karl, Thanks for confirming this. Much appreciated - como siempre... Played around with the jpg in iPhoto and yes that opening in the mast is very clearly evident, along with a sheave. Charter33 (Graham) thank you for your nice words, and welcome aboard. I'm glad that we found each other's logs (:-)
-
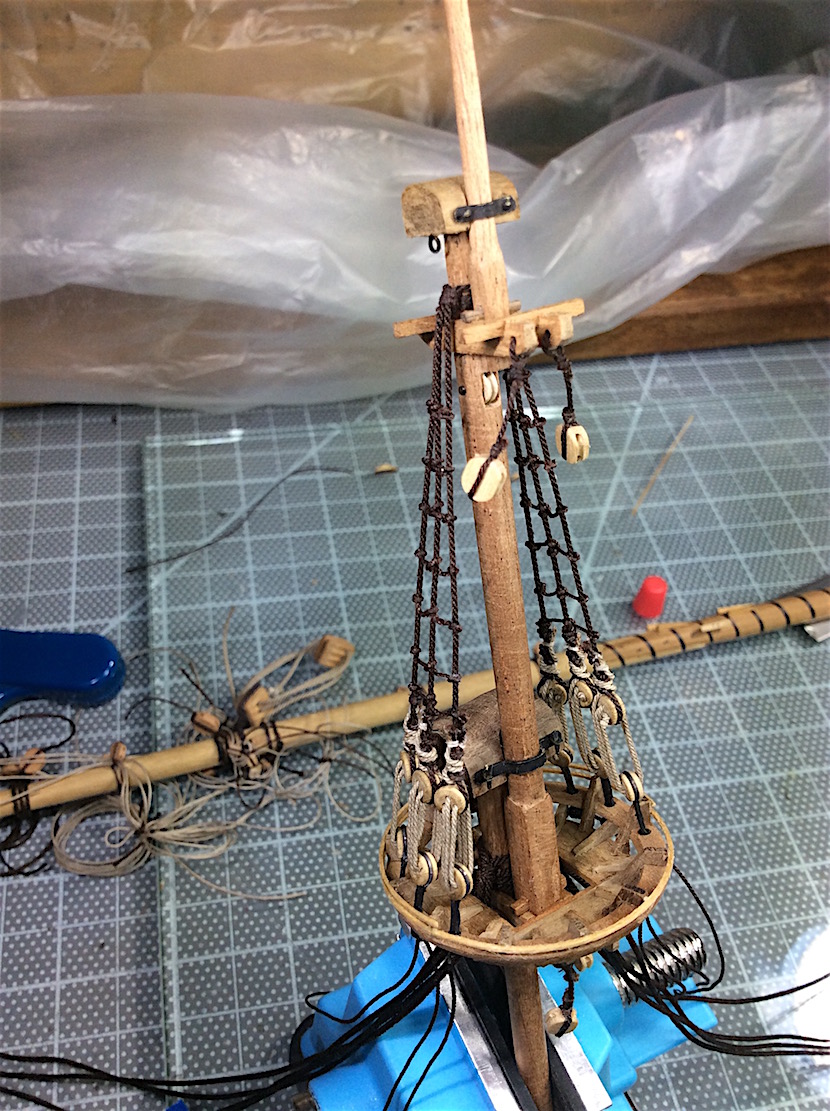
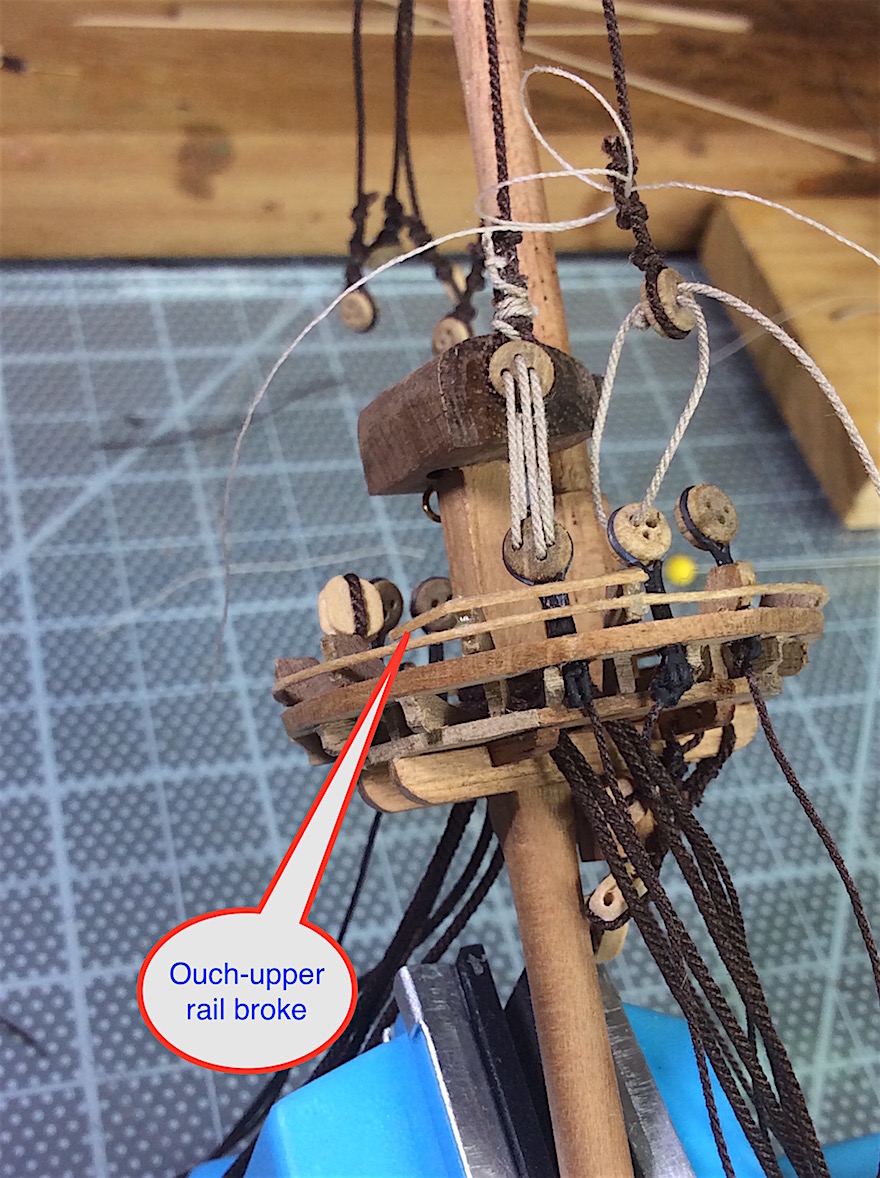
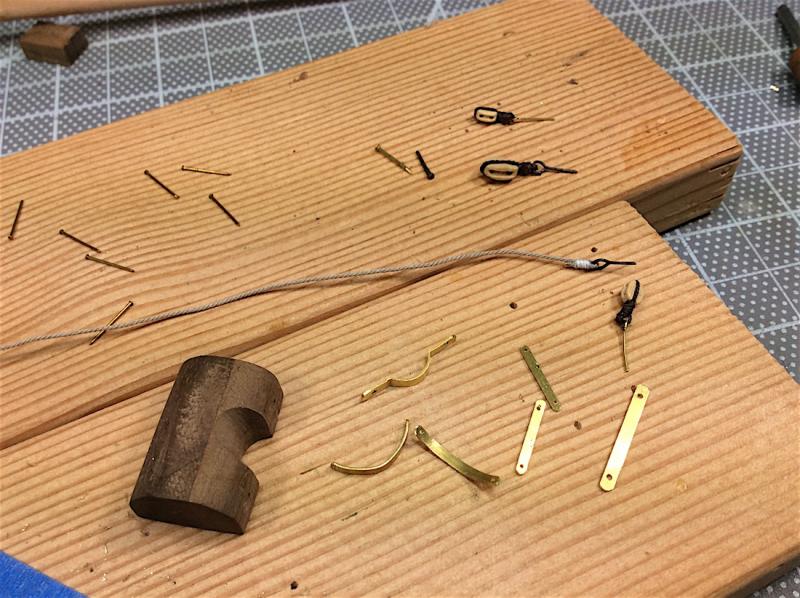
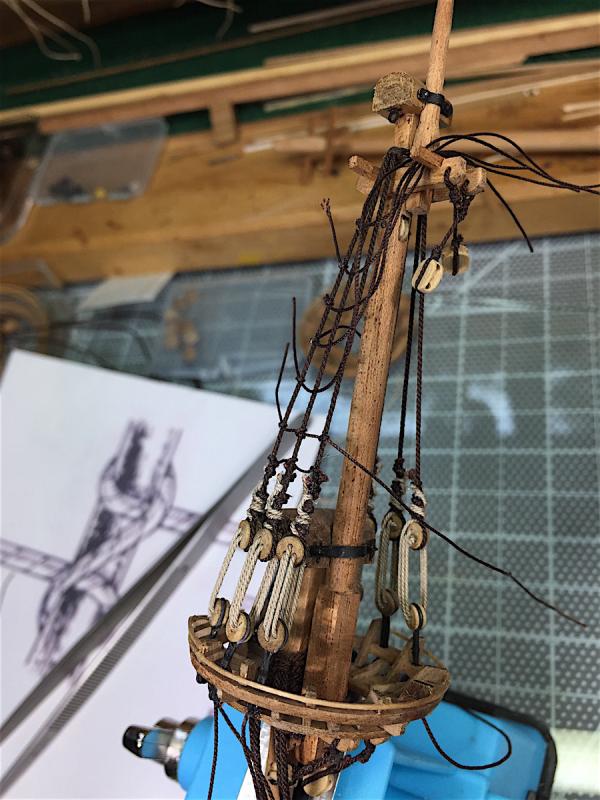
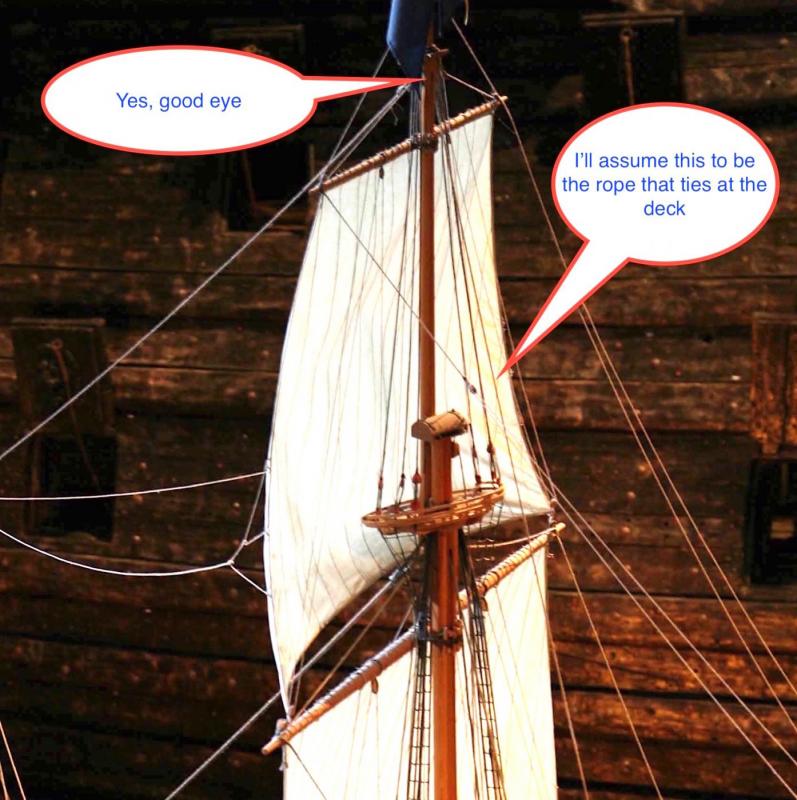
Hi Mates, First thanks for dropping by and the likes. AND Lawrence, I just don’t know how to respond. Your post is well so touching indeed. I am so pleased that you have found this build a pleasure to follow – however slowly it has evolved. Your words are so encouraging; we have all seen builds that make our jaws drop here at MSW. For you to place some of my work on that level, well it’s touching indeed. BIG thanks. PS: I think, by-the-way that you finished your entirely awesome HMS Victory in the time that it took me just to make the crows nests (;-) =============================== Minor update on upper foremast; Mistake; Deadeyes were way too large for the upper platform. I learned through a posting that deadeyes should be about half the width of a corresponding mast. That (in scale) is almost impossible to do – that said my use of the same size deadeyes as with the lower shrouds was all wrong; lack of foresight. So pulled them out, had to make up some smaller chainplates. Used wire that was then joined together with CA Gel glue, and painted flat black. Not correct – but such a minor area that will become lost in the aggregate. So fixed that. Then Karl was helpful and led me in the right direction regarding the upper yard hailing rope bit. I took it a step further and decided (right or wrong) to add a sheave within the upper mast. I assumed (there’s that word again) that a sheave was probably how it was done. Though Anderson does not make that specific detail clear (I might have missed that text?) Foremast all done now onto putting the upper main bits together THEN attaching the two other uppers at once. Getting a bit nervous regarding that swing-arm light. In a nightmare to be I was thinking of hanging a large double fluorescent fixture with chains from the ceiling of my son’s room. He’s no longer on my payroll !!J , and I use a corner of that room as my shipyard. Notice the nightmare idea. The admiral would force me to walk the plank for sure. PS: Not complaining lucky to have the space, I know that some builders need to move their work after each session, but lighting needs to be re-visited. Bowsprit and upper fore just for this photo - not installed.


-
Ferit, Welcome back to your ship yard! --oops, but as Slog mentioned should be an easy and quick fix. Cheers,
-
Yes IT IS relative indeed. $1000/3 - so $330 per year so far. So $27.00 per month is your cost so far after three years. Let's say that you spend 40 hours a month on the project; Your build hobby is costing you .69 cents per hour. Yup that beats bowling indeed ha ha However - YES the upfront costs are very high AND one needs to add tools and so on into this mix. That said this hobby is so satisfying that IMHO it's all worth it. And yes the Admiral needs to be -- well not too informed indeed. Cheers, PS: http://seagifts.com/hmspewomoshk.html?utm_source=googlepepla&utm_medium=adwords&id=18283950120 your cost just dropped to .35 cents an hour (;-)
-
Graham, Hello found your log as it came up front page of "kits' awesome work. Your tree nails are superb detailing, as well as your work so far. I will never be able to get to a Victory build - way beyond my skill set. That said so enjoy following builders who brave this ship. Yours looks to be splendid indeed. Looking forward to following along as well. Cheers,
-
EJ, Yes, many (some) of us probably rig 16th and 17th century ships with some "ball park" guesses; nature of the hobby given that it was not until later that builders used master plan sheets that survive today as references. I'm thinking of the HMS Victory et, al-- Anderson is certainly our best "bible" his work certainly is based on as accurate as possible historical notations. That said I would think it nearly visually impossible to "eyeball" a completed three mast model ship and determine if lines are connected to wrong pins one-way-or-another (well for me anyway (:-) ) For now I'm much more comfortable with wood and paint than with rigging - maybe after this learning curve it will become easier for the two or so waiting under the table. One of which will involve copper plates - can't wait to learn how to do that correctly ha has. As usual thanks for your kind words and following along... Cheers
-
Karl, Thanks again! yes I think that this would be the easiest to do I will add two blocks below the fore and main upper platforms, then just drill a hole near the tops of the fore and main upper masts. There should be a sheave also inserted - don't think so - already too much to think about. - All of this rigging is very new to me, especially if I add sails. I am, however enjoying the learning--AND the help Muy amable de tu parte para ayudar de nuevo (:-) PS: Going to Colombia in a couple of weeks need to practice my Spanish Cheers