md1400cs
-
Posts
2,868 -
Joined
-
Last visited
Content Type
Profiles
Forums
Gallery
Events
Everything posted by md1400cs
-

SOLEIL ROYAL 1669 by michel saunier
md1400cs replied to michel saunier's topic in - Build logs for subjects built 1501 - 1750
Michel, Mon Dieu --- Stunning work. So happy that I found your log. You live in a builder's world that I will never ever reach or be able to think about achieving. That said, the pleasure that looking at your work gives me, makes up for my much. much, lower level of skills. Your work is, in fact, a work of art. PS:J'espère que Google pourra traduire mes mots pour vous. Je suis née en France alors le français est ma première langue. But English is the MSW required language - happy about this in fact. Respectfully, -
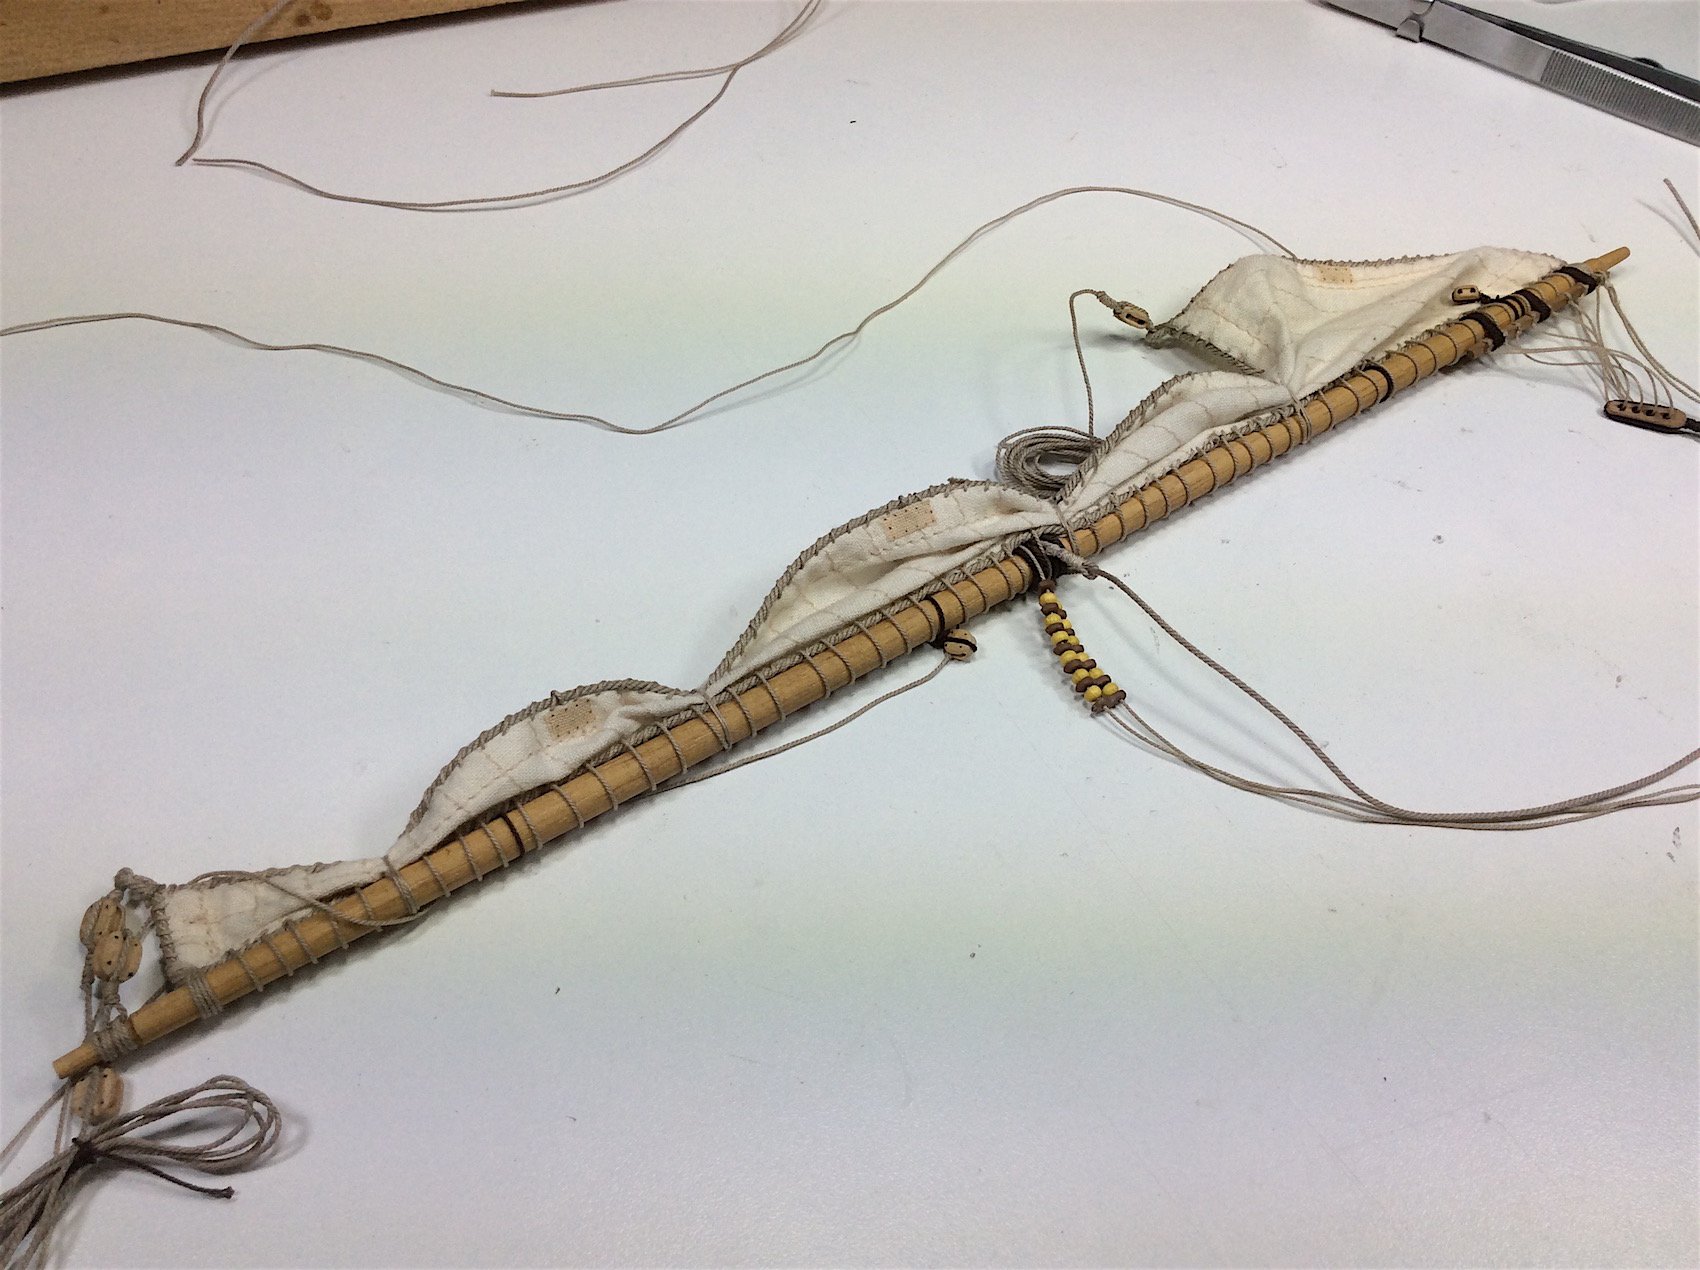
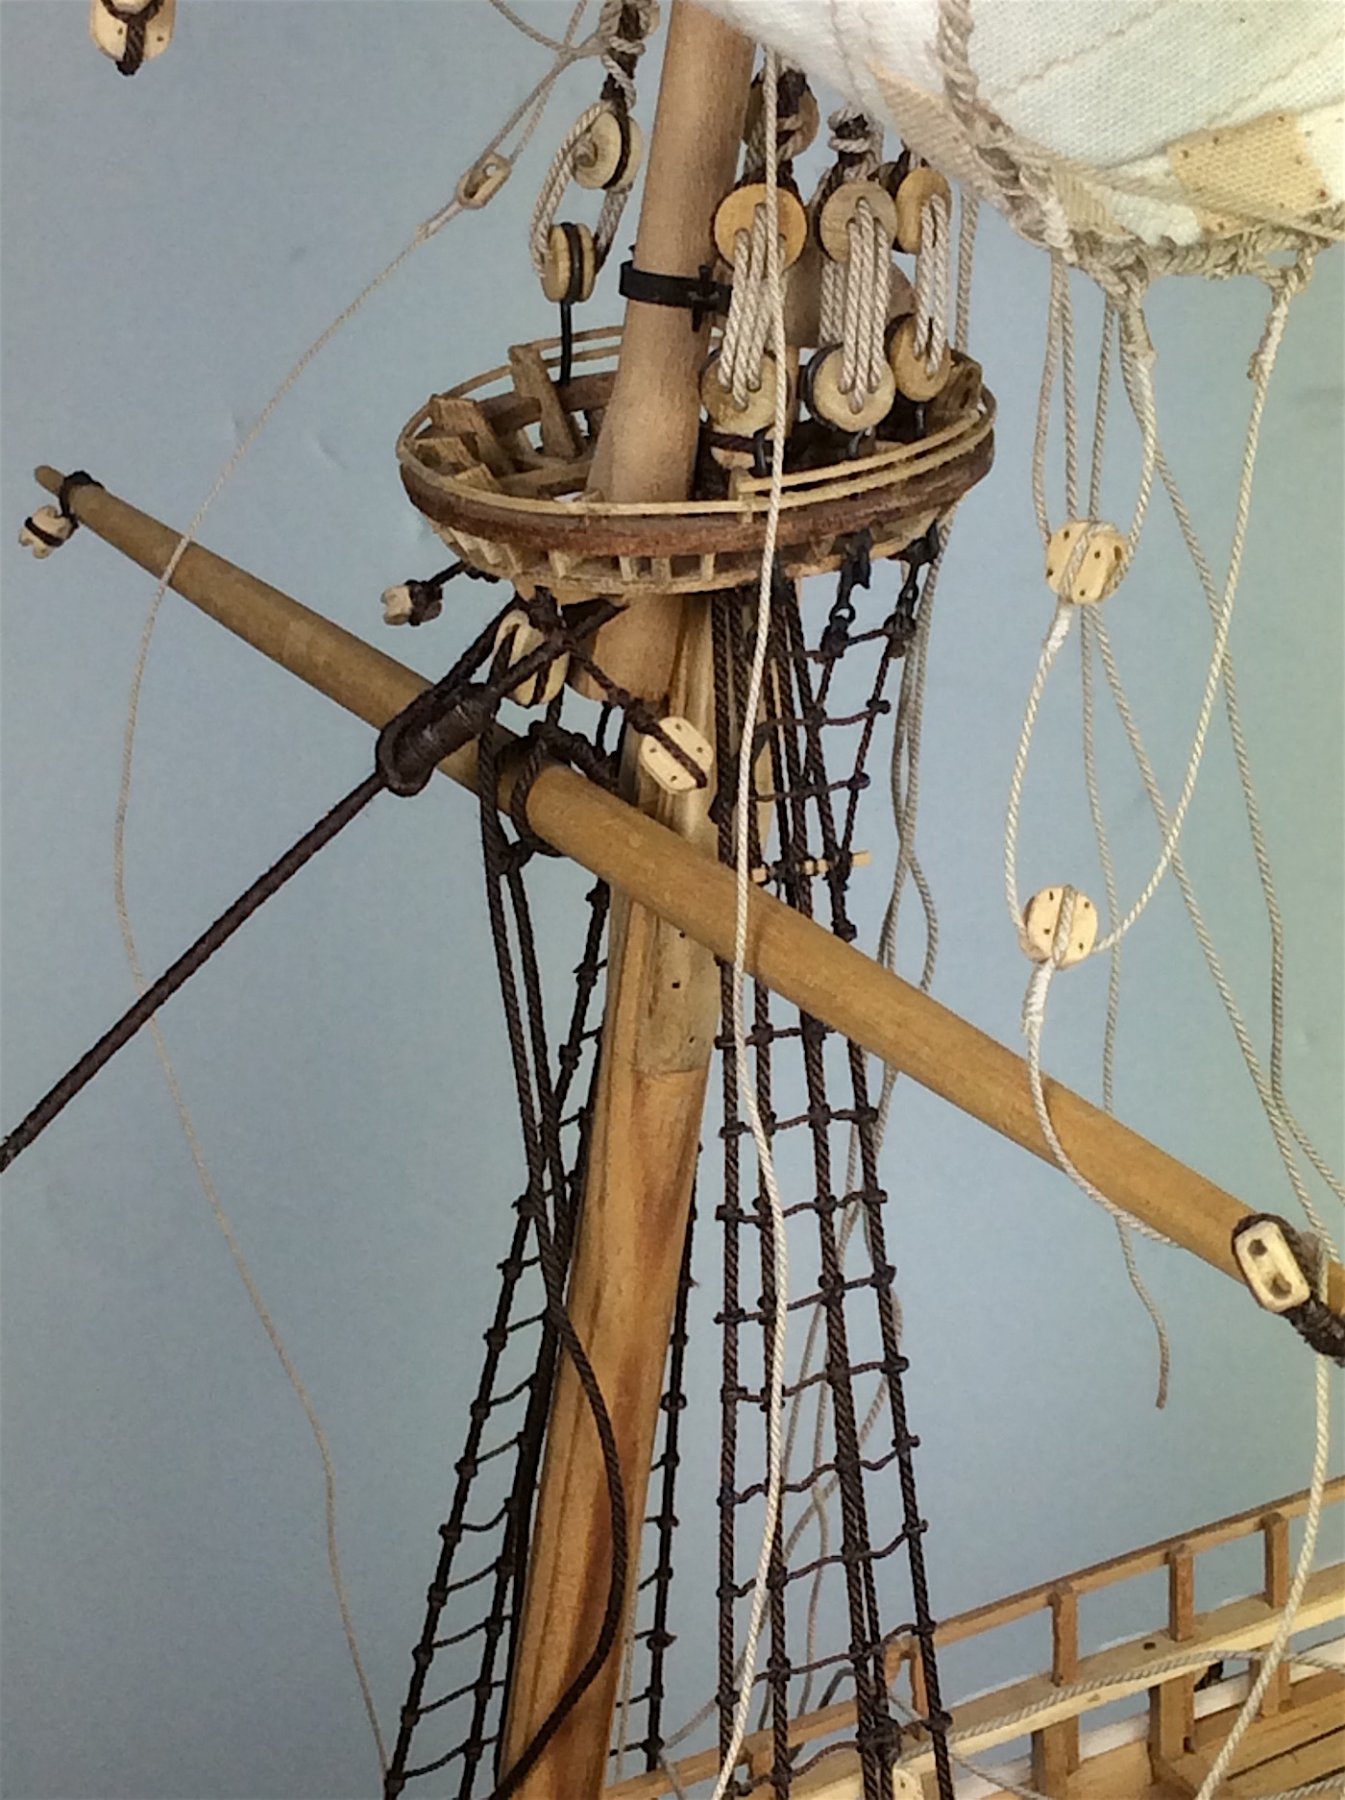
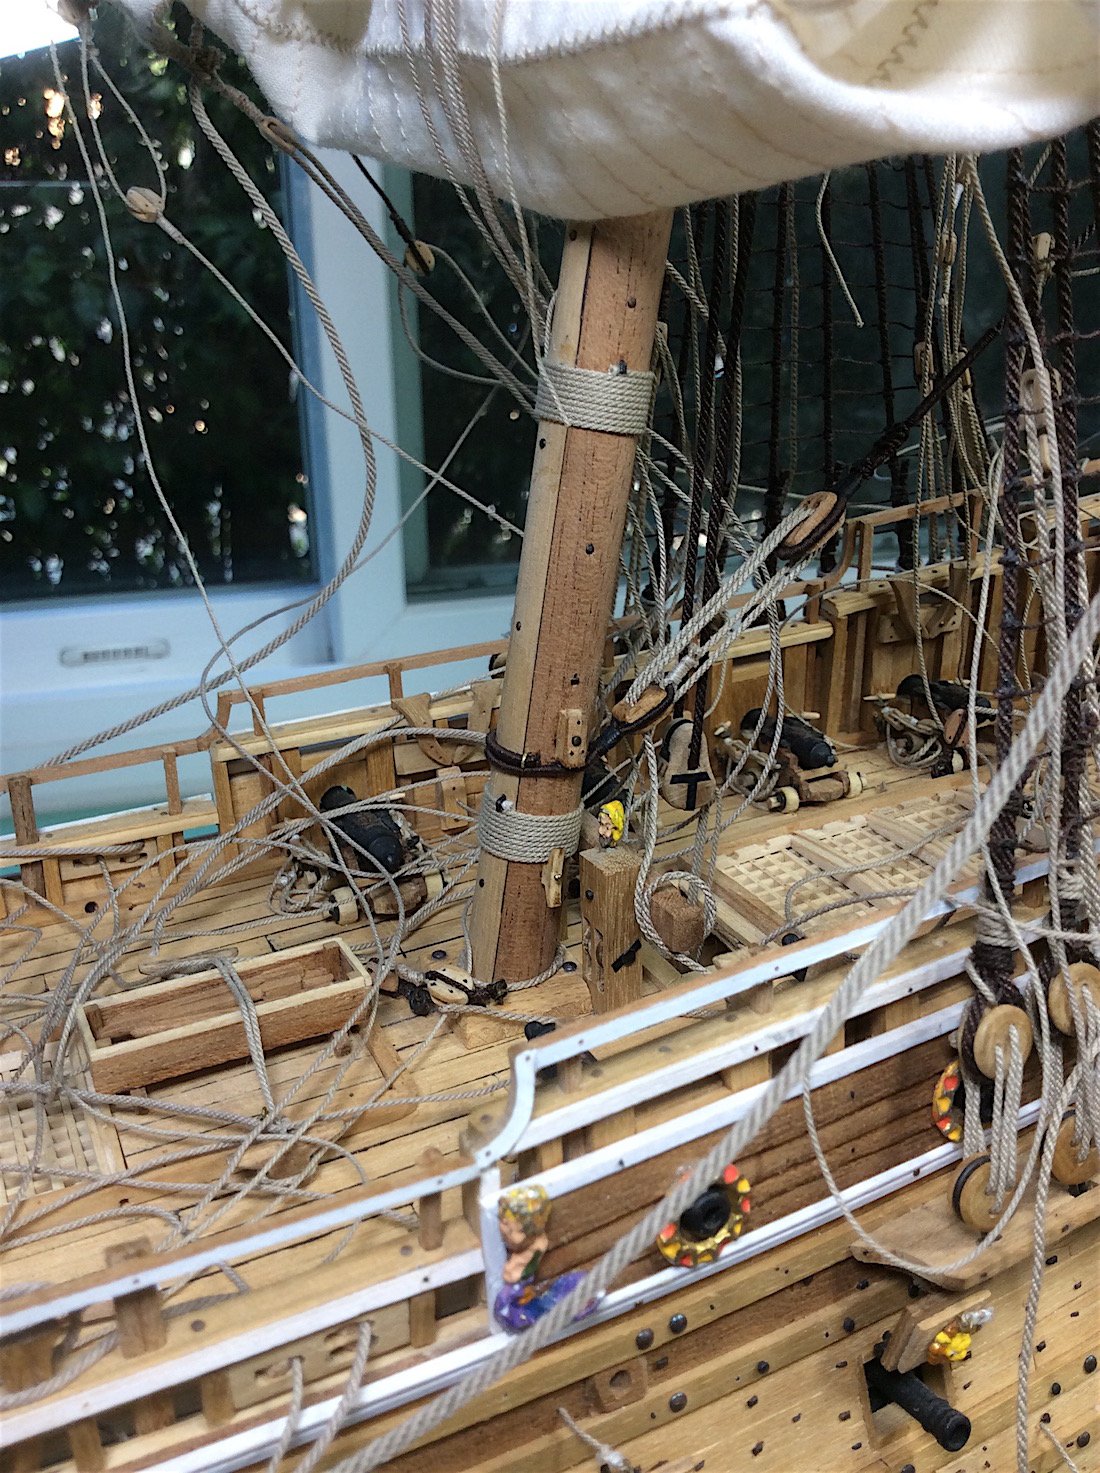
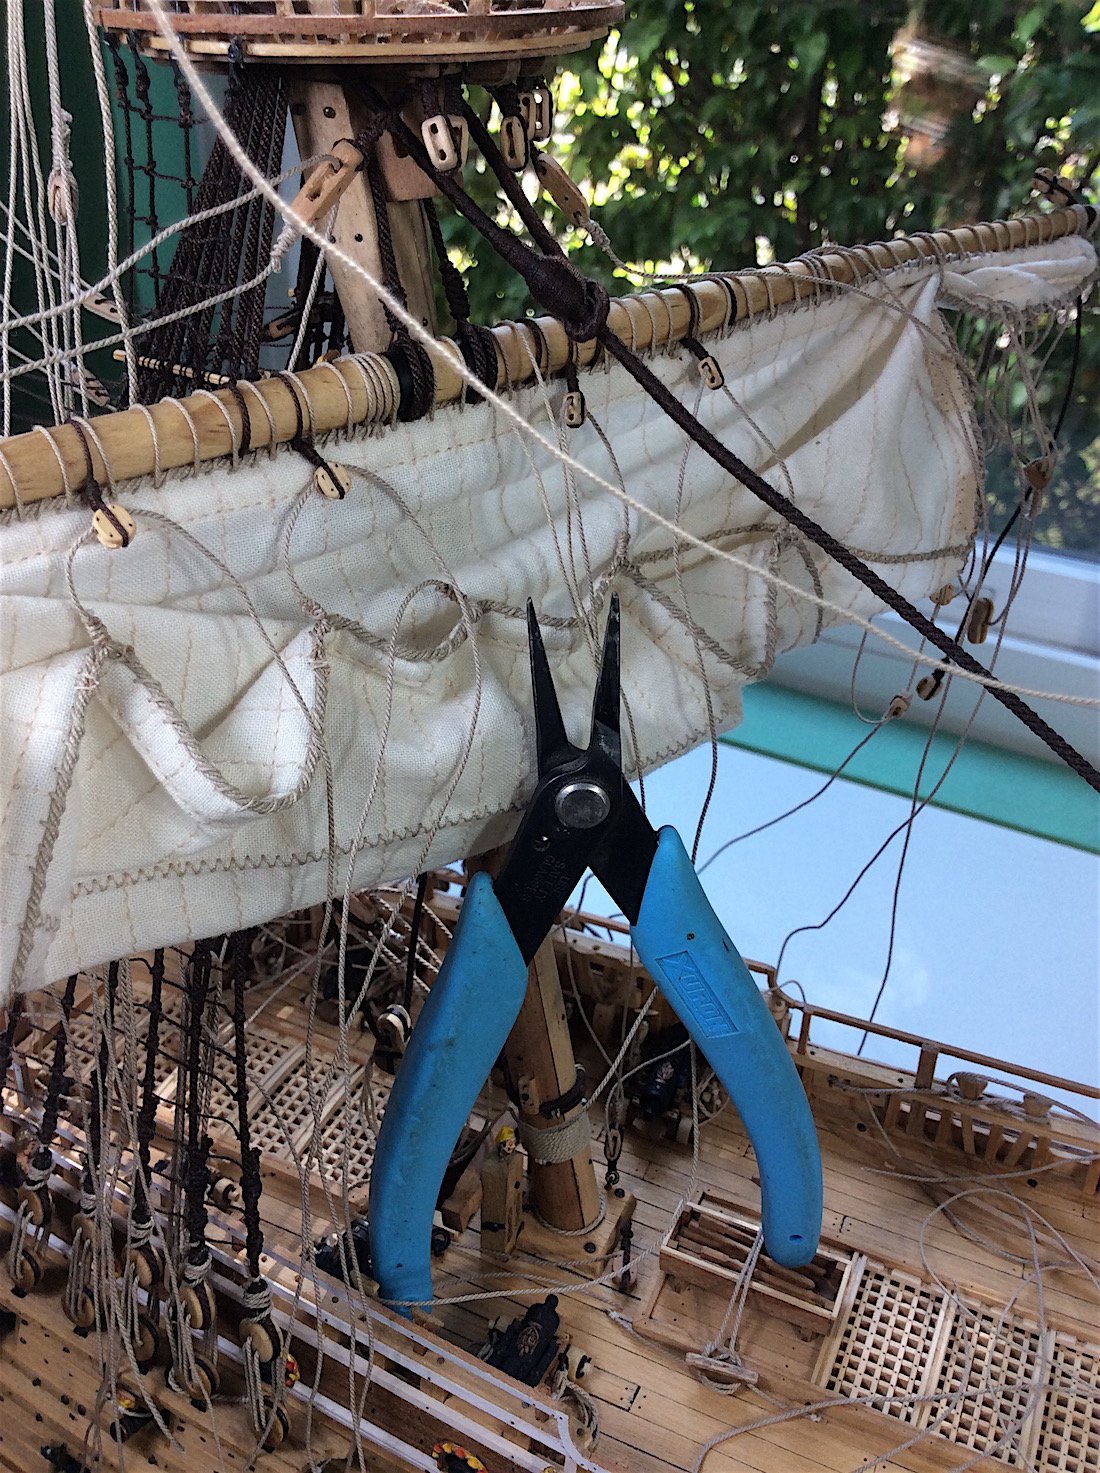
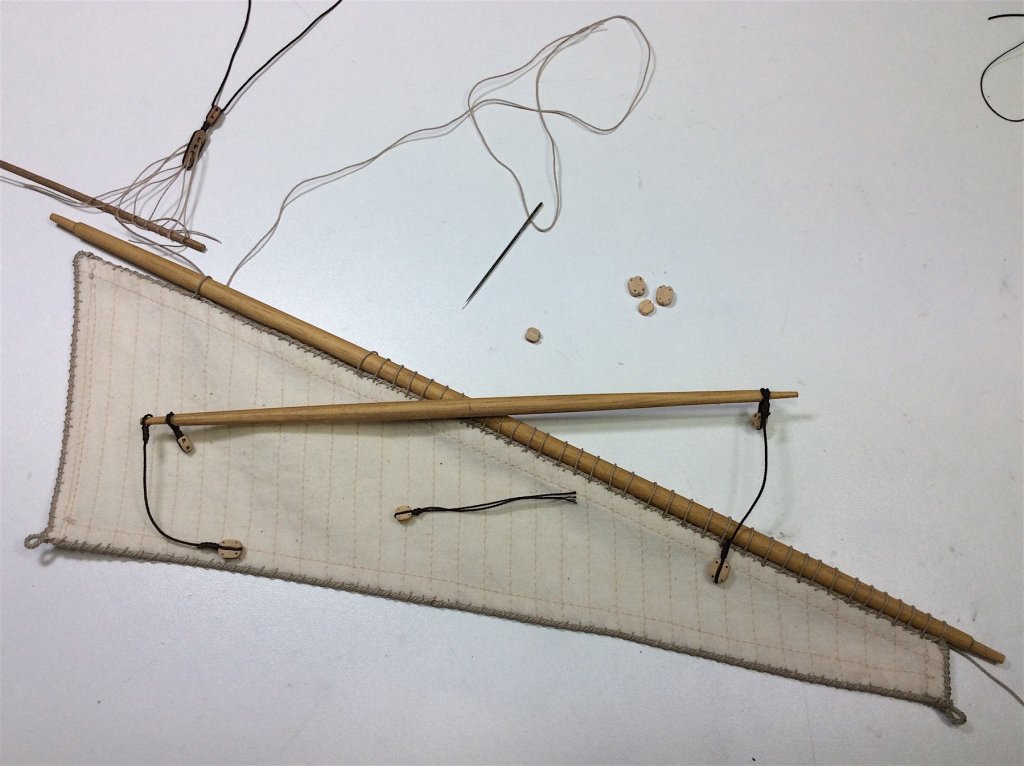
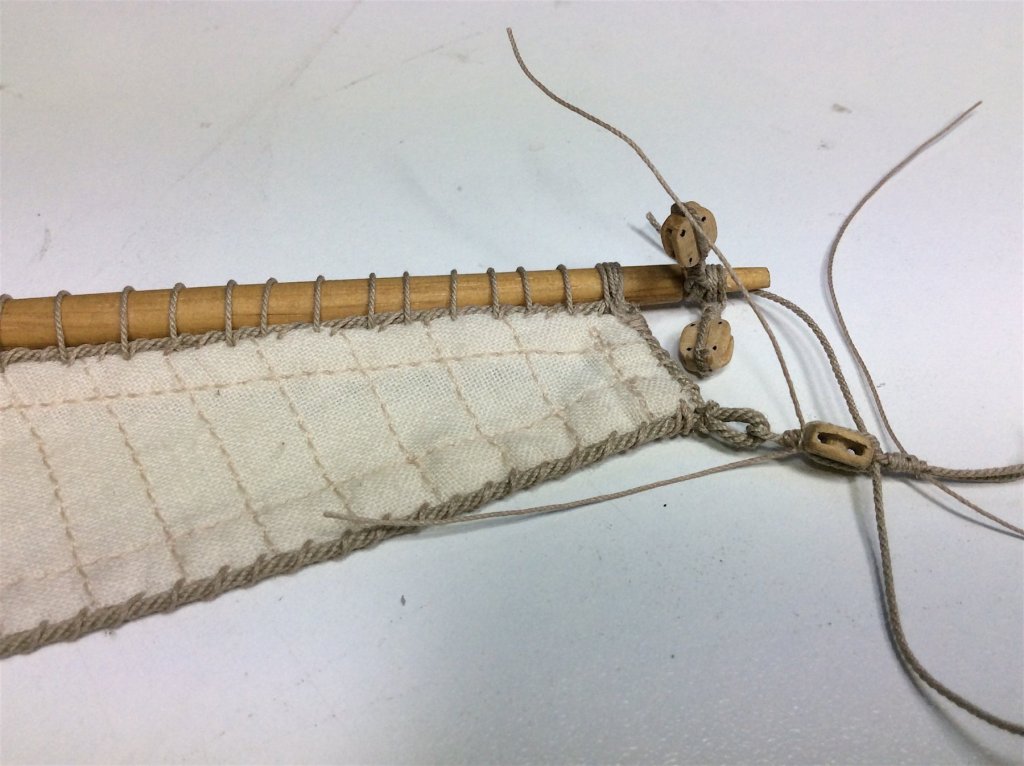
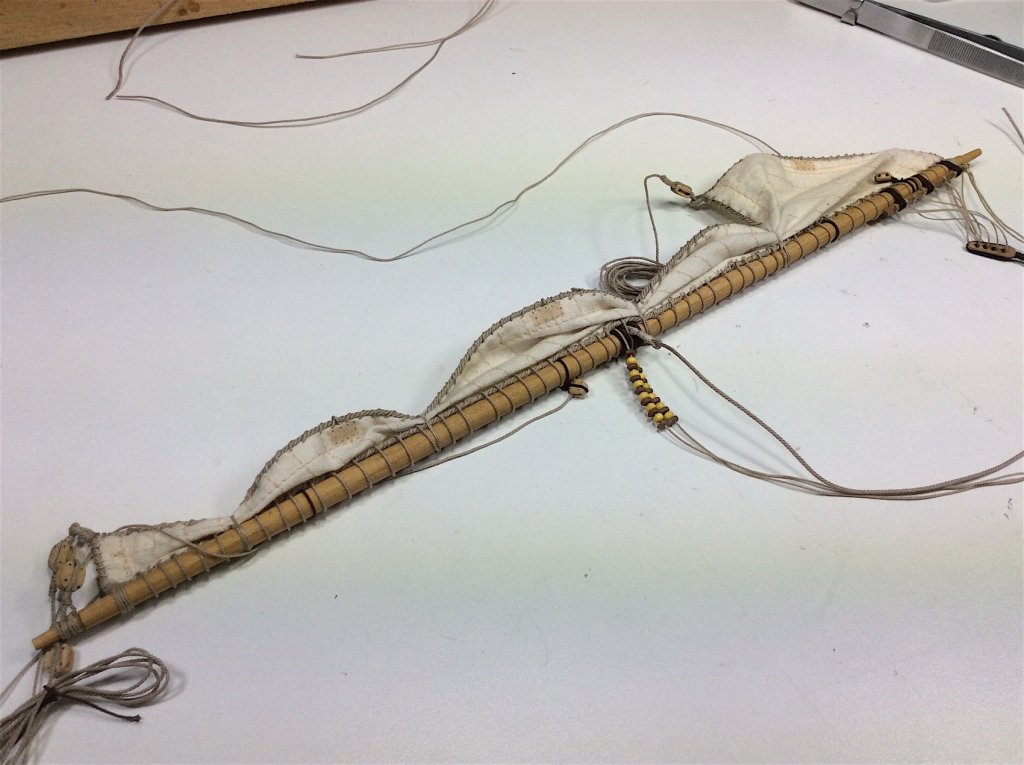
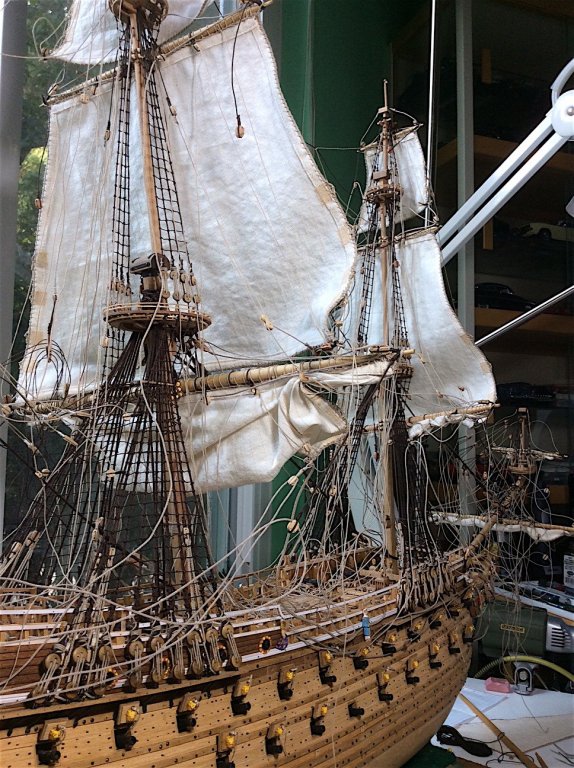
Peter, Thanks, as always for your superlative level of knowledge regarding the Vasa and its mysteries. I very much appreciate your information. I did find another photo of the Norske løve. Made a couple of notations. Thanks for the thought, and the link. Very interesting that you “got one” over on Fred – And indeed the rigging is very similar to Vasa. =================================== Minor update; getting the mizzen sail and its two yards ready for mounting. Here are a few updated shots along with comments. Yes, nearly done – thanks so much for your very nice compliment as well. Cheers,

-
Nils, Just came across your current build. Such a nice choice indeed. As a devoted fan of yours I will also take a seat and follow along.... Your canon carriages, lower planking, framing all such excellent work ! Cheers,
- 692 replies
-
- 4
-

-
- eagle of algier
- chebec
- (and 2 more)
-
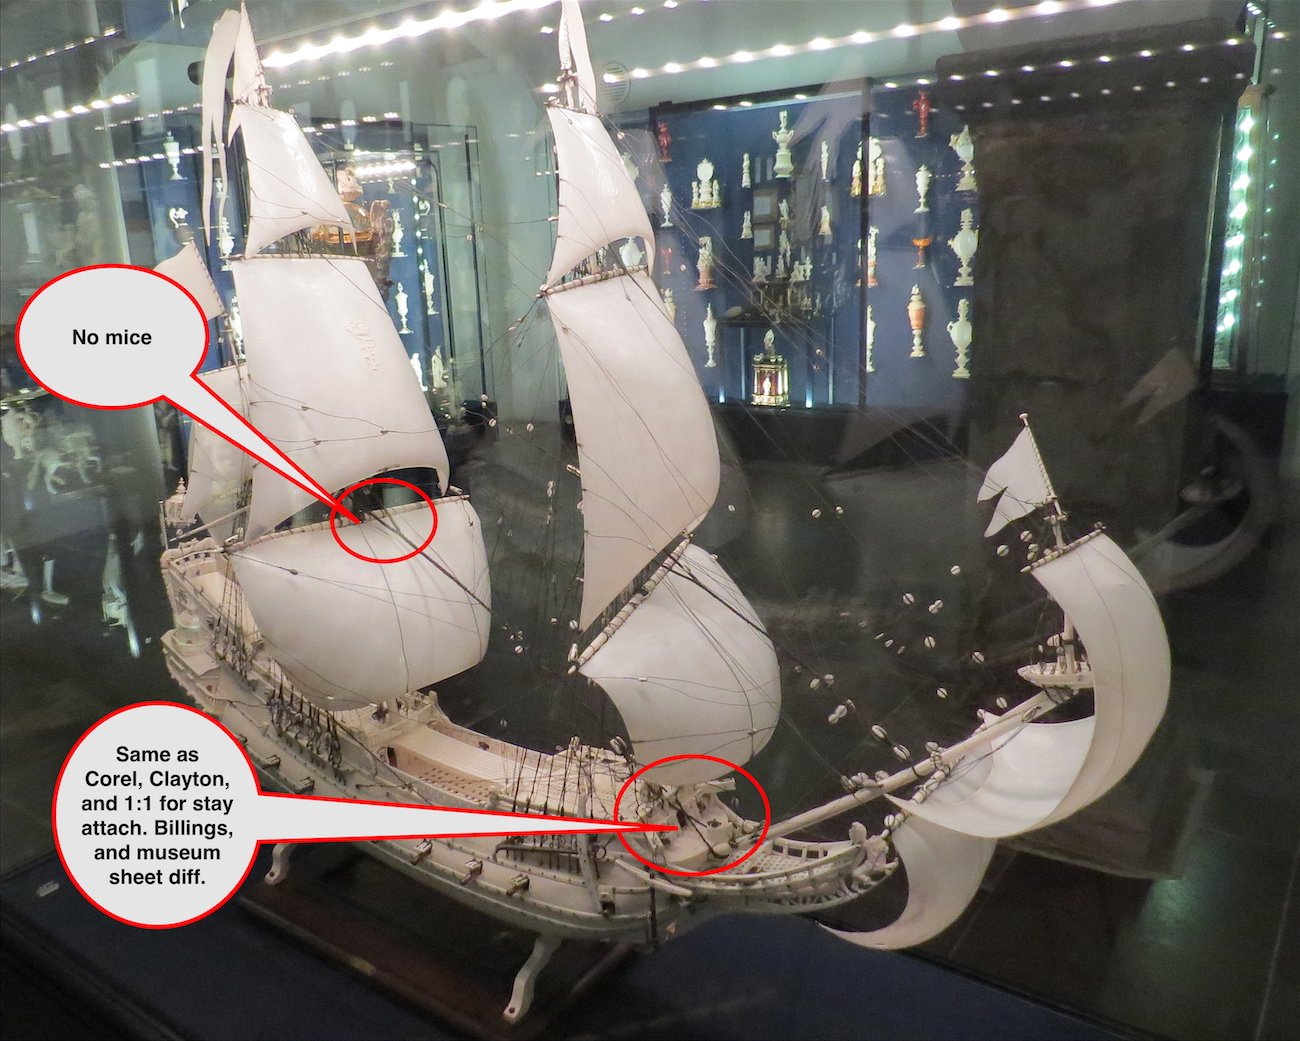
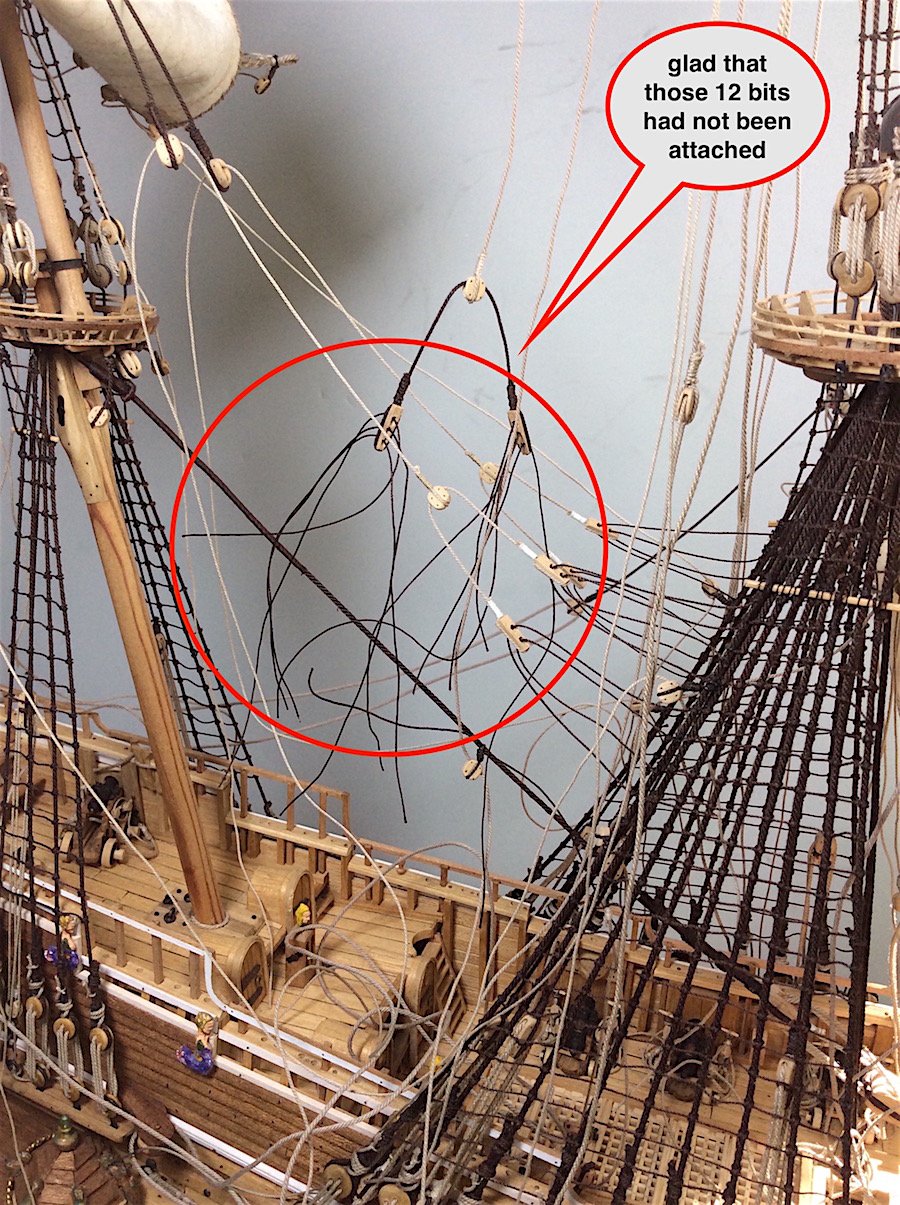
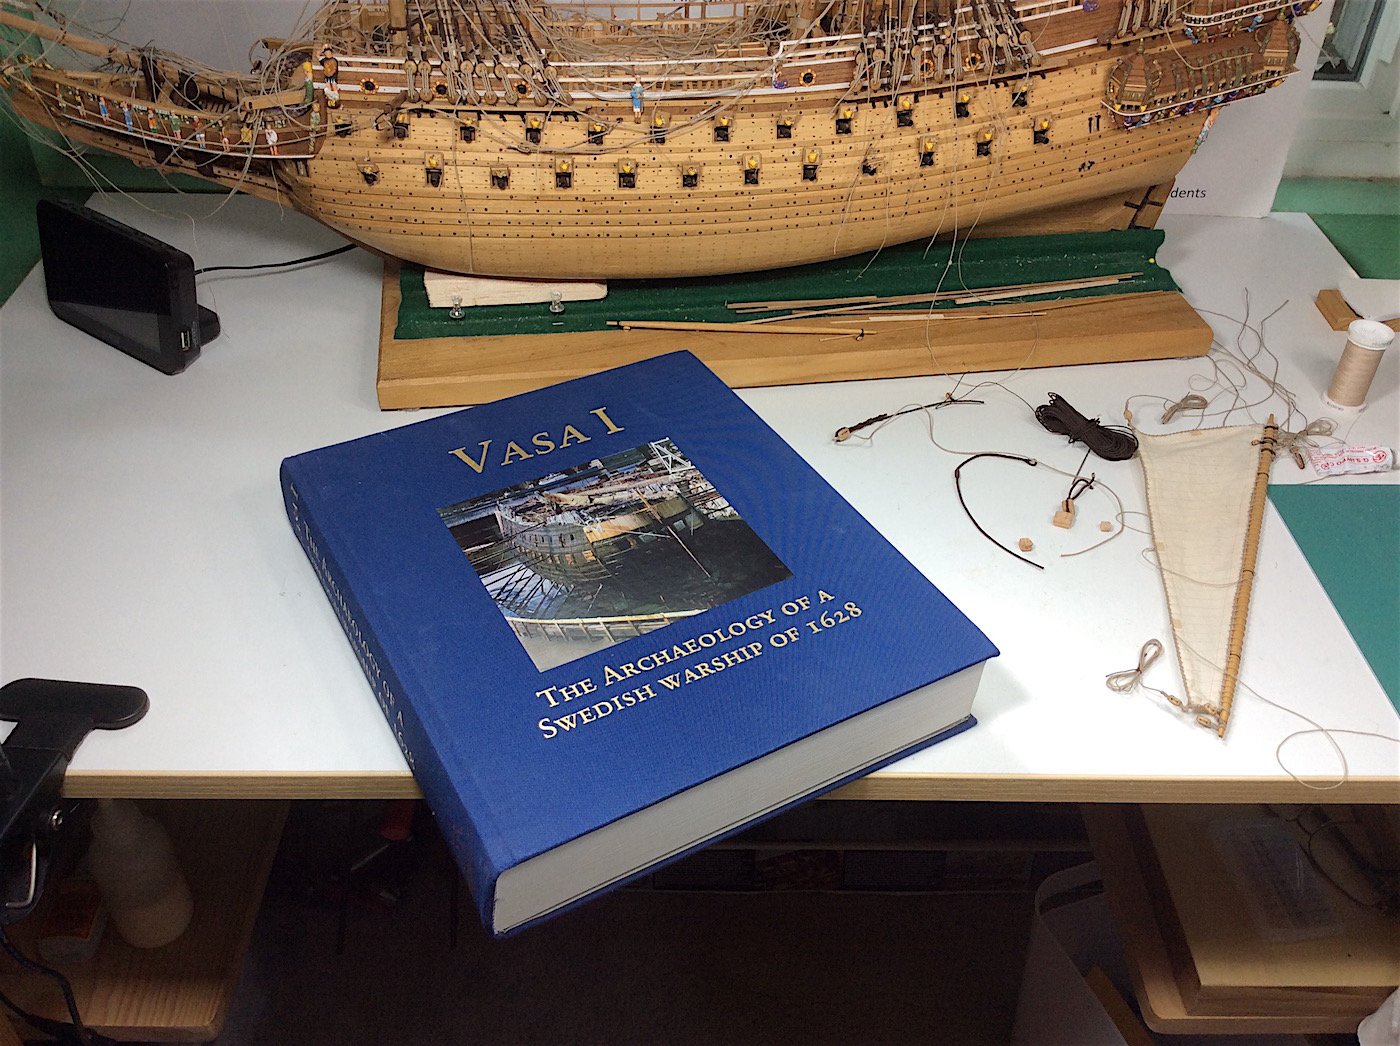
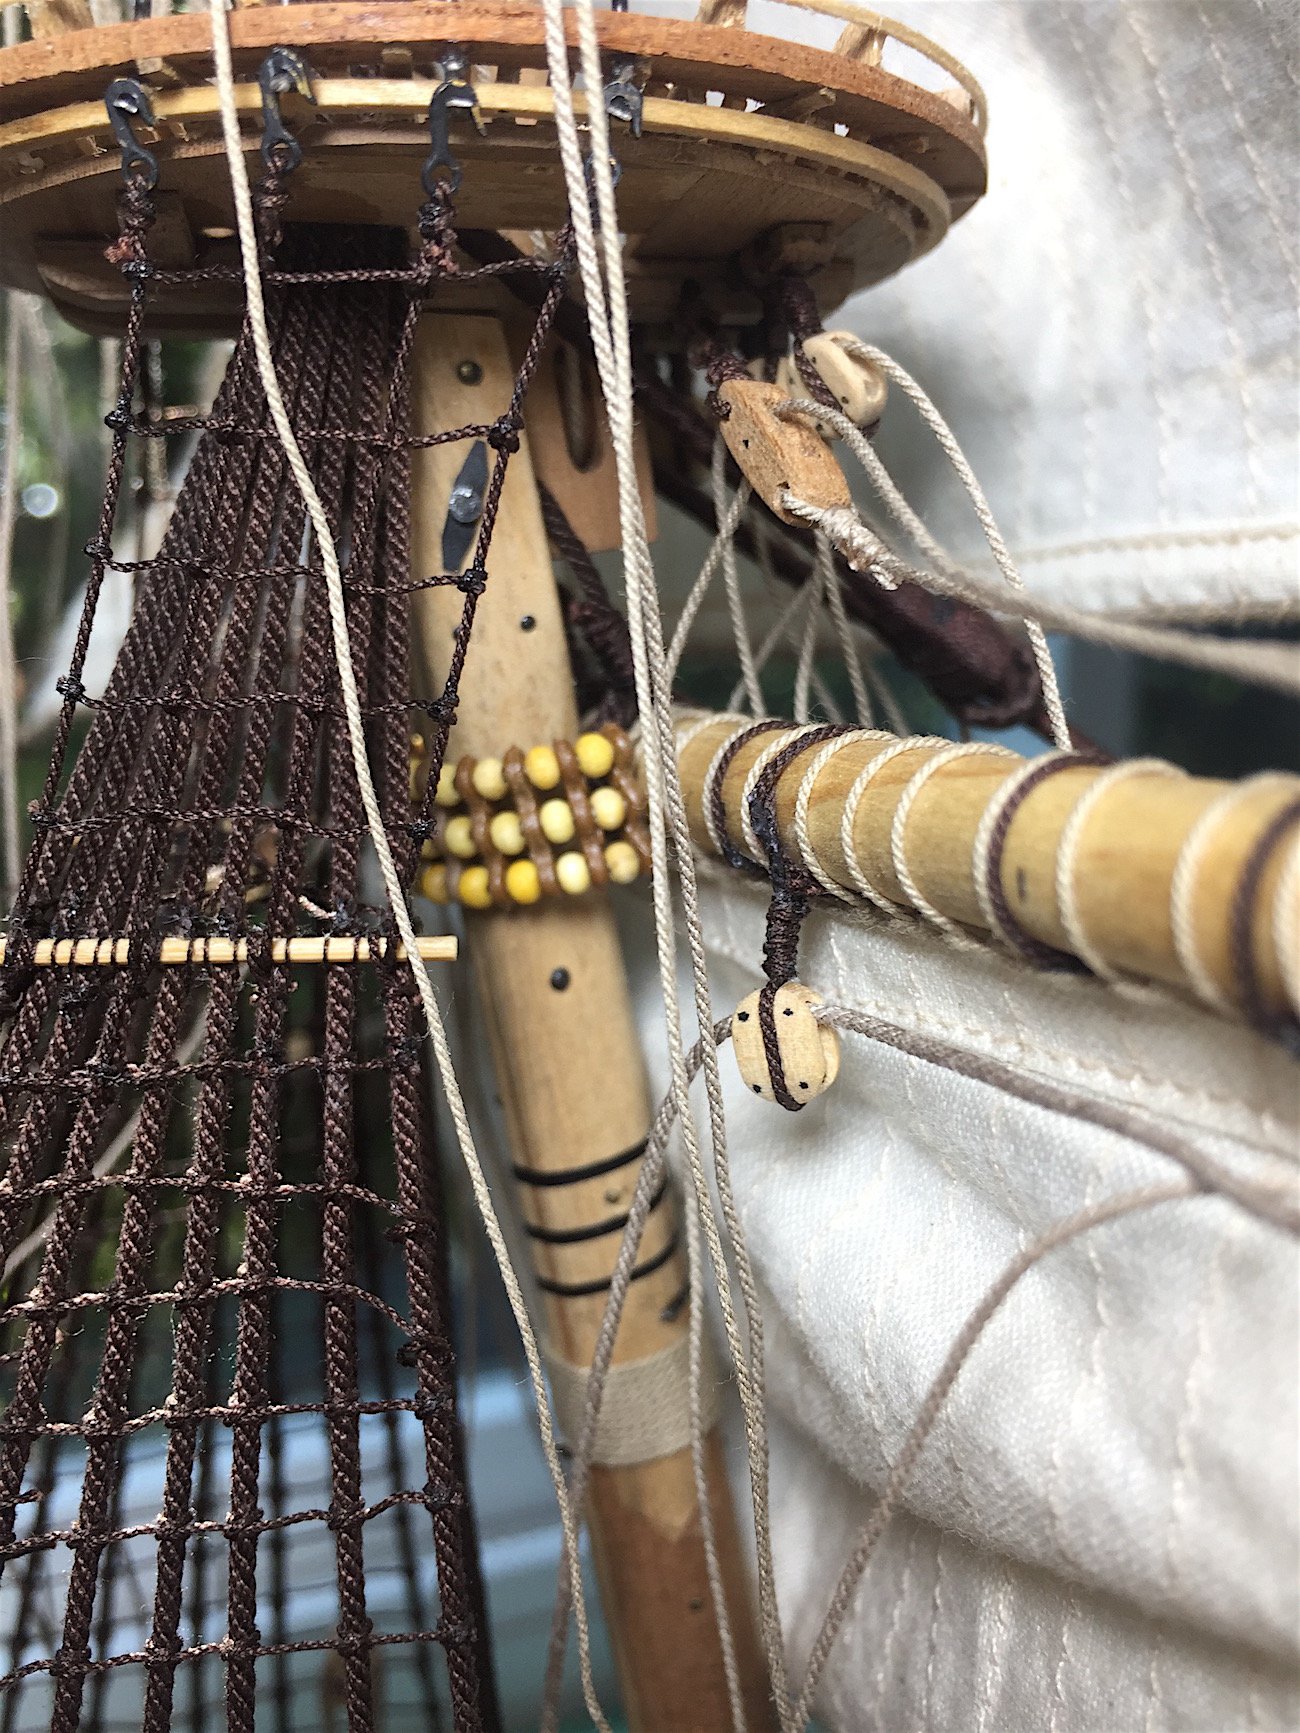
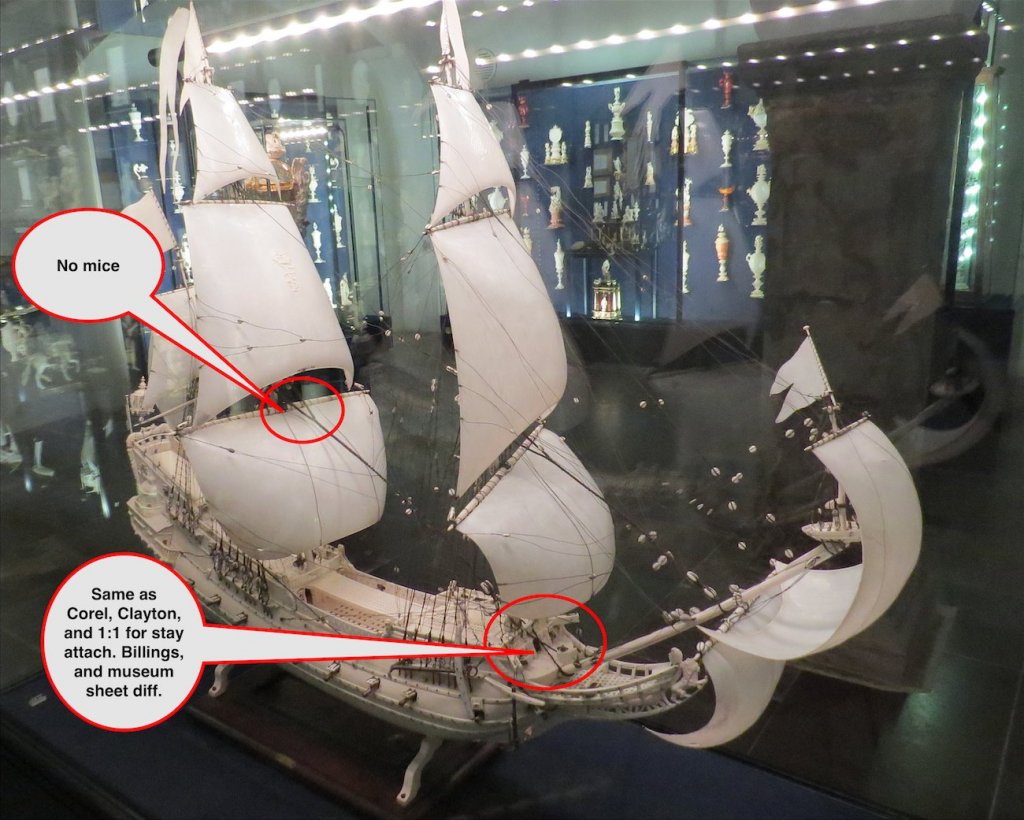
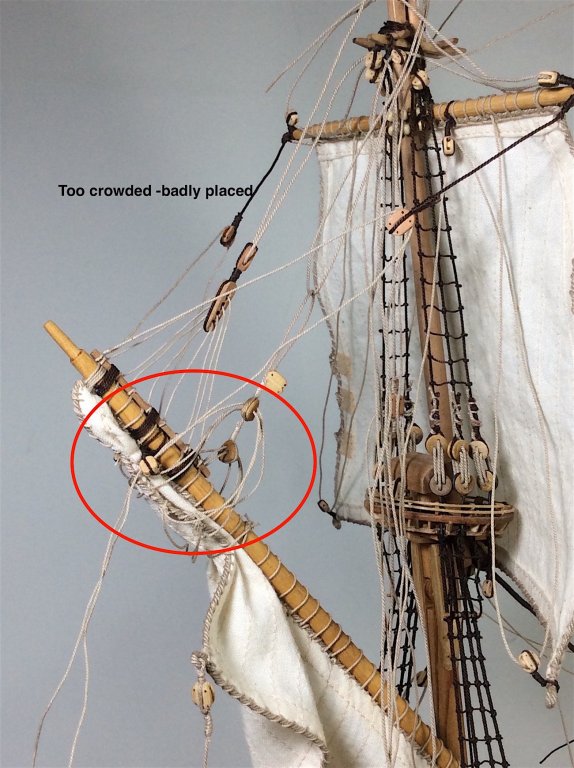
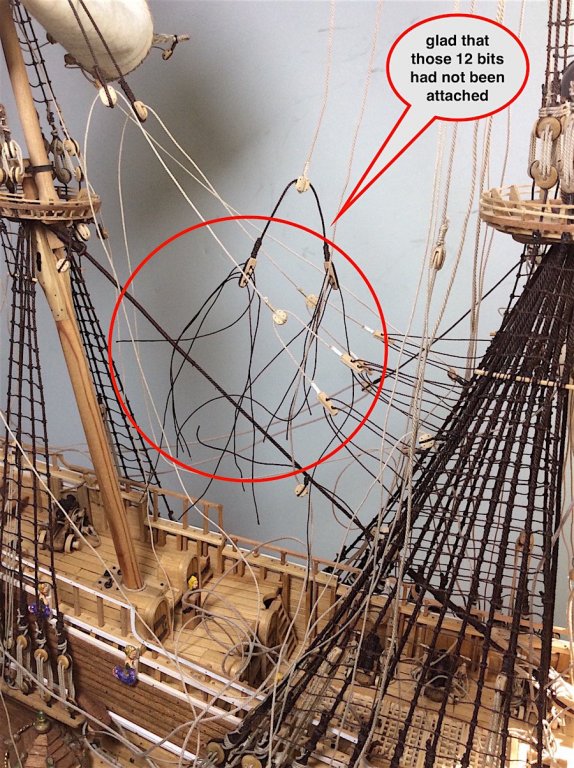
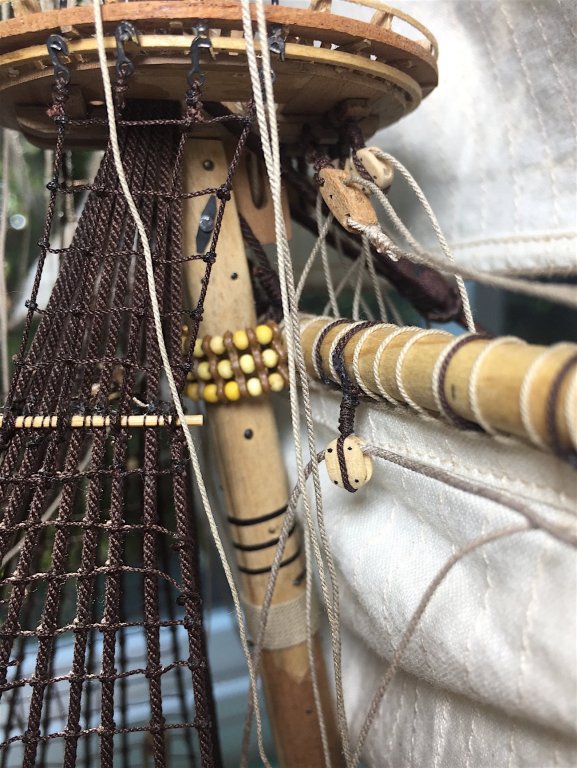
Peter, Ha ha No I won’t read that book it will become a “Nightmare from Stockholm Street” . My thoughts today anyway Having spent 1000+ hours (I think) really trying, to the best of my skill set, accurately add details to this effort, the last thing I need is to be read about so many other things that are also “not right”, when VASA II becomes available. That said IT WILL BE an invaluable source for future Vasa builders – assuming, of course, that they don’t purchase the Corel example as a base kit. SMALL UPDATE: Turns out that there was no choice. I had to remove the mizzen stay shroud because the mouse was choking the mast. As I was moving towards installing the mizzen yard, it became clear that there would be no room for the yard rope through that block. So decided to also remove that huge triple block at the base of the lower main. And just fix all those issues. I did serve the ropes – like the look, and all the other stays had been served. Accuracy or not – will no longer really, at this point, stress over this anymore; now onto attaching the mizzen yards, and the lower sail - I’m already seeing several rigging differences for the lower mizzen sail depending on where I look for help. Oh well….. ======================= PS: Yes Peter the Oseberg Viking long boat is next. Just wood! What a relief that will be -- ha ha….And still THANKS again for pointing out those block issues Cheers, Here were the issues and the fixes;


-
Moreplovac, Very nice project. It is also nice to see very diff. projects being worked on. I will follow along as well. Your work is indeed also excellent. PS: You have given me a great idea regarding oars for my next project (Oseberg) Next time I go to my local coffee shop I will take a few extra of bits Cheers,
- 122 replies
-
- 1
-
-
- greek bireme
- scale-1/35
- (and 2 more)
-
Don, Very nice update. That traveler's hook is also great detail work. Sails are very difficult to get "right" looking - you hit the mark.
- 653 replies
-
- 3
-
-
- trabakul
- marisstella
- (and 1 more)
-
Patrick, Excellent work !! your drilling idea is IMO as well a better idea. Again your research for this project is very commendable. Cheers,
- 756 replies
-
- 3
-
-
- galleon
- golden hind
- (and 2 more)
-
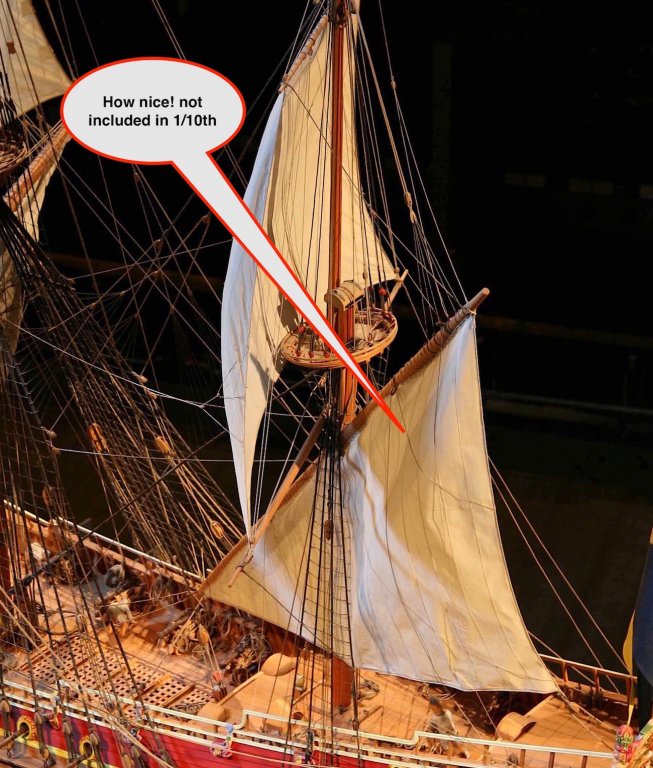
Peter, Dave: Thanks appreciated. I have decided to do something about the "problem" that I have with those two blocks. I'll update when I have a plan. Hubac: Very kind of you to follow along. Your work is indeed very impressive. Here is the answer to your question. MORE than you probably ever wanted to know VASA II will be the companion to the first book. Here I copied and pasted from the Vasa specific forum Fred Hocker's information; for us Vasa builders it has been so frustrating waiting for this "bible" of the ship's rigging. ================================================= Since everyone wants to know, I thought I would start a thread here for status updates on the Vasa rigging volume (Vasa II). PS: thread is from 2014 Part 1 – The archaeological evidence (Hocker) The first part of the book presents and analyzes the find material from Vasa which is relevant to the understanding of how the ship was rigged and sailed. Chapters are organized by functional groups and vary in length, depending on the amount of find material. In each chapter, the relevant finds are described and illustrated in sufficient detail to allow useful conclusions to be drawn. Due to the number of finds and the fact that many of them were made on a production basis in specialized workshops, it is not necessary to present every object individually – readers are referred to the Vasa Museum’s online finds database for such information. Chapter 2: Hull, including construction (Hocker) This covers the fixed part of the rigging material which was part of the ship’s structure or fastened permanently to it: 1. Mast steps and partners 2. Chainwales 3. Bitts 4. Catheads and fish davit 5. Fixed sheaves in bulwarks, chesstree, etc. 6. Belaying devices (kevels, pinrails, etc.) 7. Ironwork Chapter 3: Spars (Hocker, Nilsson) Spars are the masts and yards, the wooden poles which carry the sails and allow them to be adjusted to meet the wind at an optimum angle and transfer the wind’s energy to the ship. Chapter 4: Tops (Hocker) Tops are the round platforms at the heads of the masts which provide working space for handling the rigging as well as sharpshooter positions in battle. Chapter 5: Tackle (Howe, Lindblom, Hocker) Tackle is all of the movable wooden and metal parts of the rigging which connect the sails to the spars and the hull and allow them to be raised, lowered and controlled 1. Deadeyes (Lindblom) 2. Blocks (Howe) 3. Parrels (Hocker) 4. Euphroes (Hocker) 5. Fairleads (Hocker) 6. Other (Hocker) Chapter 6: Rope (Magnus, Seeberg, Hocker) The rope represents one of the groundbreaking studies in this volume. It is a common find on archaeological sites but rarely presented or studied in detail, so this chapter receives special emphasis and extra material on the materials and manufacturing processes. Chapter 7: Sails (Bartoš, Bengtsson) The sails are the most unusual find among all of the artefacts found with Vasa, and so this chapter is also given extra weight. Chapter 8: Capstans and windlass (Donohue) Capstans are the human-powered machines mounted on the deck, which make it possible to lift the heavy weights of the anchors and sails. Chapter 9: Steering (Hocker) Vasa preserves the only known complete example of the whipstaff steering system, the most common form of steering gear on large ships from the late Middle Ages until about 1700. Chapter 10: Anchors (Hocker, Ward) Anchors are essential for operation of the ship, and all parts of the anchoring system survive, including anchors, stocks, buoys and cables. Chapter 11: Navigation equipment (Hocker, Pipping) The navigation equipment (compasses,timekeeping devices, sounding leads, etc.) is included in this volume as it is essential to sailing the ship. Chapter 12: Reconstructing Vasa’s rig (Hocker, Pipping, Stolt) This chapter synthesizes all of the archaeological evidence and comparative material in a reconstruction of the rigging of Vasa. Part 2 – Rigging and Sailing Vasa (Pipping) The second part takes the archaeological data as the departure point for a more wide-ranging contextual examination of the rigging and sailing of a large ship such as Vasa. Where the first part focused more on objects, this part focuses on process and meaning to explore the relevance of this find to larger questions of ergonomics and organisation, resource utilization, and operational implications. Chapter 13: Ship performance and the sailing environment of the Baltic Sea The geographic and climatological context is examined, as are the operational environment and the strategic limits within which the ship functioned. The essential parameters of the ship’s performance, such as speed, stability and weatherliness, are discussed in order to establish how well the ship was suited to its likely sailing routes and conditions. Chapter 14: Money, materials and men (Hocker) This chapter concentrates on the administrative framework for outfitting Swedish naval vessels and the resource base from which the raw material were drawn, as well as the organization of the processes of producing rigging and assembling it into a functioning rig. It addresses the economic, environmental and social factors influencing the production of sails, rope and tackle. It makes use of the historical documents relating to the operation of the Stockholm navy yard, where the ship was rigged and fitted out, as well as the remains of the ship itself. Chapter 15: Rigging the ship The process of rigging, starting with a bare hull and progressing to a fully outfitted ship ready to sail, is followed in detail, with attention on the manpower requirements, the organizational challenges, and the technical limitations imposed by the particular materials and methods used. Chapter 16: Sailing the ship The chapter opens with an analysis of crew organization and Vasa’s one, brief sailing passage for what they say about the ship’s performance and the level of competence of the crew. The rest of the chapter follows a typical passage across the Baltic, based on the sequence of sailing orders recorded for the Swedish navy in the 17th century. It presents the different maneuvers which the ship was expected to perform and how they should have been carried out. The ergonomic requirements are analyzed, and the ship is placed in the context of what is known about Baltic sailing in the 17th century. Chapter 17: Sailing a modern reconstruction (Morgens and Litcofsky) Trials made using the modern reconstruction Kalmar Nyckel both confirmed certain hypotheses about the how this rig functioned and raised new questions about the nature of the evidence used to study 17th-century seamanship. The relevance of Kalmar Nyckel for the study of how Vasa sailed is studied, as are the basic limitations of experimental archaeology. Chapter 18: Conclusions (Pipping and Hocker)

-
Mark, your quote "with some work it can be made to look presentable." Really? - You turned a piece of plastic into a thing of beauty - Brilliant Cheers,
- 652 replies
-
- 2
-
-
- royal william
- euromodel
- (and 1 more)
-
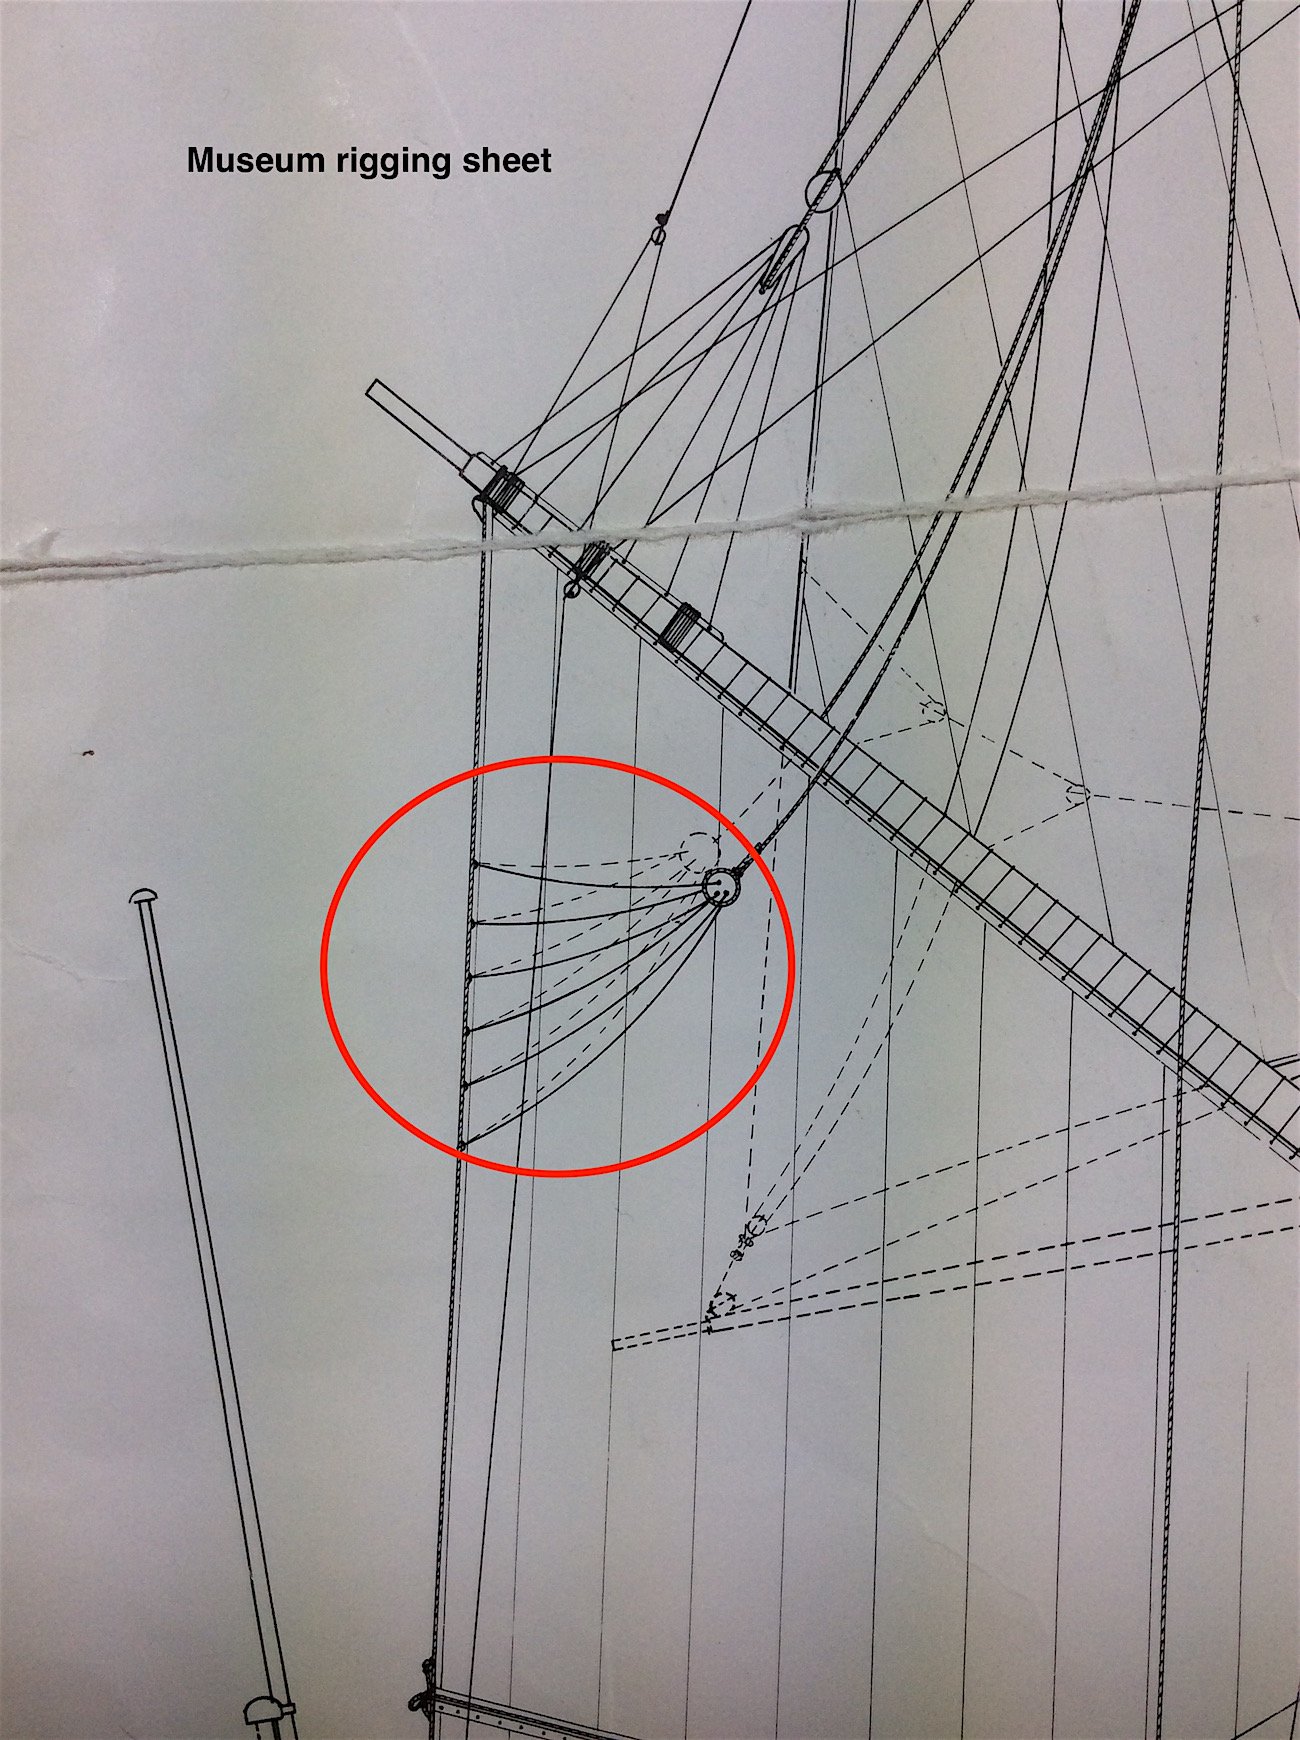
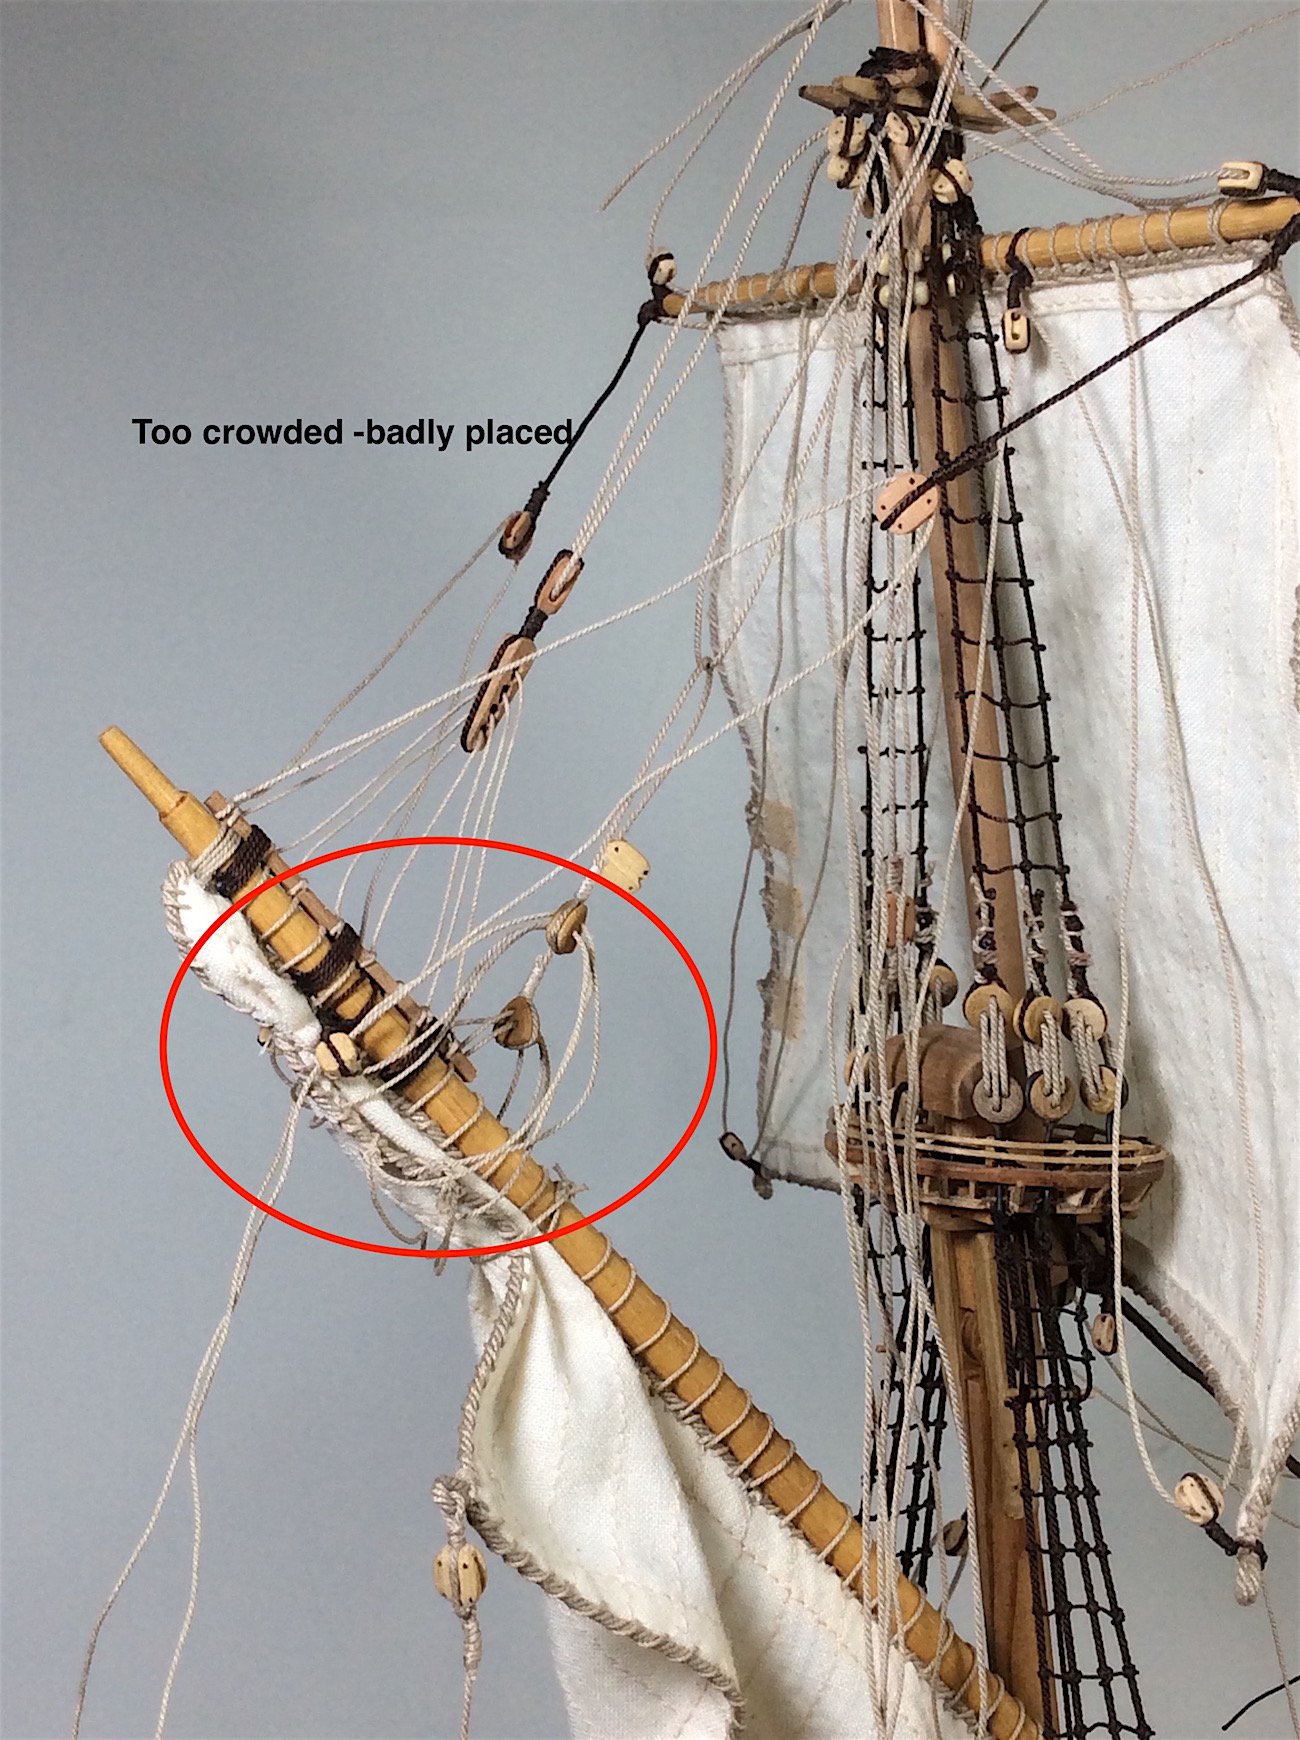
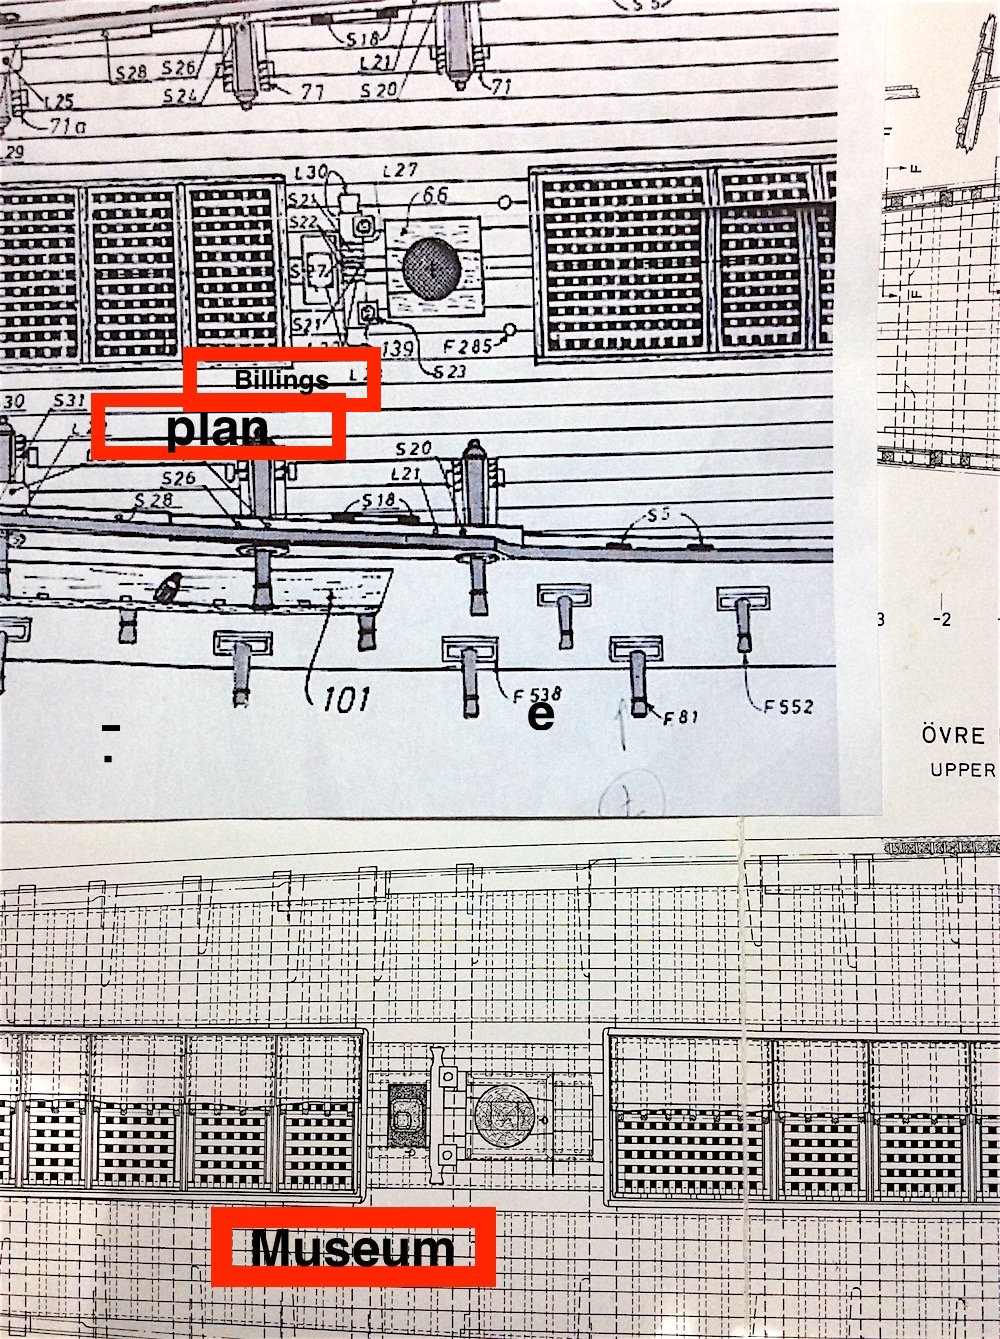
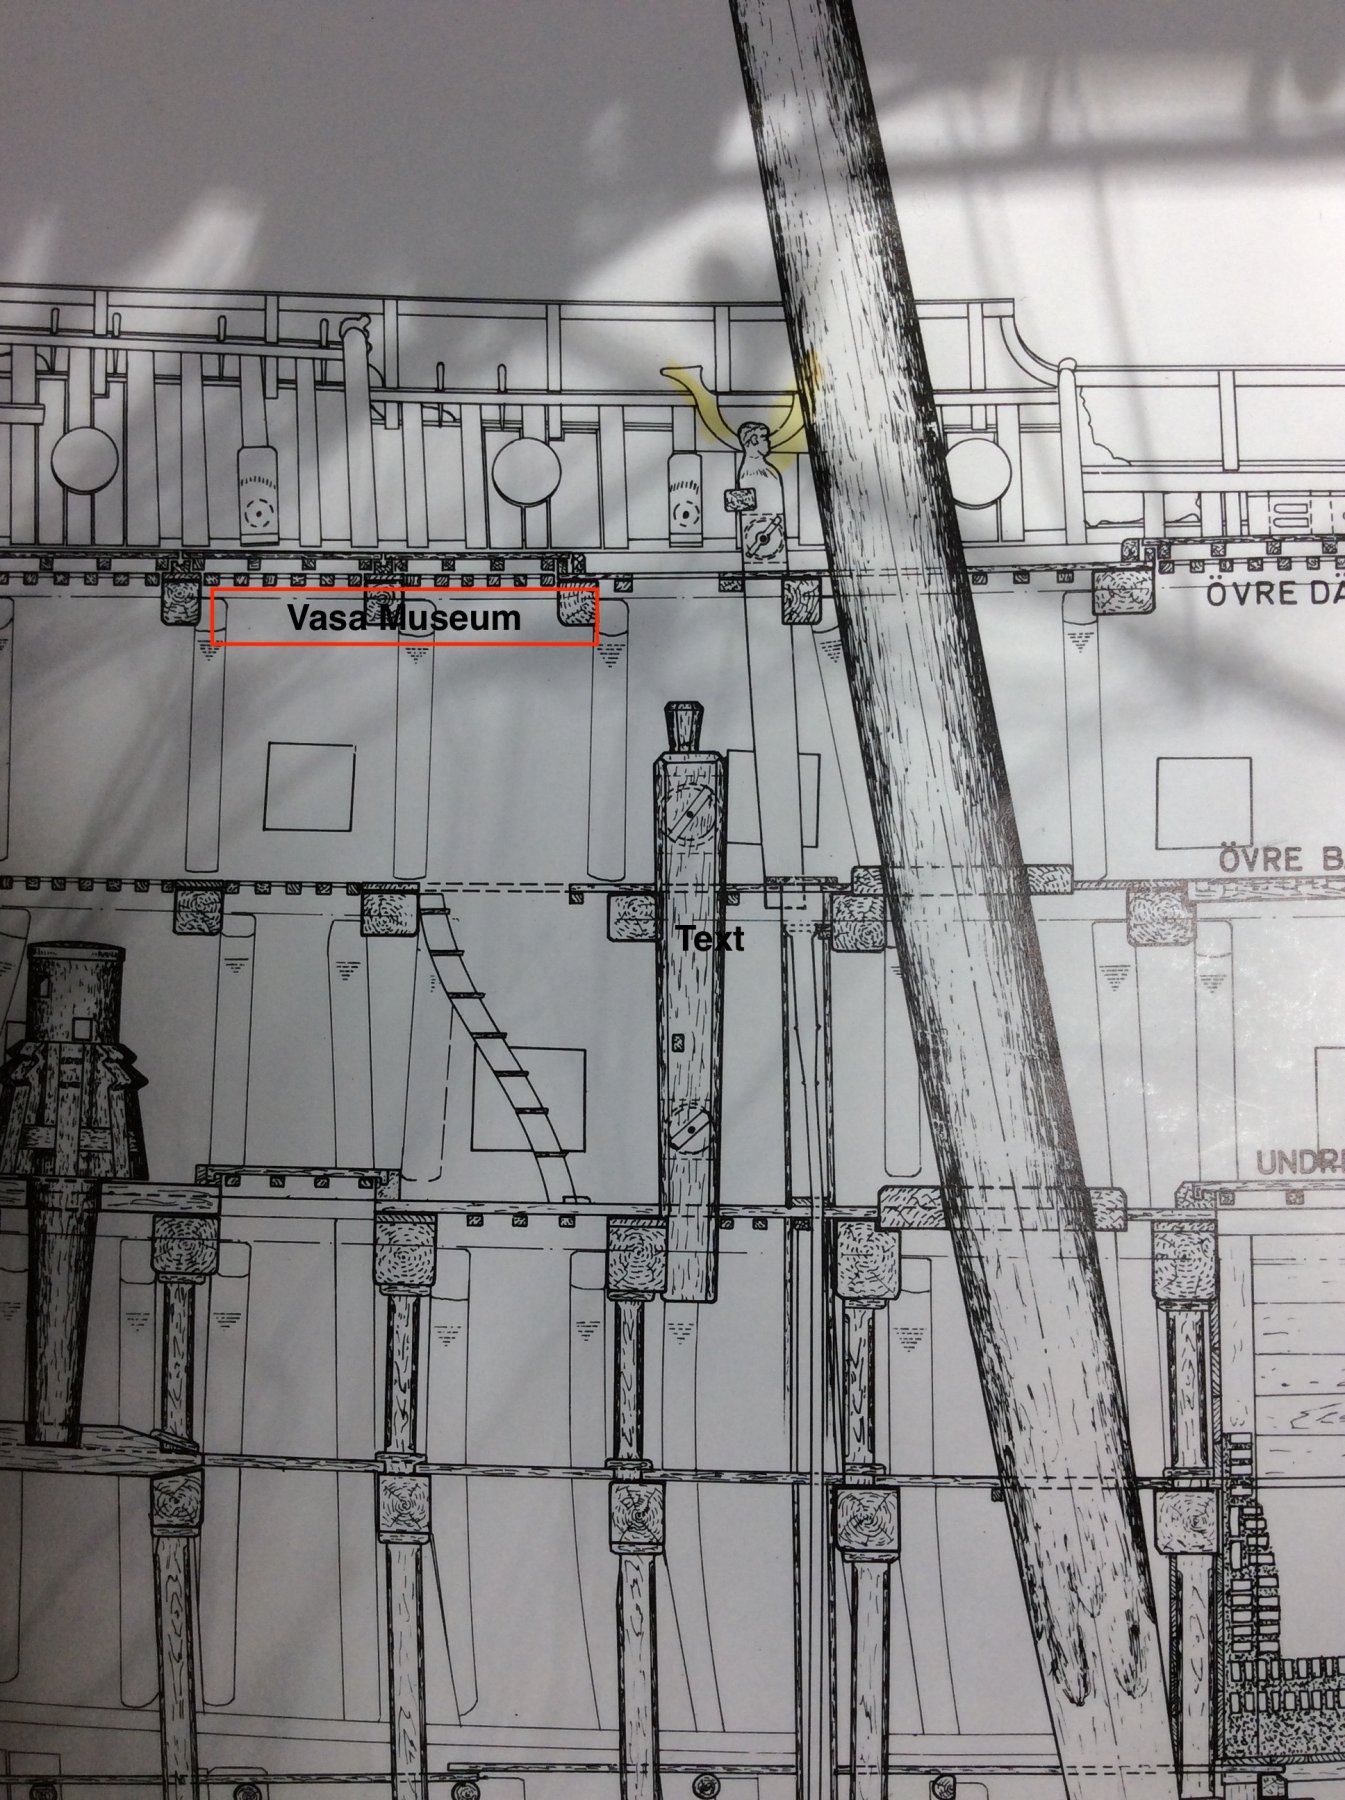
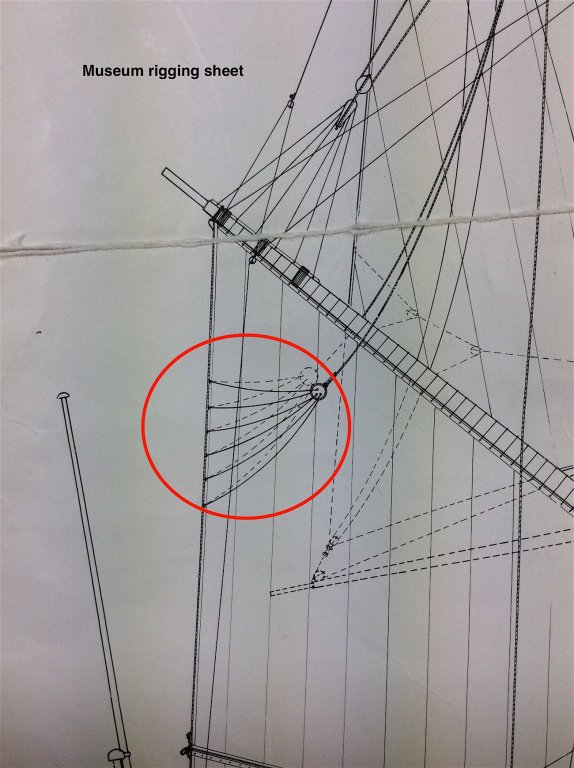
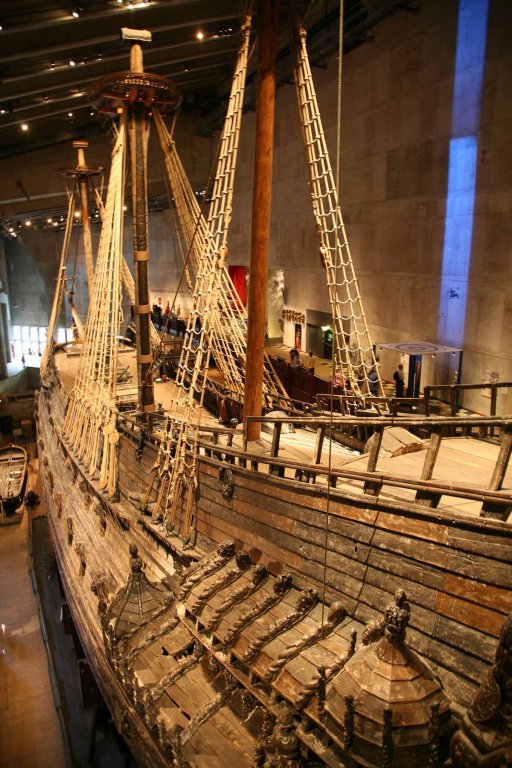
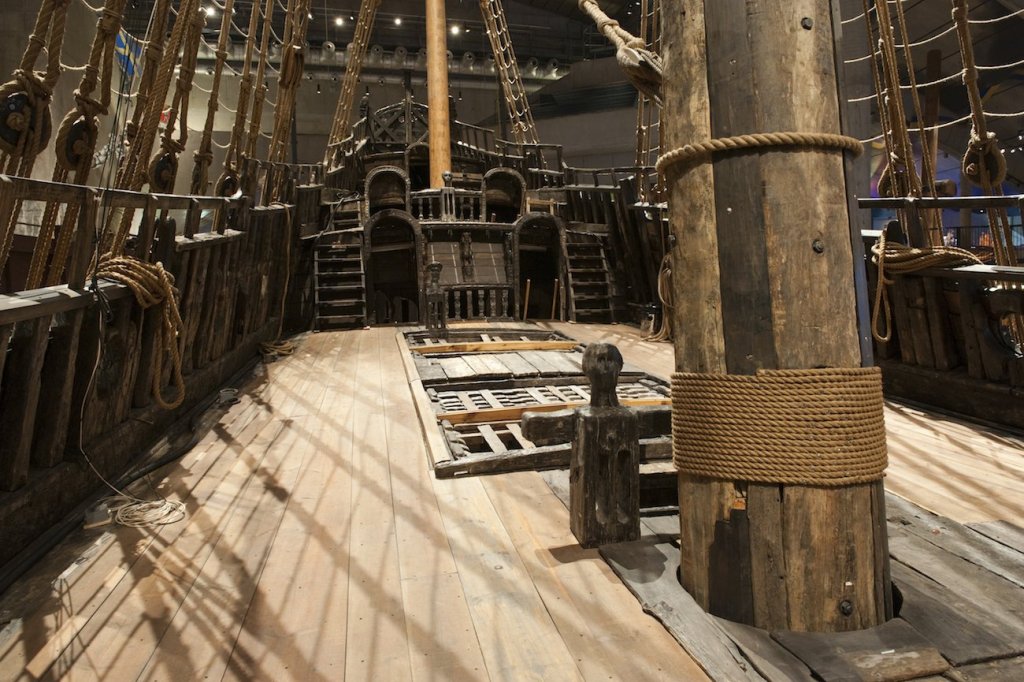
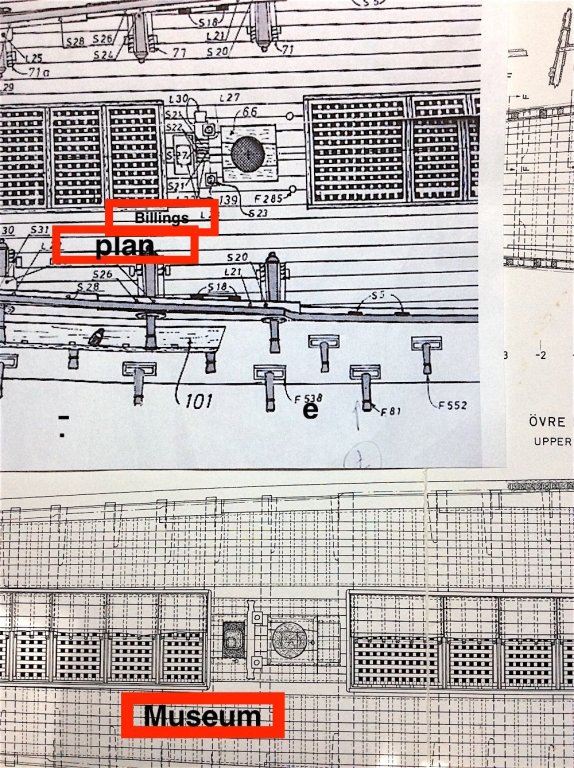
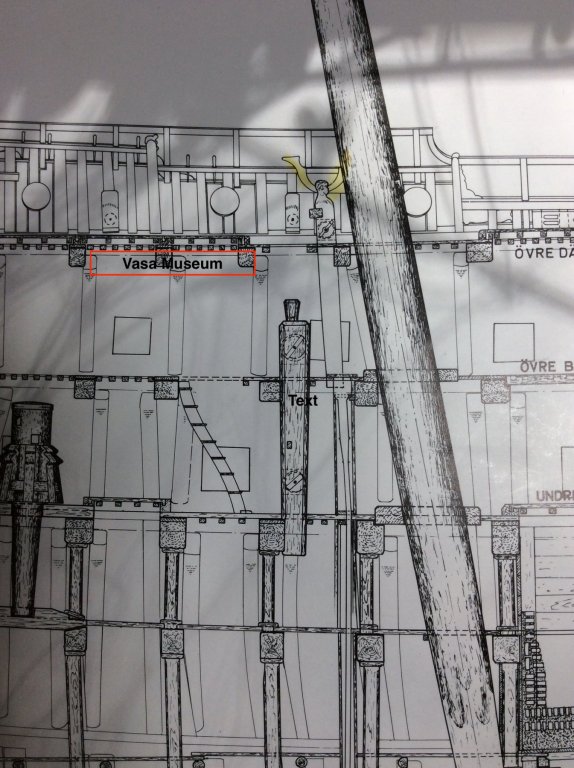
Peter, Thanks again for your very astute observations. Your constructive expertise is really very much appreciated. It certainly adds to my novice nautical knowledge. Rigging this ship along with sails is demanding a steep learning curve on my part. That said much of my learning, for this Vasa, has been based on looking at photos of the 1:1, the 1/10th, Clayton’s, the museum plans sheets, and of course other Vasa builders here on MSW. This build has gone through many stages of work, sitting collecting dust, and returning to the project. Between these absences I have increased my skills, discovered techniques as well as reading from the likes of experts such as Anderson. Adding to this mix of learning was also the occasional excellent constructive criticism from member’s posts. These in the aggregate have increased my core knowledge base. AND the so many amazing compliments that have nurtured this build along the way as well!! Peter, comments regarding the size of the mizzenmast blocks will now gnaw at me as this overkill stares me in the face. You are, of course 100% correct – AND I do appreciate that you mentioned this. That said I’m just not sure that I want to remove that stay, re-serve a new thinner rope, add a mouse, seriously shave down the size of those two triple blocks, and try to re-attach re worked bits to the main mast (with an off-set) that will also require moving the knight back to center. My concern is also removing, and then having to re-attach the line around the mast with so many shrouds and lines already in place. Hmmm?? –But I will be staring at this every time I look at it. PS: I probably will go back to fix this - it is SO out of scale indeed. grrrrr I “sorta" new that those two blocks were too big. Thought of using two of Chuck’s 1/4” triple blocks, but they “looked” way too small. Corel’s two smaller triple blocks were also too small, and were, well disgusting. So went with the Corel larger - that I “detailed”. And now I also learn that the 1/10th is just a rigging mess (did not follow all the forum during Clayton’s brilliant example). I did know that the 1981 museum rigging plan sheet is not accurate. This sheet, as well as the Billings rigging plans have been my “go to” sources for attaching lines, pulleys to all of the yards and sails. There are no alternatives. I will use Billings regarding pin locations. Those sheets include the sail rope locations. In the meantime the VASA II is years behind being published as it is facing its Swedish bureaucratic perfect storm; a book that has been completed, along with the latest rigging details for the entire ship. Still unavailable as of the end of 017. ============================ Yes you are correct given scaling - it is hard to accurately replicate scale for pulleys, or deadeyes (which should not exceed half the width of its corresponding mast) learned this from a member who kindly posted this during my bowsprit platform work – I changed the deadeyes after reading his post – I had used the kit mid-size, not the smallest. BTW even those are a bit “off” scale. being larger than half the width of that small bowsprit area mast. =========================== Apologies for this inordinately long venting post. I need to be done here. Just need to attach the two mizzen yards, and the one furled sail. Then go from bow to stern searching for the correct pin locations for the 100’s of lines --- Then it’s an 8th century visit. JUST WOOD - I plan on an open cut-out hull project. I'll add the truncated mast. Again I DO very much appreciate the expertise, the likes, and compliments that members have shared on this log. Thanks Mates (;-) Sincerely,
-
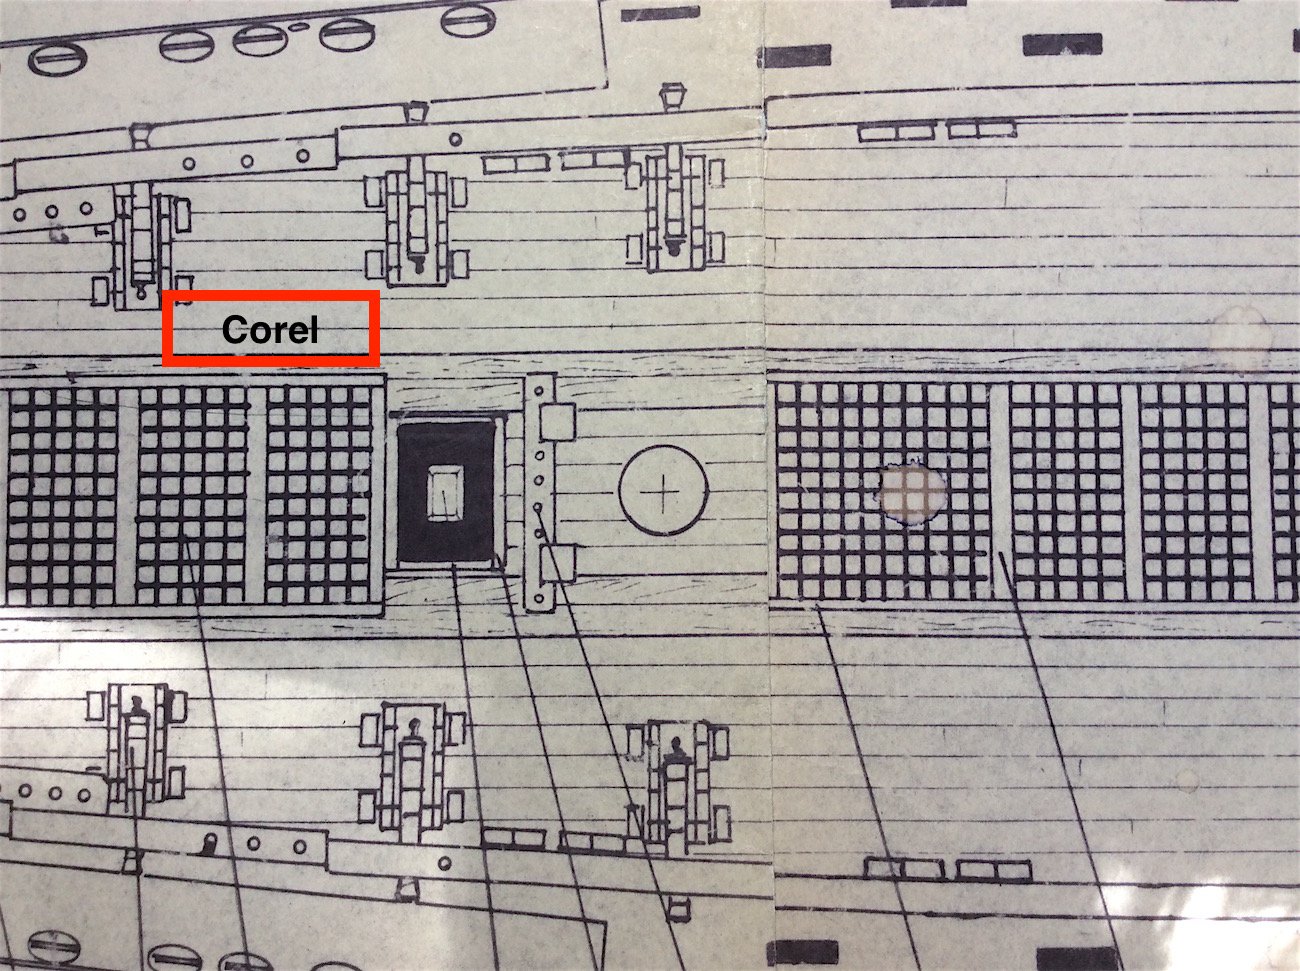
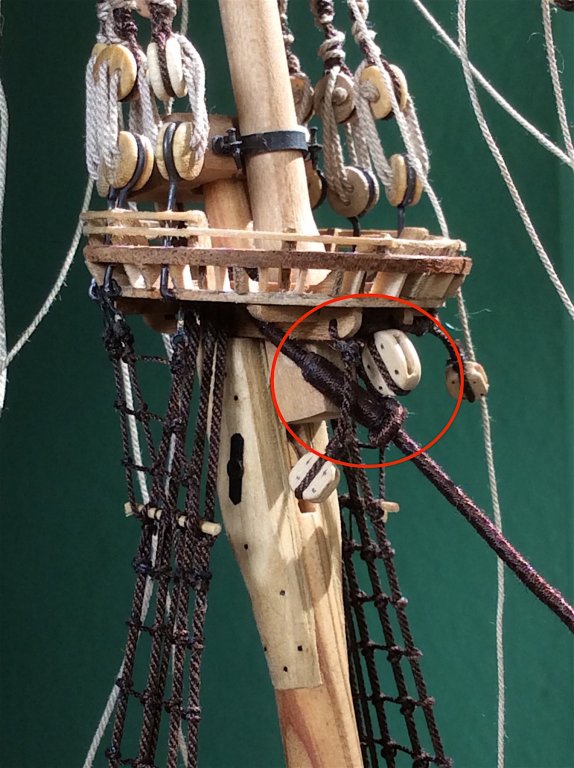
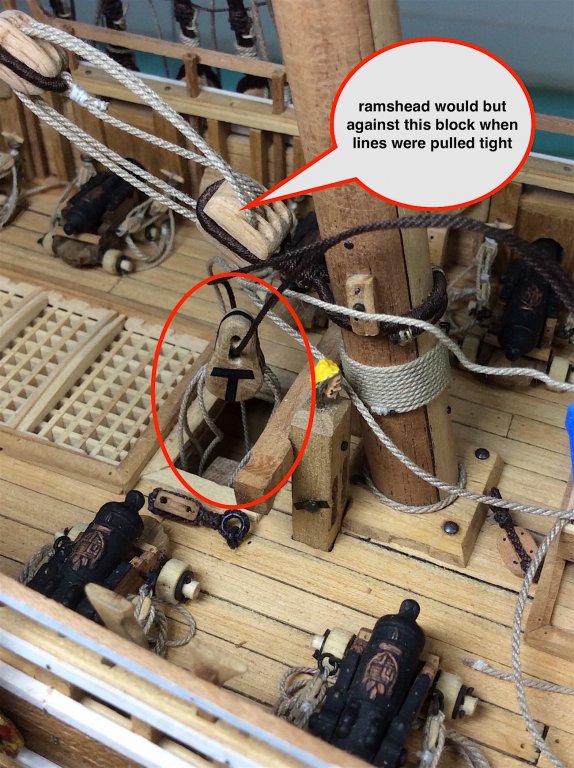
Peter, Thanks for the detailed info. much appreciated. I have extensively followed photos Clayton's build, and in fact noticed this as well. Then looking over several photos of the 1/10th ended up not sure either way. Looking at the 1/1, however it does seem to indicate a rather small opening into the upper gun deck for the ramshead pulley to attach to the knight. When I cut that part from the weather deck I was using Corel's info re: the size of the opening. And not being well informed seeing the foremast rams offset I just followed suit for the main. Now regarding re-positioning that mizzen stay section that is attached to the lower part of the main -- well too late for any changes. I don't dare fiddle with pulling out those two small brass cleats in order to slightly offset the stay from center. I will repaint those poor looking knights ha ha I very much appreciate your information and your super nice comment, as well - Thanks indeed Cheers,

-
Le Soleil Royal by Nek0 - 1/72 - Marc Yeu
md1400cs replied to Nek0's topic in - Build logs for subjects built 1501 - 1750
SUPERB work- 208 replies
-
- 4
-
-
- le soleil royal
- 104 guns
- (and 2 more)
-
Frank: Using Chuck's at Syren as well as all of his blocks - (except those 6 big ones for the three mast stays those were Corel's). At one time Syren also had pear wood blocks, that I really liked (miss those)- sorta blended the few that I had left over here-and there. Regarding his ropes and blocks I find them to be superb. Order after order the quality stays 100%. And he ships right away. PS: his blocks out-of-the-box are excellent but "tweak" them just a bit. hardly needed (:-) FYI: His company link is on the home page right side. I'm sure that you've seen it. Kier - thanks SO much for your likes Zappto: thanks for your kind words. Regards,
-
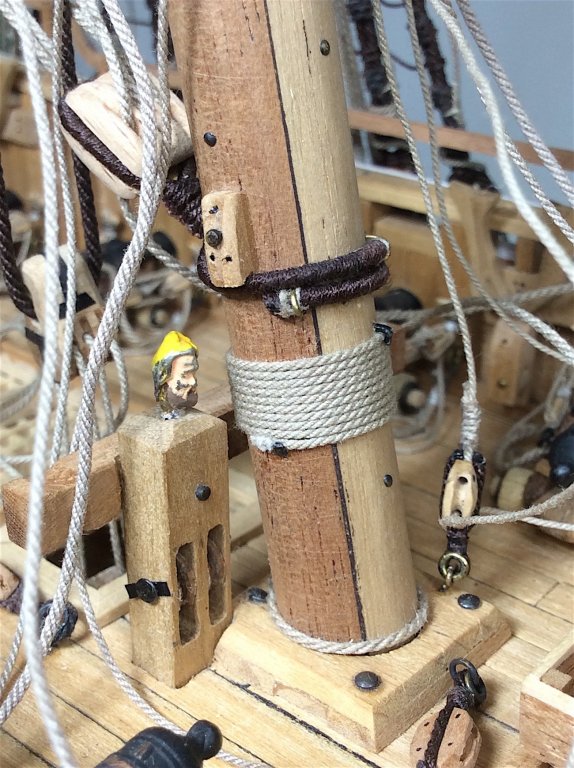
Hi Mates, Apologies for the late thanks - for the likes, and super nice comments. Denis, Martin – so overly kind indeed. Frank, she’s actually my second build. There was a 40-year gap between the Santa Maria and this current Vasa. Again you are also so kind with your compliments. PS: Your HMAT Supply with its “years” of weathering and barnacled hull are way beyond my skill set. Love that build of yours! Henry, Somehow I intuitively sorta new that that specific ramshead needed to be off center from the mast knowing that the mizzen mast stay would attach to the lower part of the main. It wasn’t knowledge – especially looking at the three plans that I was using. Nonetheless mounted the knight off center. Thanks for your knowledgeable clarification –luck on my end. Lower main yard is now attached. Added most needed lines as well; now onto the mizzen. Cheers,


-
Ken, Just discovered your log for this superb example you are building. Some thoughts; 1) your quality level of added details are brilliant 2) your use of washes make all the lumbers stand out in perfect harmony with each other. 3) Your technique for coiling ropes - Thanks ! I will try that as well. 4) Biggie - Your eye with a camera is certainly at National Geographic quality - Excellent compositions, lighting, subject matters and so on.- You're right your neighborhood helps ha ha, I've added my chair to your shipyard. Cheers,
-
Ken, Excellent updated work. Your added notes within jpgs. is so appreciated as well. Cheers,
-
Ken, Indeed excellent work - very interesting topic as well. Brought my chair. Regards,
-
Julie, Just found your log - Beautiful work indeed. Apologies for burying your email with likes (:-). Your planking skills are superlative. The deck looks to be just as splendid. Pulled up a chair and I will follow along-- Oh and great subject matter! Cheers,
-
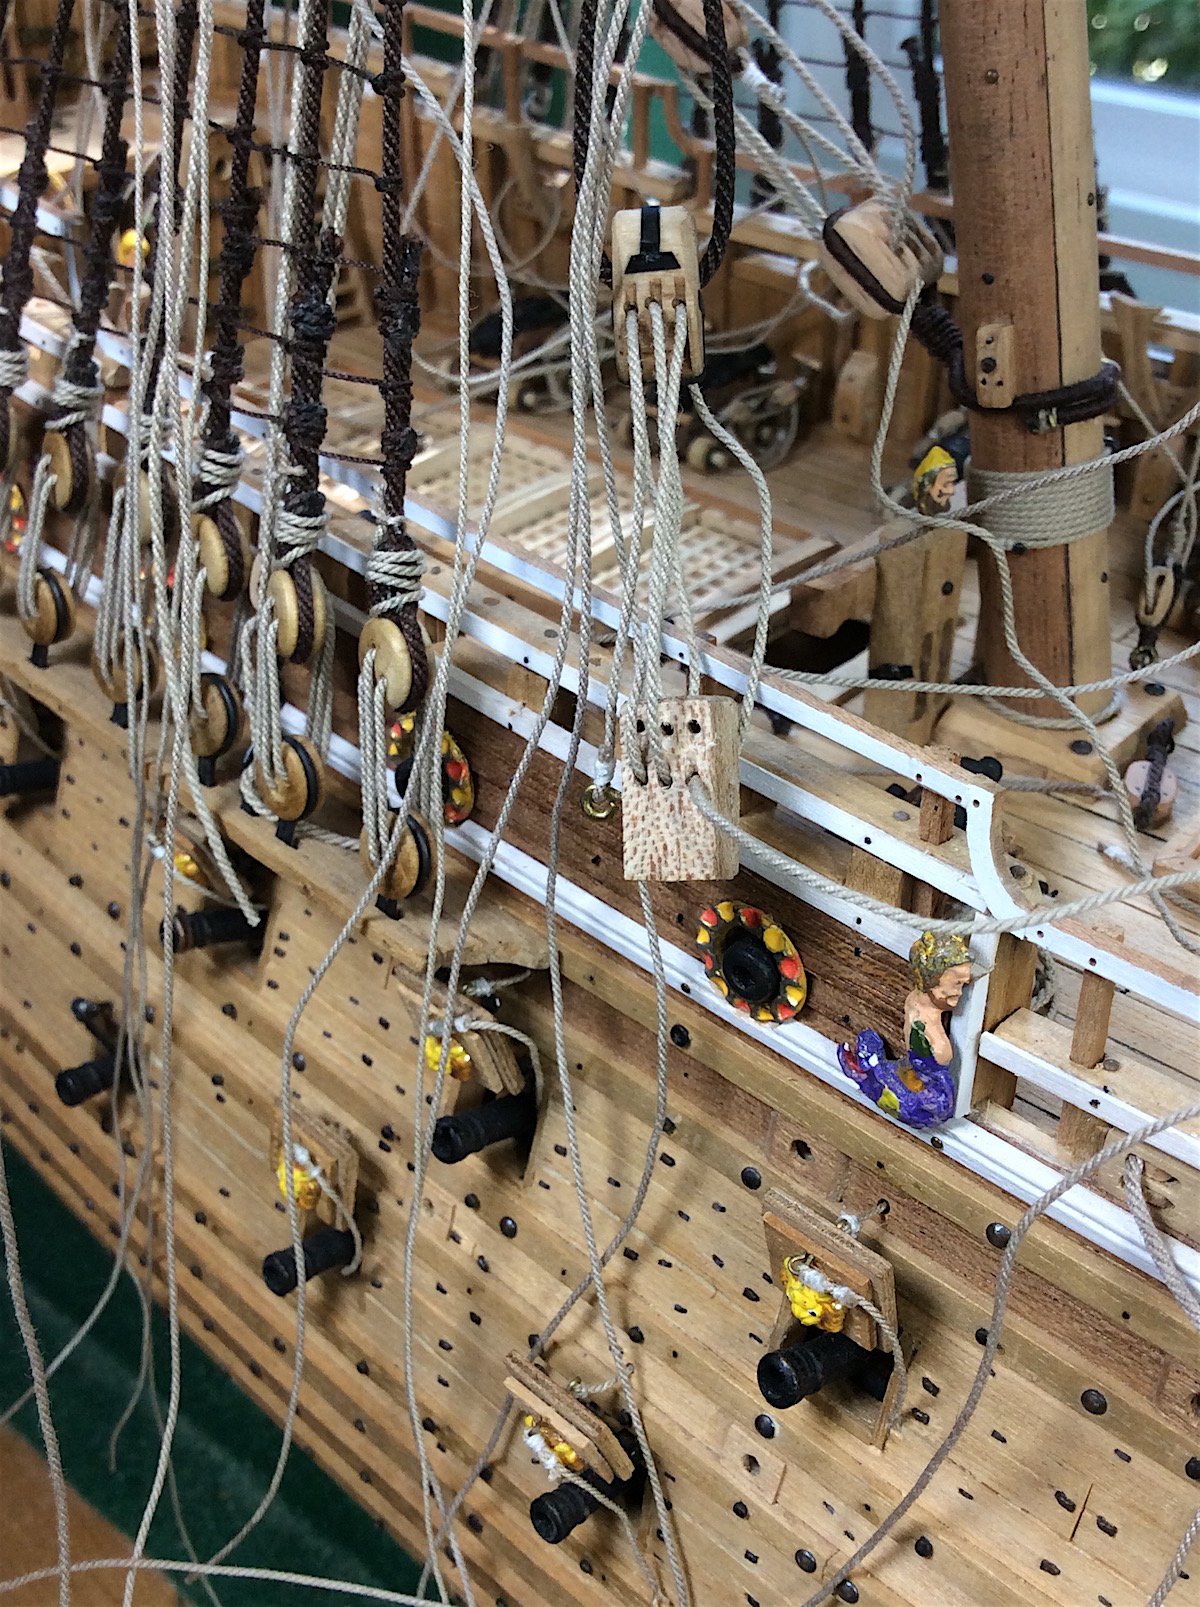
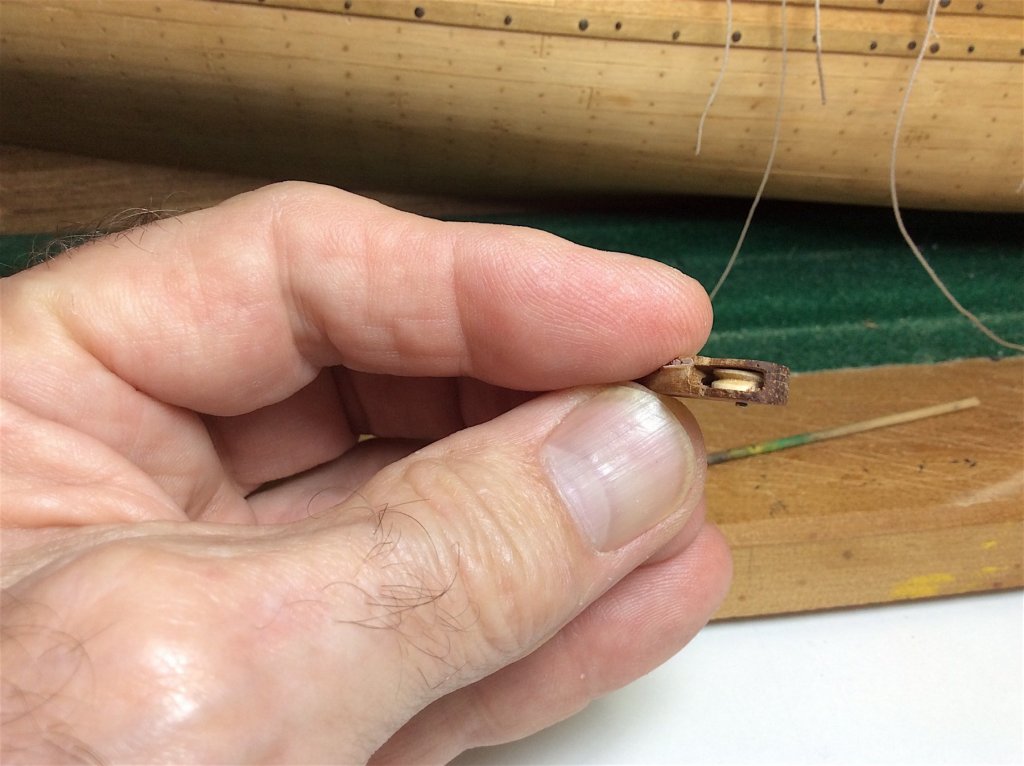
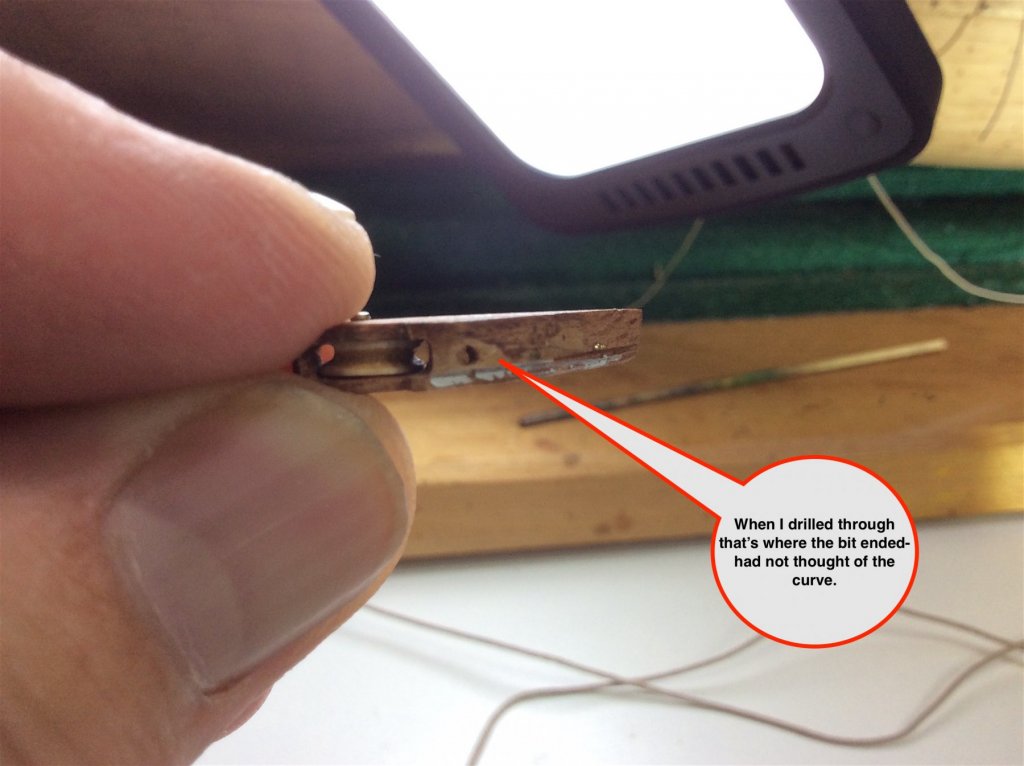
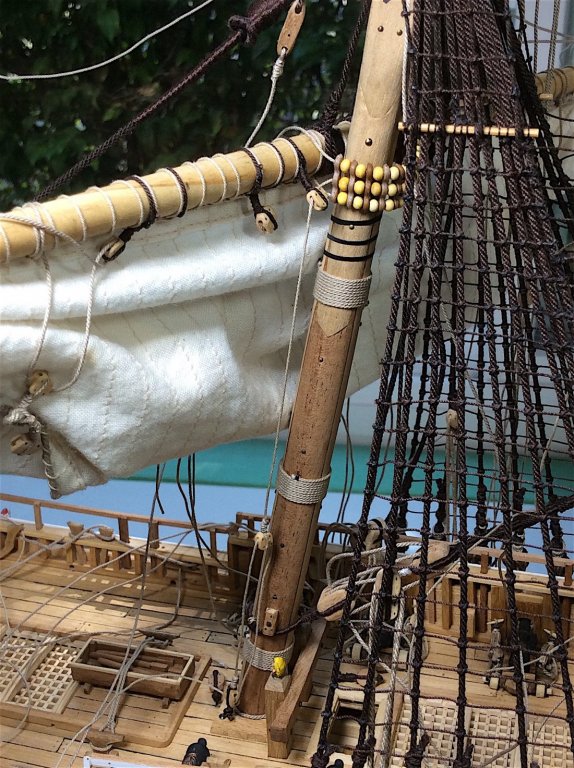
Hi Mates, Martyn thanks for your always nice comments. ==================== Continuing now with ropes for the main lower sail, well the sheaves that I had fashioned back when – well ropes would not spool through the backsides. Tried drilling through on each side of the pulley – Nope –did not work. Removed the sheaves (more taking parts off – for repairs ha ha). As can be seen – again not thinking ahead – did not allow for enough spacing for the ropes to travel through and around the back sides before the installations. Easy fix Drilled larger holes – now ok.– BUT museum rigging plan sheet – totally missed that, before attaching the ratline shrouds. Not venting just sharing – Cheers,
-
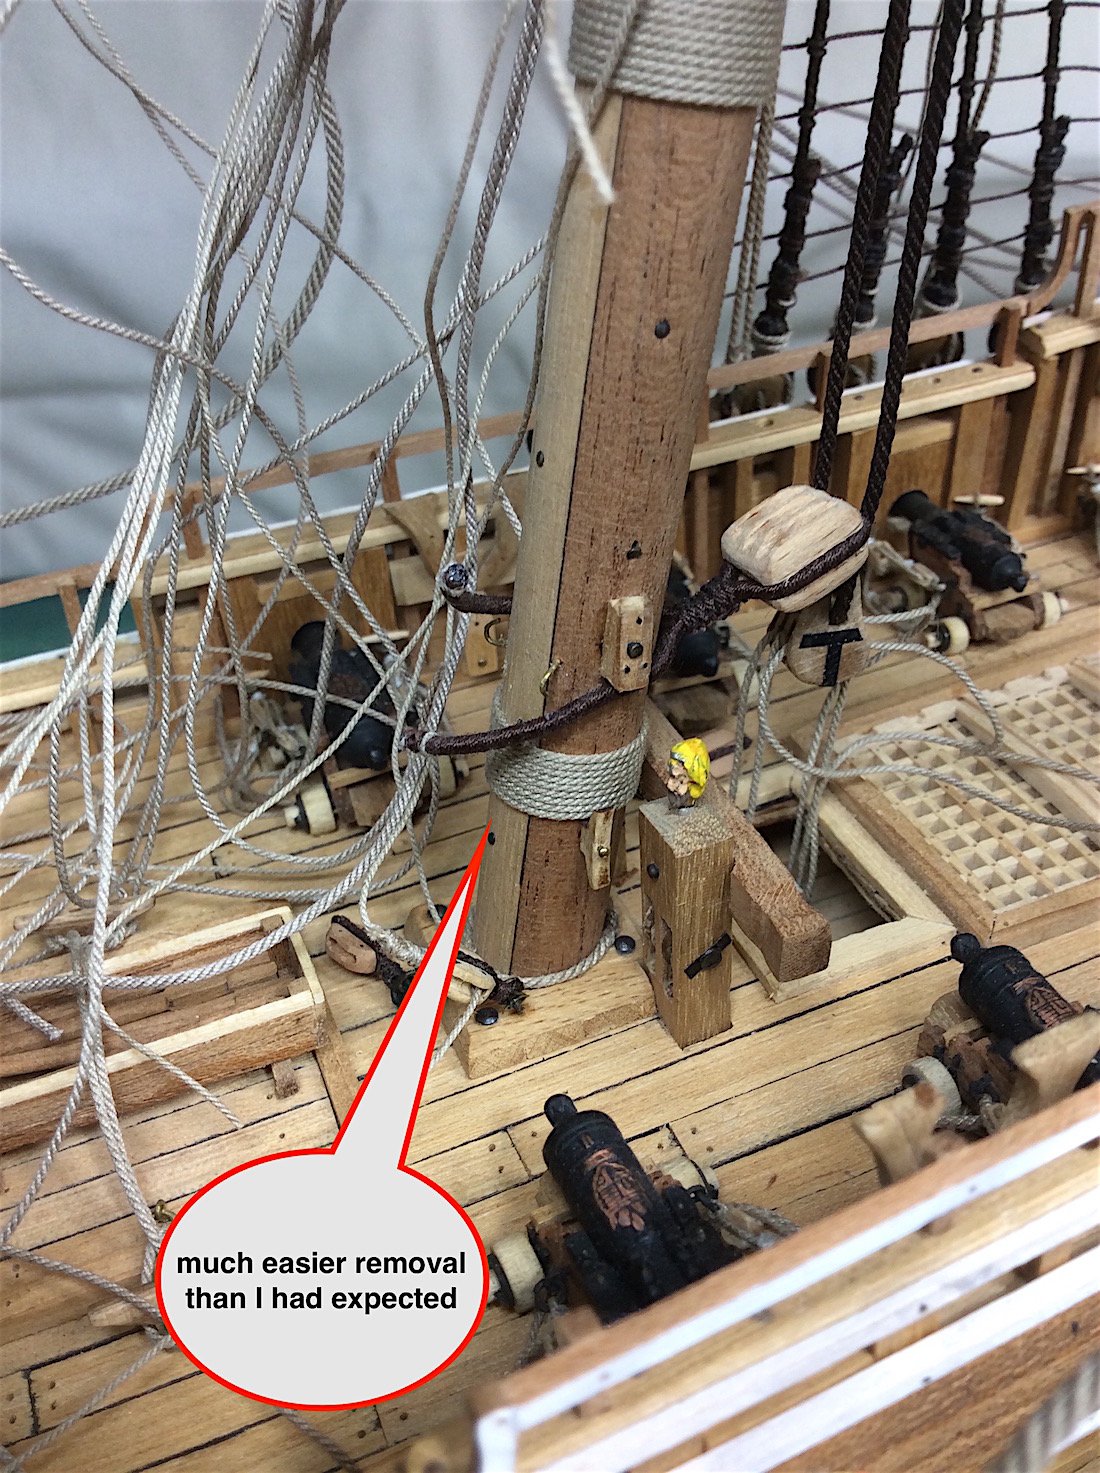
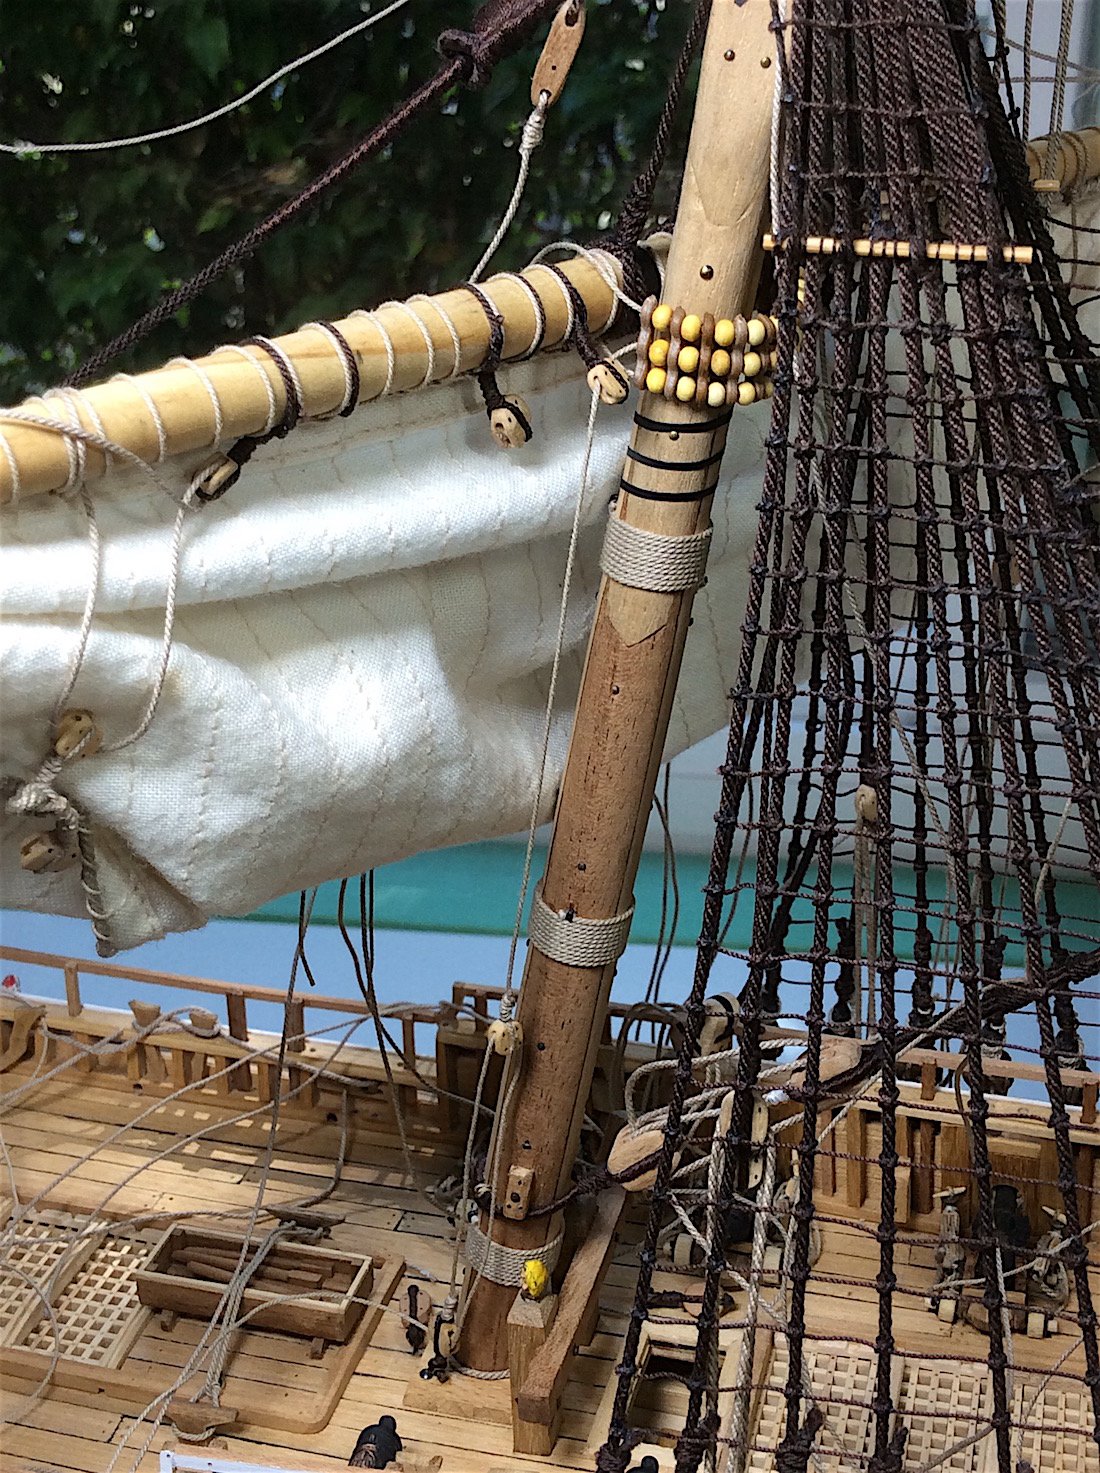
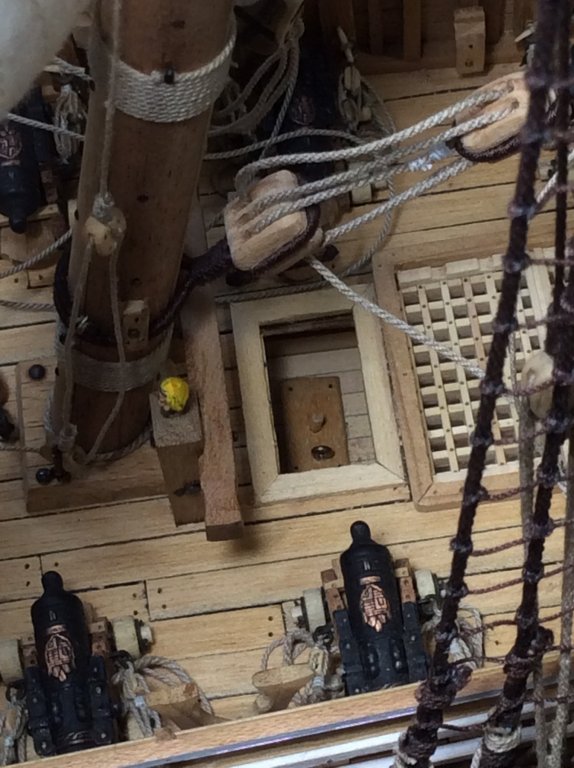
Henry – Thanks so much for your suggestion! – indeed that technique was working, and would have been the perfect solution. Had it not been for another miss-step on my part. When I pulled the rams head block tight, to attach the second loop for the yard, it butted and interfered with the mizzenmast stay large block. The fixed slack that I had pre-determined was in error. SO did need to try to remove the knightshead. The flat back of tweezers allowed for a slight “snap” of sound tugging against the deck frame opening and the knights head itself. Then wiggling those pliers released that wood bit. Its base and vertical “pin” along with that brass ring did not budge, but stayed in place attached to the upper gun deck. Reached in and cut the attached rope. Now - looking at that knighsthead and how “poor” it is. I will just re-do that part entirely, also fashion better working “sheaves”. Proxxon will help. ========================= Main lower yard is in place, working on that “functioning” parrels bit. Then after fixing “the problem” adjusting the ropes wont be an issue. The length the lower yard rope is “fixed” correctly so that ramshead will secure below the mizzen stay block. Glad that it was not worse (:-) slight delay for the two mizzen yards. Its sail that will also be completely furled. Patrick; Yes – noted - Google “AI” will hopefully never be used at the United Nations ha ha. Again Mates thanks so much for your always kind help, likes, and visits. Cheers,


-
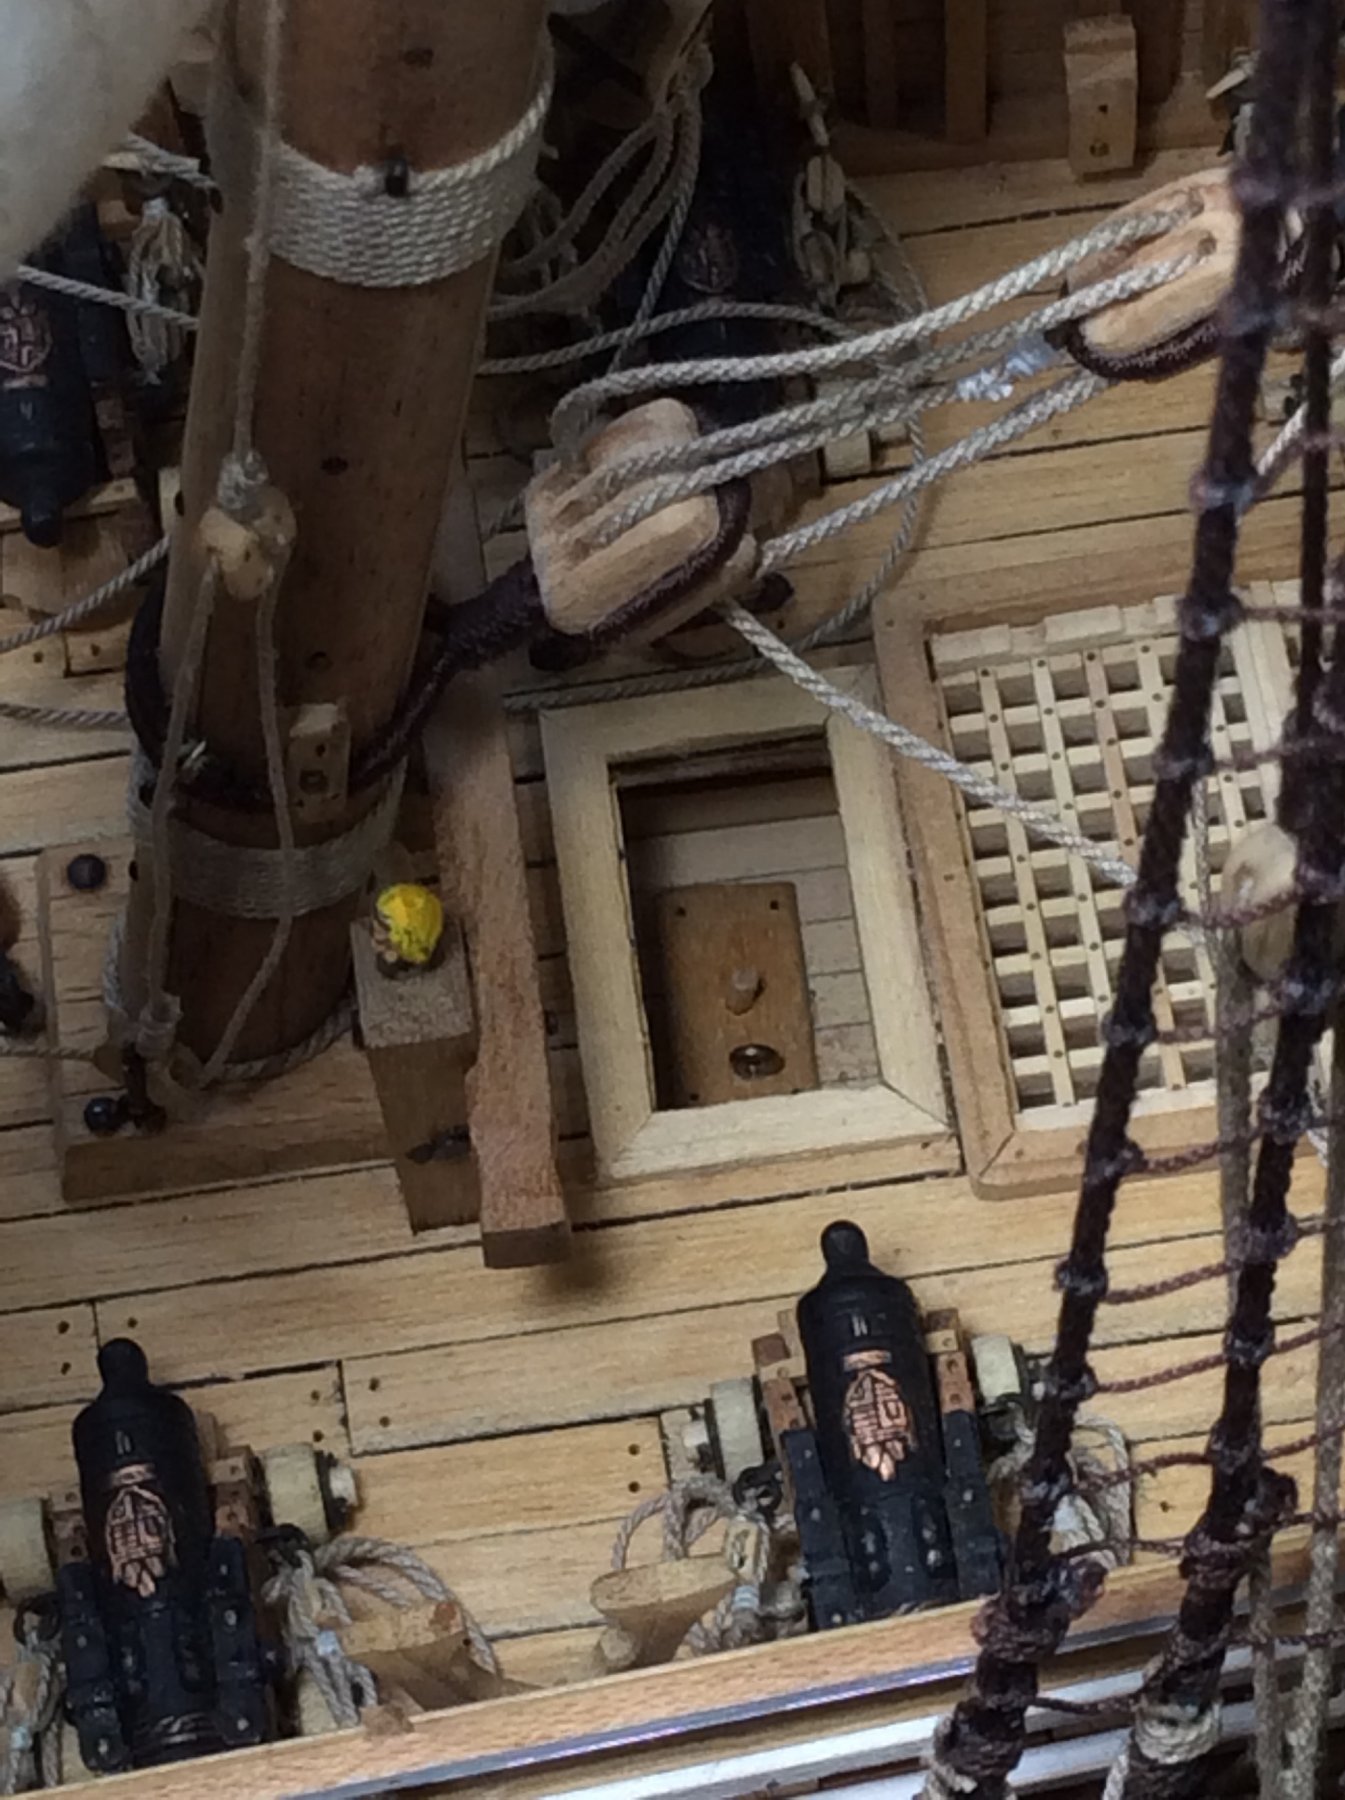
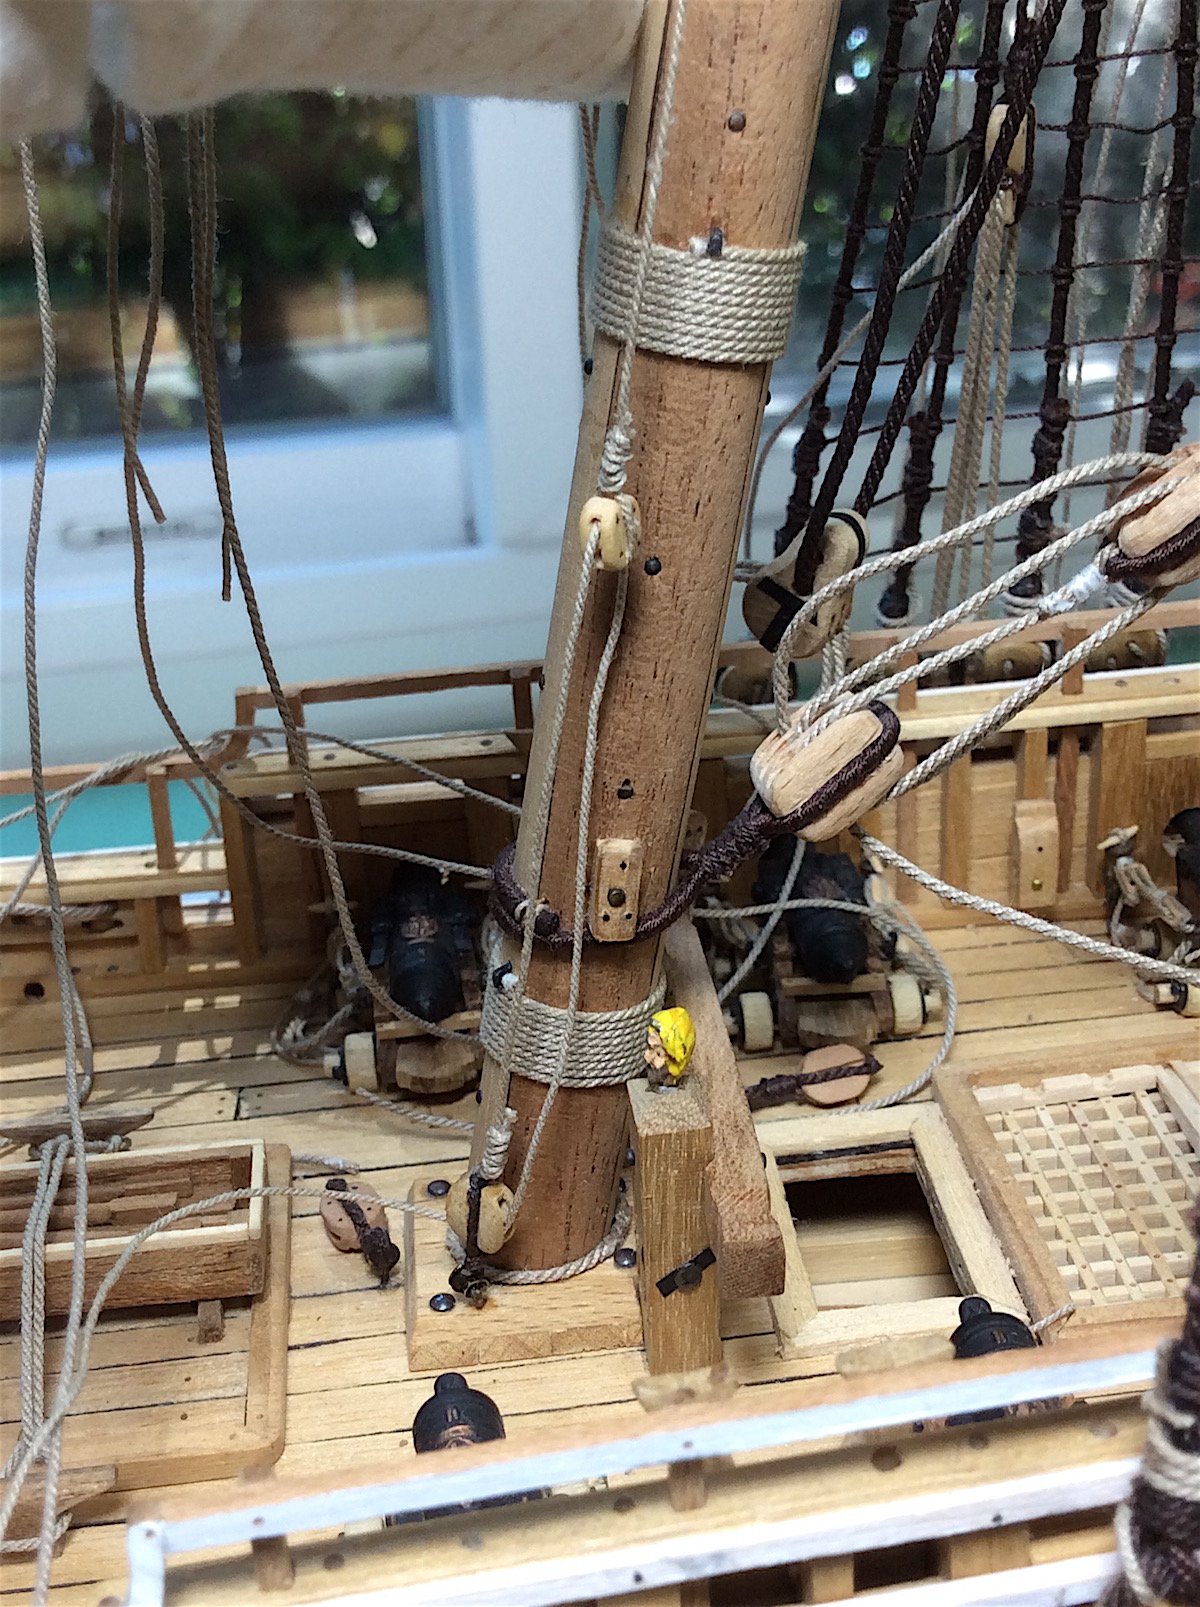
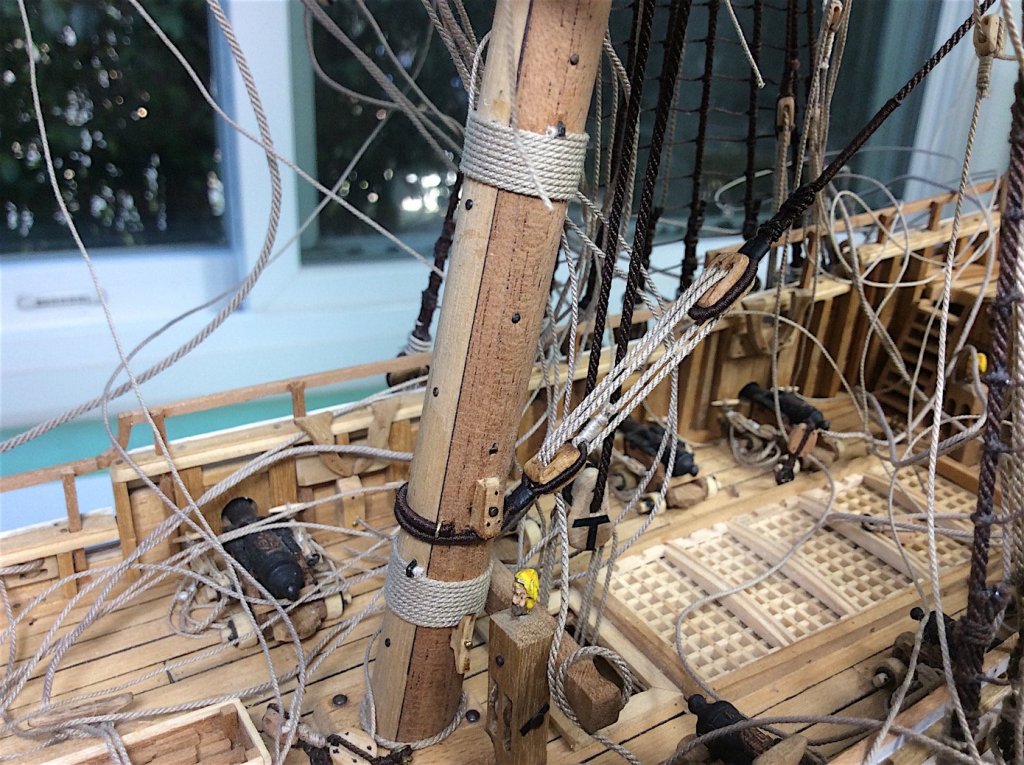
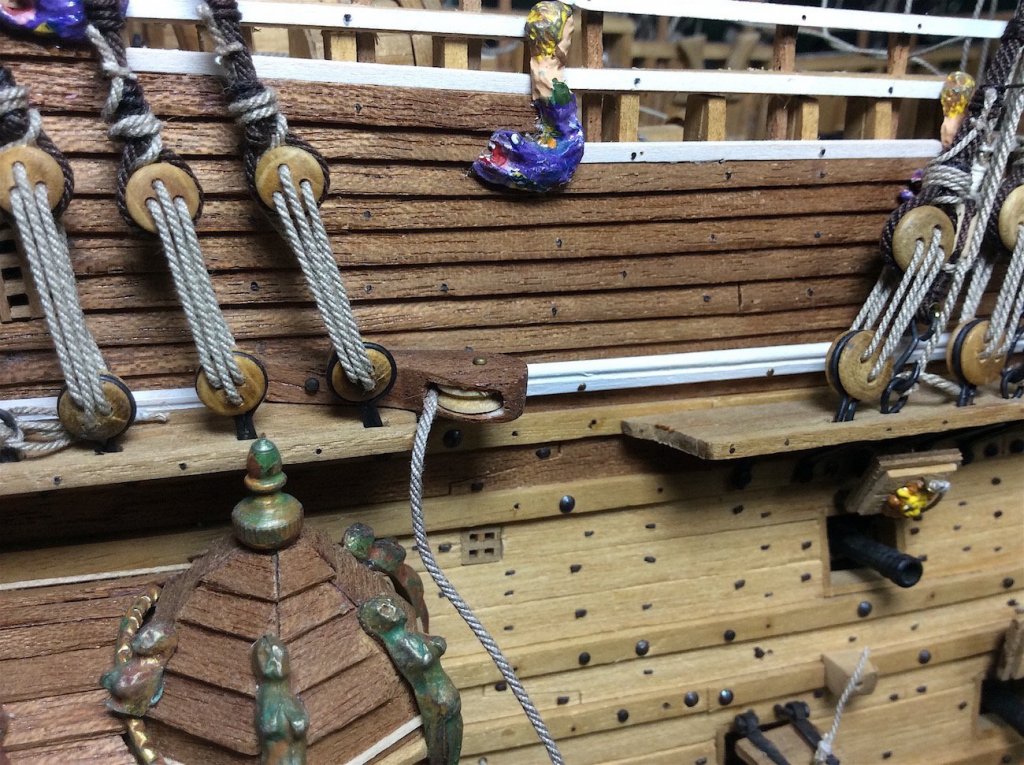
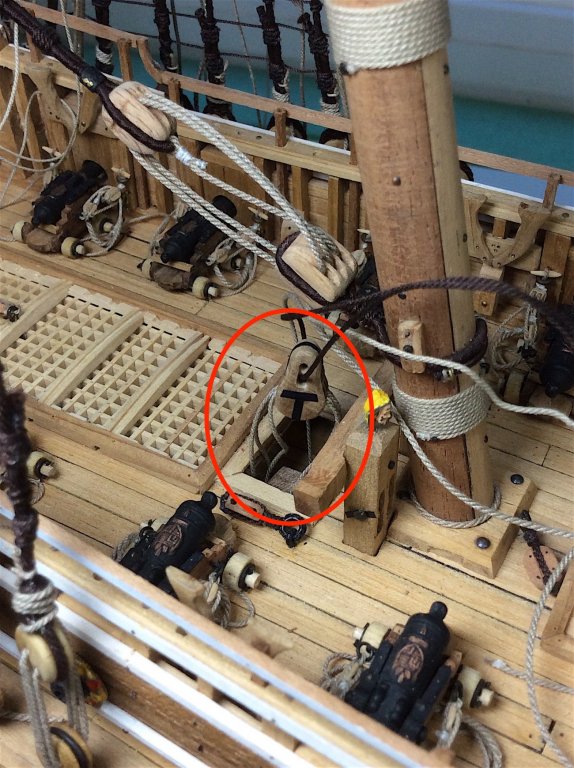
Mates, Thanks so much for the likes---- Patrick This is the root of the problem. When I installed this triple block to its upper gun deck knighsthead and base along with spooling the ropes; I then secured and knotted the end of the rope to a cleat on the side (now below deck - in a super tight space). So now that I need to attach the mainmast yard rope, I have no way of adjusting the "slack" that will be left over after looping the rope through the block, through the mast sheave, then attach this rope to the other side of the yard. Lack of rigging foresight - though I at least new to pre-spool the rope through the block (;-) I will try to remove (with pliers) that bit below deck. Though I remember attaching a rod through the gun deck and adding glue to the base - wanted to be sure that it would not "pull away" when yard rope was attached. Once removed I can unknot the rope - grrrr In the meantime I decided to also add the look of "working" parrels to the lower mainmast. The yard and mast are very visible since all shrouds are further aft. So will add blocks and rope to the center parrel line. Regards,
-
Le Soleil Royal by Nek0 - 1/72 - Marc Yeu
md1400cs replied to Nek0's topic in - Build logs for subjects built 1501 - 1750
Truly amazing work Nek0 !!- 208 replies
-
- 3
-
-
- le soleil royal
- 104 guns
- (and 2 more)
-
Jason, Just catching up. As has been repeated many times Brilliant work indeed. Regards,