HOLIDAY DONATION DRIVE - SUPPORT MSW - DO YOUR PART TO KEEP THIS GREAT FORUM GOING! (Only 24 donations so far out of 49,000 members - C'mon guys!)
×

md1400cs
-
Posts
2,839 -
Joined
-
Last visited
Content Type
Profiles
Forums
Gallery
Events
Everything posted by md1400cs
-
 Glenn, Just found your log. Excellent work indeed. Happy to follow along. Beautiful ship. It certainly helps to have photos of the original available. PS: Your wood and metal skills are also very nice to look at. Cheers,
- 101 replies
-
- 1
-

-
- L Toile
- Billing Boats
- (and 1 more)
-
EJ, For some reason I had forgotten, or missed that you will add LED's. That is an area that certainly requires much forethought. Any "leaking" lights would be unfortunate indeed once you could not go backwards. Great idea. The other builders whom I have seen here adding lights seem to be very successful indeed. Adds a huge extra dimension to a ship. Good luck (:-) PS: your SR is looking quite good so far.... Cheers,
-
Dennis, Don't know how I missed this one. Now following along as well. Yes super nice deck work indeed. Cheers,
- 453 replies
-
- 5
-
-
- thermopylae
- sergal
- (and 1 more)
-
EJ, Thanks for your correct thoughts. I came to the same conclusion. I would also regret it as well – on the back-side. ================= Then (ha ha) decided to speak directly with the Admiral, - go right to the top- explaining all of the extra work that this would require, with the same results. I was told, with an unceremonious response to “return to work, or I would be put into the brig”. It was then also pointed out to me why, after so many years I am still pounding nails, cutting planks, hanging shrouds instead of enjoying tea in a captain’s quarters; Low energy seamen…..it turns out is my fate. Cheers,
-
Gaetan, This certainly an amazing project. Thinking just about the same for your working corporate office headquarters ha ha Brilliant work indeed, Cheers,
-
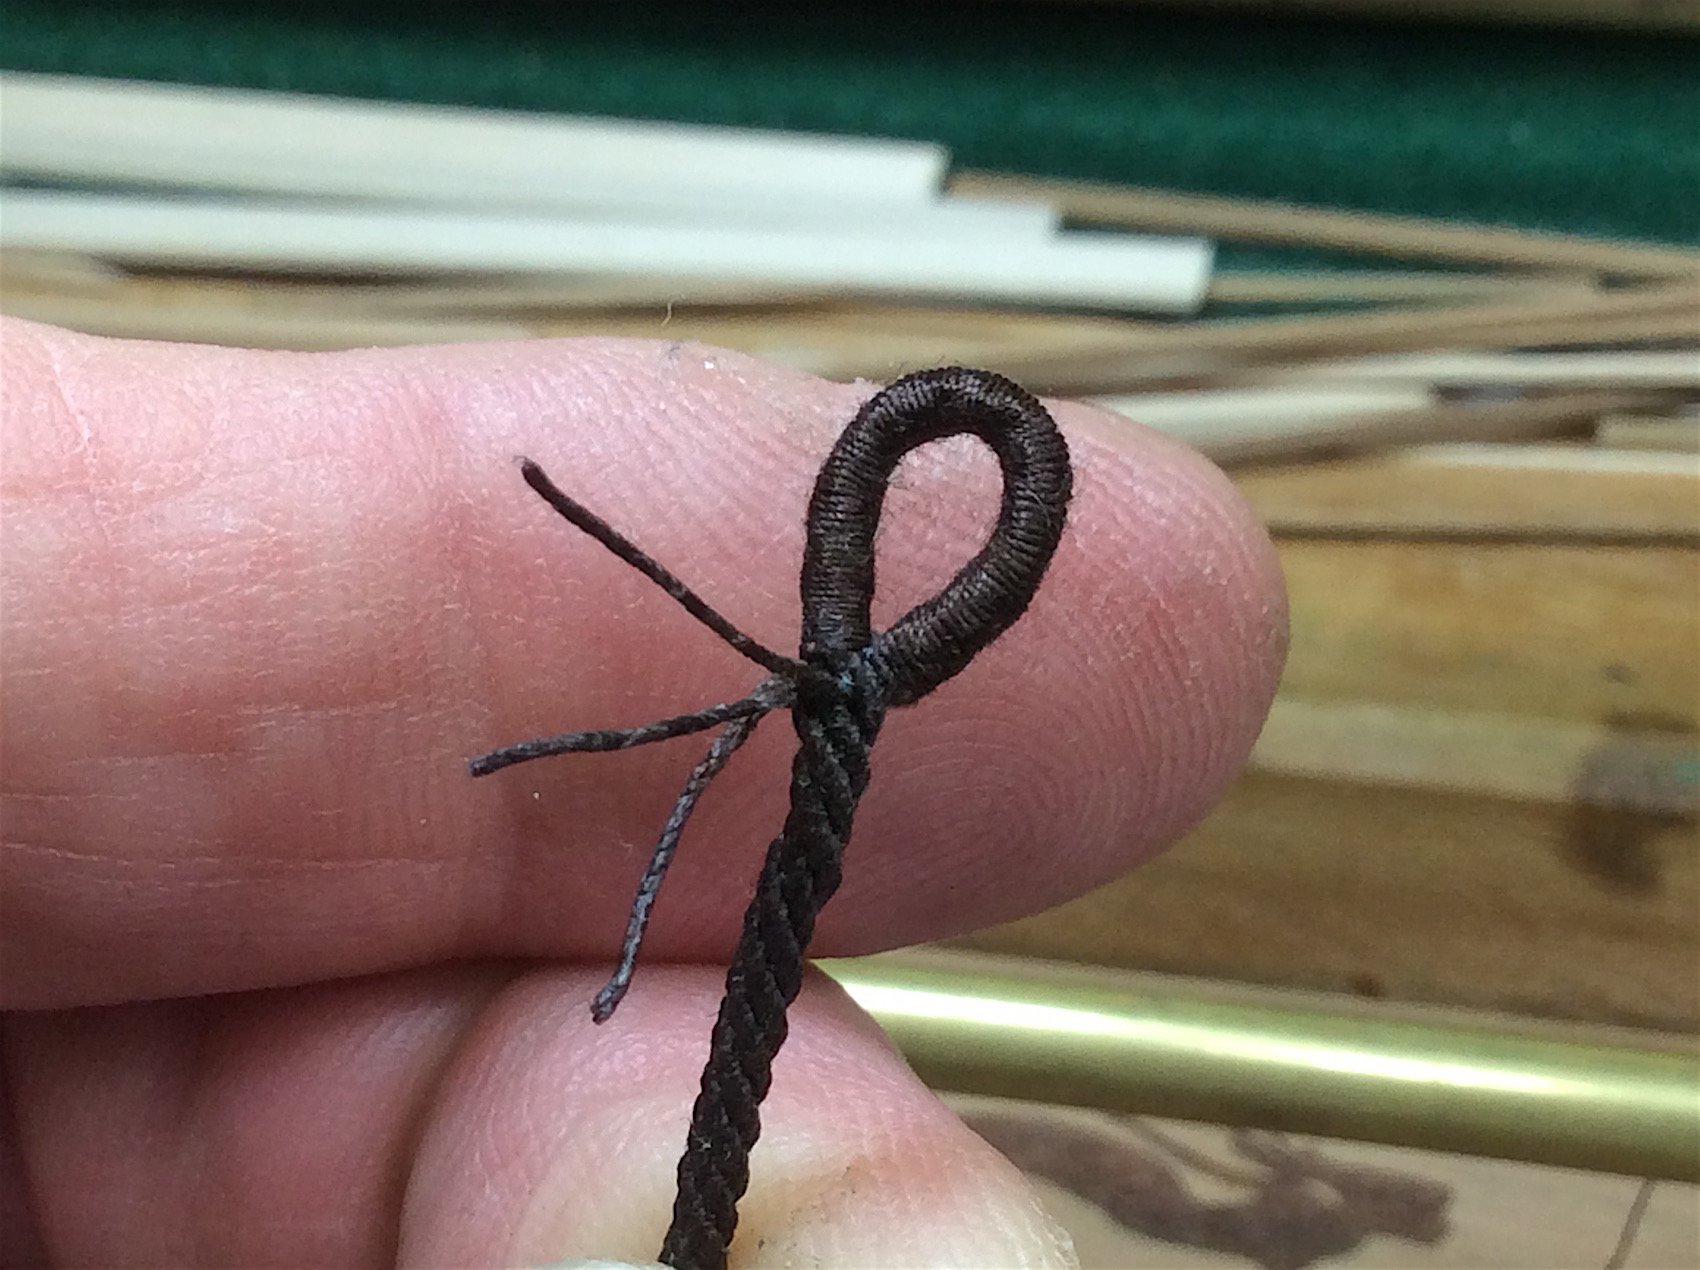
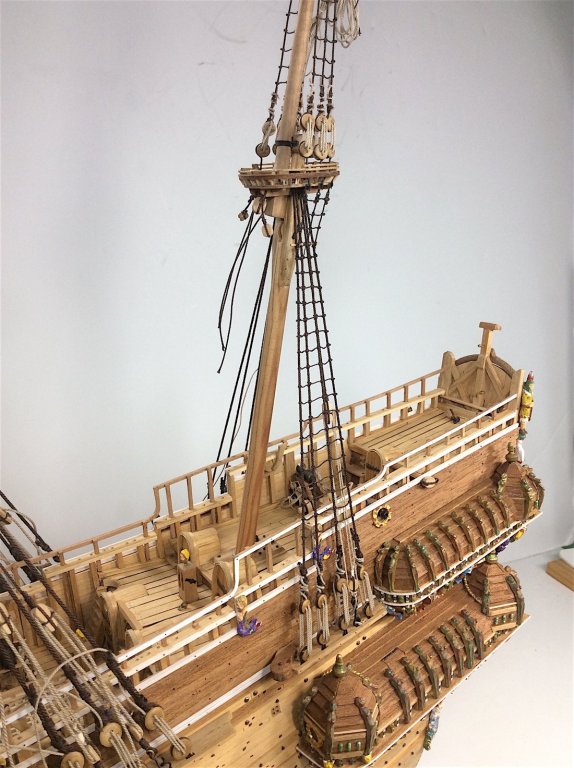
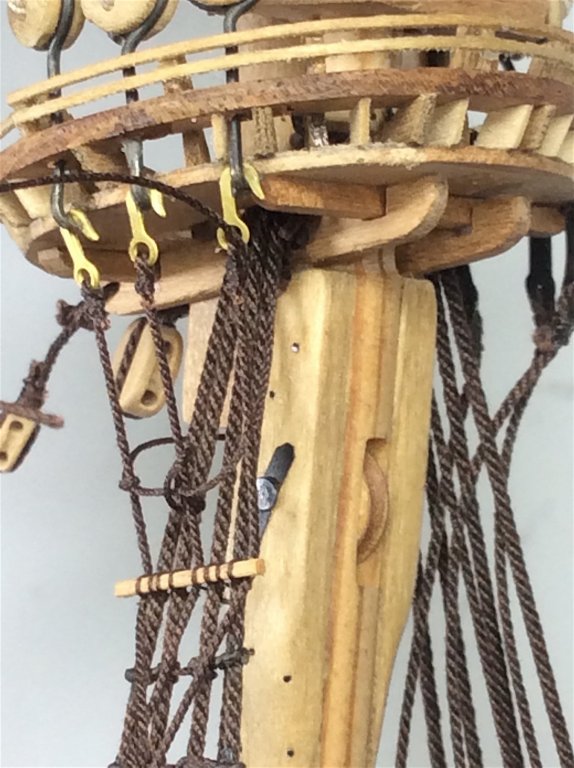
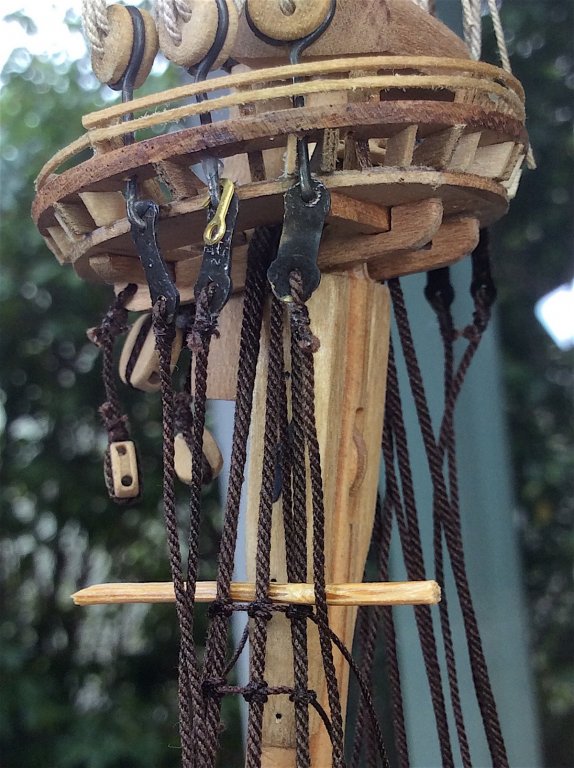
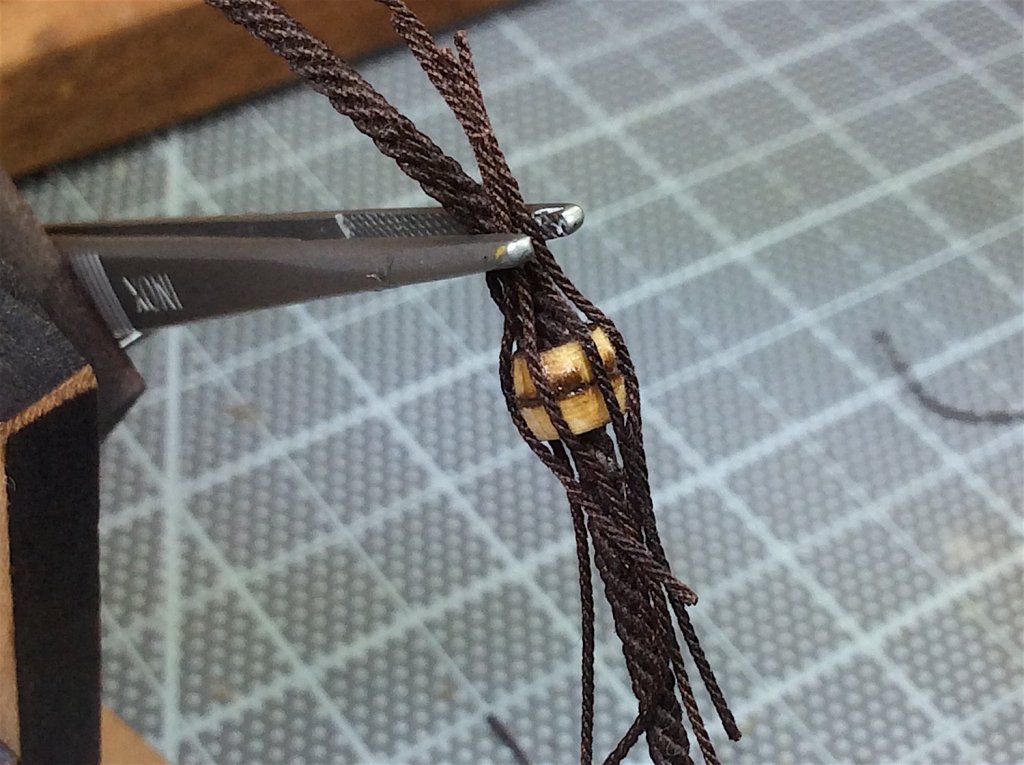
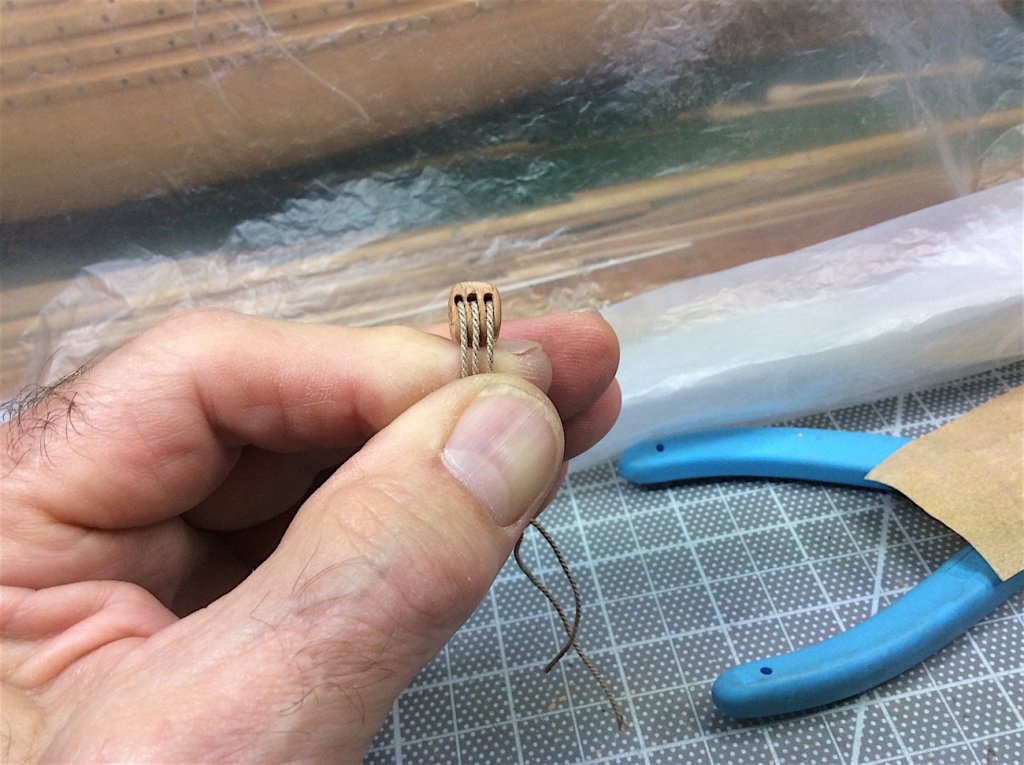
Hi mates, Anton T, and costeo - You are so kind –thanks so much for your thoughts ======================= Almost back-to-back updates, this one is small but there was a lot of needed learning. This small bit took almost four hours to figure out and execute. Hmmmm. Decided, rather than removing the already attached Futtock shrouds (used Chuck’s .018s his .012s would have been too thin. -------------------------------------- So did the following 1-2) unspooled the center futtock shroud at the stave. Wrapped it around the stave separating the three “threads, then re spooled them between the shroud to add a bit of glue at the joint. 3) removed the third ply from the shroud and attached one to each side of the shroud at the ratline. 4-5-6) did the same for the other two end shrouds also removing one strand. After wrapping around the shroud scale “looked” ok. 7-8-9) secured the mizzen backstay. 10-11) Now onto the lower mainmast shrouds, BUT the dilemma starts. Looked at the 1/1 for guidance, for the mizzen shrouds, then noticed the 1/10th where the work looked much neater then “finally saw” the difference. Hmmm? 12-13) went back to my picture bible (what I have been modeling so far. Then read/looked at Anderson – either way it seems is “ok”. Certainly the 1/10th method would be so much less work, but having already done all the topmasts, the bowsprit area, and the mizzen on one side the Peterson way – I will probably need to continue with the extra work for all of the lower shrouds. PS: I’m not even totally comfortable with the work that I have done tying off the ropes around the shrouds - so dilemma indeed. I assume that ALL “finishing off” as Anderson calls it should be the same for the entire ship? PS: Part of the problem is that I used lines that are probably too large for this area. Though the museum 1/1 seems to use a “thick” rope. Again hmmm As always thanks for your kind thoughts and visits, Cheers,


-
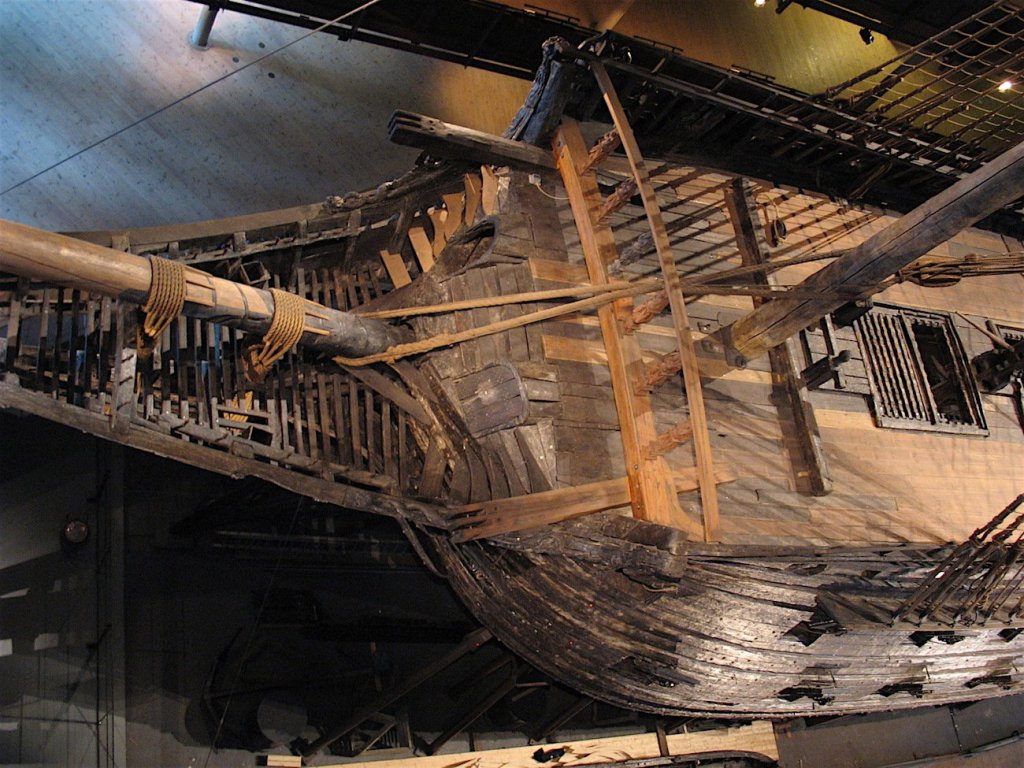
Mates. More FYI Also the very cold, blackish, very low levels of damaging ultraviolet light, and low salt content of the waters of the Baltic Sea within Stockholm Harbor minimized the amounts of sea life that would normally consume the ship. Over the centuries the silt kept rising around and protectively covering the ship as well. And the heavily polluted 17th century water also prevented an infestation of wood-eating “shipworm” parasites. Ironically enough the Vasa is today facing a potential “second death”. It is very slowly decaying inside the museum. Copied/pasted: In 2000, signs of deterioration sprang up on the ship’s surface. A new study published July 6 in Biomacromolecules shows that the ship’s wooden hull has significantly weakened, due to decay of the wood’s structural fibers. The Vasa wood is about 40 percent weaker than regular oak wood, and has become very acidic. “We found a very clear connection between low pH, high degradation, and a large decrease in mechanical strength,” said study co-author Ingela Bjurhager, a mechanical engineer at Sweden’s University of Uppsala. More copied/pasted: In 2004, the museum upgraded its climate-control system to keep the relative humidity stable, as fluctuating humidity could lead to changes in the shape and weight of the ship. Efforts are also underway to replace the corroding steel bolts that were inserted in the ship during the 1960s with improved stainless steel ones. The Vasa does not have an immediate risk of structural failure, the researchers concluded. Still, the ship deforms a few millimeters every year. Given the extent of the wood atrophy, “It’s sort of a little bit too late to do anything,” said Bjurhager, who is focusing instead on preventing further deformation. Her team is currently working on a computer model of the ship so they can design a new support structure.
-
Sorry Mark - did not perceive this. I should look back to your lantern pages. My bad. I should have known that you would have thought about this. Photo fooled me (:-) Regards,
- 652 replies
-
- 2
-
-
- royal william
- euromodel
- (and 1 more)
-
Mark, Your ship is looking to be a brilliant build indeed. The complicated stern looks so good. If I might offer a suggestion, though you probably are already thinking about something in this area. Your stern lanterns could be visually improved if you were to somehow “remove” the gold painted glass panes, though I hesitate to offer any advice here…. Using a combination of flat white (or red) mixed with a flat clear coat – fill-in each “dimple” where the glass should be. Or even using a translucent white would be nice as well. It would be a very subtle detail but would add (IMHO) much in the aggregate to the lanterns, hence the brilliant stern. Just a suggestion coming from someone not nearly as skilled …… PS: Your work on the yards is superb. Cheers,
- 652 replies
-
- 2
-
-
- royal william
- euromodel
- (and 1 more)
-
Vasa by Jörgen - DeAgostini - 1:65
md1400cs replied to Jörgen's topic in - Kit build logs for subjects built from 1501 - 1750
Jörgen Nice update, along with very informative advice. Your paint-work is very good. IMO finally, I believe that your kit will be THE Vasa kit to own. Billings was the best before, Corel as most know was very weak. It will be interesting to see what the rigging instructions will look like. As you know this has been one of the “grey” areas for those of us building a Vasa from the three main available kits. Last week I contacted DeAgostini – below are their response. I’m posting it here since you are building this specific Vasa, and for your followers who may be interested in the USA market. ====================================== Dear Michael, We have not been made aware of plans to introduce this model through Model Space USA. I will forward your email off as a suggestion as a model for us to introduce in the future. I also encourage you to subscribe to our monthly news-letter at the bottom of the Model Space website so you can be made aware when new models are being introduced. If you have any other questions, or if I can be of any further assistance, please do not hesitate to contact me again. Regards, Danny H DeAgostini Customer Care Model Space: 877-544-6779 www.deagostiniusa.com Also, I did read that Fred Hocker noted, responding to the same question, that the month-by-month kits in the USA market do not sell very well. Most kit purchasers prefer the entire kit at once. He further stated that when this Vasa kit ships its last package to subscribers, the kit would then be complete, and its possible that the complete issue will be offered for sale in N America. Cheers,- 50 replies
-
- 1
-
-
- vasa
- deagostini
- (and 1 more)
-
Hi Mates, Thanks for the nice comments and "likes" - Dave here are some poss. answers for your question; Why VASA Capsized In the treatise by Curt Borgenstam, Anders Sandstroem "Why VASA Capsized" (AB Grafisk Press, Stockholm 1995, ISBN 91-85268-60-7) the reasons are outlined, after a careful investigation of the wreckage and the historic archives. They concluded: 1. Too many design changes during building were made. The VASA was probably laid down as a "small" ship and completed as a "large" ship, with two gun decks instead of only one as originally planned. 2. The shipbuilding master Henrik Hybertsson became serously ill and died a year before the ship was completed. During his illness he had to delegate the supervision of the project to his assistant Hein Jacobsson. As a result the leadership on the shipbuilding side was very weak. Jacobsson had not even been informed that a stability test carried out in Admiral Fleming’s presence had indicated that the VASA was unstable. 3. By far too little ballast (only about half of the weight needed, as turned out when investigating the wreckage) had been put into the ship. That was ordered by Admiral Klas Fleming, who resented more ballast, as this would have brought the lower line of gun ports too close to the water, and the military usability of the ship would have been hampered. THEN ( my addition - paraphrasing from other sources) based on the above there were also gusty winds that day, the ship badly caught such a gust and listed to one side. This allowed the lower gun deck (with open doors) to ingest too much water.
-
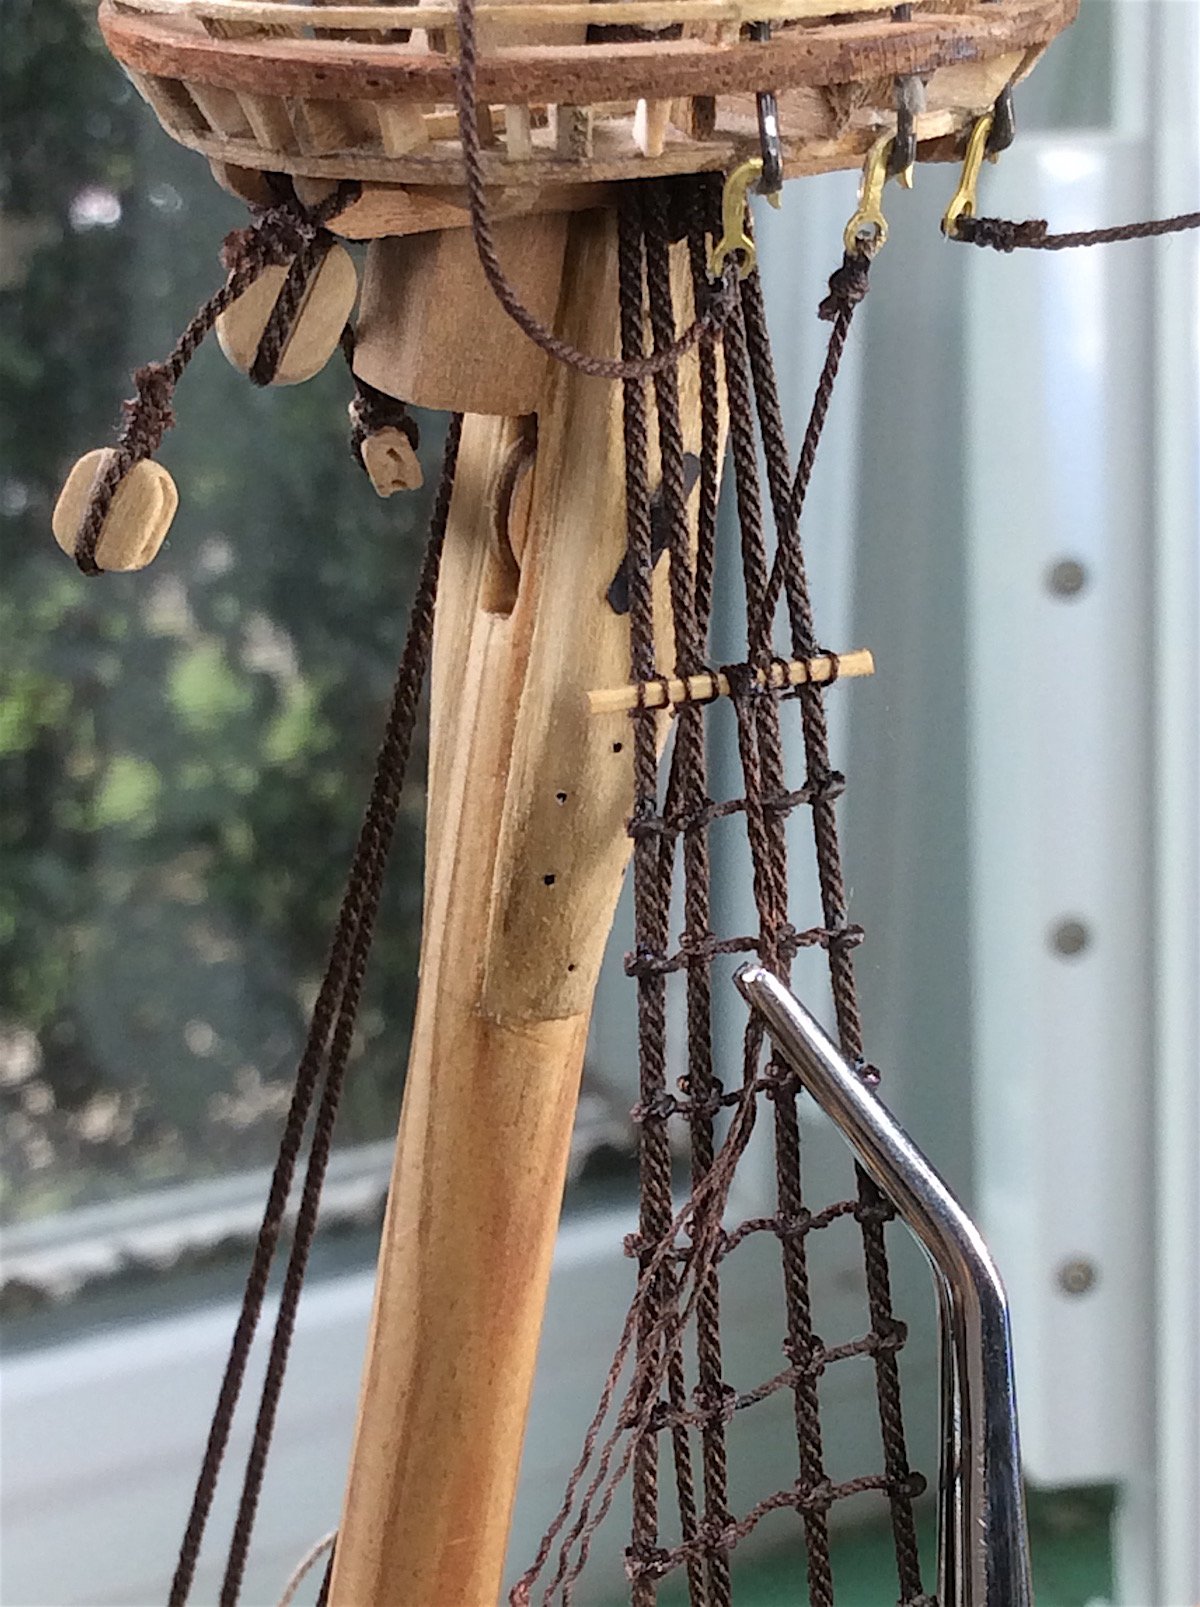
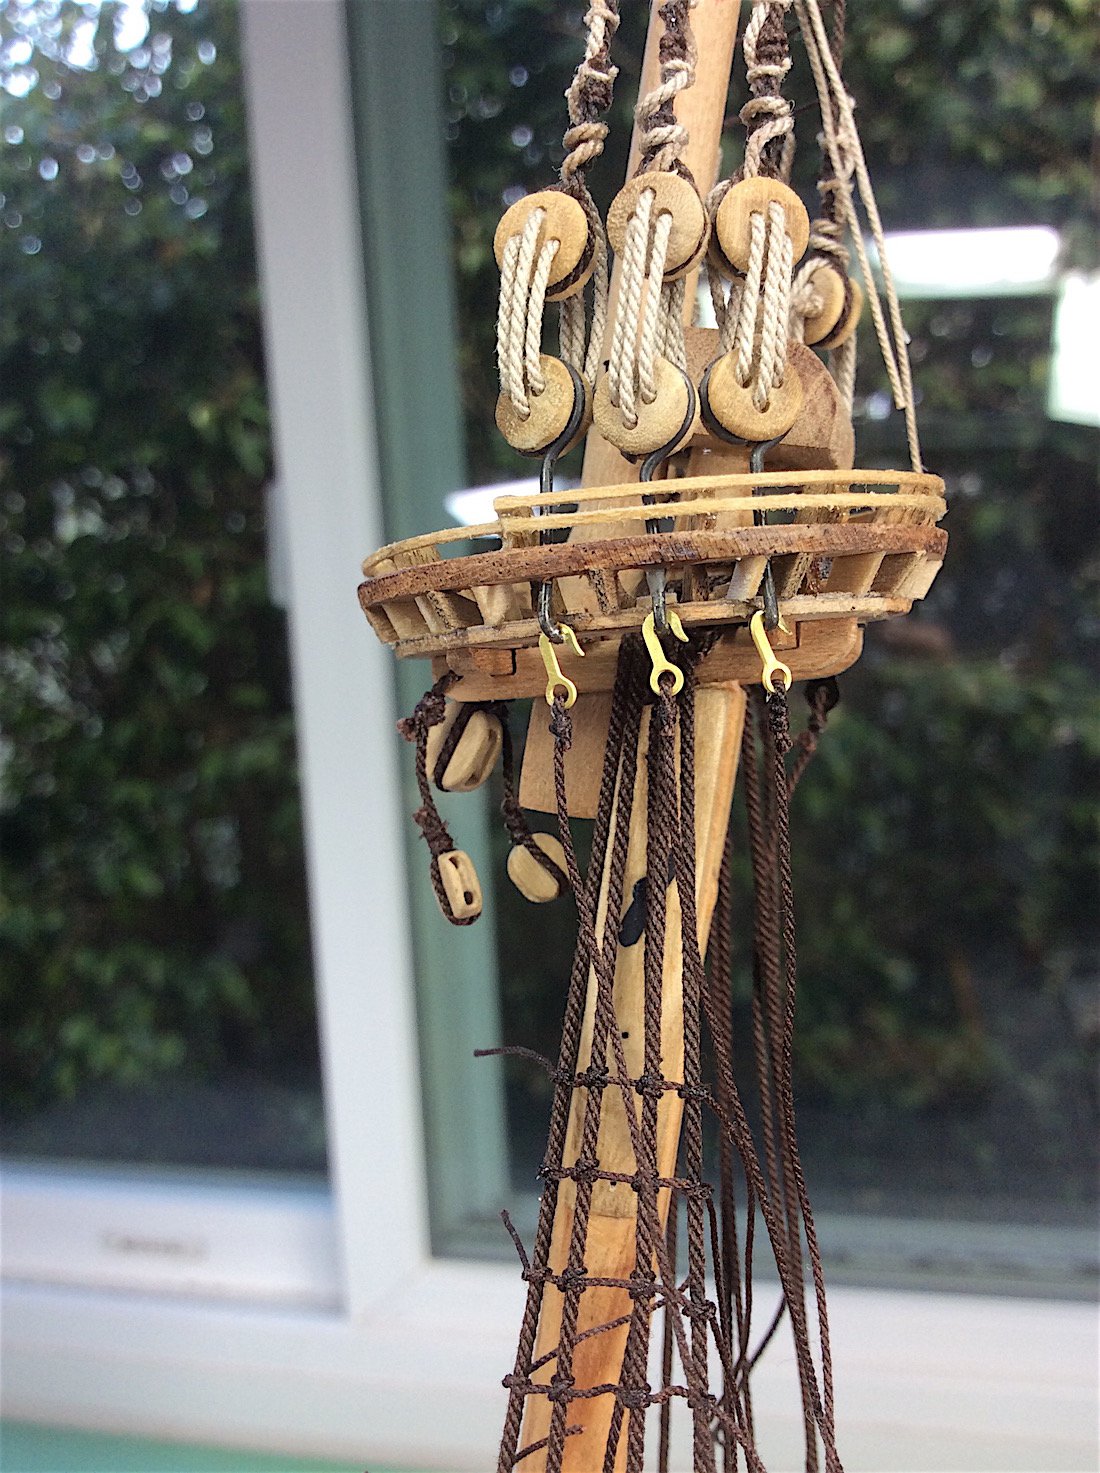
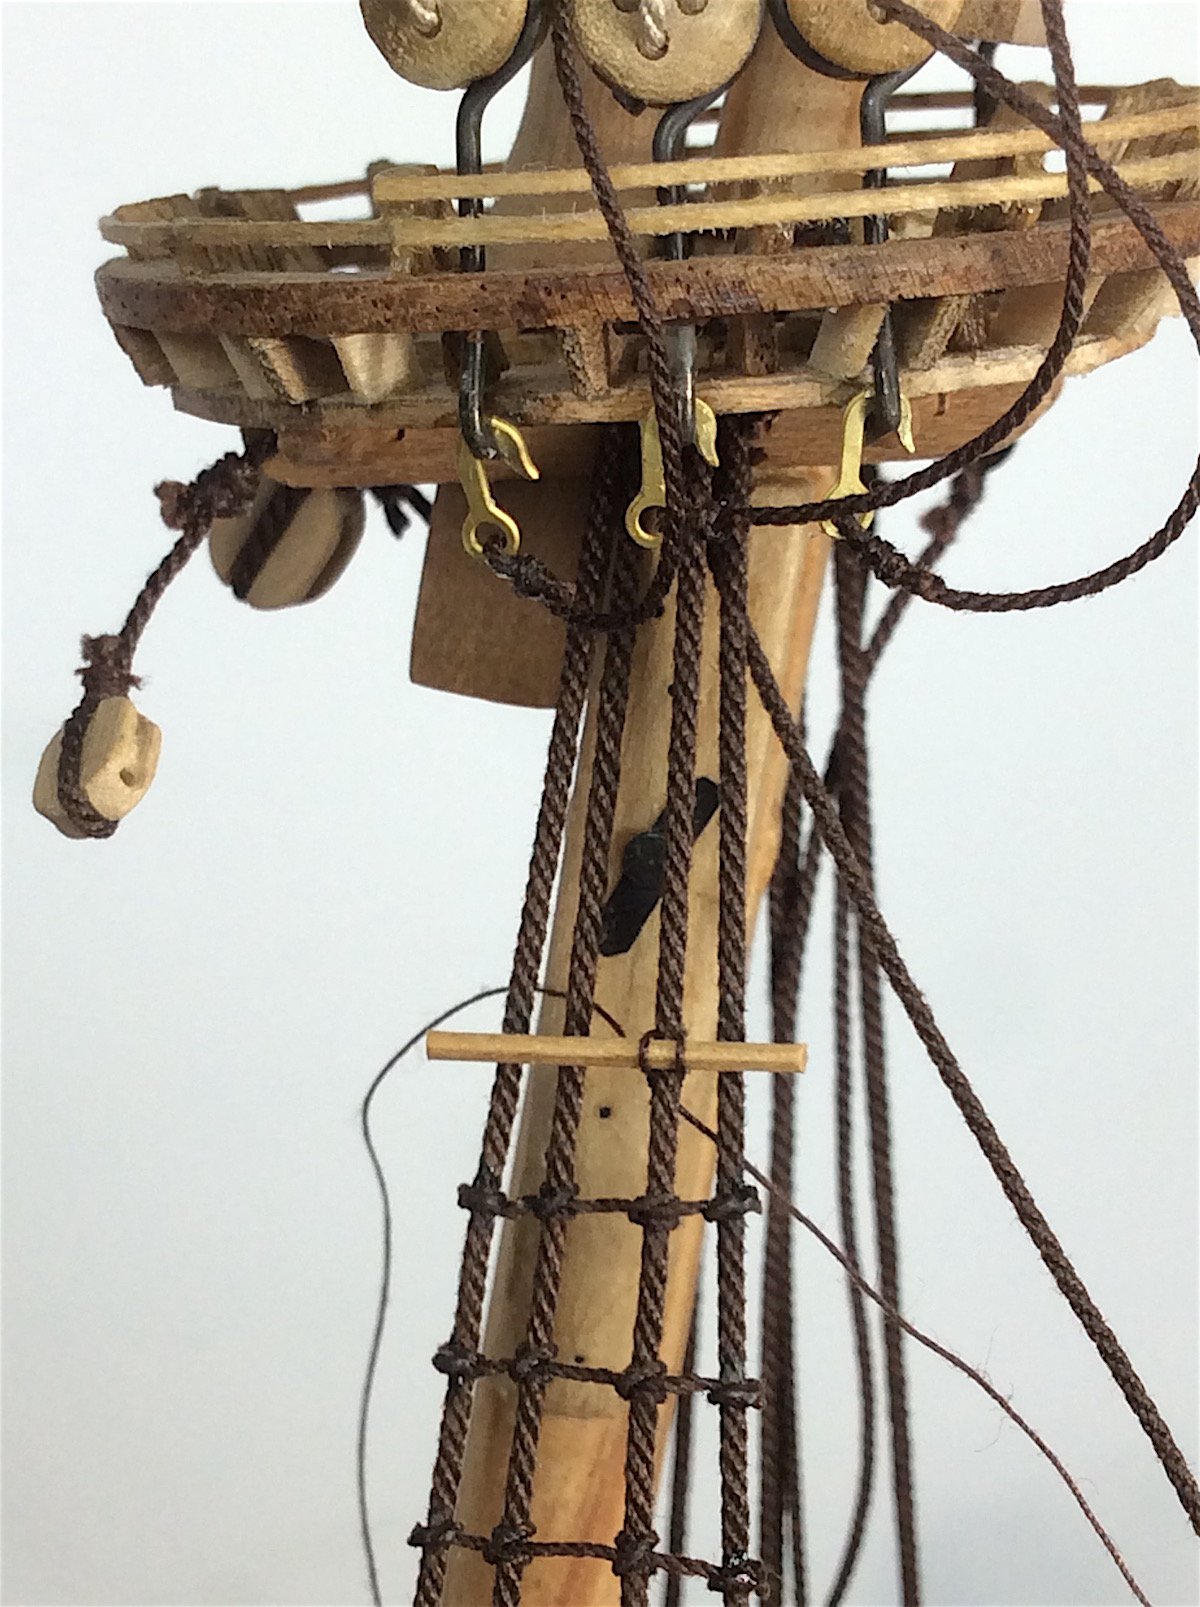
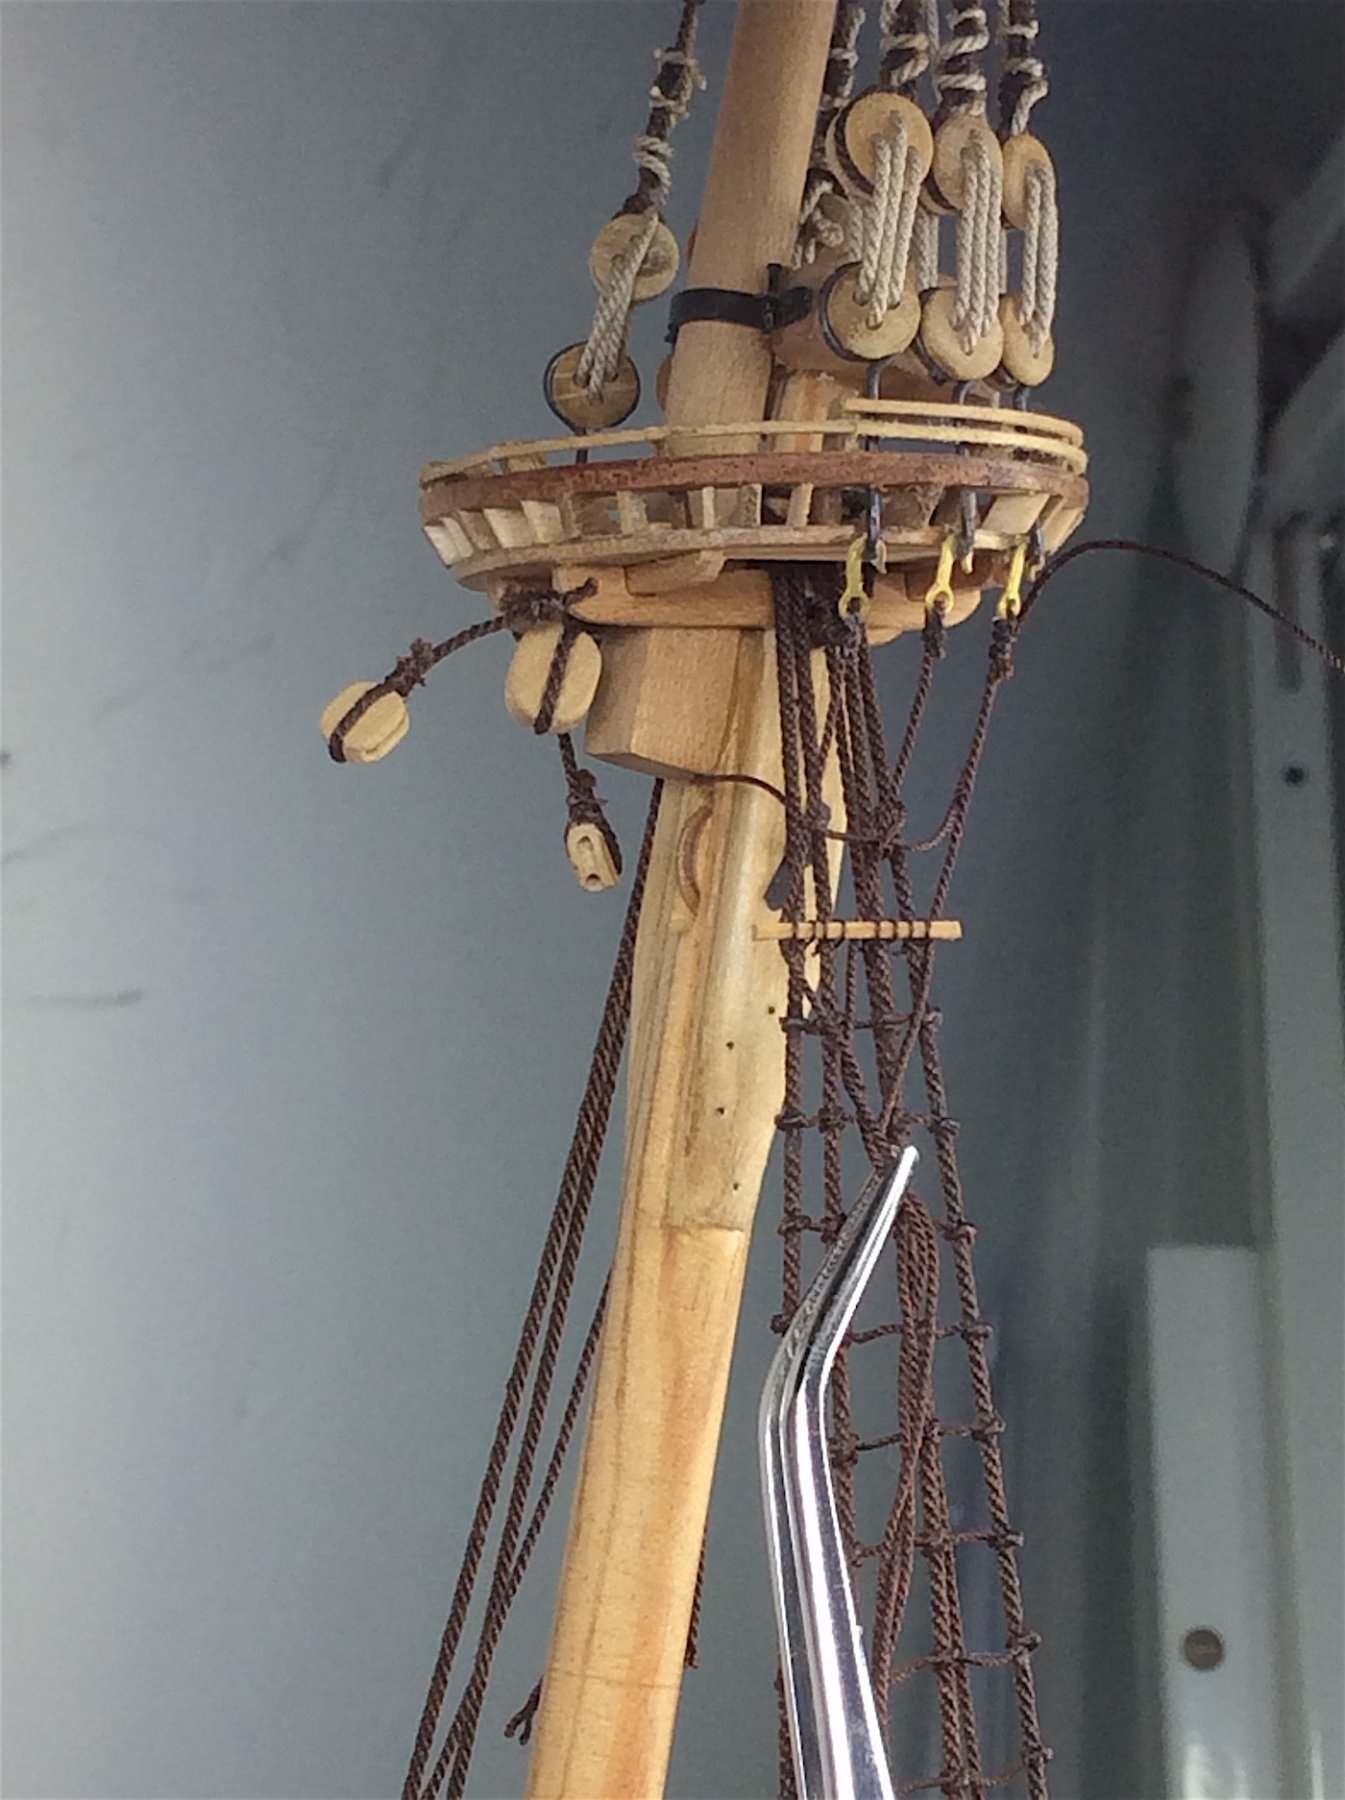
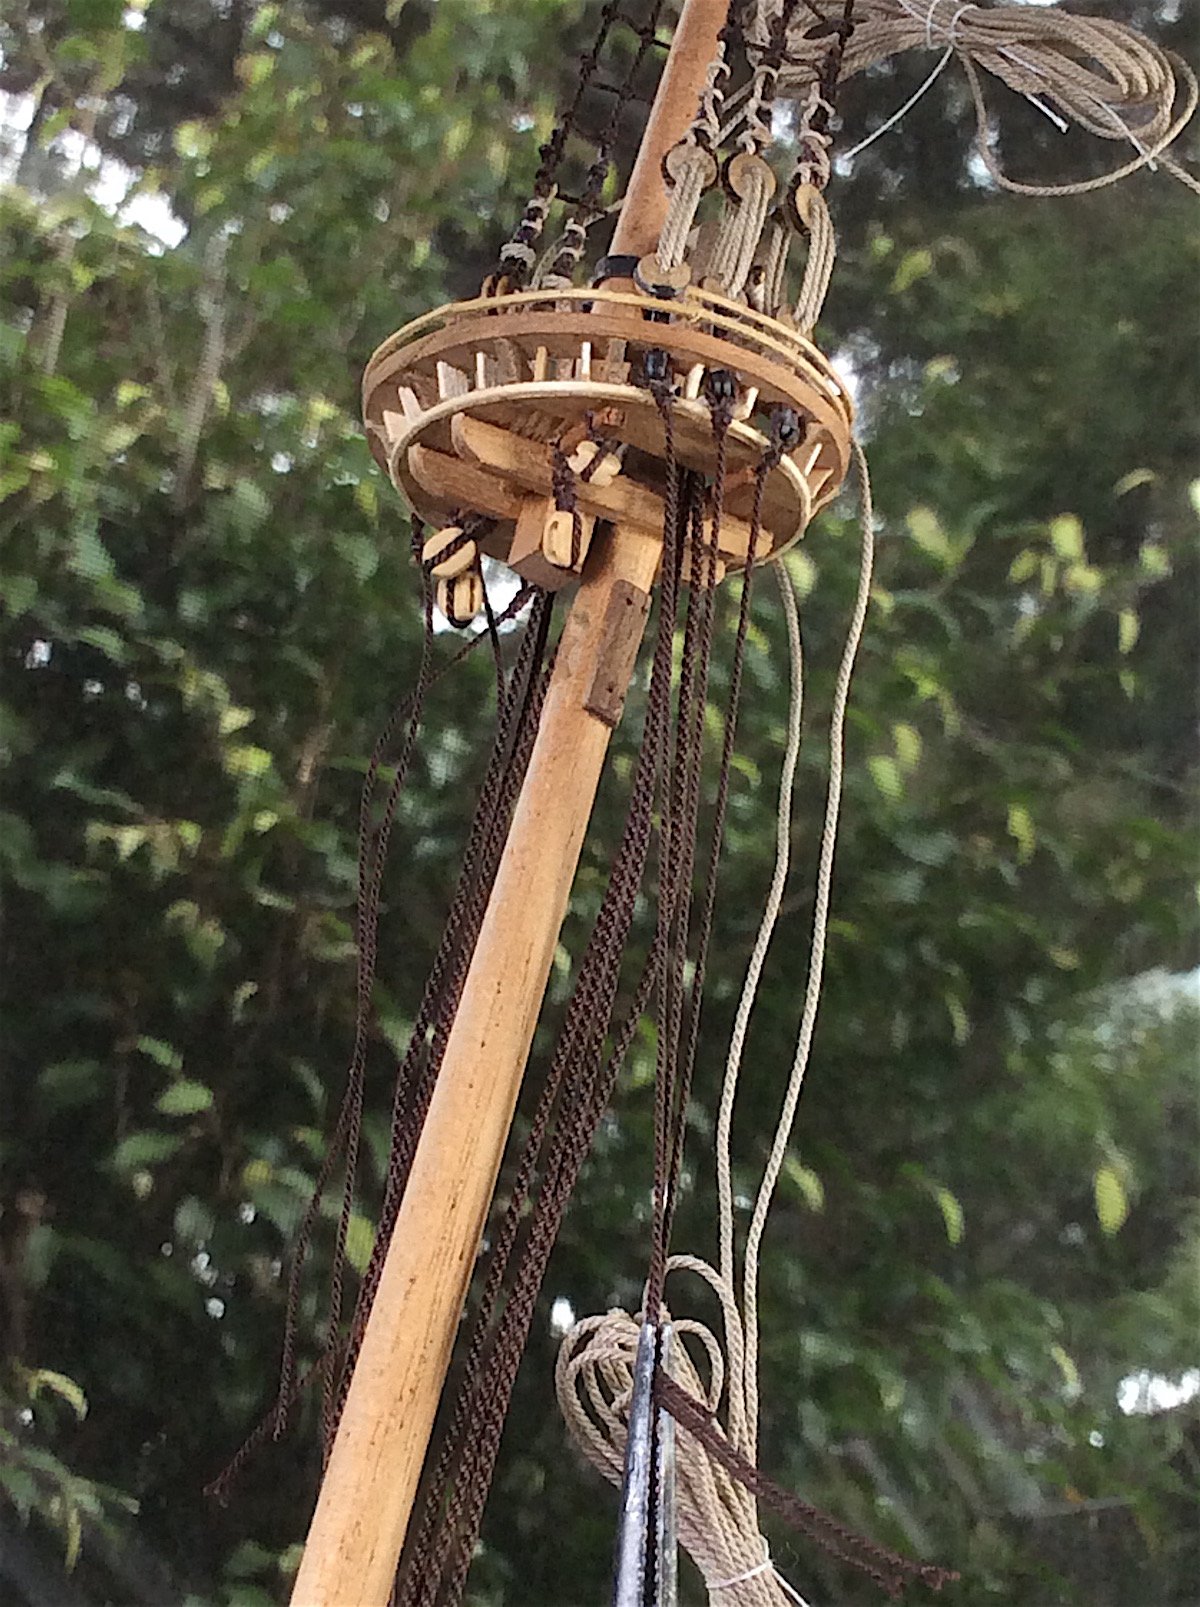
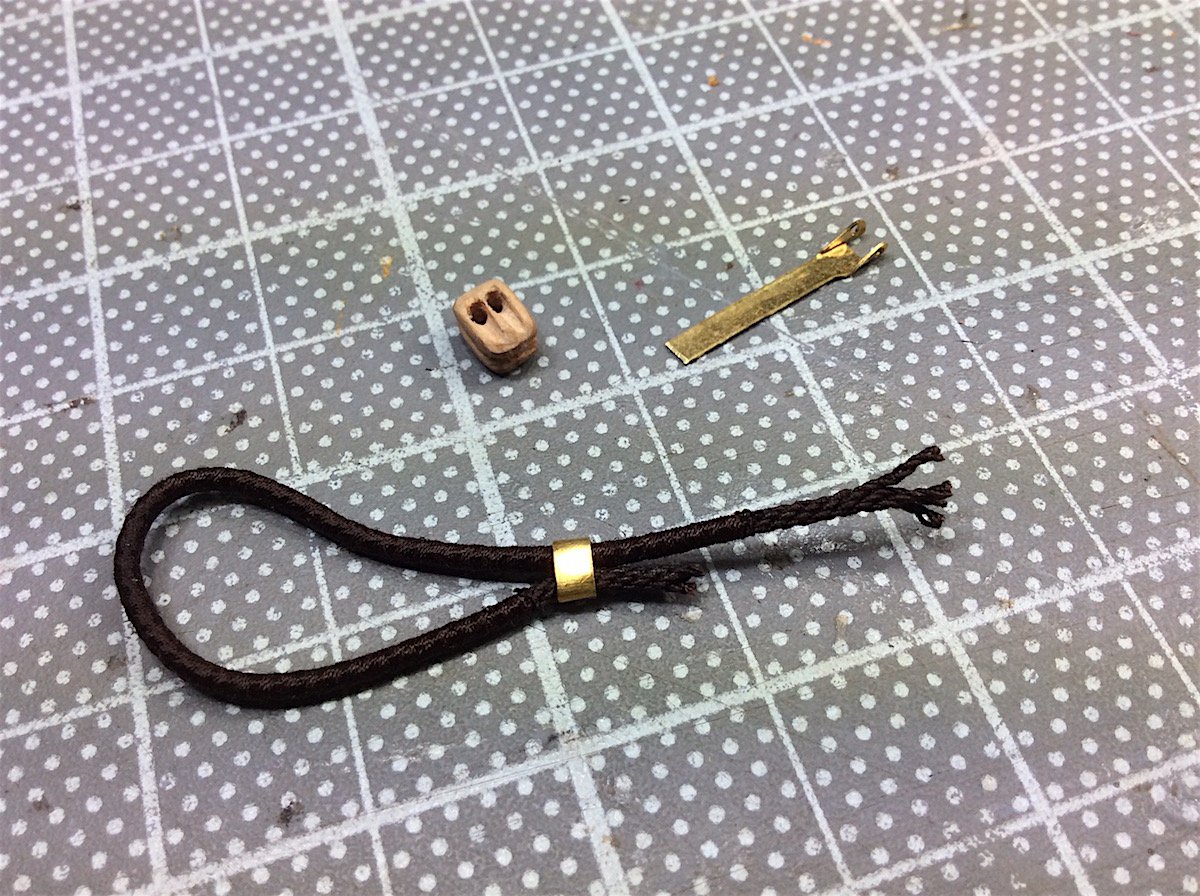
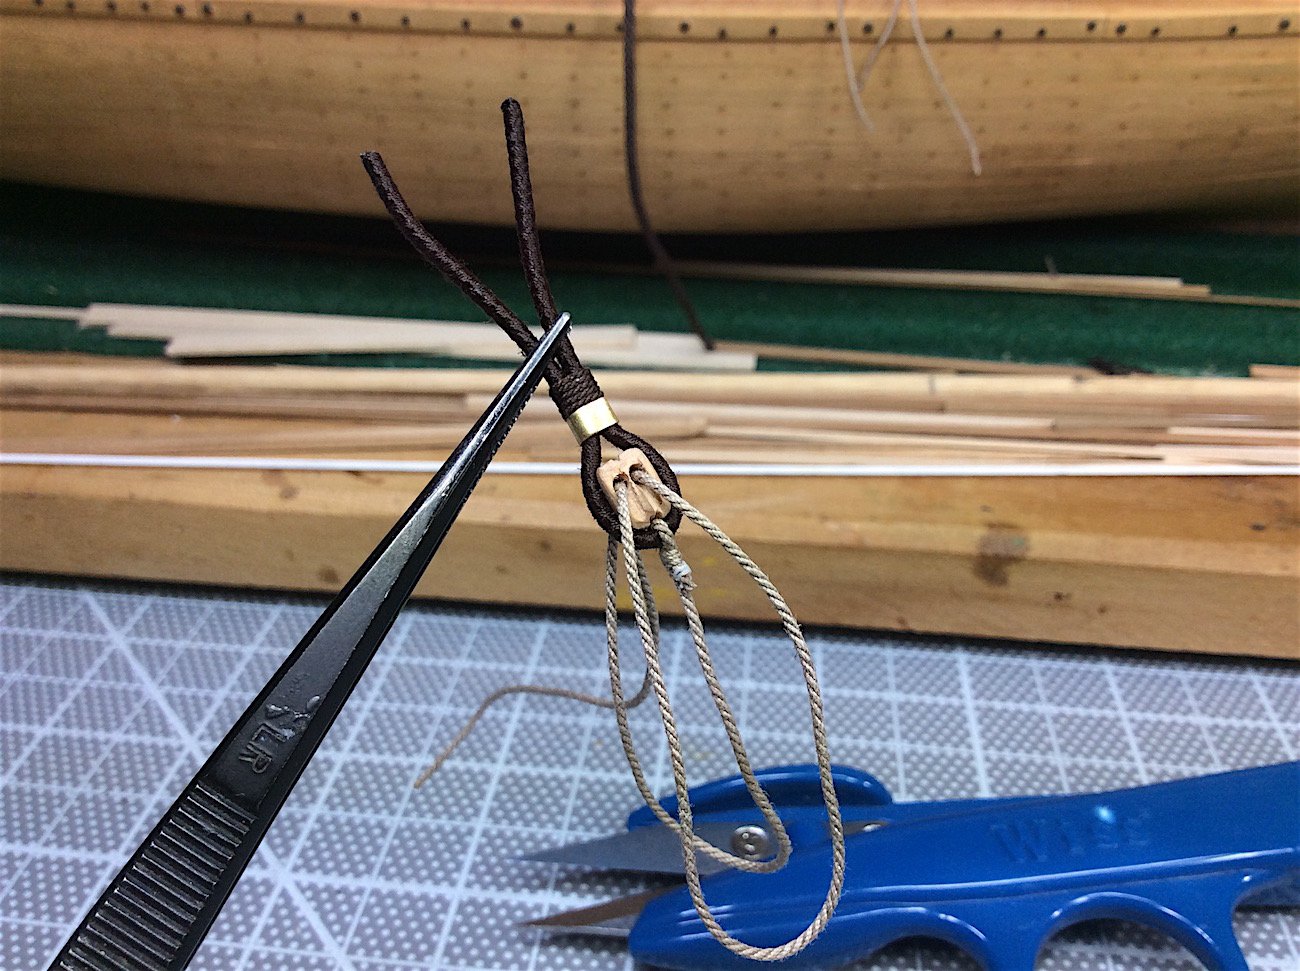
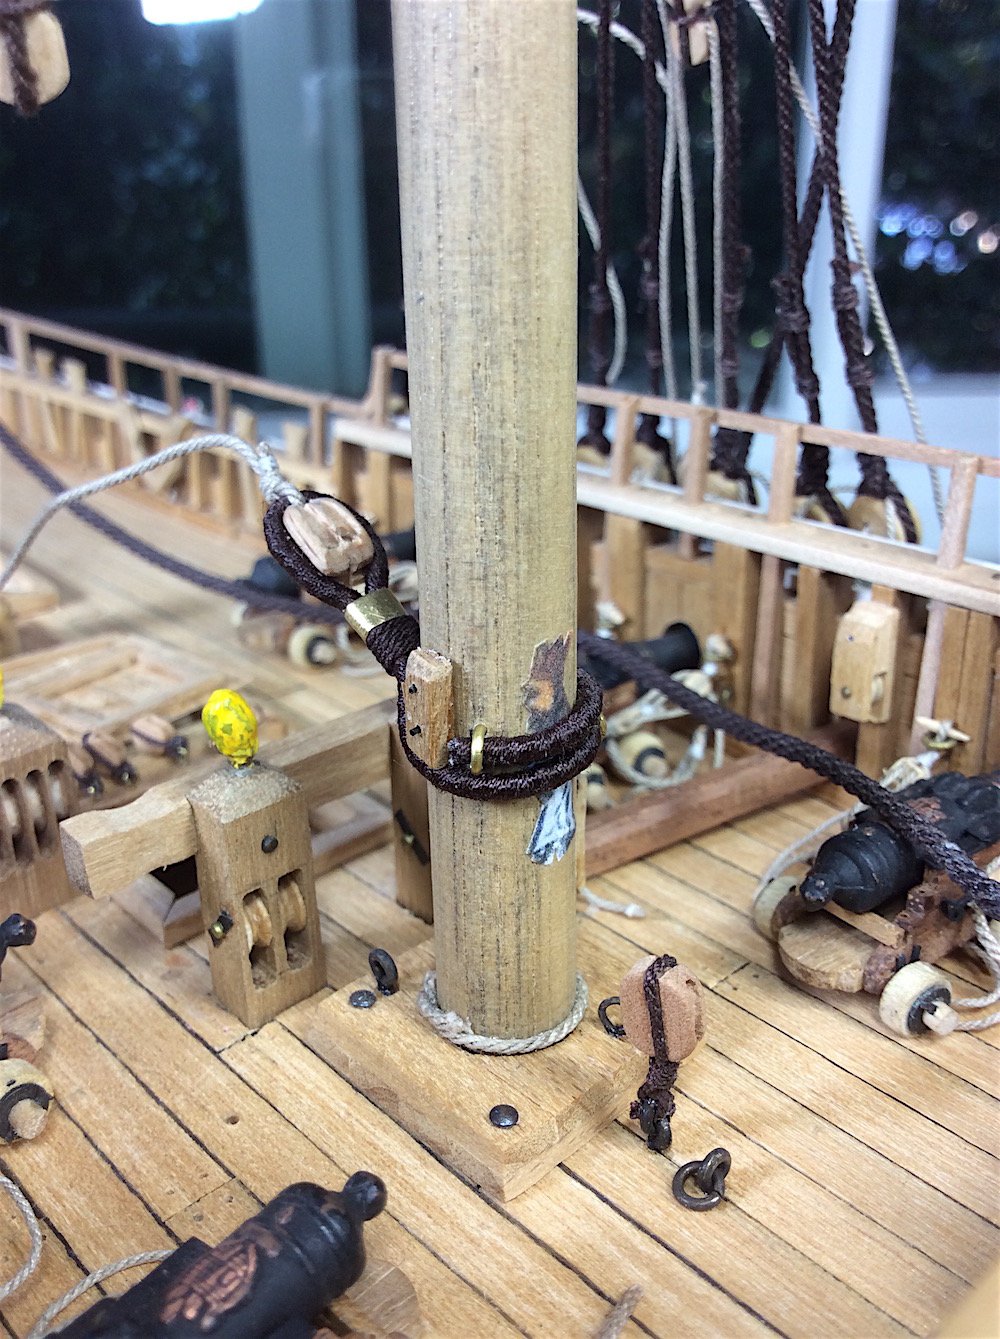
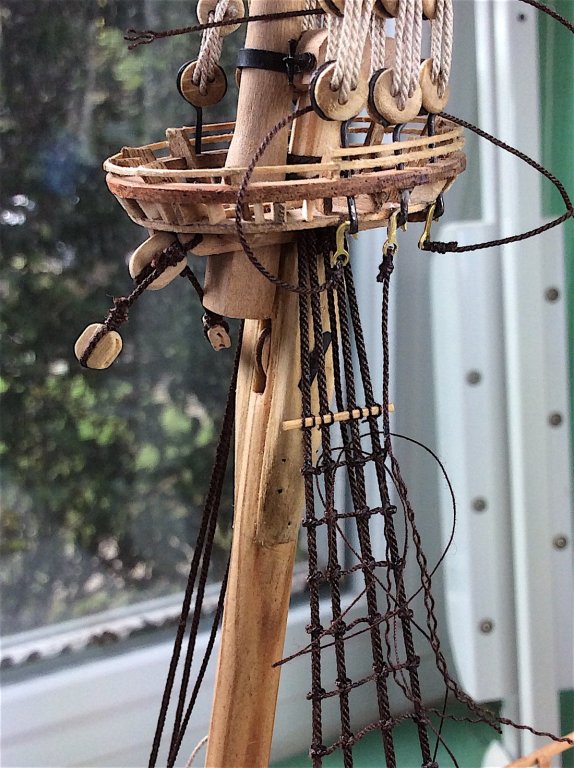
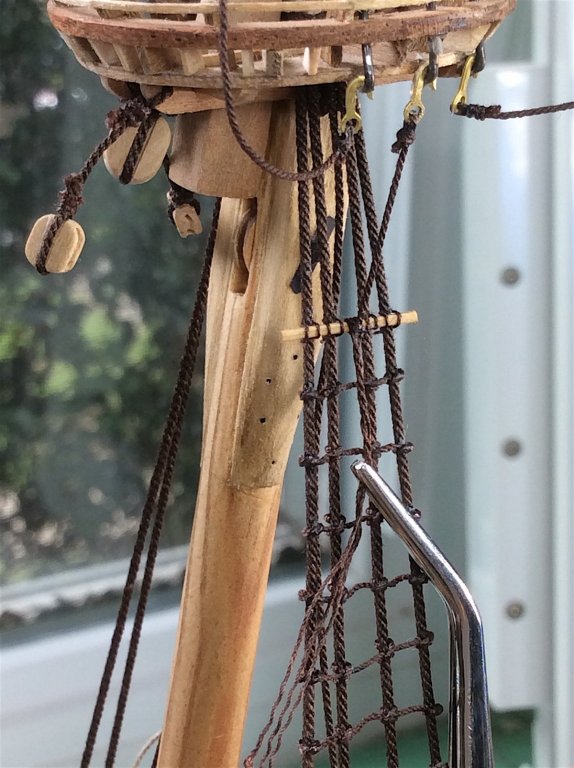
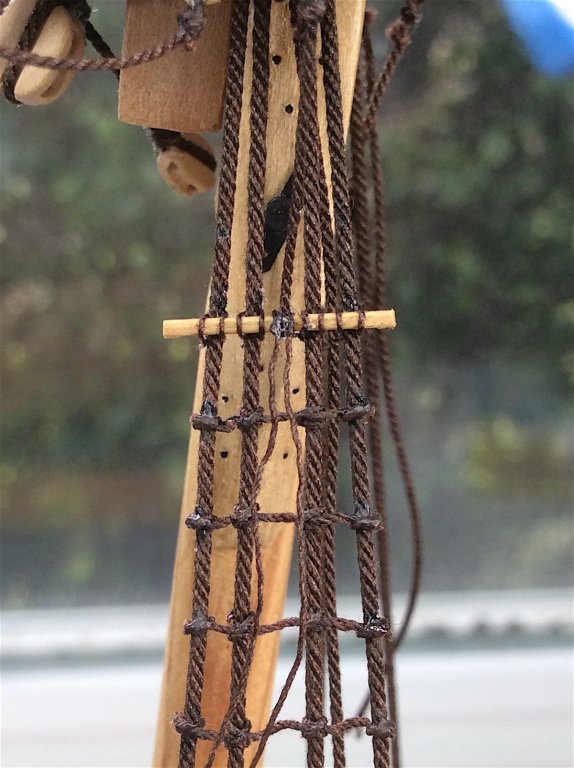
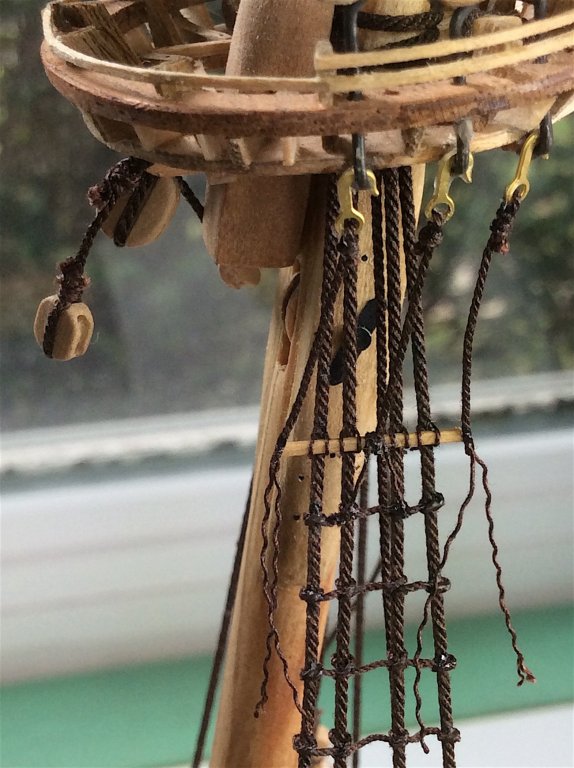
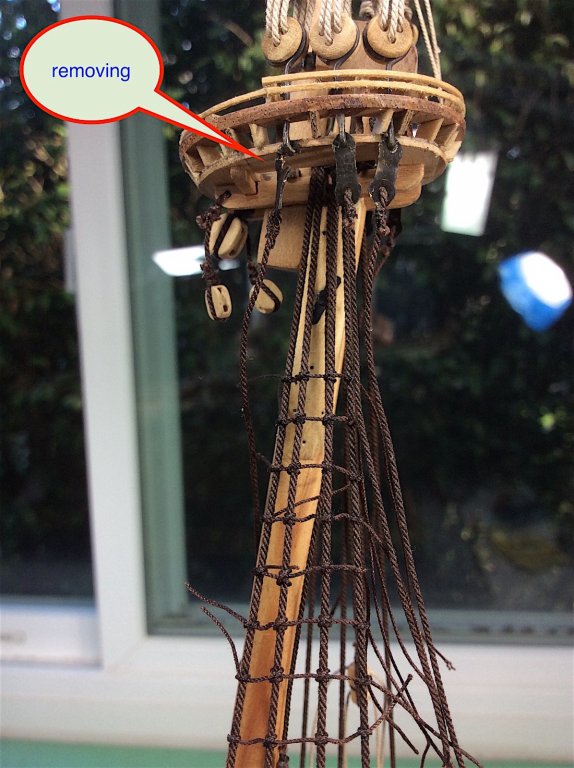
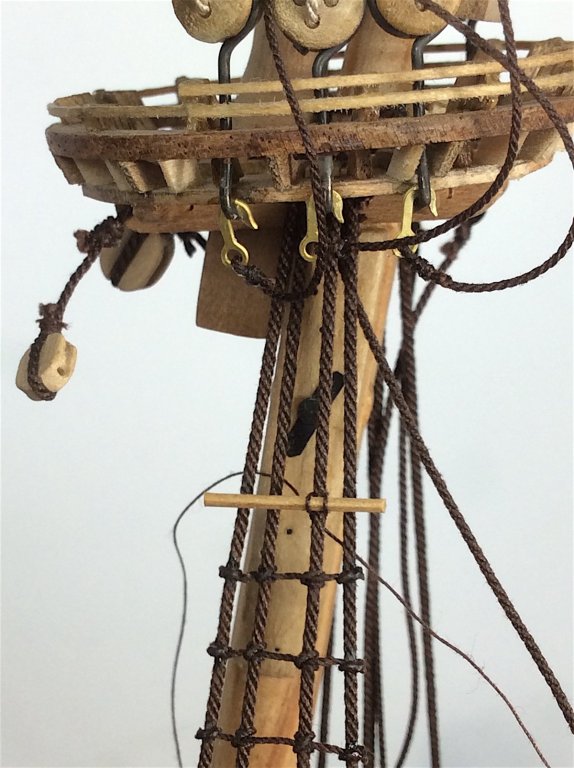
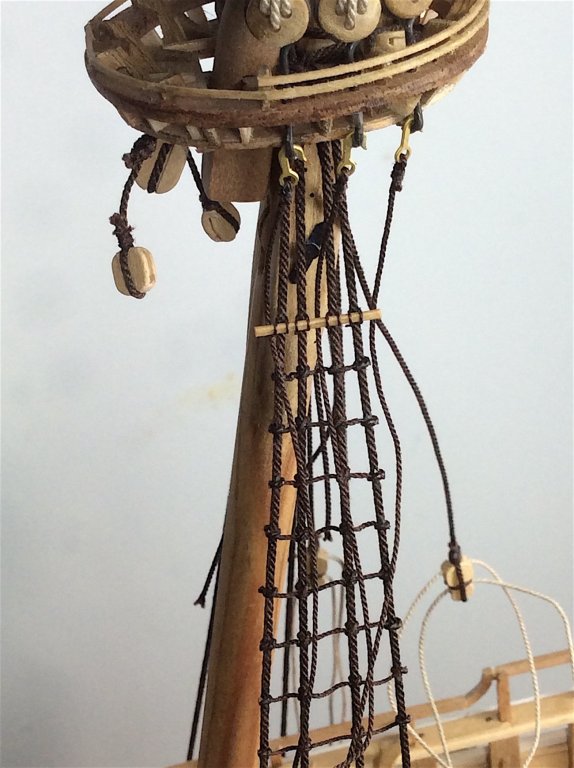
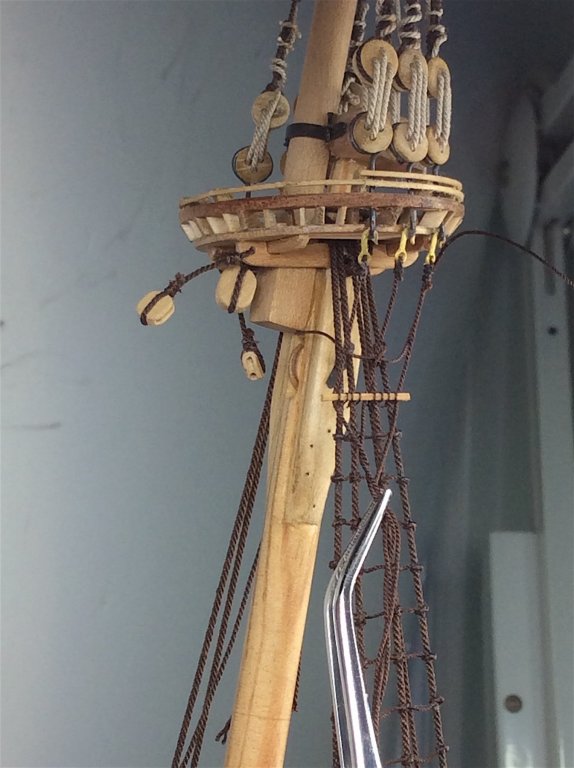
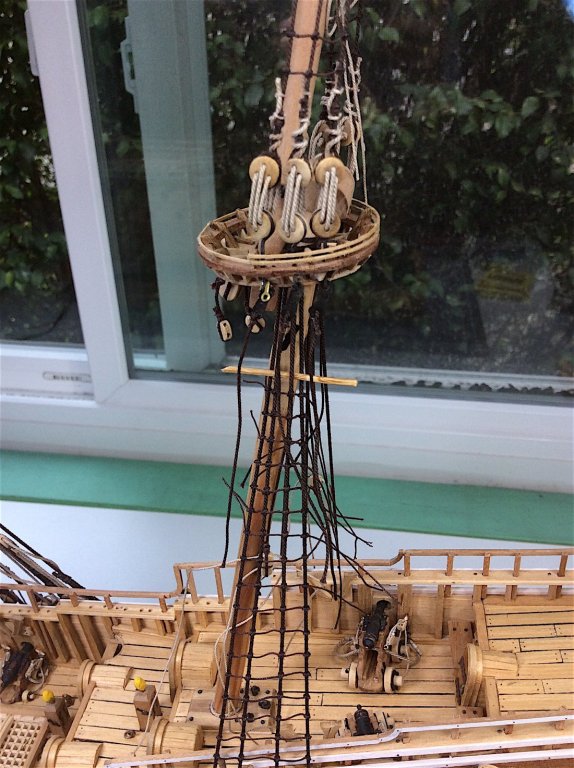
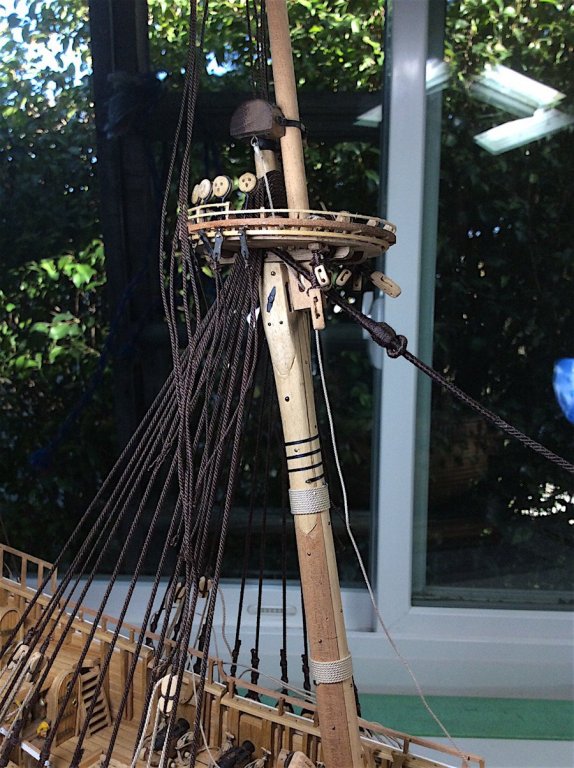
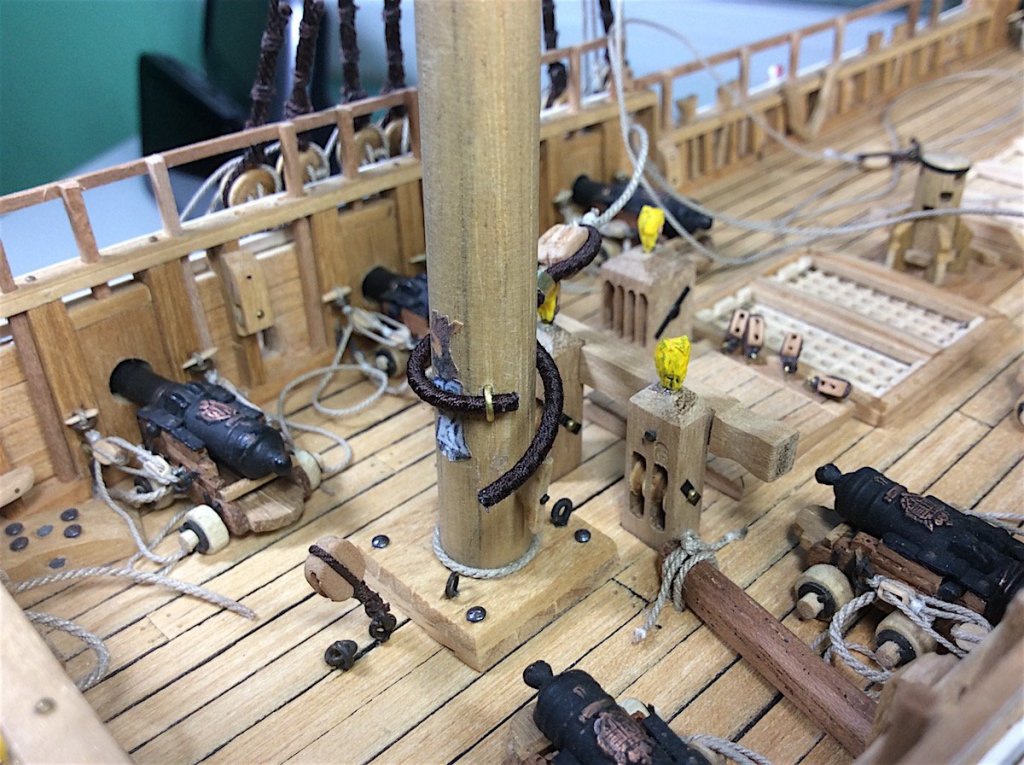
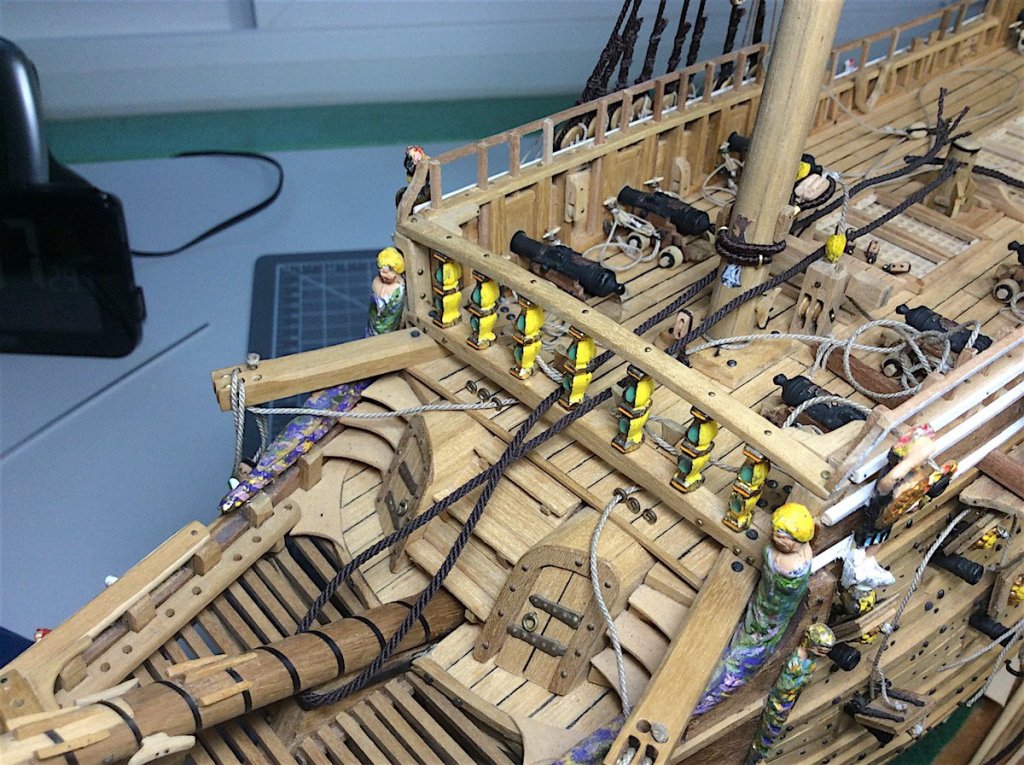
Hi Mates, Continuing with the mizenmast shroud rigging as a “test start”. This area is all new to me. Ratlines look ok – but will get better. Yes - as has been SO noted very repetitive indeed. And I’ve barely started. So; Removed those totally wrong futtock plates and added hooks (to be painted flat black). But the following bit is confusing; need to think this bit out. Installed the first futtock stave. Should be tarred, but left it as is just to highlight details. But here is where is gets more involved. I believe that my futtock shrouds are too large. Should have used a smaller diameter rope. Attaching these three shrouds to the stave will make for too “thick” a look (after spooling/tying these to the shrouds). I think that I will remove a strand from each at the point of attachment; then wrap them over the staves. Also note the 1/10th photo (during its construction) it appears that these shrouds should also be split and attached in two places. Noted that this photo is for the main mast. Hmmm. I will do that for the center of the three shrouds that I am presently working on. Then again, I may (since I have to remove all of those lower cap plates just re-rope these first three and start again. Just sharing my frustrations (J))) Cheers,

-
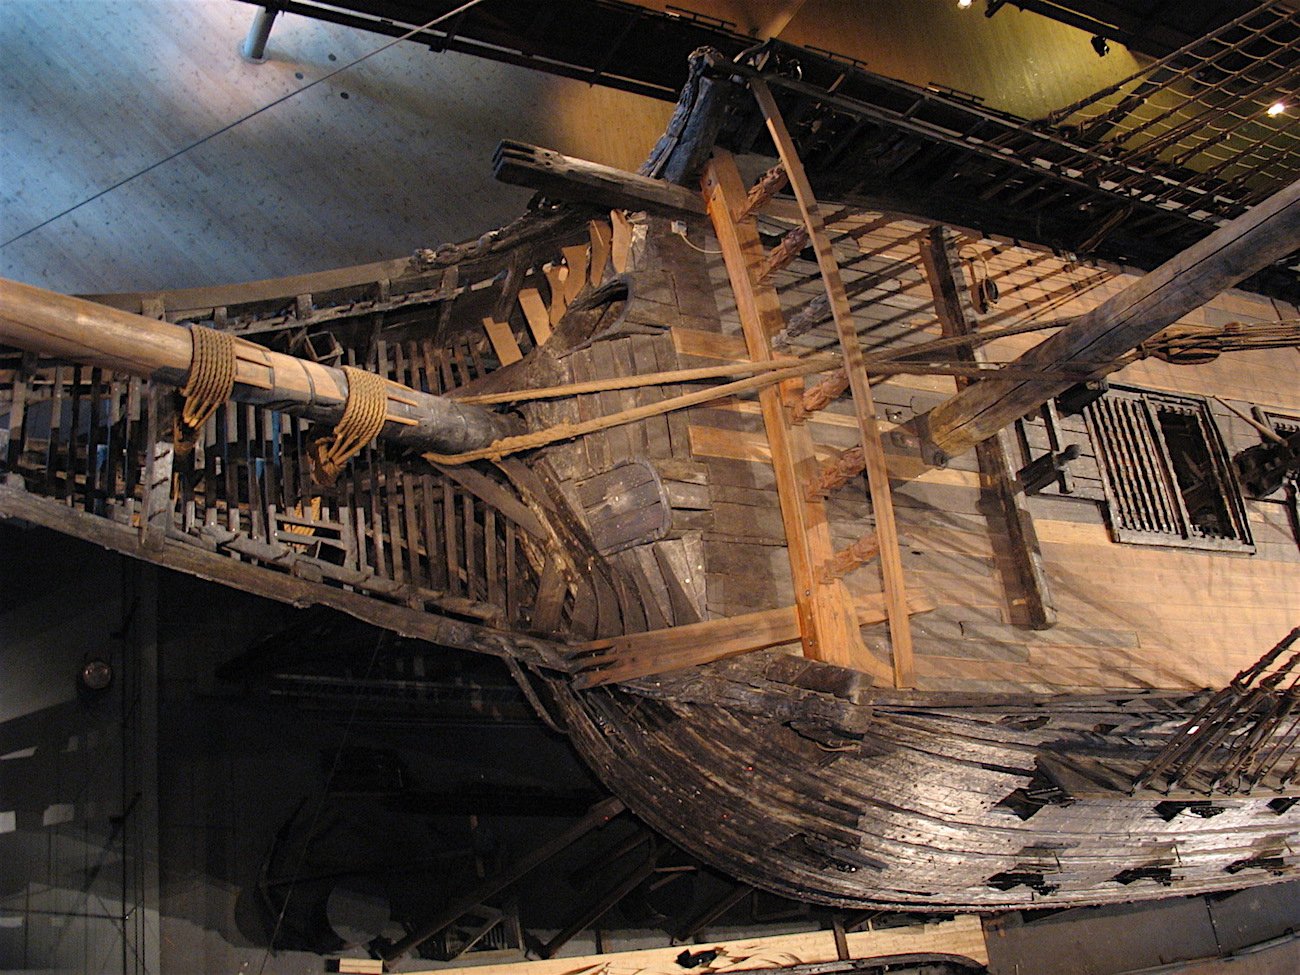
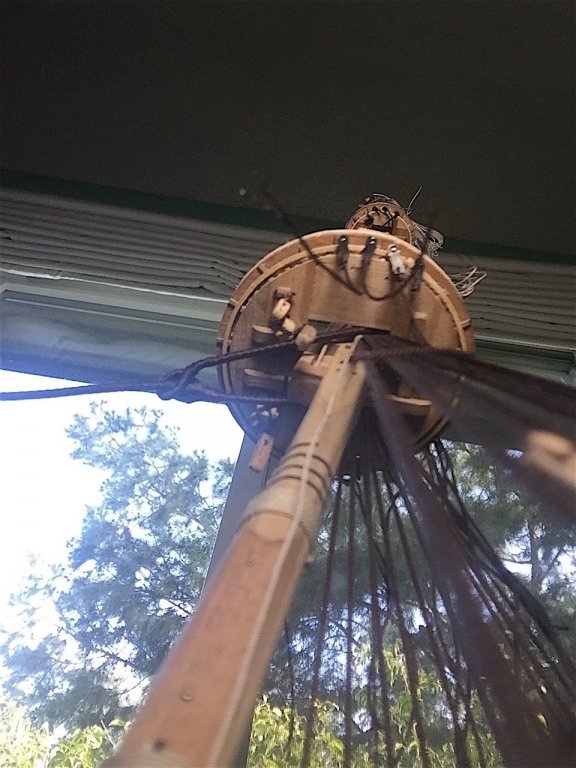
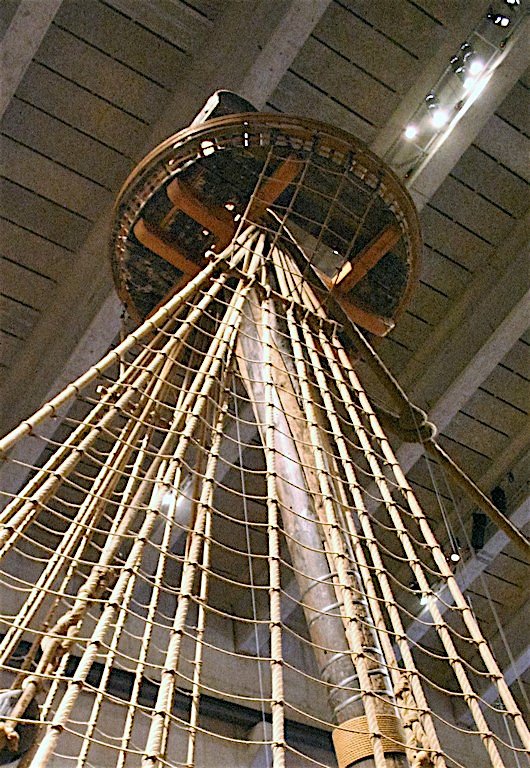
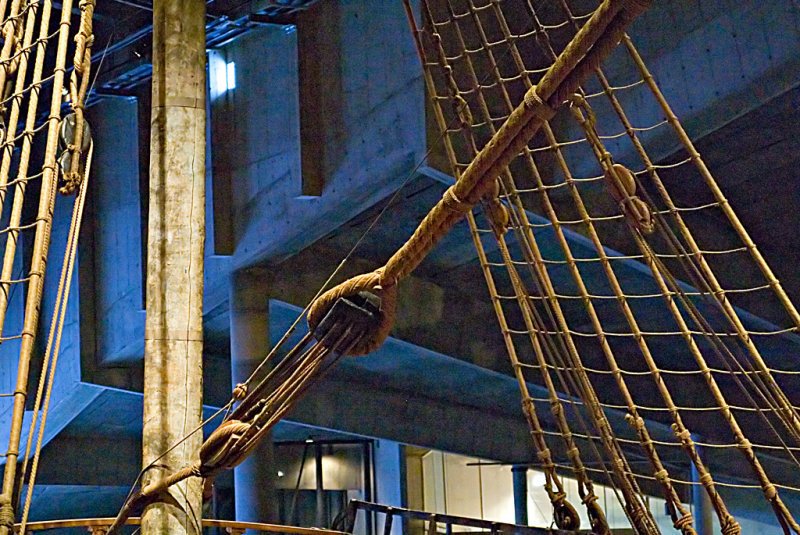
EJ, Still laughing about that your 1/1 photo from your previous post. So thought that I would be a bit immature (my wife swears that I still am (:-)) So here is one looking up ha ha - iPhone was none too pleased - too close
-
Mates, Thanks for your comments always noted. EJ, I laughed so hard you made my year, and we are only in March. That last photo is actually of the original in the museum. I was, trying to show how mine should actually look like, So perfect - thanks ! PS: thanks for your alway super nice thoughts! MJD
-
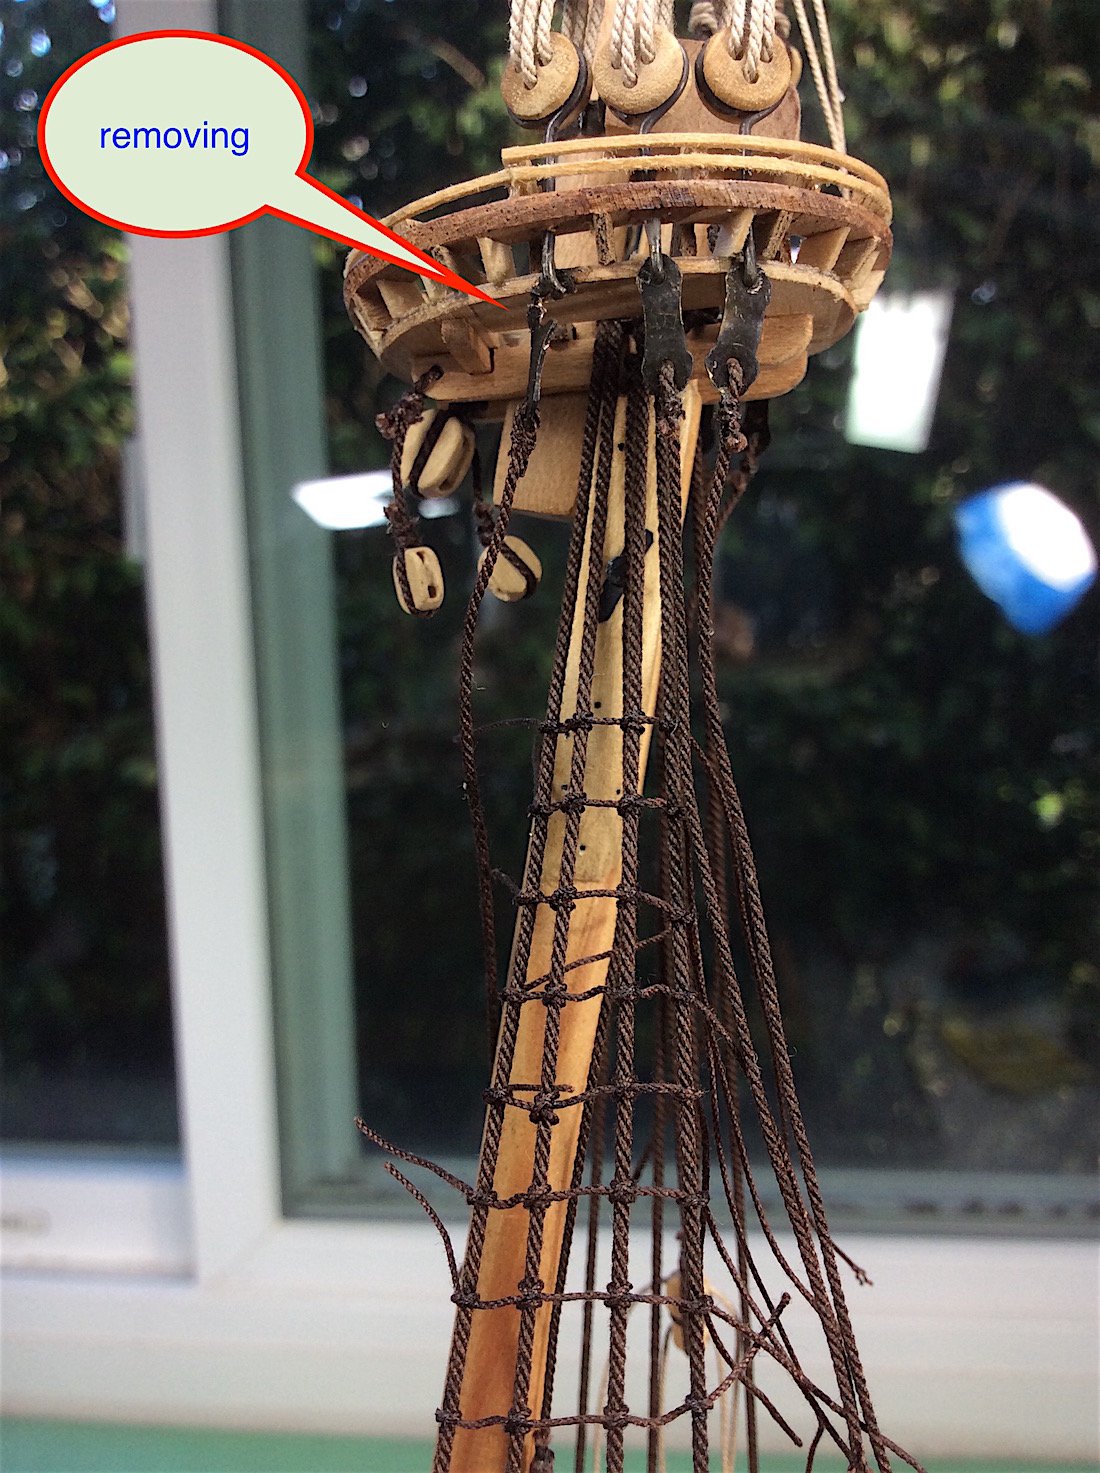
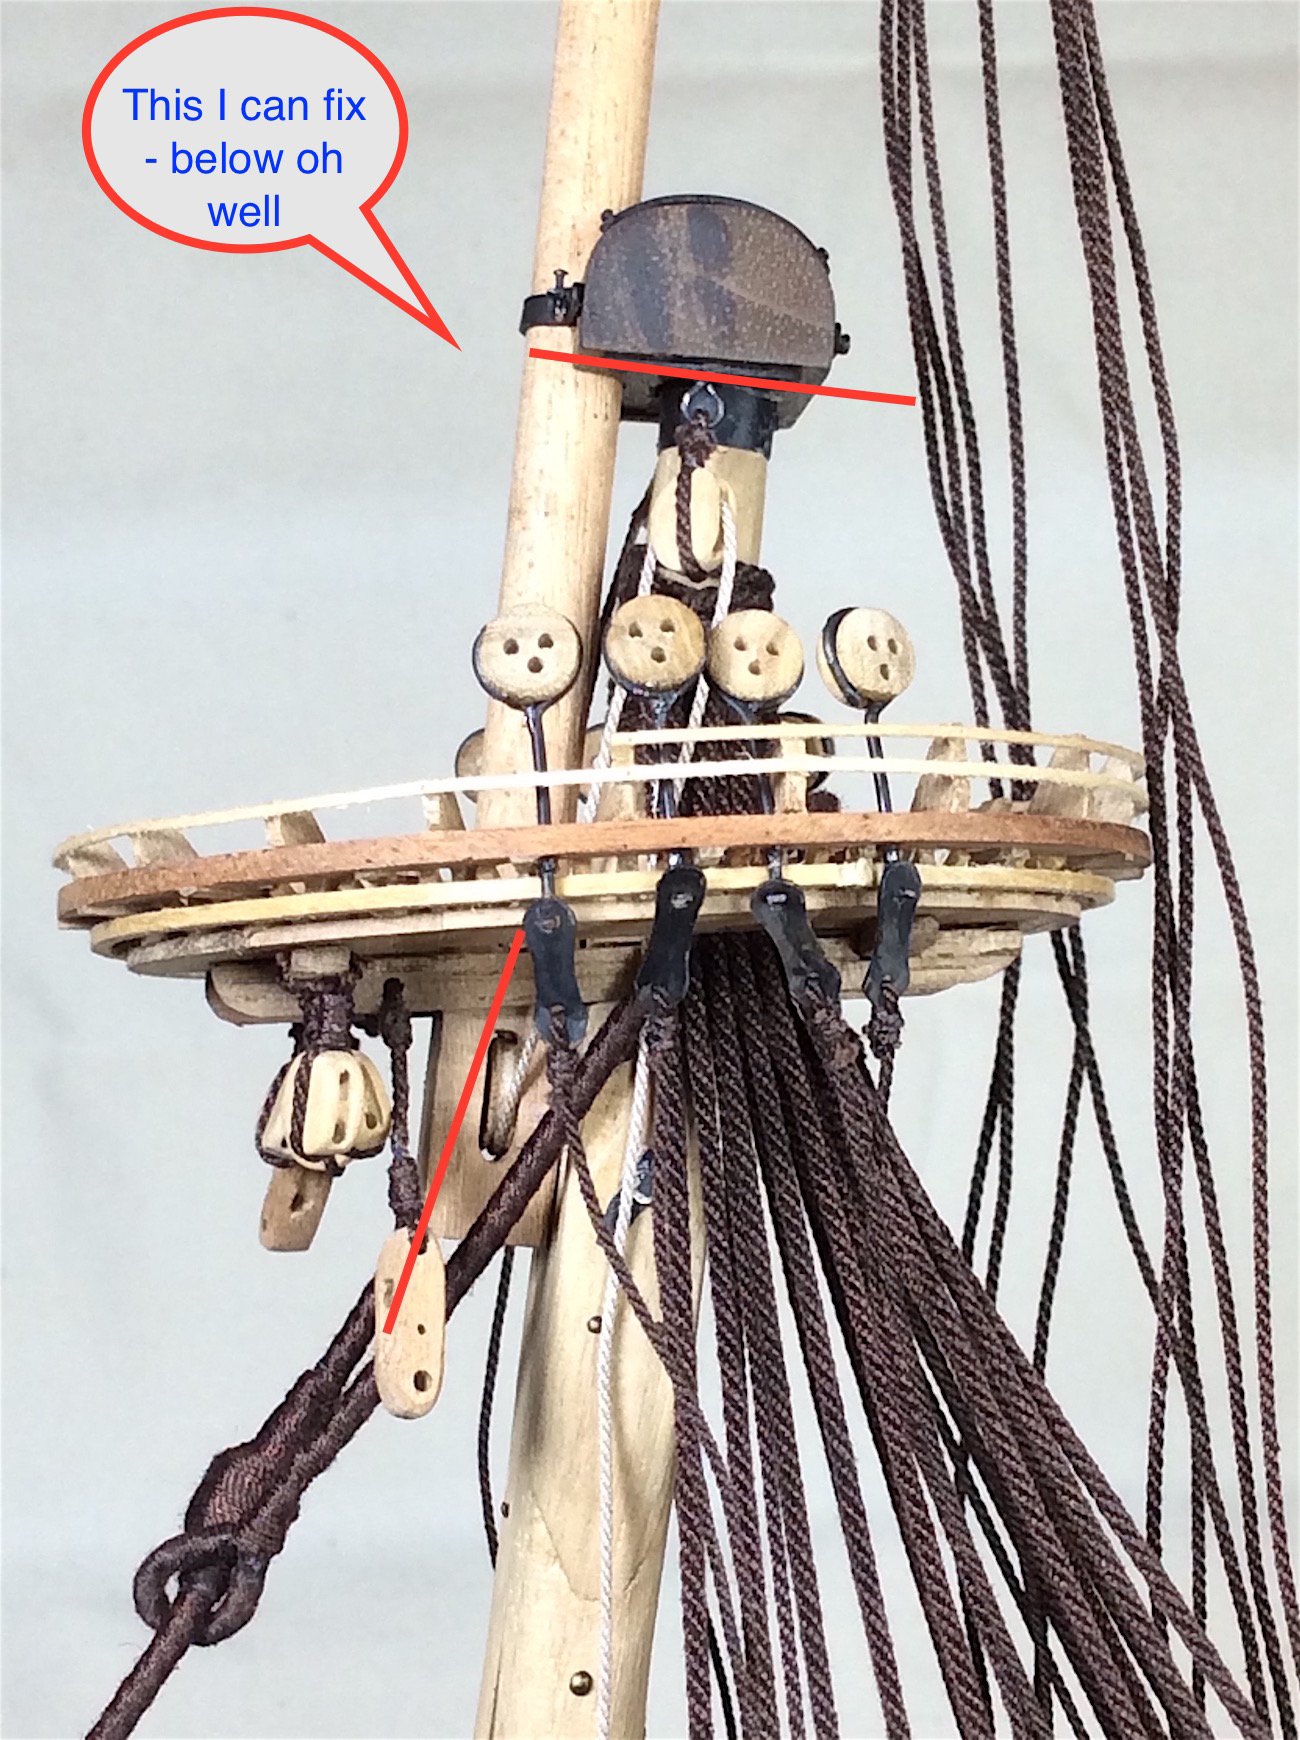
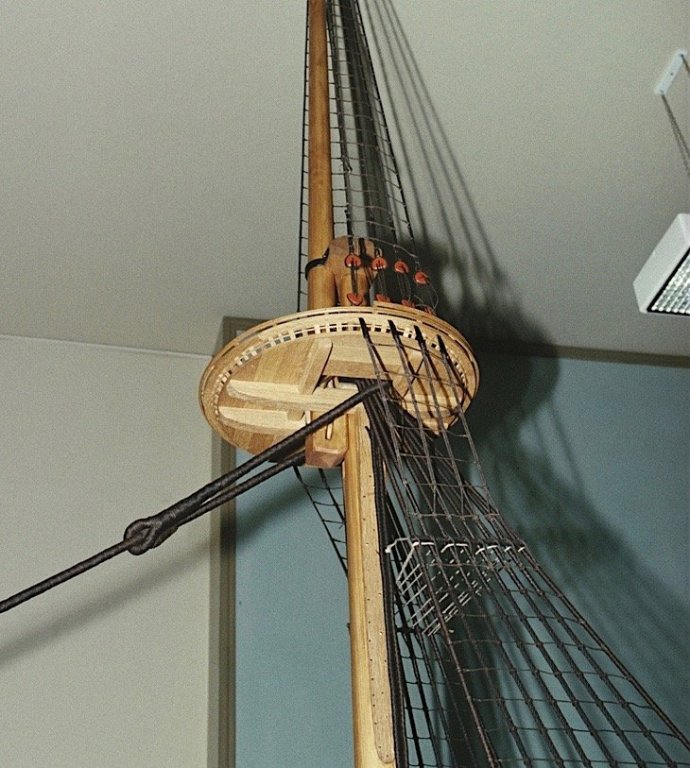
Hi Mates, So need to work backwards again. Finishing up the mizenmast crow’s feet, now thinking of how to attach the needed futtock stave, and then the light came on. Futtock plate connectors all wrong; need to remove those (what was I thinking) and replace them with small rigging hooks. This will need to be done for all three lower platforms. I did not initially see rigging hooks on Vasa, but certainly what I have is worse because then I can’t continue the crow’s feet to the platforms. Still learning. Topmast platforms will all be OK as is. Cheers,

-
B.E. So glad that you were able to bring much of this log back to life. By far on the superlative side of log and works that live here at MSW. Your's is such a delight to follow and especially to learn from indeed. PS: Though Nils - your "SS K" is also such a joy to follow (;-) As always Cheer, Michael
- 366 replies
-
- 5
-
-
- pegasus
- victory models
- (and 2 more)
-
Karl, thank for that – needed. As always thanks so much for following along. Peter, I meant to add a comment to my post regarding this. All of the plans that I use (Billings, 1981 Museum sheets, Corel, and the 1/10th all tie that rope to the foremast. Only the Museum’s original ties it to the bowsprit. I also “think” that the new monthly DeAgostini, that uses the 1/10th as a base, will also tie that rope to the foremast – So I decided to do that as well. Yes, many of us have been waiting for Vasa II as “the” rigging bible for this ship, but as you note it’s buried in Swedish bureaucracy. So in the meantime ------it is what it is. Koen, thanks for your very kind words, and thank you for following along. No I do not, principally use nails, but glue for the majority of this build. The only structural uses of nails were for the first planking as do the vast majority of builders. Frank, as always thanks – Happy that you liked the lamp. I have, in fact, purchased a second one. This one is floor standing and also has five-Kelvin temperatures all dimmable. Moved an old incandescent with this one. https://www.amazon.com/TROND-Gooseneck-Adjustable-Temperatures-Diffusion/dp/B01FDF27R0/ref=sr_1_8?ie=UTF8&qid=1489181035&sr=8-8&keywords=led+floor+lamps+for+reading MATES I have nothing to do with Amazon or Tron – just really appreciate these two current technology products. As always thanks for all of the nice comments, likes, and for just dropping by. Cheers
-
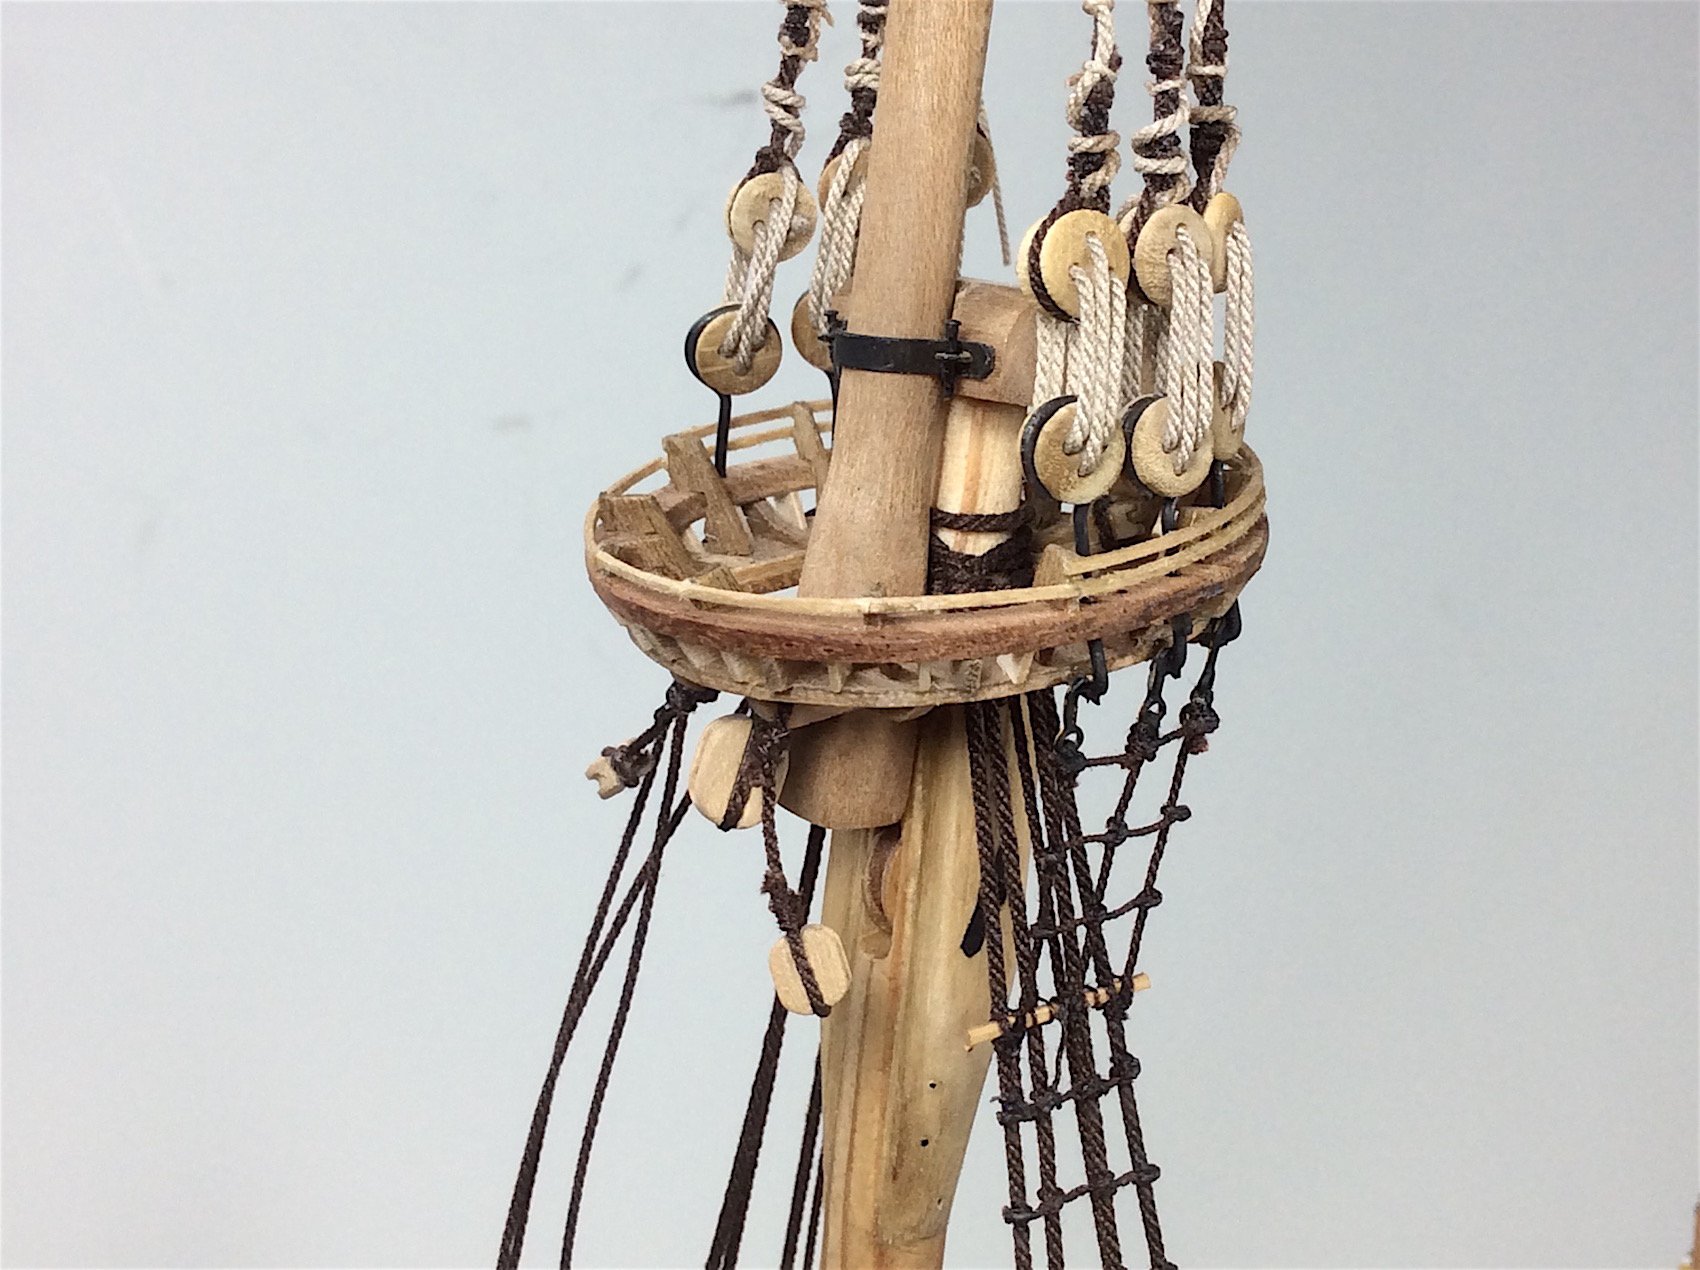
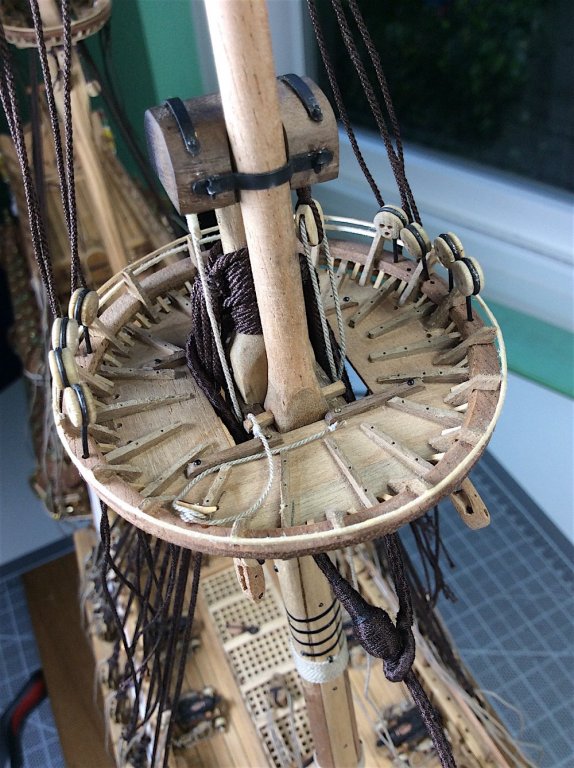
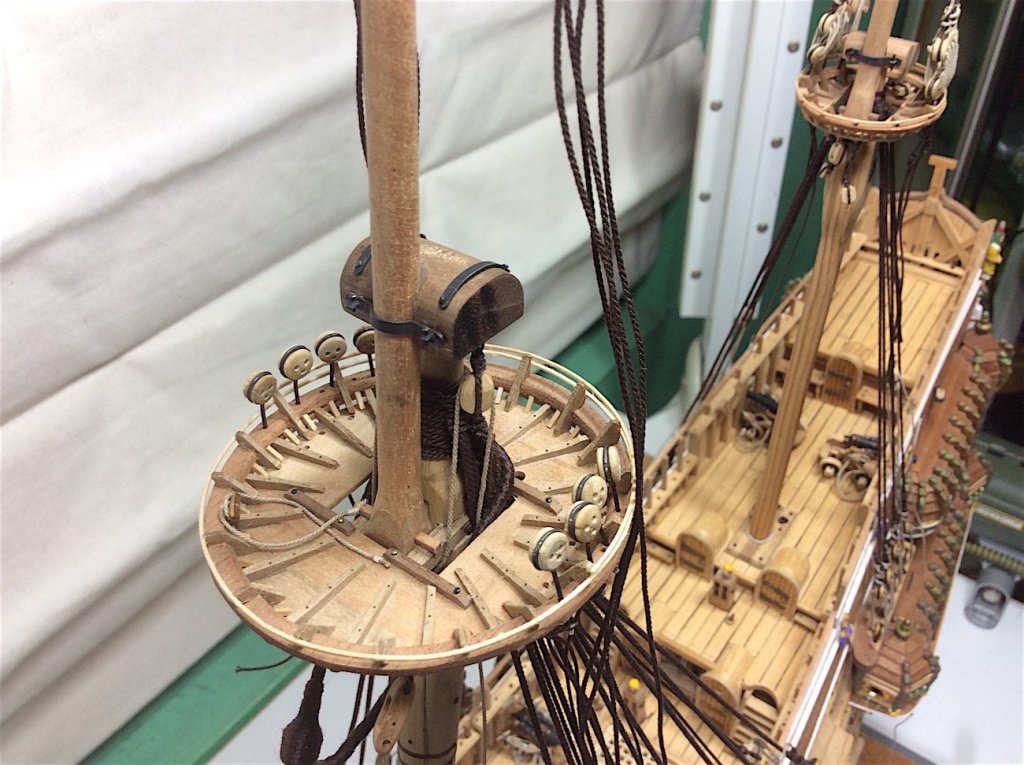
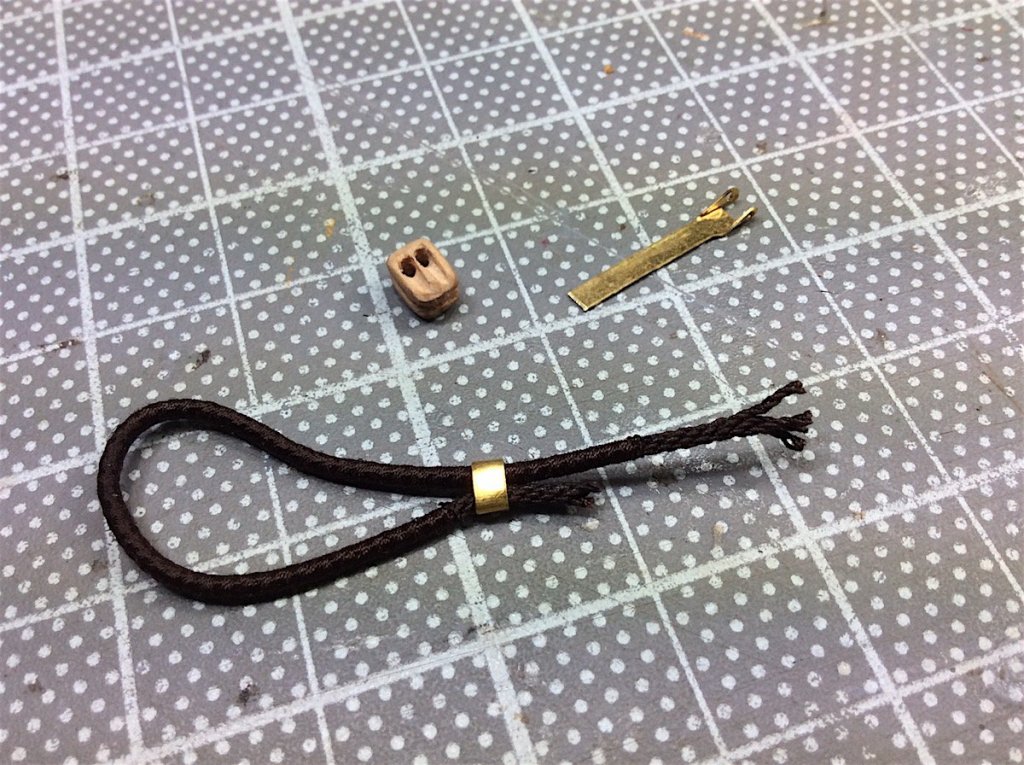
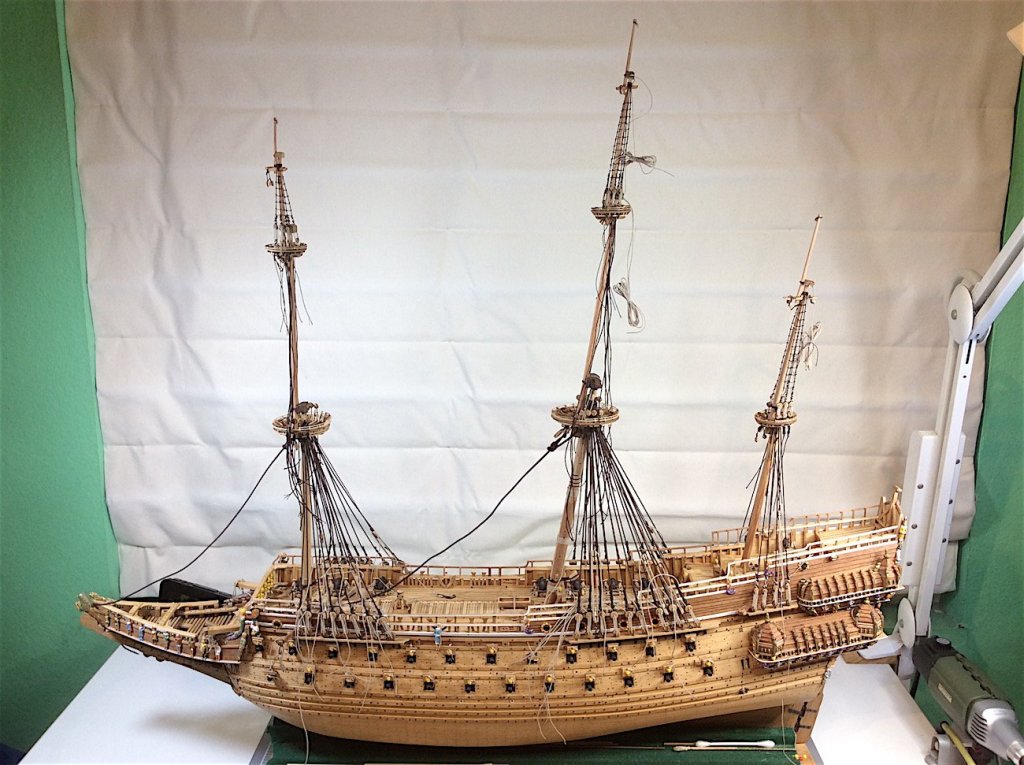
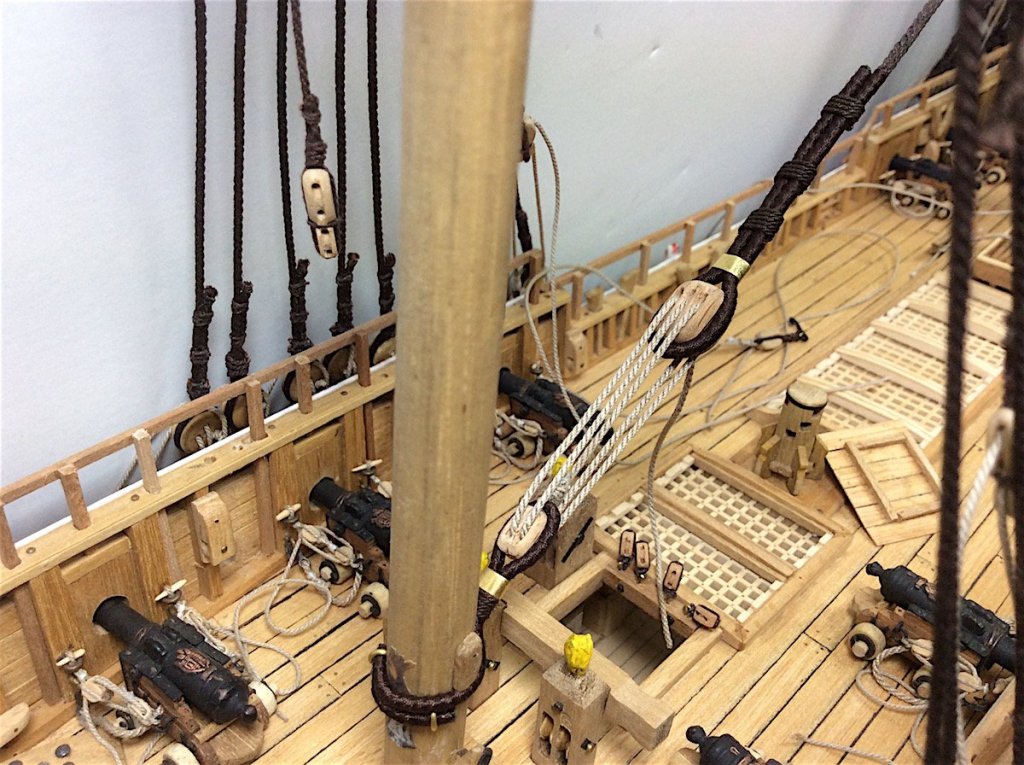
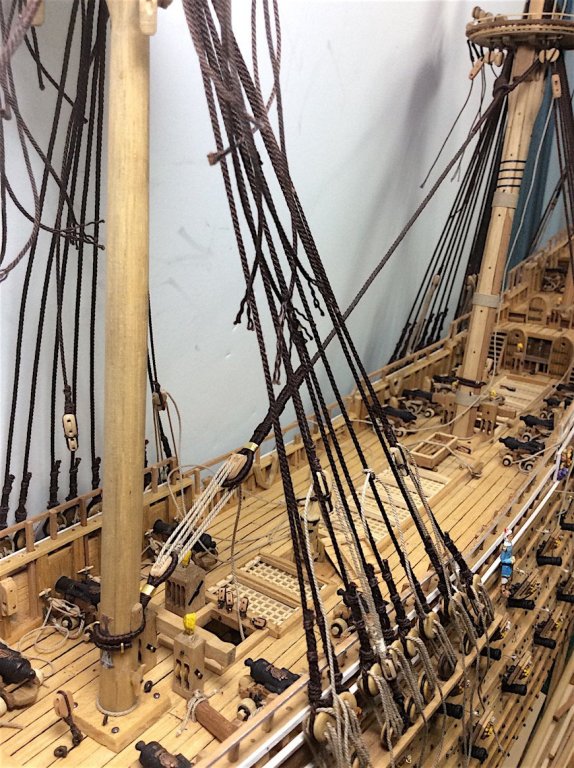
Hi Mates, Well this update, for me is actually mostly satisfying. Built two more platforms, and caps Installed all of the topmasts Started some ratlines Made another mouse for the mainmast stay. Served the mainmast stay, and the block rope on the foremast Re-worked a Corel triple, and double block Many new blocks tweaked and attached. Attached the double pulley at the base of the foremast for the mainmast stay, and attached the triple block. =================== A few Grrrrrrs, of course, main topmast sheave cutout should have been angled inward, lack of foresight. Main cap doesn’t quite “sit” right Mizenmast cap is too close to its platform Mouse should be, as you know, a woven affair. What I made is obviously incorrect. I saw how to do it correctly on another’s build log. Hmm my skill set not there. Always nice of you to drop by, and thanks for the encouraging notes – much appreciated. Cheers,


-
Mark, Nice. I am wondering about the black mast tips as well as the black platforms. I tried to Google for an answer as to why - No luck - Do you know the history for the painted trims? They do make those ships look much more formal indeed. That might just be the reason? Just curious. PS: Nice - noticed your fids - as you know I just learned about that detail bit recently. Cheers,
- 652 replies
-
- 1
-
-
- royal william
- euromodel
- (and 1 more)
-
Vasa by Jörgen - DeAgostini - 1:65
md1400cs replied to Jörgen's topic in - Kit build logs for subjects built from 1501 - 1750
Jörgan, Welcome (:-) I will also bring a chair to your shipyard. This Deagostini kit is still NOT available for the USA market hmmm? Your start looks very good. Cheers,- 50 replies
-
- 1
-
-
- vasa
- deagostini
- (and 1 more)
-
Giampiero, When I click "like this" I wish there were, other adjectives available (:-)))) - Absolutely superb work indeed. Cheers,
-
Yes, thanks I realized that a bit later. As we (most of us) all know; "after all else fails, then read the instructions". Chuck had posted a "how to" for the site updates. that I, of course, did not read First! cheers,
-
Hi Mates, Glad that you thought, as I did, that the lamp is excellent for our purposes. I also posted it on "What have you received today?" " (:-) Seems to be a good idea there as well. I've had it for a week or so Really liking the extra outdoor light that it projects. PS: Not so sure about all of the new white everywhere at MSW so far. Poor tired old eyes. Where's the Night Shift option?? ha ha Cheers,