md1400cs
-
Posts
2,868 -
Joined
-
Last visited
Content Type
Profiles
Forums
Gallery
Events
Everything posted by md1400cs
-
 Martyn, Your hull planking is such excellent looking work! Cheers,
 -
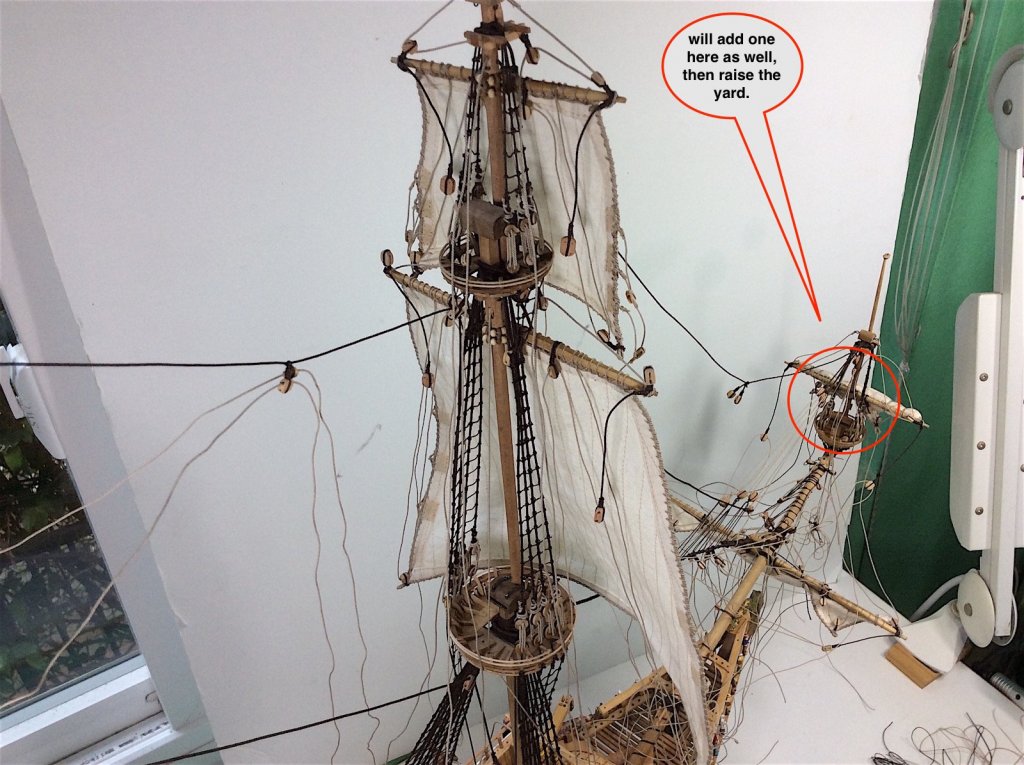
Mark,- Too bad well 2024 but not to be in your neighborhood at all - 2017 would have been awesome indeed. Frank - No excuse for you, I don't think? -- ha ha Denis - Martyn - thanks ! funny as well PS: Installed the first two parrels. Cheers,
-
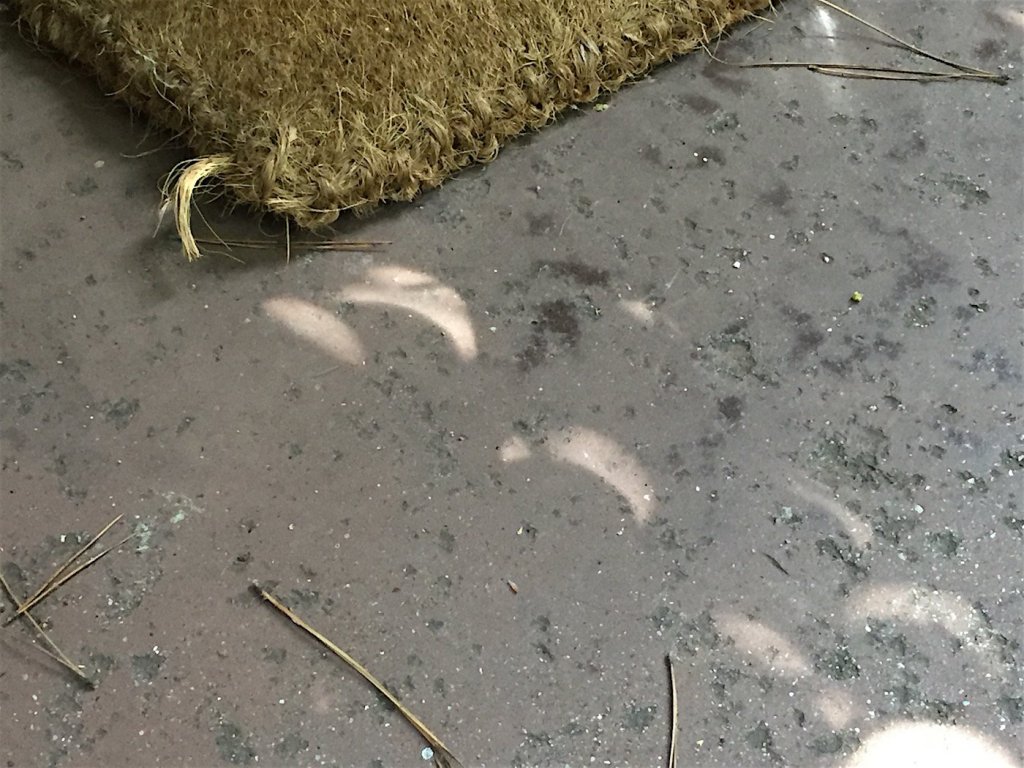
EJ - thanks its getting there. Sails it turns out are also a nice learning curve for me. Parrels were much easier than I had imagined, and yes mounted sails do get in the way. zappto - thanks for your very nice comment. The Vasa Museum is, indeed an amazing visit - especially for us members. OK sorry had to add a couple of the eclipse EJ your view will be much better than mine ======================= On a piece of paper pin "hole camera" shade reflections just out my door. Cheers,
-
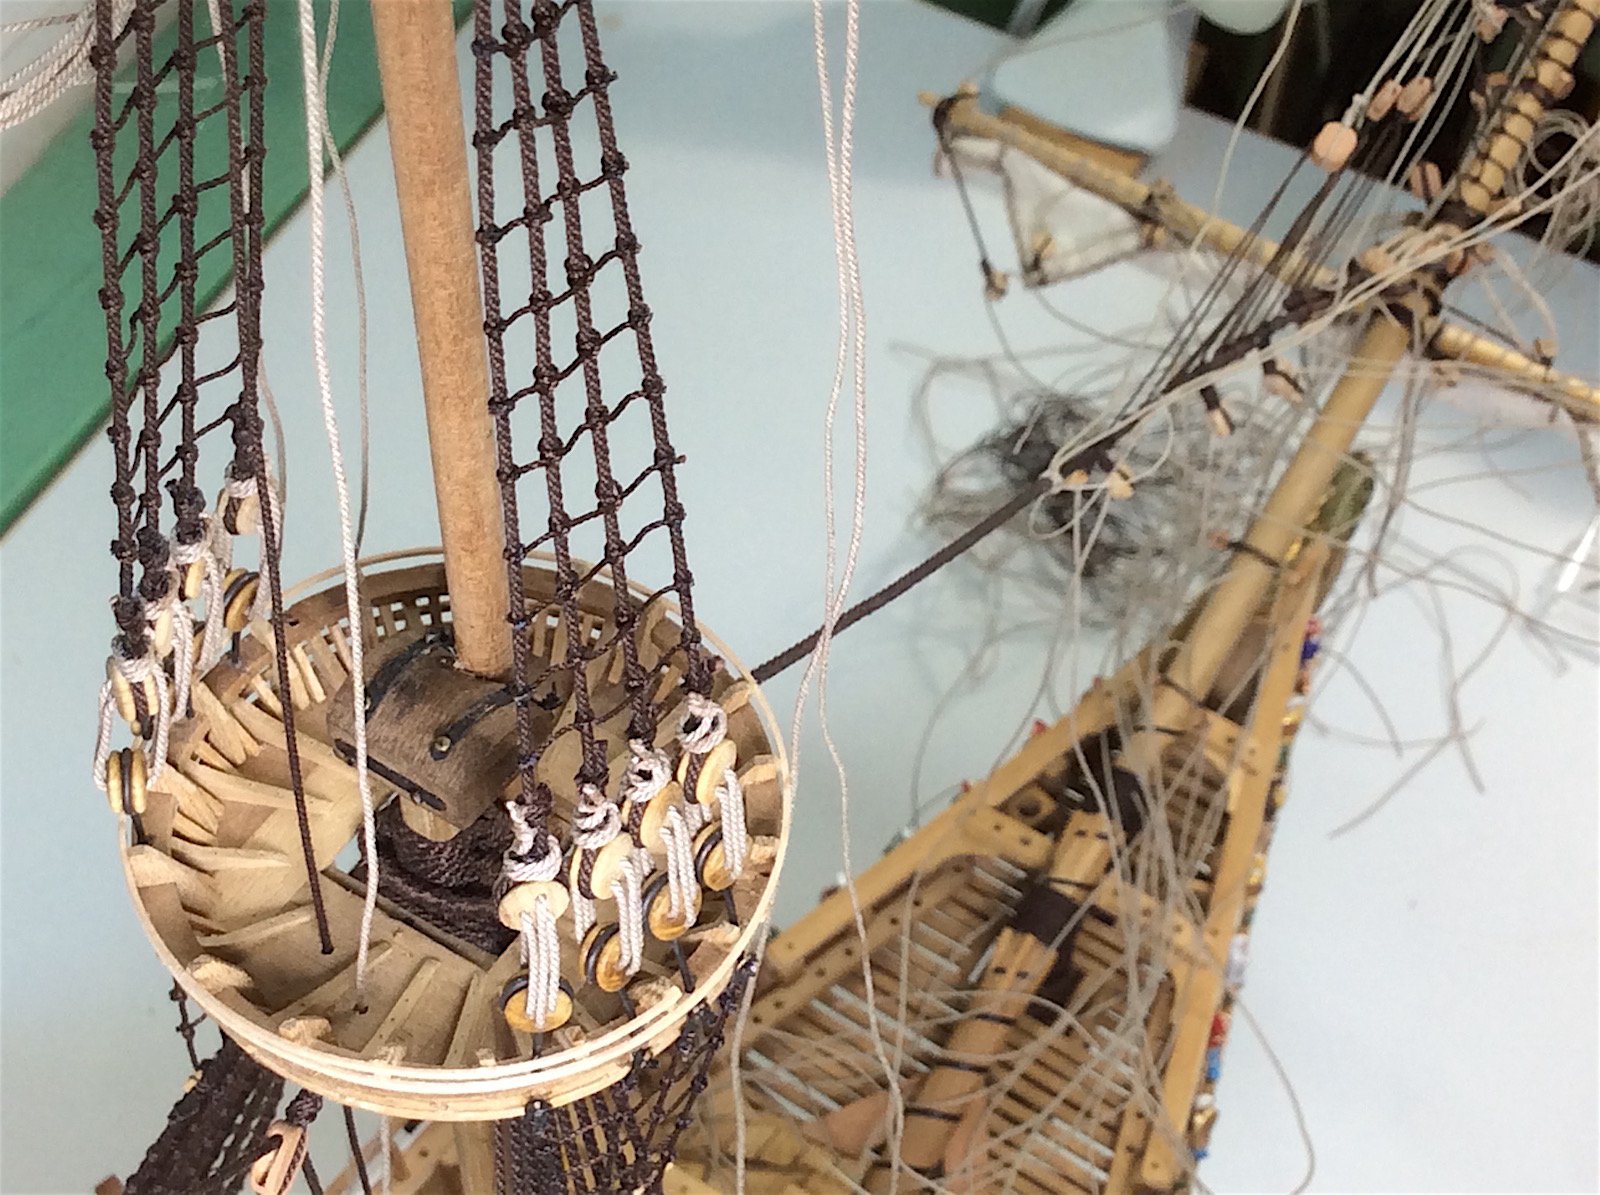
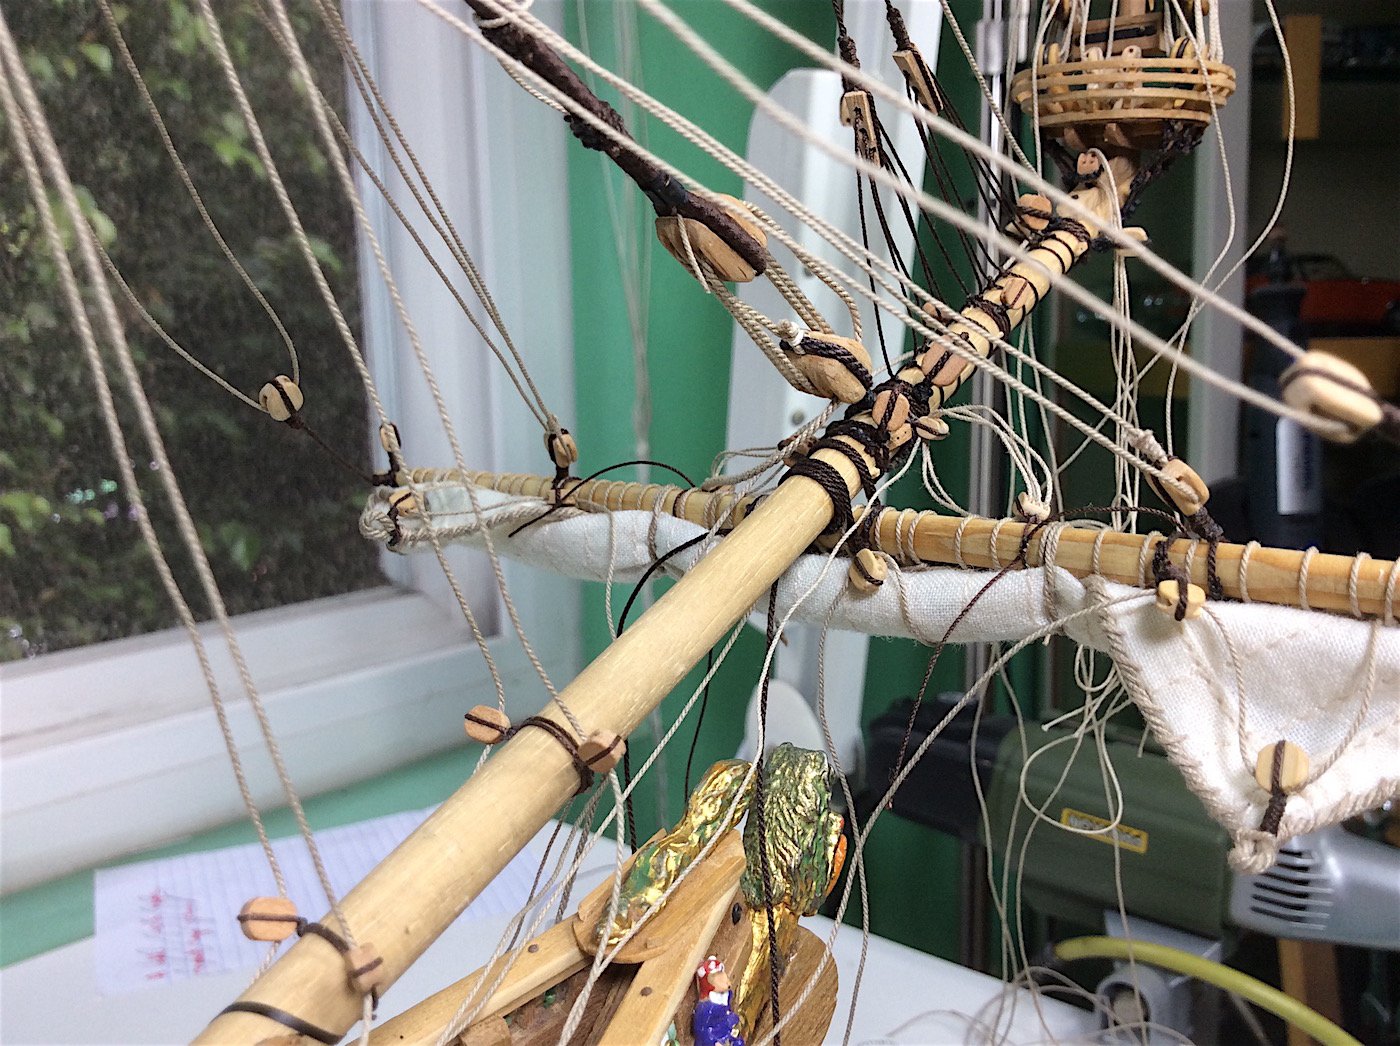
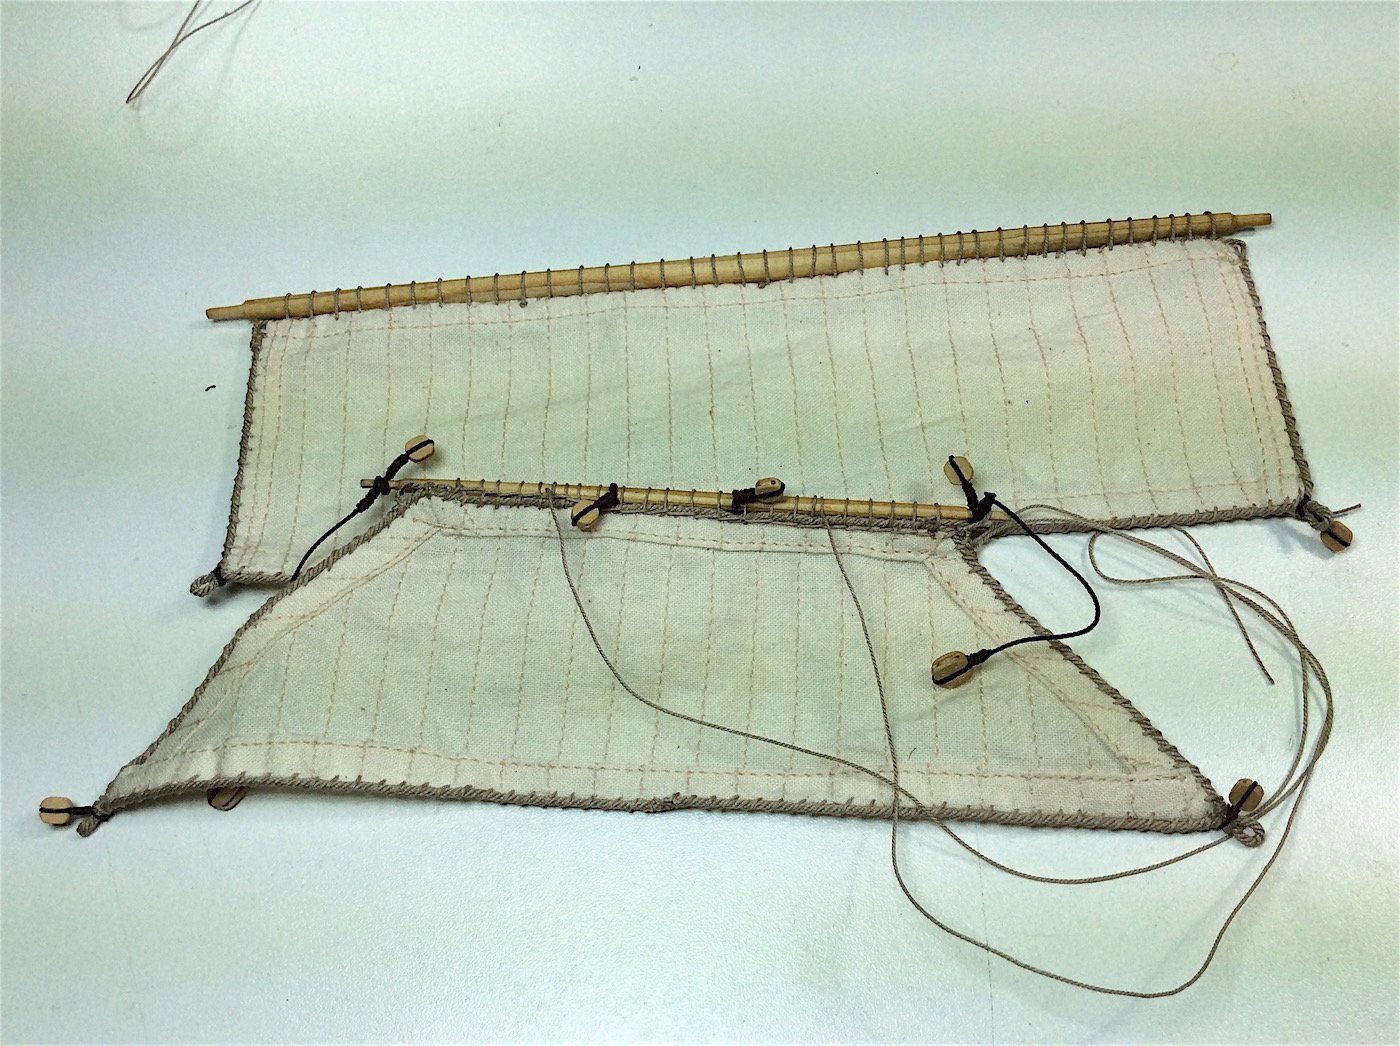
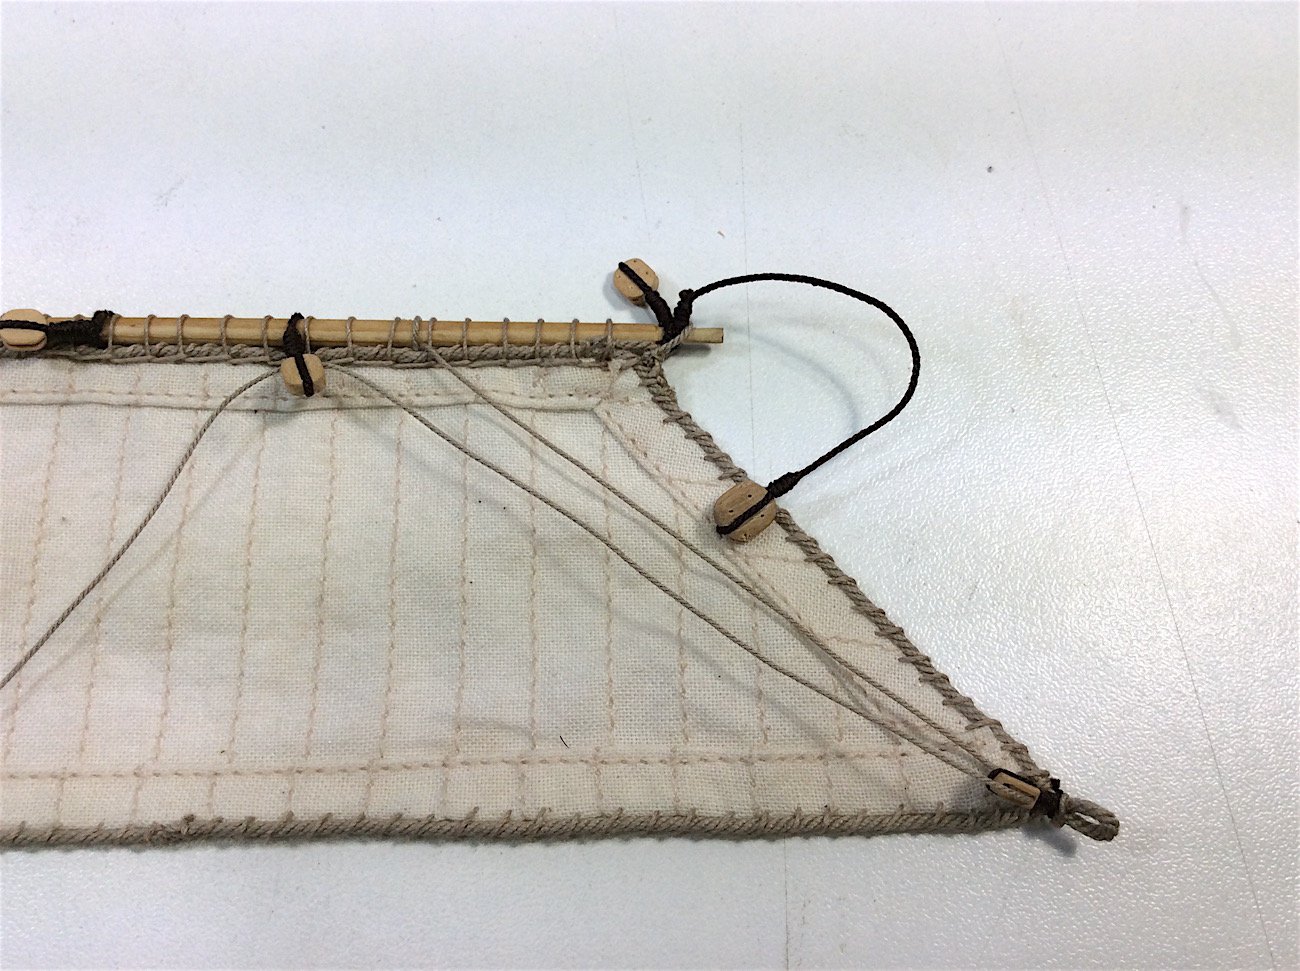
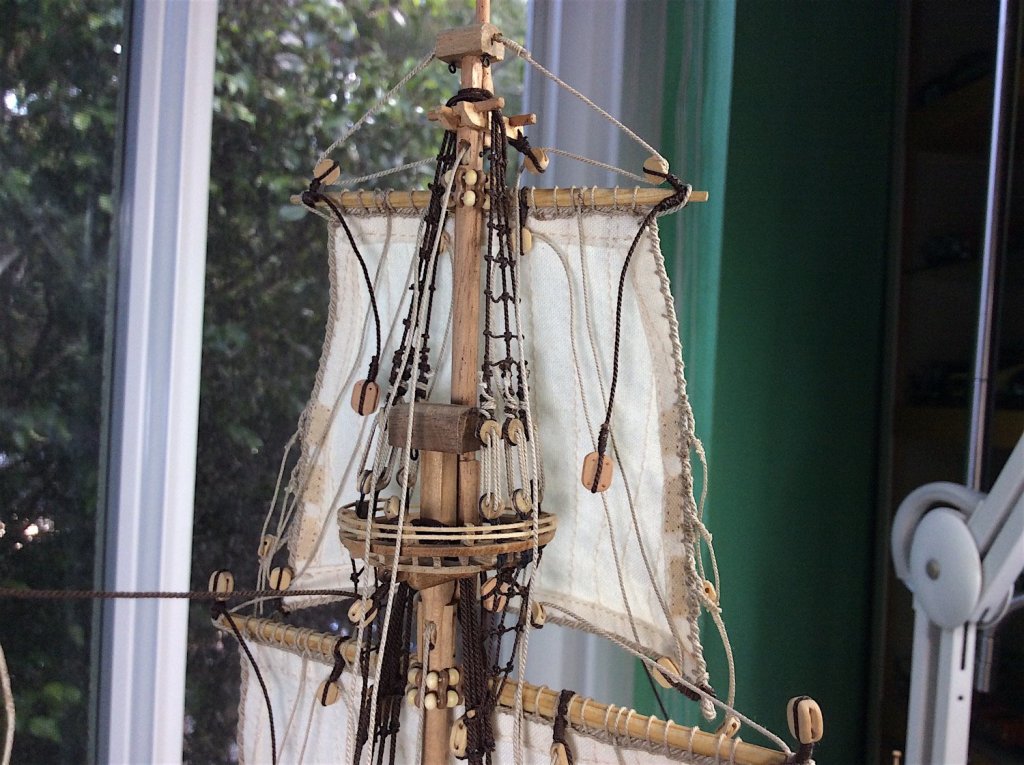
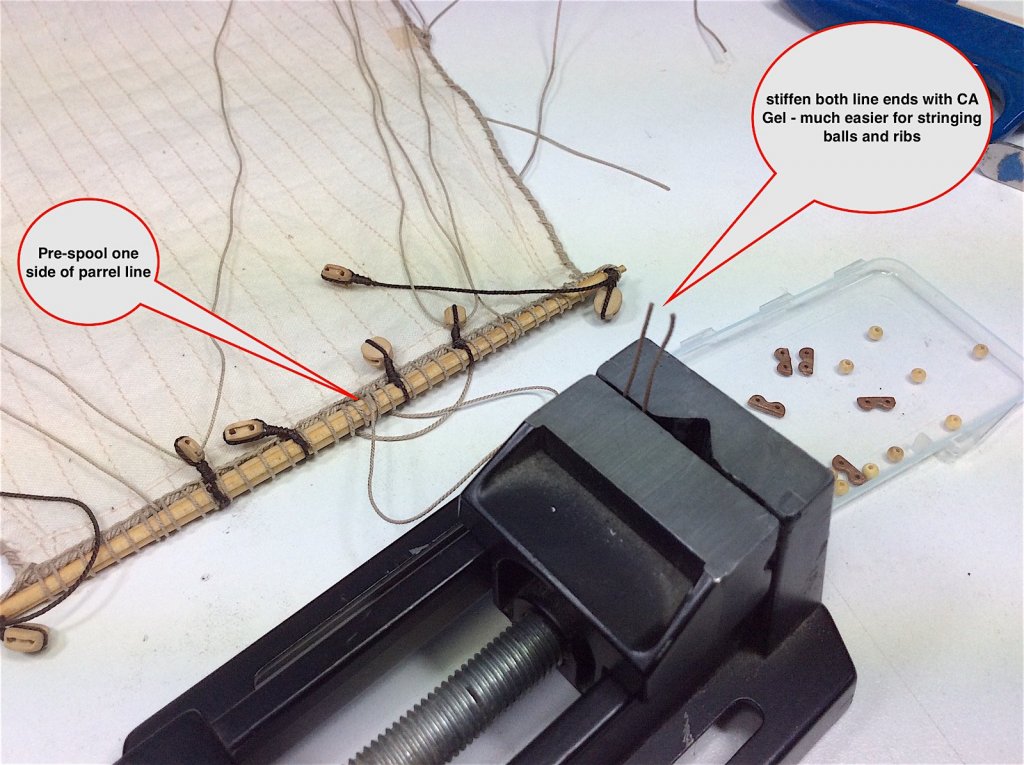
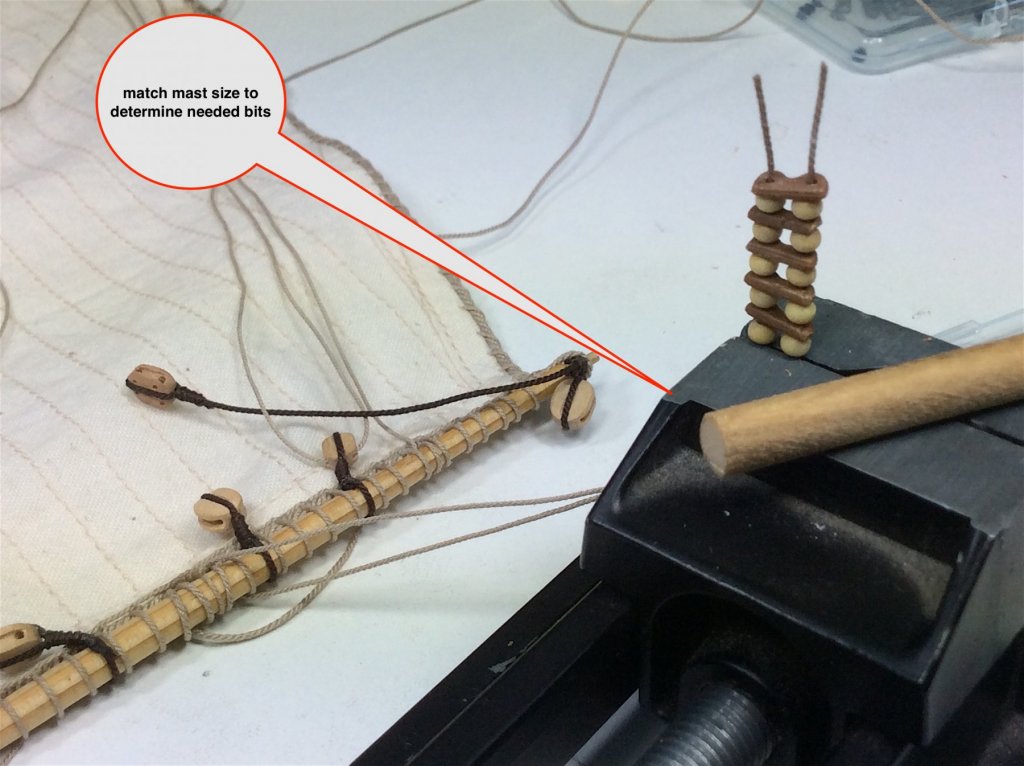
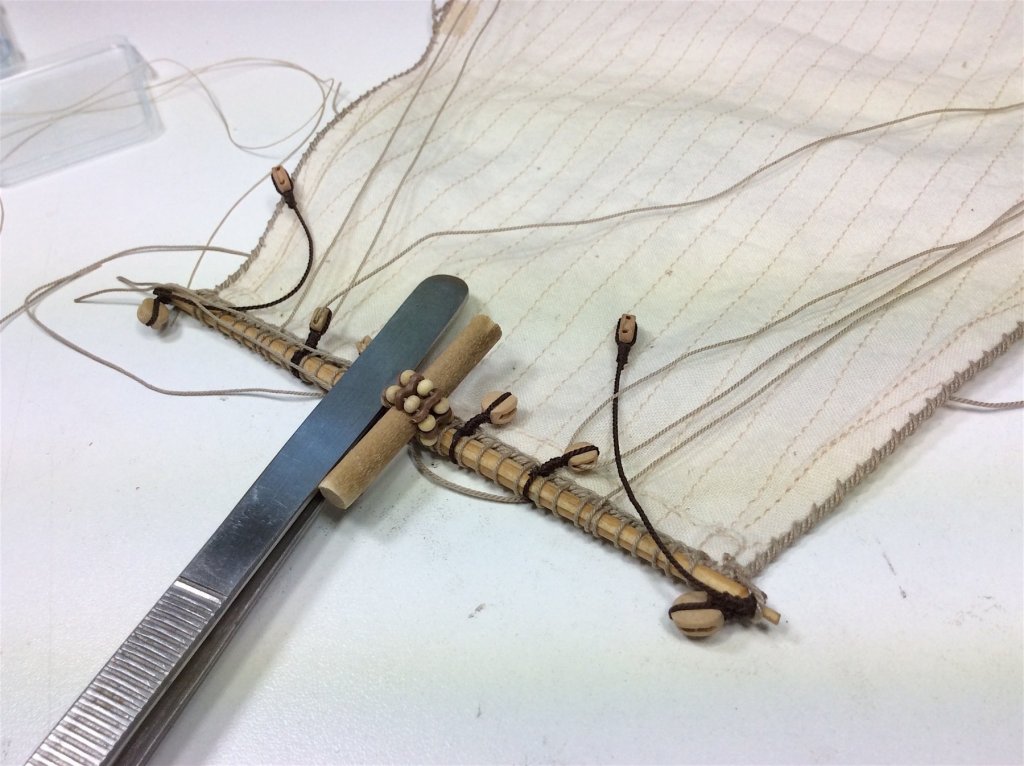
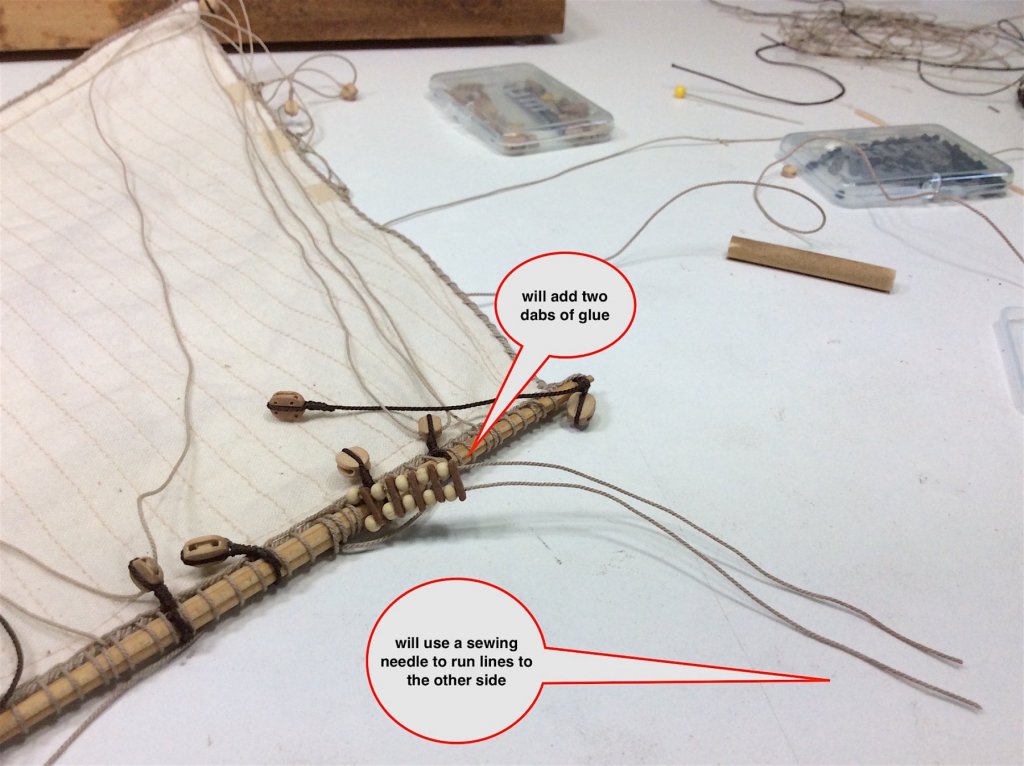
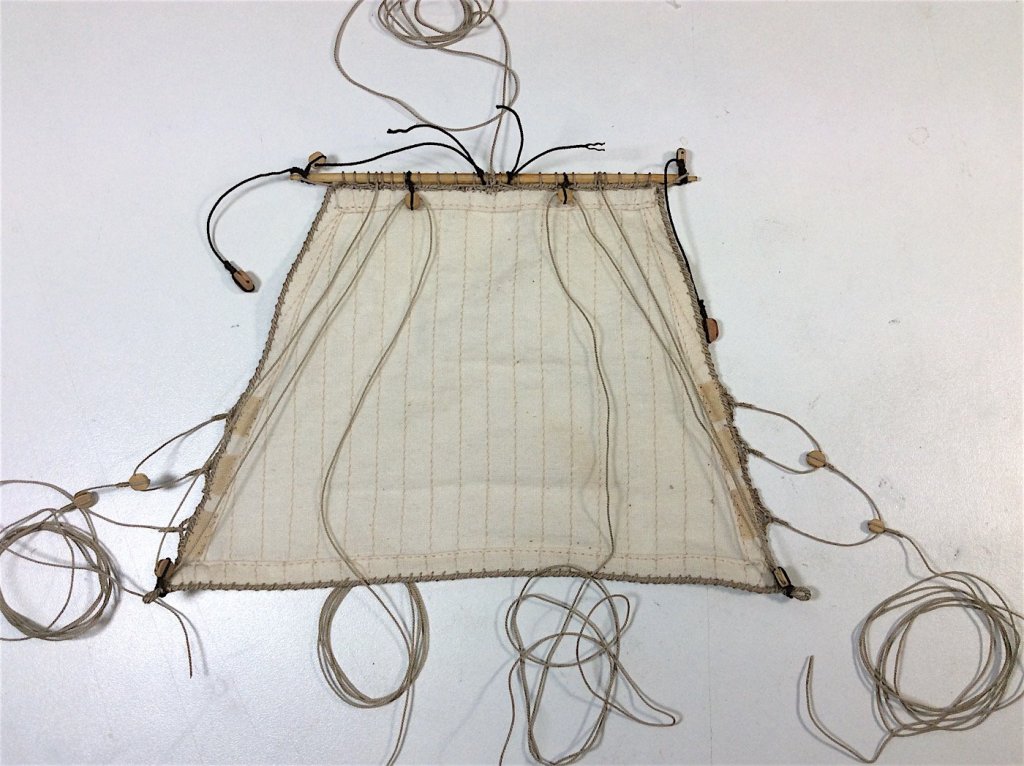
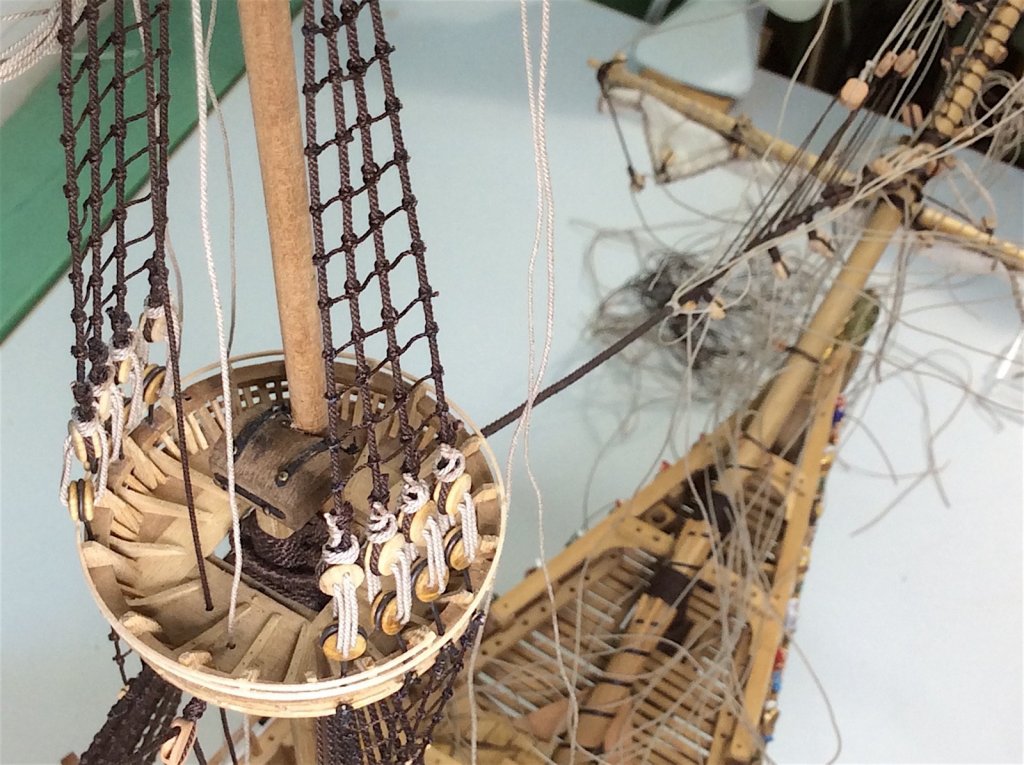
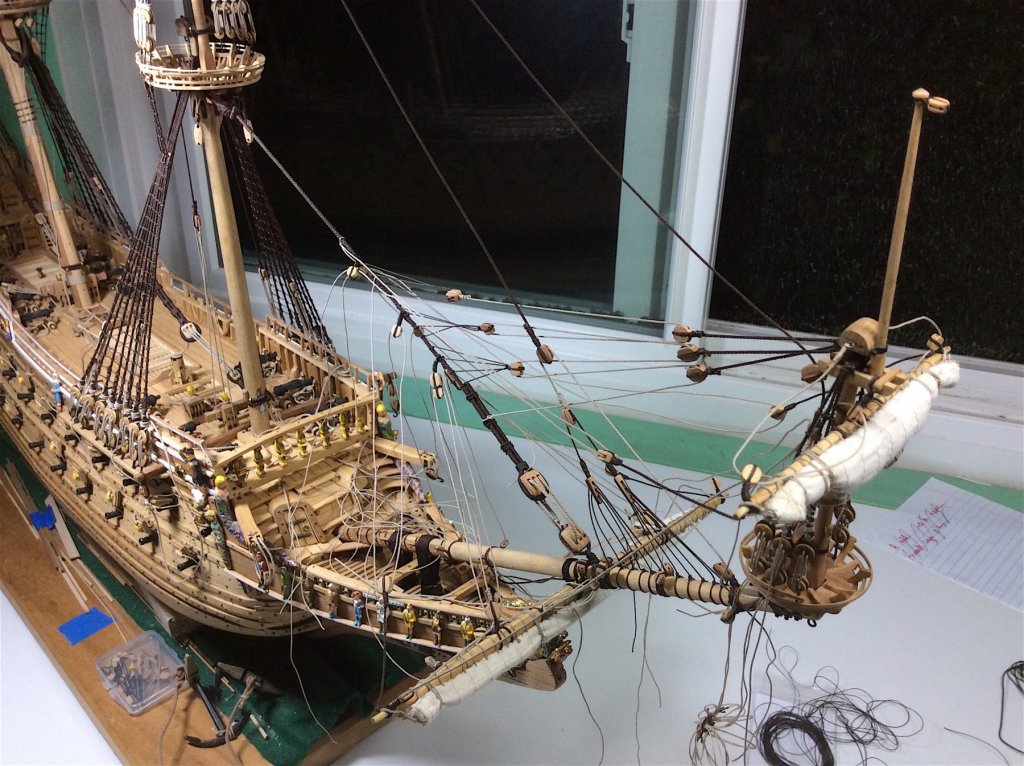
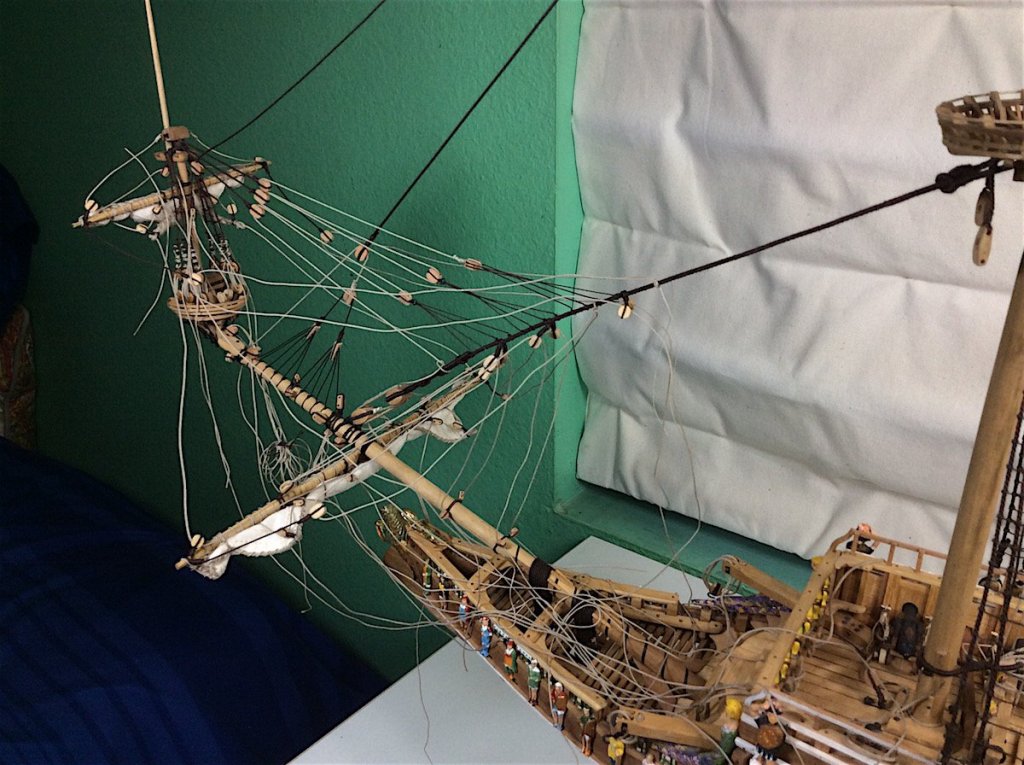
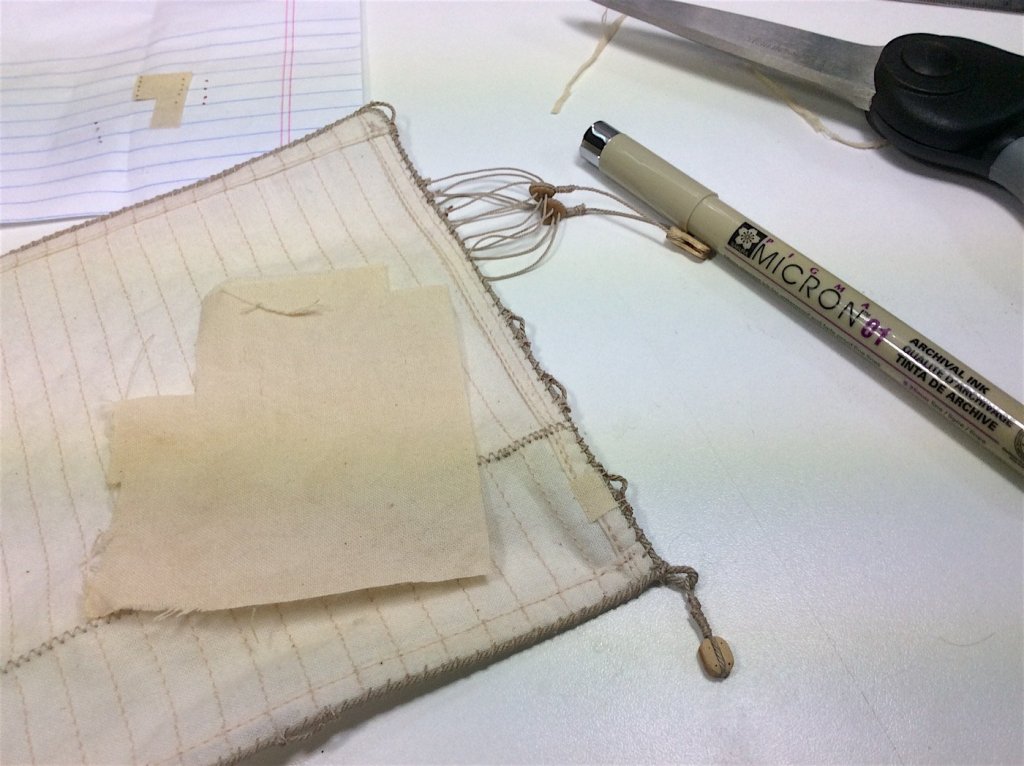
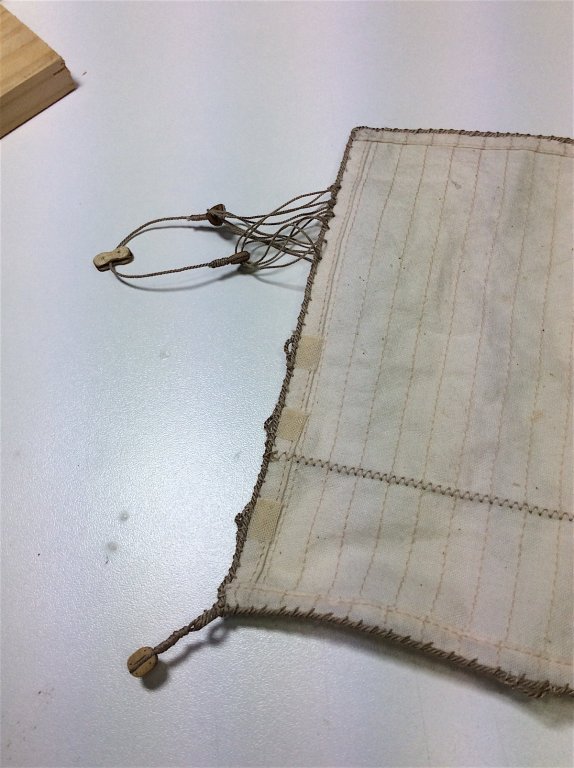
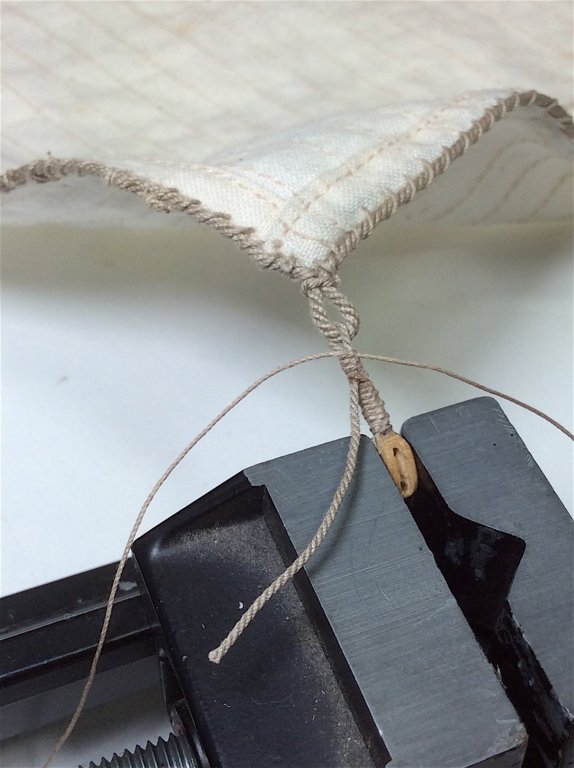
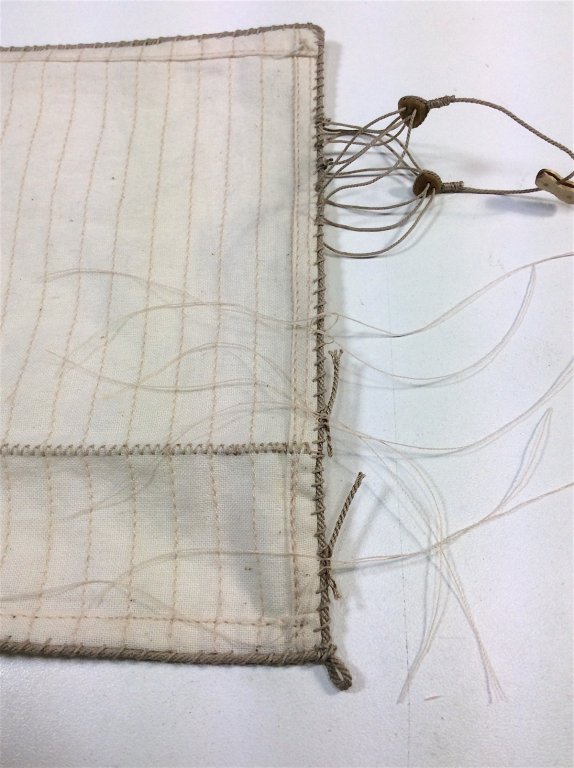
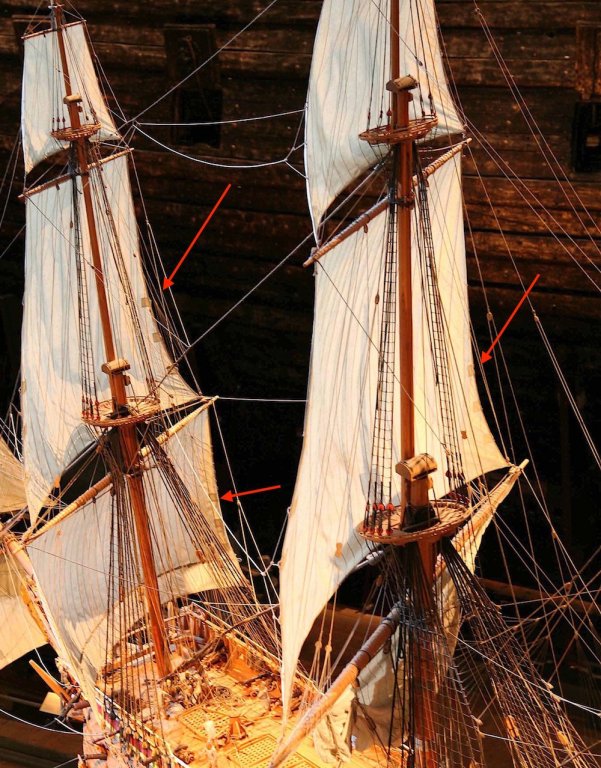
Hi Mates, Minor update – first effort at installing parrels; I will also remove top gallant fore and main sails in order to also add these bits. I got a bit lazy with those two most upper yards. This top fore sail broke the ice with parrels (that I intended to in any case add to lower yards. SO; Thought I would share what I think is a fairly easy way of doing this (for me in any case) Photos go through sequences. Anderson writes about parrel lines running down to the deck?? hmmm - Think I'll pass on that part. ================================ PS: last photo -- now need to see if my new glass is up for the job Oh and the Admiral – Not a fan – told me that actually when I drink I know very little and forget most things – She was not in on this Ha ha.. As always thanks so much for the likes, posts and just dropping by - as always. Cheers,


-
Rich, Thanks so much for your wonderful compliment. Very much appreciated. Yes the Corel's "out of the box" stern is not, well, the Vasa stern. After I started this kit, and more or less completed the hull and weather deck I starting to "see" all of the kits errors. I decided to go back and fix as many as I could. The stern being the first "fix". That said I was, at the time, a real novice and new very little. Very kind members along the way also offered great guidance indeed. It is always nice when some of what I learned can also be useful for other members. PS: I'm still learning but now feeling much more comfortable. Though I look at other logs and think OMG I'll never be that good ha ha... Again thanks for posting those old photos from earlier in this log. I had forgotten about that stern fix it. YES the Vasa museum is indeed spectacular. Regards,
-
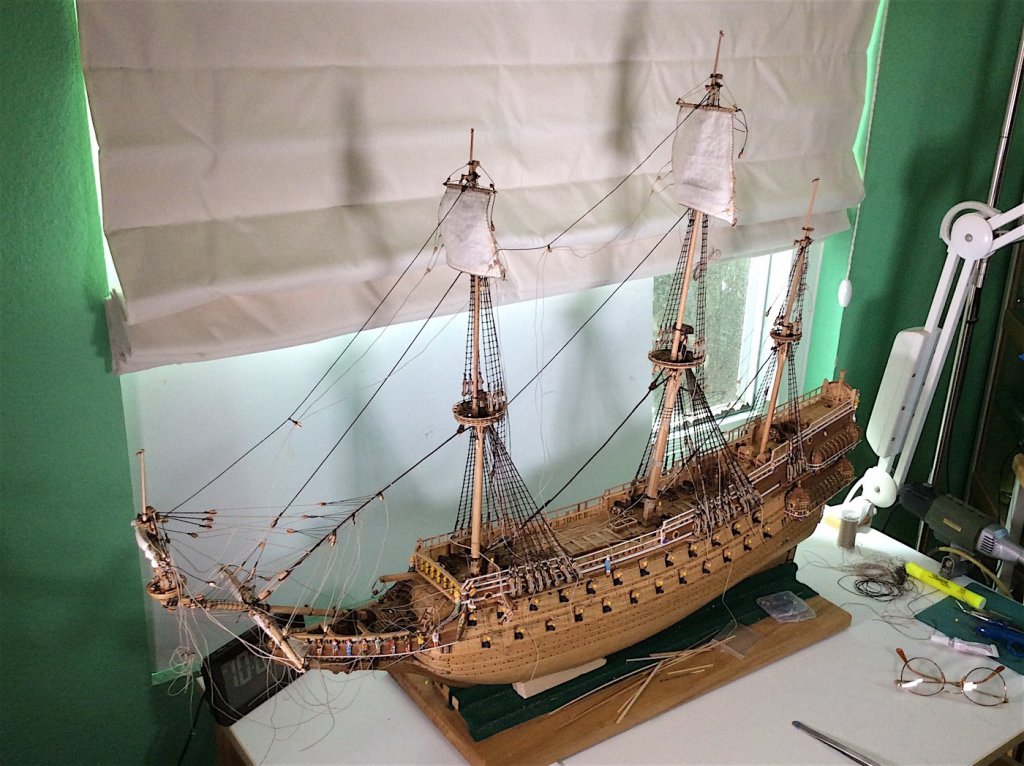
Continuing work on installing sails – now onto top gallant fore and mains first. Here are some updated pics. My goal is to prepare at least one sail per week; •Attach yards •Make sailcloth edge reinforcements •Make needed edge cringles •Make head cringles •Prepare/attach all needed blocks •Attach all needed lines •Prepare parrels ============================= As always thanks so much for your continued and very encouraging support. PS: I need to check my settings – since the software update I’m not getting notices from all of the logs that I also follow. Hmmm? Cheers,


-
Greg, Photo etch parts add amazing details to kits indeed. BUT so hard to work with BRILLIANT work on your part. I have seen photo etch after-market sets added to 1/12th Ferrari kits - they make the completed cars look amazing! Cheers,
-
Don, Yes indeed such a great project - your level of added details are also brilliant. Regards,
- 653 replies
-
- 3
-

-
- trabakul
- marisstella
- (and 1 more)
-
Ulises, Of course - your Vasa - back in 014 - was the first that I saw after I joined MSW that had sails . It was at that time, way beyond me then to think about sails. Then continued to learn and improve -especially following great build logs that explained how bits were achieved. Lot's of inspirations are created for me (and other members of course) by following other build logs - fun indeed. Thanks for your kind compliment. PS: your "under the table" list is really impressive. Cheers,
-
Patrick, Thanks - but as I noted this technique was taken from Frank's great Corel Wasa. Working out quite well. Had it not been for Frank's and Karl's(Billings Vasa) adding sails to their builds, I would have passed on these extra details. I just did not have the skills to understand how to do these correctly. They were/ are my teachers. I'm only copying. In fact still I'm spending half my time with their build logs as I continue with my just started sails. Great references indeed. Your sails also came out super nice - really does add an extra dimension to these builds PS: I have also learned that adding sails is really complicated and takes a lot of extra time. Glad, however that I'm taking the leap. I also still need to follow through on my New Year's 017 wish -- FINISH this build by 12/31/017 ha ha - Cheers,
-
Ken, A real beauty. - PS: Took some notes on your technique for hanging flags
-
B.E., Just catching up - As usual beautiful work! Cheers,
- 156 replies
-
- 3
-
-
- pinnace
- model shipways
- (and 1 more)
-
Jack, Don't how I missed this one -I have been following your builds for a while. This one is especially awesome indeed, as has been stated by many members. Beautiful work. So perfect! Photobucket !! what the He*ll. Cheers,
- 174 replies
-
- 2
-
-
- gaeta falcata
- marisstella
- (and 1 more)
-
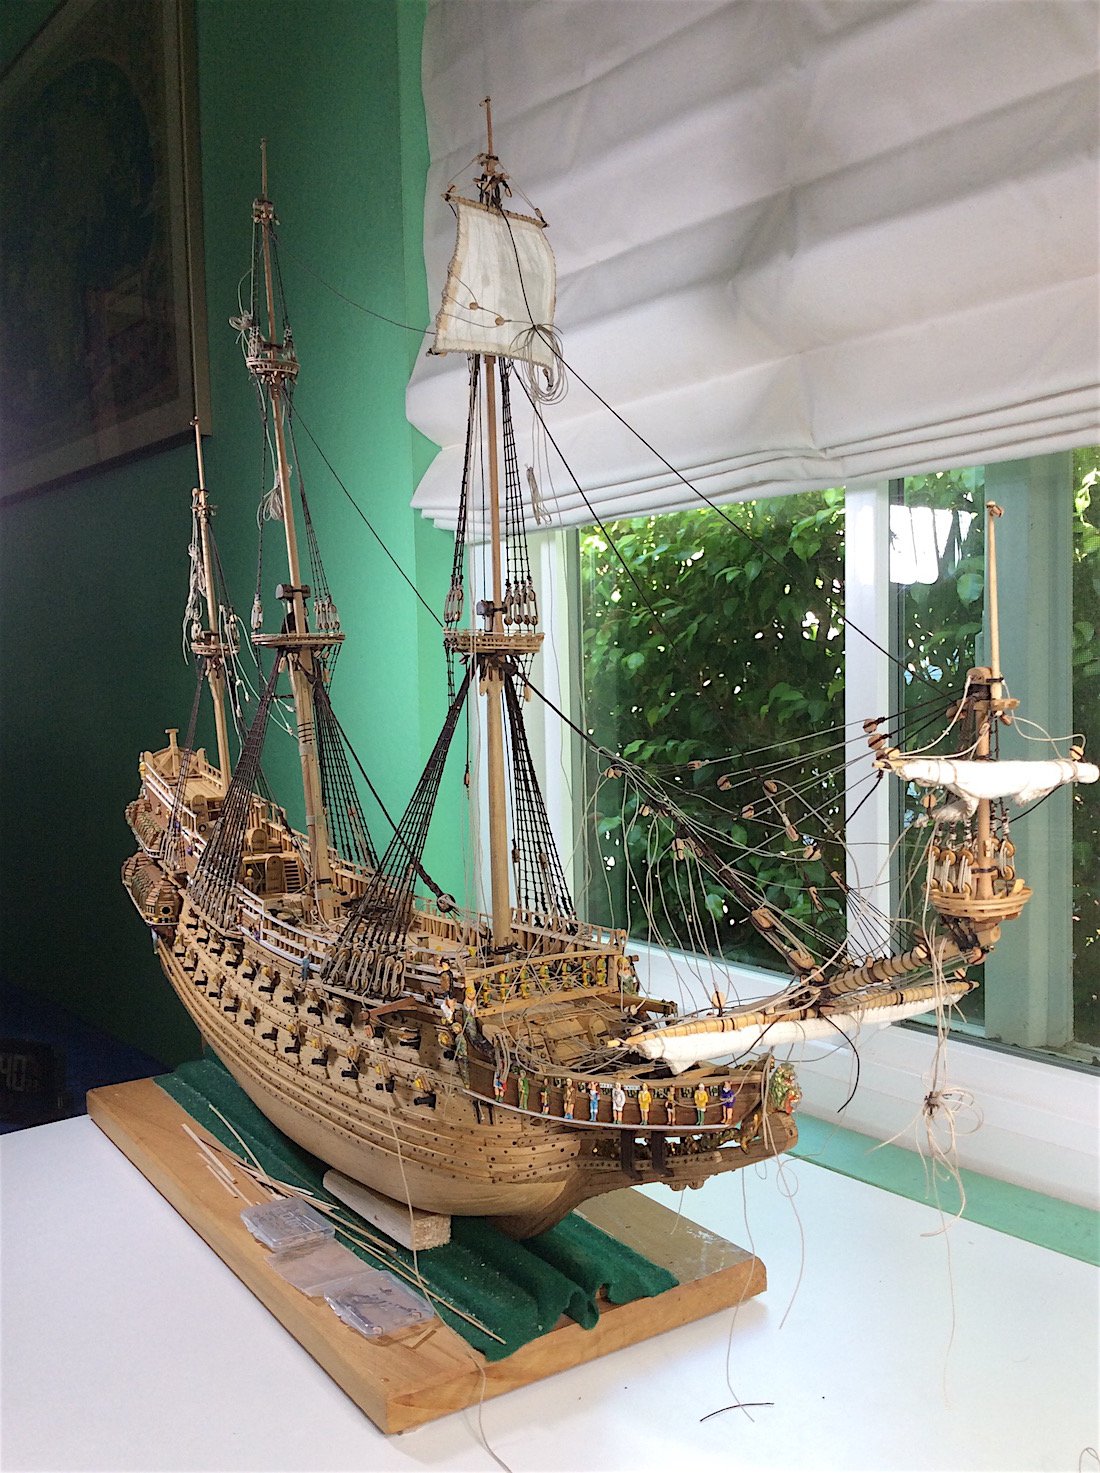
Hi Mates, Finally started installing sails. First effort at this. Lot's of learning going on for me. Also working from three sets of plans is a bit confusing. PS: I'm now so impressed by builders who breeze right through installing sails (:-) Regards,

-
Patrick Your research is, as I and others have often stated super impressive. But IMO don't knock yourself out - whatever you end up with will obviously be sort of a general "guess". High stern? lower it and some will say that it is too low (:-) At the end of the day it still requires a lot of 16th century timeline guesswork. Your GH will be brilliant in any case ( by that I meant YOUR concerns) we are always our worst critic are we not?? ==================== This would be the same for the Vasa builders (hull) had it not been resurrected. It's rigging, however, is generally speaking ok - but as Fred Hocker has indicated many of the actual pin and rail locations are guesses as well. ==================== Batavia will be a great visit - Enjoy. PS: I have been tempted to return to see the Vasa Museum again - my visit was 19 years ago. Cheers,
- 756 replies
-
- 3
-
-
- galleon
- golden hind
- (and 2 more)
-
Patrick, She just gets better and better with each visit. Superb project indeed. Regards,
- 756 replies
-
- 2
-
-
- galleon
- golden hind
- (and 2 more)
-
Martyn, Super nice updates. These types of kits are so advanced that they still make me nervous ha ha Your start looks excellent indeed. As EJ mentioned Yes nice to see color added. Regards,
-
Ken, Brilliant as always - learning alot from your log THANKS indeed. Cheers,
-
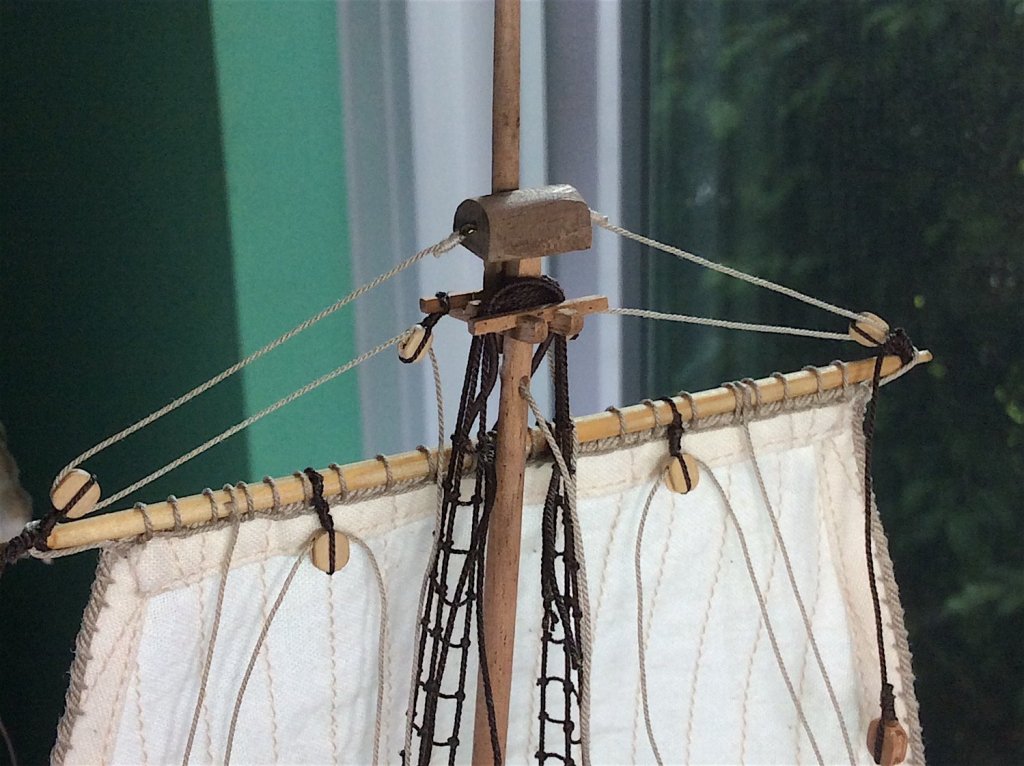
Hi mates, Martyn - so kind thanks so much. Minor update but big one for me. Decided to “bite the bullet” and challenge myself to improve areas that were new and very uncomfortable (working with sail details) – so most of the day yesterday was trying to get these two particular sails acceptably ‘ok’ – feeling comfortable with the results; The other nine are waiting in the wings, but I now have a direction. PS: these two sprit sails are reduced by 30+% - they will be furled. Would have been too bulky (scale wise )in full size --- Frank (fmodjr) thanks for that sage advice from your superb Vasa build log - I followed your build, and will furl all lower sails, but partially raising the lower main as you did- love that look that you created. Cheers,

-
Edwin, Frank, thanks so much mates for your posts -- appreciated Peter nice of you to post Thank you!– much appreciated. PS: Not So fast. Cubans are somewhat available in this small box. I was in Cartagena a couple of months ago and brought some back (not the Cartagena close to you, but the one across the Atlantic closer to me) And whenever I travel to any other country on this planet Cuban's are available (:-) They are still illegal to possess in USA – so ridiculous after more than half a century. I have not been caught by customs - so far........ As always thanks for the likes and just dropping by. Cheers,

-
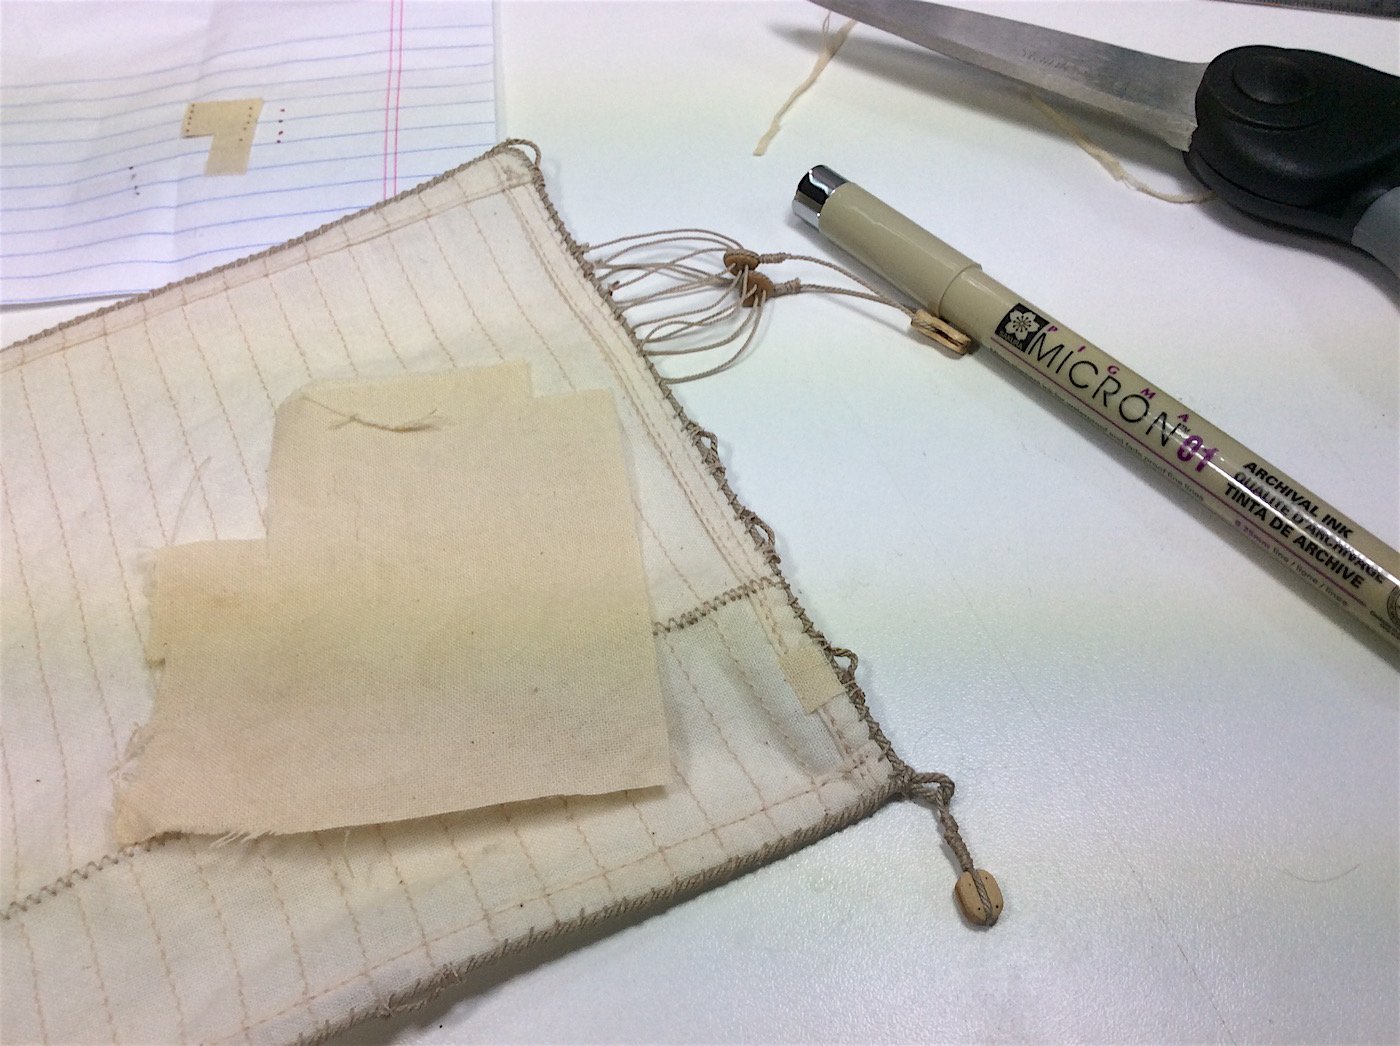
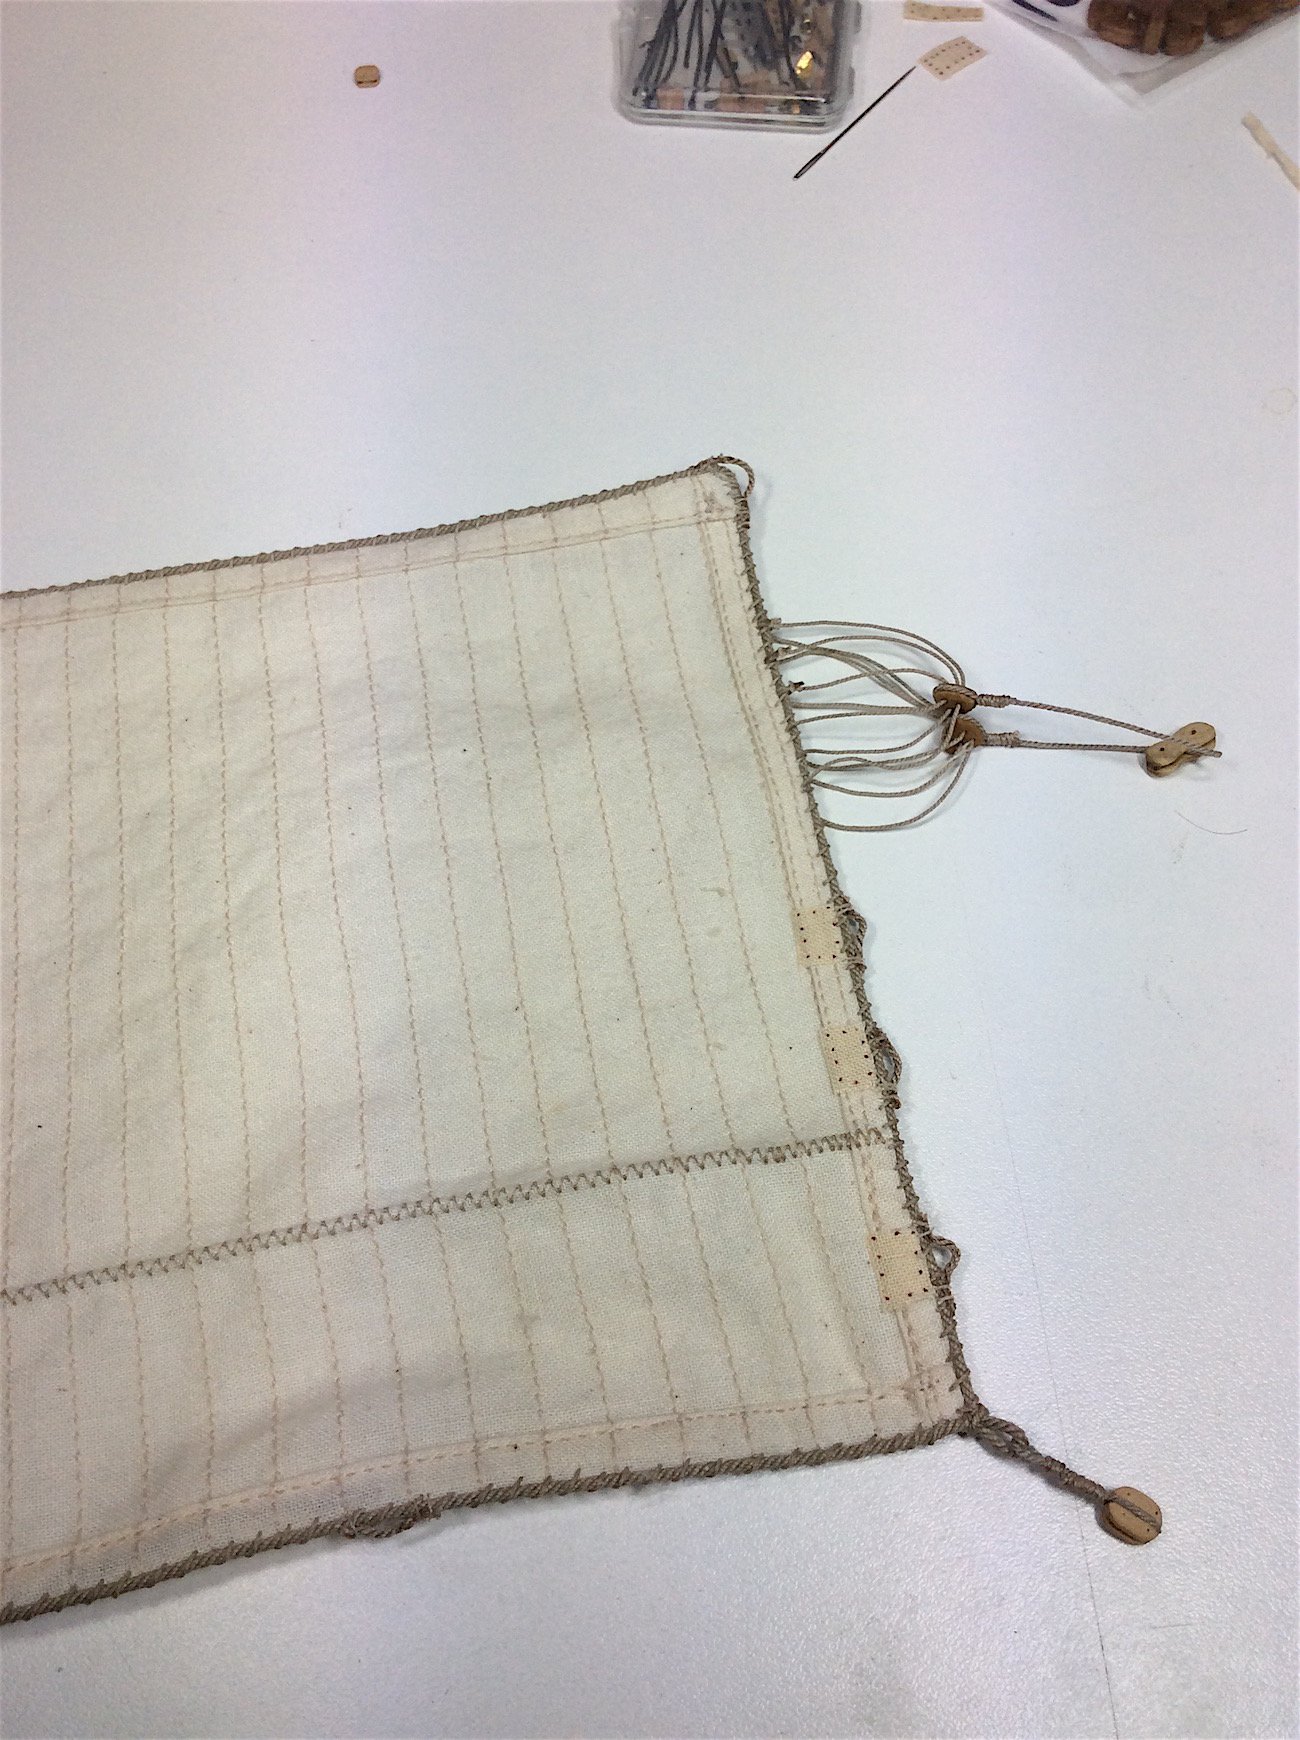
Hi Mates, Frank thanks – nice of you to comment – much appreciated needed a “pep talk”…Denis Cheers as well ! Mates -Apologies for venting on my last post. Not a place in which to do this. Your kindness in following along, posting or just dropping in is not for some builder (me) complaining. That said - after, I decided to go outside, smoke a nice Churchill (along with a Single Malt (or two) of course). Listen to my baseball team on the radio, and also allow for some introspection. Cigar took care of any TV- Admiral would have lowered the plank and pulled out her sword. Can't blame her actually... It then struck me that to rush parts that are not “fun” will result, on the backside, with disappointment. Especially given the attention that I have spent trying to build it as best that I can “right” so far. Thanks Frank!! So I will work in this area more carefully spending all of the time that I need to not feel that it is work, but instead as a new challenge in trying to improve my skills. Minor update: Found a way to add those reinforcement bits to the sails. Tea steeped some left over sailcloth to allow for a slightly darker tint. Found that Gorilla Wood Glue is perfect for fixing those little cloth bits, and still allow flexing. Added little dots trying to achieve the stitched look – not sure on that part. Too dark I think? Won’t post until I really move forward – no point in boring you mates any further with this area. As always thanks so much for the likes, posts or just dropping by…… Cheers,

-
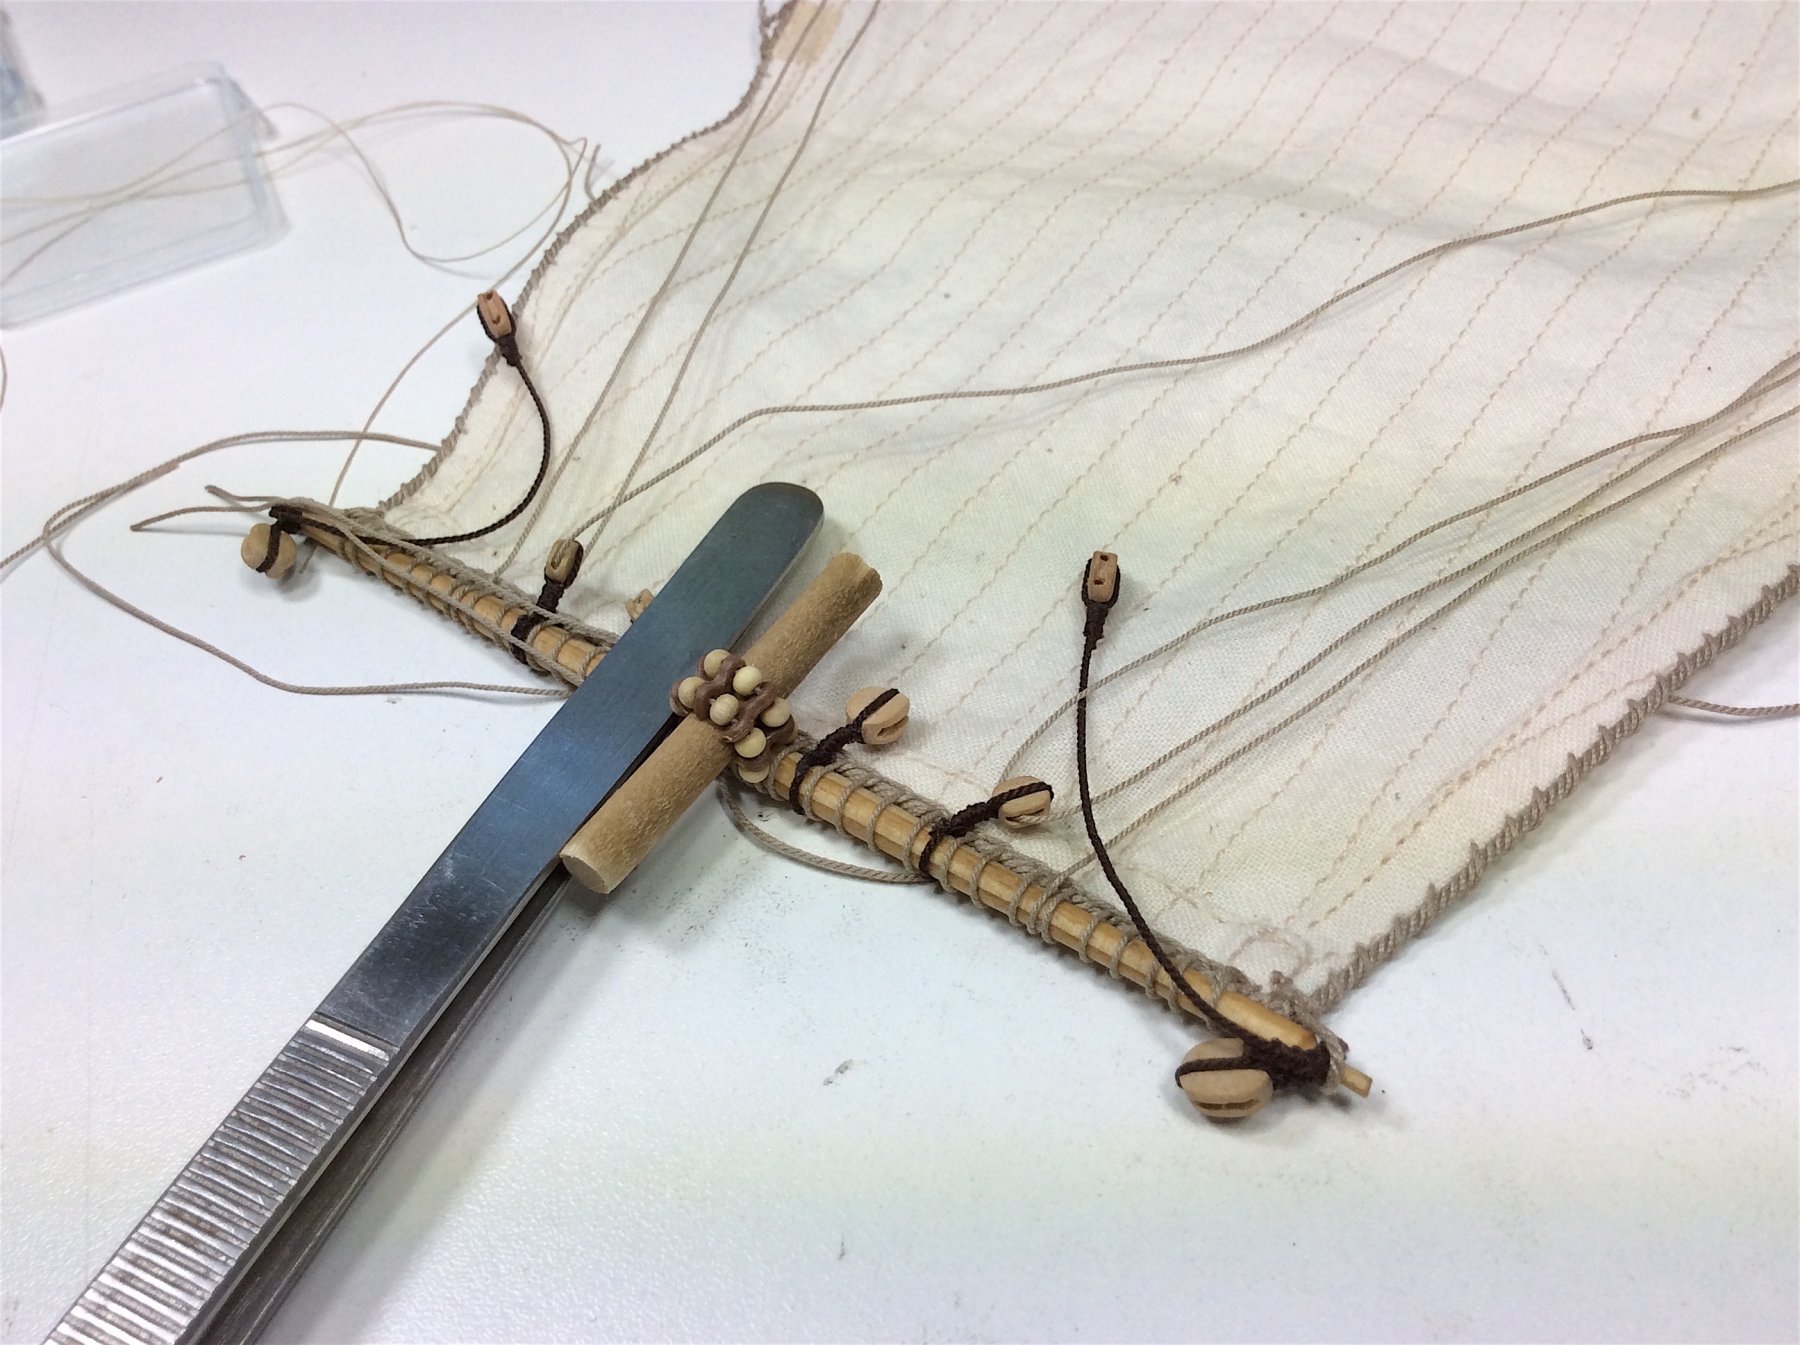
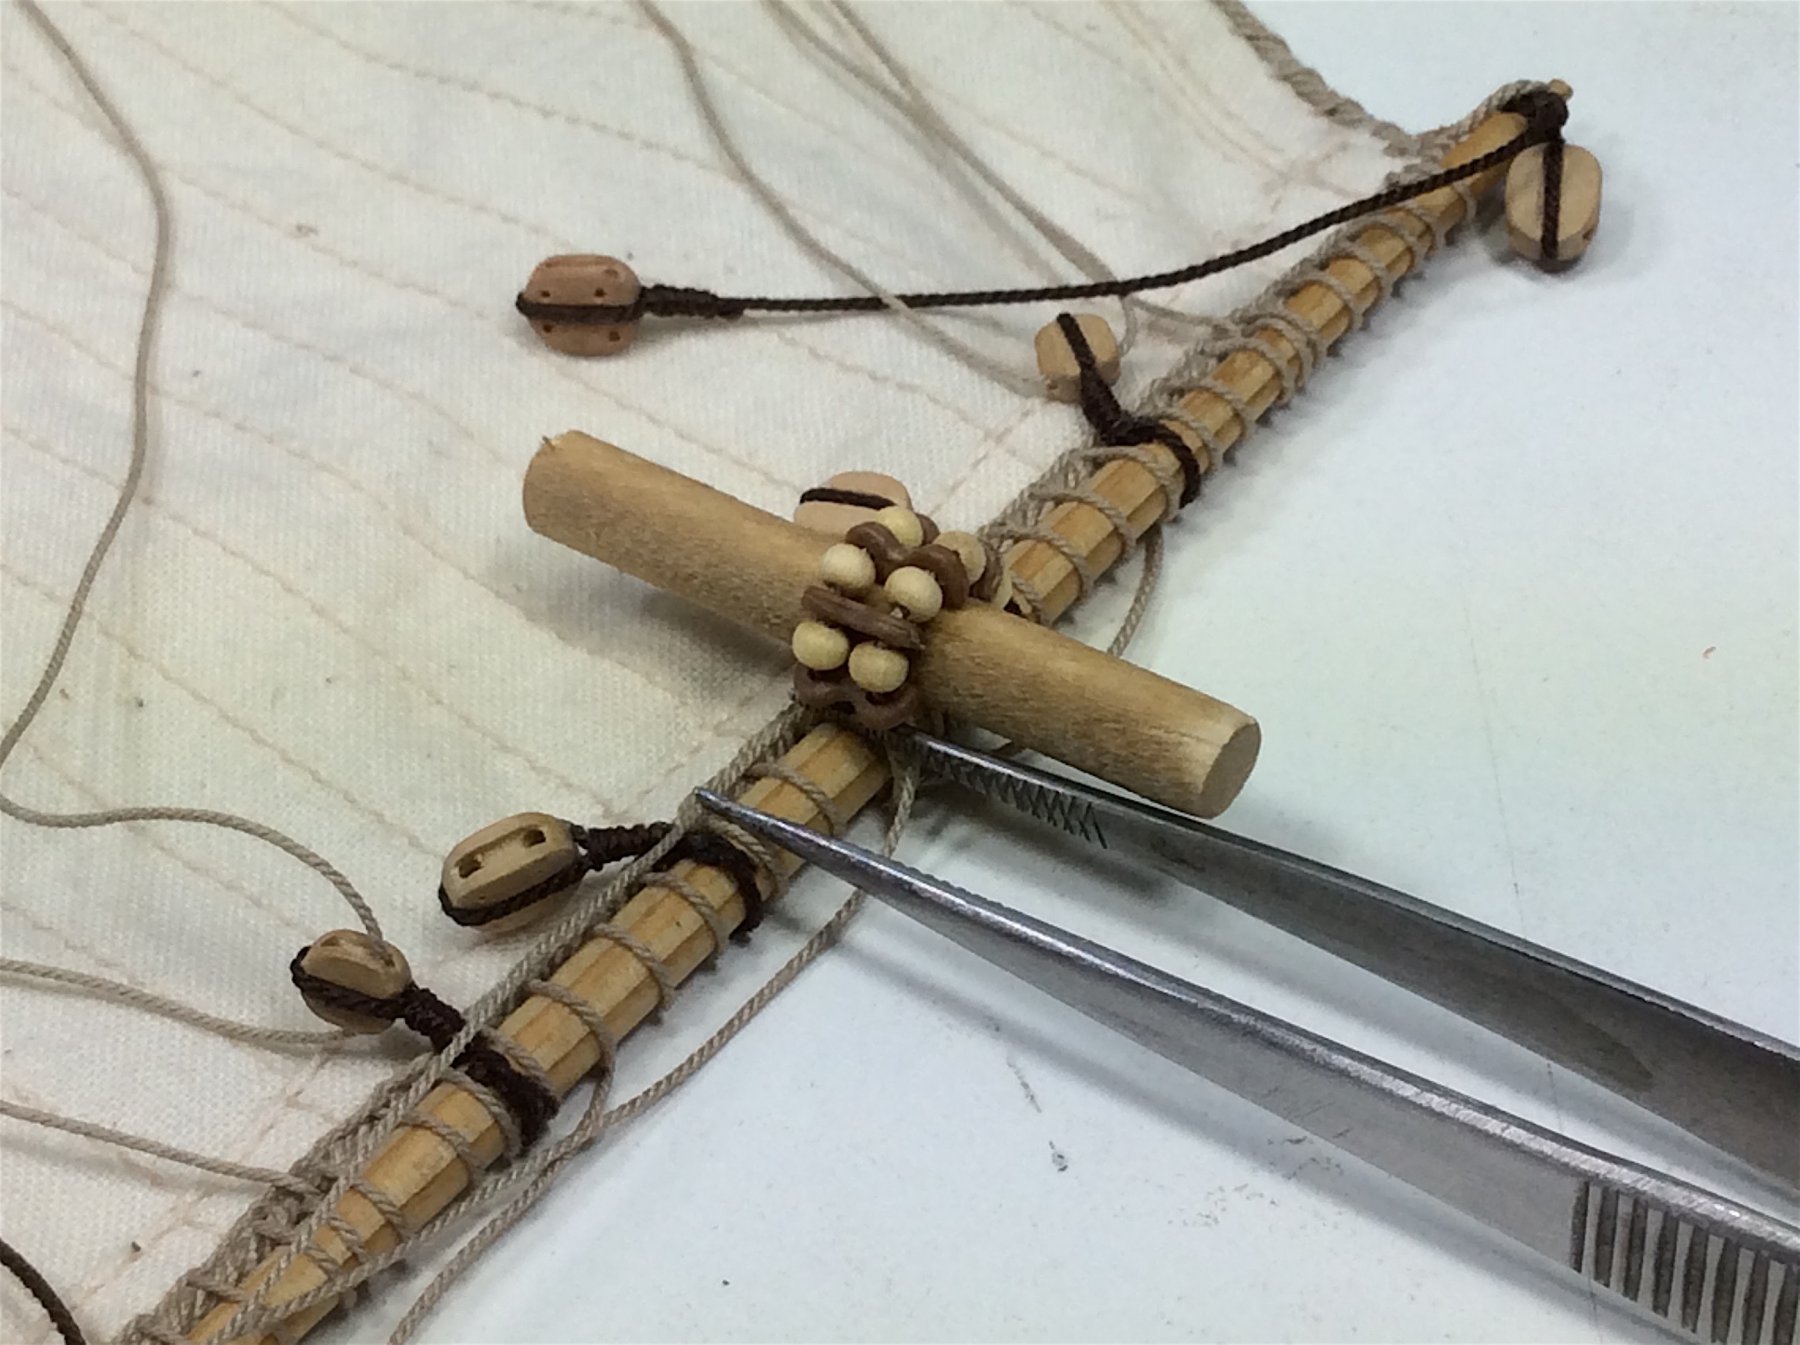
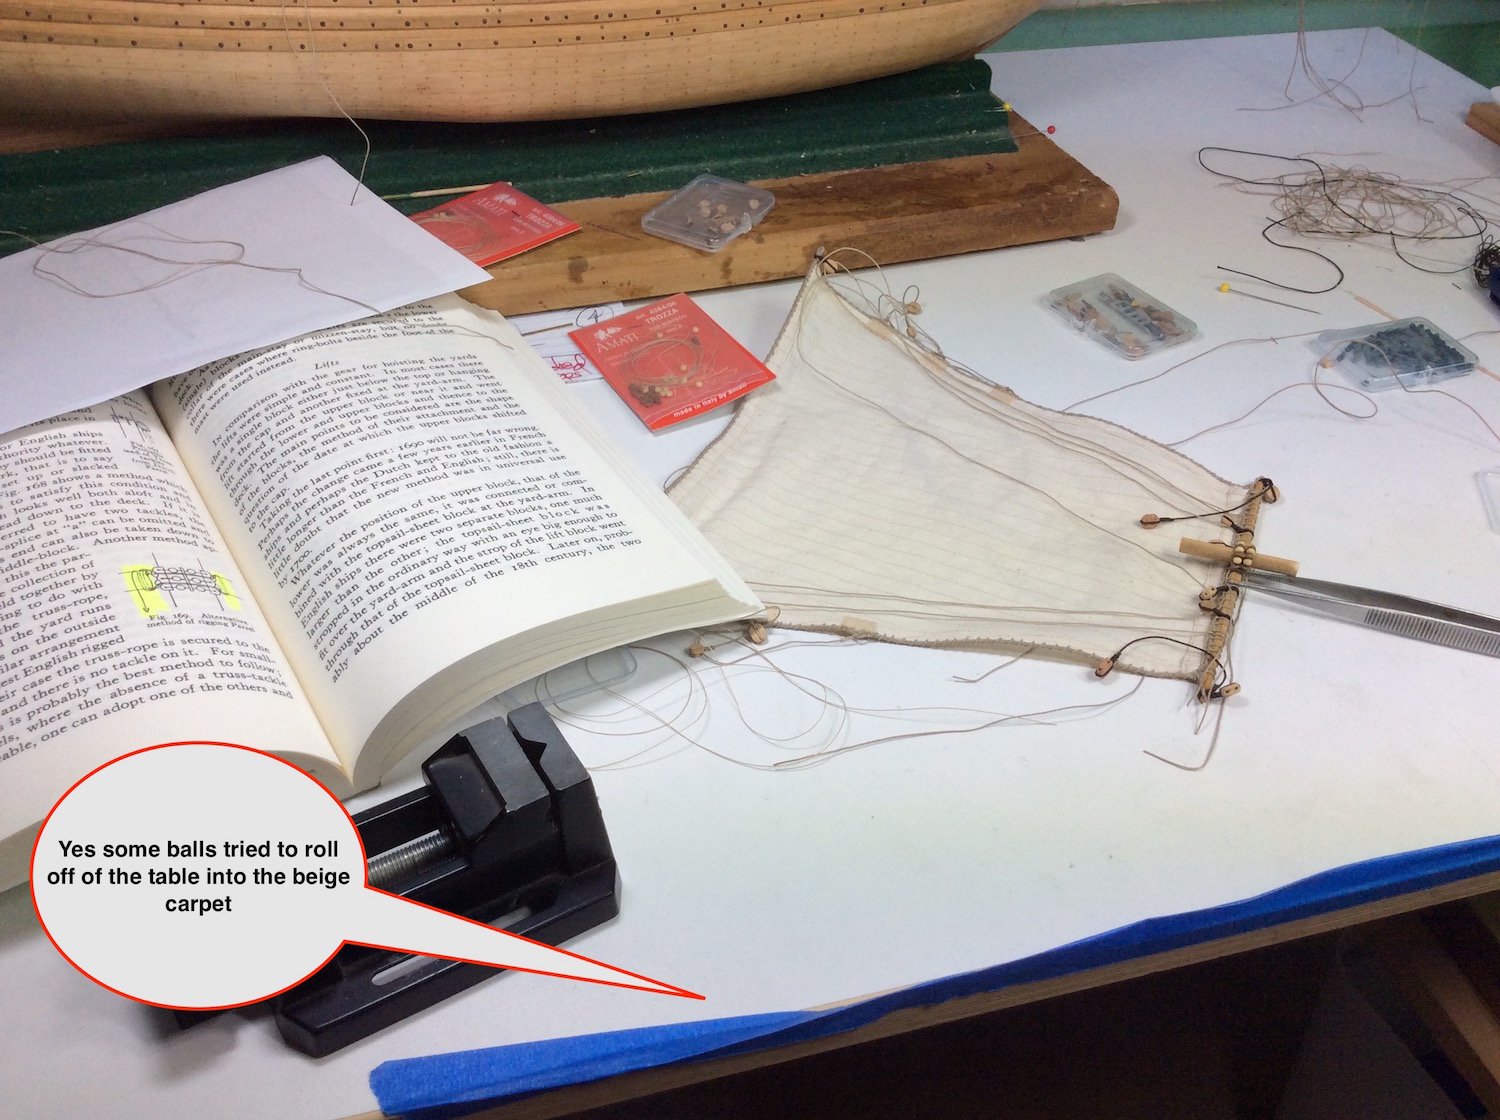
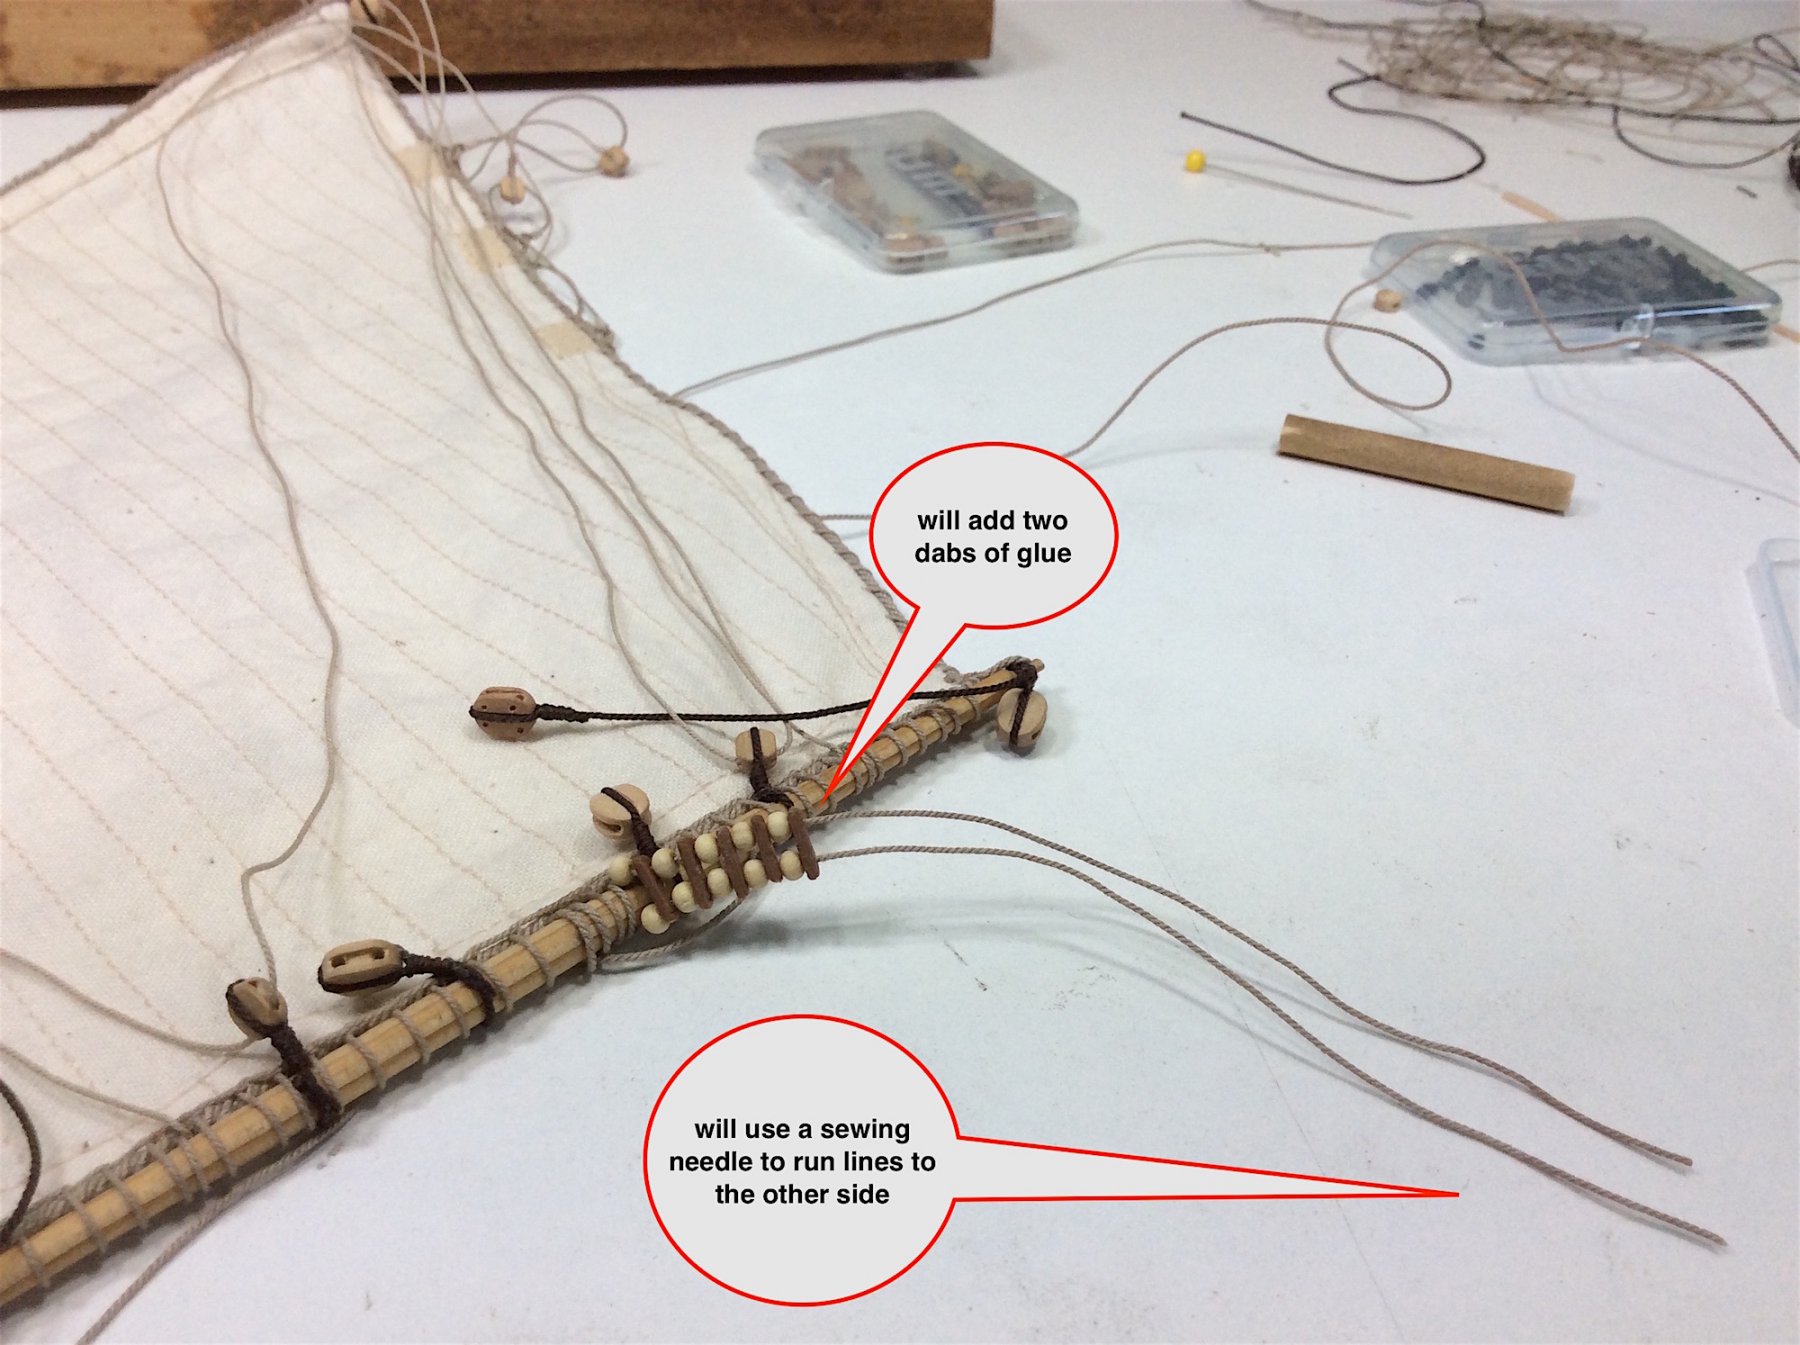
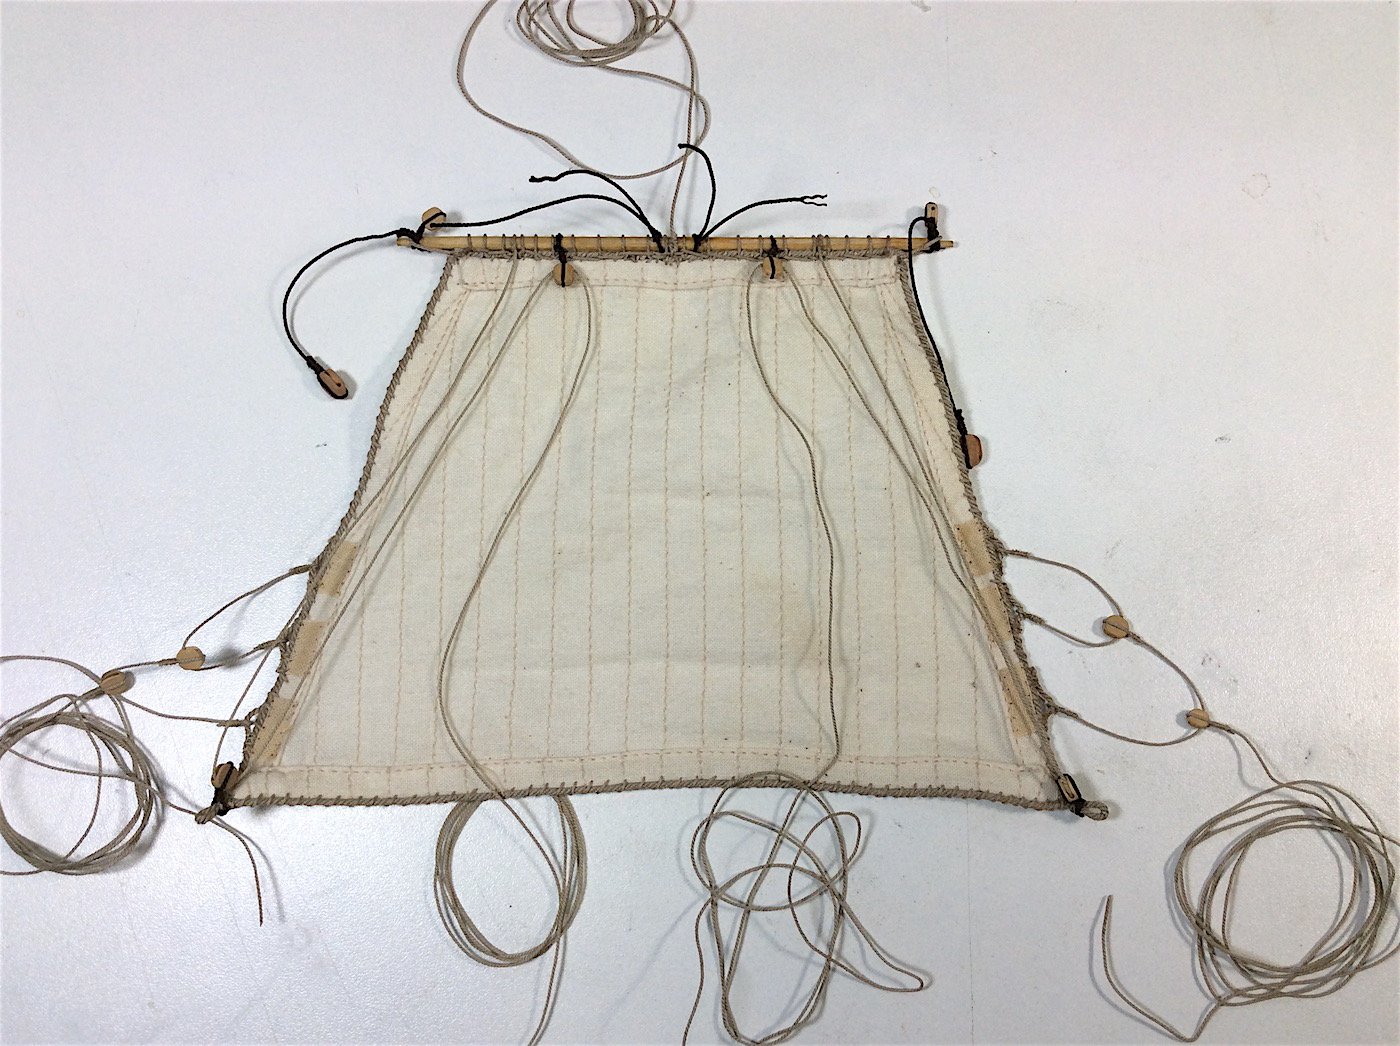
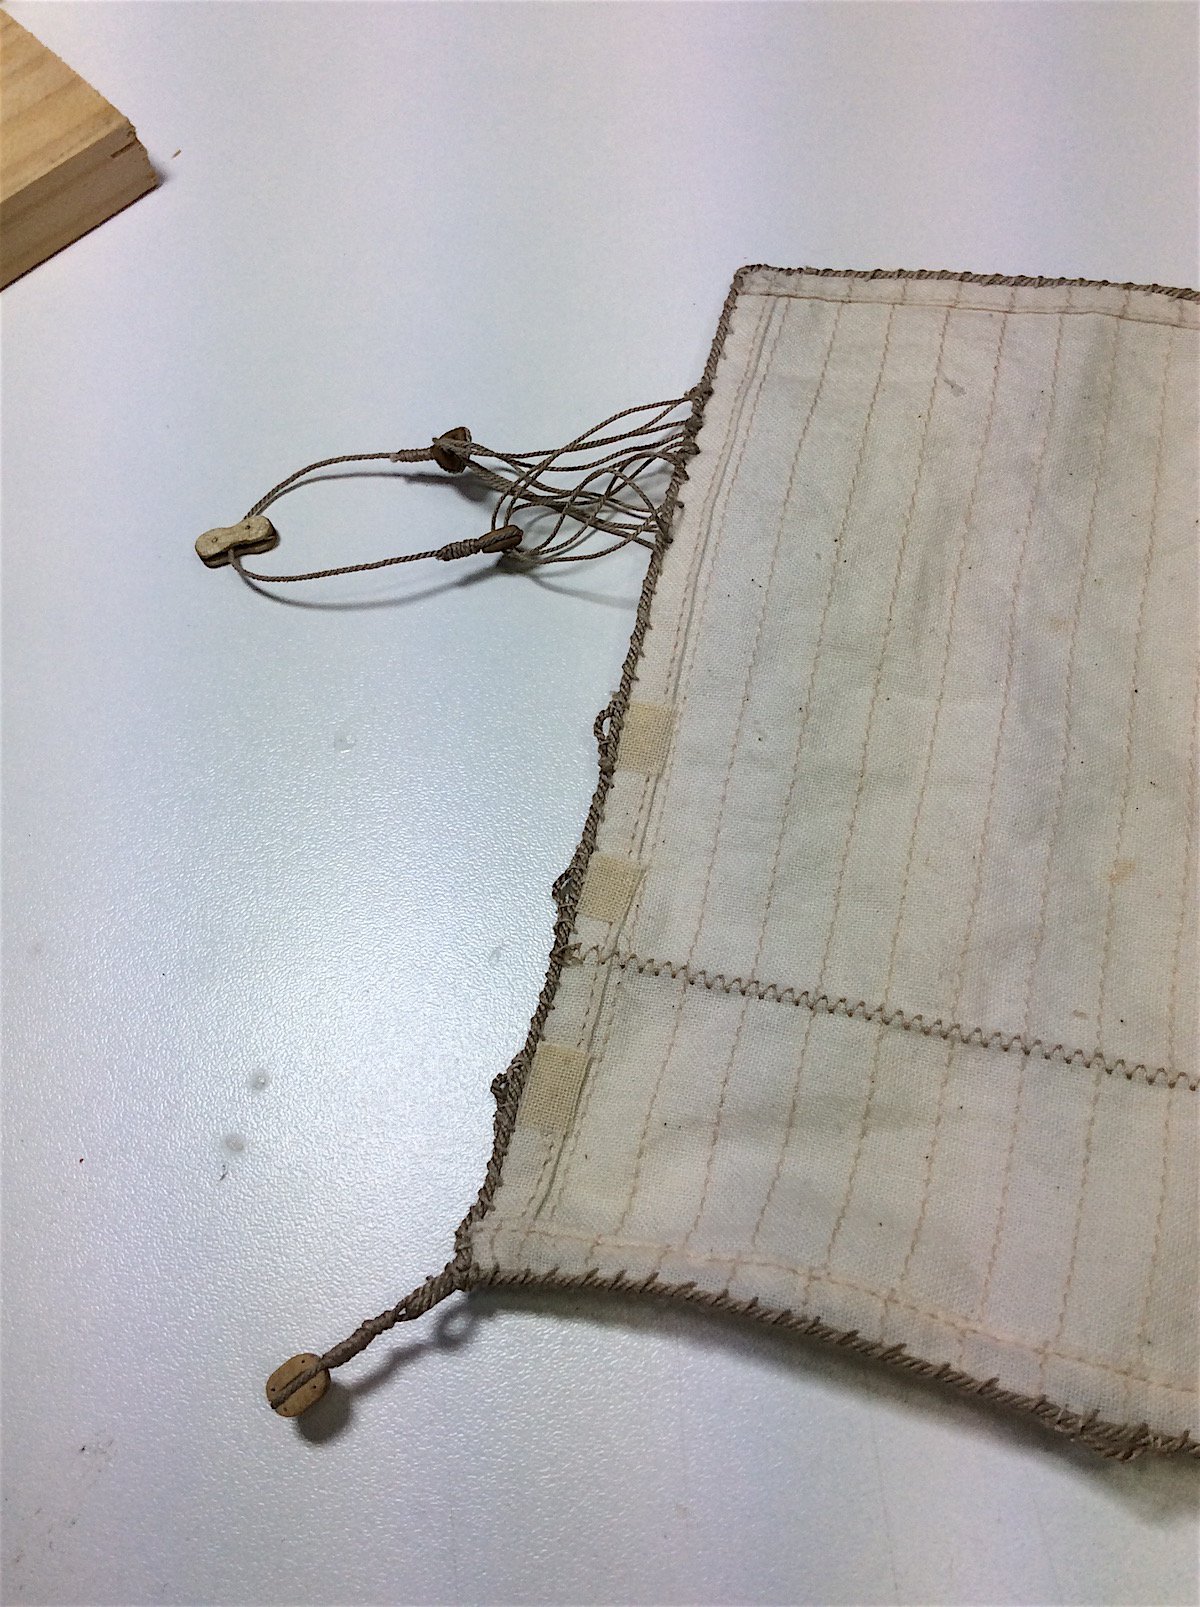
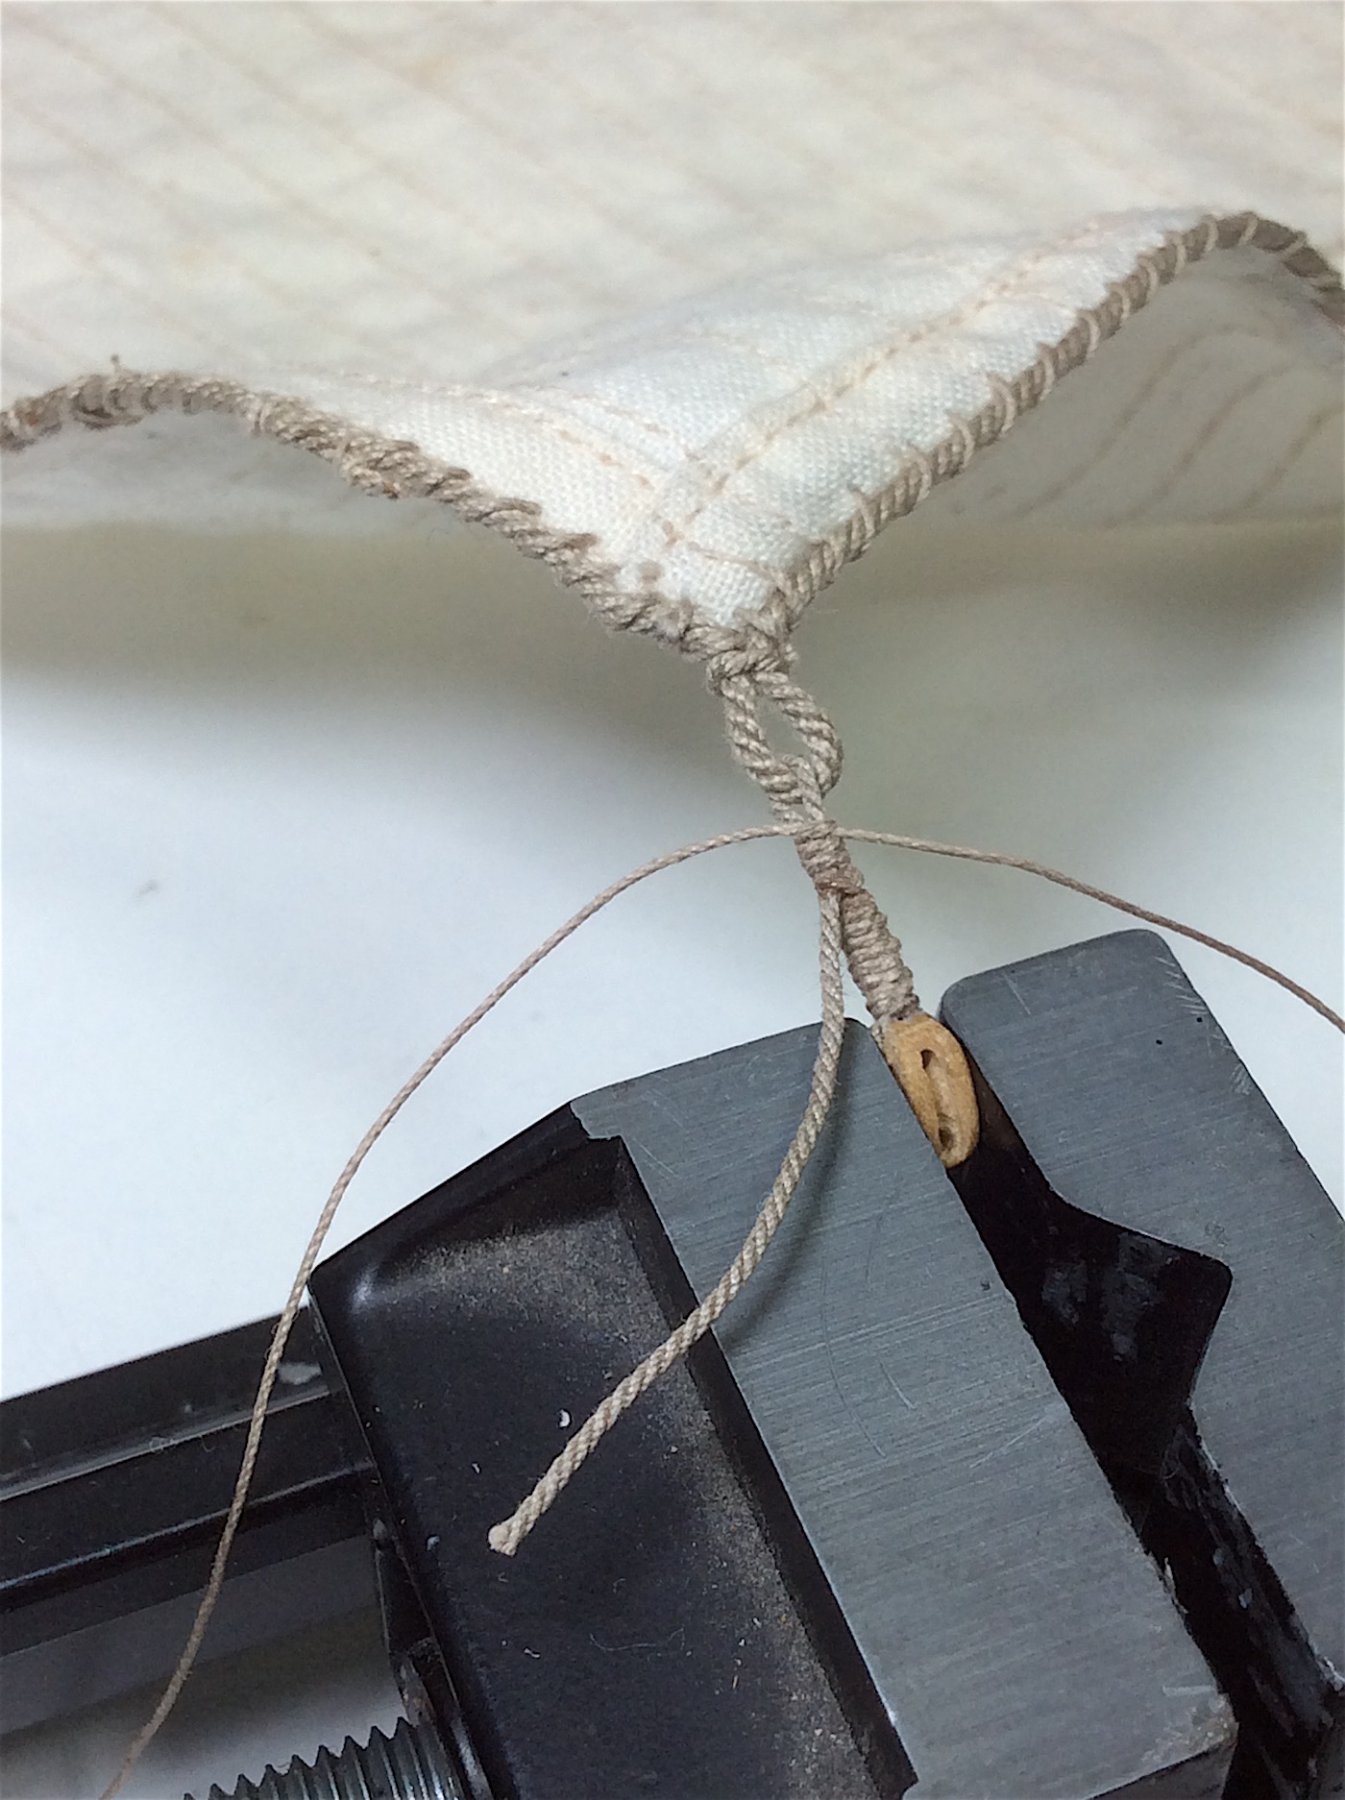
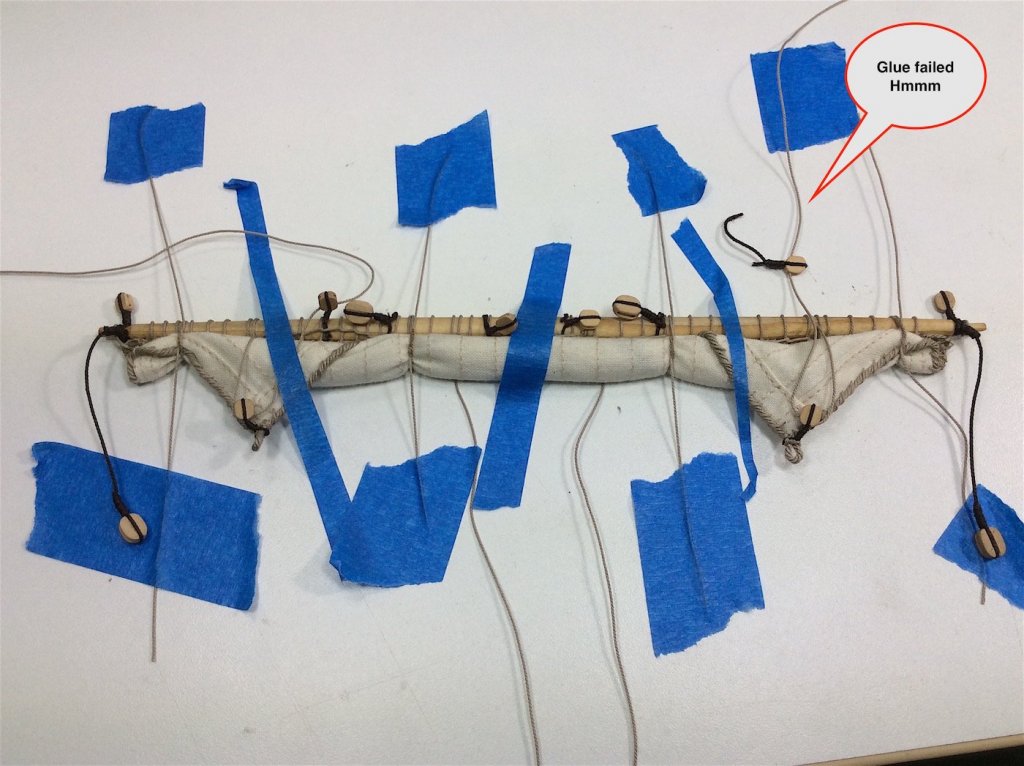
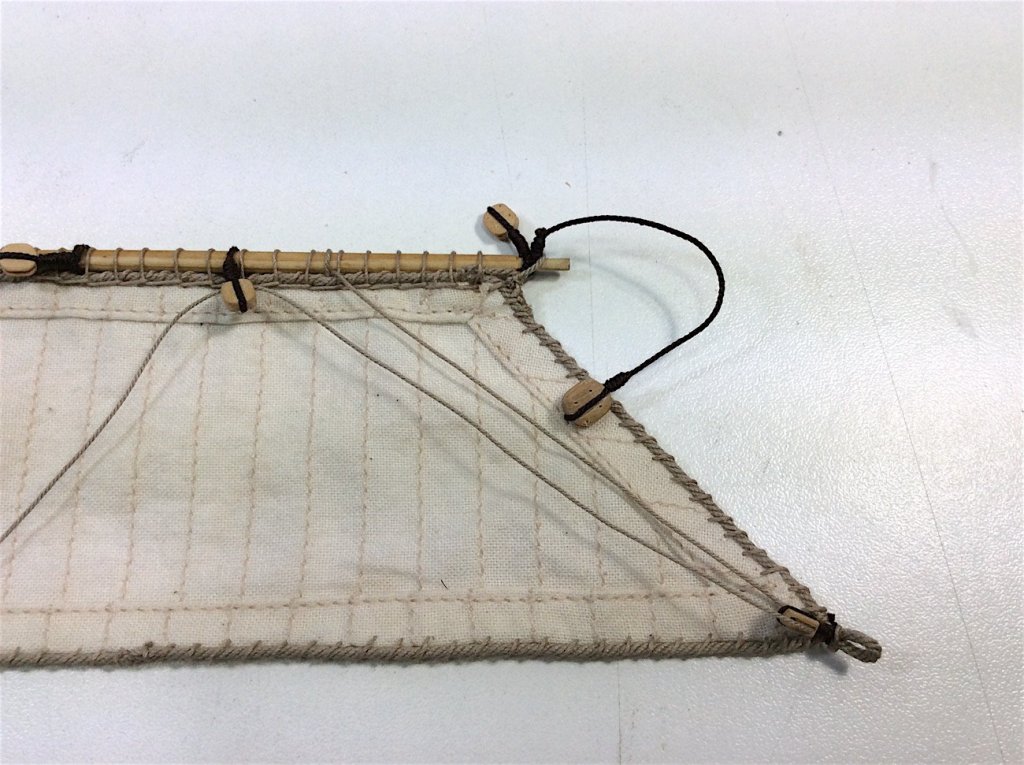
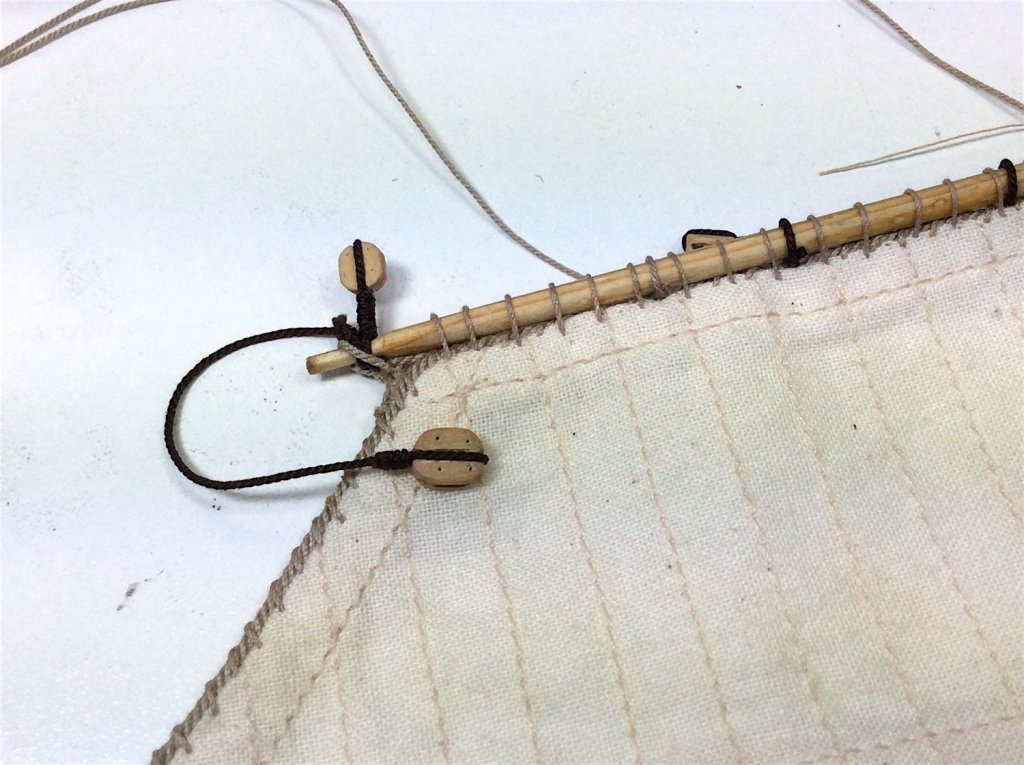
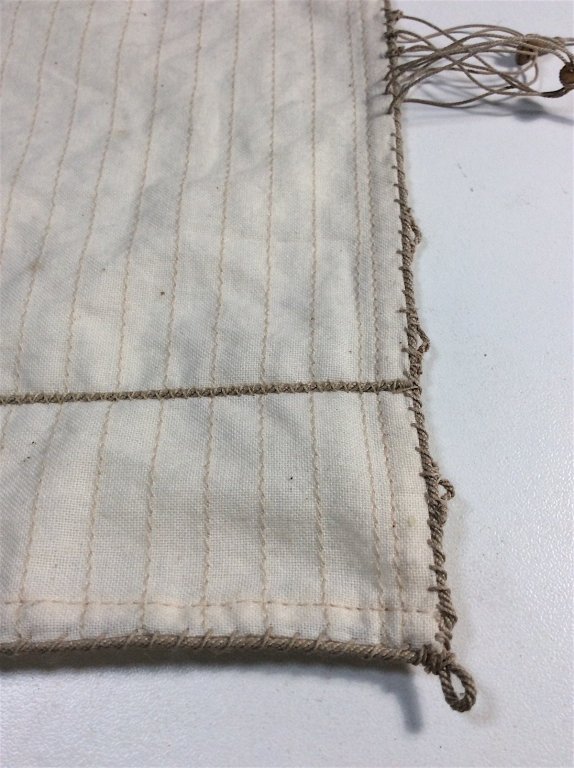
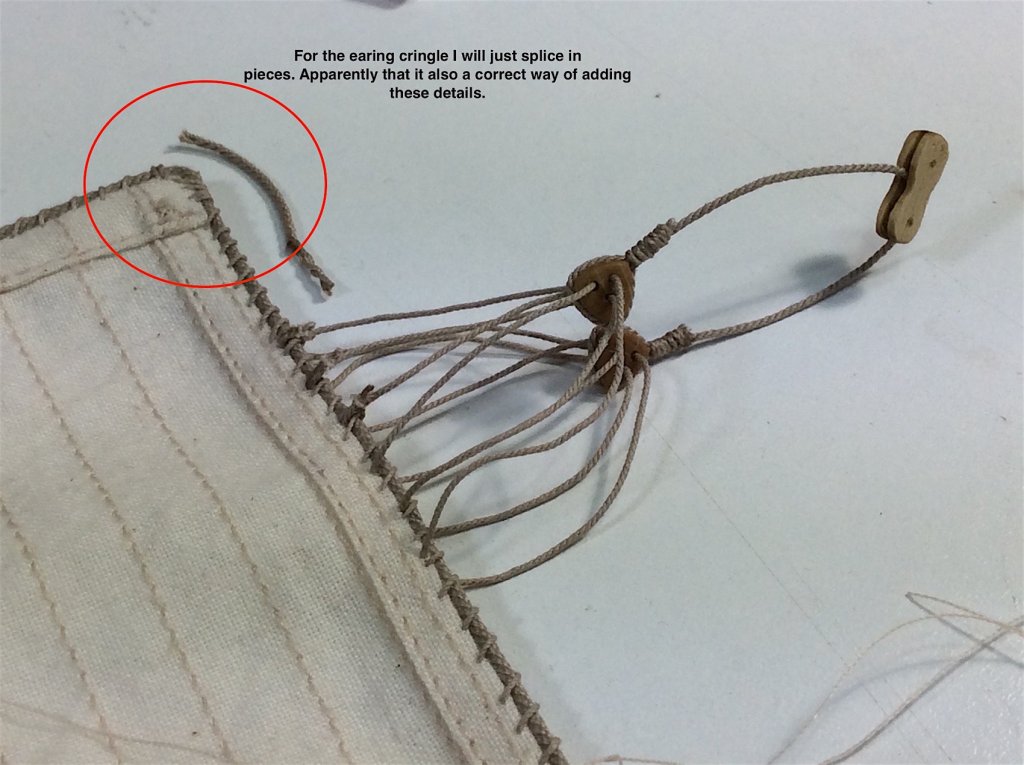
Hi Mates, Minor update. Working with some sections of the sails has proven to be – well not so much fun (for me)– venting here Hmmm--- I got through the boltropes – pleasant enough. Then came the need to add various cringles. Now those are really hard for me. So far the least enjoyable part of this build. I am also not satisfied with the results. And knowing that a reinforcement canvas wrap should also be included around each cringle has annoyed me. Tried several glues on sailcloth bits and could not find a glue that “disappeared”. Also these cloth rectangles are to be sewed as well – just not happening. I re-did the martnets after buying some triangular deadeyes from WoodenModelShipKit (one of the vendors that advertises here). After fiddling around several times finally discovered how to lace without lines crossing over each other. Happy with the results. So this area (sail details) is slowing me some. Several of the other sails will not need so much extra work – and it will all be fun again (;-)
-
Jerry, As has been said - brilliant work in such a small scale (tiny boat). If after some fishing and some rest --- considering working in the same scale (1/65th) would obviously present this opportunity that would be "larger" Though I'm sure that this one has already crossed your mind. Regards,

-
EJ, Nice wrap on this build !!. To think that you built this entire beauty in the time it took me just to get sails ready. As they say, Old folks just drive too slow-- Cheers,
- 608 replies
-
- 1
-
-
- la couronne
- corel
- (and 1 more)