HOLIDAY DONATION DRIVE - SUPPORT MSW - DO YOUR PART TO KEEP THIS GREAT FORUM GOING! (Only 24 donations so far out of 49,000 members - C'mon guys!)
×

md1400cs
-
Posts
2,839 -
Joined
-
Last visited
Content Type
Profiles
Forums
Gallery
Events
Everything posted by md1400cs
-
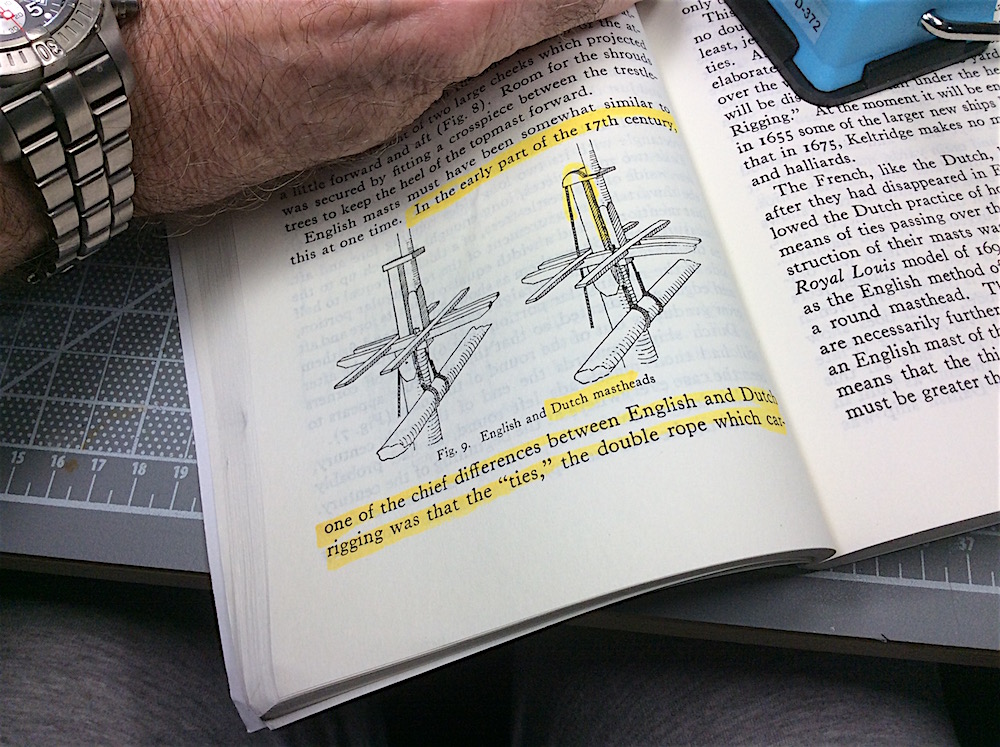
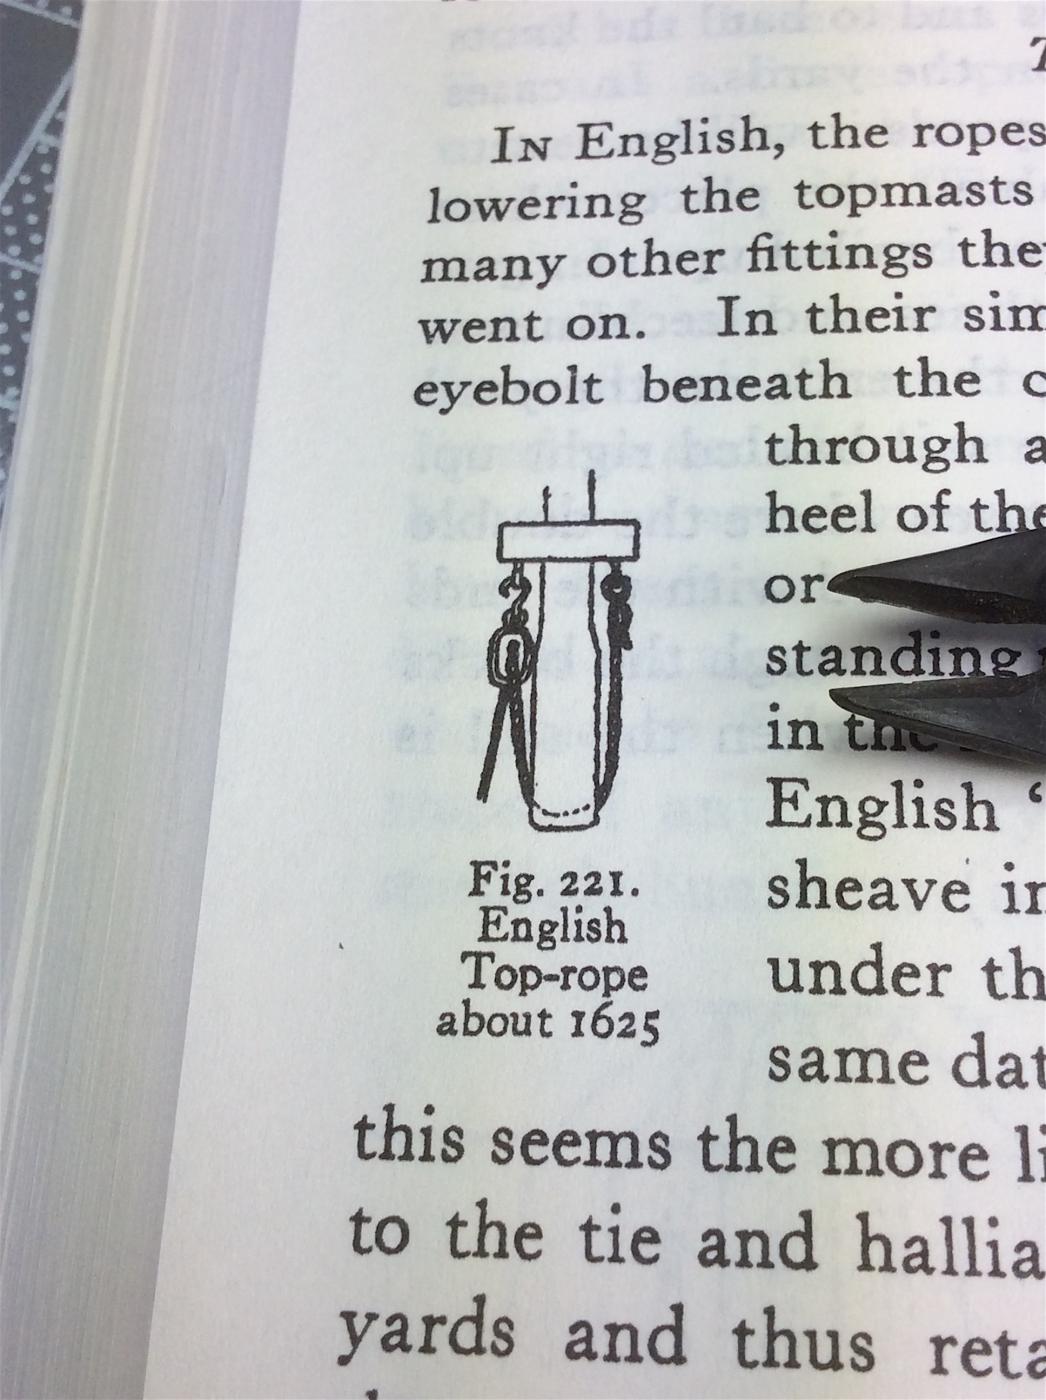
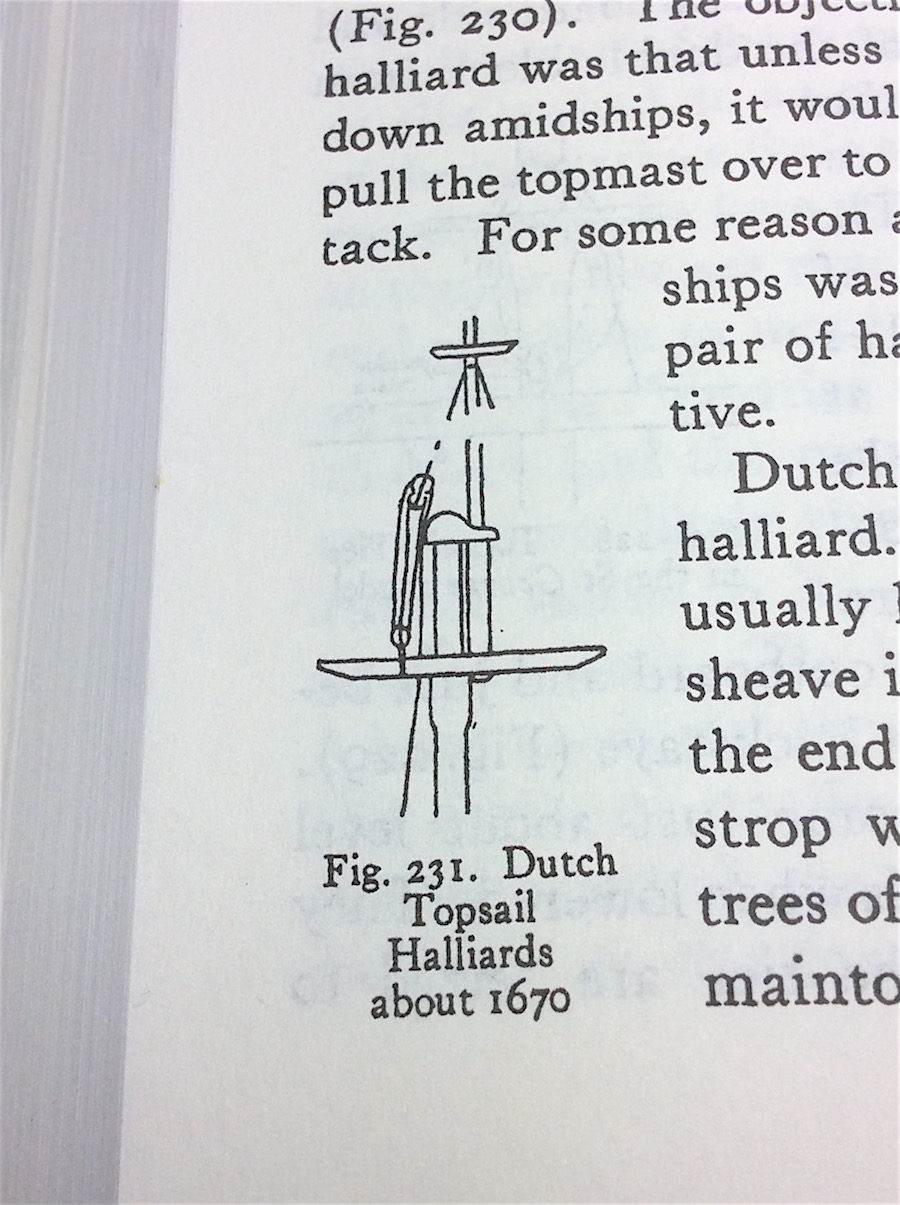
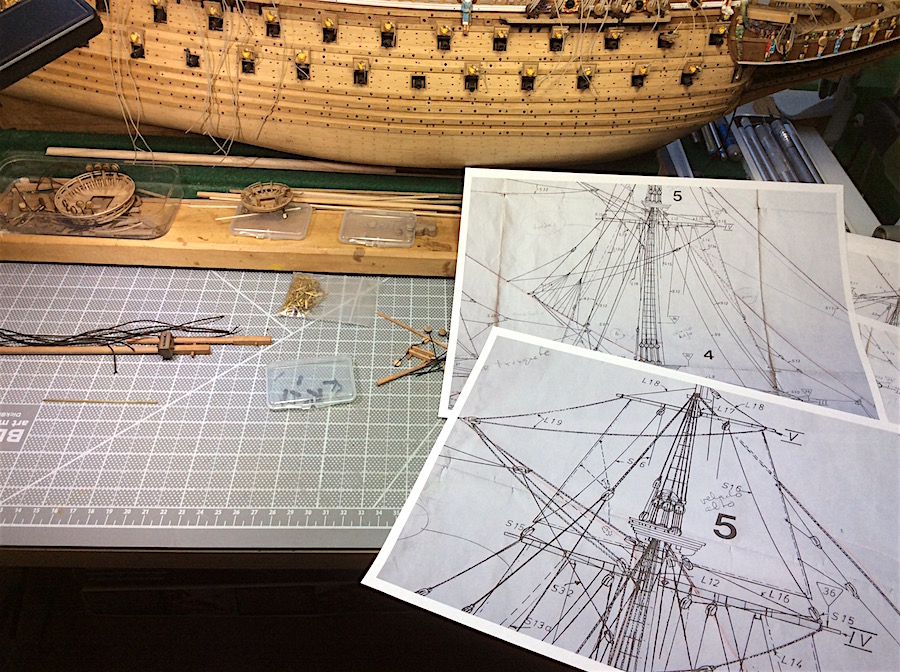
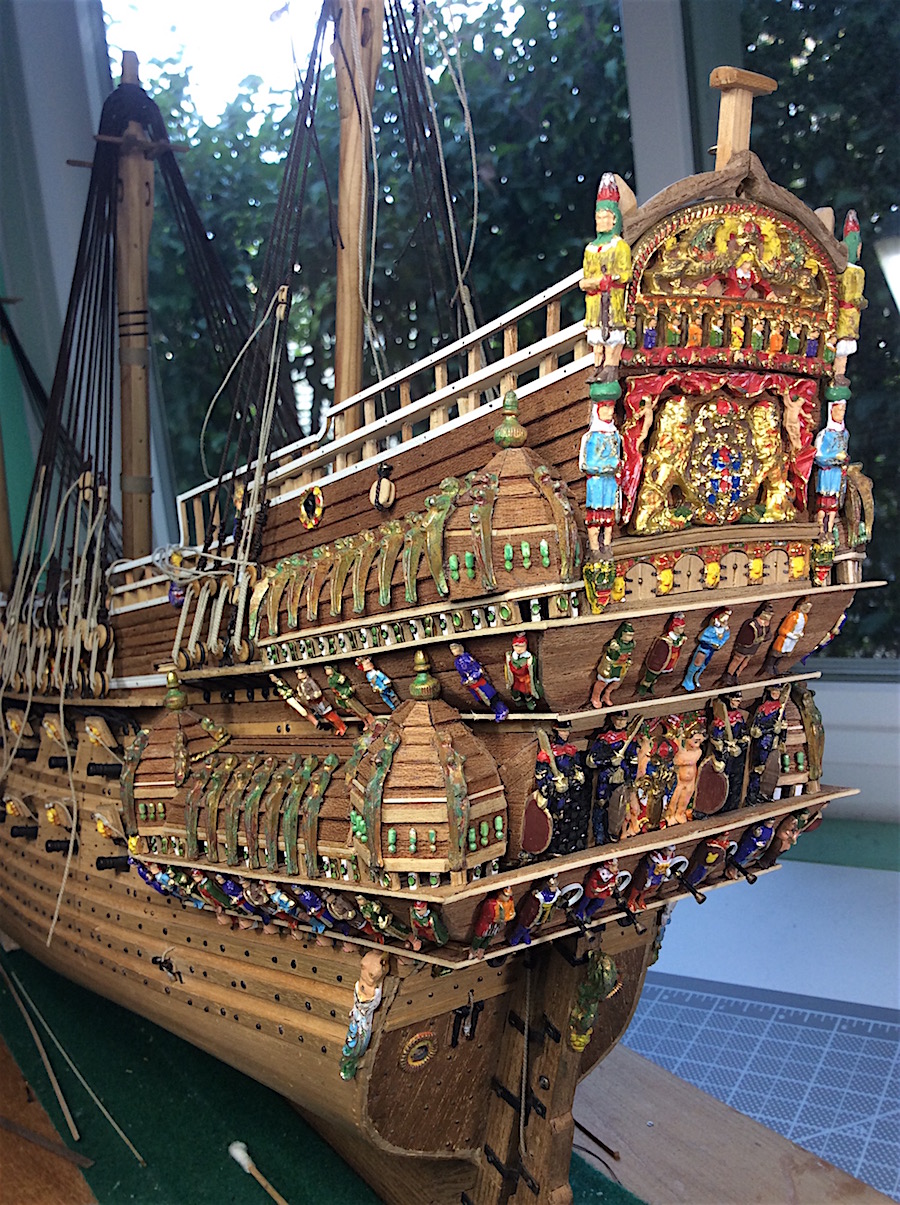
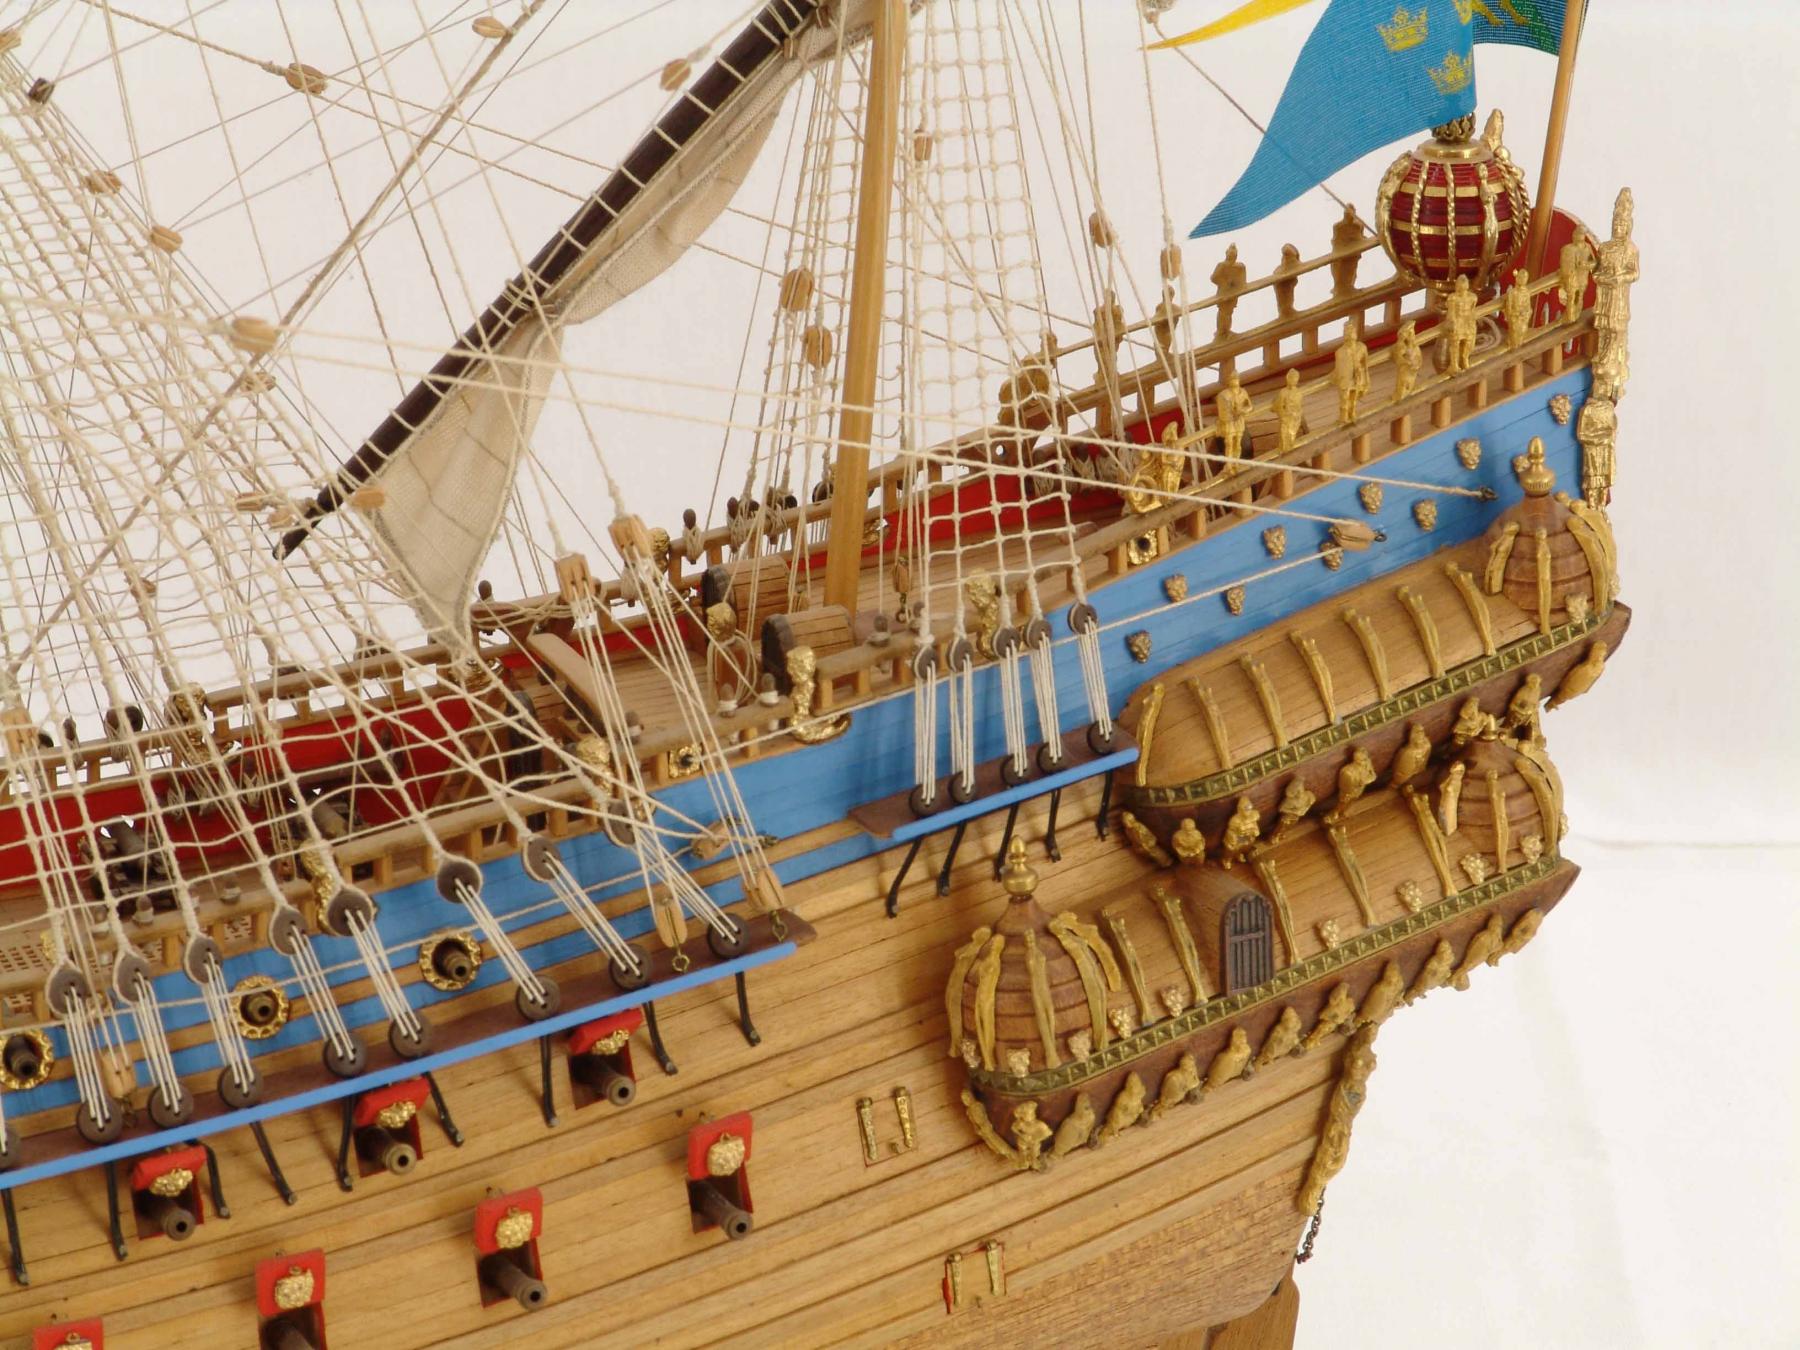
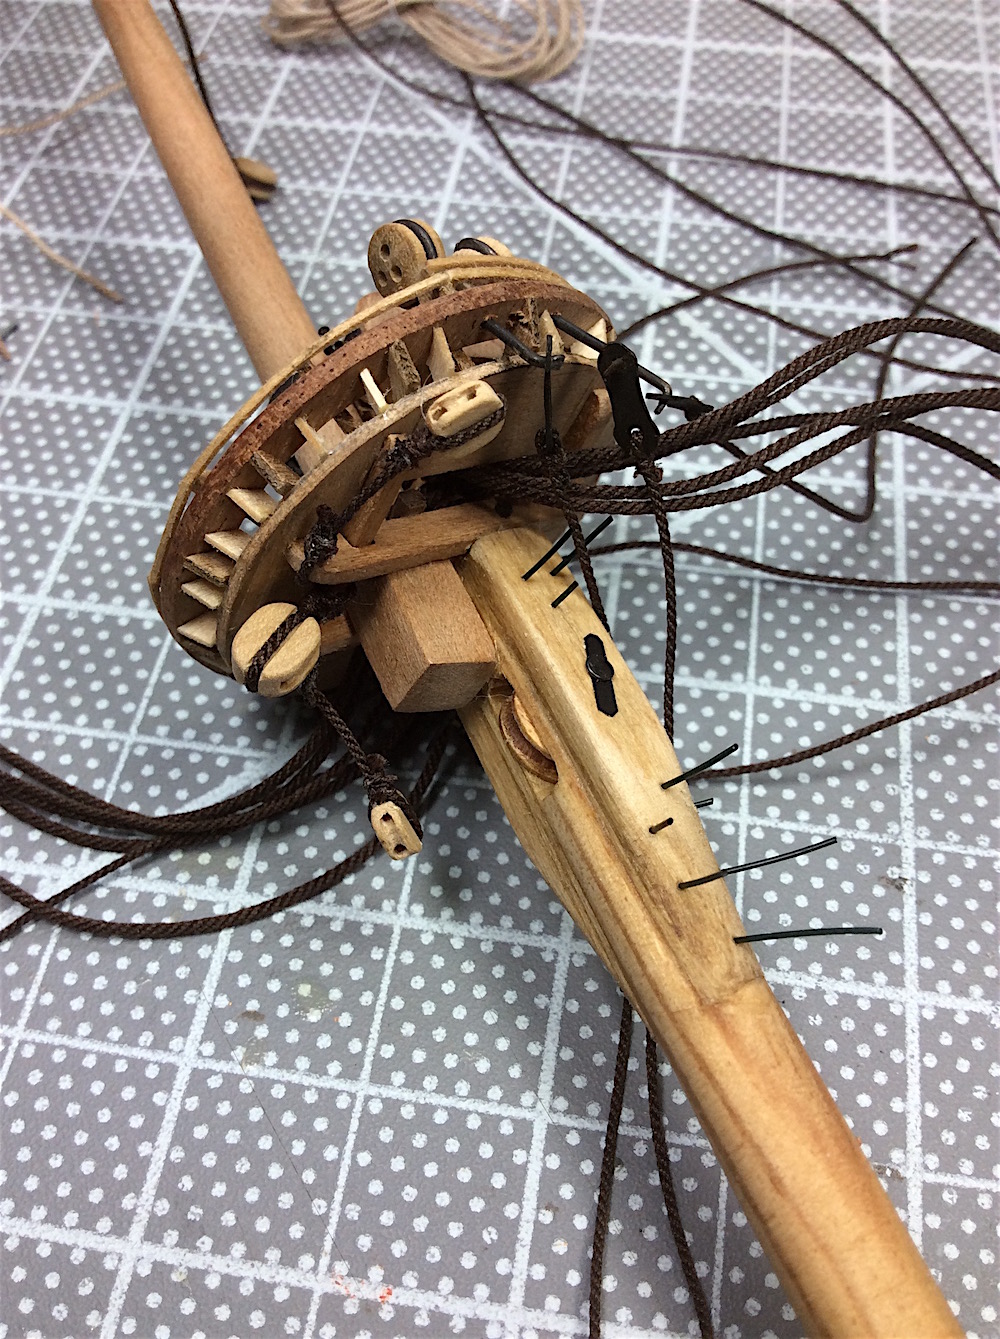
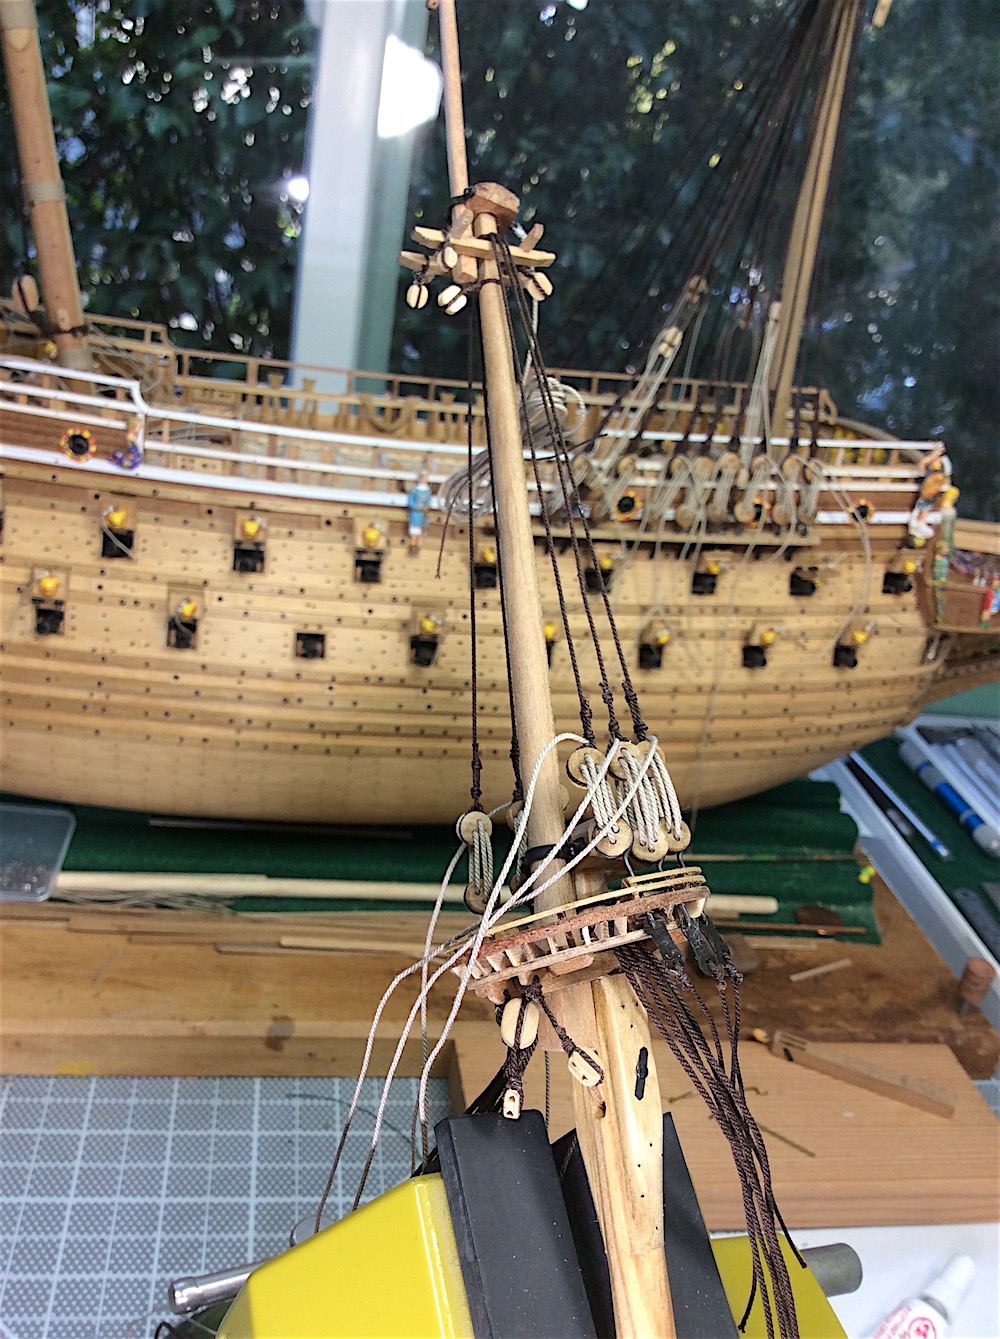
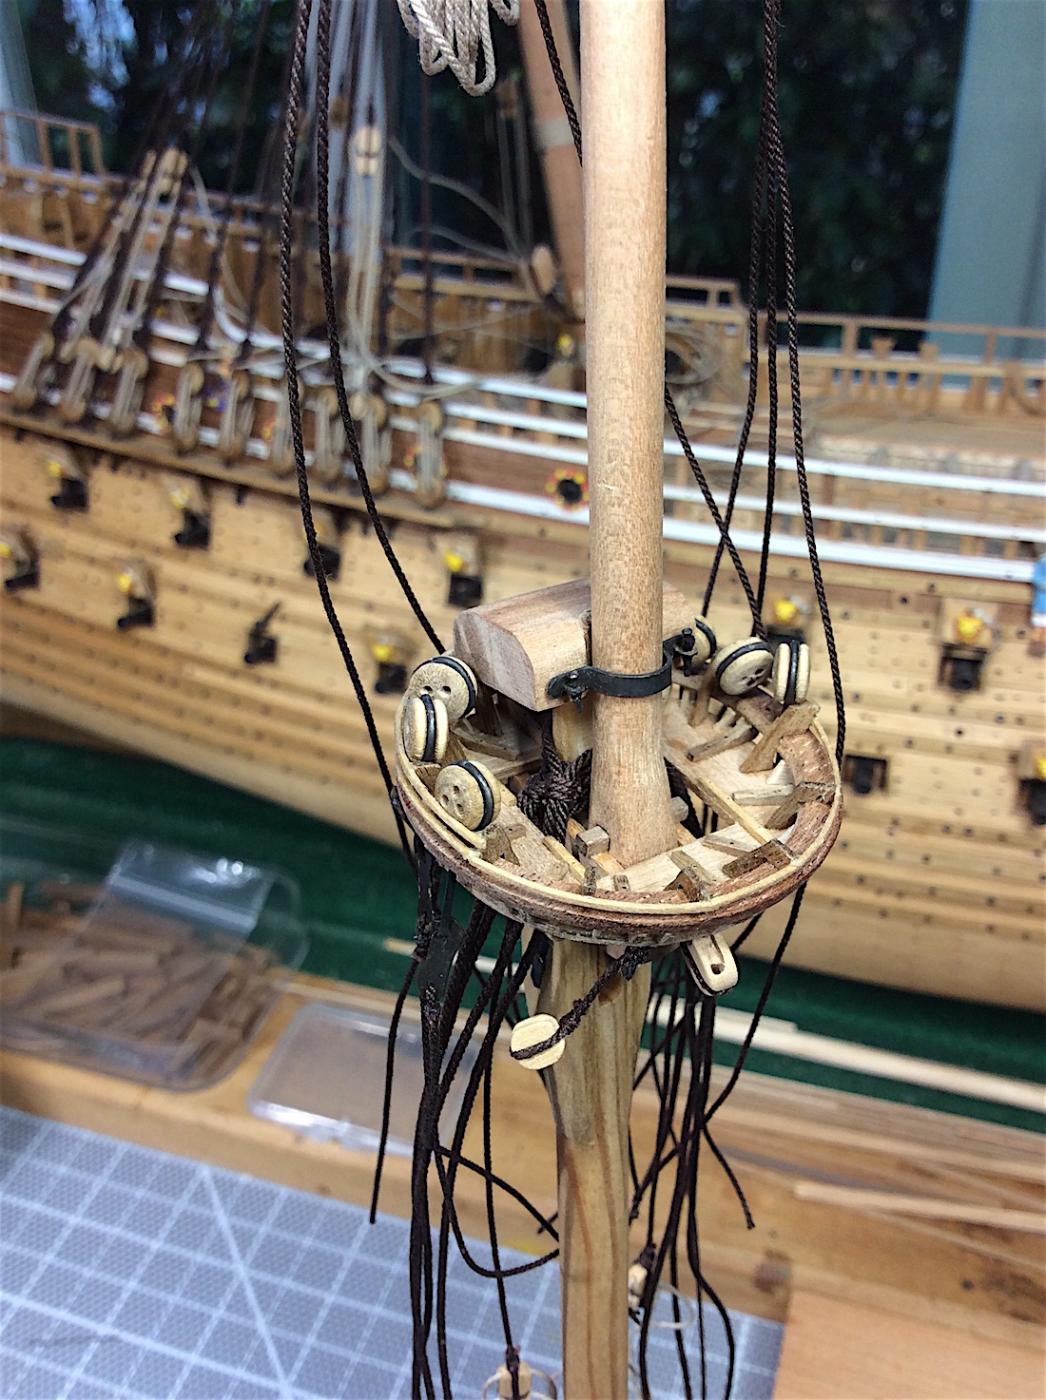
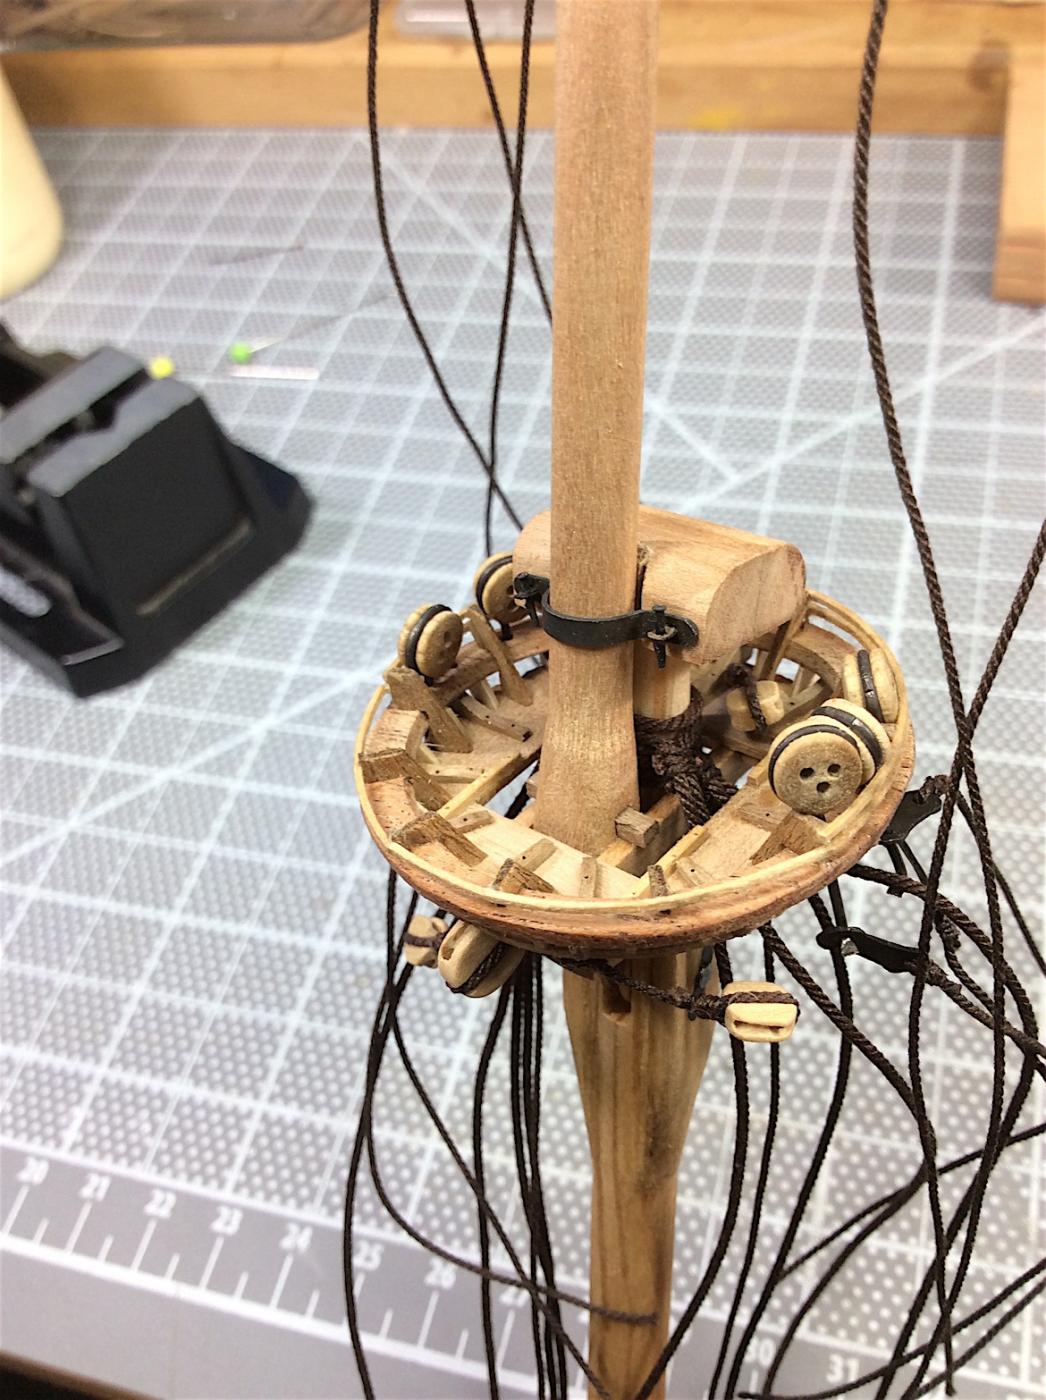
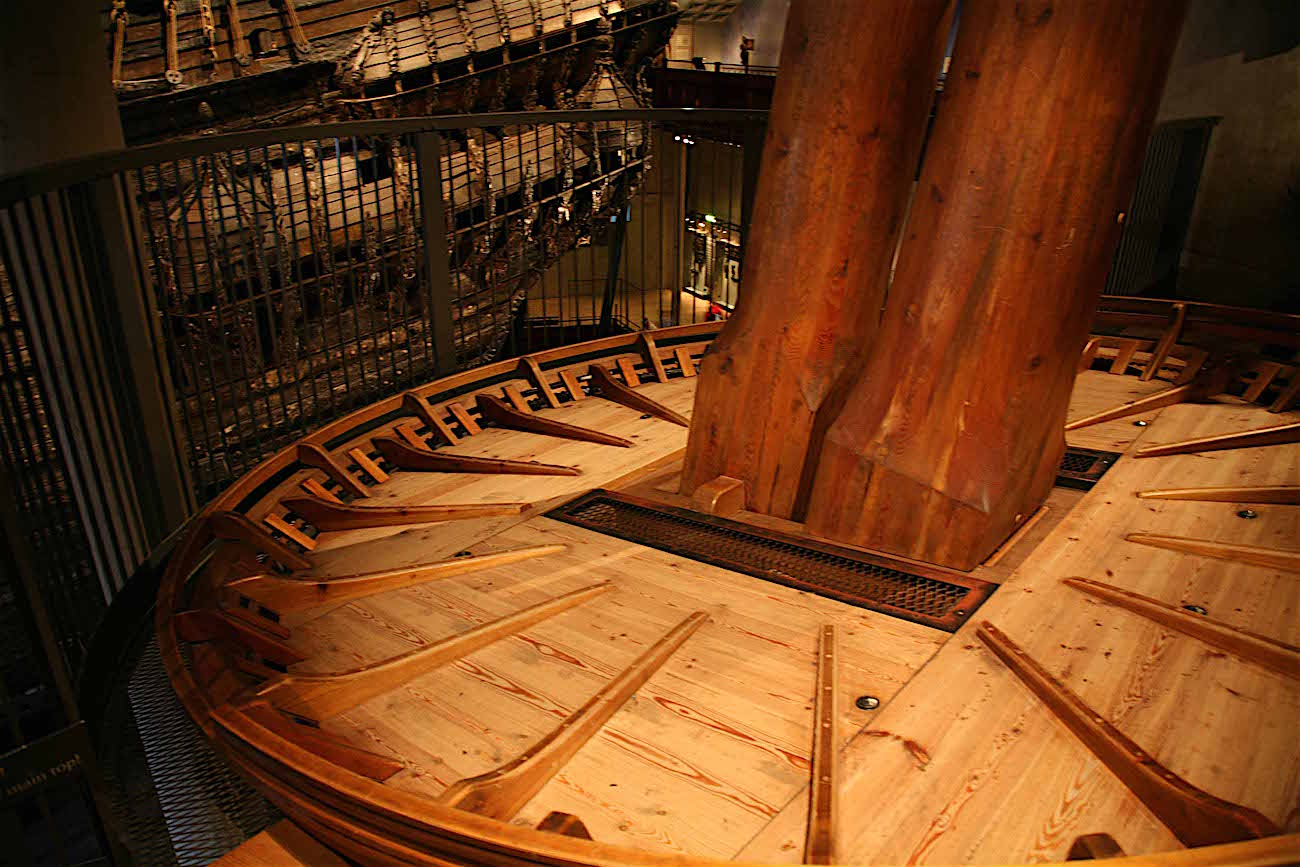
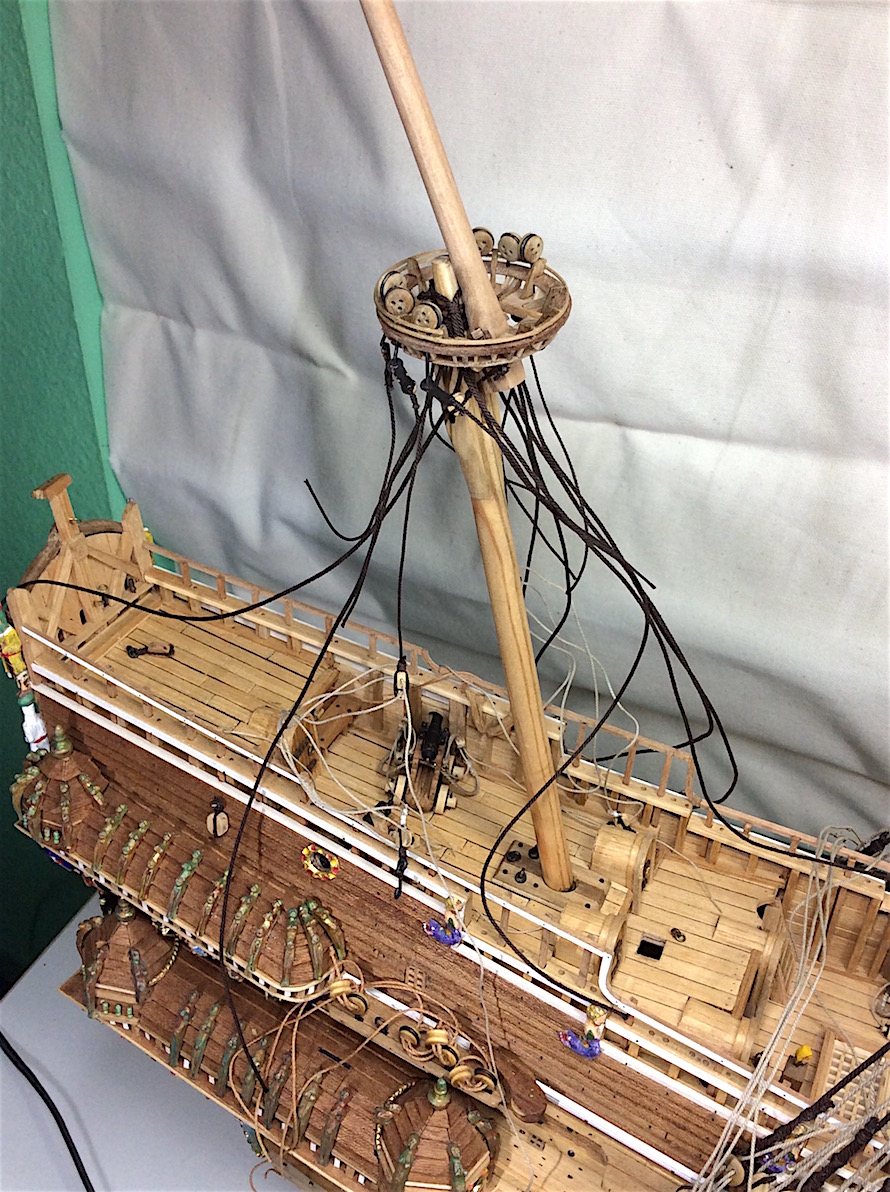
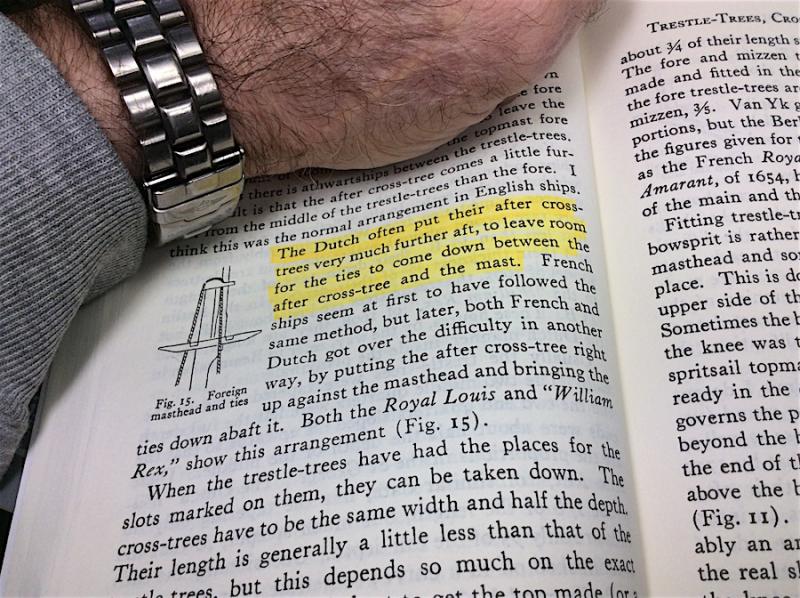
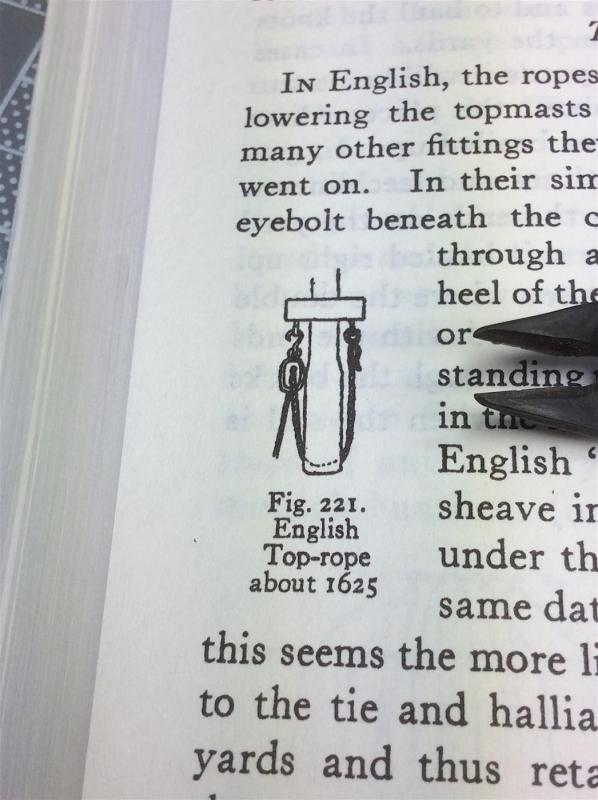
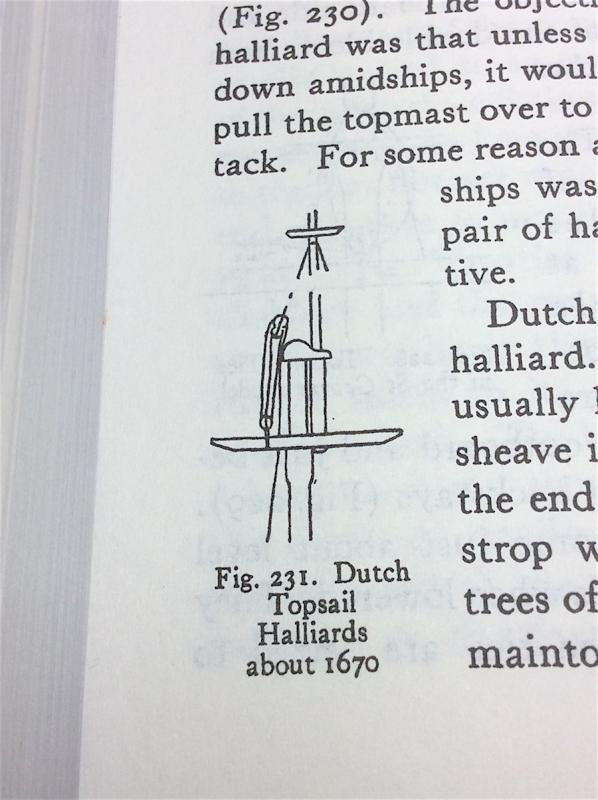
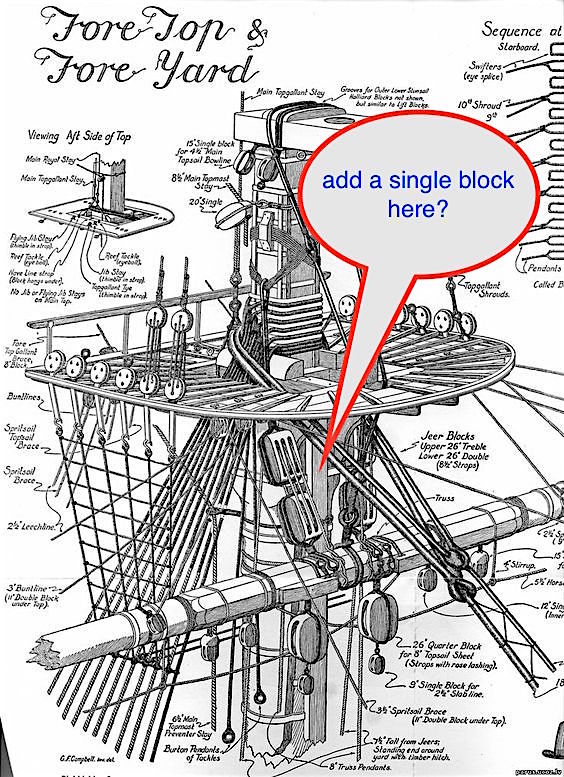
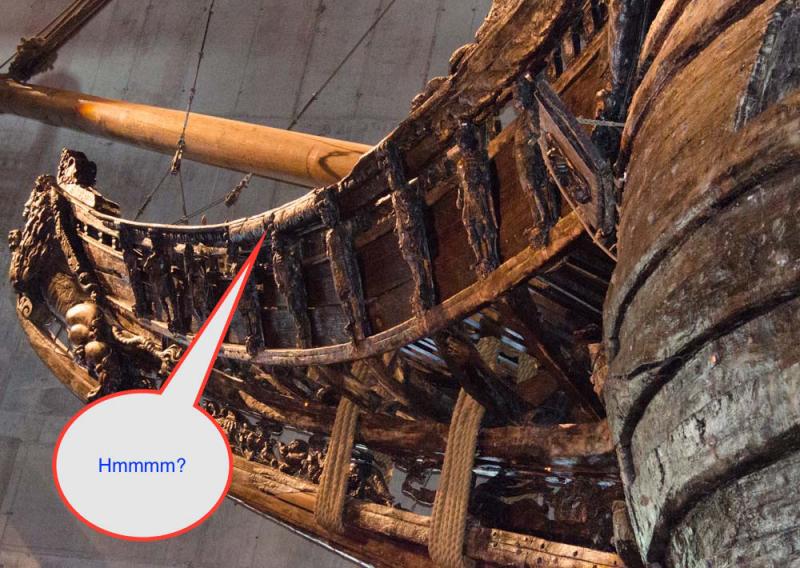
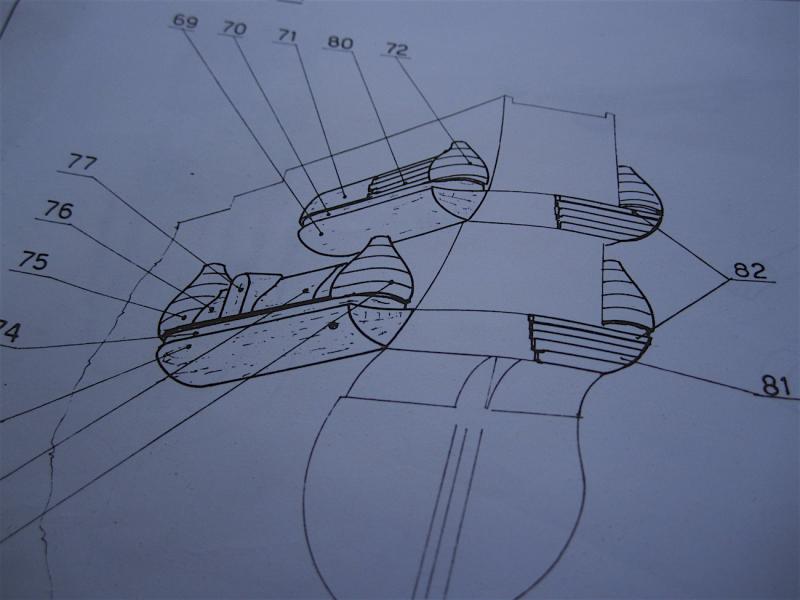
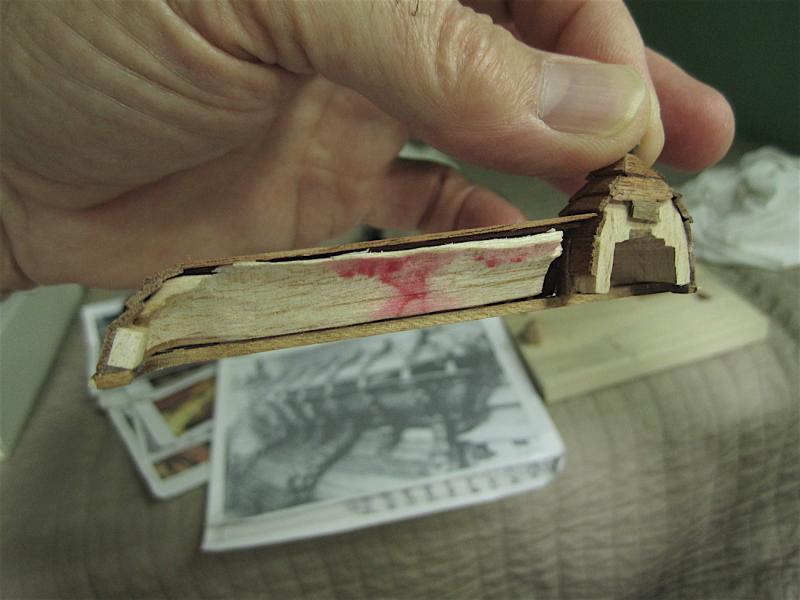
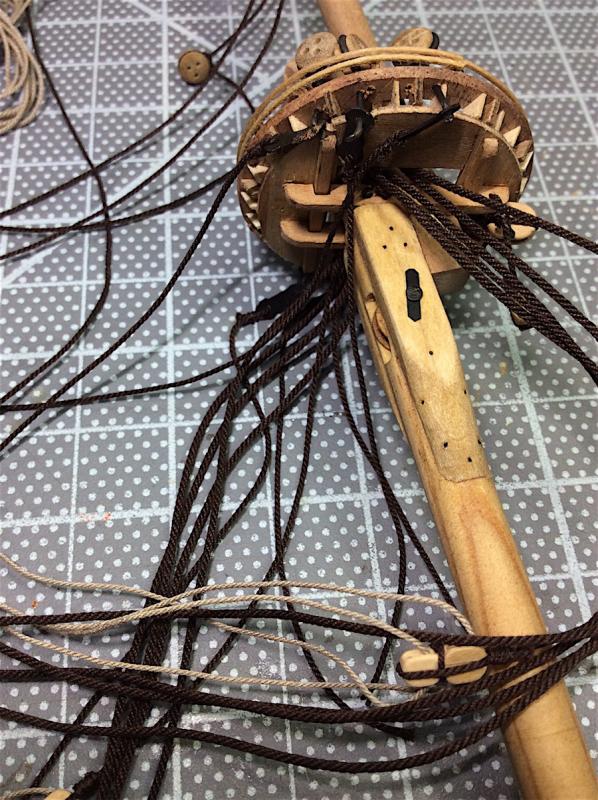
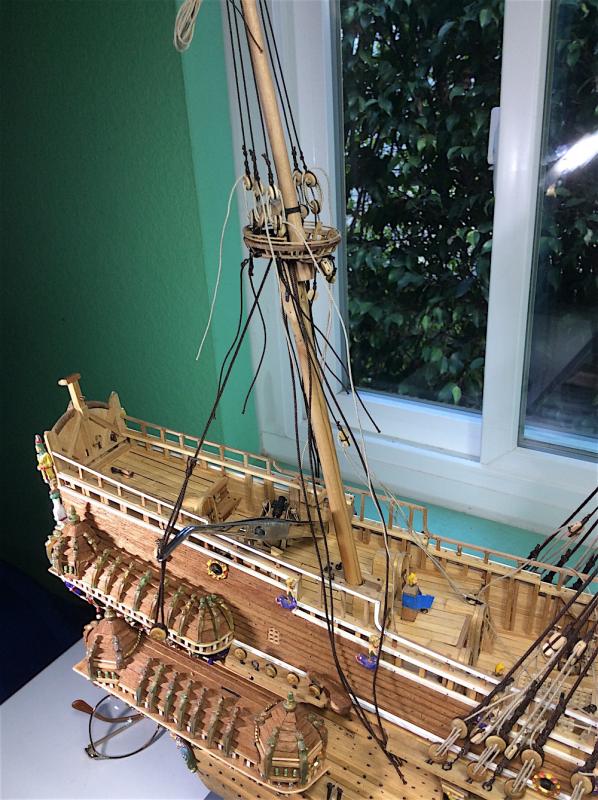
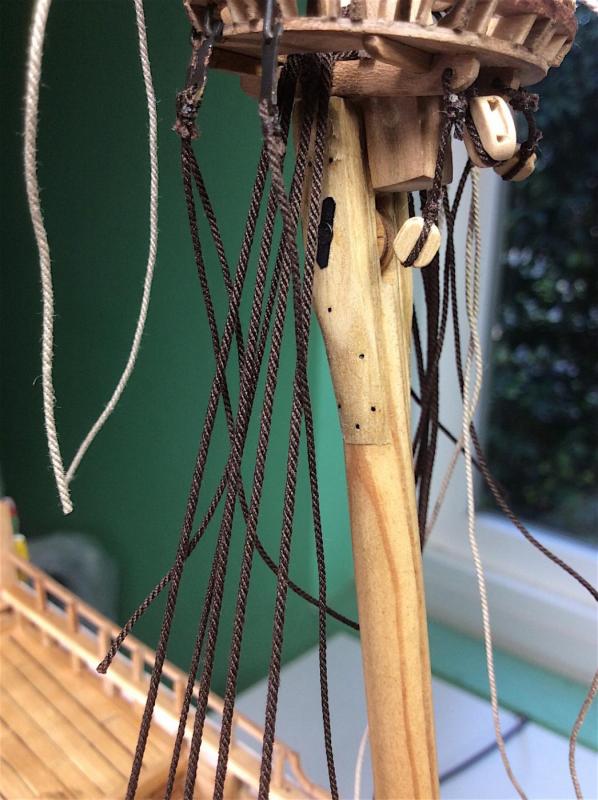
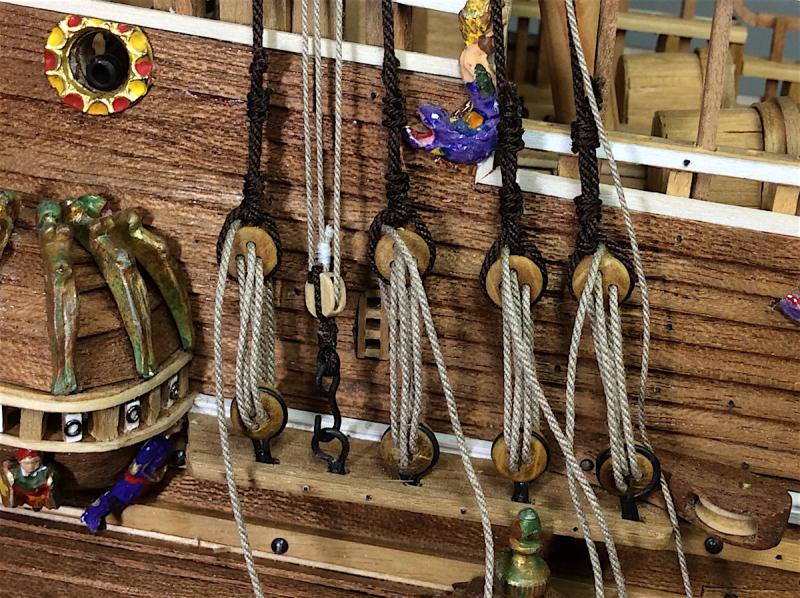
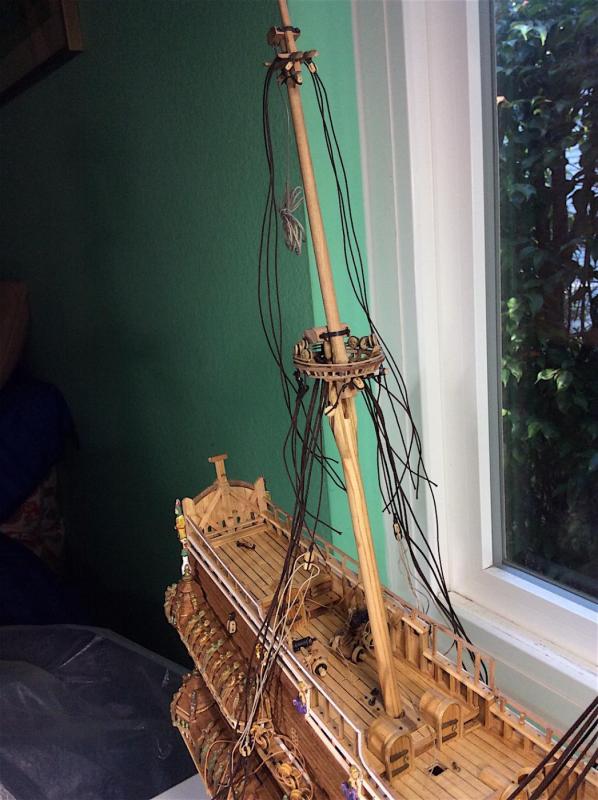
 Hi Mates, Need your kind advice, if you don’t mind. As work continues on putting together the upper masts for all three masts, I realize that I did not think about (nor understand) what method should be correctly used for hailing the mid and upper yards. I went to Anderson, but it still left me a bit confused. Putting ropes over the cap does not appear in any Vasa model that I have seen including the 1/10th (but I have NO good pics of that area) And I assume that grooves would be needed in the caps? PS: All lower yards for all three masts have pulleys cut into each mast – so that is easy enough (pulley may be the wrong term). That part I understand. Then I thought that I would add a second ring under the caps, but then it seems that those are actually used for hoisting topmasts. Makes great sense, but then why need the fid?? That leaves two other options; Drill another hole in the upper masts adding a pulley within – I think that I’m too far gone for that option Or add two more blocks under each of the platforms to use to hail the yards. Last pic is obviously a complex and prob. 18th century vintage The two extra blocks under each platform could be the easiest to do. Any thoughts will be appreciated indeed.
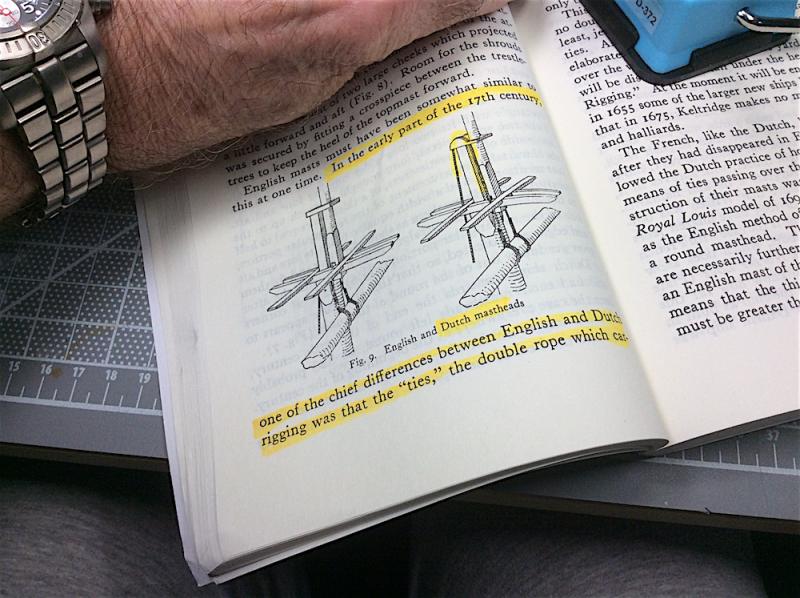

-
Jason, I've been following mostly "silently" hmmm. Superb build indeed. Your rudder and lower hull plating is so Perfect !! along with the rest of your build to date. Cheers,
-
Capt. Steve, thanks for that tip - will use it when I get to the main caps. Thanks for your nice thought as well. Karl, I also need to thank you a second time. You were so kind to send me jpg's, in sections, from your master Billings rigging sheet. These have been SO HELPFUL - so appreciated. Thanks again. PS: When I get to the sails I will have to spend a lot of time looking through your's and Frank's build log again (:-)
-
Karl, Ola - Don't know how I missed this one -Did not want to stuff your inbox with likes - Nice project. I will follow along. PS: Loved your weather deck planking work super well detailed Cheers,
- 164 replies
-
- 1
-

-
- Model Shipways
- Finished
- (and 1 more)
-
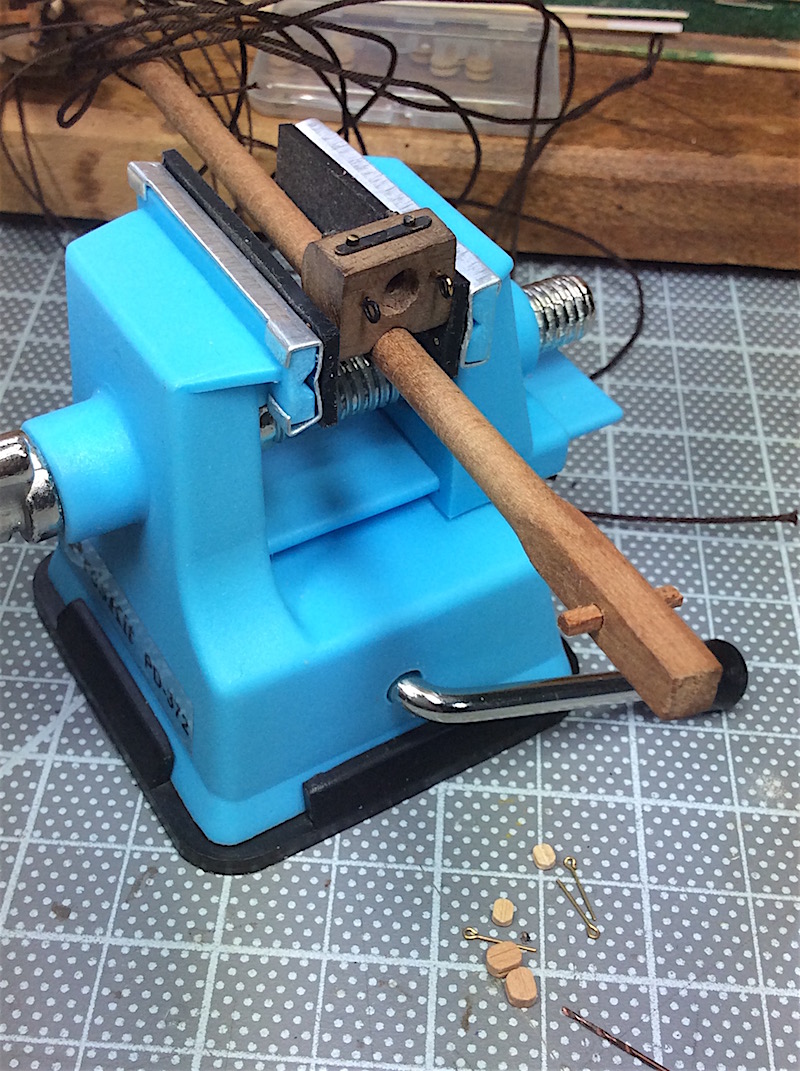
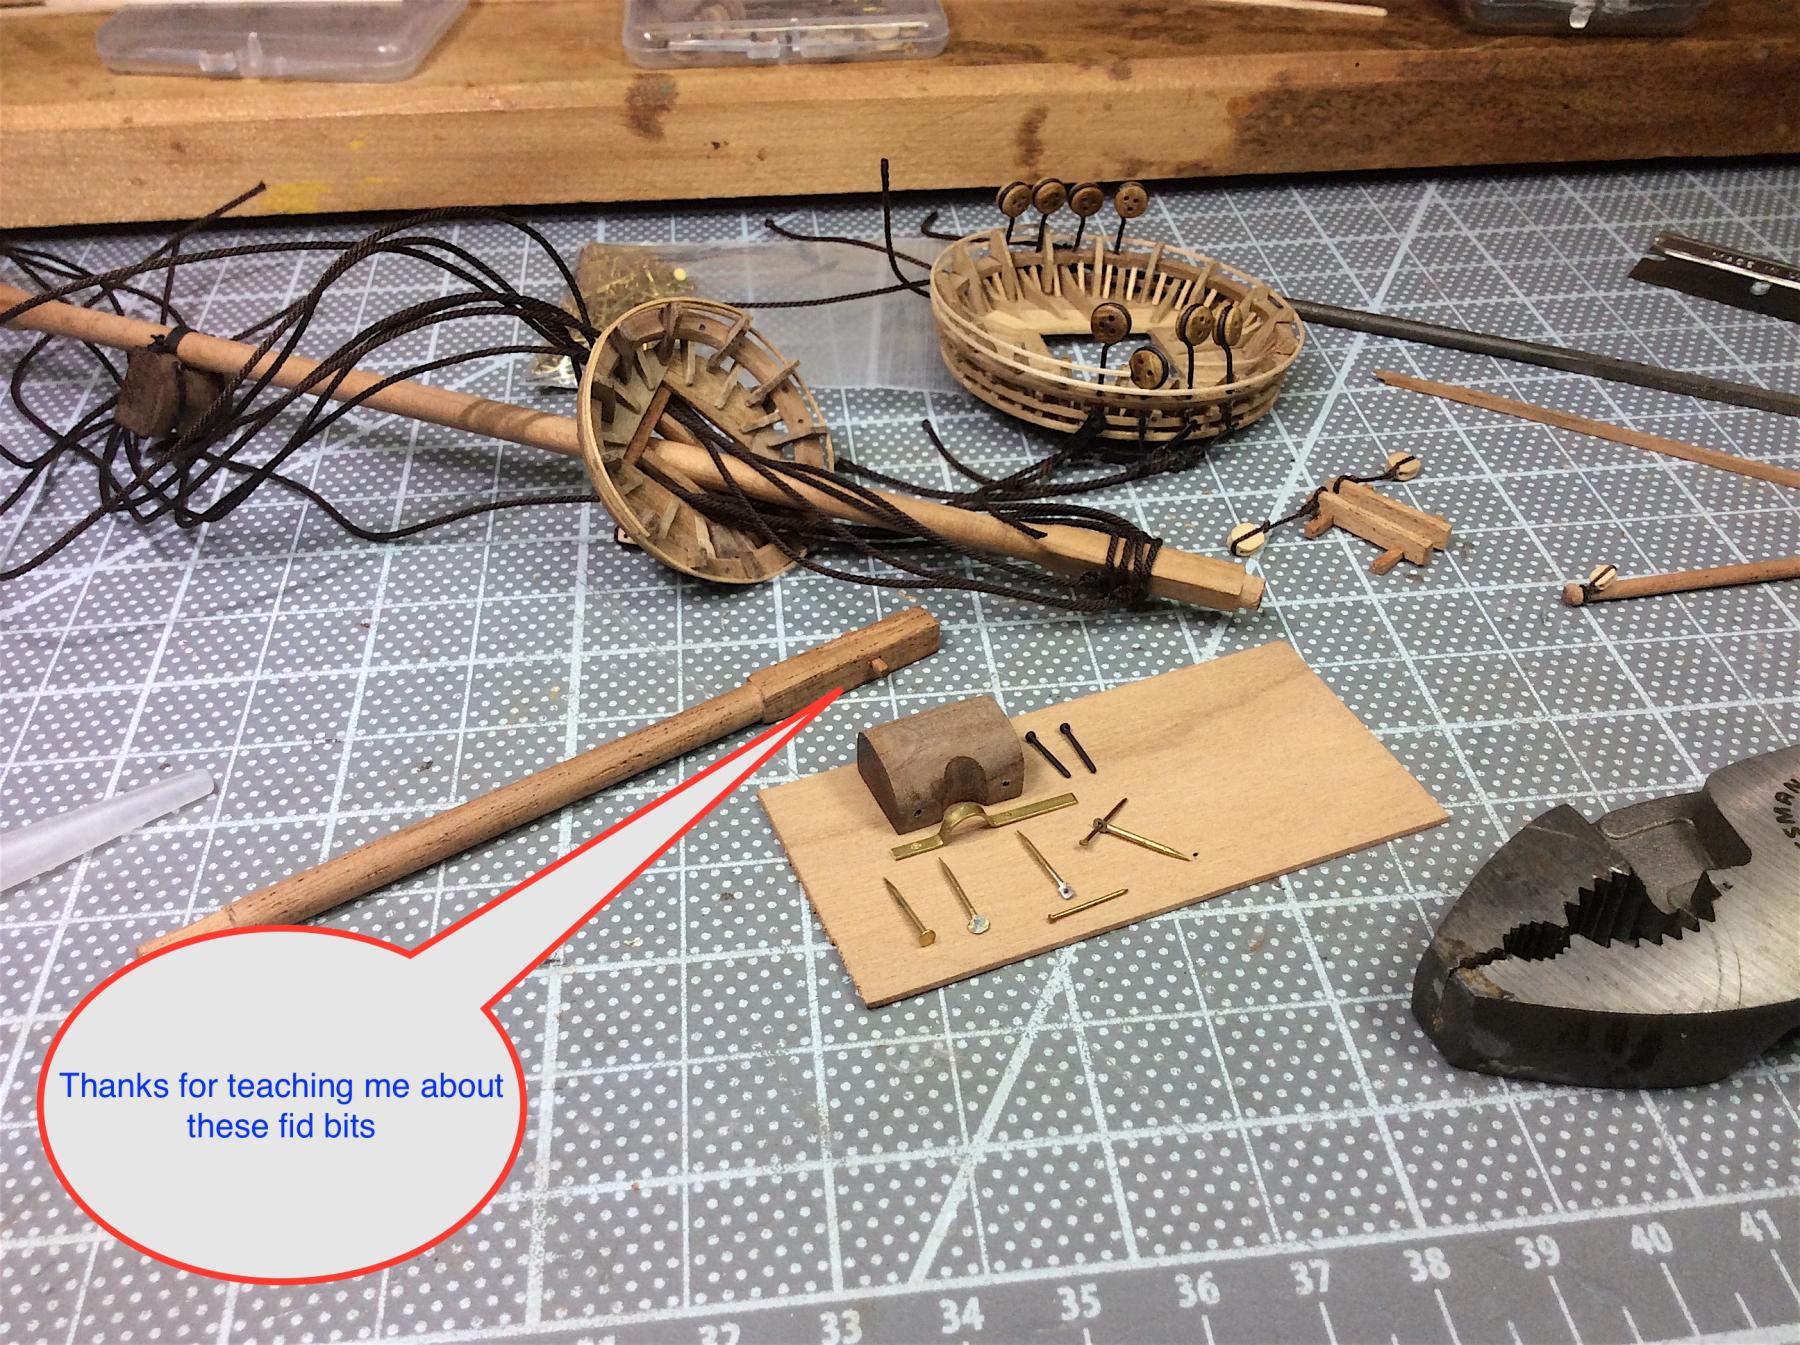
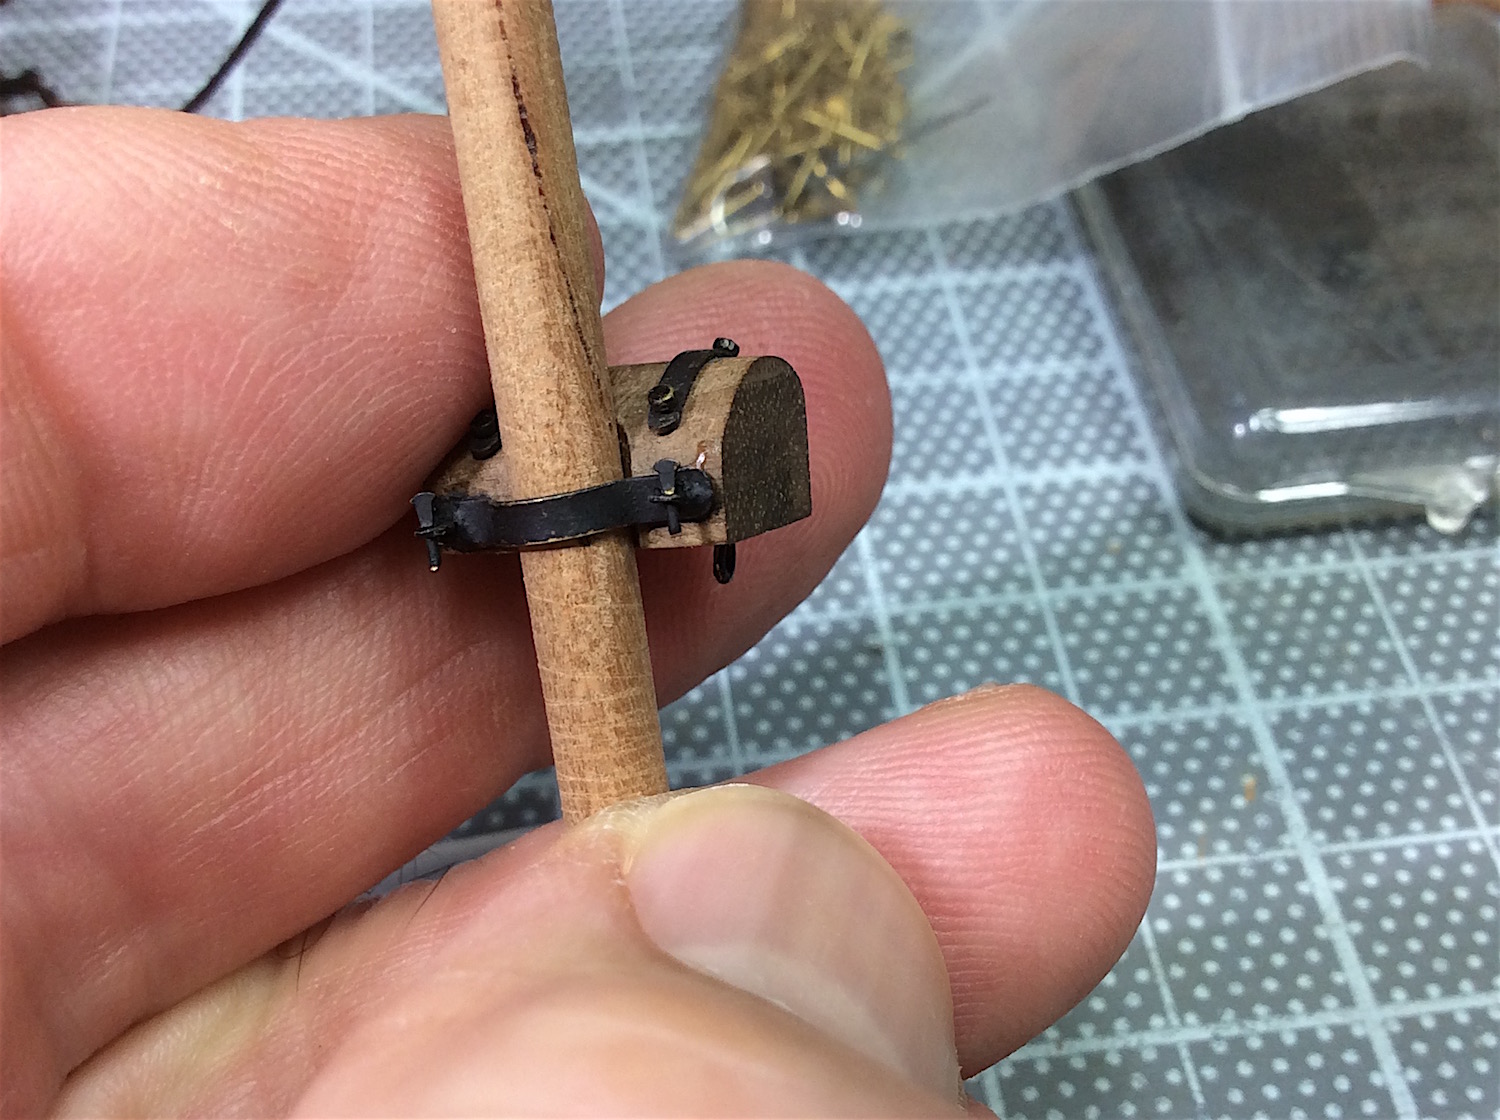
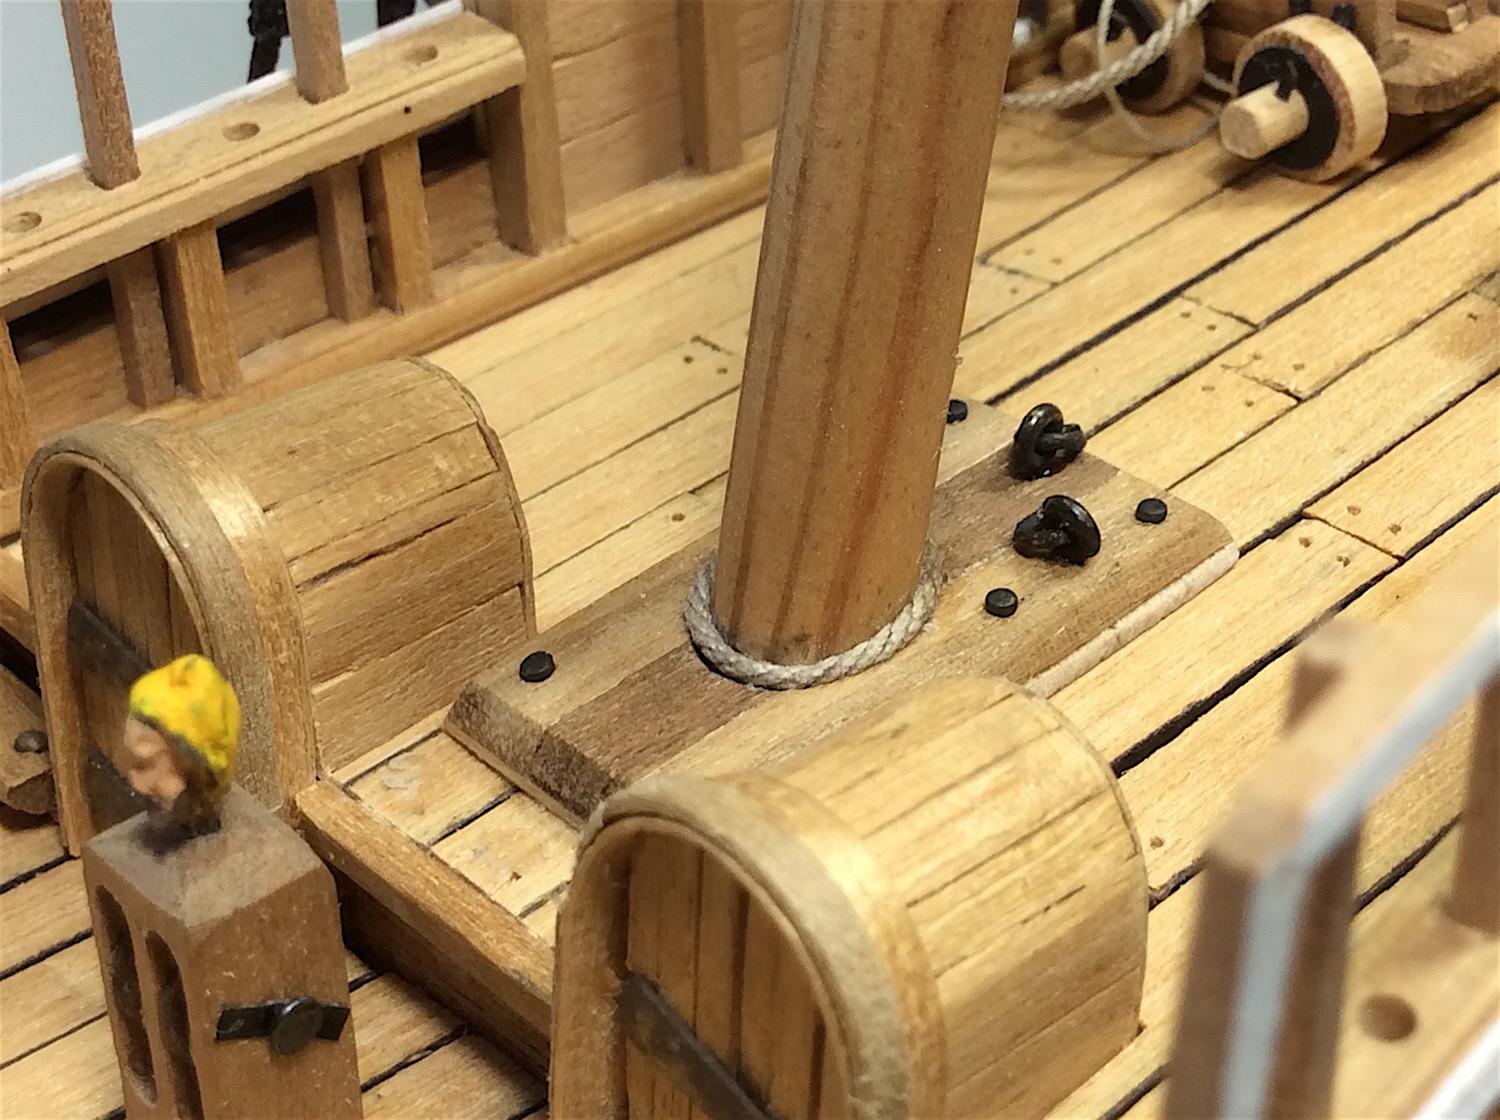
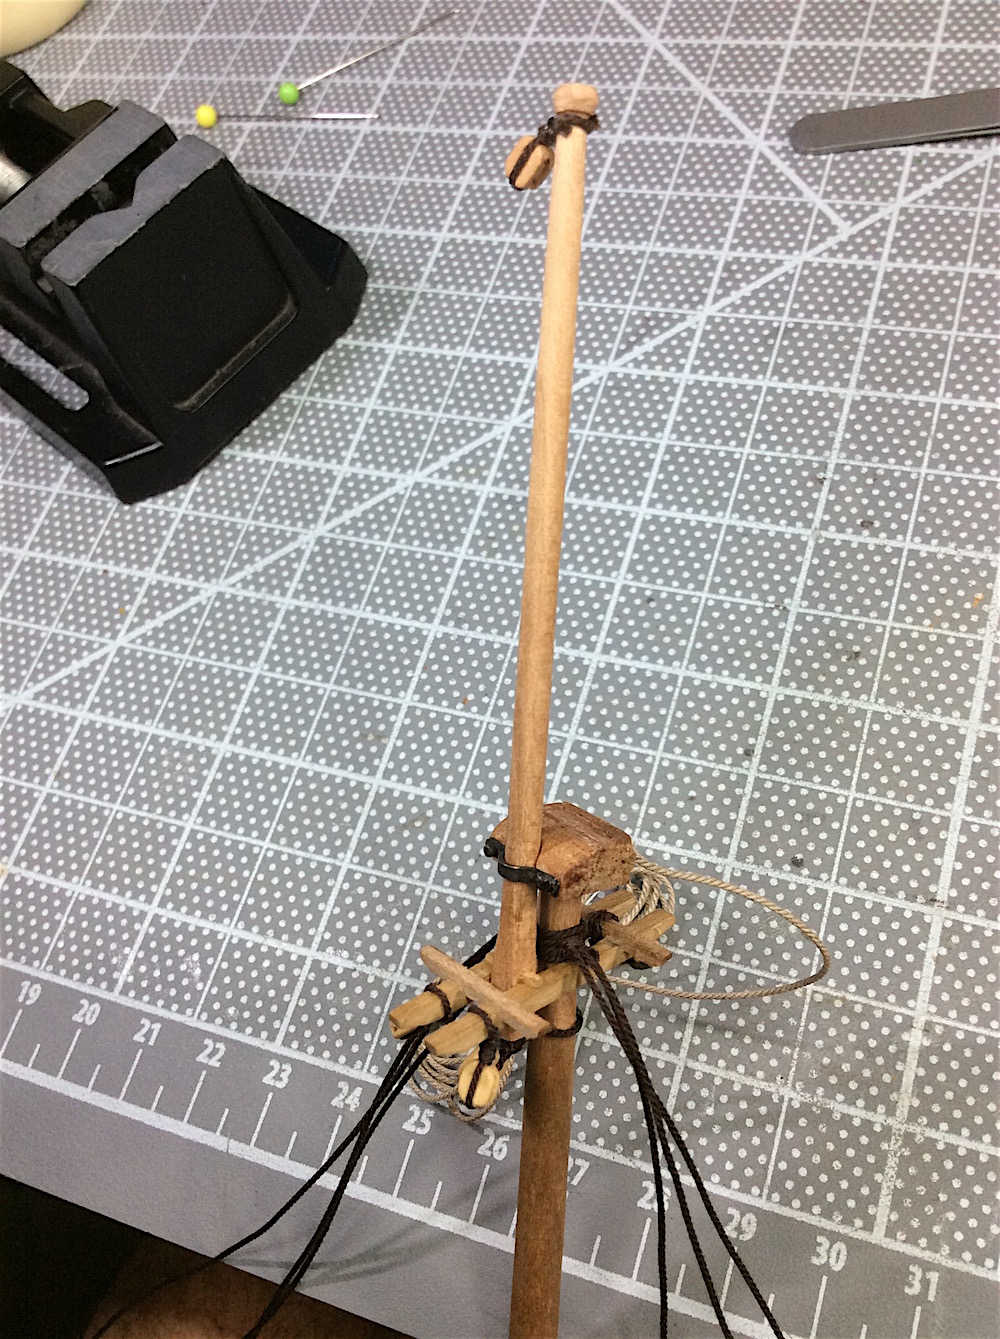
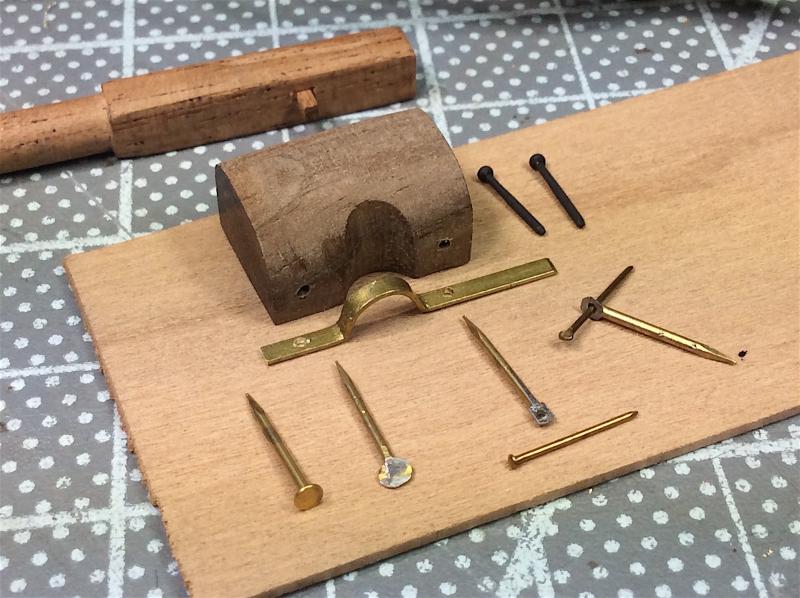
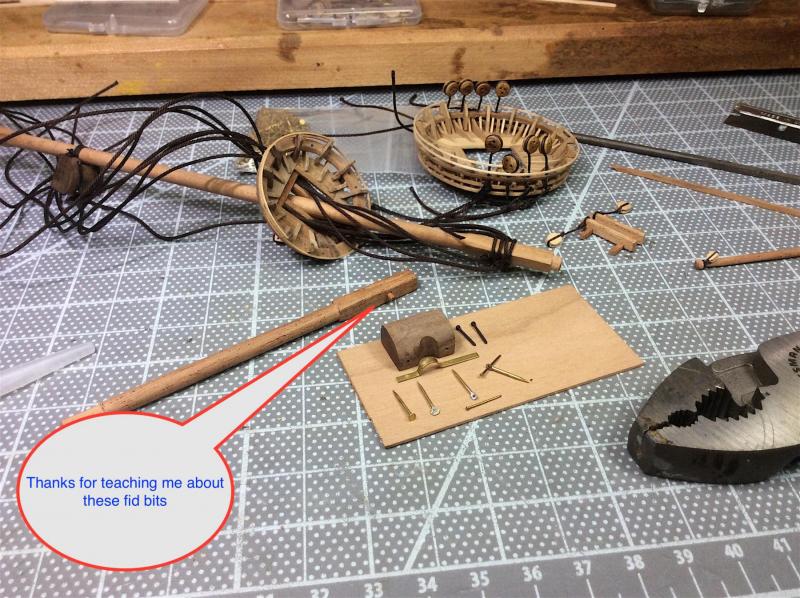
Hi Mates, Working on the mid-foremast installation - how I fashion the mast cap release pins; ==================== 1) Using a small brass nail squeeze its head with standard size pliers. 2) Using a rotary tool smoothen (a bit) the now flattened head – top and bottom only 3) Drill a hole through the flattened head first measuring the drill bit so as to have it conform to the other nail that will serve as the vertical locking pin. PS: the attrition rate tends to be high with this step –it’s hard to align the drill bit so that it remains centered and drills the hole where you want it to be on the flattened nail head (doing it without a drill press) 3) Then with a rotary tool flatten the sides to square off its look. 4) Now flatten the head of the other smaller nails 4) Blacken all the parts with Black Brass Metal Finish. Over time I do not think that black hobby paint will Stay adhered and may flake off (IMO) only. 5) I found that the tiny vertical lock pins tend to slide too low. So I use a super small smudge of CA as I insert the pins Holding the pin where I want it to remain. 6) Cut off the too long vertical pin ends PS: Thanks mates for the help with the mast fid bits. I’m happy to have learned this detail. J I think that it was Peter Jensen – I need to go back through to check your kind advice…

-
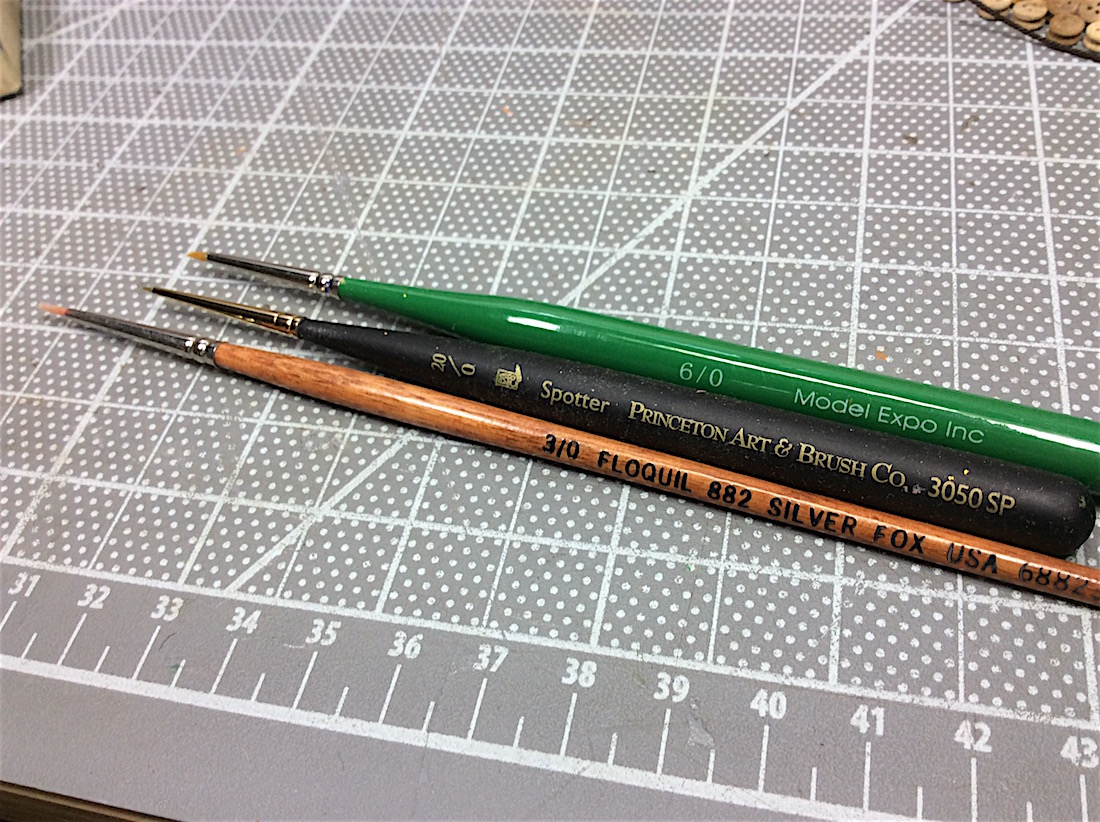
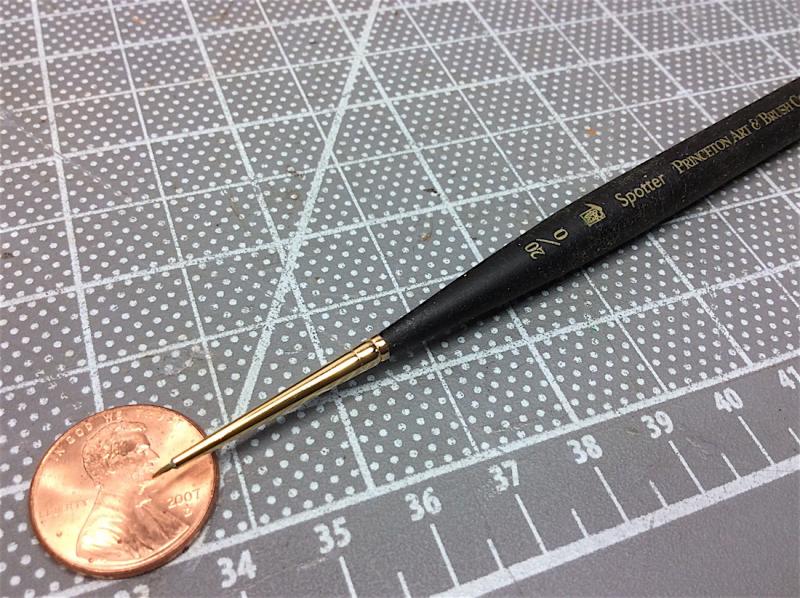
Hi Mates, Thanks for the likes as well as just dropping by. EJ – thanks – yes being “creative” occasionally helps out. I do, however, stay too bogged down with redundant minutia IMHO J My next post will actually be a real move forward. Martyn – Thanks as always for your kind encouragement. Karl – Thanks for your nice words, regarding the painting I use several diff. brushes (see pics) For paint I use various colors from Humbrol, Testors Model Master, Tamiya, and Floquil Railroad Colors. These paints were used for all gilded bits from stern to bow.

-
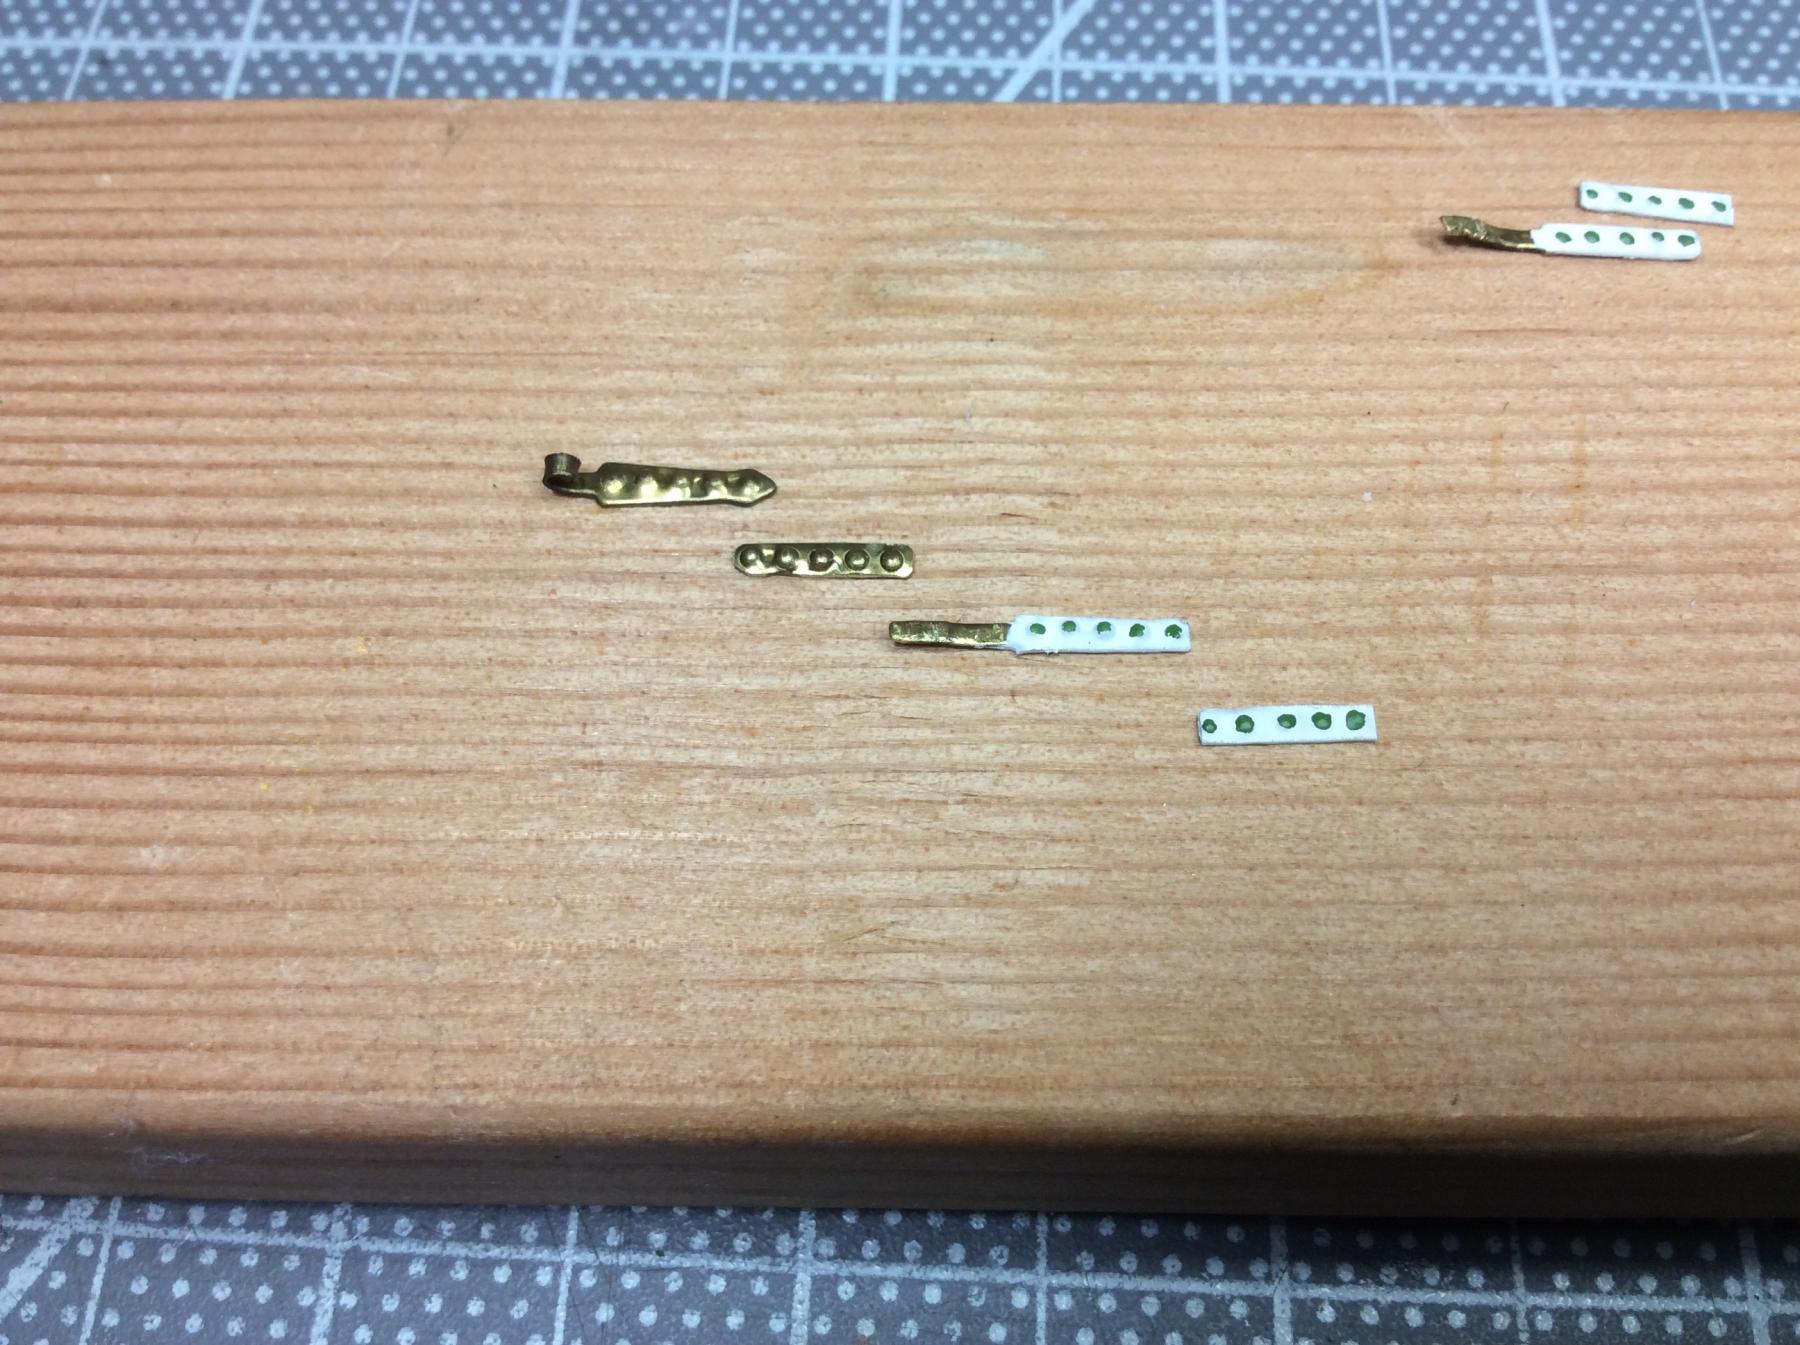
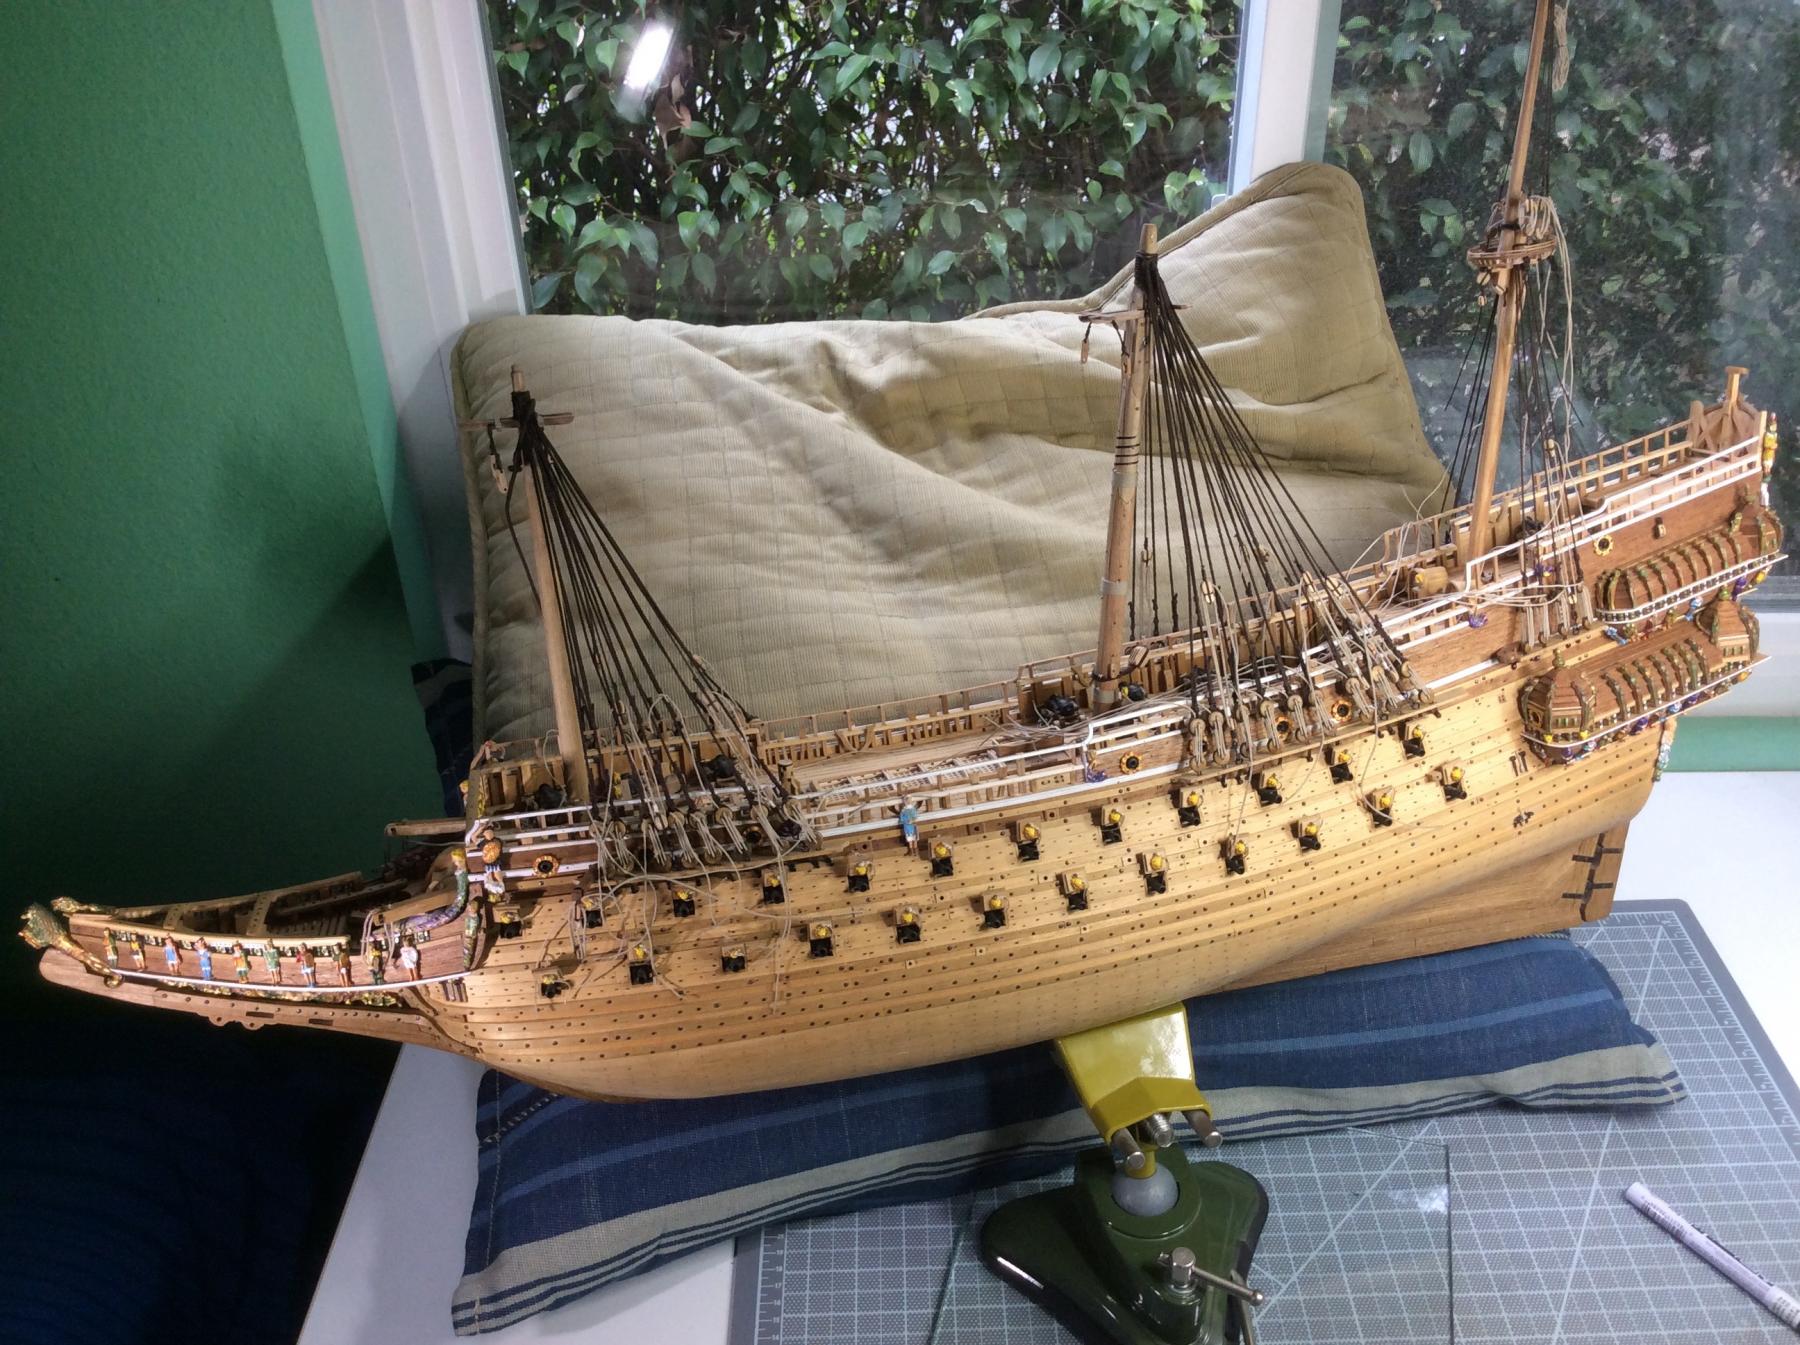
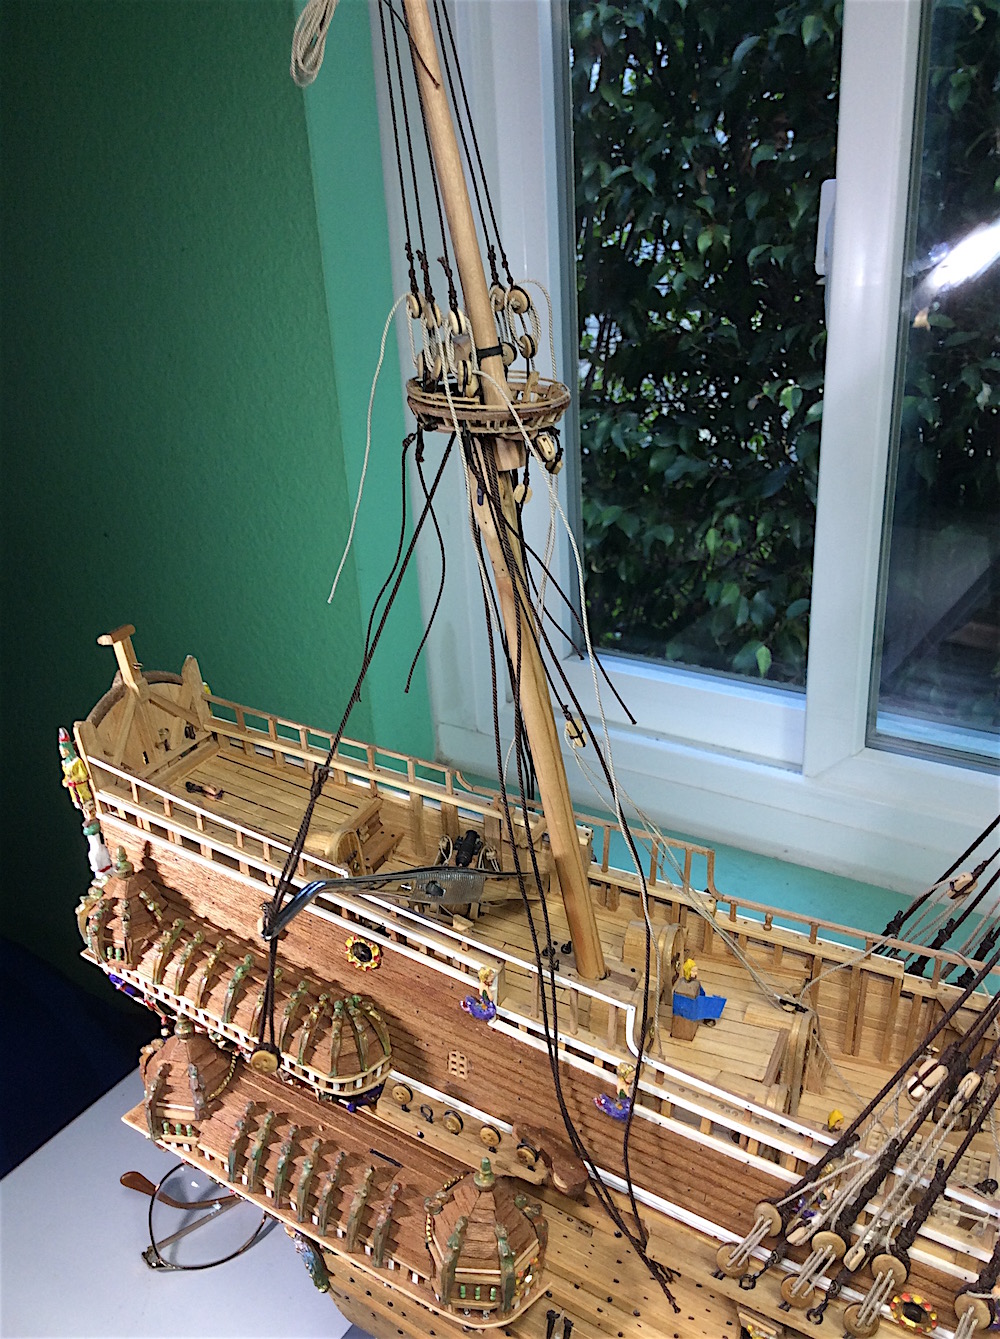
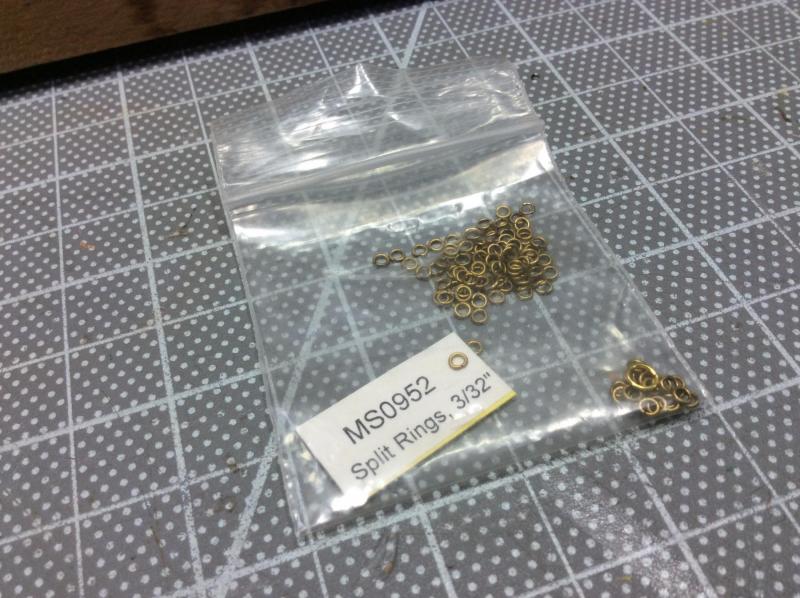
Hi Mates, Happy New Year to all of you here at MSW J And thank you Micke R for your interest in following along. Welcome aboard indeed. So the New Year’s first shipyard “tweak” had to do with the bowsprit. After finishing up the galleries I moved to the fore area to finish tying up the foremast shroud deadeye ropes then, of course, thought hmmm. So decided to first update some of that bowsprit previously completed area. As the bow area looked Looked at a photo of the 1:1 and noticed this bit of left out detail. Then thought that I might as well also add the extra bits/paint that I had just completed at the stern area. Used these rings as well as those left-over canon door hinges And added an extra touch with these two great white markers. Here are some updated shots of the extra details. I’m not sure about those little flattened hinges yet. May pull them and try to do something in wood instead, but I have absolutely NO idea how to carve details. And last pic: (Added the white marker highlights to the gallery trim as well). PS: The pillows were in case the Proxxon vice lost its suction allowing the ship to keel over. It happened to me once before. I have since learned that the Proxxon suction pad is actually very stable but it MUST be on a surface that has absolutely no pores (hence the piece of glass) and the pillow insurance, the first time I cranked the suction cup directly to that little white table in the photo and the ship fell over after about ten minutes. That resulted in a broken main mast lower top. Cheers,


-
Frank, Thanks so much - you are always so overly nice. Taken to heart indeed. Back home - had a wonderful time in Mexico (Place called Sayulita). Though preferred a little town right next door called San Francisco known as San Pancho. Will try one of my many -over the years "New Year's Resolutions" ha ha --- :"Getting more serious about speeding up this build". I keep Eyeing one under the table that is getting very intriguing (the Santisima Trinidad cross section) I don't have the room to work on more than one at a time. Hence the N Year's Resolution. Enjoy your New Year's Eve weather is finally nice and wintery - that is to say around 55º and a bit of rain with sun mixing in as well. We So Cal folks are so spoiled are we not? Cheers,
-
Buck, Catching up - per your usual levels of micro detailing your mast mast-hinge is a thing of beauty. Well next to your assistant I'm not so sure ha ha Well done indeed.
- 515 replies
-
- 7
-
-
- artesania latina
- whaleboat
- (and 1 more)
-
EJ, Excellent forward thinking/planning! It will pay off for sure. Good start. This kit - it looks as if you might "bash" it right from the start(:-)
-
Joe, Thanks - very touched by your overly kind words. Your continued support is so encouraging. ================ Mates - Enjoy your holidays wherever you may be. We are off to the home country of Tequila for a few restful days along its southern western coast, and for a few shots of cactus juice as well - ha ha, Looking forward to actually seeing stars in the night sky as well. Regards to all here at MSW
-
EJ, Yup the Vasa Museum always seems to come up with previous errors that need to be removed or added. I'm sure that rigging will be included in future changing updates as well. Especially, from what I understand that in the early 1600s Swedish ship builders did not use consistent plan sheets that applied to all ships of the same type. Which actually could be a "silver lining" in this case (no rigging pin locations might actually be right or wrong) Again thanks so much for your always kind remarks, - touch of paint - got lucky (;-)
-
Capt. Steve, Thanks for your kind words, and for following along - Glad to finally put this to rest. Not sure if I want to attach other masts, or first do all of the lower ratlines. I'll hunt around for some other "builders best options" Cheers,
-
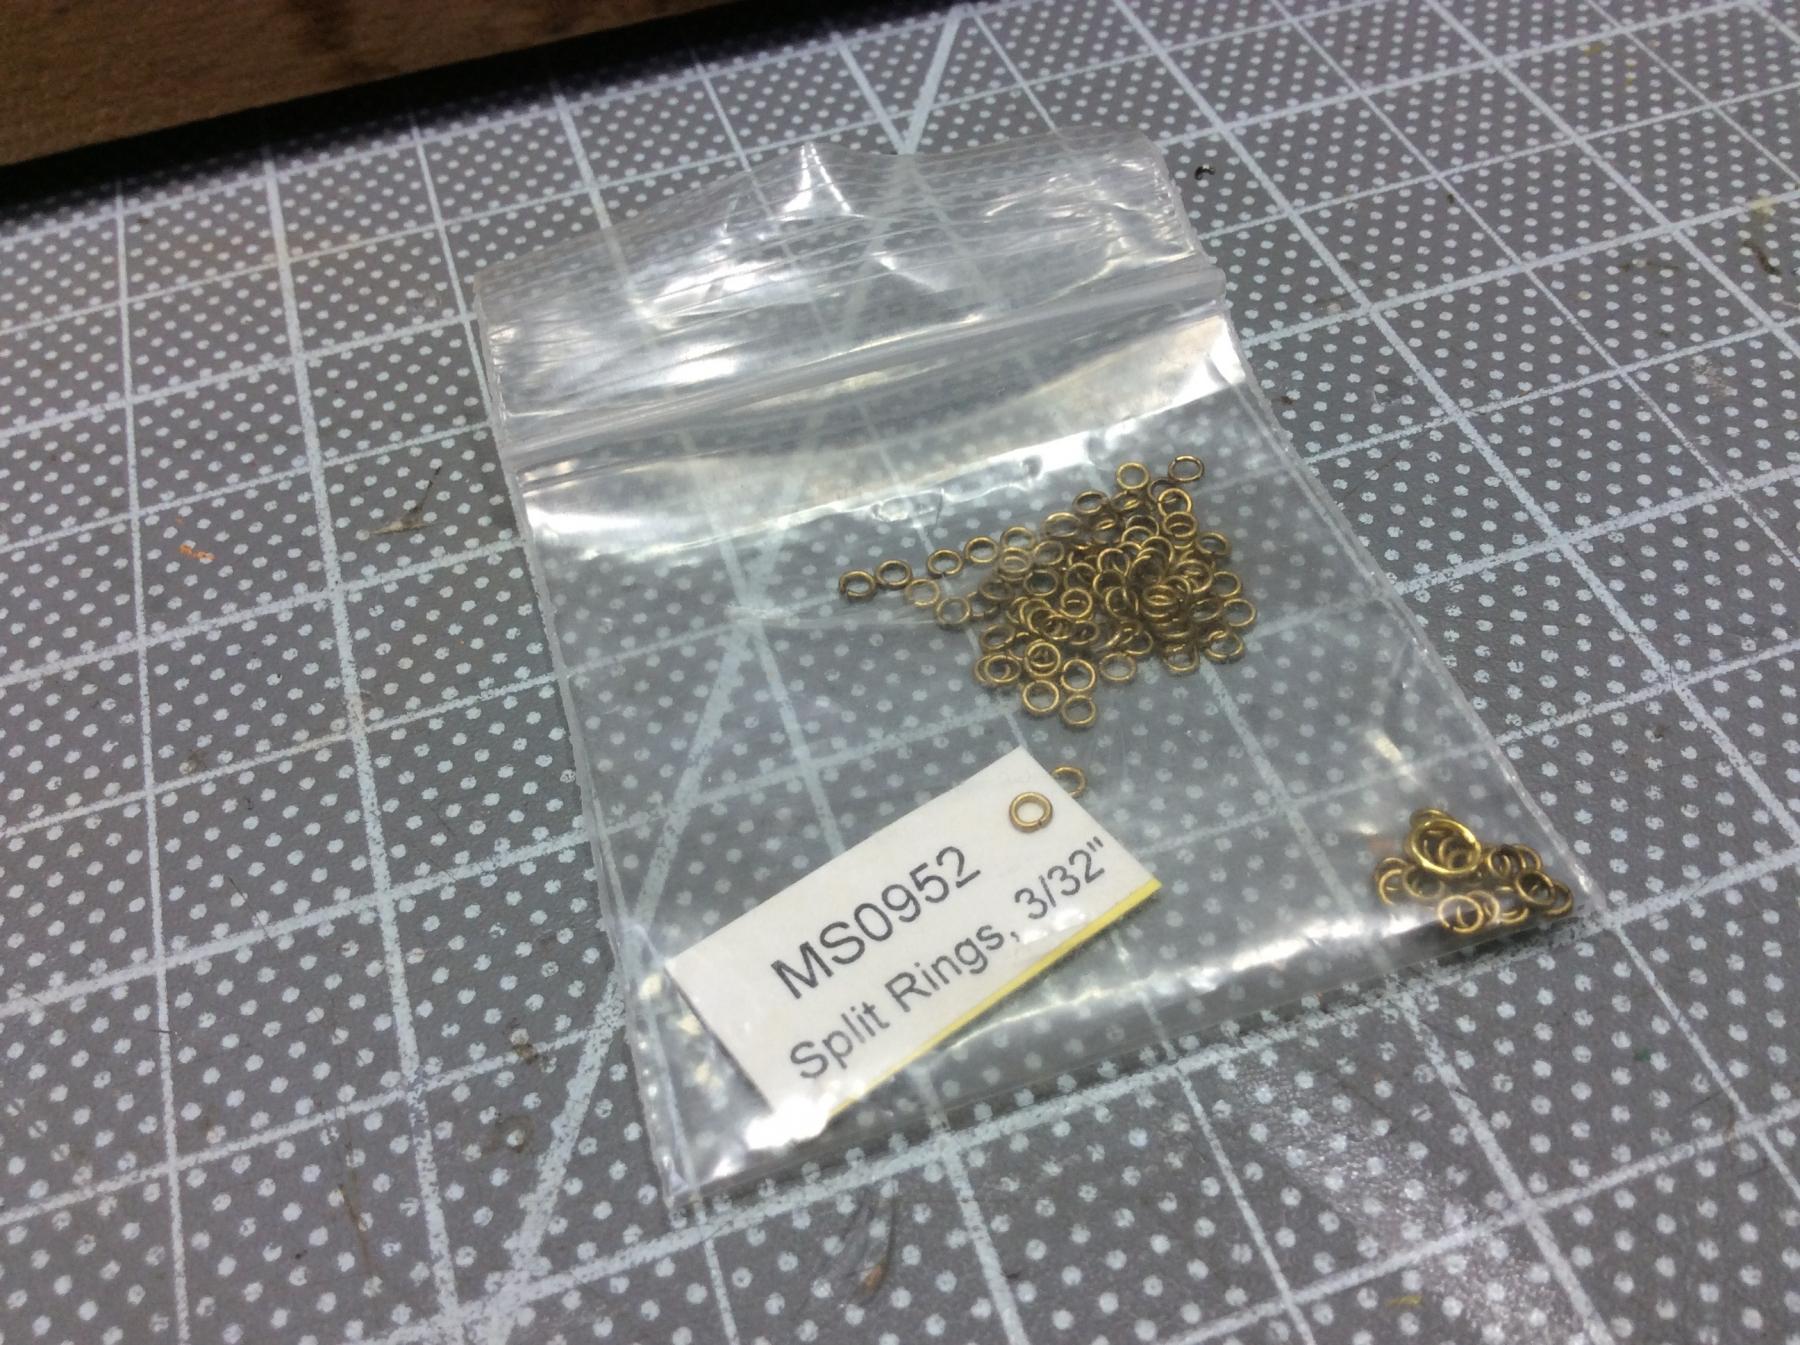
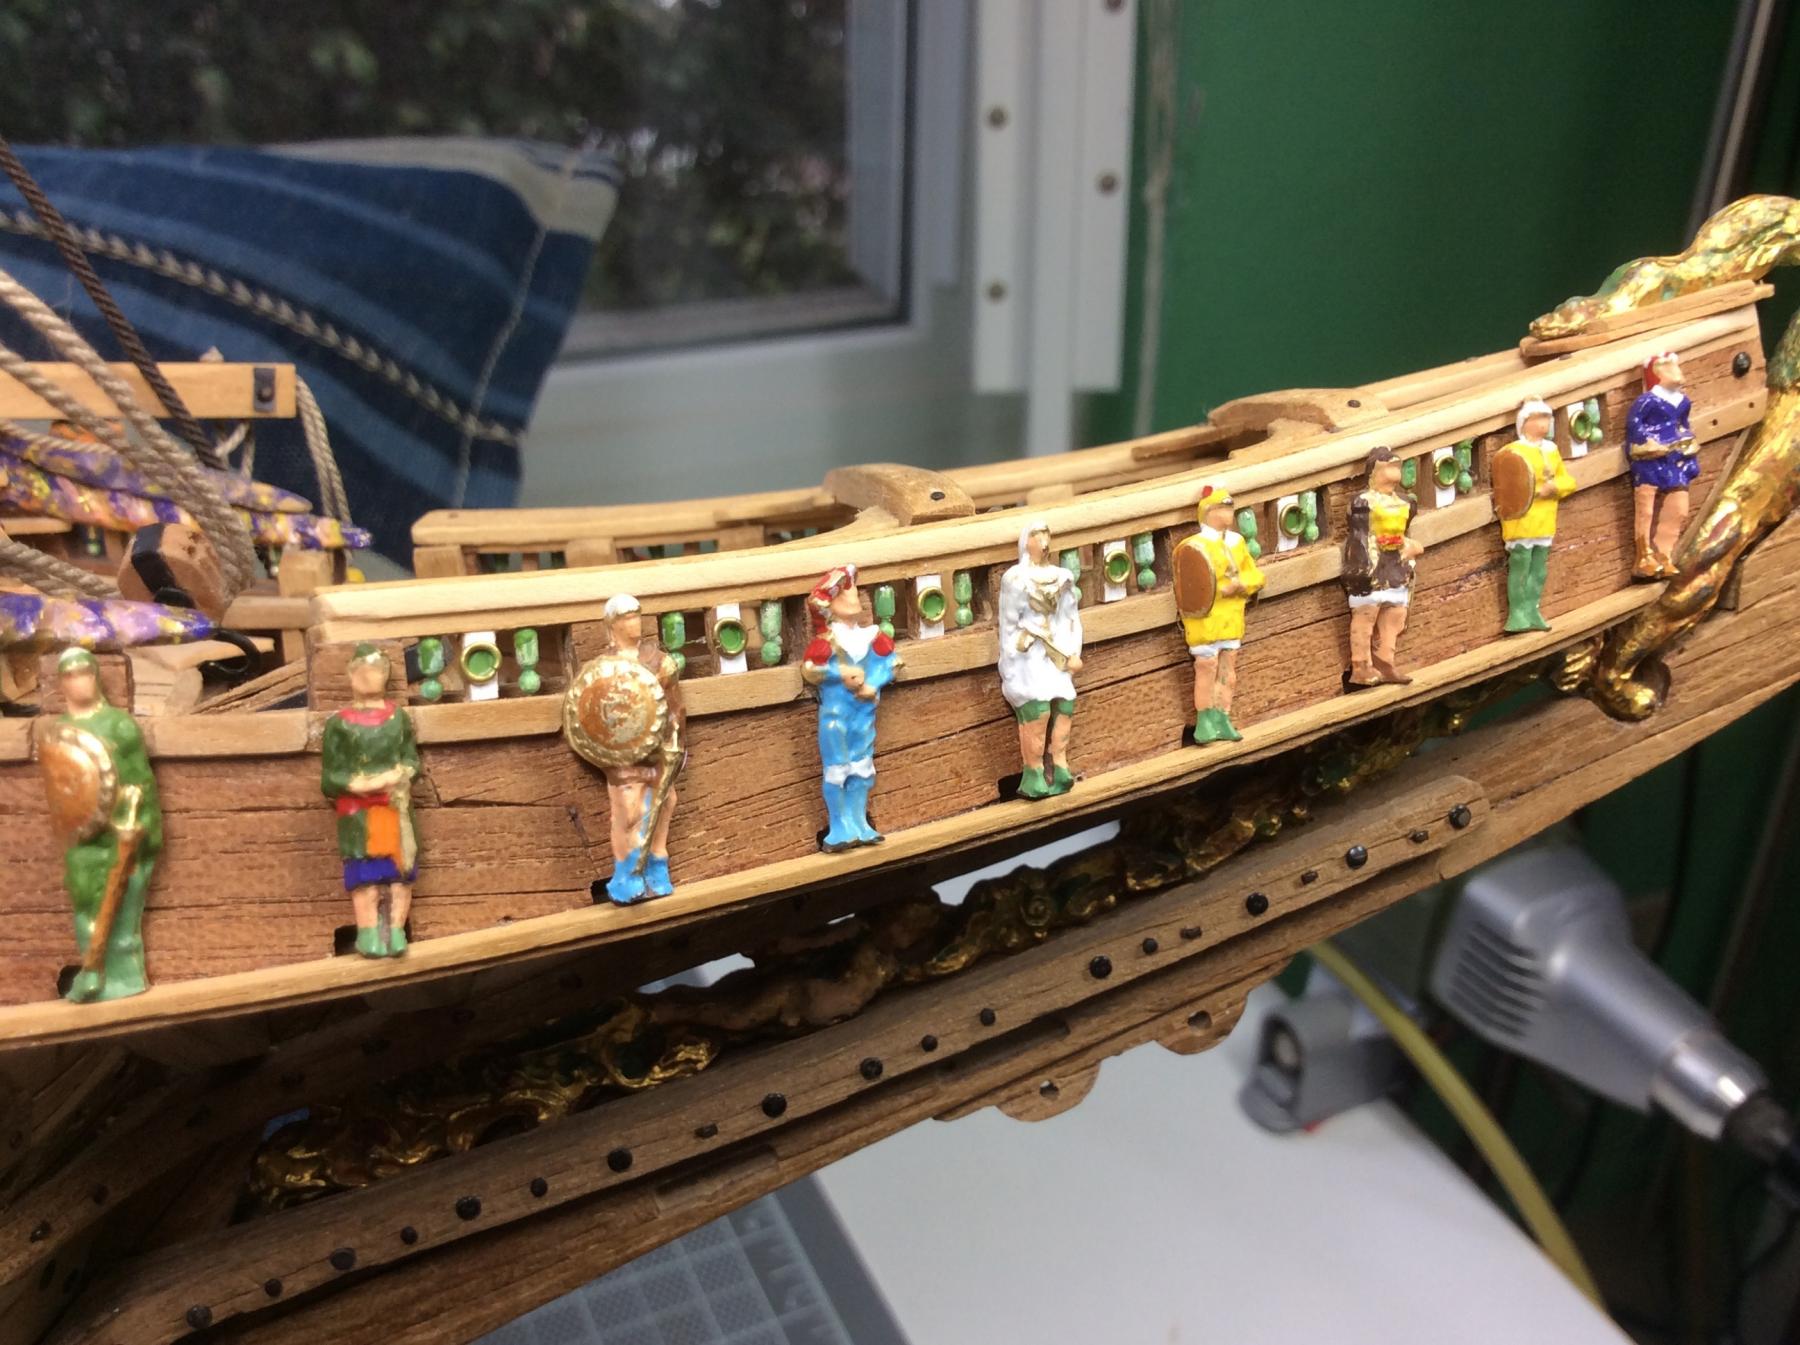
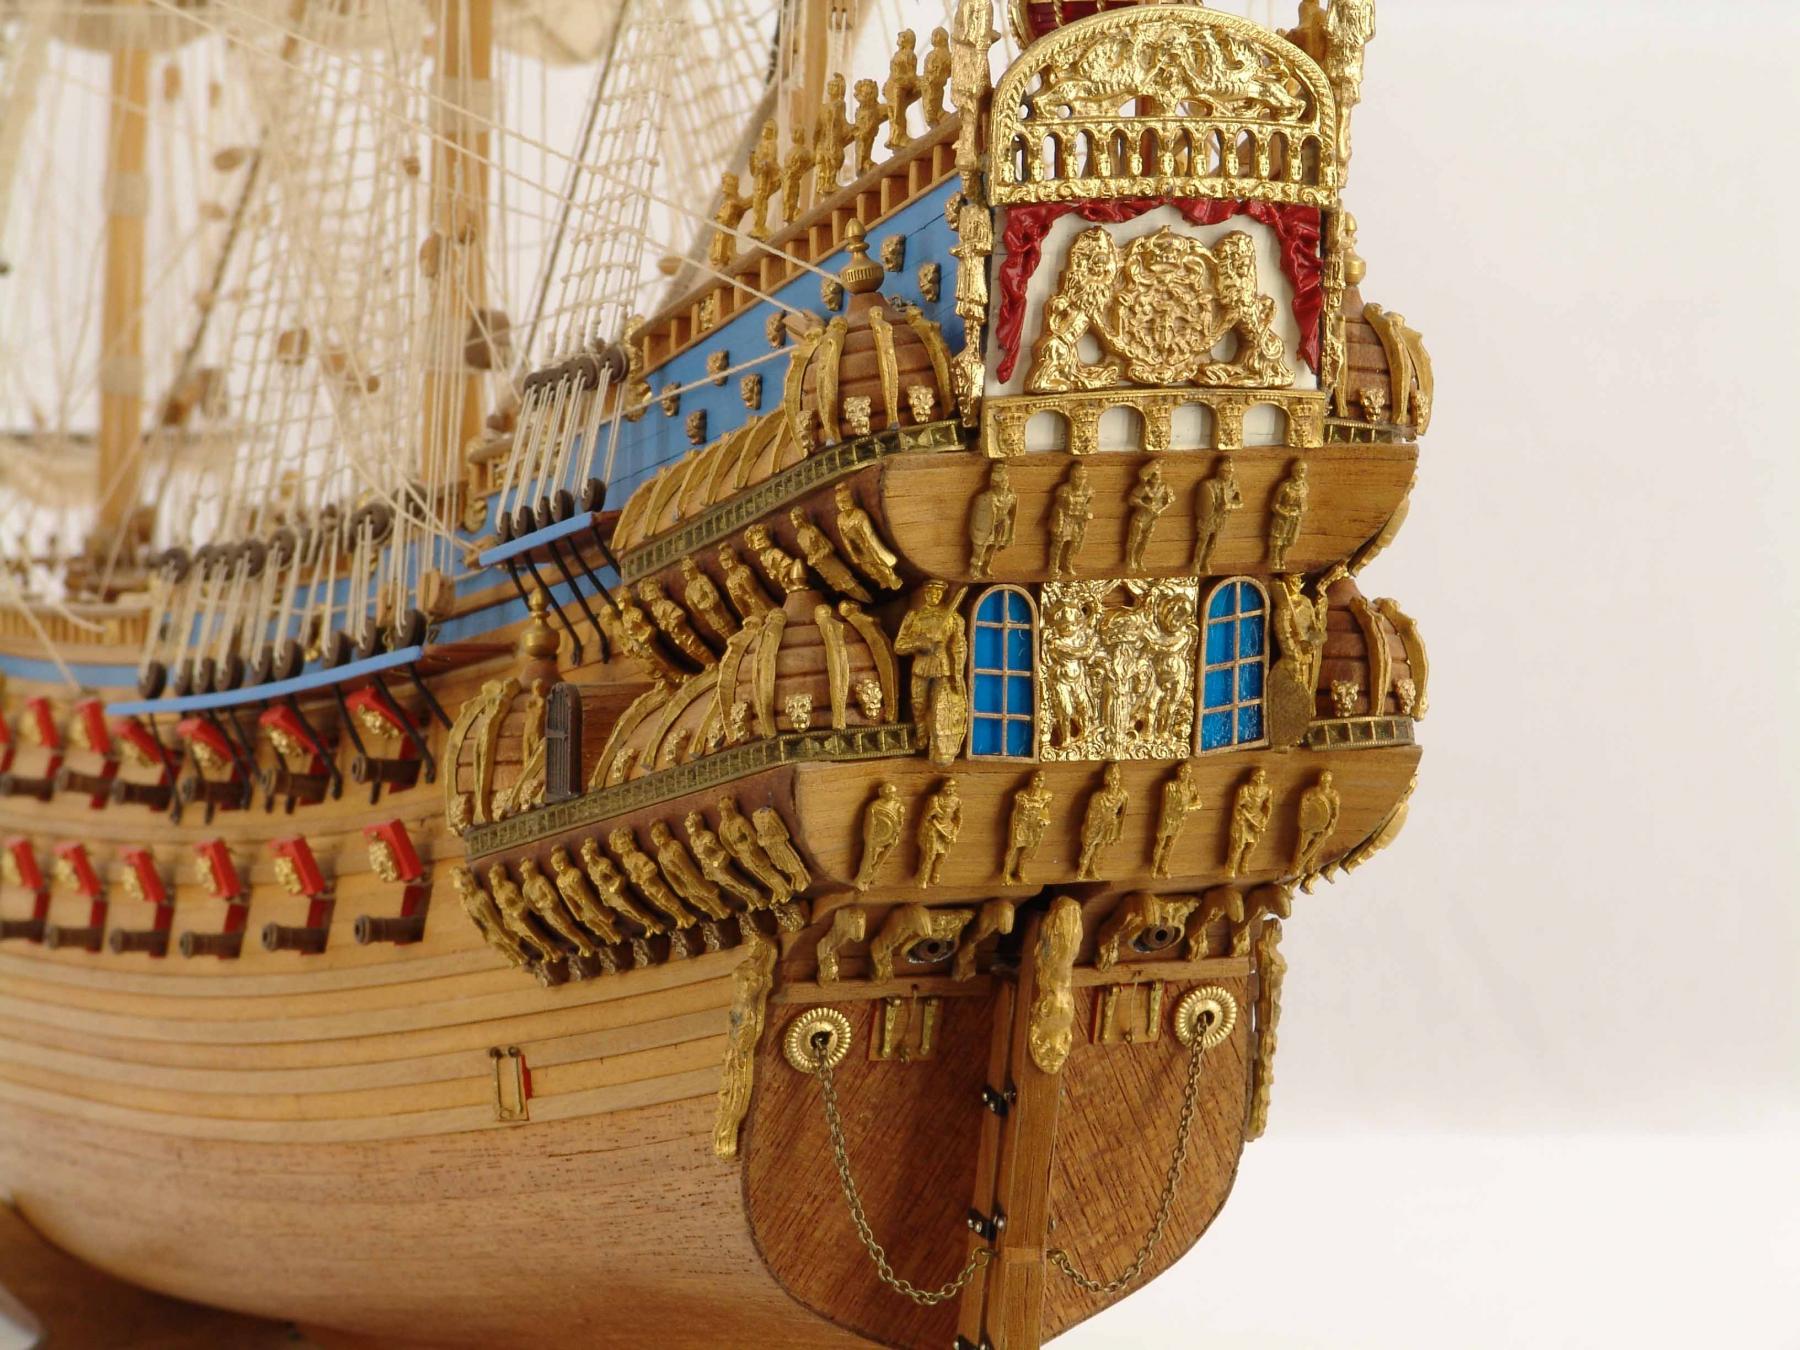
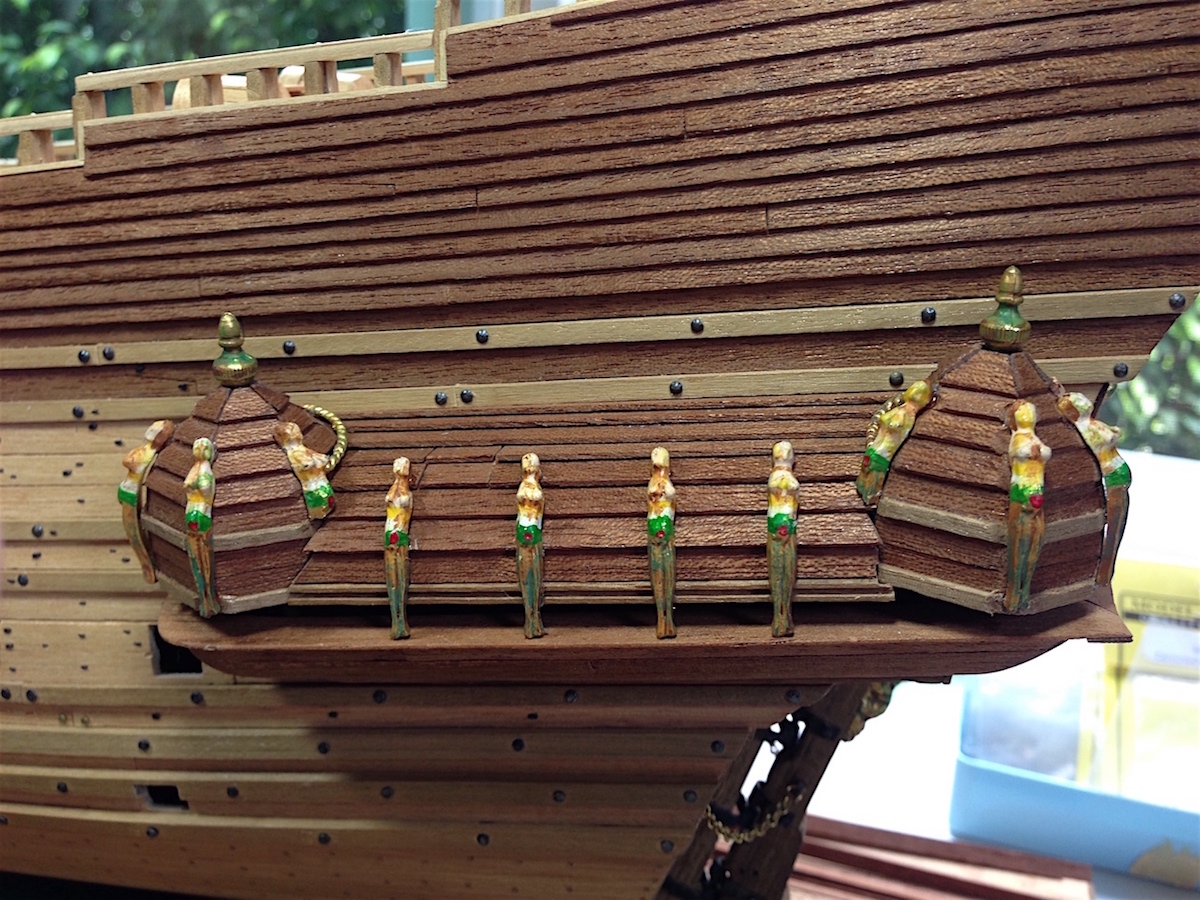
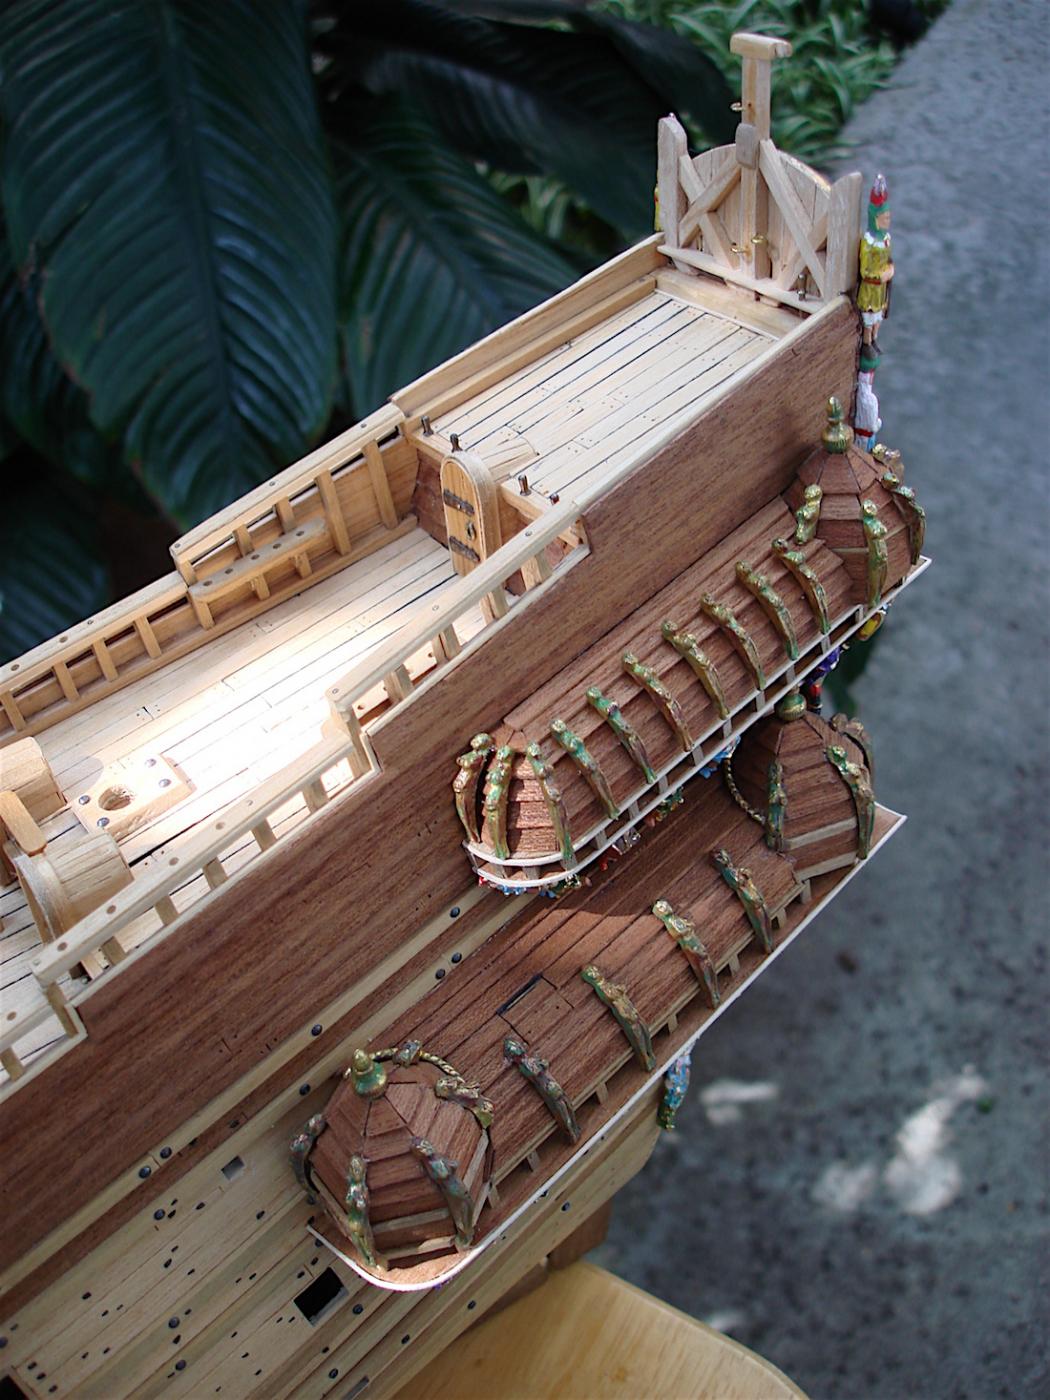
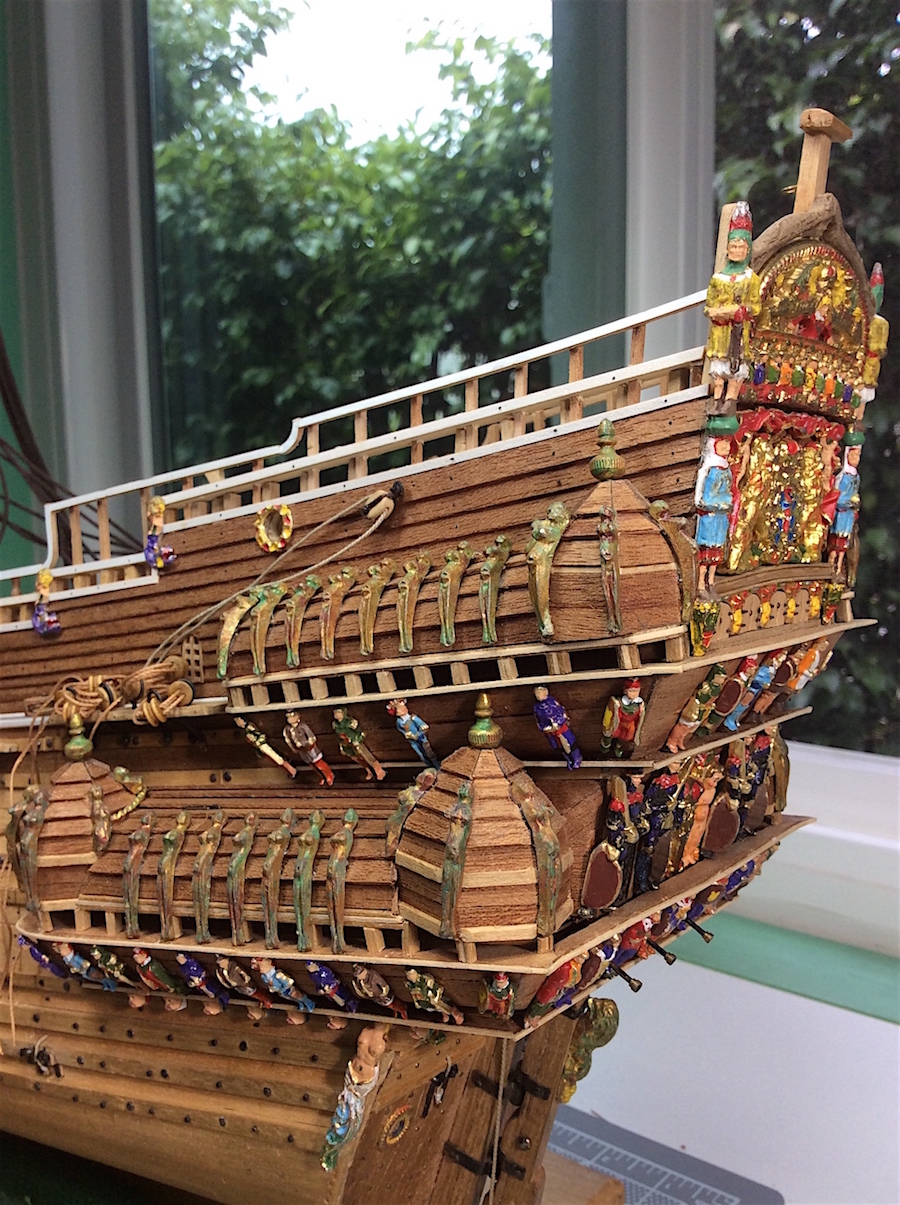
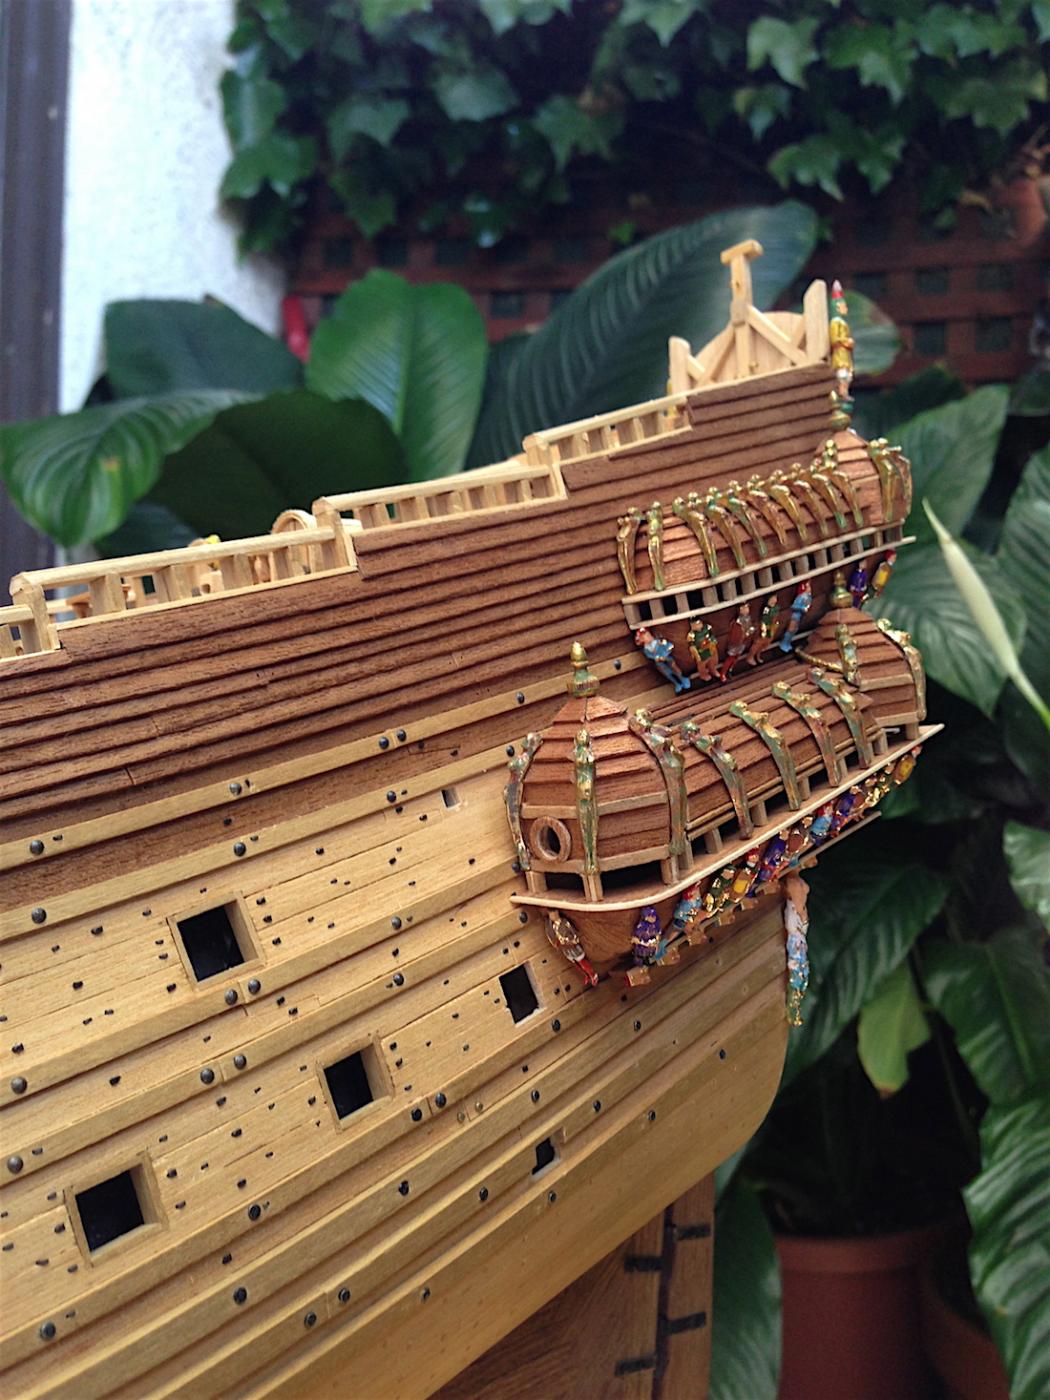
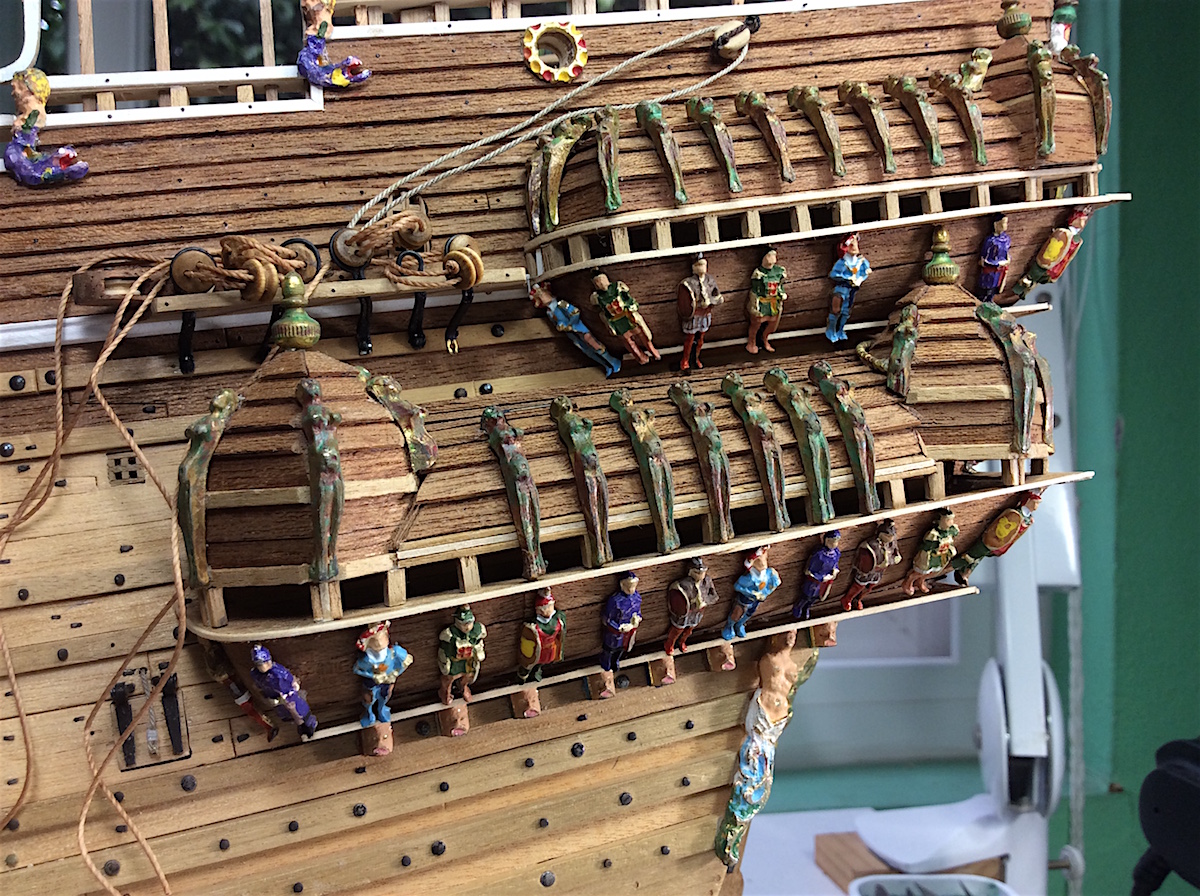
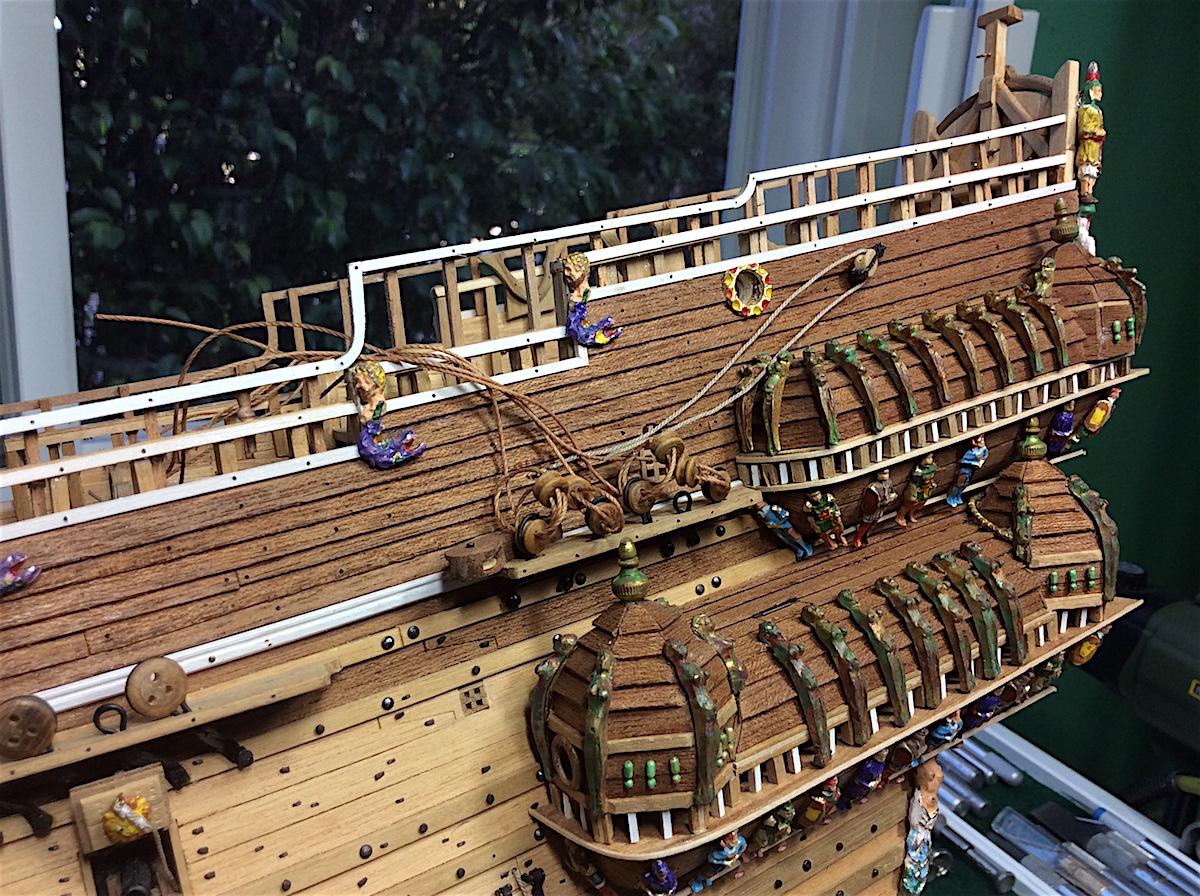
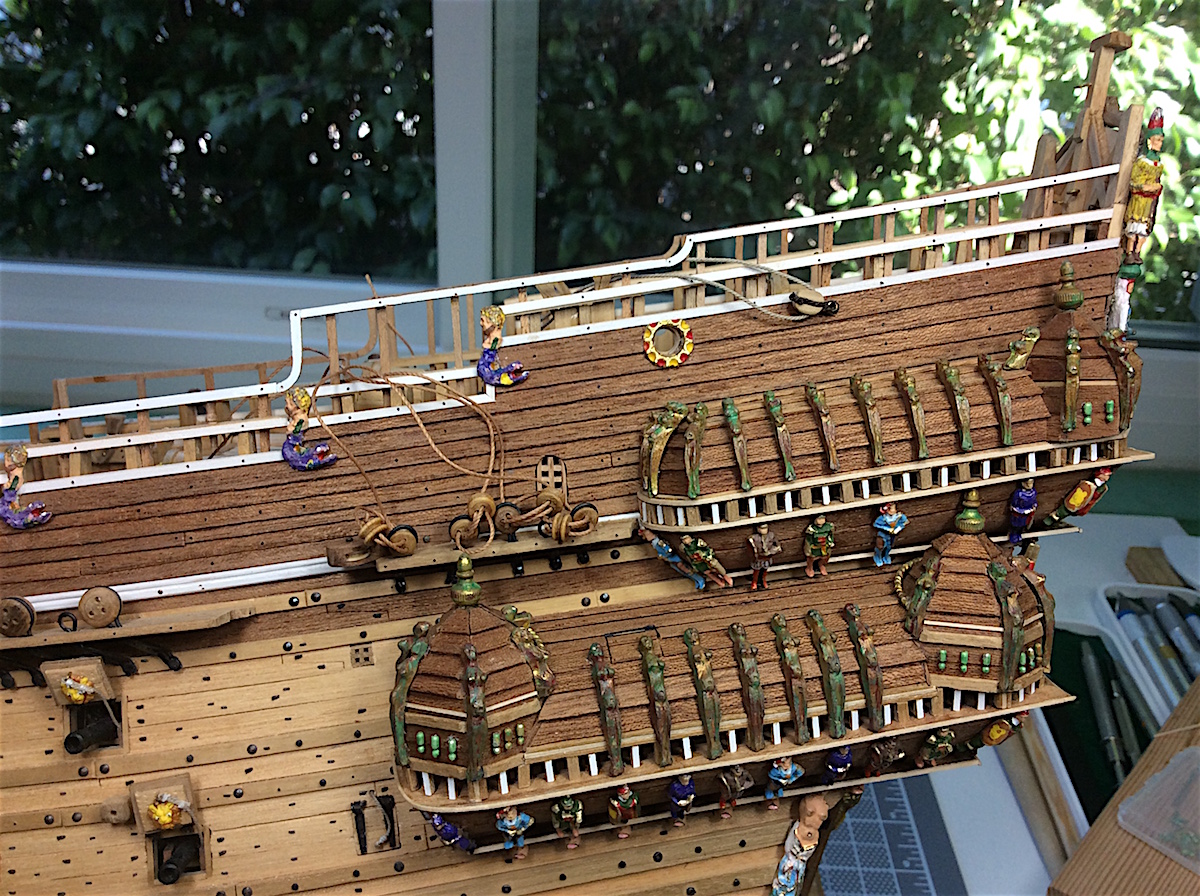
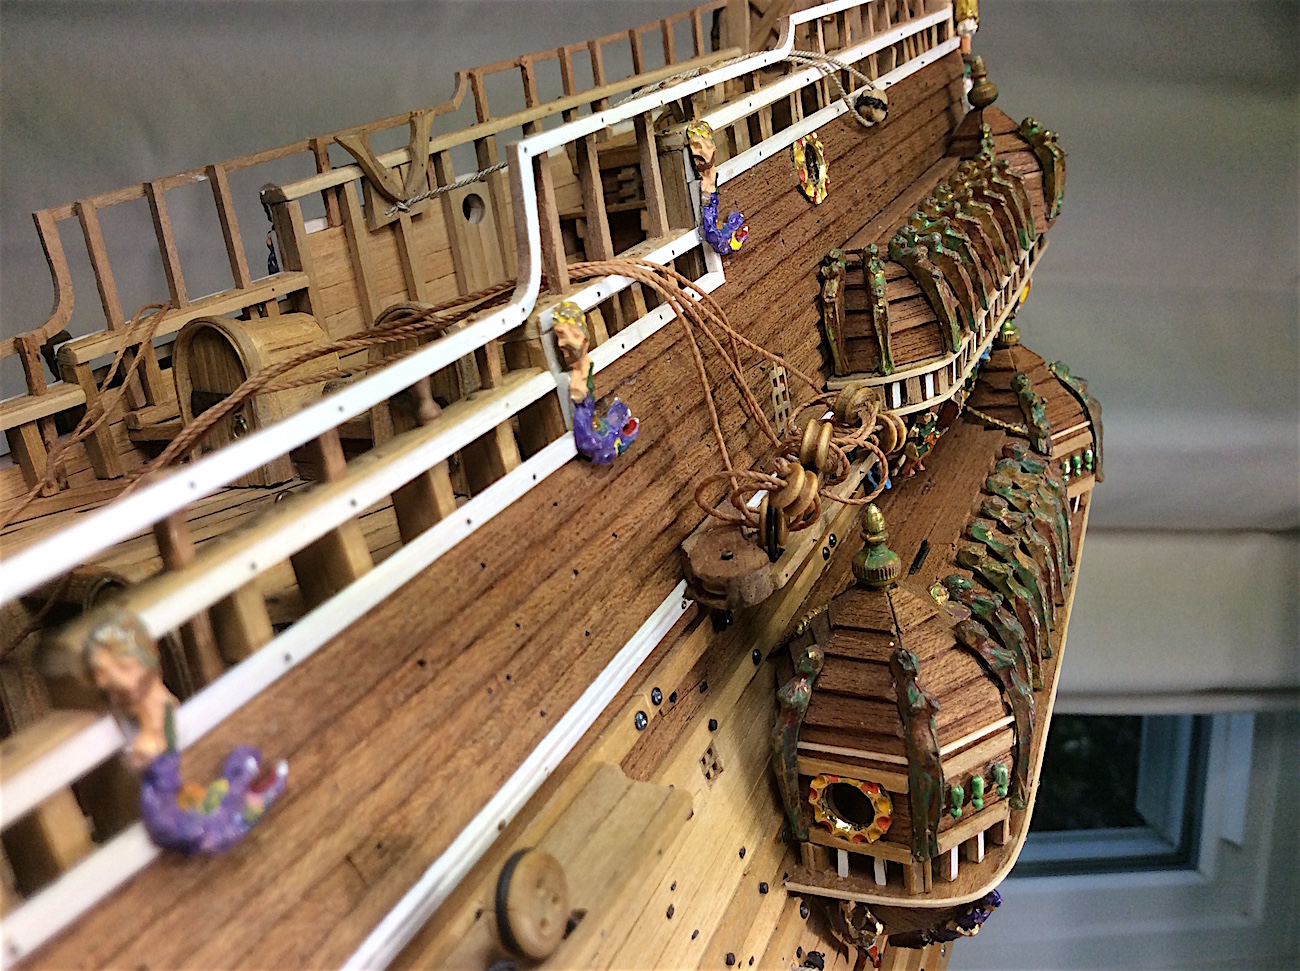
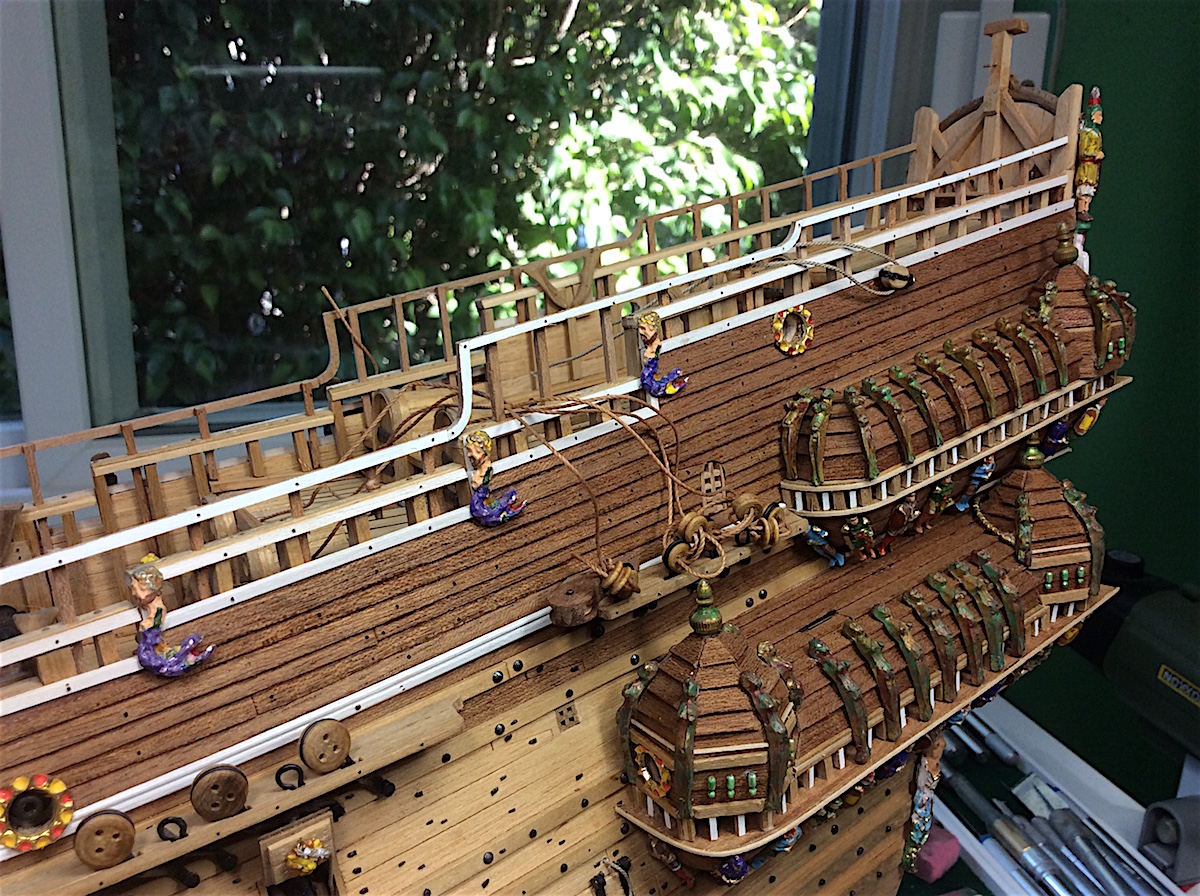
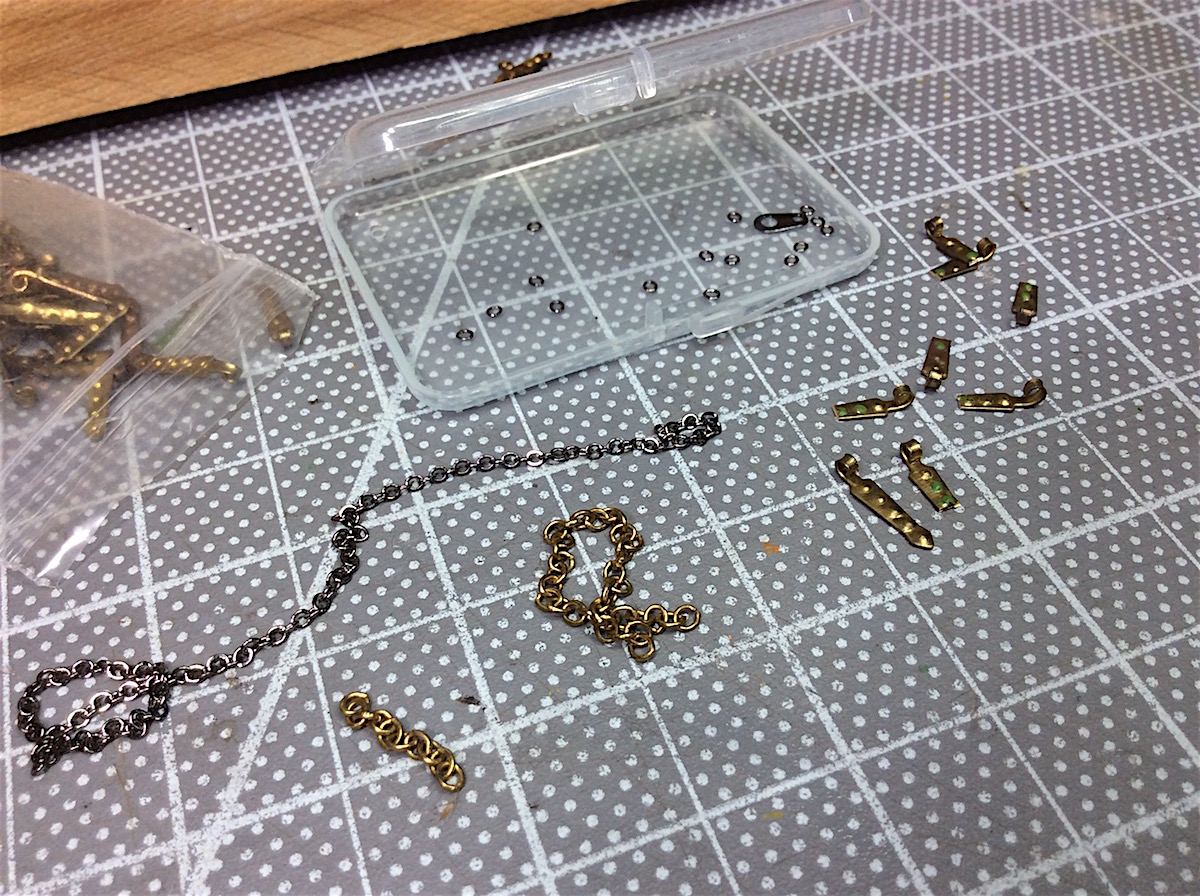
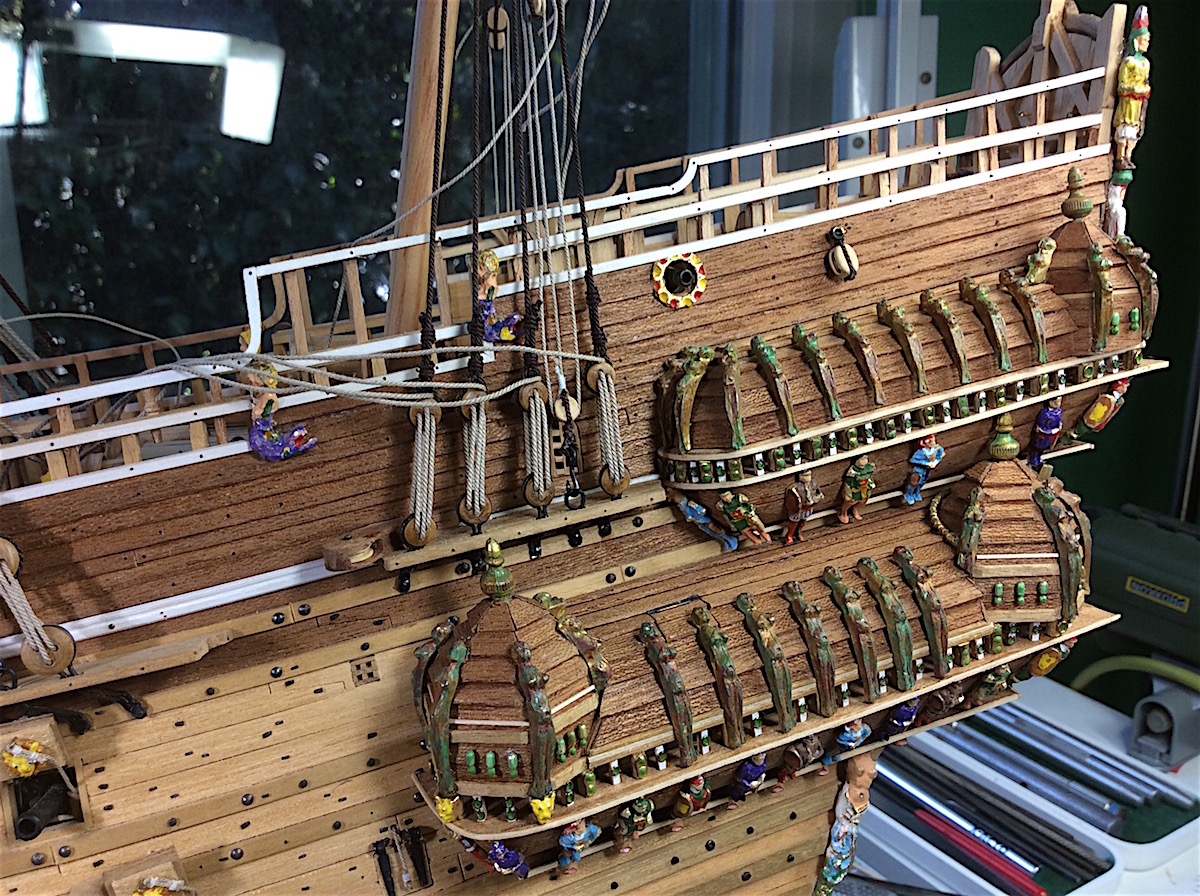
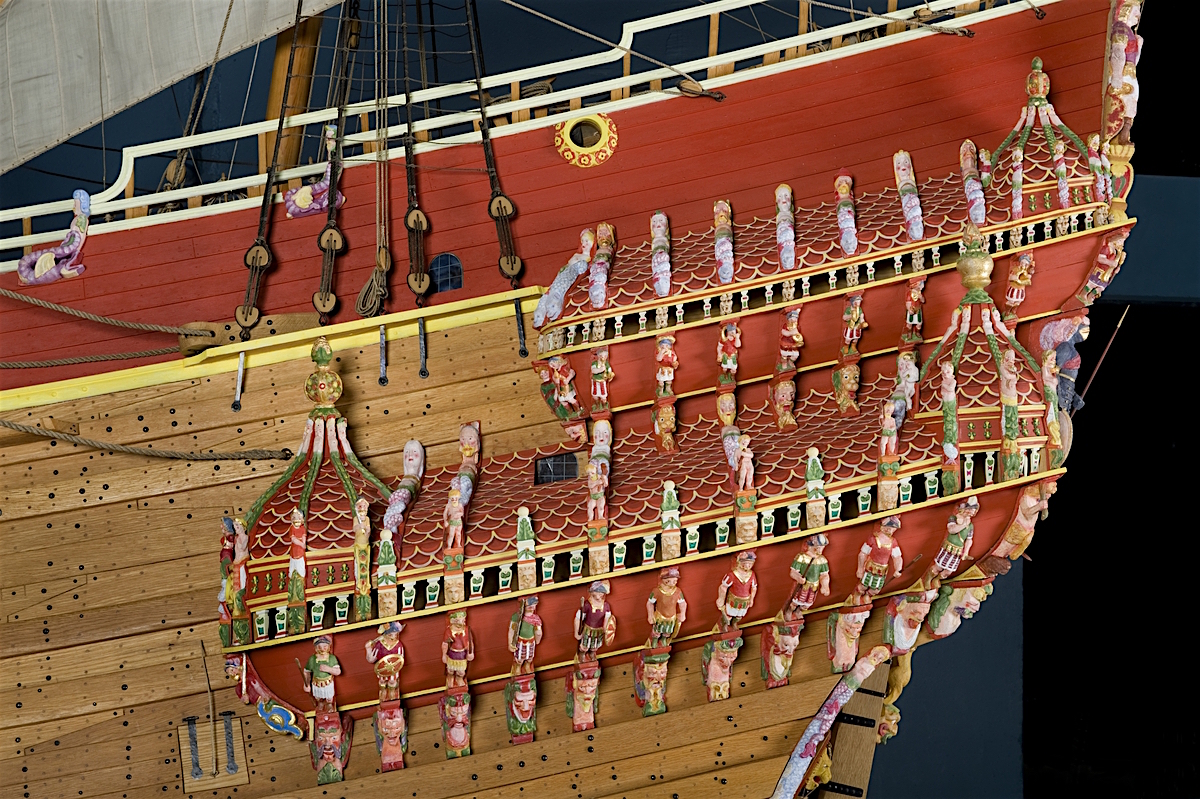
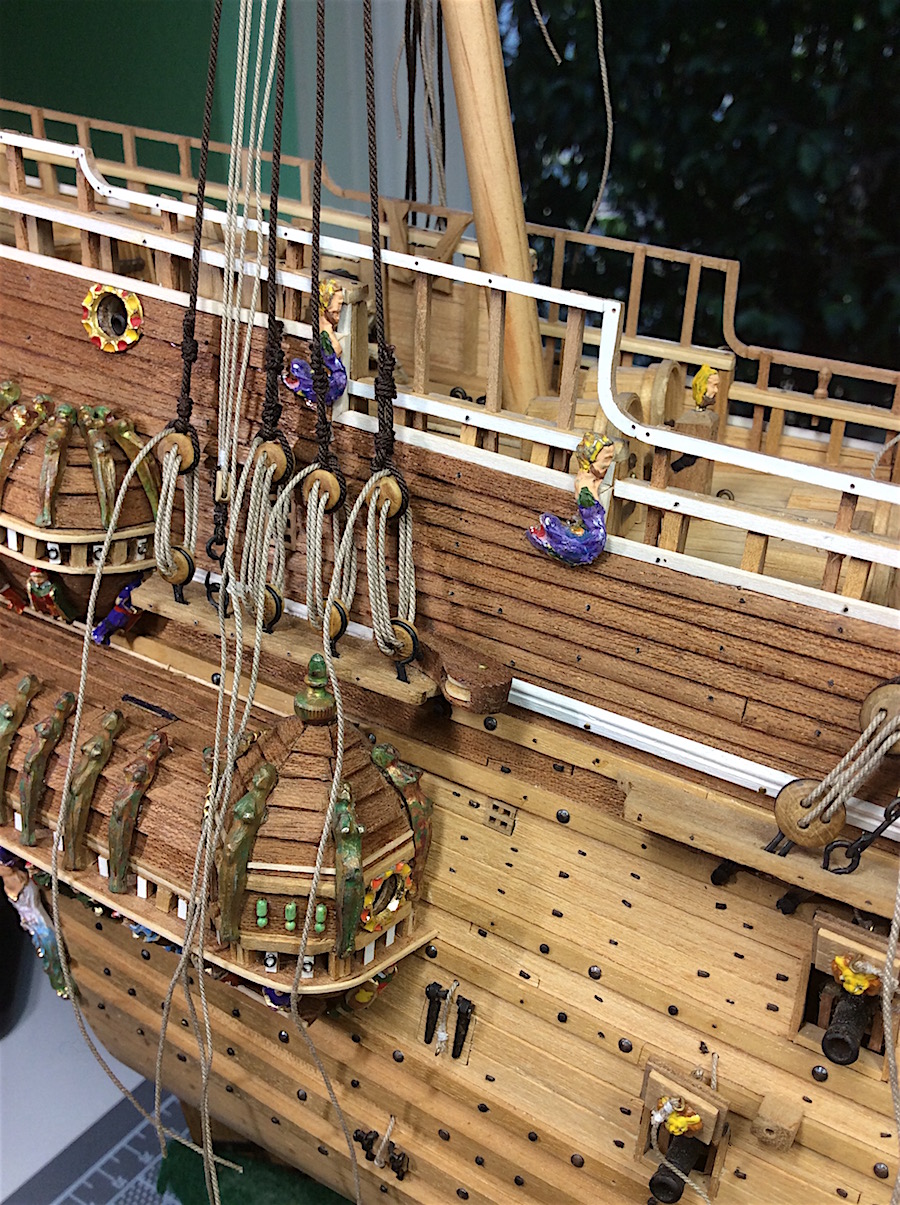
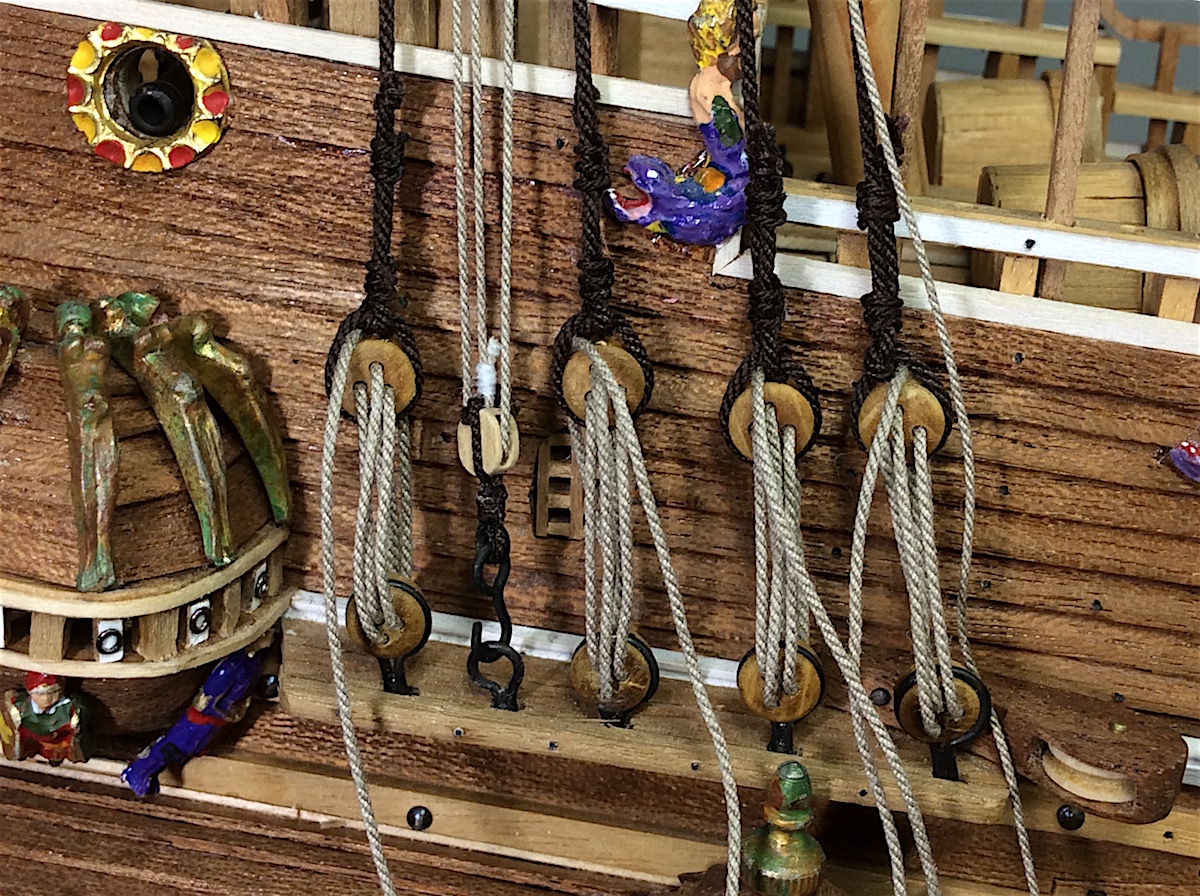
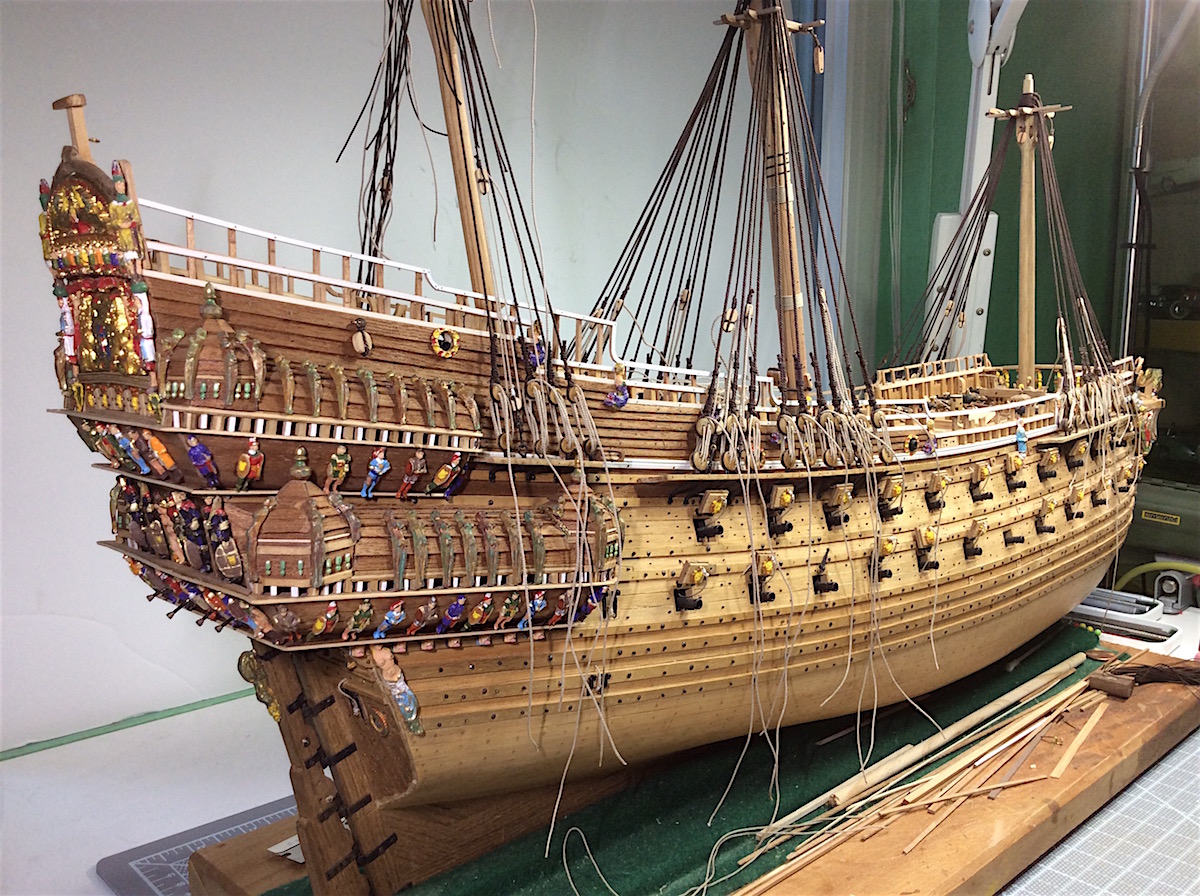
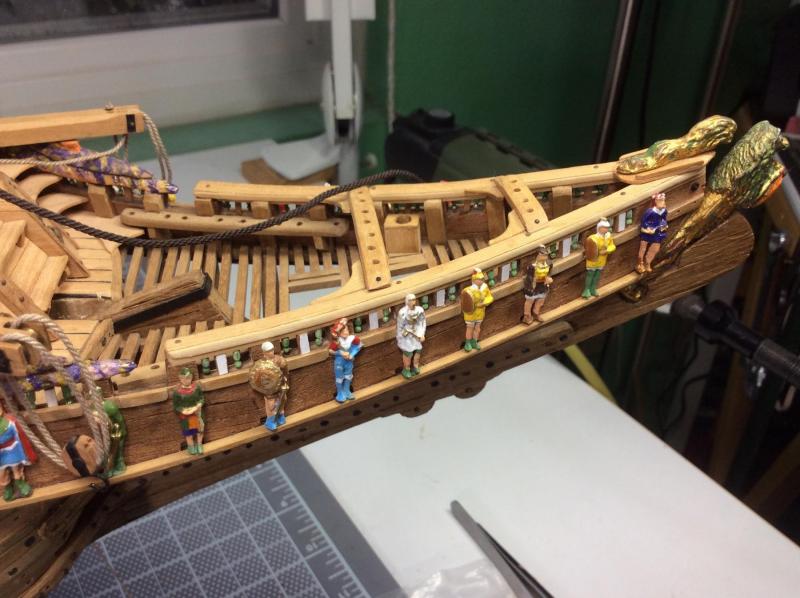
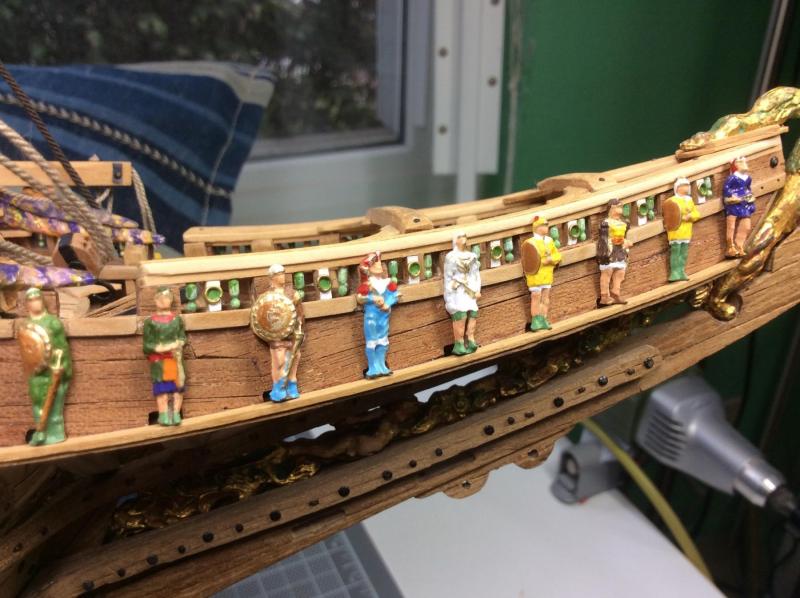
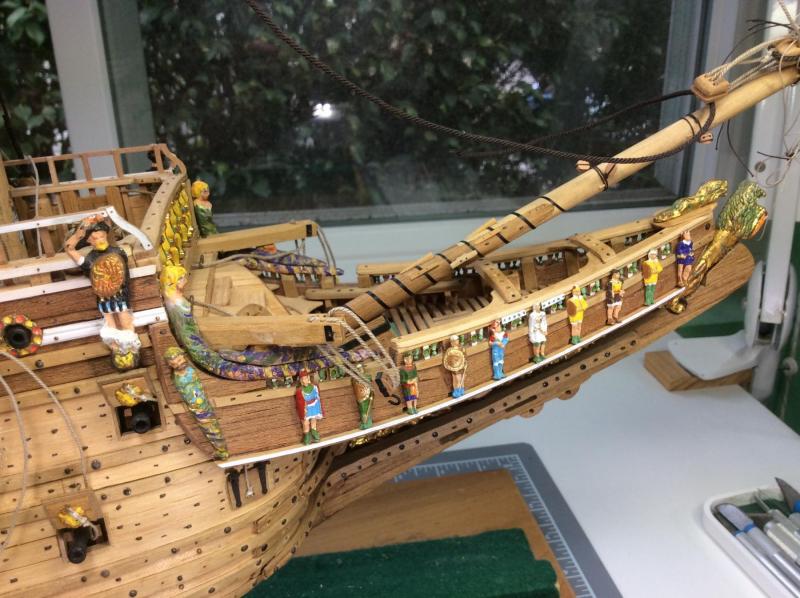
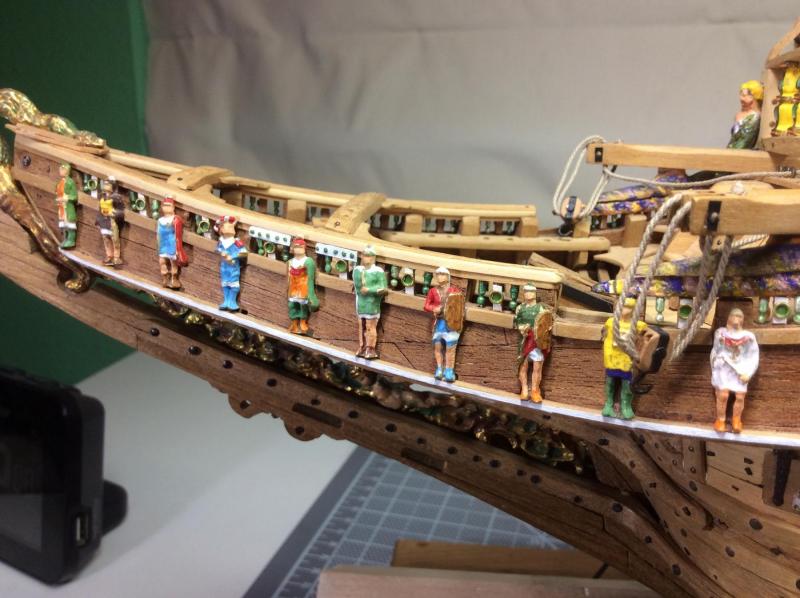
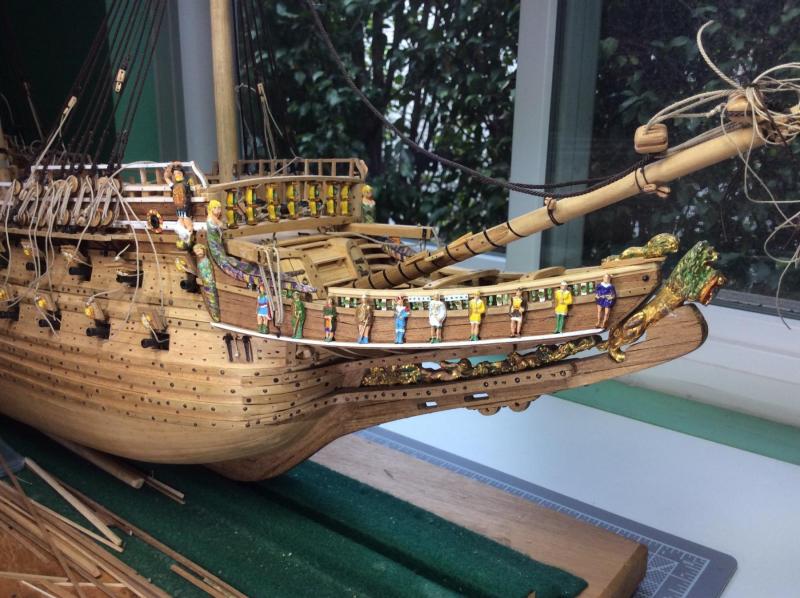
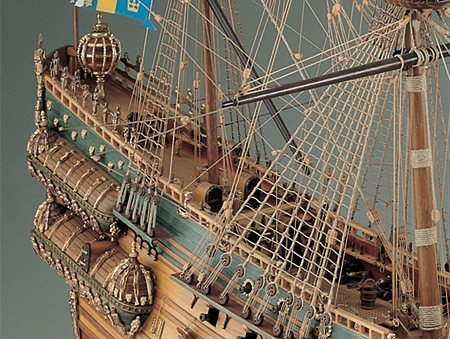
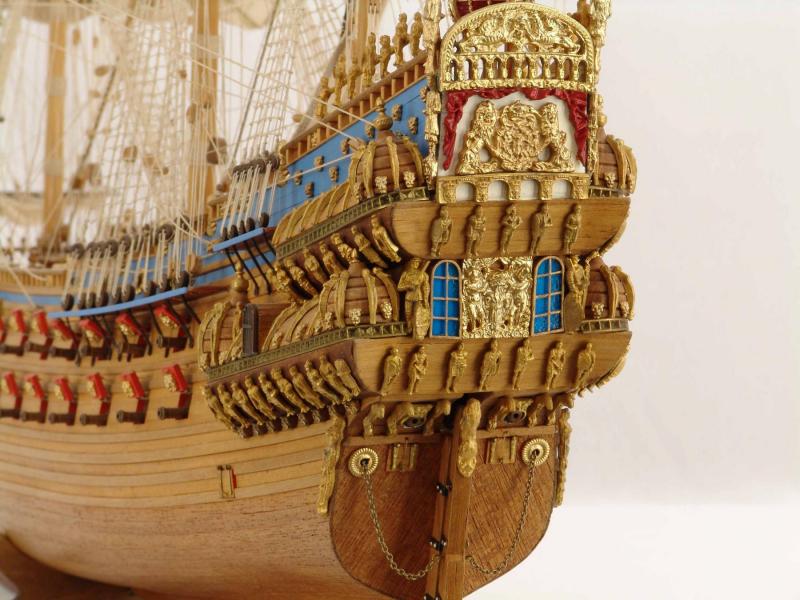
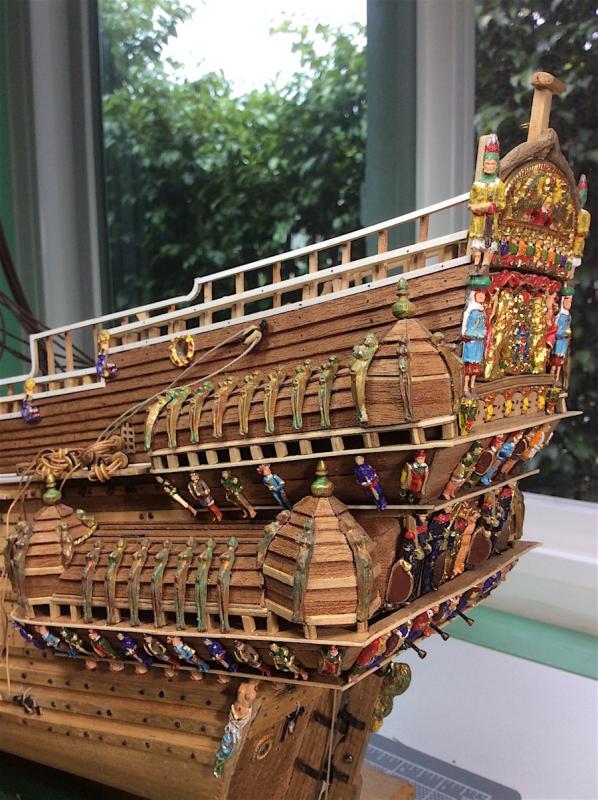
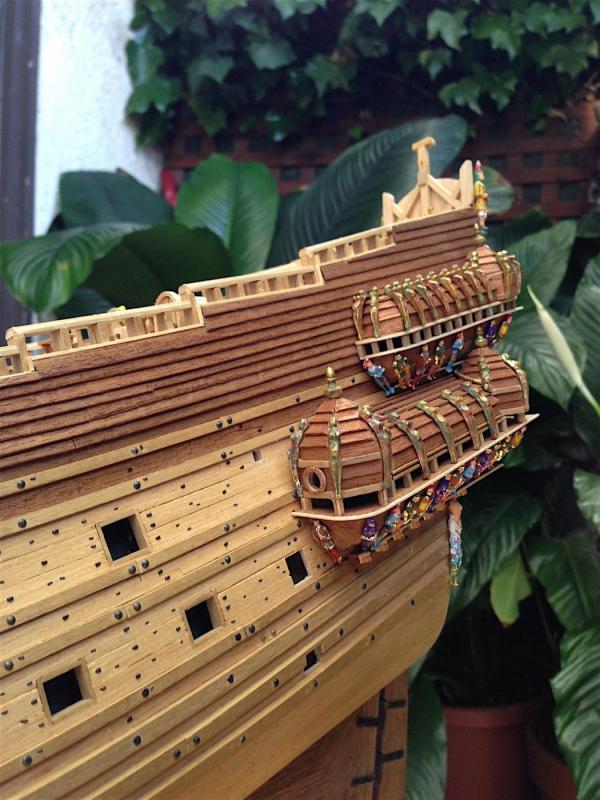
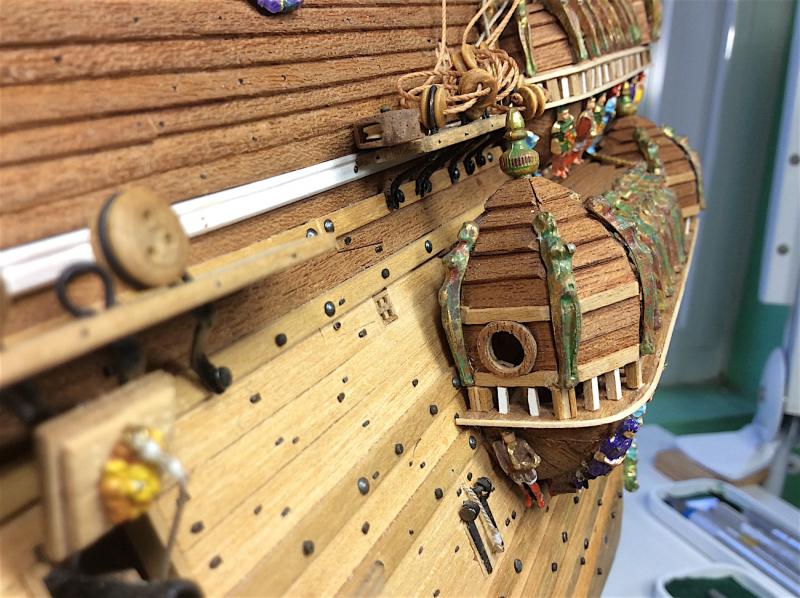
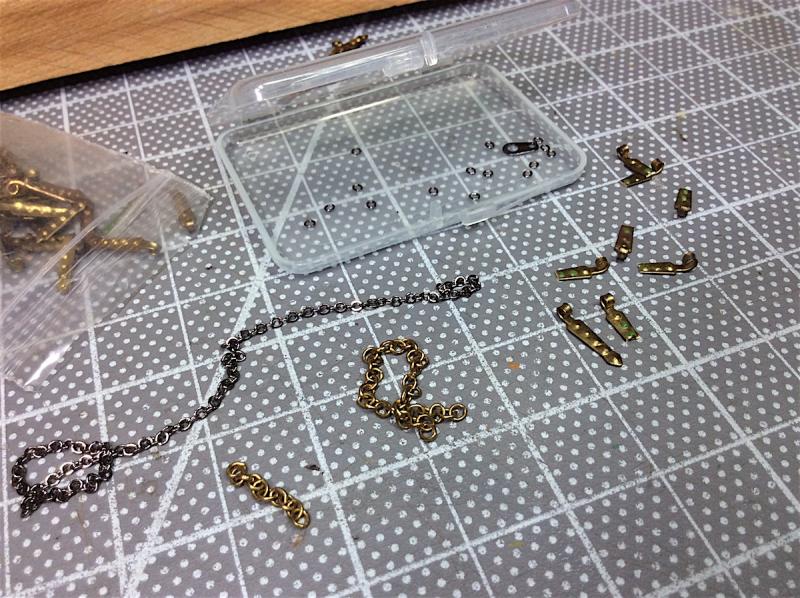
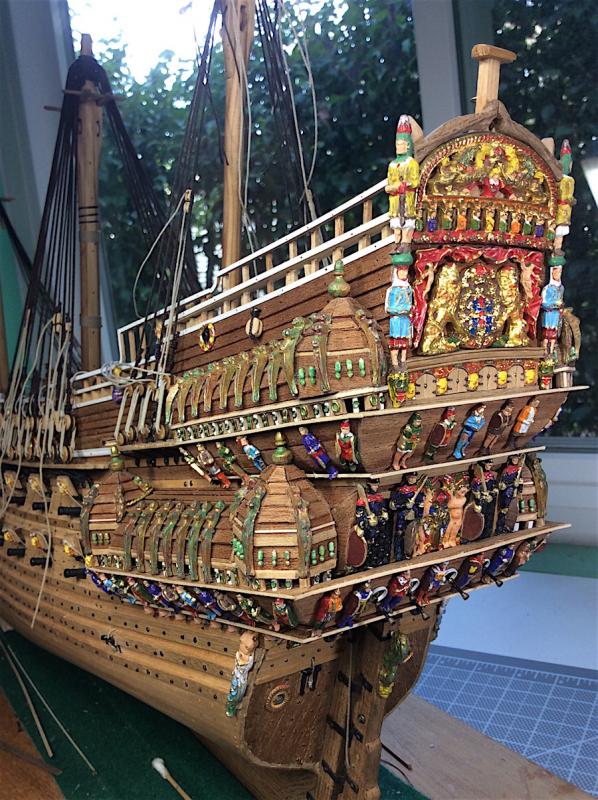
Hi Mates, Thanks for the likes, and thank you LMDAVE29 for being kind enough to want to follow along. Welcome aboard this very slow build… Evolution of Corel Vasa galleries (Evolution because this area is now part of three years of on-and-off intermittent changes, and additions – finally - Done) As it turns out got “side-tracked” again trying to add further details to the kit’s galleries (to be a bit more representative of the actual ship) after looking at the 1/10th TOO many times, and feeling bouts of frustration. So as I was (moving forward) attaching the mizzen shrouds, it mentally clicked that I could “play” with the galleries again just a bit more. First, if you don’t mind, some changing looks of these for me “troubling galleries”; then the final finish. First pic is out-of-the-box kit build per Corel’s official photo. The next two are from a brilliant example of a right out of the box Euro commercial builder’s work. And he added sails J - Posted only for comparisons to the kit provided bits…. Kudos to this builder’s excellent work. What Corel supplied in the kit for, and my earliest attempt at adding initial extra details to the galleries (decided to initially scratch built in any case) Early attempt at painting the very poorly represented guilded figures that Corel supplies in this kit. That just did not suit - IMHO. So tried to instead “antique” paint the figures, and then also added a basswood border relief along the lower platforms of both galleries. Though I am very happy with the many other guilded pieces that Corel included, and enjoyed painting those as they appear today. Added the circular opening in the forward bobbinets along with a basic wood trim ring. At that point I left this area alone thinking that I was done. Revisited the area by adding painted white extra vertical bits, and those green decorative pieces on the bobbinets (sourced from a necklace at Michael’s art Supplies) Added small basswood lower horizontal trim pieces as well to the lower bobbinets. And removed their forward wood rings adding decorative guilded pieces instead– same as those provided in the kit for weather deck cannon openings (PS: Corel has ALWAYS been very kind in sending me any requested extra parts) That was when I thought that I was (again) done “obsessing” over this area. Then another thought crossed my mind; decided to use anchor chain links, kit included lion heads and cannon door hinges to finally finish off this area’s detailing. I kept referring back to photos of the 1/10th gallery details for help -- So final solution – Painted the chain link centers with green paint as well as the canon door hinge centers. Then added the two lion heads per side. some pics of the finished efforts – I WILL leave this area alone now – I promised myself- Though the very last pic - Still makes me nervous – ha ha Cheers,


-
Hey EJ, That kit looks really awesome indeed. This one has always been on my "wish I could do list". The metal gildings also look to be very well cast as well. Lazer cut is also a nice treat. Good luck - I will also watch from Dry Dock gallery. PS: As with ALL kits you will "loose" those blocks - right? ha ha Cheers,
-
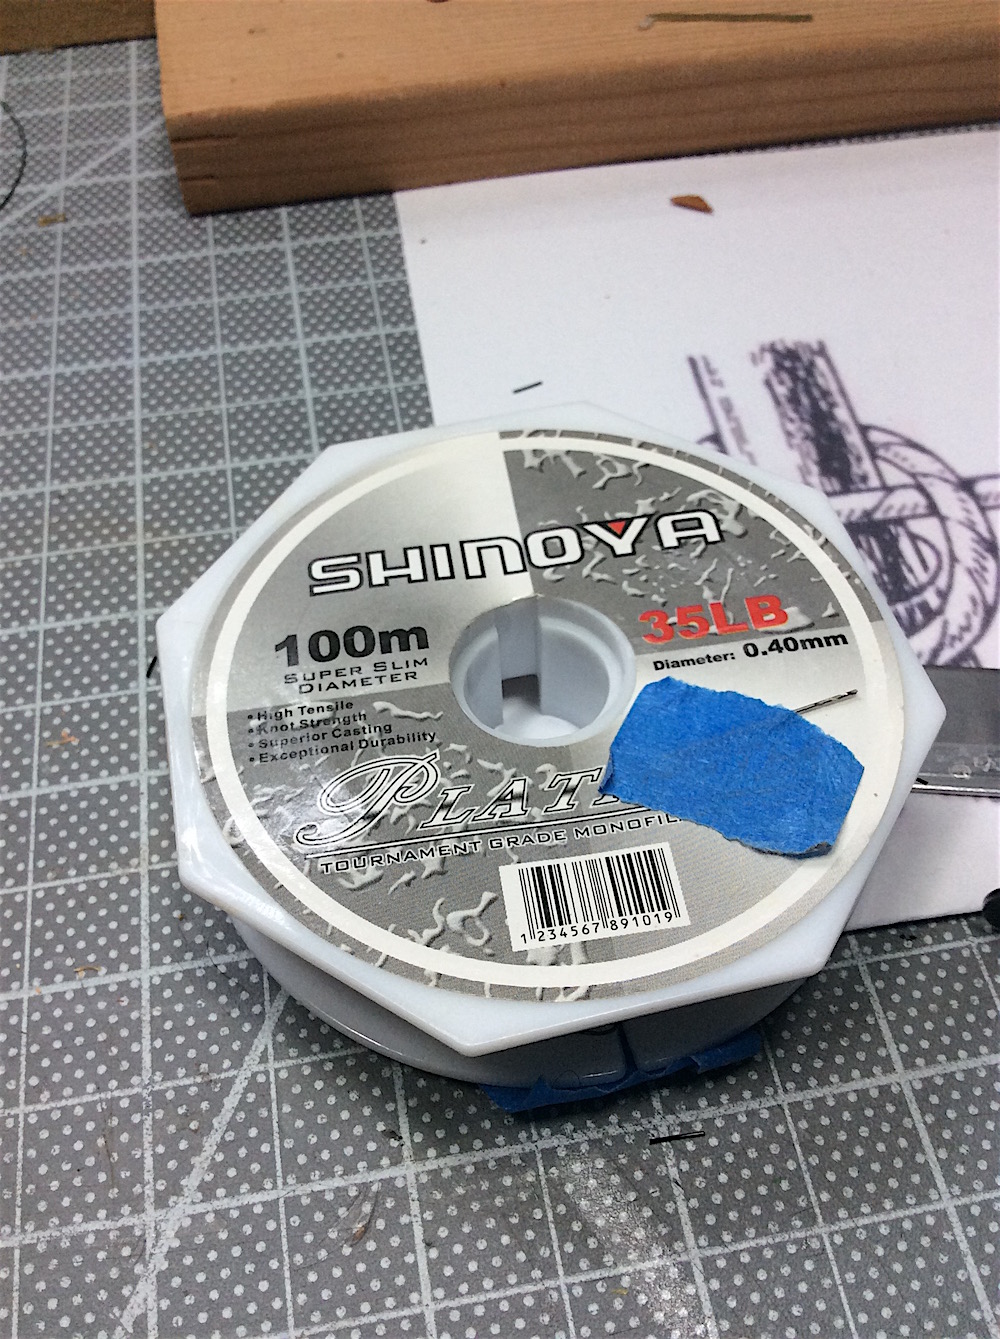
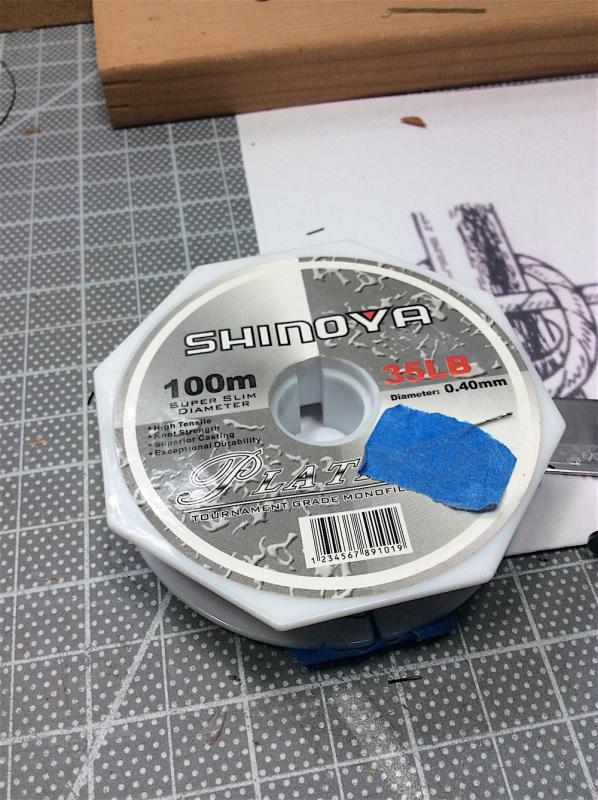
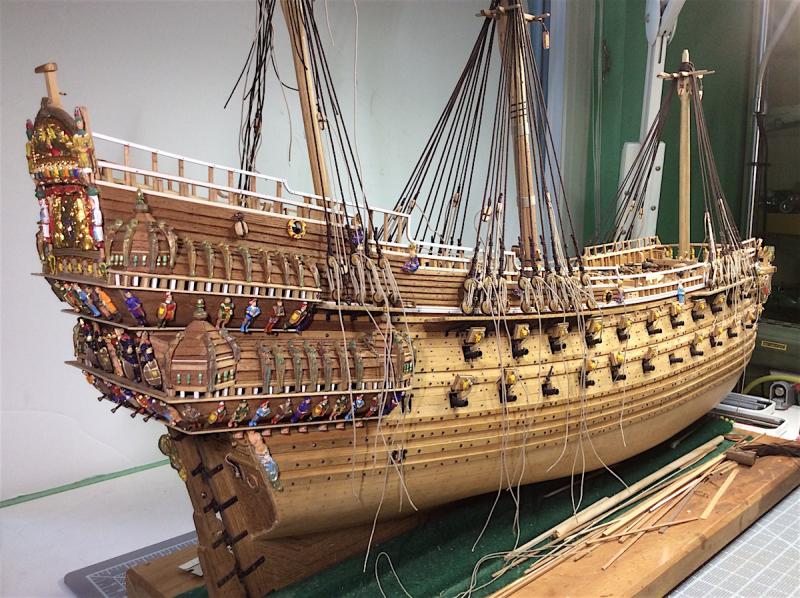
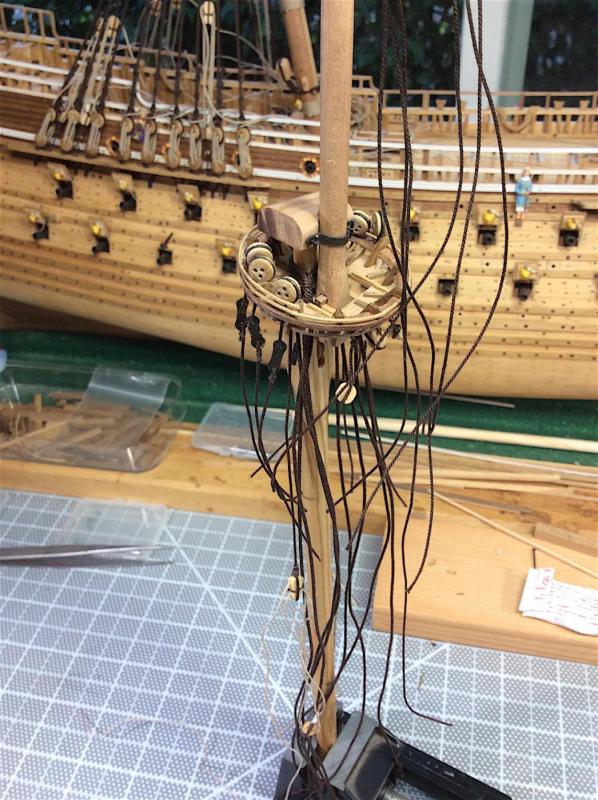
Hi Mates, Finally installed the mizenmast. As I had previously noted I was going to add bracing pins to mizzen pulley housings. Have been using this black nylon fishing line with great success for details such as this. Thought it best to attach upper shrouds - off ship. Seemed much easier using the vice. Won’t have that option with main and foremast Hmmm. Lower shrouds - I found easy to do Added a rope wrap at lower mizzenmast. Also satisfied that I pulled out and rebuilt the deck bracing for that mast. My first effort was weak. A few more general shots Now onto the upper main, and upper fore bits, at least those parts have been built, and were patiently waiting in line. This might take me through the Summer 017 ha ha. Then I’ll go back and tightly secure all shroud tensions as well as wrapping deadeye ropes for all three masts. Cheers


-
Vivian, Thanks for the kind words, and for dropping by - also (:-) Very nice to see that you are active again here at MSW and back in your shipyard.
-
EJ, Just catching up. very nice work on your foremast and all of its details. Yes - good luck with your move. I also need to get back to work (:-) Cheers
- 608 replies
-
- 3
-
-
- la couronne
- corel
- (and 1 more)
-
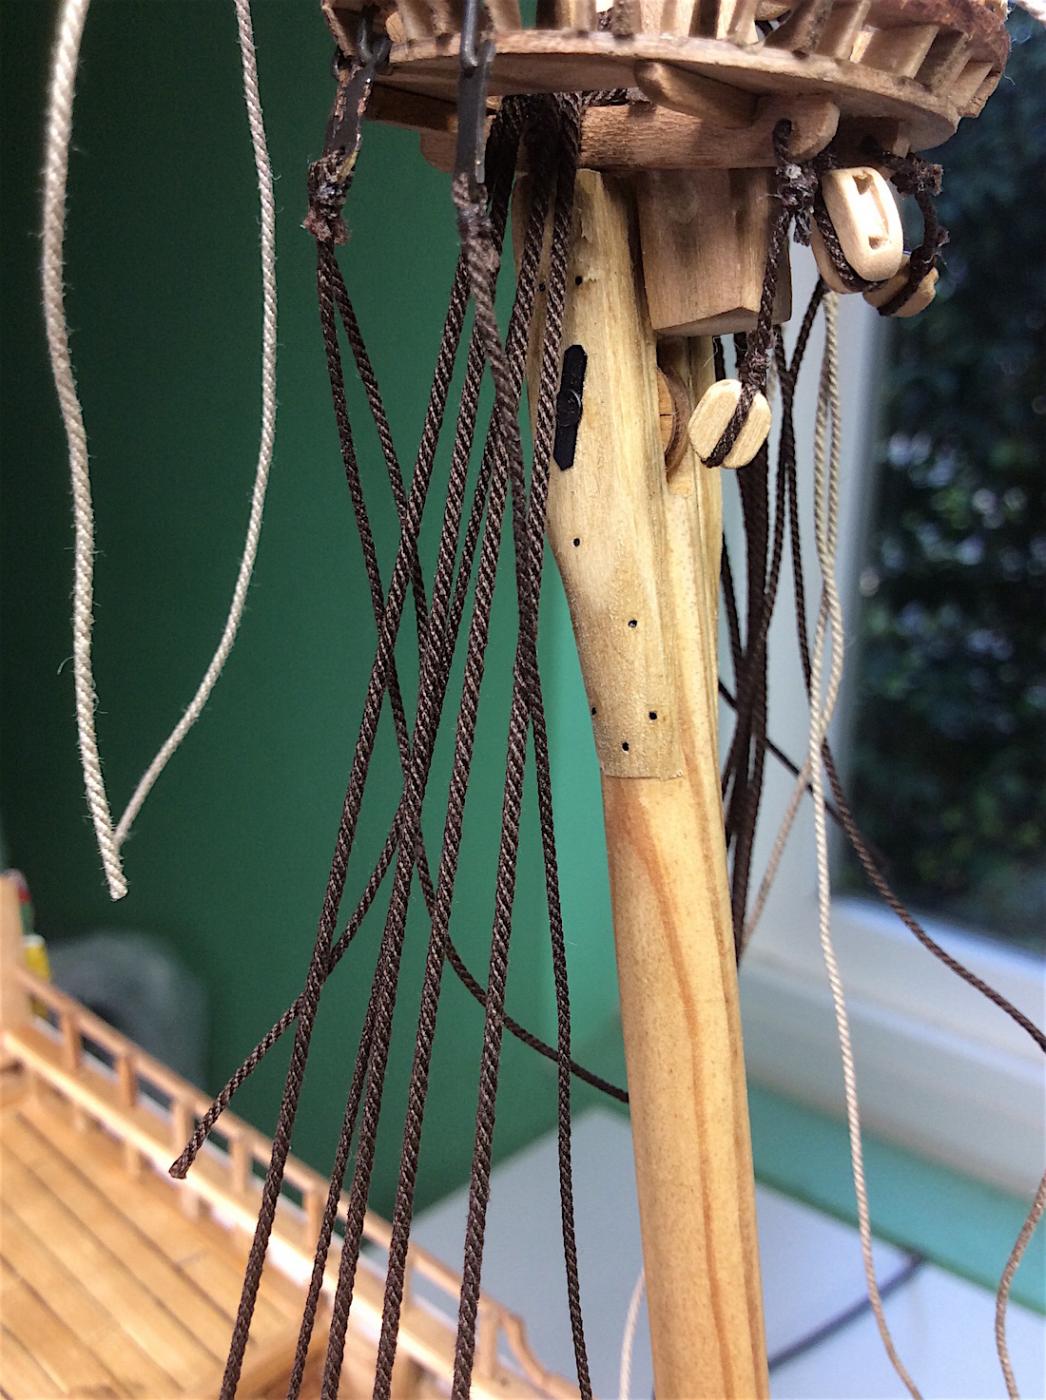
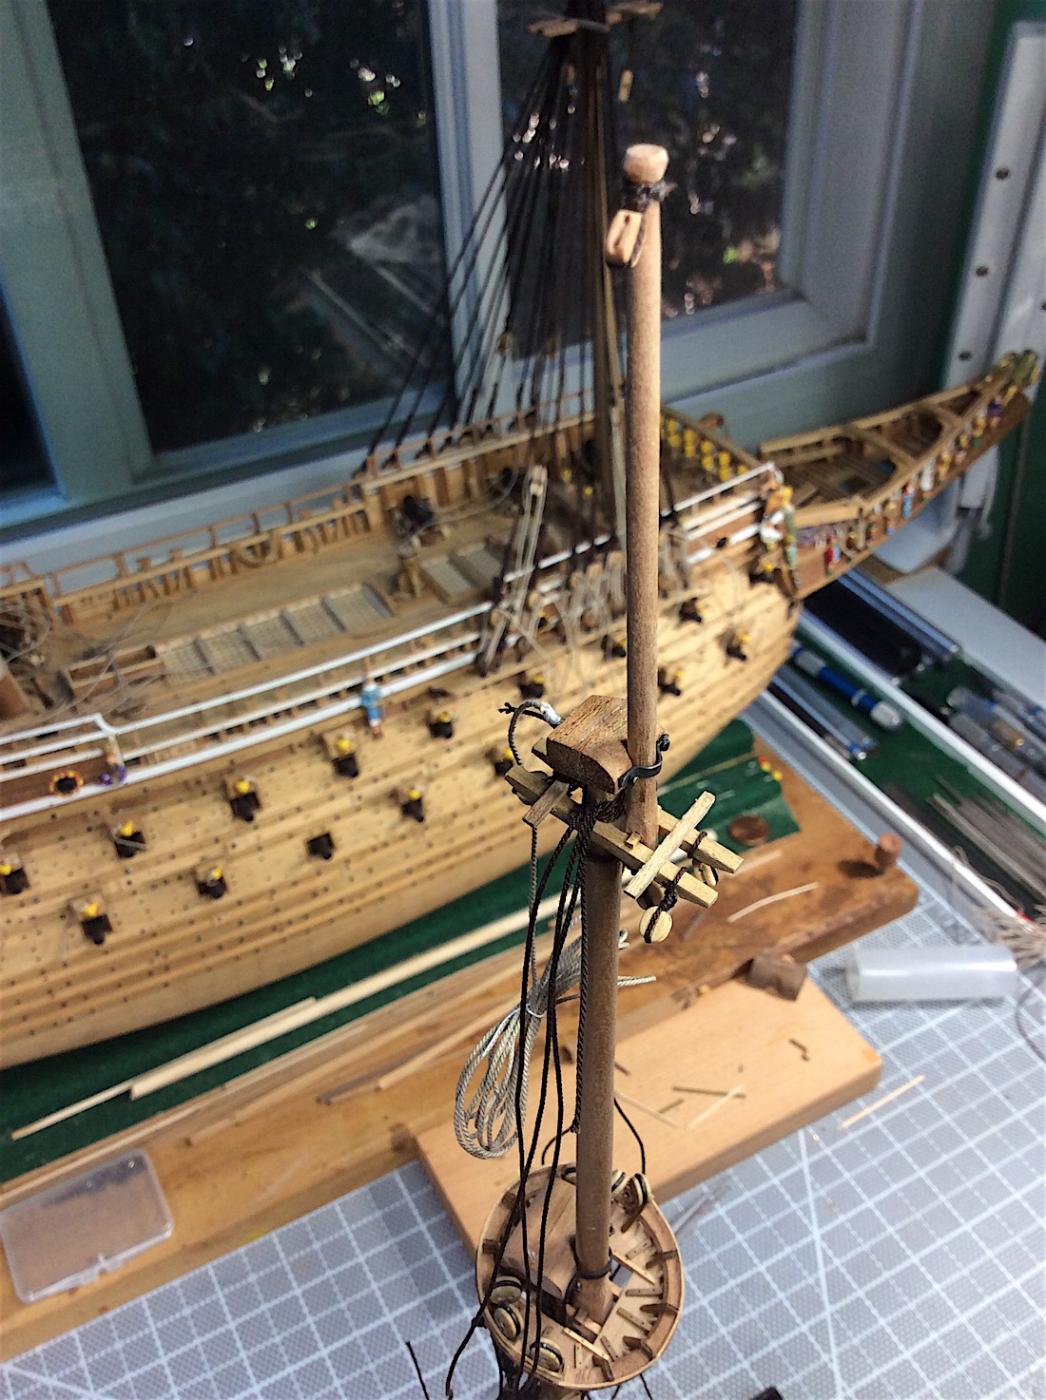
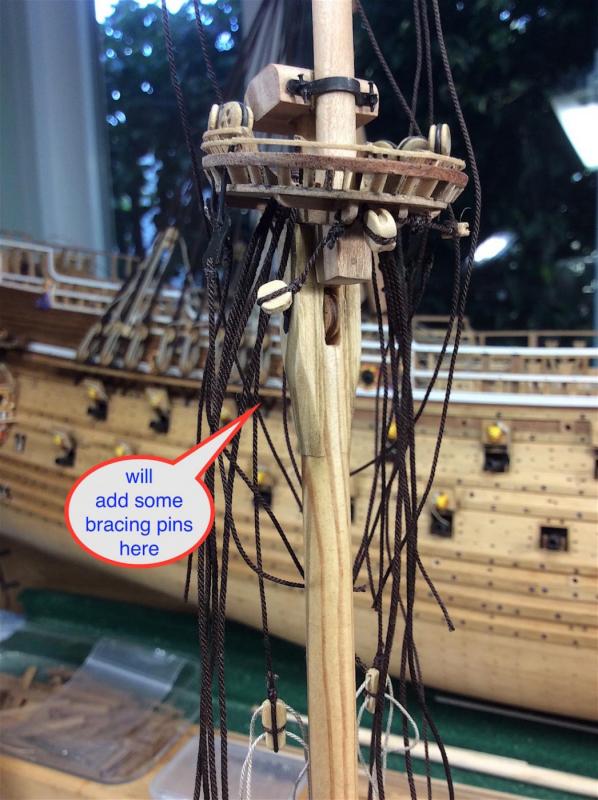
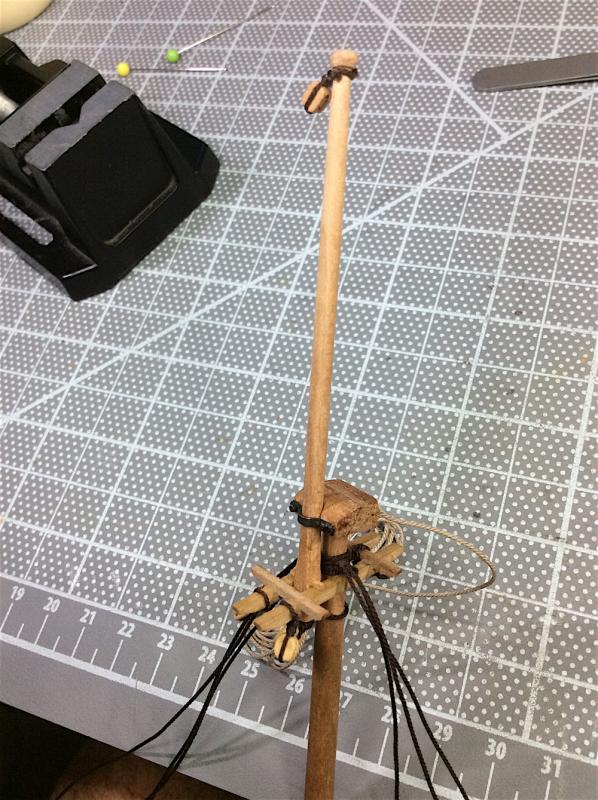
Hi Mates, Patrick _ Thanks I do, in fact, have those plans AND never saw the fid there either. Nice bit of detailing on the part of Billings. ========================= Mizenmast bits have all been put together. Some general pics…. A few personal quibbles; Lower cap is too close to platform and prob. a bit too big, Flag mast is too thick. hmmm Will now attach upper mast shrouds to deadeyes and do ratlines as well before attaching mast to deck. Will add some of those bracing pins as noted in photo. And, as always, thanks for the likes, helpful advice and just dropping by – always so appreciated. Cheers,


-
Peter, Yes indeed AND Snow Patrol (prob what I was thinking of) Song called "Open Your Eyes" (:-) and, it seems, many others including the sage - John Legend Cheers,
-
Randy, Just catching up - super nice work. Wonderfully well detailed indeed, A pleasure following along. I also really like the Viking heads. I'm tempted to follow your lead and add these to my build. Hmmm Would you be so kind as to post the width of the heads ear to ear sorta speak. Mine is a 1/75th but I believe that those heads of yours would actually look better that what Corel offered in their kit. PS: apologies for asking this in your build log about mine (:-) Cheers
-
Peter, What's that song with --"Open your eyes"?? I've had that photo in my files and never "saw" the fid staring at me right in the middle of the photo. Looked at the photo for help with the platforms and totally ignored the masts - Gee whizz--But thanks so much for your guidance. much appreciated indeed. Now I will also add a fid to the main (:-) Cheers, Making some progress