md1400cs
-
Posts
2,868 -
Joined
-
Last visited
Content Type
Profiles
Forums
Gallery
Events
Everything posted by md1400cs
-
 So EJ, Are you going to "bite the bullet" on this one and add sails, or just walk the plank -- haha PS: As you've noted from my build it IS a chore - especially for first timers such as myself. That said it is a great step forward in this hobby - for me it was. Along with excellent learning. Either way your SR is great.
 -
Denis, Not sure about that. I am allowing for further reach by not inserting the drill bit too deeply into the Dremel. Also the size of the drill precluded wobbling. I do insert a pointer first - so that in-any-case- drill bit won't wander off and really cause extra grief. Drilled six or so extra holes so far with perfect luck Thanks for the advice ! Regards,
-
Dave, Nice updates. End loops on rat lines NICE effort indeed. Also all of your lines look great - spacing and all PS: I was too nervous to do looping on my current effort - Cheers,
-
Ken, Your yards look great. -- Ah YES, those infamous kit included plan sheets. I note that you are also having your issues with them, as I assume many of us have. Certainly the case with my current project. (Though 16th century is iffy at best regarding any sort of accuracy). Your RW type of ship, by that time, had original (contemporary) drawings, and models that still survive - Is that correct?? Though I have learned from other logs, that paintings of a same ship - also create confusion for MSW builders, especially at the stern and galleries whereas painters often differed their interpretations- if I remember correctly. That could have been because paintings were finished at different times during the life of a particular ship? BTW: are you also planning to add sails? I don't recall that within your log. Your build is such an inspiration - brilliant work ... Regards,
-
Danny, Super nice detailing! These "modern" type of ships are so involved trying to also include so many tiny needed details "right". Excellent work. Now following along as well. Cheers,
-
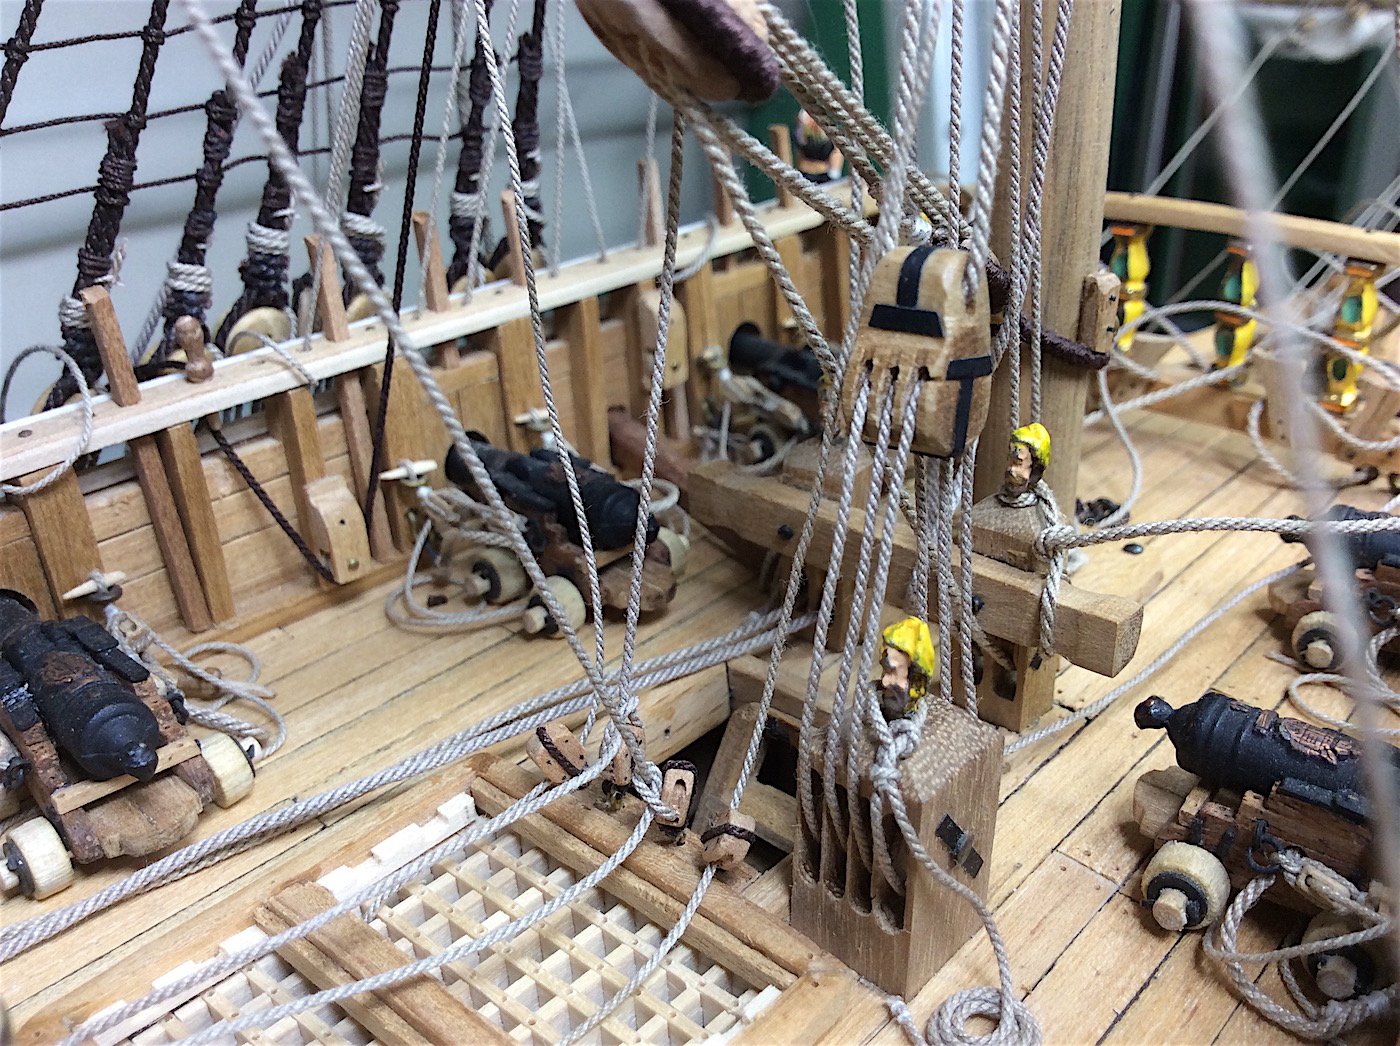
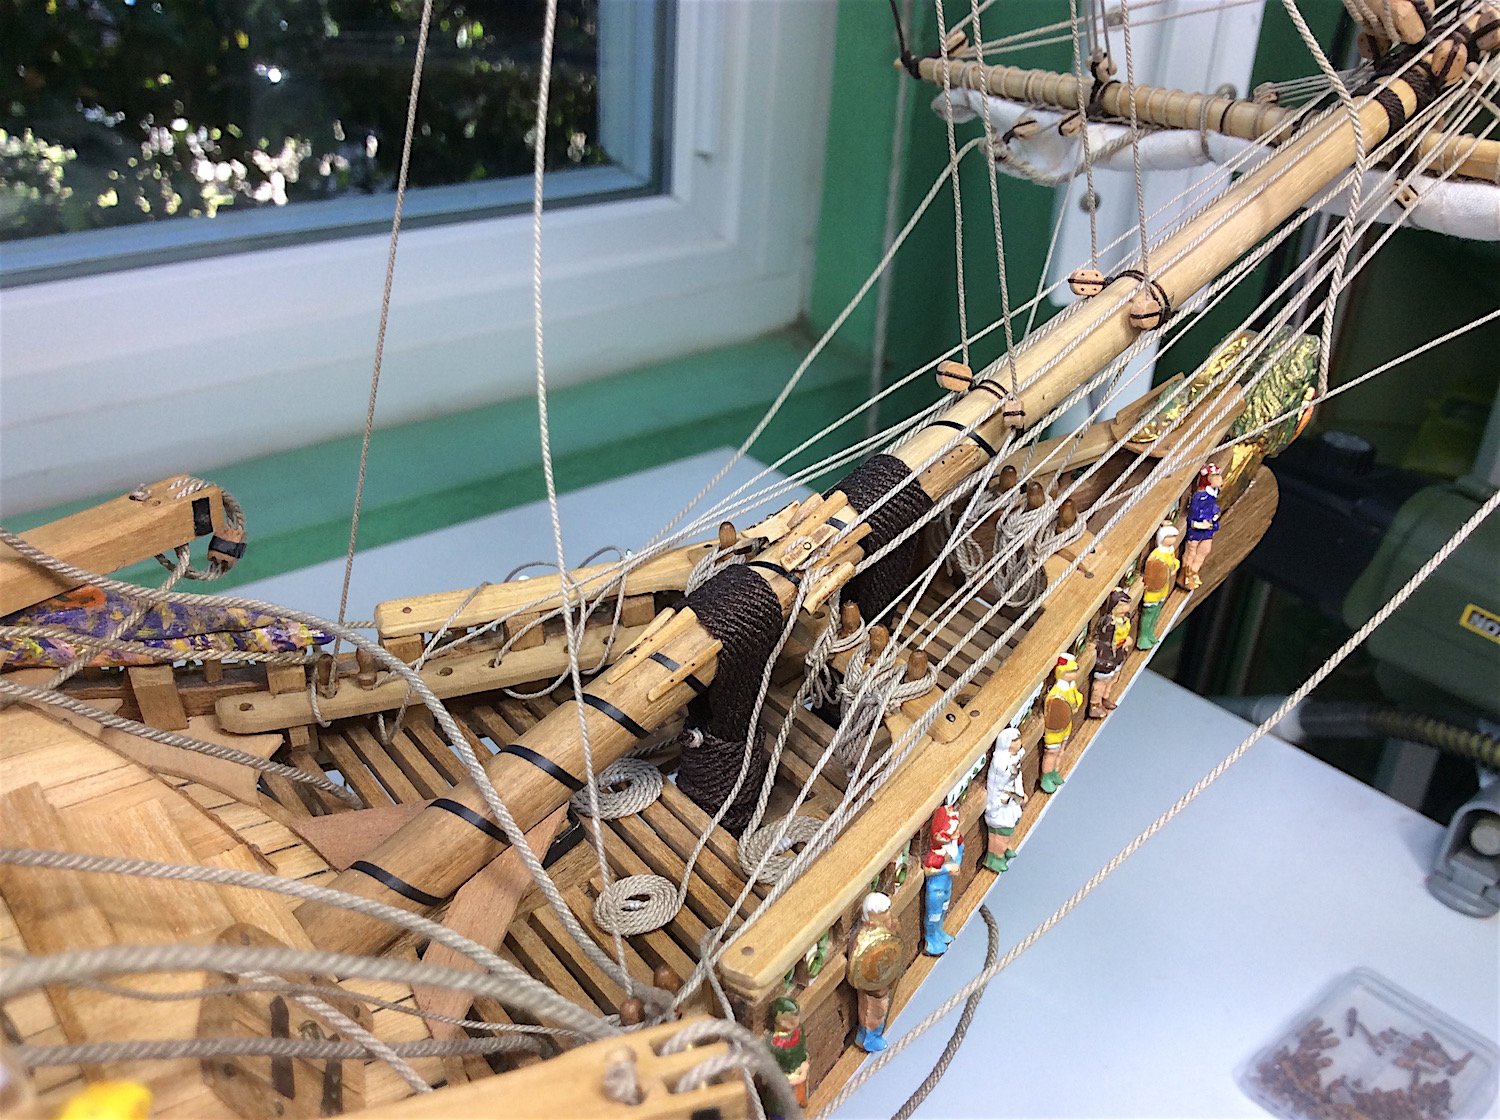
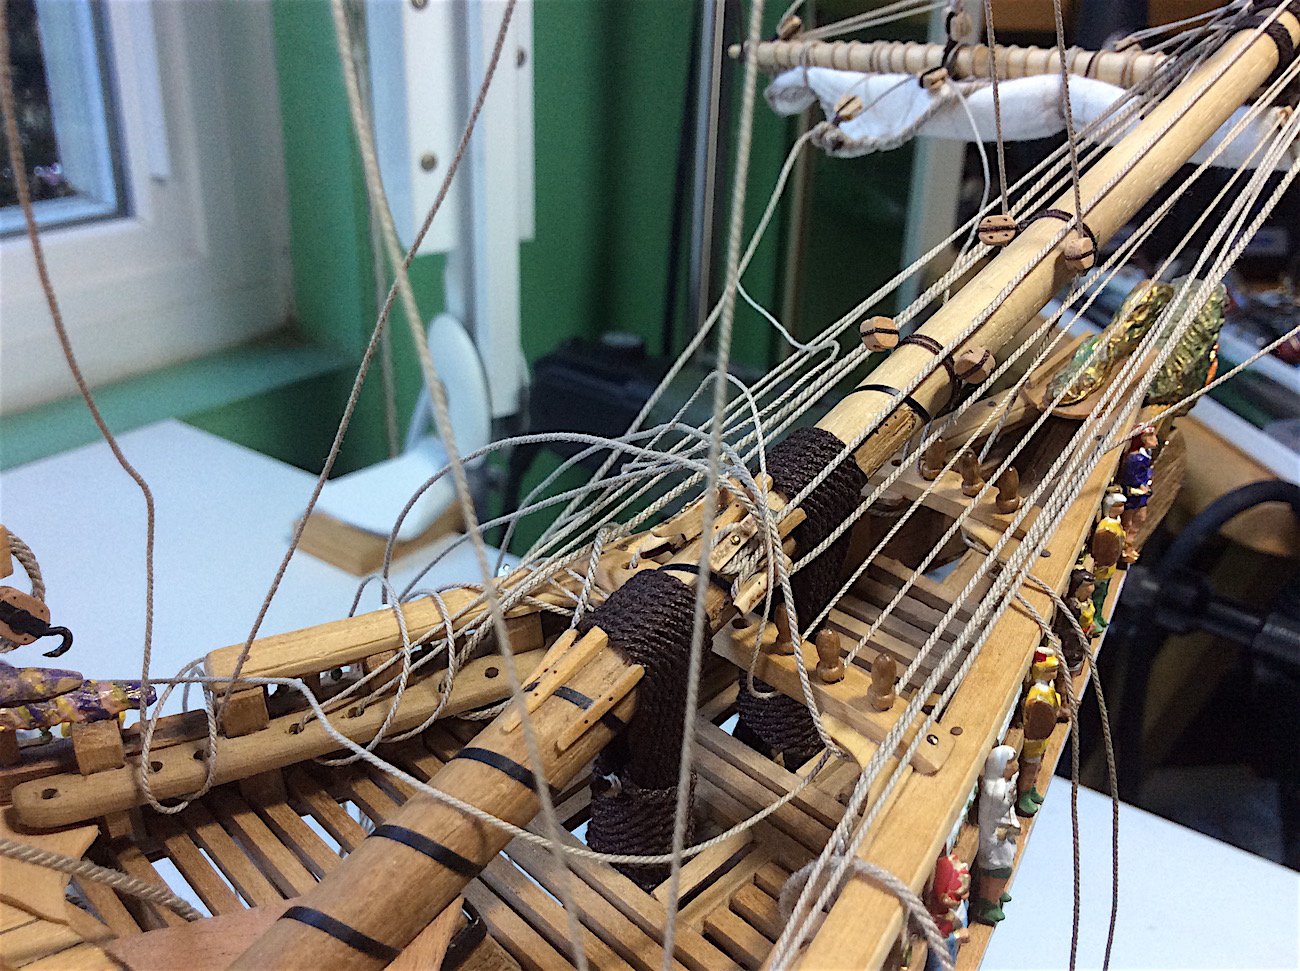
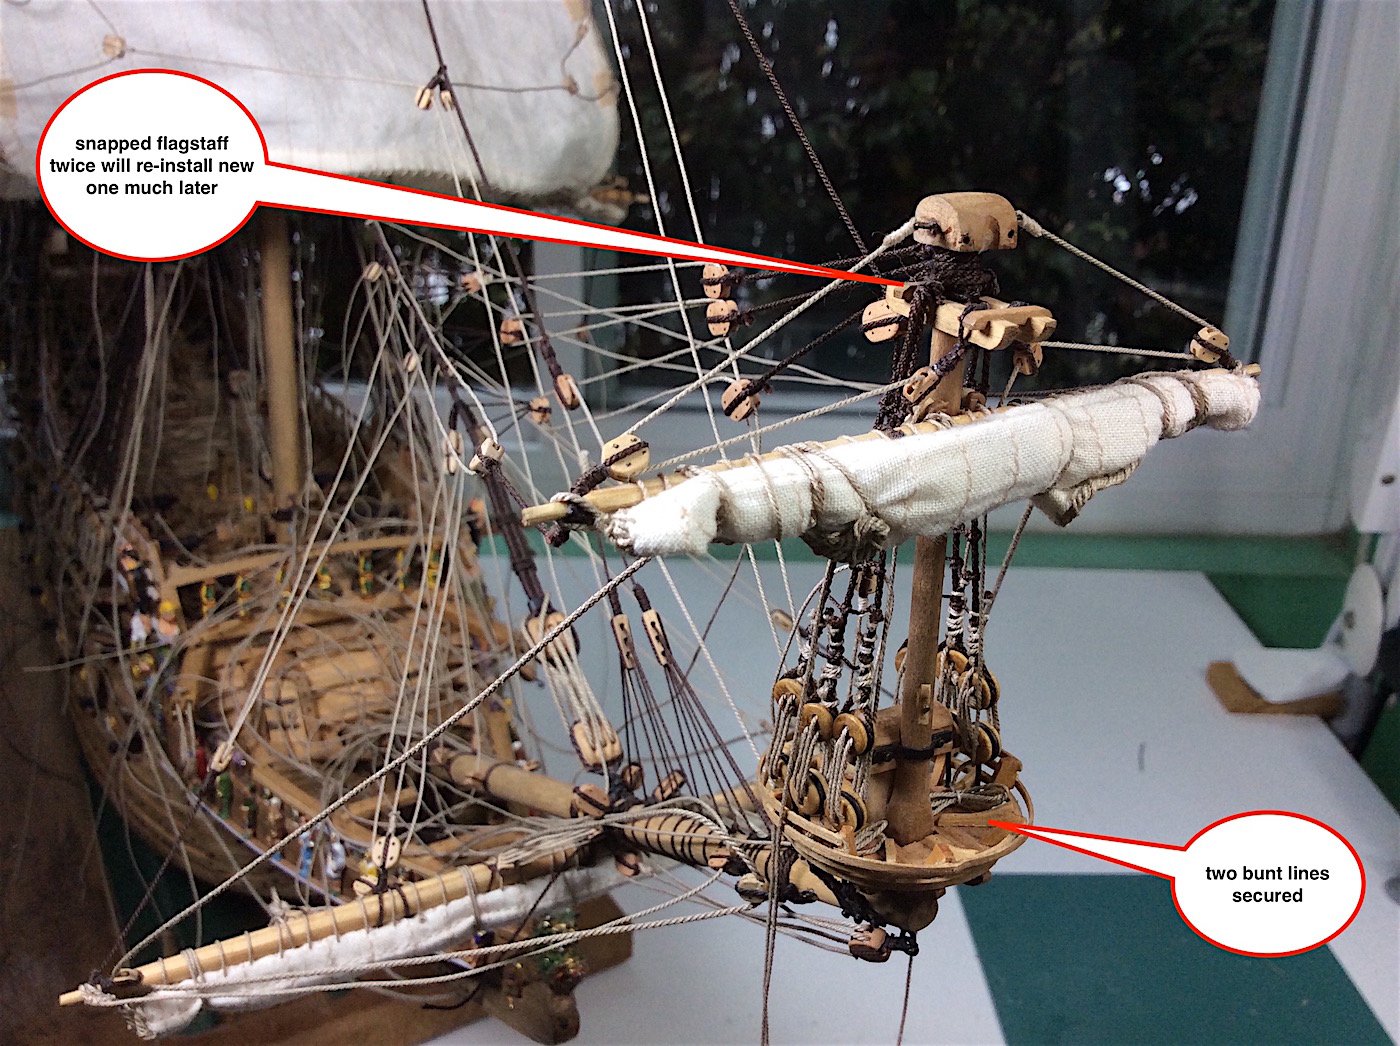
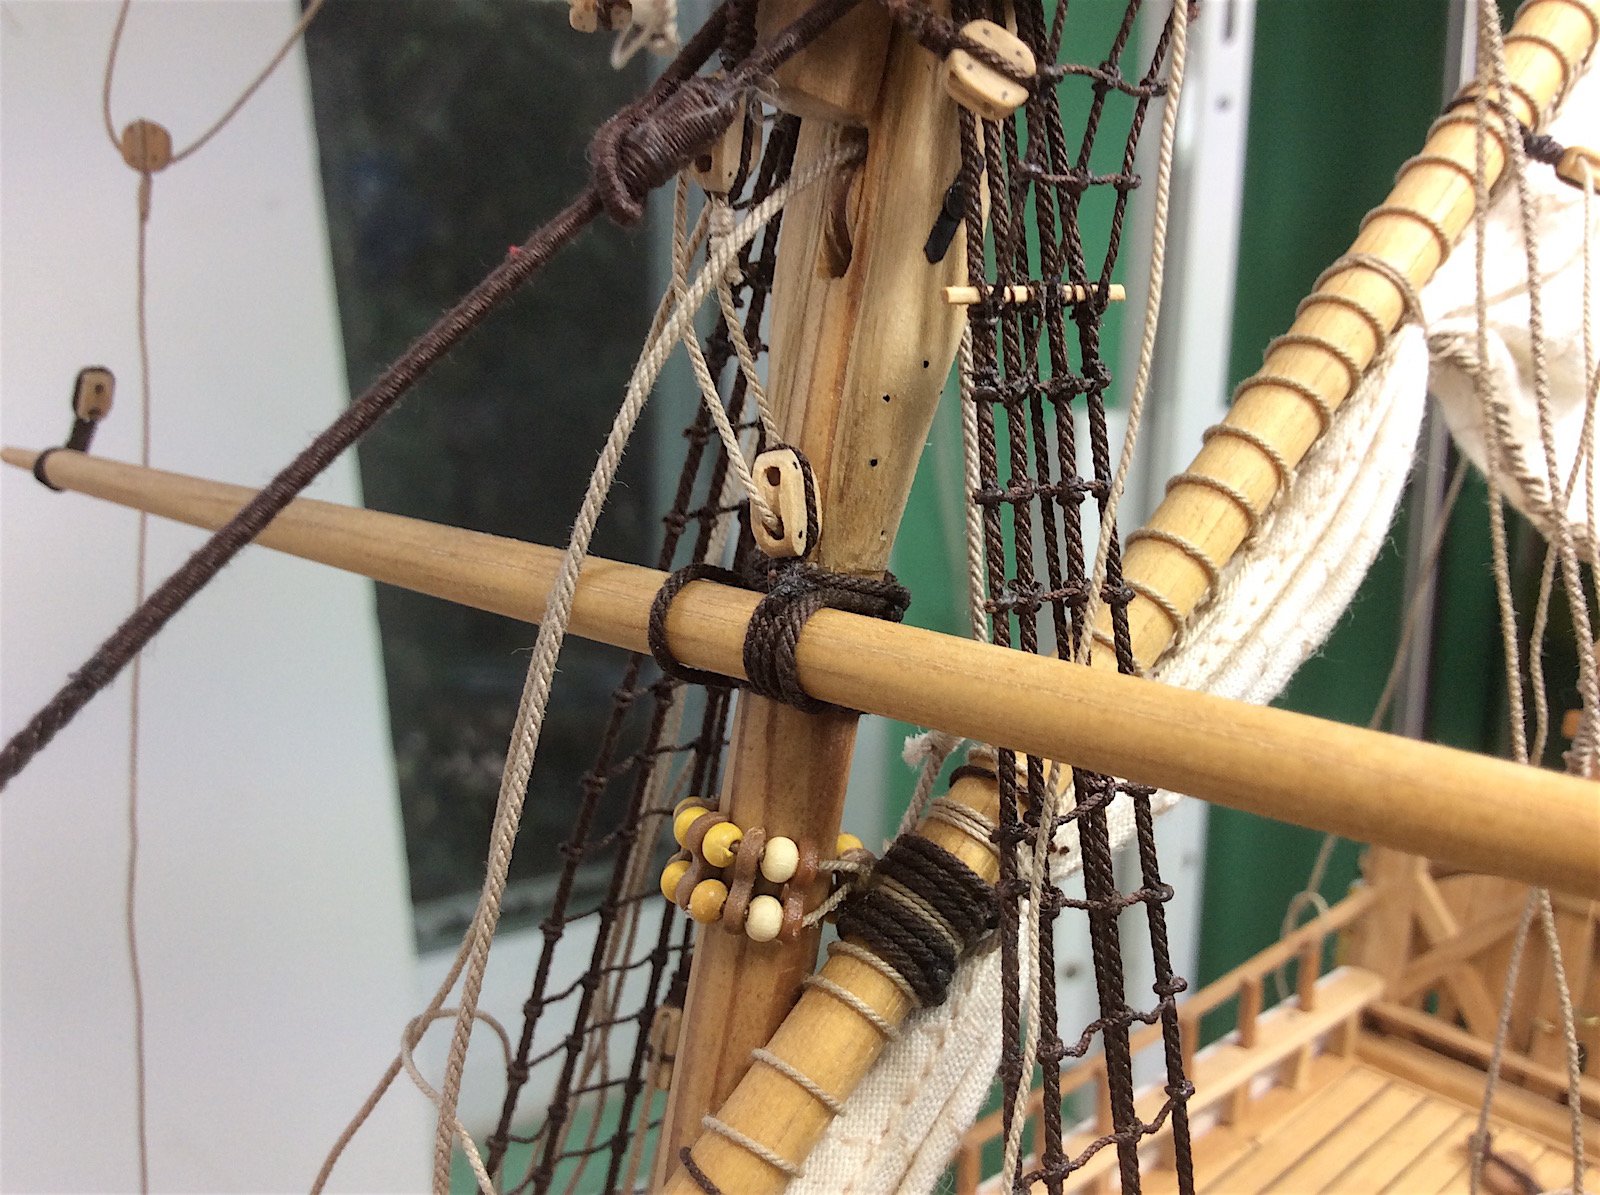
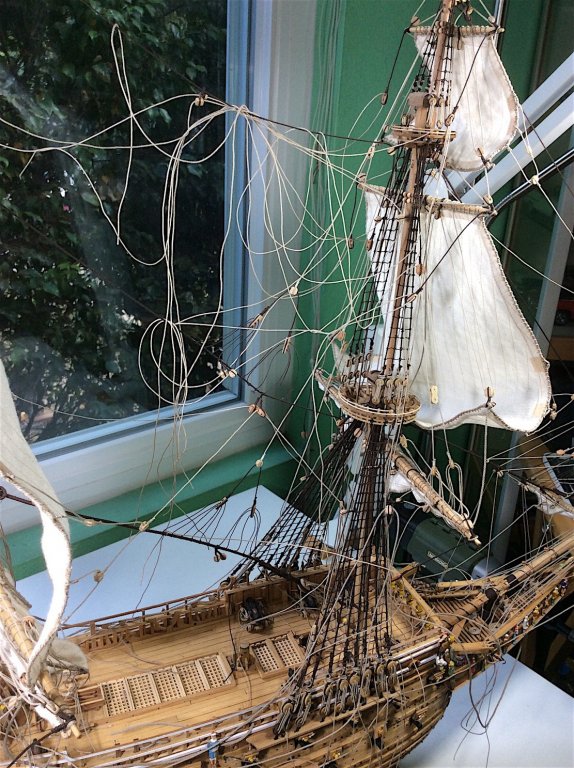
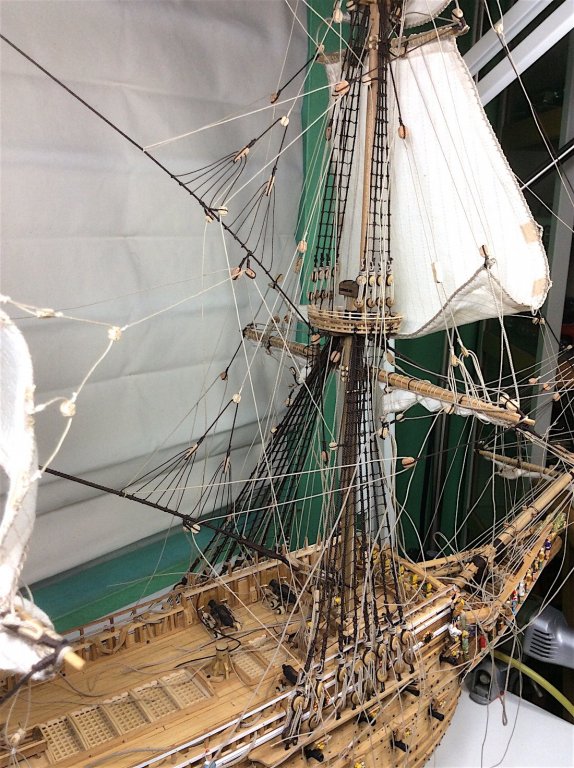
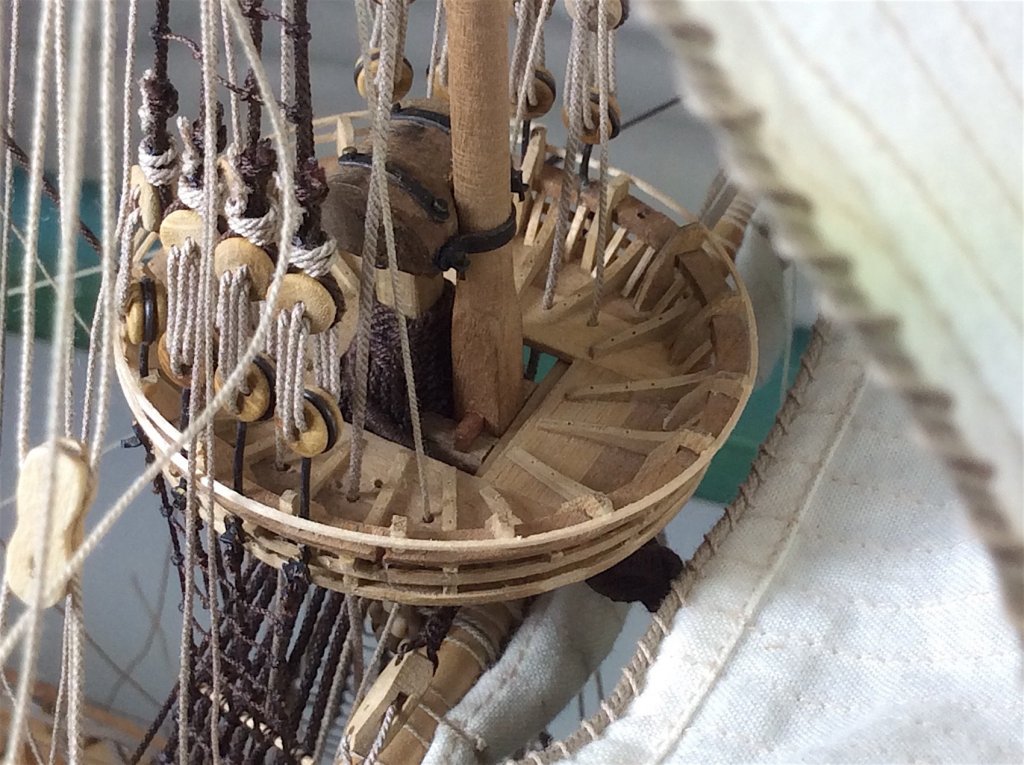
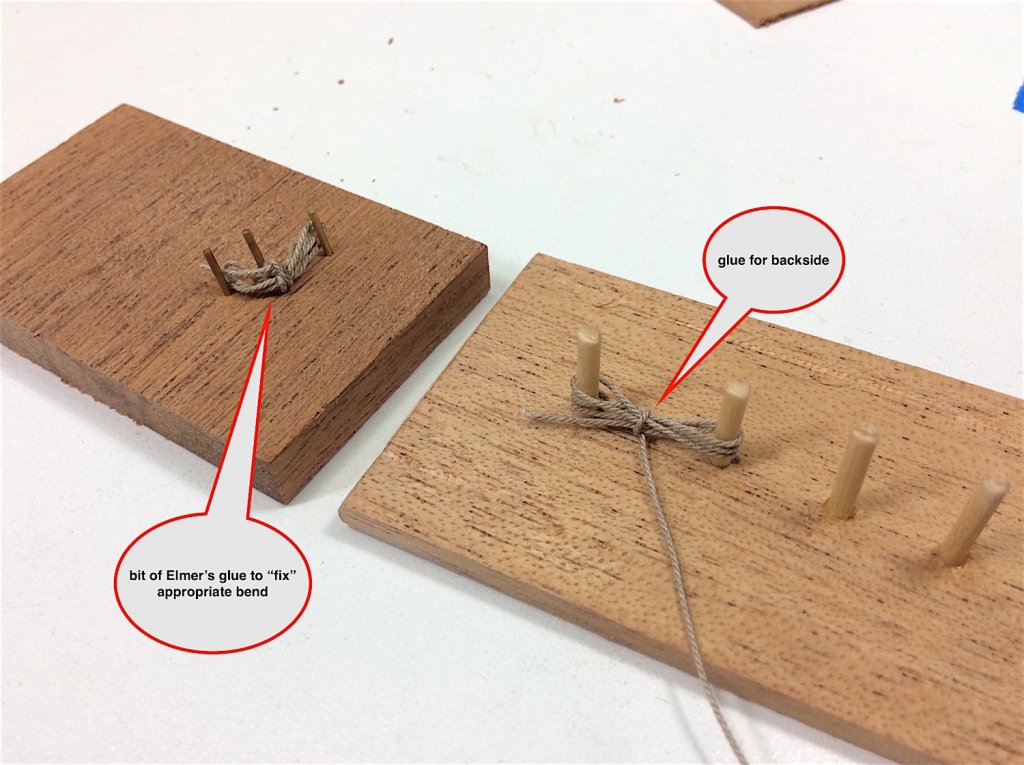
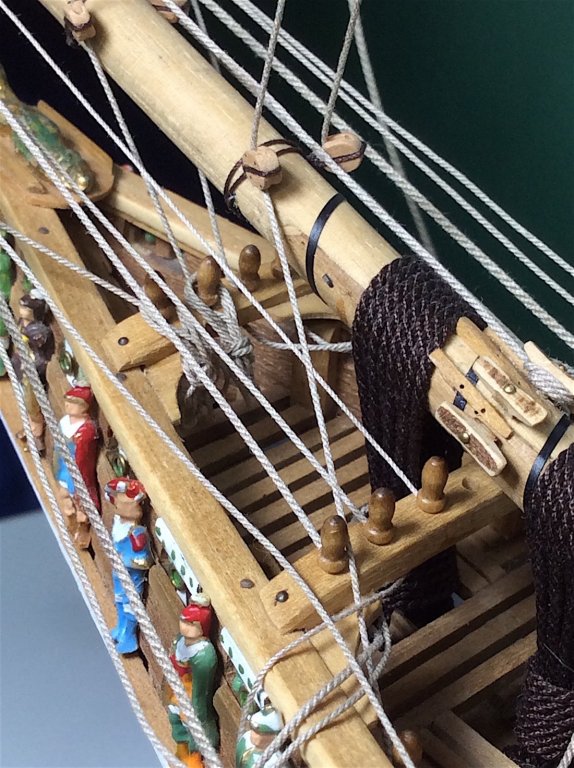
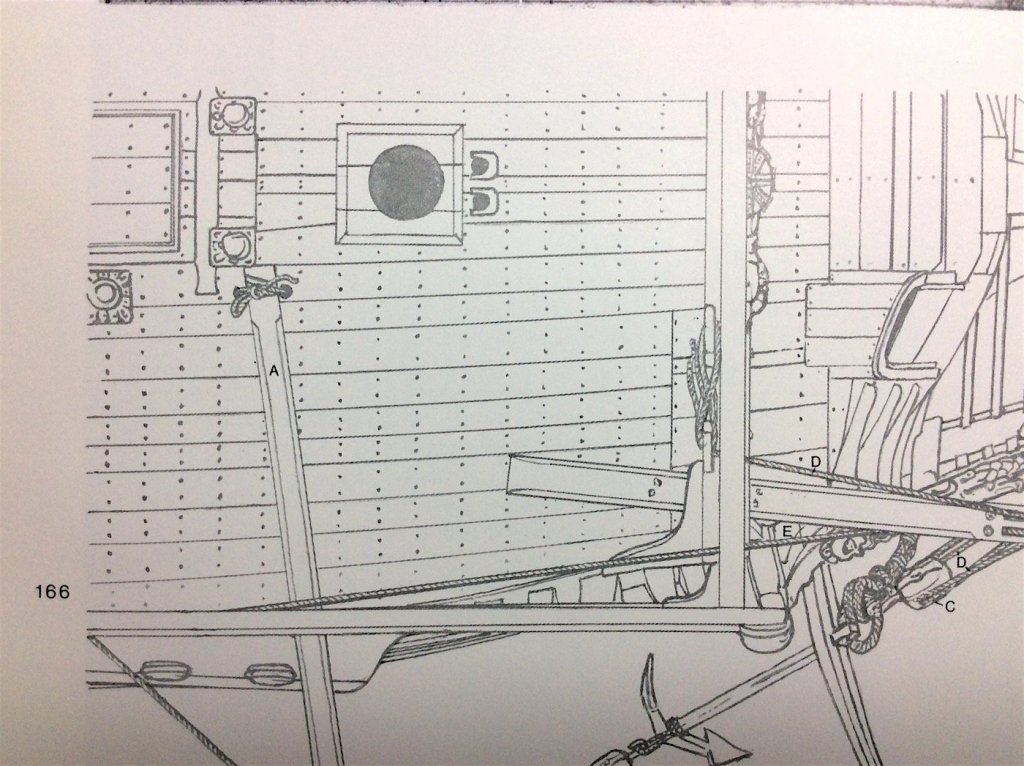
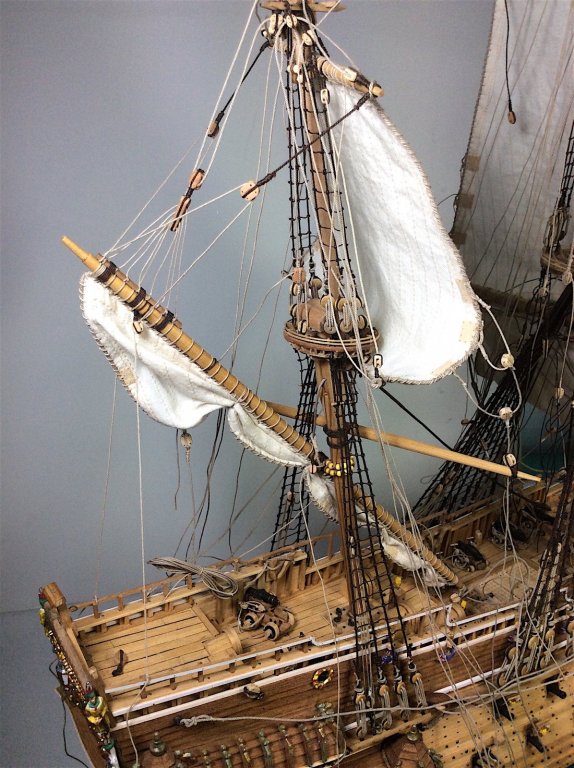
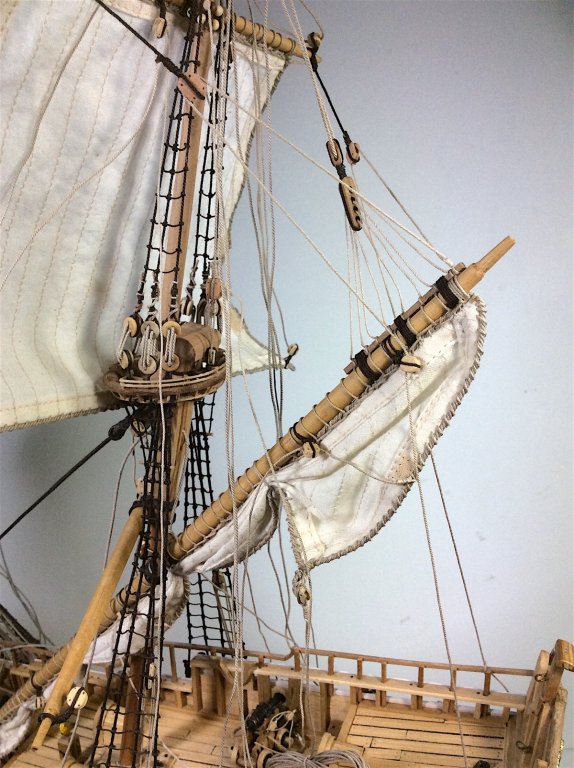
Hi Mates, Thanks for your very kind thoughts and likes. Section work in progress update: Moving to the foremast area. This area having so many more shrouds and ropes in areas that are harder to access behind the ratlines has resulted in needing a few more stress “time outs” Also working from three diff. plan sheets that show specific (and diff.) pin and rope attaching locations has increased the workload. Not a complaint = just an observation. Also when I first installed the rails and drilled the pin holes on the upper railings (using Corel instructions way back when) that kit not having running rigging did NOT include the extra needed pinholes. Now needed to drill more rail holes behind ratlines. Will need the same fix when I reach the mainmast. But it will all sort itself out Here are a few in-progress updated views. None of the lines have been fixed or adjusted – just sorting out where they "should" go. Regards,

-
Awesome work on that propeller - must have at least 4 of those?? PS: Is that a swimming pool a couple of decks bellow bridge? regards,
-
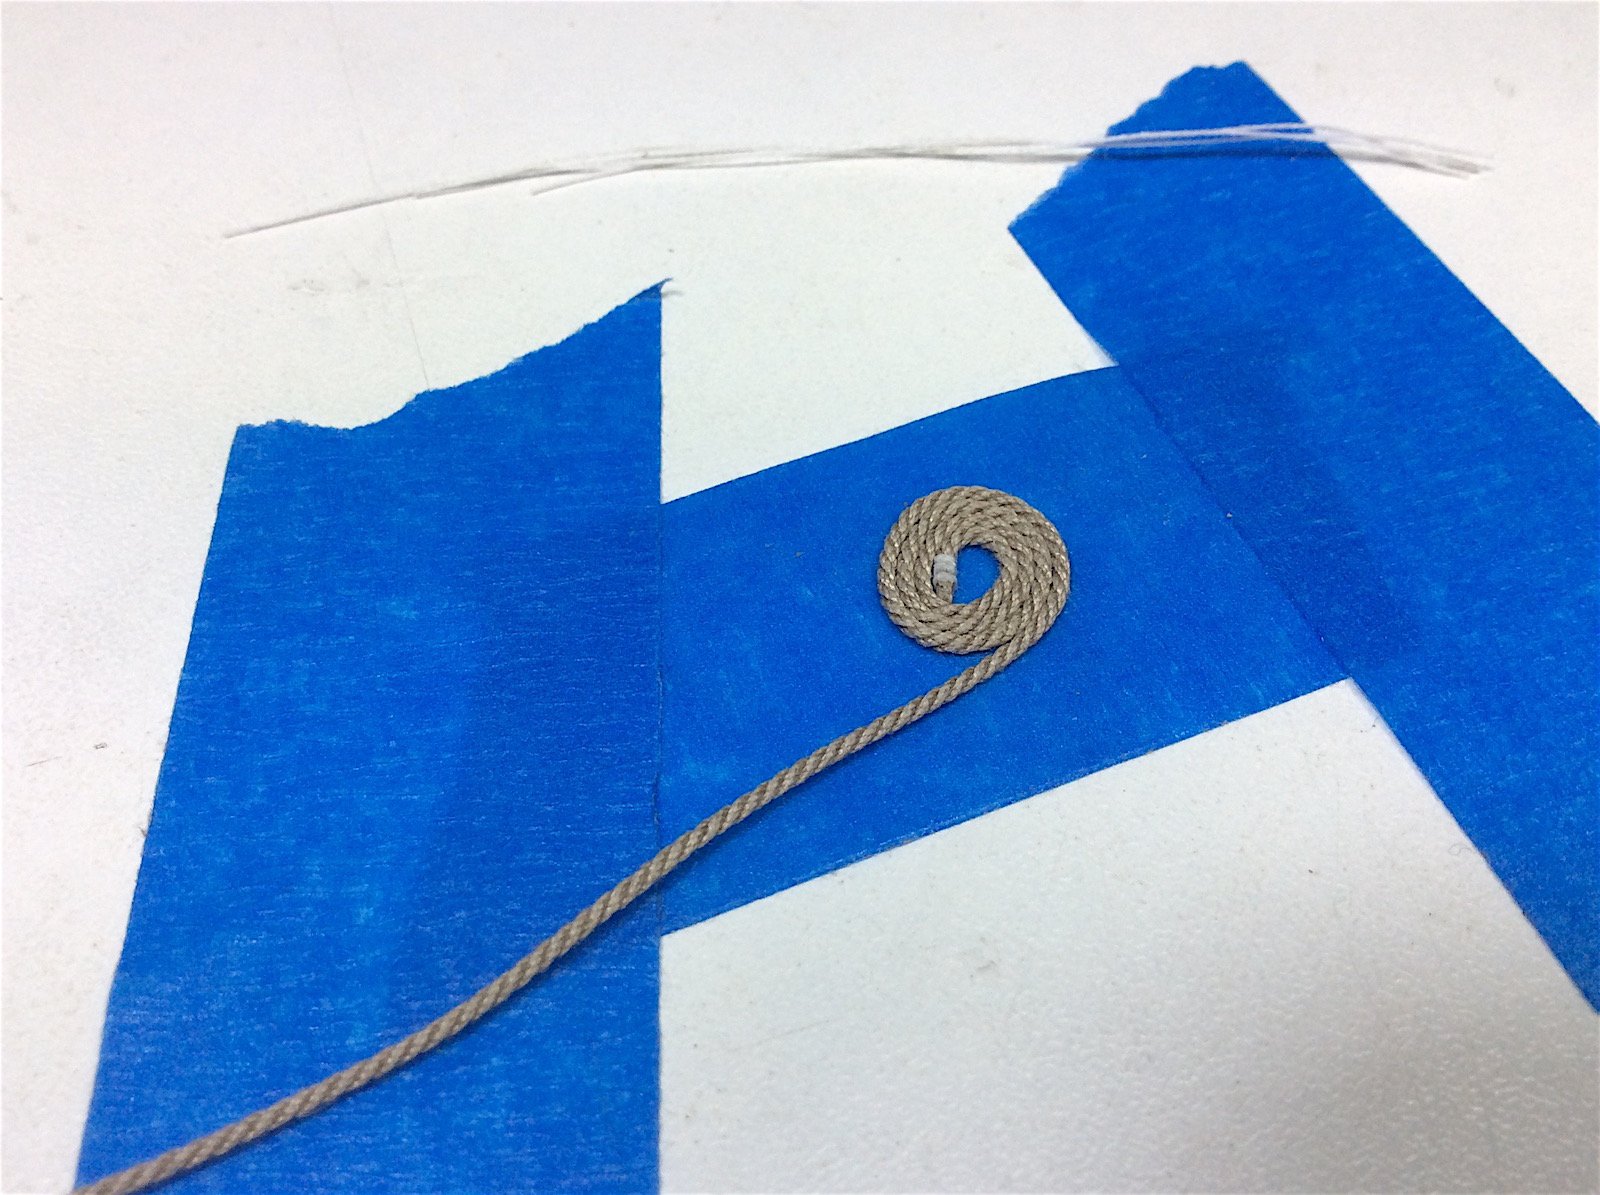
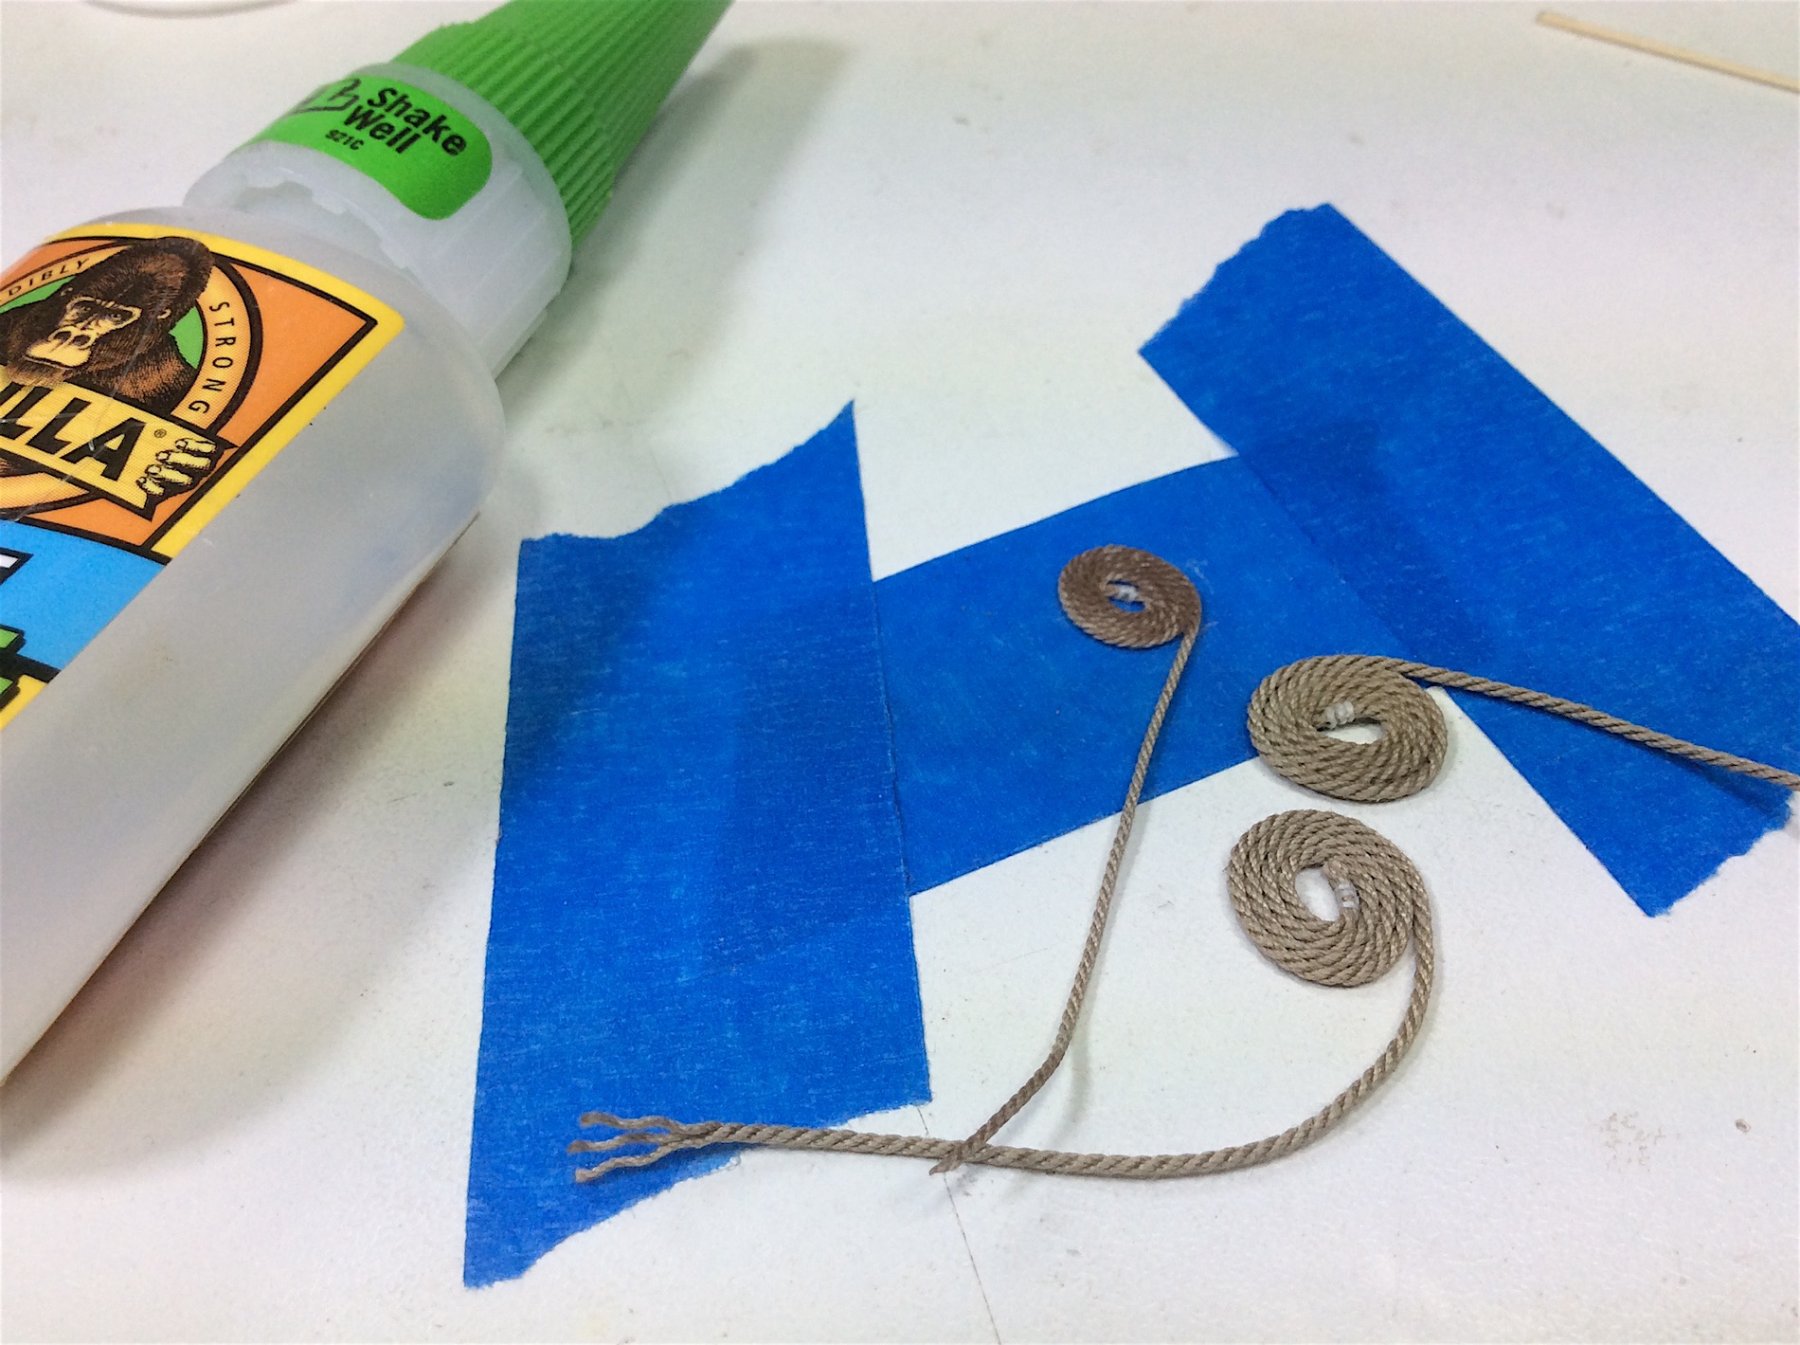
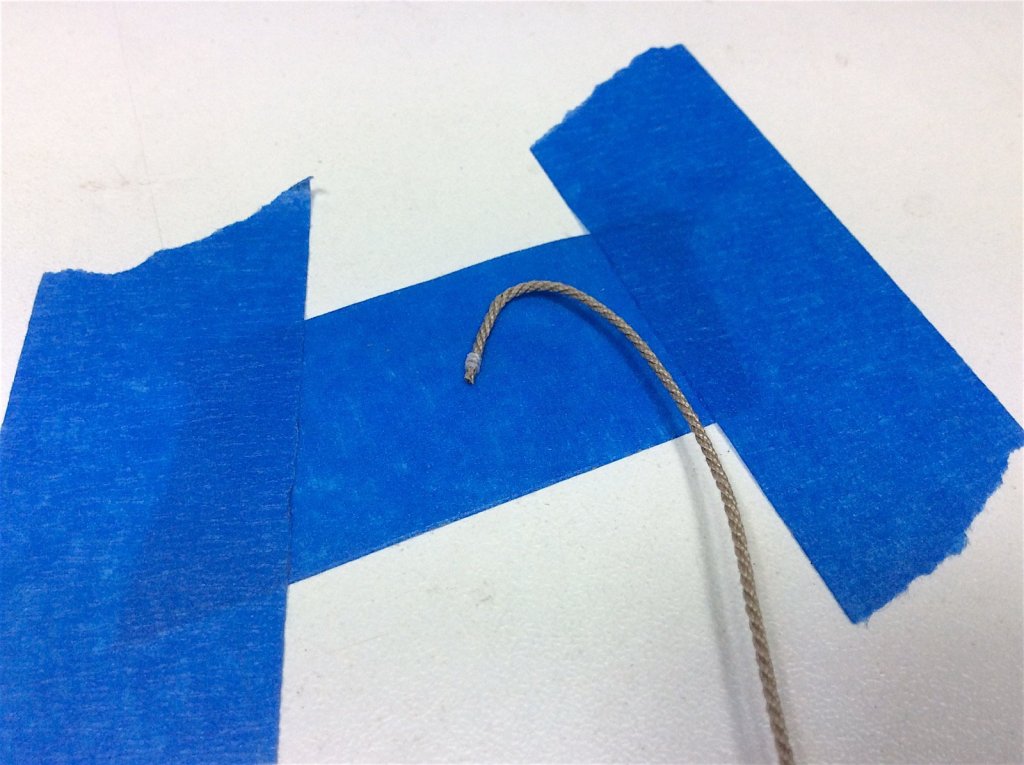
Denis, Yes it’s a good technique. It also adds temporary tension to a line with just the pin holding in place allowing for later re-adjusting the lines as needed. Then cutting the extra and adding the coiled rope covers seems to work very well. ======================= Also for making coiled ropes: Using painter’s trim tape coil the rope. Add a film of CA Gel This will “lock” the spooled coil. And the gel will not bleed through to what will serve as the topside of the coil. I then used small beads of Gorilla wood glue to secure the coil in place on the deck. Had I thought of this much earlier I would have tried to coil all of the canon ropes. Though those ropes are super small almost like thick thread. Hmmm Almost fished with this section - Last night started the three foremast sails- now that's a mess to figure out. PS: Peter, I'm so happy that you know very little about Viking ships - what a personal relief (:-))) Don Thanks !


-
Just catching up - nice progress. PS: using cardboard cylinders to bend planks - so simple Brilliant - I will remember that for my next project (The Oseberg -Viking ship) Thanks for posting that photo. Cheers,
-
Robert, Just came across your Victory! Awesome work indeed. Your level of details with wood are as good as it gets. Really like the lights - especially with warm Kelvin outputs - perfect. Glad to be at your shipyard looking in and learning. Regards,
- 527 replies
-
- 2
-

-
- caldercraft
- victory
- (and 1 more)
-
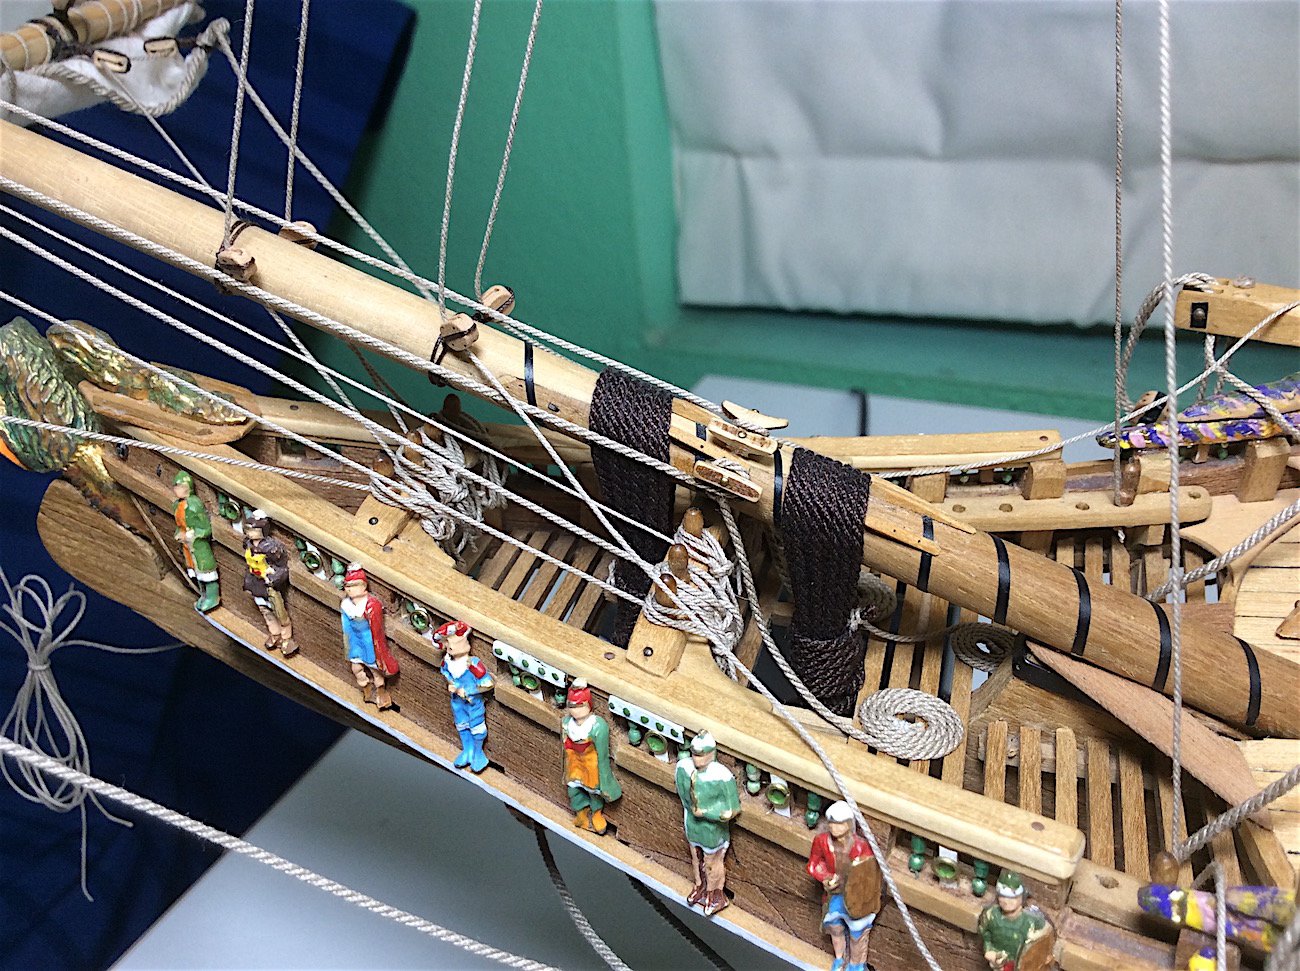
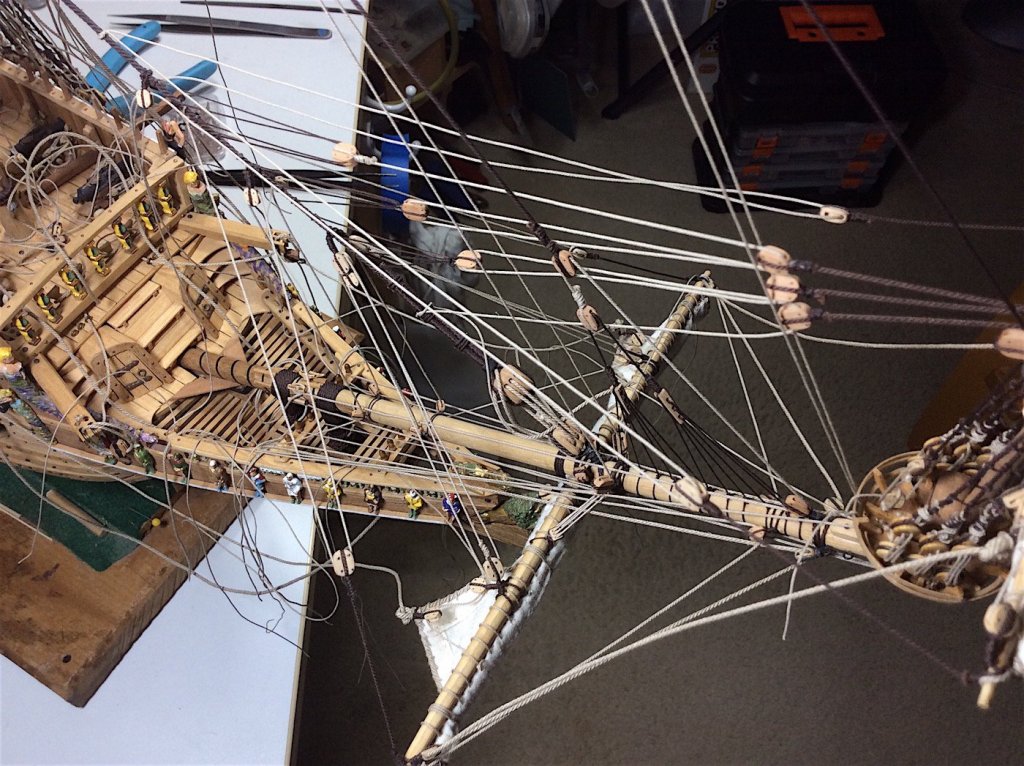
Hi Mates, Minor update. Started locating all of the bow area pin locations. Now starting with securing most of the shrouds, a few will wait until I get to the foremast. These lines connect to the foresails as well as to the lower forestay rope. Need to be sure that no tension bends occur later. Also started doing rope wraps for the pins. One at a time will take way too long – need to get some kind of mass assembly of sorts. I’ll search out of logs for ideas in the rigging section. Need to determine visual spool lengths as some shrouds connect to furled sails, others not. Also need to do some coiled wraps on the deck. For that purpose, I’ve ordered double sided clear tape as one of the members suggested in his log. Rotating the boat back and forth on that small table of mine – the side of the gallery hit the recess of the inside the deep double-glazed window frame – Grrrr fix came out OK. Moved the small table a bit away from the window ledge. As always, thanks for your comments and likes. Regards,


-
Mark, Yes indeed very impressive work! A pleasure to follow along.
- 652 replies
-
- 2
-
-
- royal william
- euromodel
- (and 1 more)
-
Udo, You, of course, know this link (;-) http://www.bataviaphotos.com/index.html
-
Udo, Hi - just located your log. Nice start (that 1/10th is awesome) Will enjoy following along your build - nice start. Cheers,
-
B.E., Apologies - I have mostly (are double adverbs ok in your neck of the woods? haha) silently followed this one - I owe you at least 30+ Like clicks and comments. As Nils just said - Yes a little gem indeed Regards,
- 91 replies
-
- 3
-
-
- 18th century longboat
- model shipways
- (and 1 more)
-
Peter, Again learned something from you. I was not aware of the distinctions. ================ Are you an Oseberg expert? May need to PM you each time I sit down with the next project (:-))) Cheers,
-
Ken, Yes, lucky indeed. I do know Morro Bay (:-) We have good friends in Paso. We sometimes drive up the coast, then cut over to the 41. Oh - nice update as usual ! Regards,
-
Peter, (;-))))) One very last back and forth volley (from me) about this build's schizophrenic personality of have and have nots. The 1/10th (yes, I now know that it is a poor representative) also has treenails on the weather deck. Hmmmm Let's see how the new month-by-month DeAgostini 1:65th kit comes out in all of these areas. Apparently Fred H. is also very involved with this project. PS: Do please keep me (us) updated - Your knowledge is so nice to read about. Cheers,
-
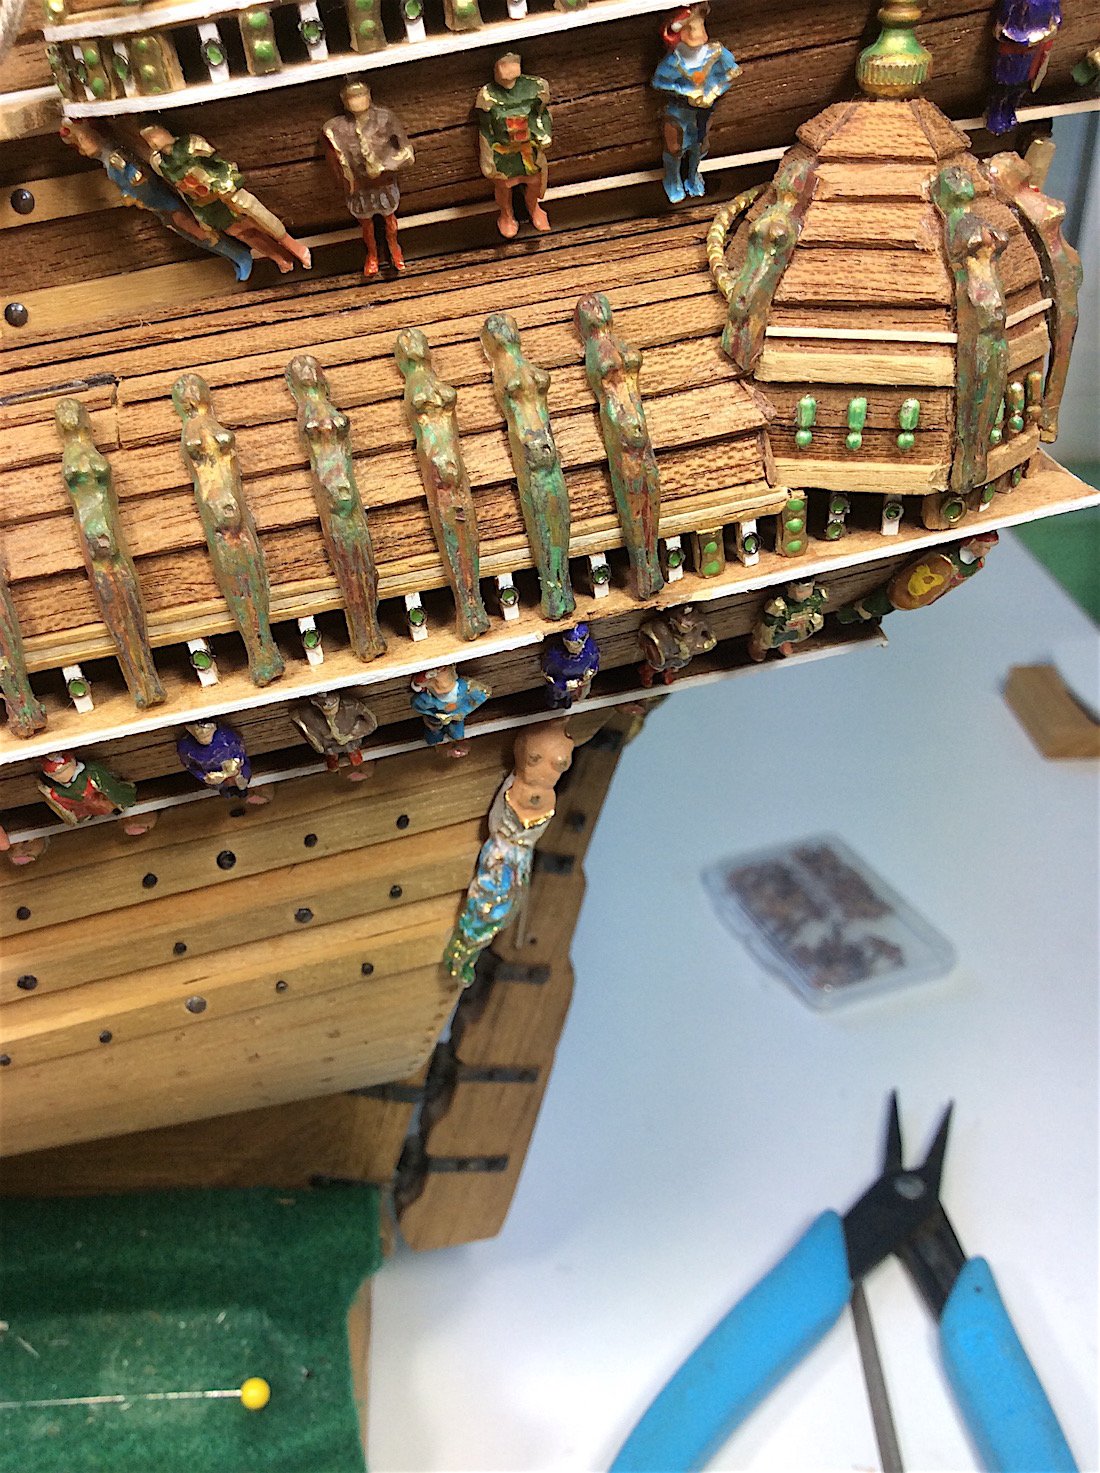
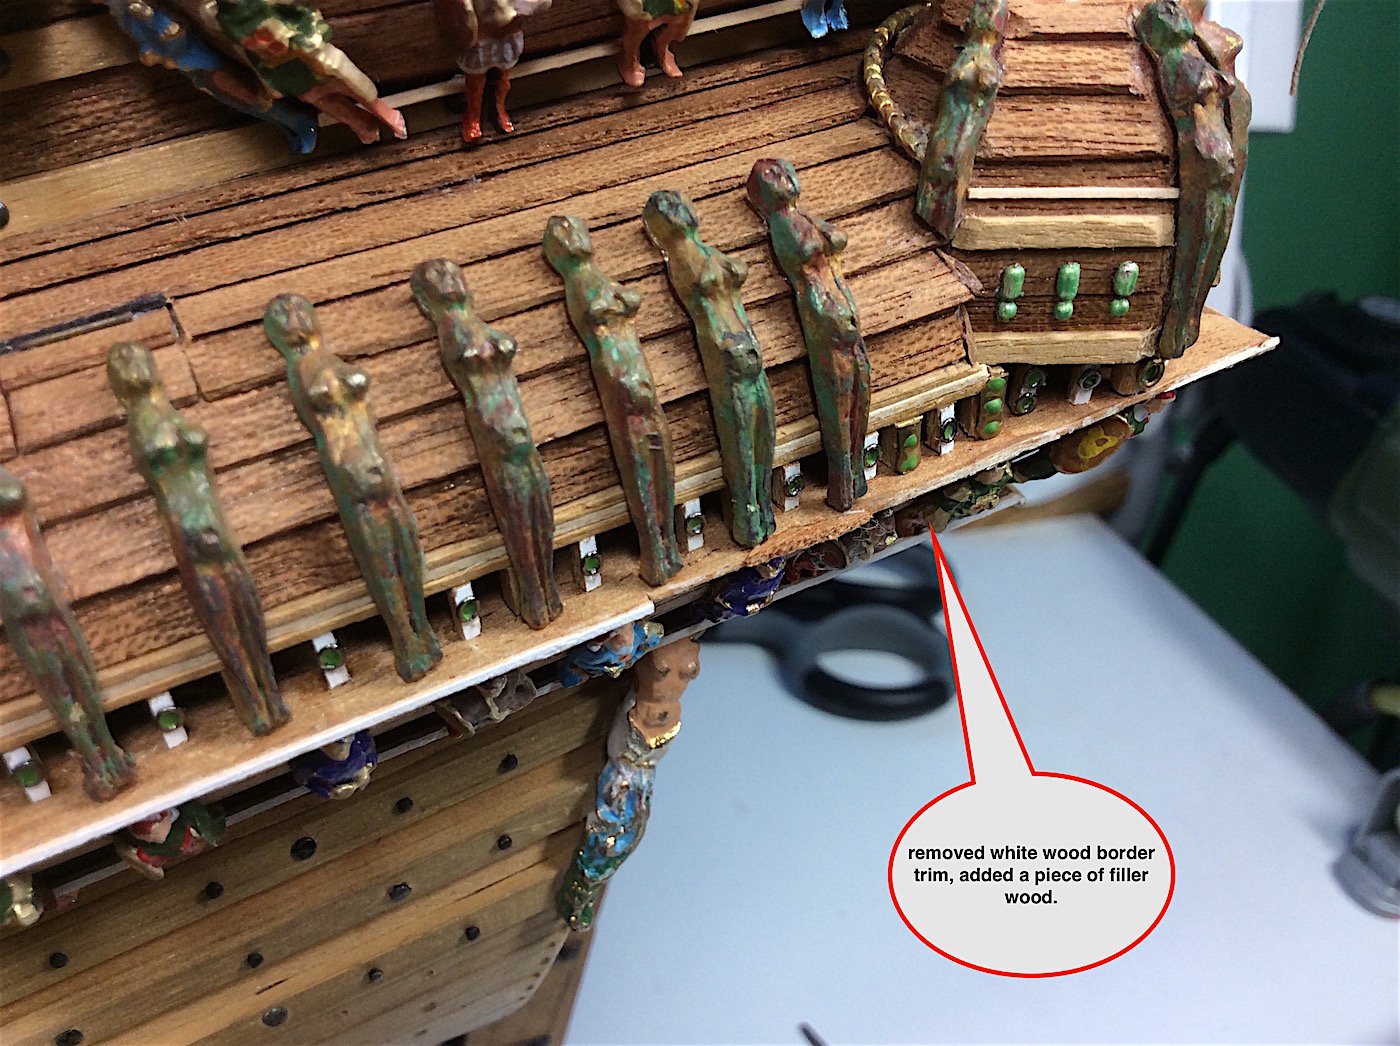
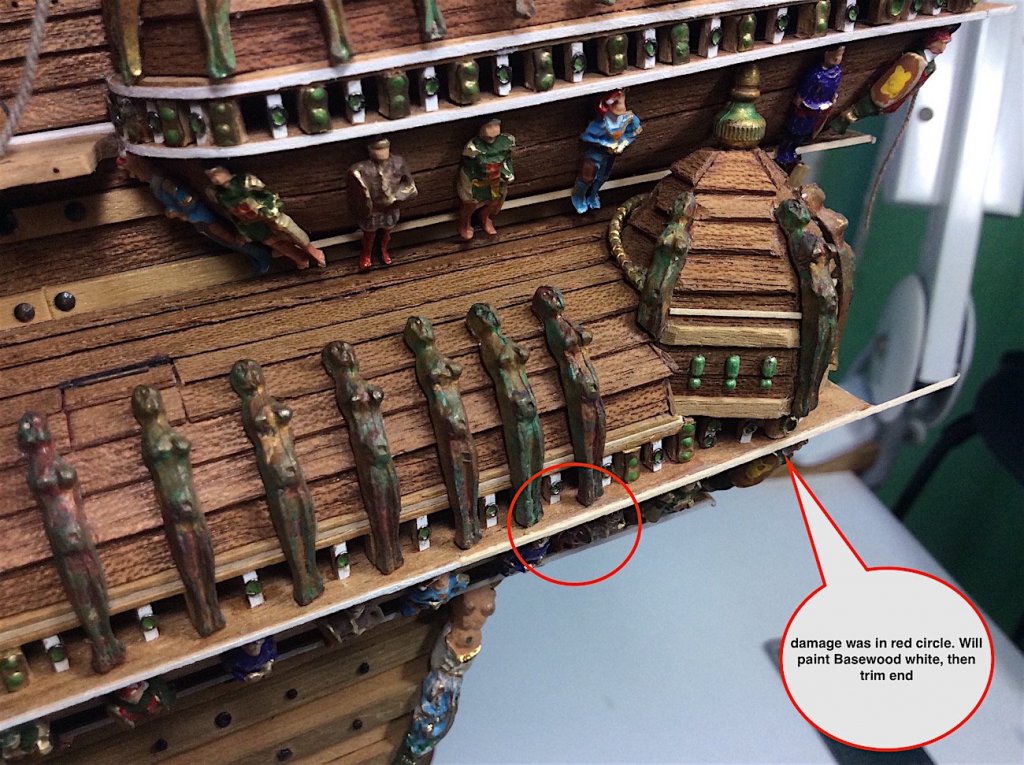
Hi Mates, Sorry for the late thank you’s. zappto: very appreciated - thank you John: Oh! what can I say? – Thank you so much – I’m very happy that you find this log, and build so much to your liking. Your words have really touched me. I have felt the same following other logs, and feel touched that you find this build in the same regard that I feel about others. Again your words, and the support that I have had from members here have indeed been inspiring. kier: Thanks as well. As I had mentioned I was not comfortable with the idea of sails, these being my first effort. I learned from other logs and gave it a shot. Yes, they did come out nicely – very much to my surprise and relief. Thanks for your nice comments –much appreciated. fmodajr: Frank as you know you were the catalyst for my embarking on adding sails having closely followed your Vasa build. (;-) thanks! Peter: Thanks as well – much appreciated. Regarding mizzen – yes the fore tip will be adjusted. In fact all yards and sails will be adjusted, set and made to look correct as I move from the bow to stern finishing up this build that has taken way too long. Funny you never disappoint – I did, of course, add treenails to the weather deck. I followed one of Landströms drawings from The Royal Warship. So it has gone with this build. Regarding the base, the nails will stay just of the extra detailed look. So small start at bow pulling lines and now looking for pin locations. This has brought up a dilemma for me. Kit and after-marked wood pins all seem to have too much girth. I like the look of metal pins, but not going there. I may thin out all of the needed wood pins, and re-stain them. Could be overkill on my part. Still thinking Hmmm Again Mates thanks SO much for your super kind words, the great like clicks and also for just dropping by. Regards,

-
Ken, As Hubac' just posted "all on the money". Your build and log are a pleasure to follow. This ship, that I have so wanted to build, is still too intimidating for me . Excellent work indeed.
-
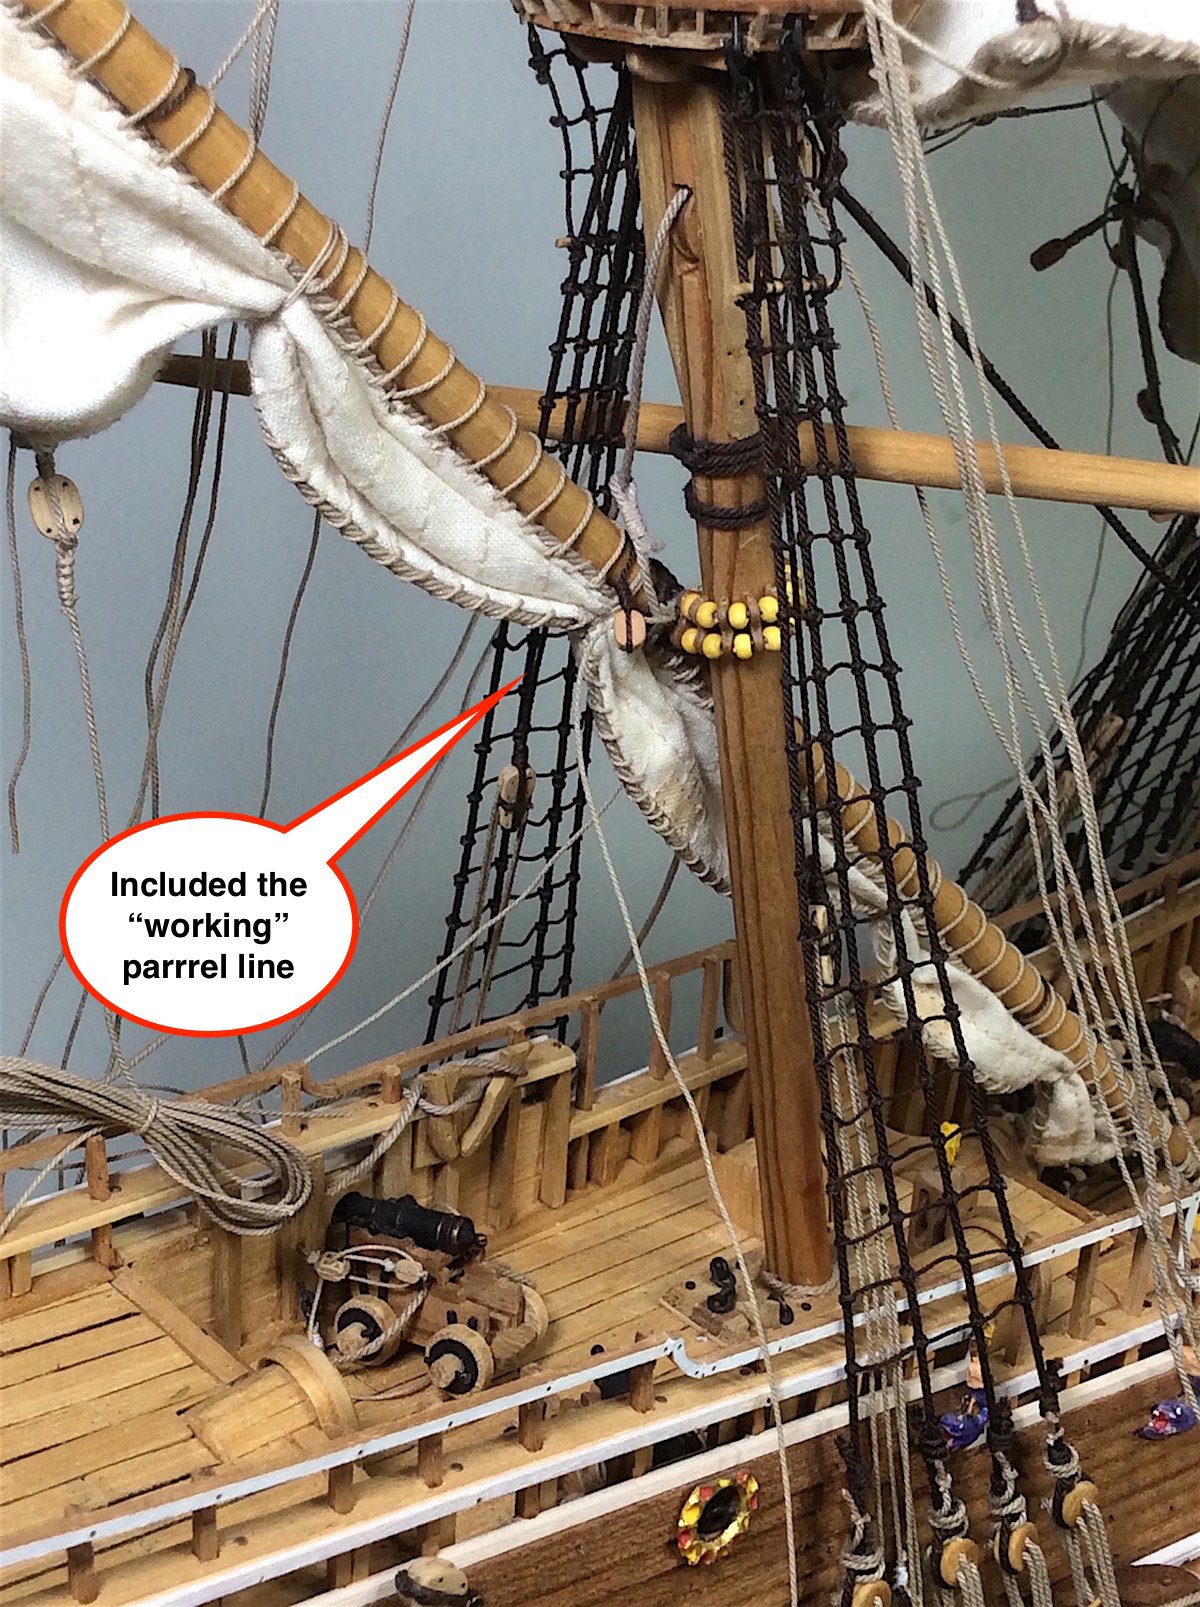
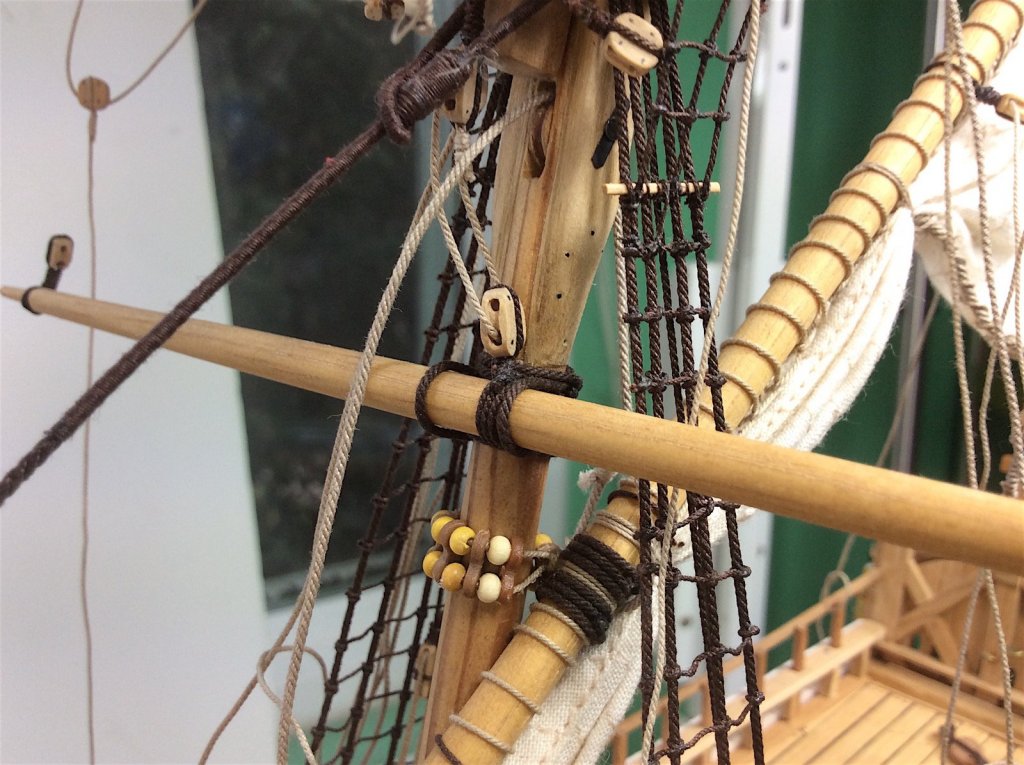
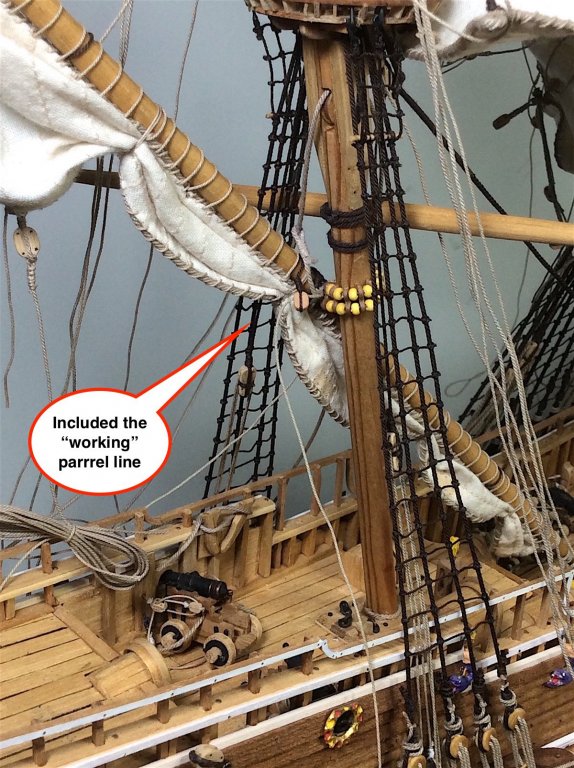
Don, Really nice work. Learned a lot about sails looking at your work (too late however haha) Also wished I had seen that parrel mounting detail about three days ago haha again too late. Very nice project as well as excellent research. Cheers,
- 653 replies
-
- 4
-
-
- trabakul
- marisstella
- (and 1 more)
-
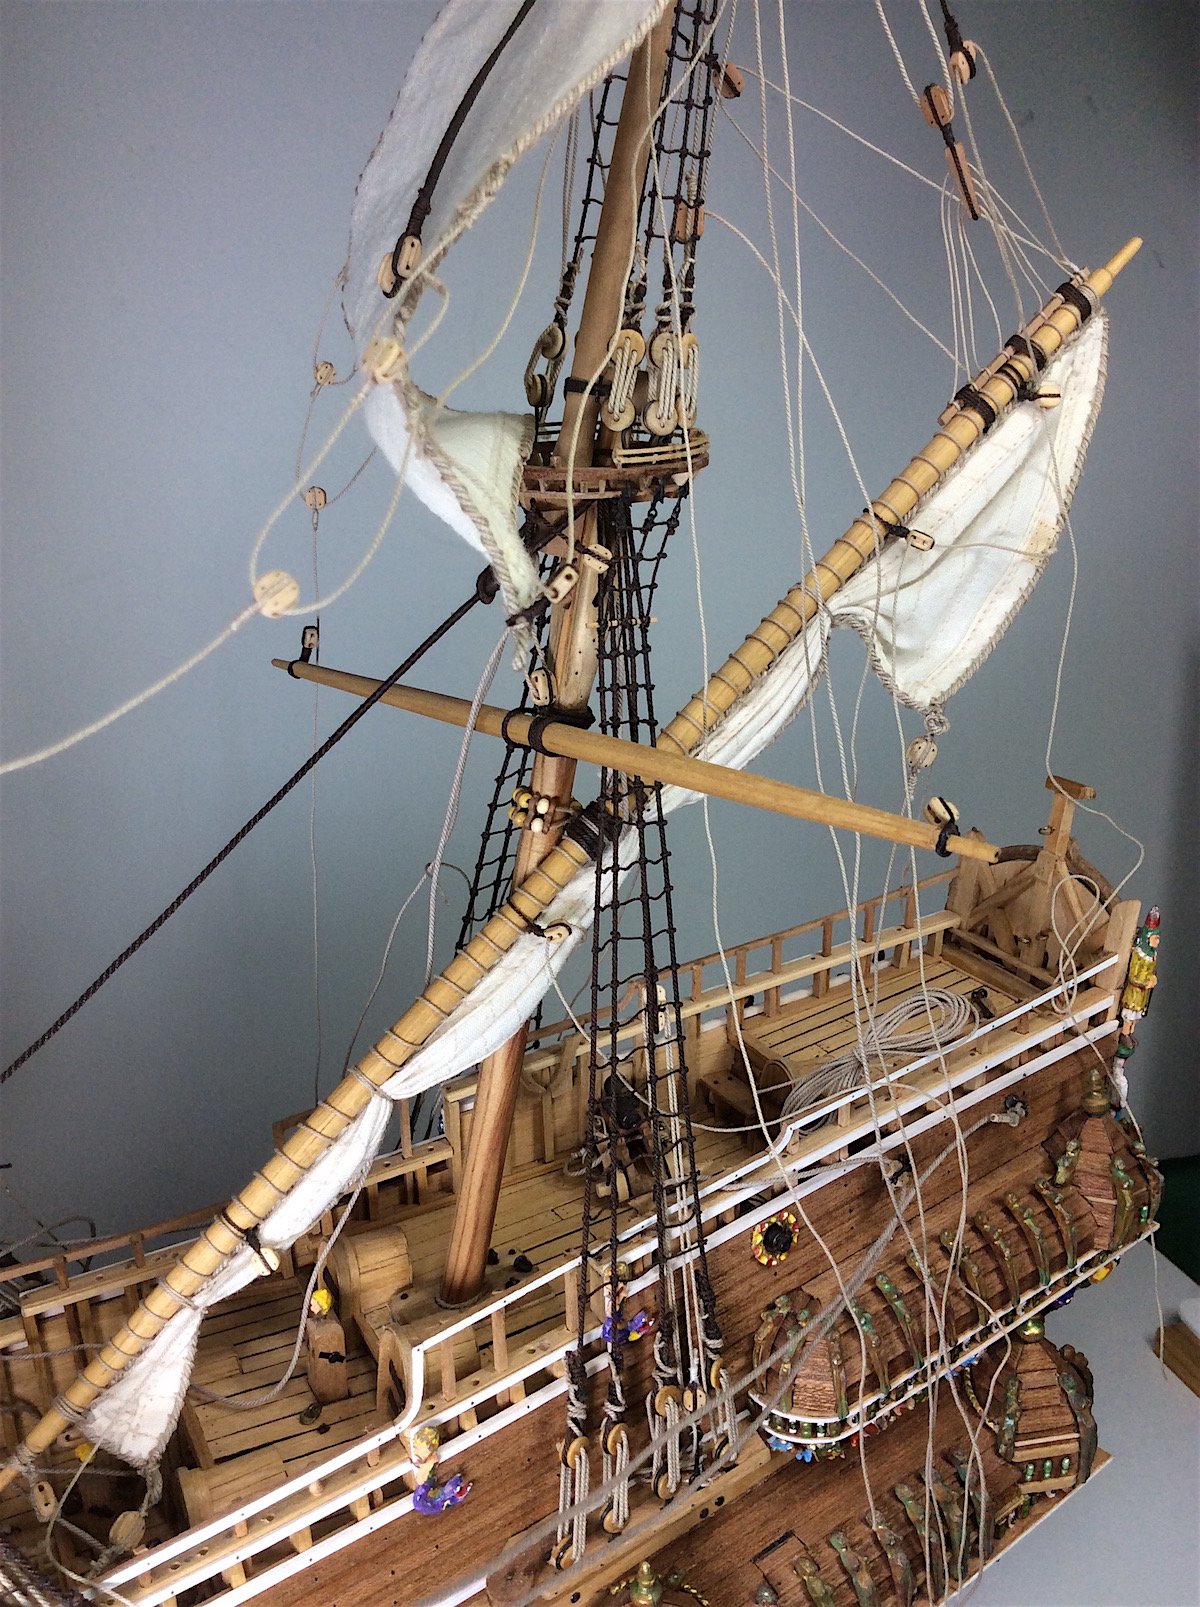
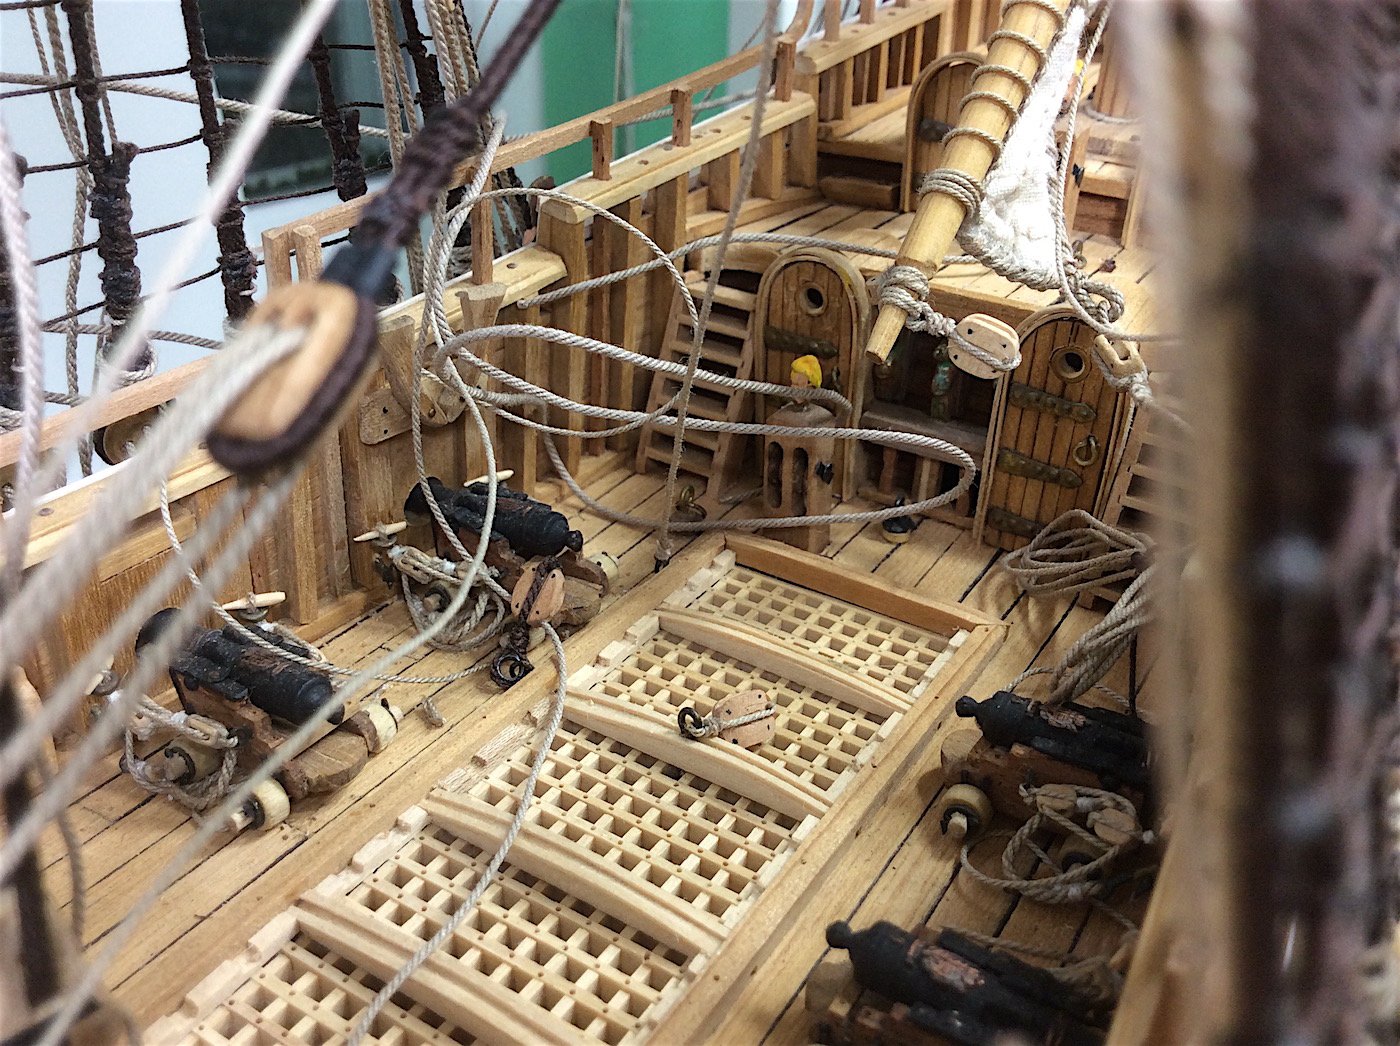
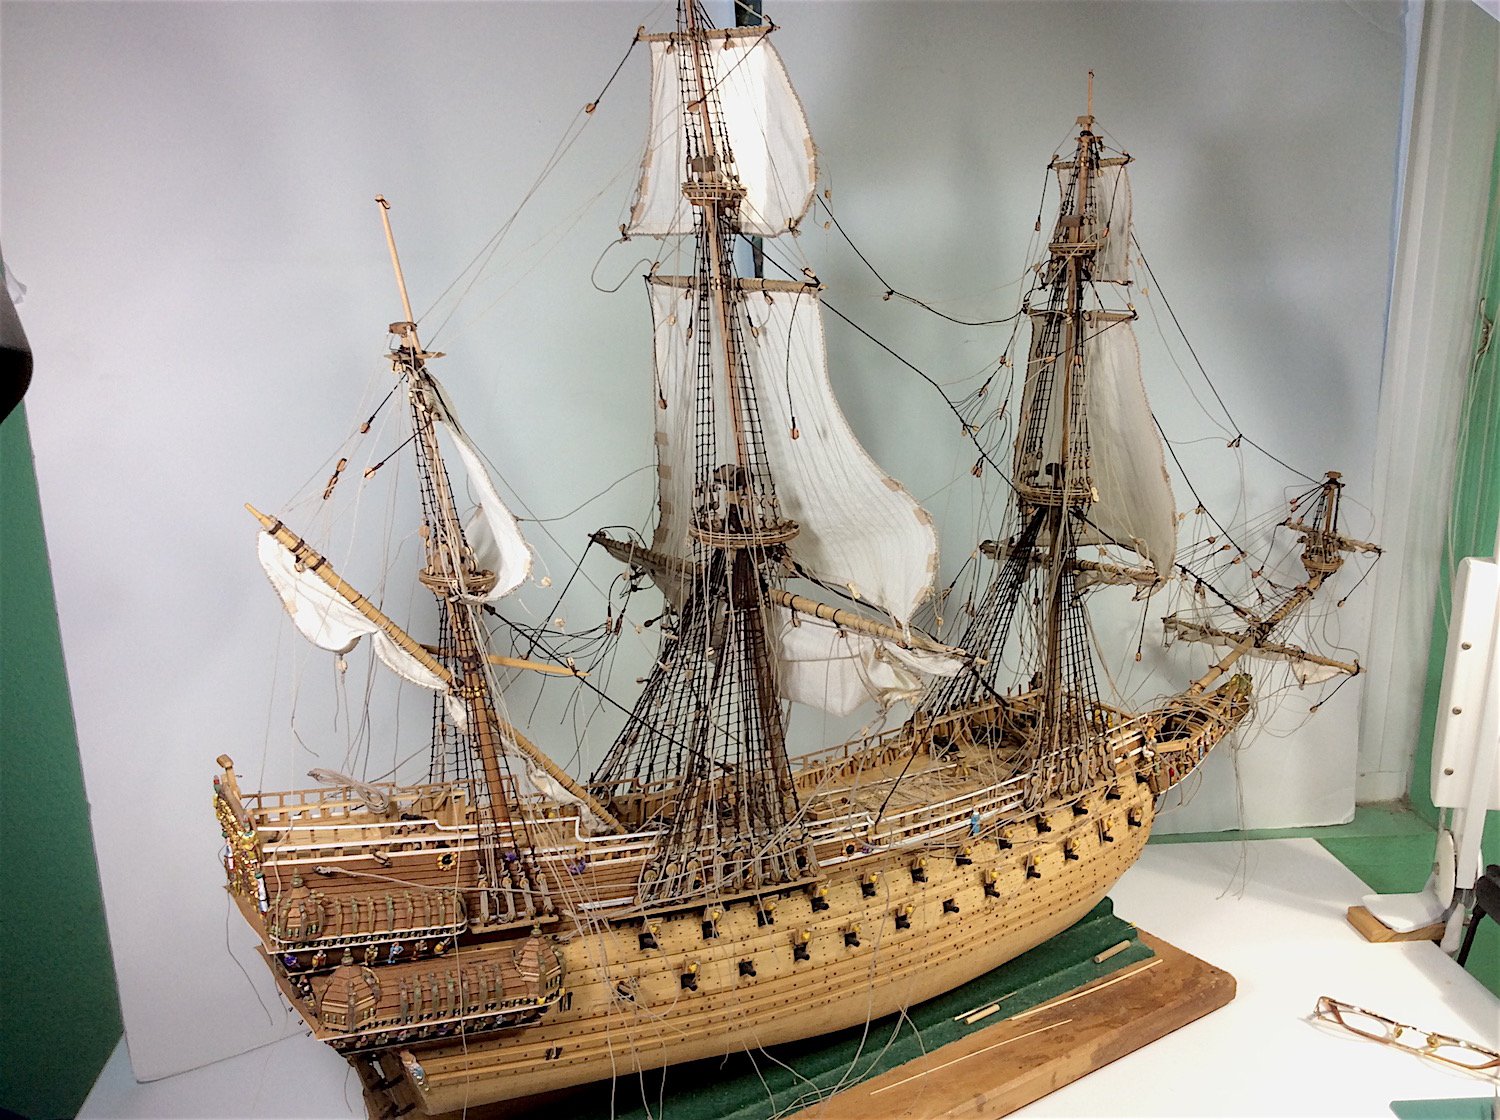
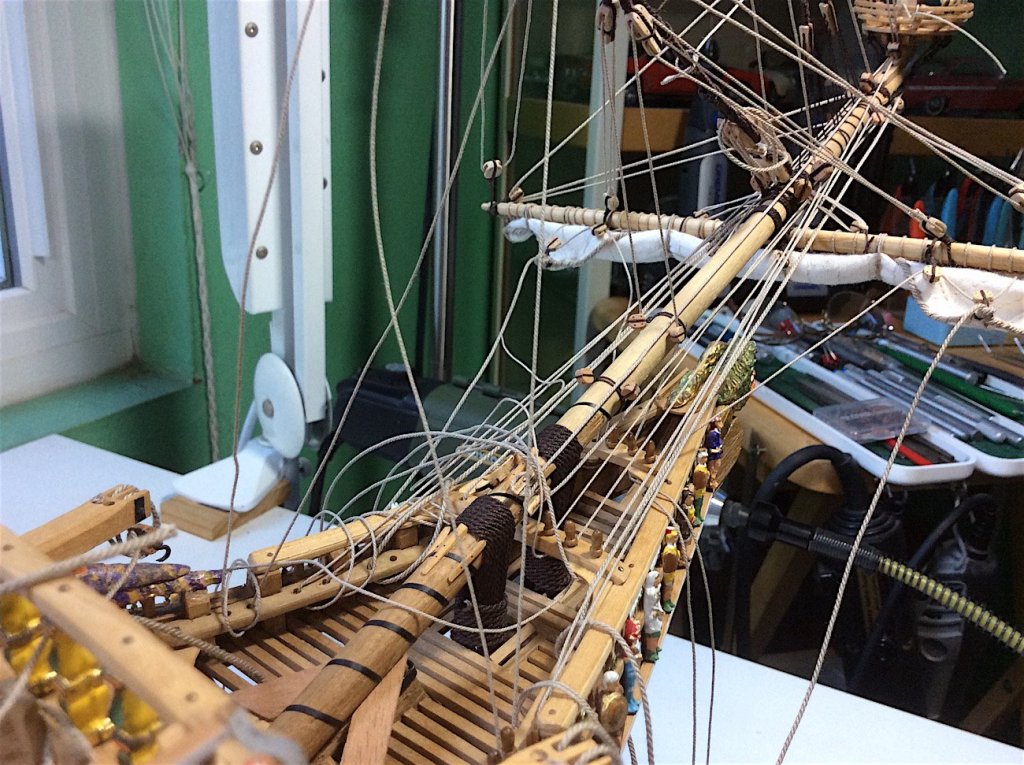
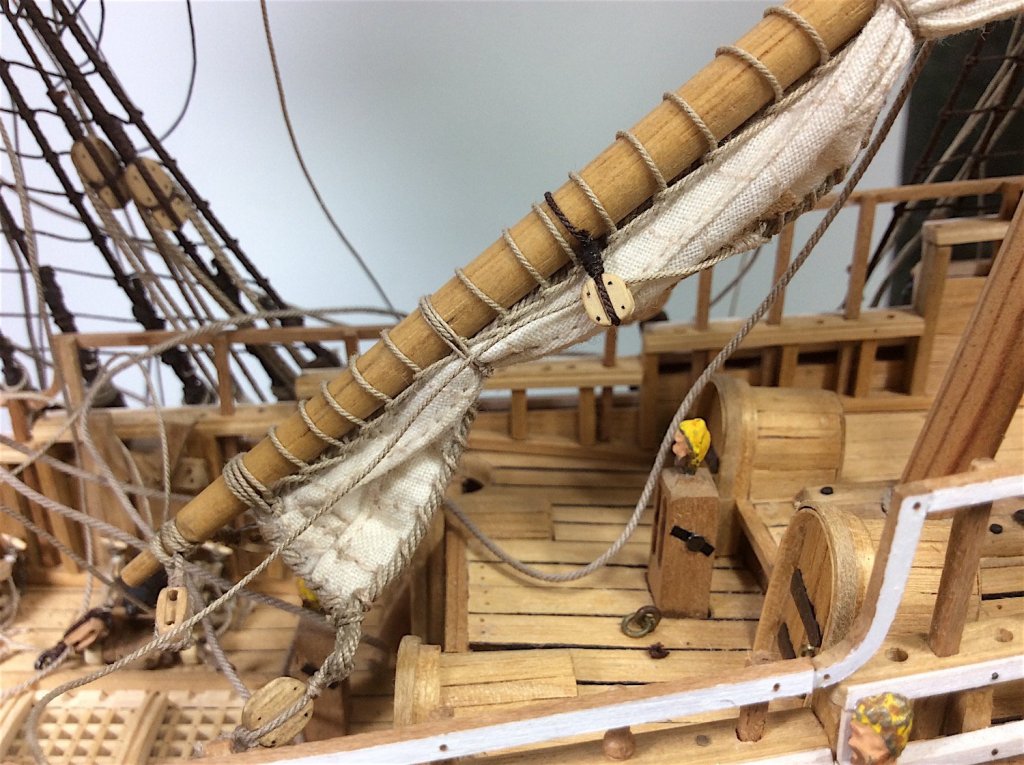
Hi Mates, Installed the mizzen yards and the last furled sail. Well, I do believe that all rigging has mostly been attached, except for a few upper mizzen sail lines, and other bits. ================= An observation: I had initially a lot of doubts about adding sails. In retrospect happy that I took the leap. That said, the sails added (I’m estimating) probably 60% more required rigging than if I had just hung the yardarms without any sails at all. Though as I had mentioned earlier – much appreciated the learning experience this provided. Now will start at the bowsprit attach, and pin locate all of the 100s of ropes leading through to the stern. Steven Thanks so much for your kind compliment, remarks, AND for your link. Excellent indeed. Here are a few updated pics. Cheers,


-
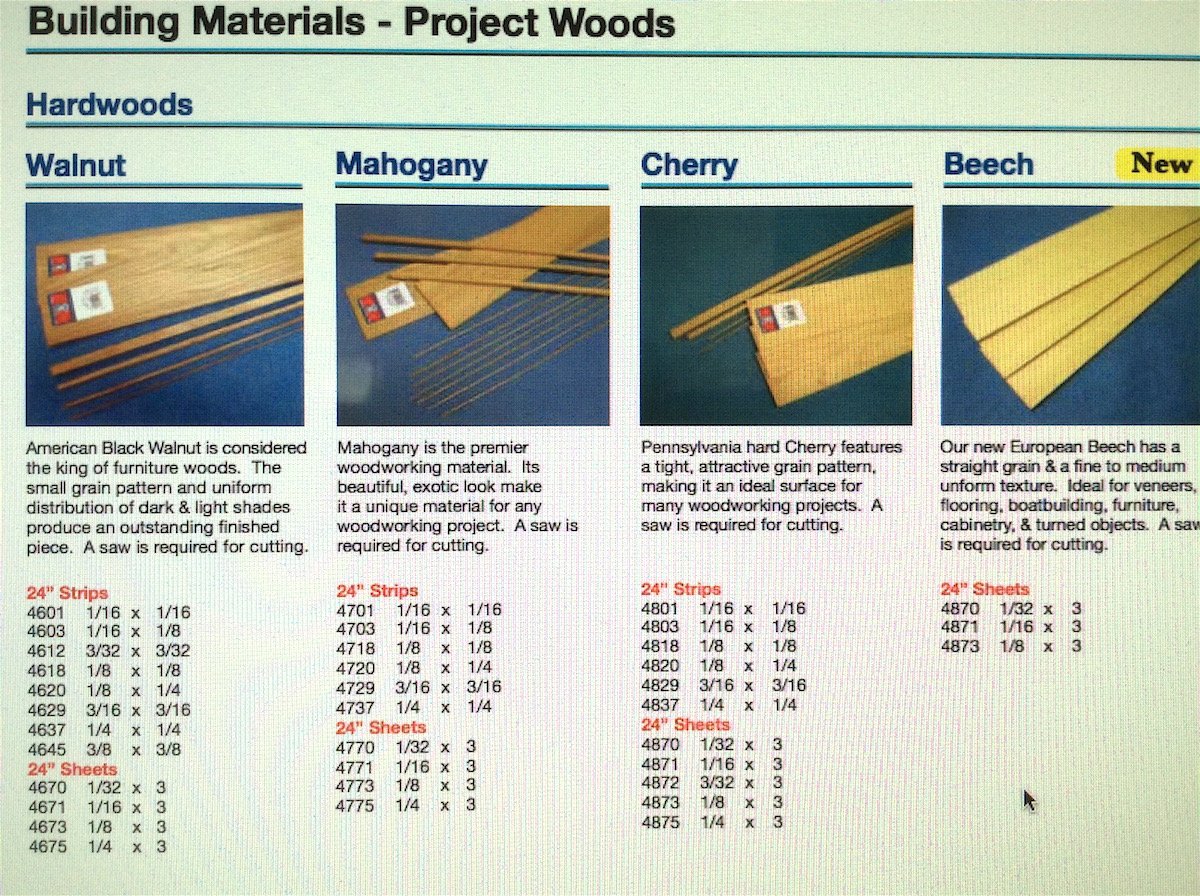
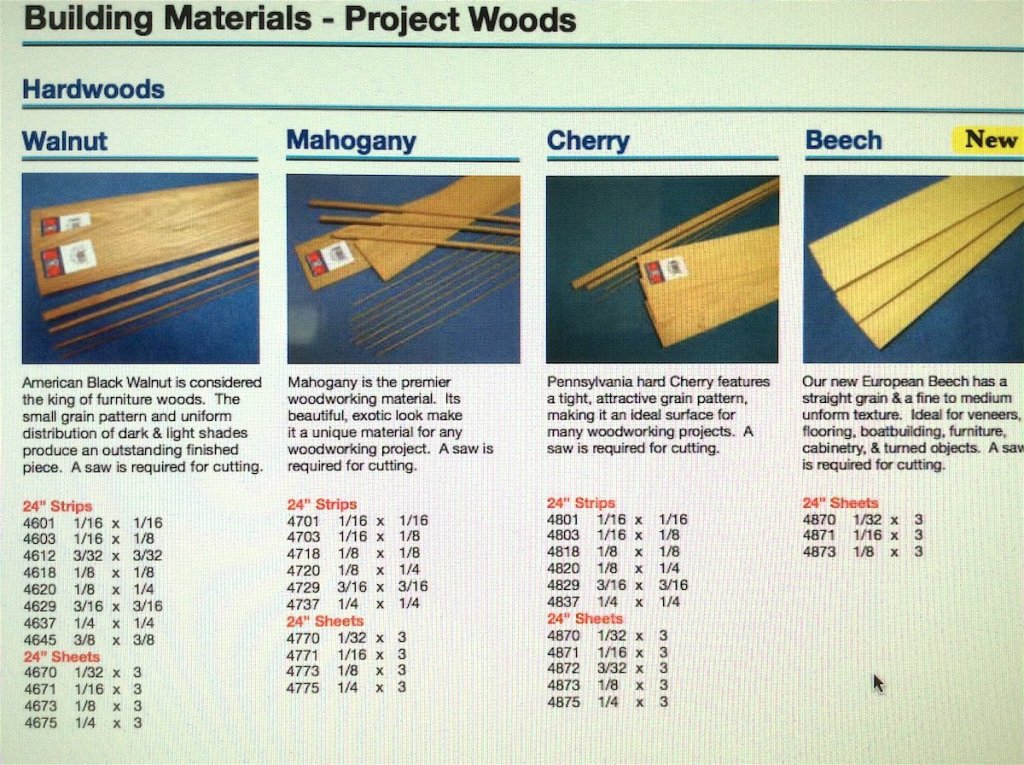
Hi Mates, Thanks for the likes much appreciated. Peter No I will not rig the Viking ship - well the four ropes anyway. Intensions are to have a partially open outer hull, missing deck plank coverings, adding as much added details as possible with square nail cleats in as many locations that I can copy from photos from the Viking museum. Also will add the ballasting rocks. Will scratch build all of the shields, including leather strips for the hands. Those are my mental build plans - to be determined how it all works out. This kit is just tooooo large to also add its sail. Mast will be mounted but with a truncated hight. I'm presently putting together hundreds of available photos and drawings for this project. =============================== Regarding Vasa - Contracted a local Wood shop that is building the base. The ship will mount on a base that will replicate a weather deck/including treenails - in larger scale (prob. five planks across its width - with cuts along the way that will be tree-nailed. Then four antiqued brass Pegasus. A plexiglass case will cover the project. (still need to work-out how to secure the keel to the base). Kier Thanks so much for following along, your clicks, and of course your very kind comments. Regarding the wood, apart from that supplied with the kit, I also would purchase the woods below from Blick Art Materials store. These were available from Midwestern. Sadly Midwestern no longer produces these so useful hardwoods. Now only in sheet size planks. Leaving an easy supply source for me no longer available. https://midwestproducts.com/collections/hardwoods
-
Johann, just discovered your astonishing build log. Absolutely (as has been said so many times) stunning. And I did look at your two videos as well - your work is, world-wide, at the top of this hobby. Regards,