


pete48
-
Posts
2,132 -
Joined
-
Last visited
Content Type
Profiles
Forums
Gallery
Events
Posts posted by pete48
-
-
-
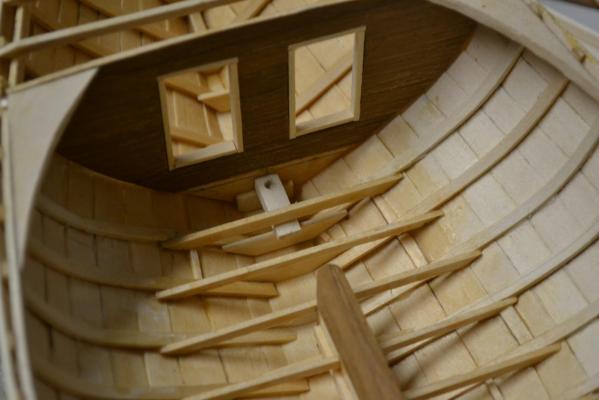
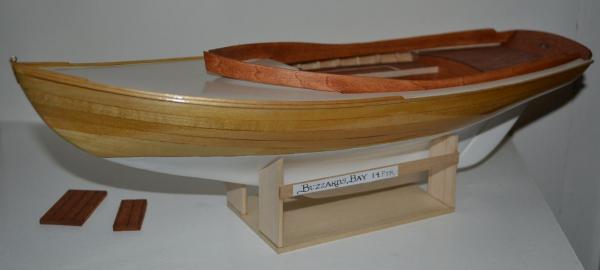
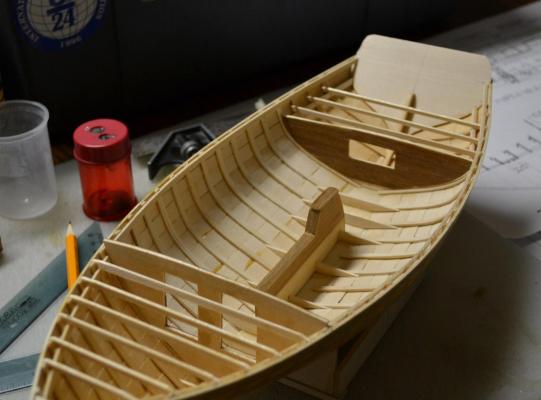
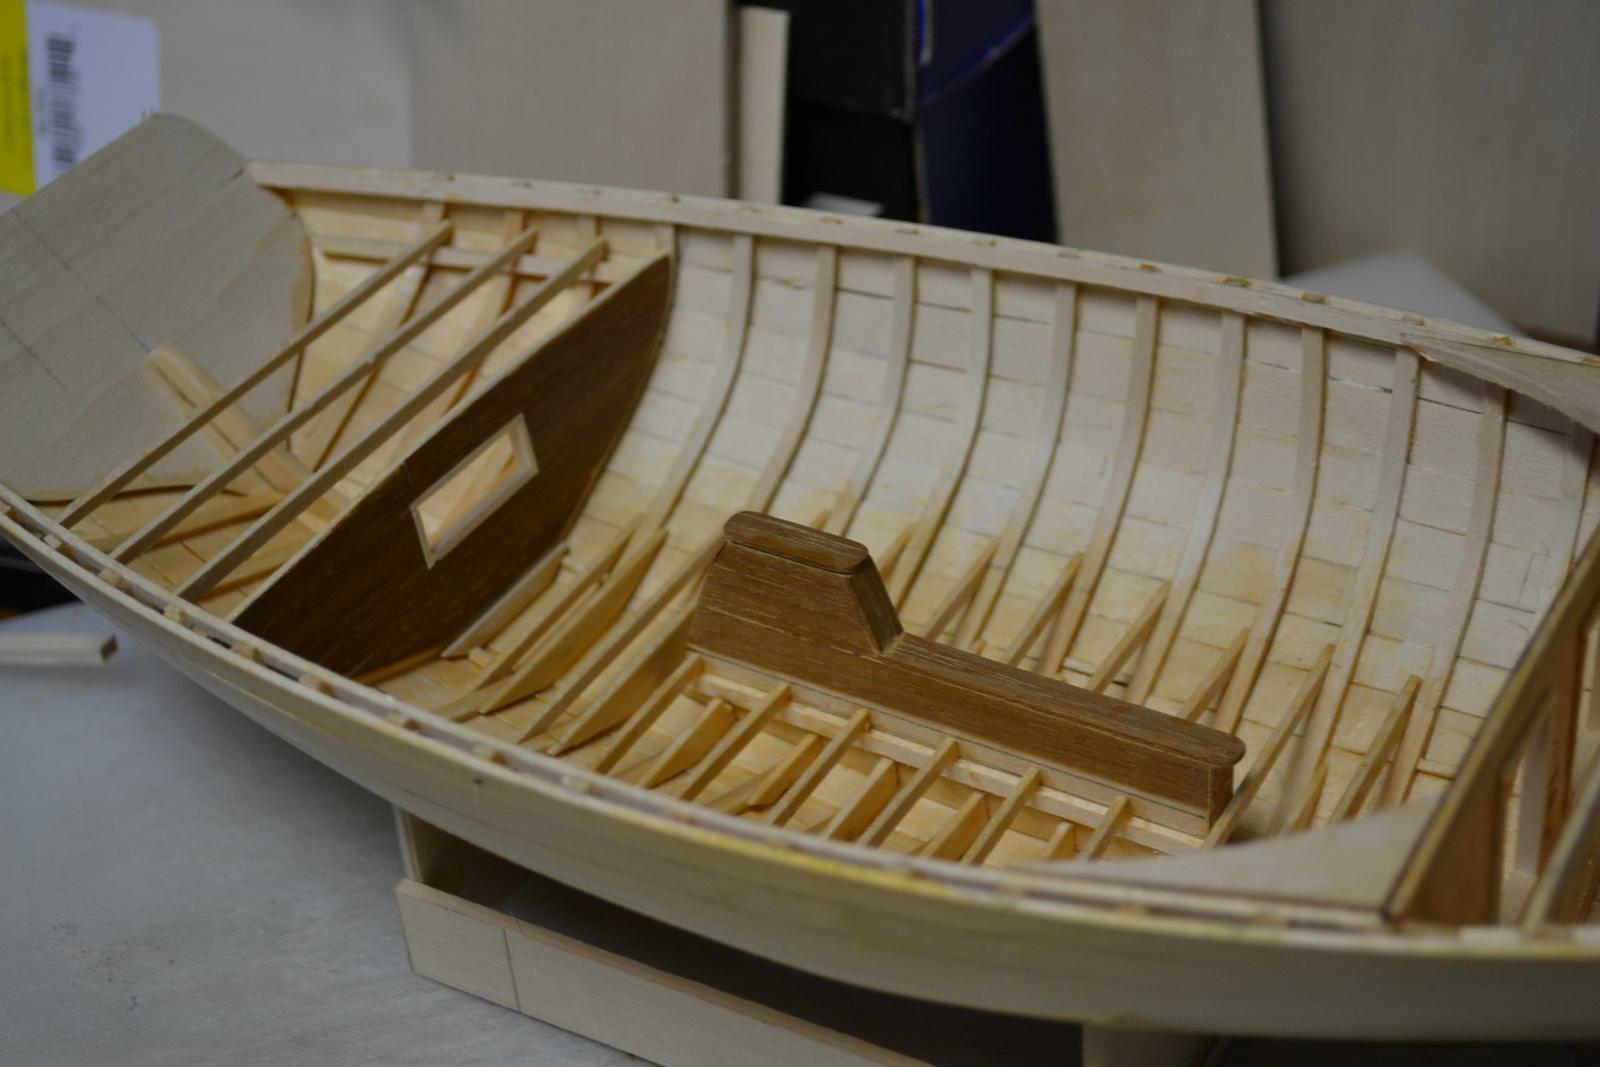
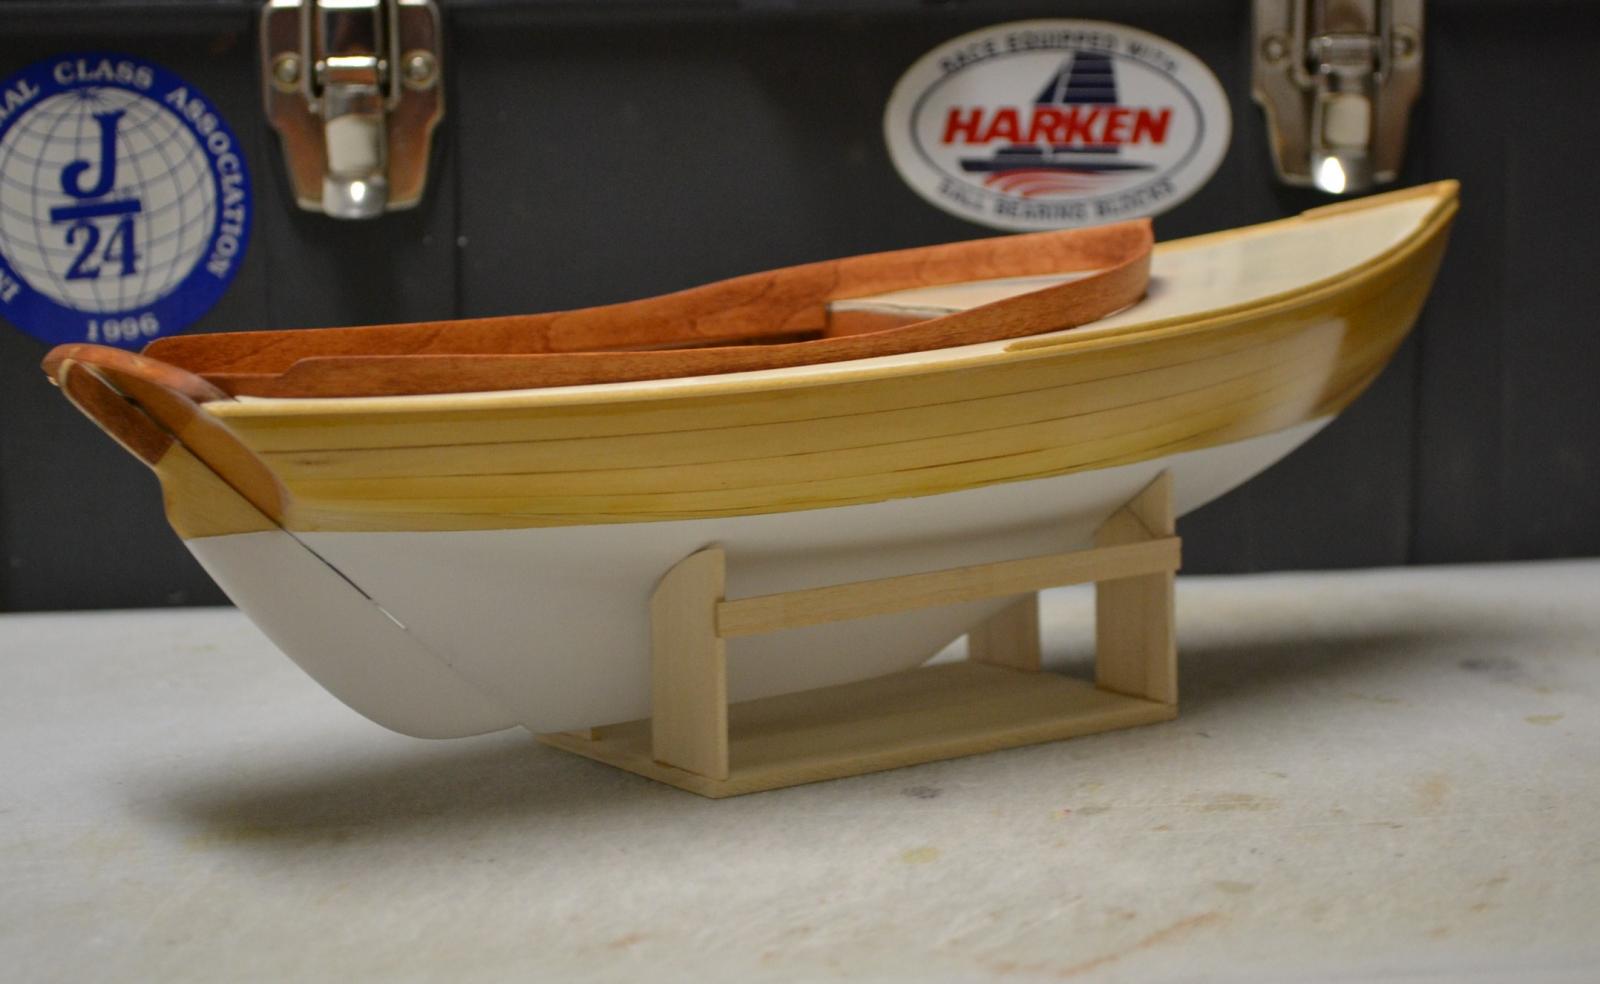
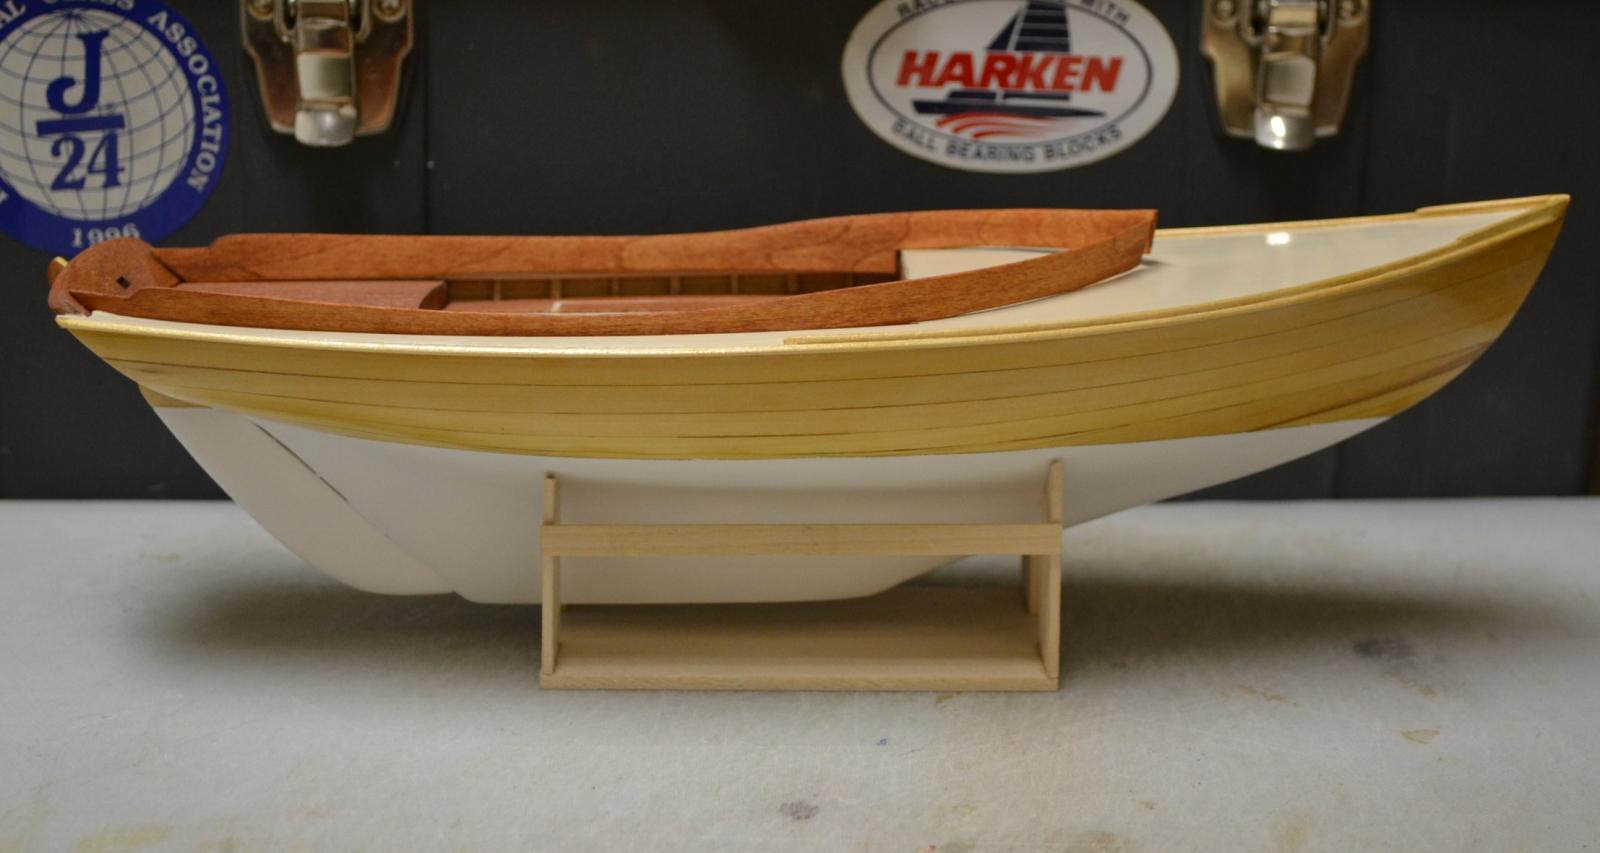
Today, I started by installing the rear bulkhead, Next I finished the floor framing in the rear section, up to the rear bulkhead. I then ( before I got to carried away ) Made and installed the Mast Step. Next I made and installed all the door jambs, Followed by a coat of Titebond 3 in the bilge area. This will seal it up. Next will be to paint the bilge ( grey like I used on the Buzzards Bay 14 ) Here are the results

-
-
-
Thank You, Jon, I have found it on the internet (and Flounder Bay always has it ) It would be nice to find it here locally, so I can pick thru it. I imagine it;s a pretty penny for an actual mast
Thank you, Piet, Hey, you never answered my question, Did you fly as a commercial pilot?
Best Regards,
Pete
-
-
-
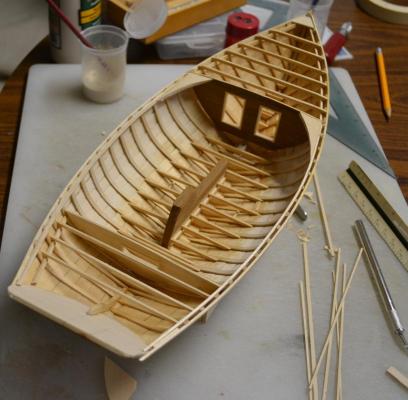
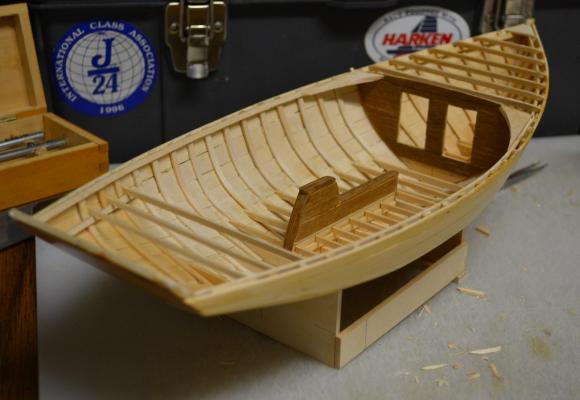
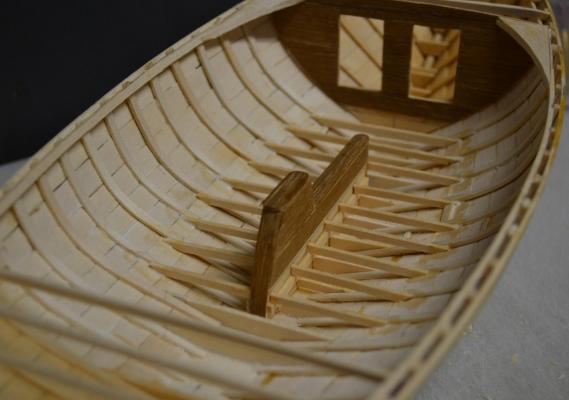
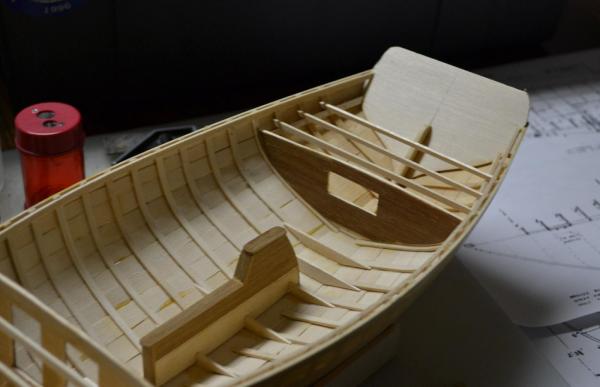
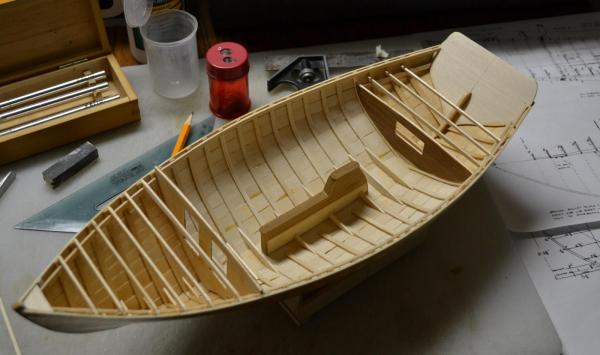
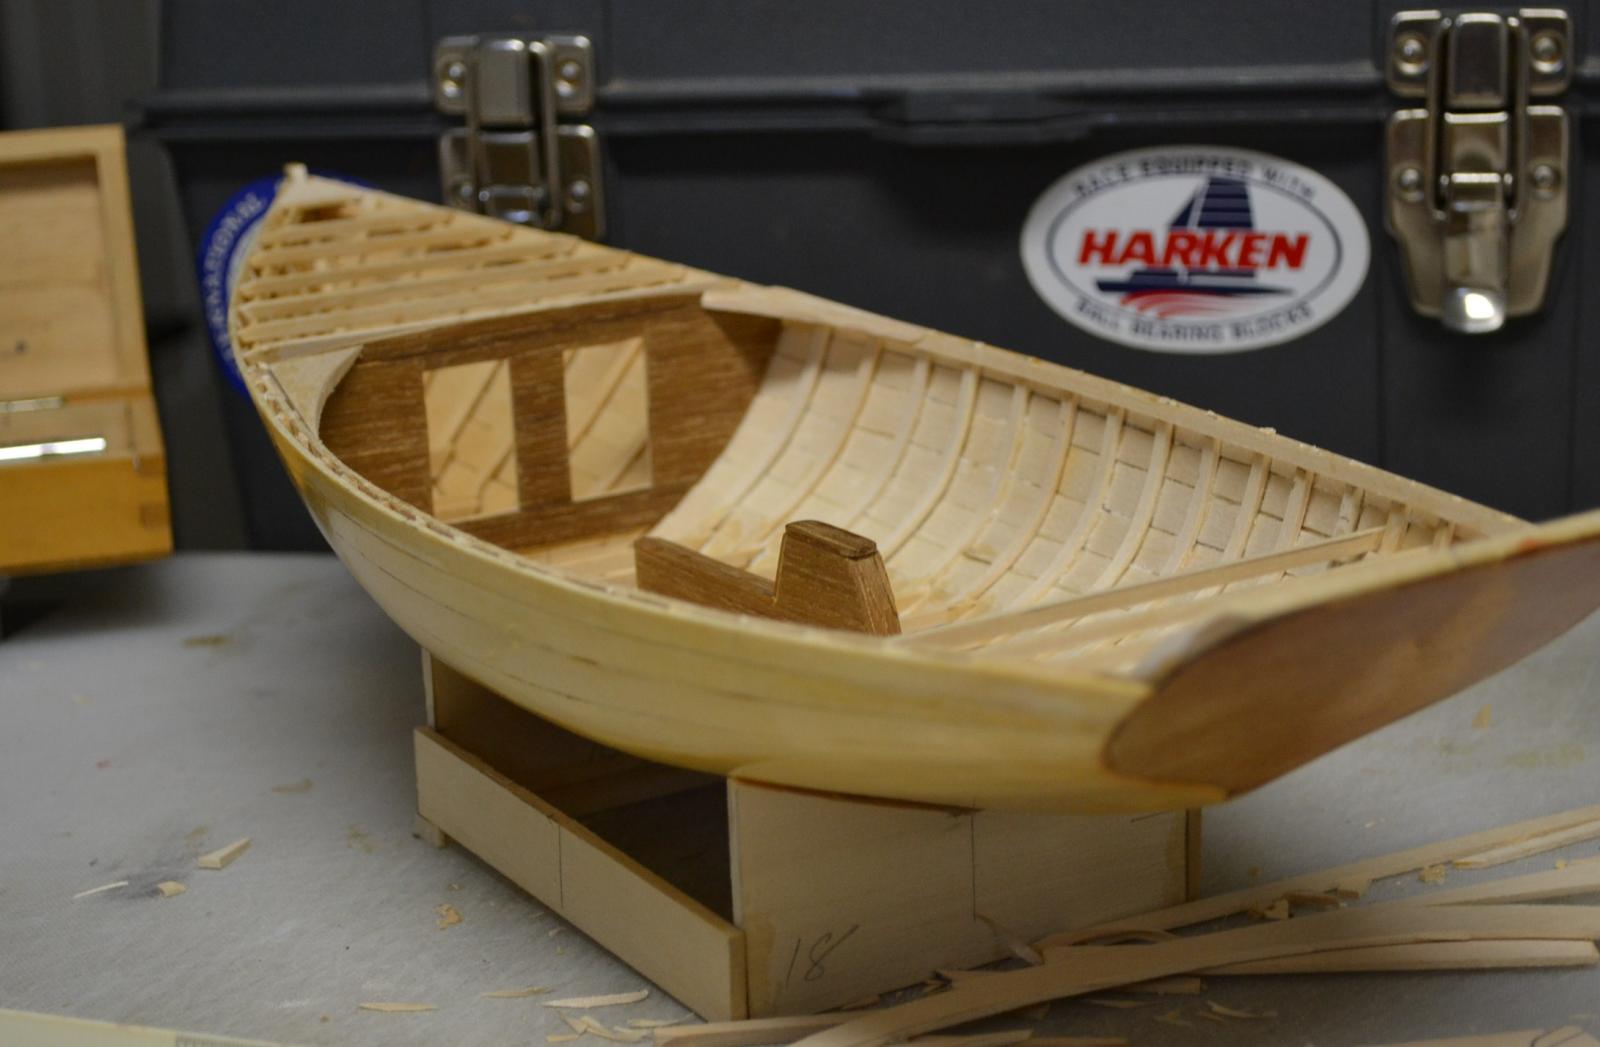
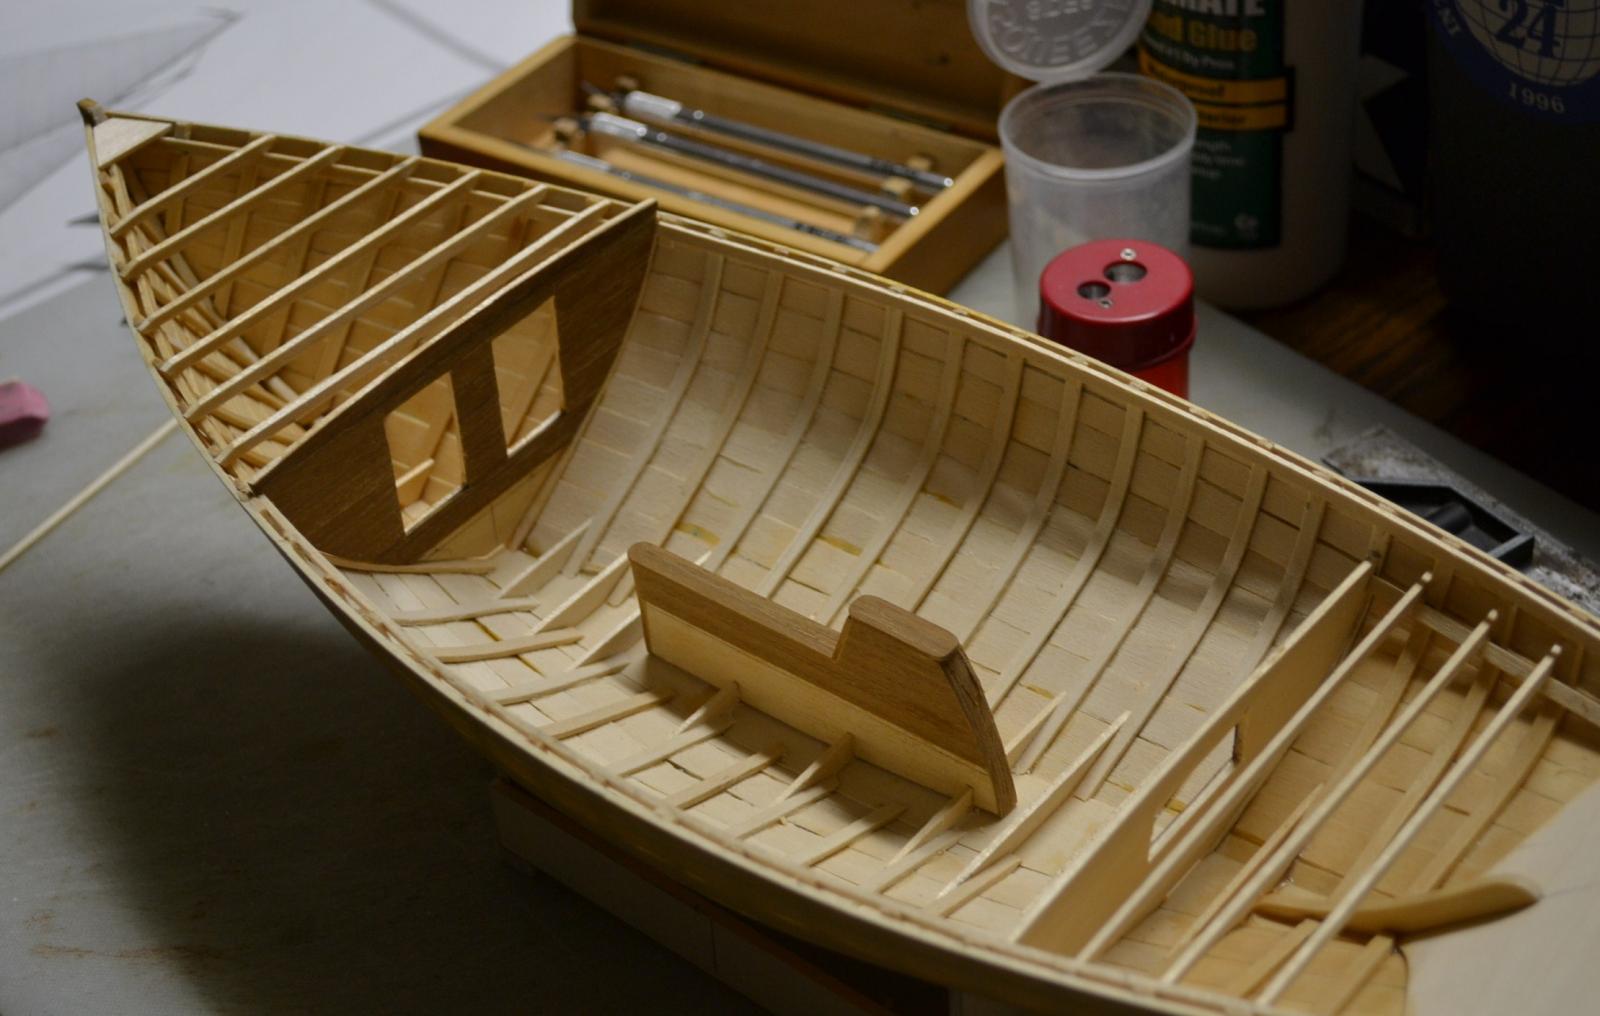
Today, With a high temperature of 28, ( about 0 C) and an impending snow storm, I decided I would get all the floor timbers installed. I started with Installing the Forward bulkhead, I then installed the Centerboard box, Once the centerboard box was installed, I used a template that I made to lay out the Floor timber lengths, I then measured and cut and installed all the Floor beams. I then turned my attention to making and installing the 2 blocks at the front bulkhead, Everything to this point has been glued with Titebond 3. Next will be to install the rear cockpit bulkhead and seal up the bilge. Here are the results

-
Thank You, Jon, I think Joel White did an Amazing job designing this one, The Herreshoff Boats have the most beautiful lines and are an absolute pleasure to build.
Thank You druxey,
Thank You, John and everyone that has hit the like button
Best Regards,
Pete
-
Hi Michael, That's about what I went with on the first one, on the current one I went with 4" at the transom and 9" at the forward bulkhead ( that's finish without the coamings )
Best Regards,
Pete
- Bobstrake, Omega1234, michael mott and 3 others
-
 6
6
-
-
-
-
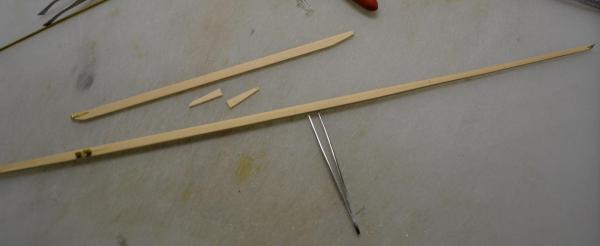
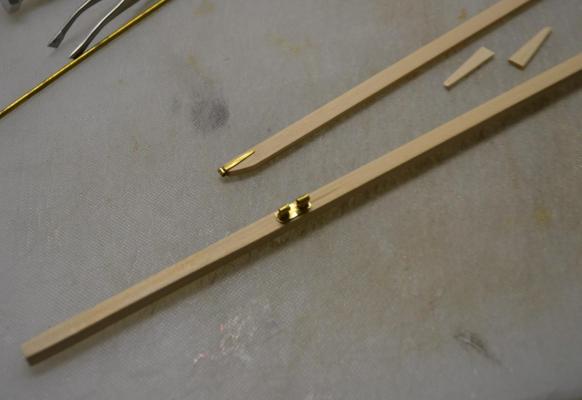
Thanks, Piet, Its all smoke and mirrors, I cheated the metal parts are super glued together, as soon as I use the soldering gun its all over, I make a big melted blob of brass and solder. I did use brass. The Mast is made from 1/4" square stock out of Alder, the Boom is made from basswood. to lay out the mast, I first cut to length, in this case the mast is 24' ( scale ) I then mark the sail slot side of the mast ( this side has no taper ) I then mark and cut the taper on the front of the mast, in this case the taper is 1/8" to 0 from the mast head to the base ( top of the deck ) I then mark and cut the taper on both sides of the mast wich is 1/16" to 0 from the mast head to the spreaders. Then its a matter of rounding off the edges and giving the leading edge a foil shape ( I leave the sail slot side of the mast alone as this has to remain straight ) I would like to get some Sitka spruce for the Haven mast, I get the Alder from Home Depot ( I try to find the tightest grain possible )
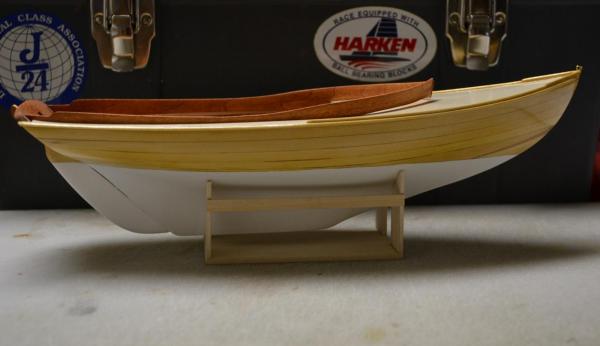
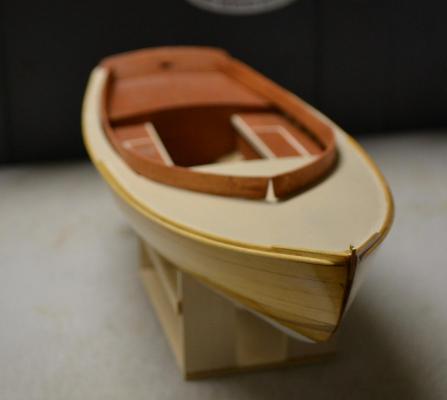
Thank You, Mark, I am pleased with how the colors turned out, I am going for that Classic look , like you see in Wooden Boat magazine
Best Regards,
Pete
-
-
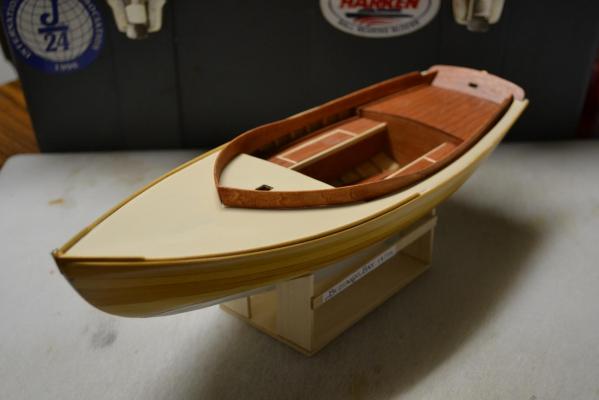
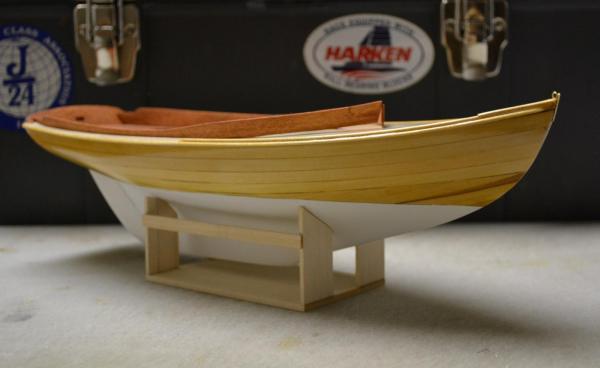
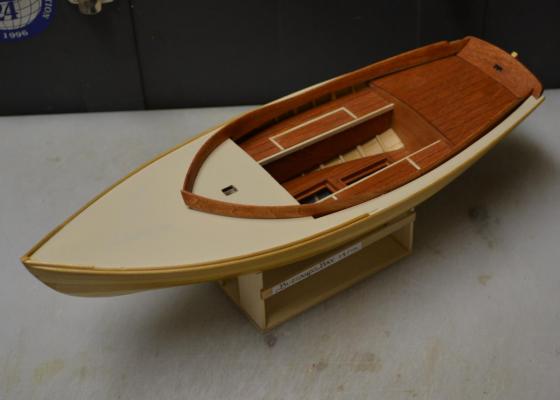
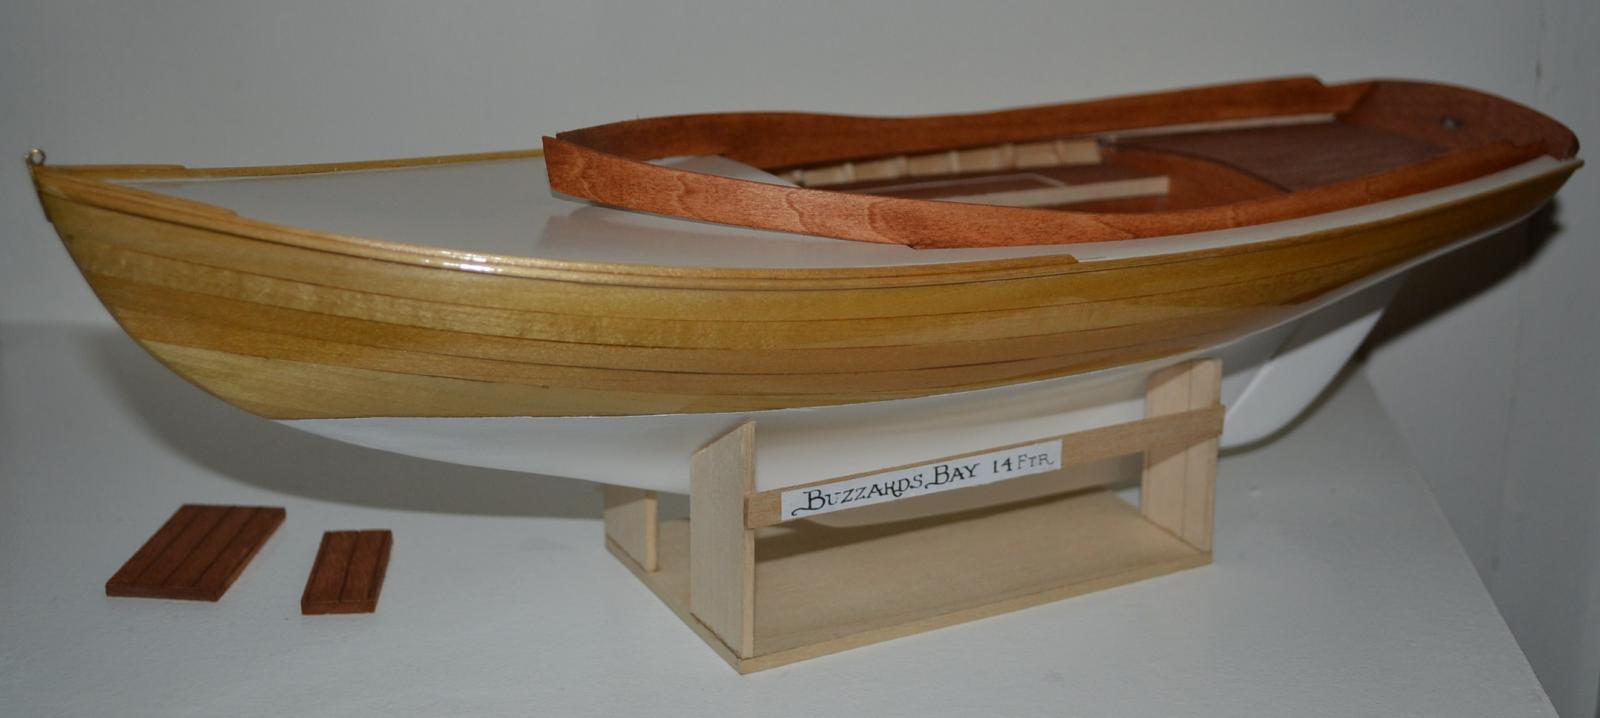
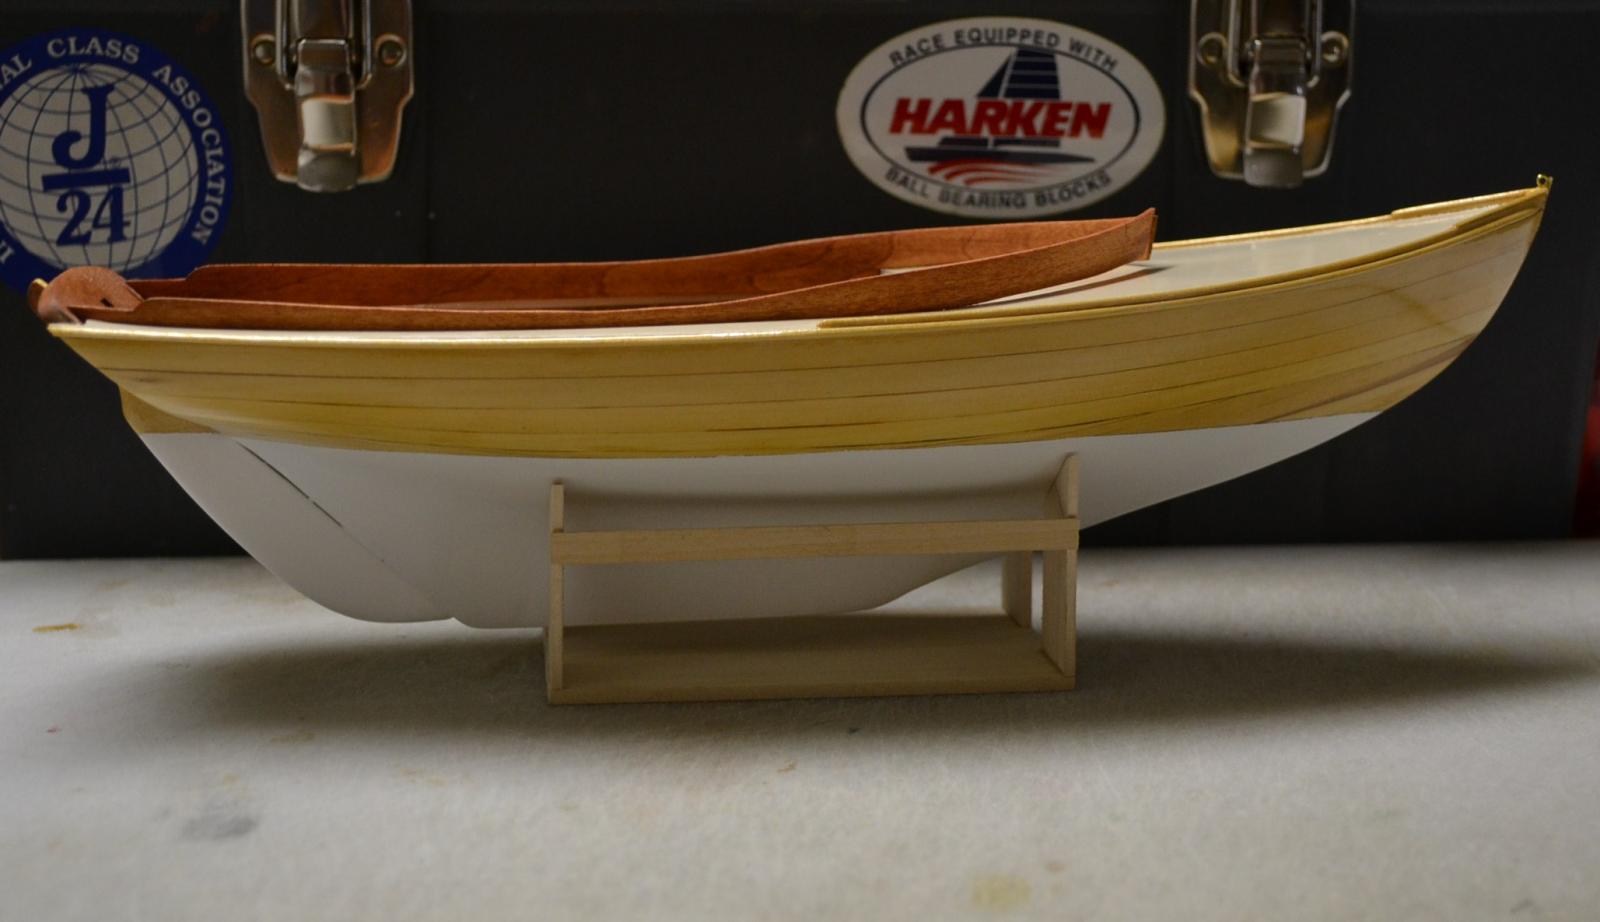
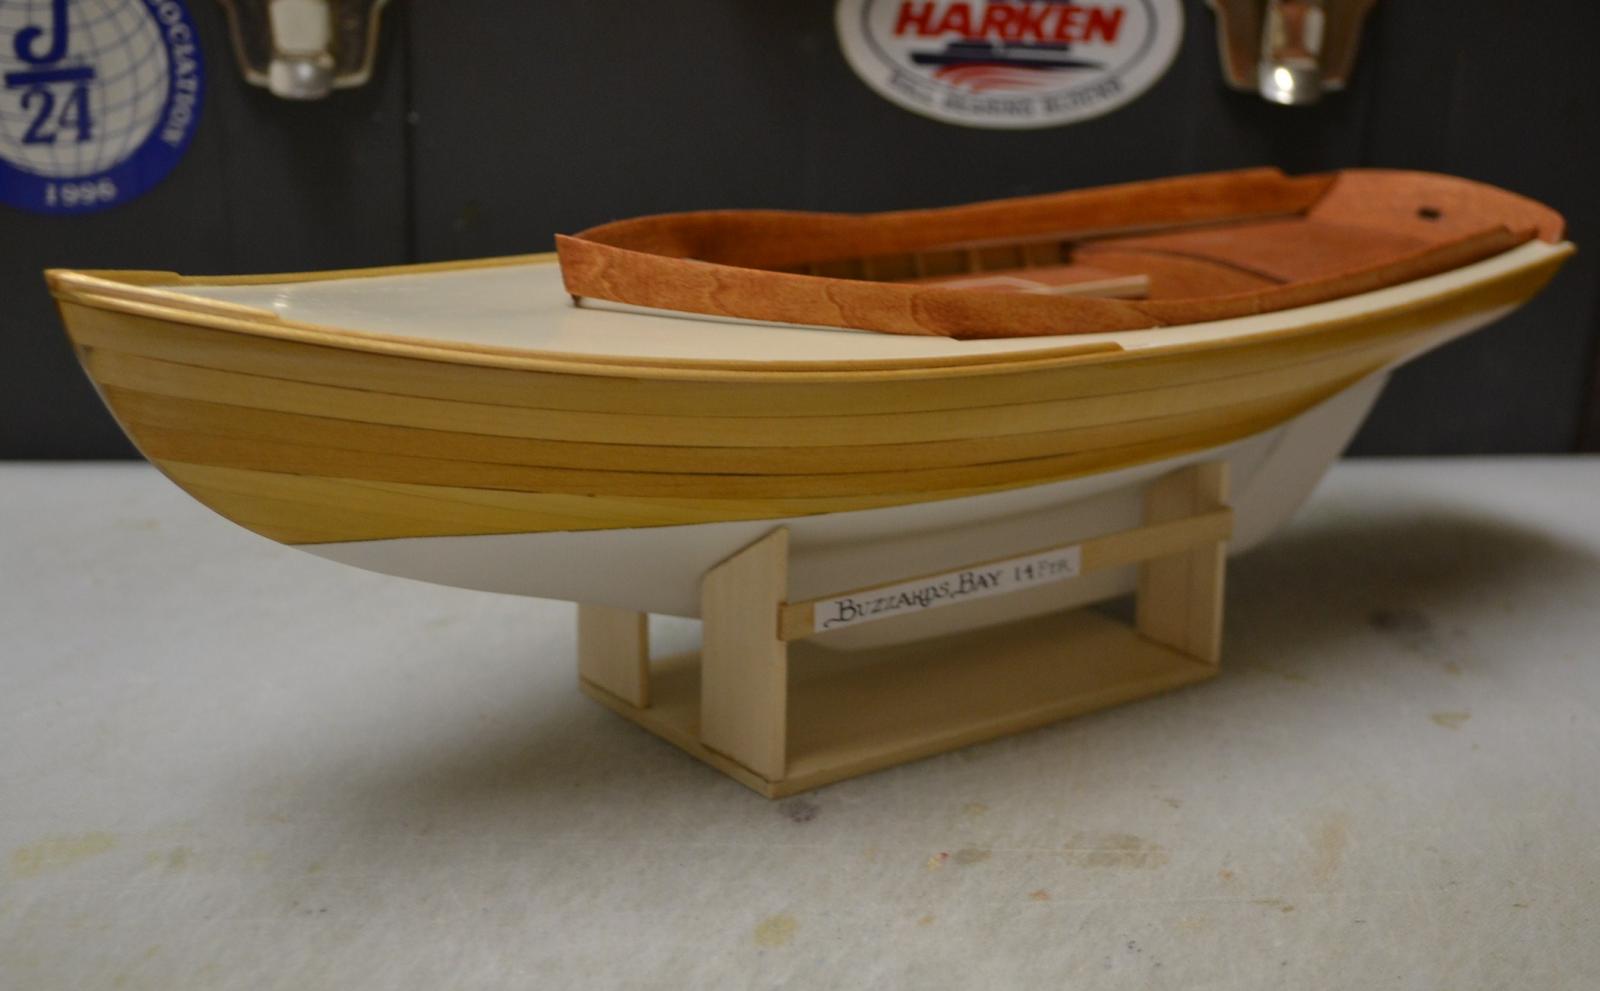
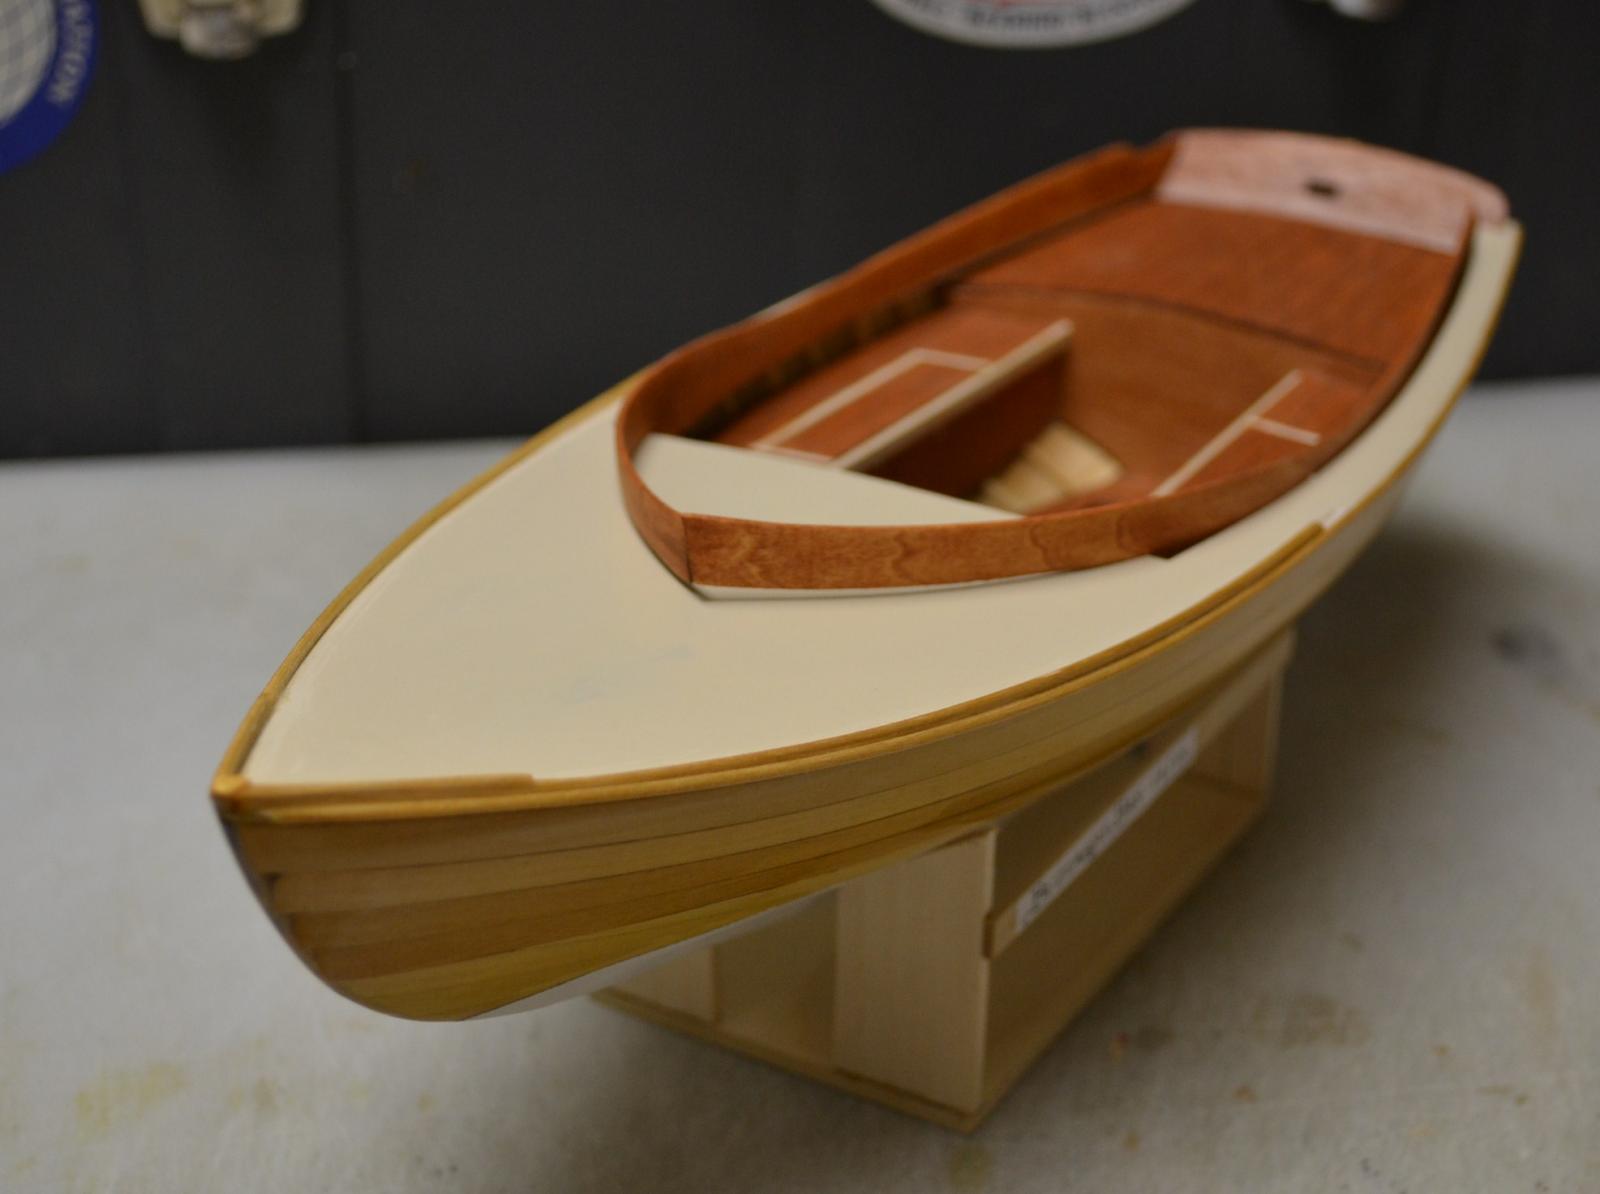
Today, I started by sanding the Rub and Toe Rails with 400 grit sandpaper. Then something Patrick said, got me to thinking, so I got out my very small metal working tools and made the bow chain plate Masthead and Gooseneck. I then attached the Bow Chain plate and applied the second coat of varnish. I then turned my attention to making the mast and boom, I then made the spreaders. I went with a slightly larger boom so that I could give it a more performance oriented shape ( similar to that found on a Americas cup Boat pre cat ) The Cockpit coamings and gooseneck have not been installed. Next will be to finish the Mast and boom and get it ready for varnish and a third coat on the Rails. Here are the results
- Elijah, Jond, Mirabell61 and 10 others
-
13
-
-
-
Thank You, Elijah
Thank You, Greg
Thank You, John
Thank You, Patrick, A trailer Wow, I don;t think I have the skills to build one ( my metal working skills are terrible) I think I would need to sub that out to Piet ( He's Got some serious skills ) I do enjoy a good Challenge However building a trailer is out of my Wheel house
Best Regards,
Pete

- mtaylor, Mirabell61, dgbot and 9 others
-
12
-
Thank You, Patrick, I have been having a lot of fun building this one, I am enjoying working on a larger scale, I have been able to use more actual Boat Building techniques wich is nice
Best Regards,
Pete

-
-
-
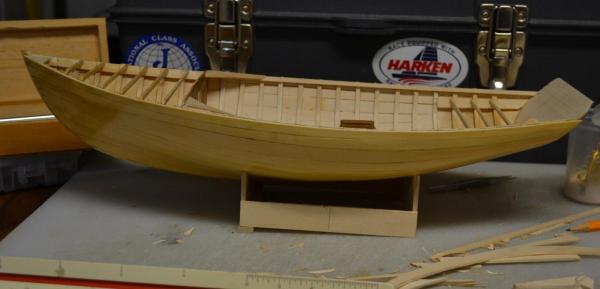
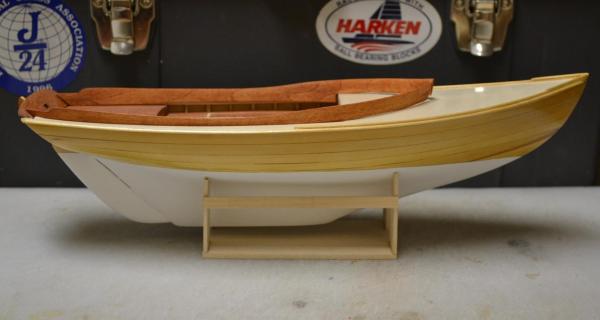
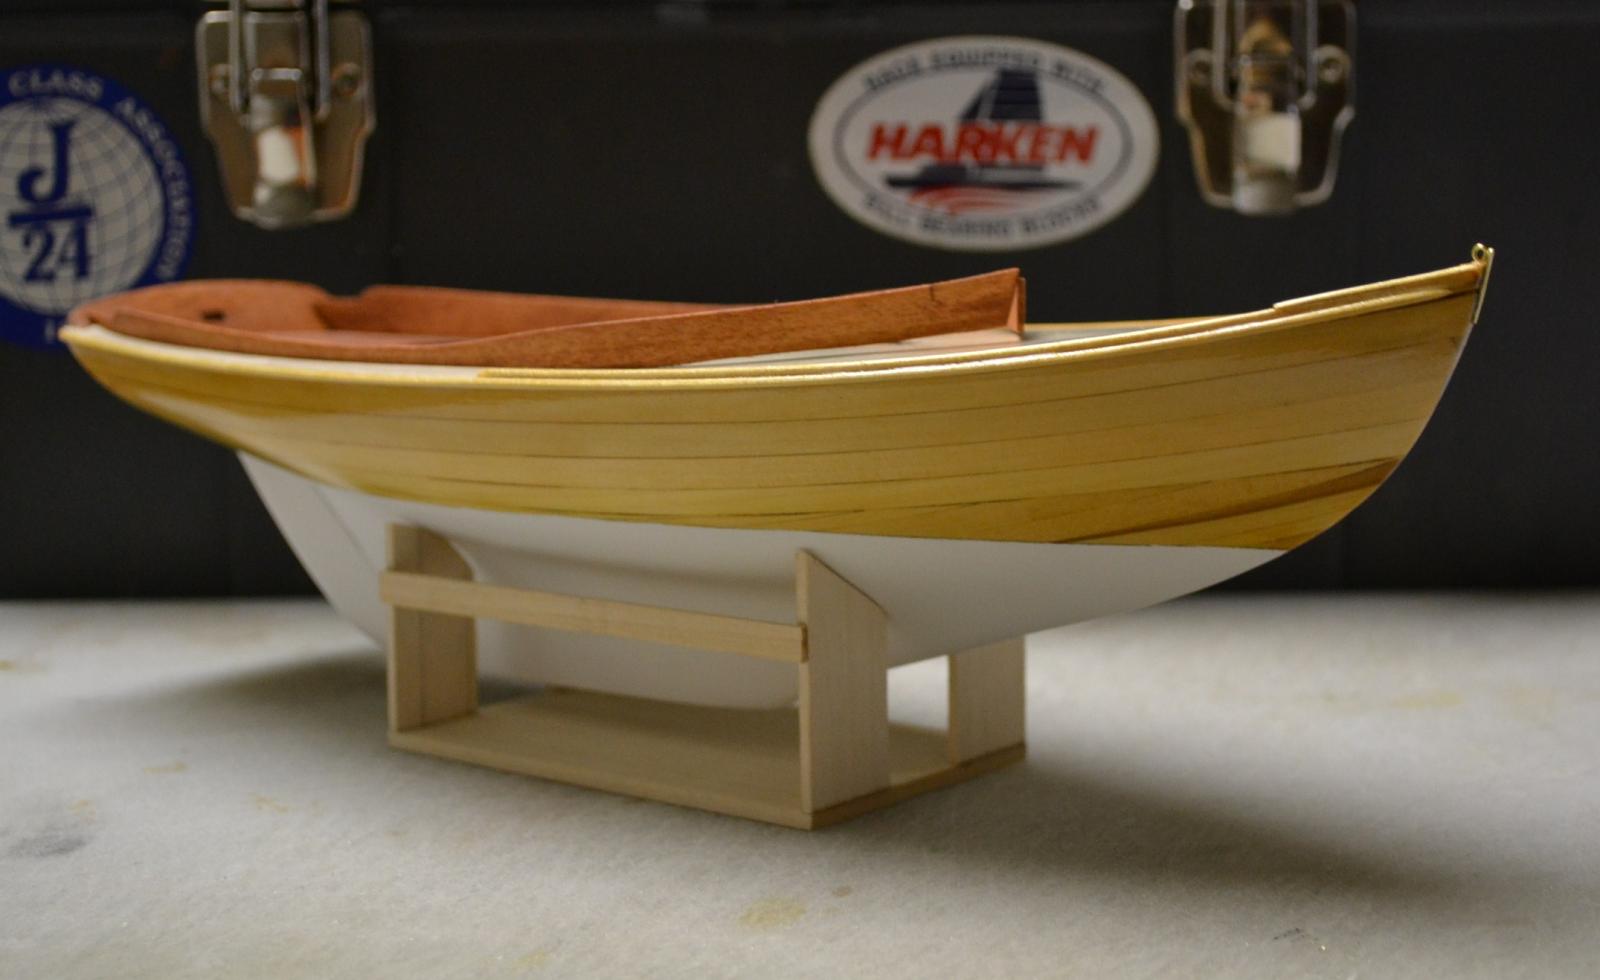
Today, I started with the shaping ( rounding off ) the toe and rub rails. I then sanded them up to 600 grit sandpaper. ( starting with 220 and working my way up to 600 ) I then applied the first coat of varnish to the rub and toe rails along with the rudder blade. I then applied a thin coat of varnish to the Hull to fill the in blend line. Next will be to lightly sand with 600 grit sand paper and add the next coat of varnish, and to start making the Spars ( Mast and Boom ) Here are the results

- Omega1234, captainbob, druxey and 7 others
-
10
-
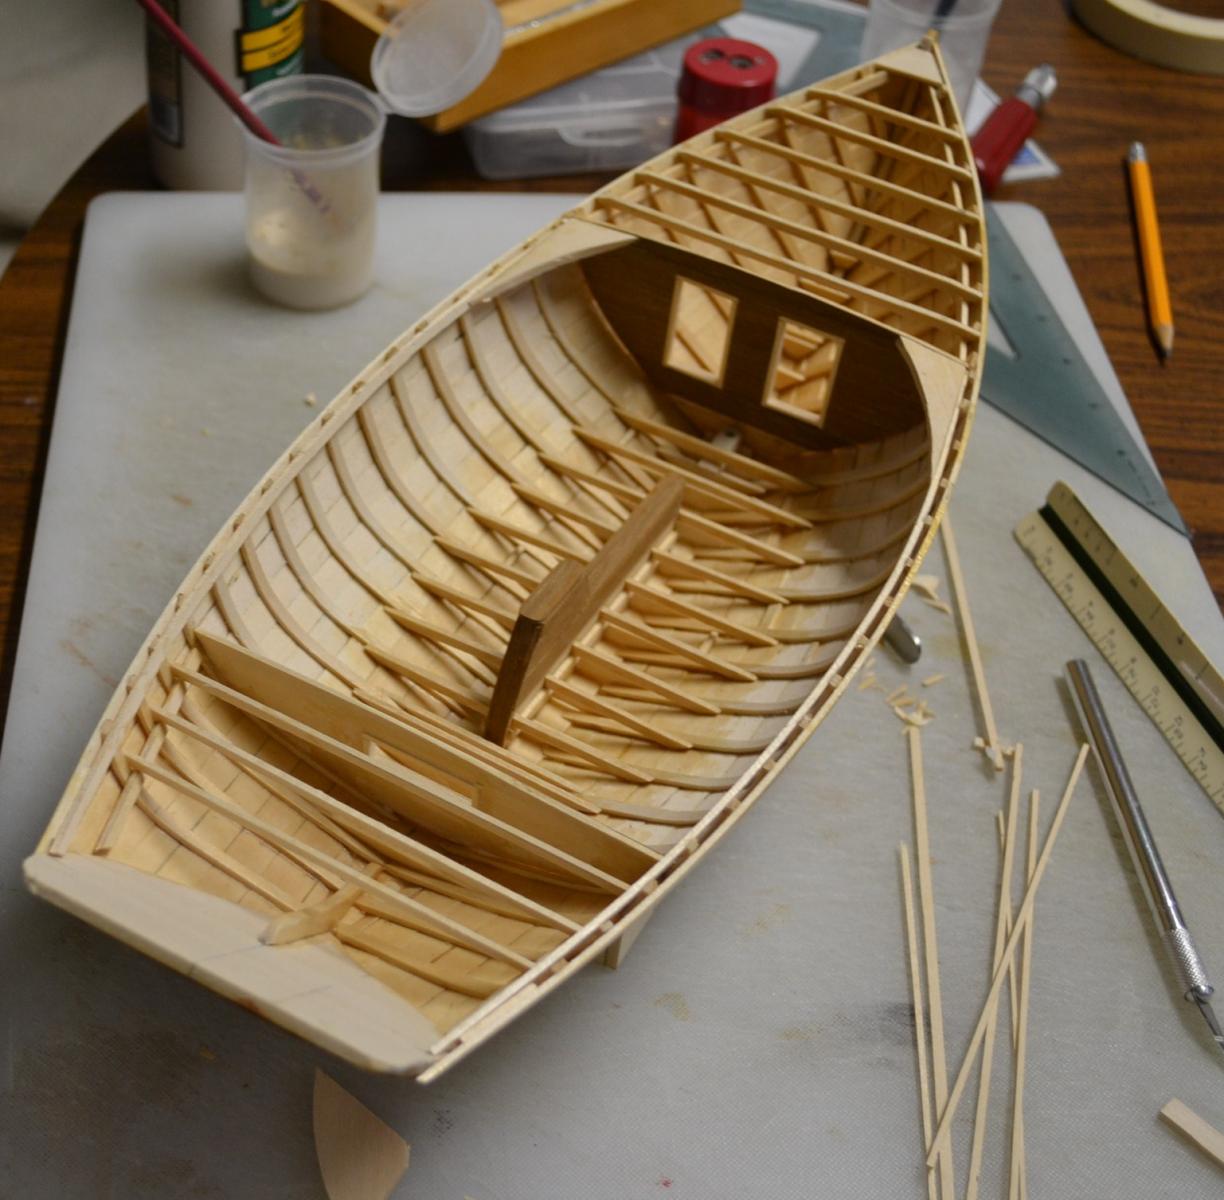
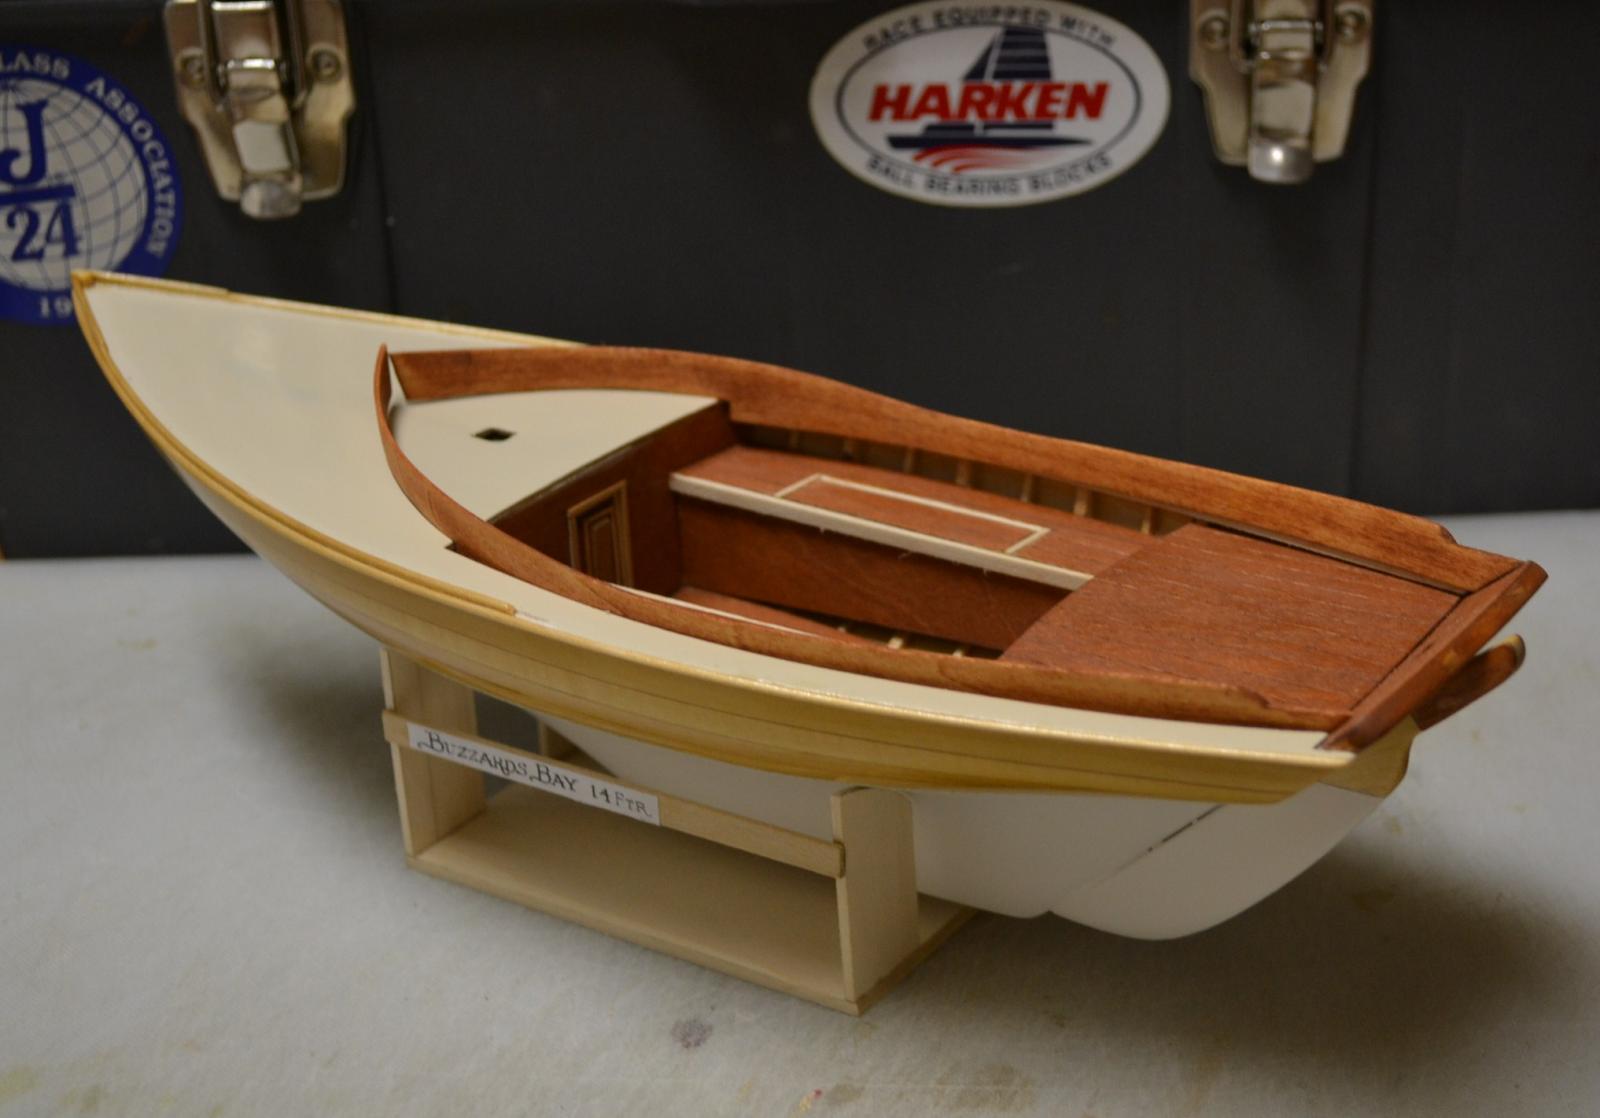
Today, after applying varnish to the Buzzards Bay 14, I concentrated on getting the rear deck beams installed and apply teak to the rear cockpit bulkhead. I started by laying out the access hole in the Bulkhead and then applied teak strips. While that was drying, I laid out the supports for the rear deck beams and installed them. I then installed the beams. I then trimmed the teak off the bulkhead and sanded it to 320 grit sandpaper. the bulkheads and center board box are dry fit. Here are the results
- mtaylor, yvesvidal, michael mott and 5 others
-
8


Sovereign of The Seas by SawdustDave - FINISHED
in - Build logs for subjects built 1501 - 1750
Posted
Just Amazing Dave, That looks incredible
Best Regardsd,
Pete