


Glenn-UK
-
Posts
3,005 -
Joined
-
Last visited
Content Type
Profiles
Forums
Gallery
Events
Posts posted by Glenn-UK
-
-
-
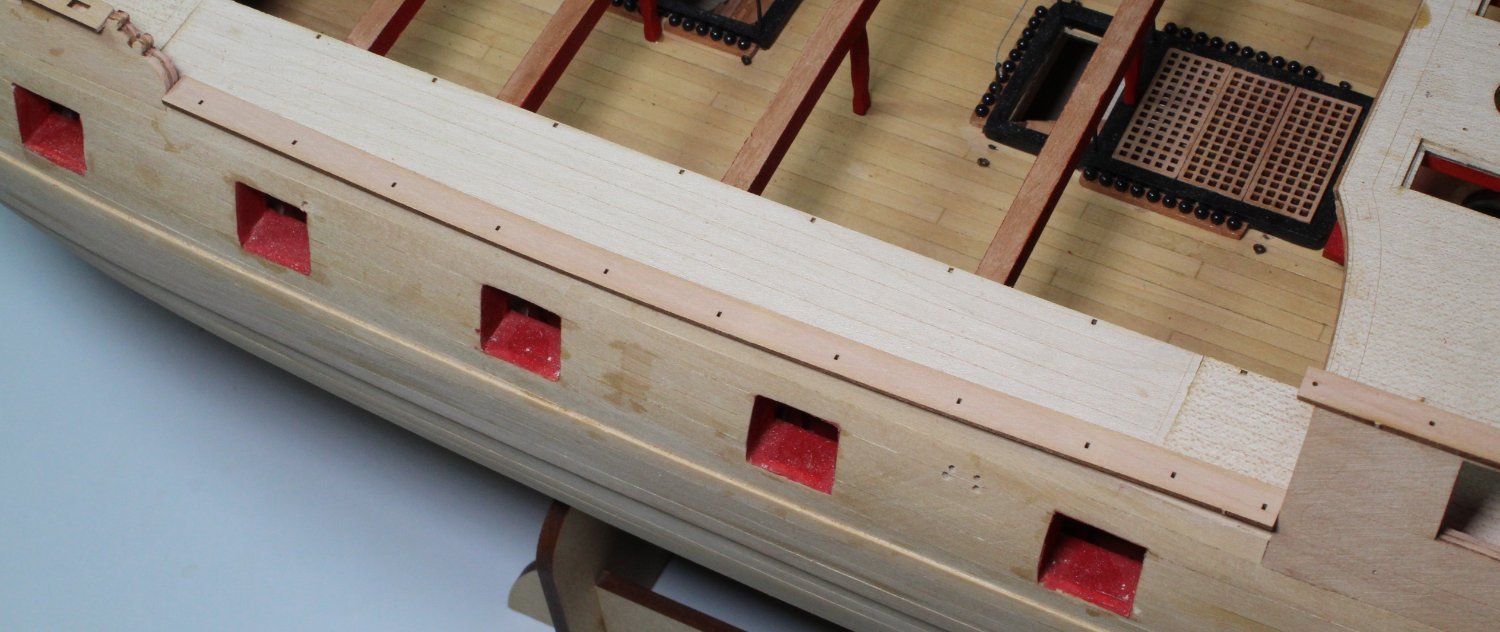
Gangway Gunwales
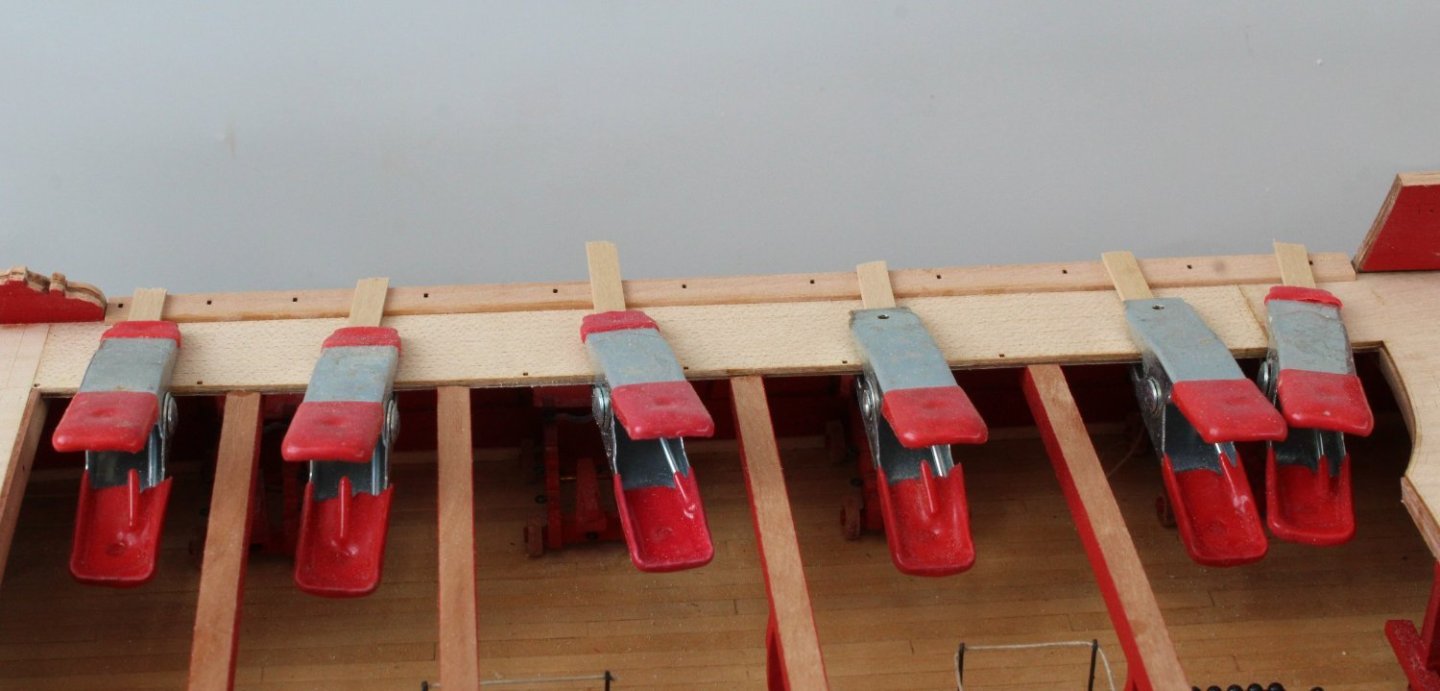
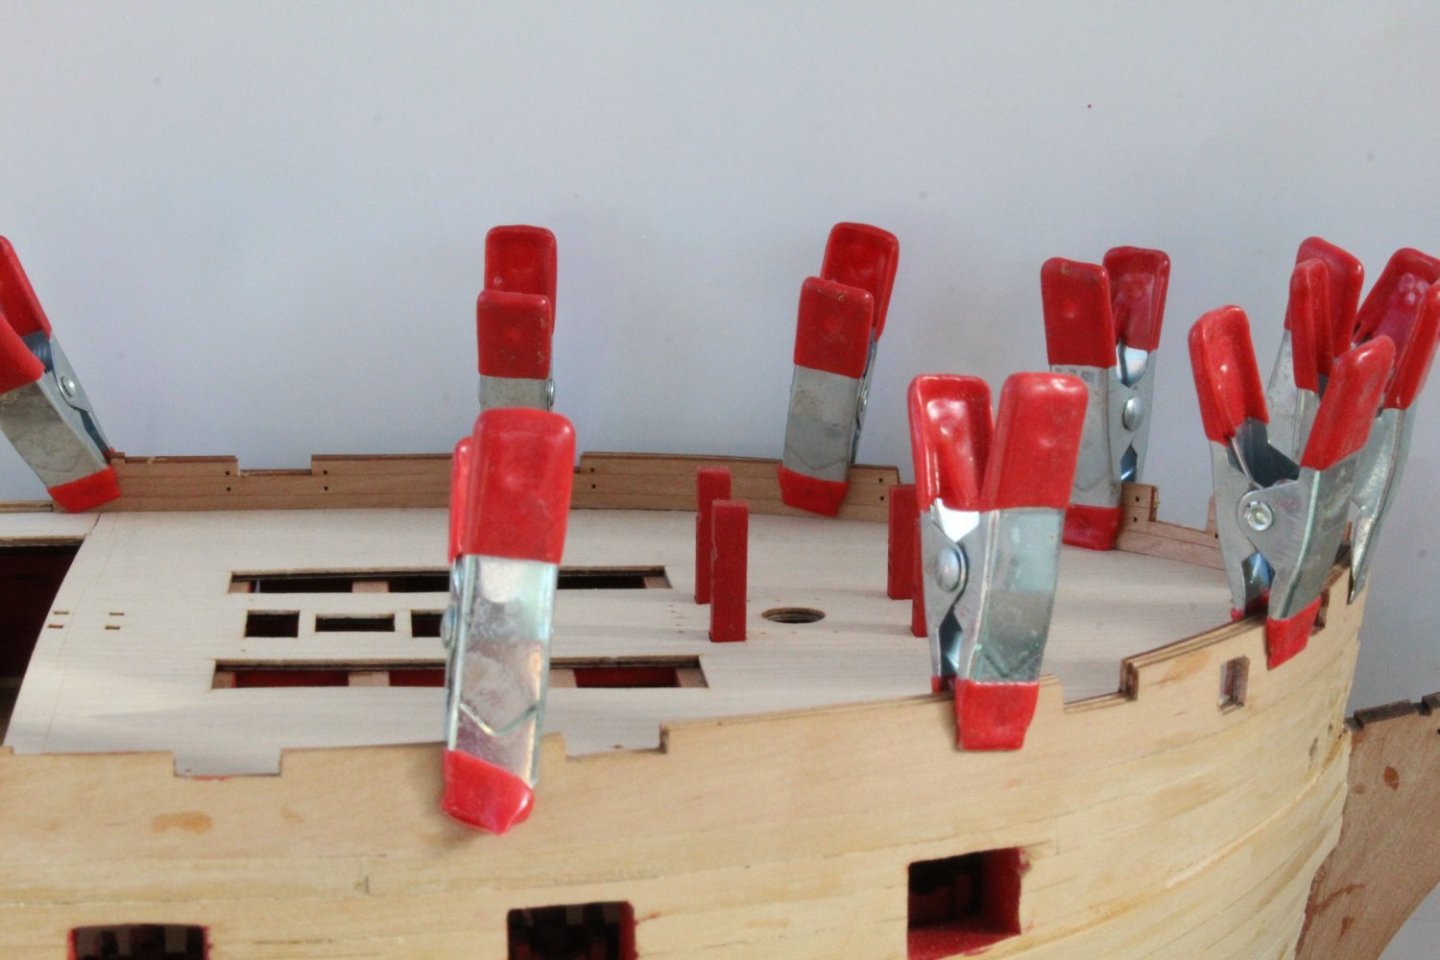
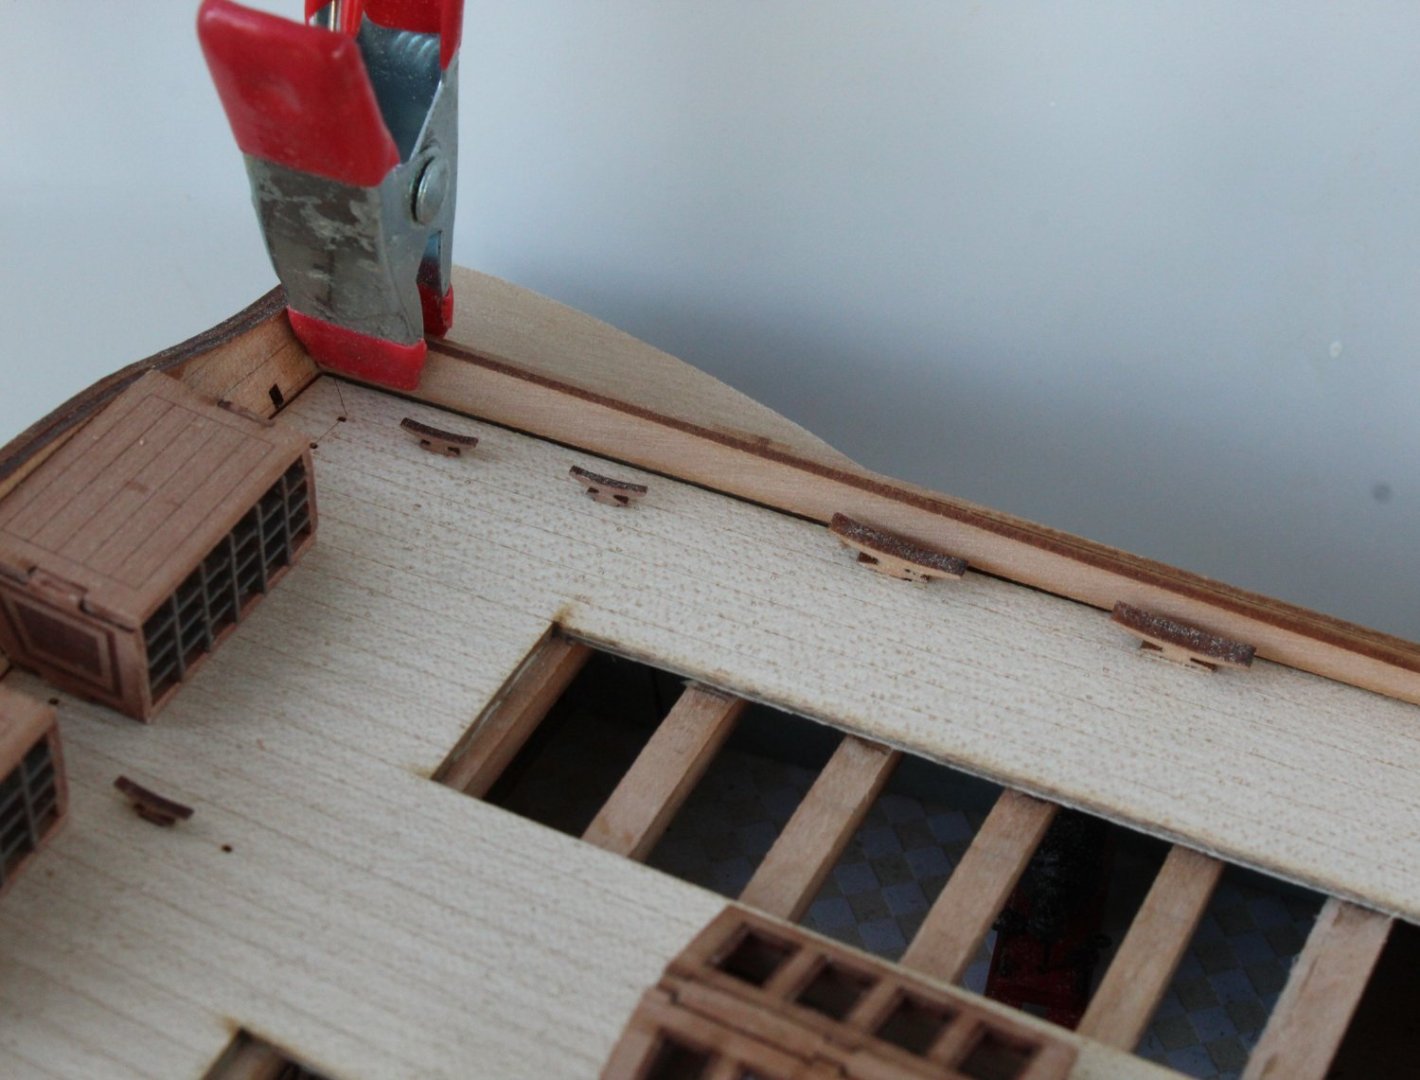
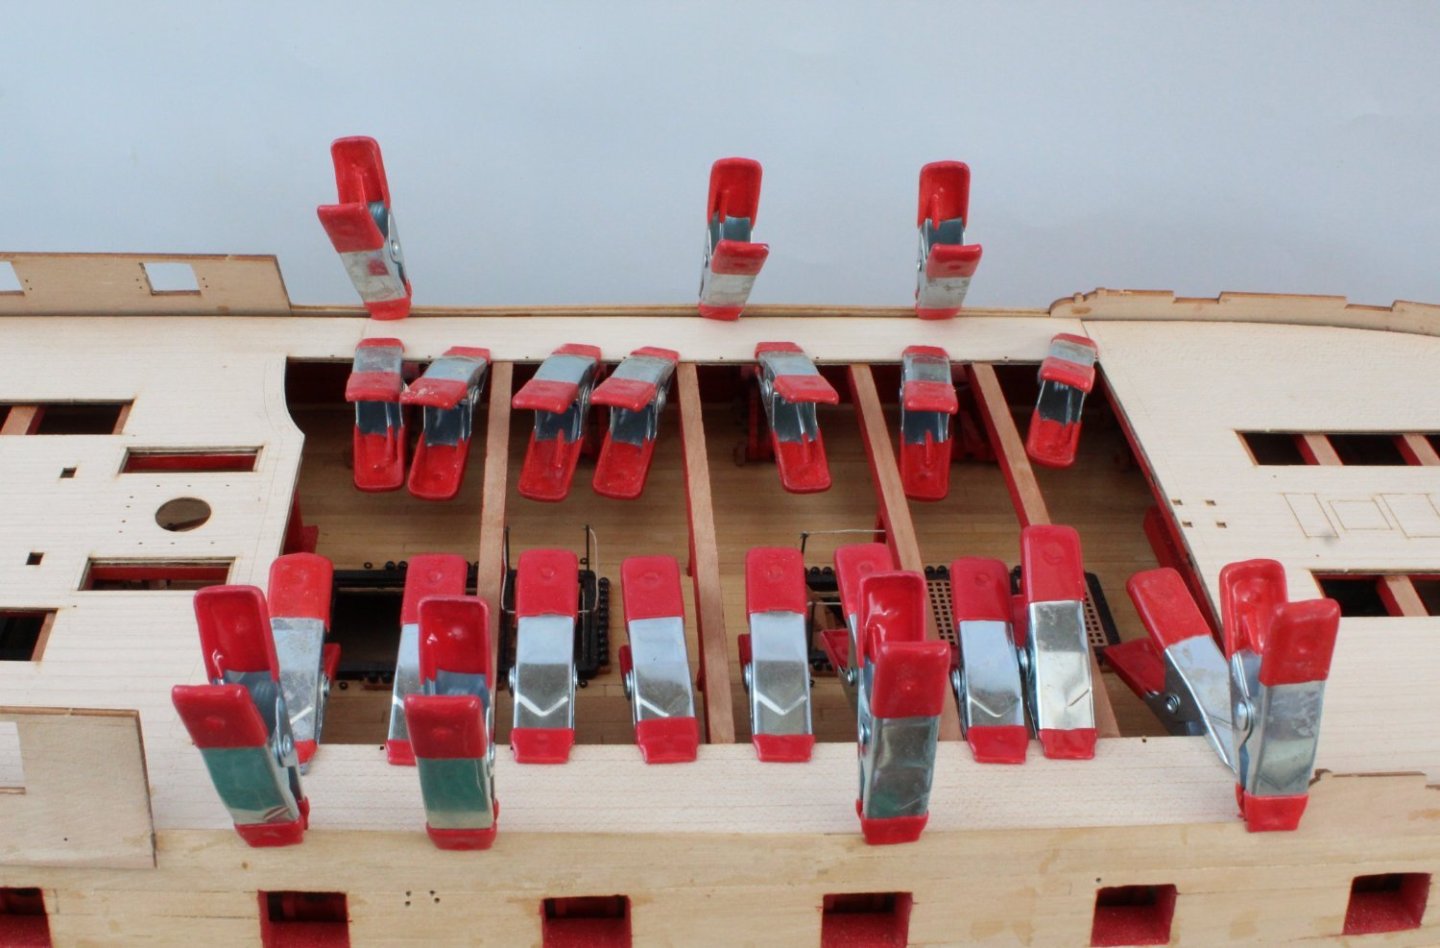
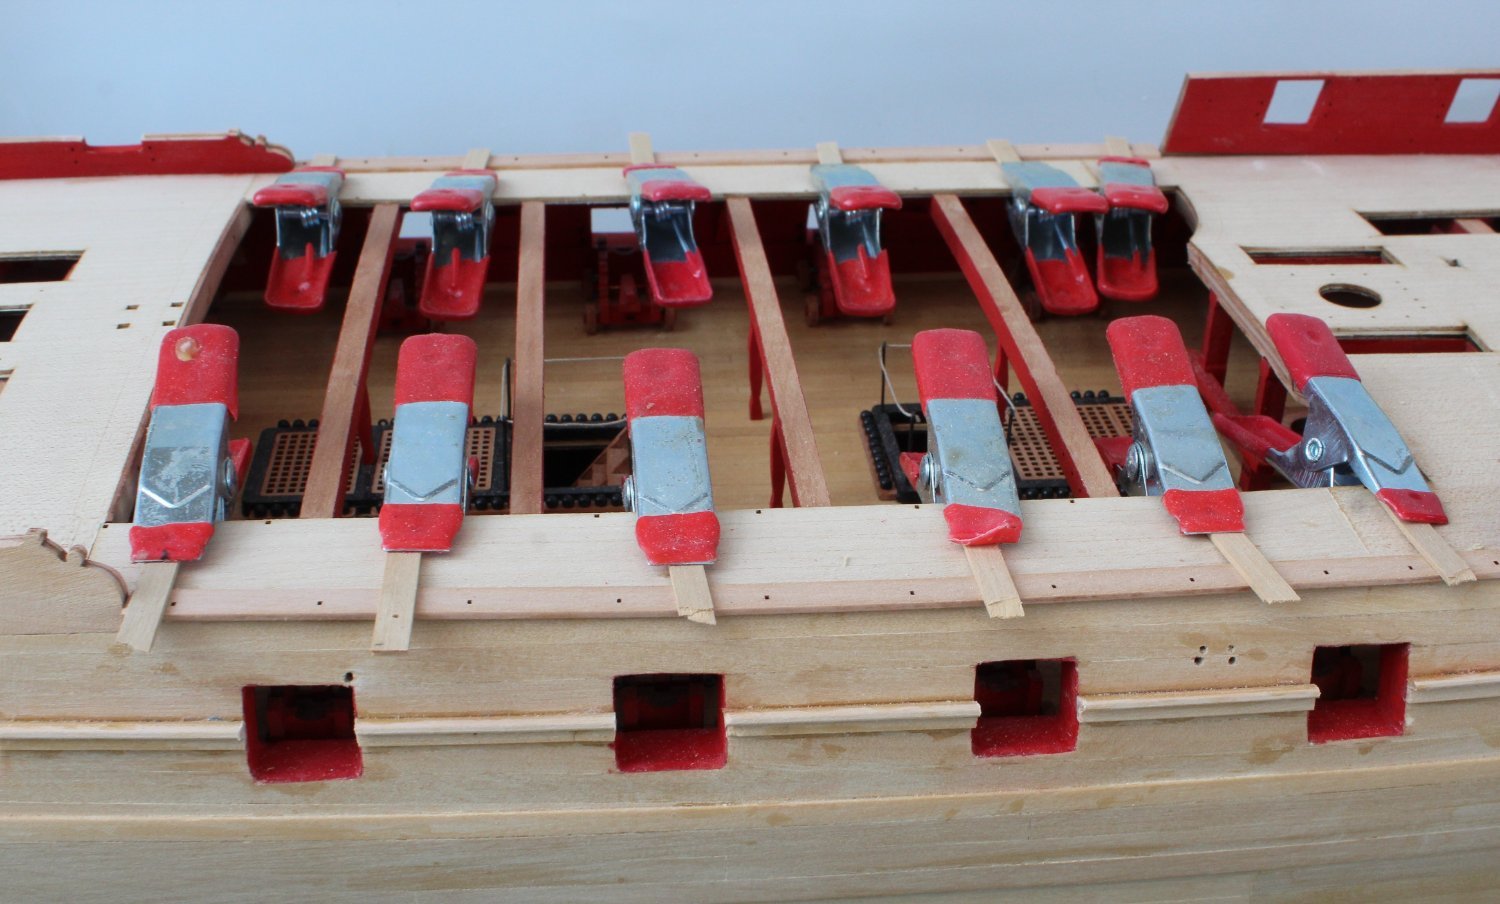
The next task, according to the build manual, was to add the gunwales to the gangway section of the deck. The sides of the hull had already been sanded flush to the deck level. The gunwales were glued in place and to ensure they were held in place as the glue cured I found a simple way to clamp them using some short plank lengths. This can be seen in the photo's below.

3D Hull Patterns
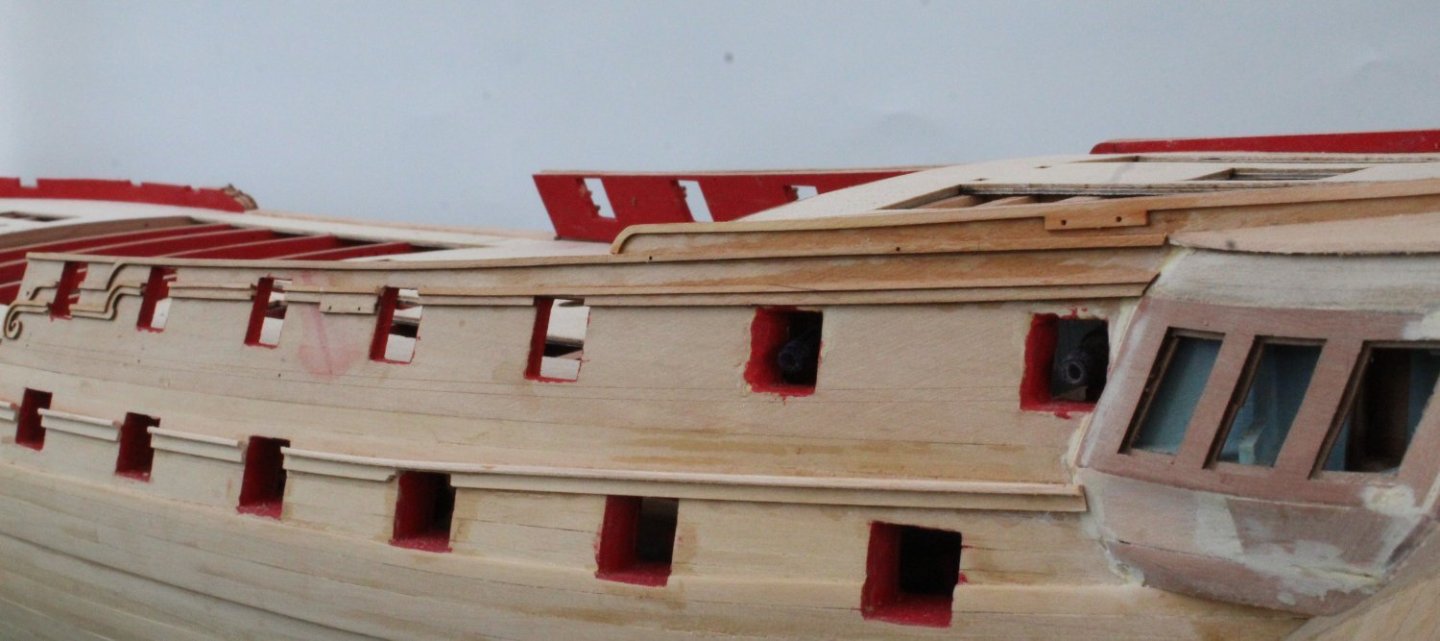
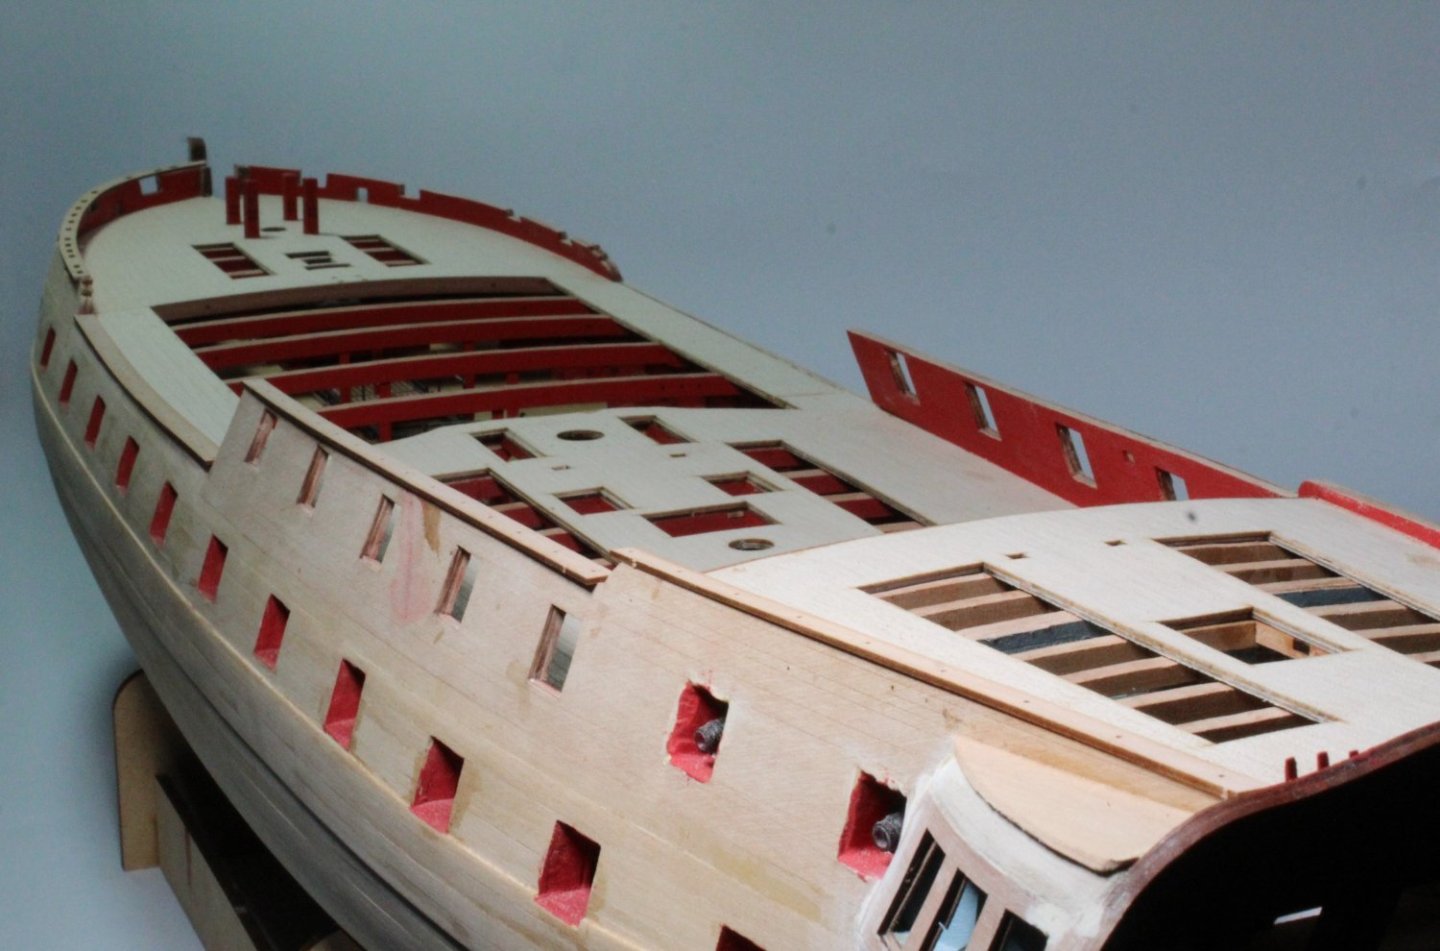
The next task was to add the various 3D hull patterns. These consist of a set of 1mm pear wood patterns and a set of 0.6mm pear wood patterns which will sit on top of the 1mm patterns.
There are guide lines on the bulwarks to ensure these patterns are correctly positioned. I have added a section of photo's of these patterns in situ.

-
-
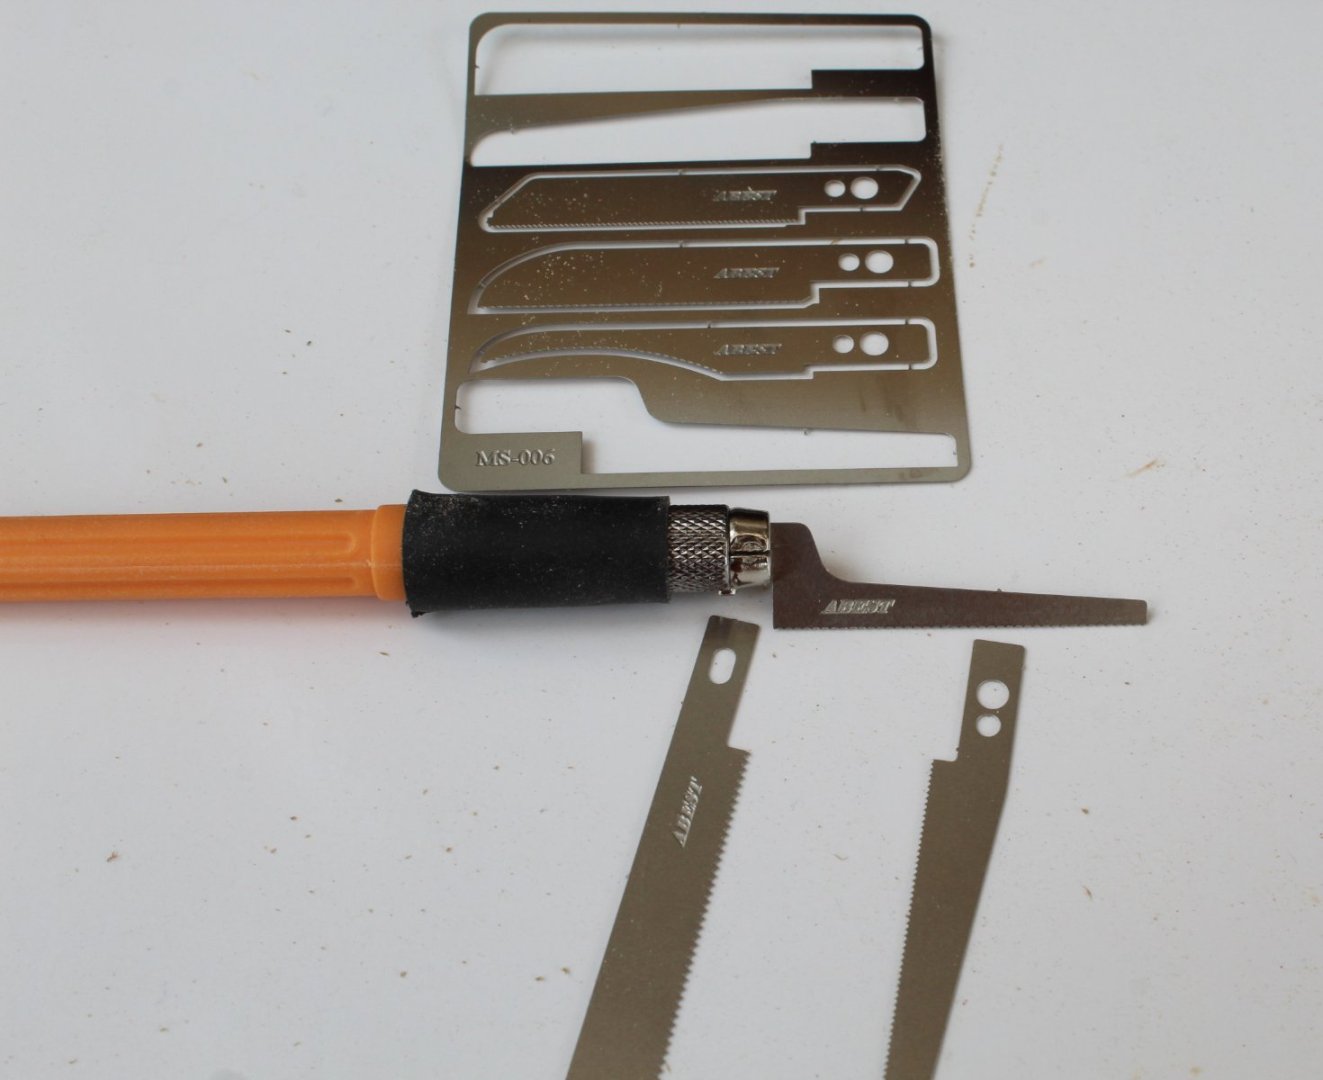
A New Tool
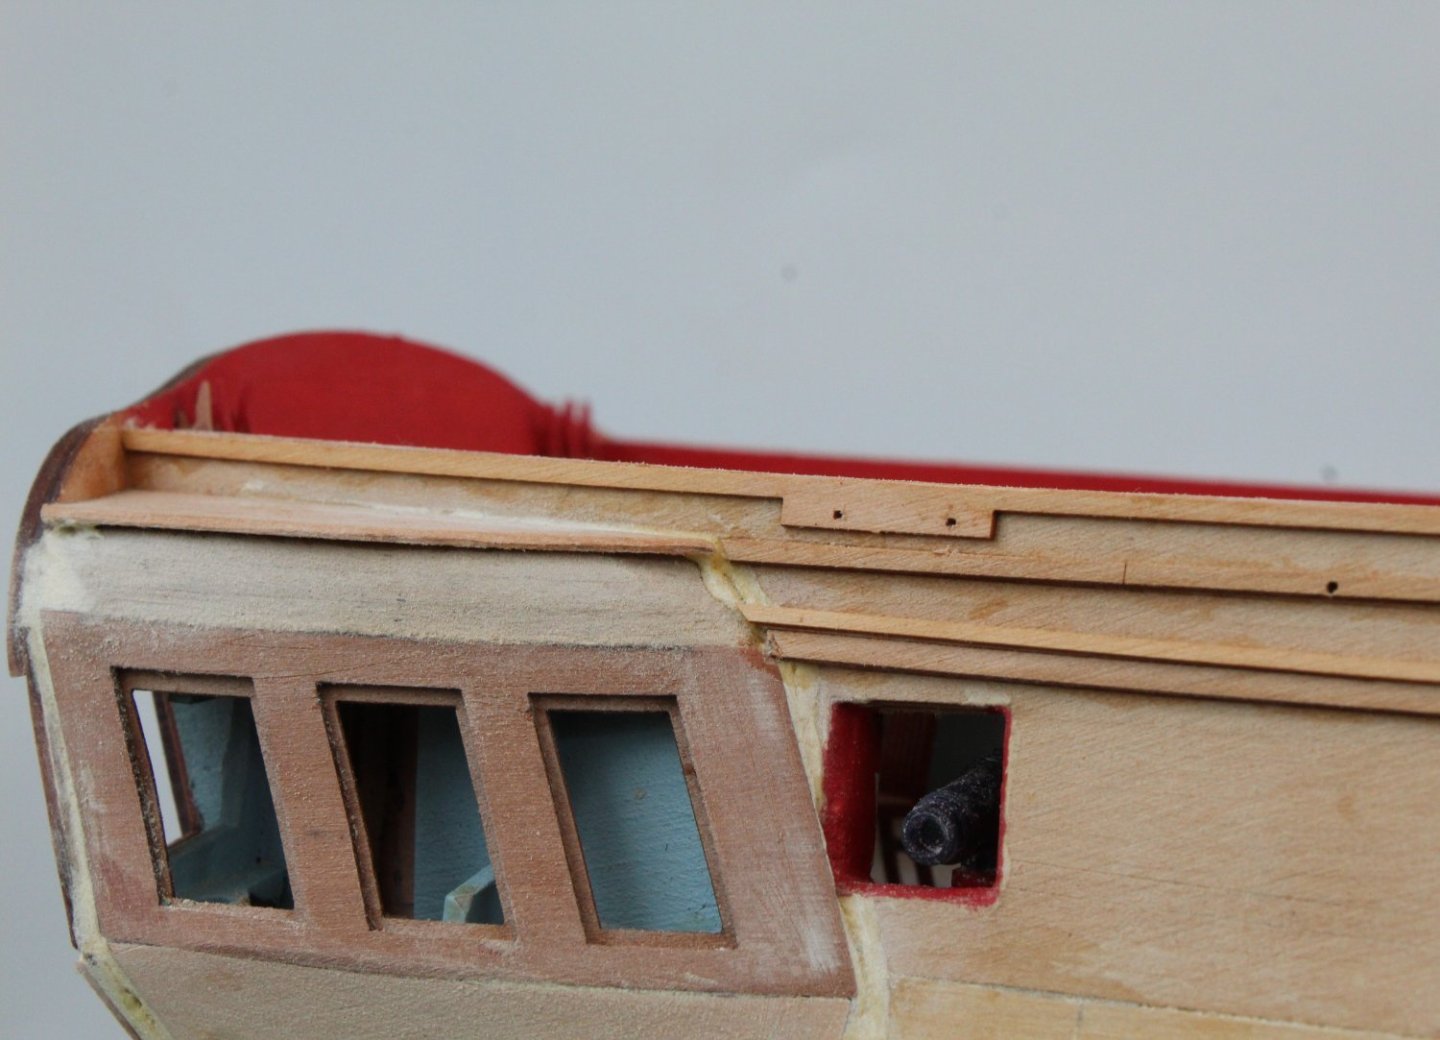
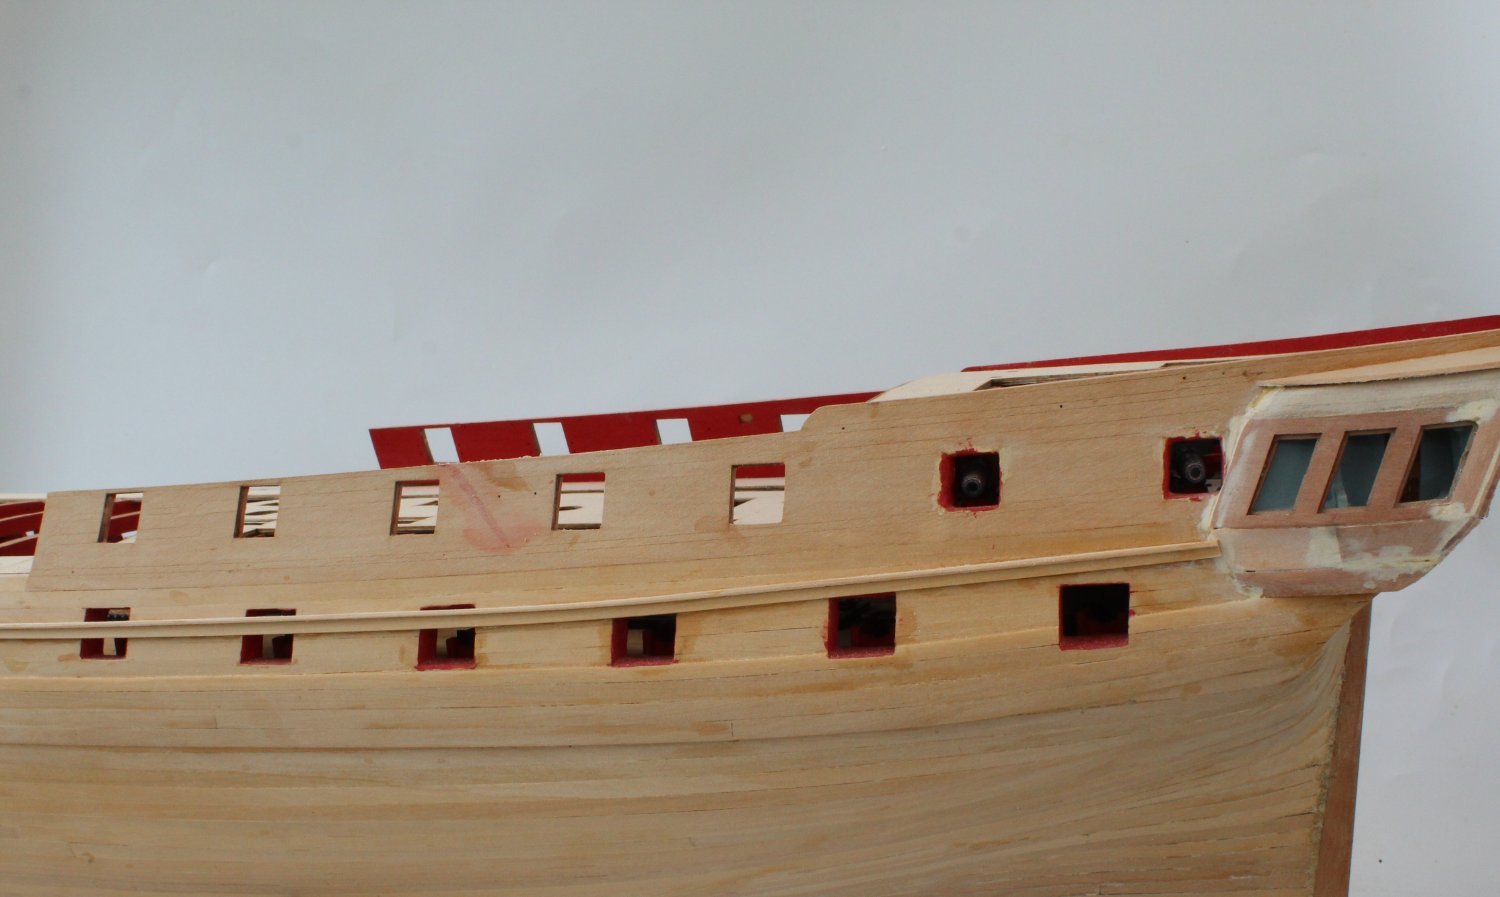
I thought it may be an idea to get a small mini saw for trimming the hull rails between the gun ports. I ended up buying the Magicrose mini hand saw (from Amazon), which arrived with a selection of different sized saw blades.
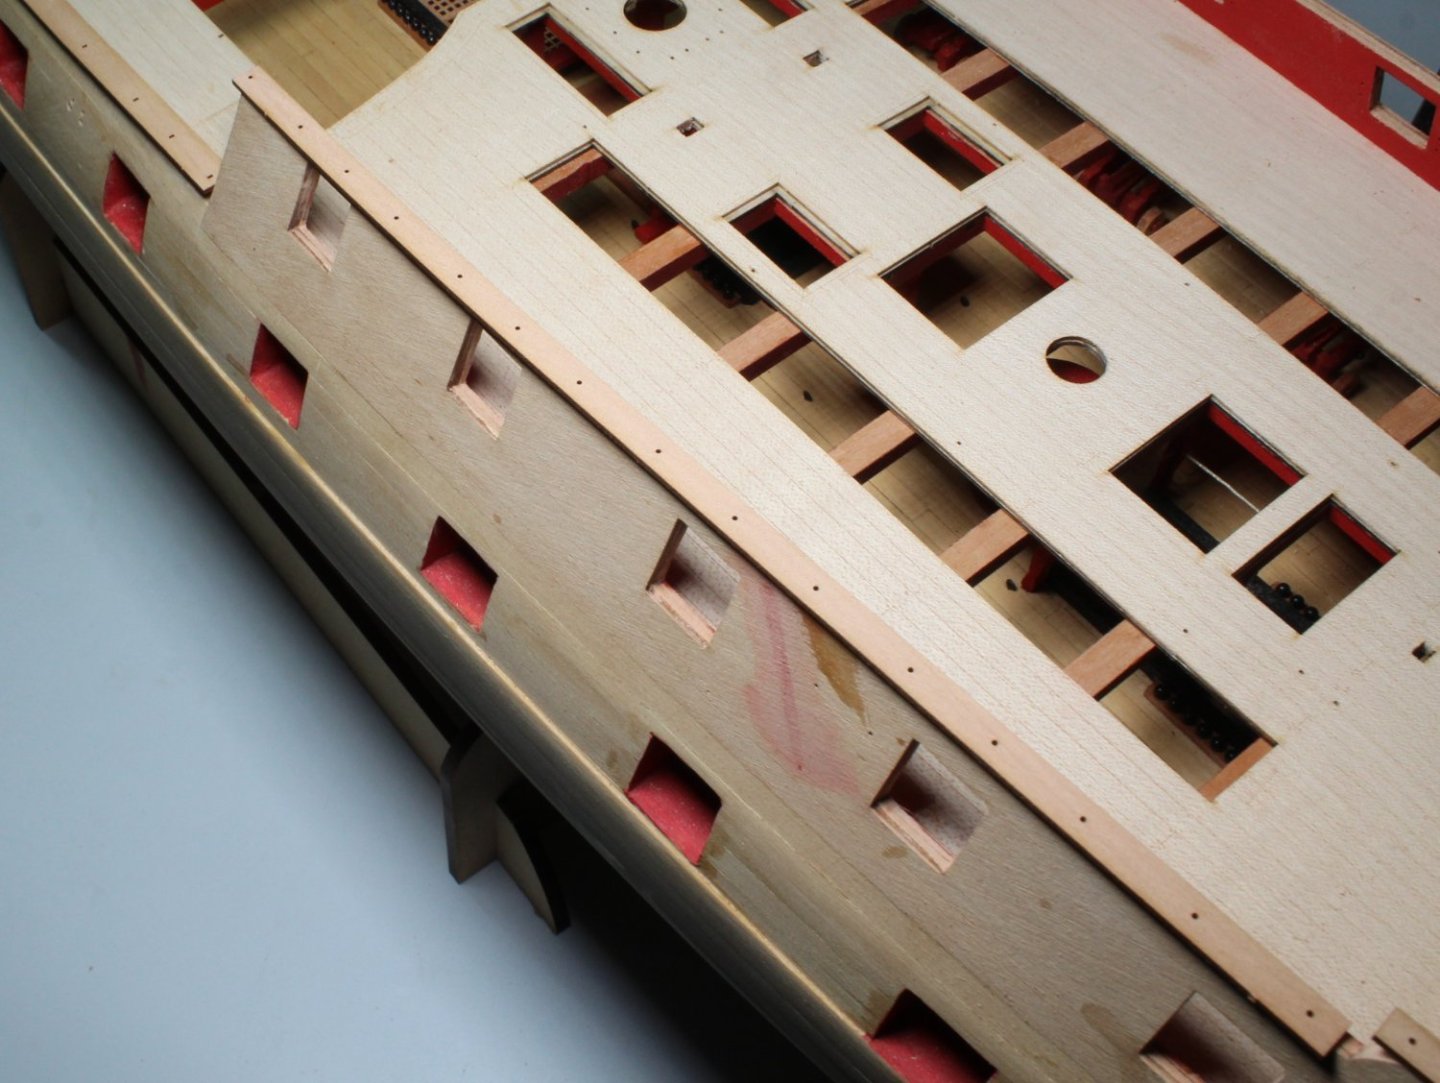
With a suitable saw blade fitted I used the hand saw to trim the material over the first gunport. The tool turned out to be a winner, noting the rail edges will require a light sand and the gunport sides will require a paint touch up.
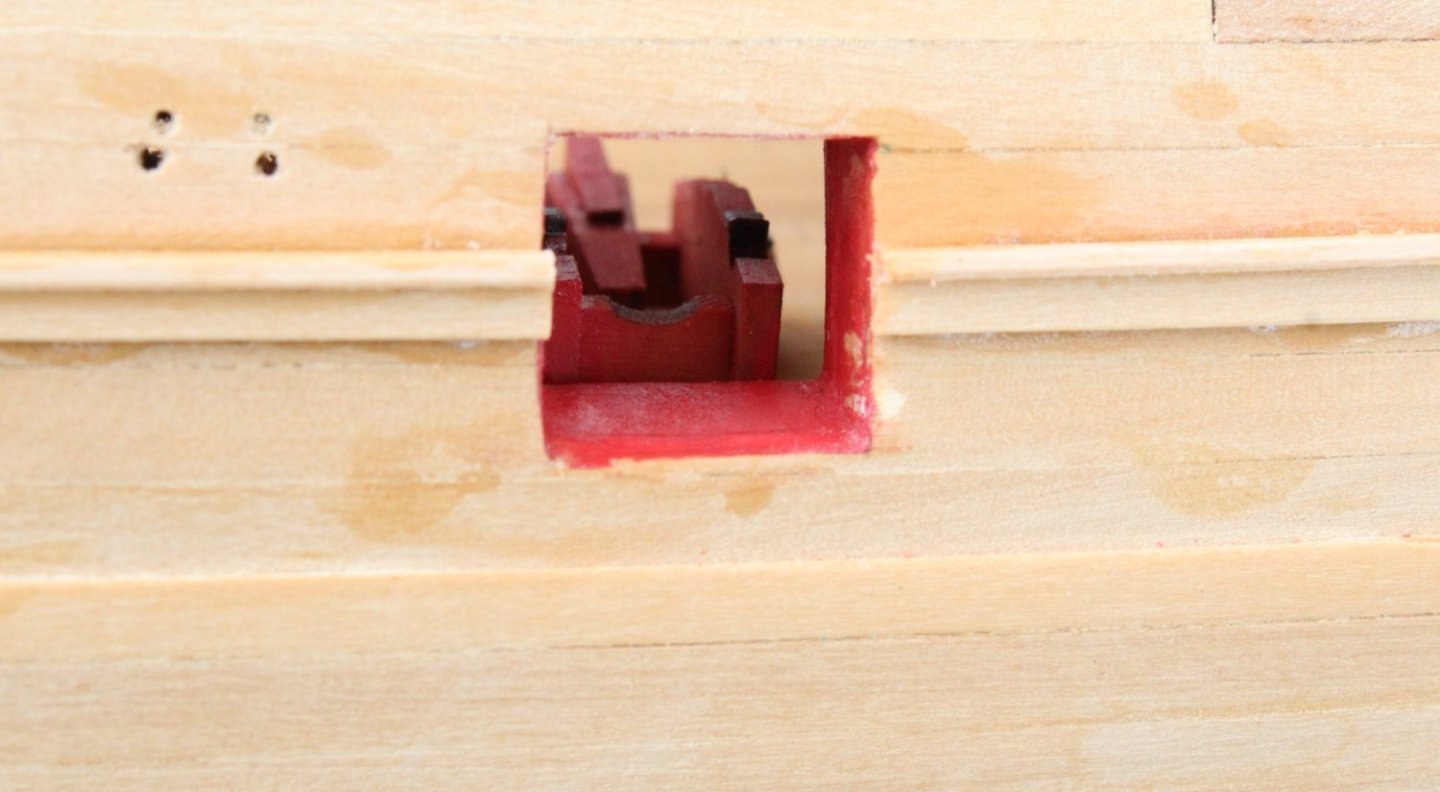
Taking my time each gun port was cleared in turn, using the mini hand saw. You will note that I have also painted the upper quarterdeck gunports.
-
Enjoy your well earned holiday, you deserve a break

- AJohnson, thibaultron, dunnock and 4 others
-
 7
7
-
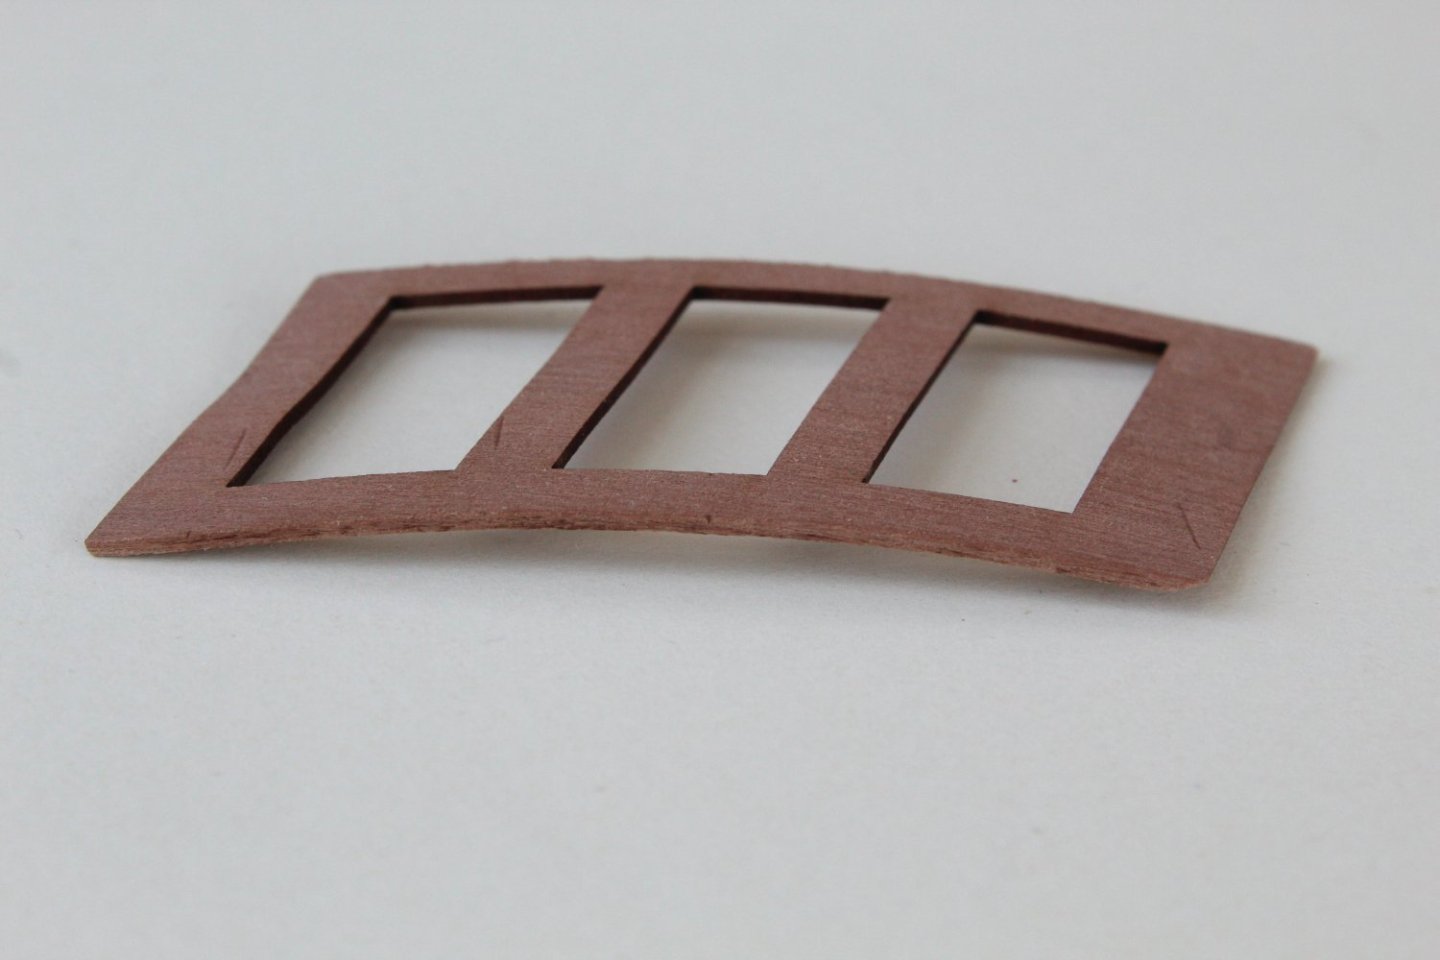
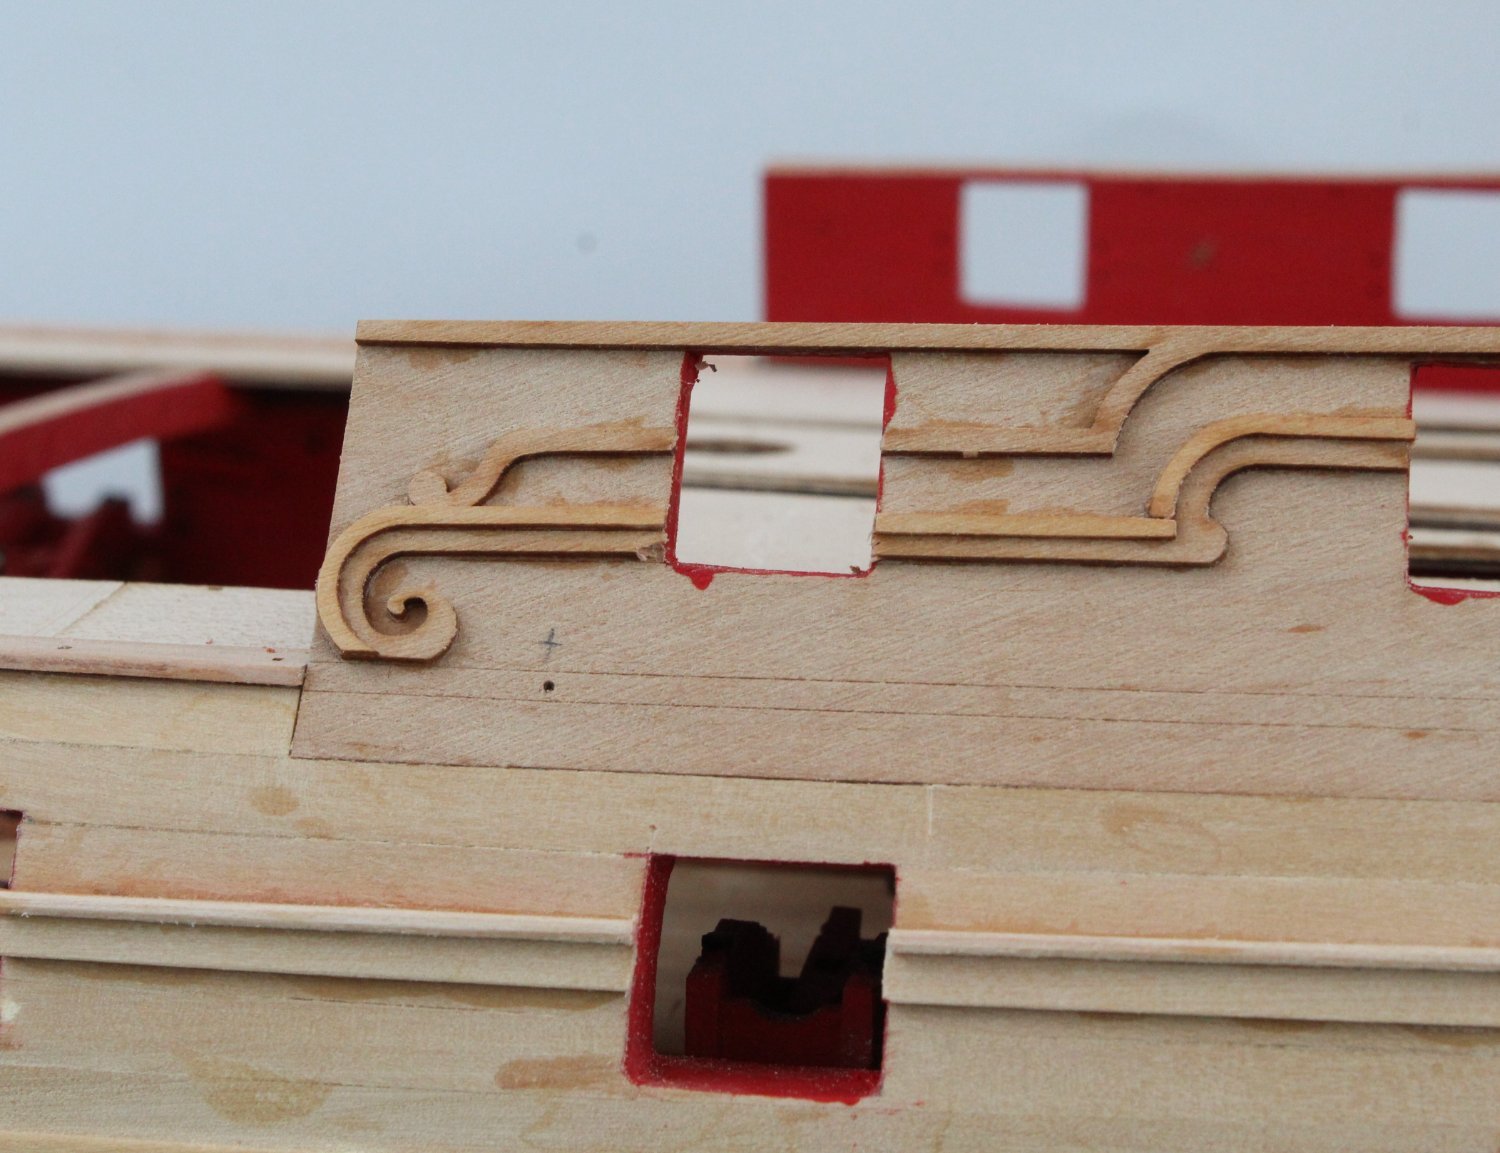
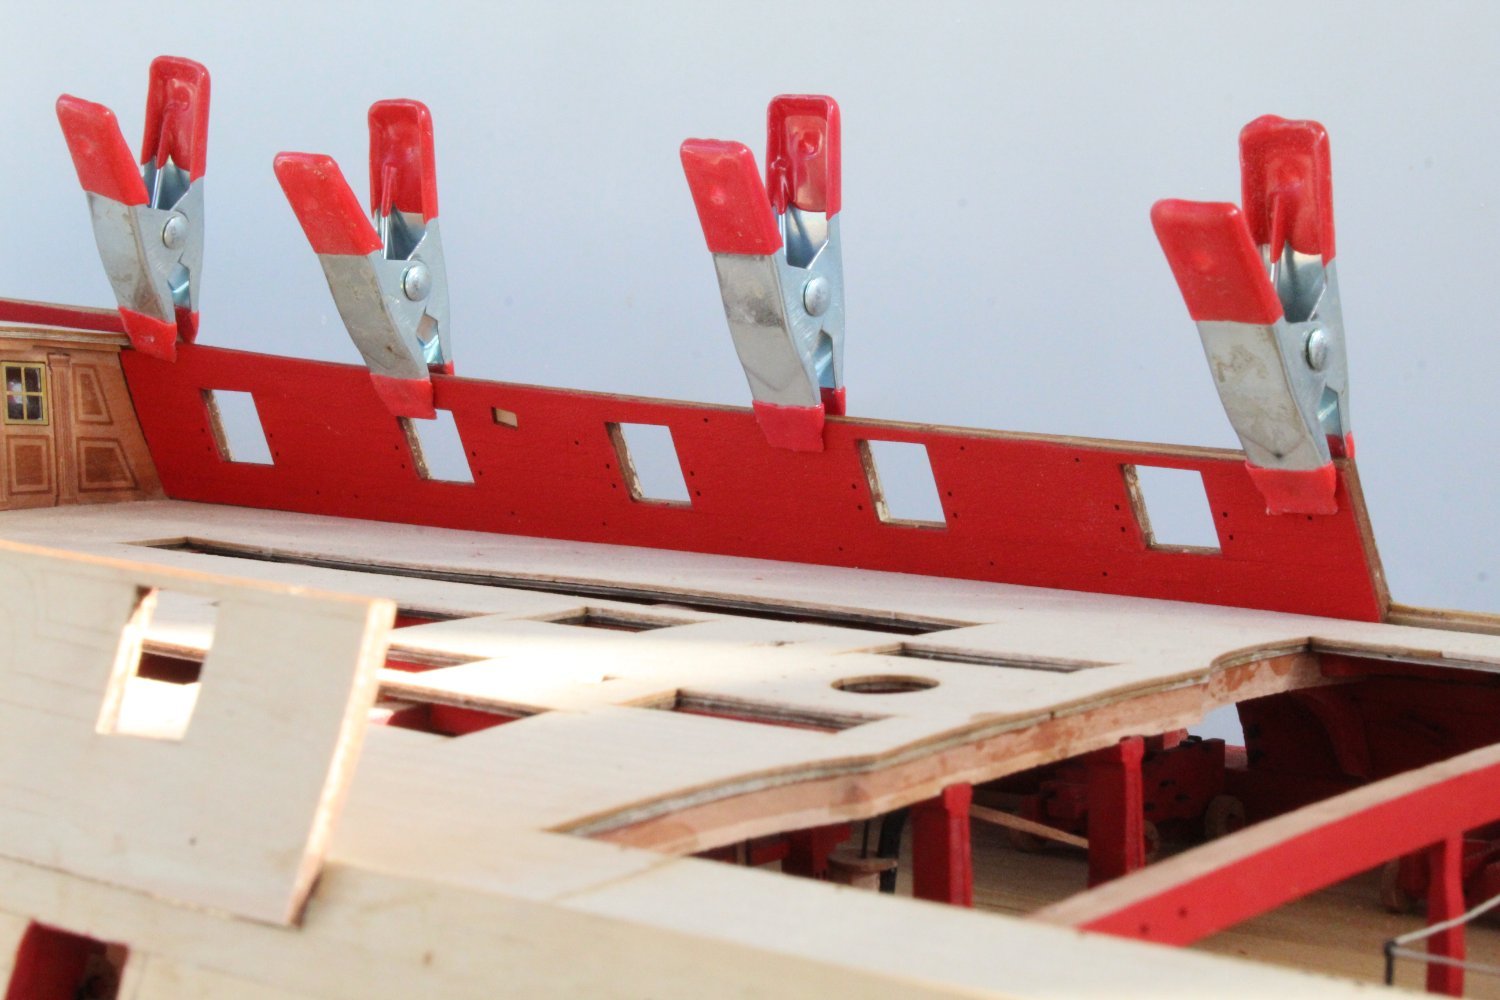
Quarterdeck Front Fascia Pattern
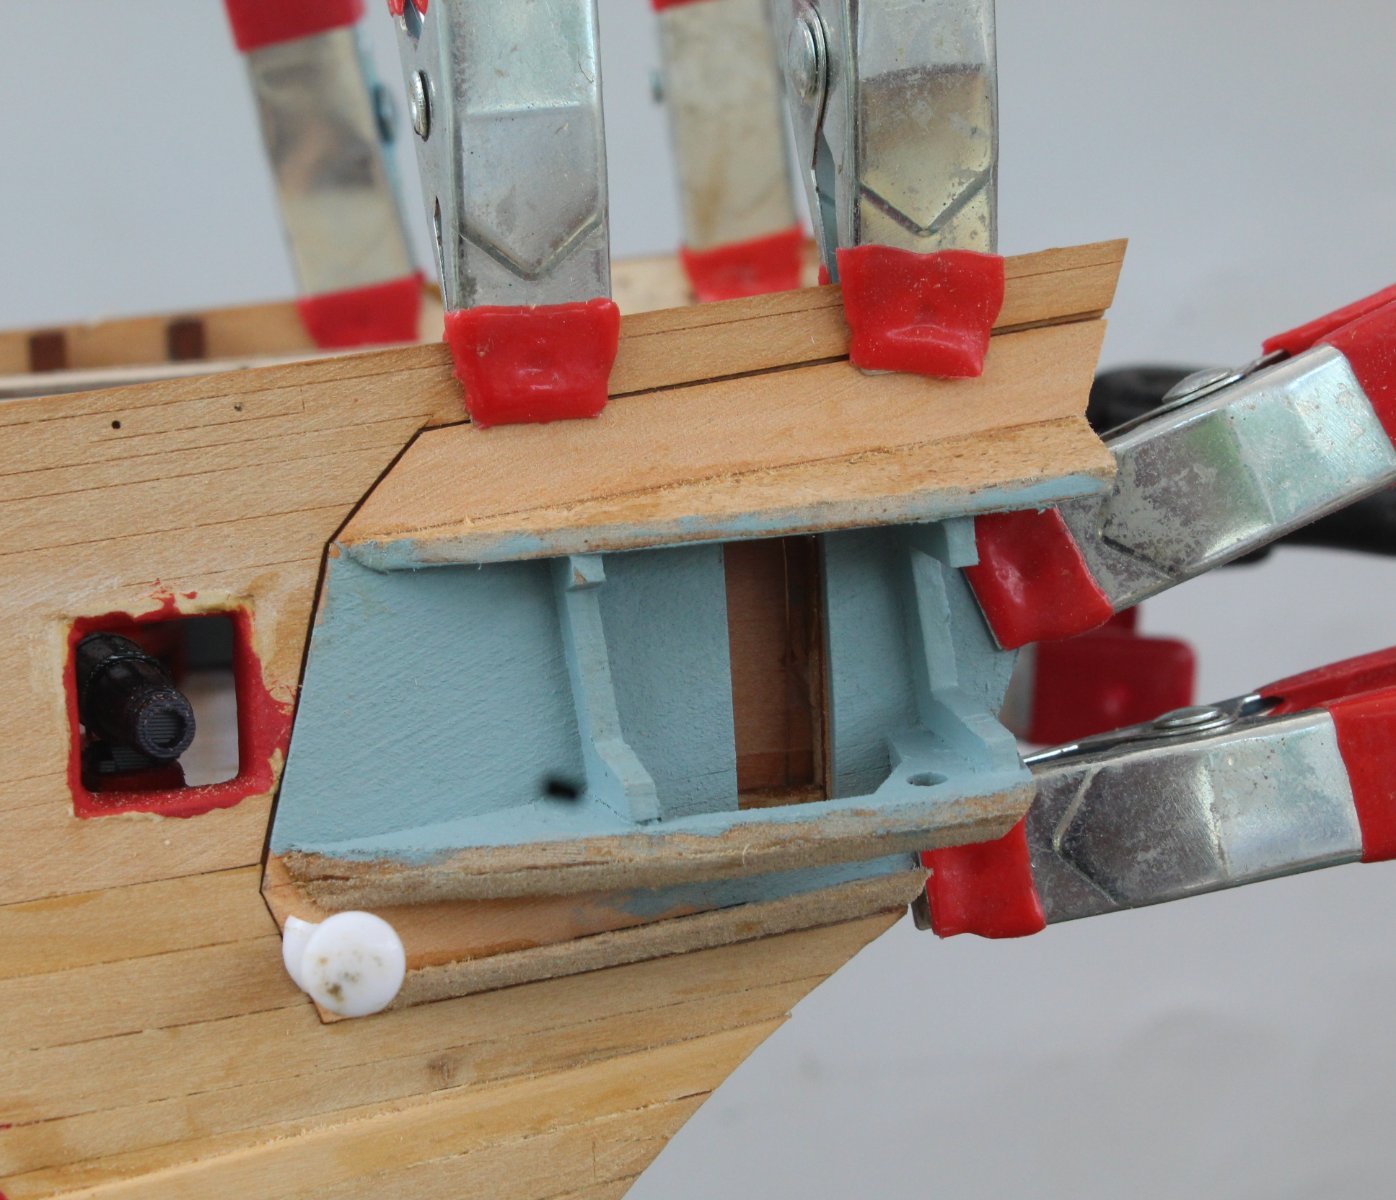
As reported in my last post I was not very happy with how the left hand side fascia pattern was fitted. I brushed some warm water in the joint area and taking great care I was able to gently release the pattern without causing any damage.
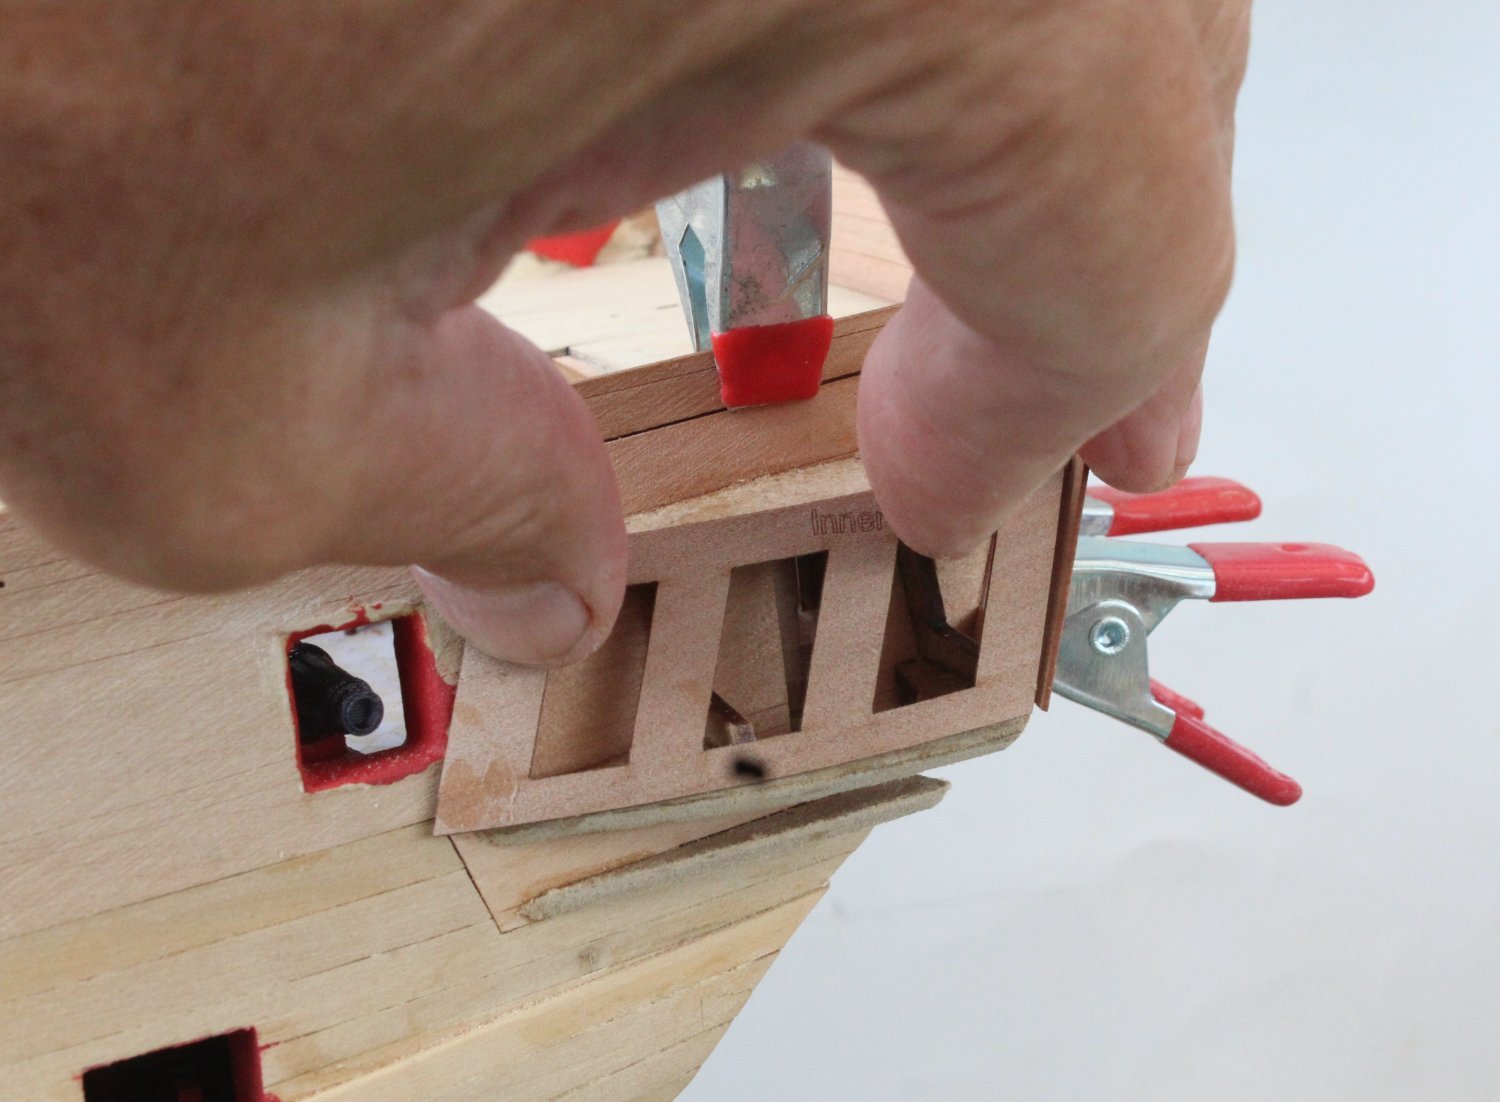
On the first attempt to refit the pattern I noticed it was not sitting as I wanted when the clamps were added. After a little bit of thought I came up with a different clamping method, as shown in photo below, the part was refitted.
With the clamps removed I was much happier with how the quarterdeck fascia patterns looked.

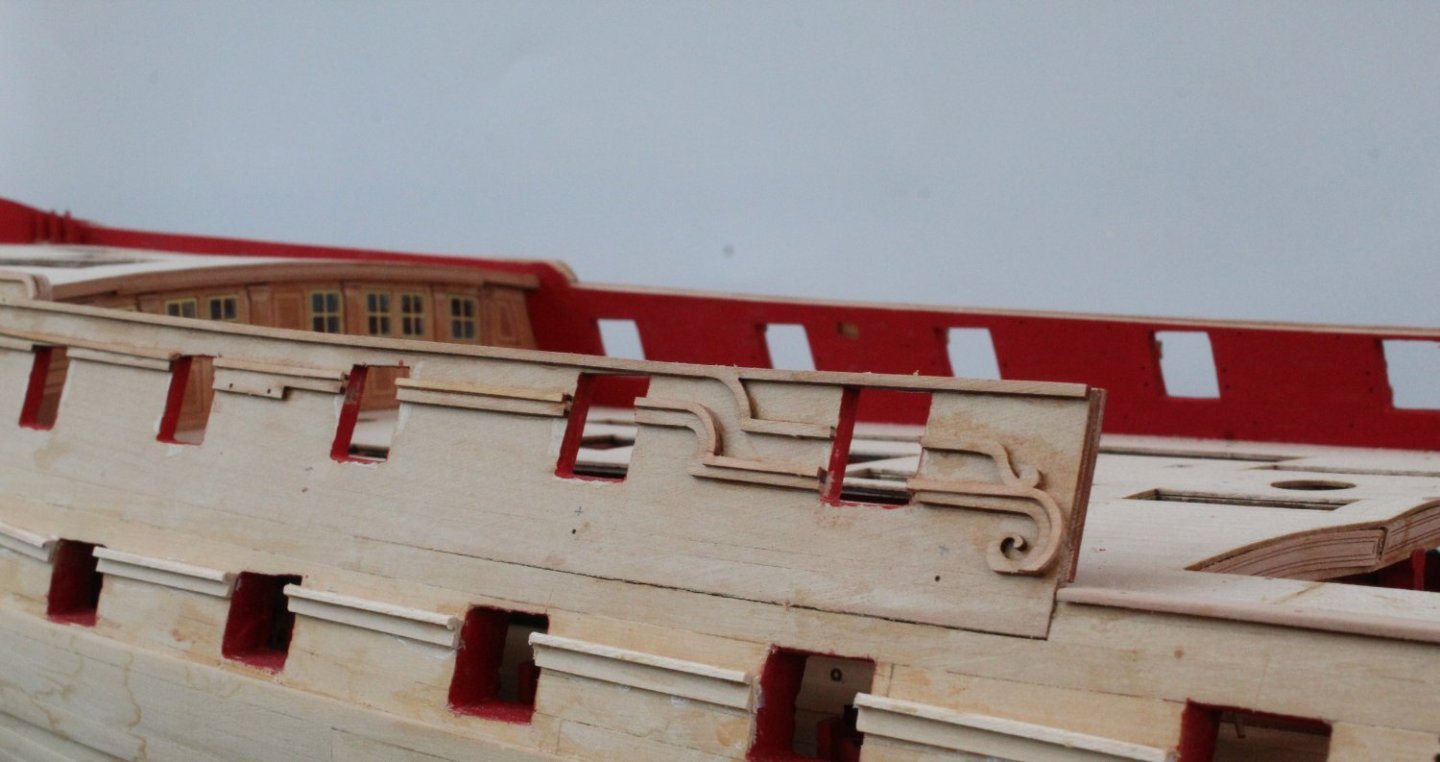
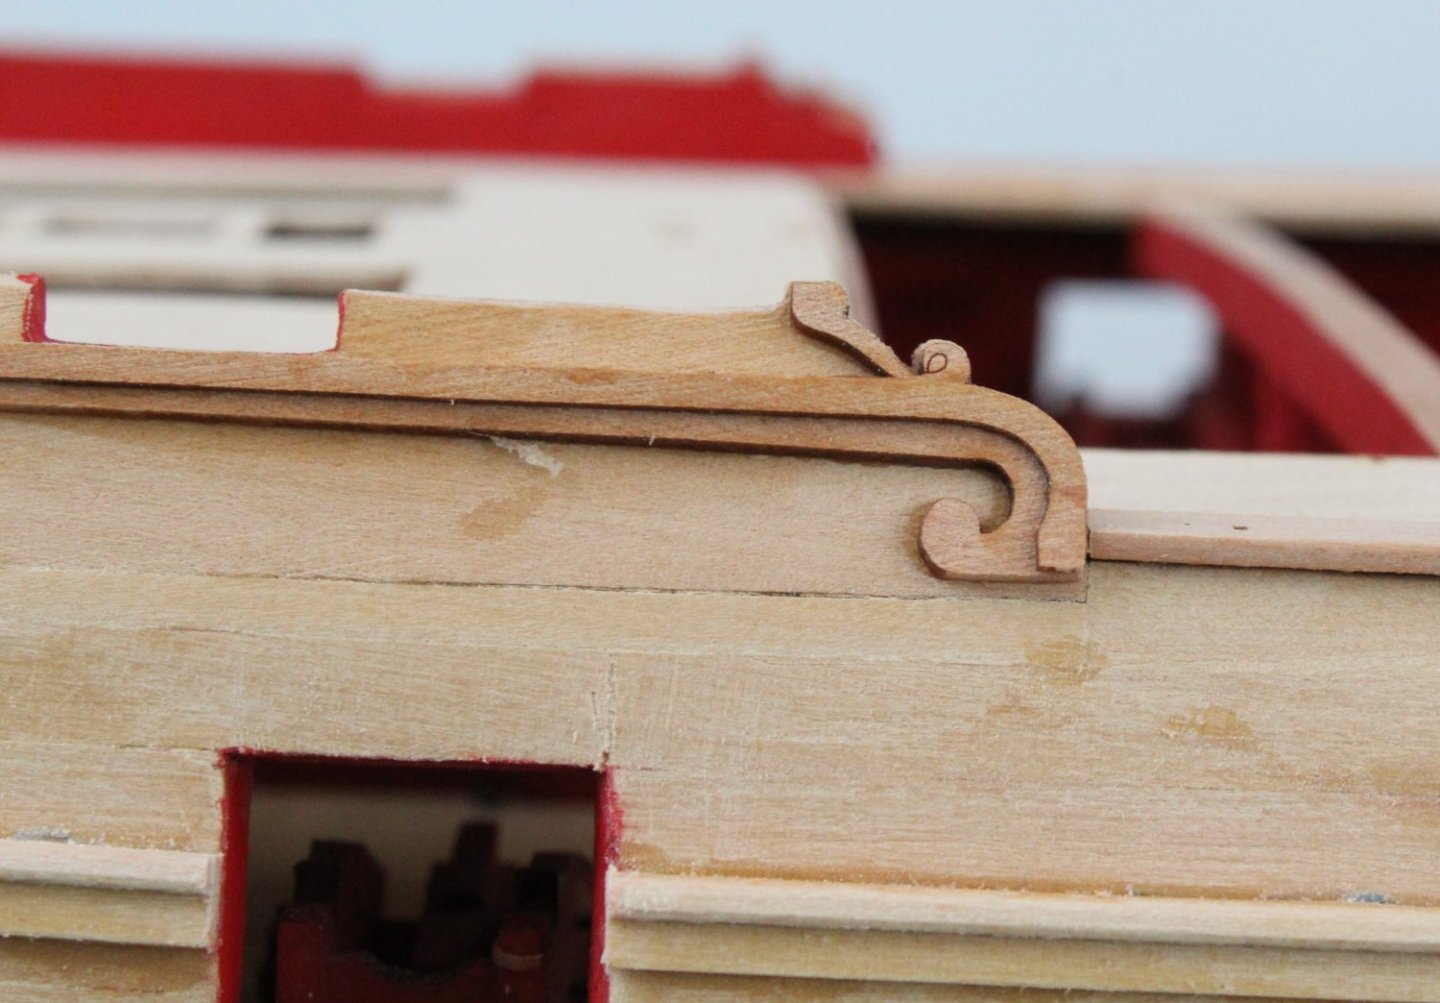
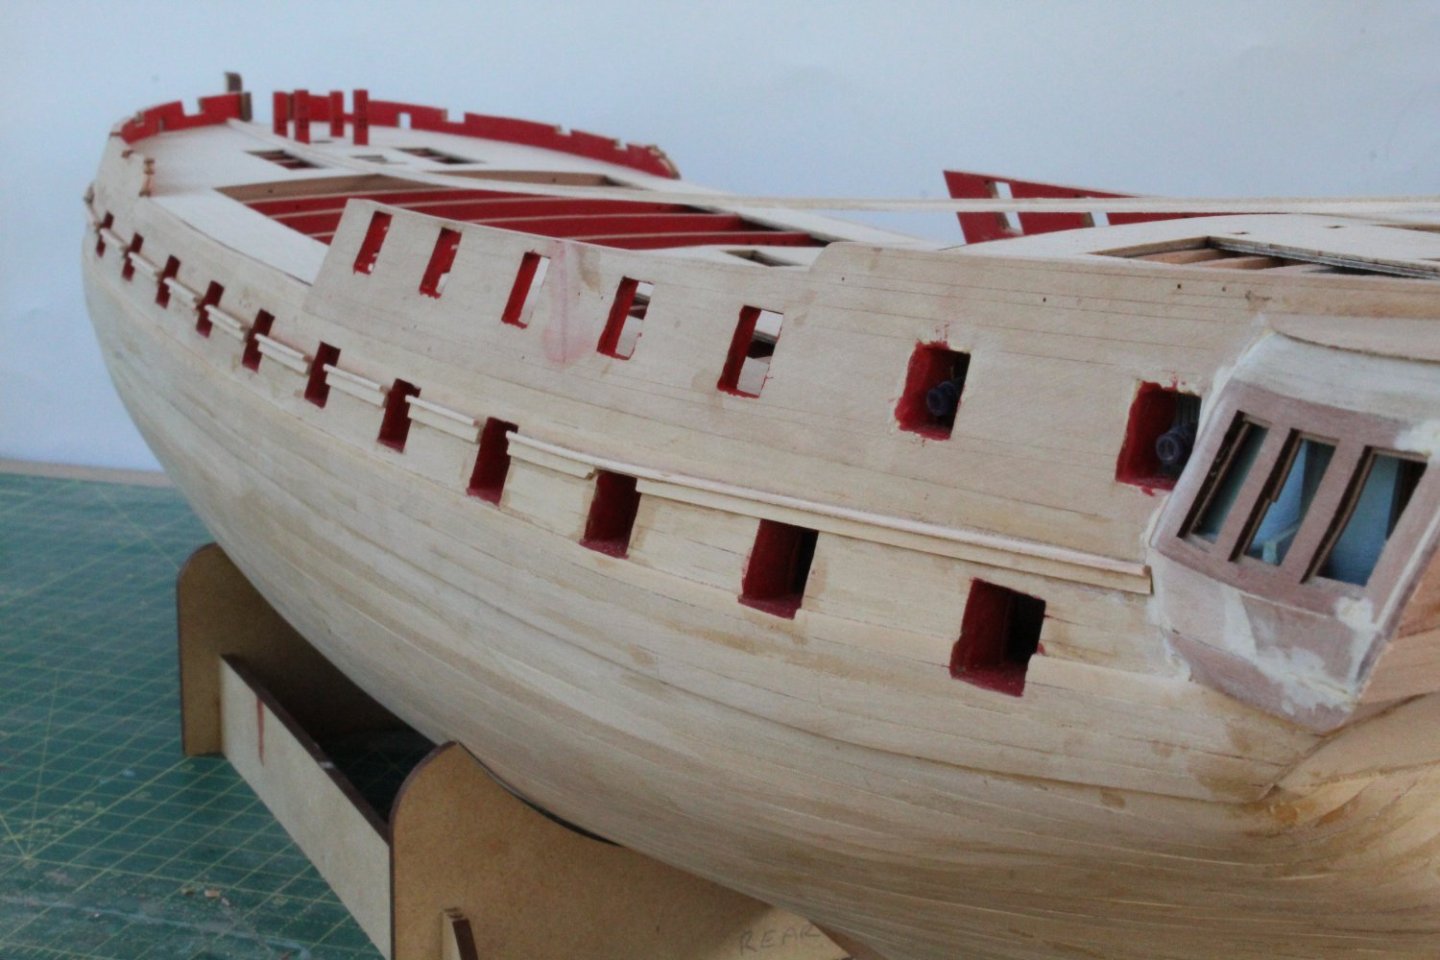
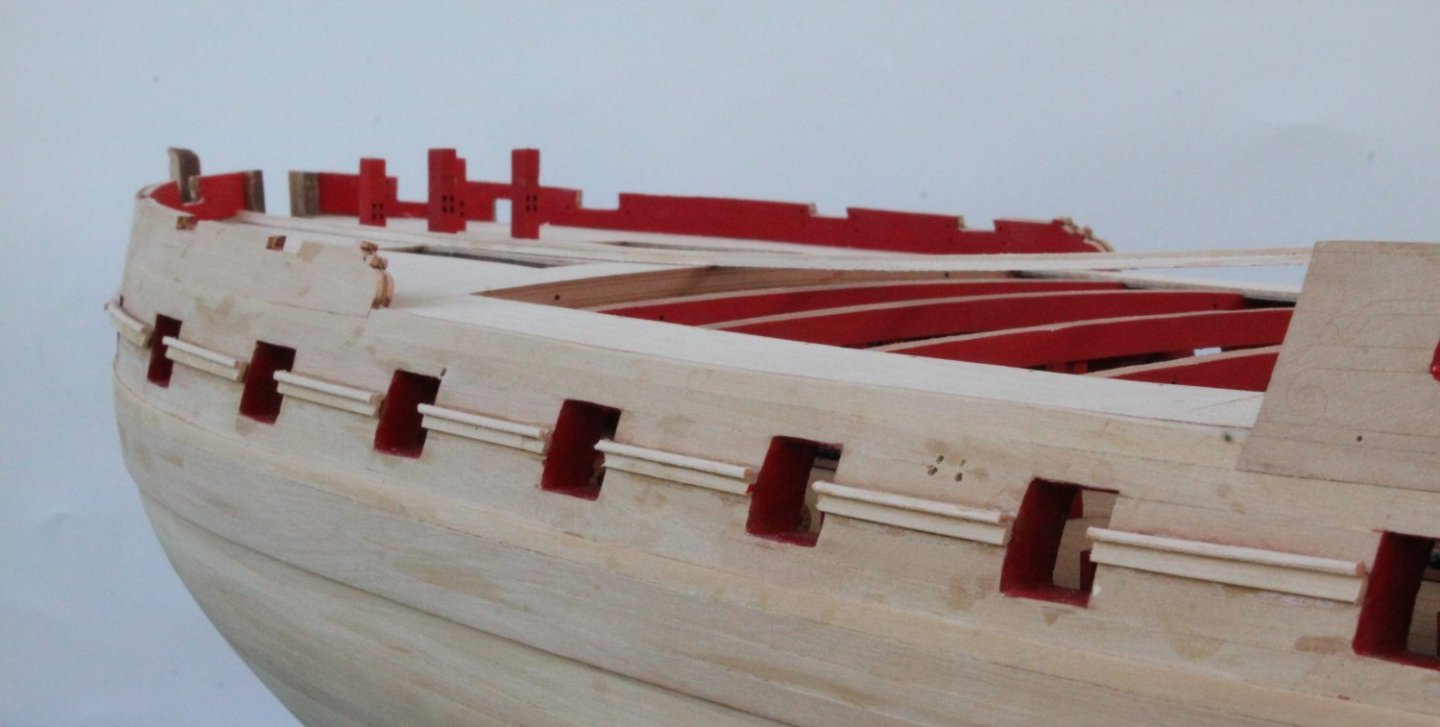
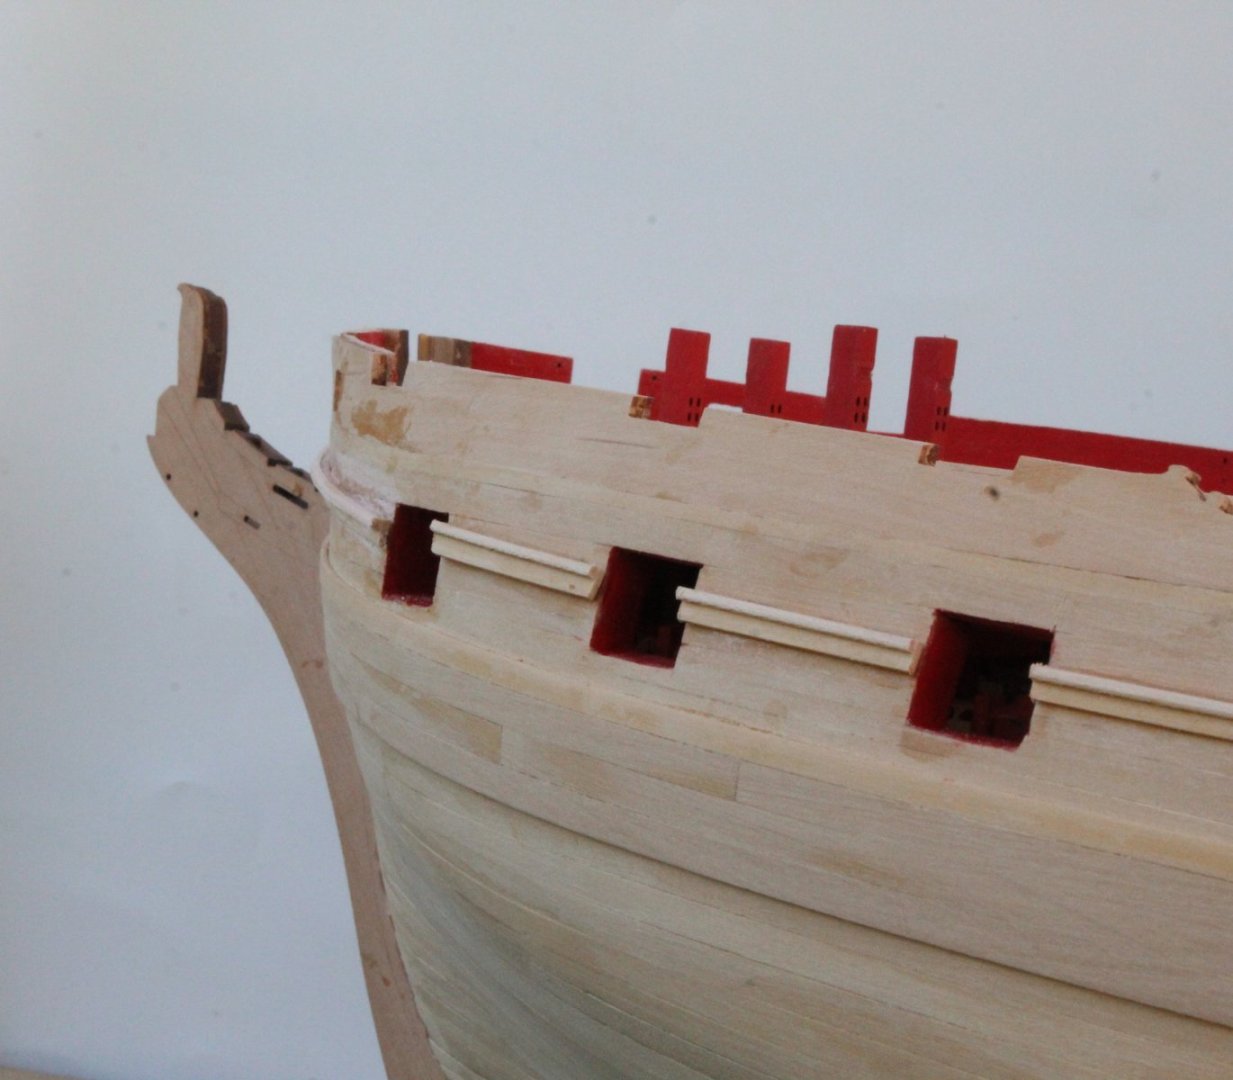
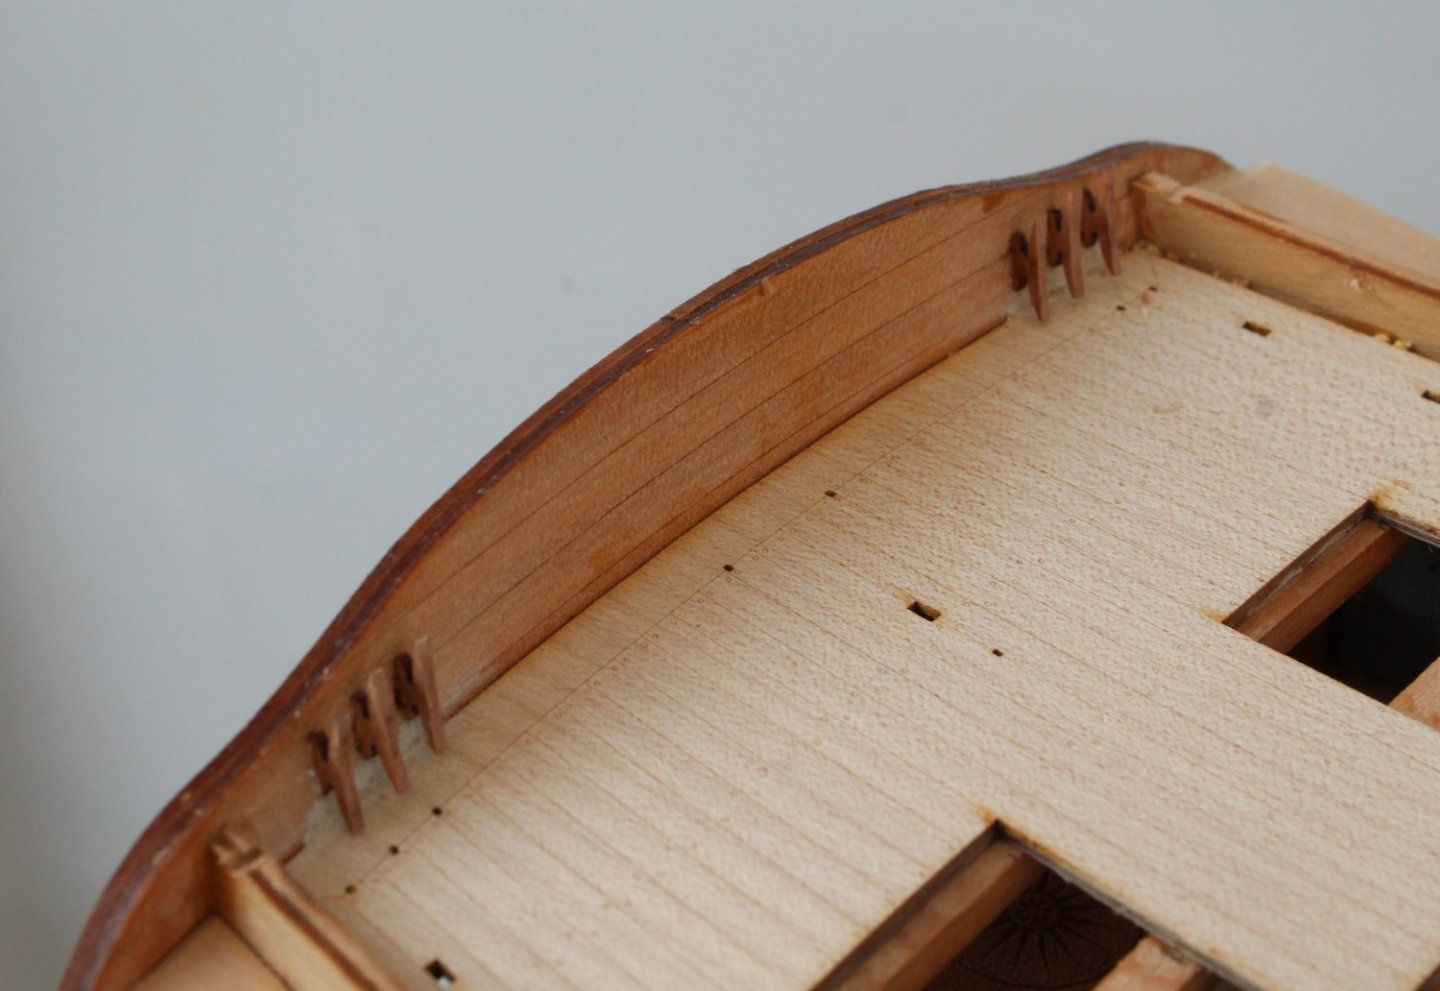
Hull Rail Decorations
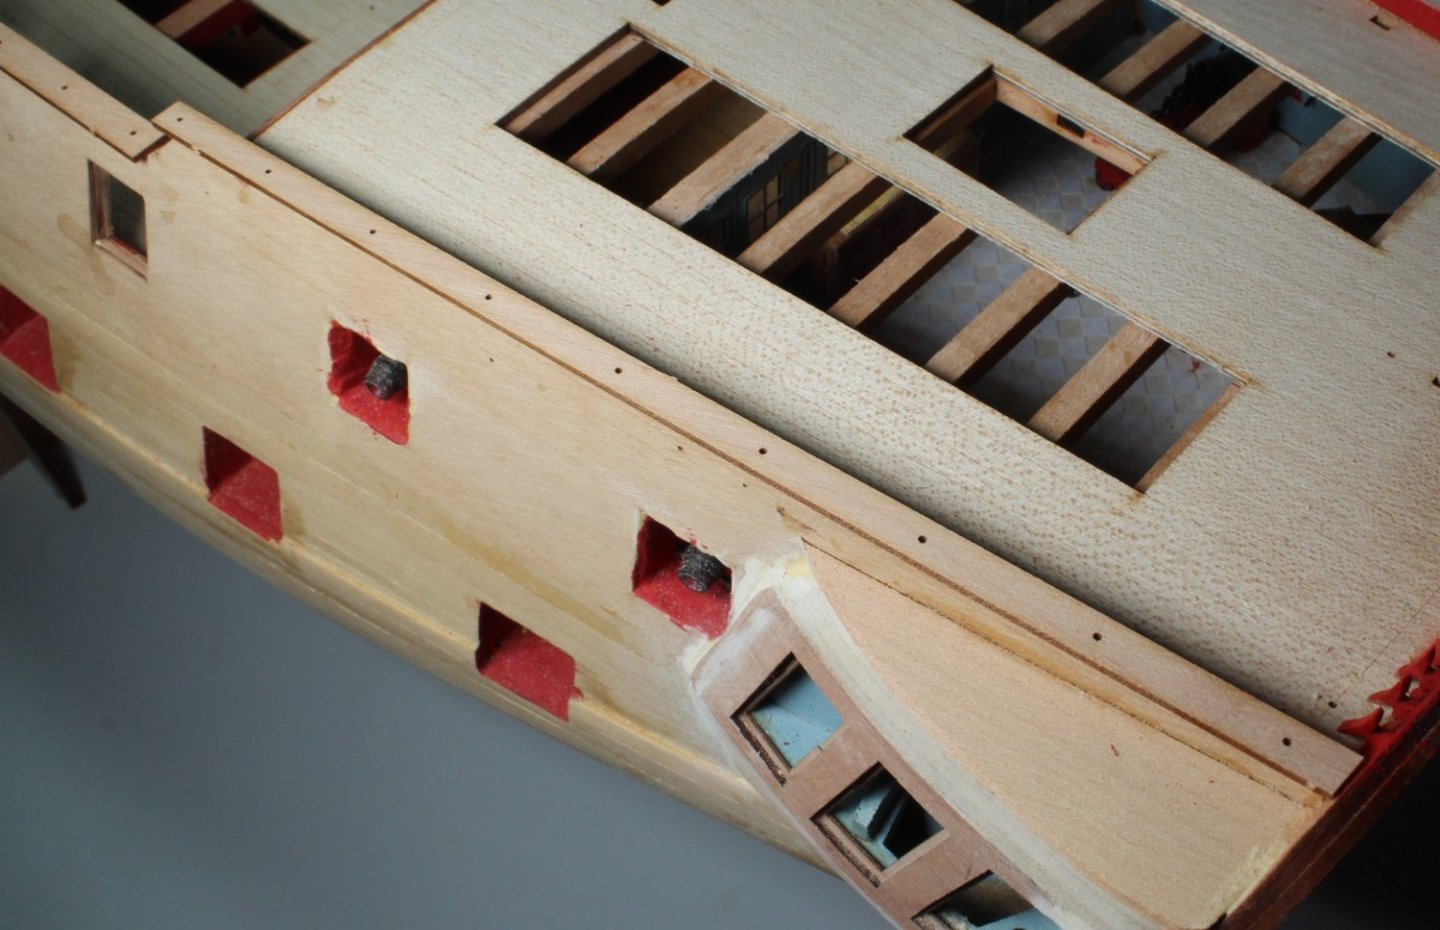
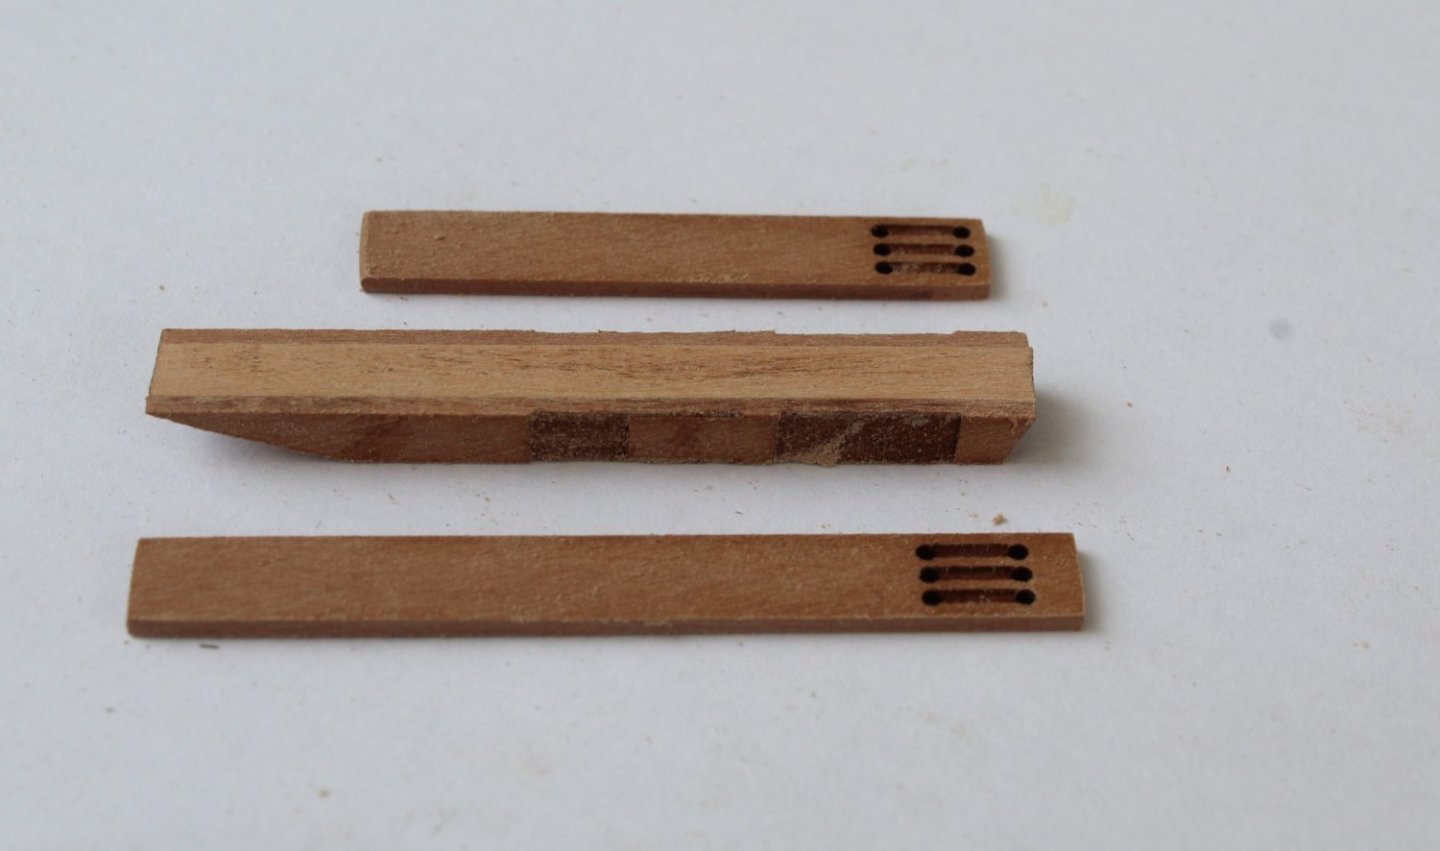
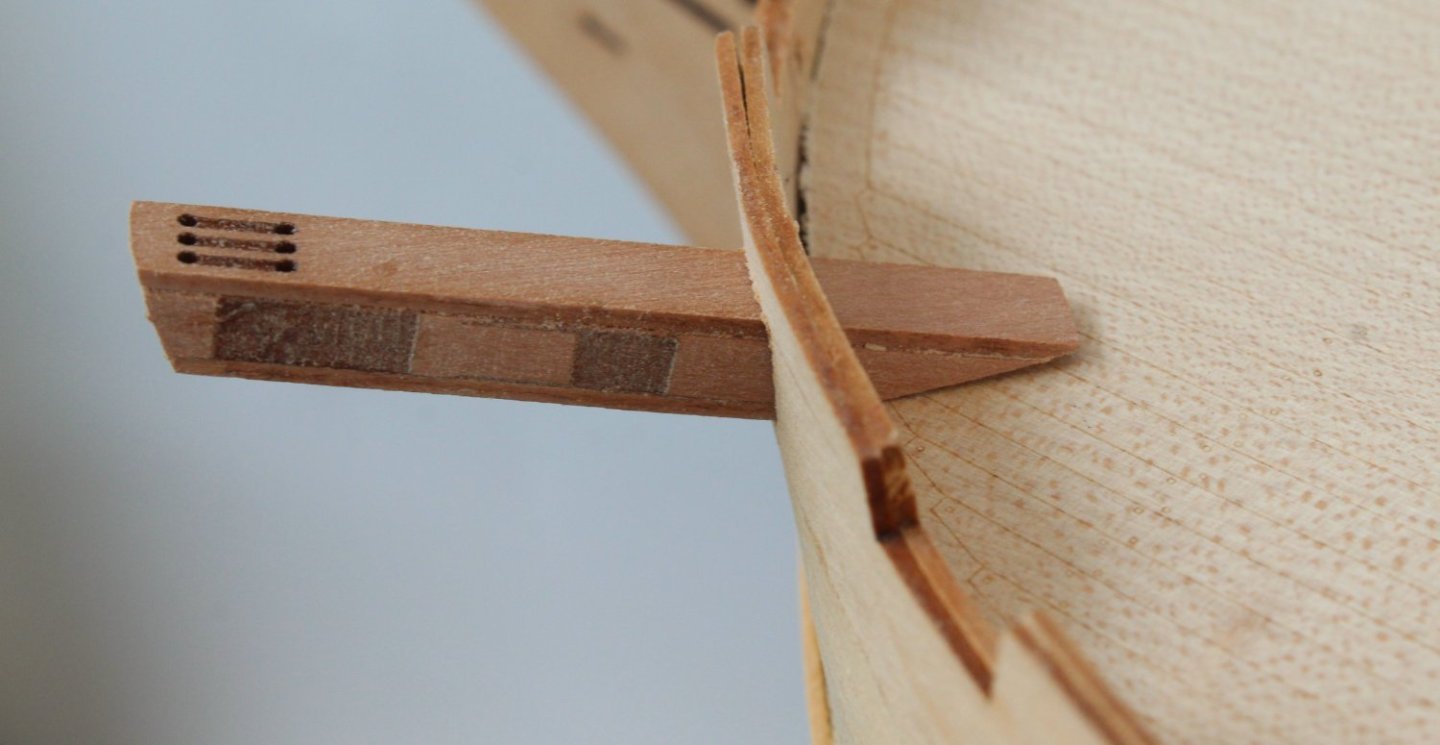
The next job was to start adding the hull rail decorations. In order to make the first rail a length of 1mm square material had to be added to a length of 3mm wide plank. Once this was done the leading edges were rounded. I am reasonably happy with how the profile looks, as shown below.

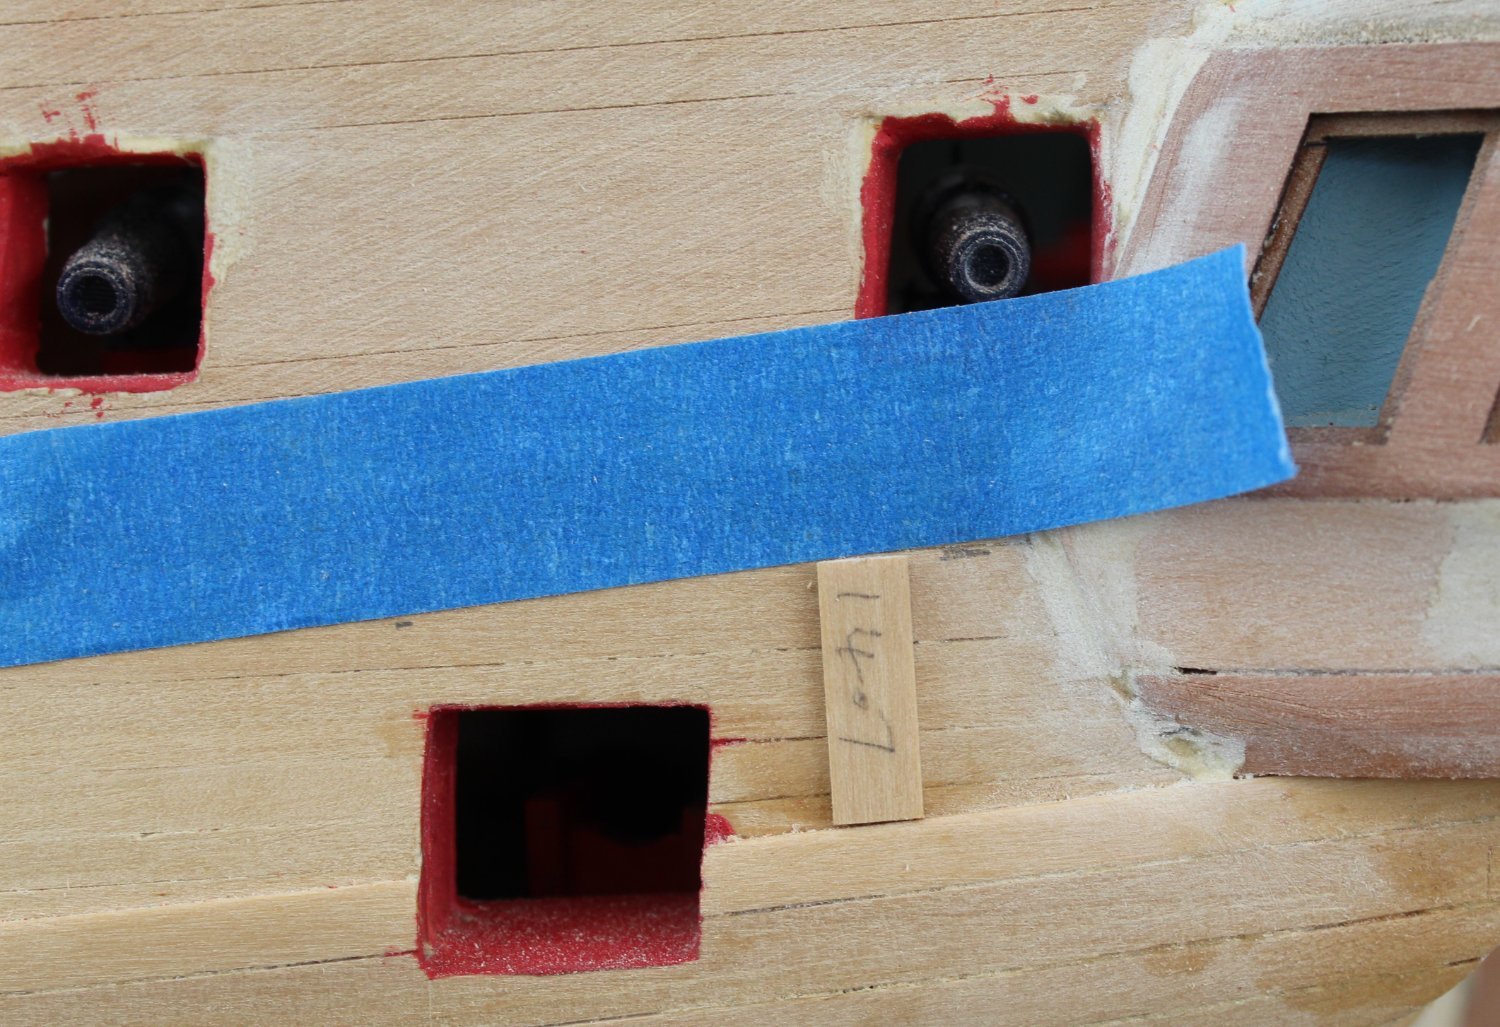
The top edge of this rail is to be positioned approx. 14.7mm above the top edge of the wales. I made a simple measurement piece that measured 14.7mm

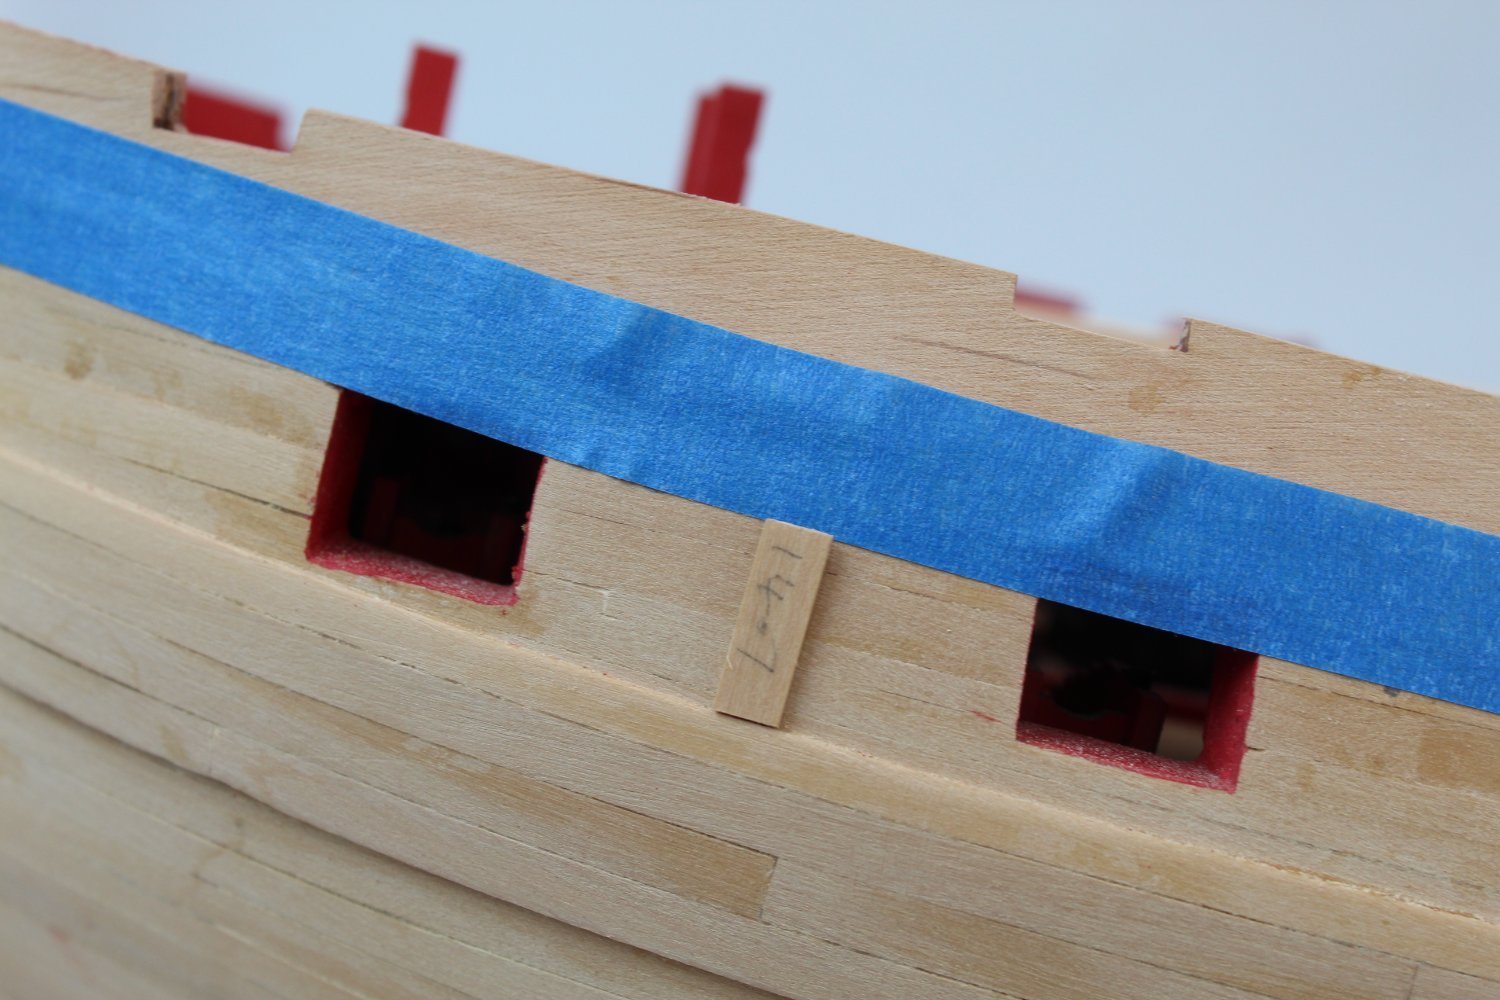
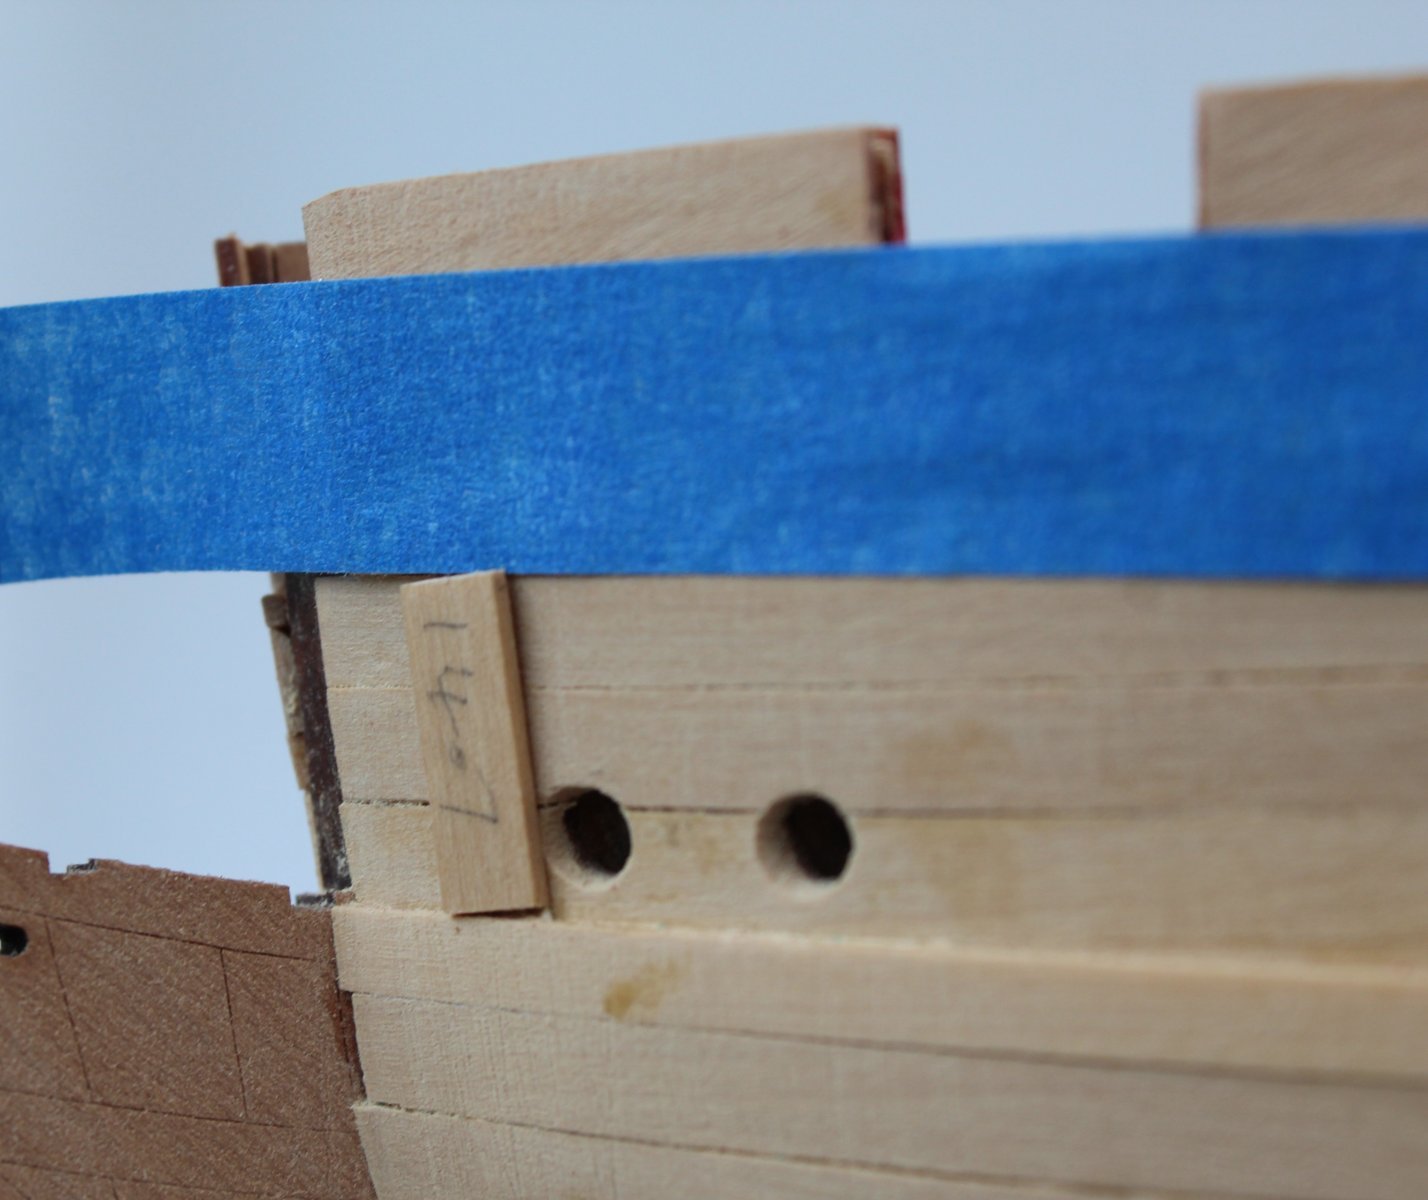
Using the measurement piece as a guide I made a few pencil marks. A length of tape was then added to the hull. After a few tweaks, using the measurement piece as a double check I was happy with the run of the tape.

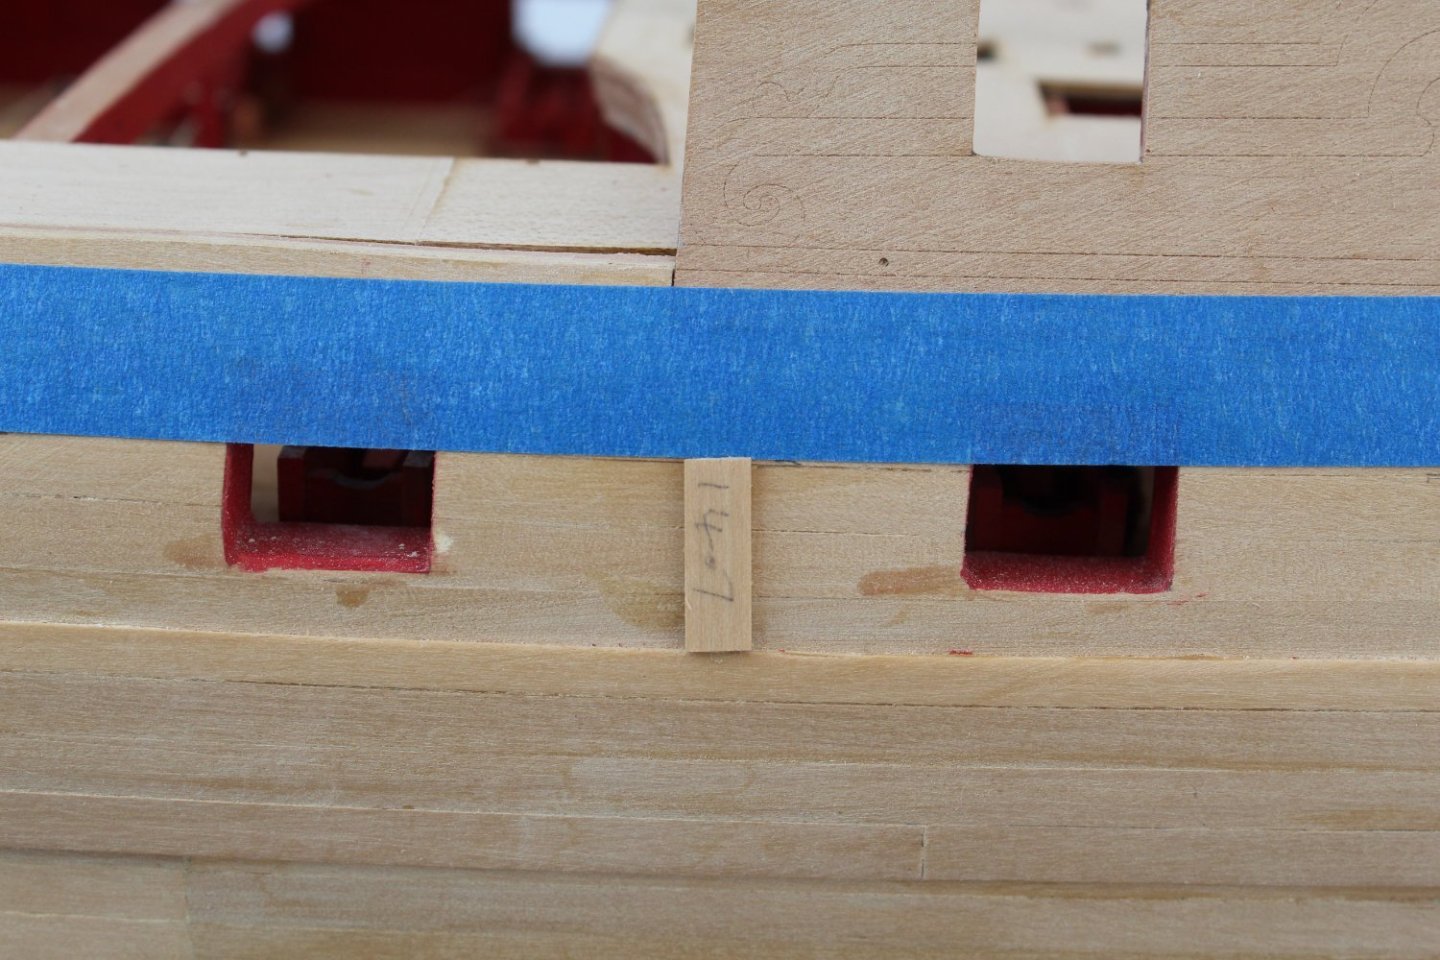


The rail was then glued in place, using ca. I took my time to ensure the rail followed the path of the tape.
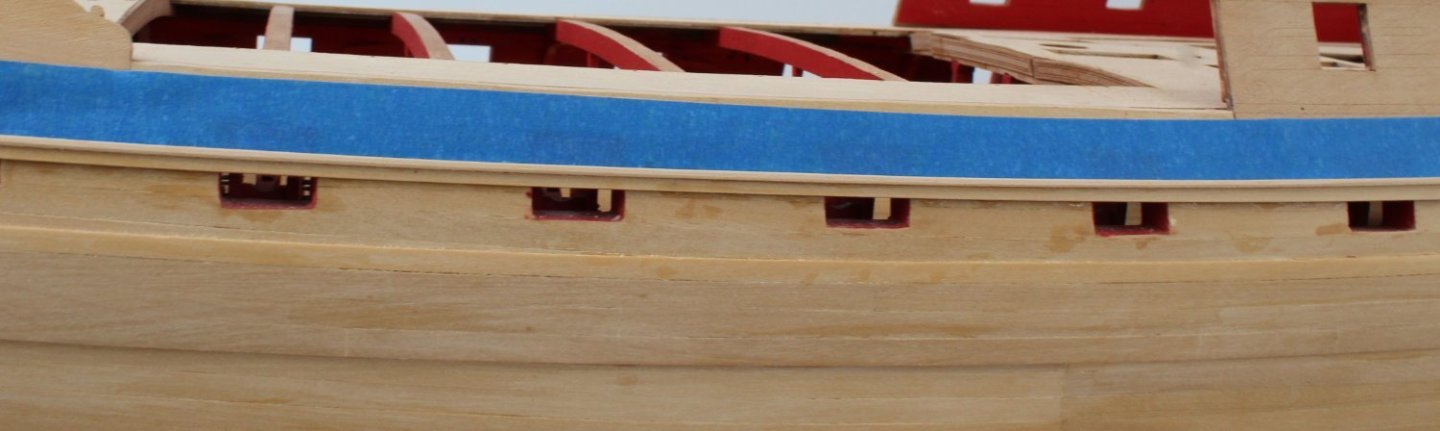
With the tape removed the rail looks good.

I will now have to repeat the above process for the other side.
- Ronald-V, James H, Thukydides and 3 others
-
6
-
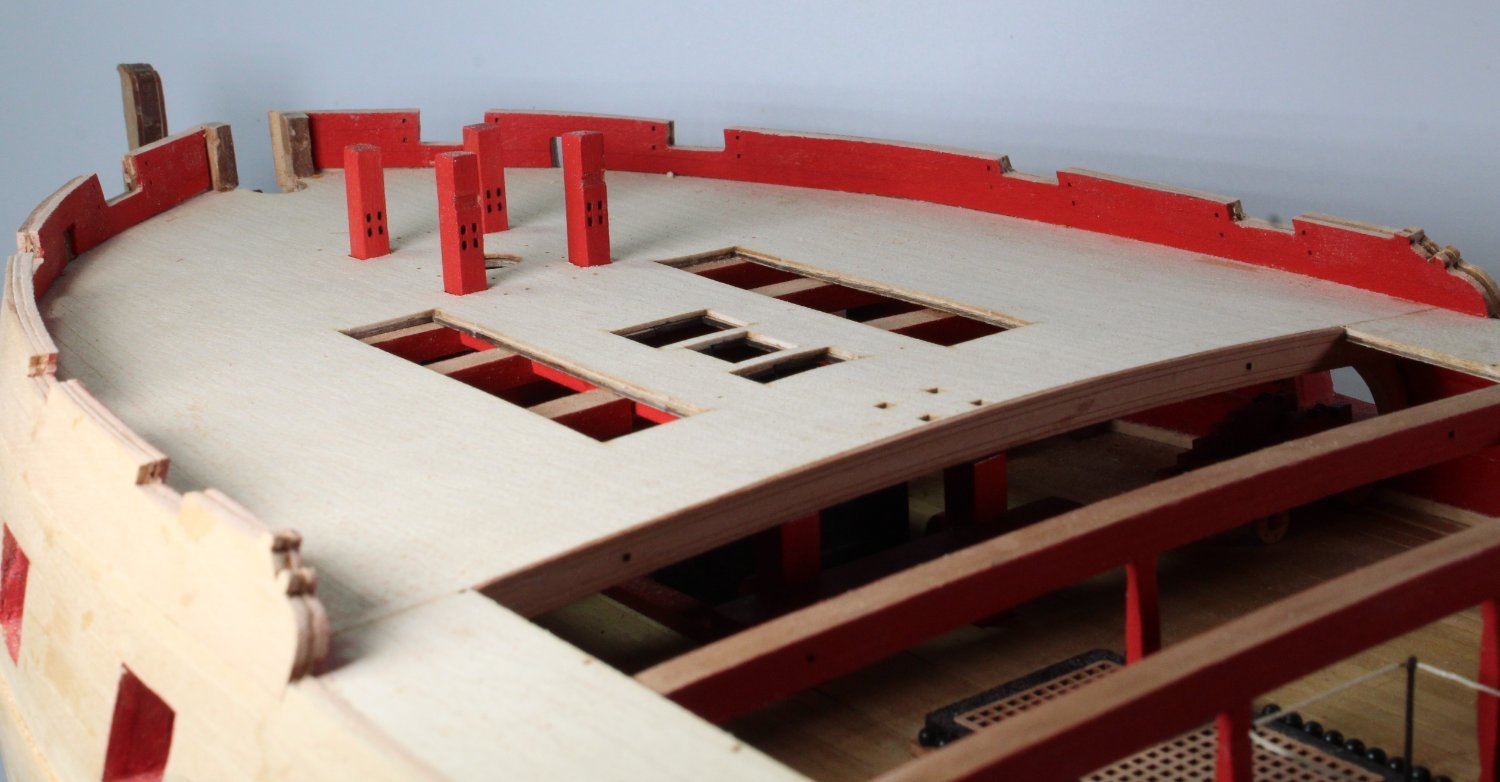
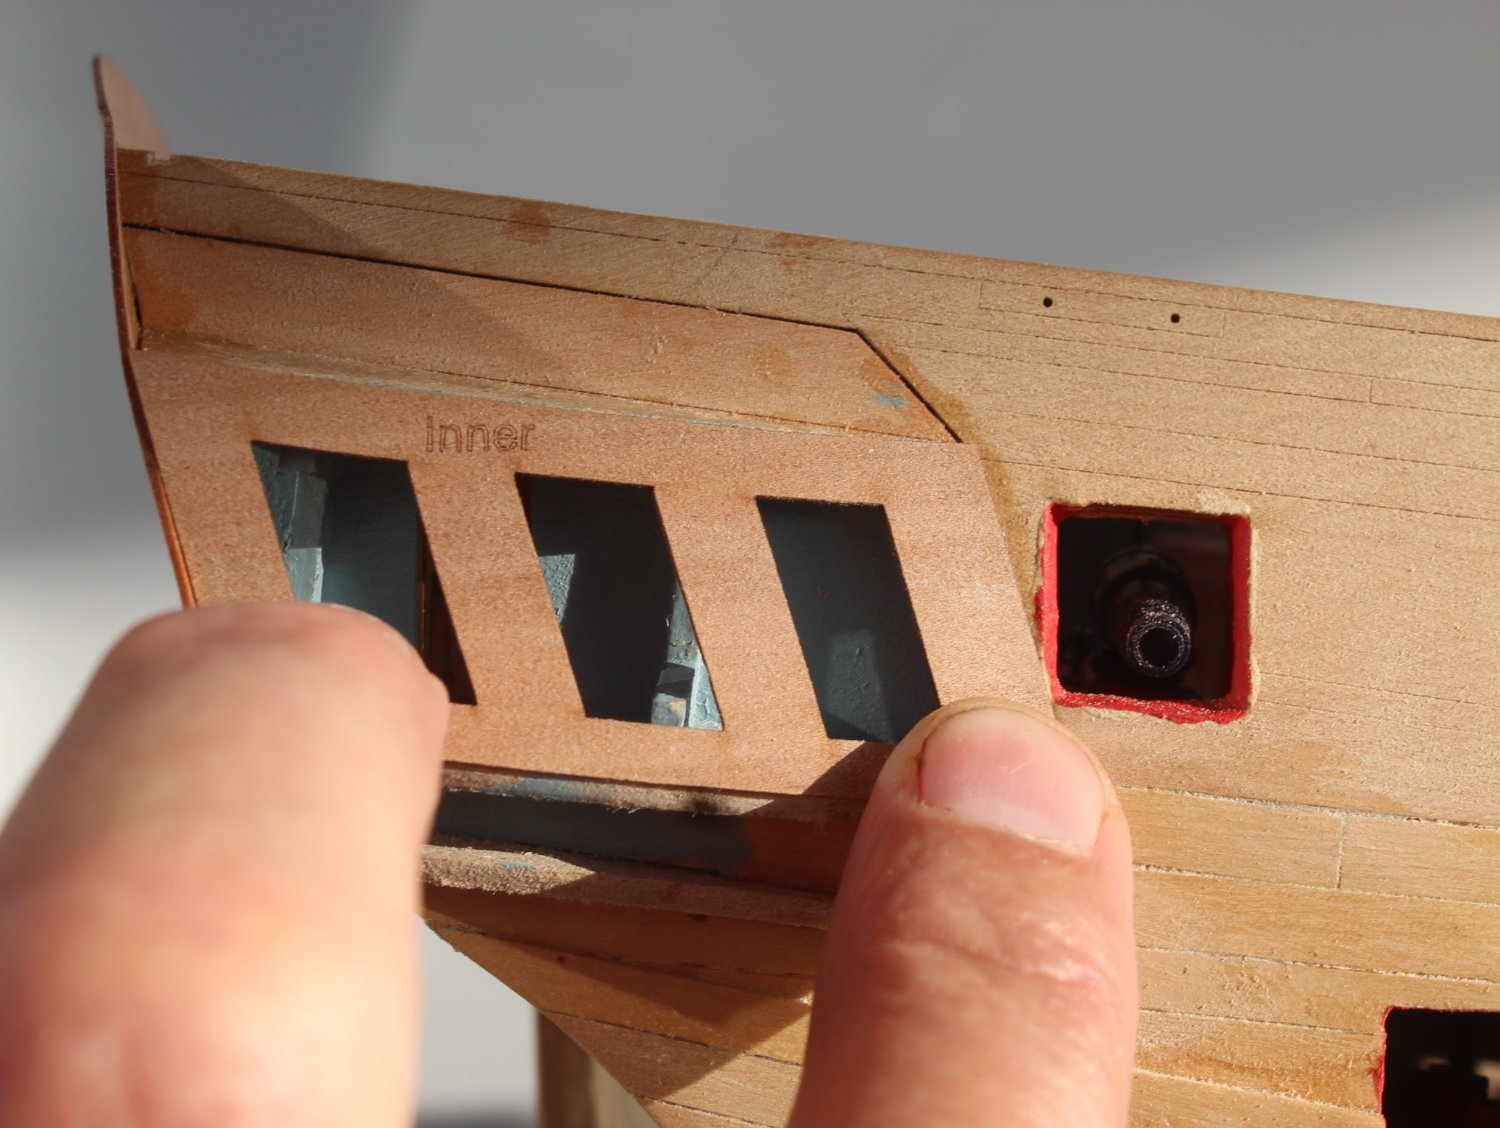
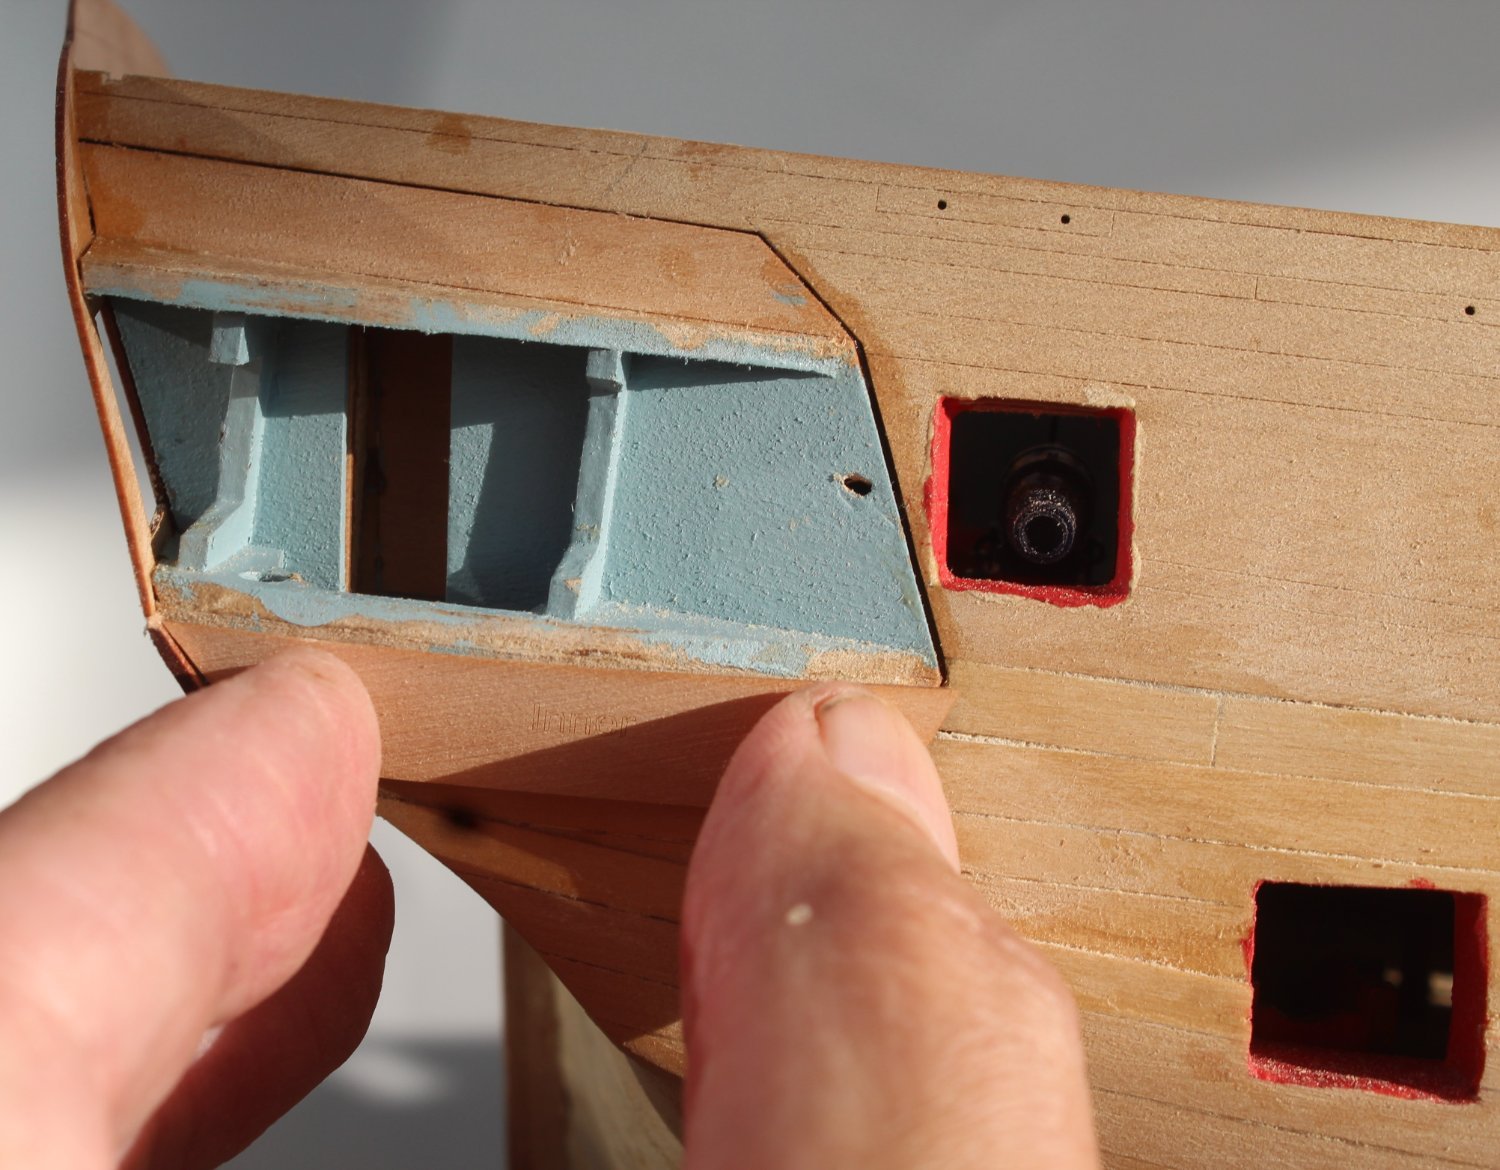
Inner Bulwarks and Gunwales
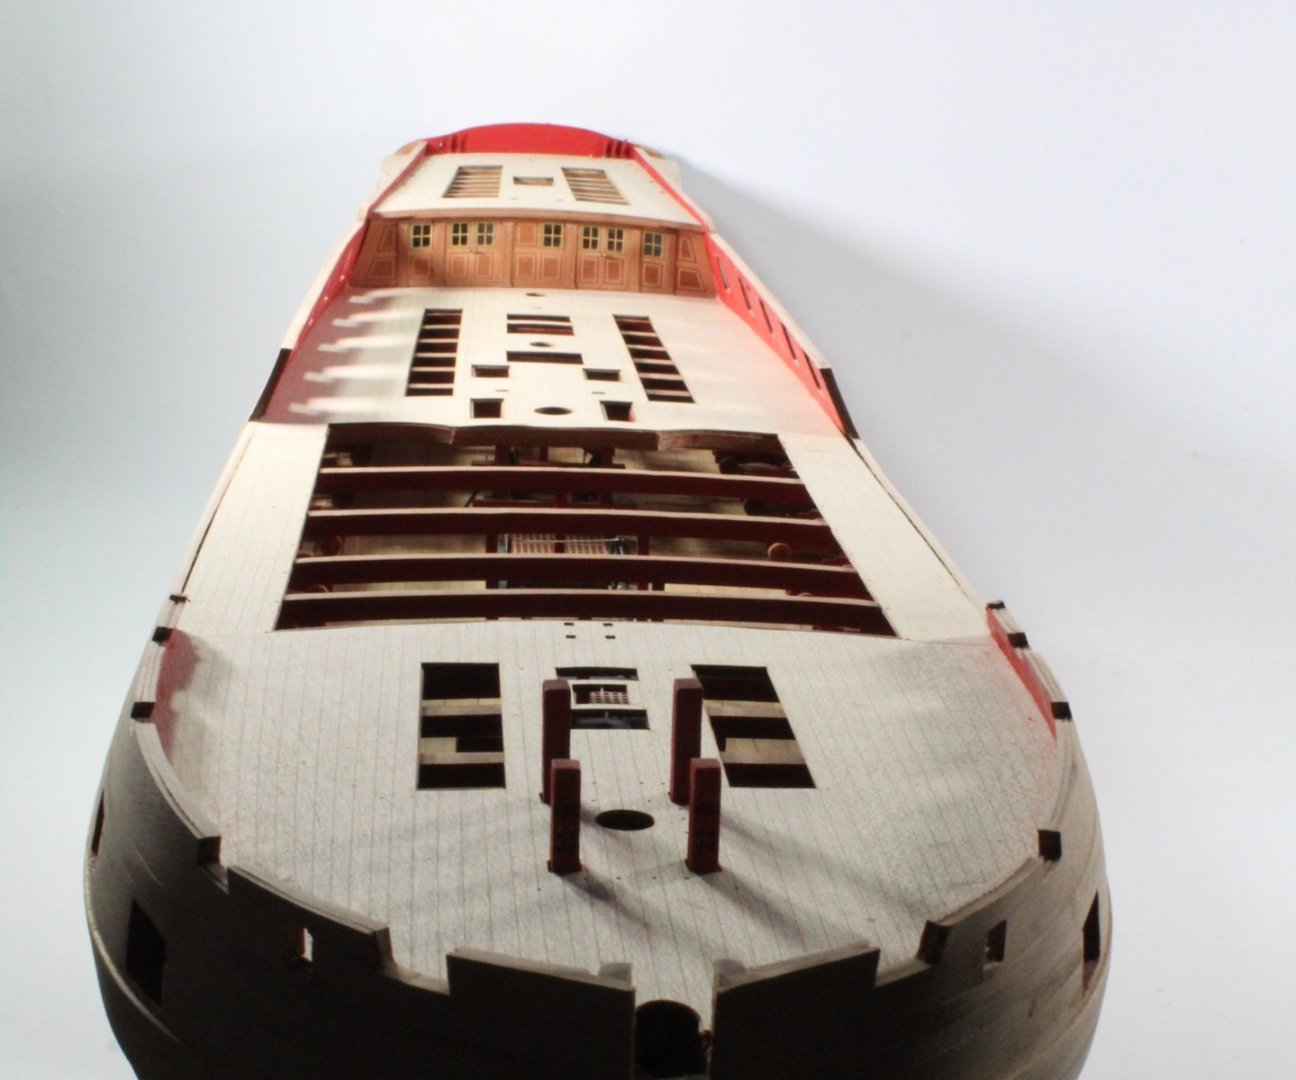
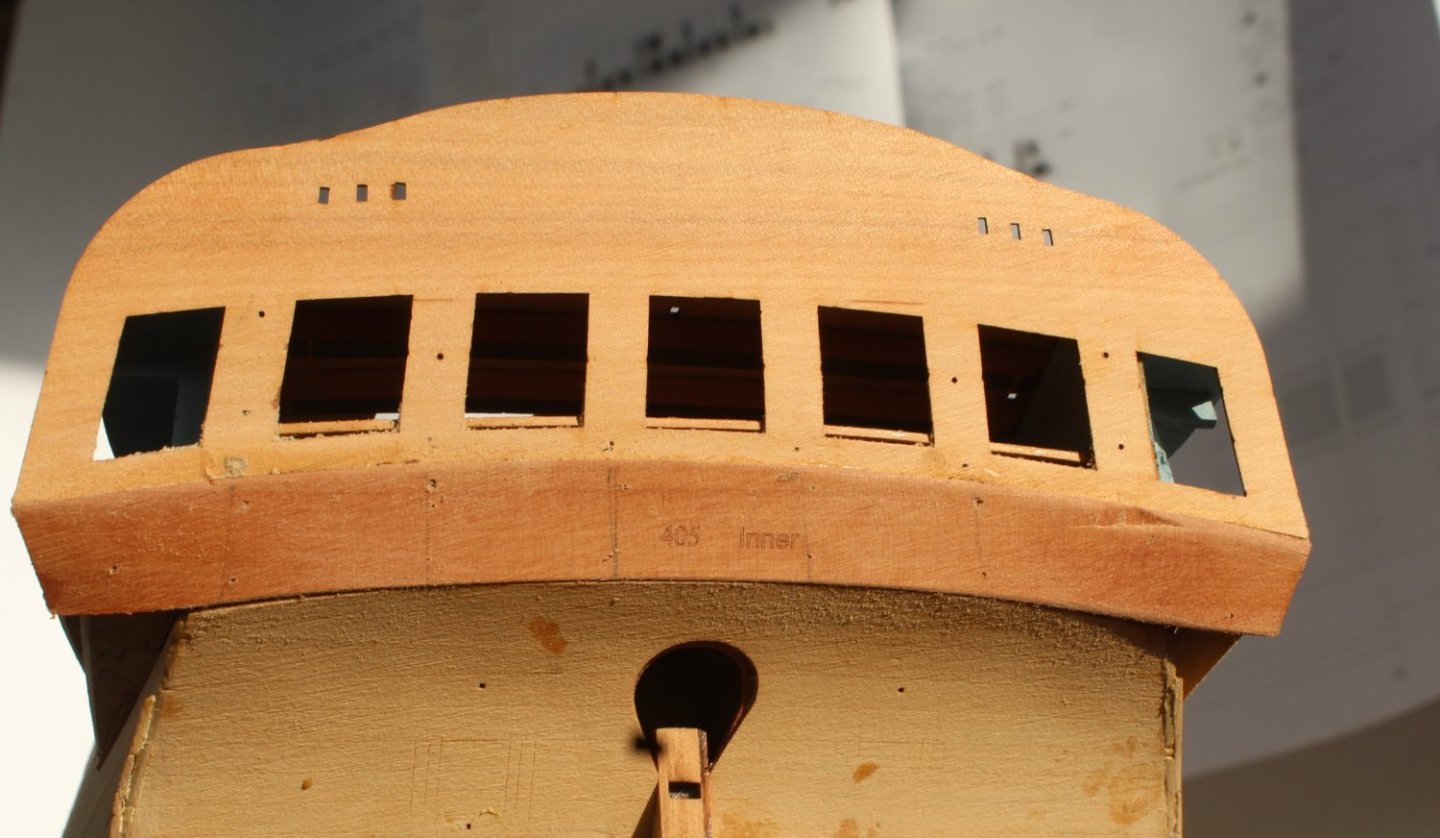
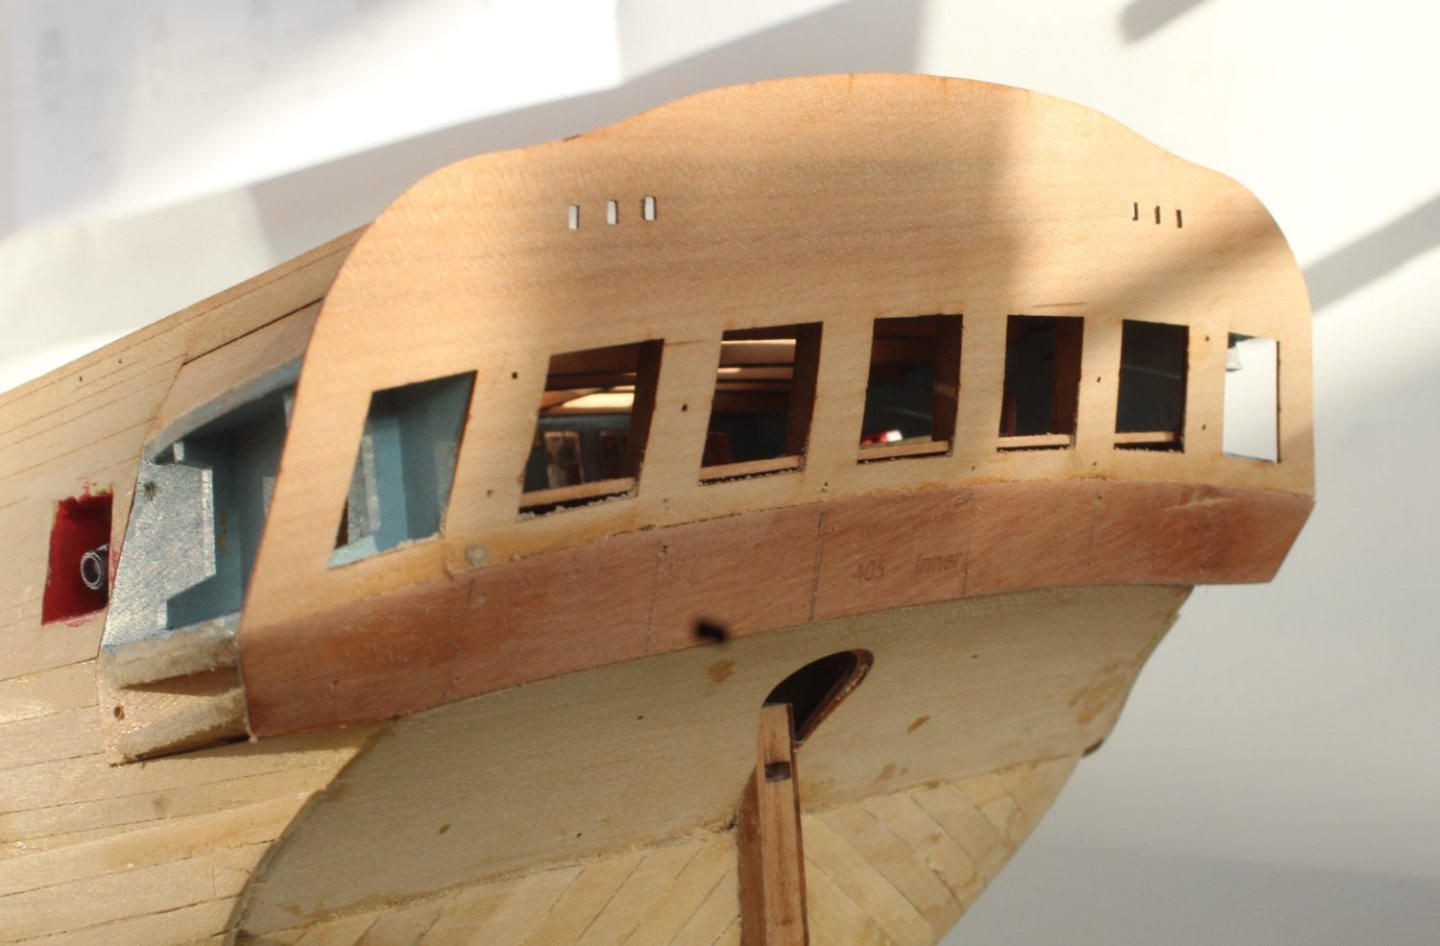
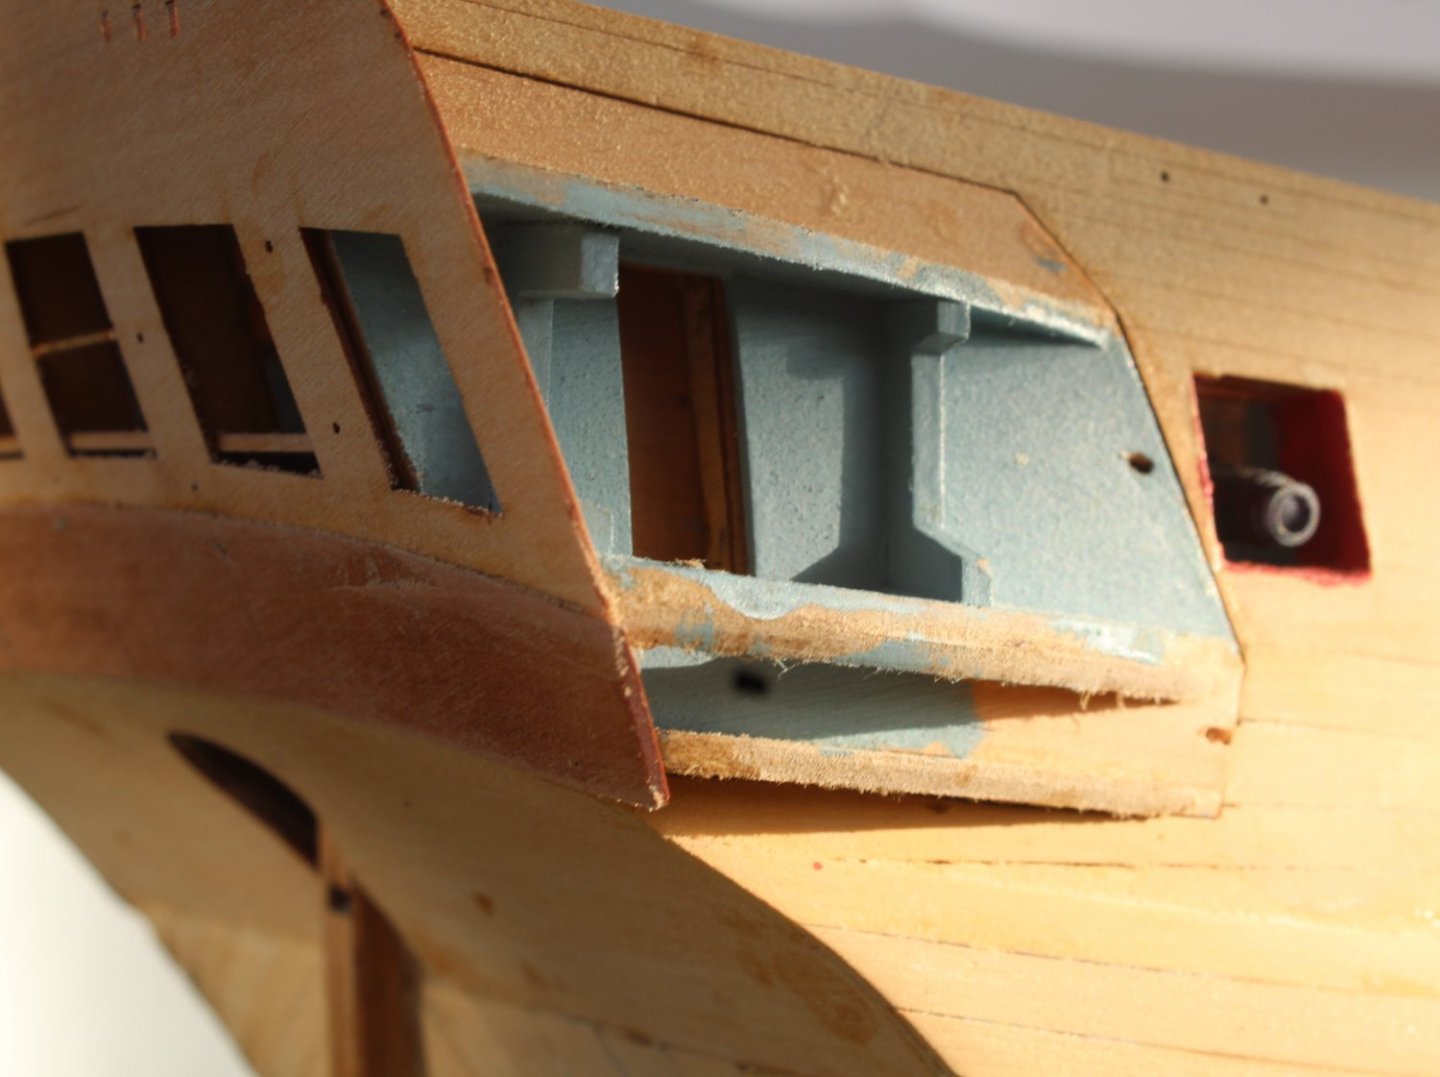
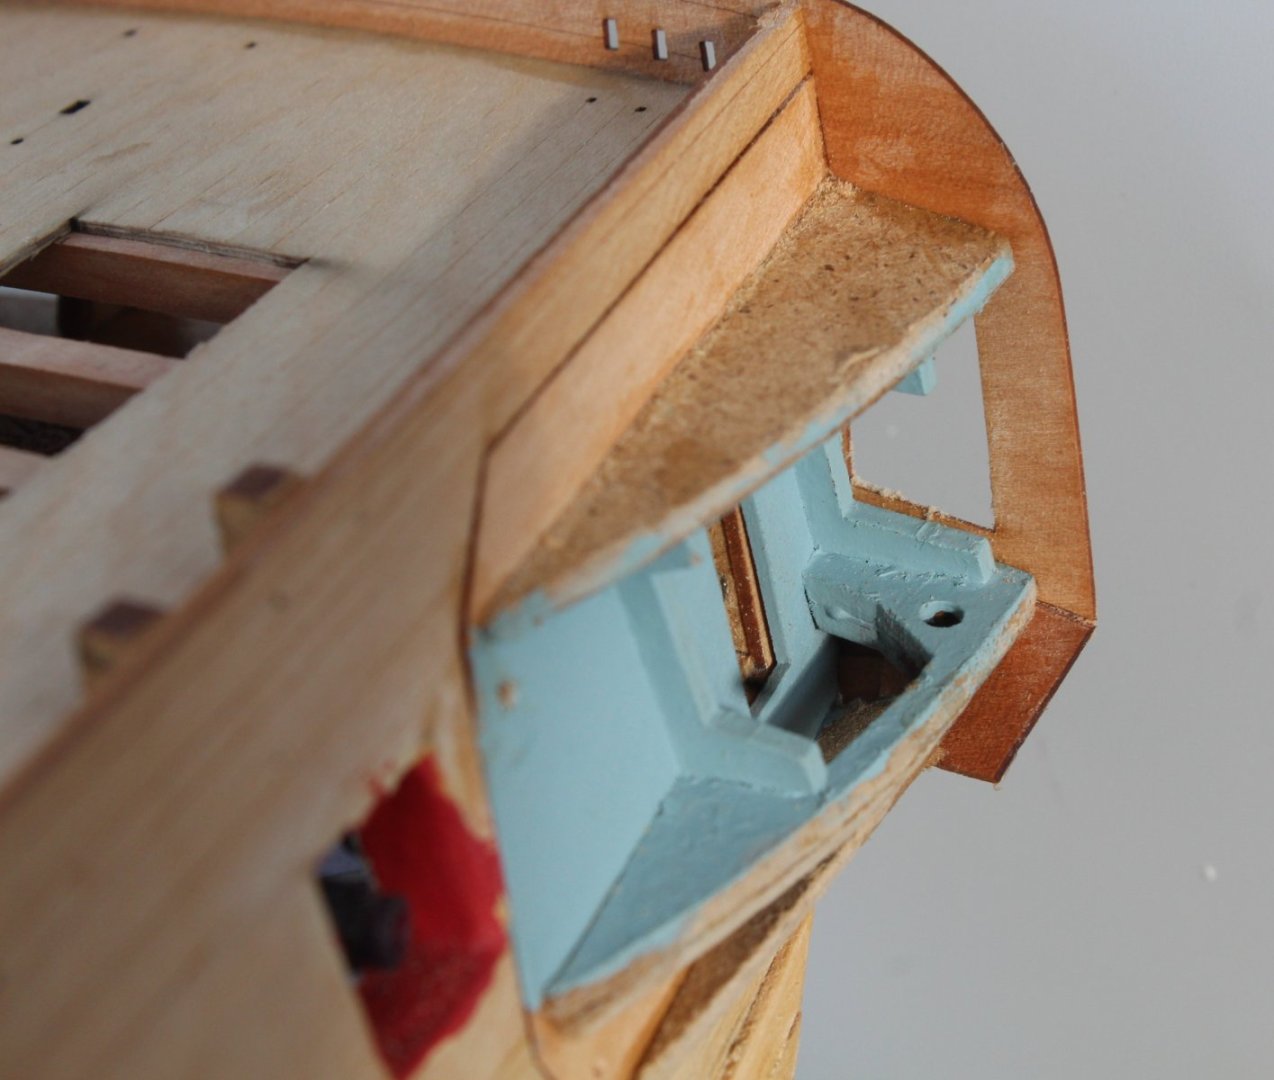
I have now completed the work related to fitting the inner bulwarks. The deck front fascia patterns have also been glued in place.
Poop Deck
Quarterdeck Bulwarks
Quarterdeck and Poop Deck
I have also sanded the central hull section down to the gangway level.
I have not made a great job of fitting the quarterdeck front fascia's patterns. I will try to release the left hand side pattern and reglue in the correct position.
Forecastle deck complete with front fascia pattern fitted


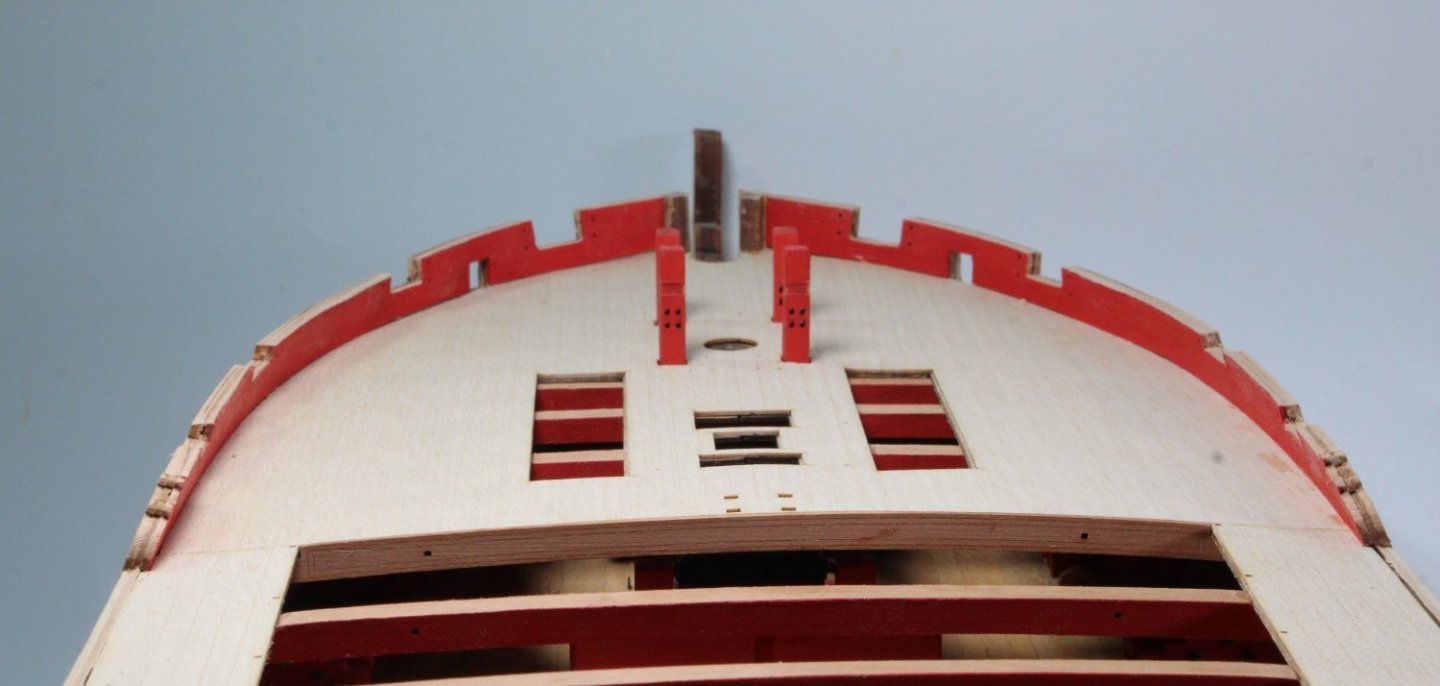
I spent a bit of time tiding up the gun ports and sanding the tops of the bulwarks level. The various gunwales were then test fitted and I am very happy with how they are laying. The forecastle gunwales may be a bit of tweaking to match the hulls bend.
Forecastle gunwales
Gangway gunwale

Quarterdeck gunwales
Poop deck gunwales
All the gunwales on left hand side
I liked the following photo so I decided to add it to this post
-
-
Poop Deck and Inner Bulwarks
In my last post I reported the stern fascia cleats would not fit in the slots as the cleats were fouling on the poop deck. As advised by Jim I elongated the slots. I then added some wood filler to the bottom end of the slots. Once this work was completed the cleats were installed as can be seen below.
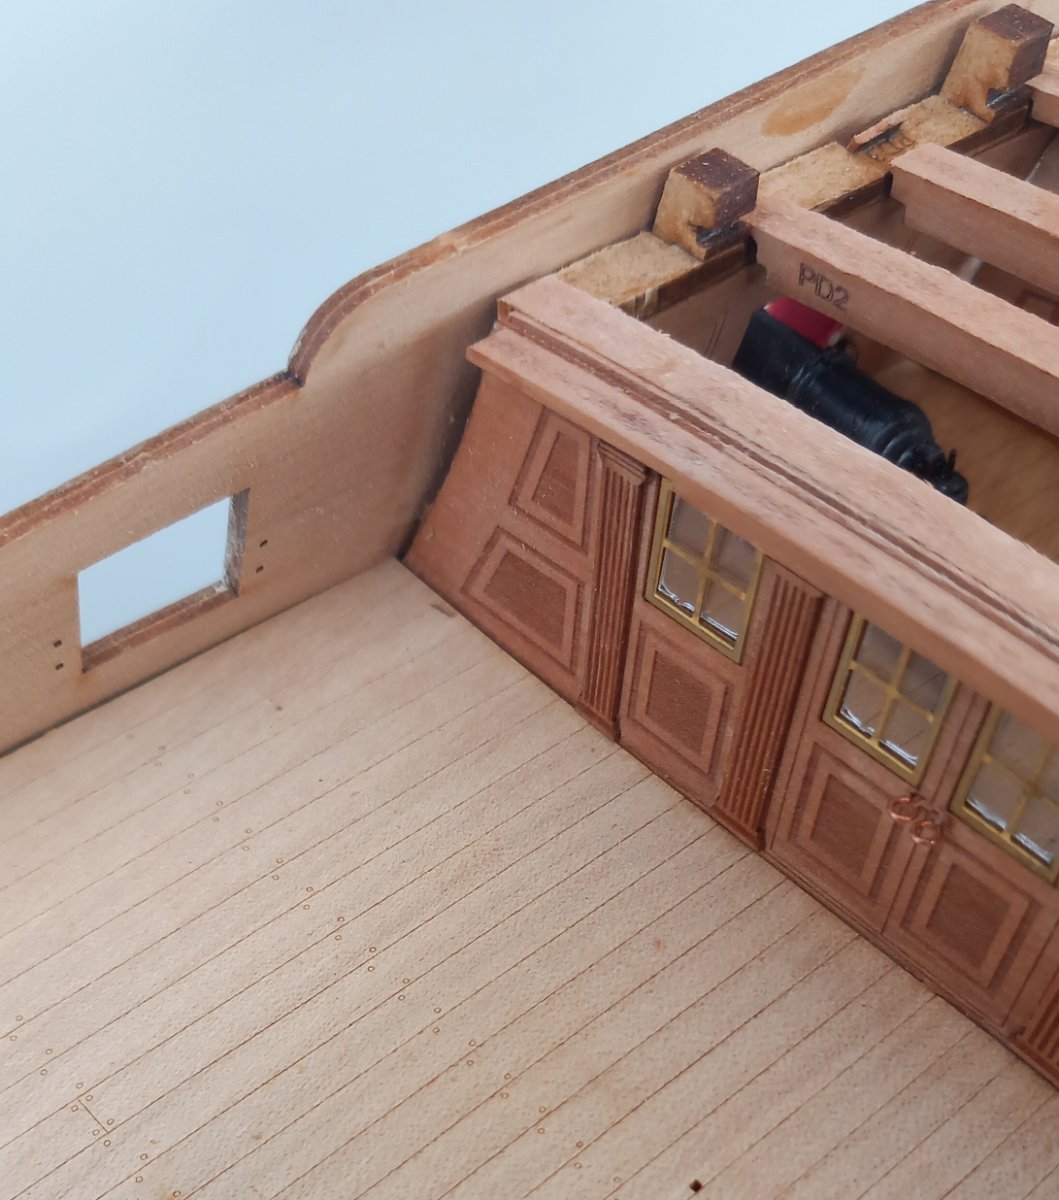
With the inner poop deck bulwarks added the fascia and bulwarks were painted red and everything looks good.
The quarterdeck inner bulwarks have been painted red and test fitted. They appear to be a good fit and once I have double checked the eyebolt hole alignments they can be glued in place.

The forecastle inner bulwarks have also been test fitted and are now ready to be painted red.
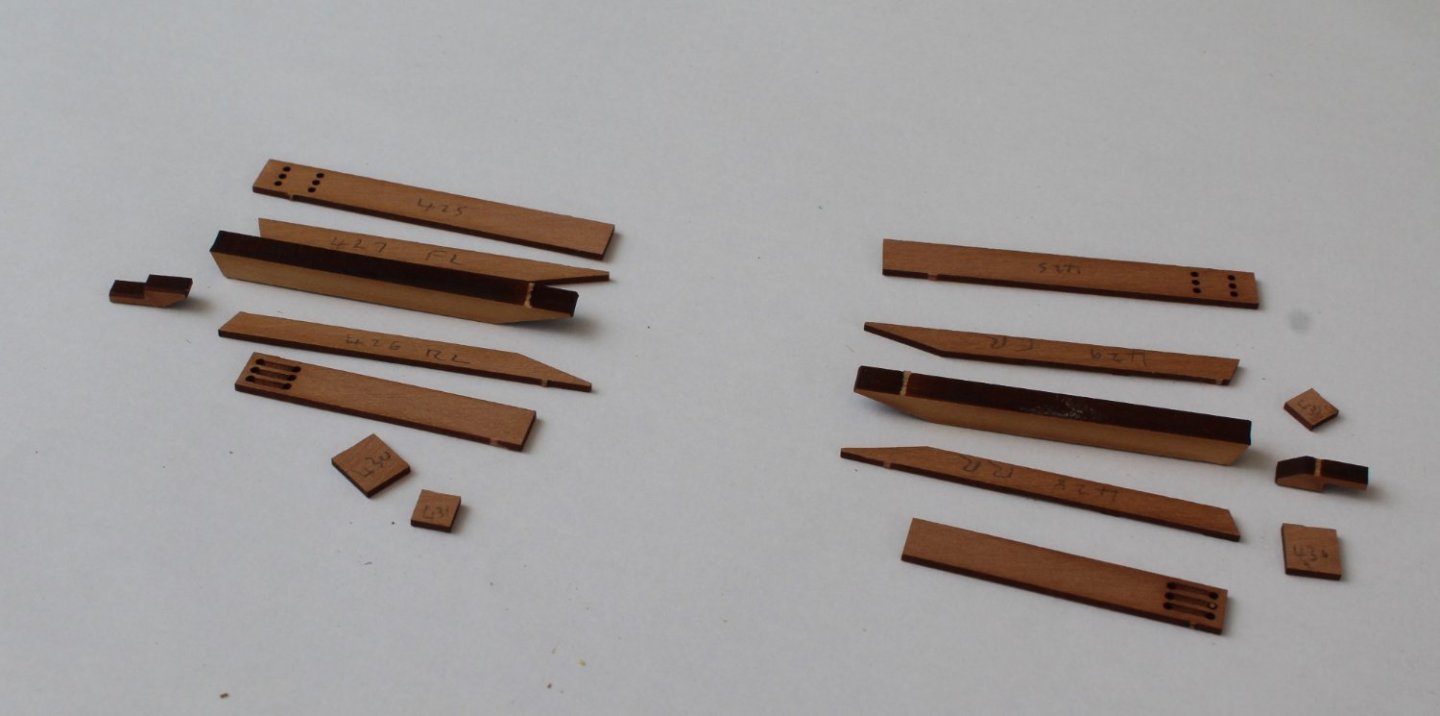
I then thought it would be a good idea to build and test fit the catheads before the inner bulwarks are added. The various catheads parts were removed from the pear wood material. I did mark the left and right hand side patterns (426 -429), as can be seen on the photo below.
The side parts were glued and clamped in place. Once the glue had cured the catheads were ready to have the top and bottom patterns added.

The slots in the forecastle bulwarks did require a little bit of work before the catheads would fit. Although not shown in the two photos below the catheads were also test fitted with the inner bulwark clamped in place.
- rlwhitt, Theodosius, ccoyle and 8 others
-
11
-
2 hours ago, James H said:
Just elongate the slot upwards. You can infill the lower slot too with scrap wood.
Thanks Jim
The slots have now been elongated upward and I have started the infill. No-one will ever know once the inner stern fascia pattern has been painted and the cleats installed.
-
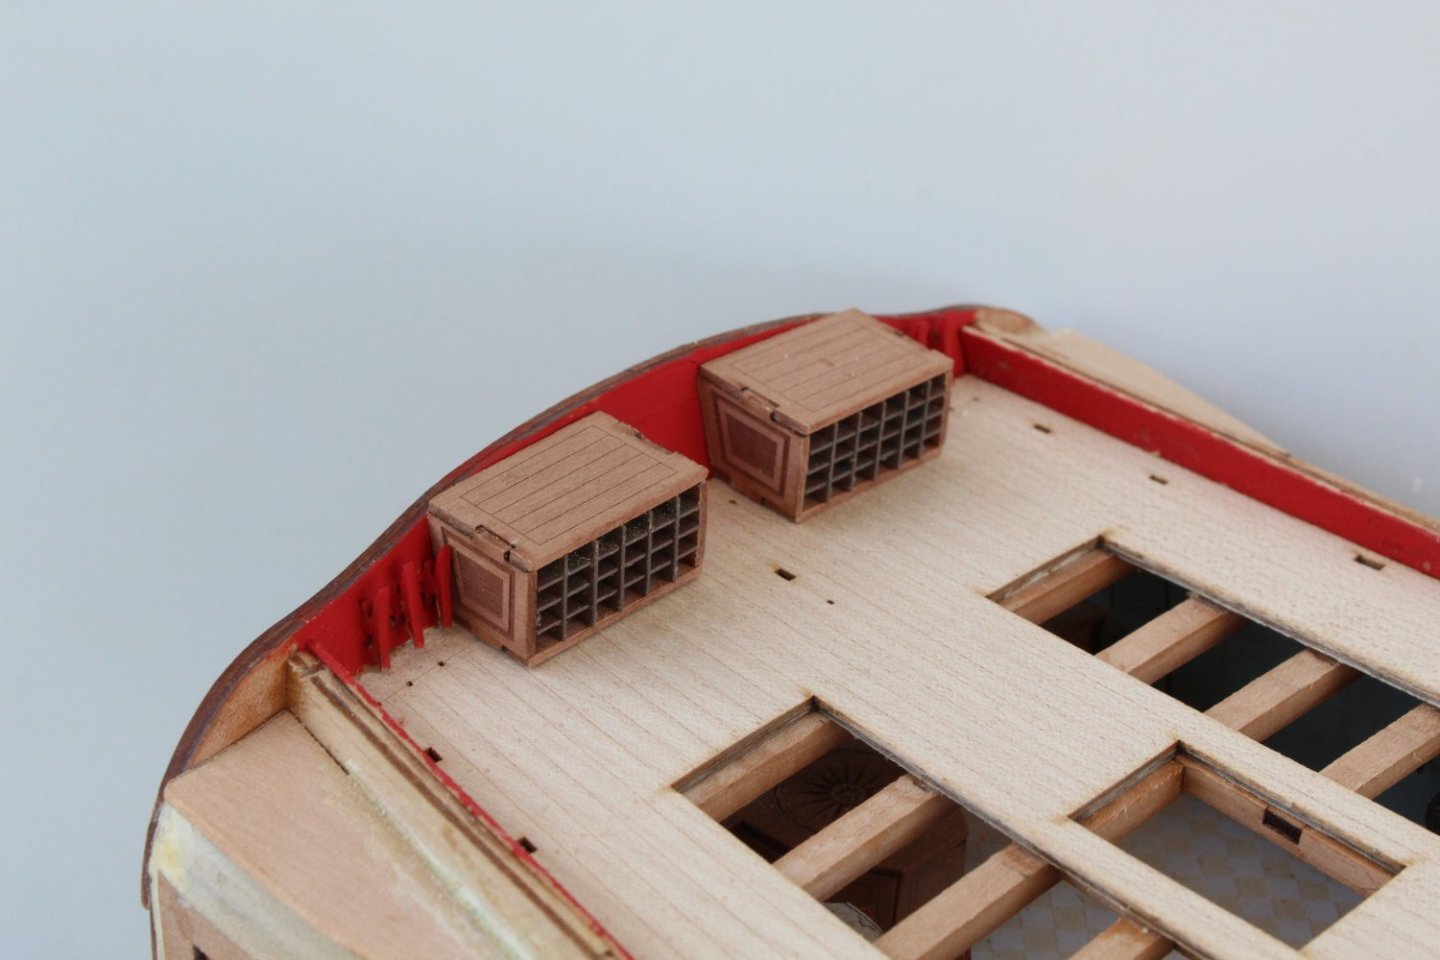
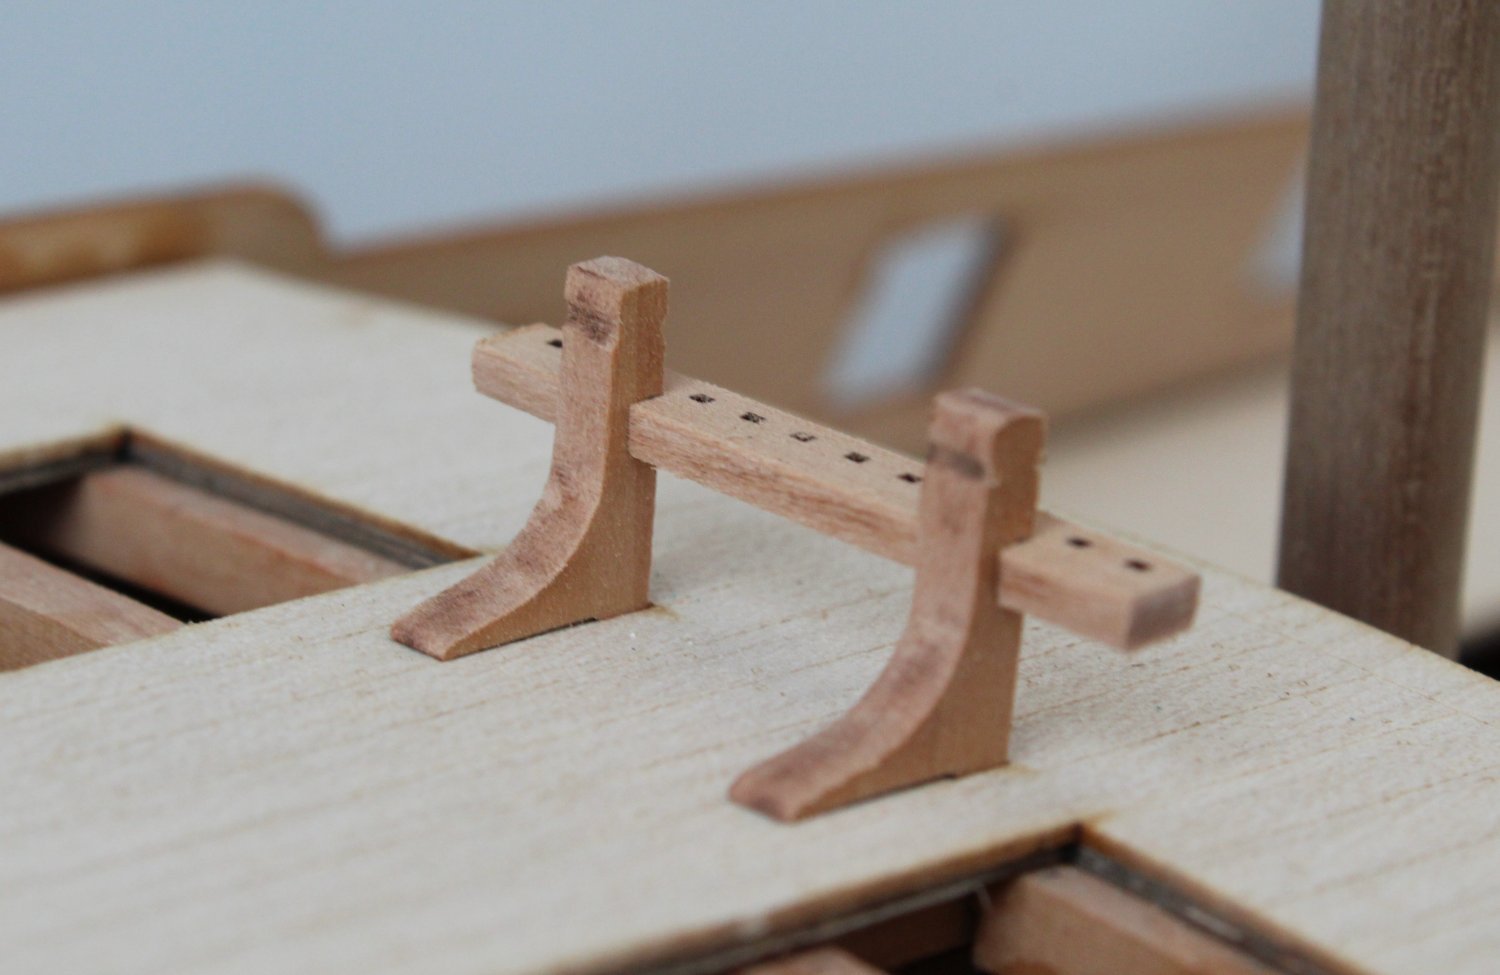
Poop Deck Cleats
Thanks to Jim's eagle eye the two flag lockers needed to swapped around. Thankfully as they were only test fitted at this stage it is an easy job to swap them around. They will be glued in place later on in the build process.
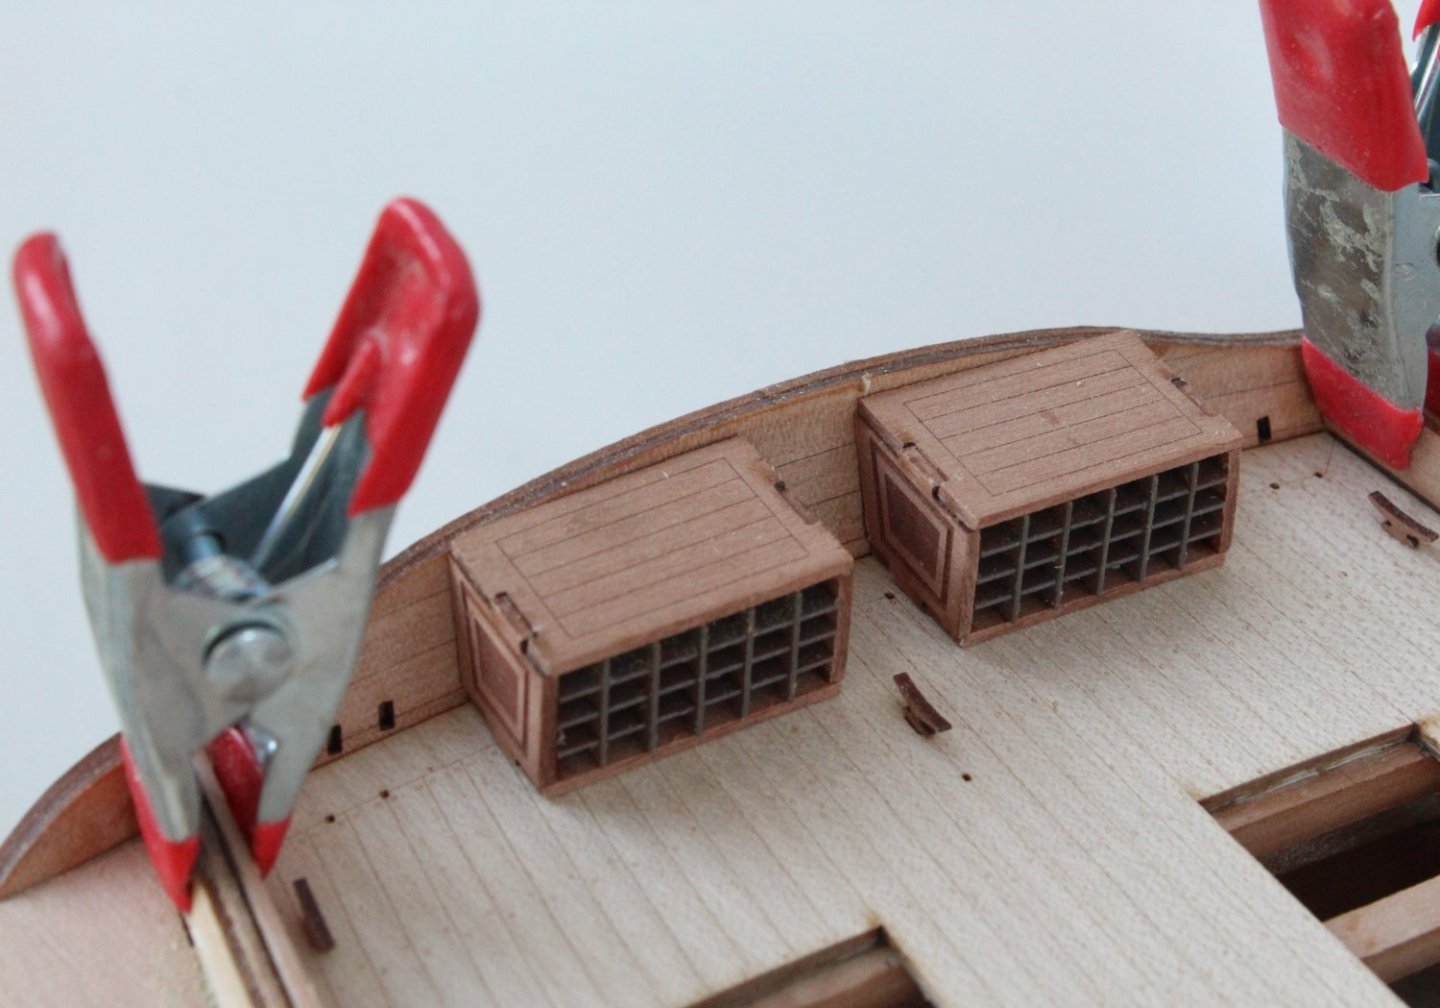
Before moving on to the next scheduled build task I thought it would be an good idea to check the various poop deck cleats would locate in their respective slots. I was happy to note there were no problems with the deck cleats, these are only dry fitted at this stage.
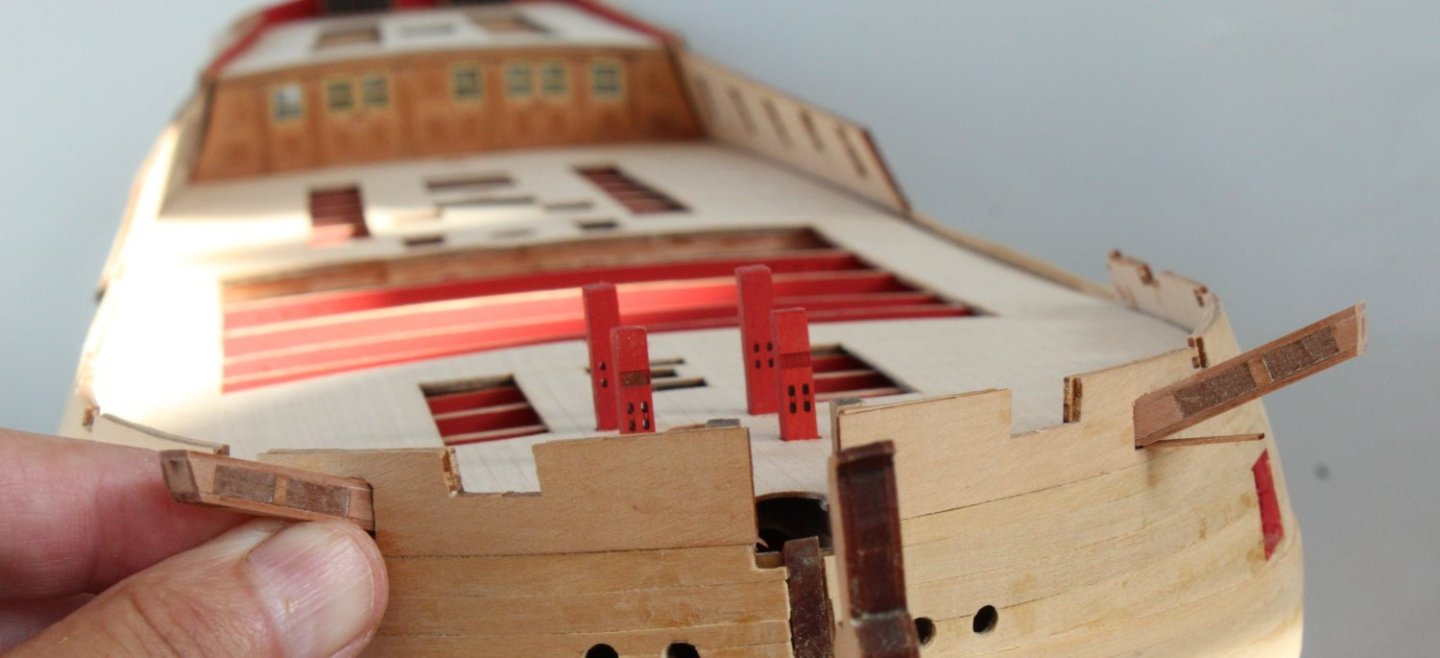
However I did discover an major issue with the six cleats required for inner stern fascia, 3 per side. As can be seen in the following photo the locating holes for these cleats are set to low with respect to the poop deck. The inner stern fascia pattern needed to be set a couple of mm higher in relation to the poop deck to allow the cleats to be added. However as the inner stern pattern position was set in relation to the rear bulwark pattern position I must have made an error way back in the build process when positioning the rear bulwark patterns lower than required. I'm not sure how I managed to do this but given my past history with boat build errors I am not surprised.
Looking at the rigging plans these cleats are used for:
a) Outer cleats belay the vang pendants
b) Middle cleats belay the guy pendants
c) Inner cleats belay the mizzen topgallant yard braces.
I do have some ideas with regards to solving the belaying of these various lines to these cleats.
- Thukydides, Theodosius, mgatrost and 1 other
-
4
-
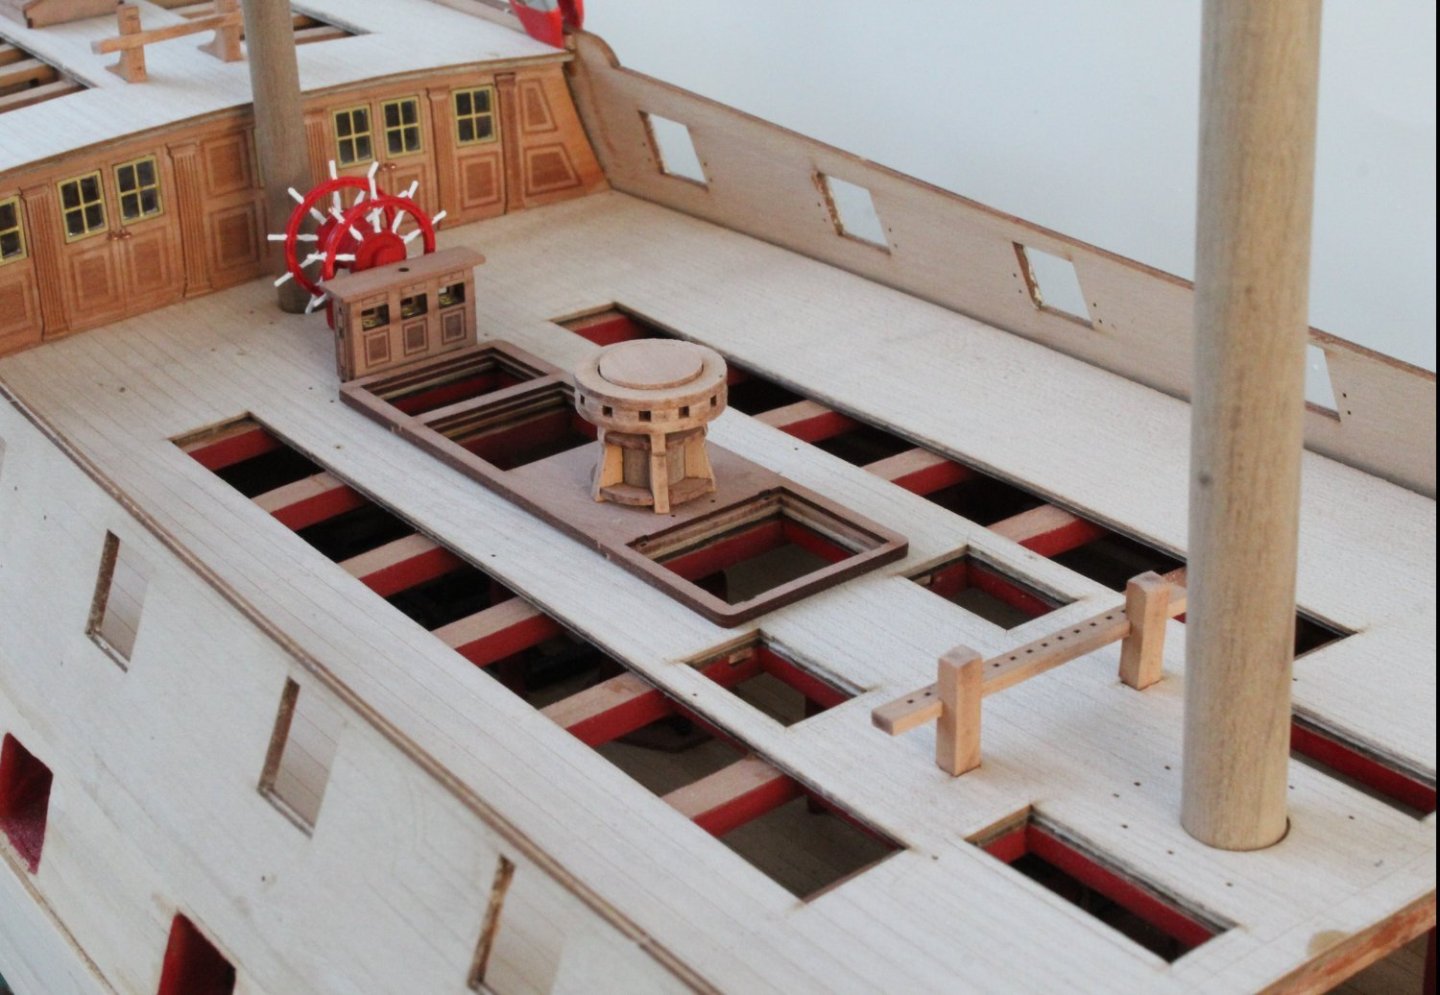
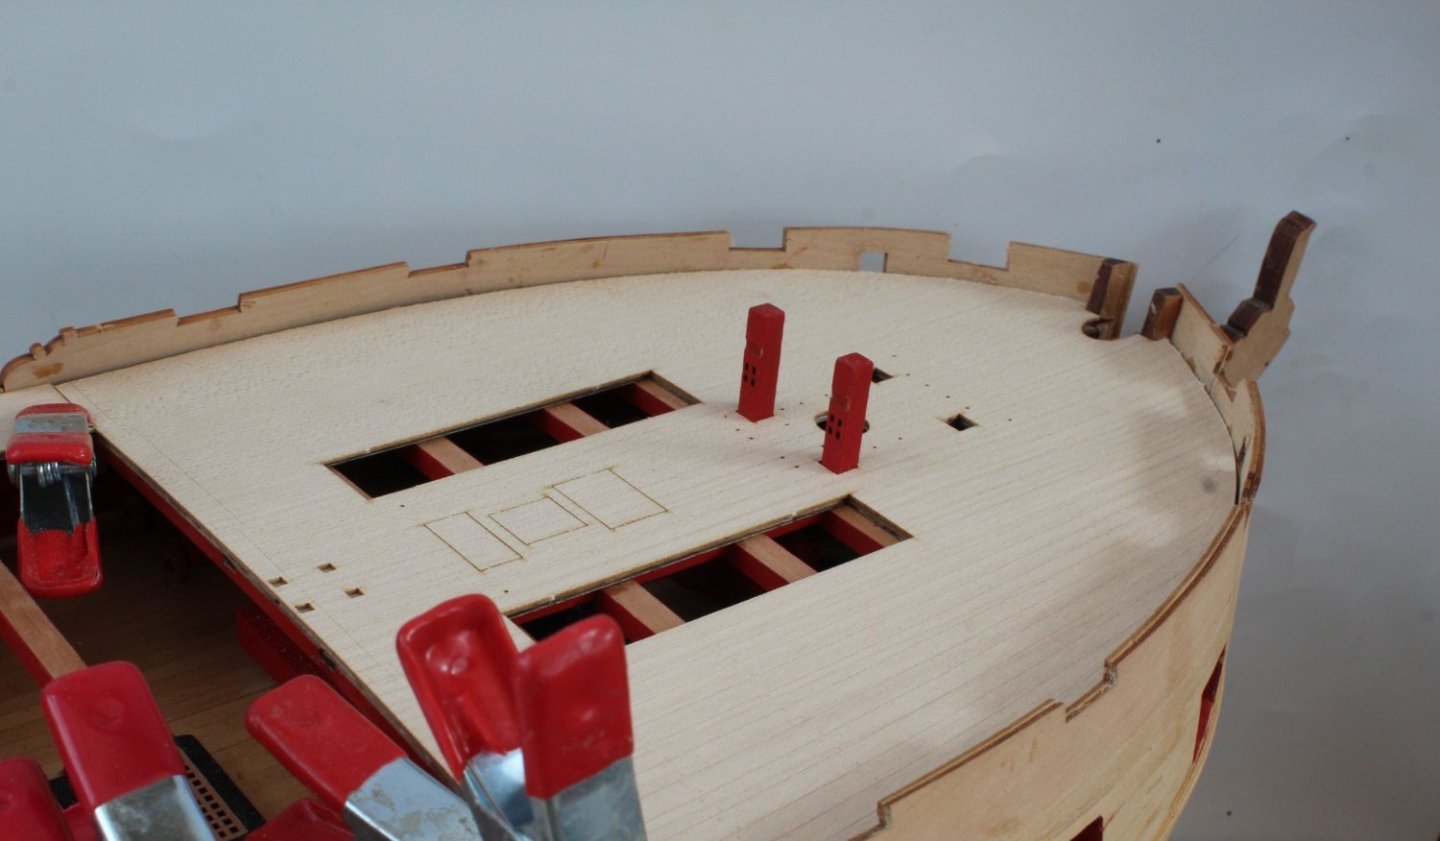
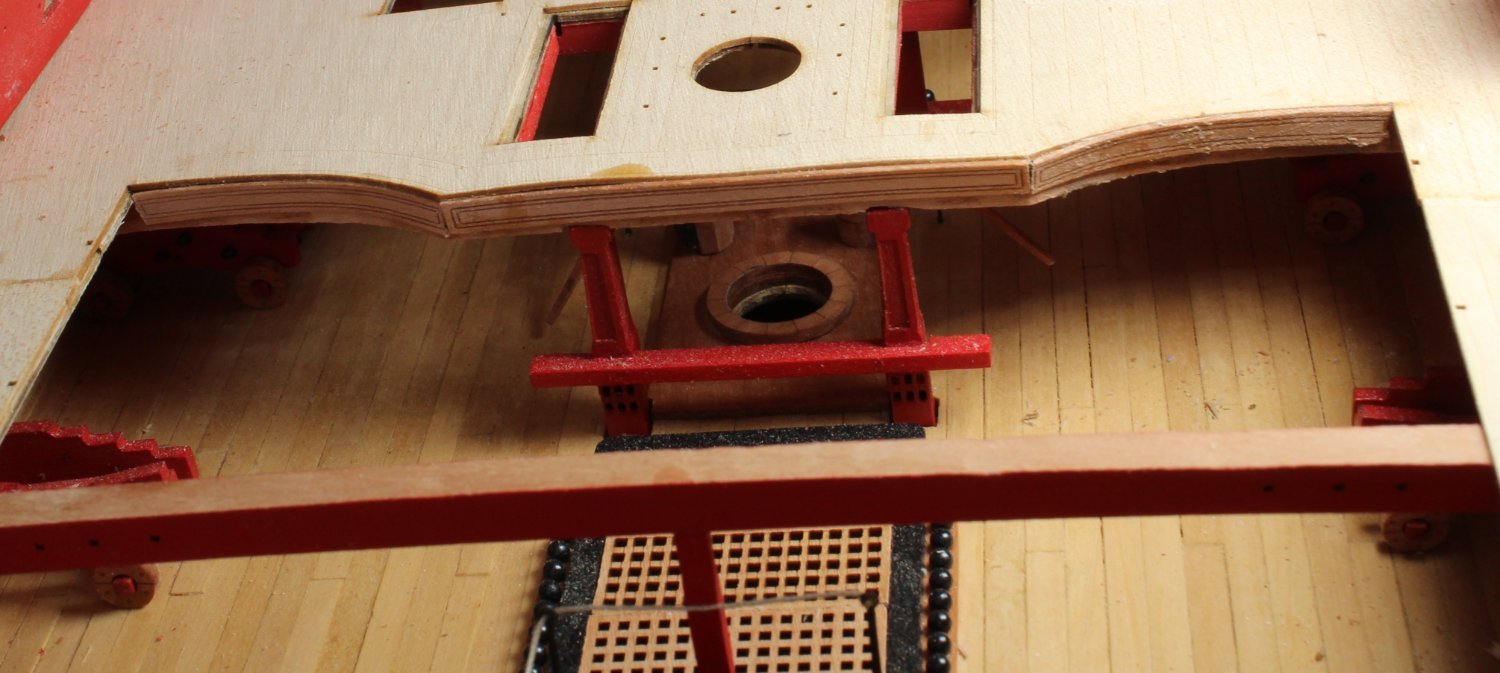
Quarterdeck Deck Items
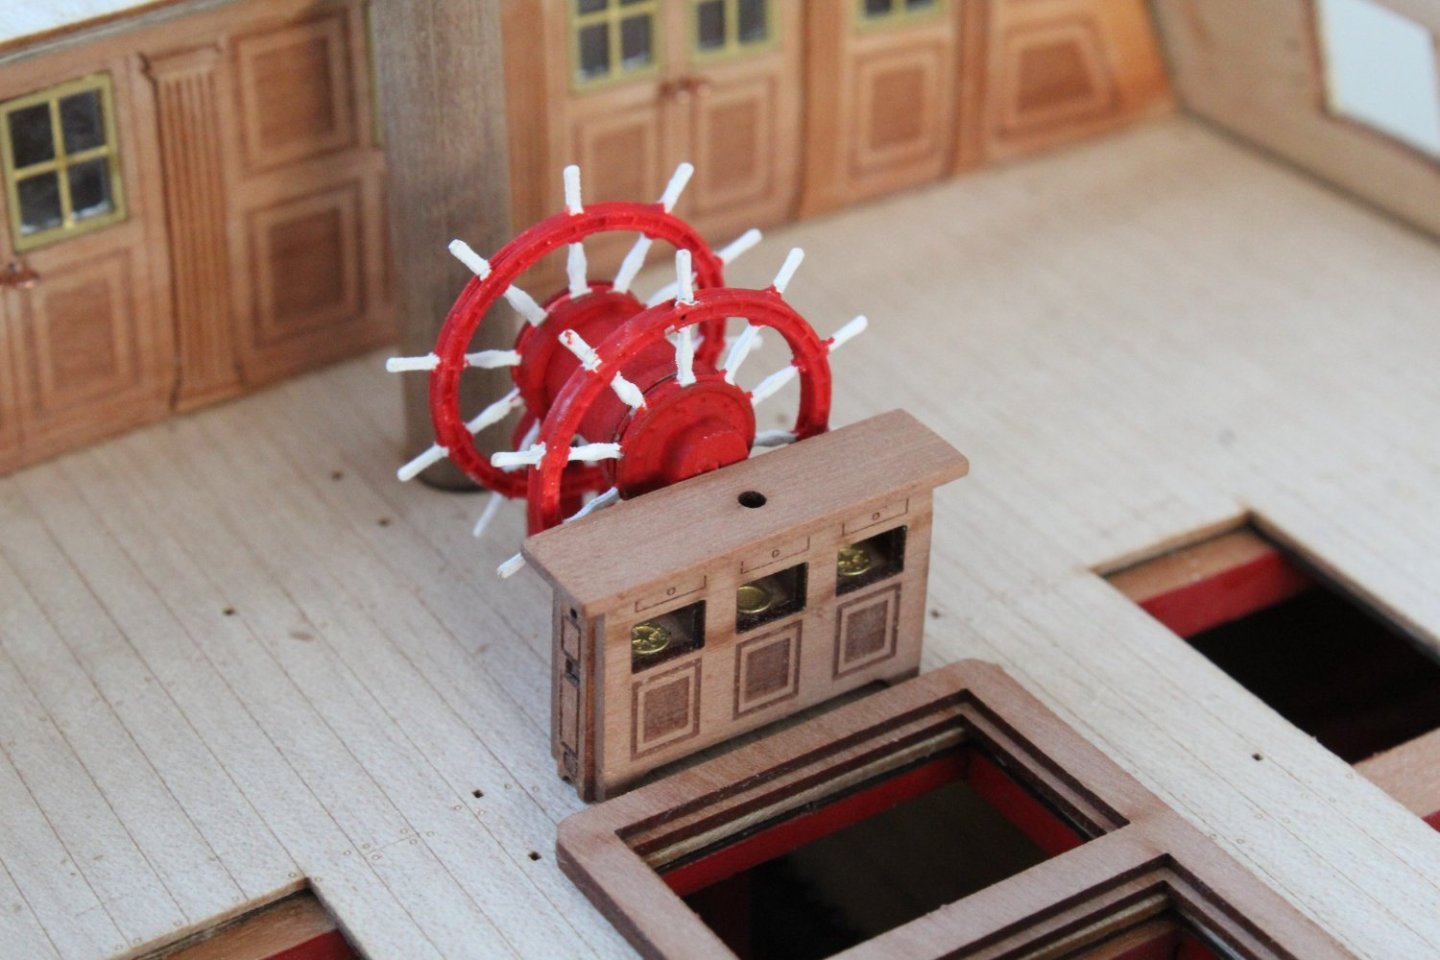
Due to the current heat wave my time in the shipyard has been much reduced. My suntan is getting topped up as I spend plenty of time in the garden enjoying the warm weather. Tomorrow afternoon my wife and I are off to Manchester for three days for grandparent duties and also taking in a show on Monday evening. Therefore I have spent my limited time building some of the quarterdeck deck items starting with the ships wheel. I opted to use the same paint scheme for the ships wheel as shown in the build manual. It does require a little bit of touch up and the paint finish looks much worse in the photo than to the naked eye. The external metal fittings still need to be added to the binnacle (eyebolts and chimney). They both look good when test fitted on the quarterdeck.
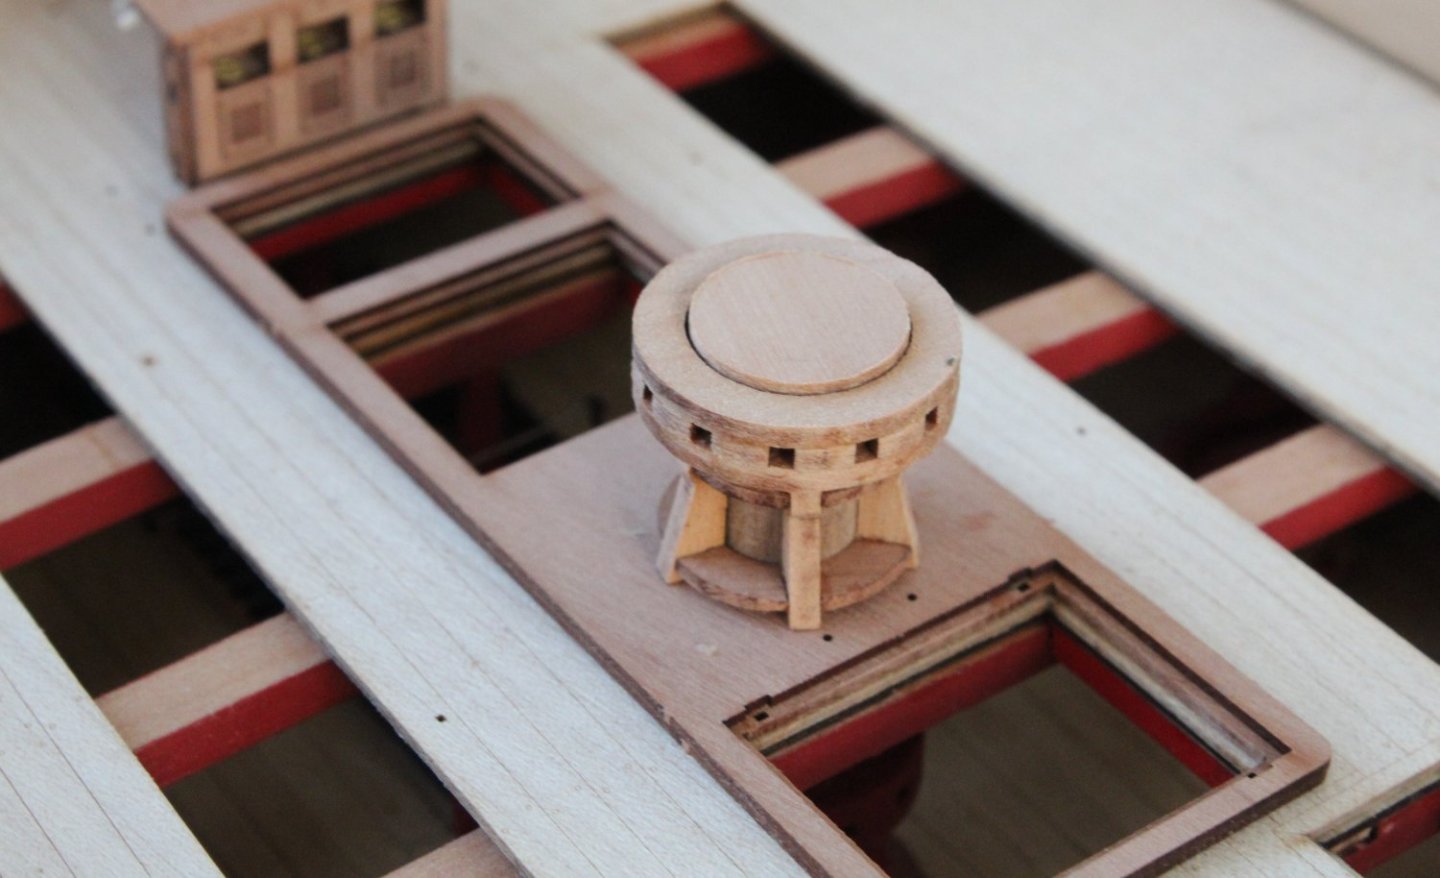
The main hatch frame and upper capstan have been assembled and test fitted. The capstan will be painted red later on in the build process but the top centre round cap will be painted black.
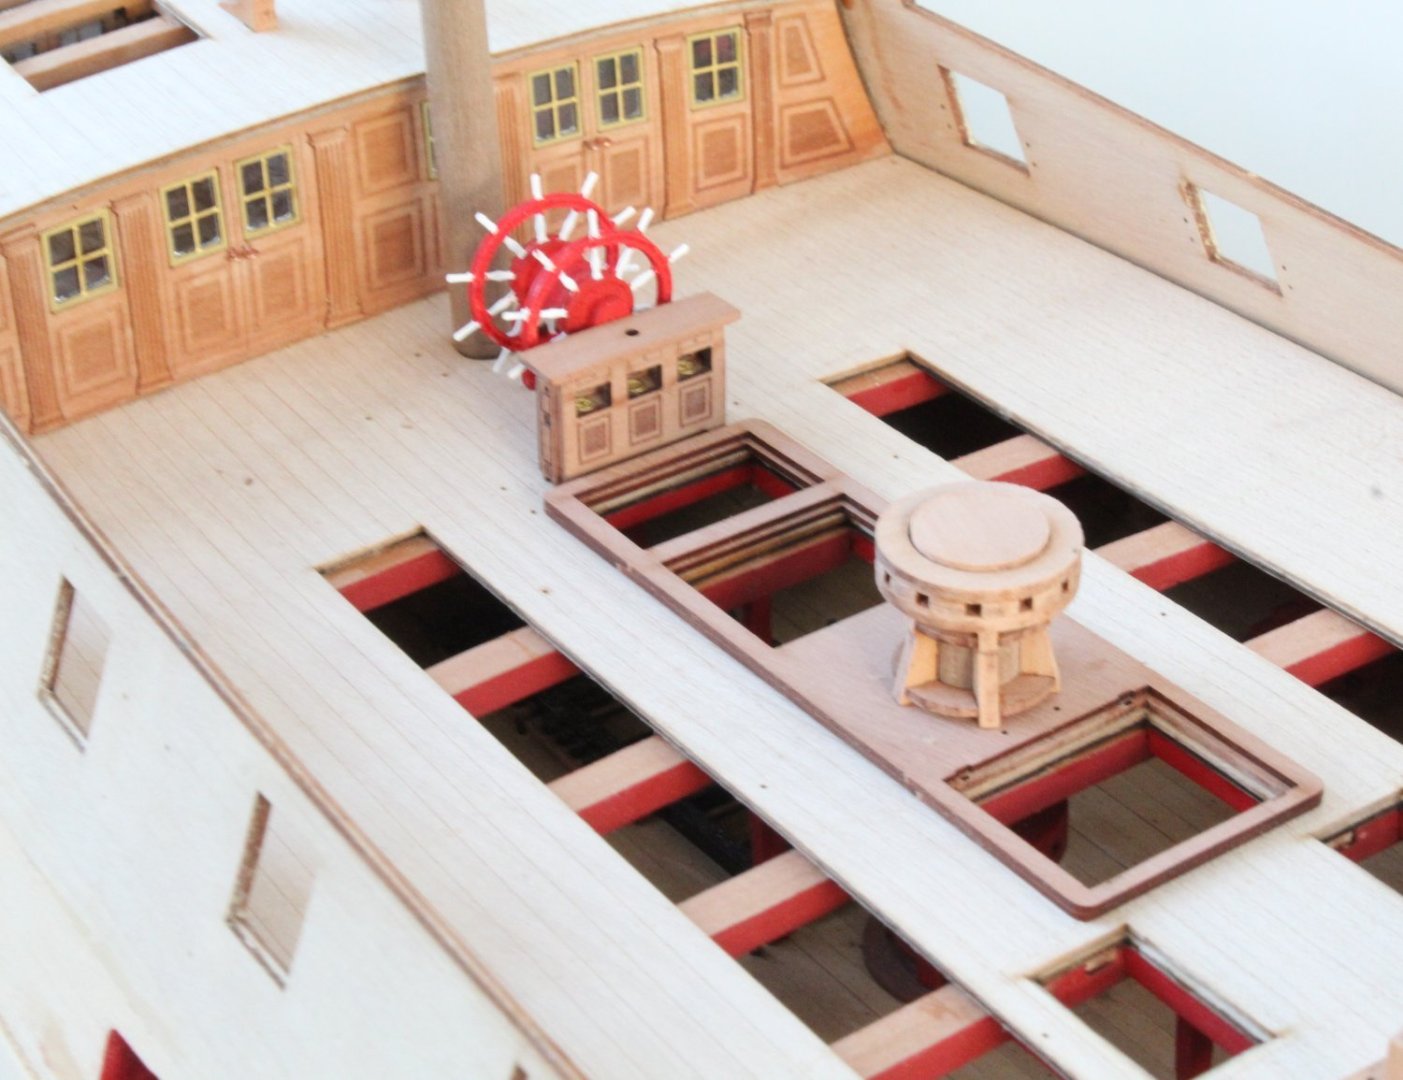
The main mast bitts are a good tight fit once the laser char was removed. They will be removed and painted red later on in the build process.
The quarterdeck deck items all seem to be a good fit. There are still a few more items to add which will be done later on in the build process.
- Ronald-V, chris watton, Blue Ensign and 9 others
-
11
-
 1
1
-
-
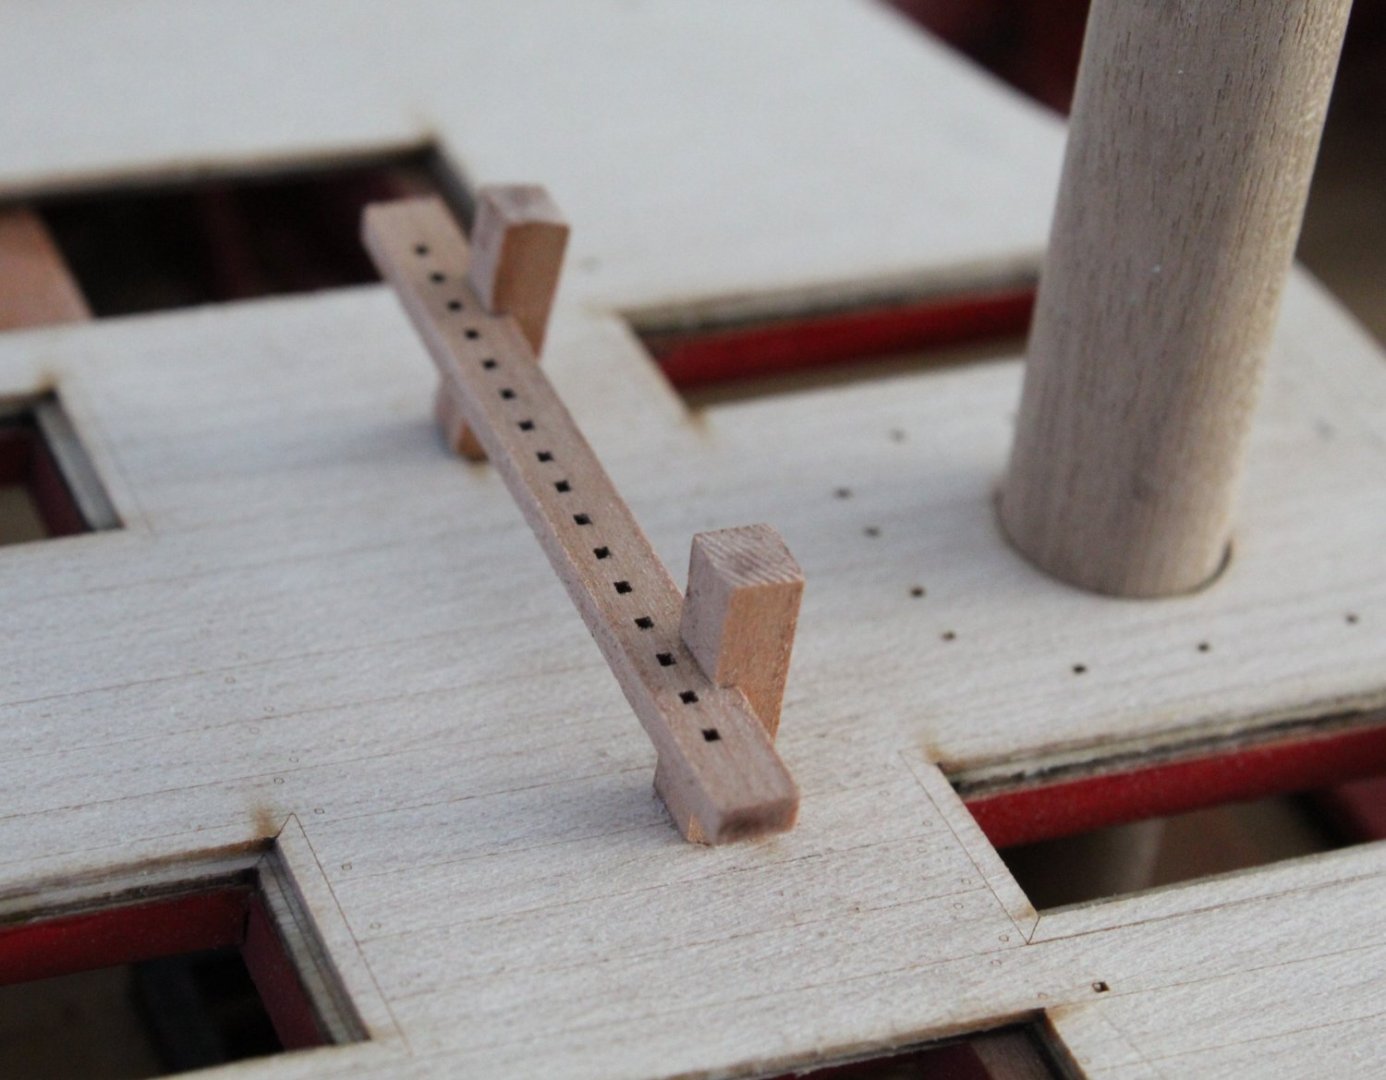
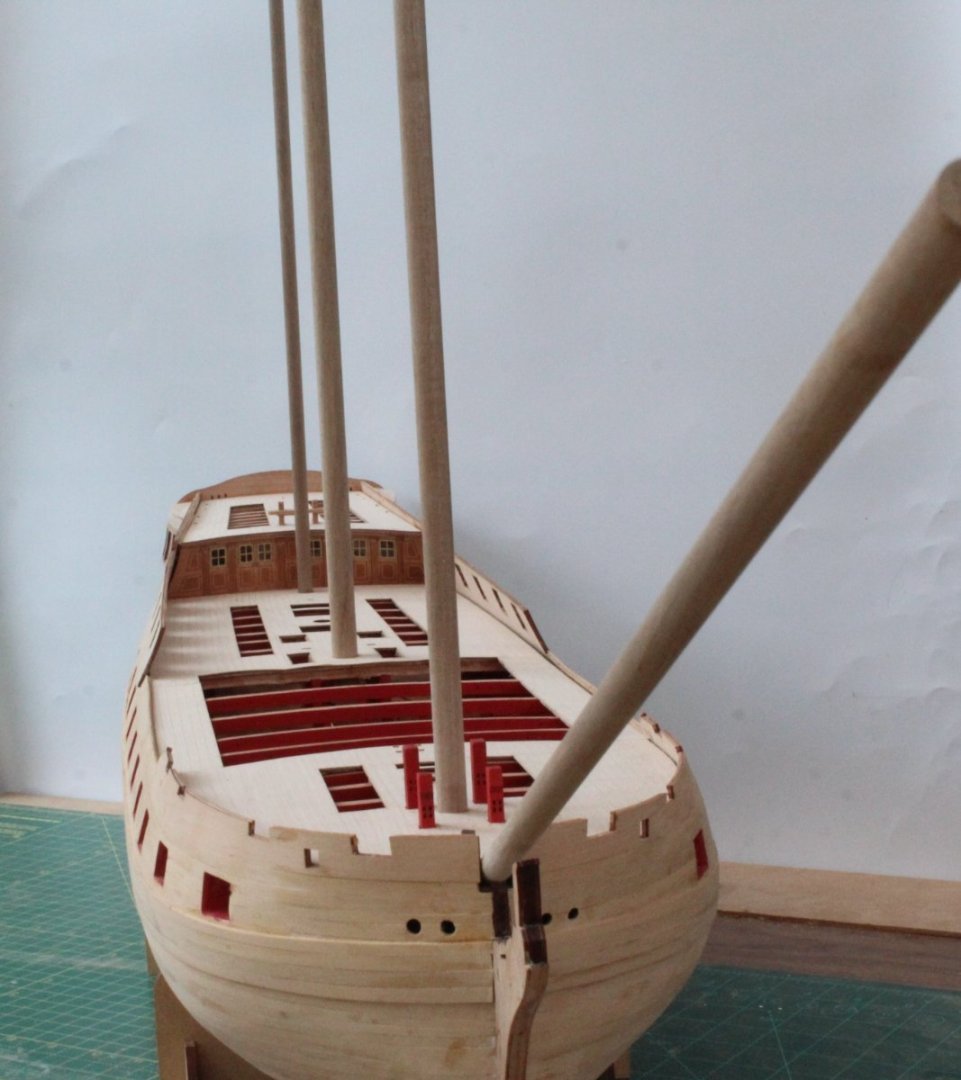
Poop Deck Items
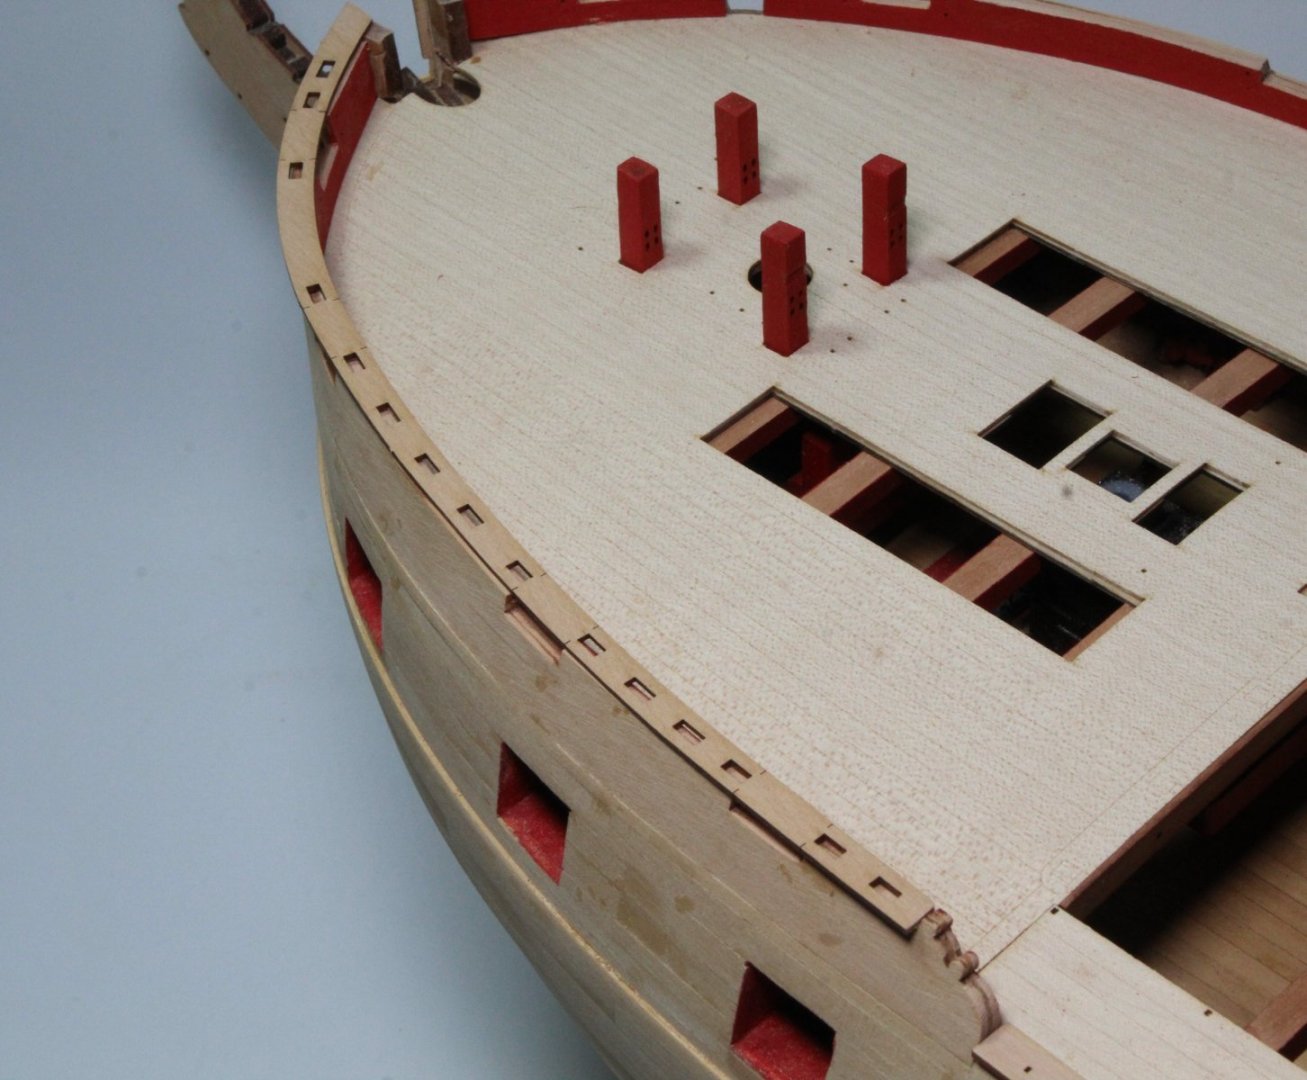
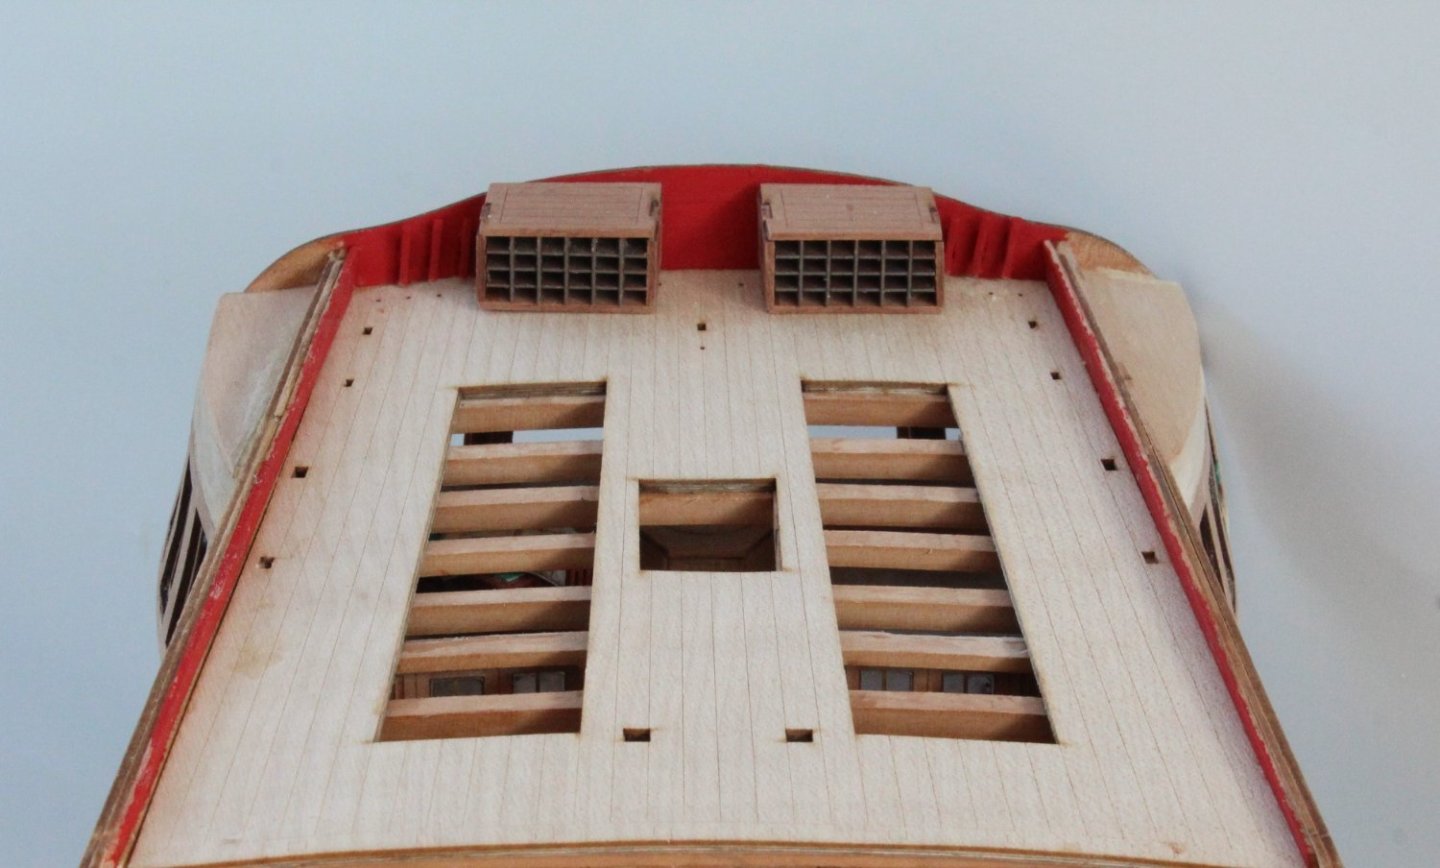
With all the upper decks in place I did a quick check that the masts could be located correctly. All looks good.
Before adding the upper inner bulwarks I decided to make the various poop deck items. With the laser char removed the bitts were test fitted.

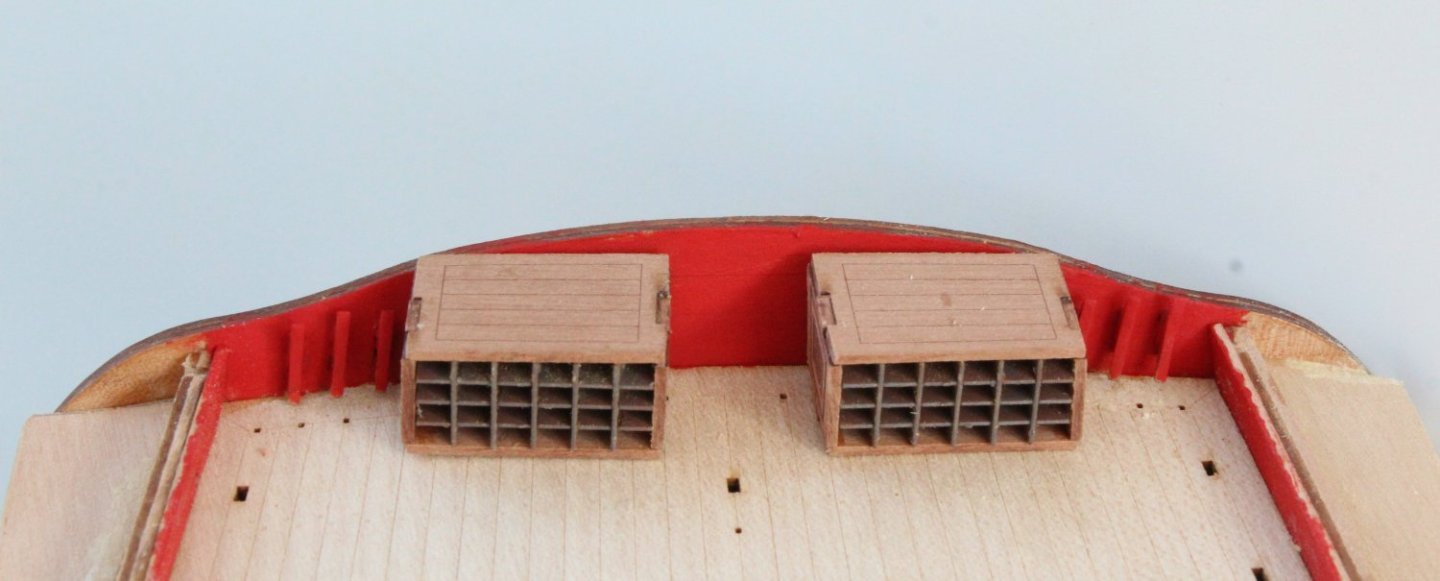
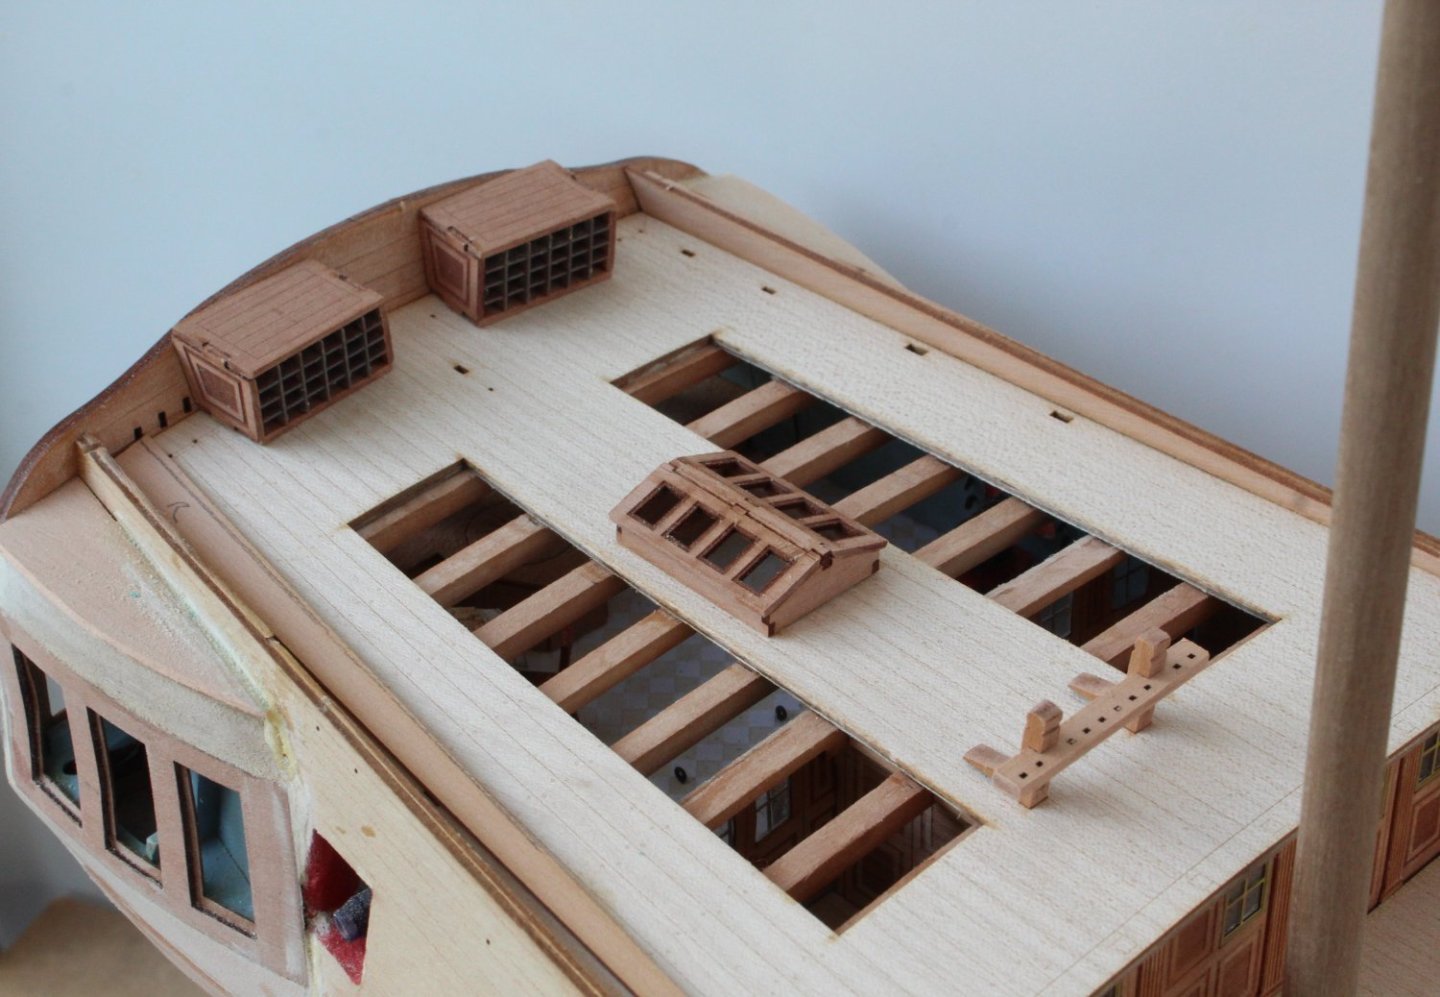
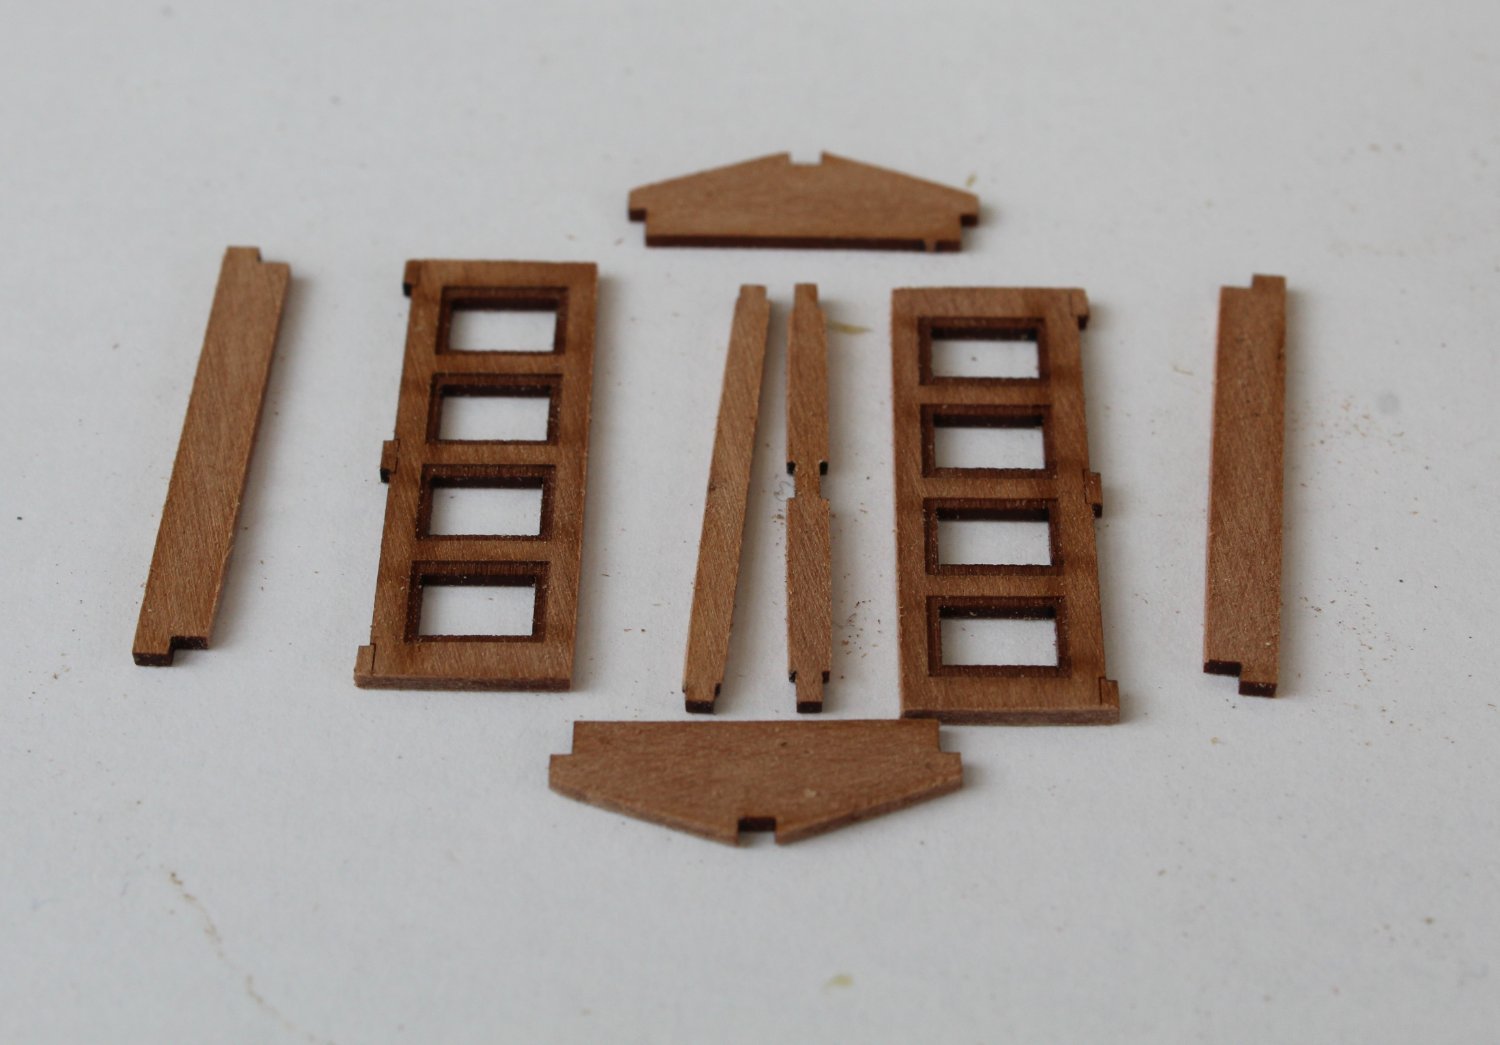
Moving on to the skylark the various parts were gathered.

I decided to use a simple jig to help with the assembly, starting with the basic frame. The jig ensured the frame was square.
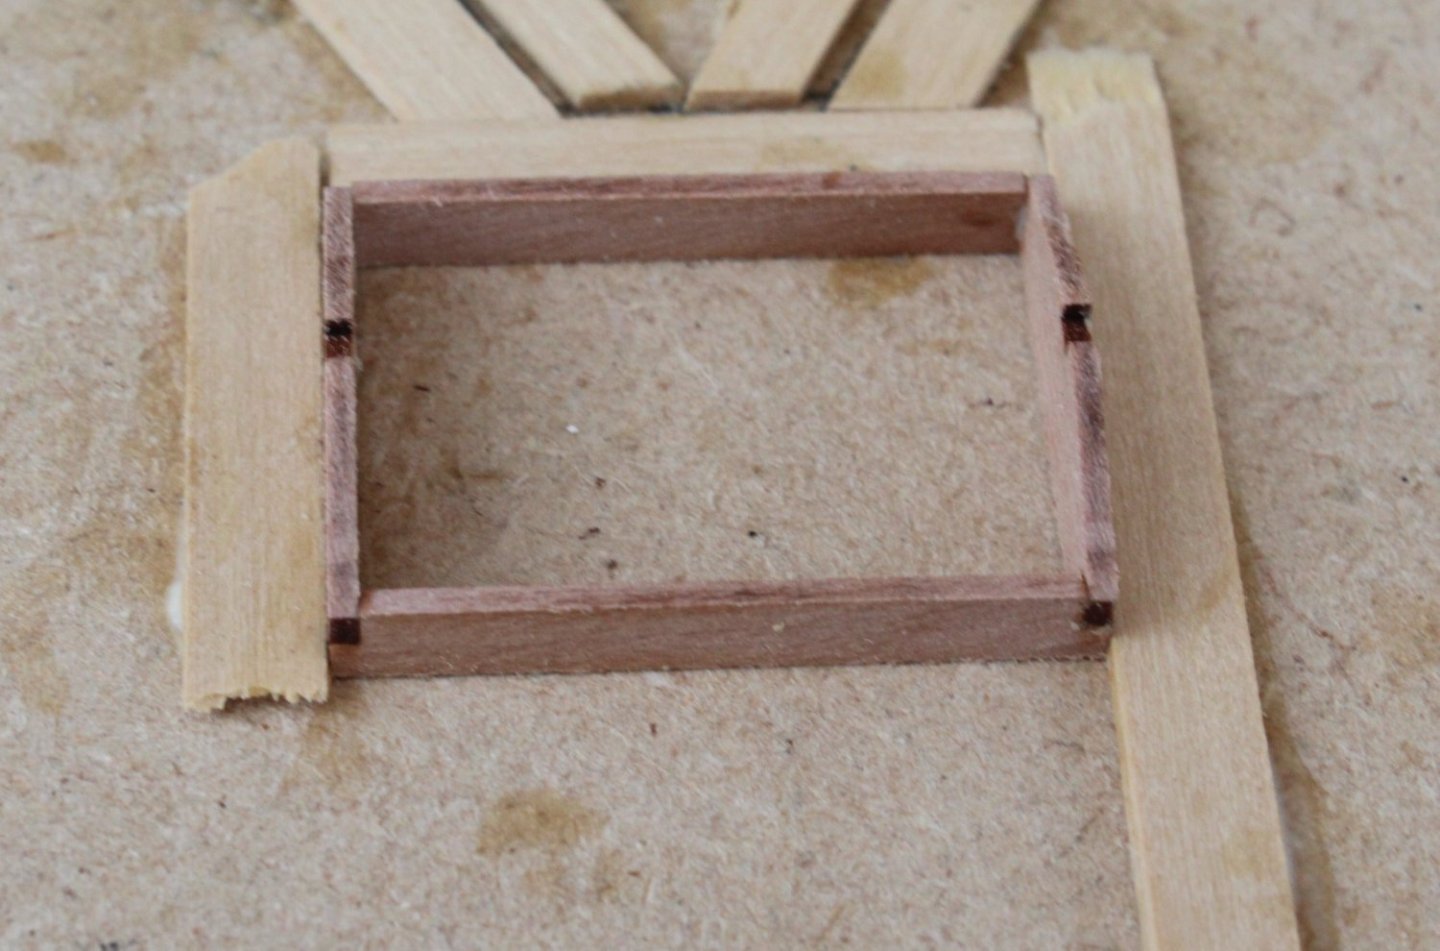
The central support was then added.
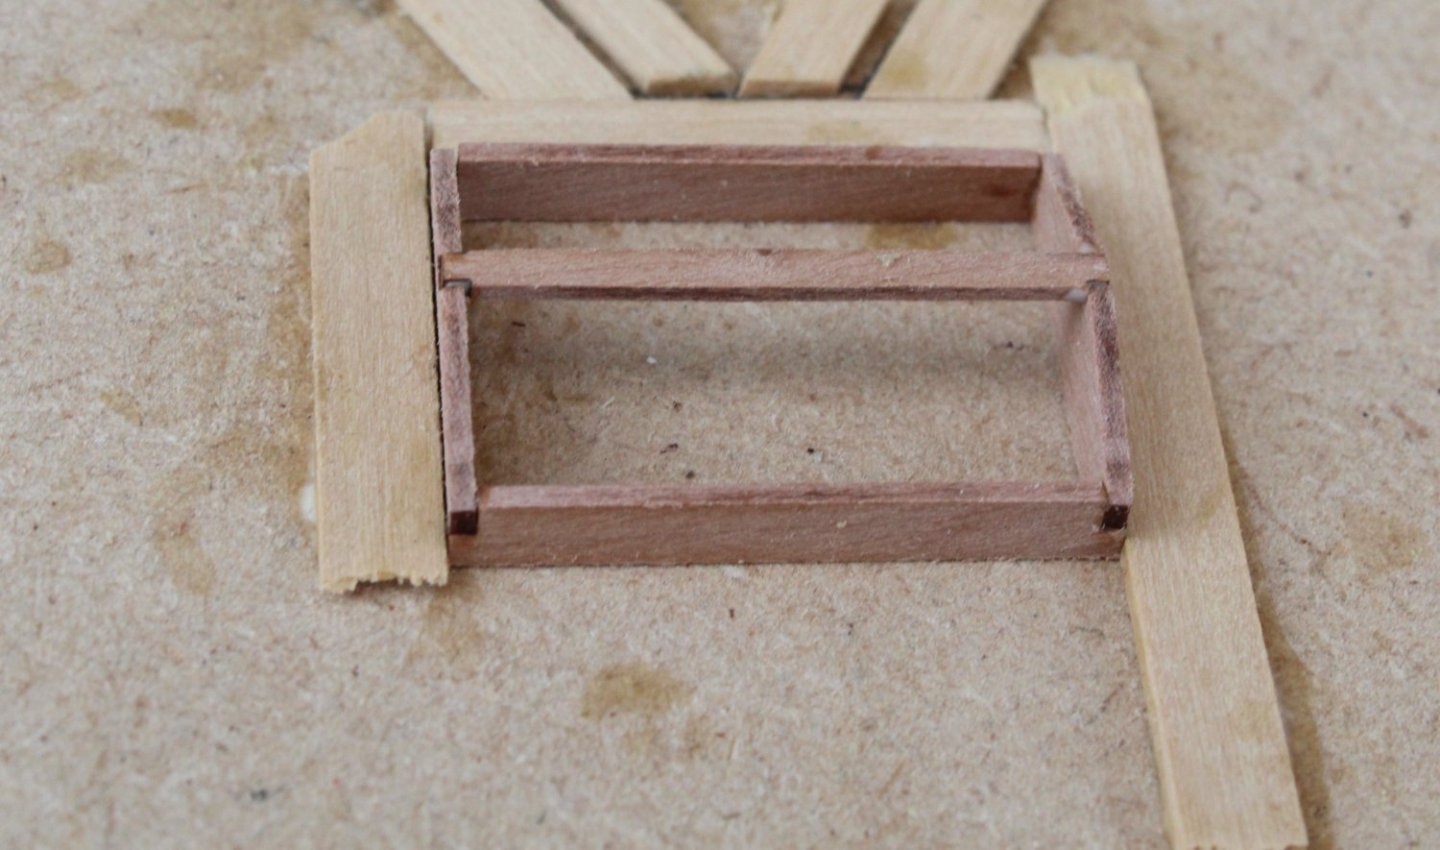
The hatch covers were then glued in place and the assembly was placed on the deck.
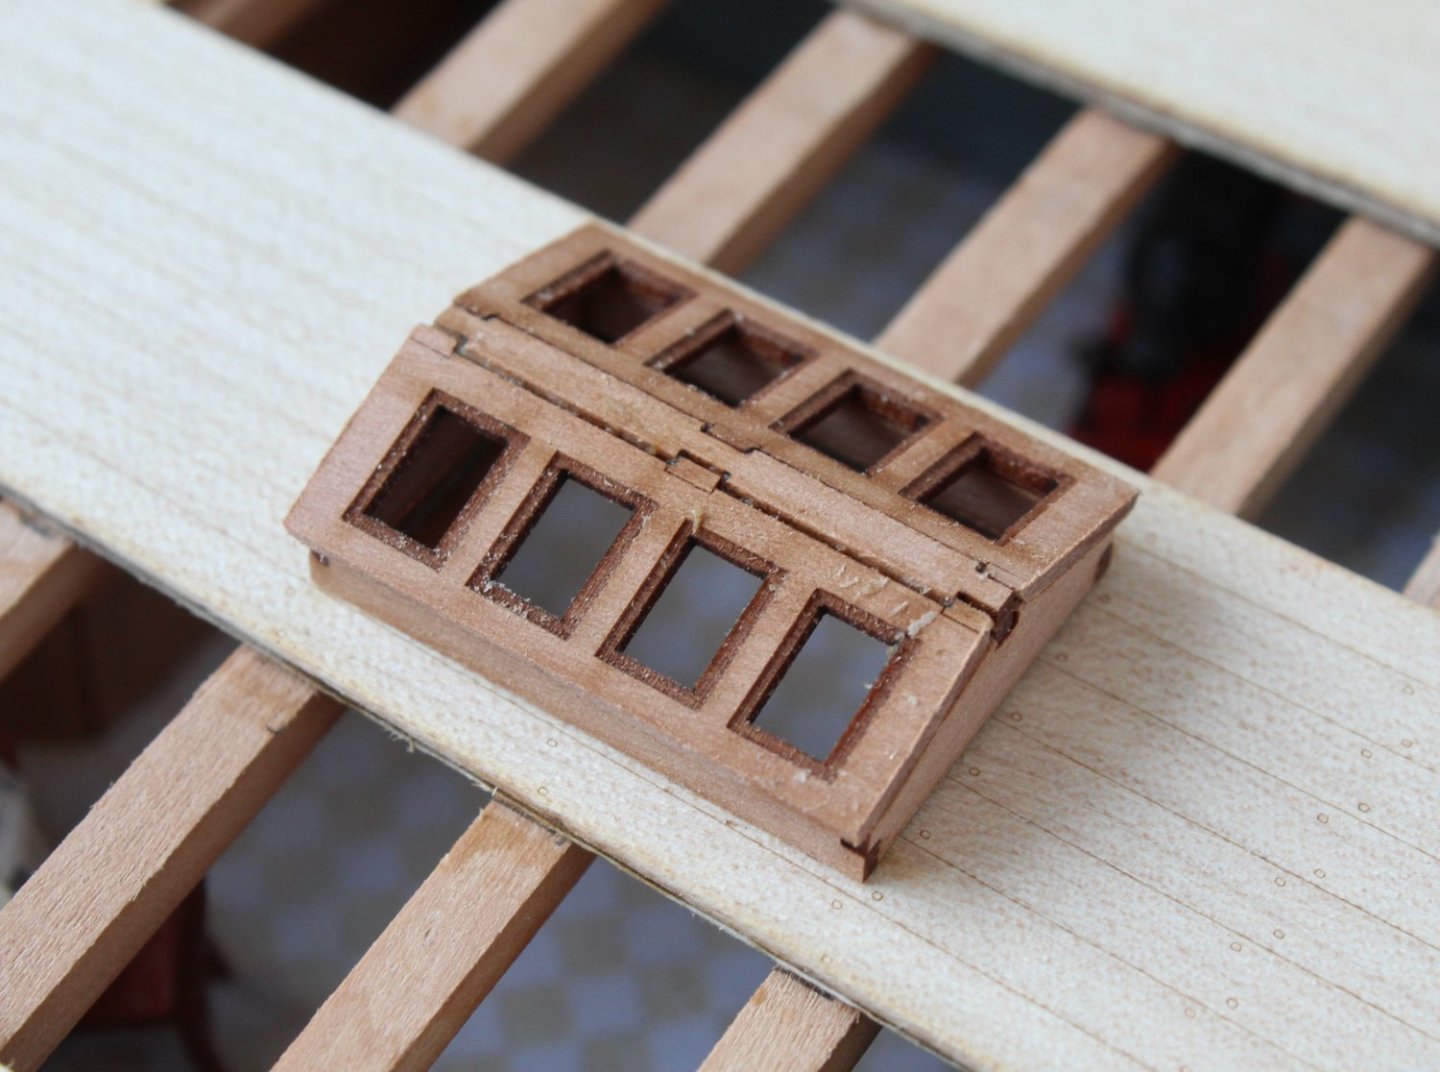
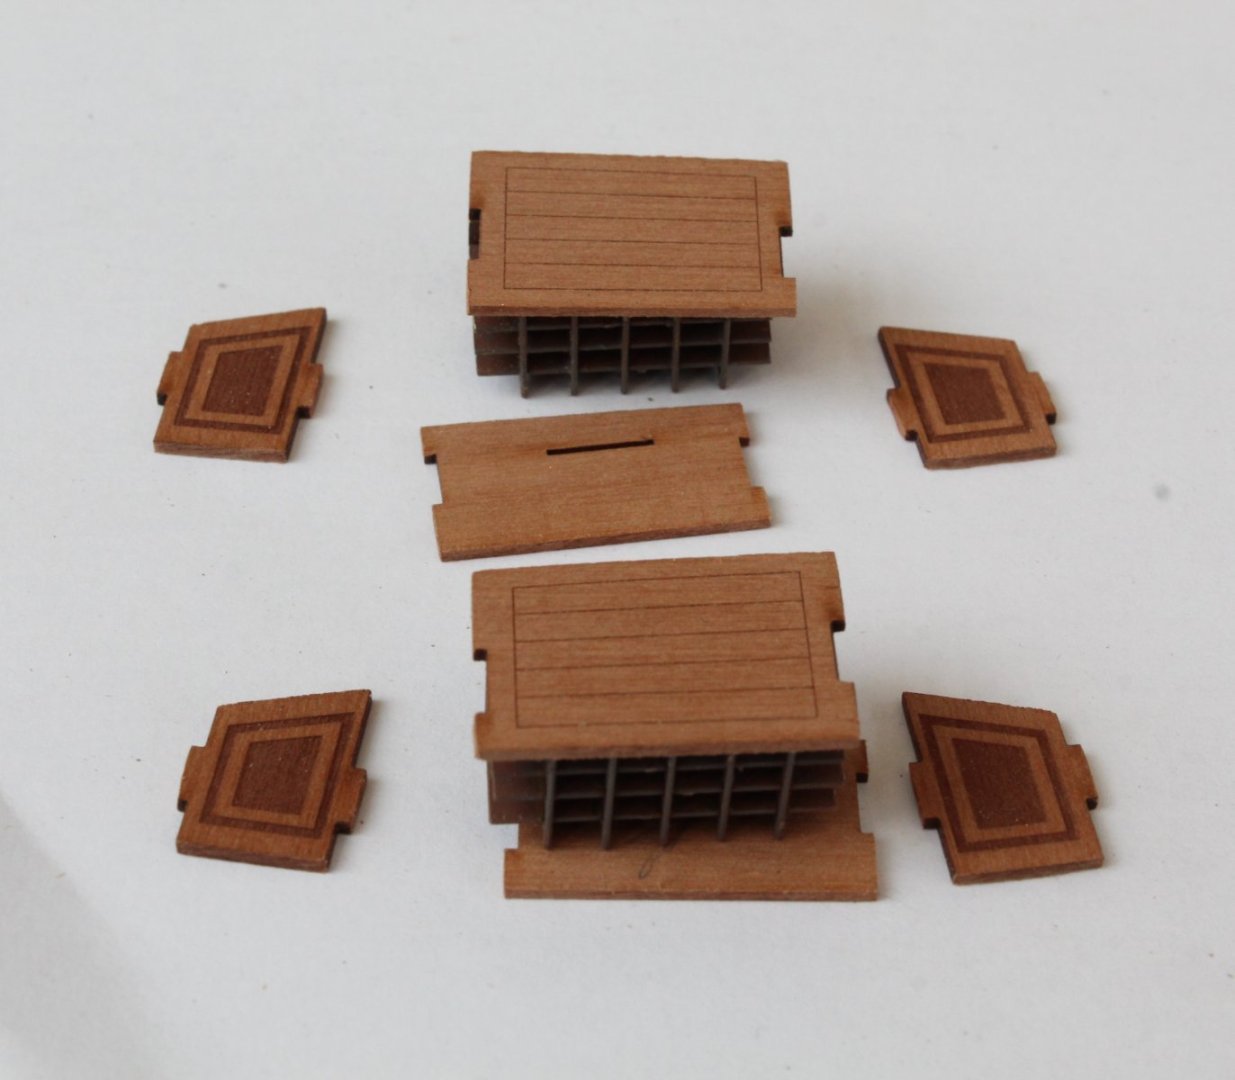
Next up was the two flag lockers. The PE parts were primed and painted and the various parts slotted together nicely. The wooden parts were then gathered.
The side parts were then glued in place followed by the top sections.
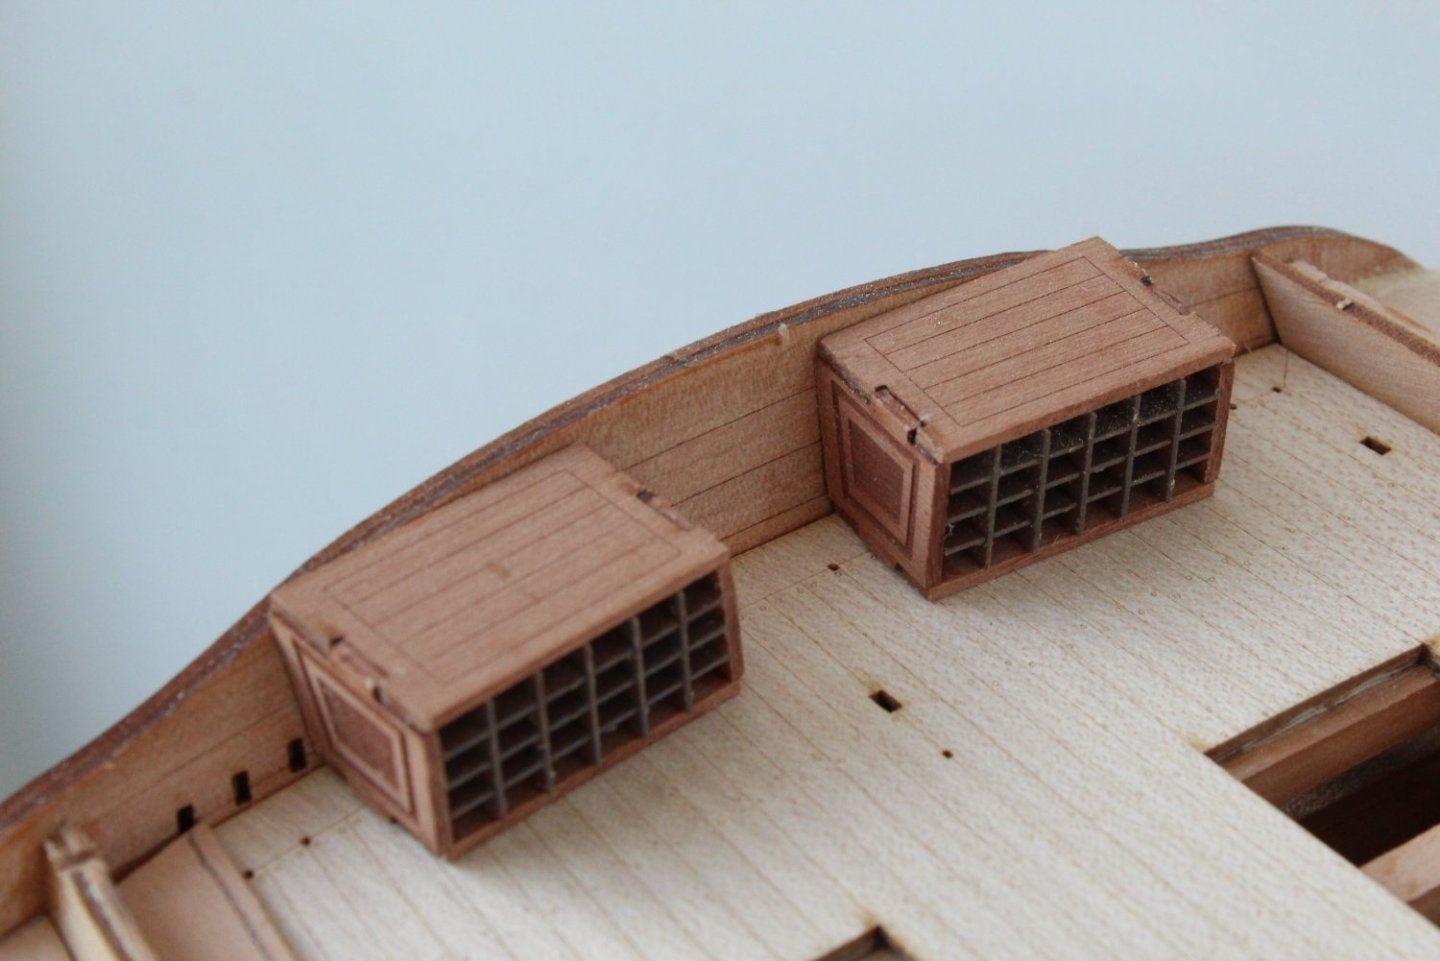
A final picture showing the poop deck with the deck items in place and the inner poop deck bulwark in place.
-
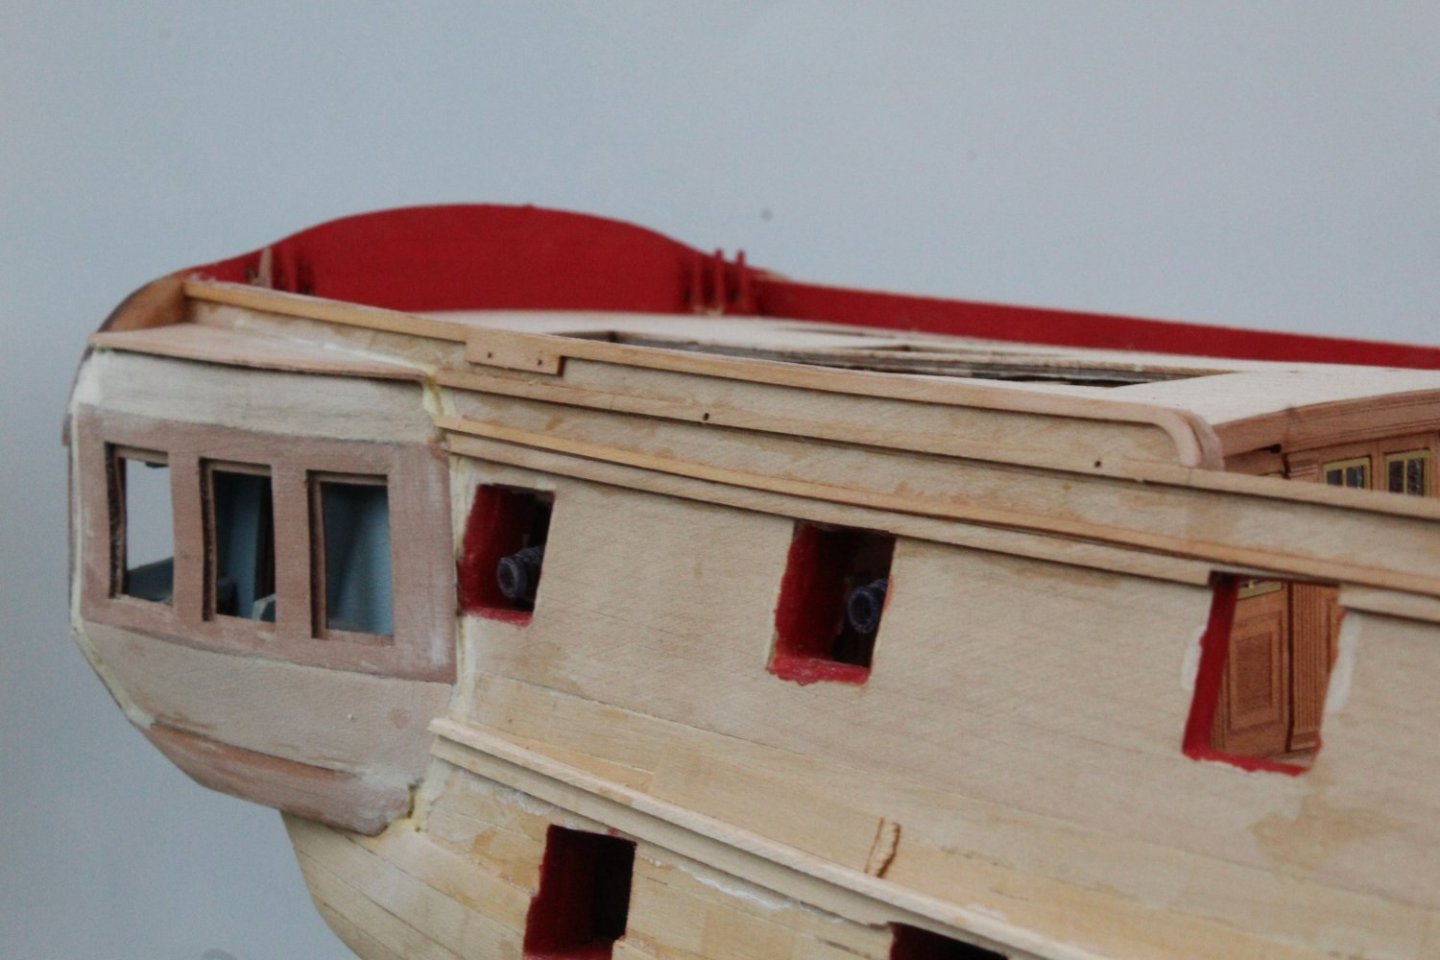
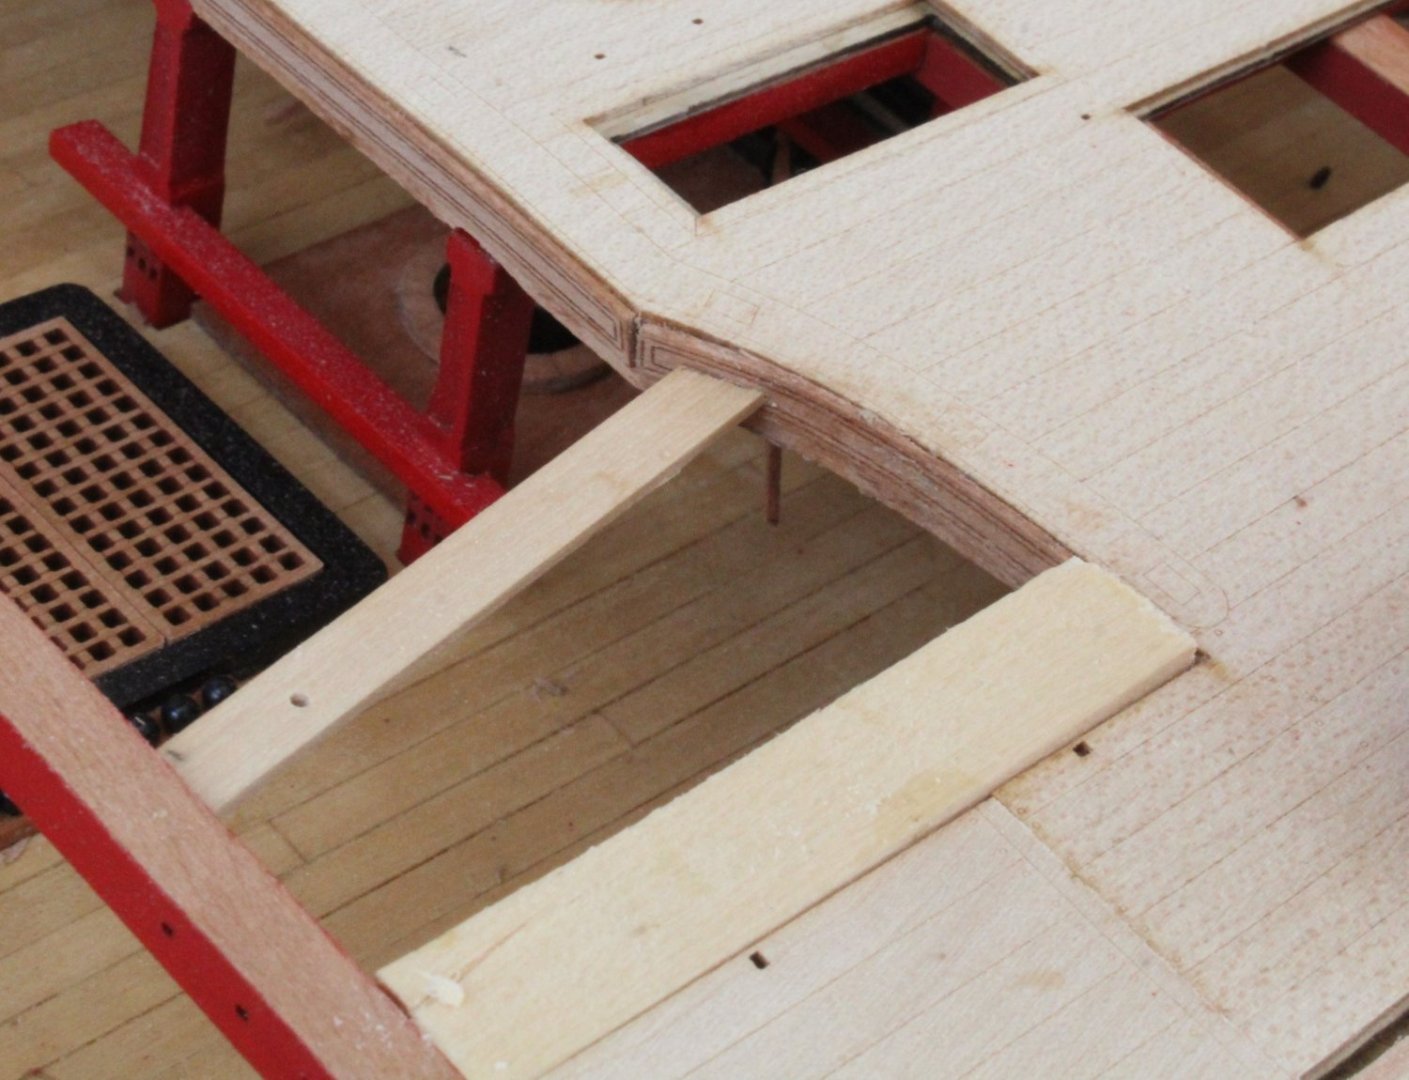
Quarter Galleries and Decks
The basic assembly of the two quarter galleries is now complete. They look a bit messy in the attached photos as I have added some wood filler. Once the paint is applied, later on in the build process, I am confident the quarter galleries will pass muster.
The outer stern patterns have also been glued in place. There is an slight issue with the rudder casing top canopy which I will rectify before the stern decorations are added.

I did plank the gun deck, with box wood. However I decided to use the pearwood patterns for the upper decks as I did have a few issues with the box wood. The deck was carefully aligned and glued in placed.
Next the quarterdeck was glued in place with the Captain standing watch on the poop deck.

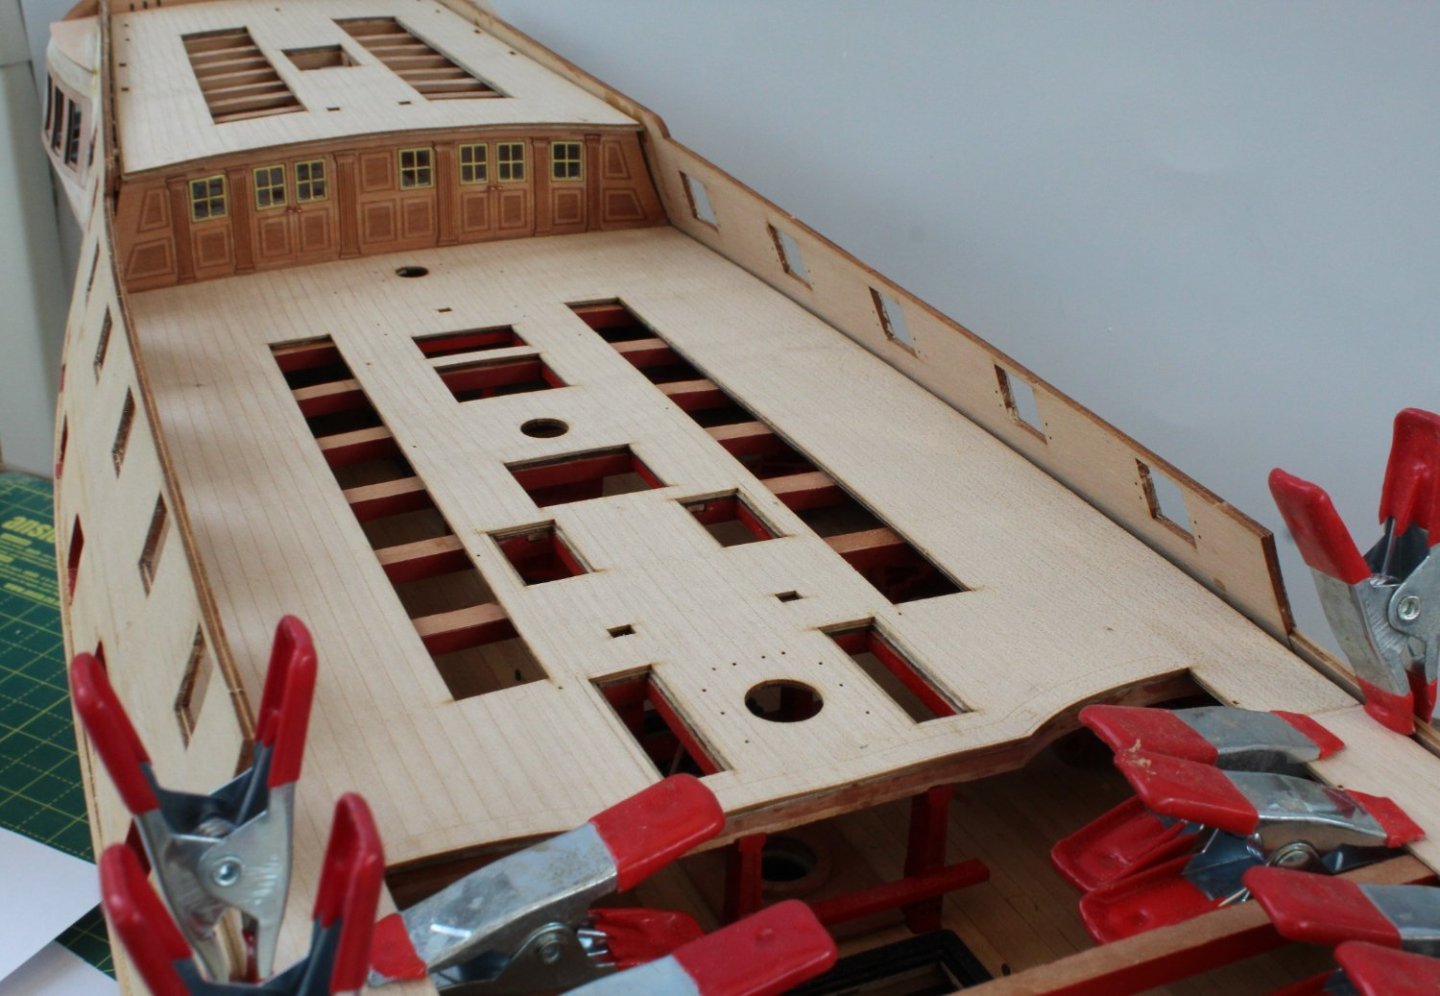
Next the gangways were glued in place.
The forecastle deck is ready to be glued in place, which will be done once the gangway glue has had time to cure.
-
-
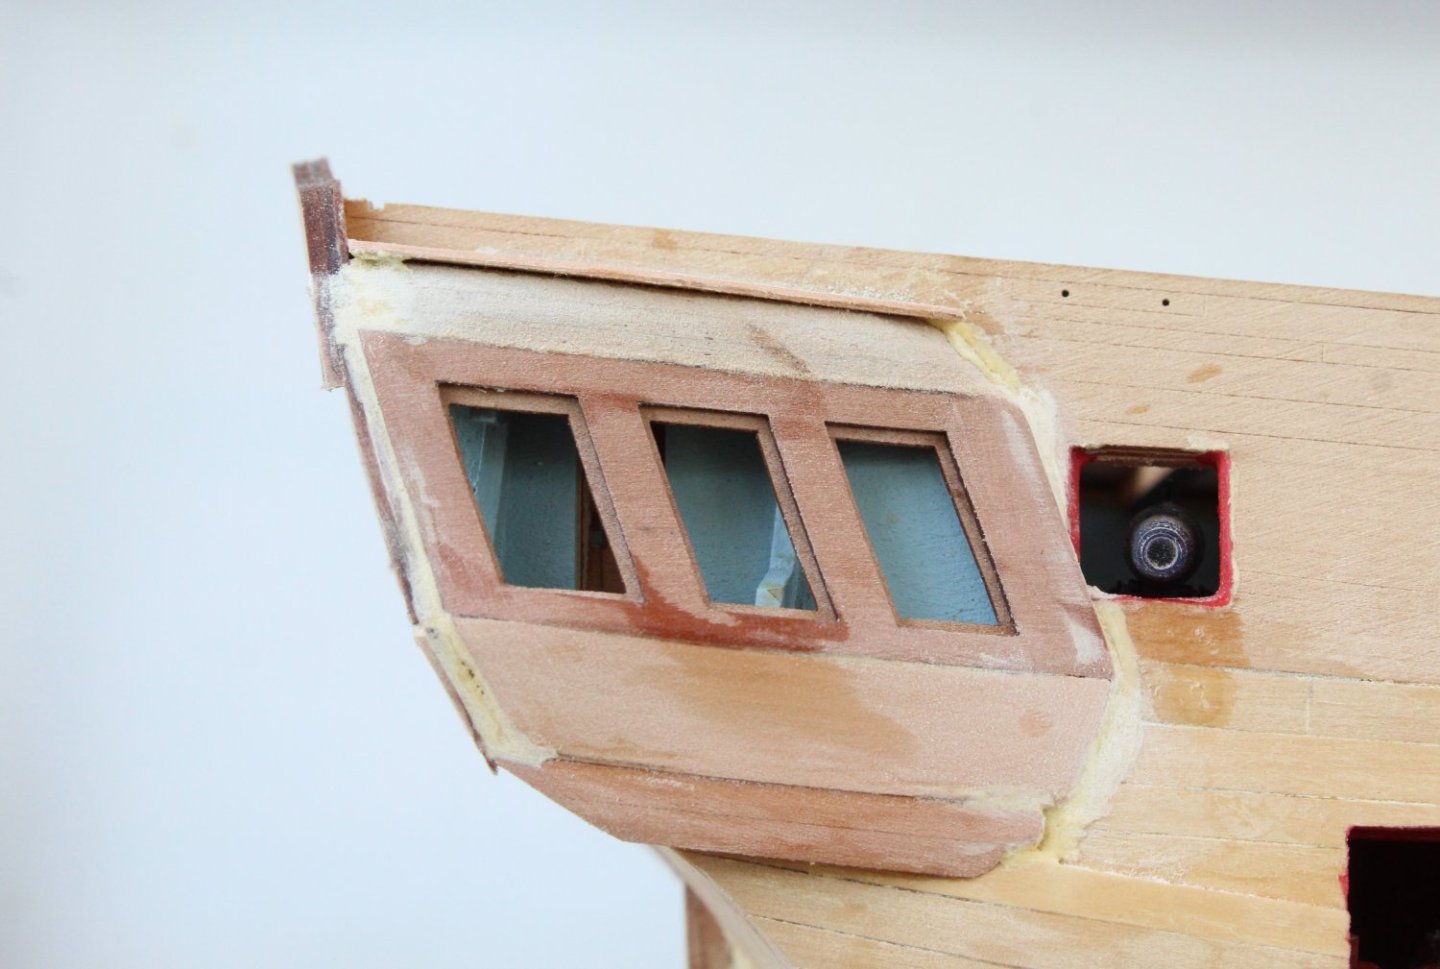
Quarter Galleries
The basic assembly is now complete. As can be seen in the attached photo's I have not covered myself in glory with this build stage. Thankfully the imperfections can be filled and sanded smooth before the painting phase.
The first photo shows the inner patterns glued in place.

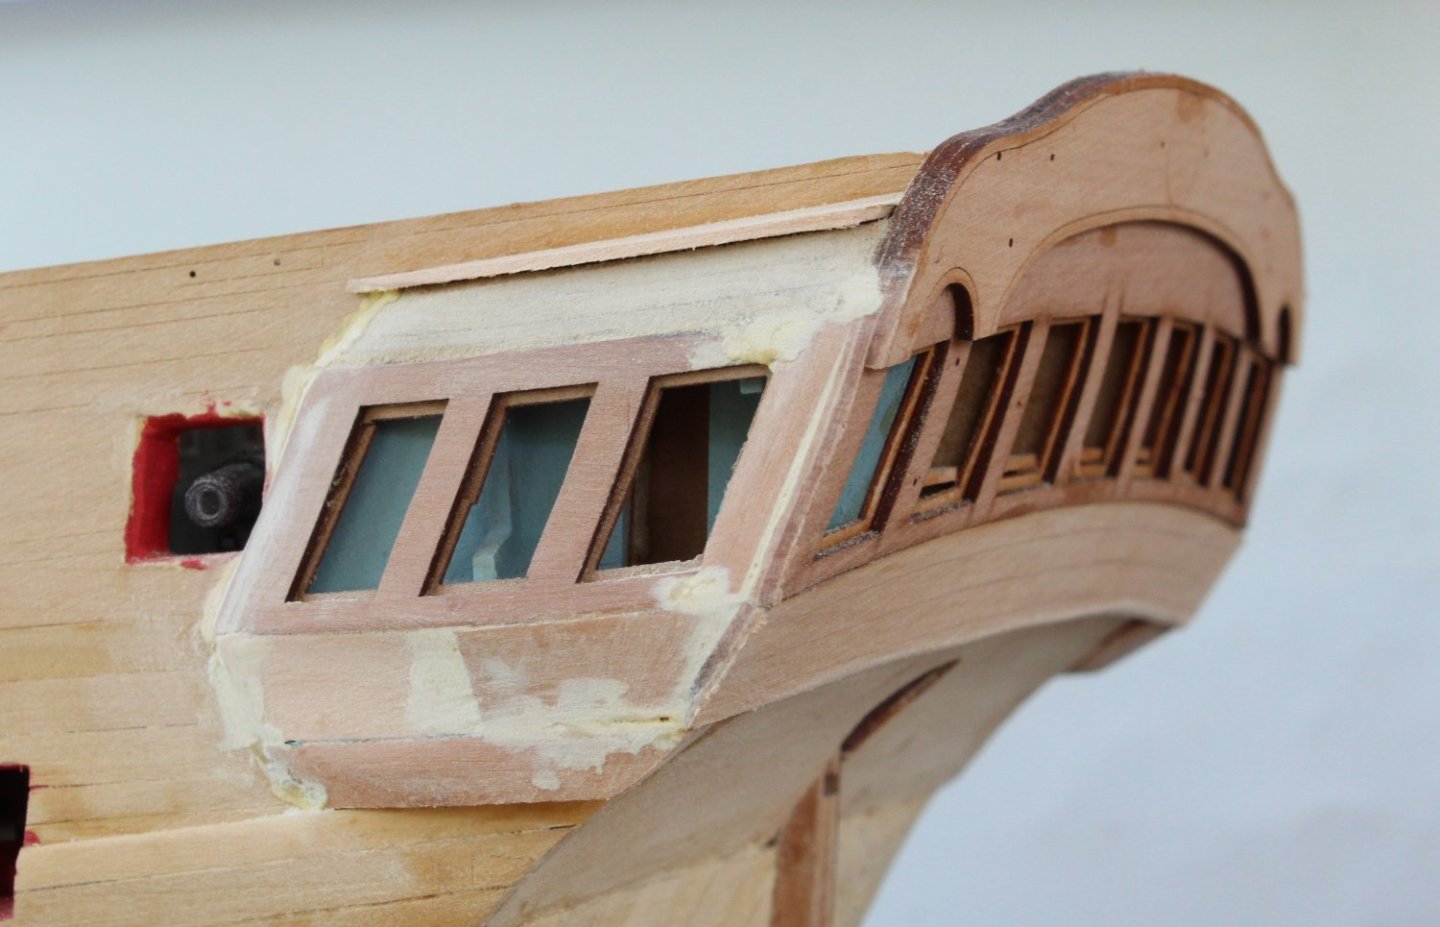
Before the outer patterns were fitted I did soak them in water and then clamped them around a large saucepan to get the required shape.
The right-hand side with the outer patterns fitted does not look too bad. I will need to add a bit of filler between these patterns and the stern counters before painting.
I seemed to have a few more problems with the left-hand side. I ended up adding a couple of filler bits which we carefully shaped. It may look a bit odd at the moment but once area has been filled, sanded and painted it will look better and I am confident it will pass muster.
- AJohnson, Theodosius, Mr Whippy and 7 others
-
10
-
-
Happy birthday Kevin, have a great day and maybe you can sneak the odd hour in the shipyard.
- Old Collingwood, mtaylor, Kevin and 1 other
-
4
-
Upper and Middle Stern Counter Inner Patterns
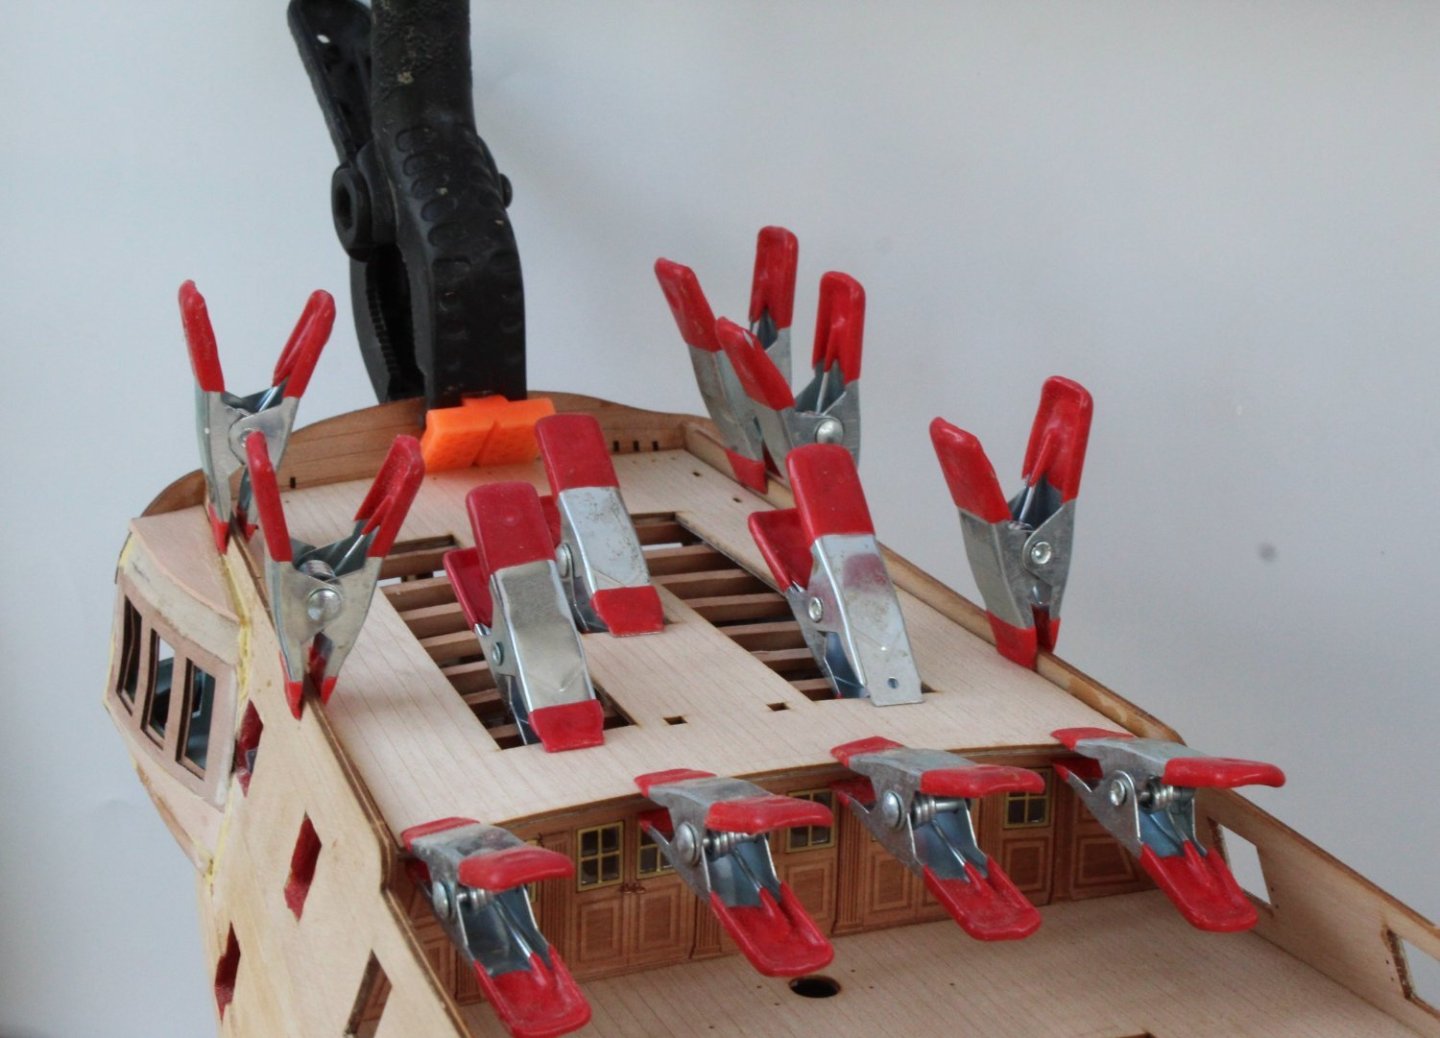
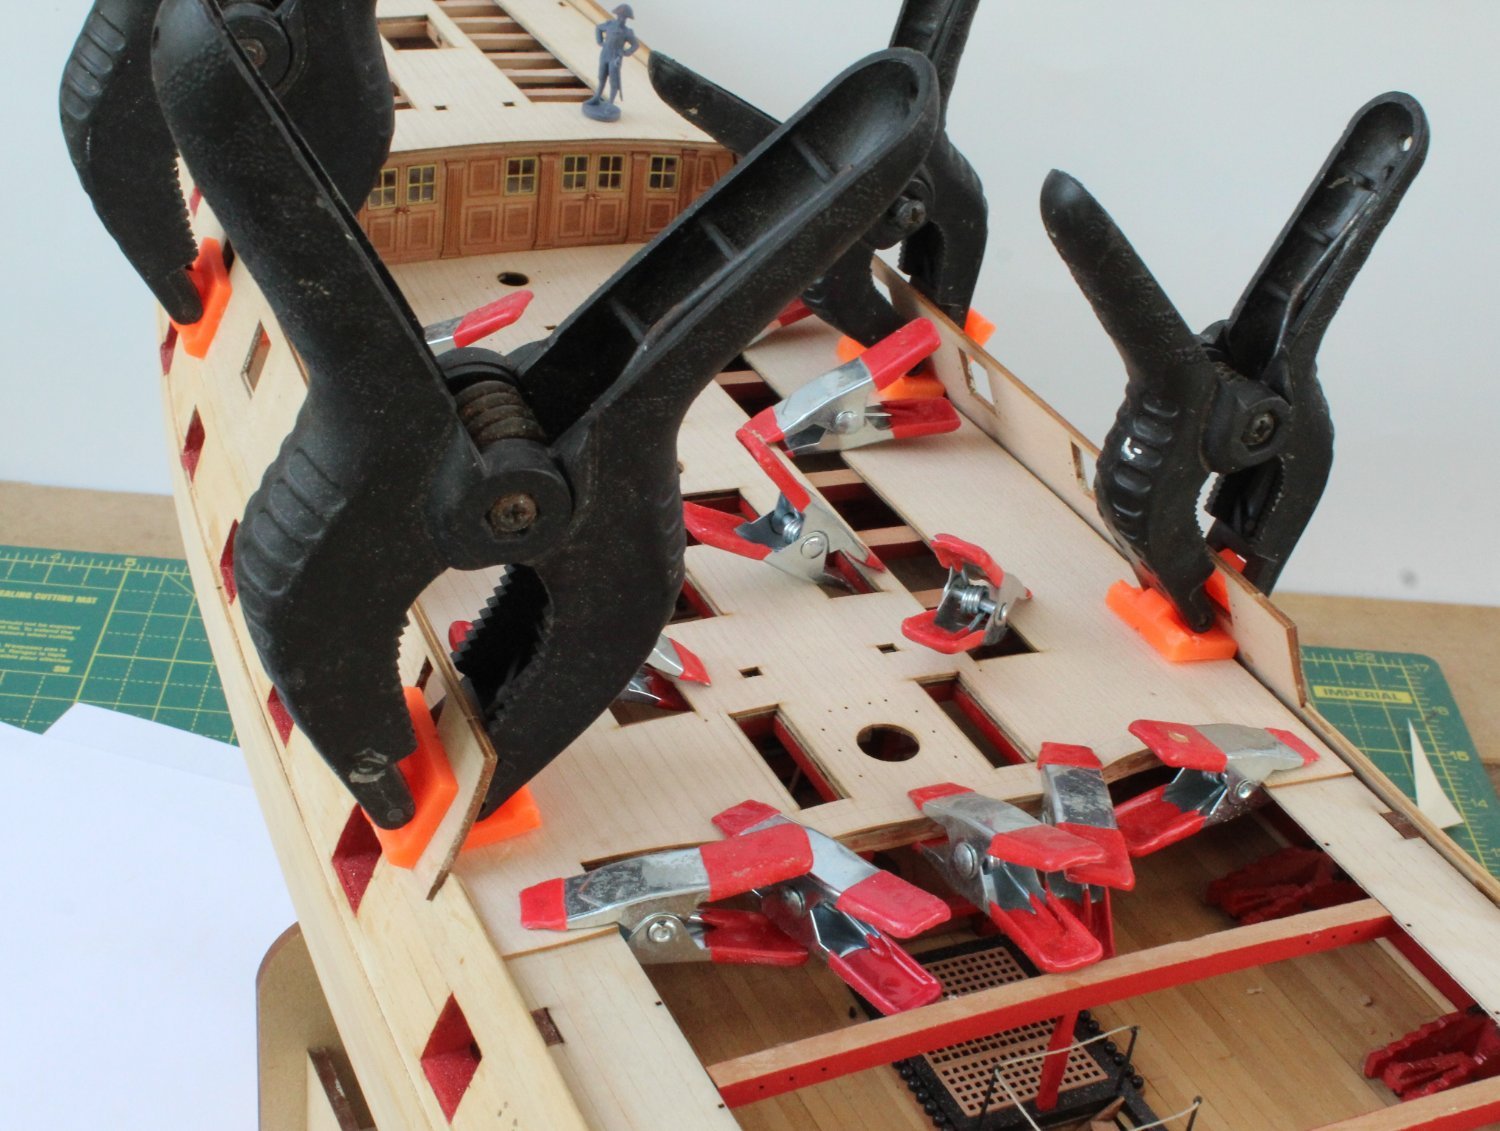
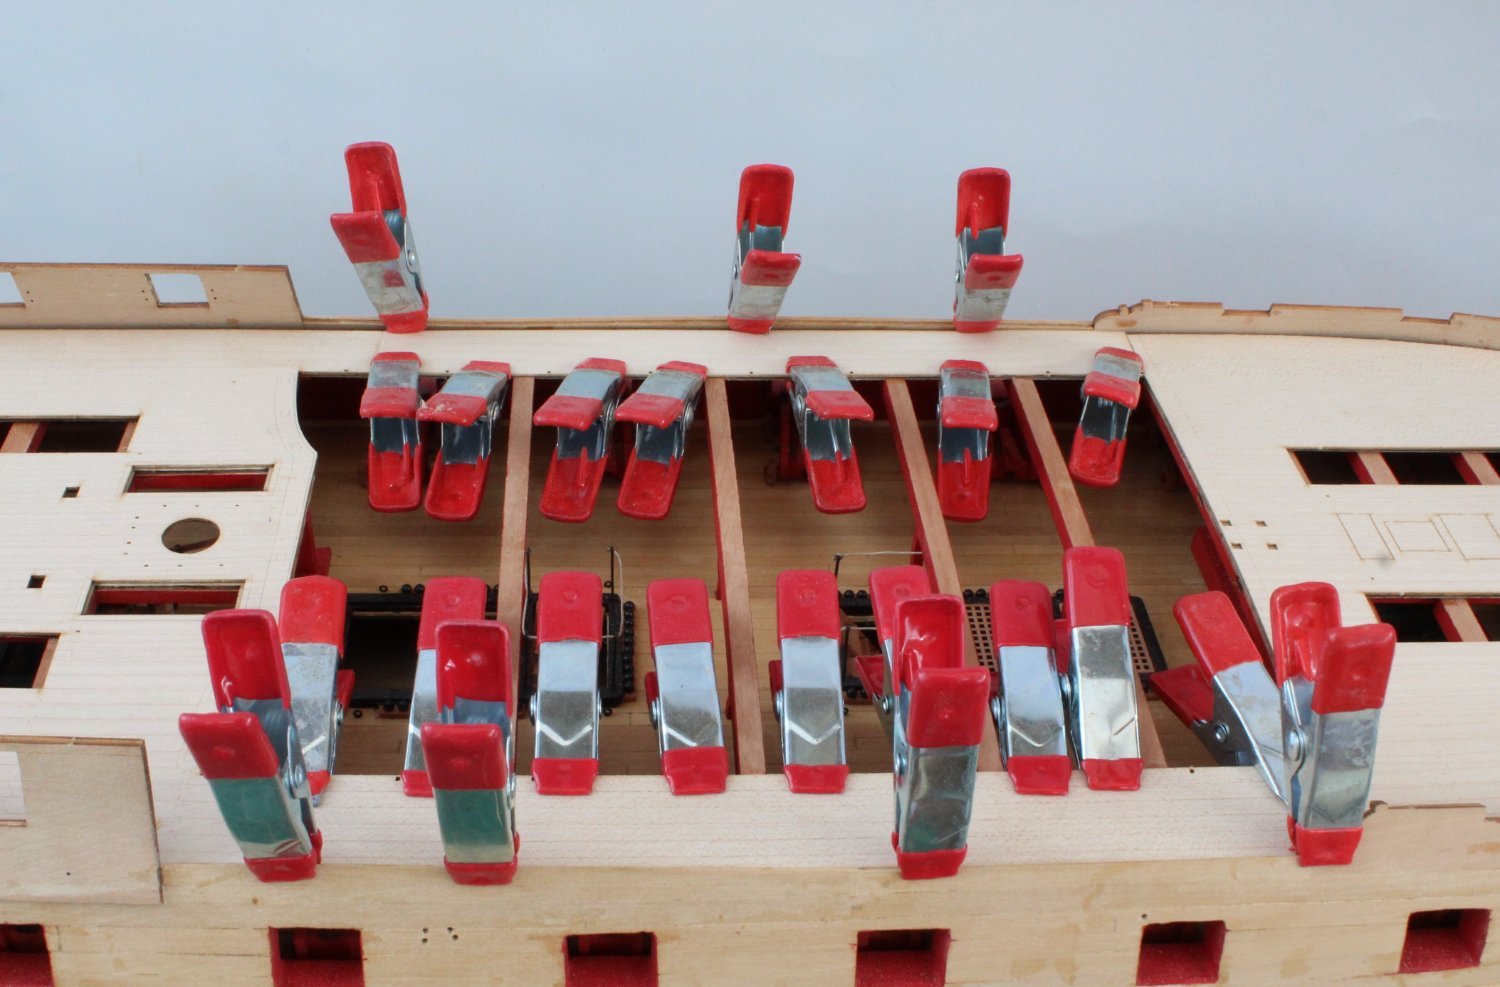
This is key aspect of the build and it is important to position upper stern counter correctly. I did do several trial fits before I was ready to glue the pattern.
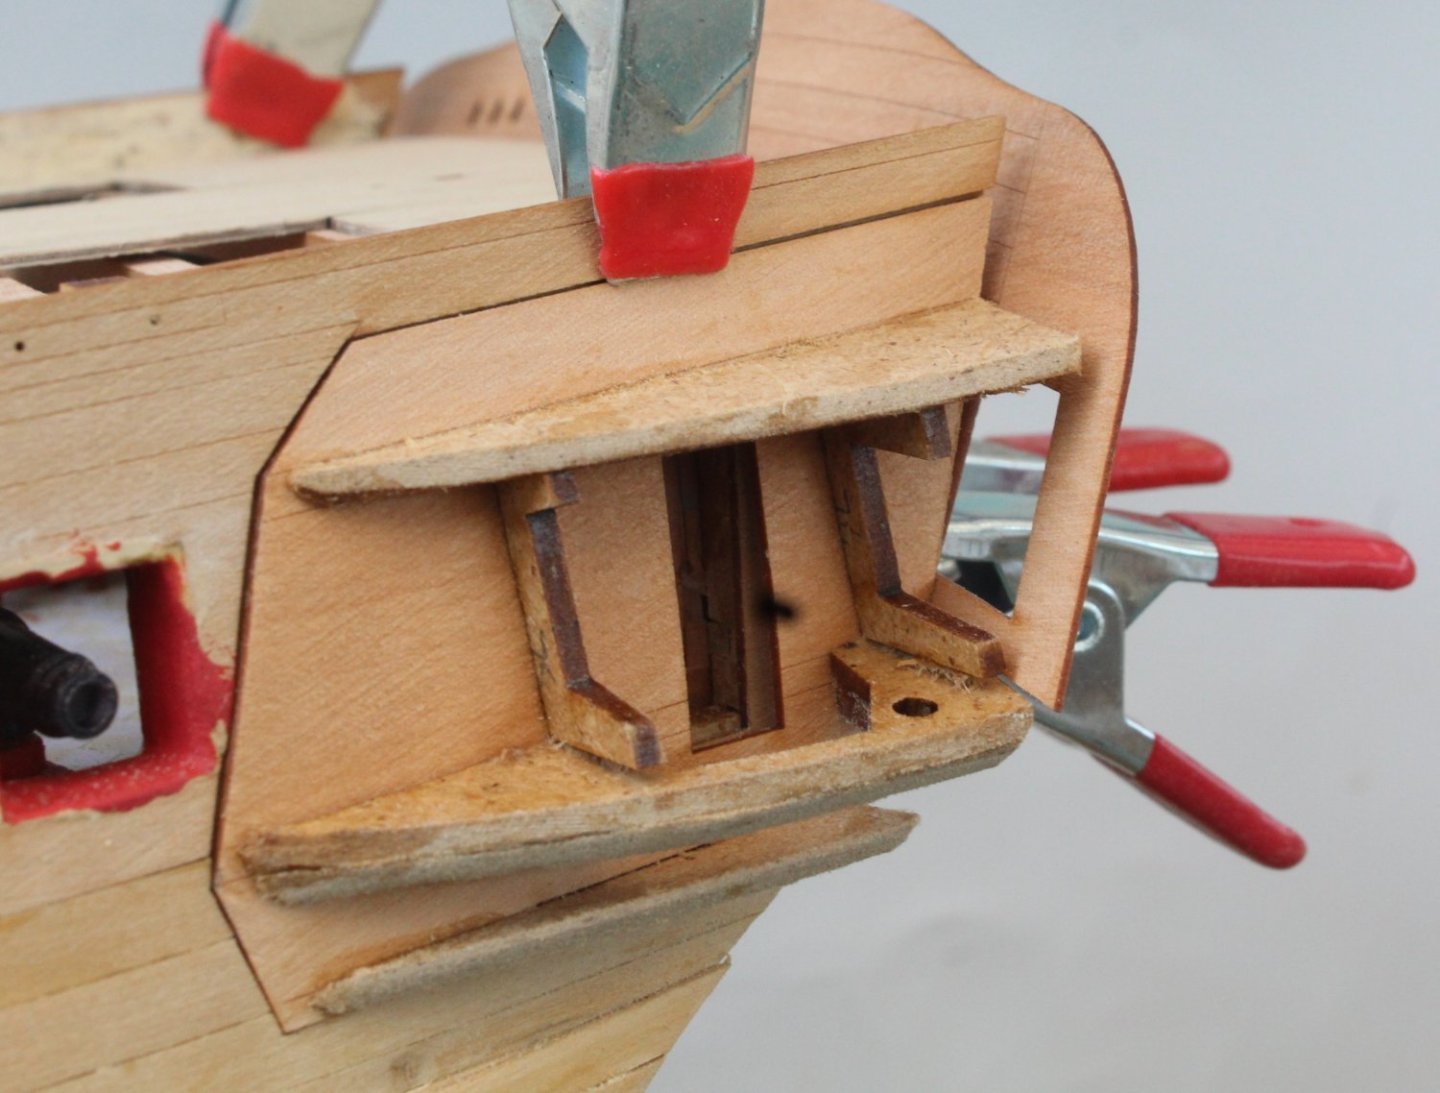
There are plenty of places to pin the upper stern counter pattern in place as the glue is curing. The only area I was concerned about was where the pattern is glued to the bulwarks. I had noted the pinning method used by Jim on his prototype and initially I was going to replicate. However I decided to see if I could find a way to hold the pattern in place with clamps. I made a small notch in the bulwarks and found it was possible to use clamps. The upper pattern was then carefully glued in place.

Next I added a camphor to both the top and bottom edges of the middle pattern. After a little bit of sanding to get a good fit the pattern was glued in place.
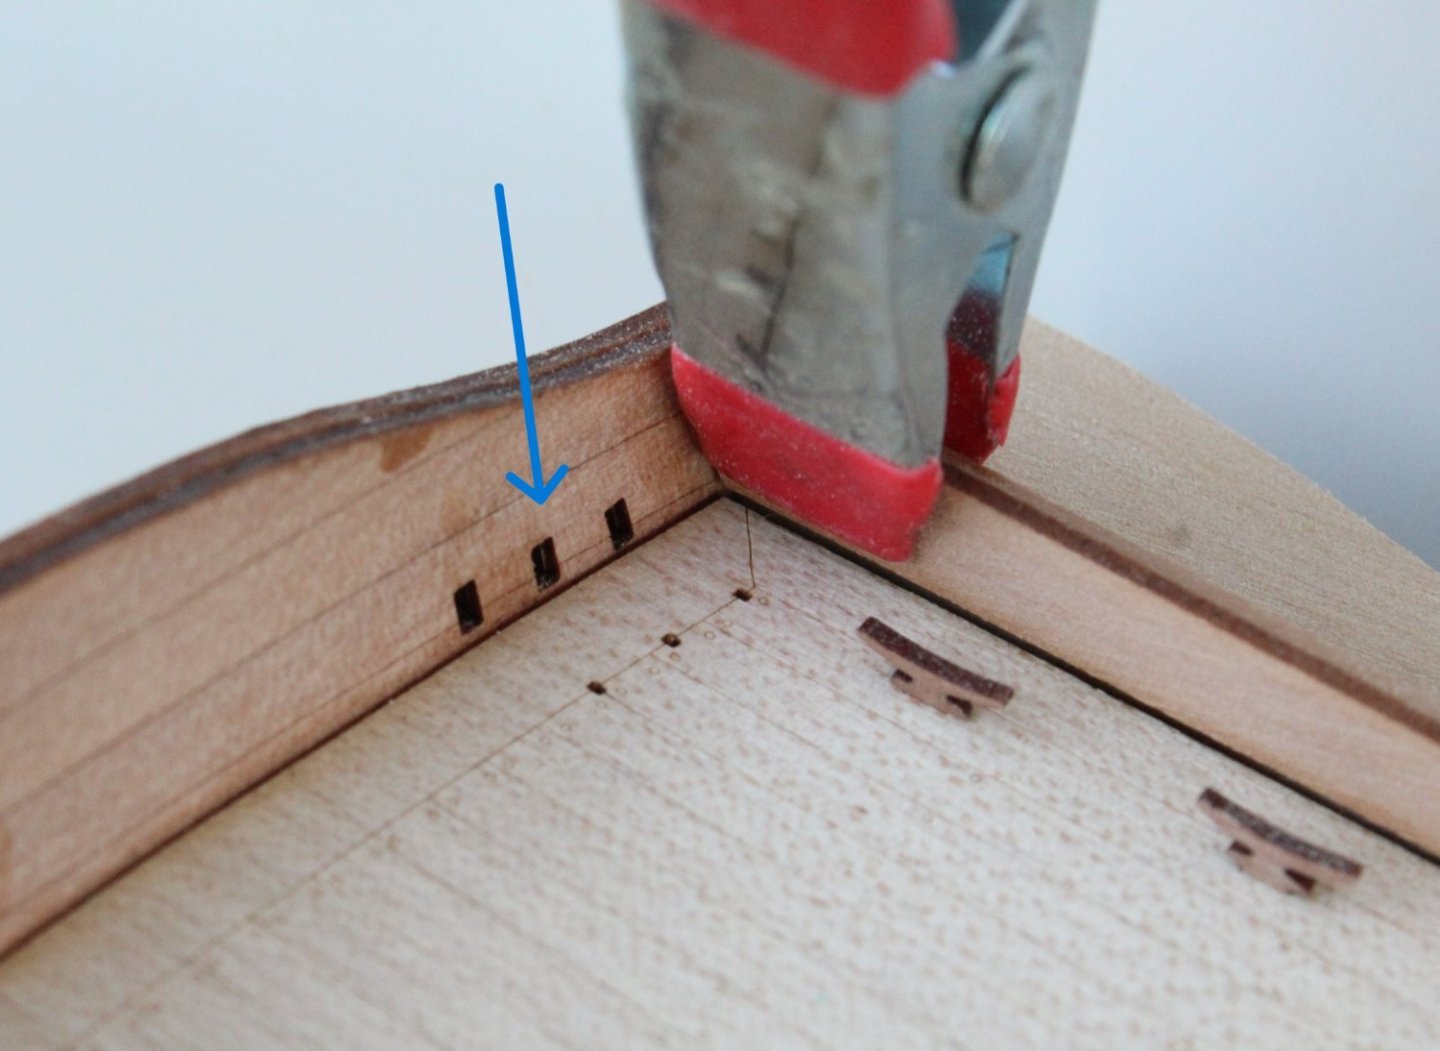
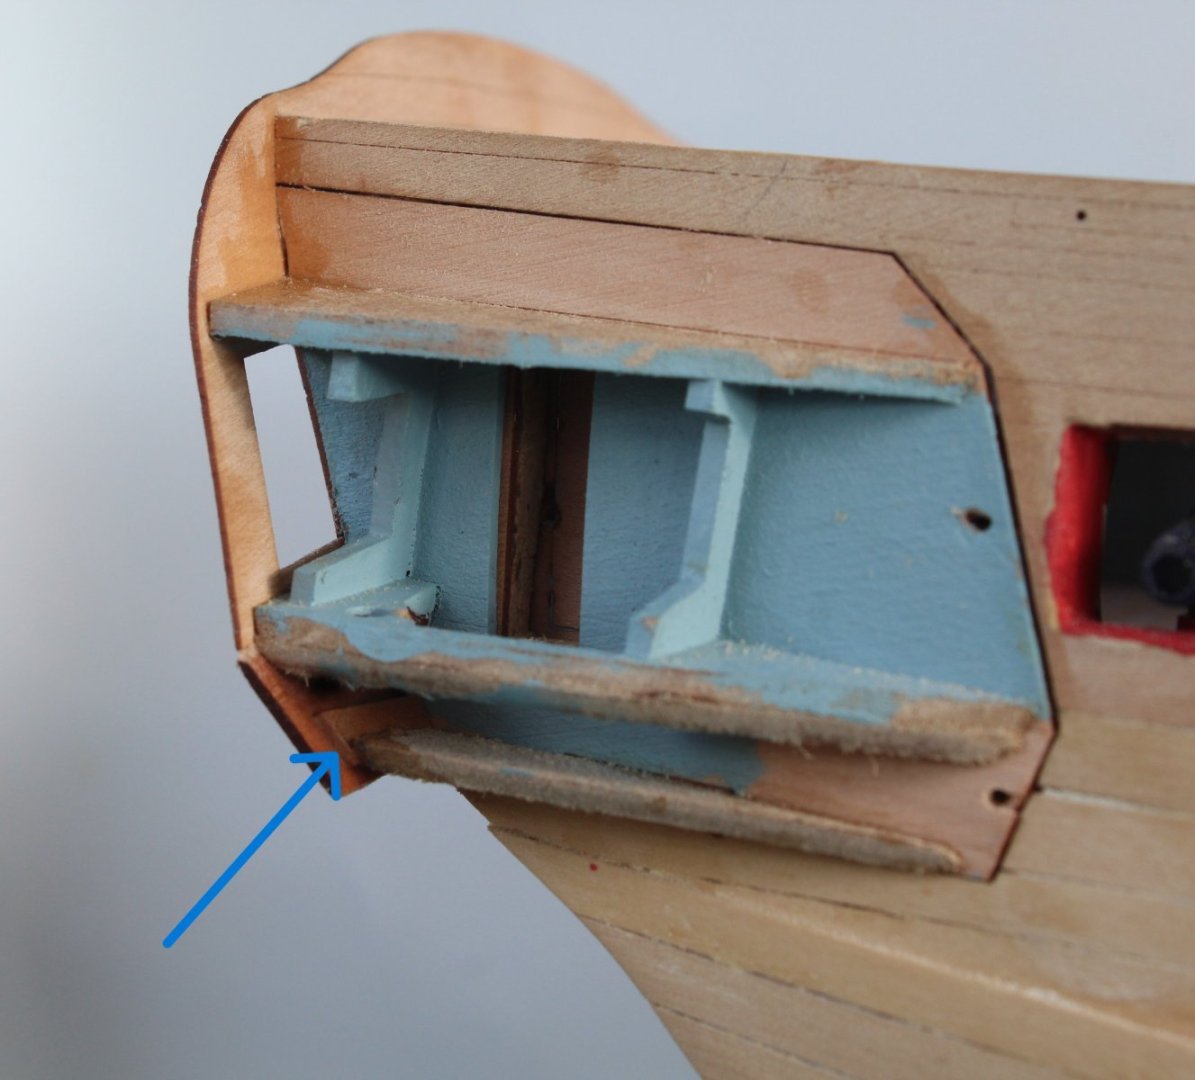
Prior to fitting the middle counter pattern I did find it necessary to add a small packing piece as I had removed too much material when sanding the quarter gallery assembly, as shown by the blue arrow in the next photo.
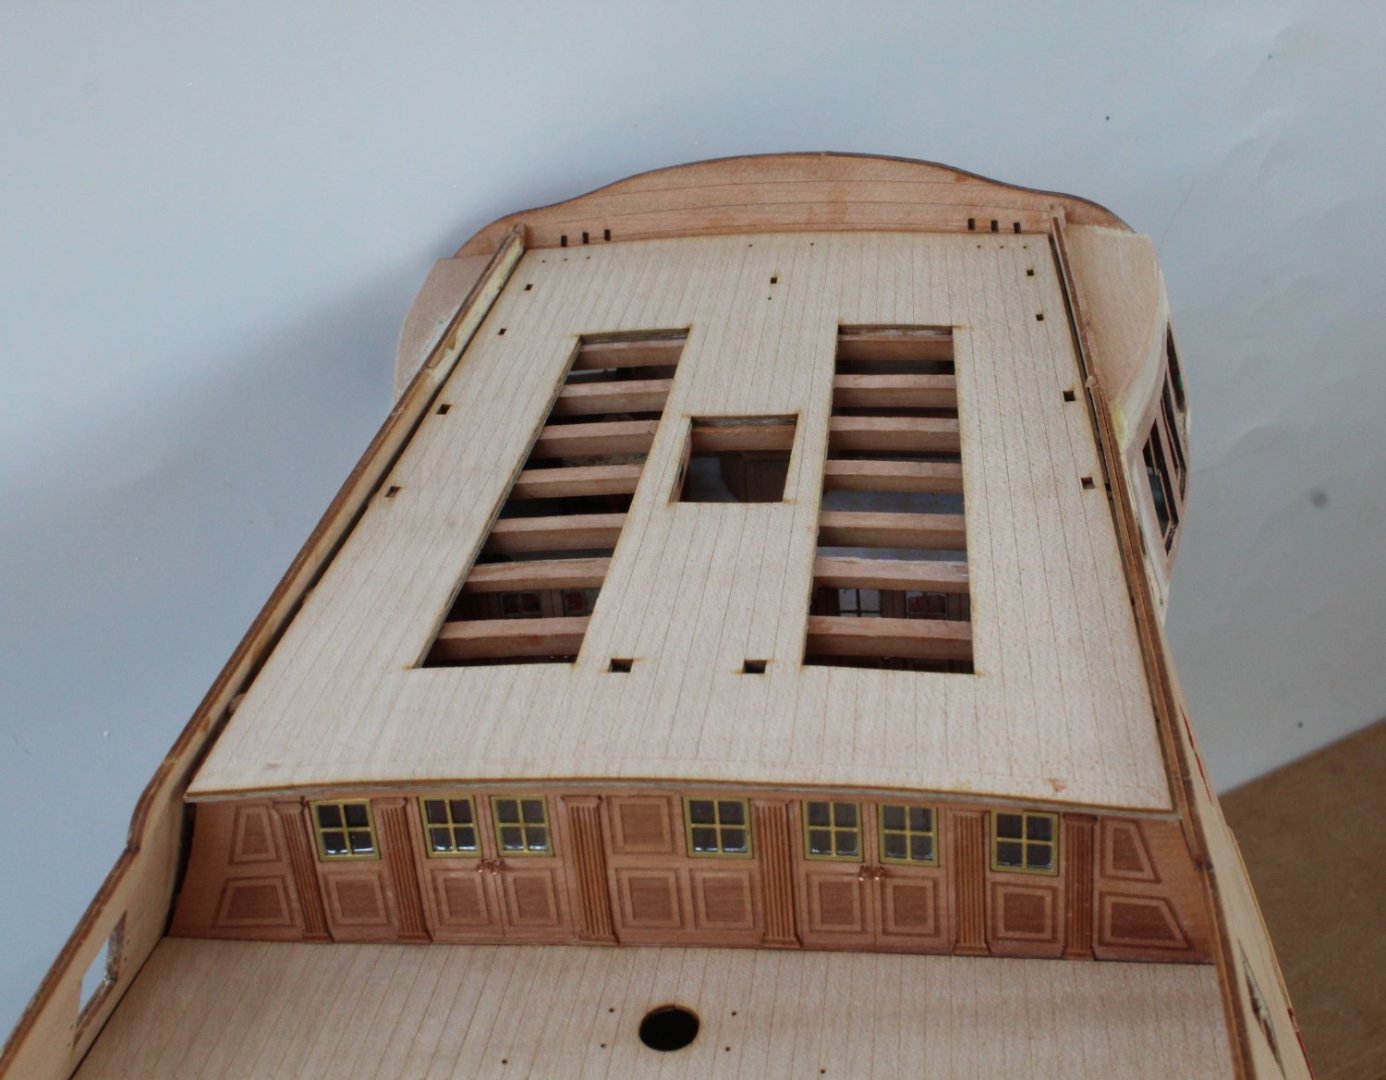
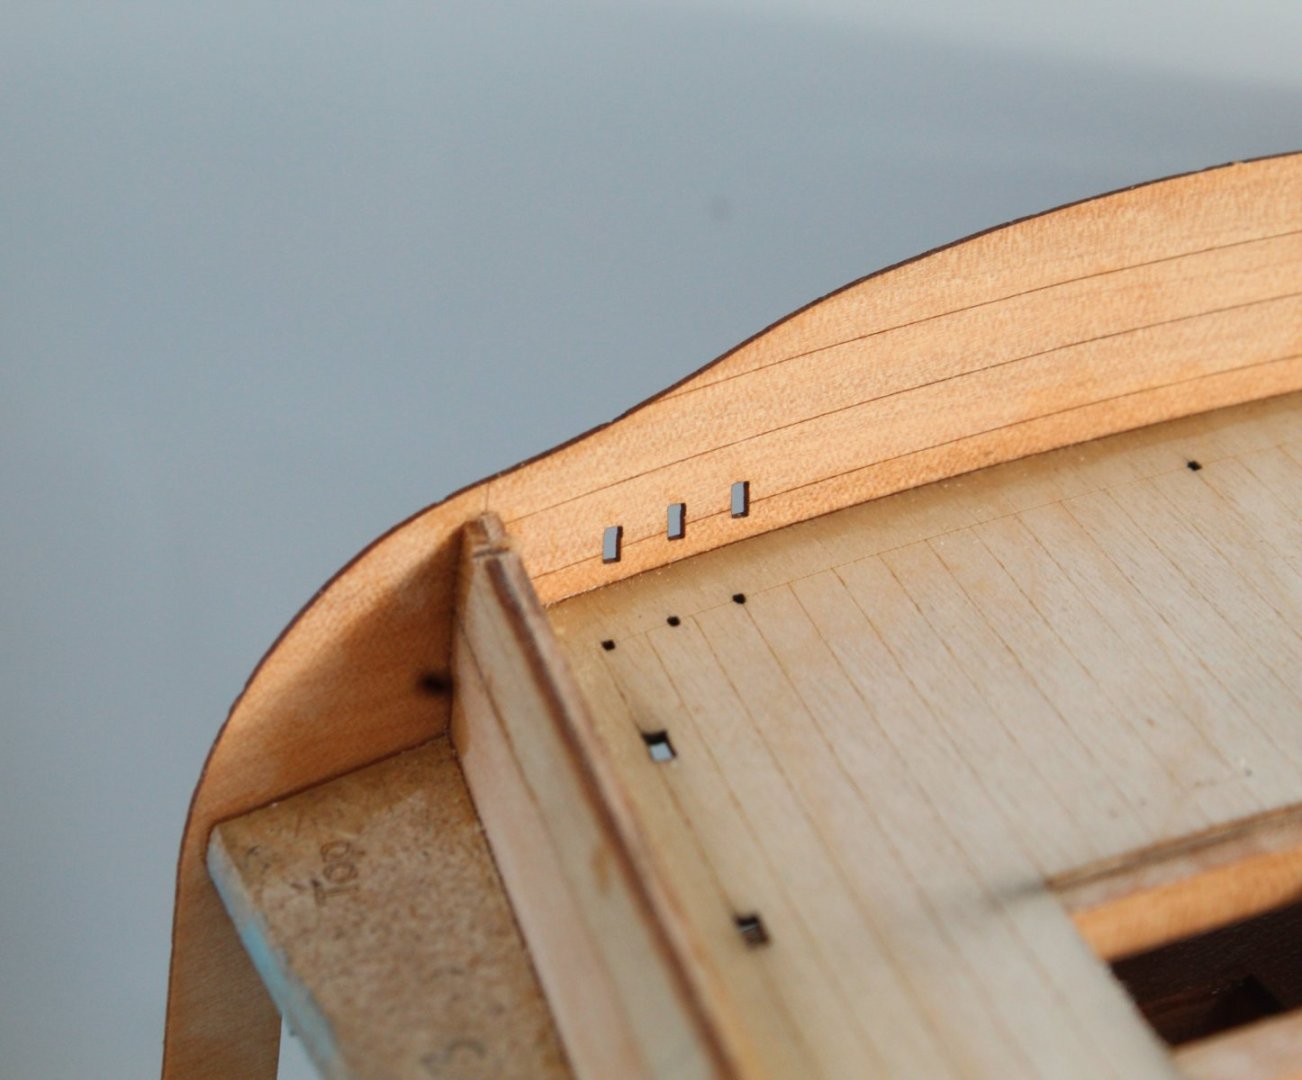
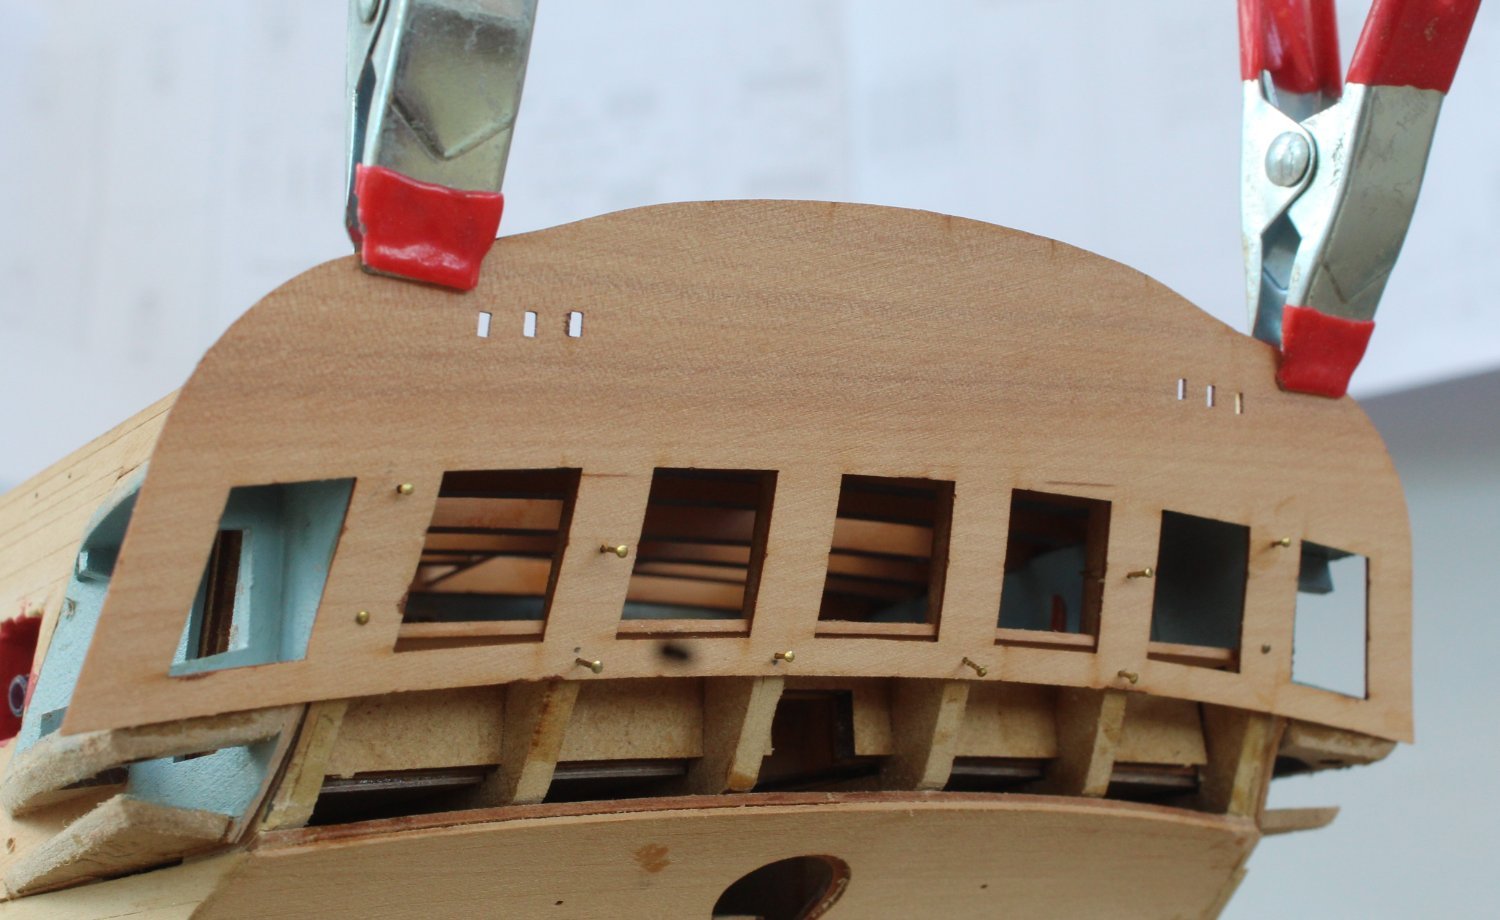
I was happy with the upper stern counter pattern fit with the edge of the poop deck.
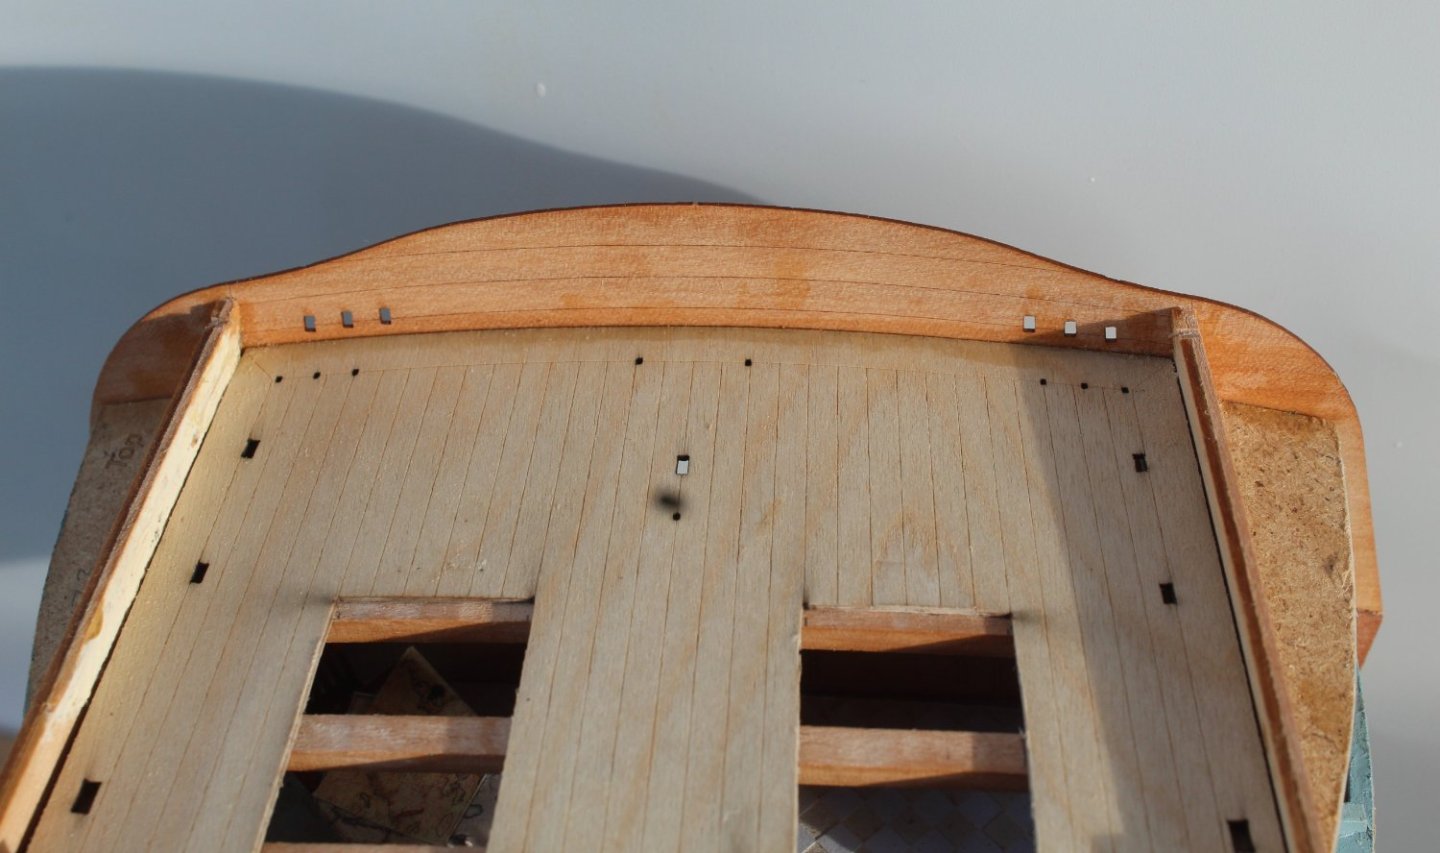
I am also happy with the position of the upper pattern with respect to the top of the bulwarks, which needed to be approx 2mm higher than bulwark.
The quarter gallery inner patterns also seem to be aligned with the counter patterns, so they can be fitted next.


-
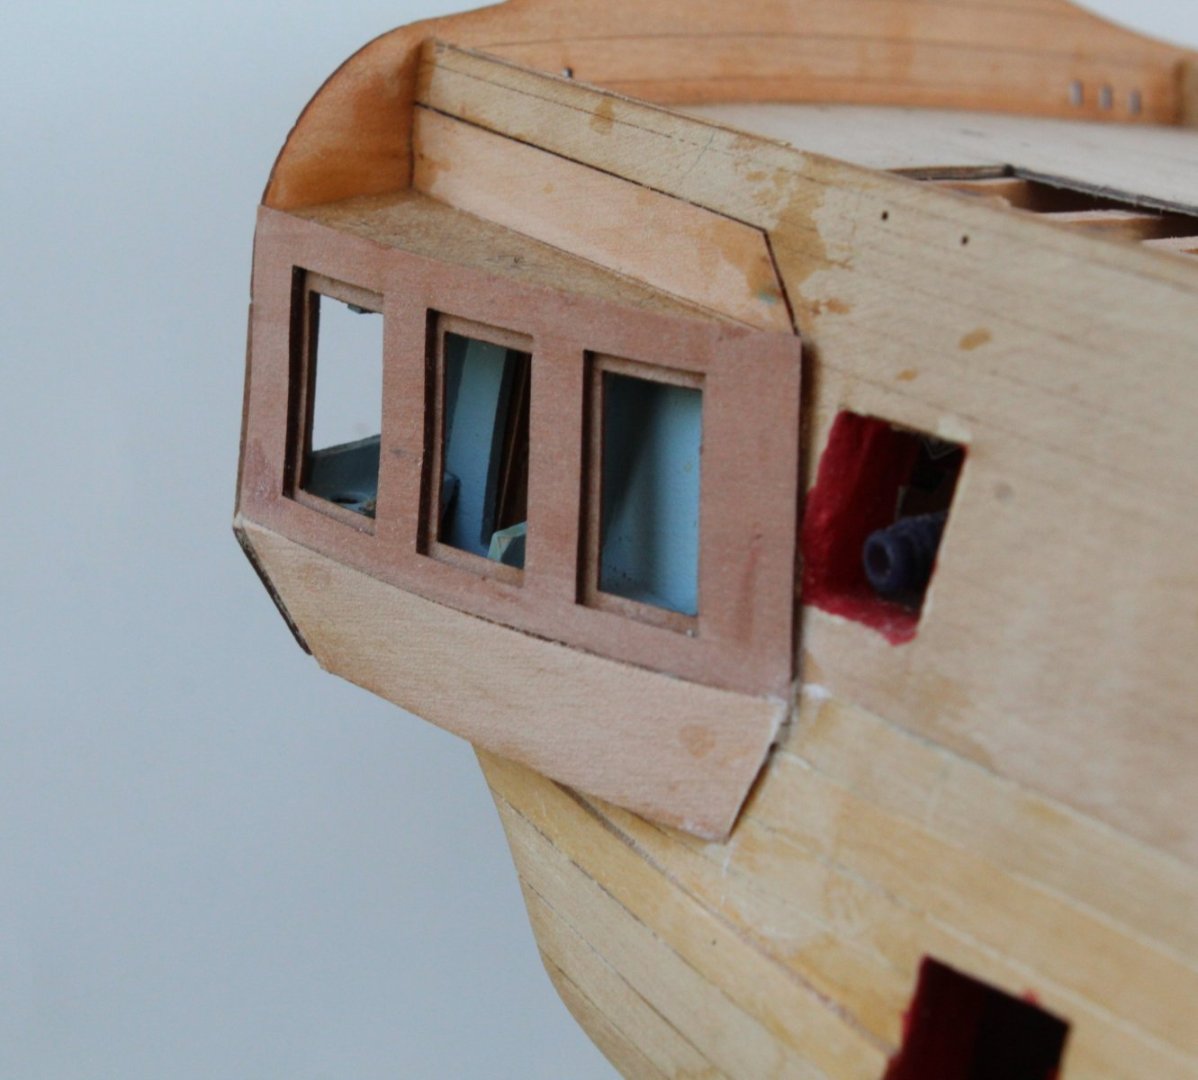
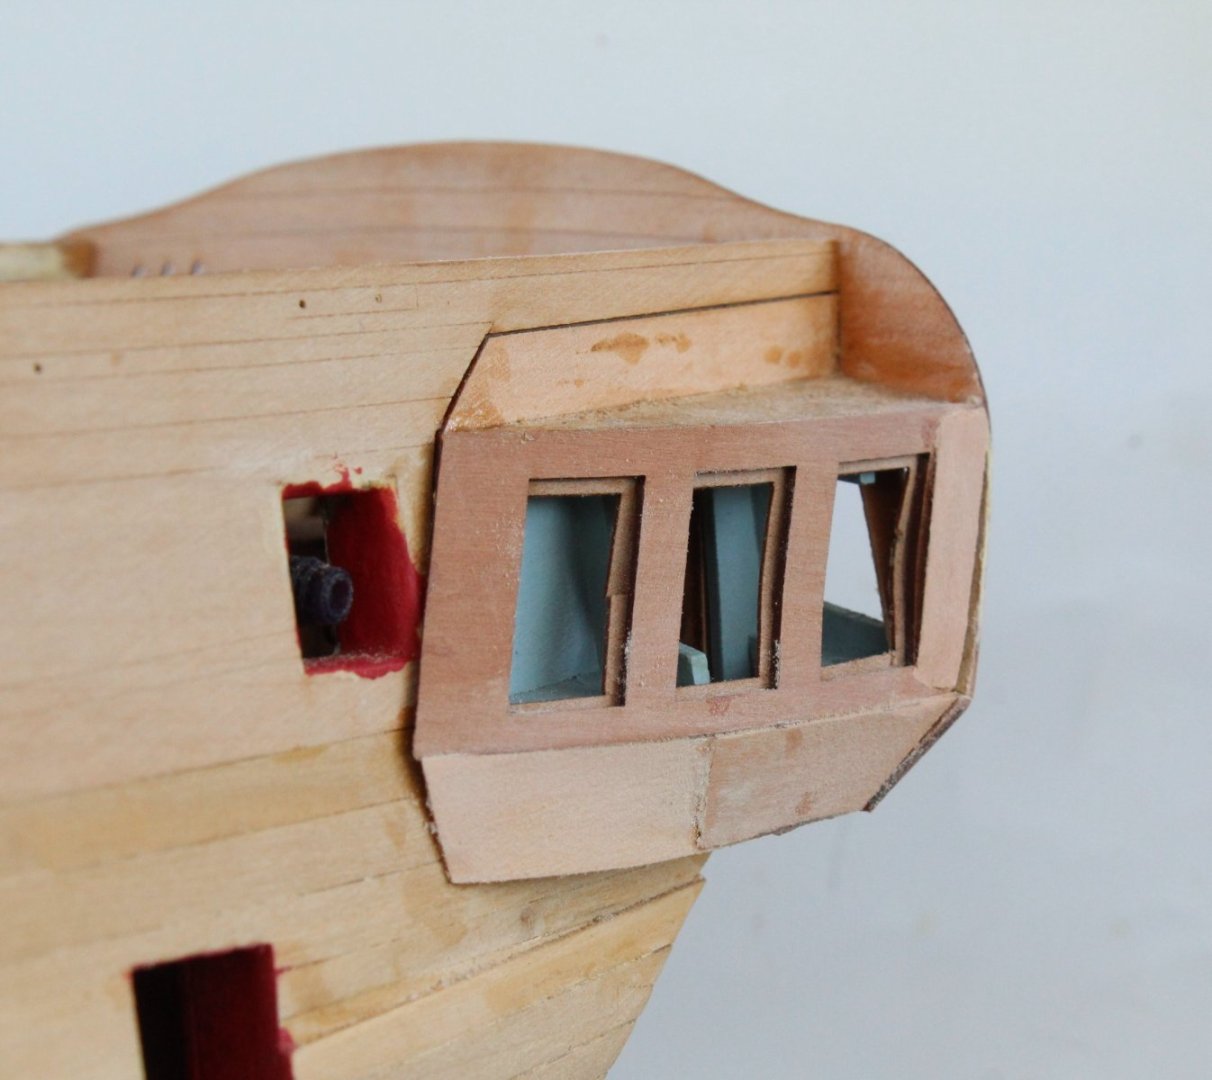
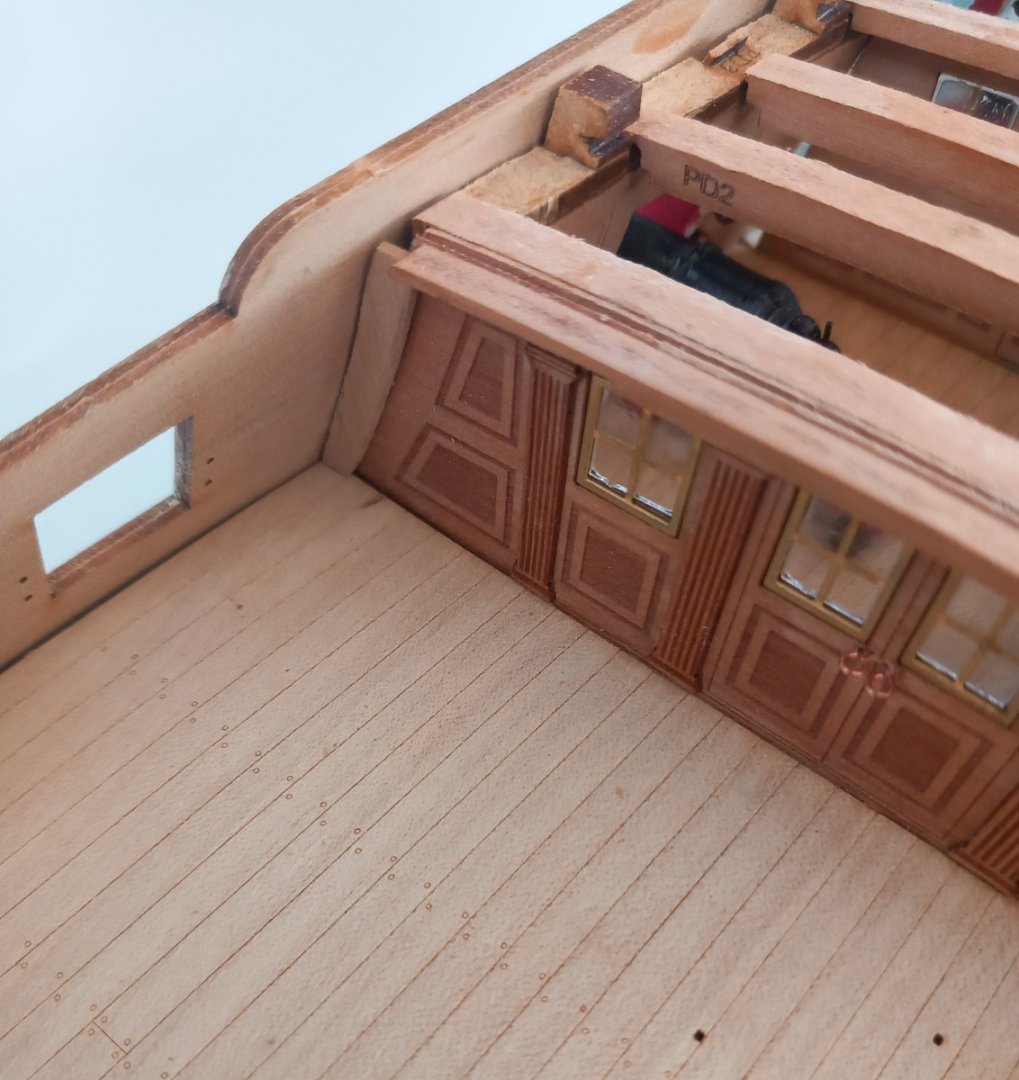
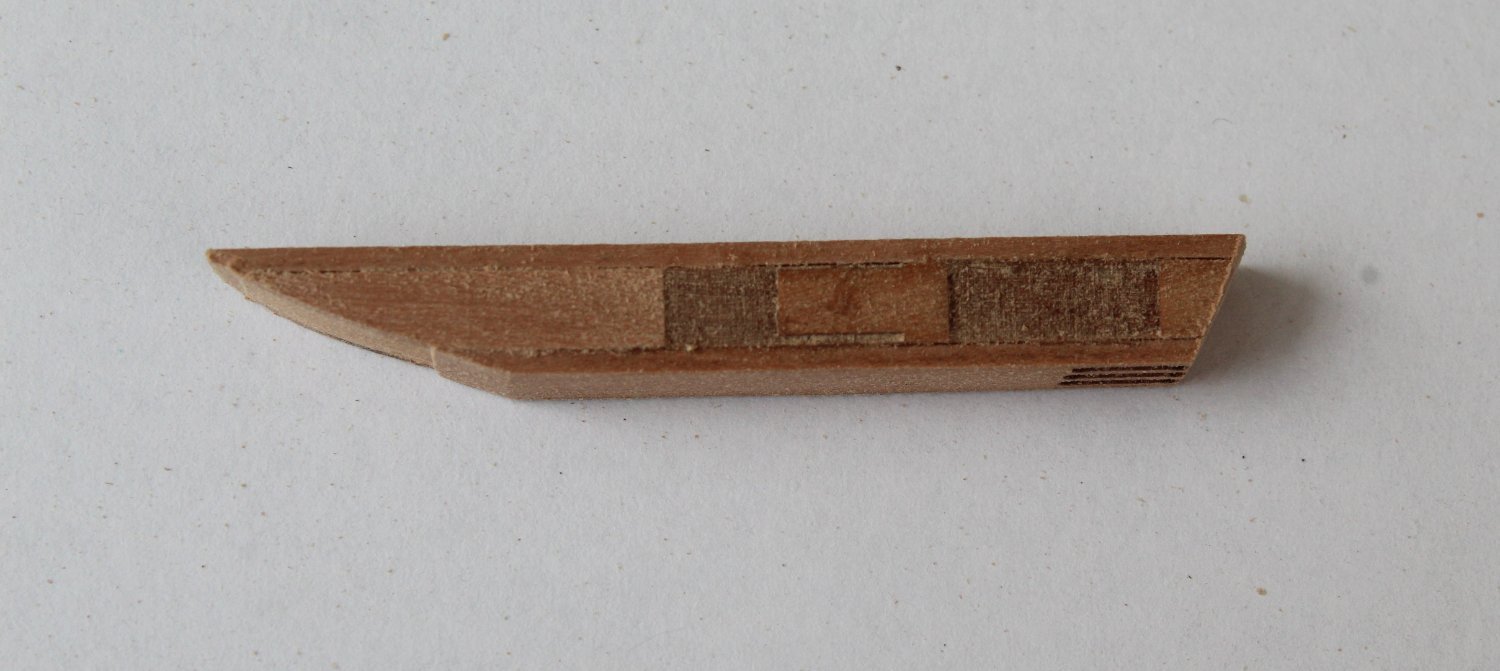
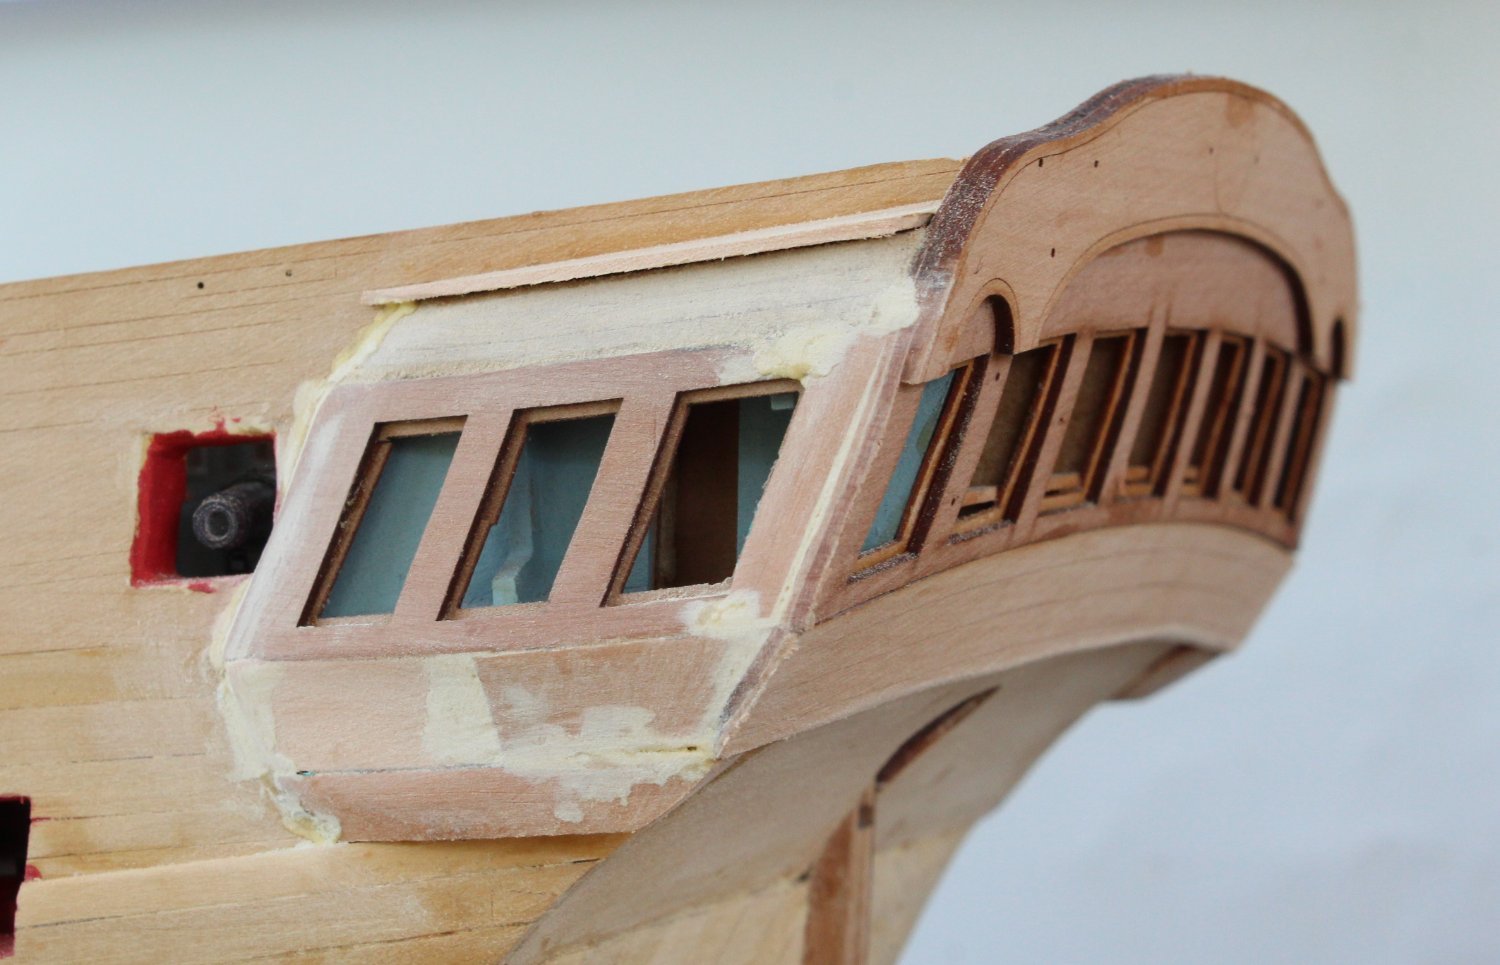
Cabin Screen Filler - WIP
As can be seen in the photo below there is a slight gap between the front cabin screen and bulwarks.
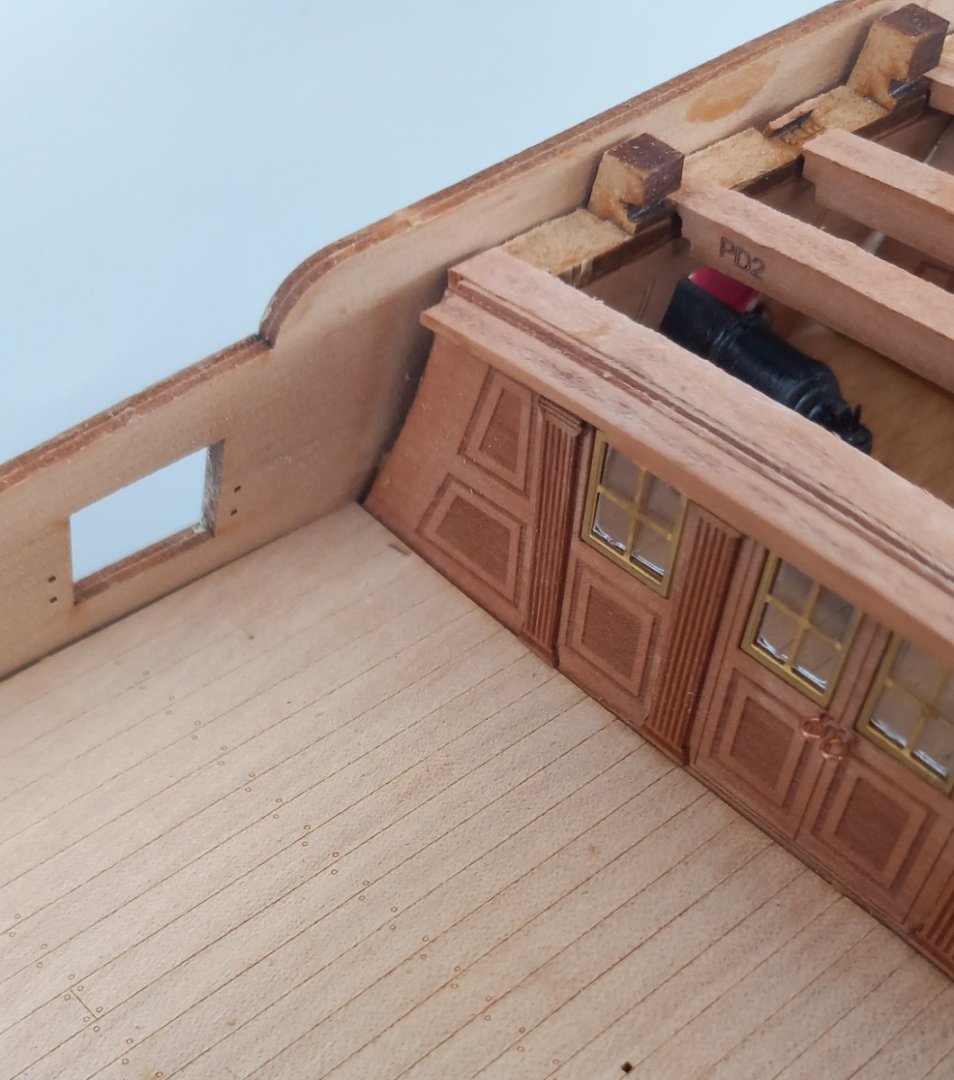
The old me would have probably lived with the small gap but I decided it would look much better with a filler piece. In the next photo I have started to fashion a suitable filler. It needs a bit more work but generally I think it will look Ok. The filler pieces (left and right) will be added at a later stage once the quarterdeck has been installed and should be a nice match with the screen after the varnish has been added.
Quarter Galleries - WIP
Moving on to the quarter galleries. I spent a bit of time shaping them ready for the front patterns. Once I was happy with that it was time for a test fit. With the upper stern counter pattern temporarily held in place the quarter galleries were checked. Everything seems to be aligned as it should be. A little bit of excess material was removed from the aft edge of the quarter galleries so the upper and middle stern counter patterns would sit flush.
In the next photo there is a quick test with one of the front patterns held in place, which is looking good. I have checked the fit of the lower quarter gallery front pattern. The black mark from my camera lens is still visible in these photos. The new lens should arrive in a few days time.

As everything looked good, and after a quick paint job, the quarter galleries were glued in place. I am going to give the glue plenty of time to cure before moving on to the next task which will be to add the upper and middle inner stern counter patterns. Ensuring these counter patterns are correctly position will be a critical task. I will be taking my time to make sure these parts are correctly fitted.
Famous last words!

-
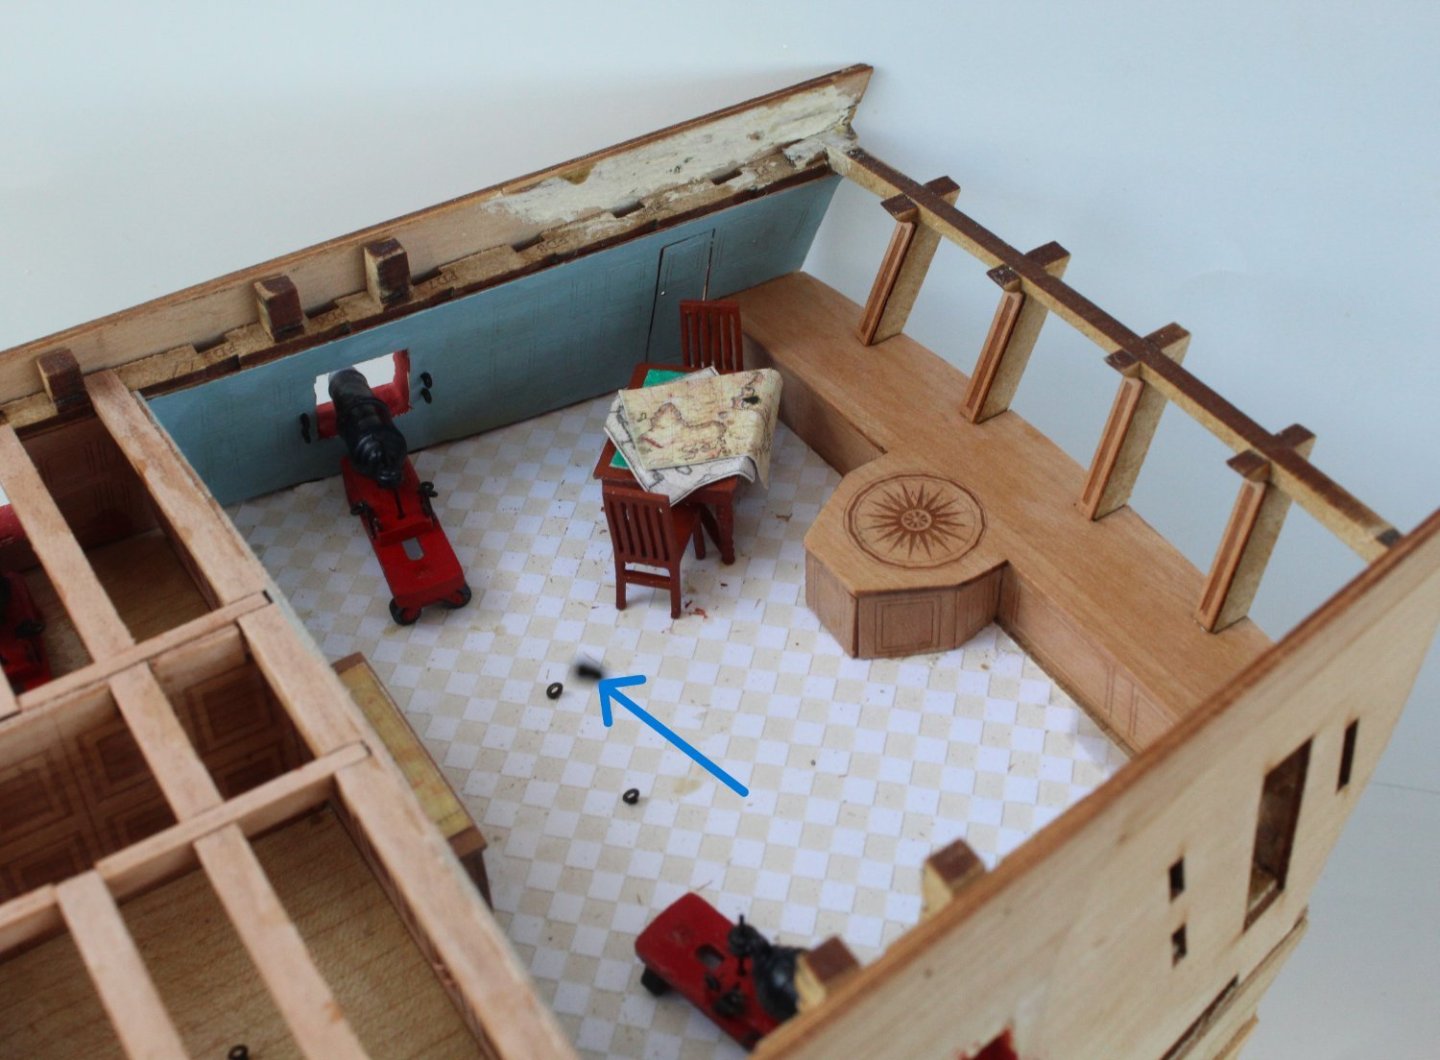
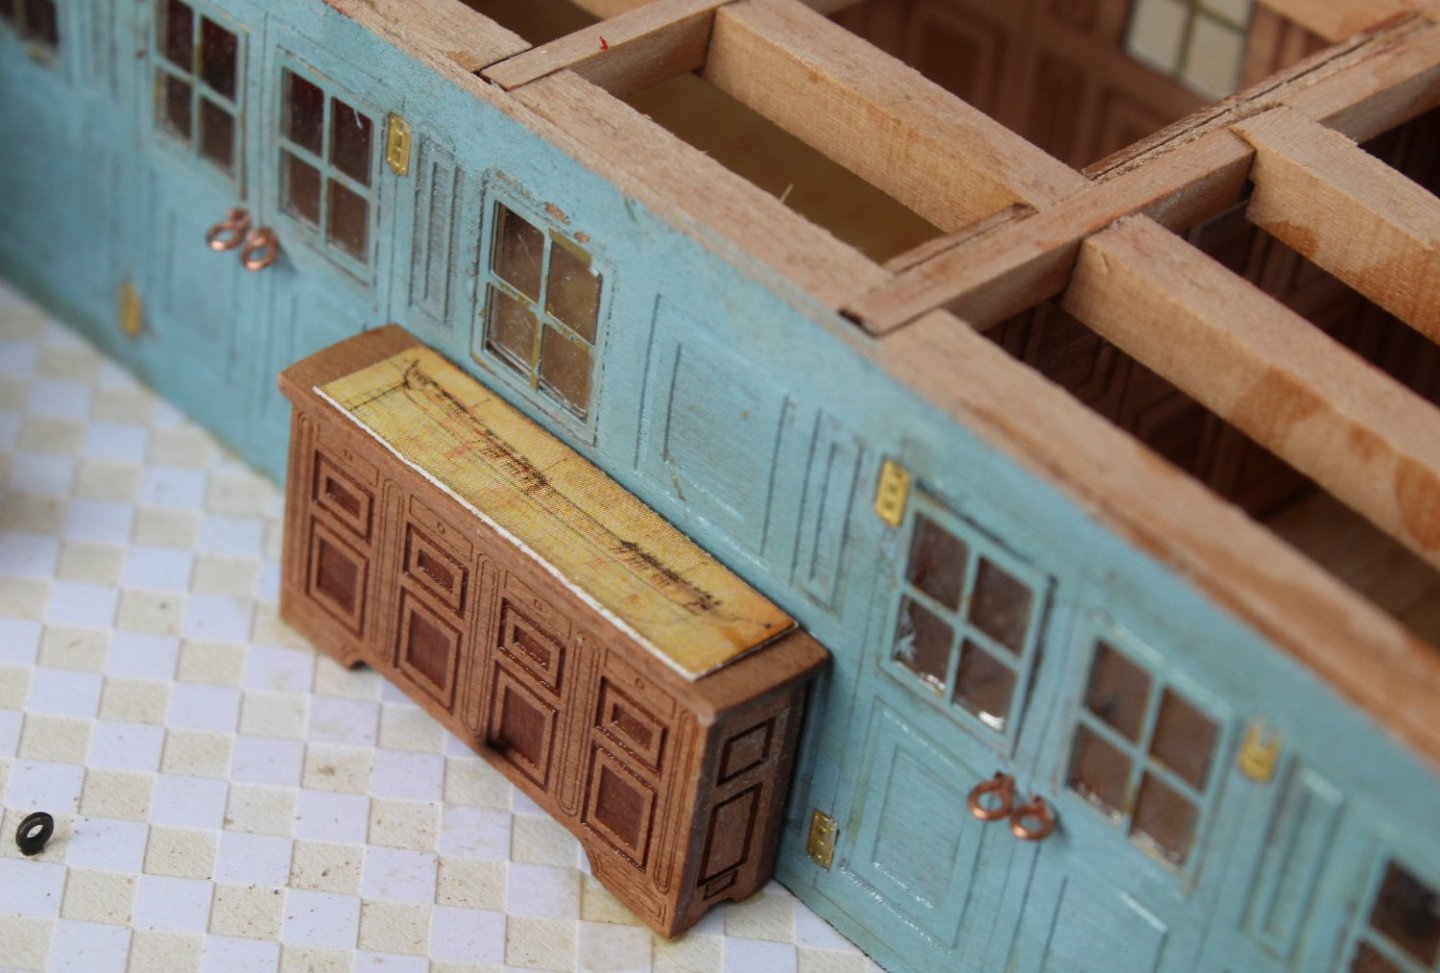
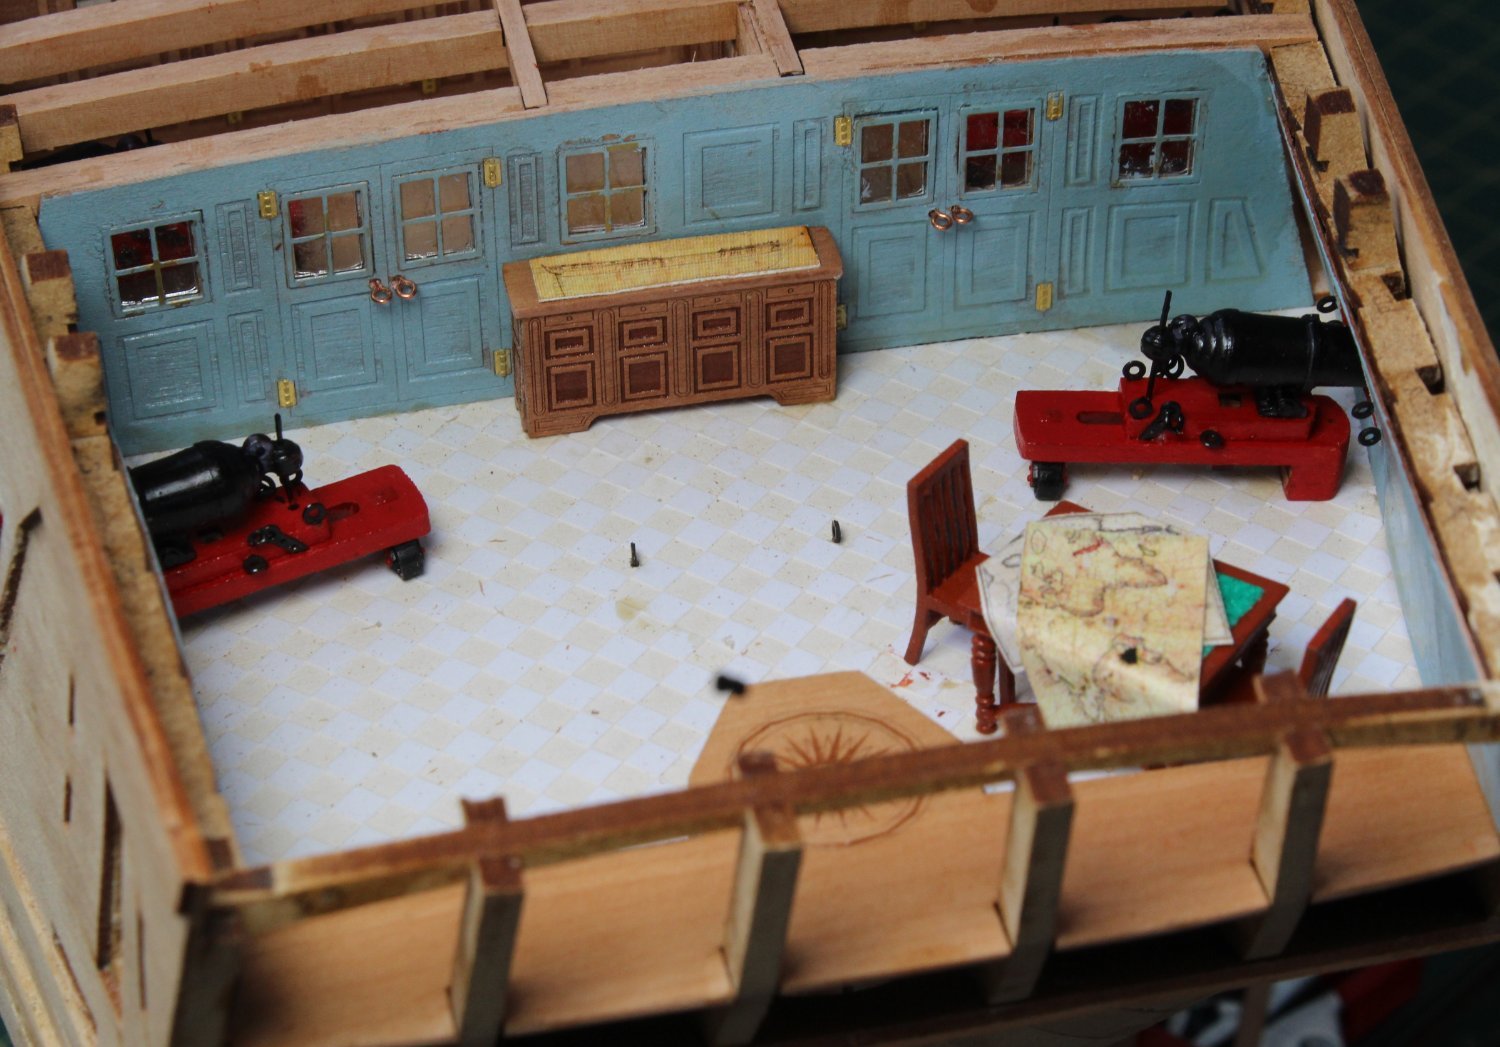
The Return - The Captain's Cabin
I have now returned from a truly memorably Blue Danube river cruise. Saltsburg was very impressive and my wife and I climbed the 144 step steps to visit Nonnberg Abbey (home of Maria Von Trapp when she was a nun). After walking getting back to Salzburg's cathedral my wife could not find her phone. In the searing 35 degree heat I ran back to the abbey bounding up the 144 stairs two at a time. Thankfully the phone was still on a pew. I then ran back to the cathedral bounding back down the 144 steps. My wife rewarded me with a nice cool banana milkshake.

As can be seen in the picture below, which was taken before my epic run, I seem to have a horse on my head. The steps behind the fountain is where they sang the doe re me song in the Sound Of Music (Mirabell Gardens, Saltsburg).

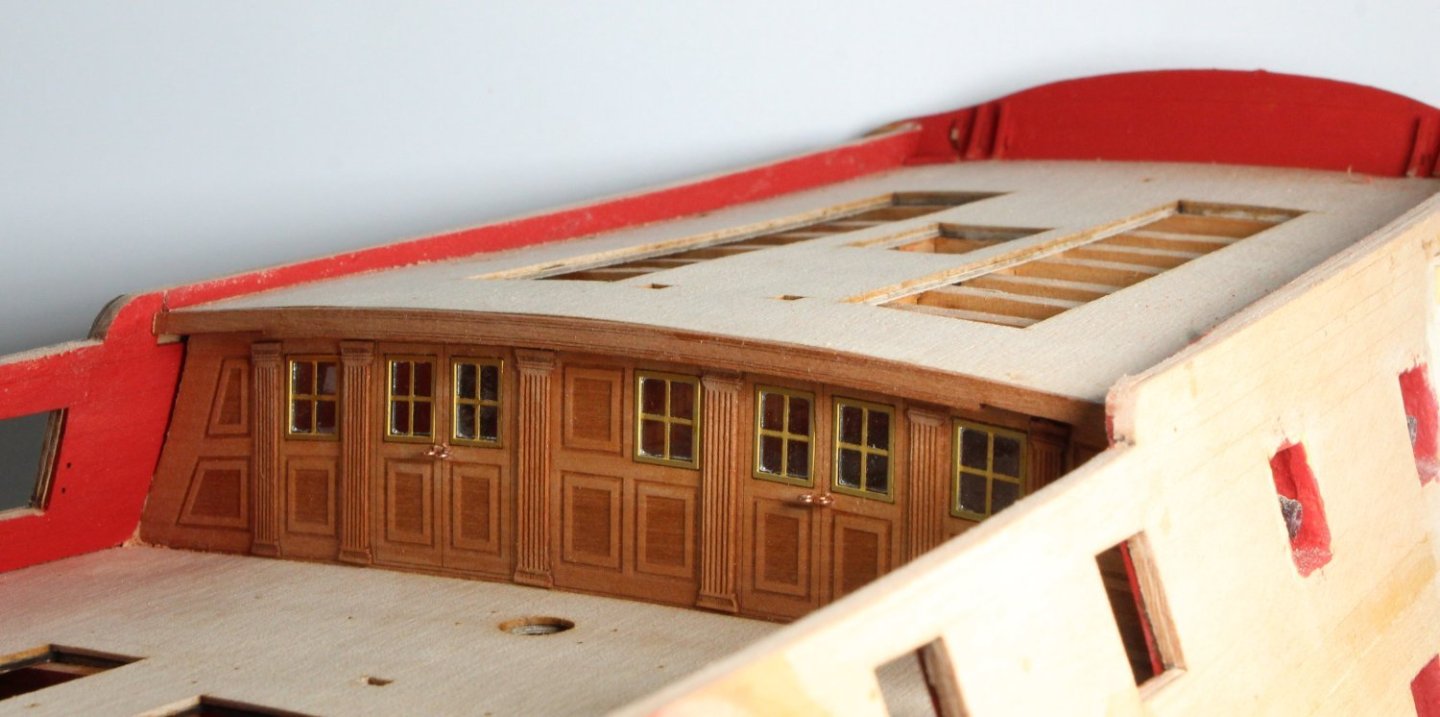
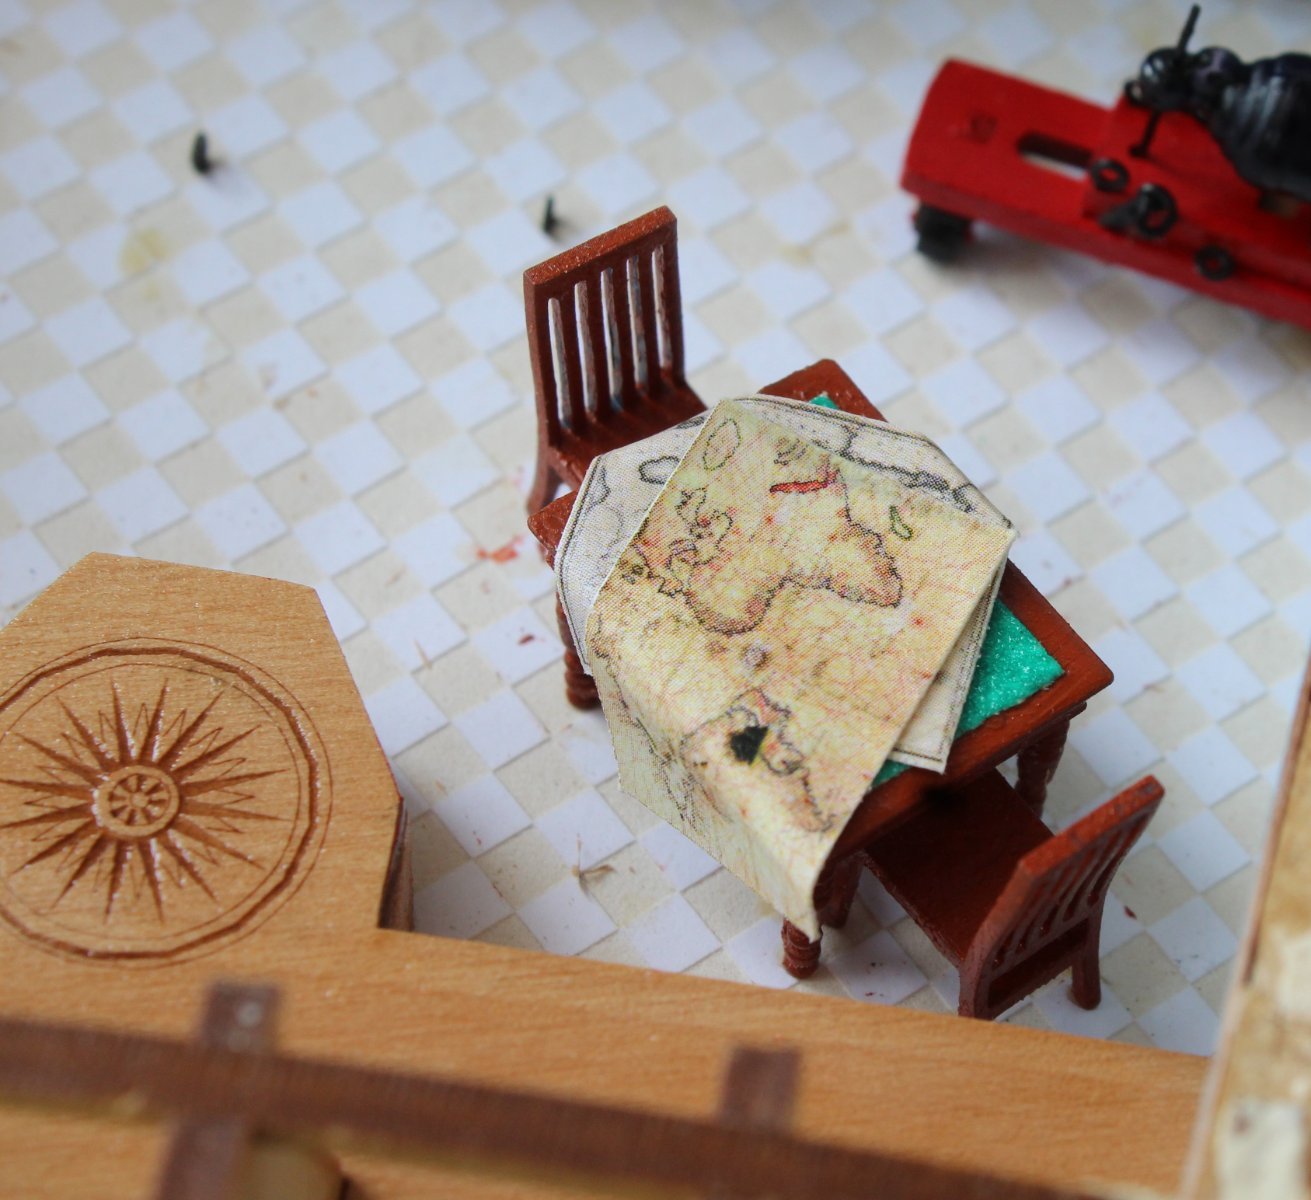
So this morning it is time to resume work on the Indy and the first task was to finish off the Captain's cabin. I added a green baize effect to the table top. After searching for some suitable material I ended up using a piece of sandpaper which was just the right shade of green. The various charts and maps were then cut of of the manual and carefully arranged on the furniture. Sadly my camera lens got damaged during the holiday so each picture has a black mark, as indicated by the arrow on the first photo. Despite several attempts to clean the lens the mark is still there so I have ended up ordering a new lens which should arrive int he next few days.

I tried a few different arrangements before deciding on the following arrangement for the table and chairs.
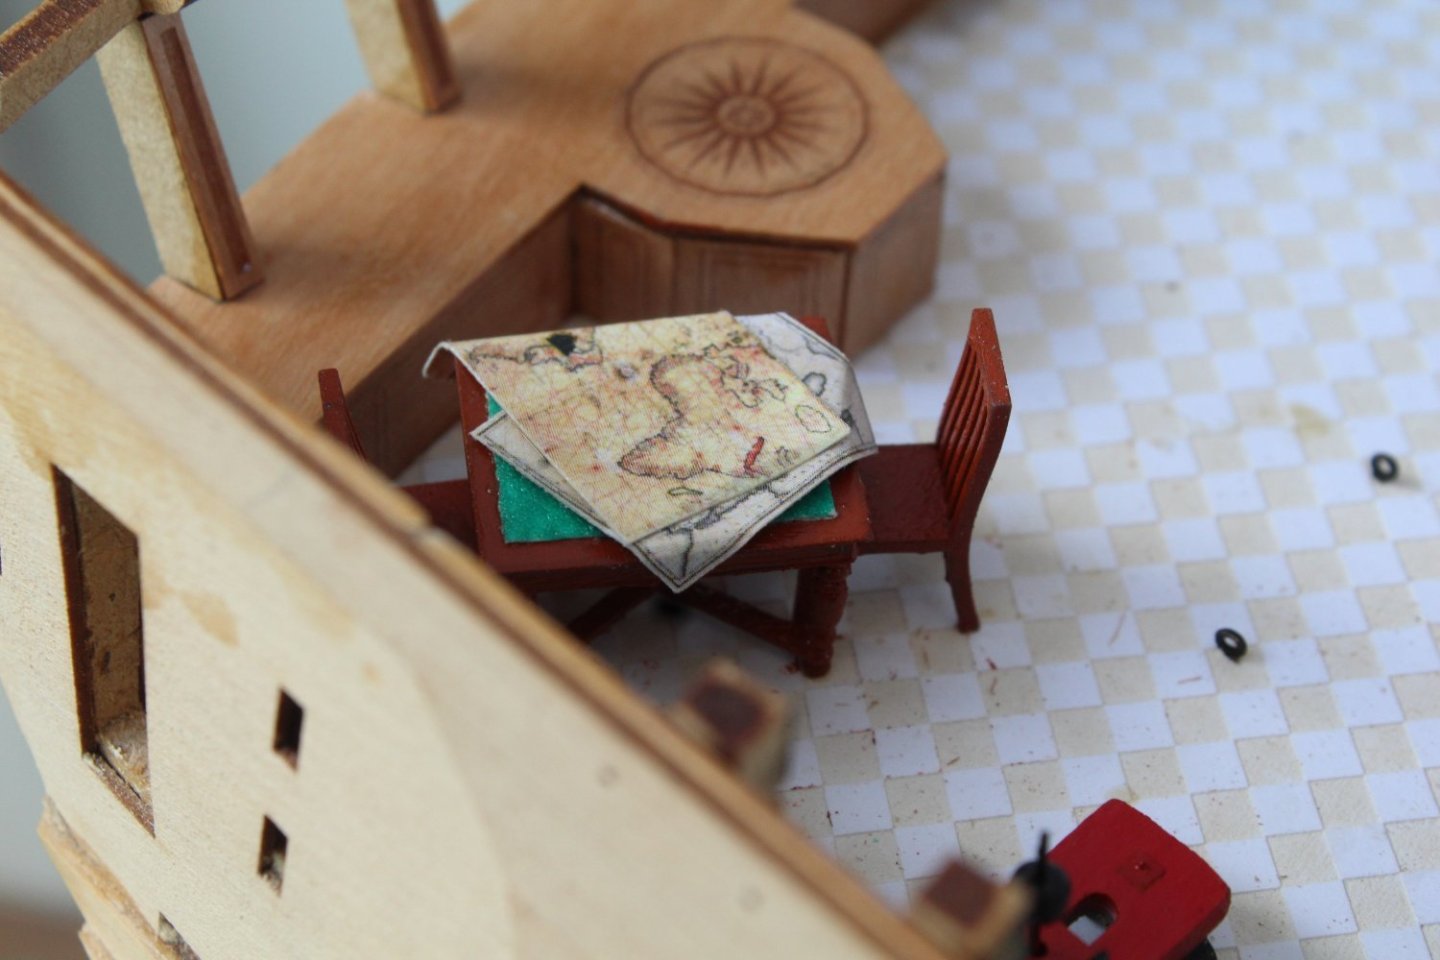

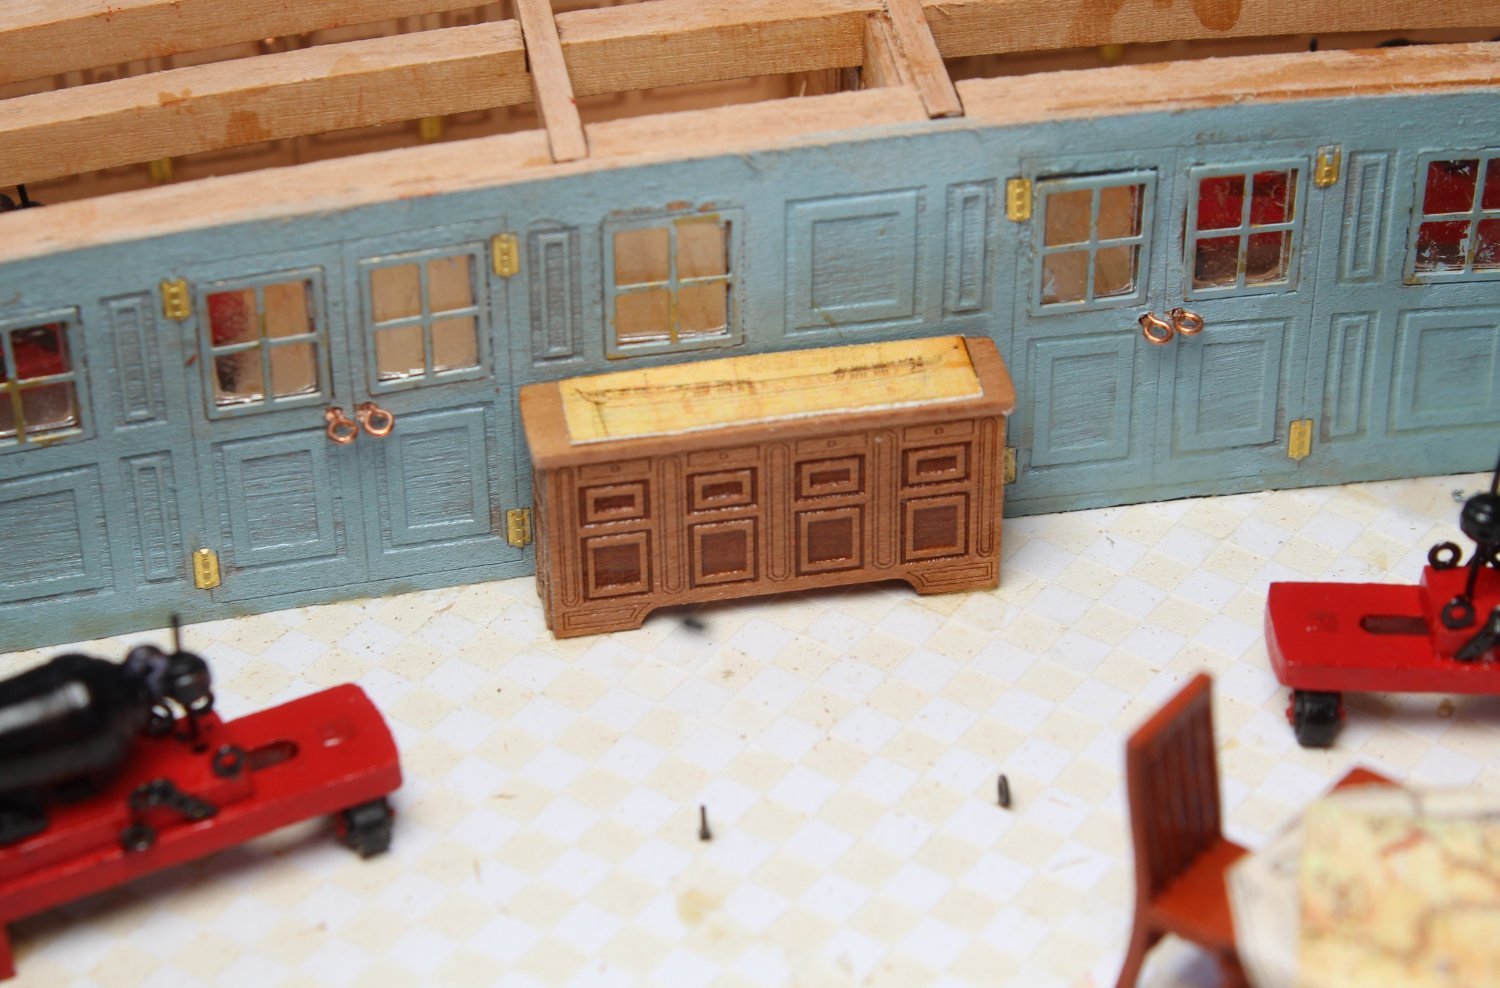
I opted to add the plan sheet of the Indy to the top of the cabinet. The workmanship on the cabin screen is not my best work.

-
Nice work great work. I do like making the masts, bowsprit and yards but it will be a few weeks before I reach that stage.
- mtaylor, Old Collingwood and Kevin
-
3
-


HMS Indefatigable 1794 by Glenn-UK - FINISHED - Vanguardodel Ms - 1:64
in - Kit build logs for subjects built from 1751 - 1800
Posted
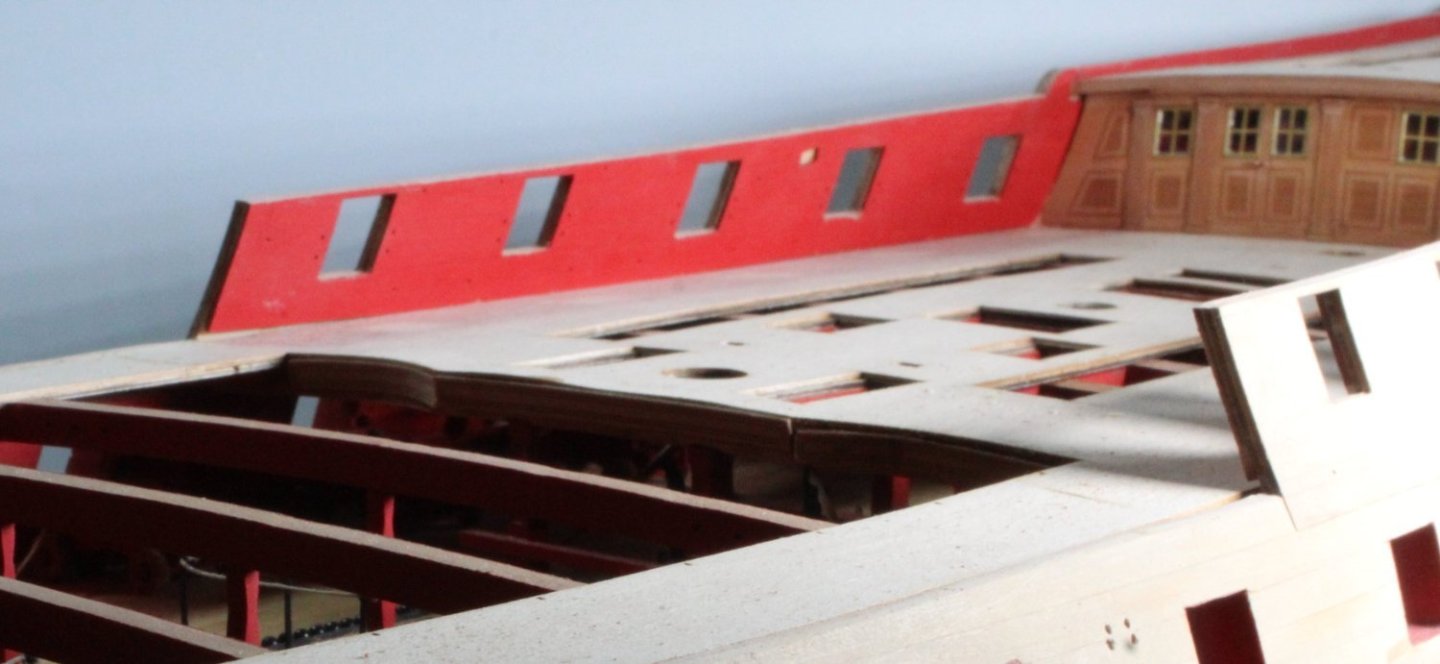
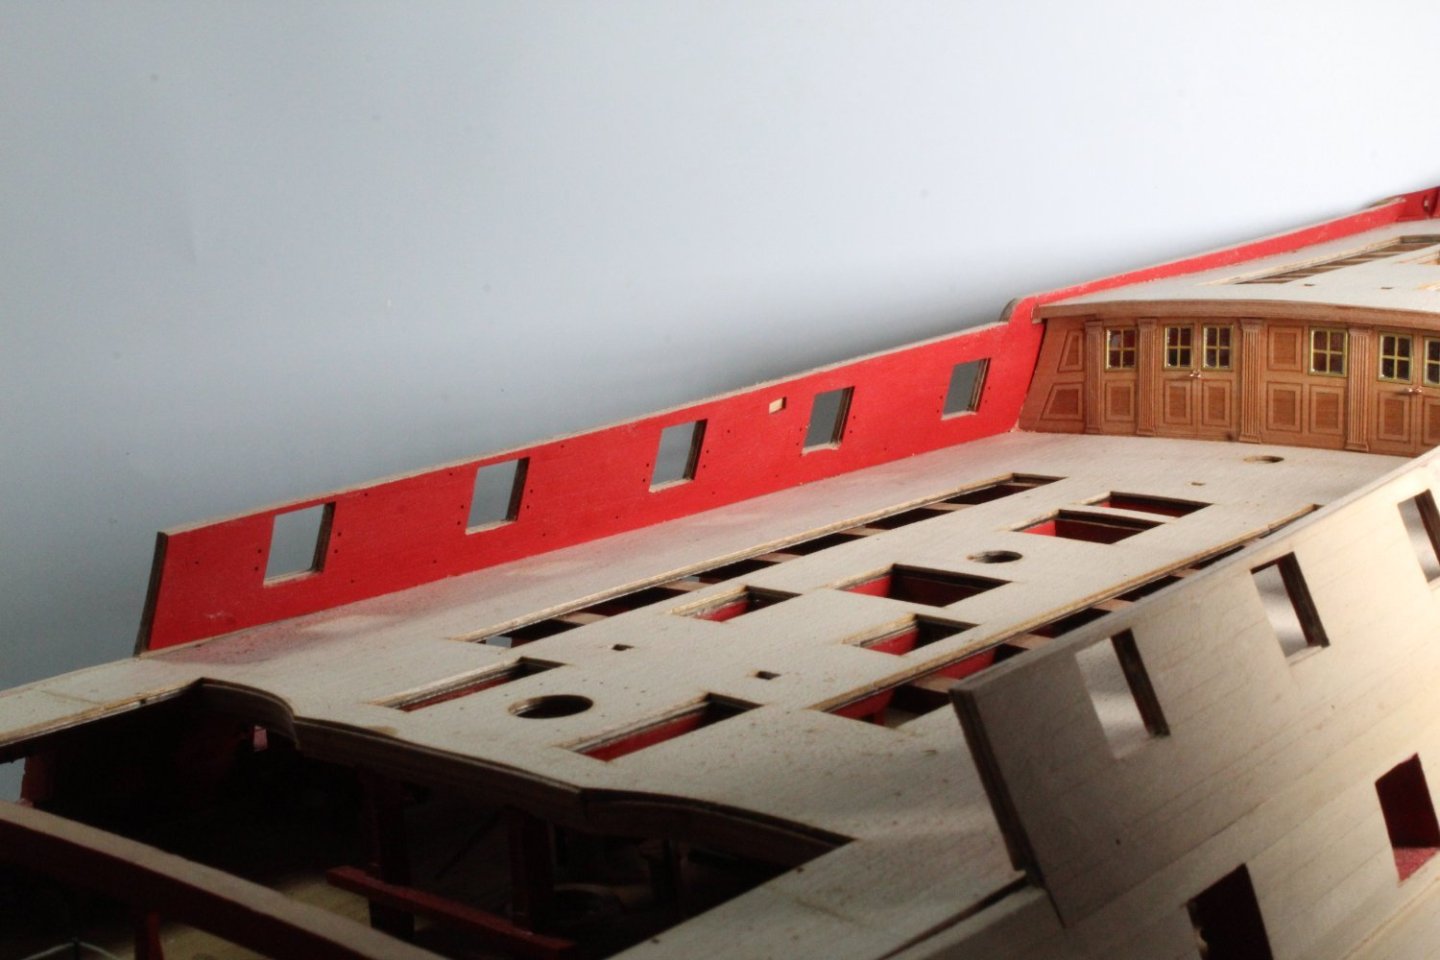
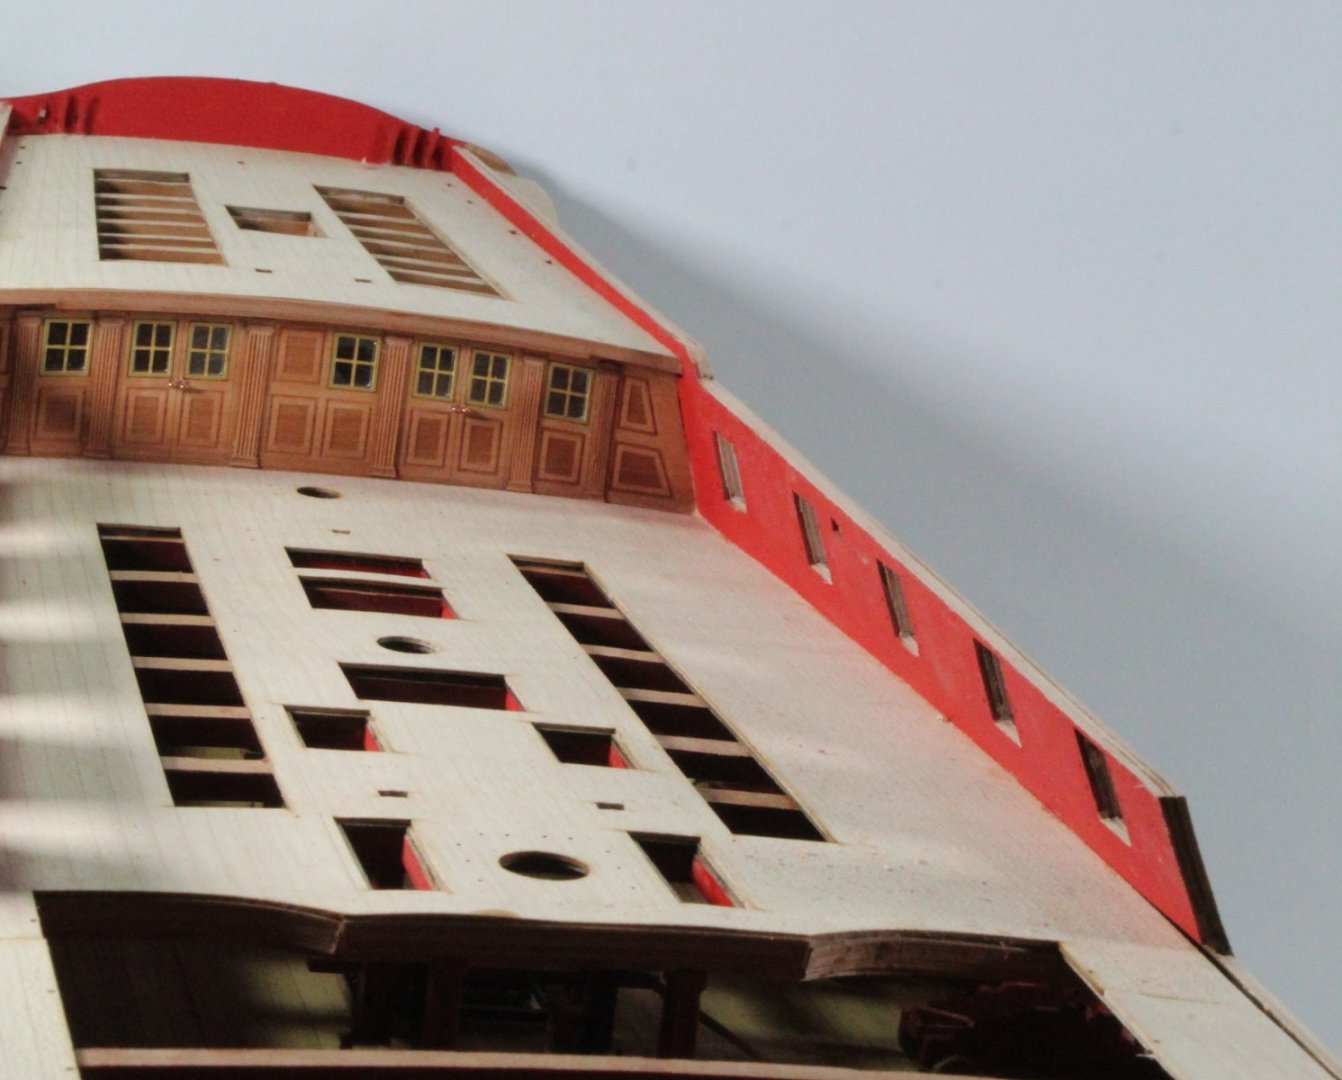
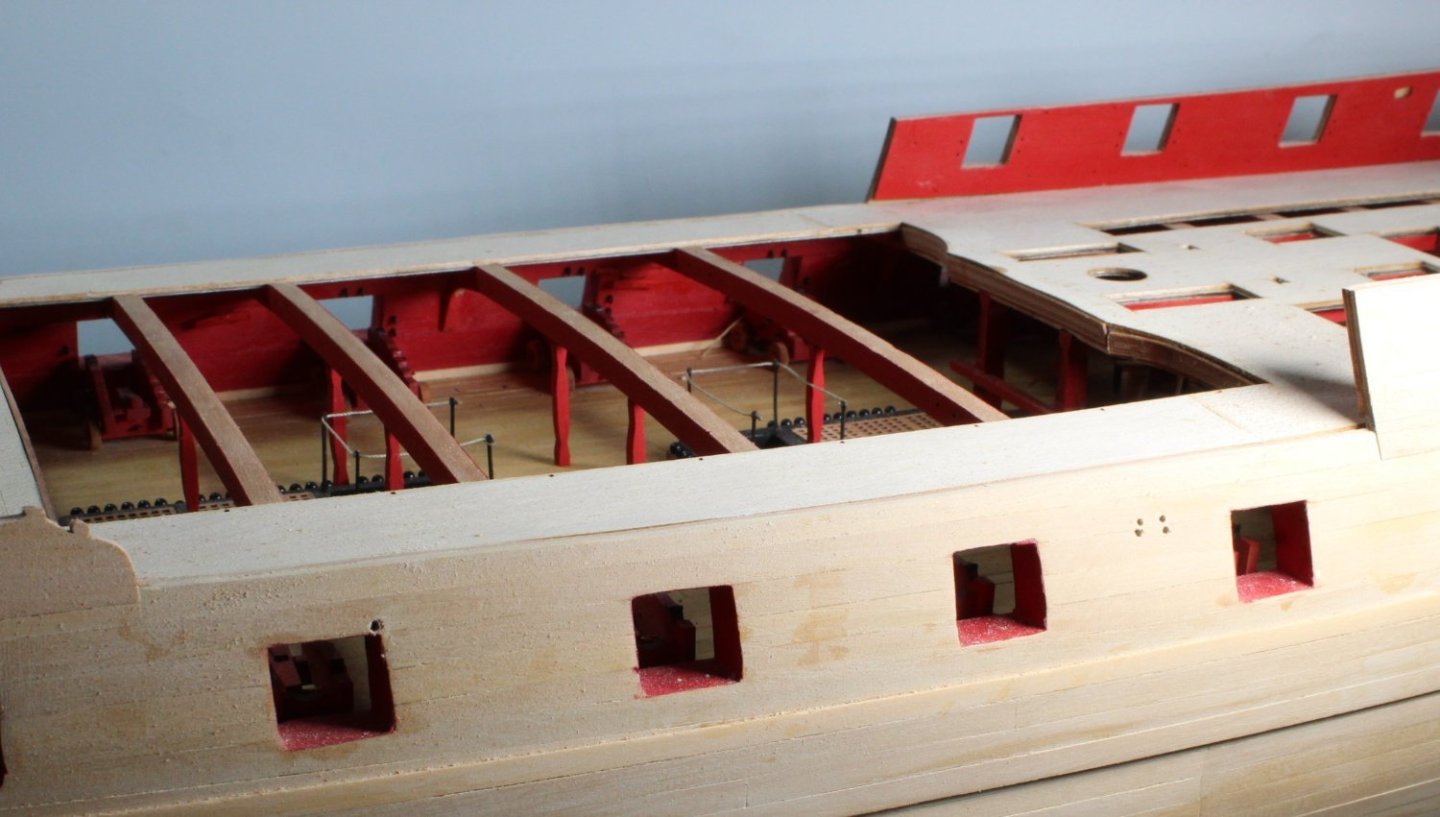
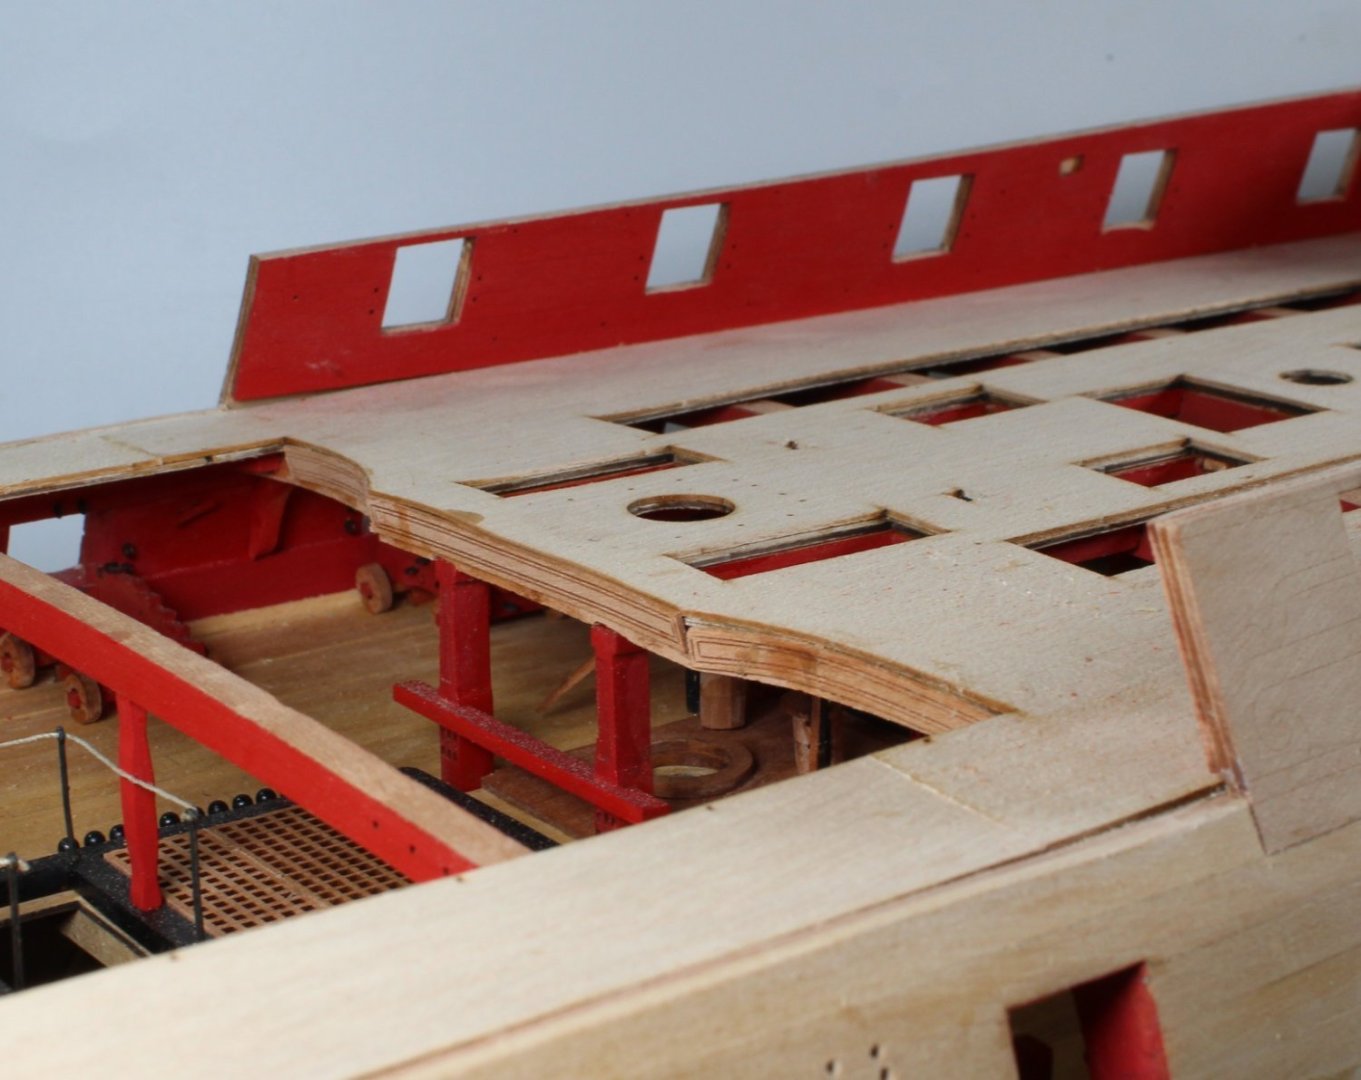
Hull Decorations
I have only been able to make progress in small steps this week with other household commitments, such as gardening, grandparent duties, etc. Next week my wife and I are off to Norfolk for a few days so progress will continue to be slow. My dad was in the RAF for several years I lived in so many different places as a child as my dad was posted to different RAF bases. I was born in Kings Lynn but I have no memory of living before we moved to Calne when I was 1 year old. We lived in a couple of RAF married quarters in and around Kings Lynn whilst my Dad was posted to RAF Marham so thought it would be interesting to locate them.
I have competed adding the outer hull rail patterns. I think they will look OK once the hull is painted. I have attached a few photo's of the rails. There were some alignment issues but, for the most part I have been able to be creative and hide my shoddy workmanship.