


Glenn-UK
-
Posts
2,732 -
Joined
-
Last visited
Content Type
Profiles
Forums
Gallery
Events
Posts posted by Glenn-UK
-
-
Great work, and I'm glad my method has helped you. I have learnt so much from your build which has greatly improved my rigging skills.
Thanks
Glenn
-
4 minutes ago, drjeckl said:
Glenn, It appears that the lower right deadeye got rotated 180 degrees from a previous view. Compare it to the other 3.
.John
Hello John.
I had noticed that when I started to add the next lanyard. Many thanks and a great spot. It has been corrected.
-
10 minutes ago, Theodosius said:
I like the crows feet. I think it's not so easy to have each leach with the same tension on it!
Thanks Theodosius.
I did apply some tension to the lines as they were rigged. Before adding the final securing knot I pulled the lines in turn to get additional tension. Very similar to tensioning lanyards, just a few more line to pull.
-
36 minutes ago, James H said:
A lovely kit. You should do this one pretty quickly.
Hopefully the Alert build time will fit in perfectly with the Sphinx release date, no pressure Jim😃.
I am planning a slightly differerent build sequence for the Alert and I will also use the Alert to refine and improve my modelling skills.
- James H and Ryland Craze
-
 2
2
-
7 minutes ago, Rustyj said:
Your rigging is coming along nicely!
Thanks Rusty, the shroud work is slow progress but I think it will be completed in the next couple of weeks.
-
I have just ordered the HM Alert (V2) from Vanguard Models and I am looking forward to receiving the kit next week (UPS delivery scheduled for Tuesday 6th April).
I am currently rigging the Duchess of Kingston (Vanguard Models) which should be completed in a few weeks time.
I choose the Alert for my next build as I think it will fit the gap between the completion of the DOK build and the release of the Sphinx kit from Vanguard Models release in few months time.
- James H, Matt D, chris watton and 3 others
-
6
-
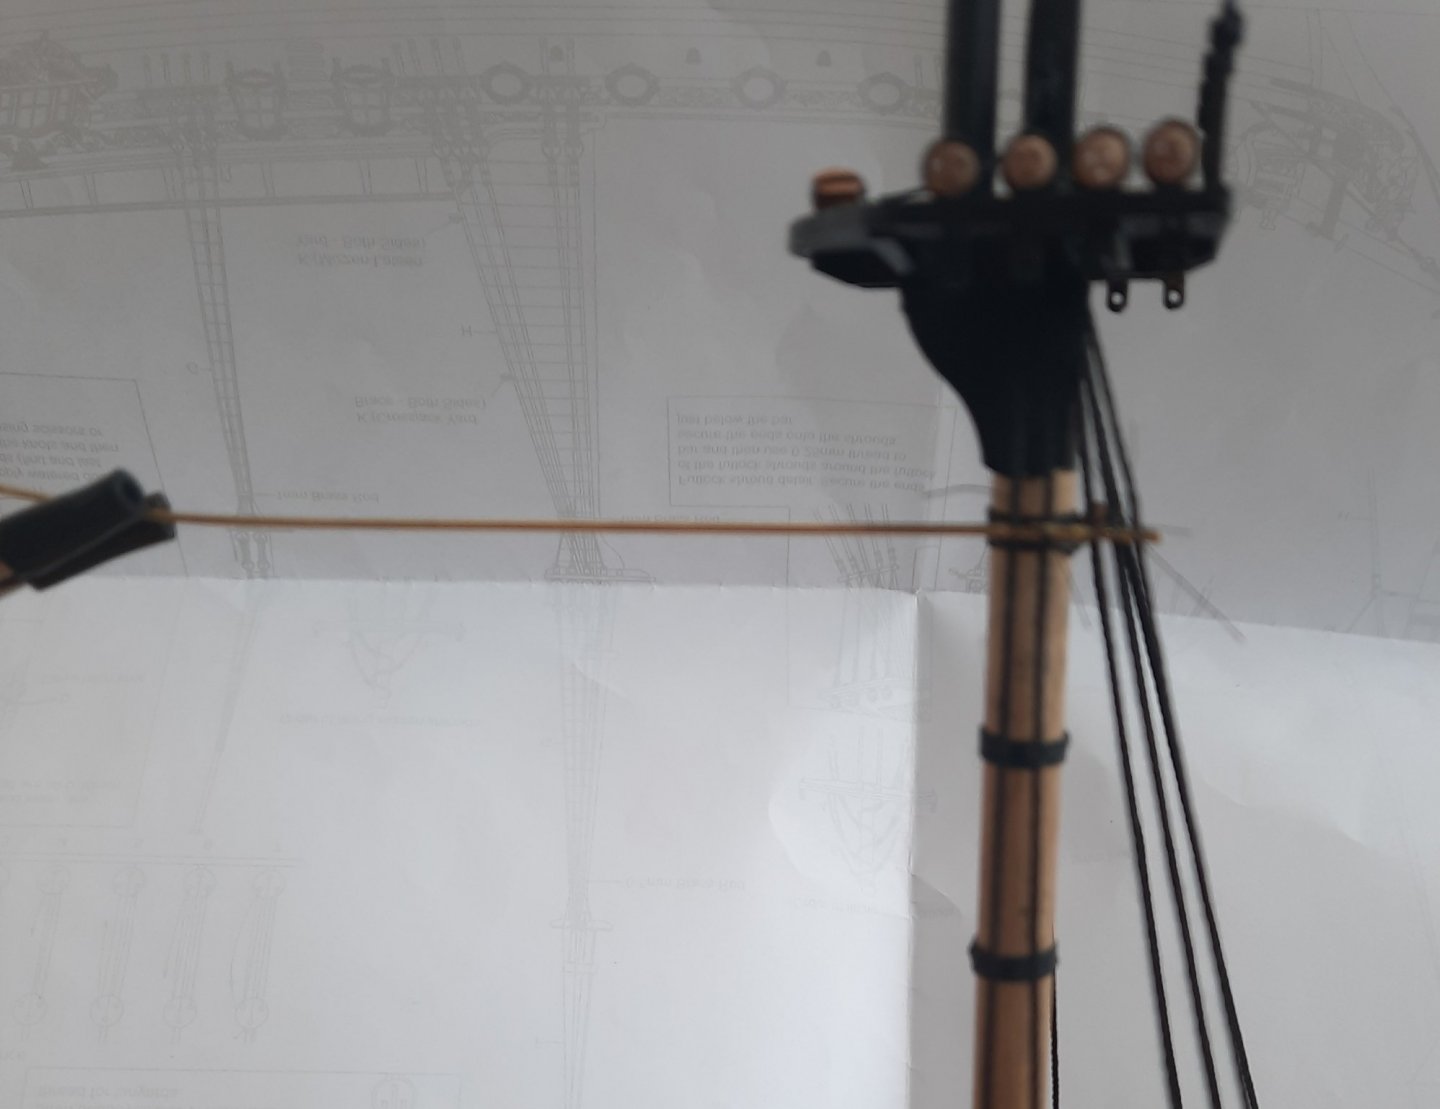
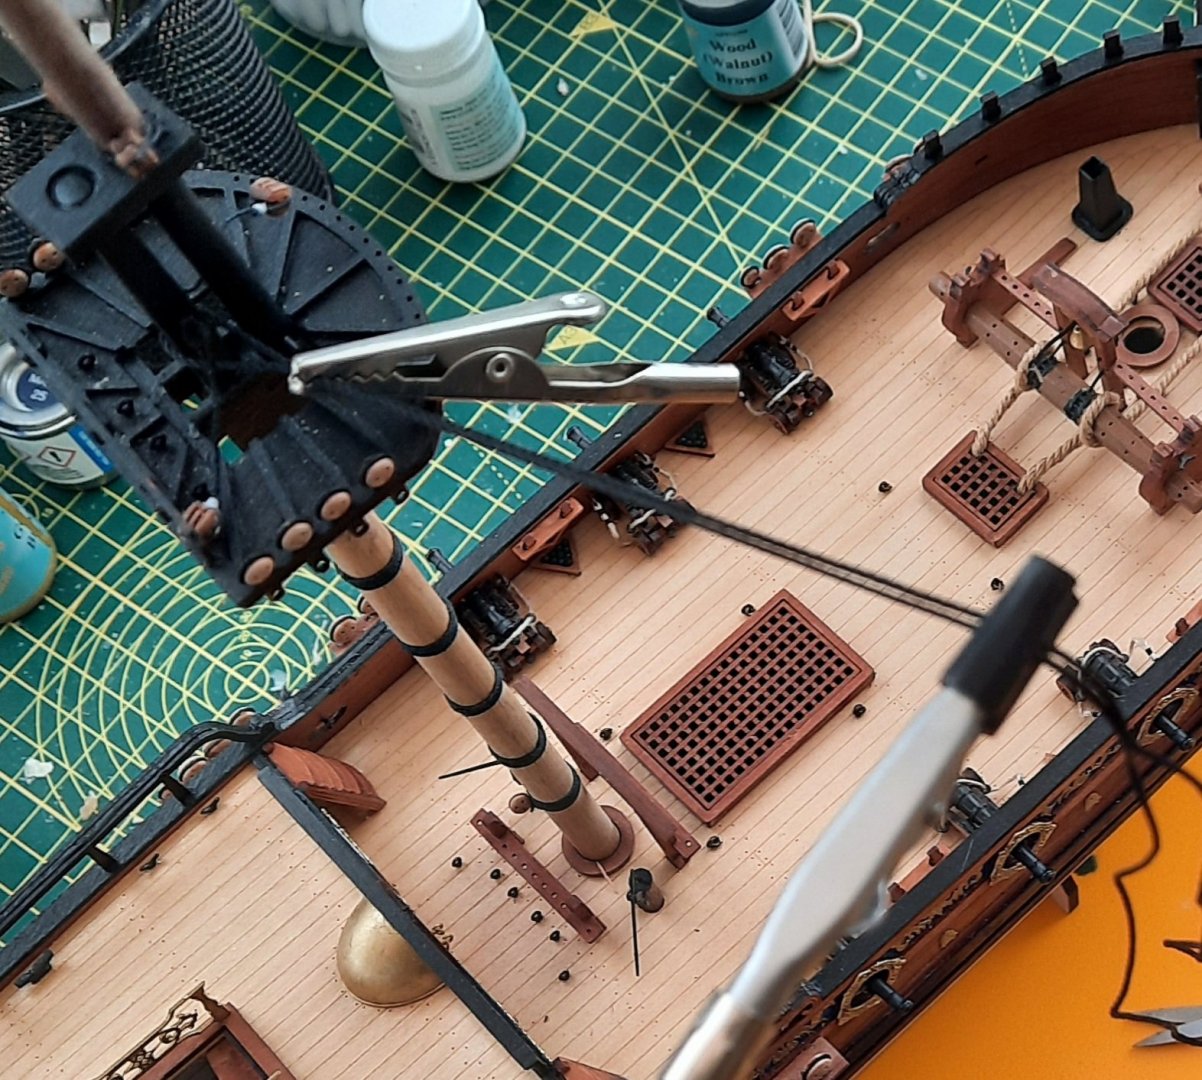
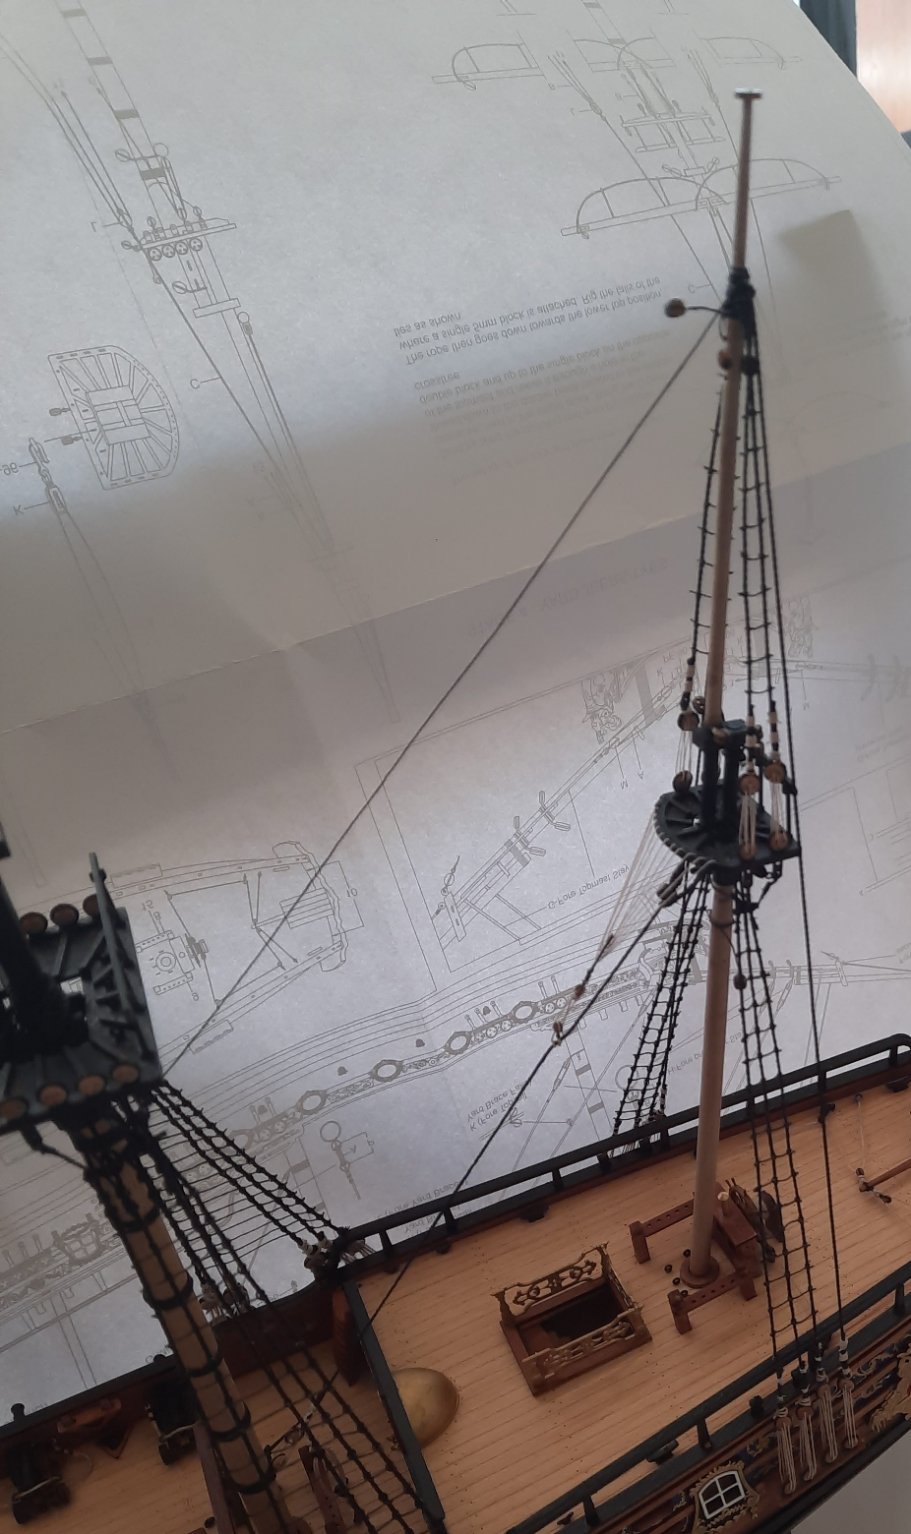
As work progresses on adding the main top mast shrouds I thought I would share my methods.
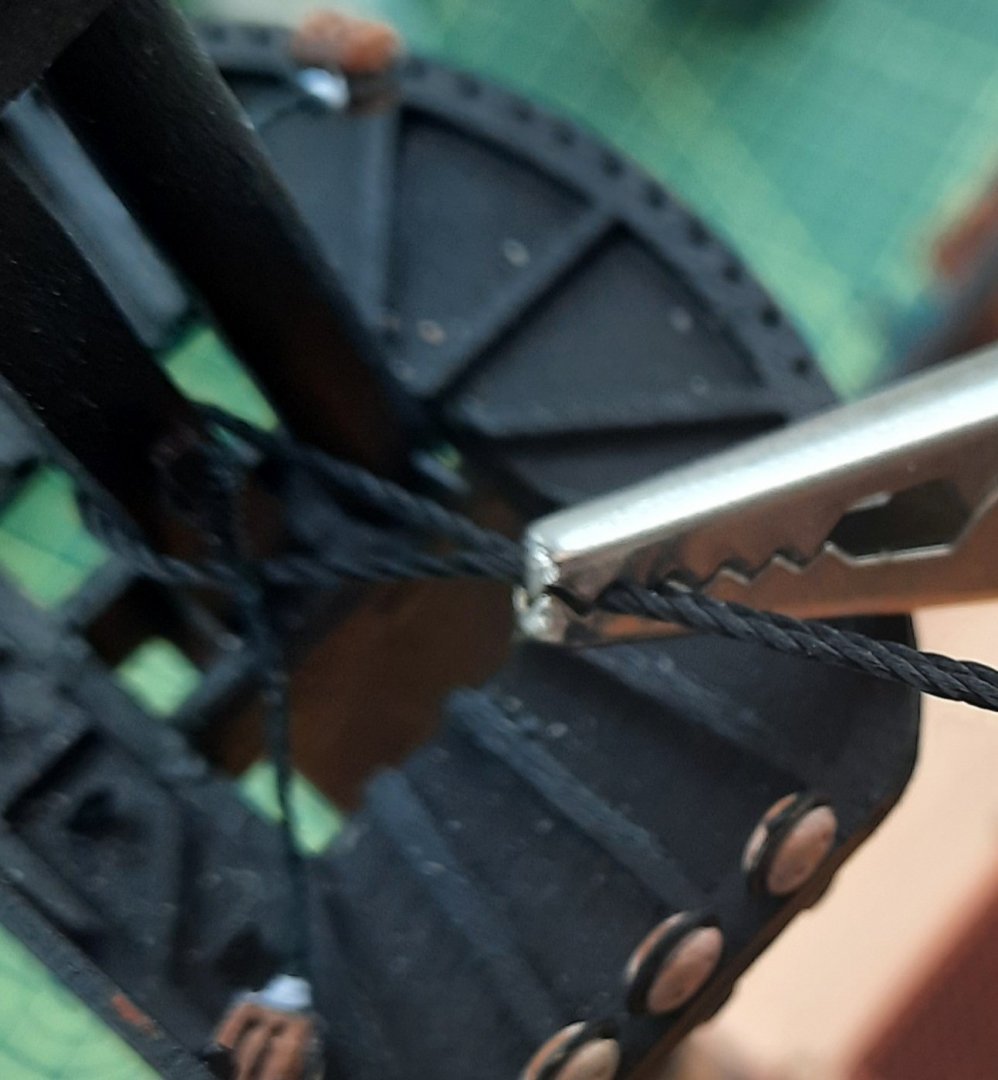
I started by cutting a 40cm length of black 0.75mm thread. This was wrapped around the top of the main mast to create the first two shroud lines. The quad hands were used to tension the shroud, as shown in the photo below. The photo also provide a nice vista of the view from my ship yard.

Using the top and bottom half hitch method with 0.25mm black thread I applied the seizing to secure the shroud. I opted for 6 top and 5 bottom half hitches. The end result of the seizing is shown in the next photo.
It took approx. 30 minutes to add the 4 shroud line pairs.
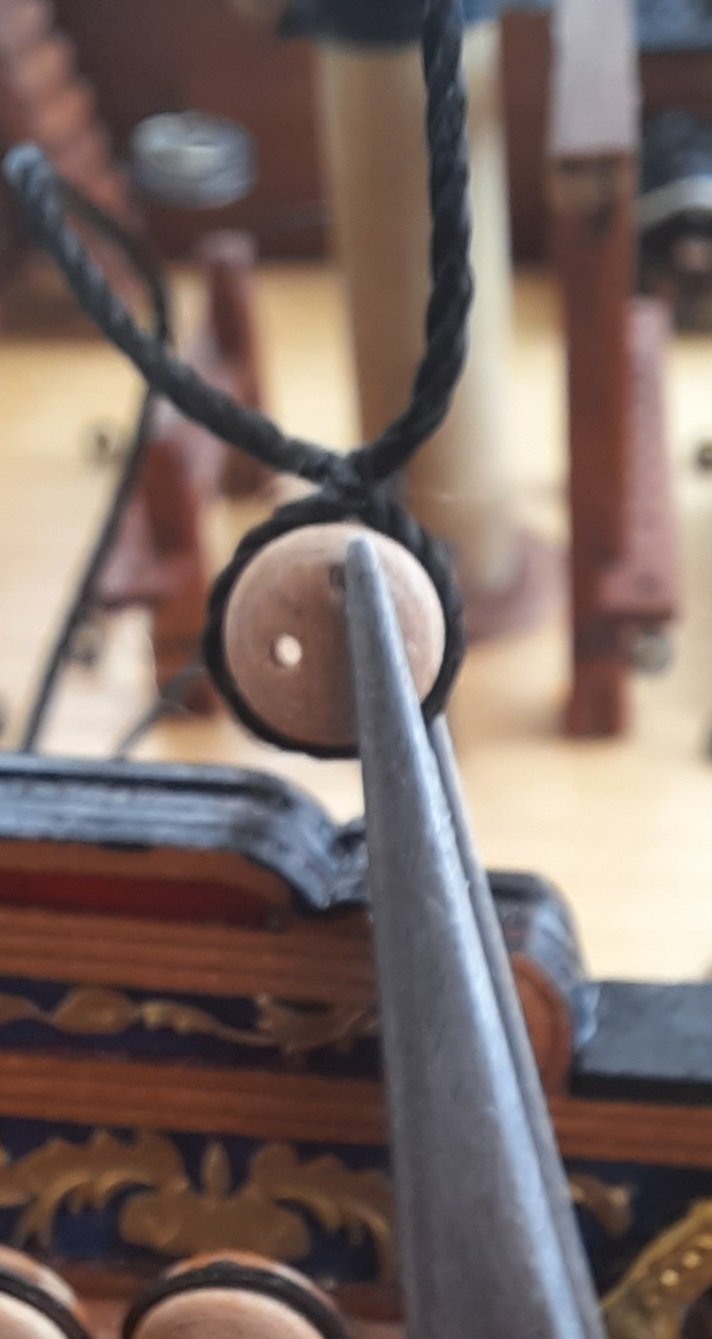
Next it was time to add the 3mm deadeyes. The first task is to form a hole for the deadeye. To do this I used my deadeye jig, as described in an earlier post. In the photo below the jig has been position and the first shroud line wrapped around it. To keep the tension in the shroud line I have used a pair of reverse action tweezers attached to the end of the shroud line.
Using the black fly tying thread I was able to form the hole in the shroud. It was then then a simple task to fit the deadeye in said hole. It is a nice snug fit.

The next task was to add whipping to the shroud line. I held the deadeye in the quad hands and adjusted the position to ensure the line was tensioned. I then cut a length of 0.1mm natural thread and started the process of adding top and bottom half hitch knots.
I added 5 top and 5 bottom knots and in next to no time the task was complete.

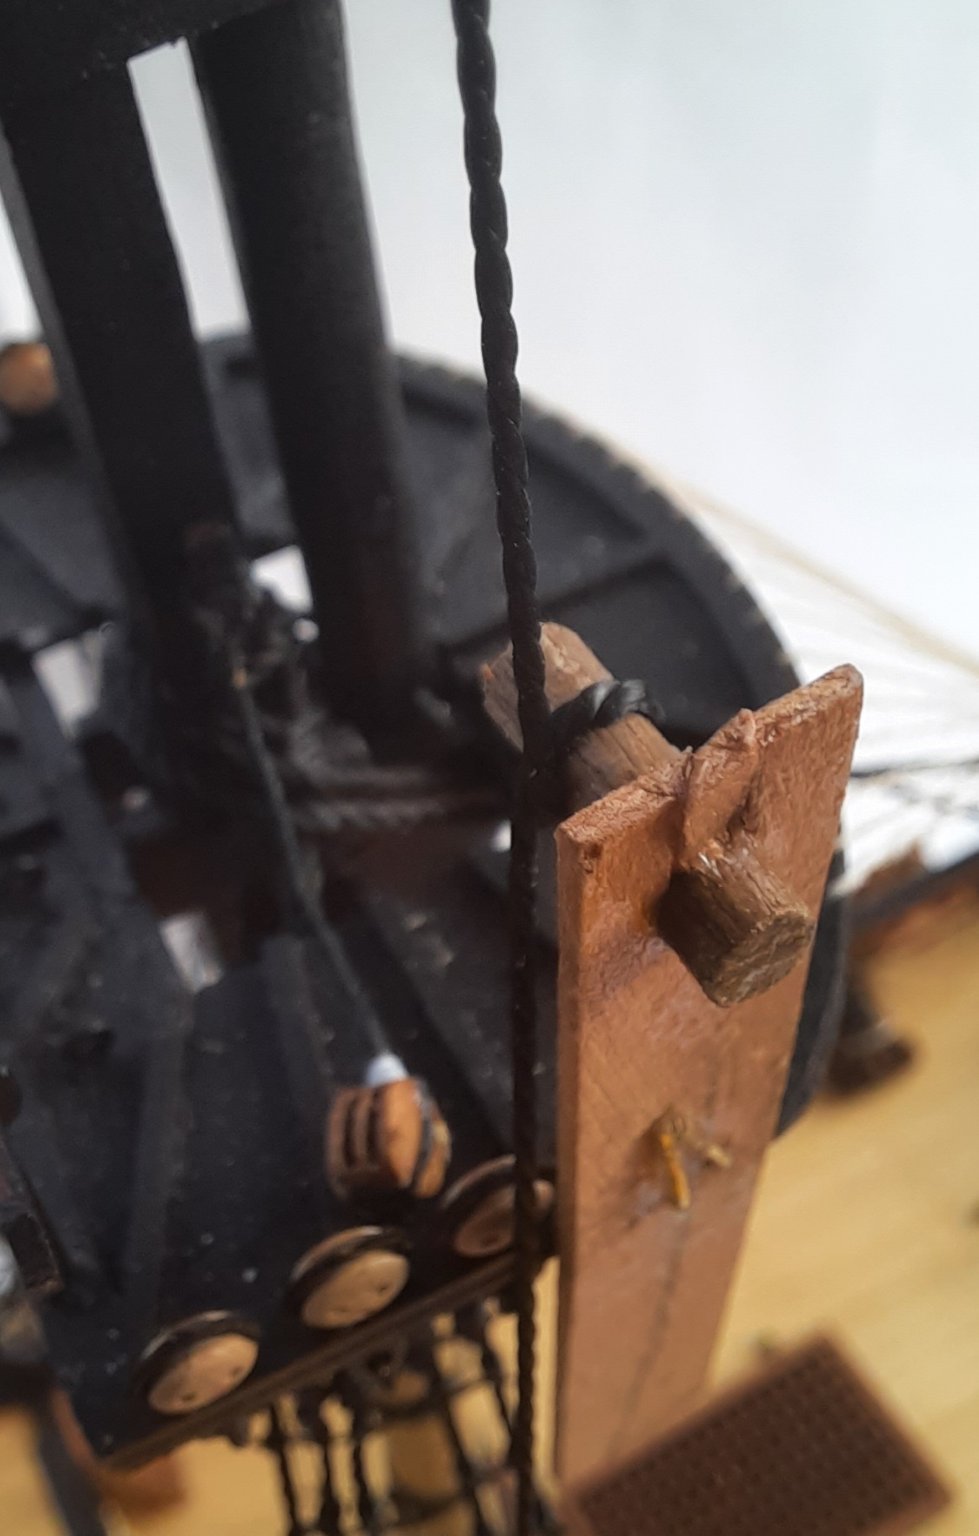
A 15cm length of 0.1mm natural thread was cut for the lanyard which was then threaded through both deadeyes. The shroud line was tensioned as the lanyards were adjusted. The thread was then passed through a small gap between the top of the deadeye. The shroud line and will tied off later on once the final tensioning process has been completed.
The above process is now to be repeated for the 7 remaining shroud lines.
-
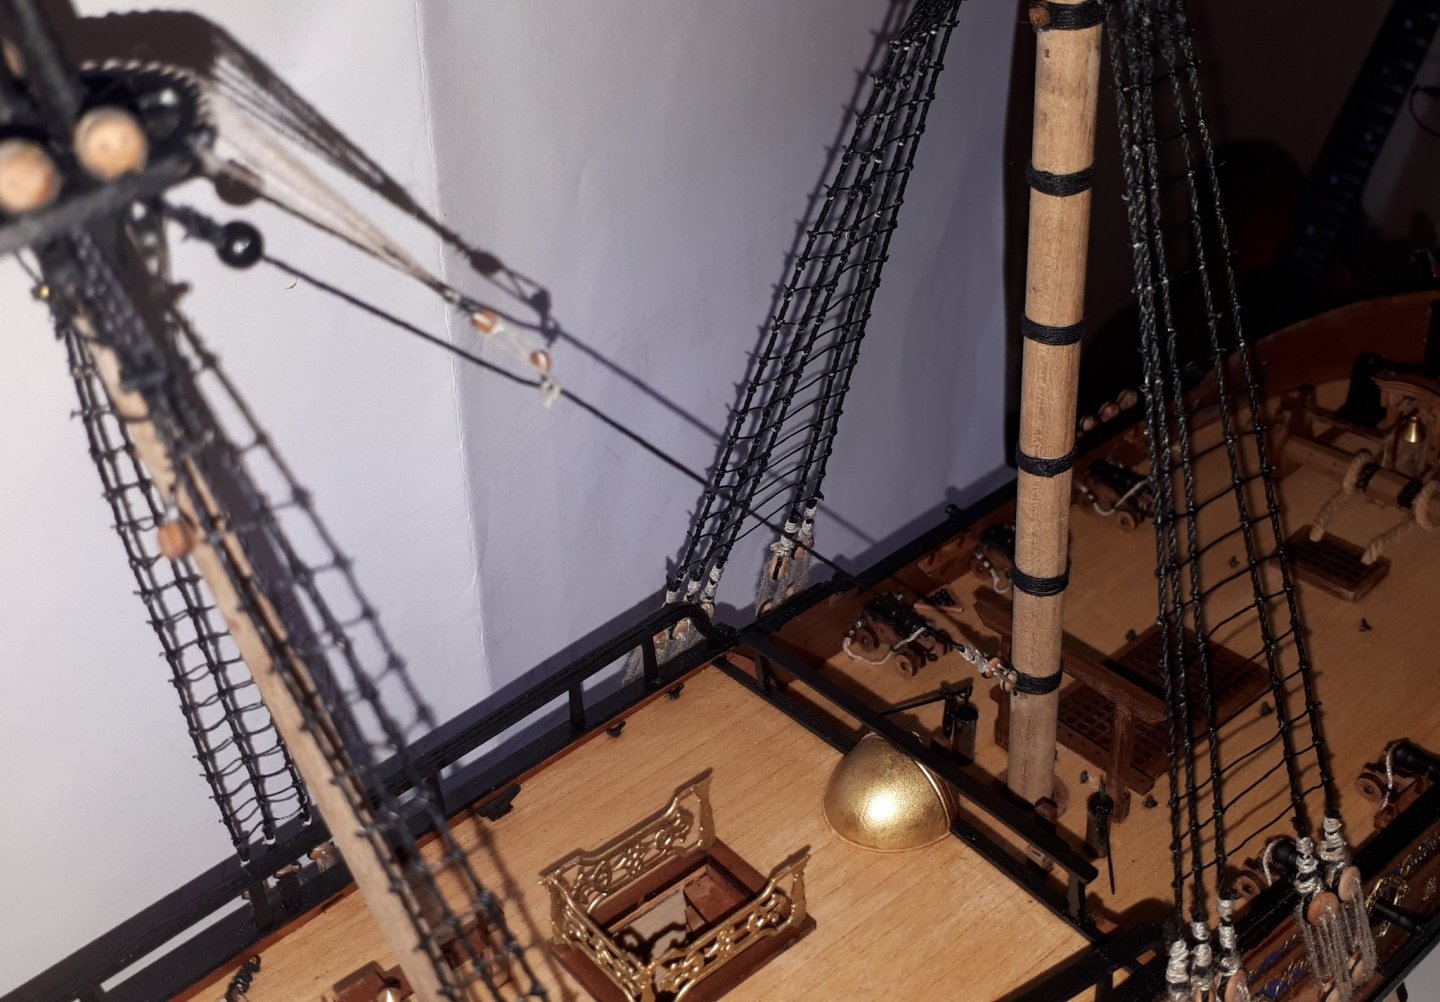
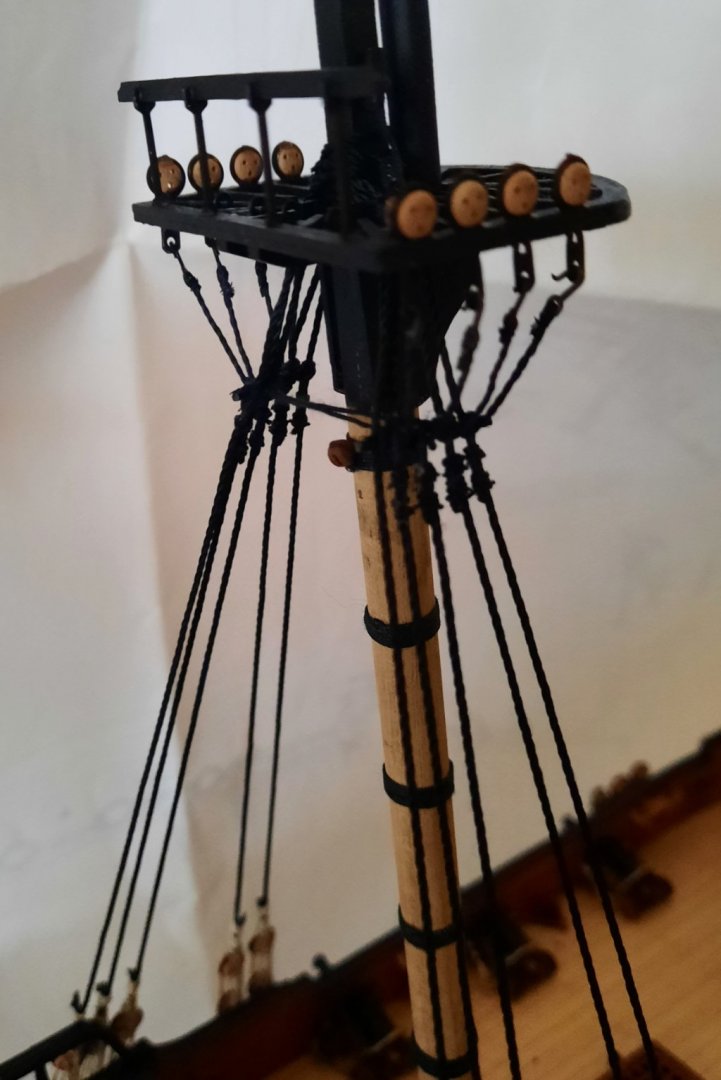
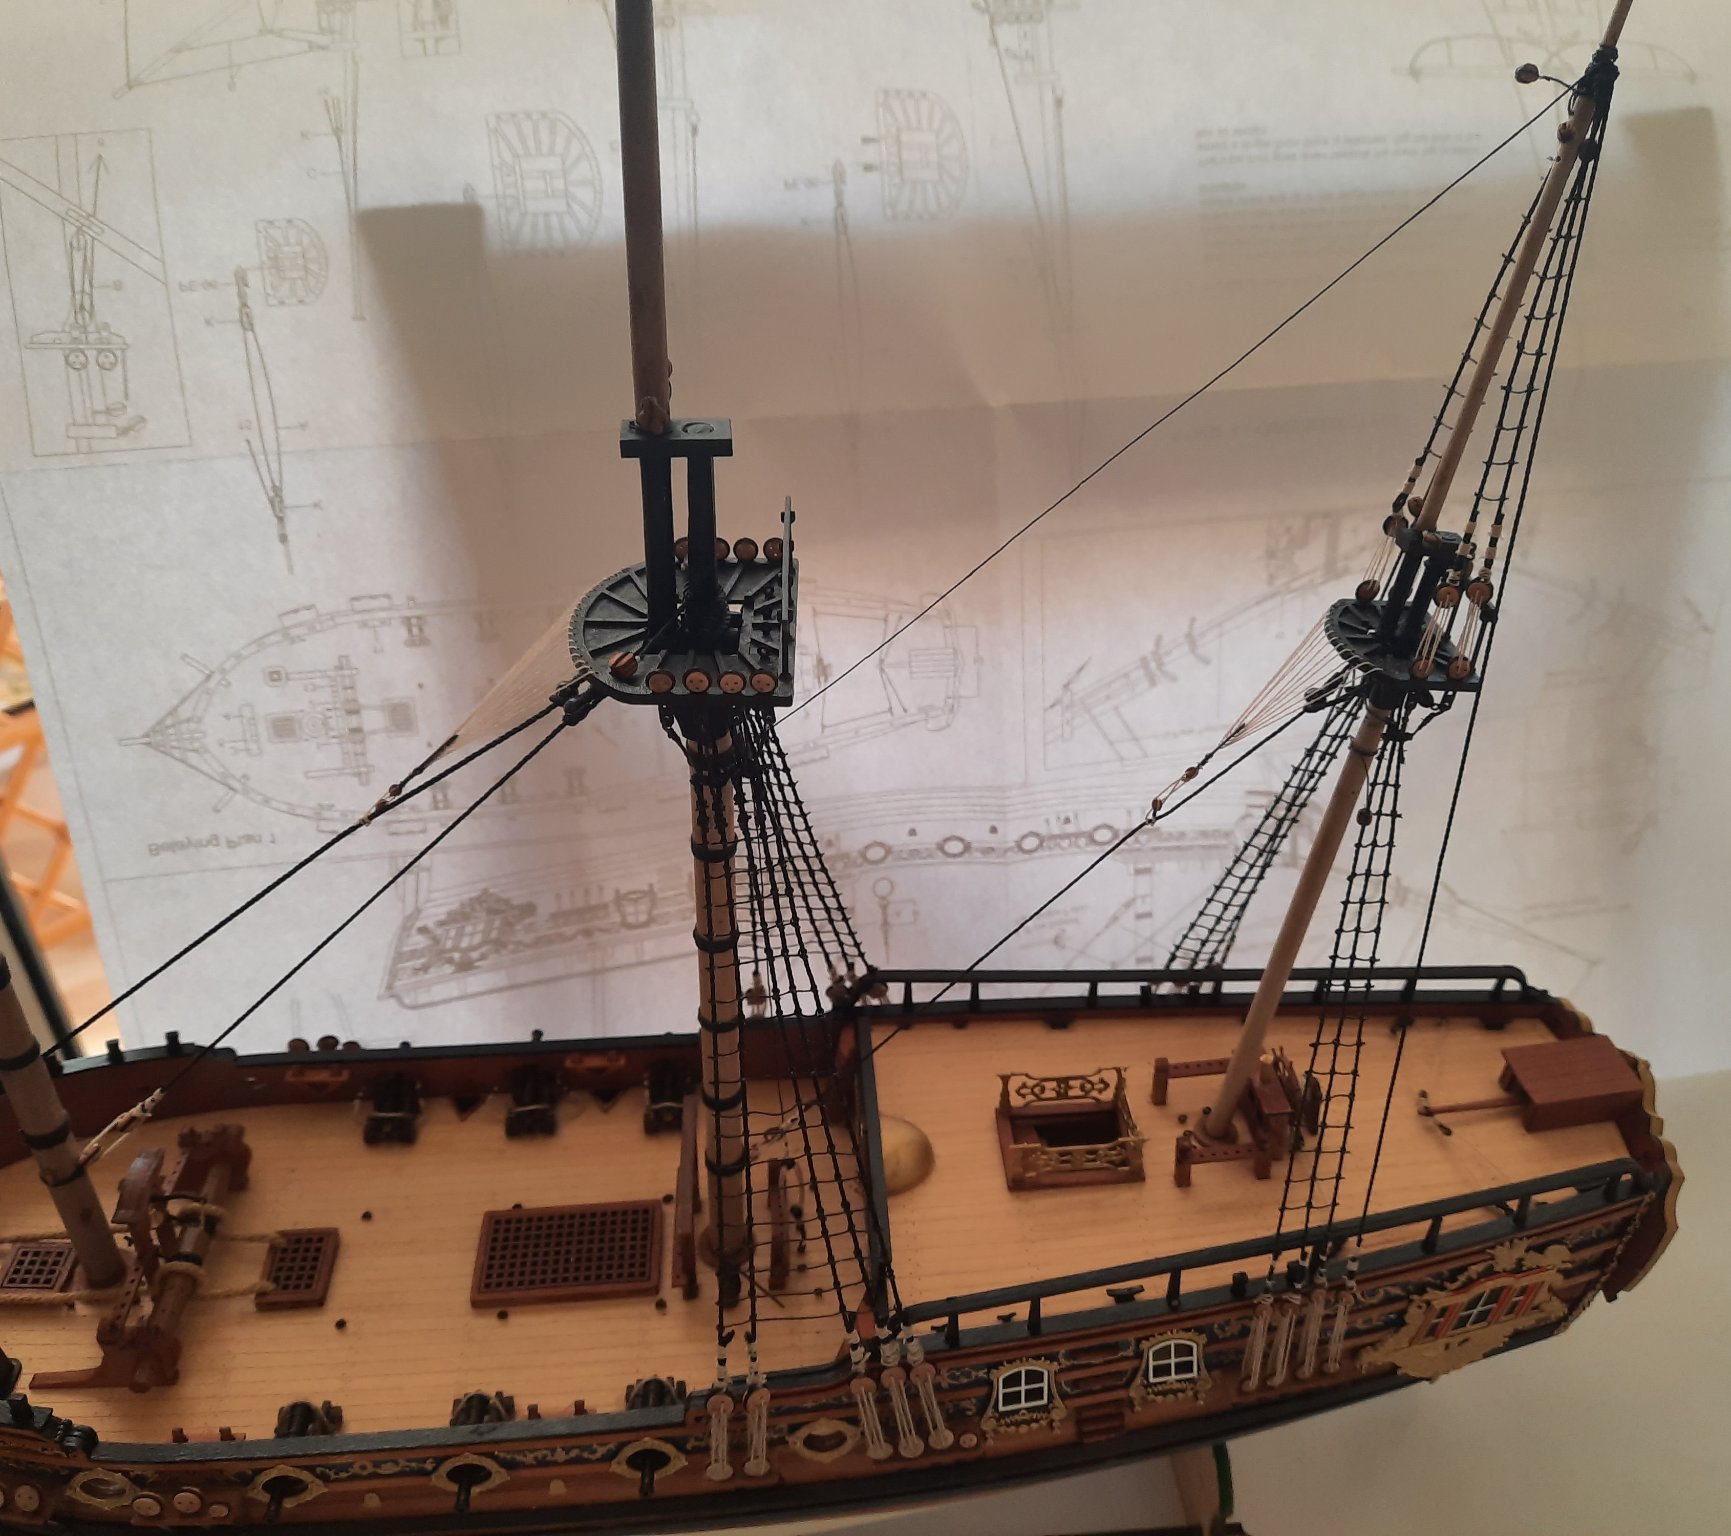
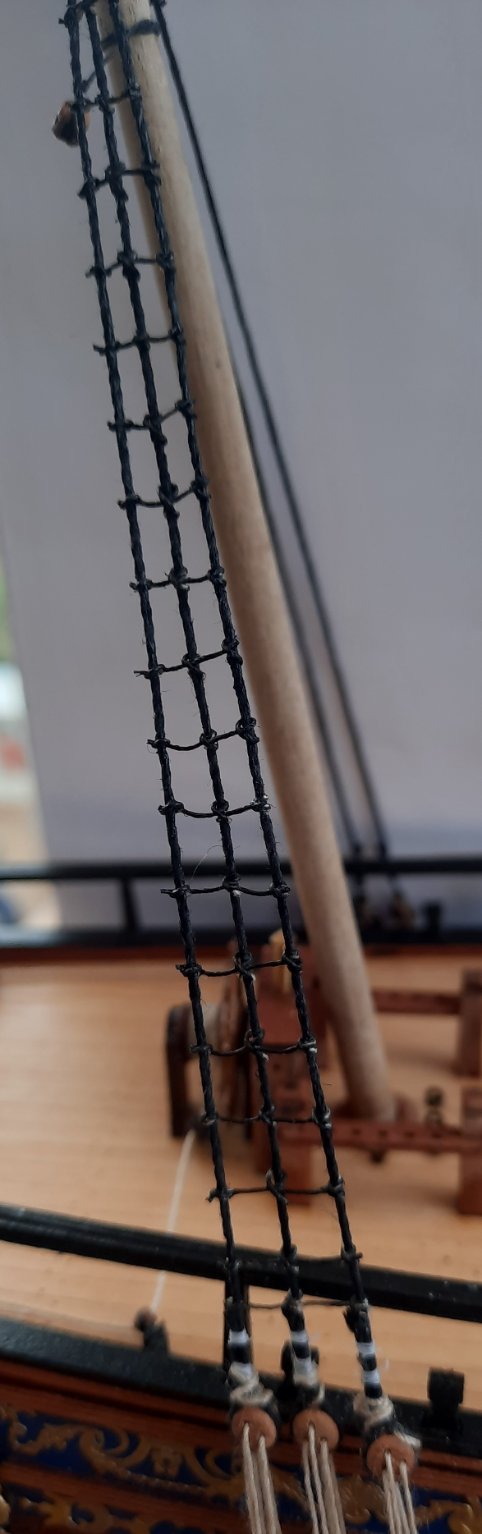
I have now completed adding all the shrouds, ratlines and stays to the mizzen mast and mizzen top mast. The mizzen is now ready for the yards. Before fitting the yards I will have to complete adding the shrouds, ratlines and stays to the main and fore masts. Tomorrow I will start work on adding the shrouds and ratlines to the main topmast, followed by the main top gallant mast.
This is a picture taken as I was adding the mizzen top mast ratlines. I quite like adding ratlines. I start with the bottom ratline, then I add the middle one and then I add the top one. I then fill in the gaps in stages. Once I am happy with the position I coat the ratlines and shrouds with a 50/50 diluted pva solution. After all the ratlines have been added I dyed the lines black.
Picture showing the shrouds, ratlines and stays.
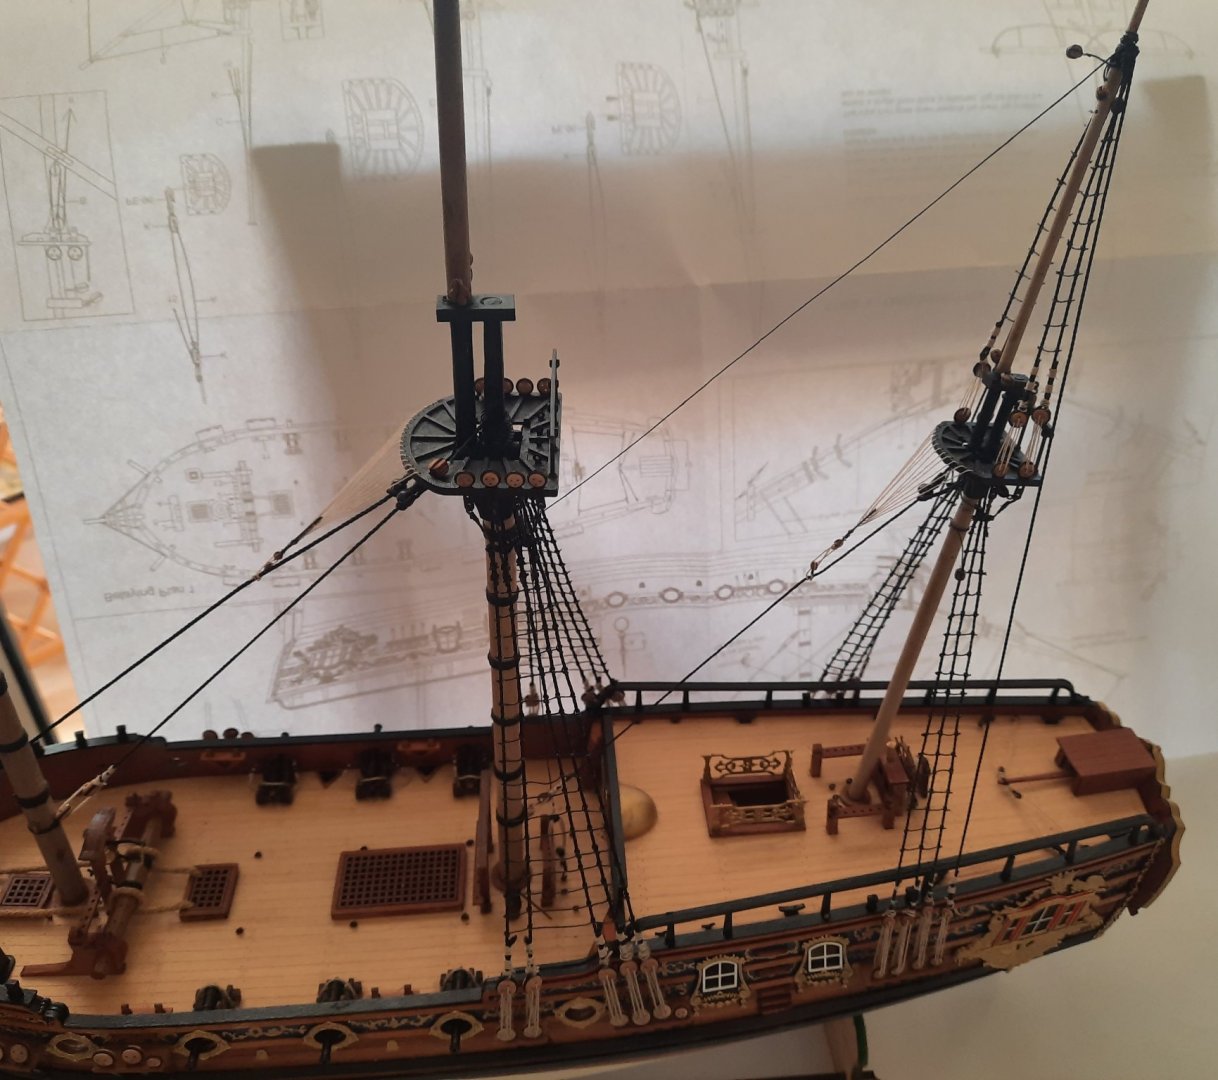
Another picture showing the shrouds, ratlines and stays.

- Matt D, Theodosius, Rustyj and 7 others
-
10
-
52 minutes ago, James H said:
A week has passed, so I have something I can share that's worthwhile.
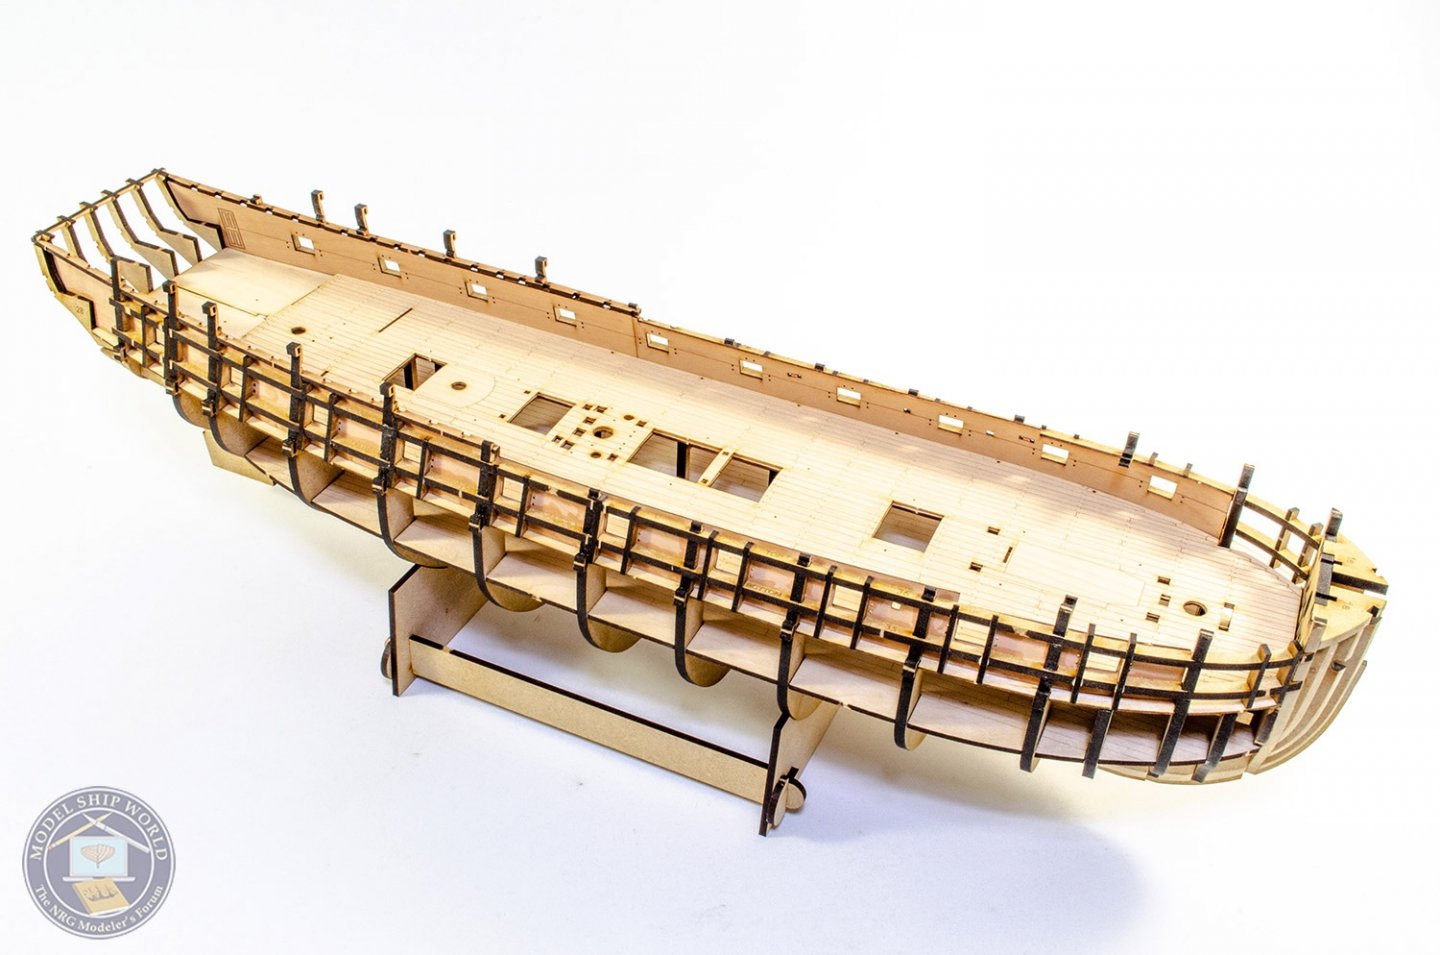
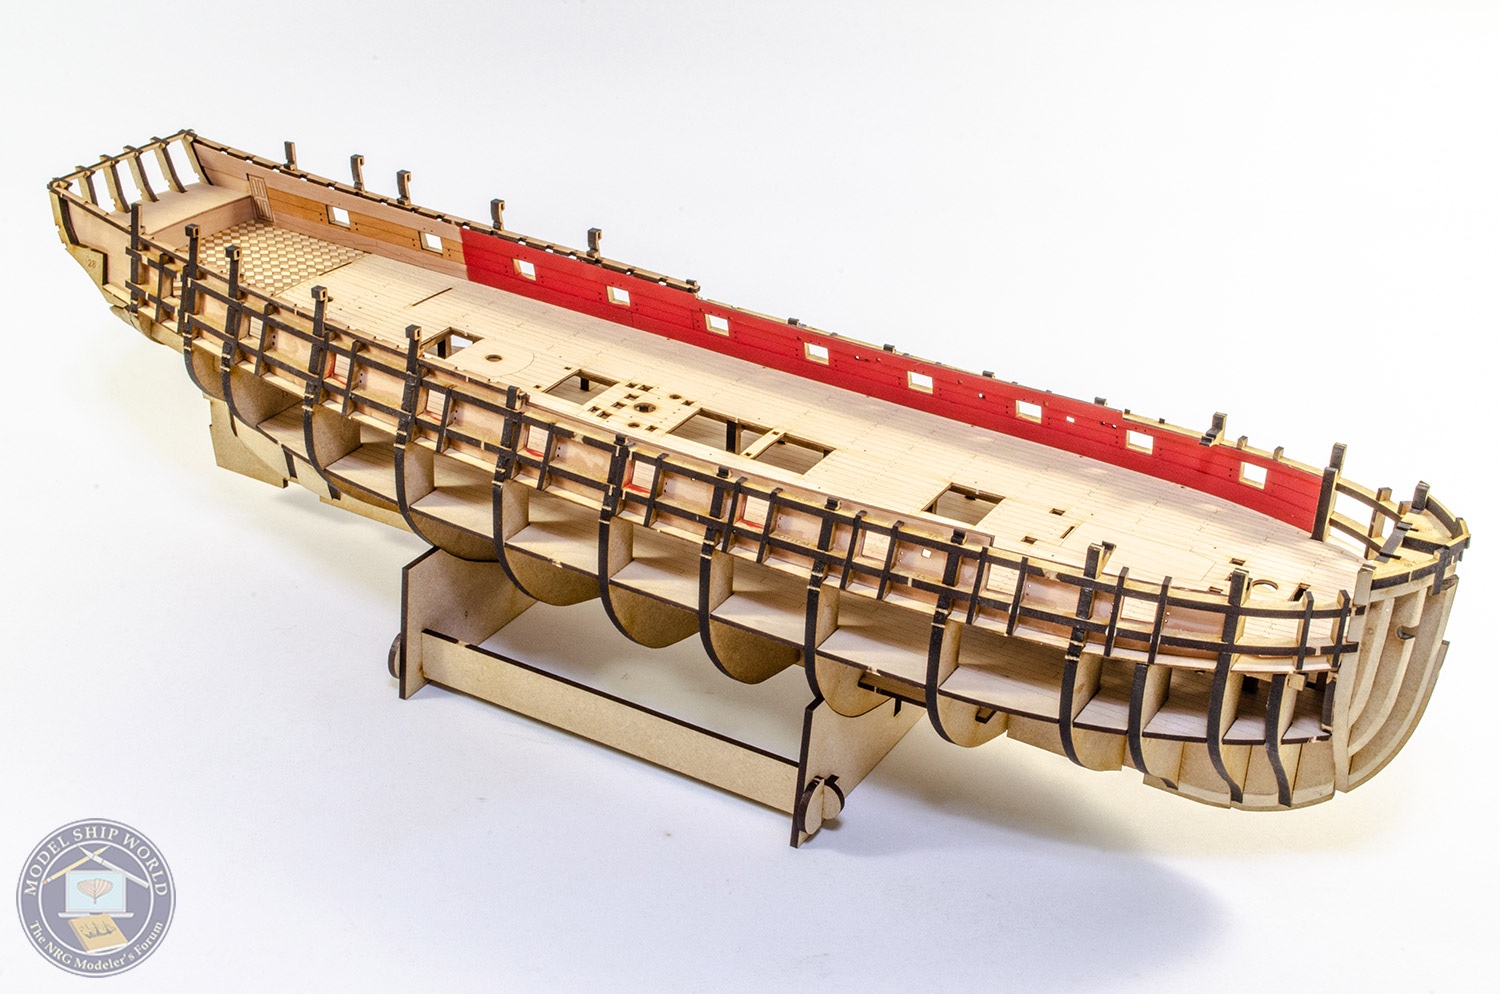
With the basic skeleton now assembled, the bulkhead ears strengthened with the longitudinal strips, and the ply deck fitted...I can now finish the framed cannon ports. These are done in the same way that Chris used on Amati's forthcoming Victory that you may have seen in my build log.

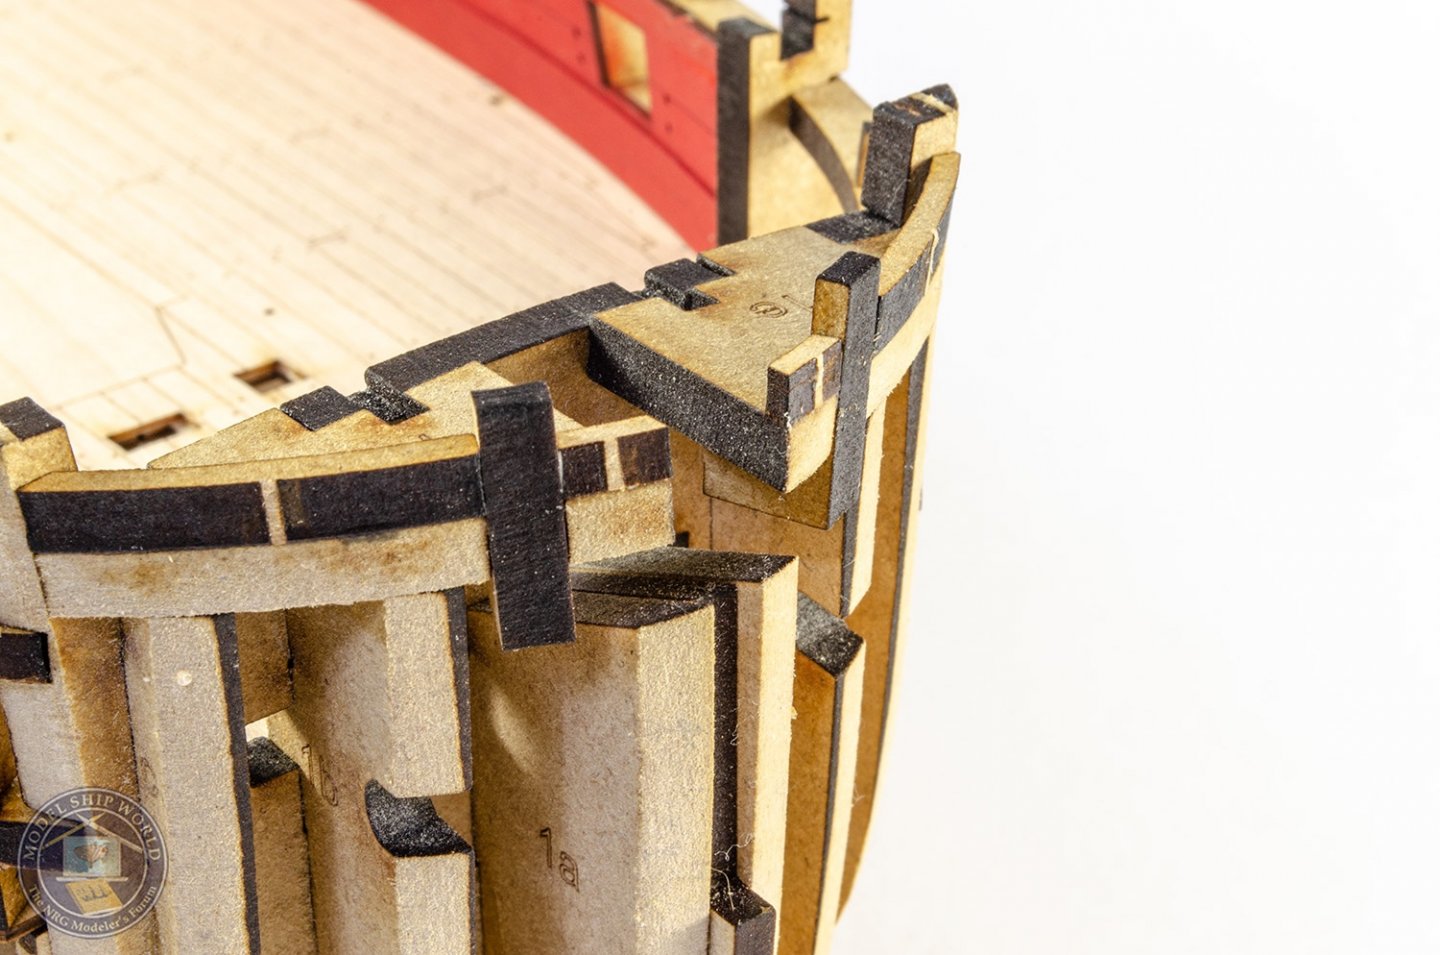
These are added in pairs, numbered from the bow, back towards the stern. I push these into position so they are at right angles to the long pot strips I fitted. This is important as they'll need to line up with the inside bulwarks which have the port holes laser-cut.
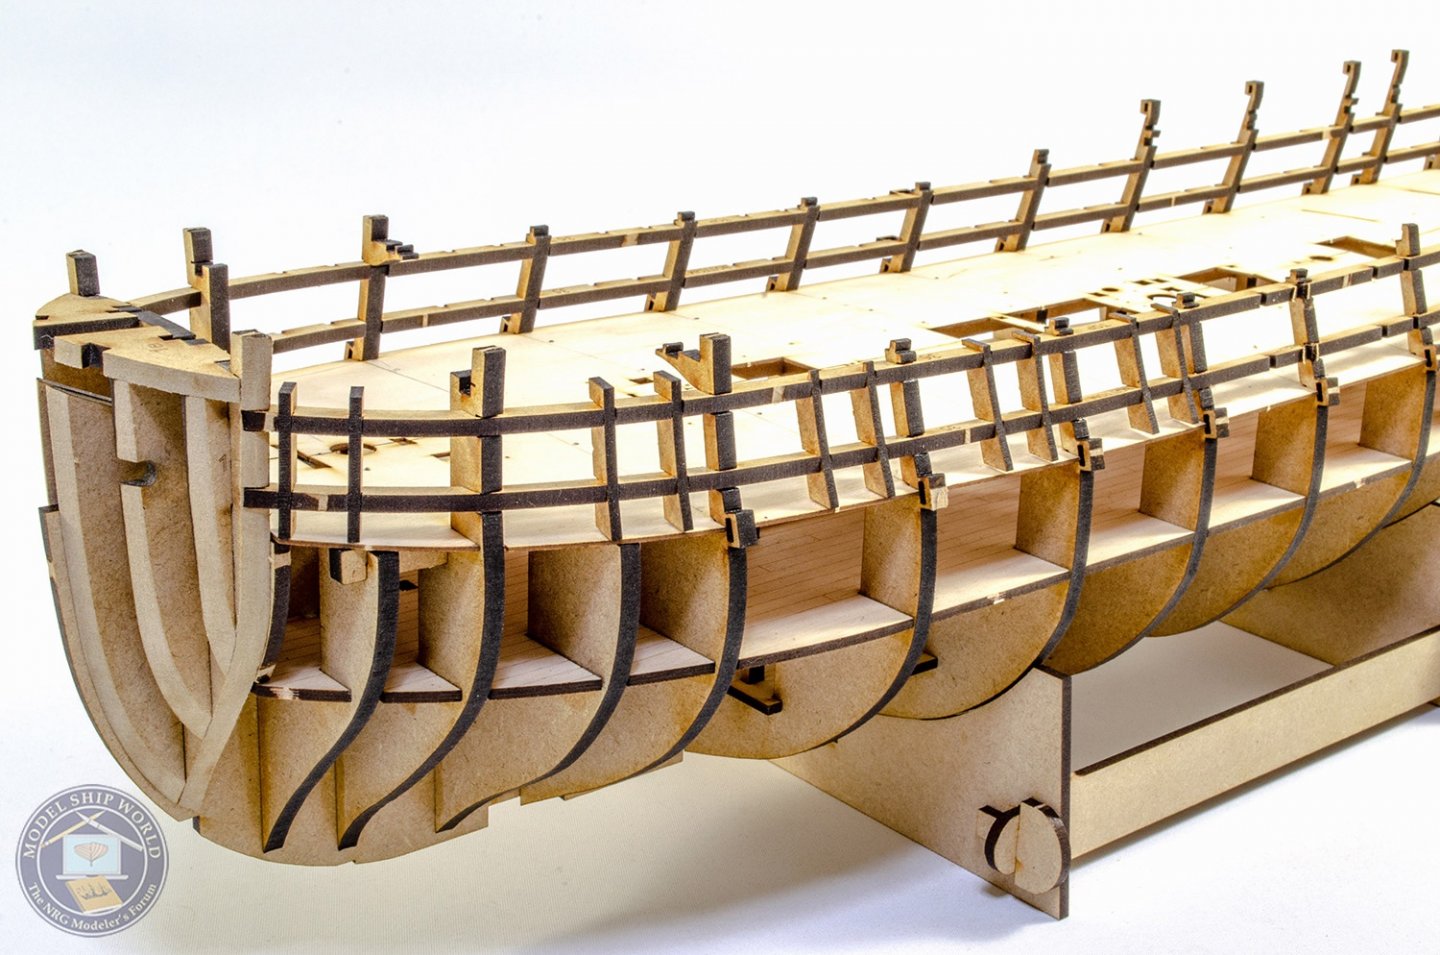

Stern and now filler blocks are now marked, shaped and fitted. I used a Dremel for these for speed.

Before the inner bulwarks are fitted, I nee to sand the inner bulwark frames smooth. The best way to gauge this is that the work is pretty much done when all the char is removed. There is leeway in subsequent part fitting even if you sand these a little more than just the char, but the char is a good indication.

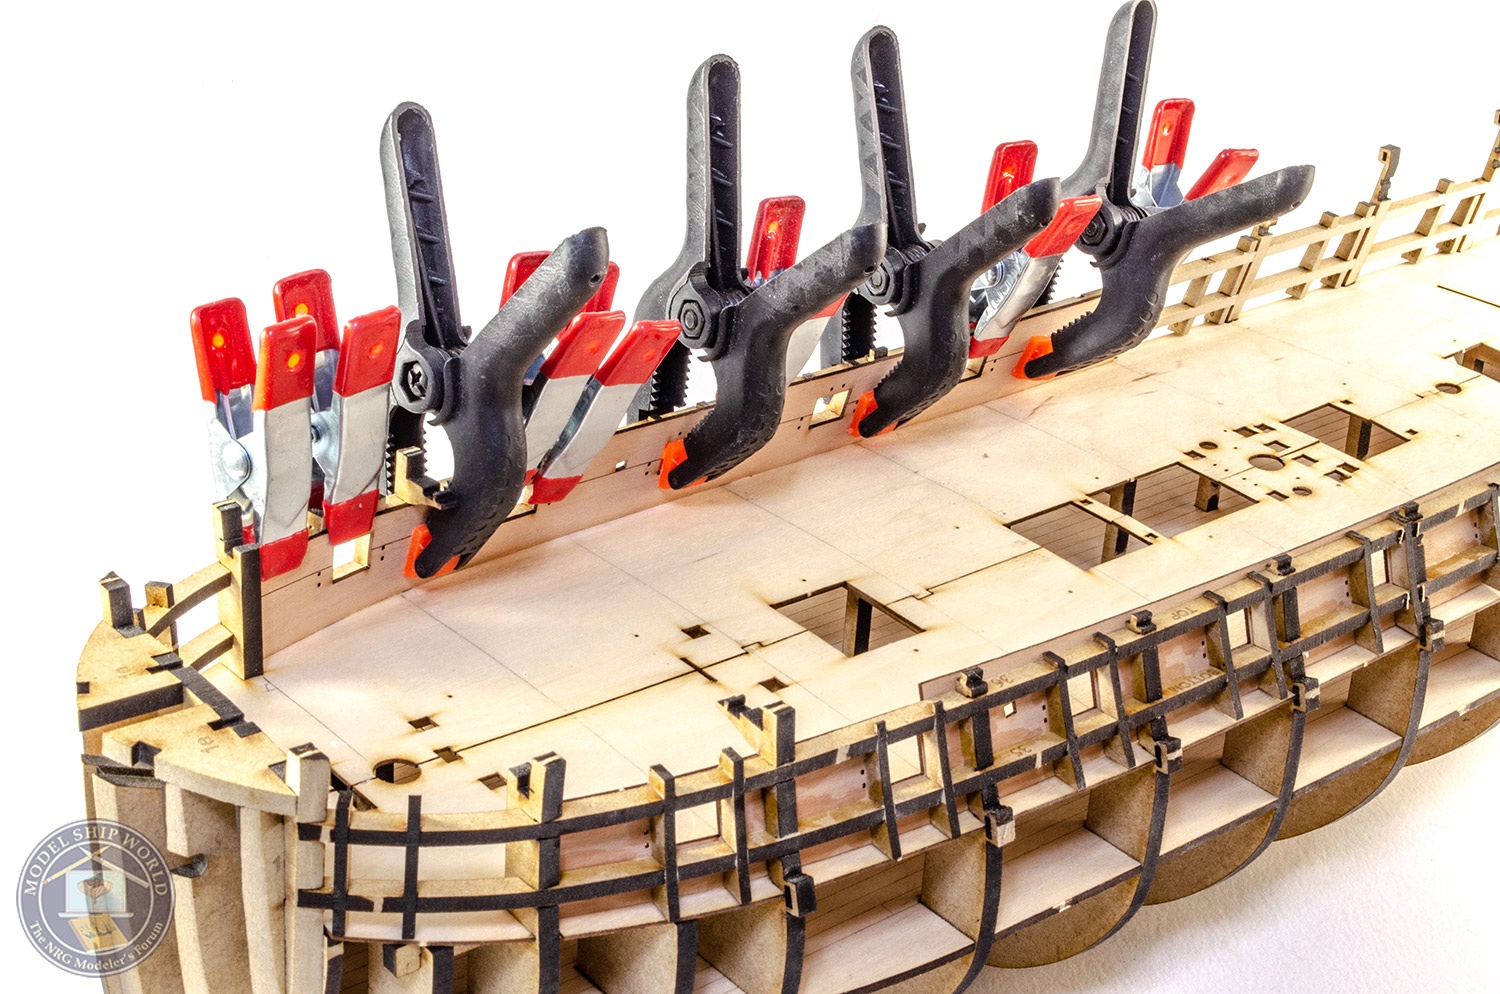
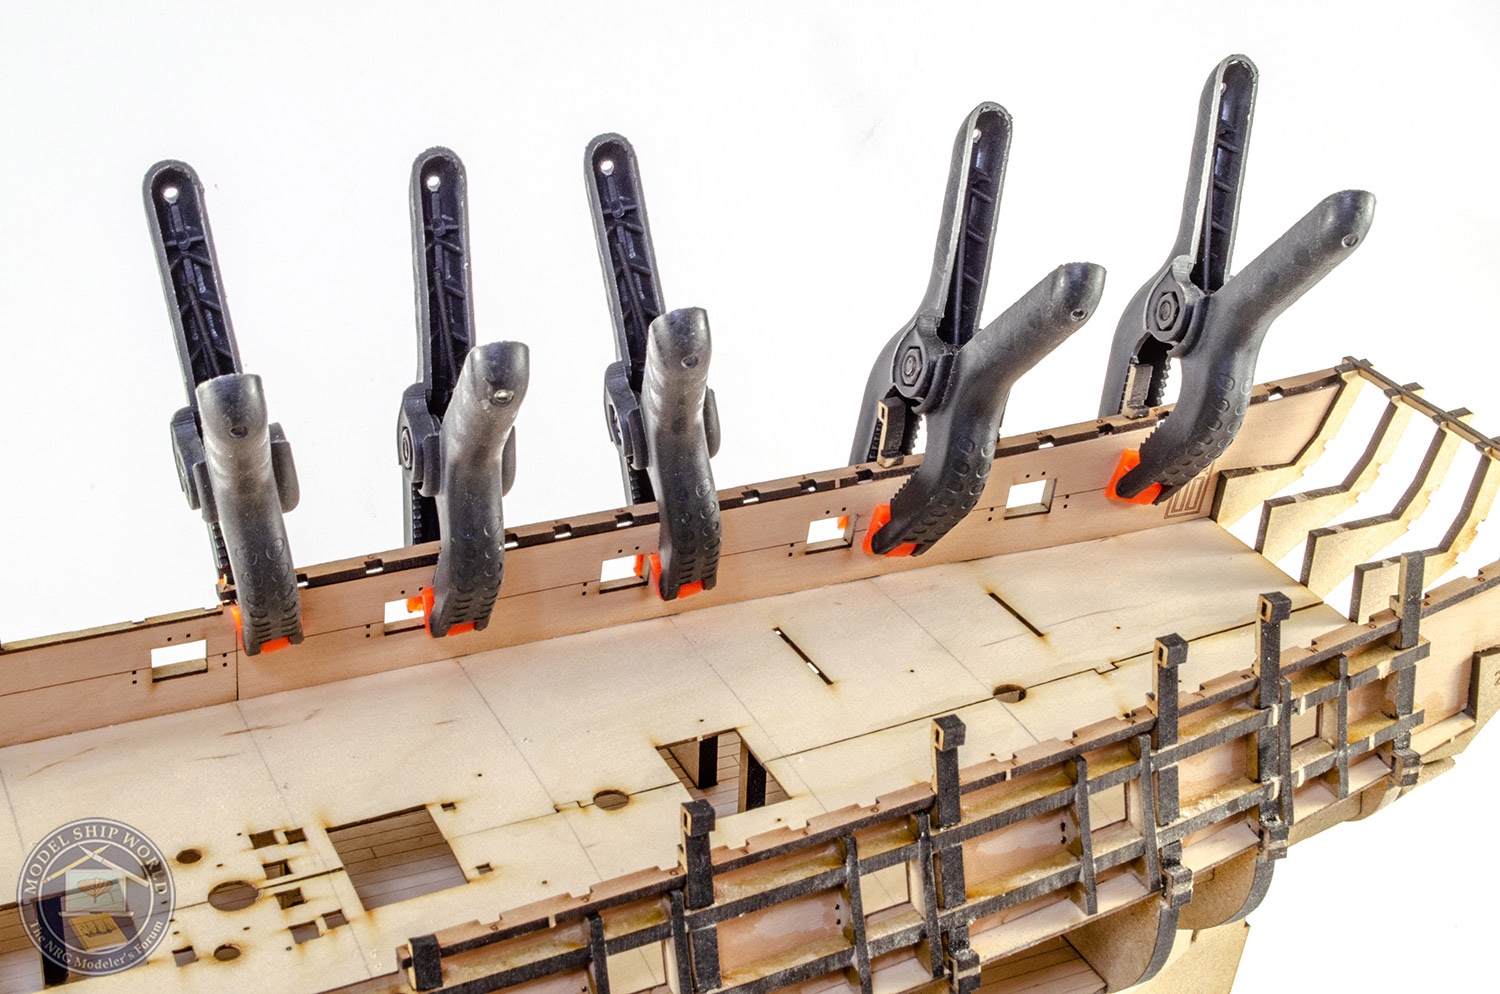
Another nice feature of this model is that you can fit the inner bulwarks with just clamps, and then paint in the glue from within the frames, once everything is aligned. There's little to no fettling to do here either. The gun ports in the inner bulwarks are also slightly smaller than the framed ports, so you can trim them to size later.

Before the rear inner bulwarks are fitted, two pearwood beams are added to the rear hull. These also tie the stern timbers to the side frames.
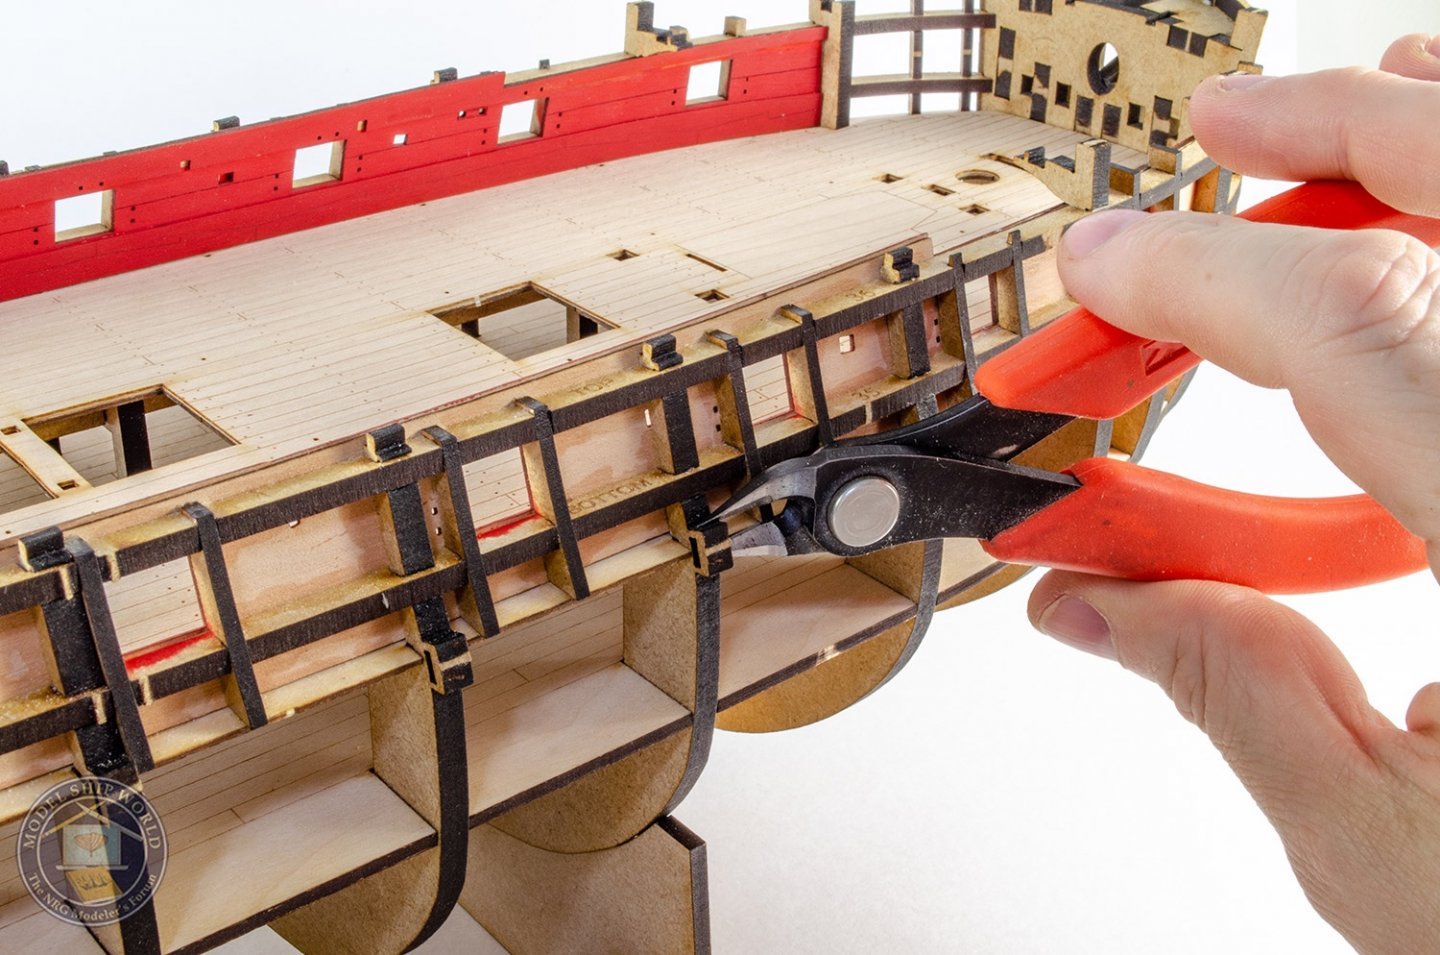
Now the rear inner bulwarks are fitted. Any small gaps between the bulwarks and ply deck will be hidden with the deck and the spirketting.

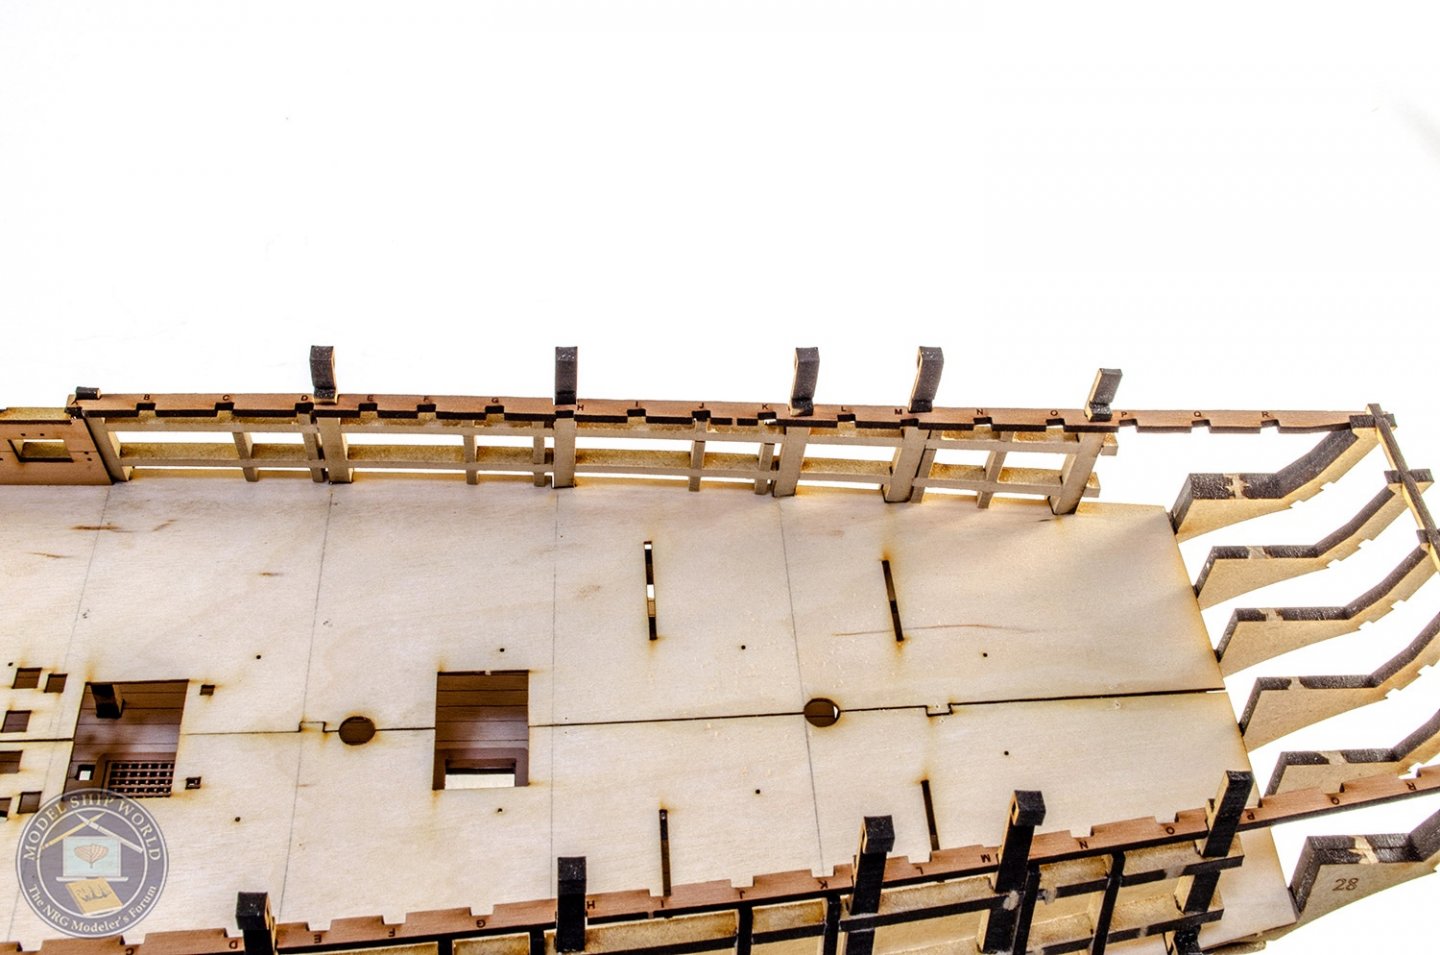
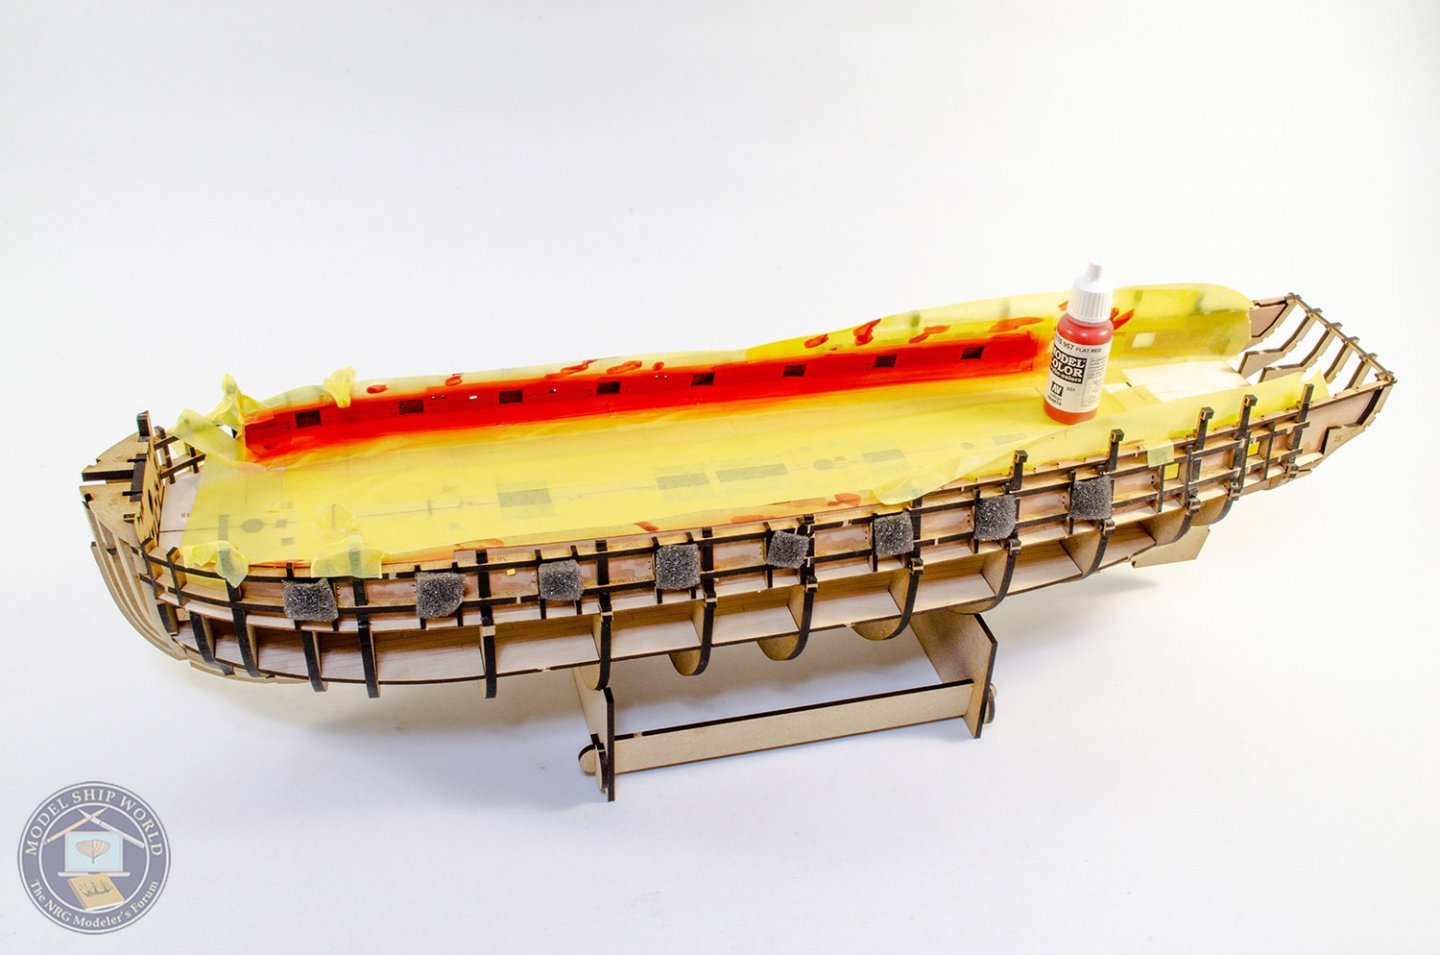
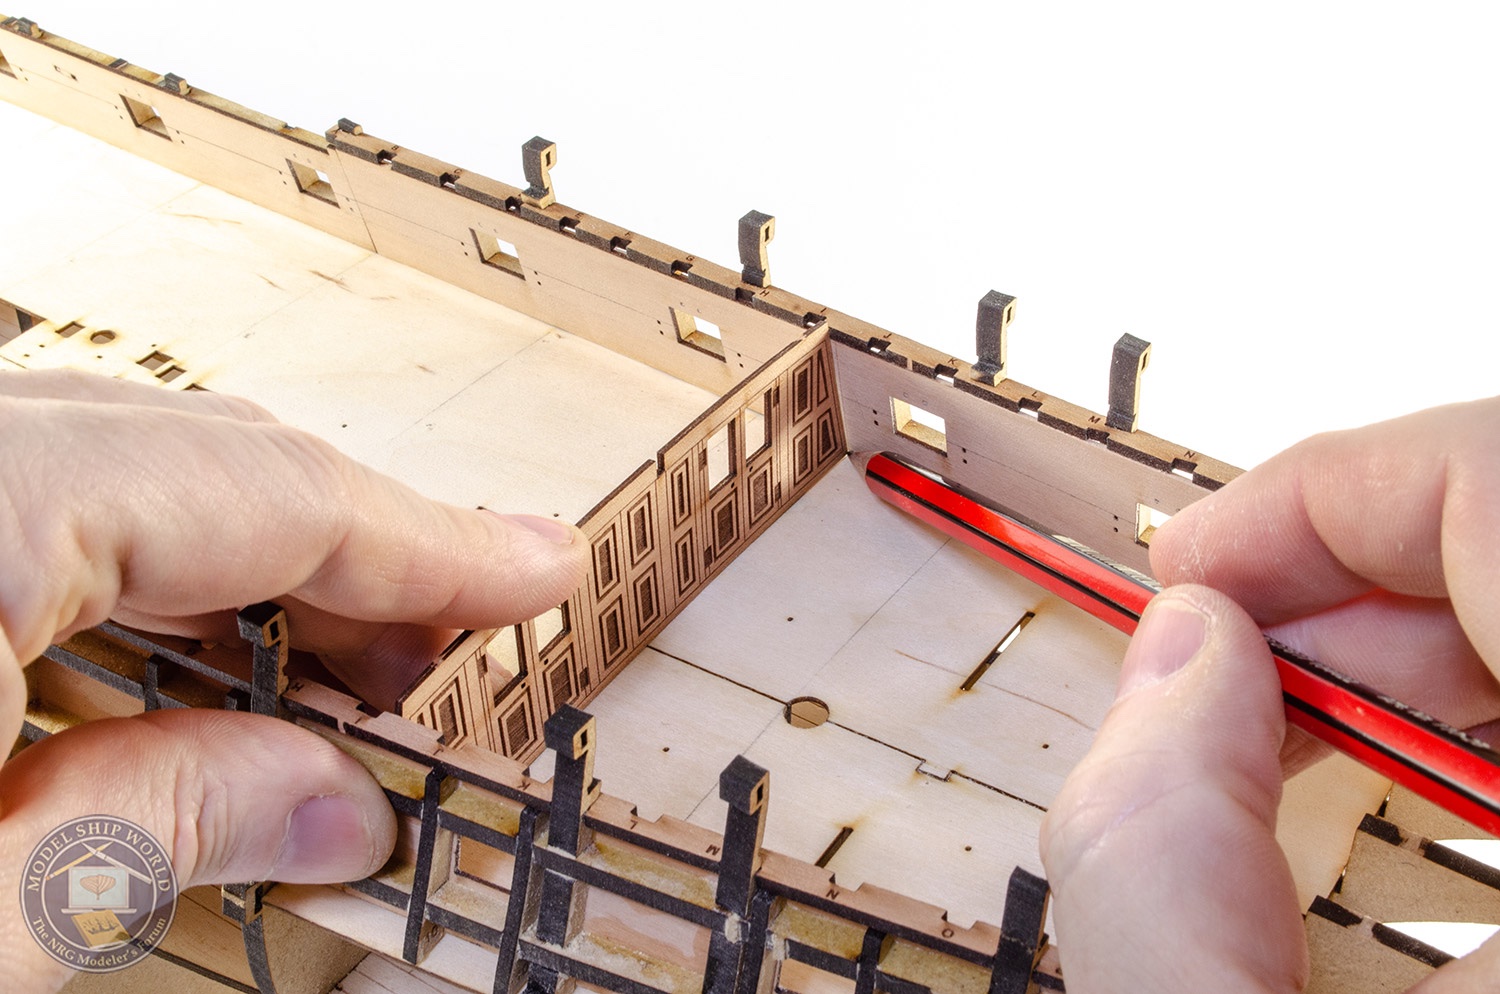
Unlike Chris' test hull, this model will be painted, and the inner bulwarks will be painted red. However, they won't be painted in the cabin areas, but left in varnish. To mark the extent of the paint, I test fit one of the cabin bulkheads.

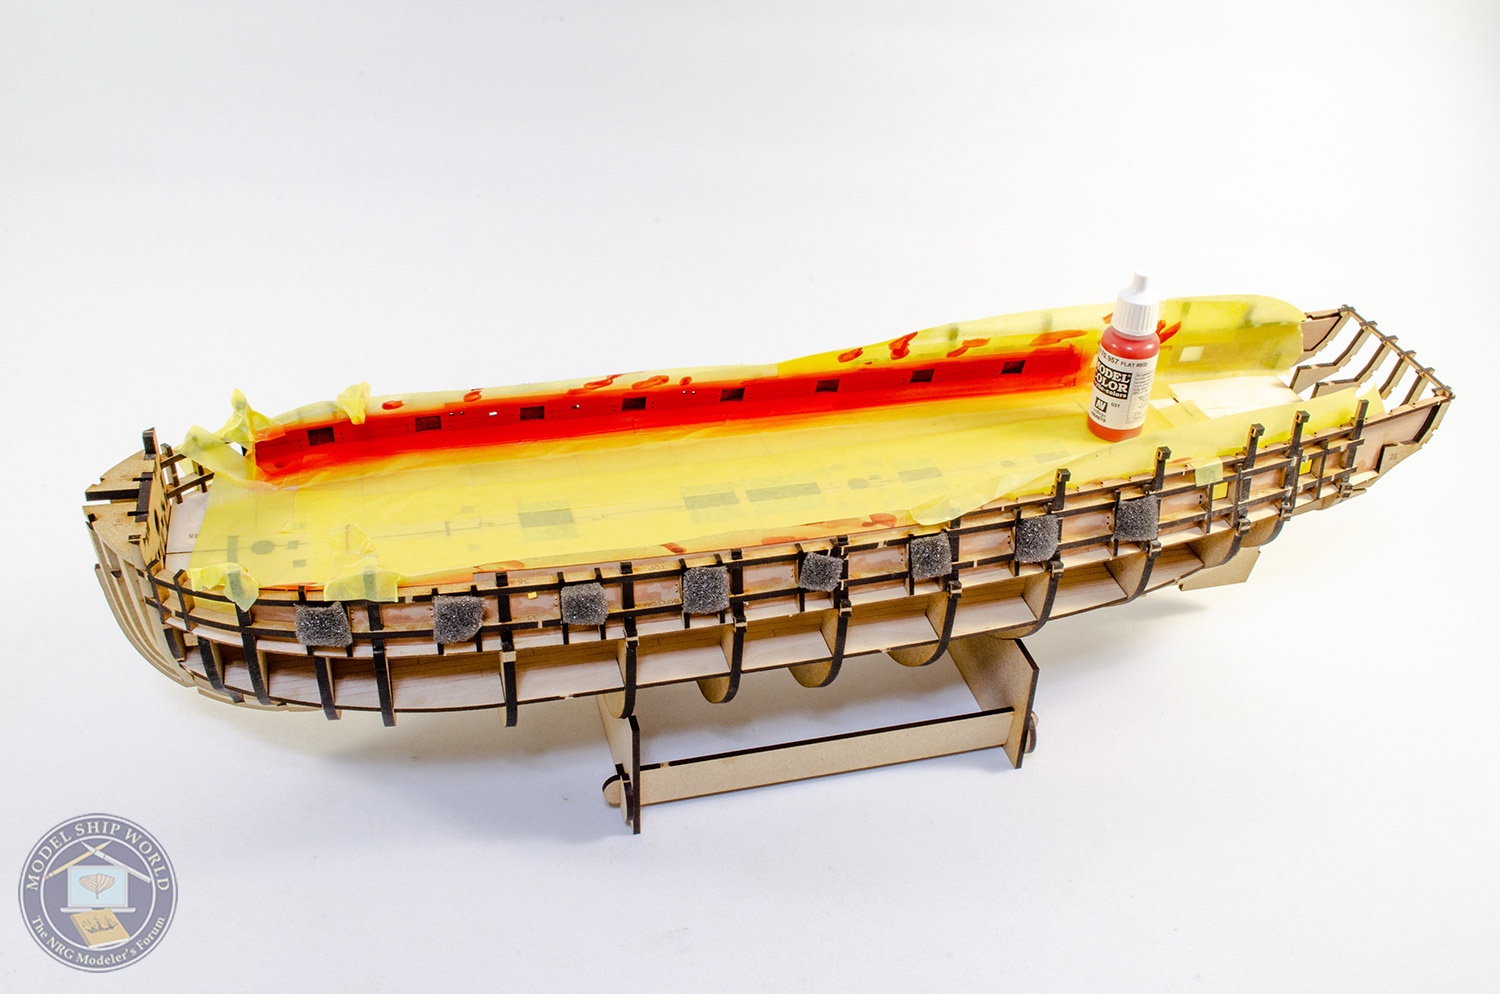
The inner bulwarks can now be painted. Before paint, the surfaces are sanded with 320 grit paper, and wipe on poly is applied only in the area of the bulwarks that will be painted (spirketting will be fitted to upper and lower bulkheads). I don't like to glue parts onto surfaces where poly has been applied, so take this into consideration. For paint, I airbrush Tamiya Flat Red over the timber, then give a very light brush coat of Vallejo Flat Red, which gives a very pleasing finish.
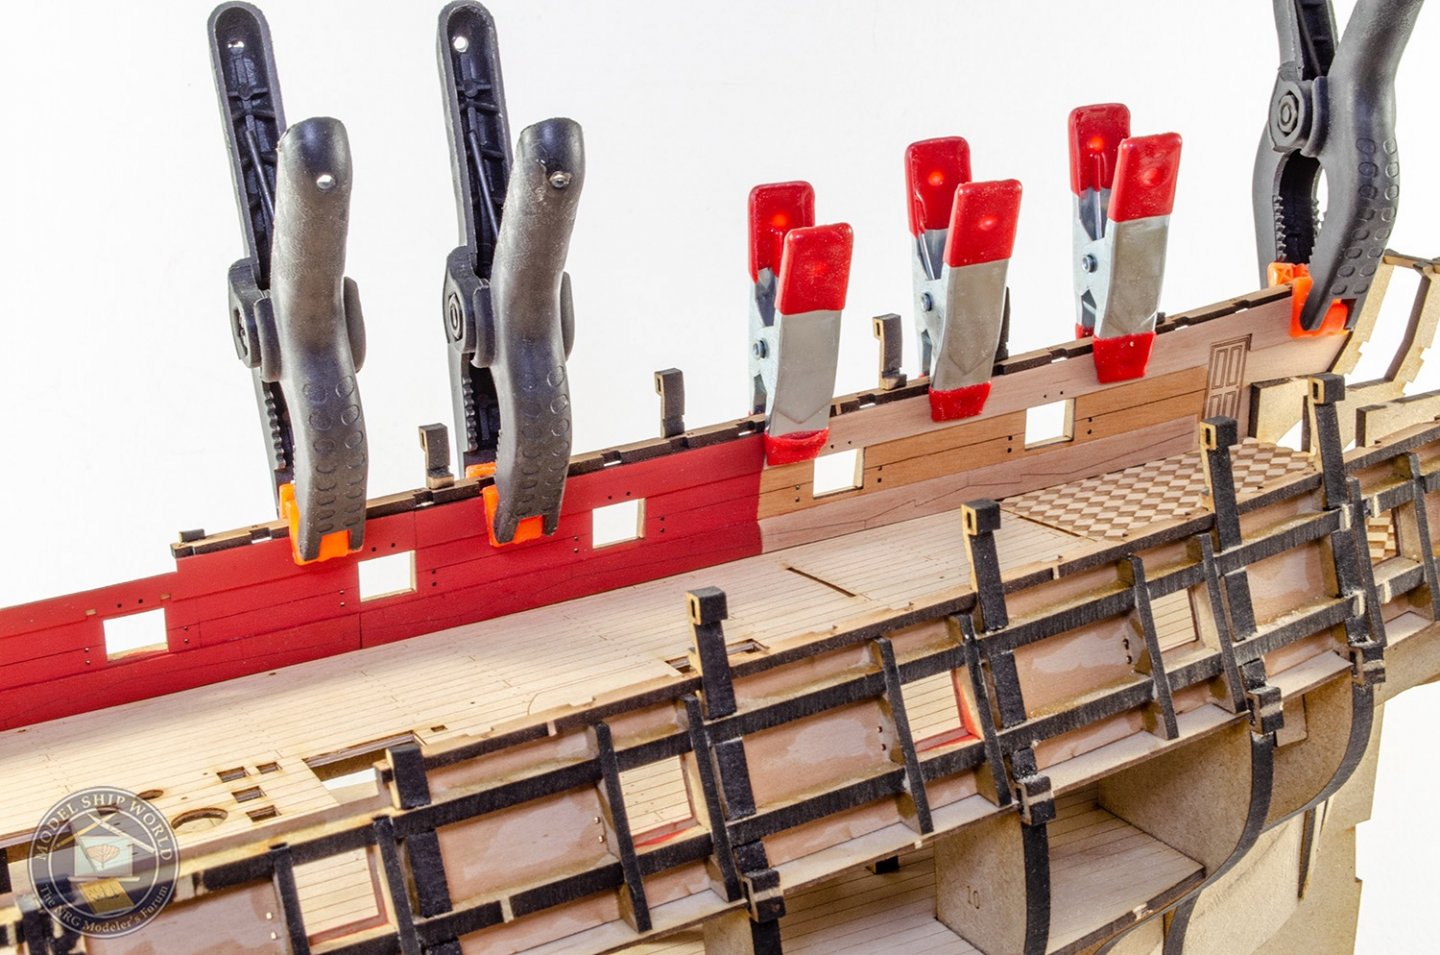
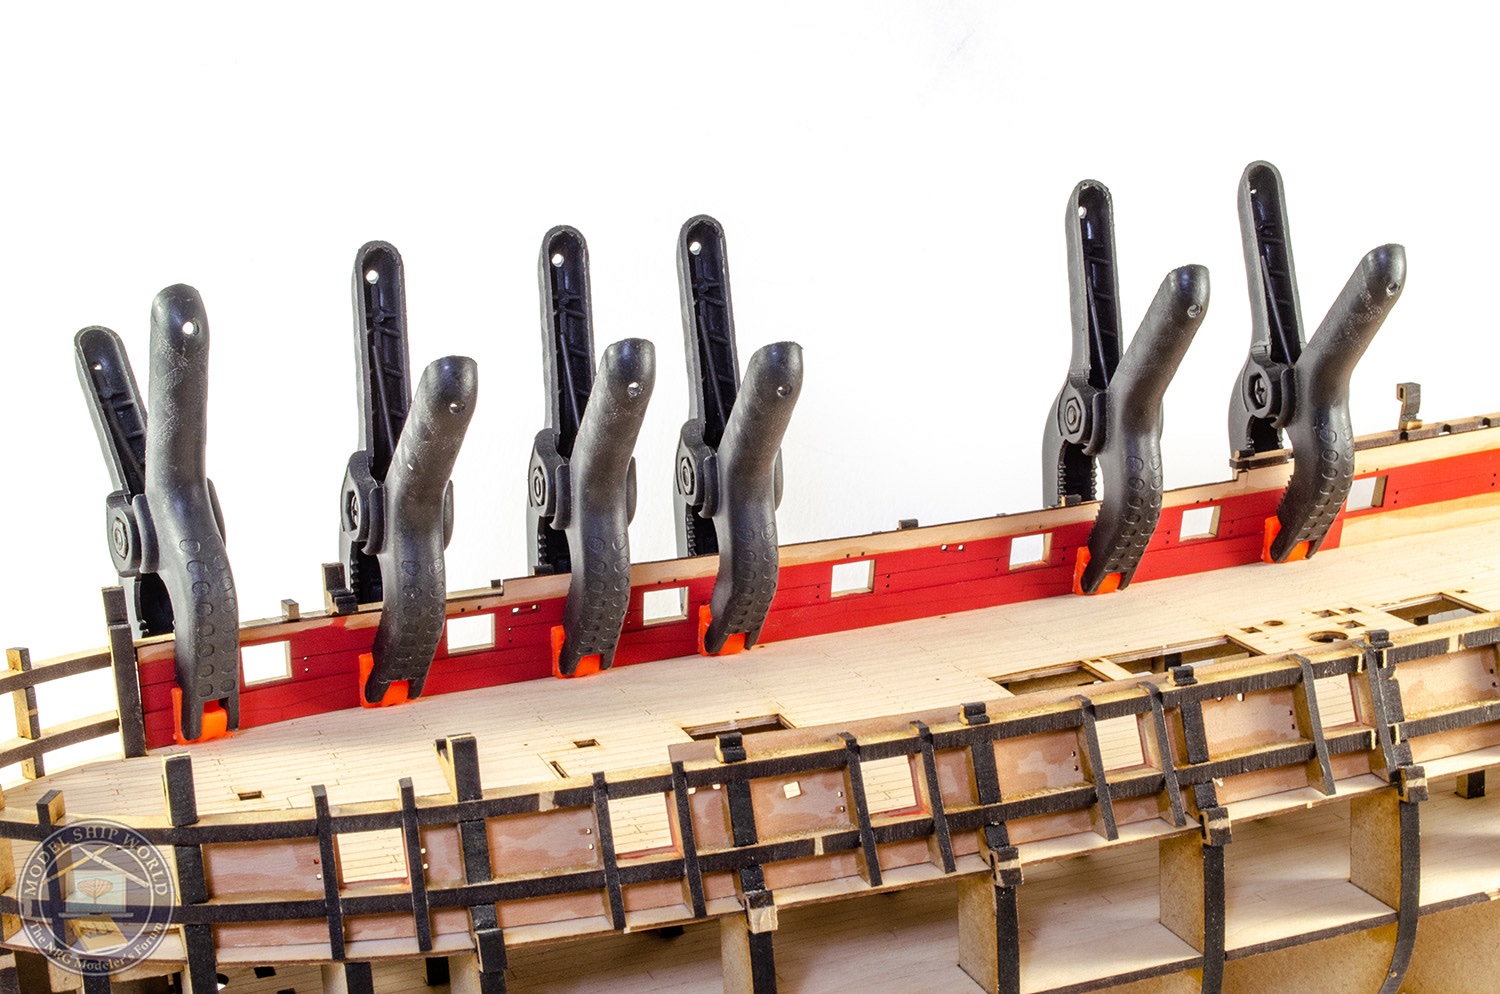
Once the masking is removed, the laser-engraved maple deck is then fitted. Some adjustment is made to the edges so it fits properly. I use Titebond Extra for this to allow me more time to manoeuvre things. Clamps hold down the deck adding the edges. Small clamps in the middle areas.
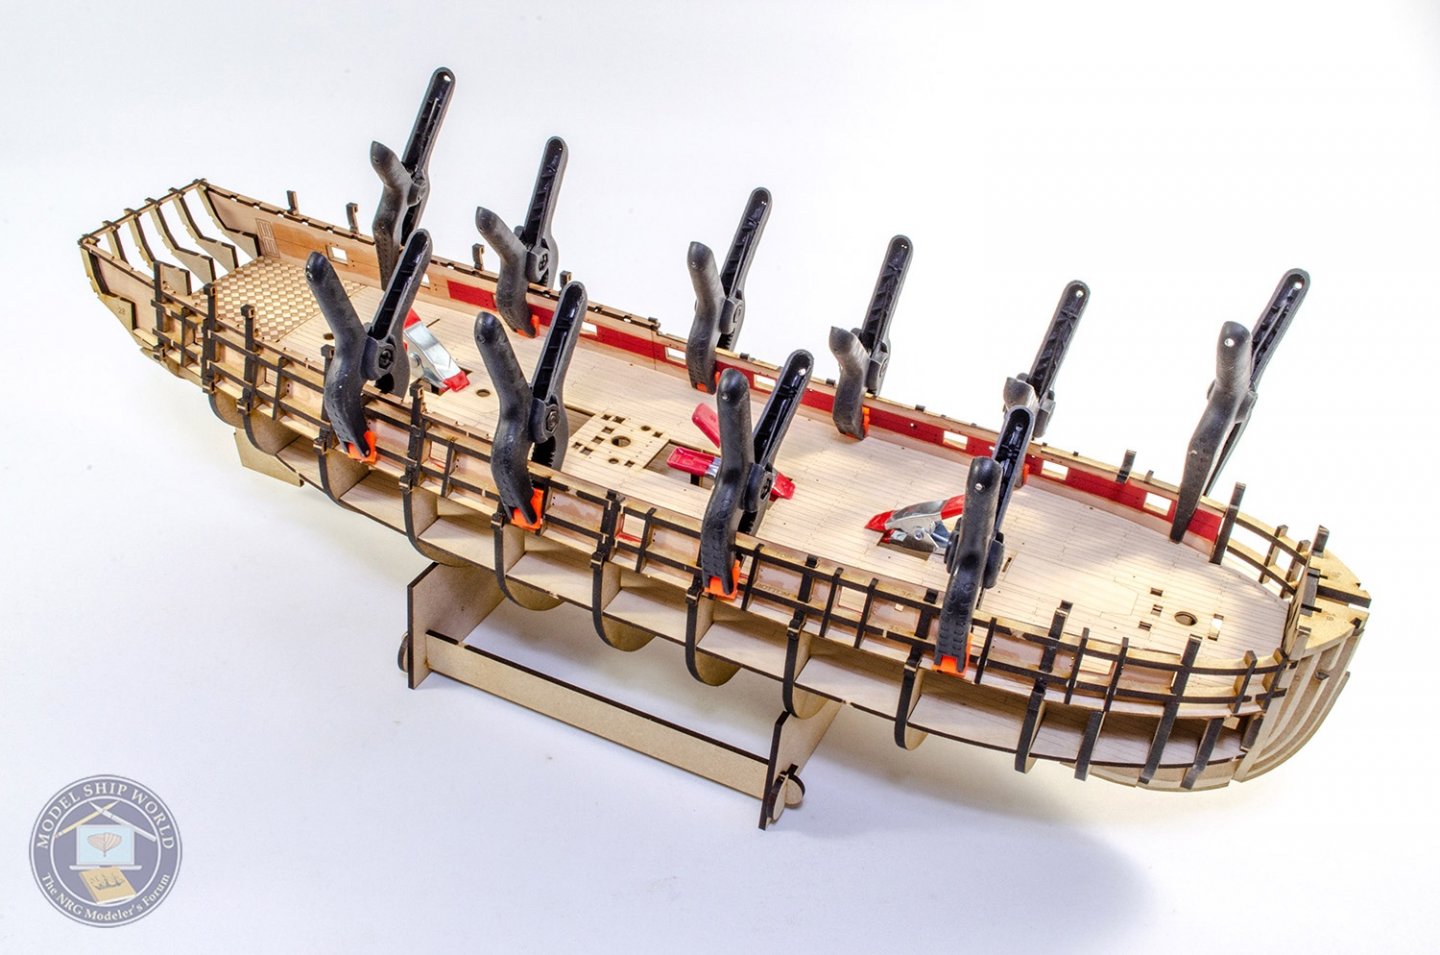
The spirketting is also painted in the same colours, but only in the area that will require it (not the cabin!) This is then fitted.

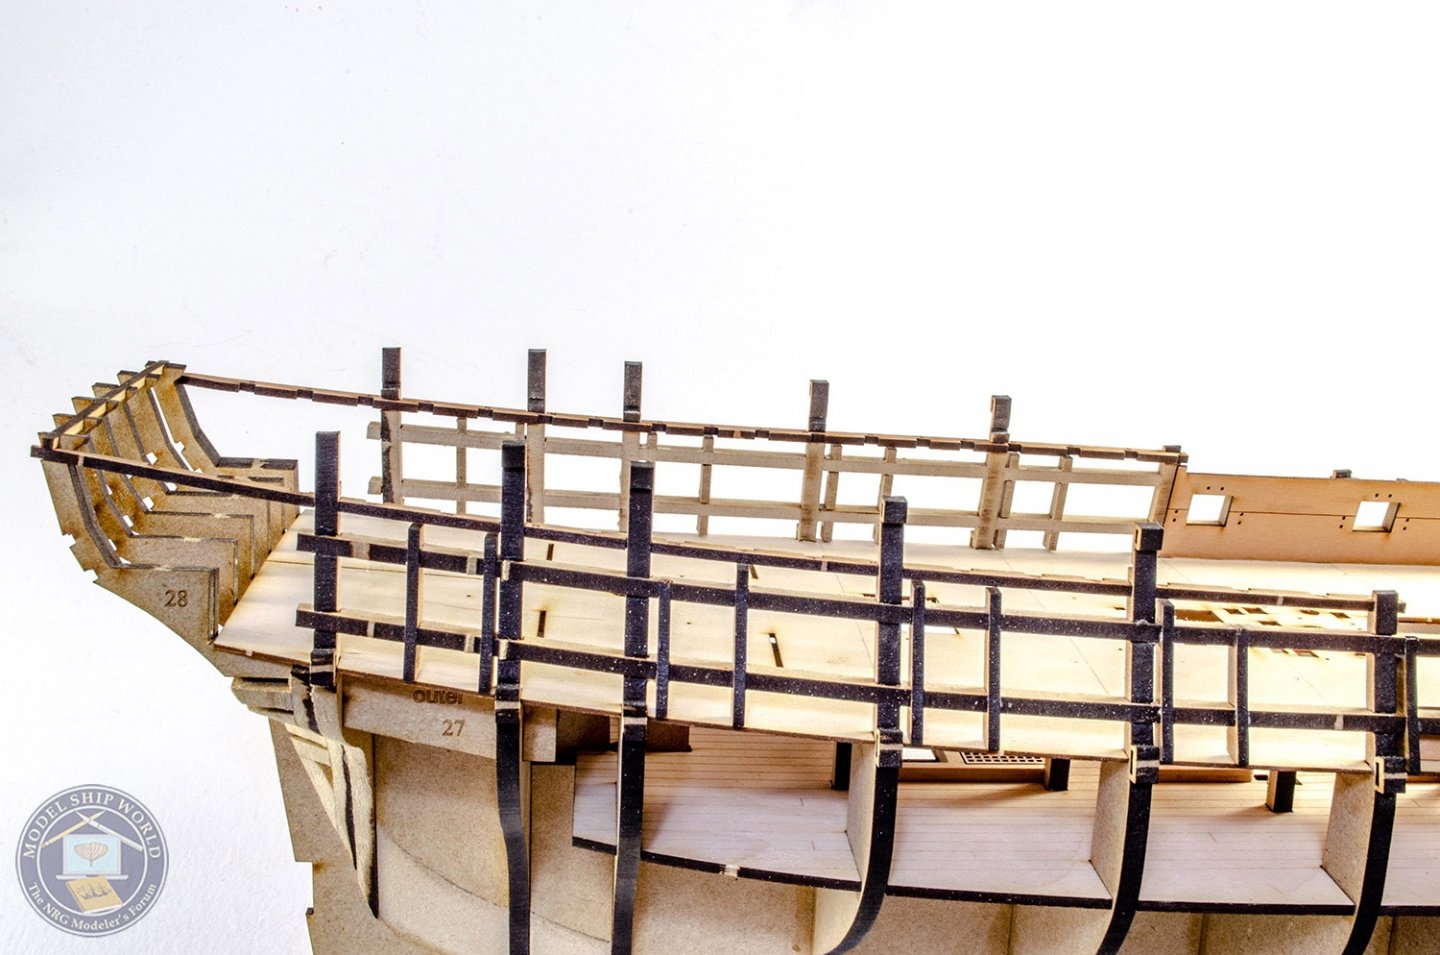
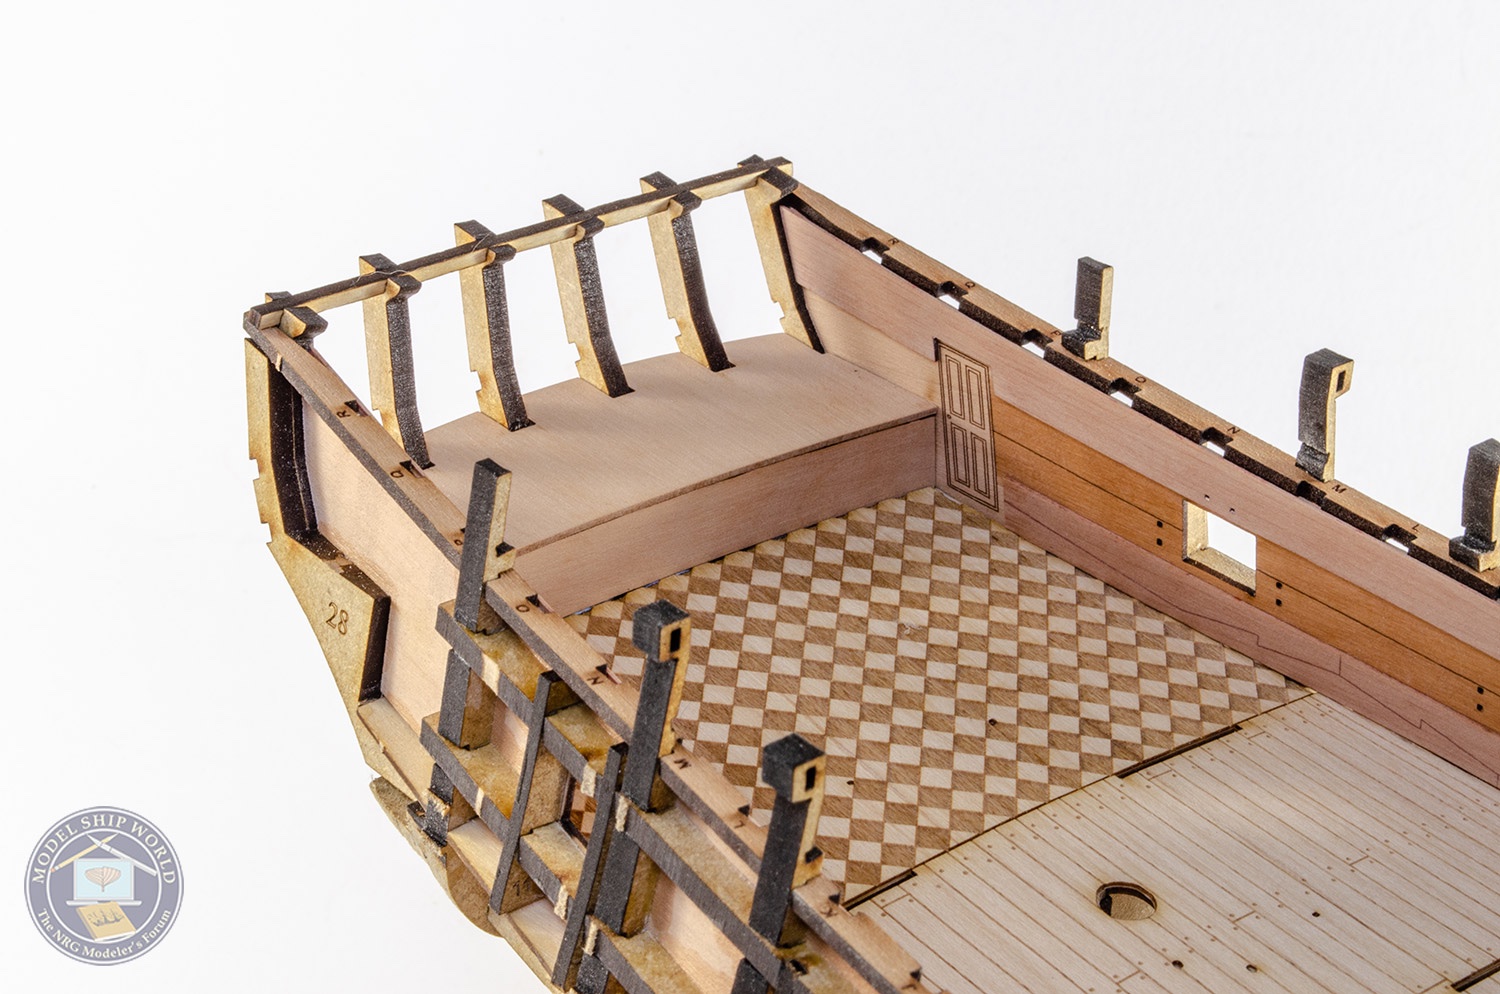
Cabin seat patterns are now adjusted to width and fitted. A little sanding of the MDF frame area needs to be done first, but not too much.

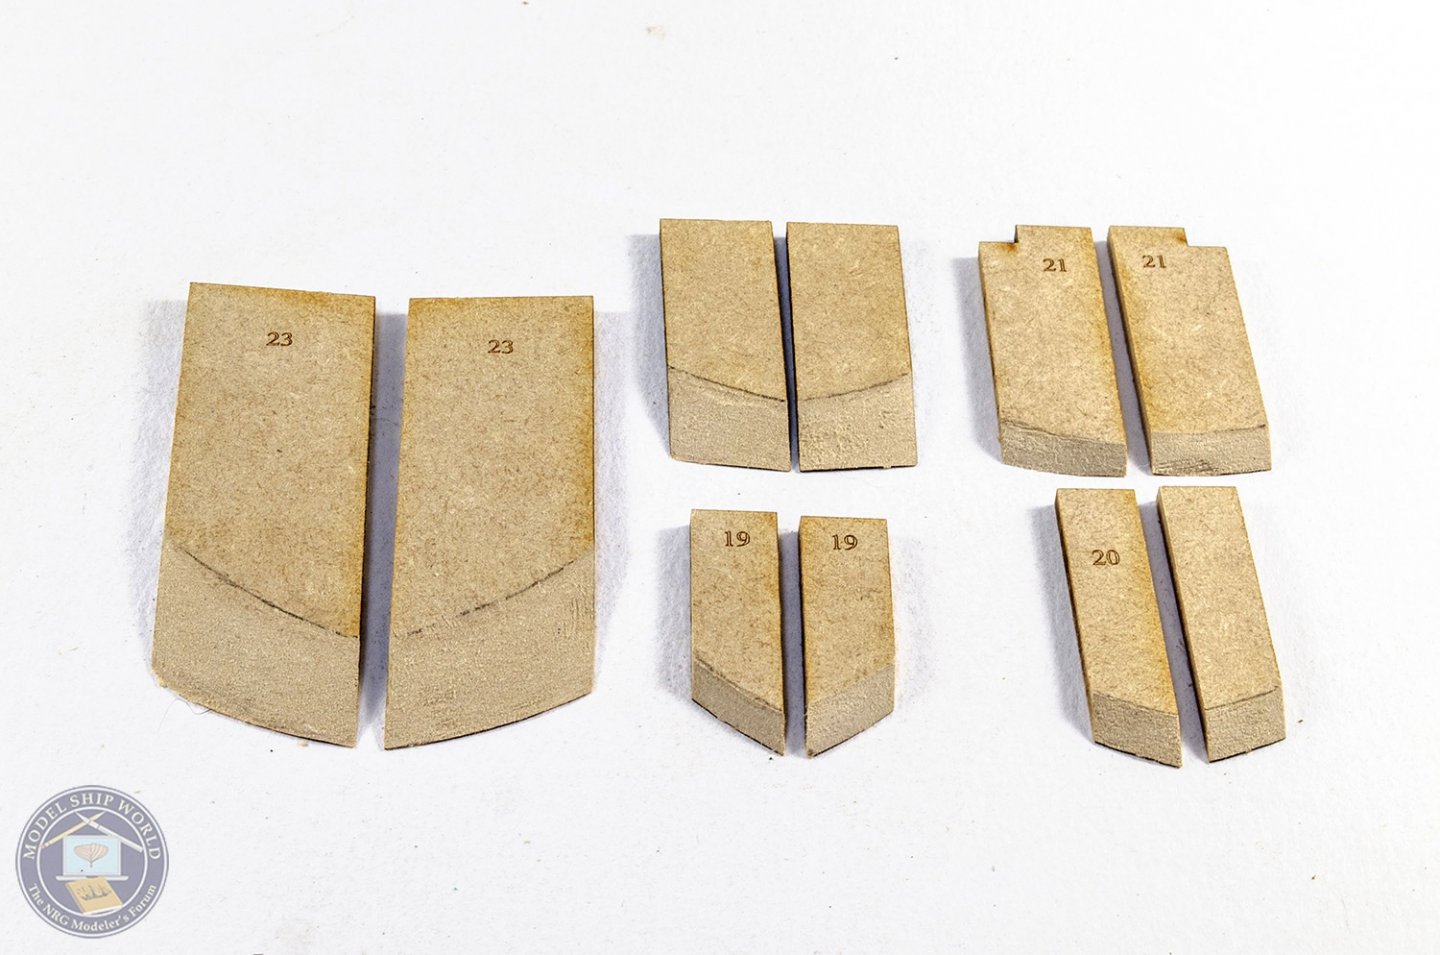
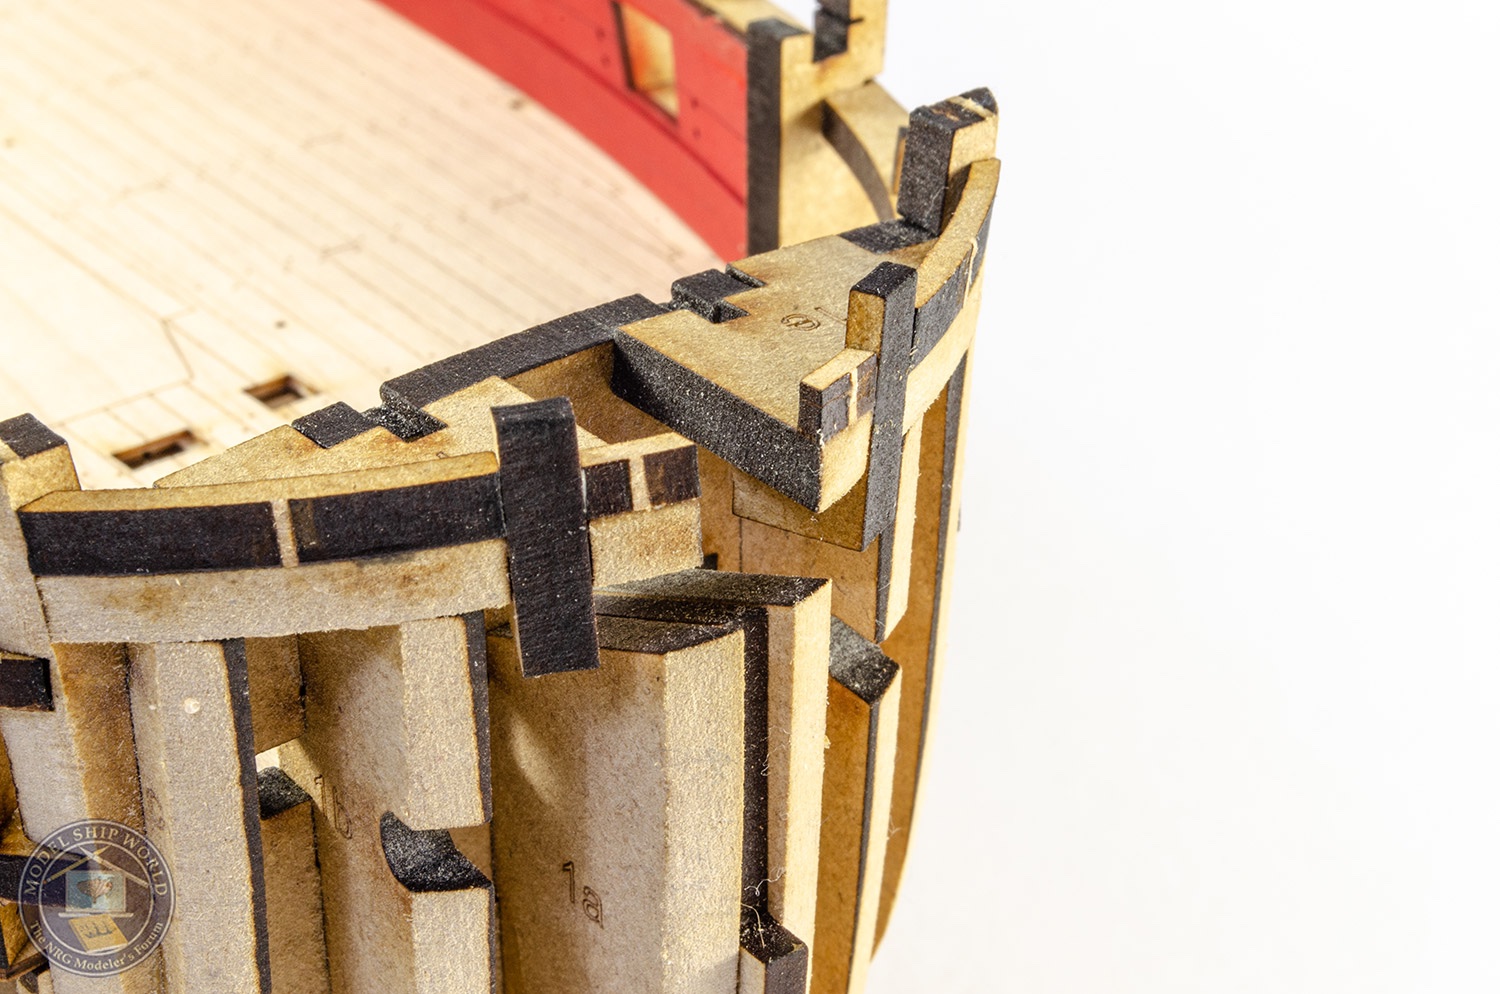
Some MDF parts are now added to the bow area to help with fitting the outer patterns. Anything above deck level will eventually be broken away when the deck is fitted.
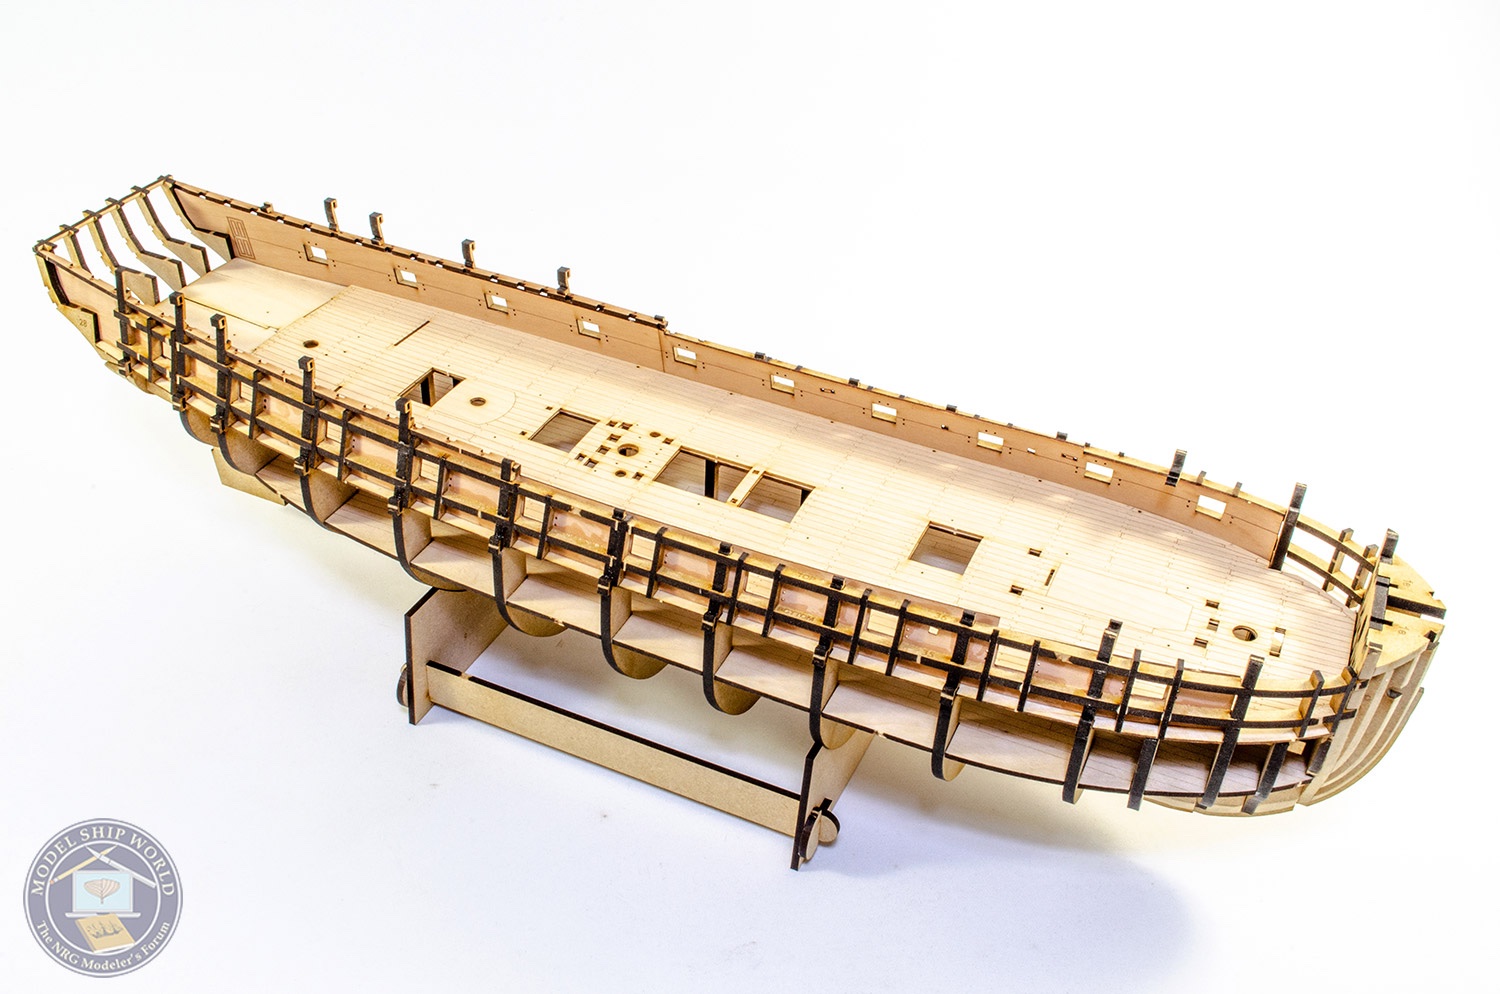
Finally, those safety gates which gave strength to the unsupported bulkheads, can be removed as the whole structure is now very strong. After this, the hull can be faired for fitting the outside patterns and planking.

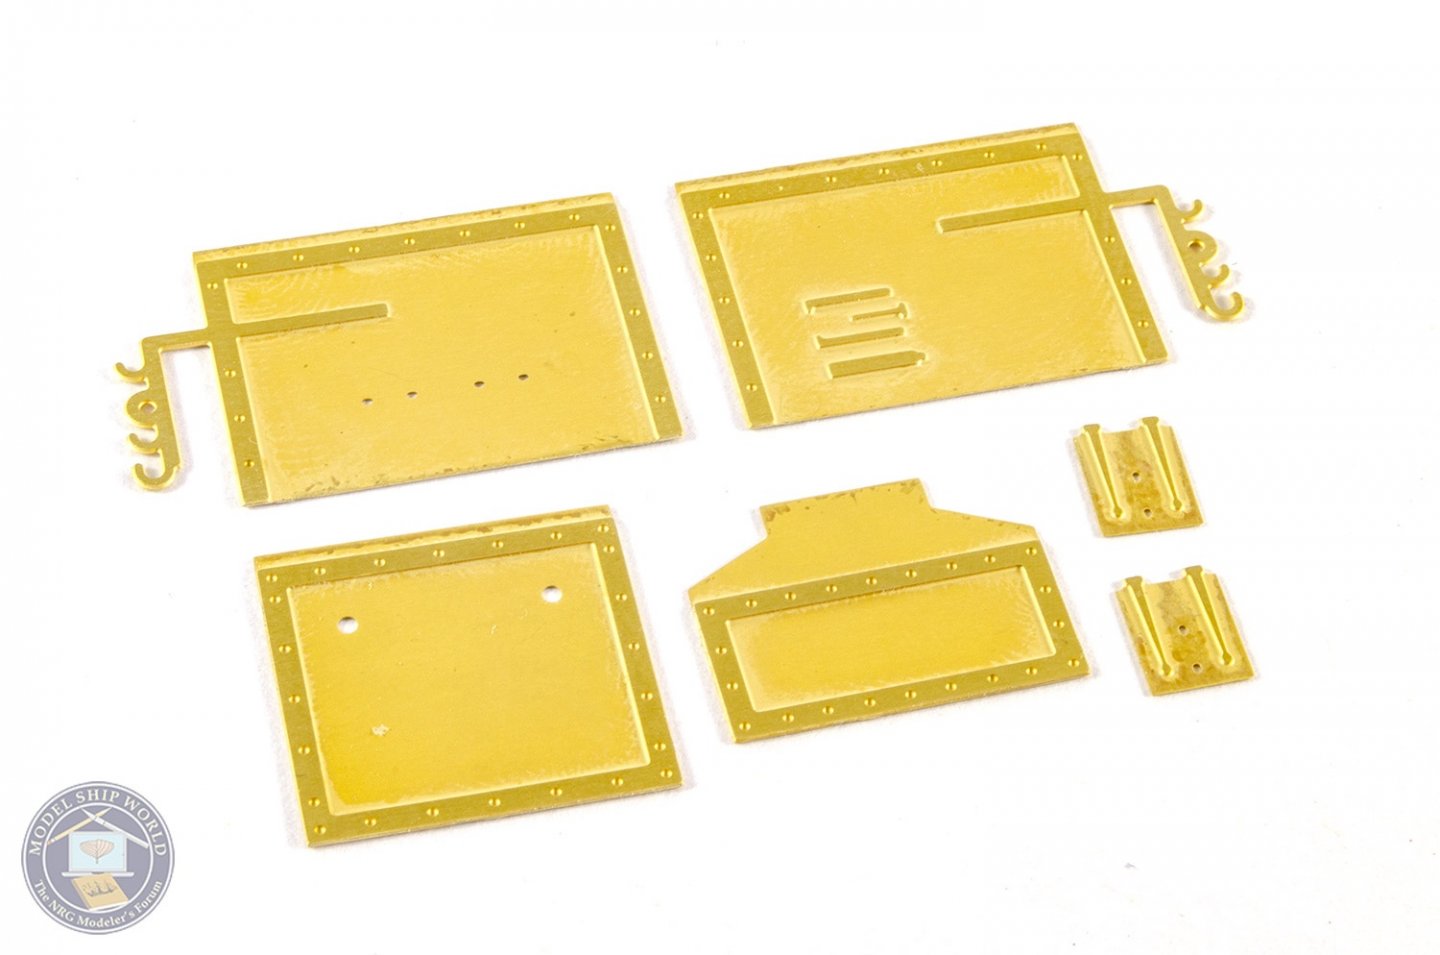
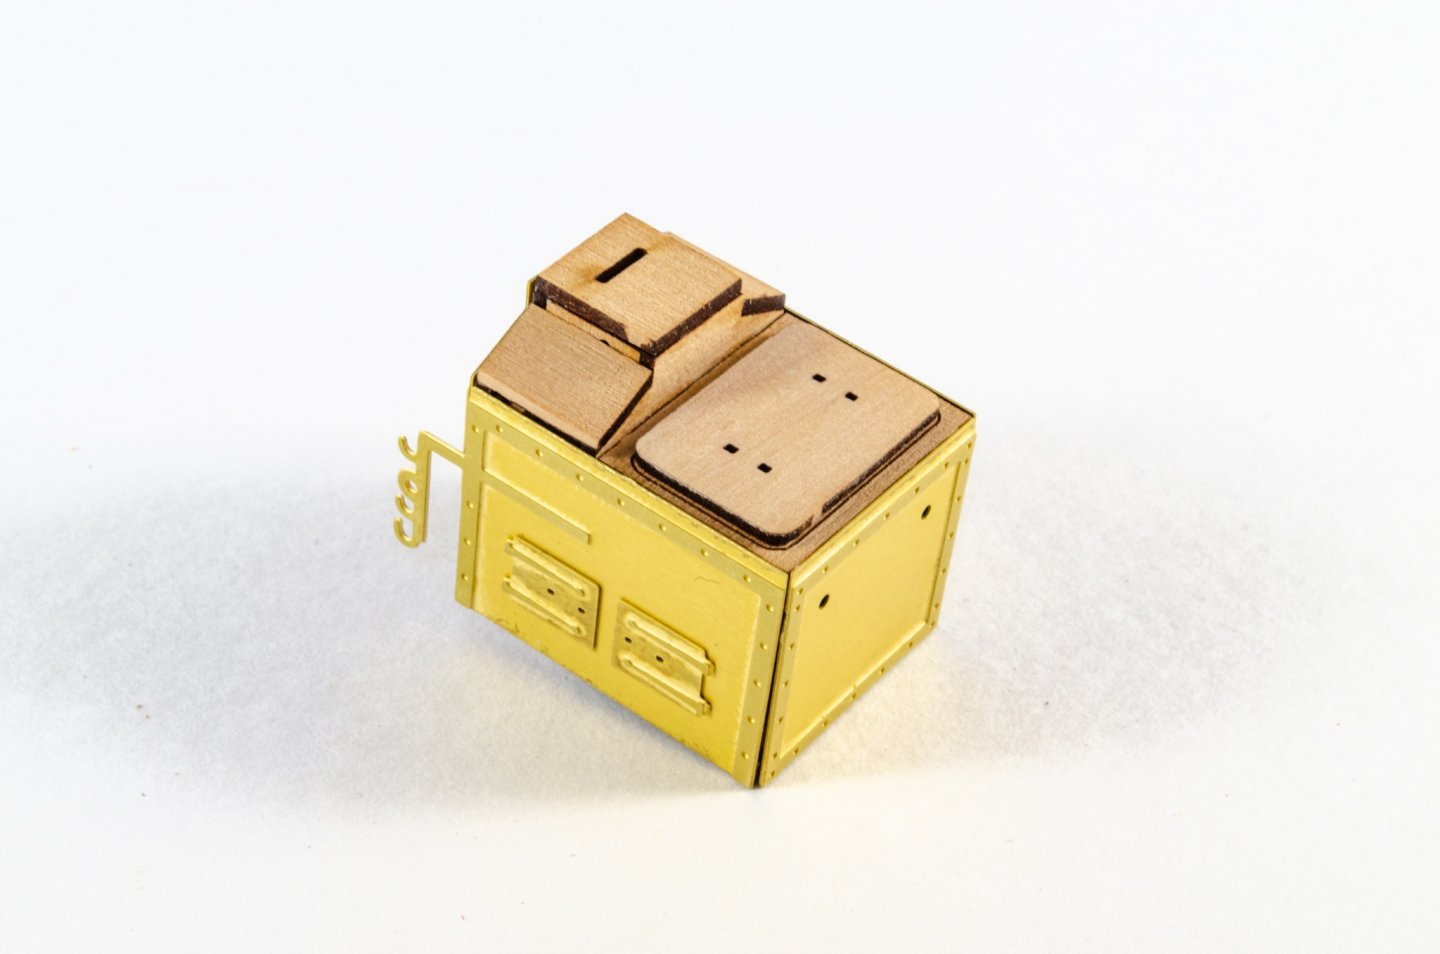
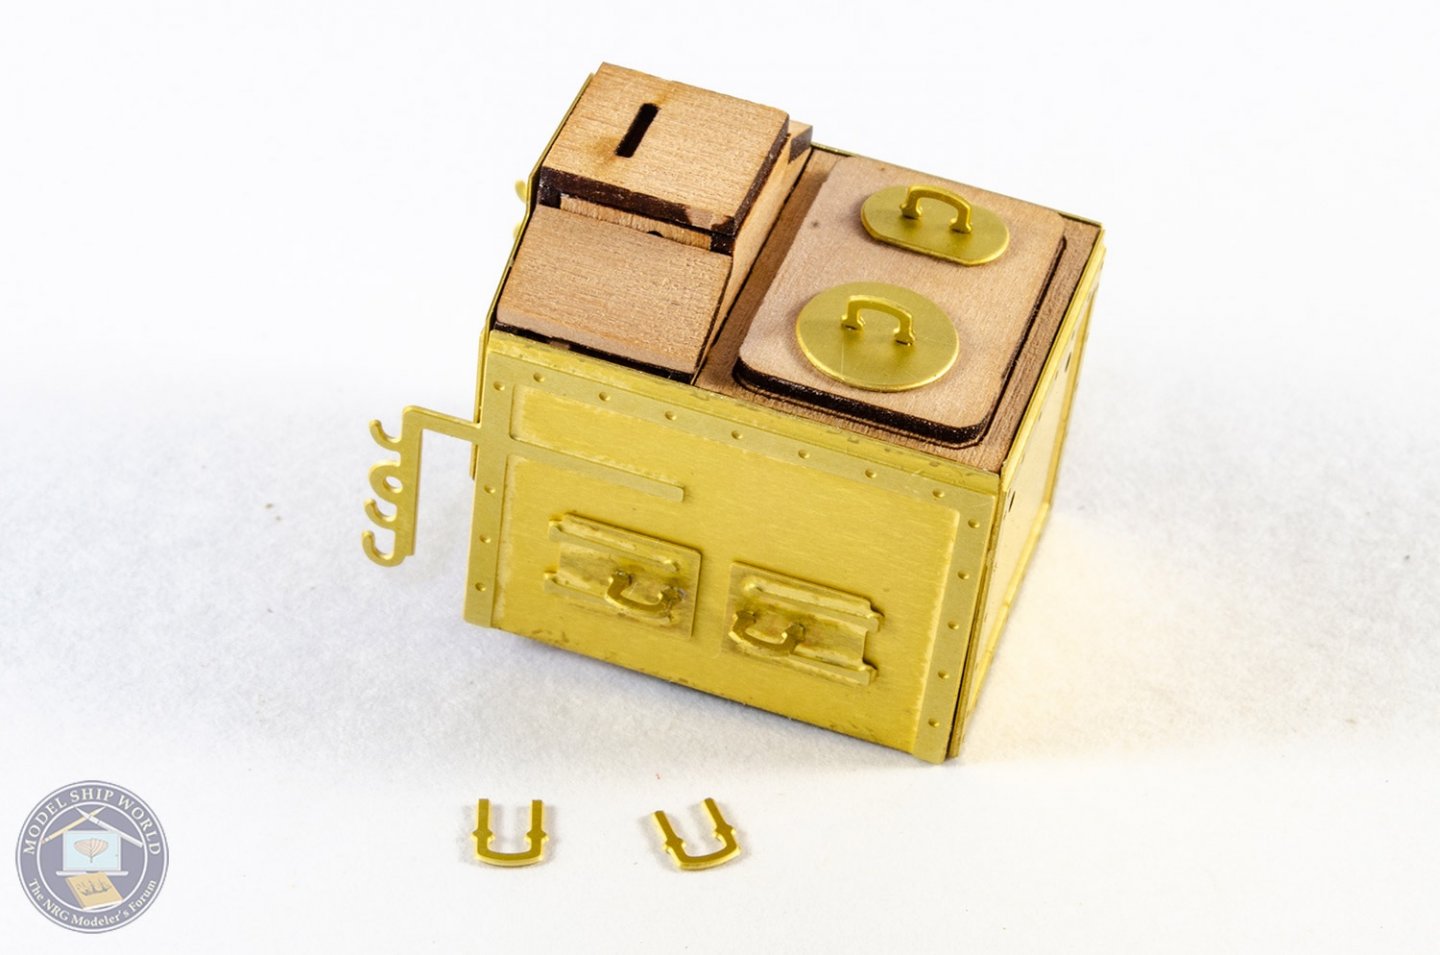
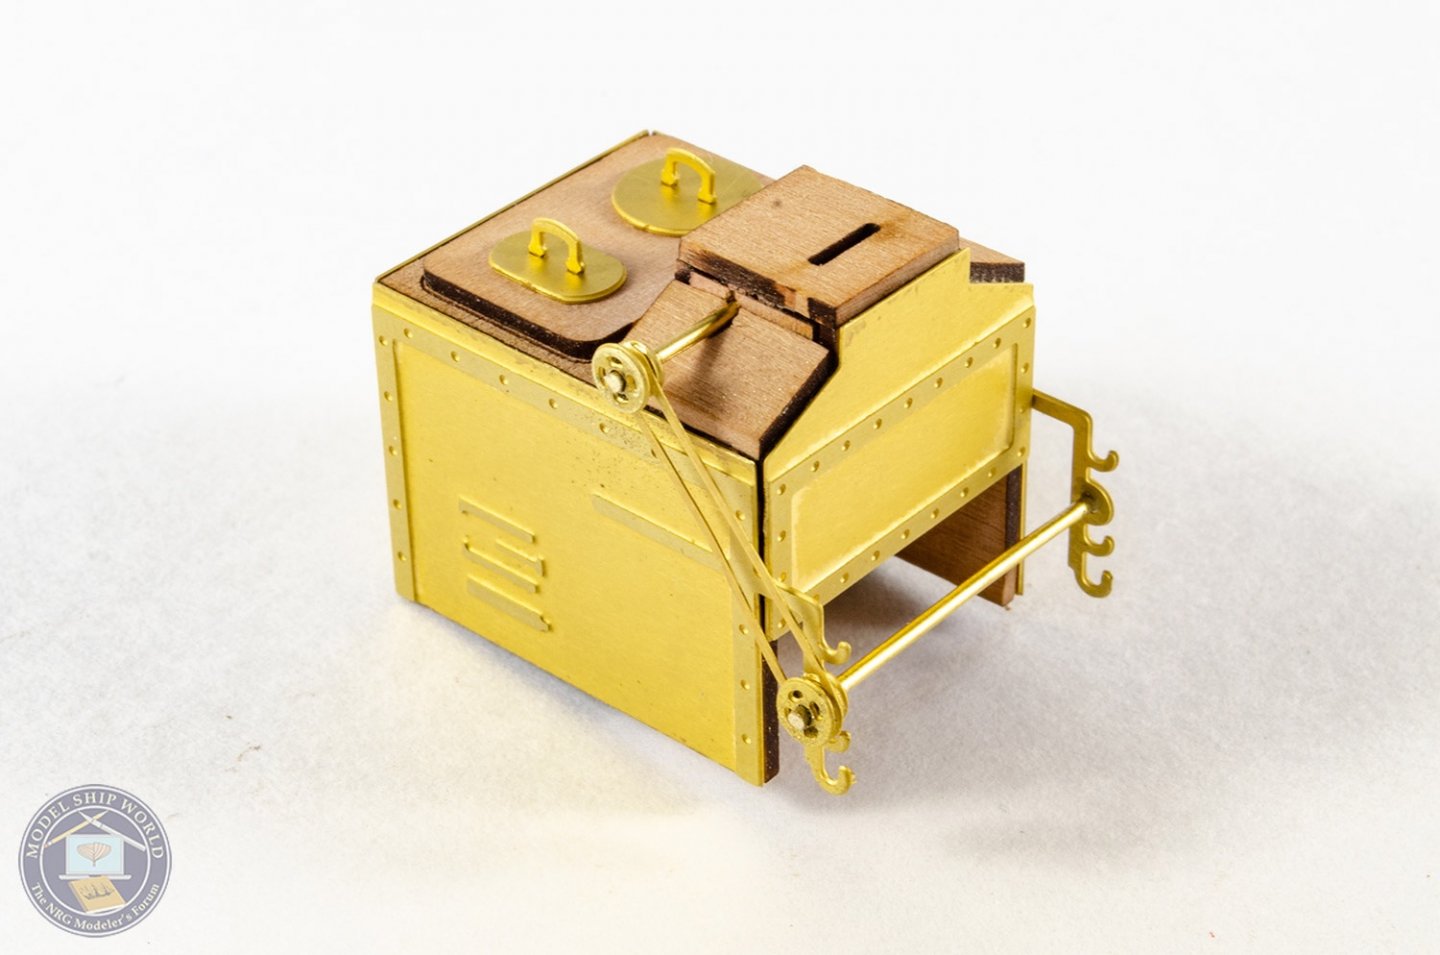
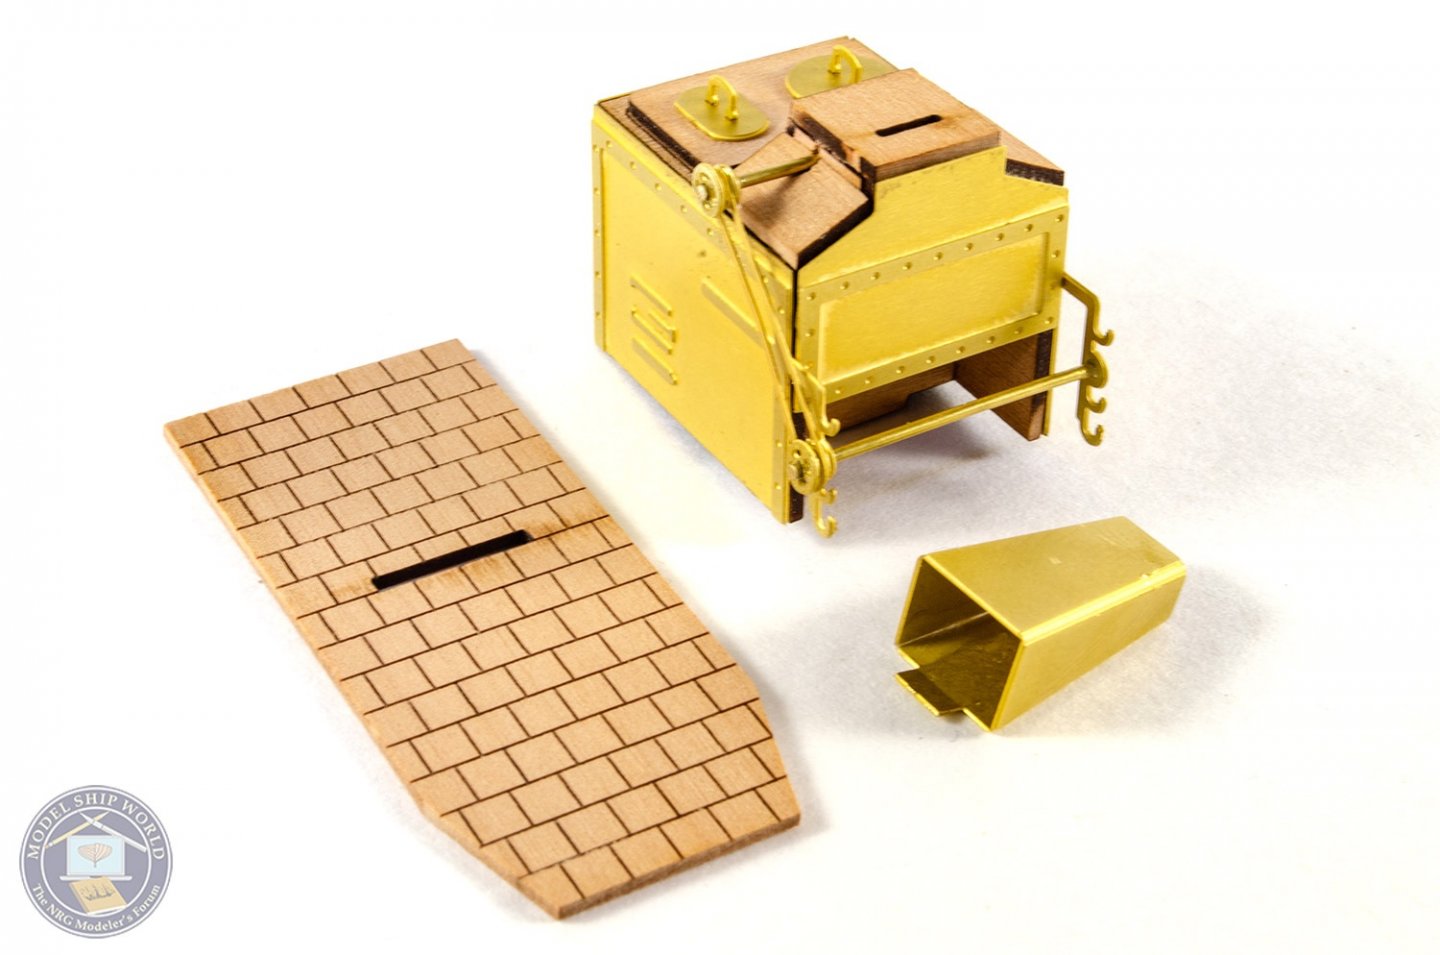
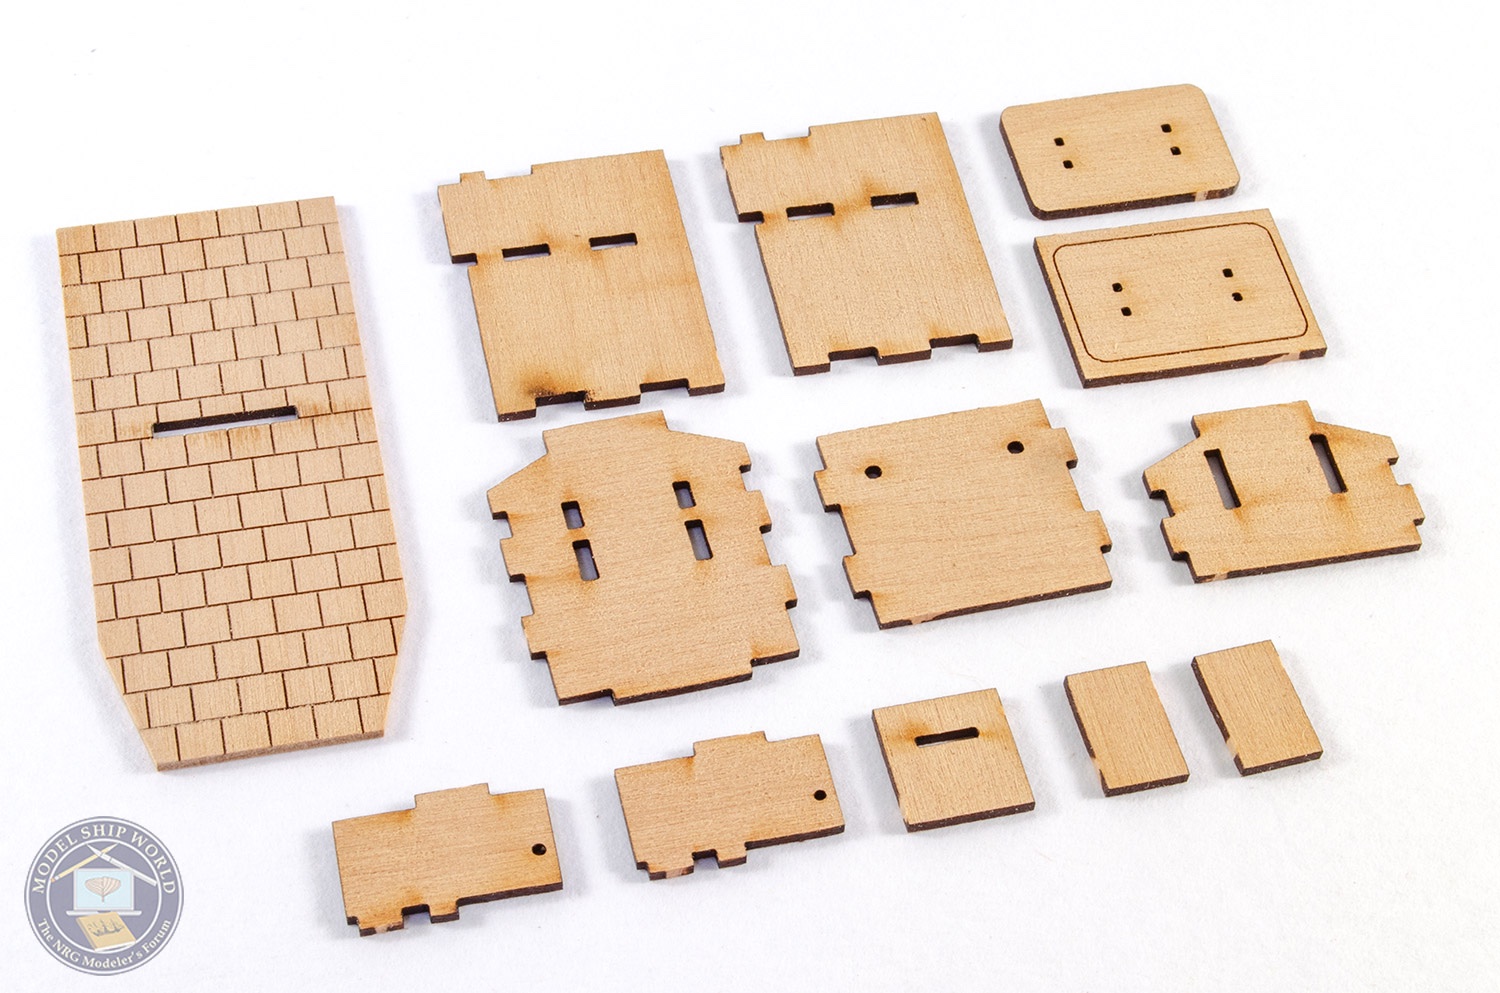
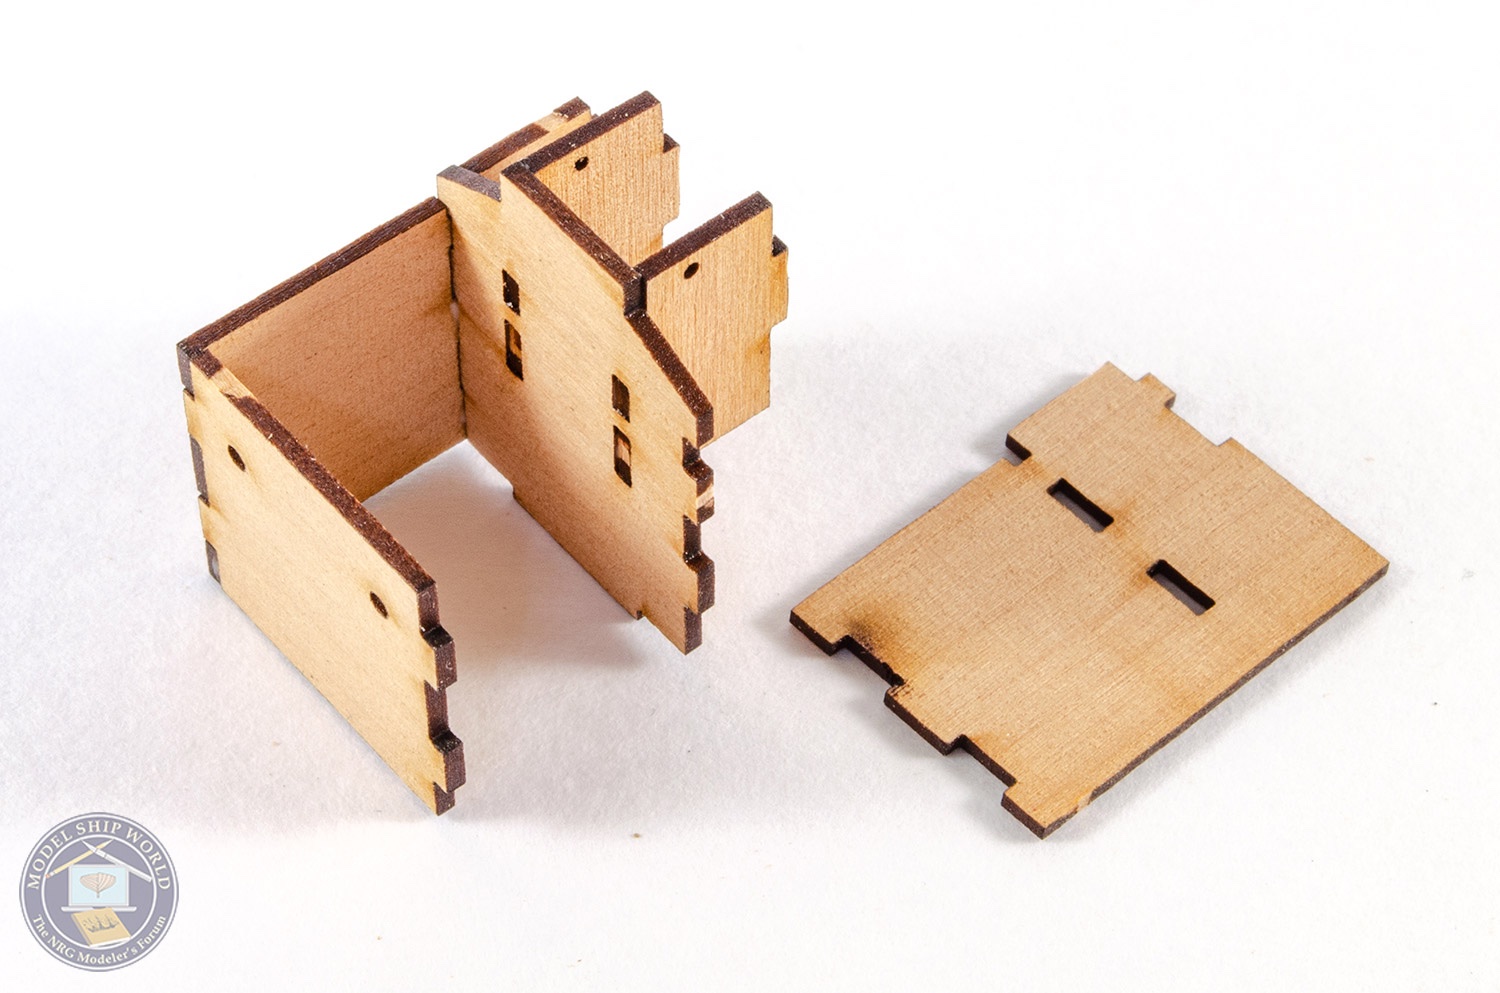
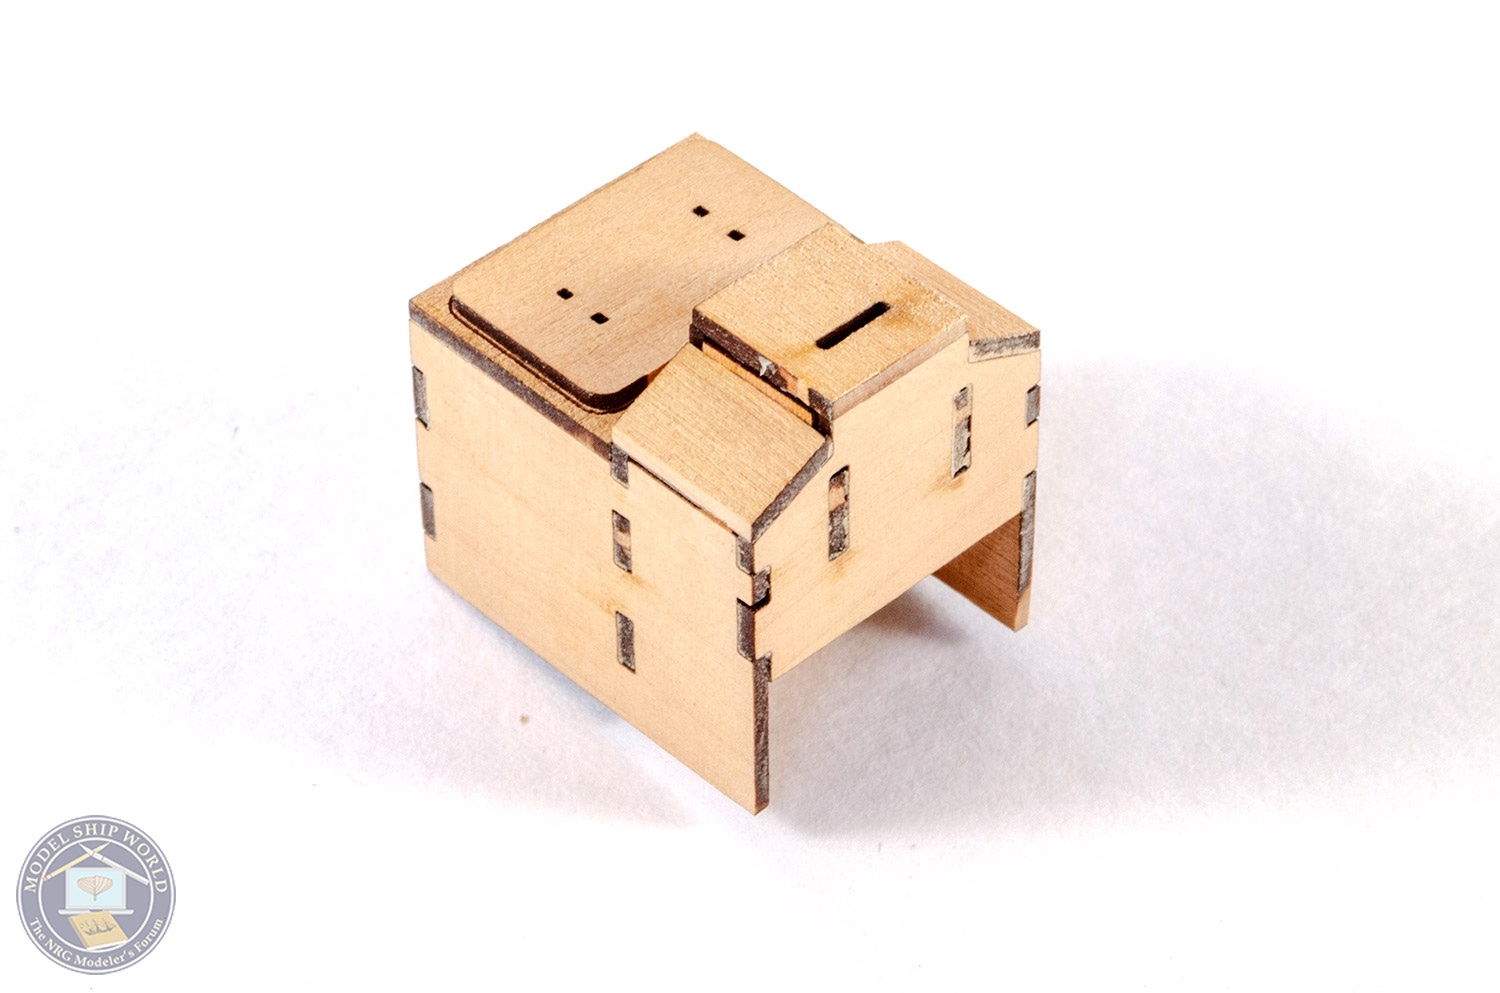
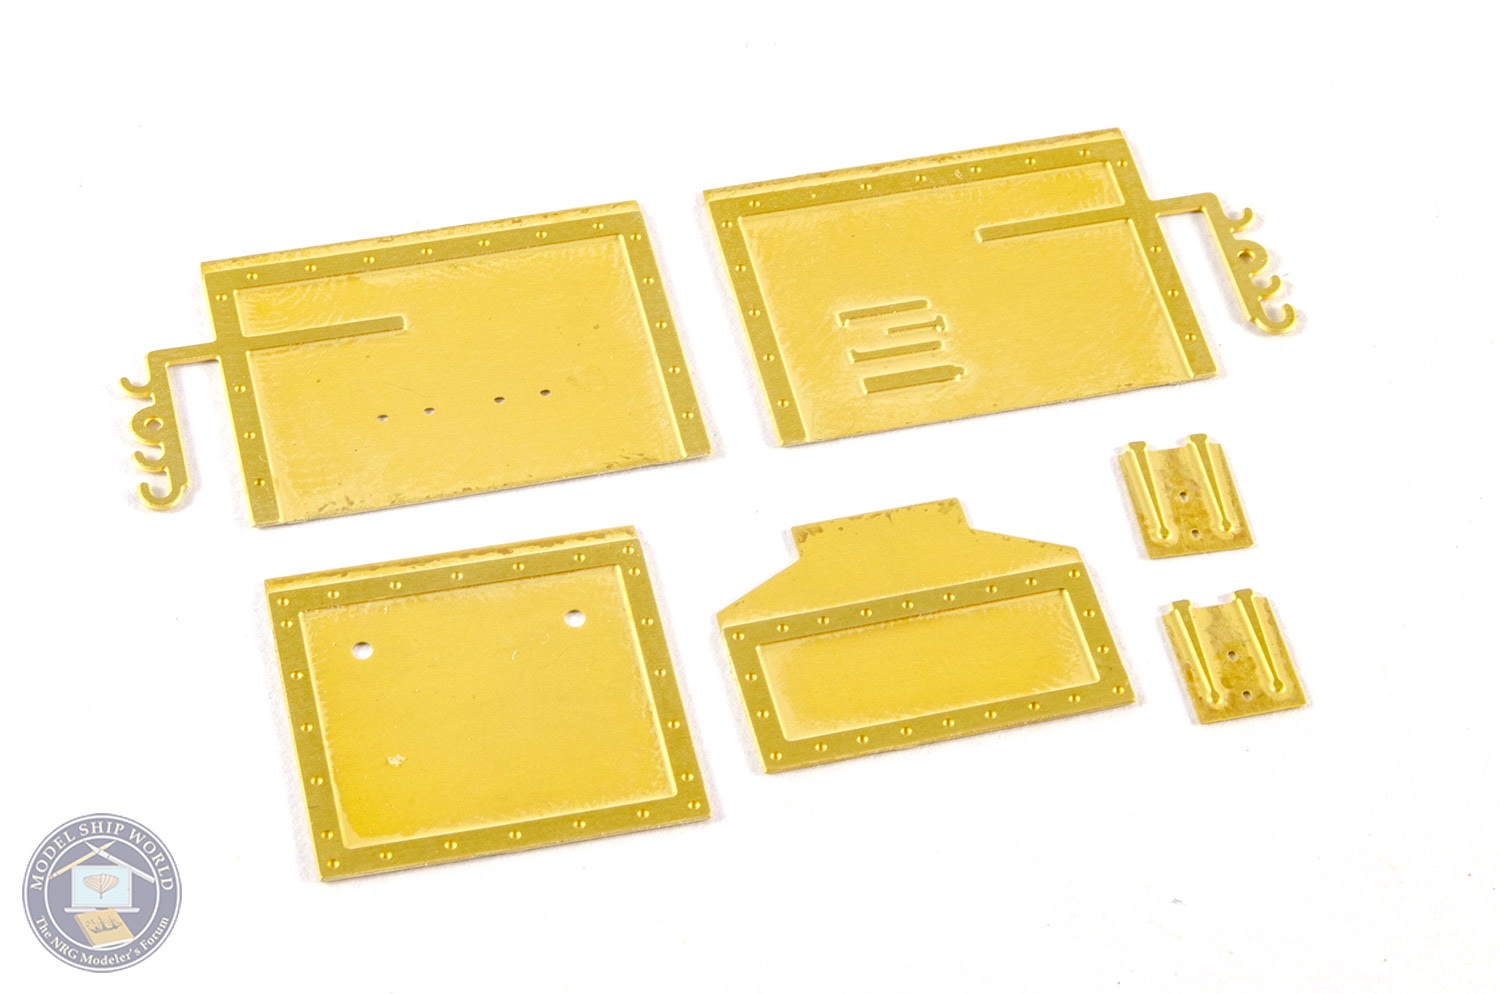
Whilst I was waiting for stuff on the hull to dry, I worked on the stove. Here you see the pear carcass being assembled.


And of course, this is mostly sheathed in photo-etch.
I'll not be sanding this hull until later this week when I finish work for Easter. That means I can do that task outside, but I will work on some deck stuff this week....maybe cannon.
Until next time 😁
Great to see the progress, you are doing a great job. This looks to be a brilliant kit.
- DmitriyMarkov, Canute, mtaylor and 1 other
-
4
-
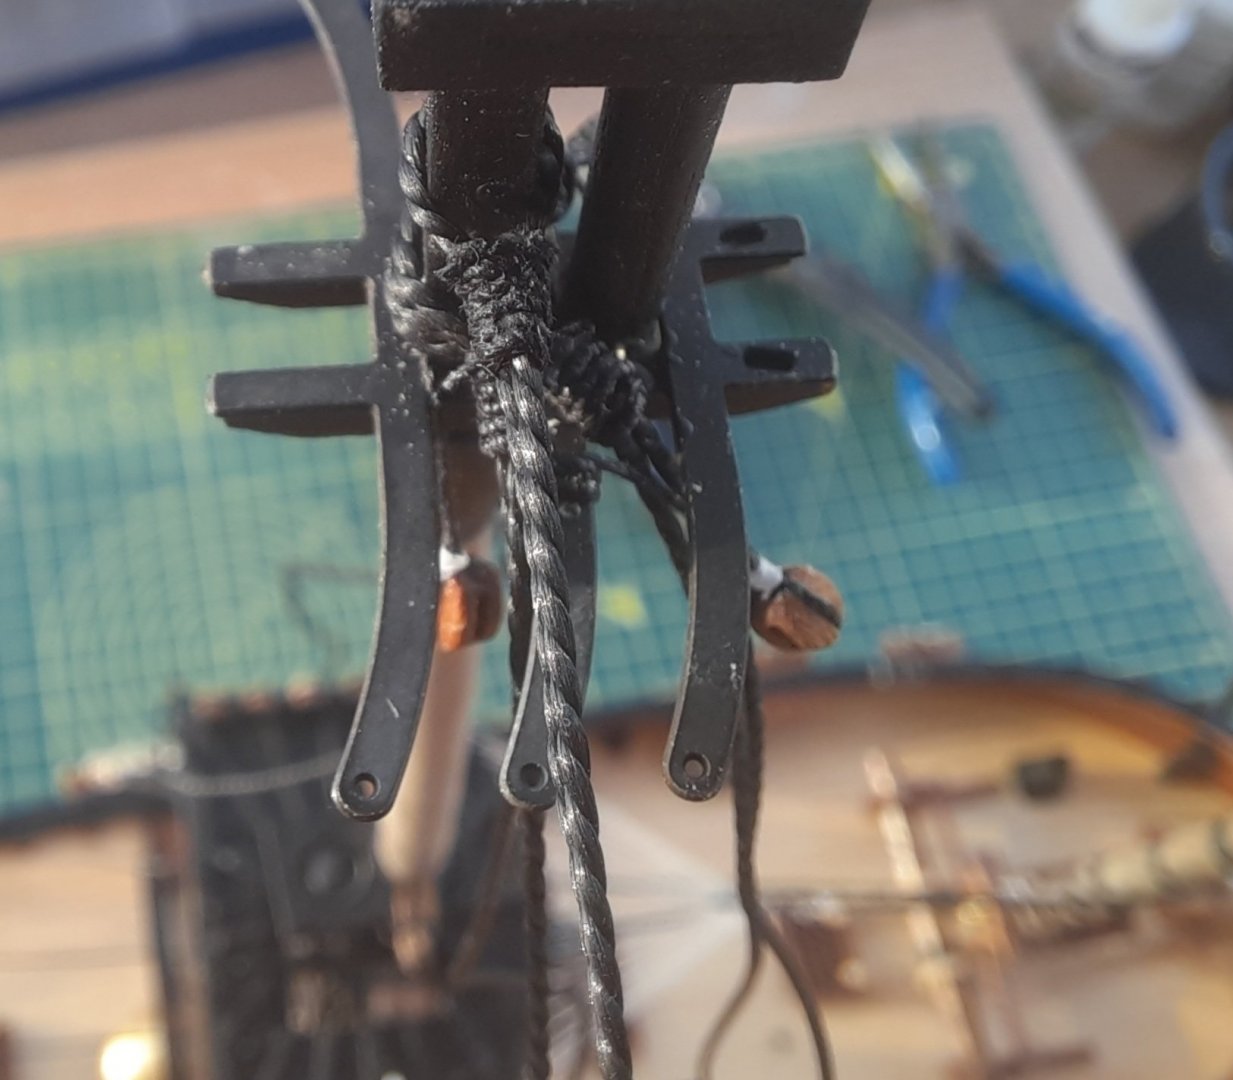
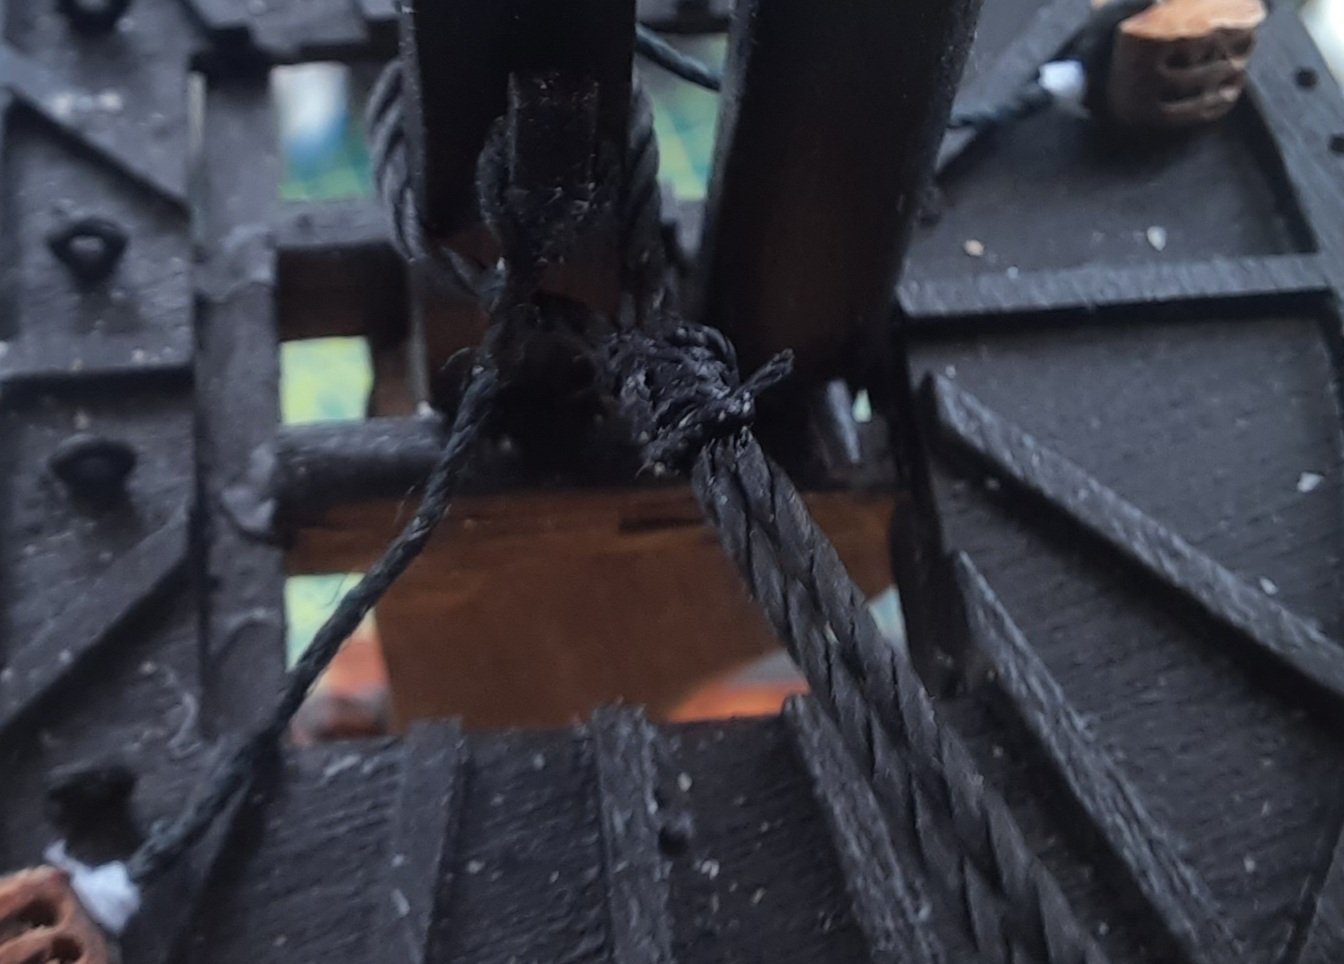
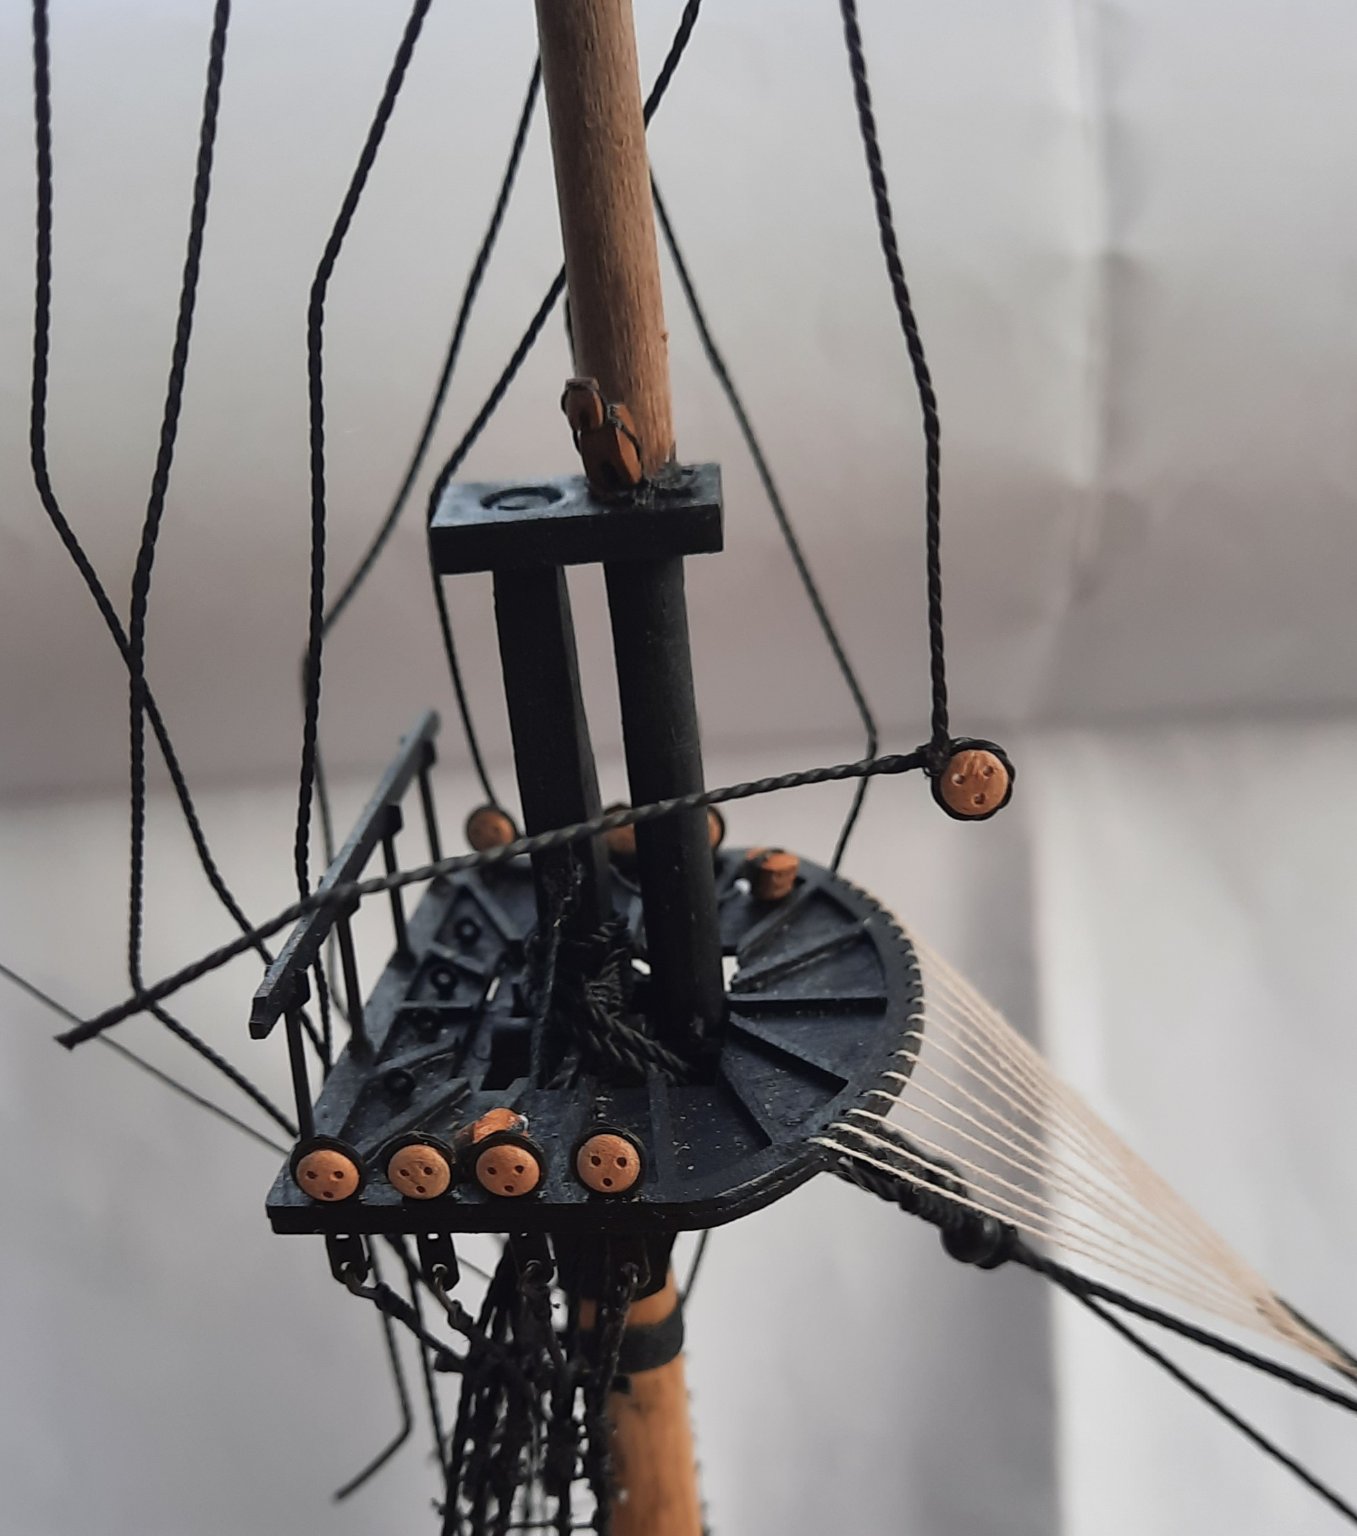
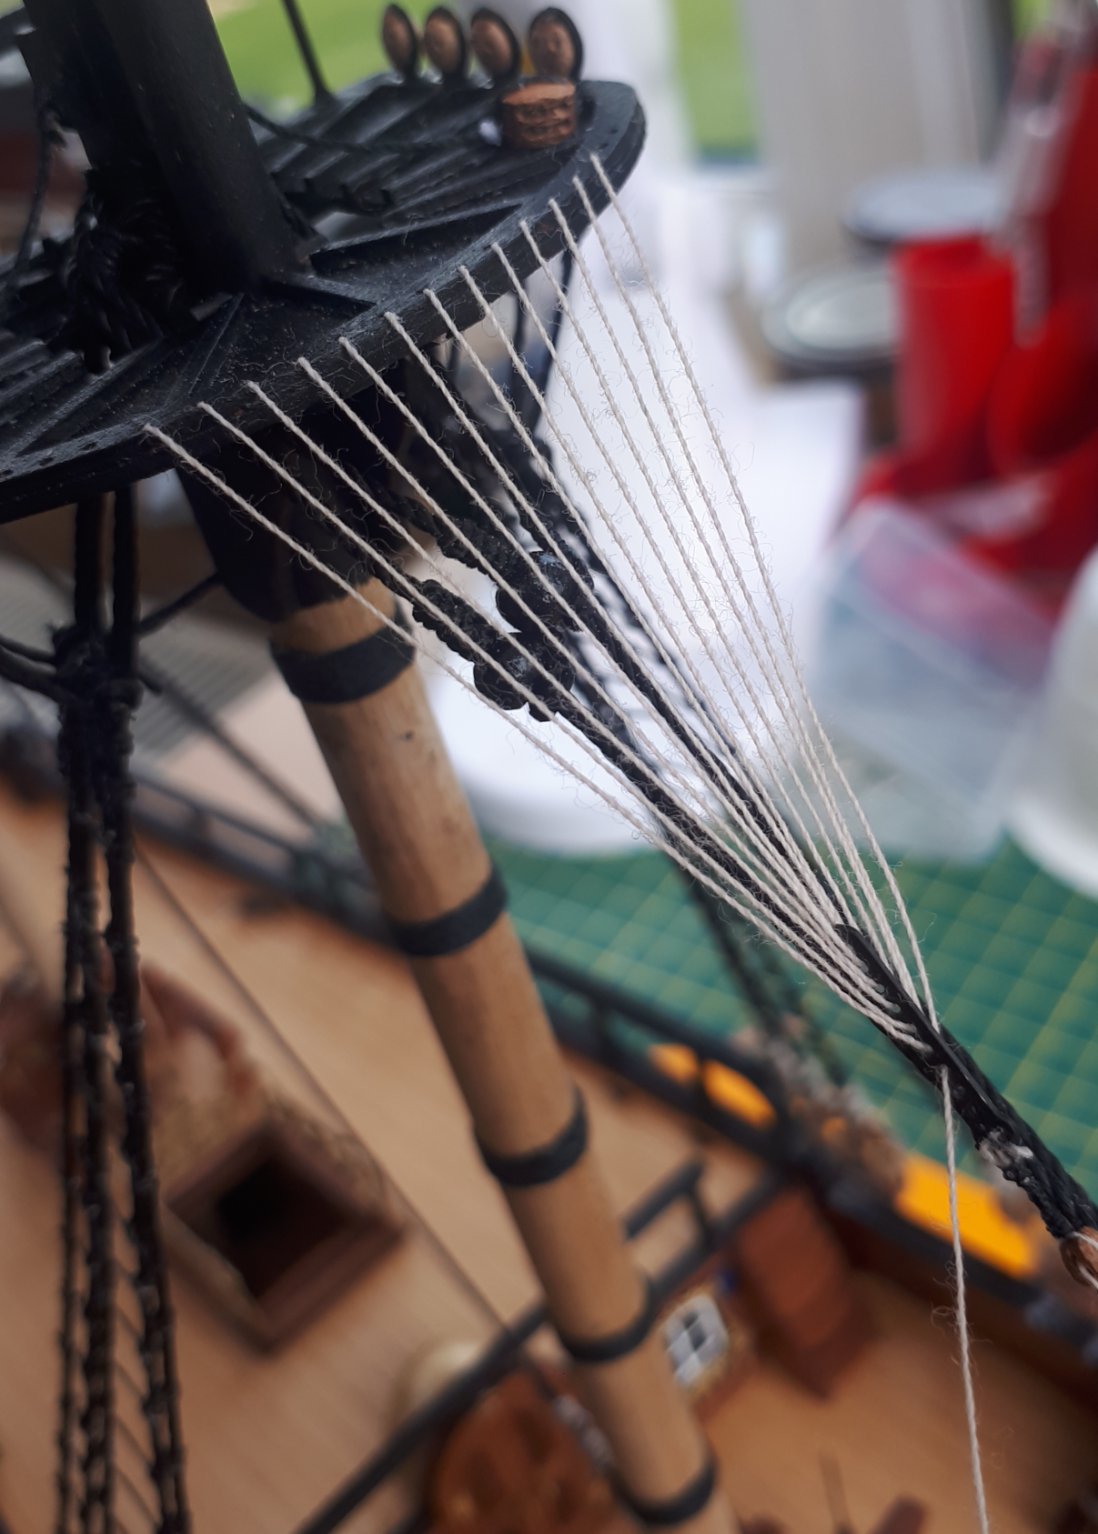
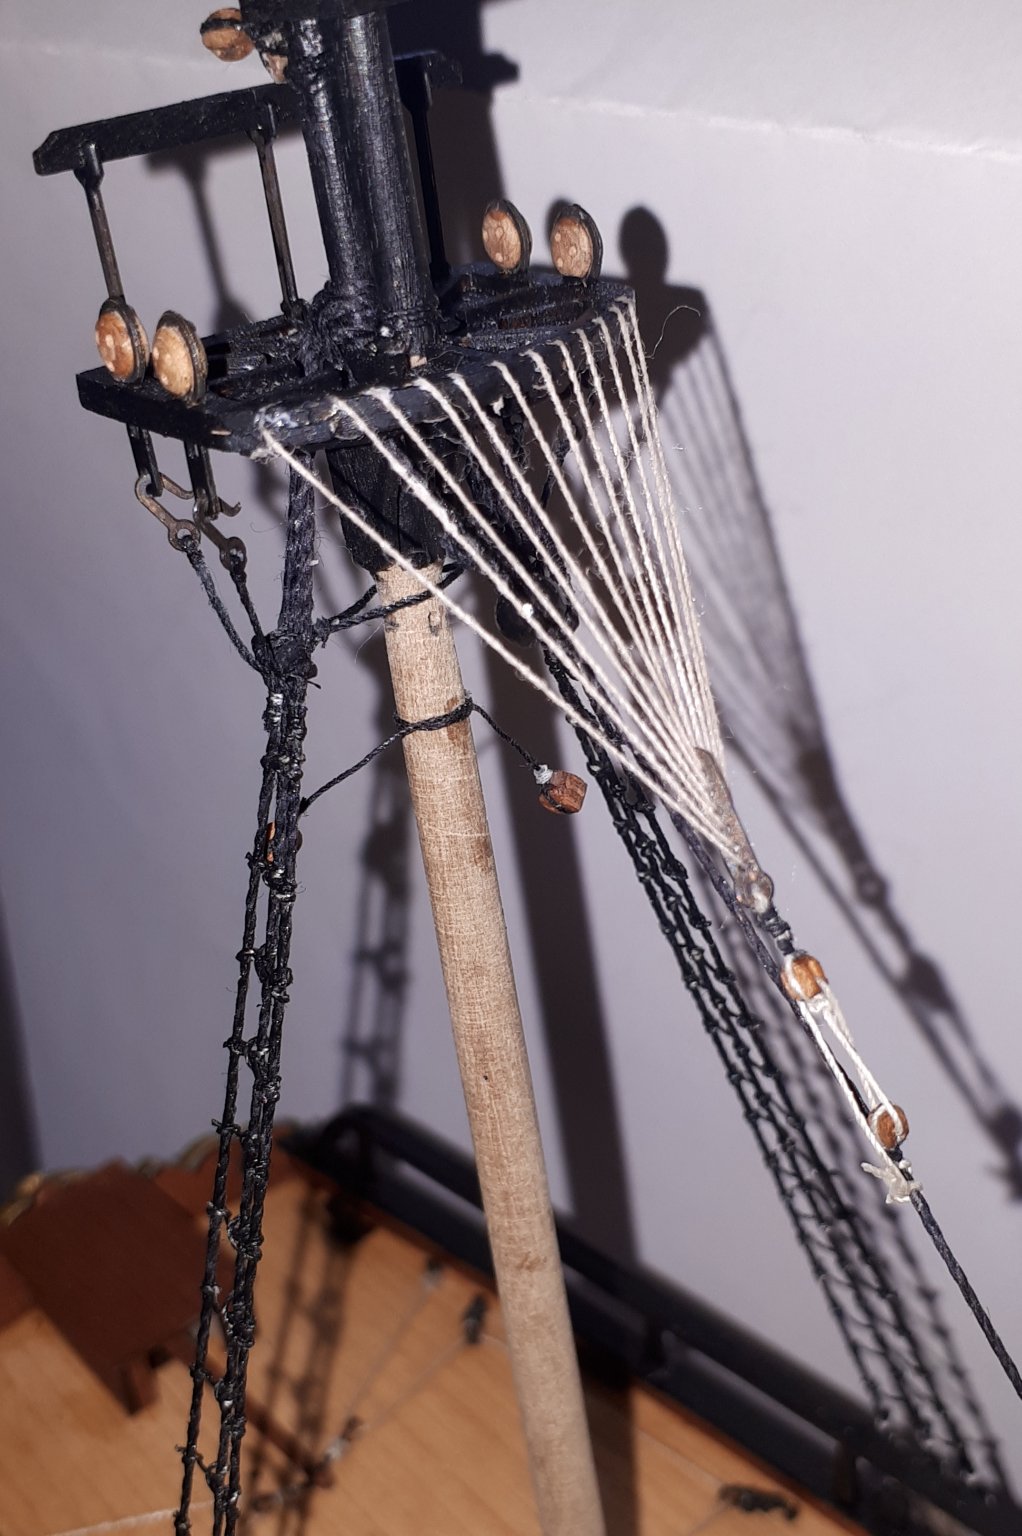
Following on from yesterdays post I have now completed adding the main mast crows feet rigging.
I started by taking a 3m length of 0.1mm natural thread. There are 18 holes in the main mast platform. To ensure I finished with the thread running through the last platform hole nearest to me I started the rigging up through the 10th hole, then I passed the thread through the euproe back towards me then I fed it down platform hole 9 then back up platform hole 8 back and then back through the next hole in the euproe etc.
Picture of the start of the rigging
As the rigging progressed the more observant will see I made a error with the threading pattern which meant I had to unthread it all and start again. I did not waste much time thankfully.
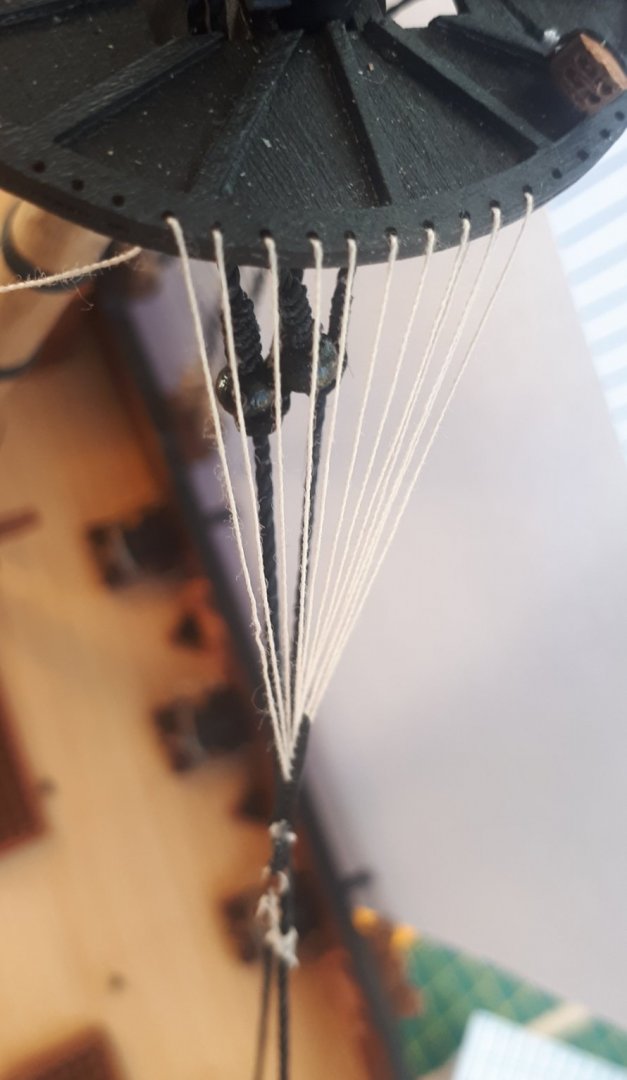
2nd time around and everything is looking better, no mistakes so far!

After a few more minutes the rigging was finally completed.
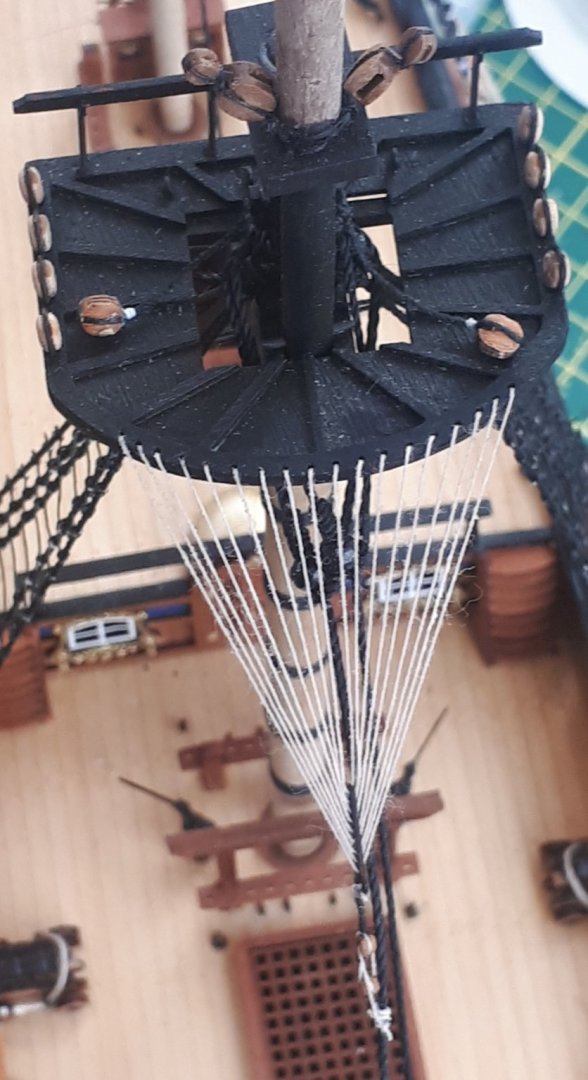
I will start to add the shrouds to the mizzen top mast next.
- GuntherMT, Theodosius, rafine and 4 others
-
7
-
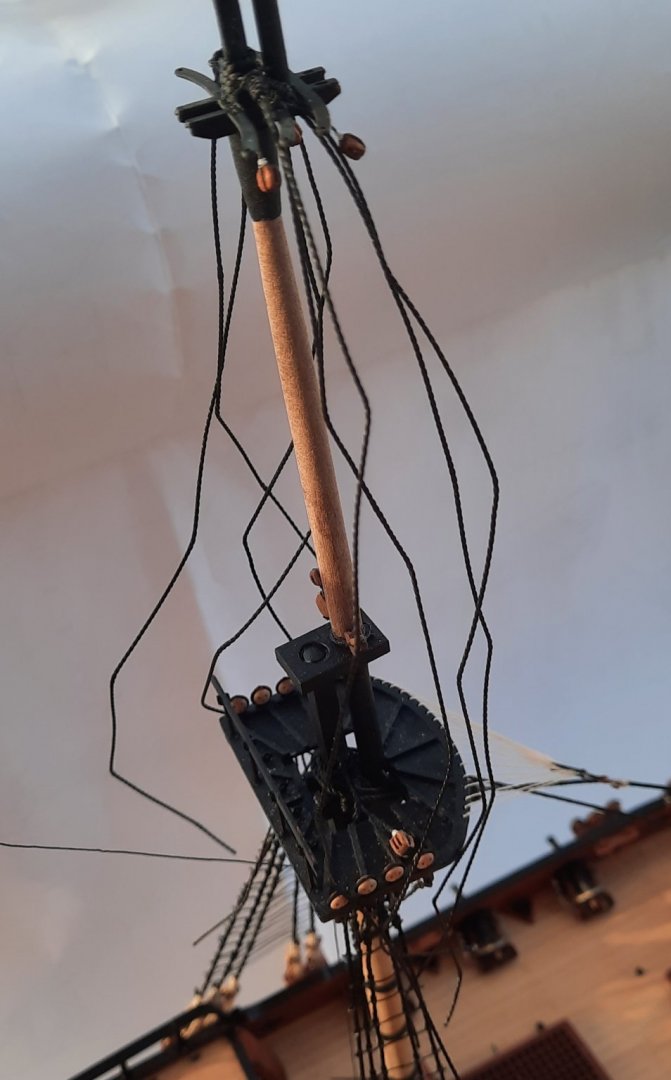
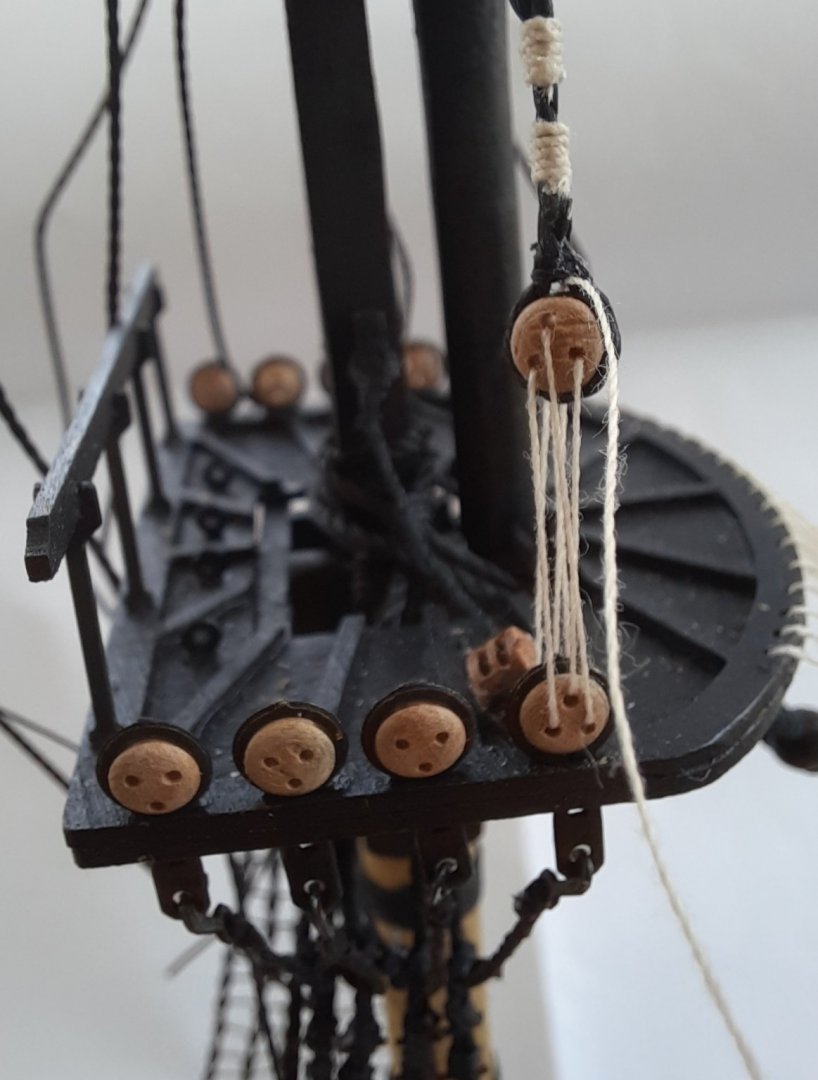
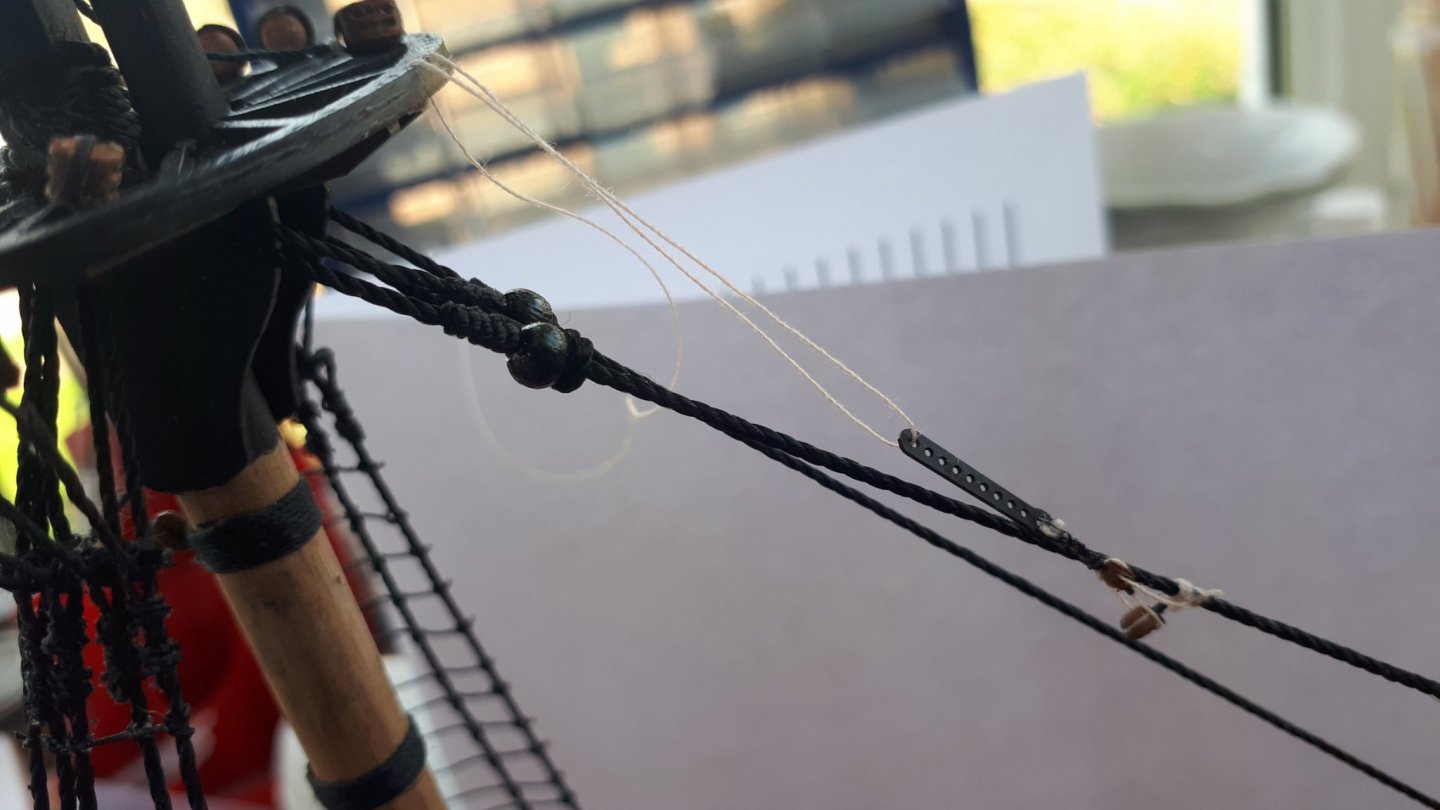
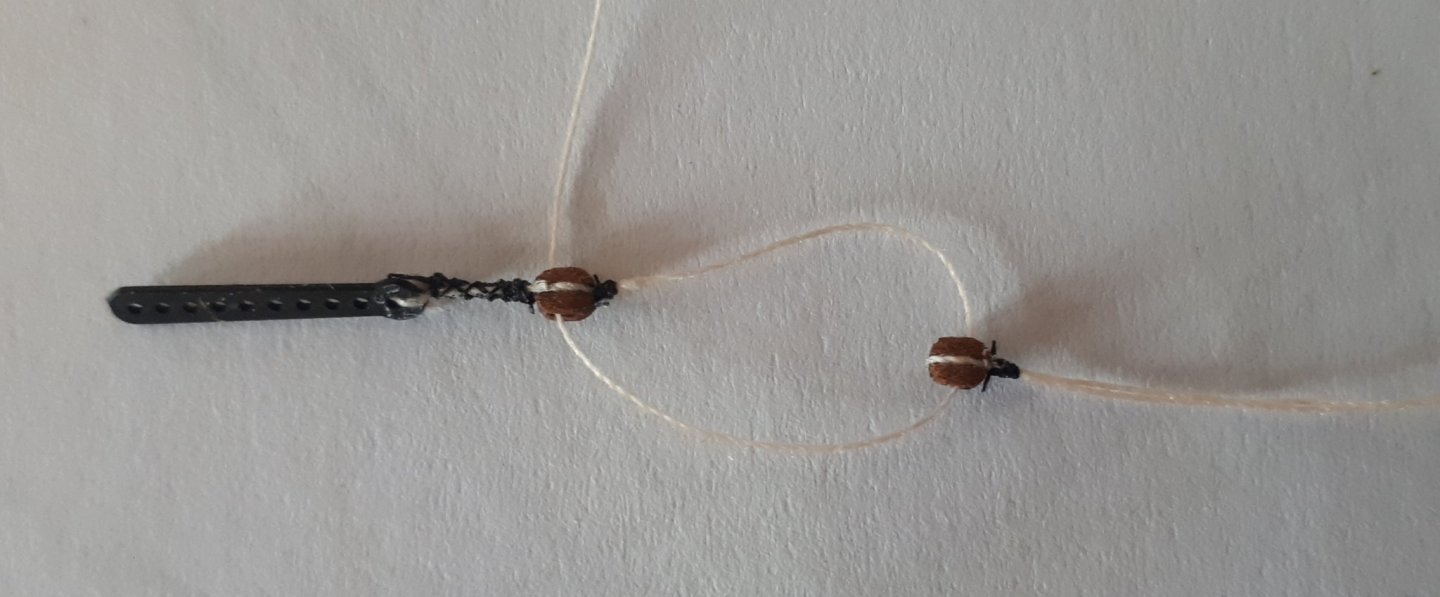
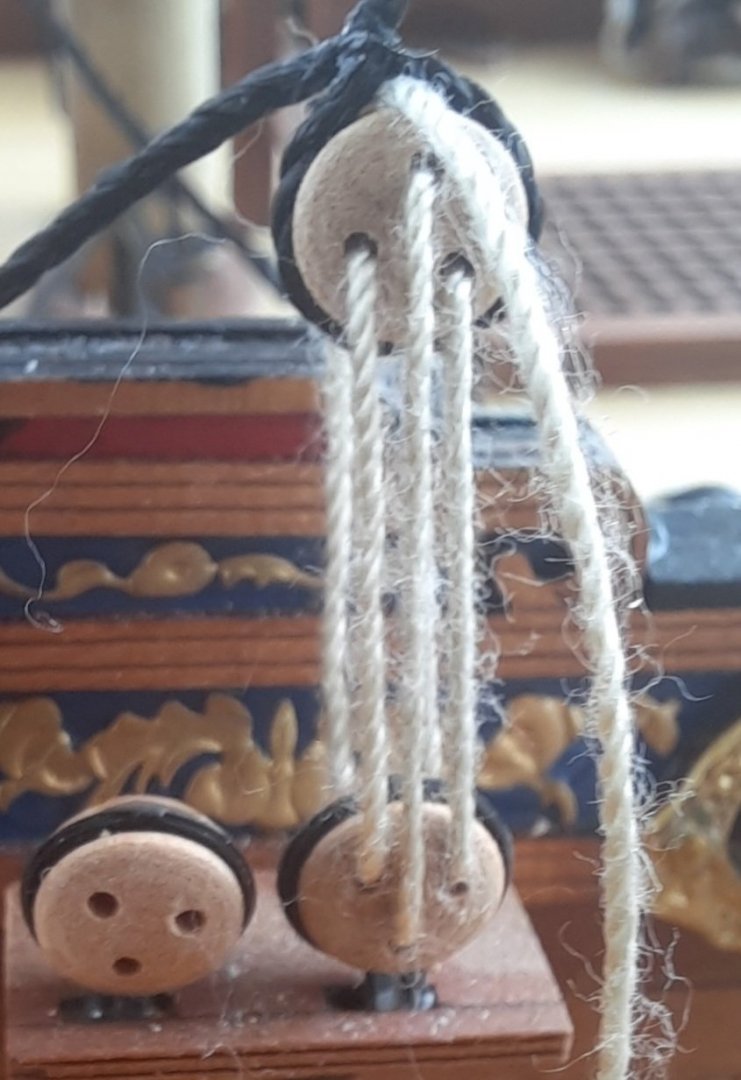
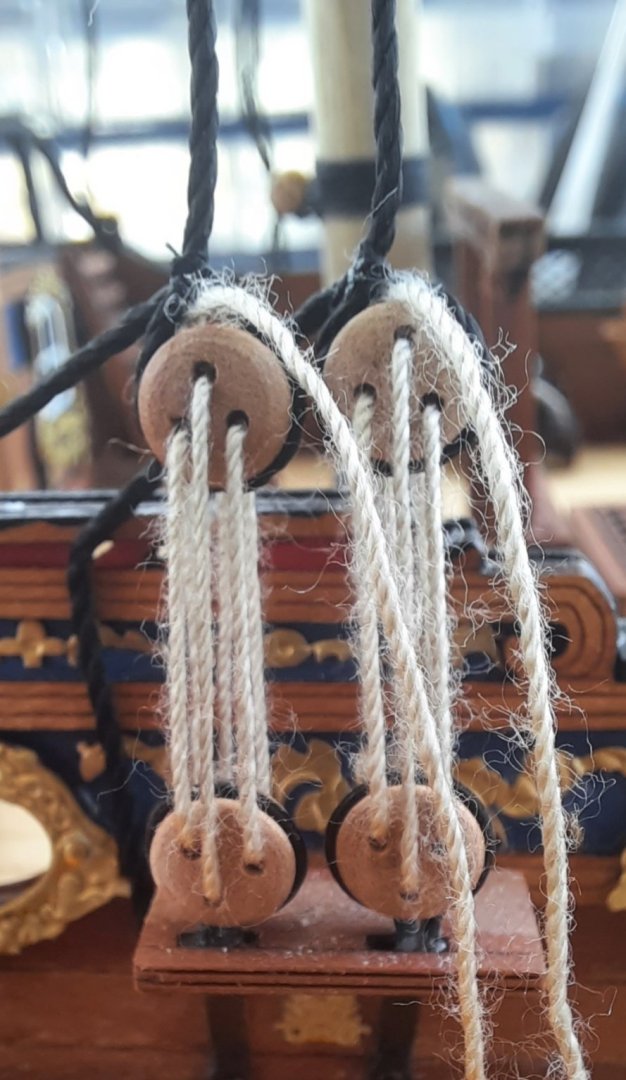
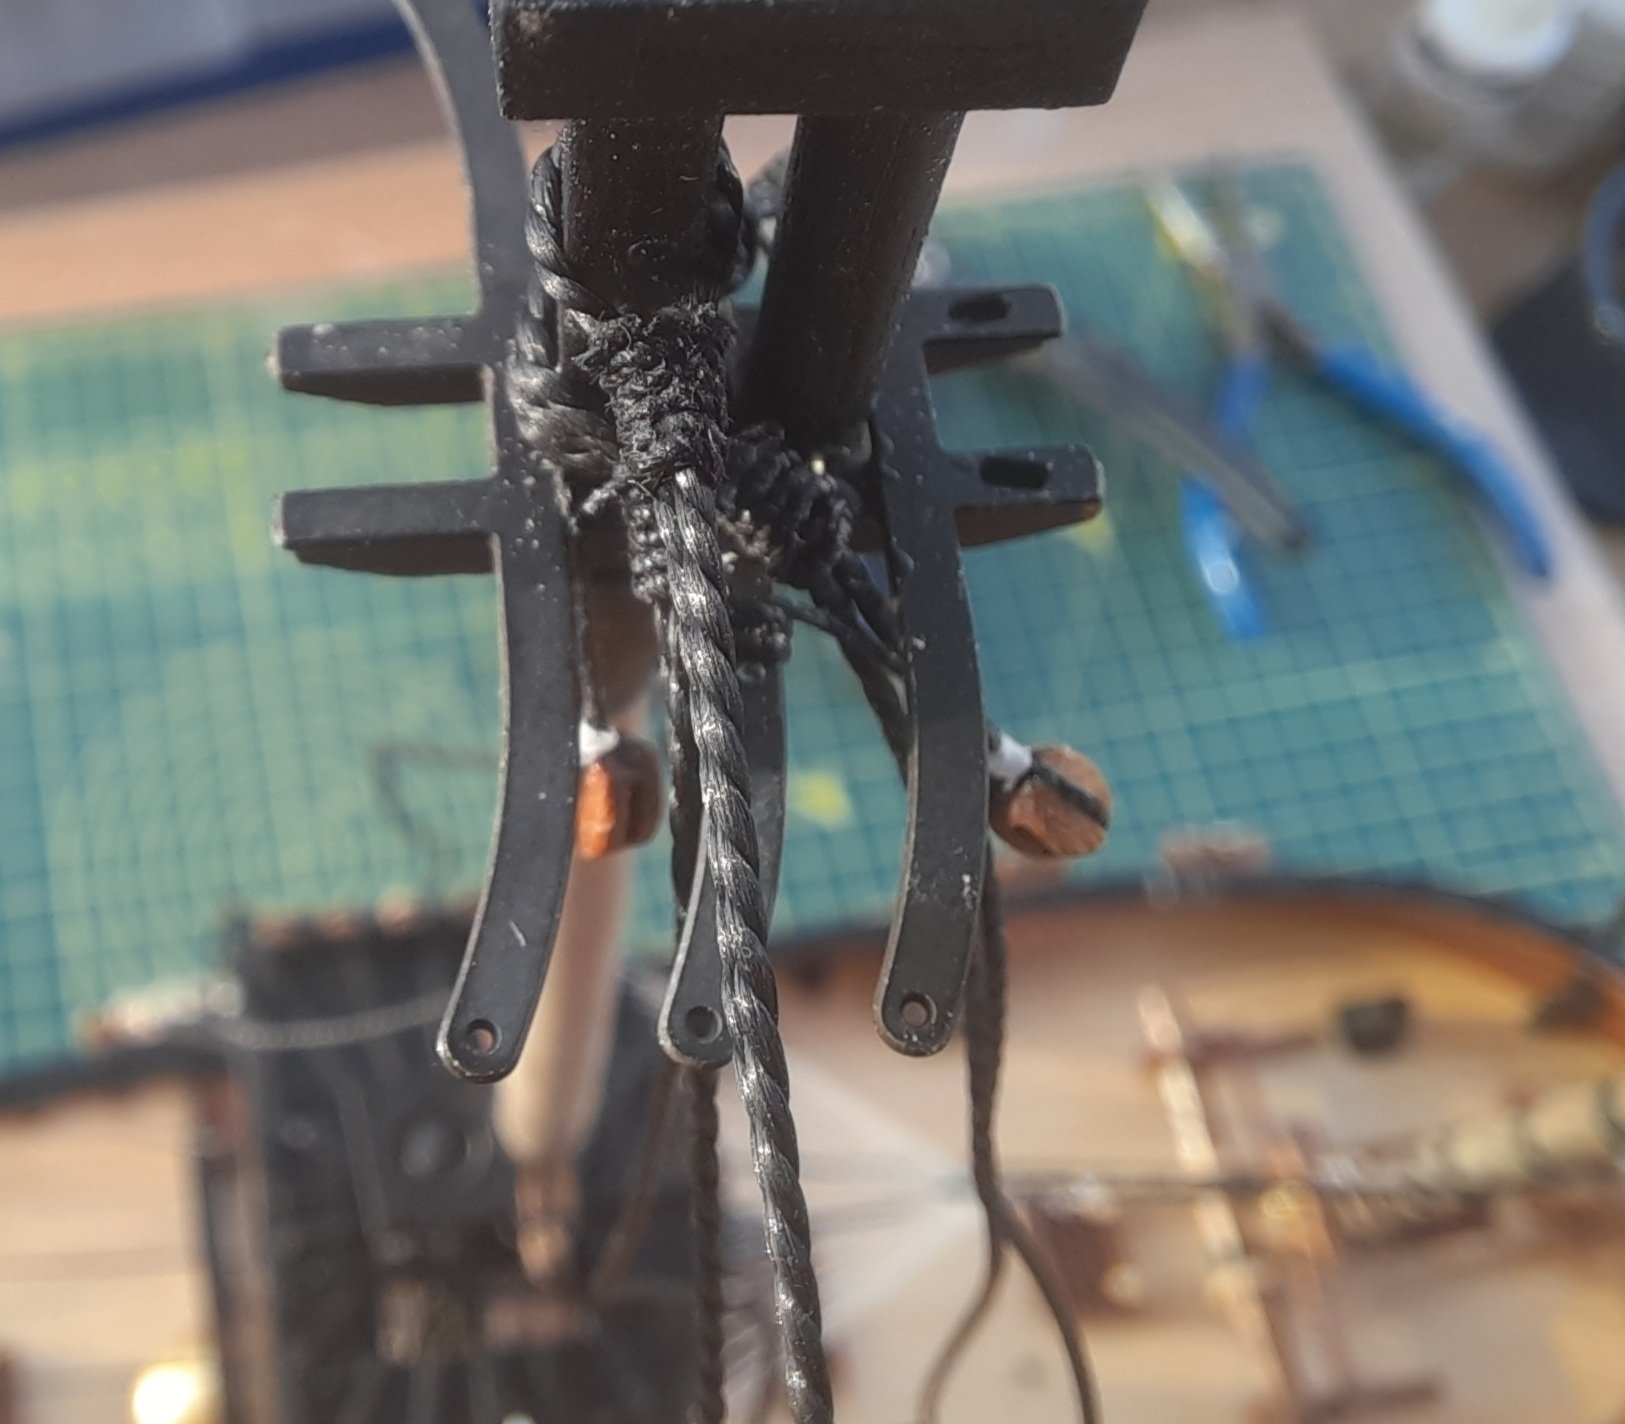
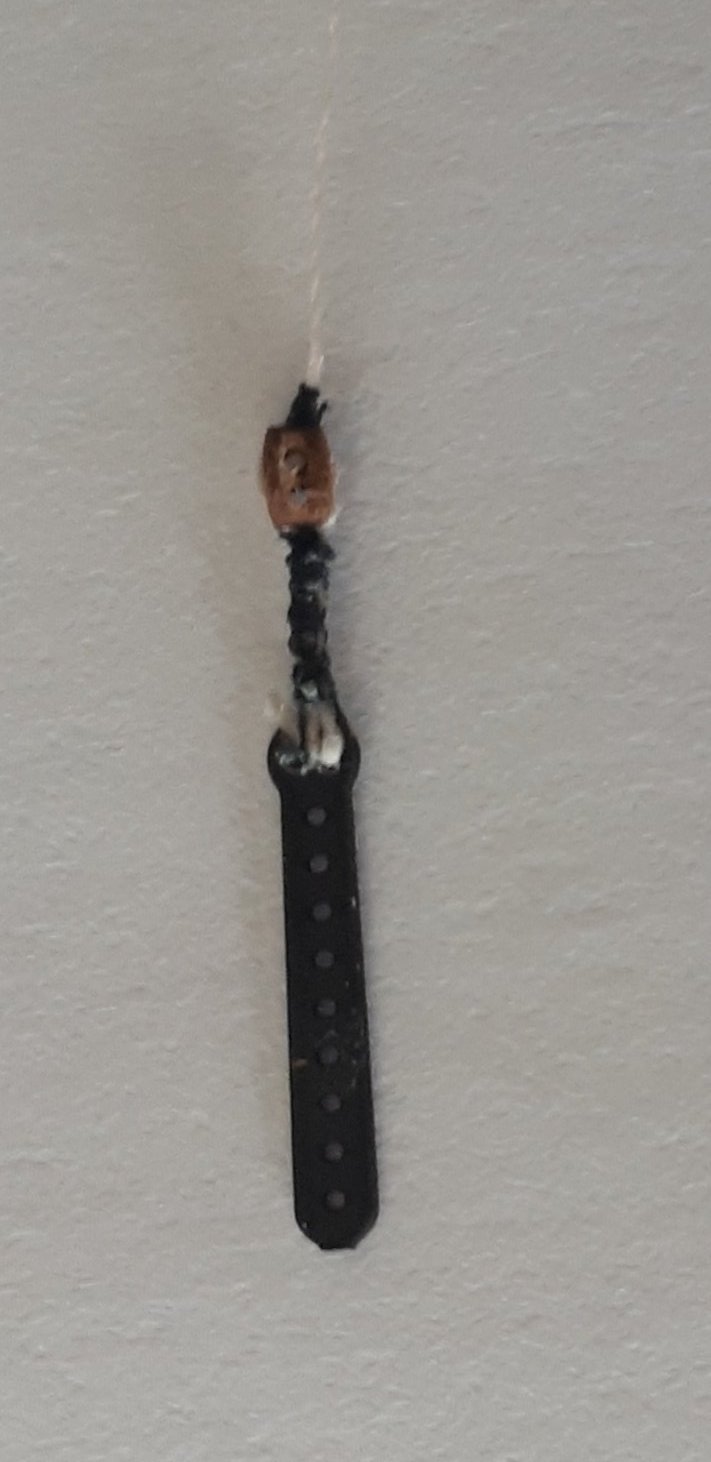
Today I thought I would detail my work on the main mast Euproe assembly. I will follow this up with the rigging of the main mast crows feet in a separate post.
The assembly consists of 2 x 2mm blocks and 1 x euproe photo etched part which I blacken using a burnishing product.
I ran a 0.5mm micro drill through both the 2mm blocks to help with the threading the rigging thread.
Using 0.1mm natural thread this was seized this to the 2 2mm blocks using black fly tying thread.
Stage 1 - Setting up the 1st 2mm block in the quad hands.
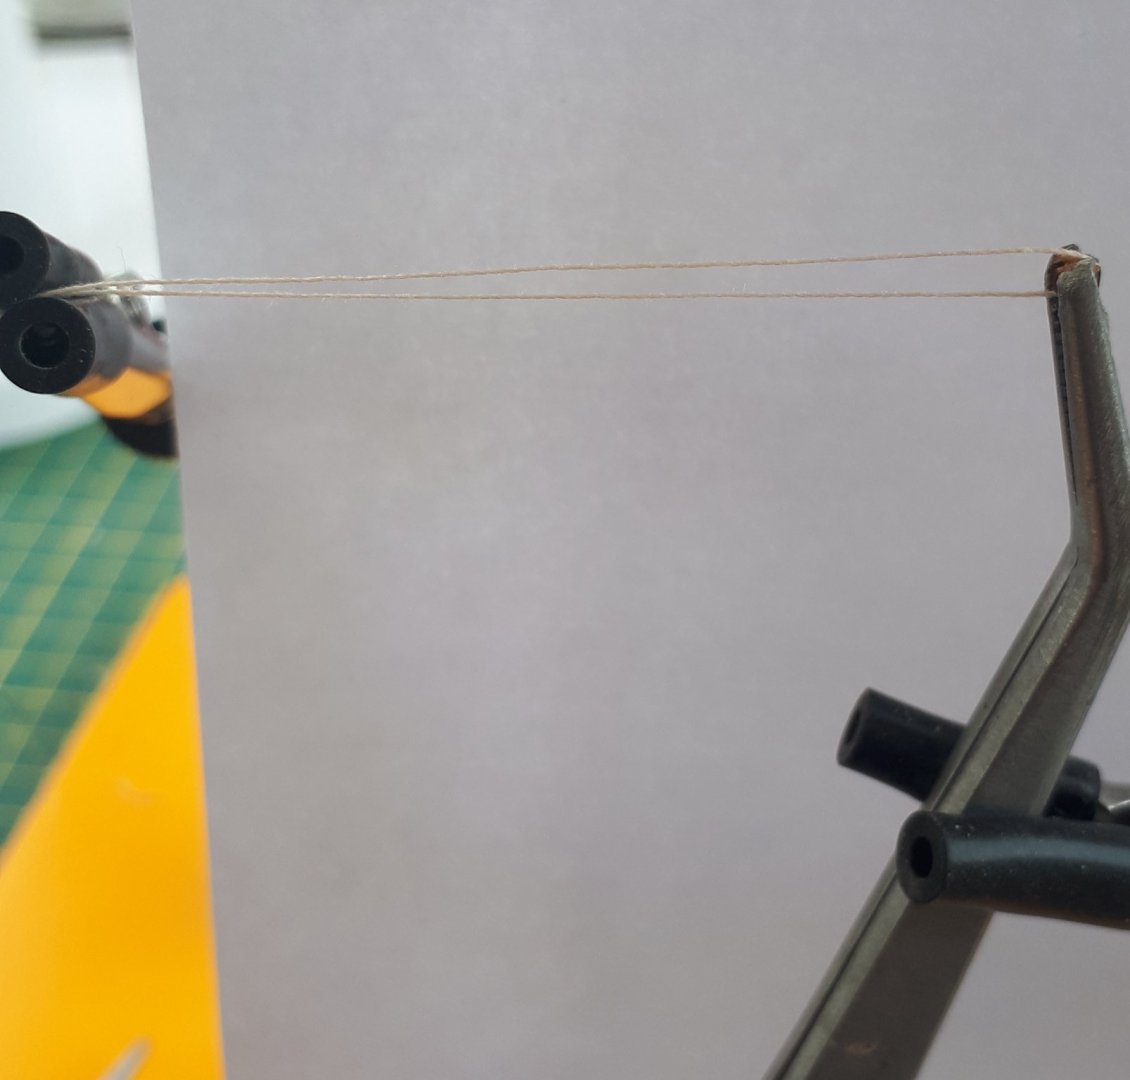
Stage 2 - Starting the seizing. I used an alternate top and bottom half hitch method to add the seizing. I found it better to work toward the block when adding the seizing.
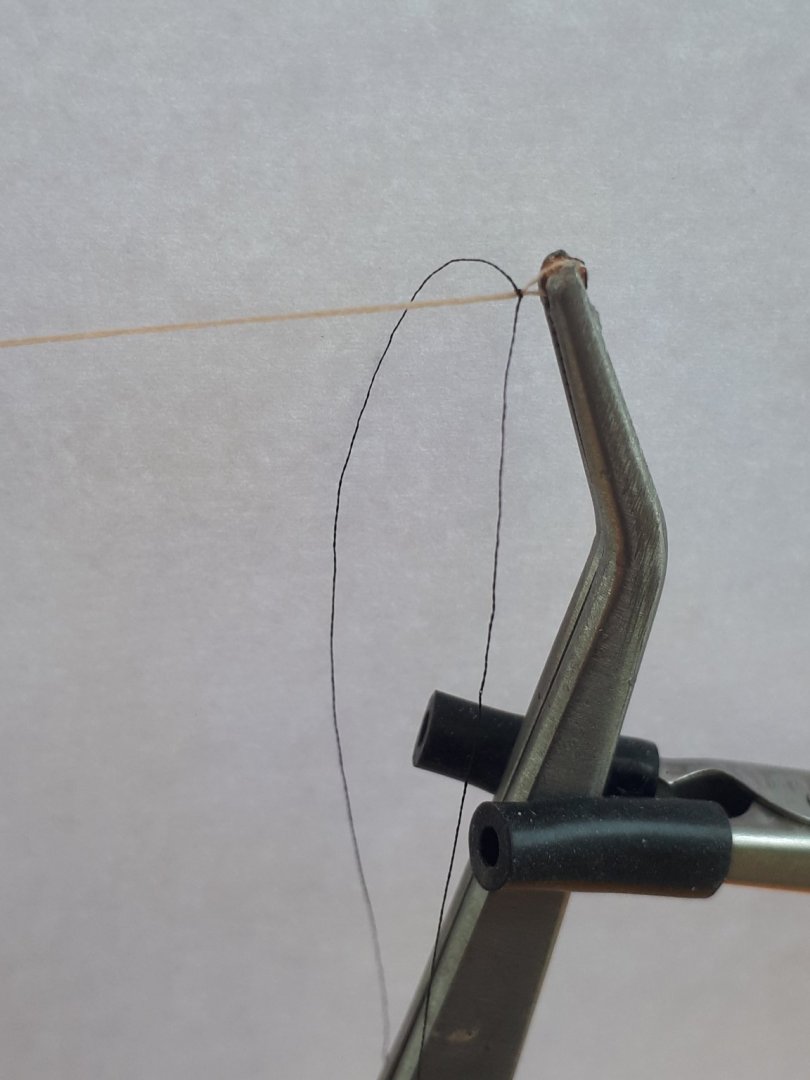
Stage 3 Adding the euproe
I ran the 0.1mm natural thread thread through the euproe hole and then seized it with black fly tying thread using an alternate top and bottom half hitch method. It produces quite a nice end result as can been seen below.
Stage 4 - Rigging the blocks
Once the 2 x 2mm blocks and 1 x euproe part were seized it was a simple case of running the 0.1mm rigging thread through both blocks. The assembly is now ready to be added to the Main Stay. After viewing the attached photo I did tidy up the seizing and badly cut ends on the right hand block.
- rafine, ObviousNewbie, Edwardkenway and 2 others
-
5
-
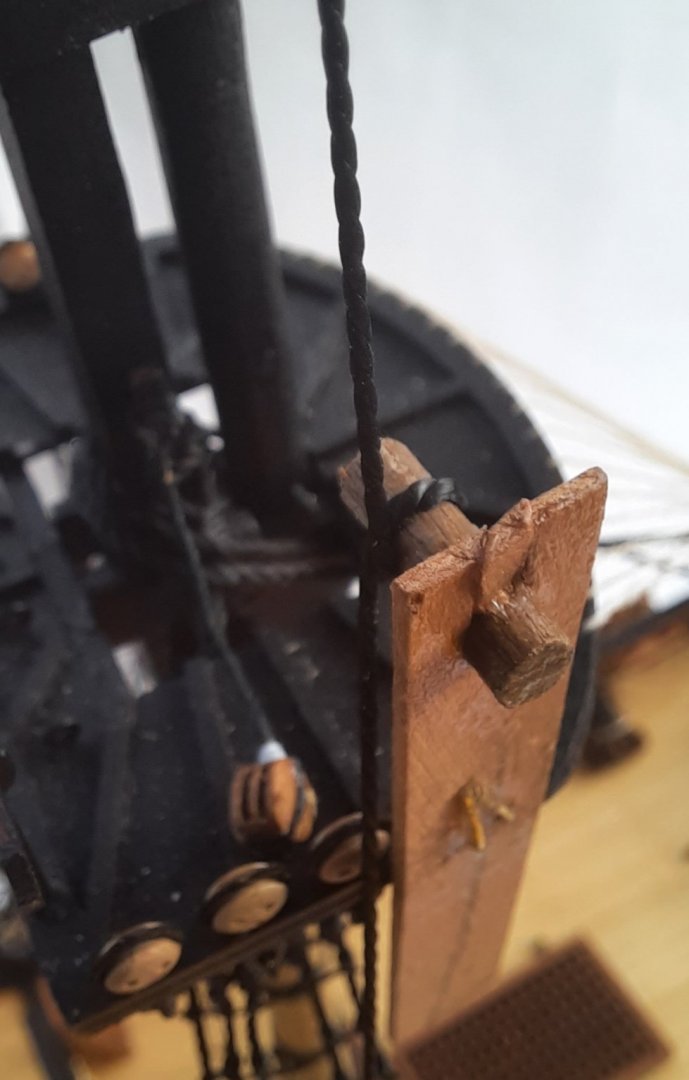
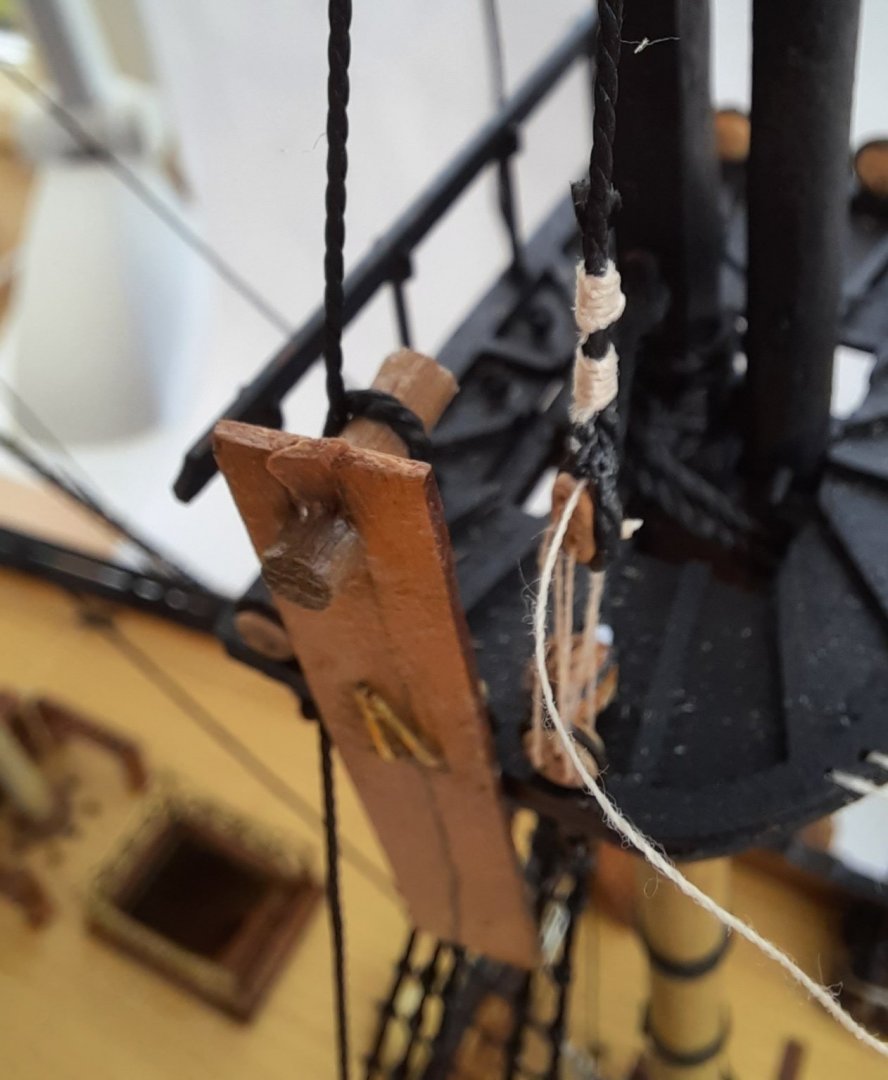
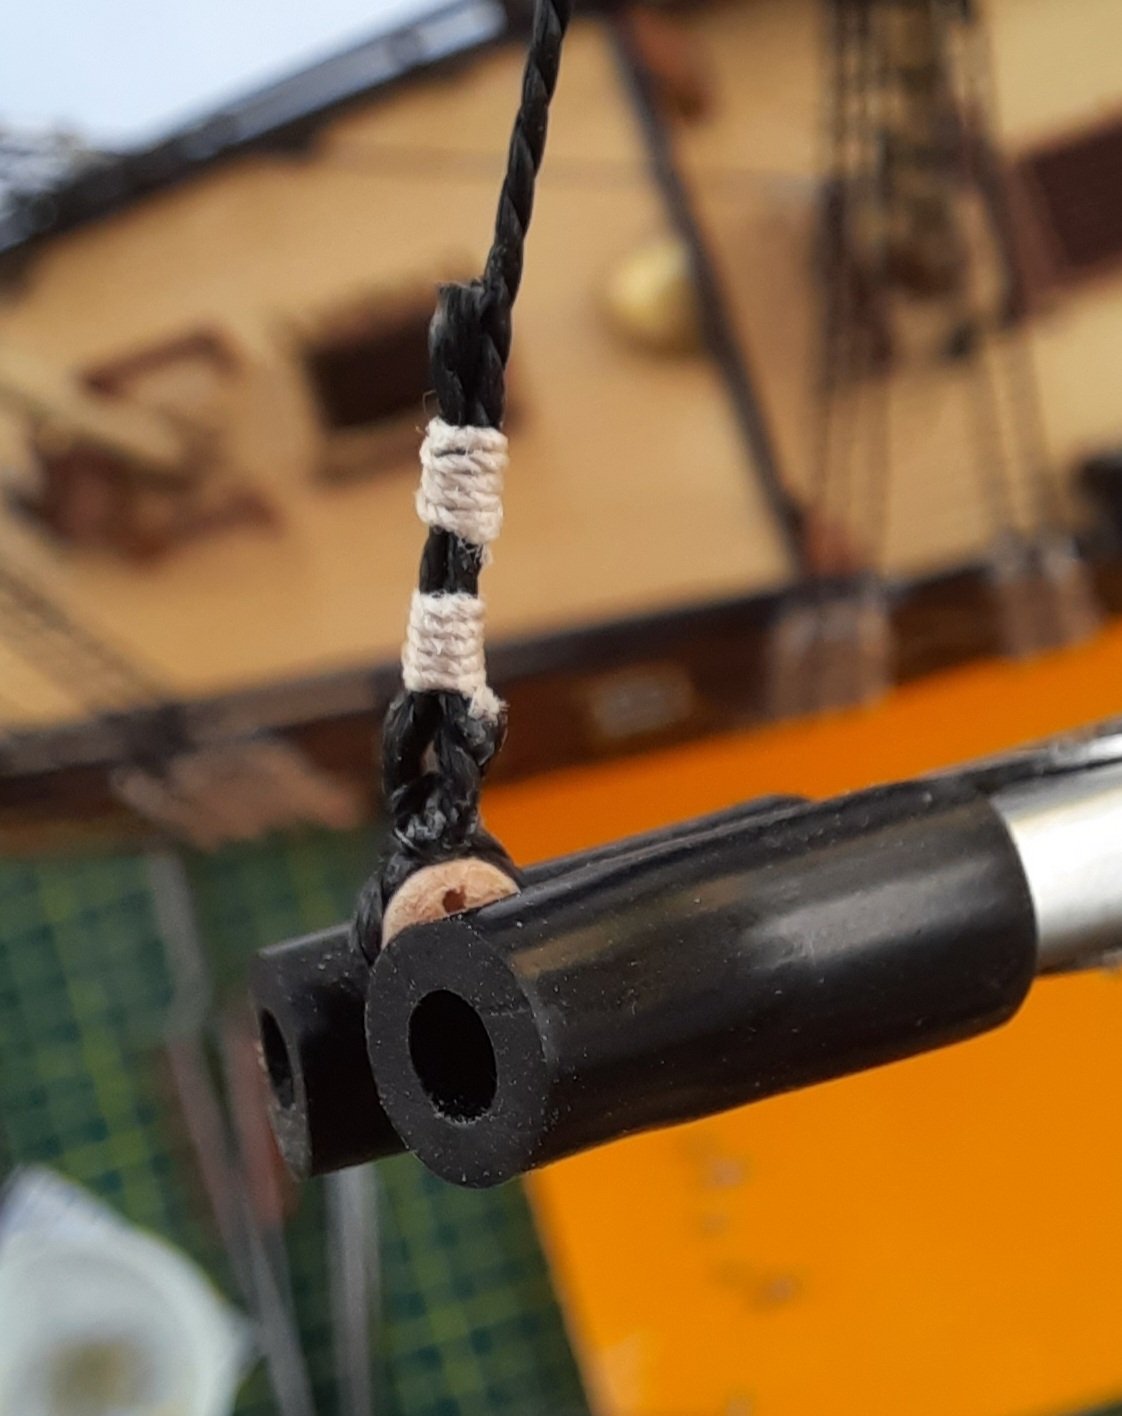
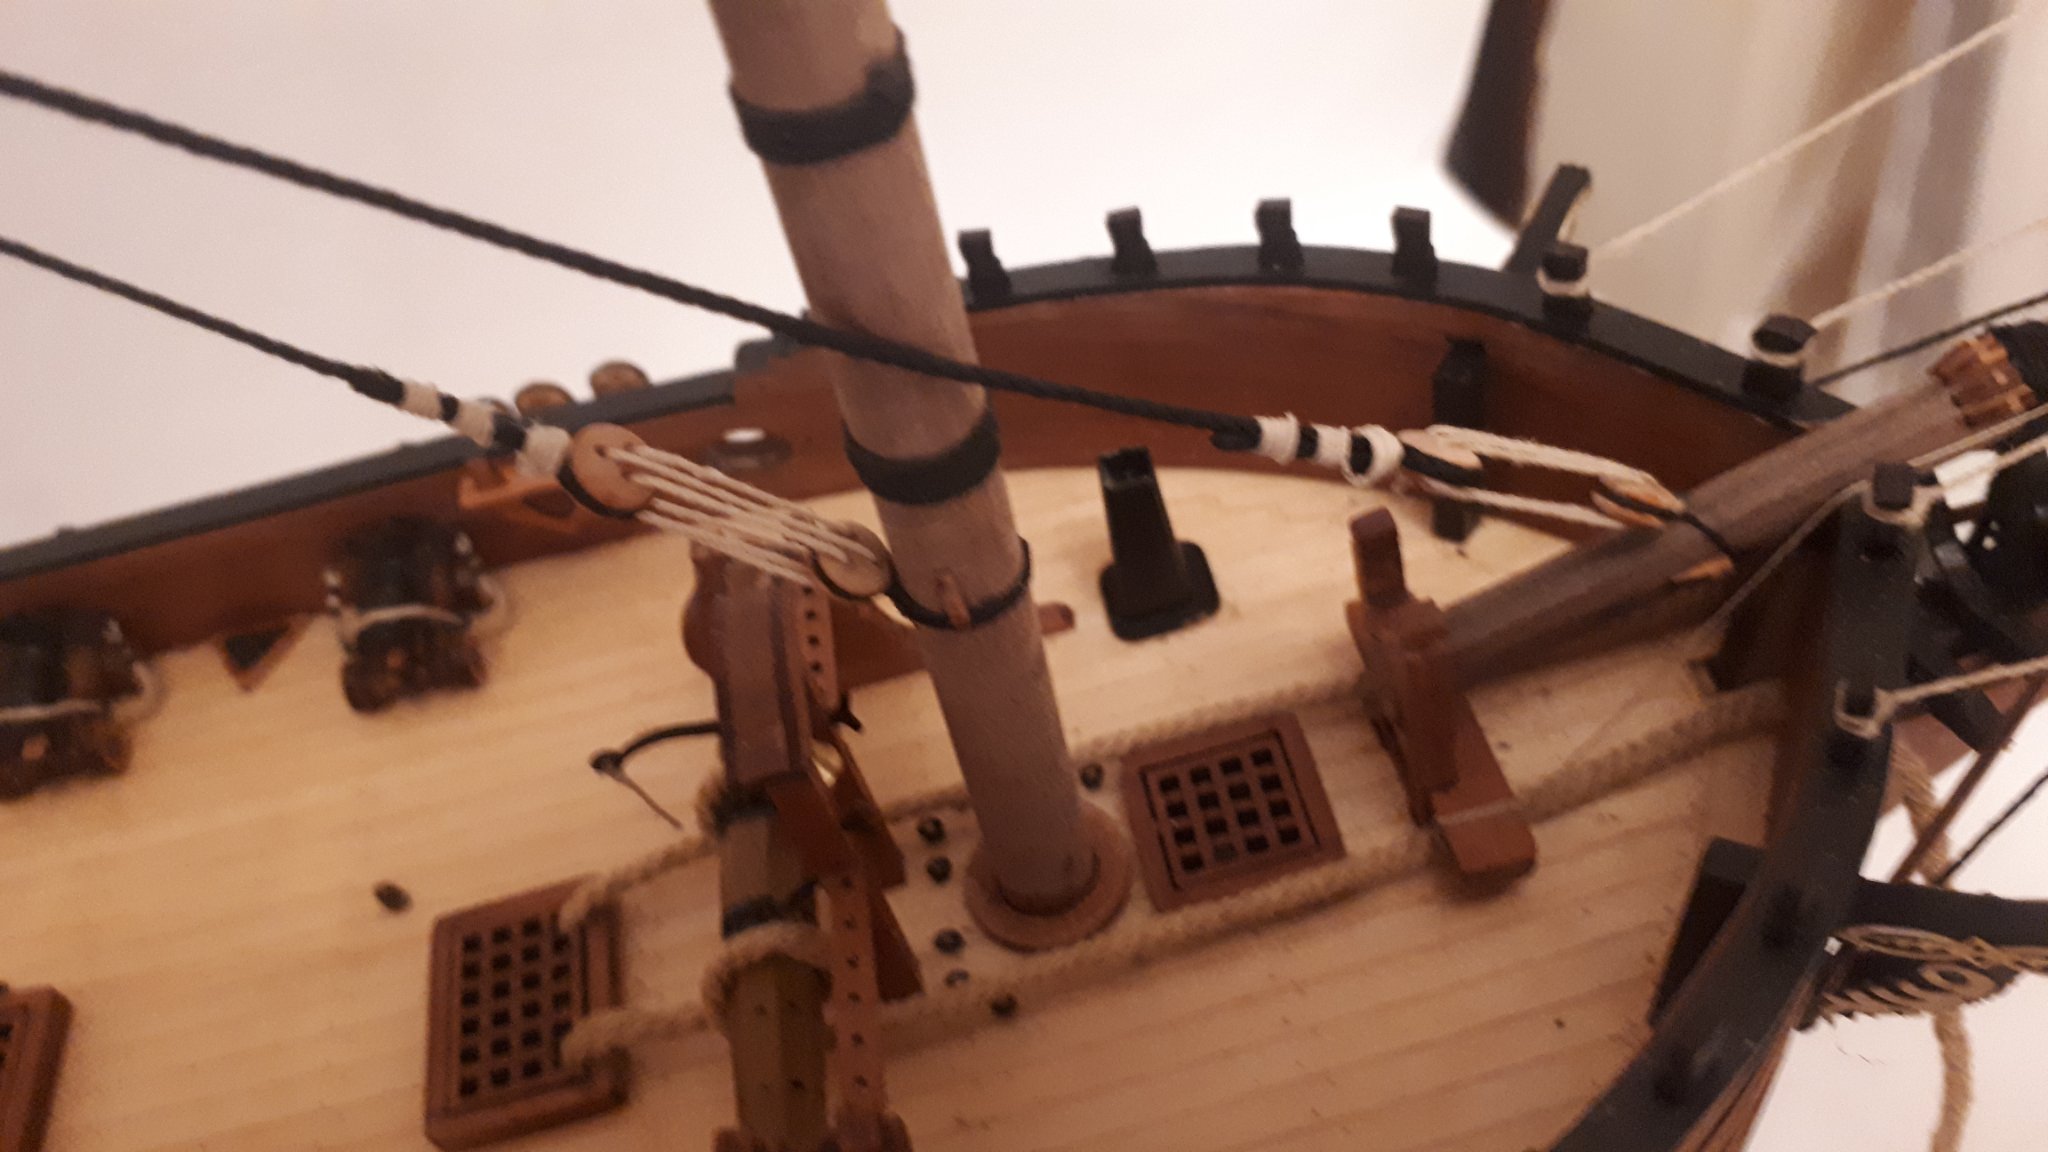
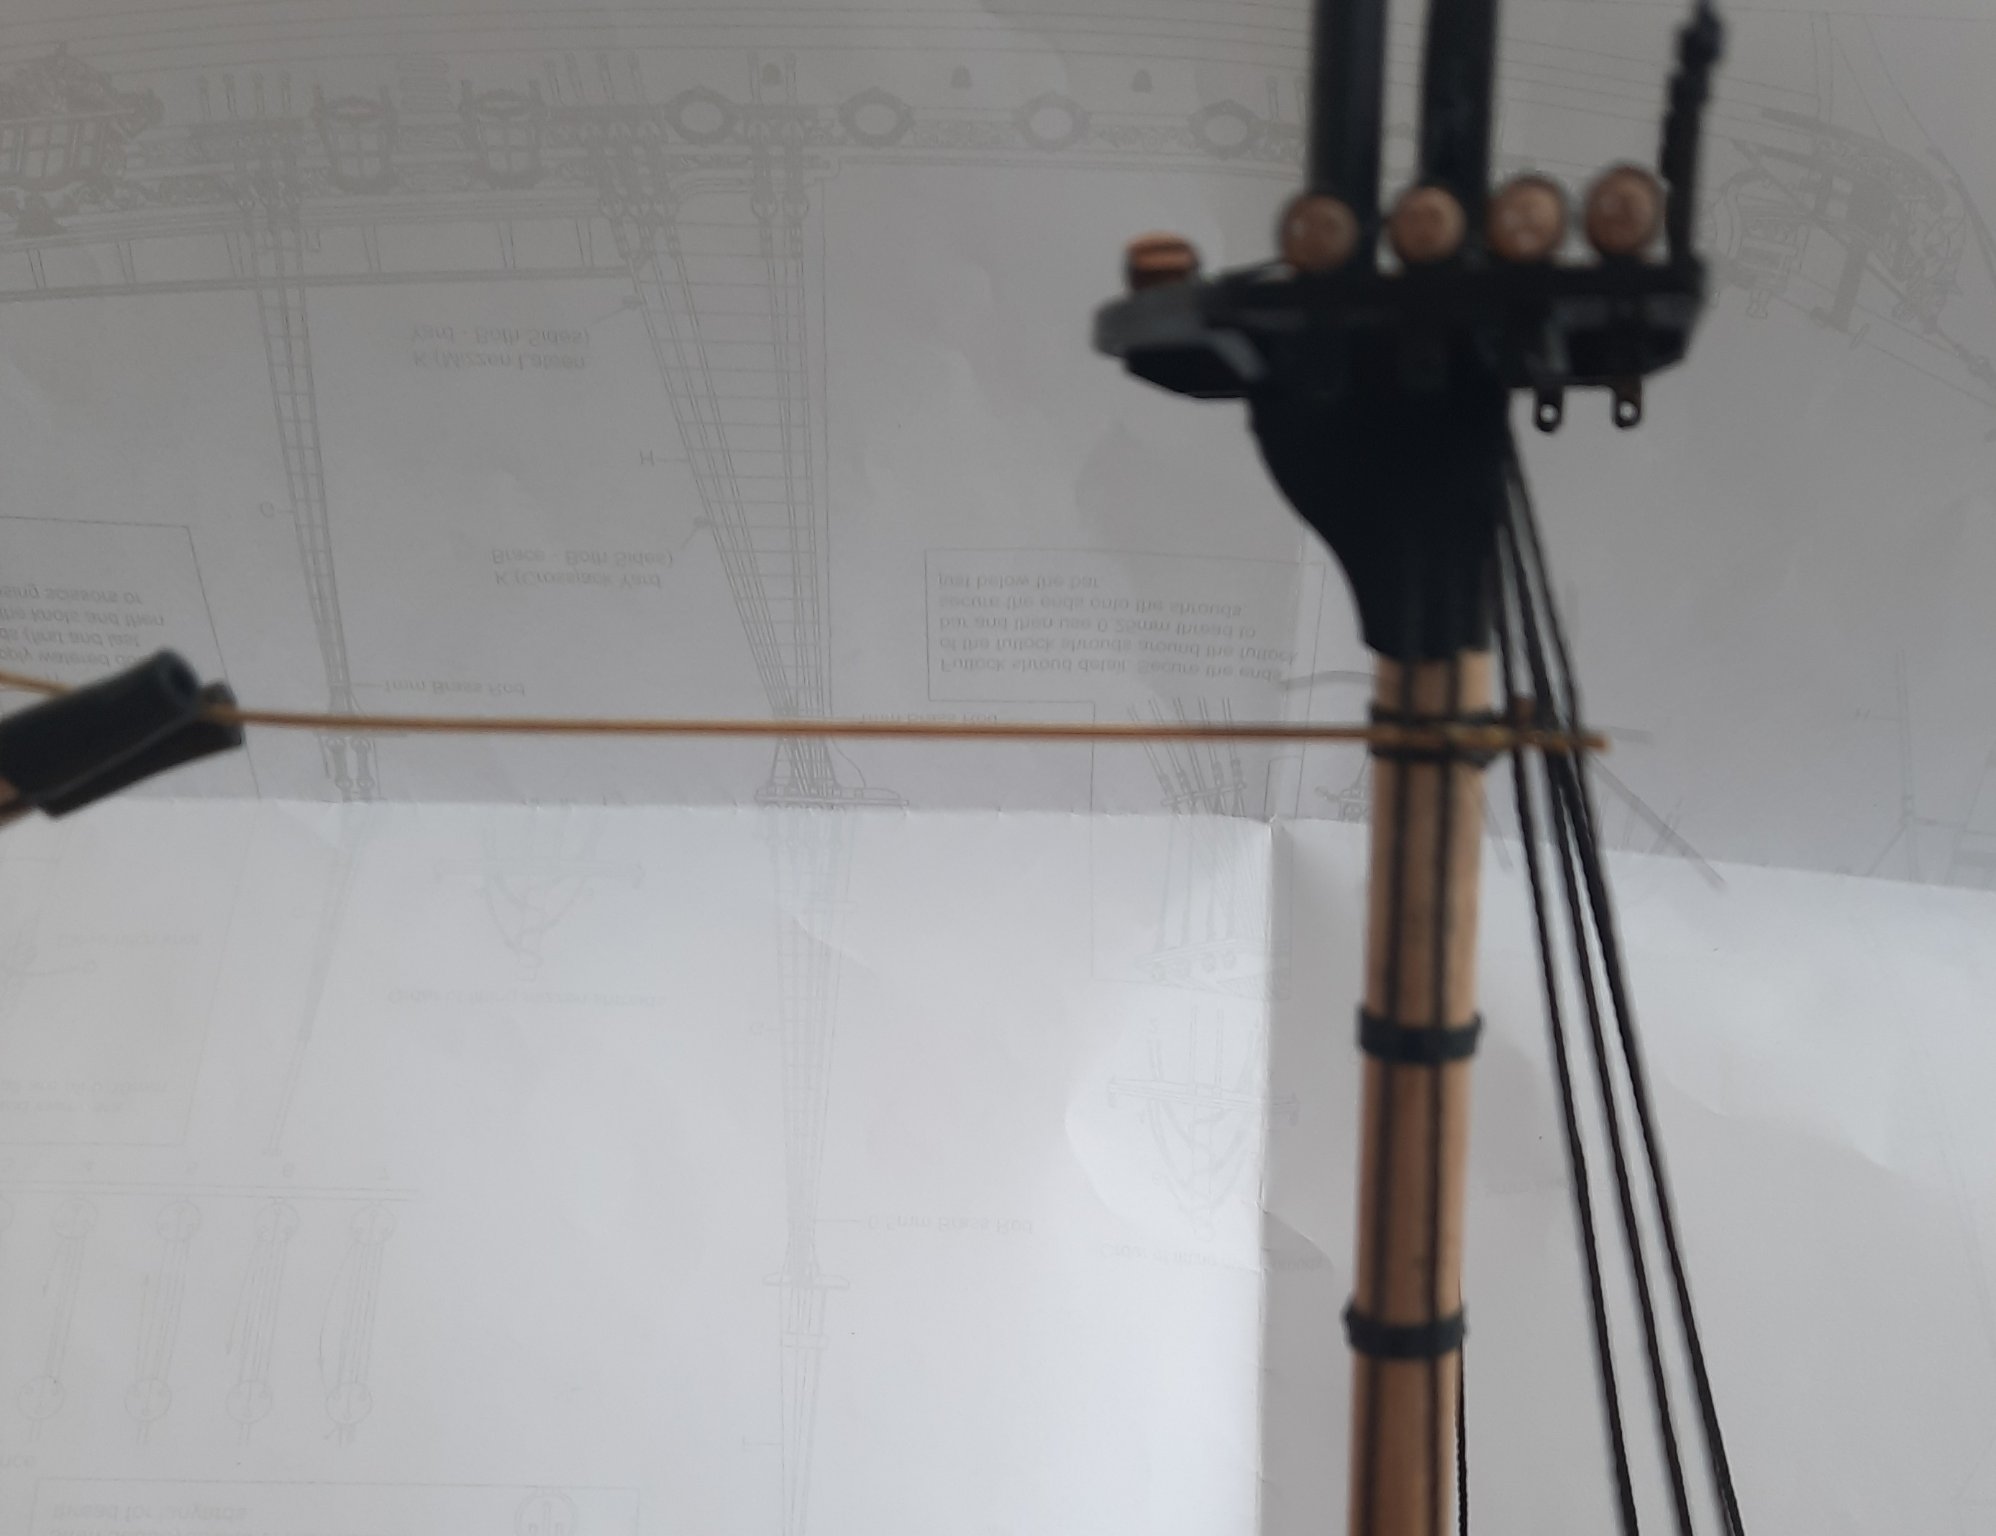
The 1mm black thread I ordered has still not arrived from CMB so I am unable to progress with adding the fore mast shrouds. I therefore decided to add the main stay and the main preventer stay. I had just enough 1mm black thread left for the main stay and I used the kit supplied 1.3mm black thread for the main preventer stay.
I added a little bit of serving to each stay line hold the mouse in place. Once the stays were fitted I coated the lines with a diluted solution of pva which has stiffen them up nicely. I plan to add the main mast crows feet next.
Main Stay and Preventer Stay

Deadeyes. I am really pleased with how they have turned out. Much improved compared with the main mast shrouds. I am starting to get the hang of this rigging malarkey.

- GuntherMT, marktiedens, Edwardkenway and 1 other
-
4
-
I am currently waiting for a delivery of some additional thread from CMB (it has now been dispatched) before I can continue with the Fore Mast shrouds. I had managed to use all the kit supplied thread because I had to redo the main mast shrouds.
Over the last couple of days I have added the mizzen stay and mizzen crows feet. I decided to manually serve a bit of the mizzen stay to hold the mouse in place. I have quite pleased with the end result.
Mizzen Mast Crows Feet with a nice reflected shadow. Very fluffy lines (no beeswax!!!!!) They do not look fluffy to the naked eye however,

Mizzen Mast Stay (again with a shadow).
- GuntherMT, chris watton, rafine and 3 others
-
6
-
-
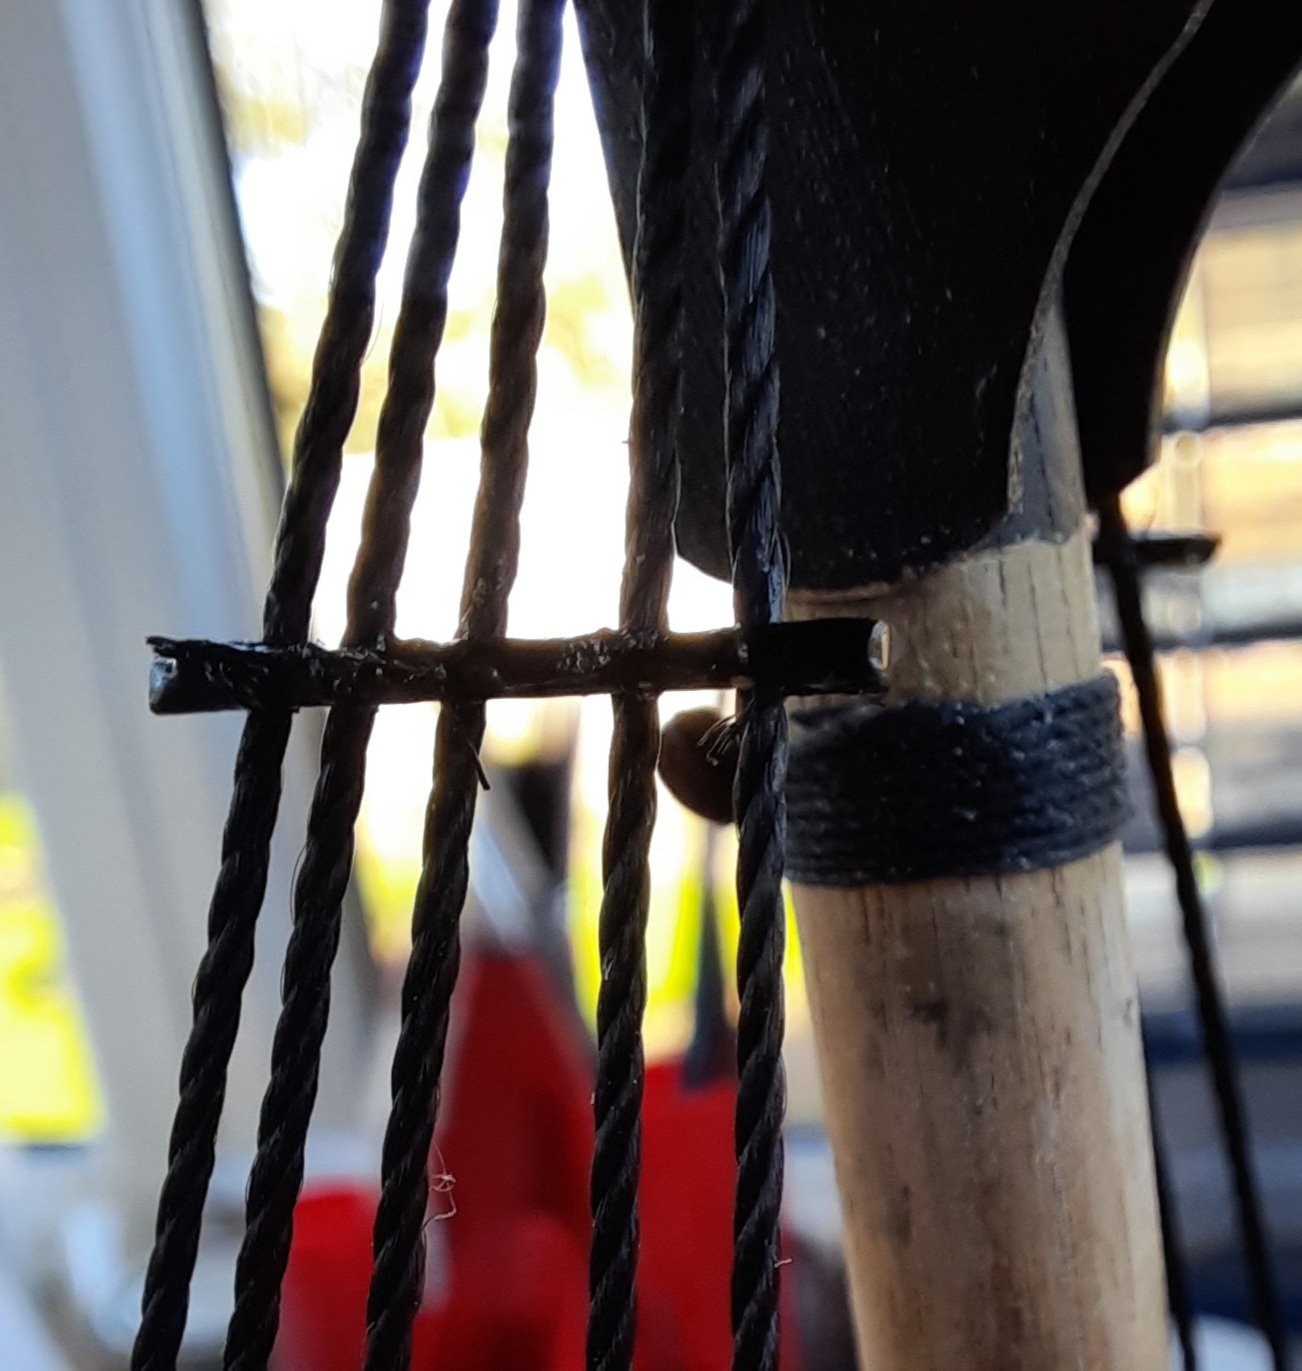
Work progressing slowly at the moment. Adding shrouds, futtock staves, catharpins and futtock shrouds to the main mast has proven to be a very time consuming task. It has also a really test of patience at times but as I progressed with this aspect I found my skill levels were improving.
When adding the futtock stave I found the use of the quads hands to be of great benefit. I used the quad hands to hold the futtock stave in positions as whilst I seized the copper bar to the shroud lines. The attached picture shows a long length of copper held which enabled me to cut the copper bar to the required length.
The following picture show the futtock stave after it has been seized and painted black. As can be seen there was still a little bit more trimming of excess thread required.

The main mast is now ready and waiting for the ratlines to be added.
-
I also use quad hands. Has made many rigging tasks much easier
-
It looks very good, and thanks for the shout out.
-
Great to see you have started on this build, it is going to be once of my next projects after the DOK
- Rustyj, mtaylor and Edwardkenway
-
3
-
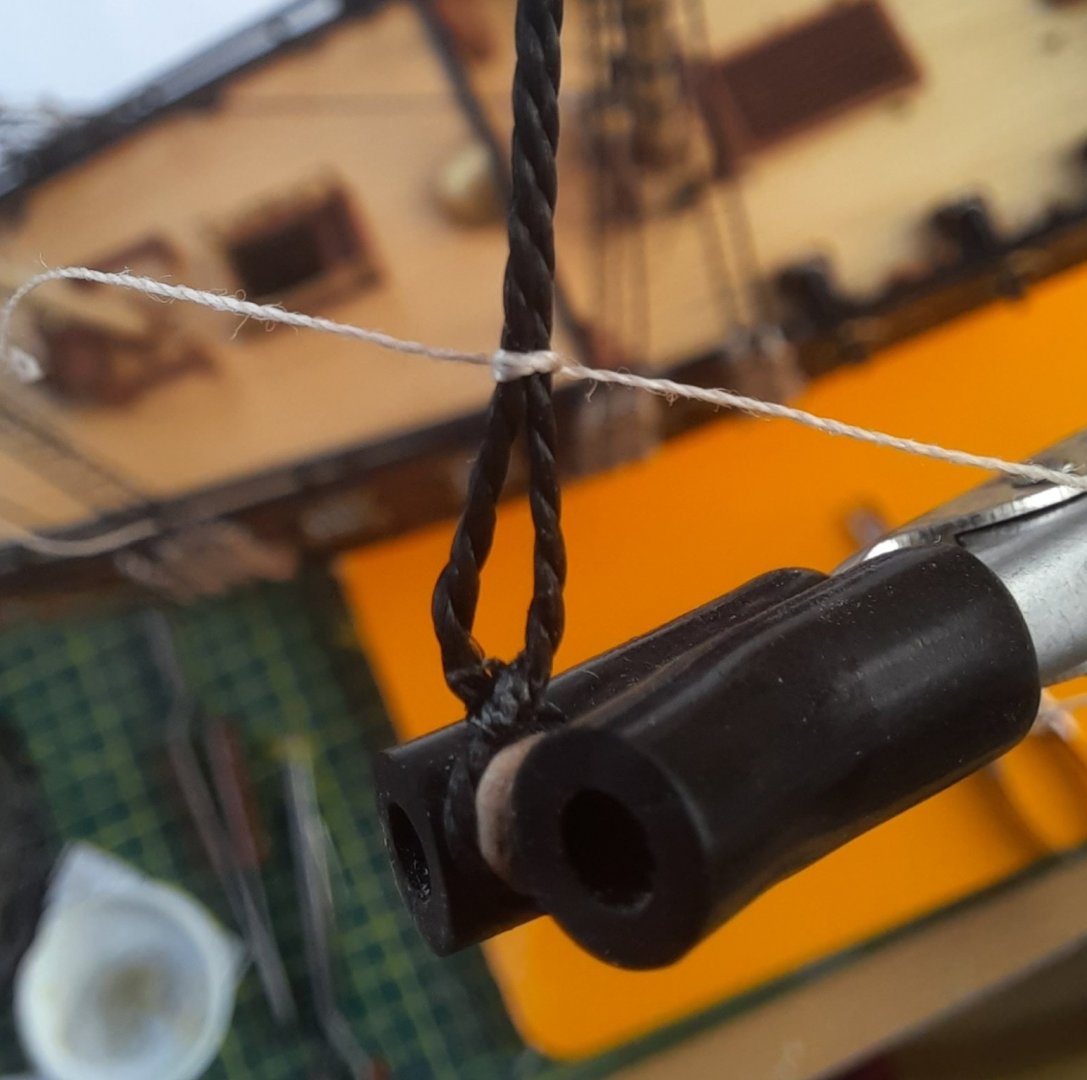
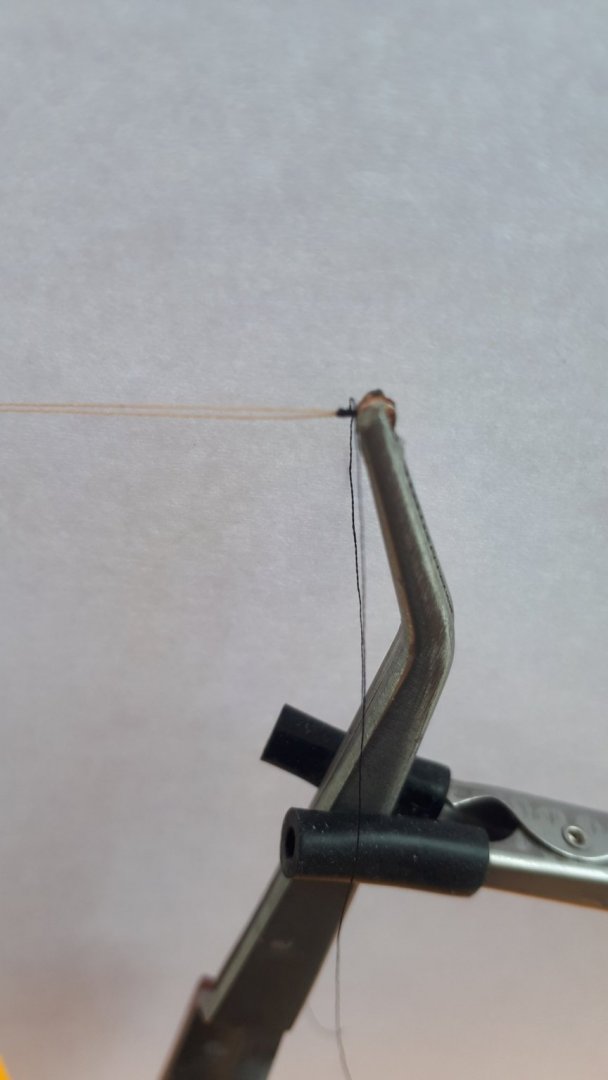
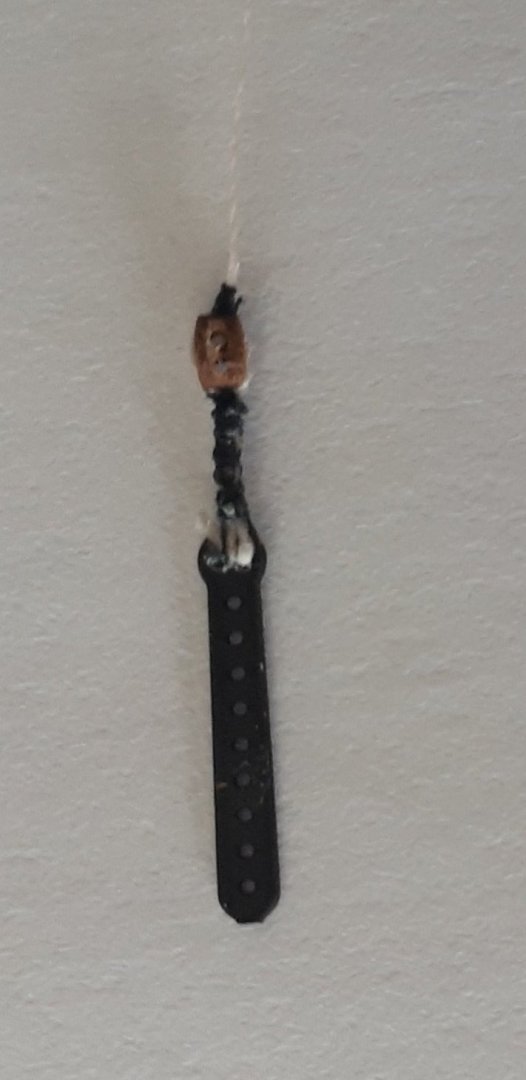
I am happy to report that take two of the main mast shroud and lanyards work is much better.
The jig used is simply a thin strip of wood fitted with two copper wire lengths set for the channel deadeye and a dowel (approx 4.8mm diameter) to represent the shroud deadeye. With the jig in place the shroud line can be wrapped around the dowel. Using some black fly tying thread I seized the shroud to make a loop for the deadeye.
Picture of jig in place and shroud being siezed

Completed shroud with deadeye fitted

With deadeyes fitted to the first starboard shroud pair I added the lanyards, using 0.25mm natural thread. I will continue to add the deadeyes and lanyards to the other shroud lines.
- Ryland Craze, GuntherMT, Rustyj and 6 others
-
9
-
It has been a few days since my last post. I had completed adding all the shrouds and lanyards to the main mast. However I was not totally happy with how the deadeyes were sitting in the shrouds. The jig I had made, similar to the one I used on the mizzen mast, allowed the deadeye to fit, but they very loose. I carried on thinking it would be OK but common sense prevailed so I took the decision to remove the lanyards and shrouds and to start again.
I started by modifying the jig, so the shrouds when wrapped around the jig and seized would form a smaller hole for the deadeye. I did a test after I had modified the jig and it produced a much better result with a nice tight fitting deadeye.
I then cut 4 x 50cm lengths of 1mm black thread for each shroud pair (2 pairs per side) and 2 x 30cm lengths for the single shrouds (1 per side).
The first shroud line was then positioned around the mast. I used the the quad hands to hold the shroud line in place, as shown below.
I also used a croc clip to bring the lines together near the point of seizing
I used 0.25mm black thread to seize the shroud line around the mast.
I will now continue to add all the shroud lines this morning which should not take too long to complete.
My next post will (hopefully) so the progress of adding the deadeyes and lanyards to the shrouds which will take me a few days to complete.
-
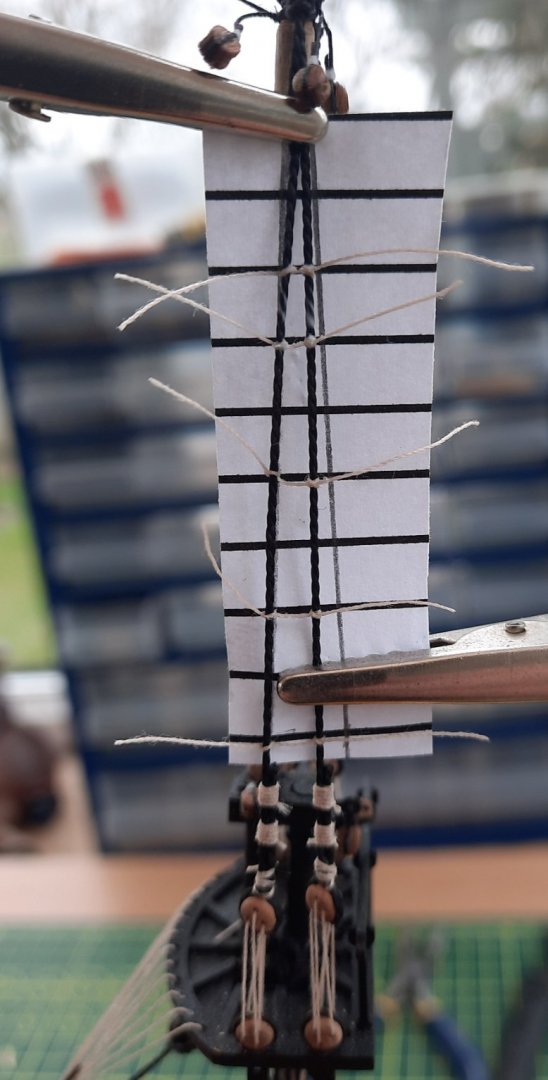
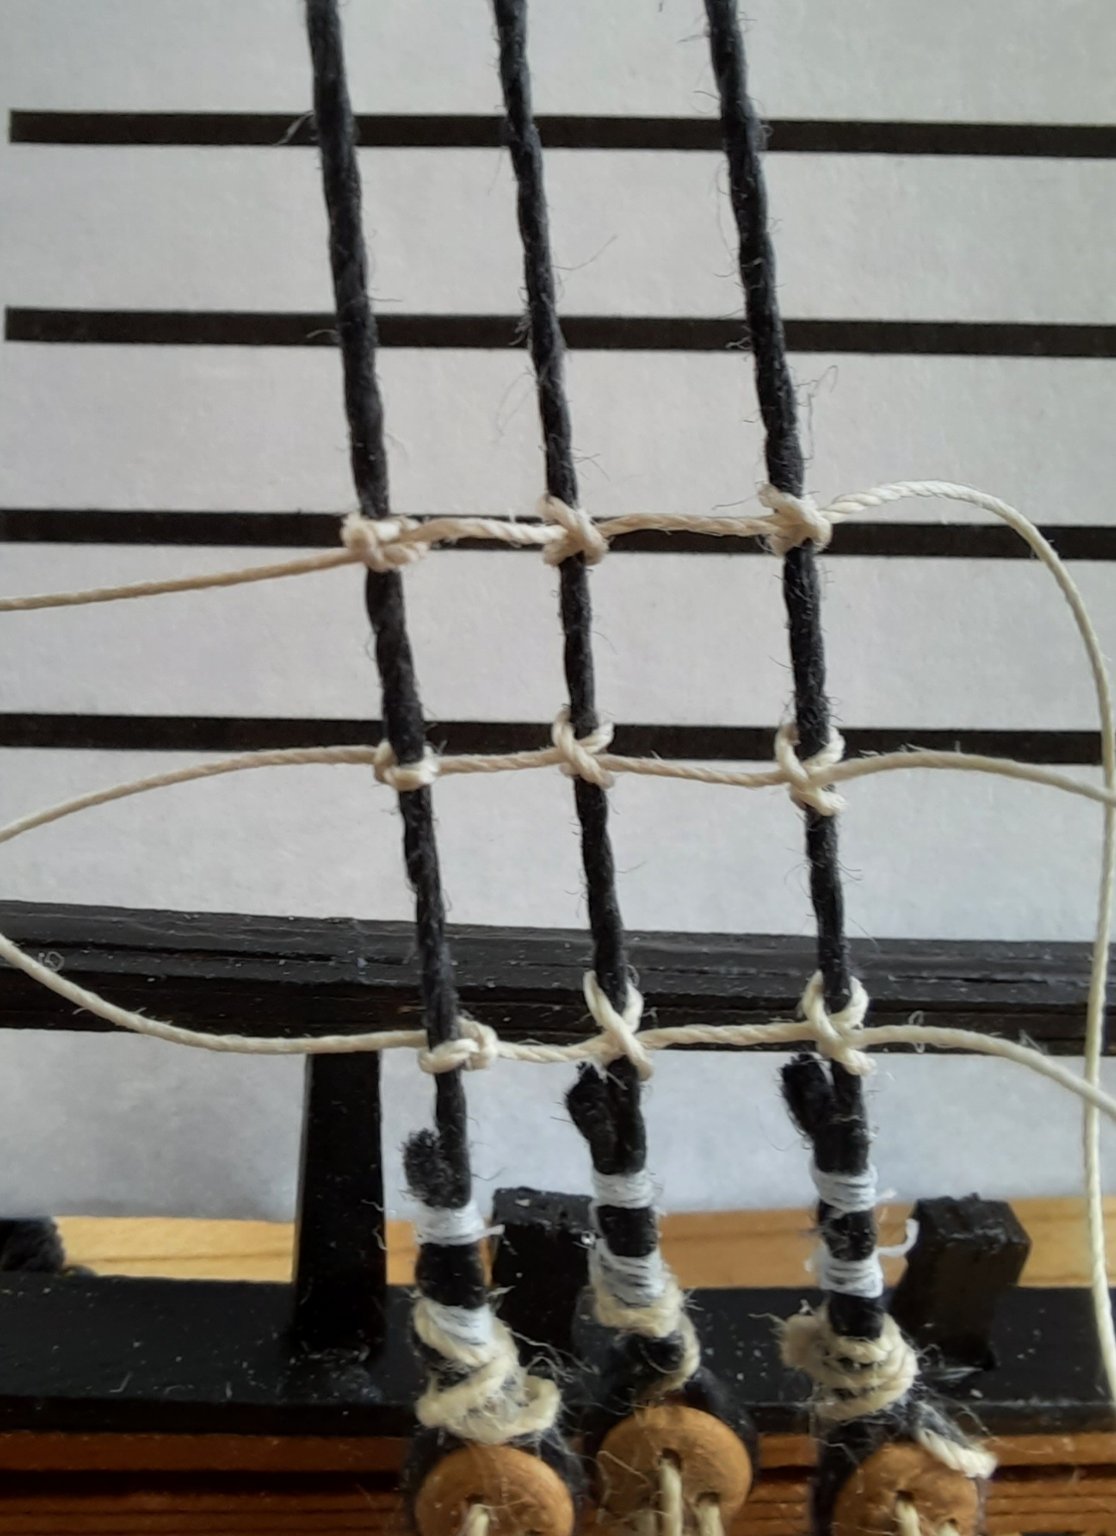
As I progressed with the mizzen mast ratlines I noticed the central shroud line was not properly centred. As I had only done half the ratlines and it was taking me around 10 minutes to add each ratline I decided to remove them and start again.
I modified by ratline template and added the vertical lines, thanks to DelF for this excellent tip.
Picture of the template

This time I decided to add the bottom rat line, then the middle ratline and then the top ratline to ensure the shrouds were true and straight. This worked much better. I started each ratline with a half hitch which I positioned at the back of the shroud and added a touch of diluted pva, (50/50 mix, another DelF tip) when I was happy with its position. I then used clove hitch knots for the next two shroud lines and added a touch of diluted pva when I was happy with each position. Finally I stained the ratlines black.
This is by far the best set of ratlines I have added to a model. Still room for some improvement

- bruce d, ObviousNewbie, GuntherMT and 7 others
-
10
-
Thanks for the update Chris, I'm one very excited model builder waiting to be able to build this great looking model.
- Rustyj, chris watton, mtaylor and 1 other
-
4
-
1 hour ago, Matt D said:
Those are some nice looking clove hitches. Are you able to do this with your fingers or does it take tweezers?
Hi Matt
Thanks for the complement. I am mainly using tweezers which I have became quite adept at using but I do use my fingers as well, usually in combination with the tweezers.
-
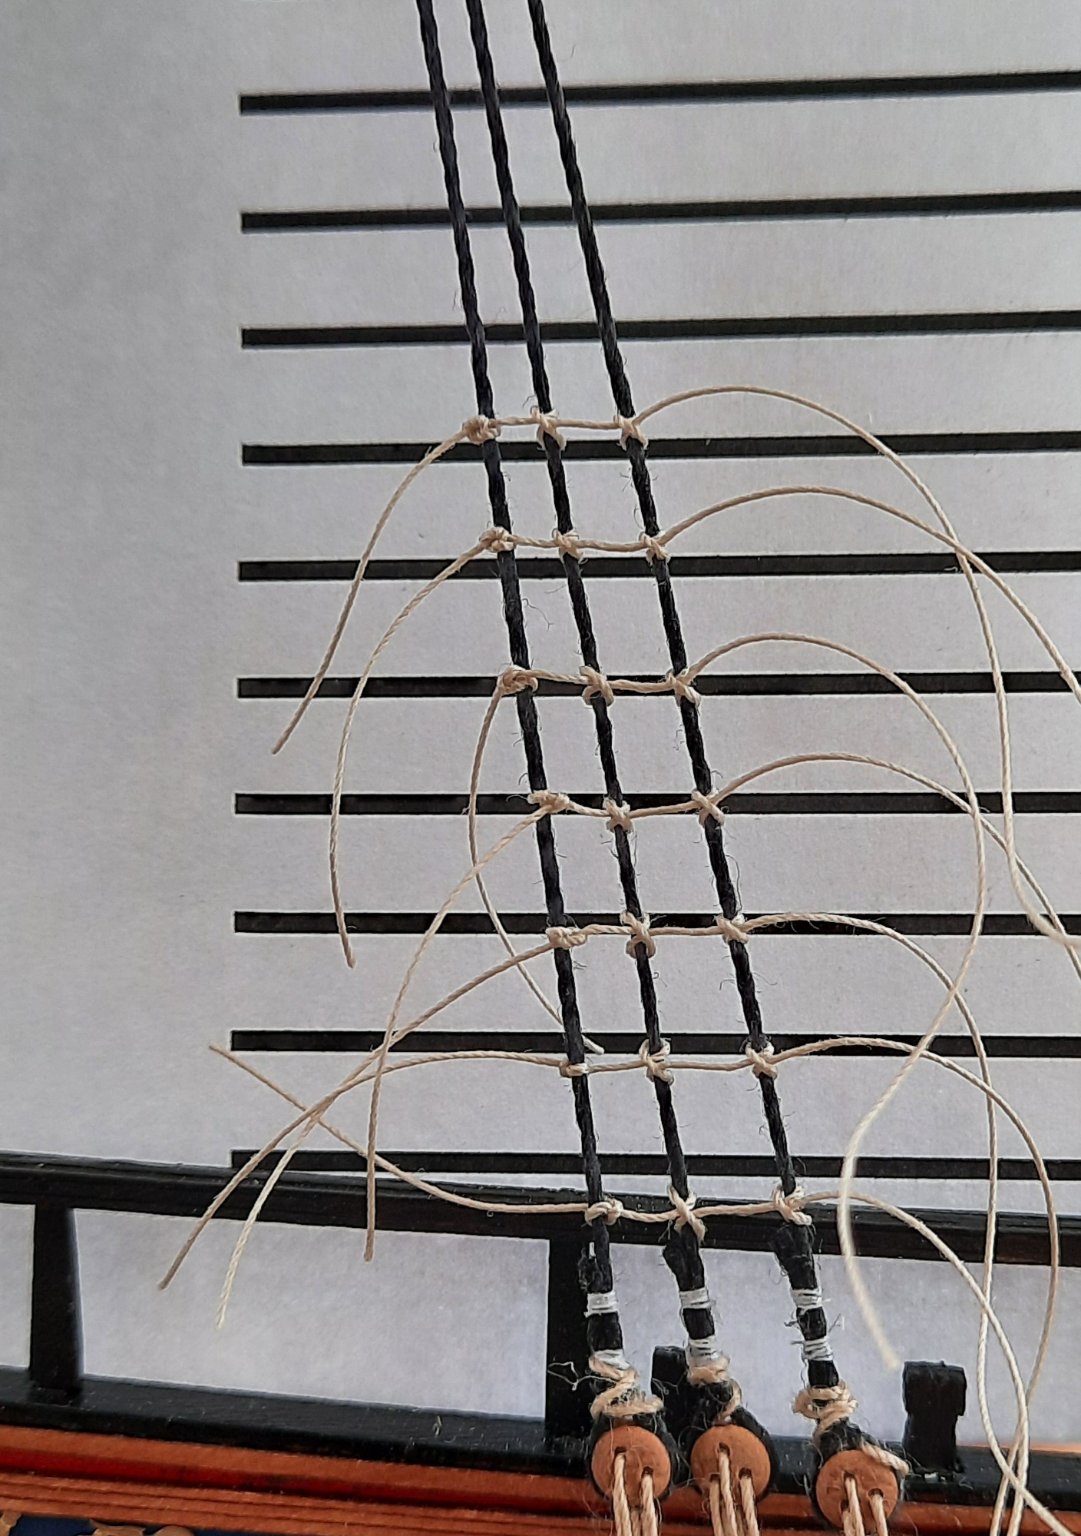
I am finding adding the ratlines to the mizzen mast to be very therapeutic and it is a task I am very much enjoying at the moment.
I started using the black ratline thread supplied with the kit but I found it difficult to see and adjust the clove hitch knots to get the desired tension in the ratlines. Therefore I have opted to use 0.1mm natural thread which has made the task much easier. I have the option to dye the ratlines black when the task is completed, e.g. by using Indian ink.
As can been seen in the photo below I printed out a paper template for the ratline spacing. I also have a small wooden strip of the same width as a double check.

I will adjust the position of the ratlines as necessary and then tighten up all the knots once I have added all the ratline lines. I will then apply a diluted pva solution to shrouds and ratlines before trimming away the excess thread and applying the dye.


Duchess of Kingston 1778 by Rustyj - FINISHED - Vanguard Models - 1:64 - Royal Yacht
in - Kit build logs for subjects built from 1751 - 1800
Posted
Nice work. It will not long before you start adding the rigging.