


Glenn-UK
-
Posts
3,004 -
Joined
-
Last visited
Content Type
Profiles
Forums
Gallery
Events
Posts posted by Glenn-UK
-
-
9 minutes ago, glbarlow said:
A thin line applicator like I’ve shown in my log helps manage the flow and amount of CA used and keeps it off your fingers. Plus it takes very little CA to hold the plank. I run the applicator behind the plank as I press down and wind up with very little on my fingers or on on the plank. I’d be careful with acetone on the wood, you might first try gentle scraping first (one of the many uses for my dental scrapers). The Chuck method of edge bending is a big help since the plank is already formed to fit.
As you said though, ultimately it comes with practice. Congratulations on finishing the planking,
I hope you don’t mind a little more input but I suspect you’ll have paint runs with your taping as it is. Tamiya tape will stretch and conform to curves. I use a 6mm size to run as a single strip as much as I can, overlaying only where there is a straight line. Then a put 10mm tape above that less concerned with the line just to prevent paint going where I don’t want it, the 6mm tape curves more easily. Every overlay, especially short pieces, is an opportunity for a paint leak, paint build up, or a less than smooth line. Just a thought having recently painted Flirt’s hull.
The taping is only for the sanding and filling phase. I will be marking the waterline again and taping later on in the build when it is time to paint the hull. The stem and stern posts will be painted white below the waterline, the tape is only added at this stage to protect the laser etching when sanding.
-
32 minutes ago, Jasseji said:
hm, luckily the Admiral has enought Nail Polish remover (and it worked for me), i am actually more concerned if i can safely remove the stains from the model (or actually paint over them as they appear mostly below the waterline on the Stem)
Cotton buds and acetone should do the trick, that's is going to be my plan where needed.
-
1 hour ago, mnewsholme said:
Looking good. You're making quick progress.
Have you seen the NRG half hull planking project. looks like exactly what your looking for to practise fairing and planking. Its in the NRG online shop at top of page although shipping to us in UK may make it expensive.
It sure does, I may look at that after I have built the Sphinx
-
-
HULL ASSEMBLY
2ND PLANKING RIGHT-HAND SIDE COMPLETED
BUILD MANUAL STEP 182 - 186
Tools Used
Craft knife
120 & 400-grit sandpaper
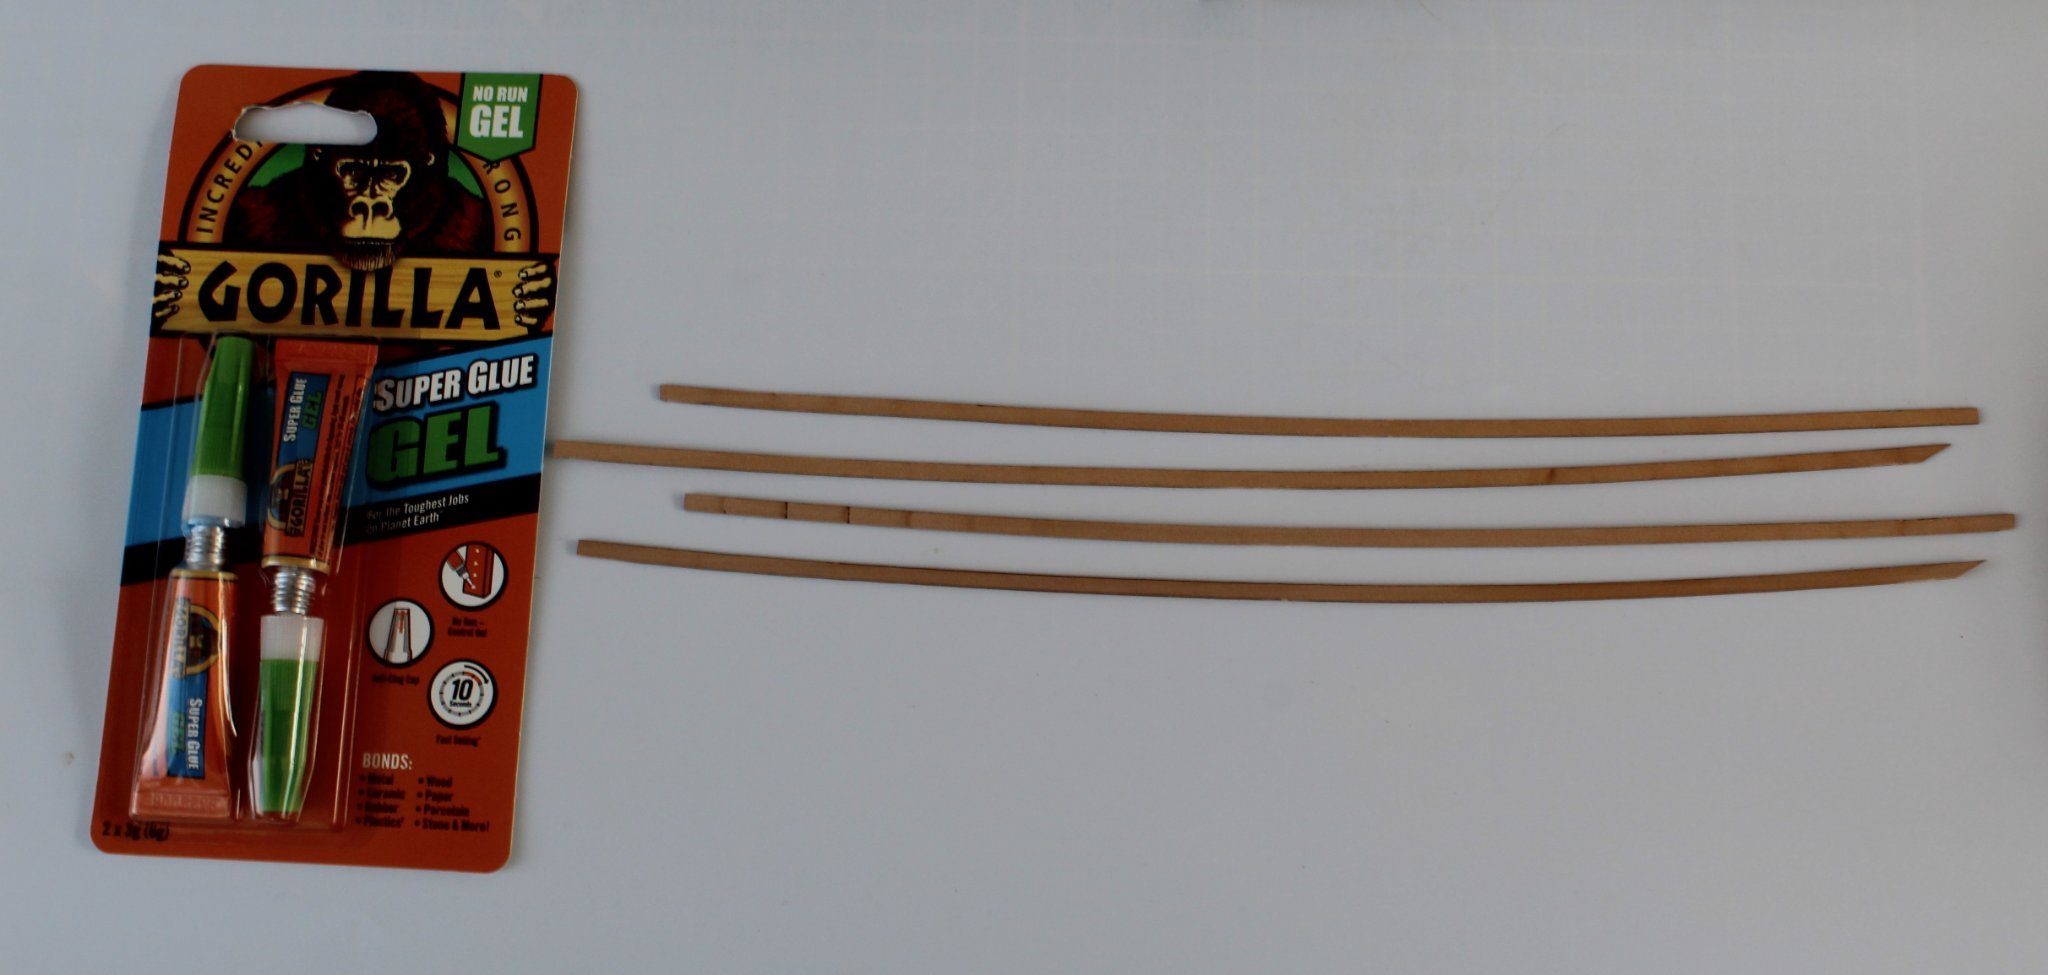
Gorilli super glue gel
Waterline marker
Tape
Gathering the materials required
The following kit parts are required for this section of the build:
Planking strips
Assembly Process
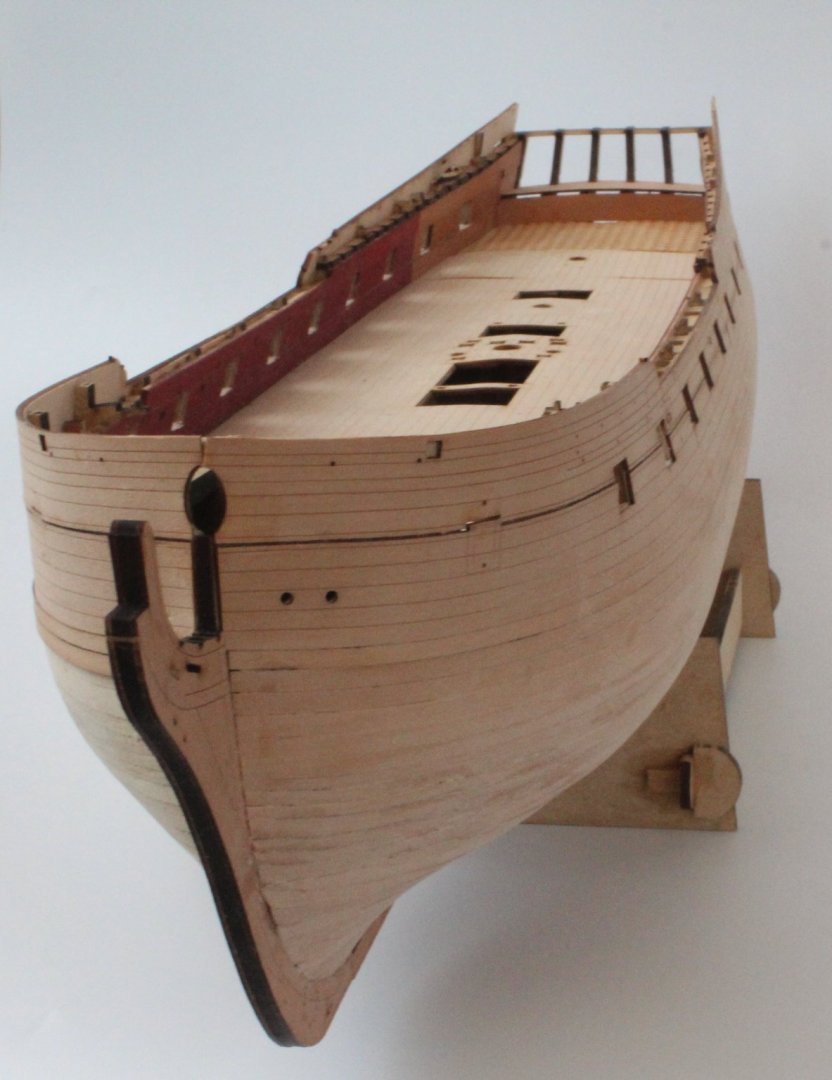
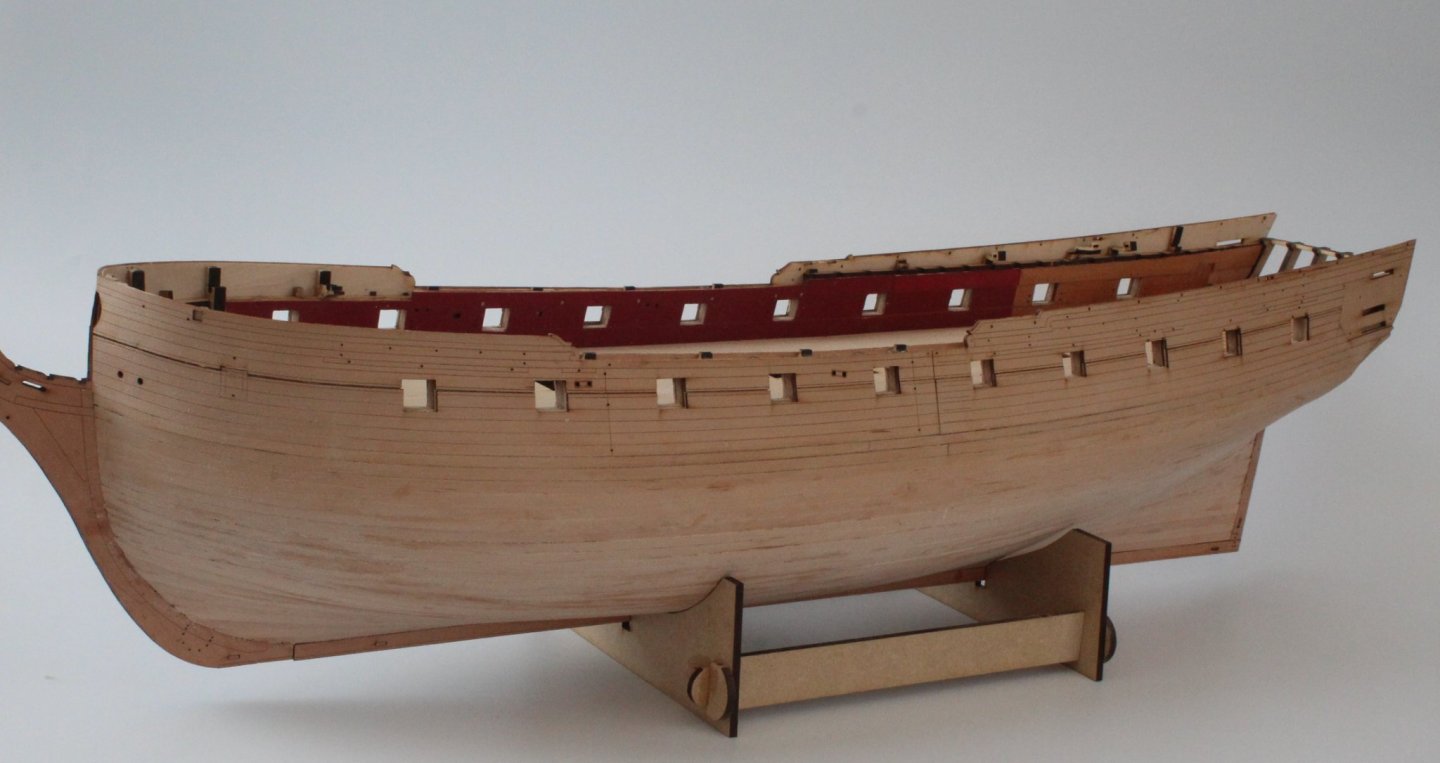
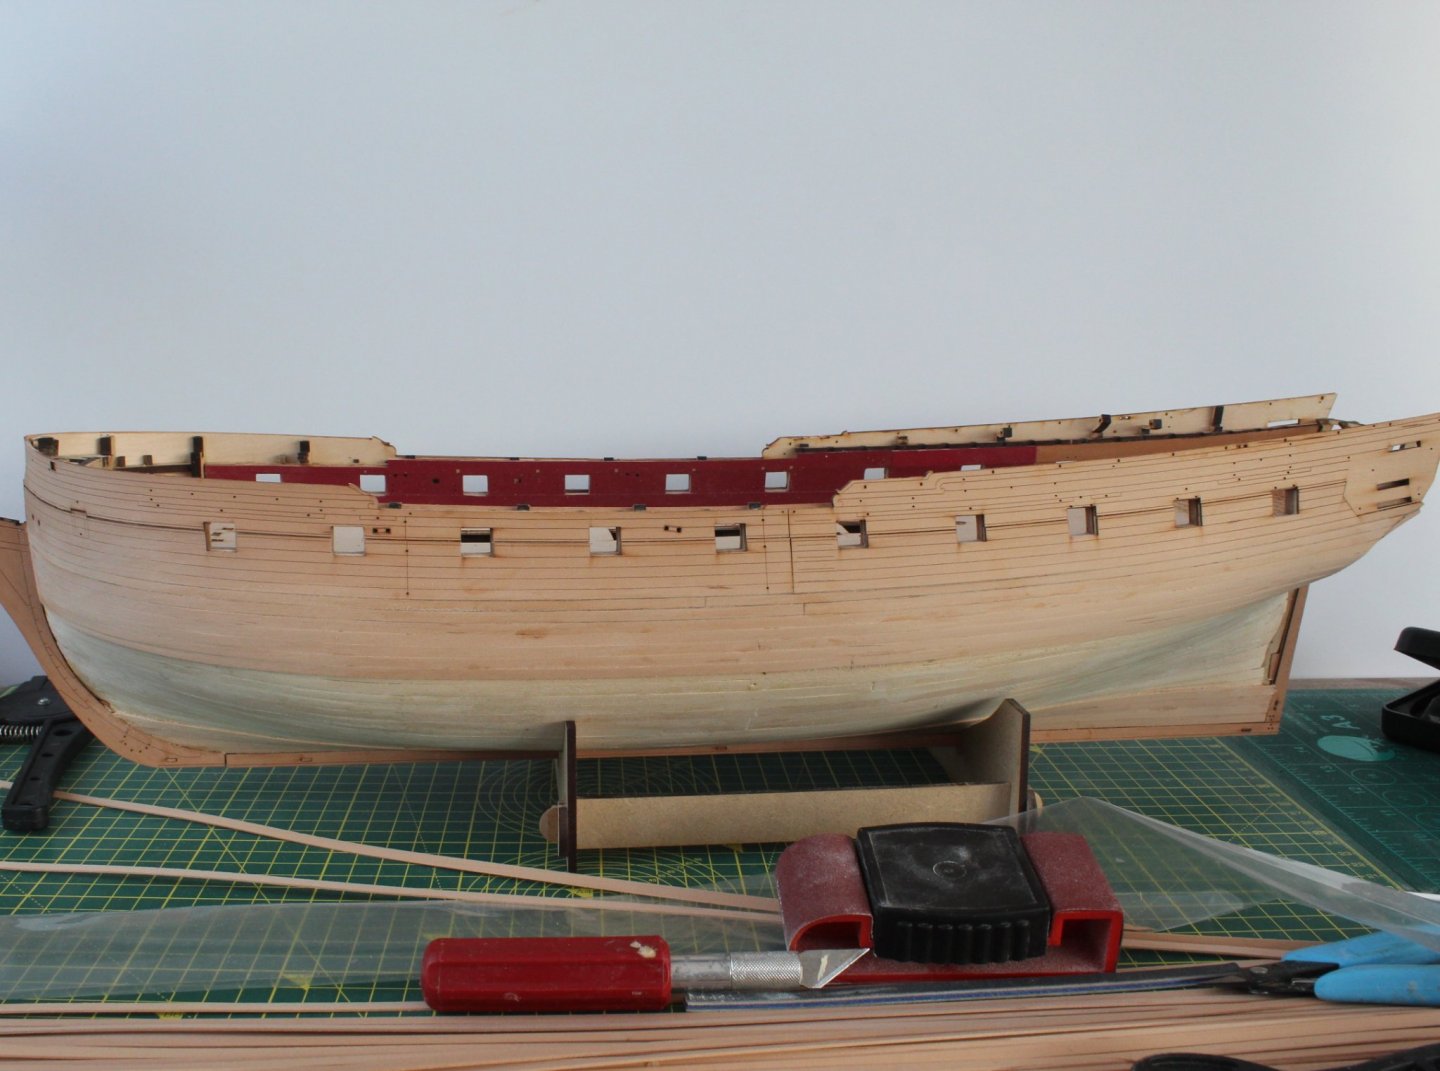
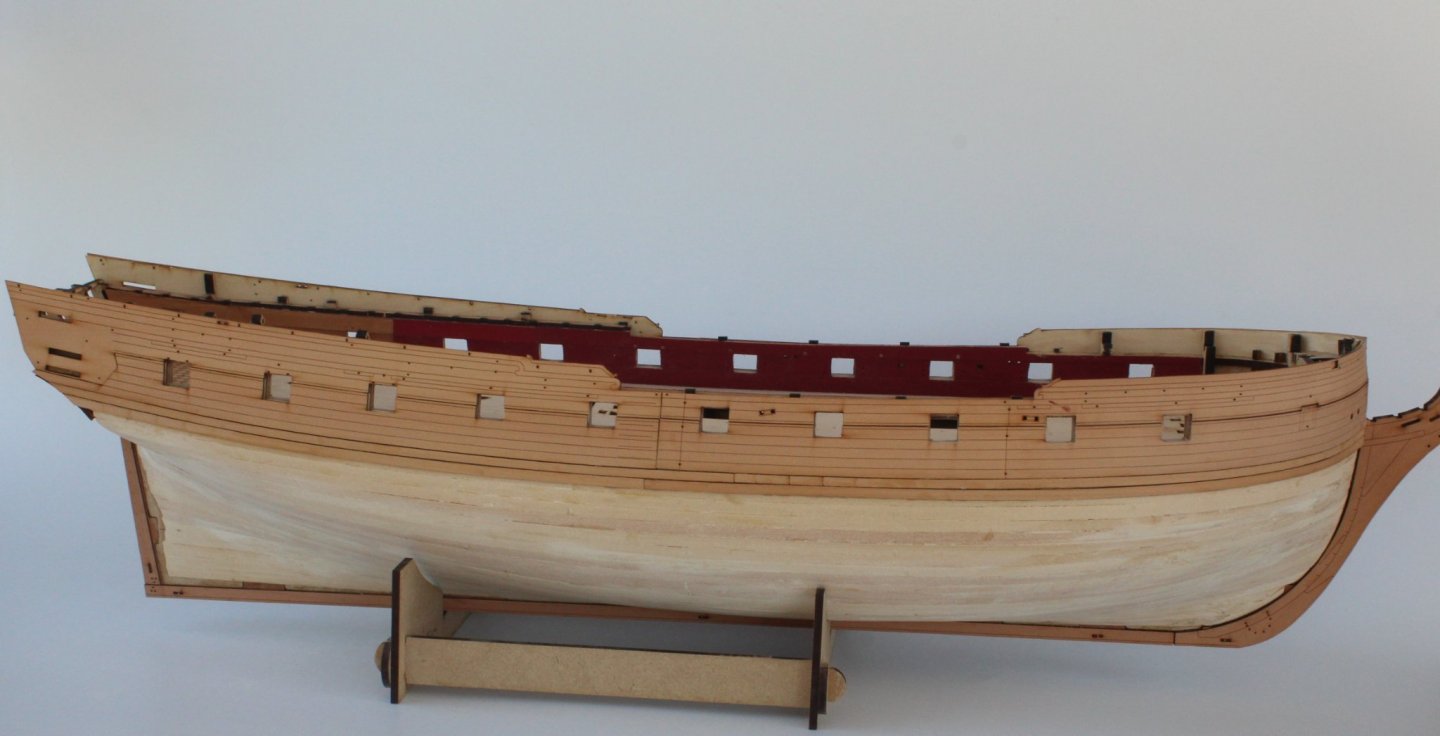
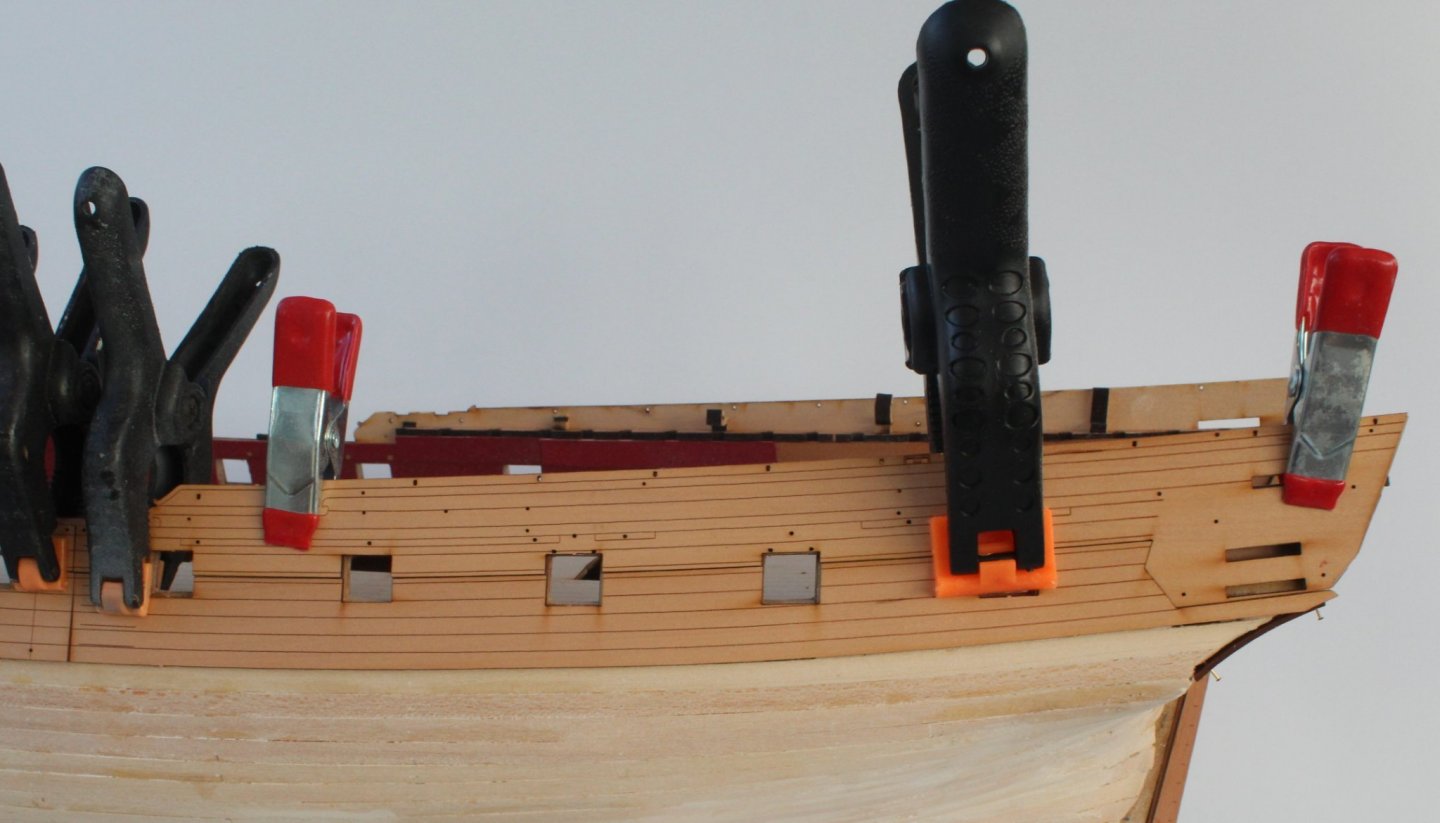
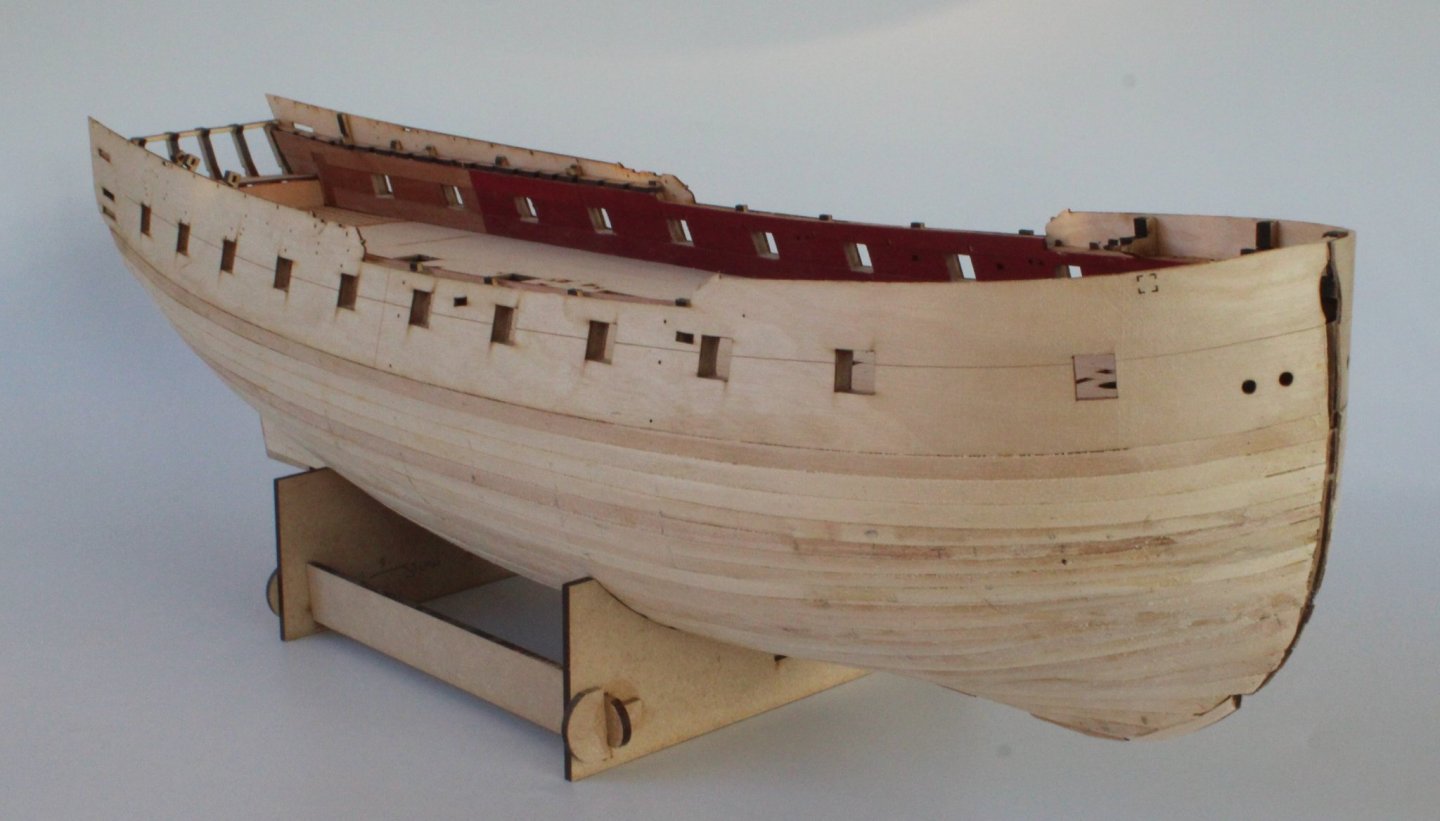
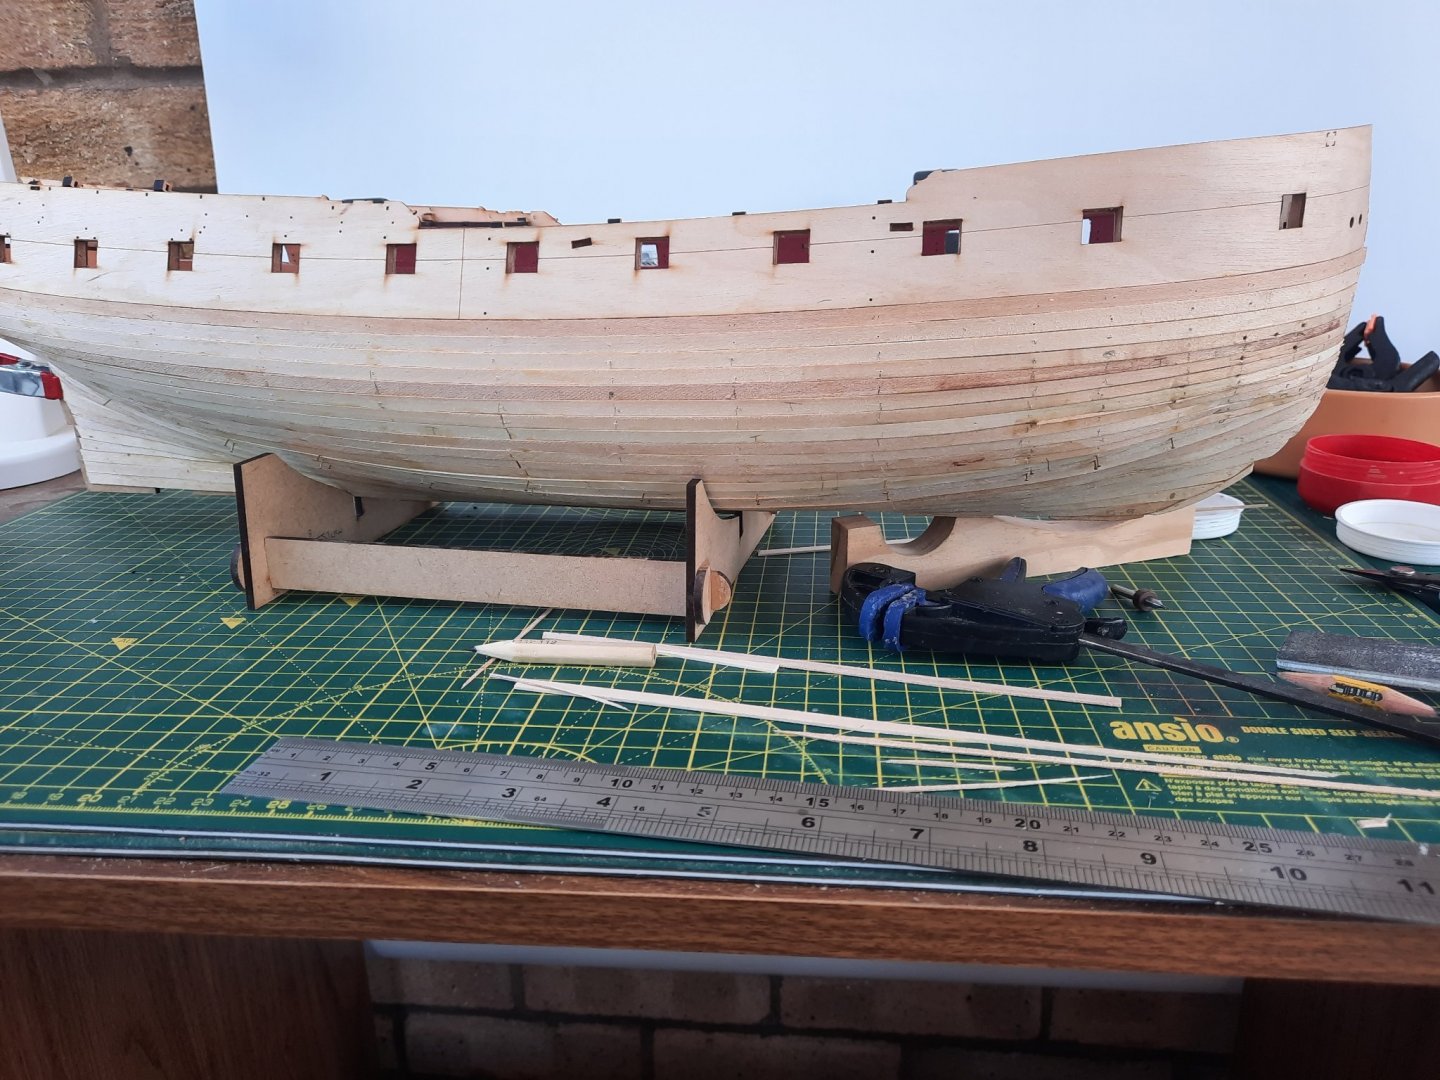
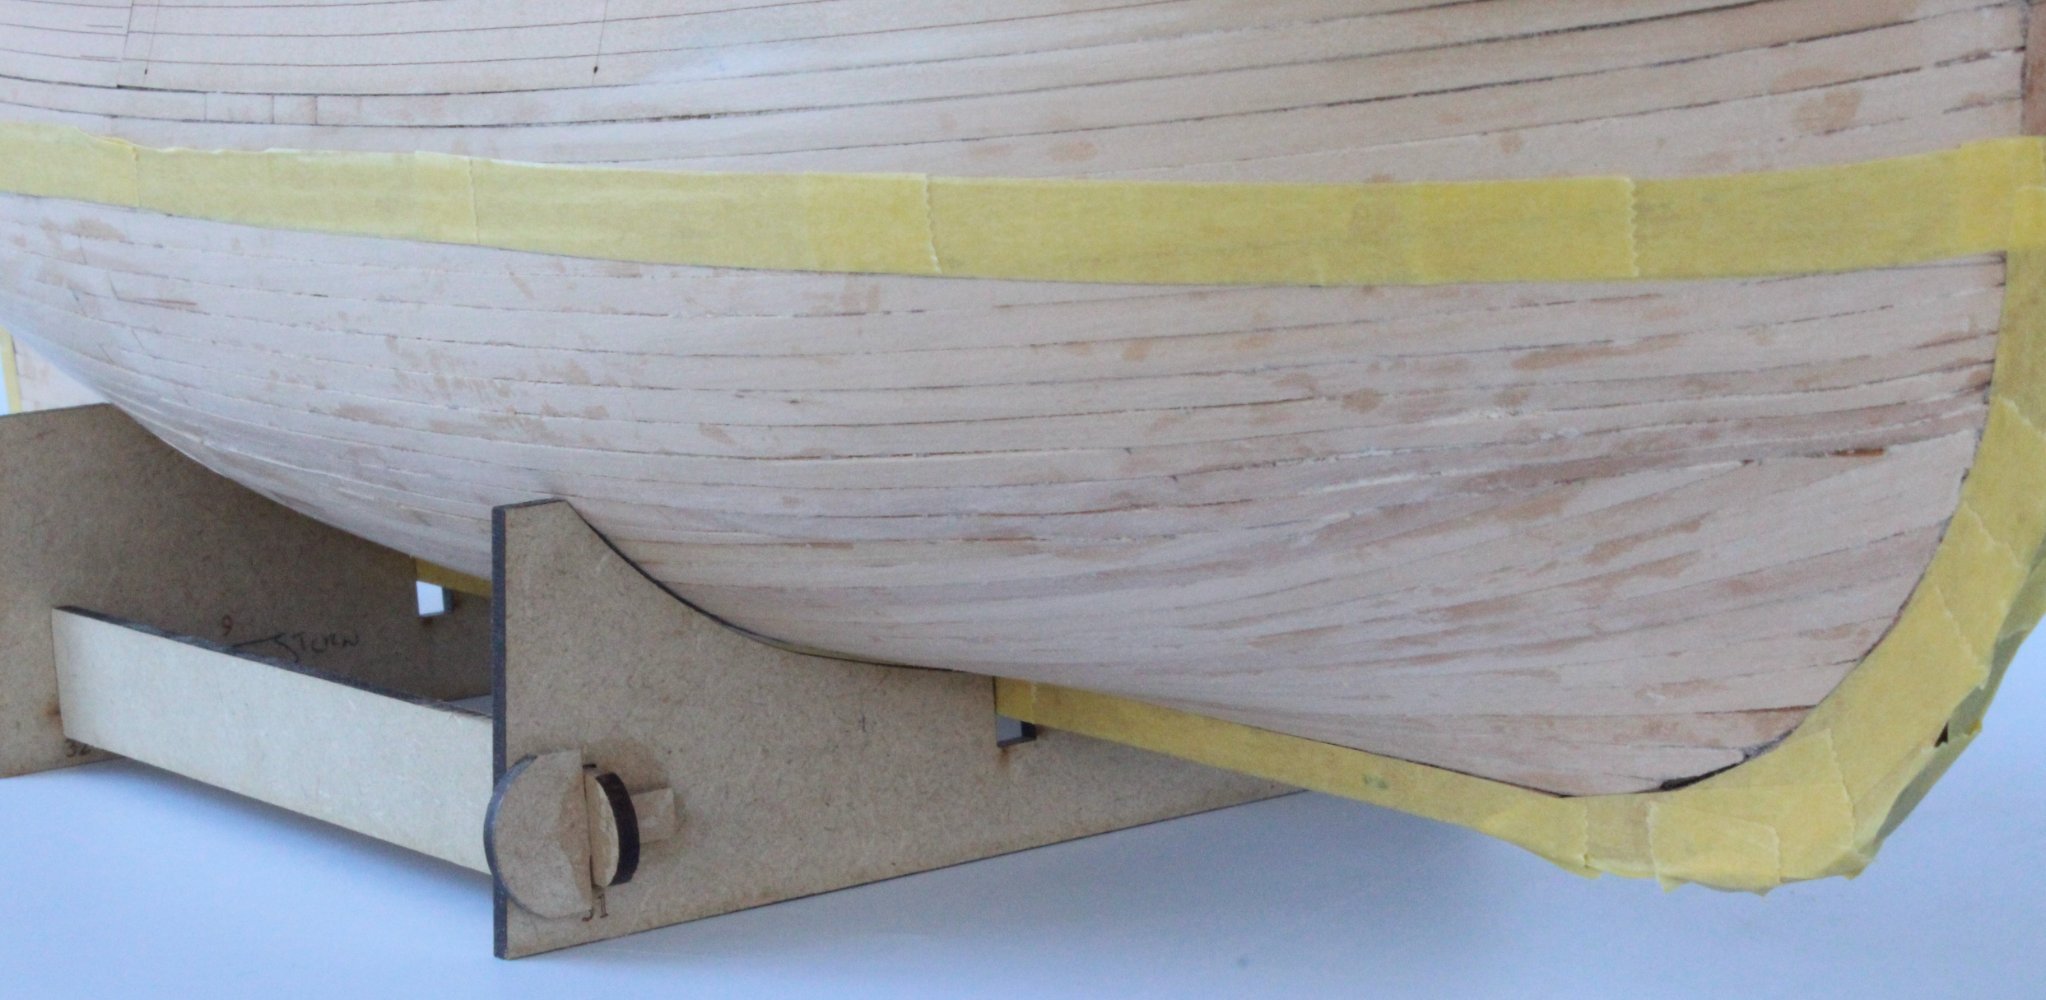
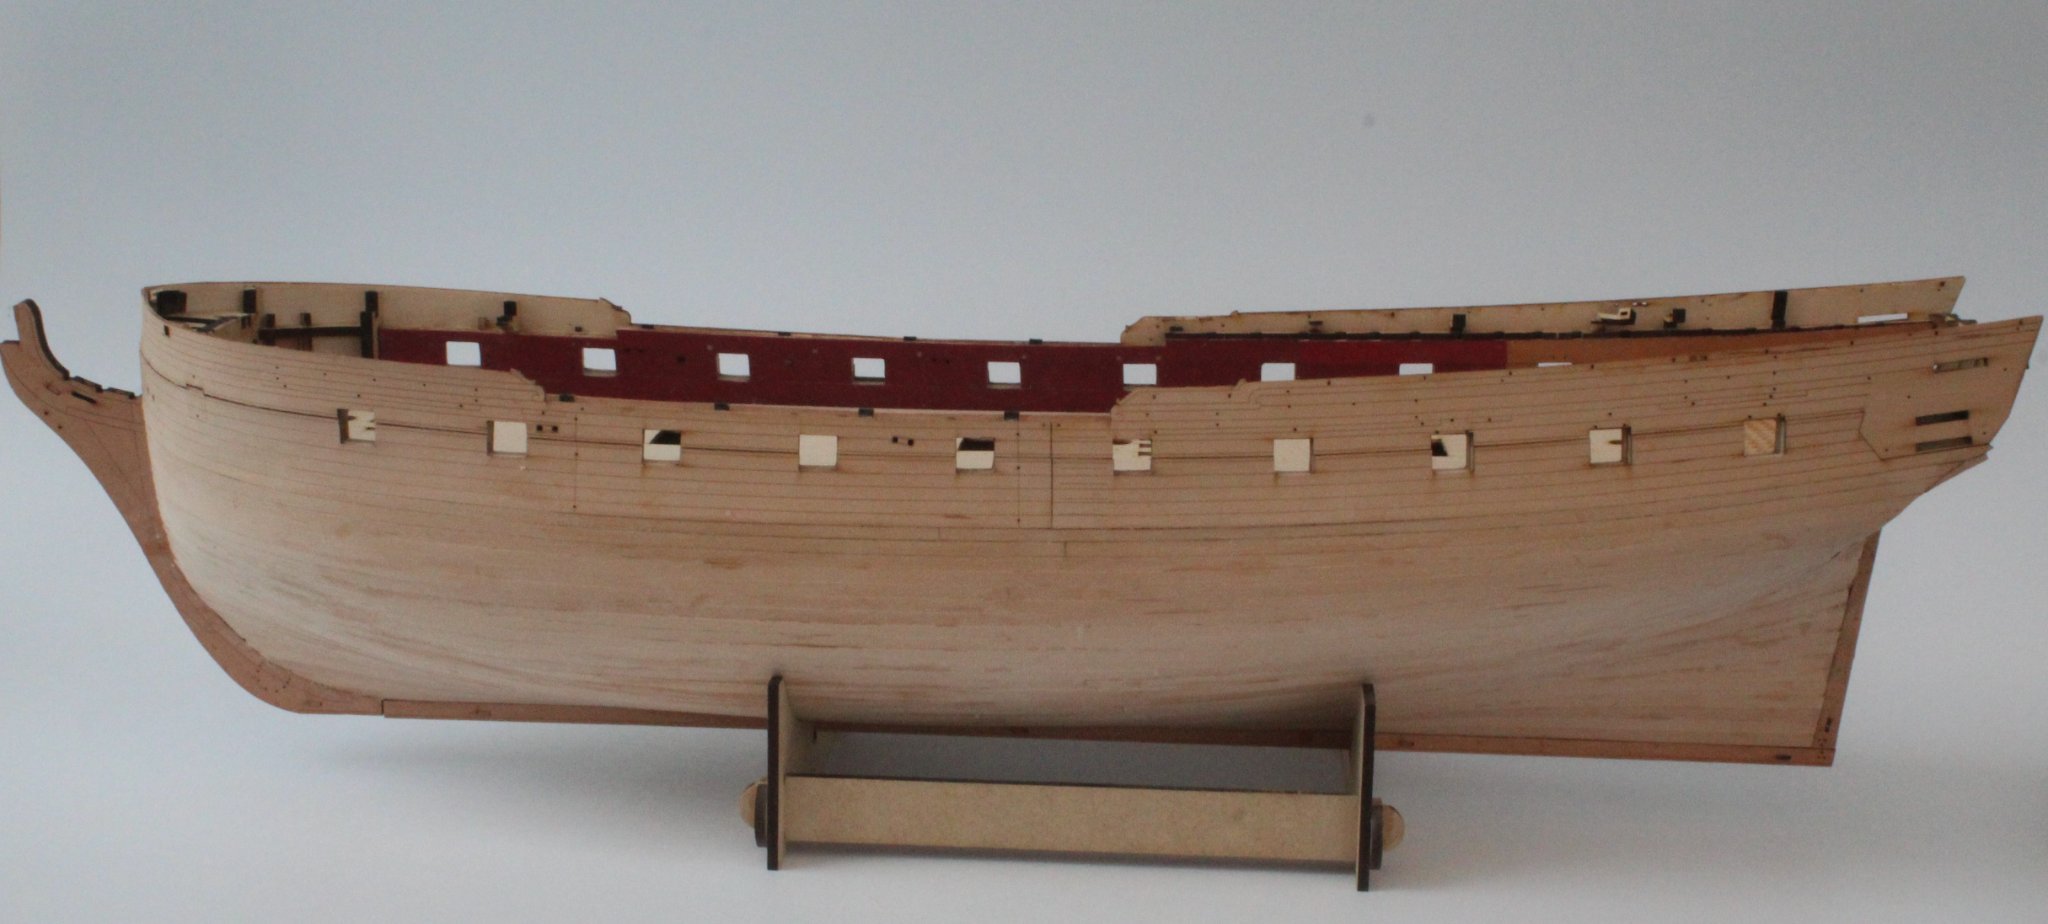
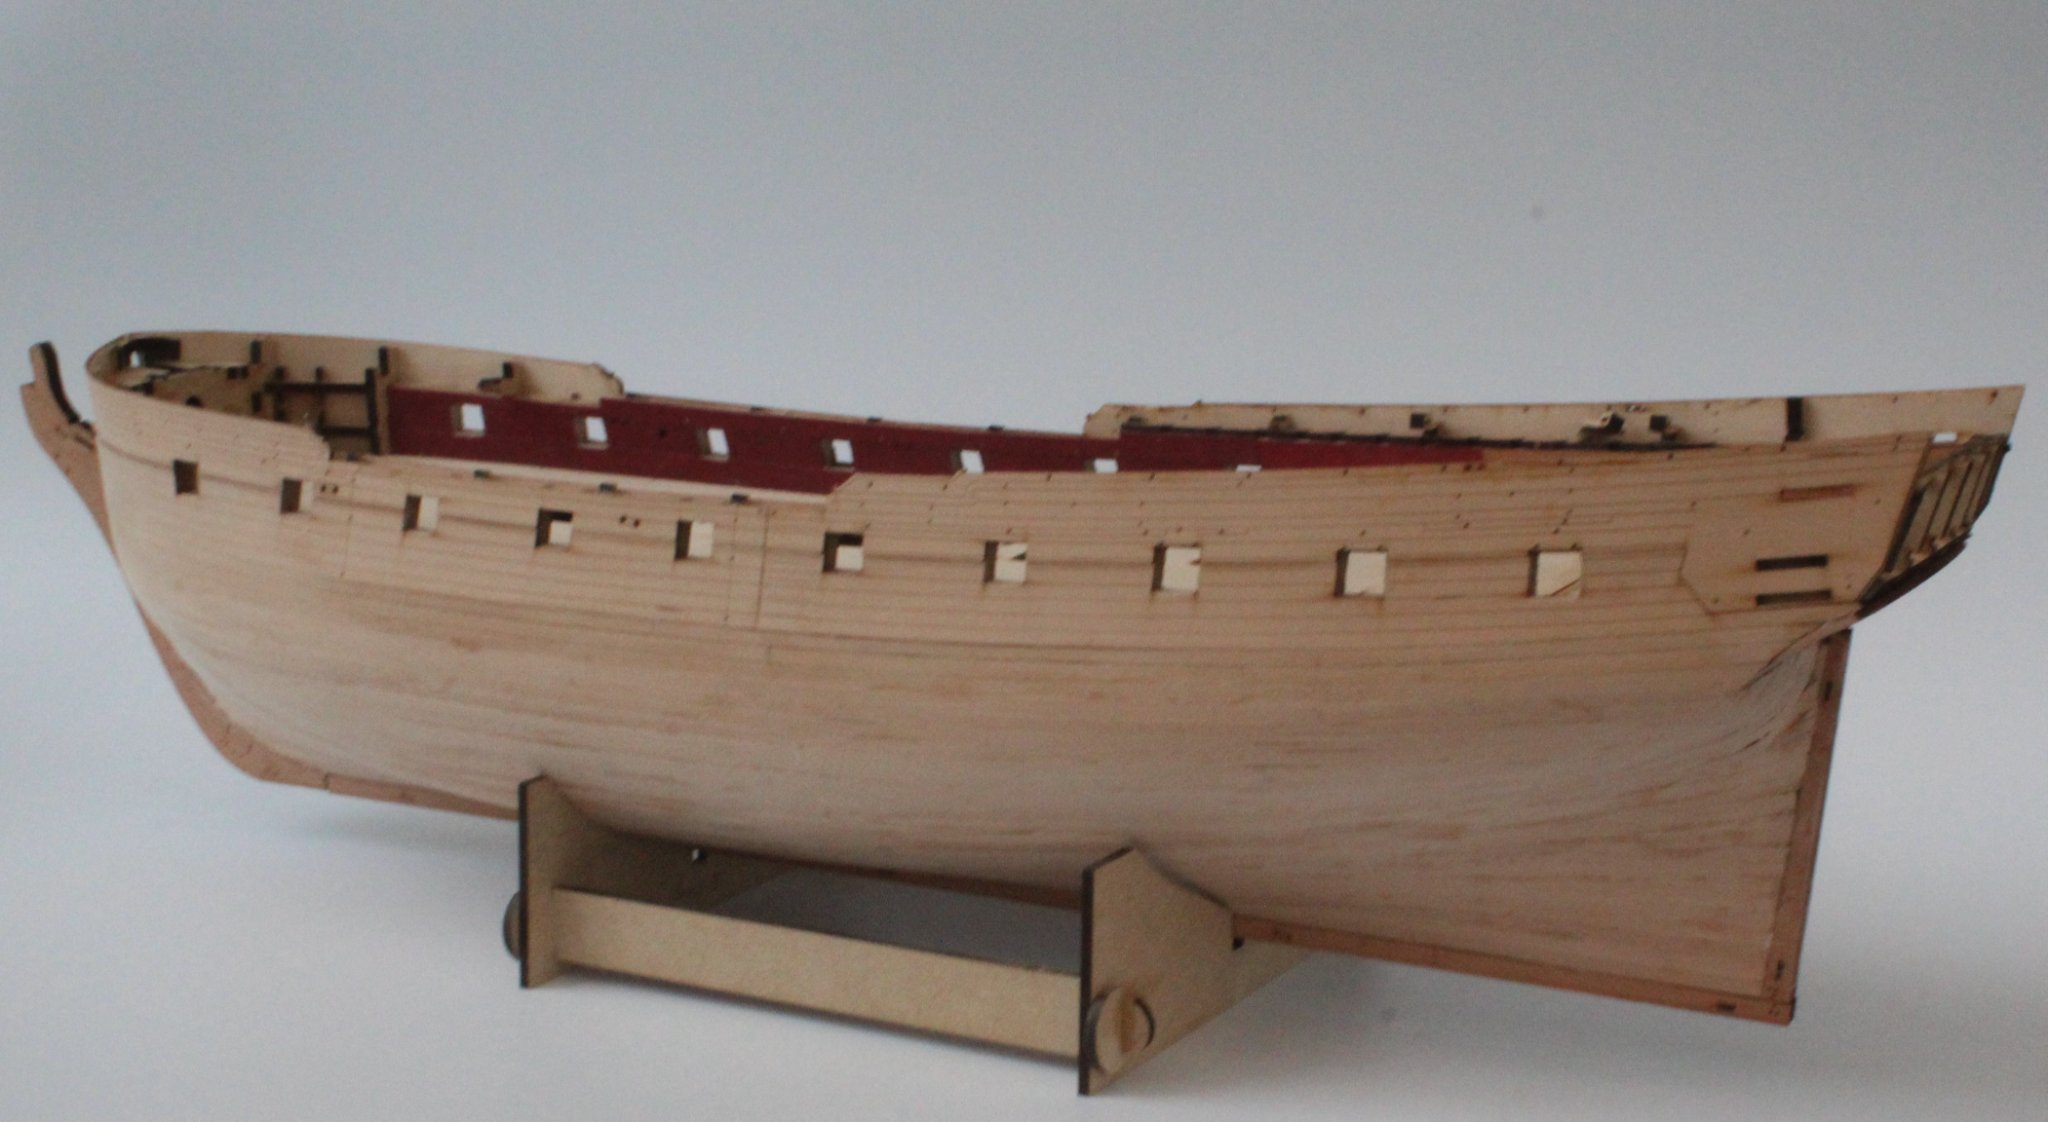
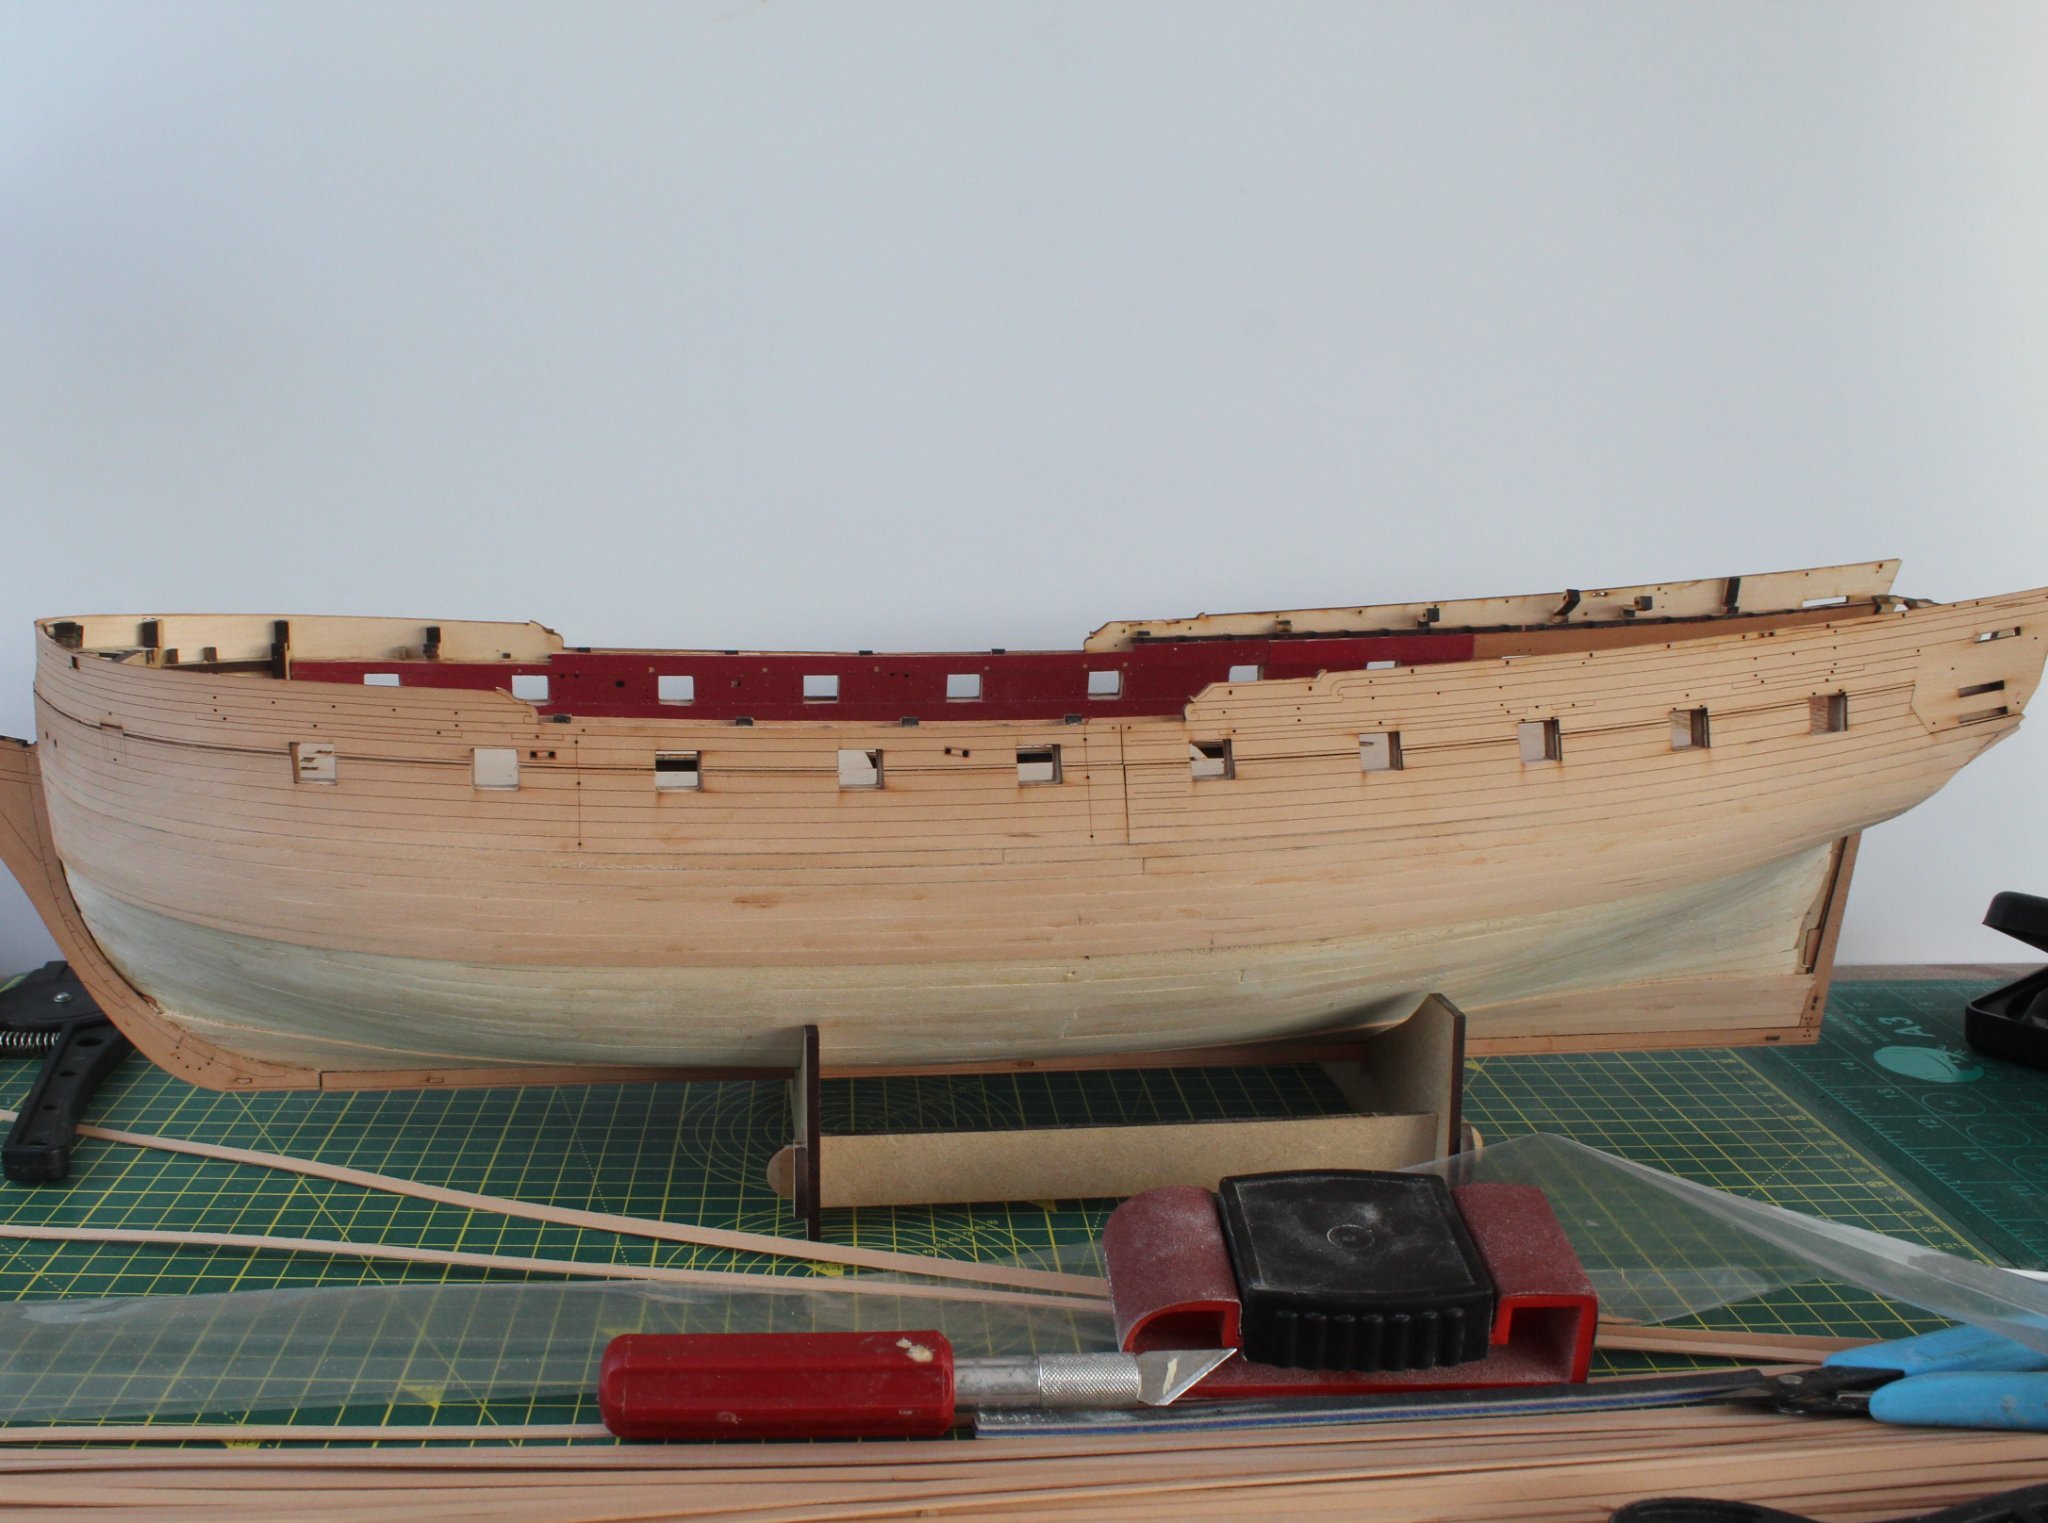
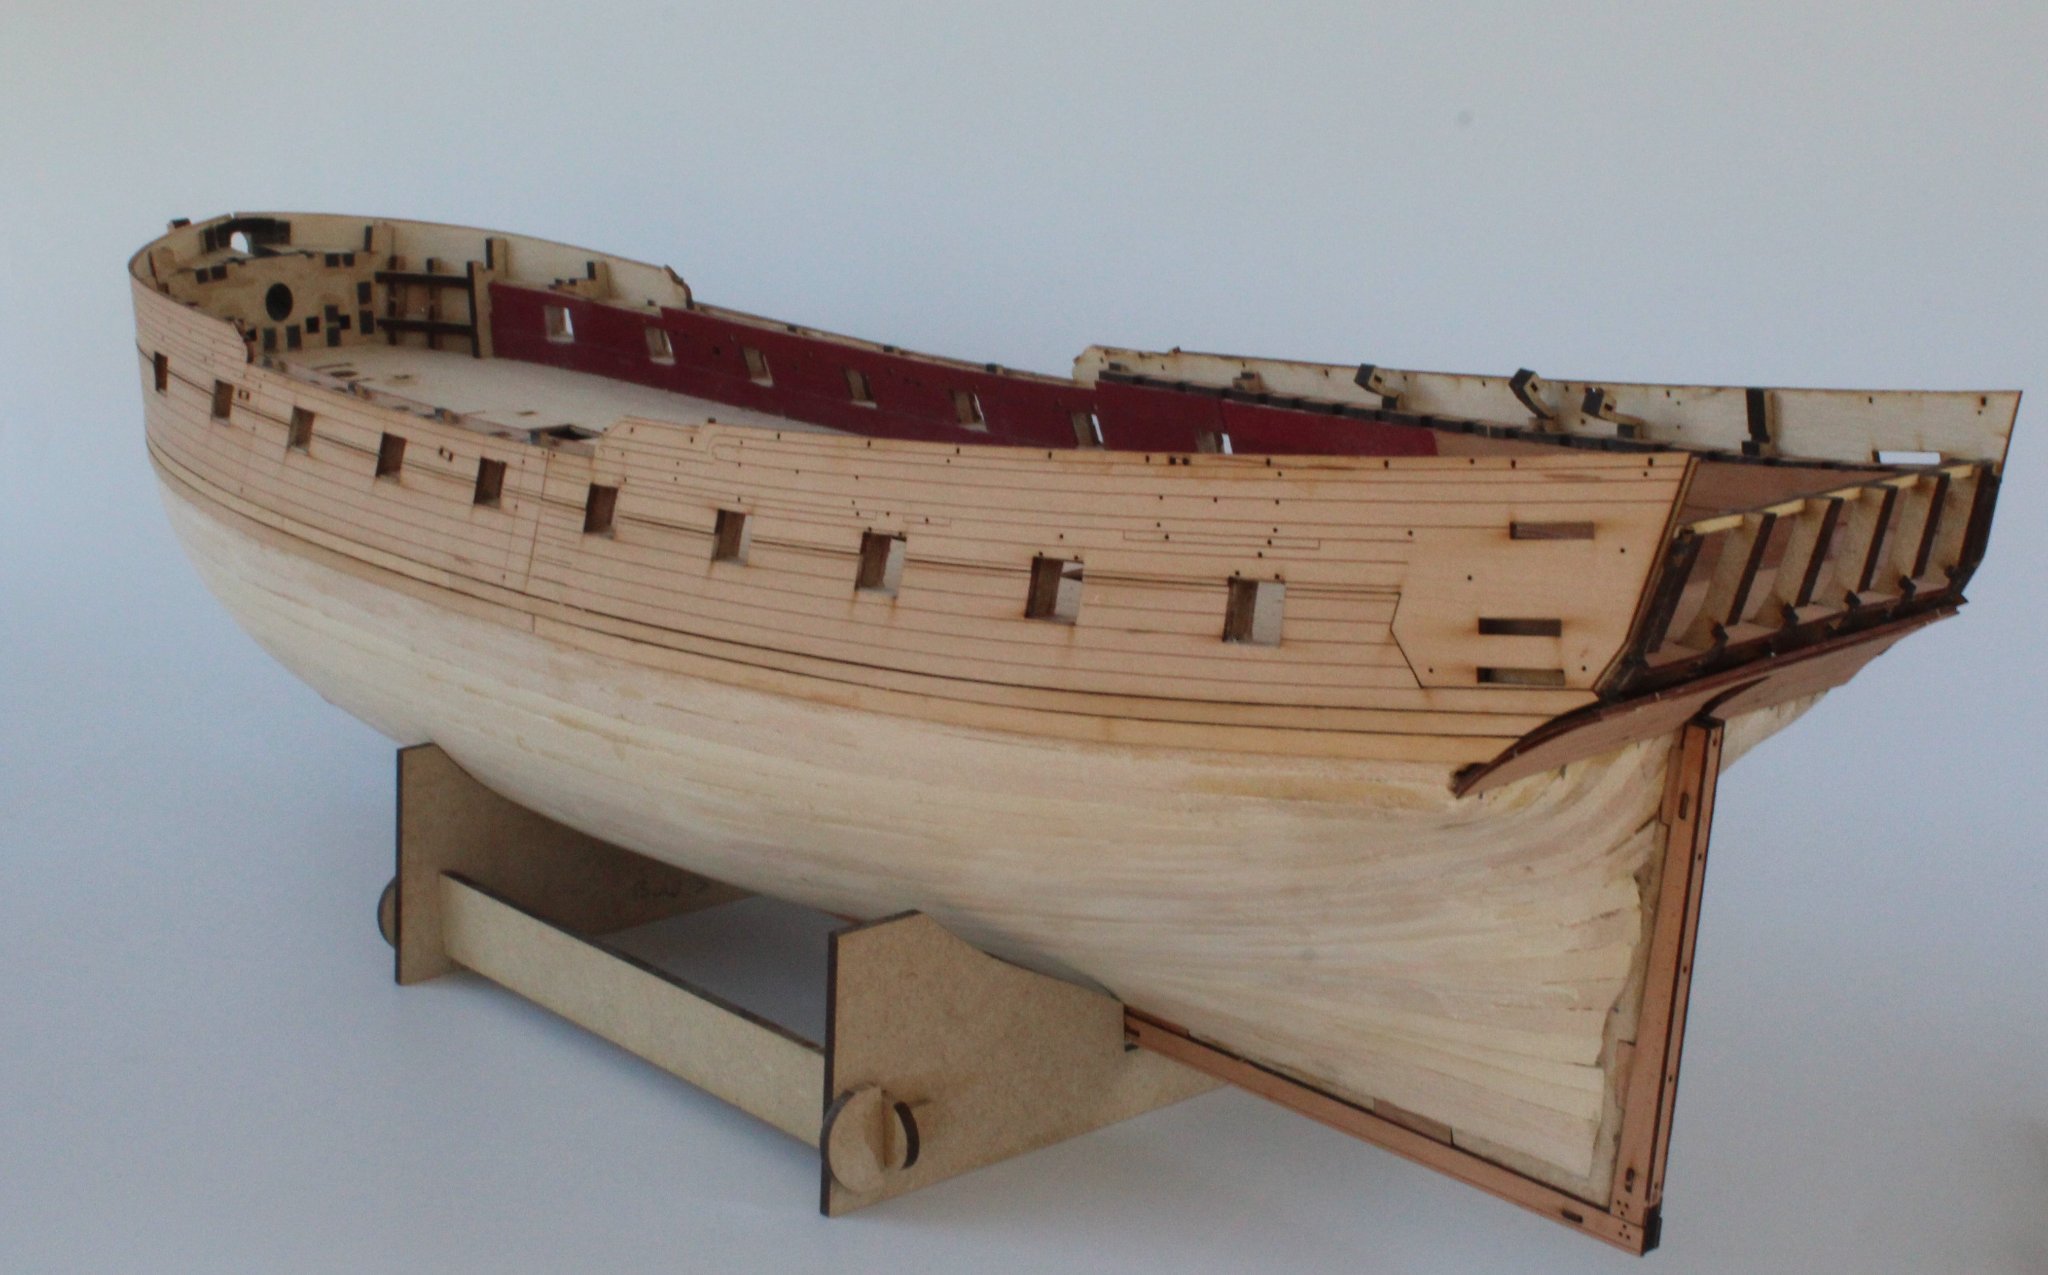
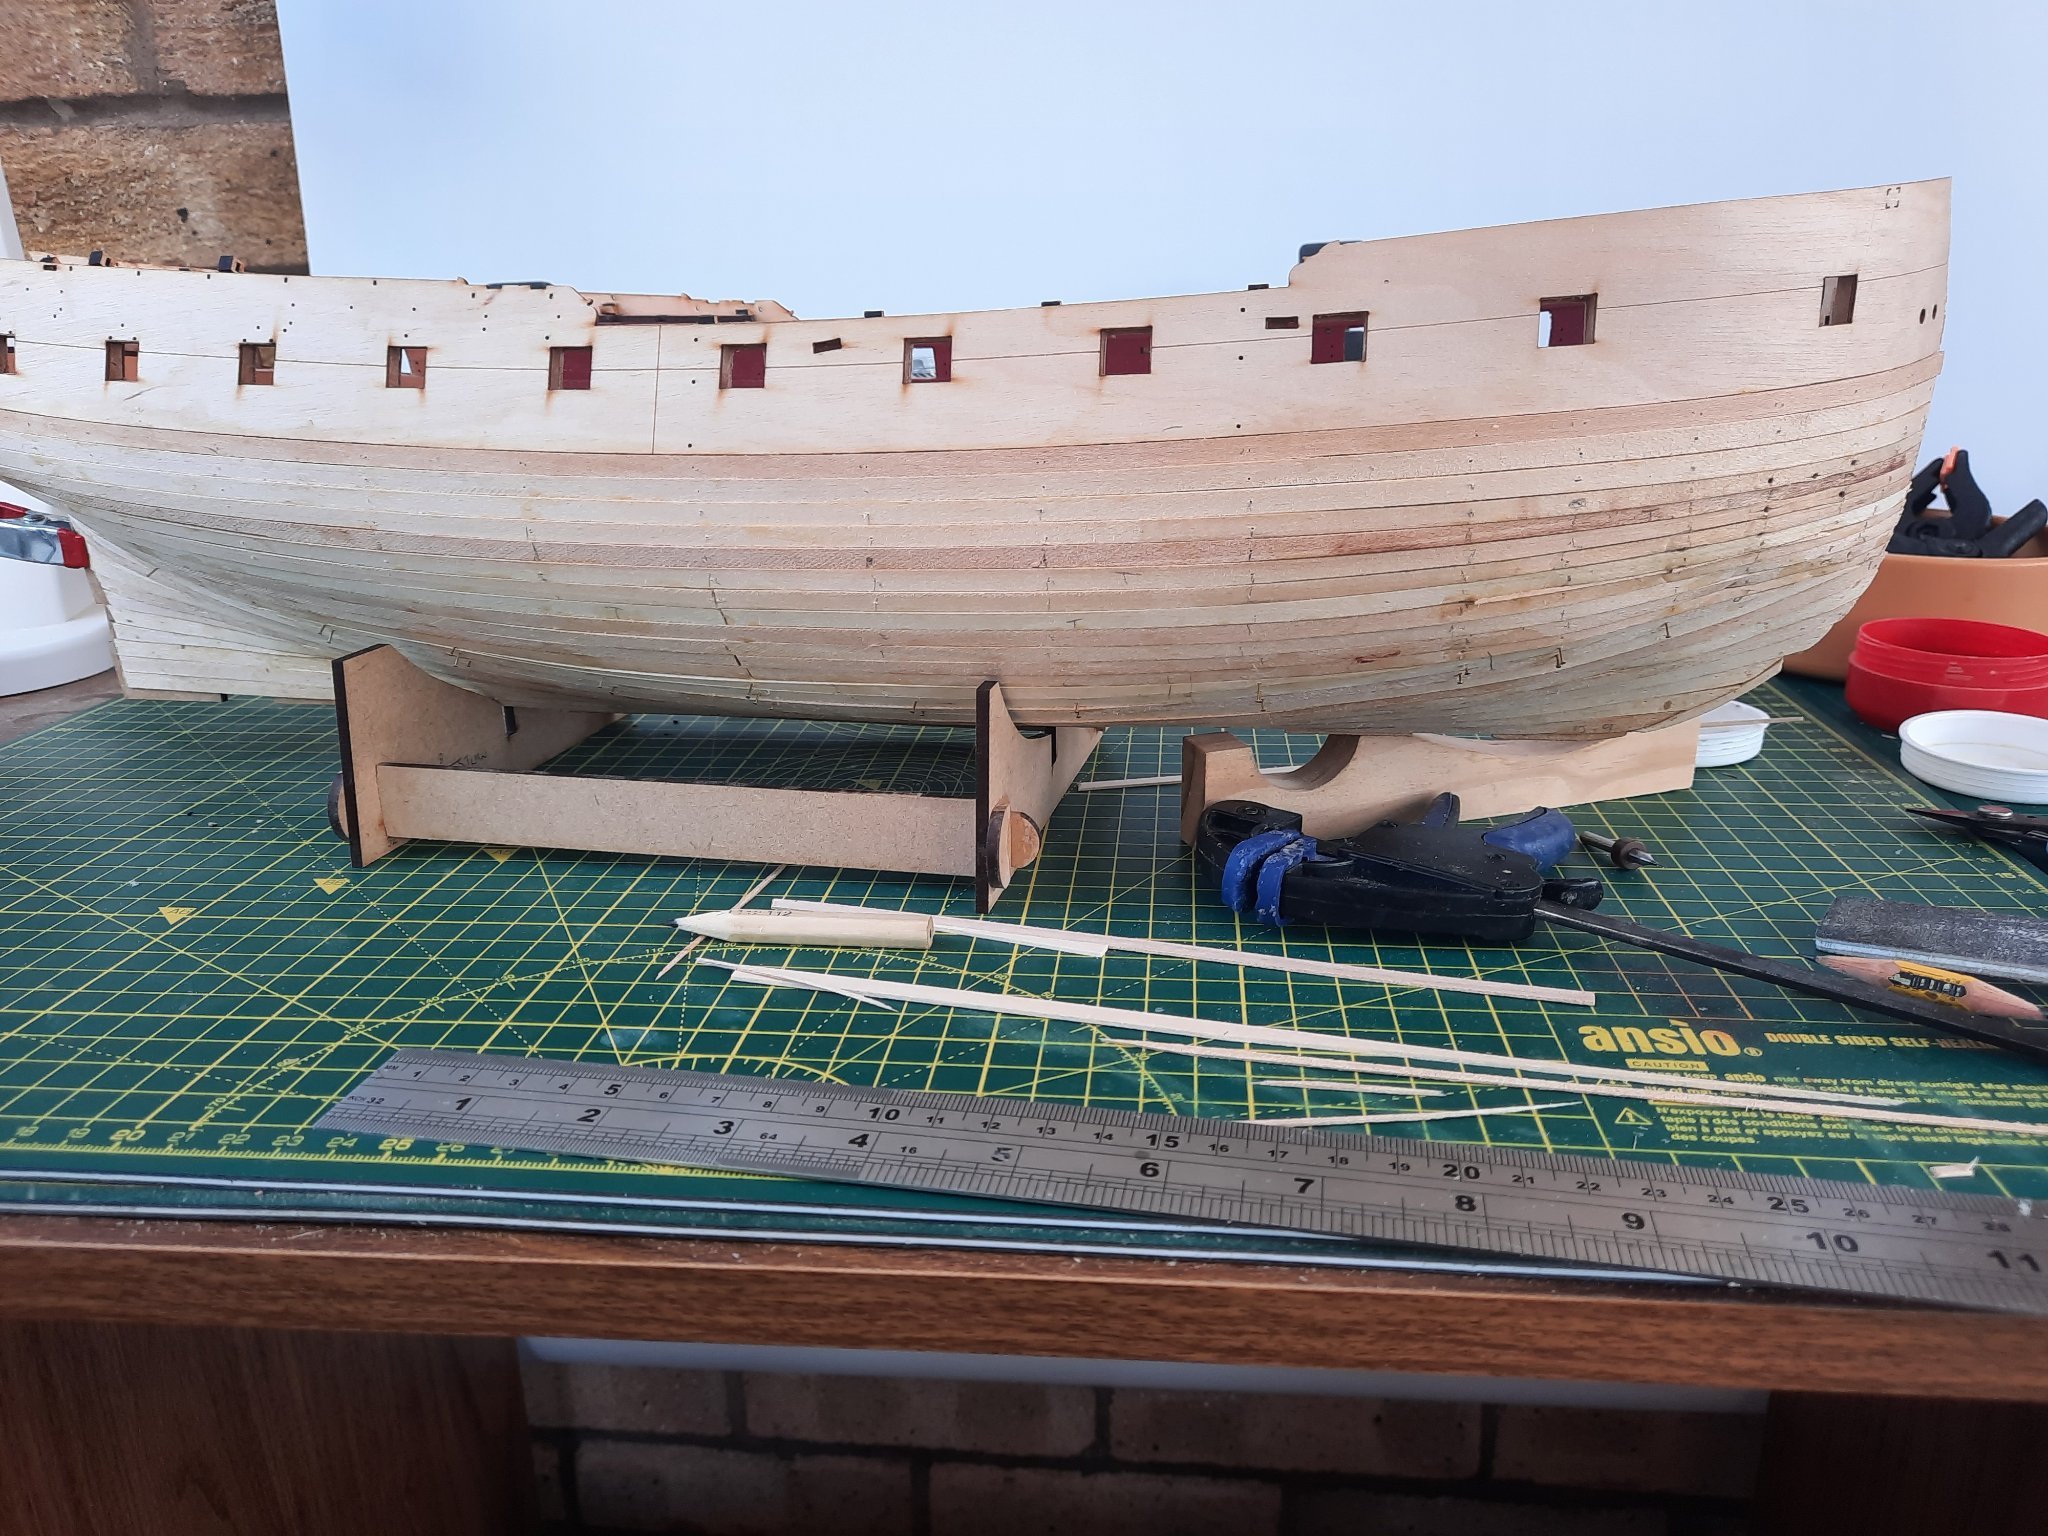
I have finally completed the 2nd planking stage. I am not very adept at planking but each new model I have planked is better than the previous model. I would love to be able to buy a kit that allows me to just practice the fairing and planking process.
I have also trimmed the jig supports, as these are now longer required.
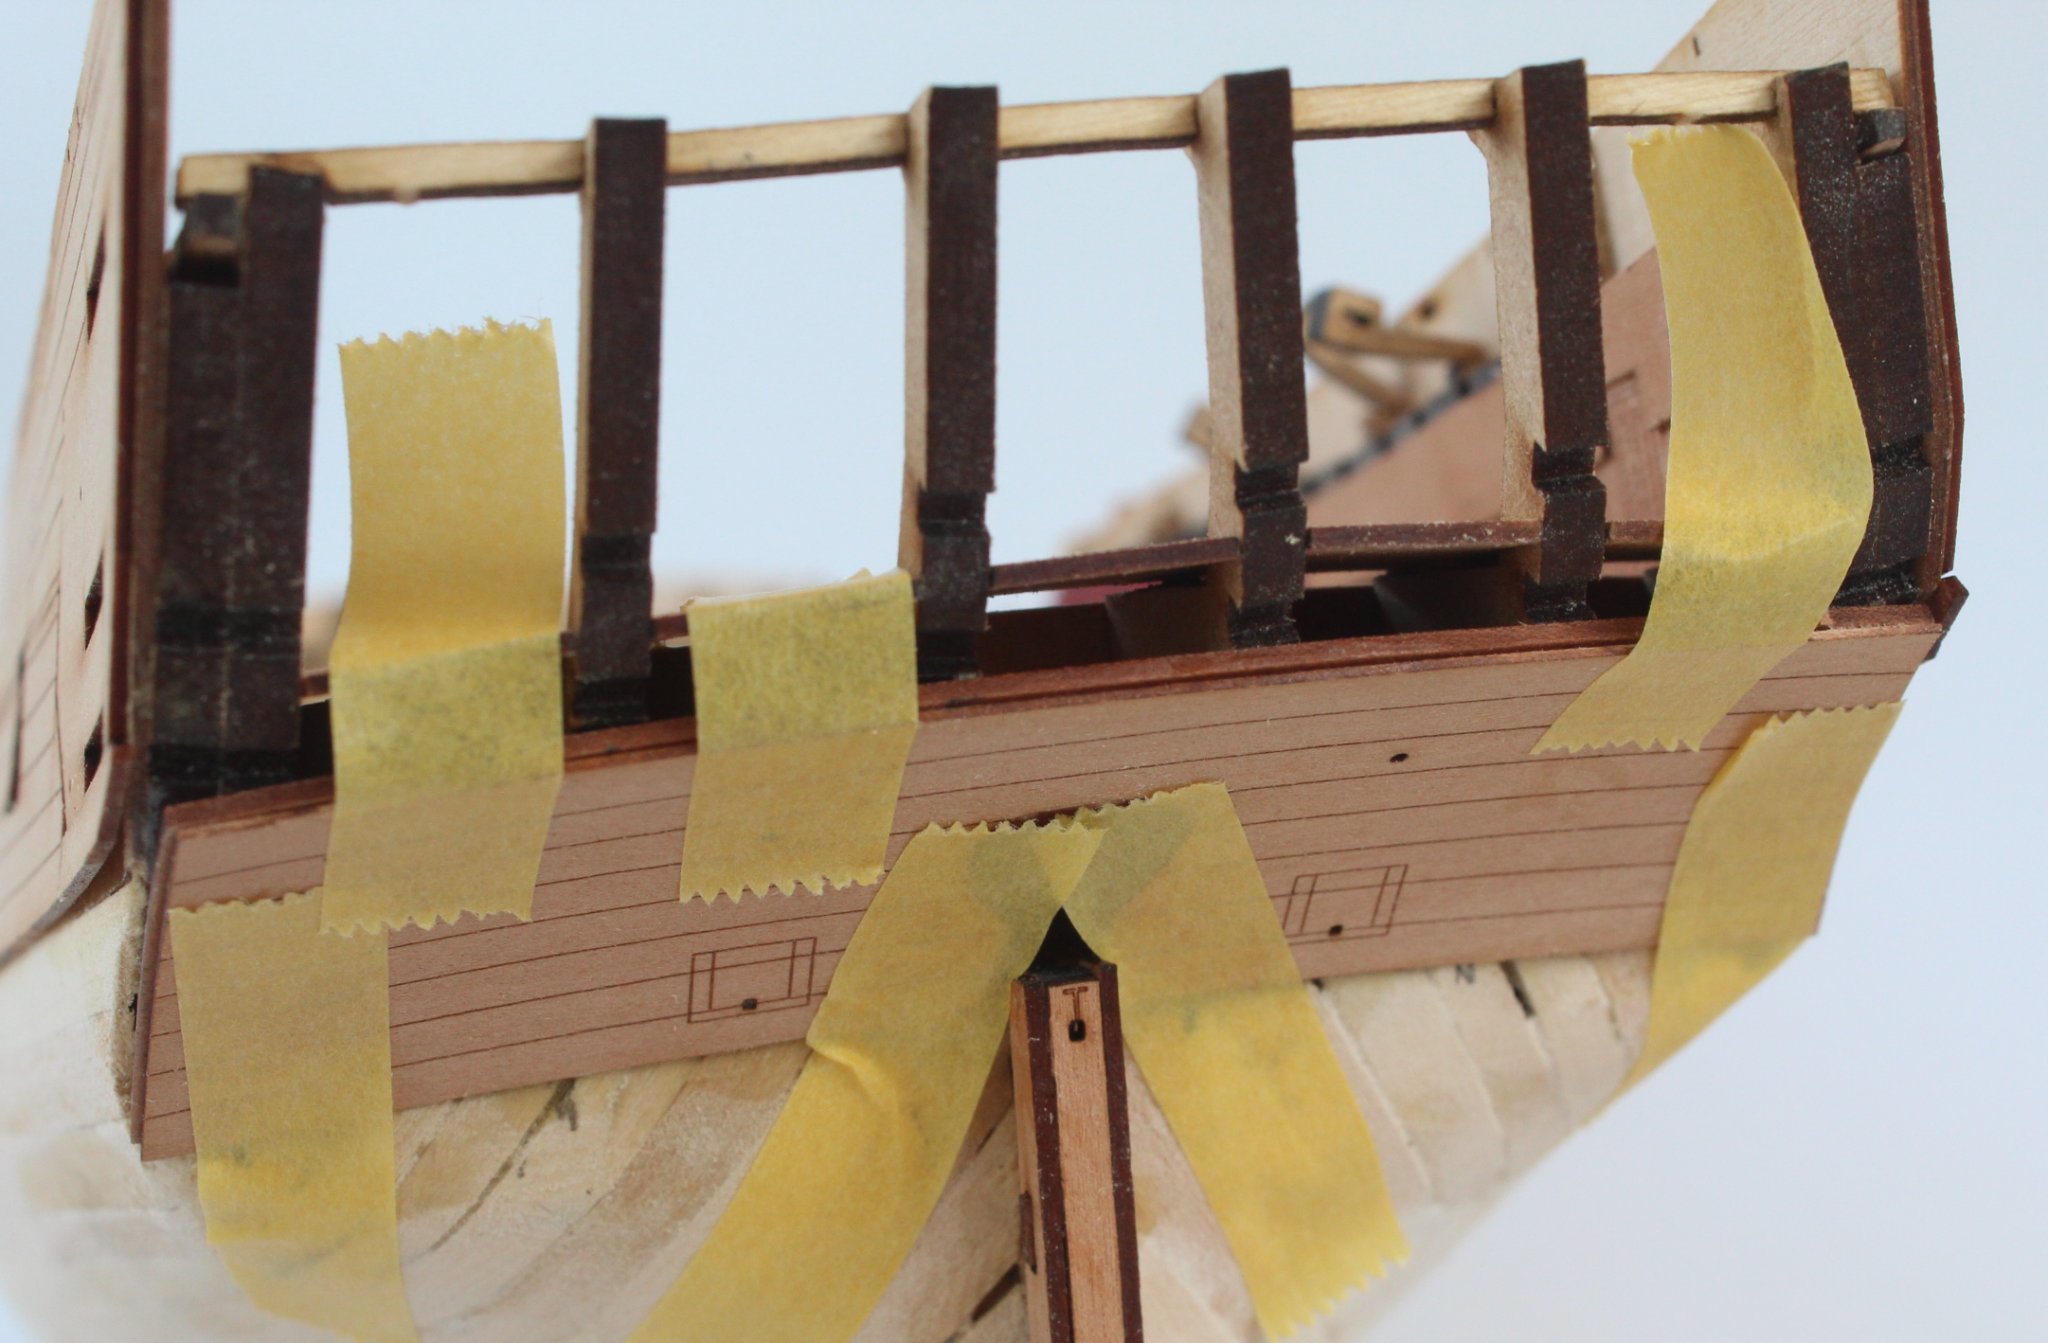
With reference to the plan sheet provided I marked and taped the water line. I started the process by taping both the stem and stern posts areas, using the reference points provided on the laser engravings as a guide. Then using my waterline marker I drew the line between the two taped points. I then added tape so I can sand and fill the area below taped waterline.


The Sphinx is now taped and ready for the sanding and filling phase.


-
34 minutes ago, Jasseji said:
My progress is slow as well, on Stern side i am half way down but i have 4 more planks at Stern than bow now
I hope to complete the planking in the next couple of days. We have our 10 month granddaughter (and her parents) staying with us for a few days but I'm sneaking a bit of time in the shipyard during her naps. I also having to make all the arrangements for my Mum's funeral who passed away last week after a short illness, aged 92.
-
HULL ASSEMBLY
2ND PLANKING RIGHT-HAND SIDE STAGE 1
BUILD MANUAL STEP 182
Tools Used
Craft knife
120 & 400-grit sandpaper
Gorilla super glue gel
Gathering the materials required
The following kit parts are required for this section of the build:
Planking strips
Assembly Process
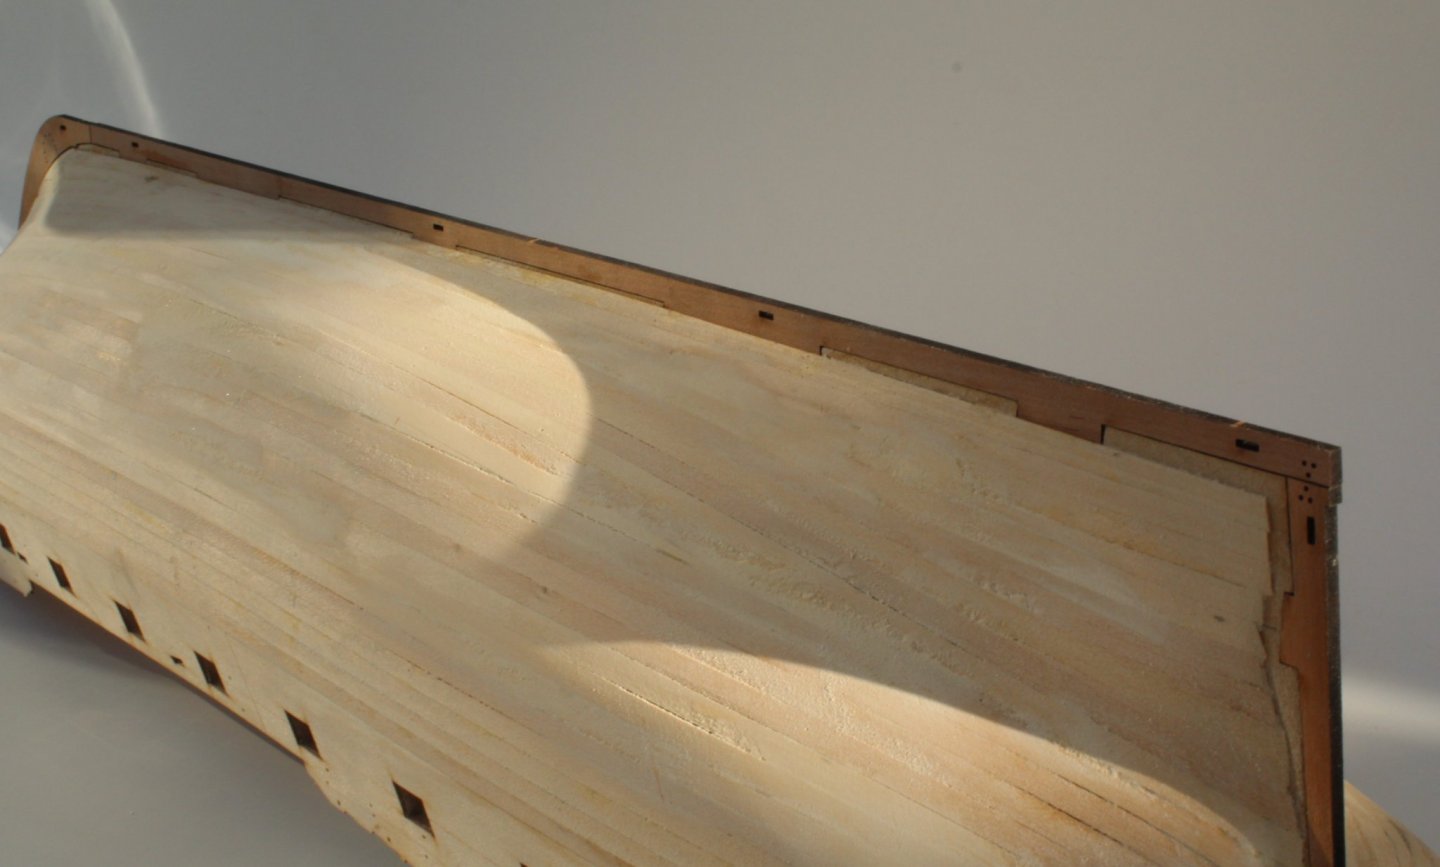
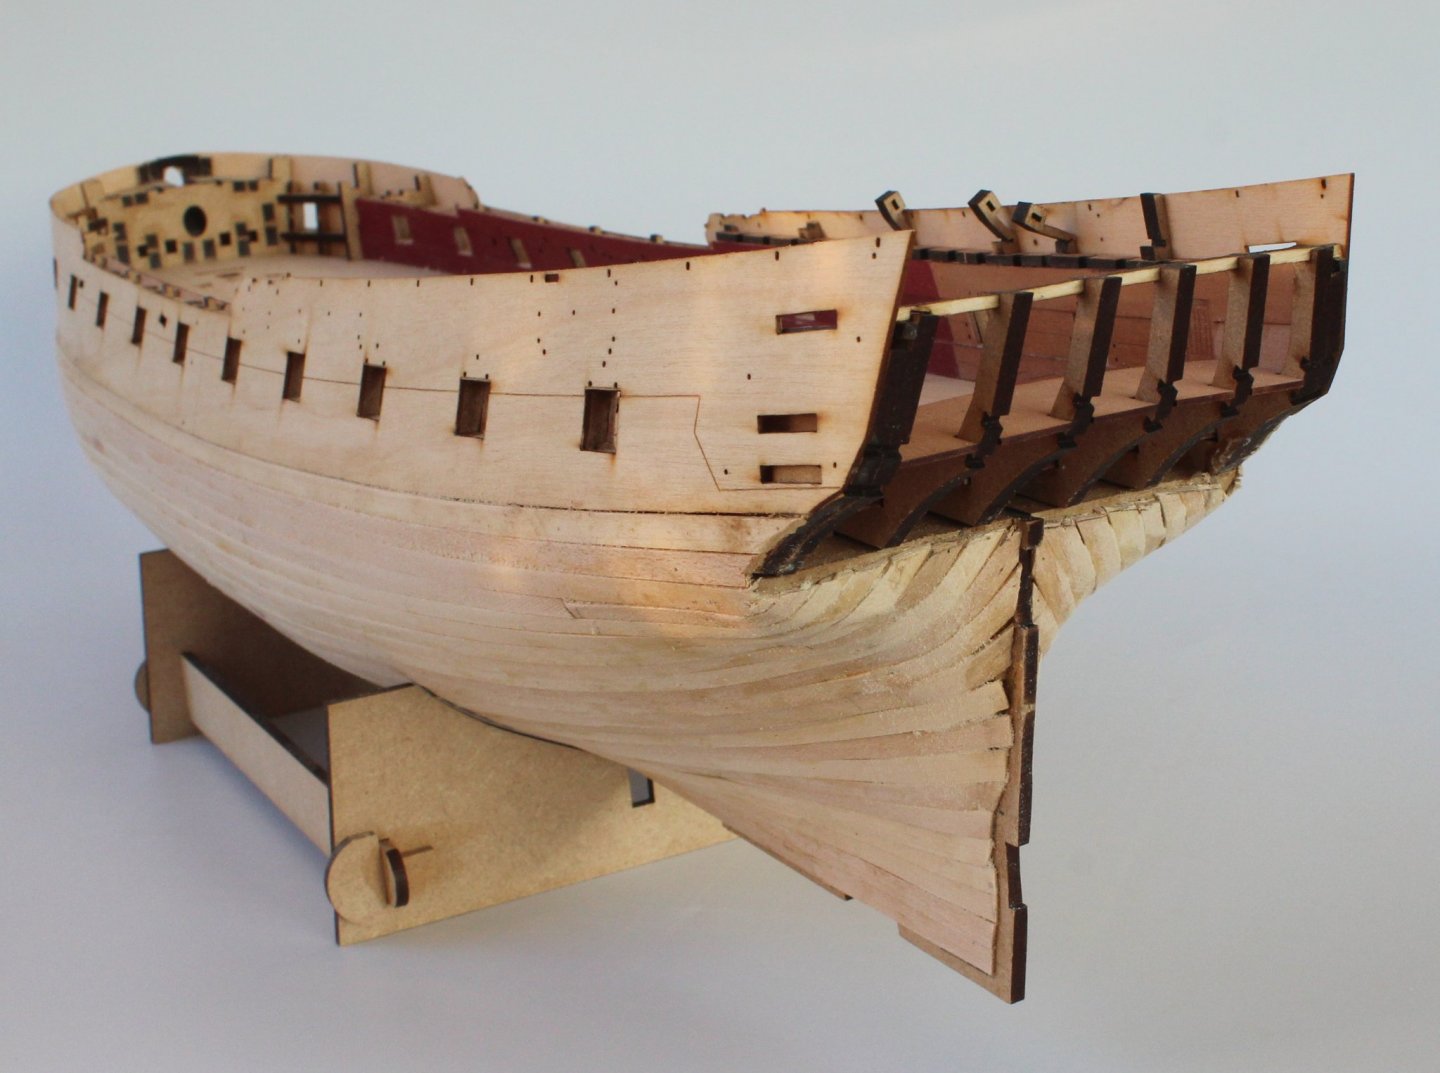
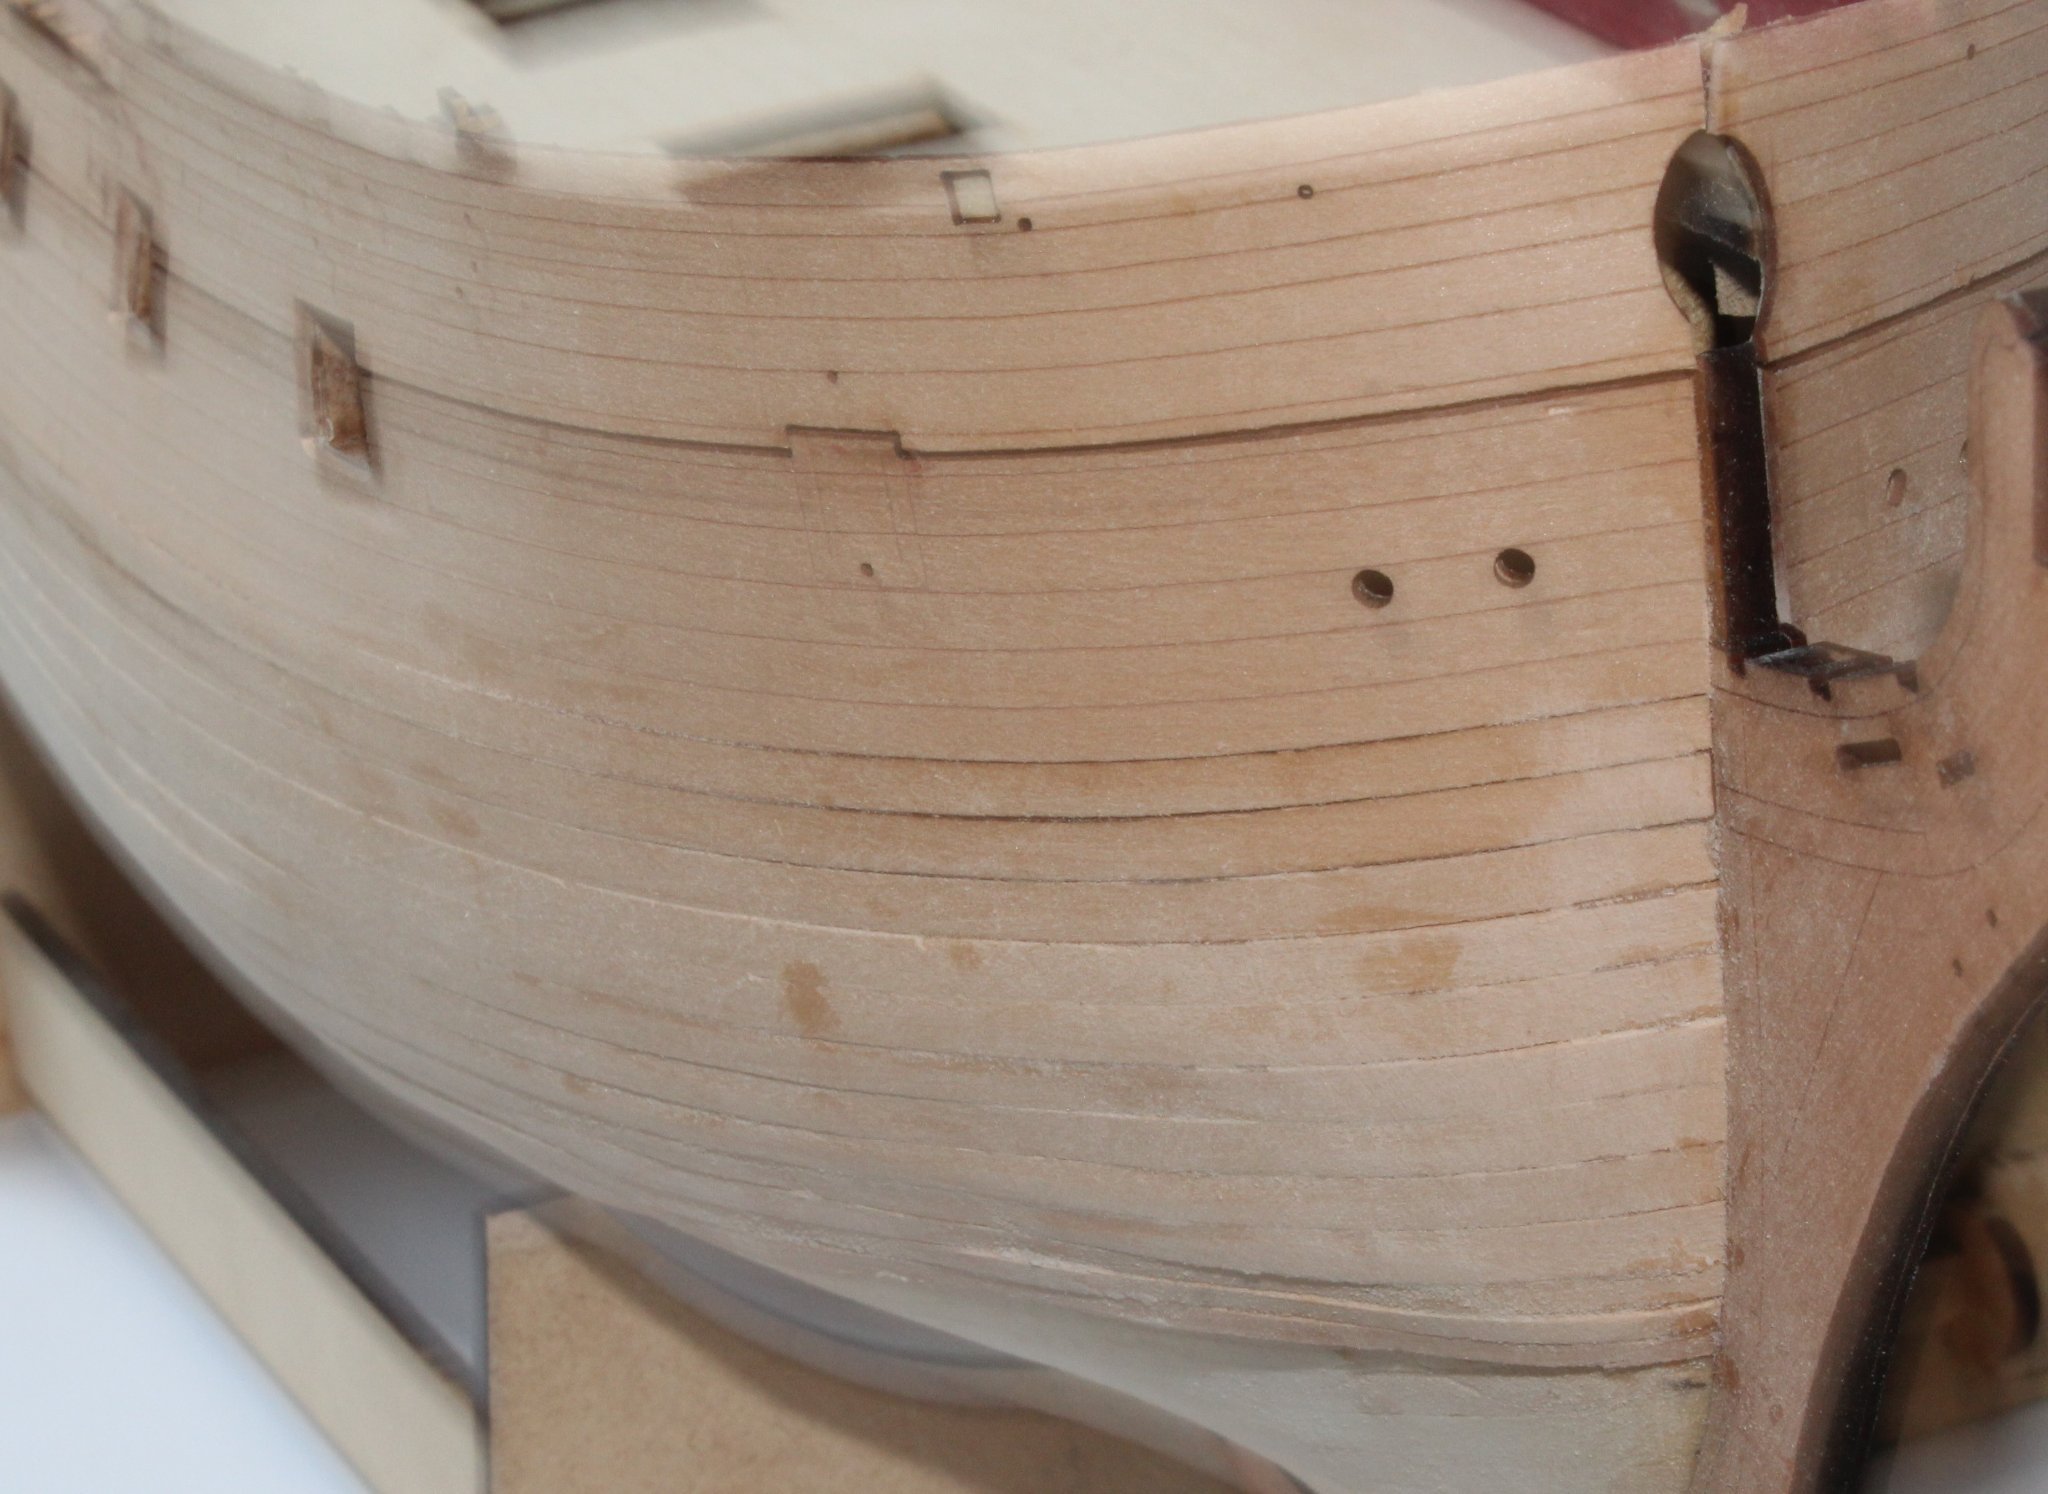
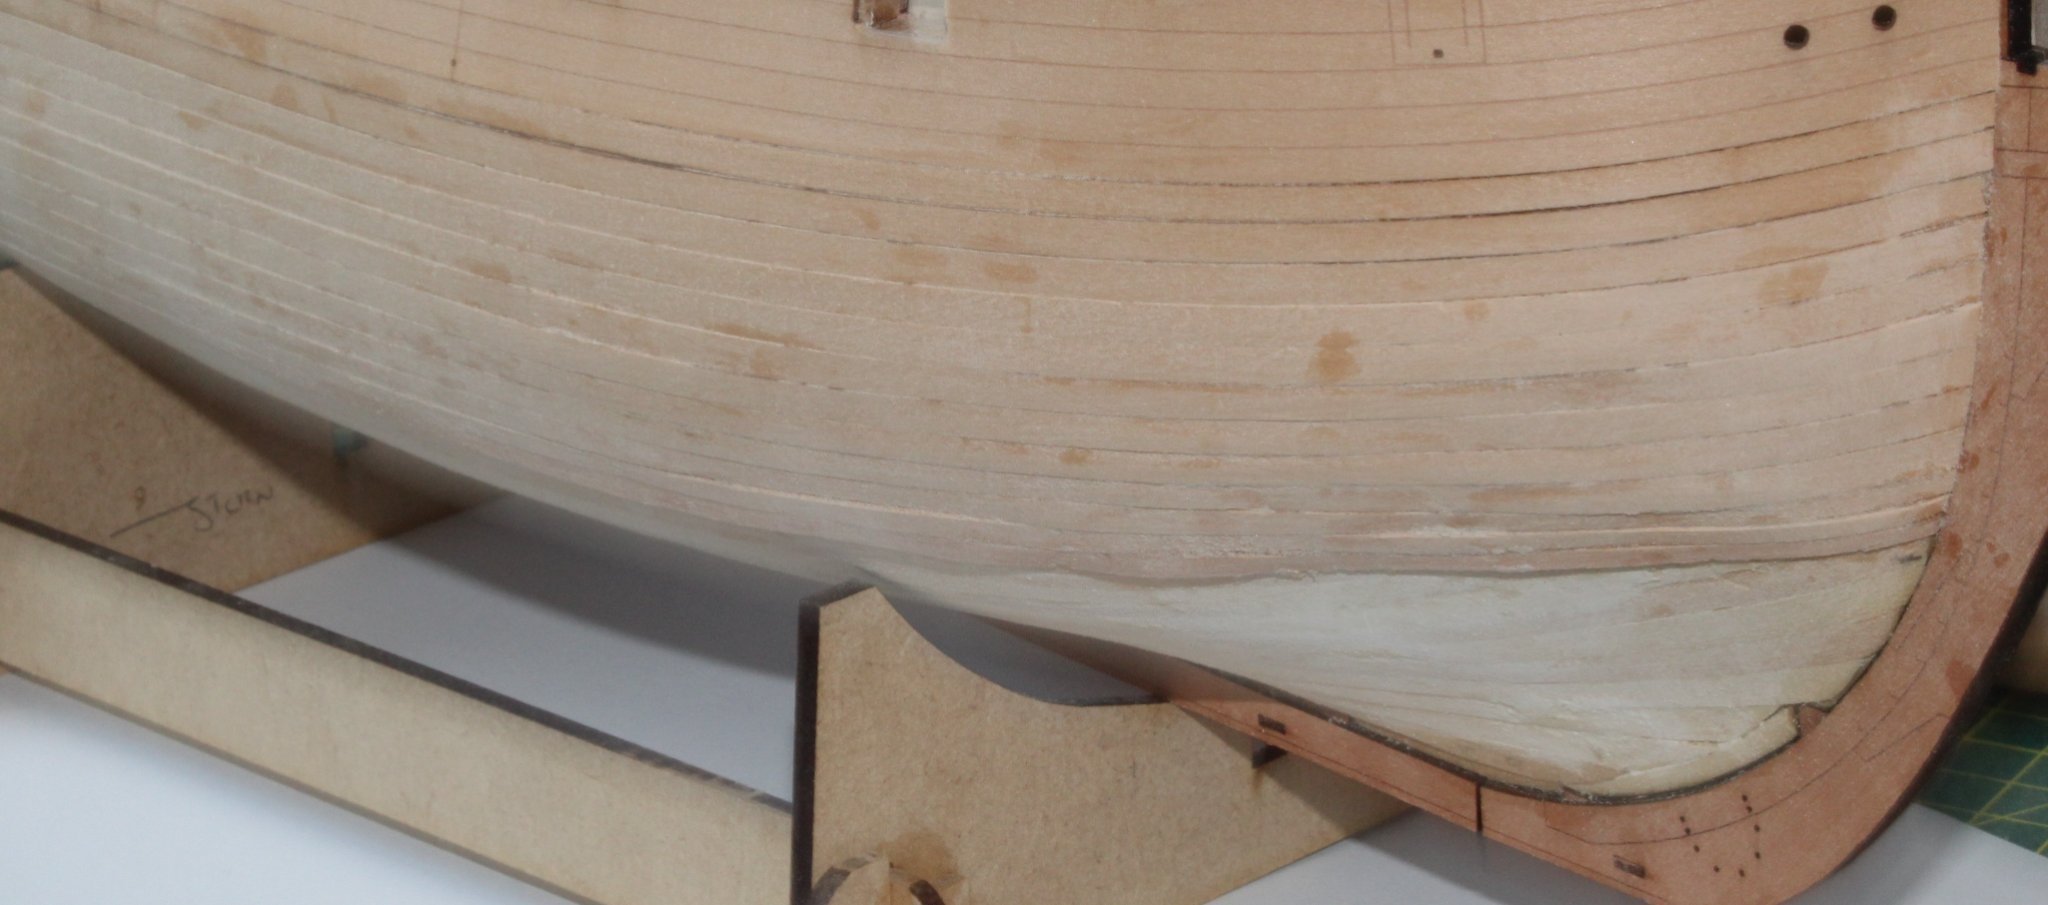
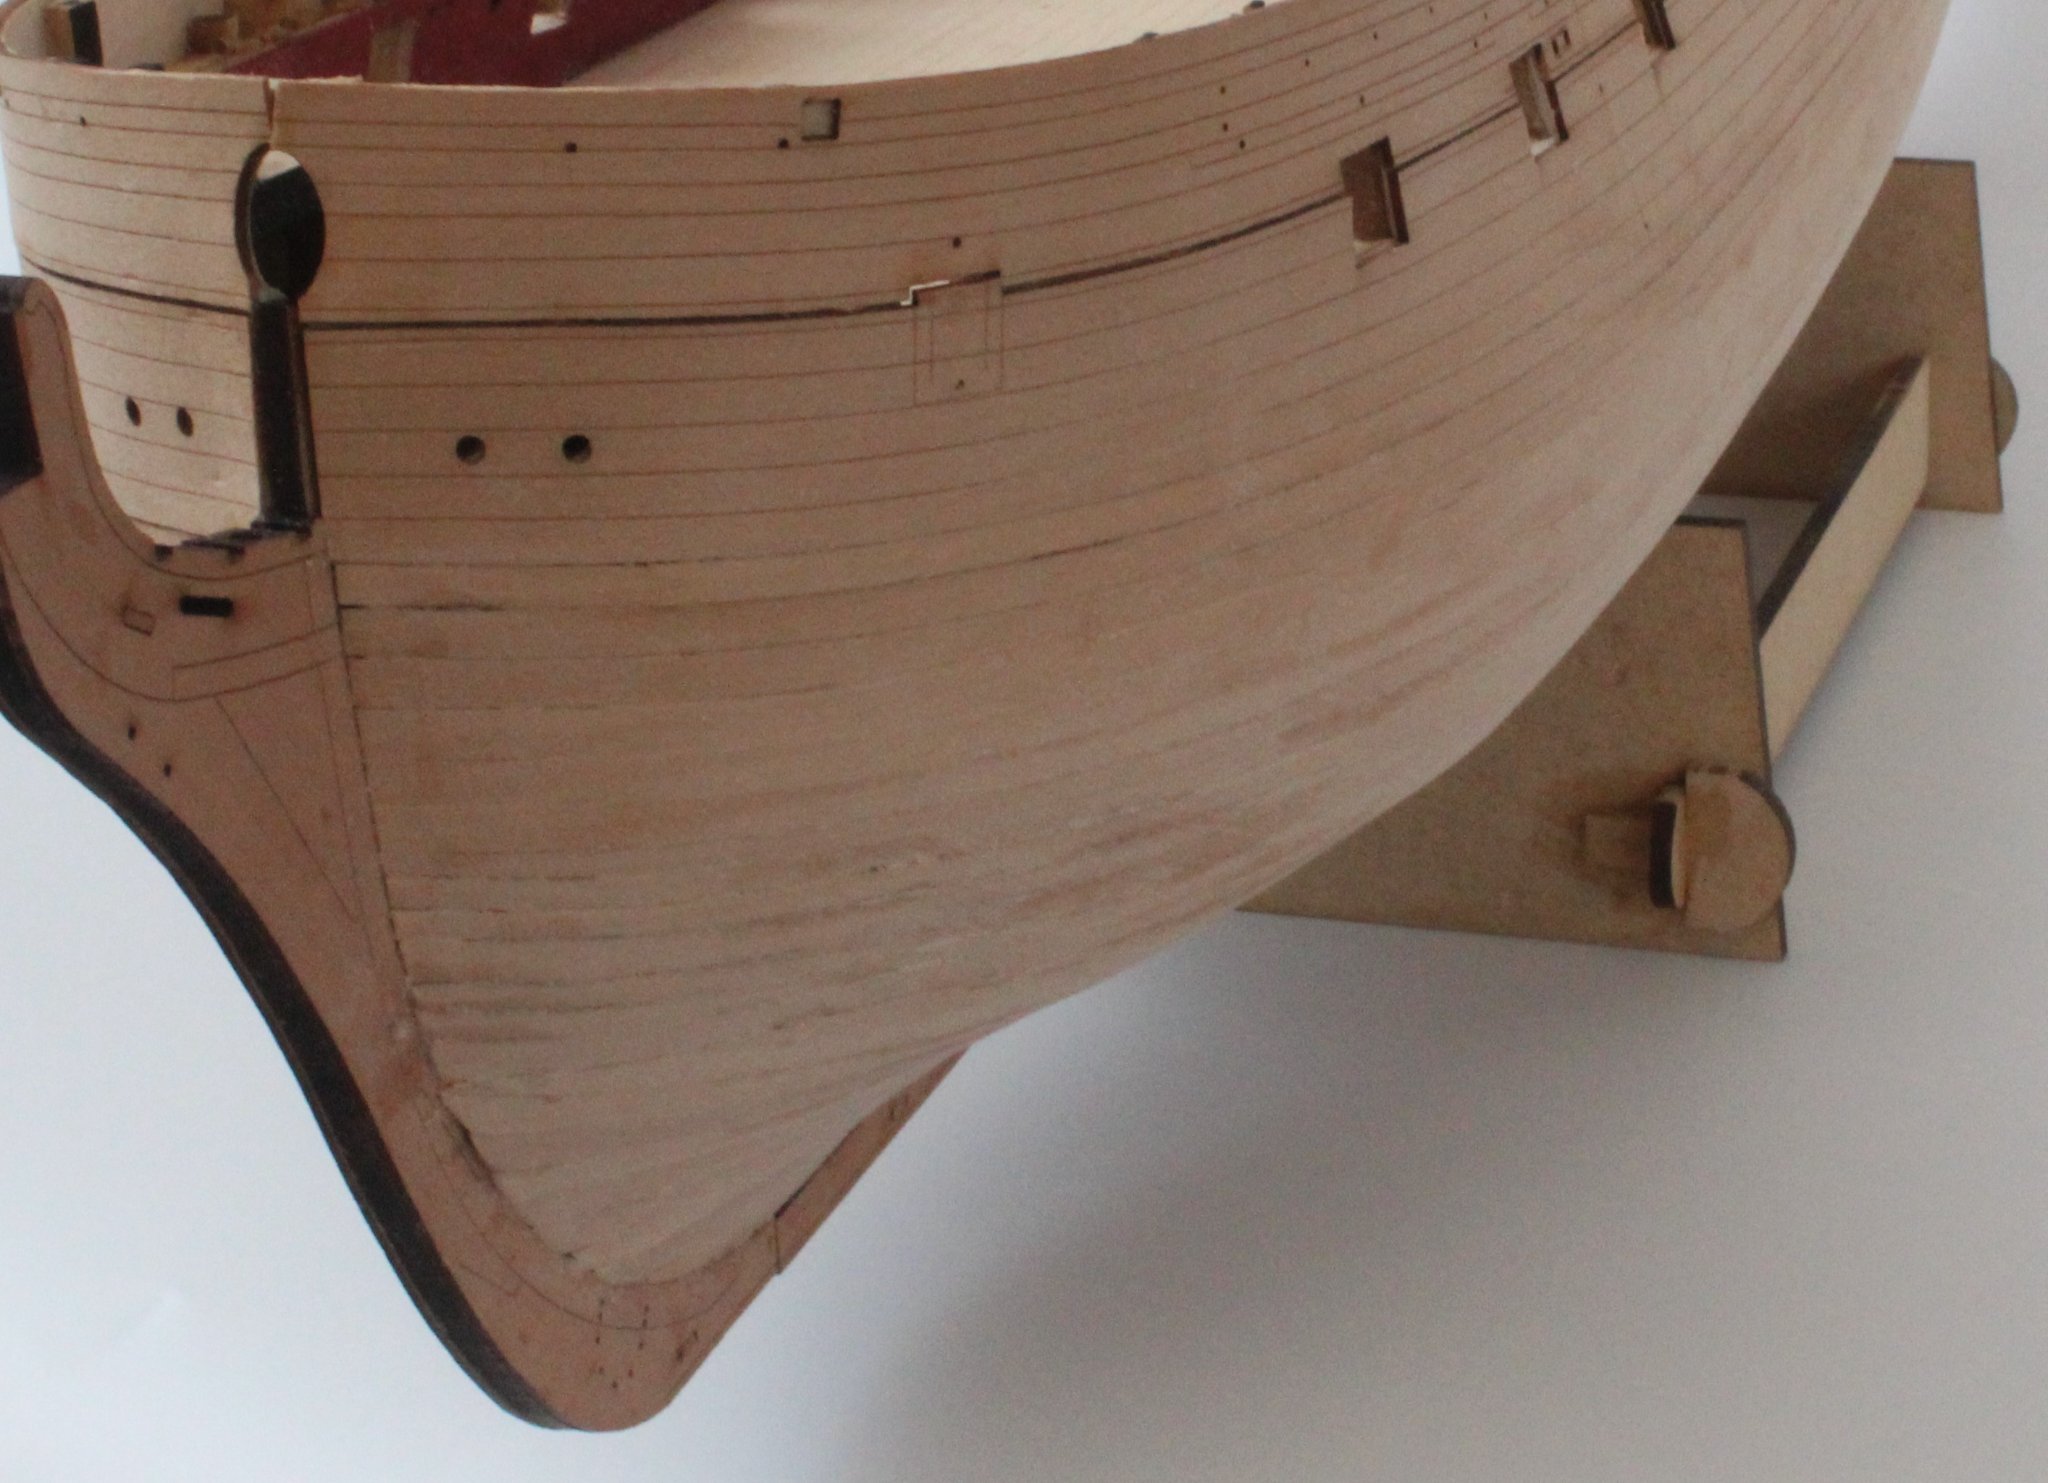
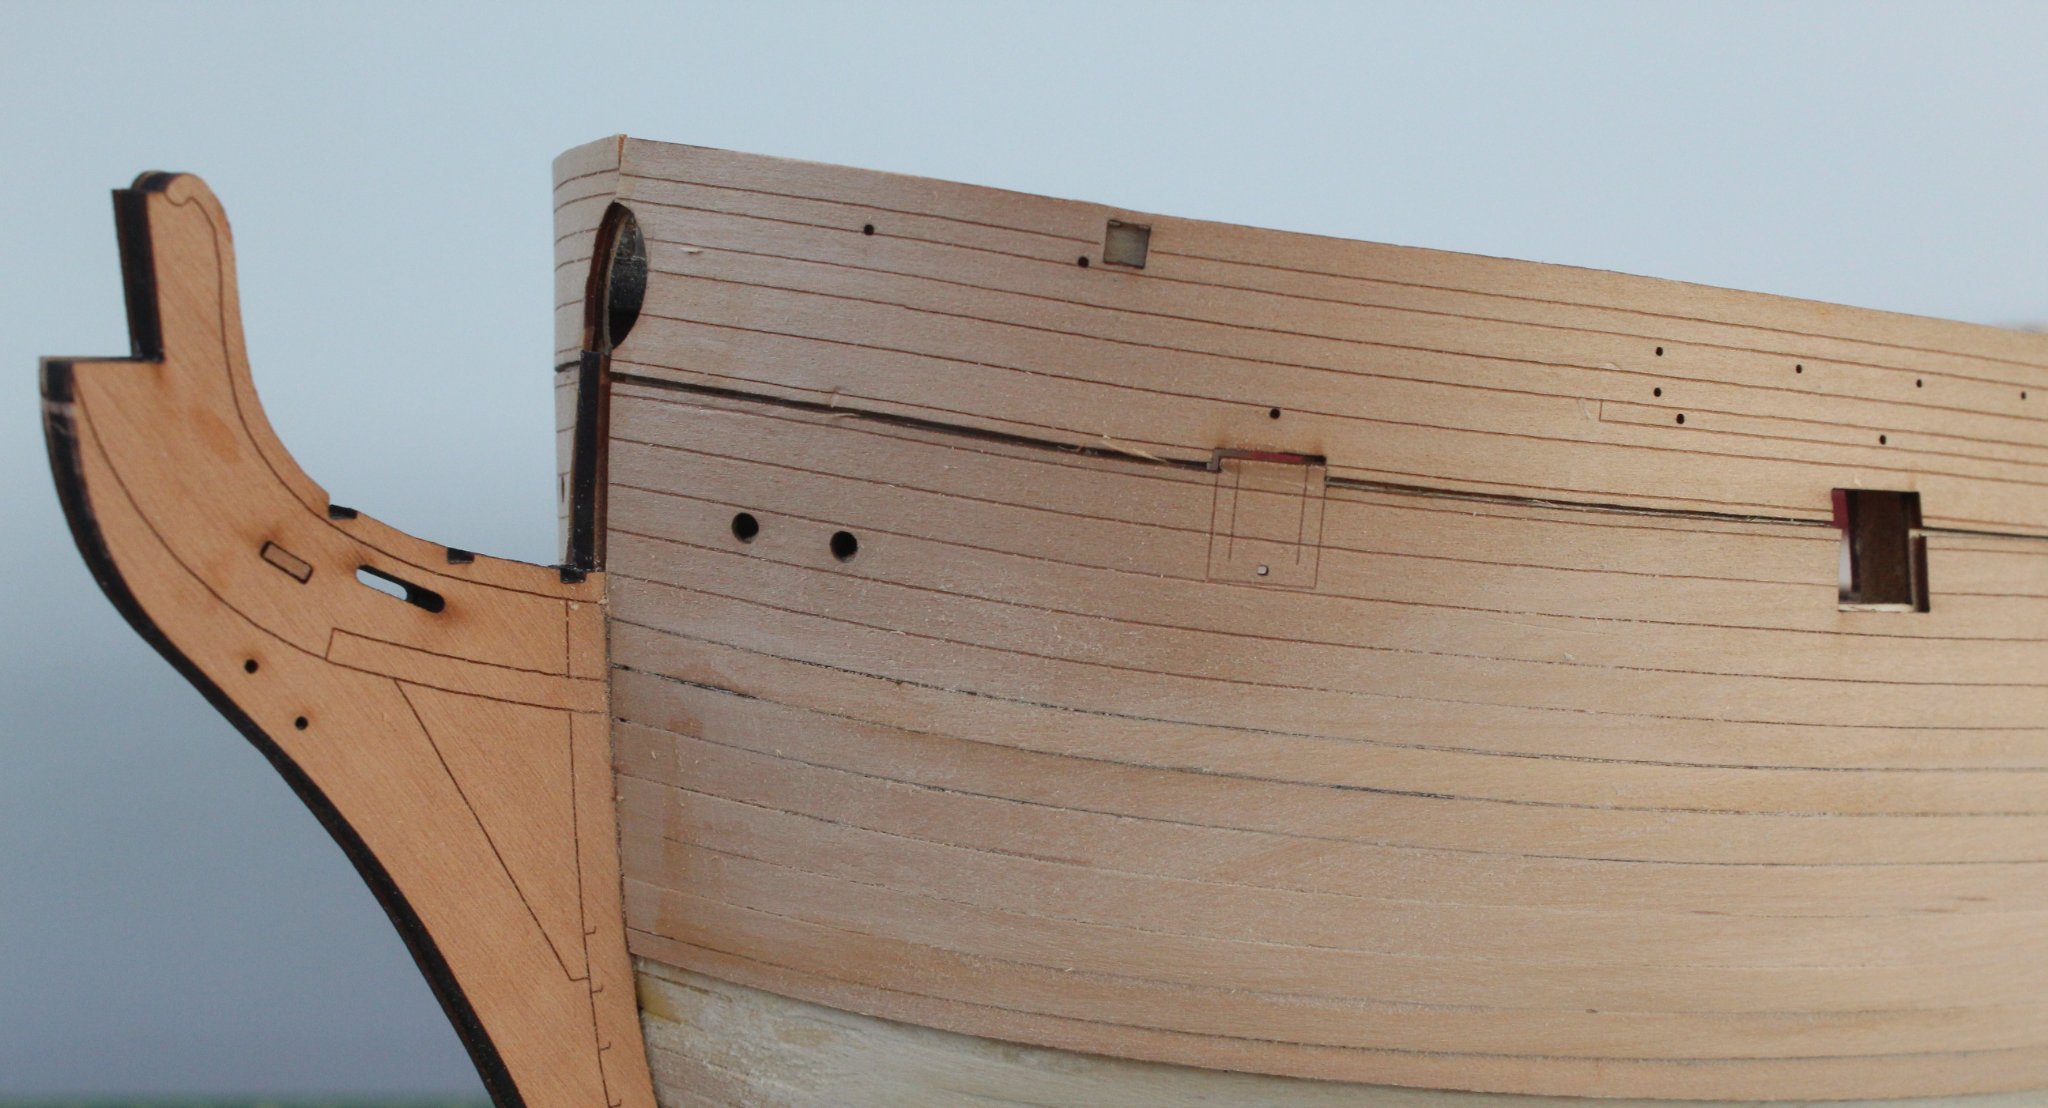
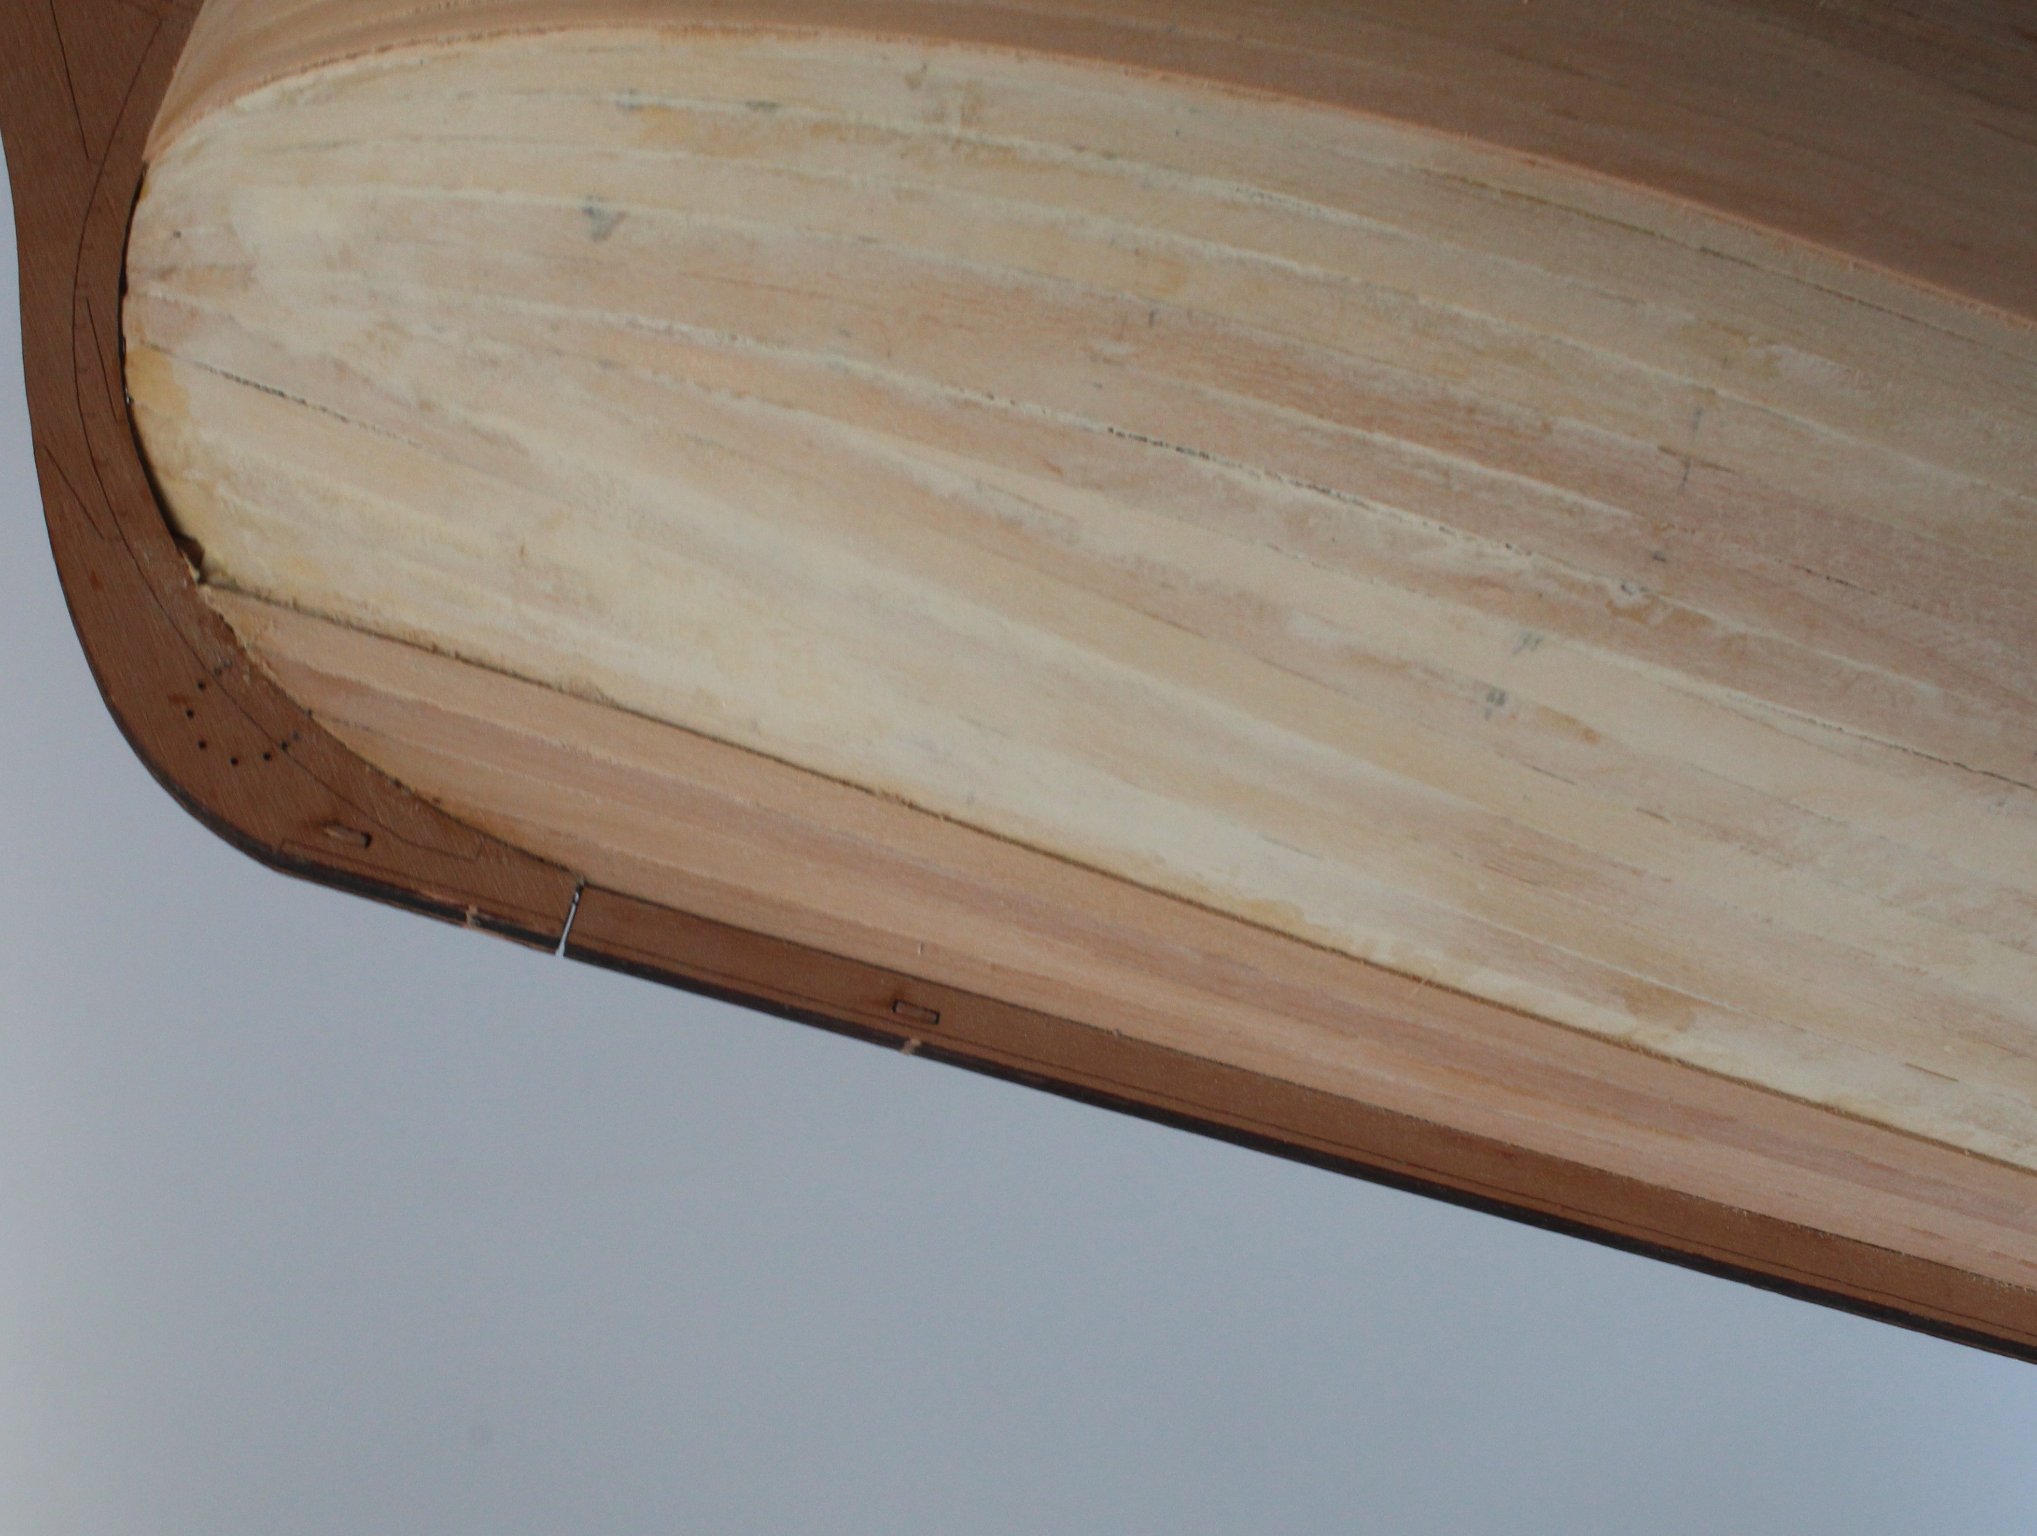
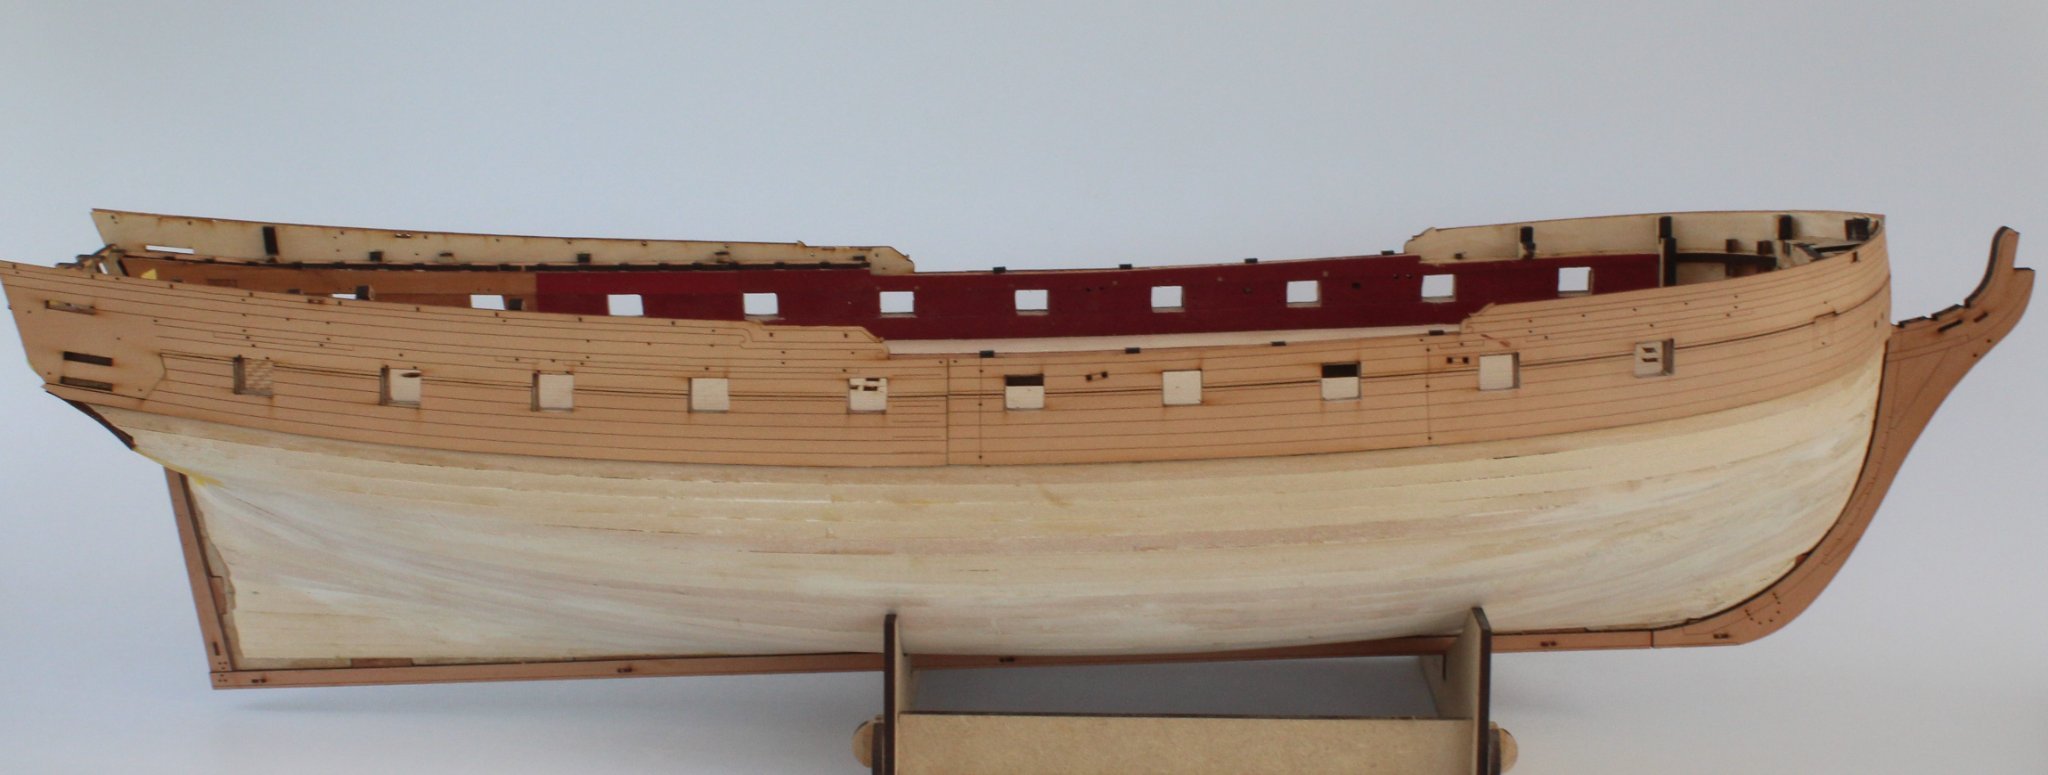
I have made slow and steady progress with the 2nd planking on the right-hand side, my time in the shipyard is a bit limited at the moment.
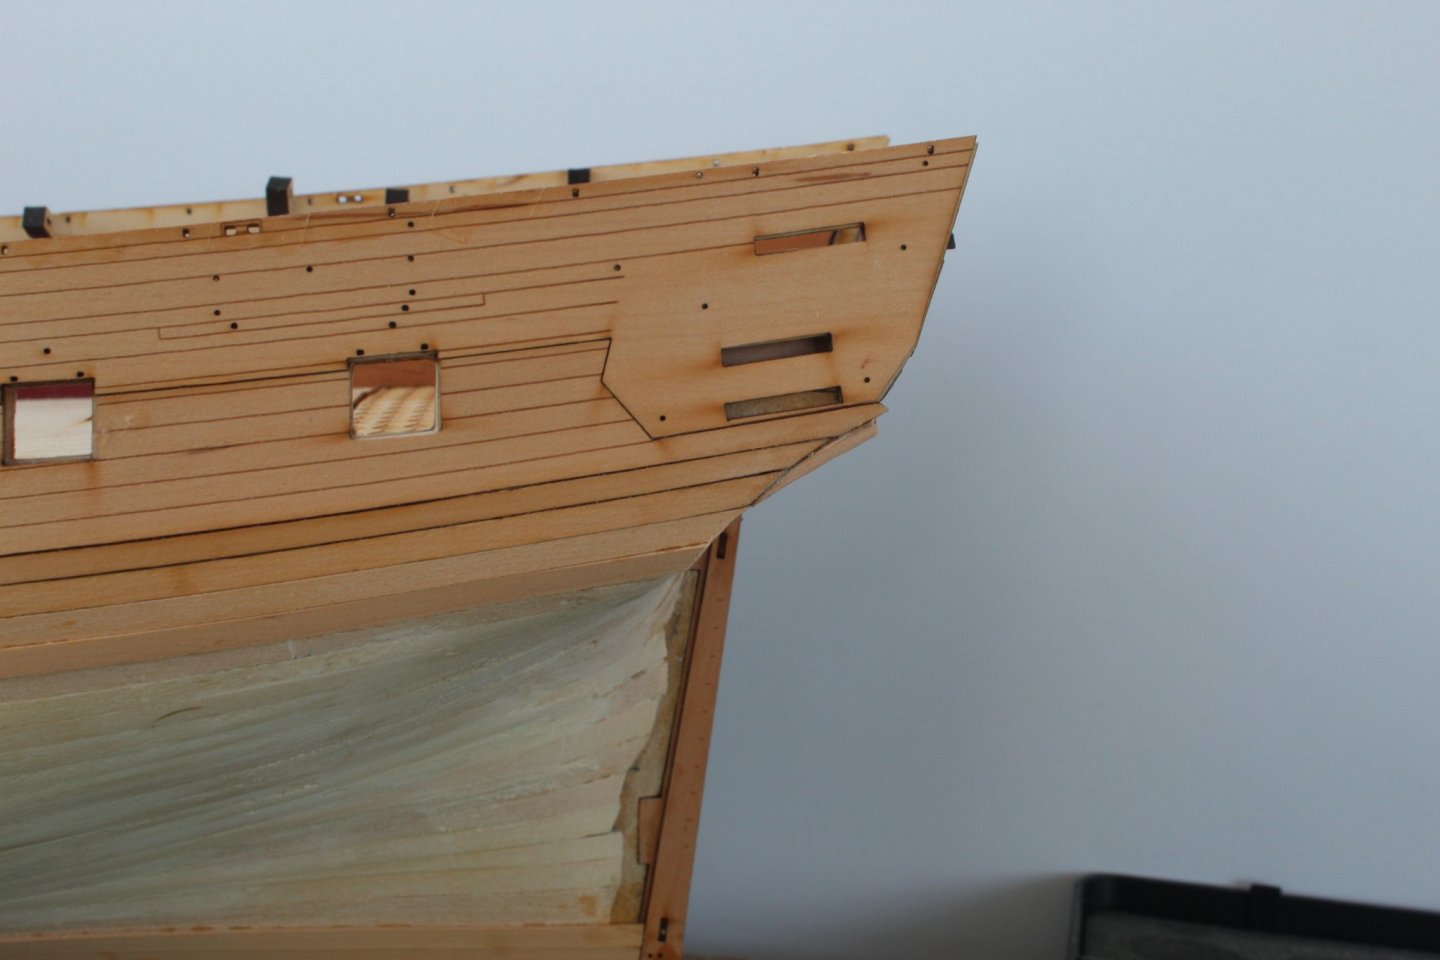
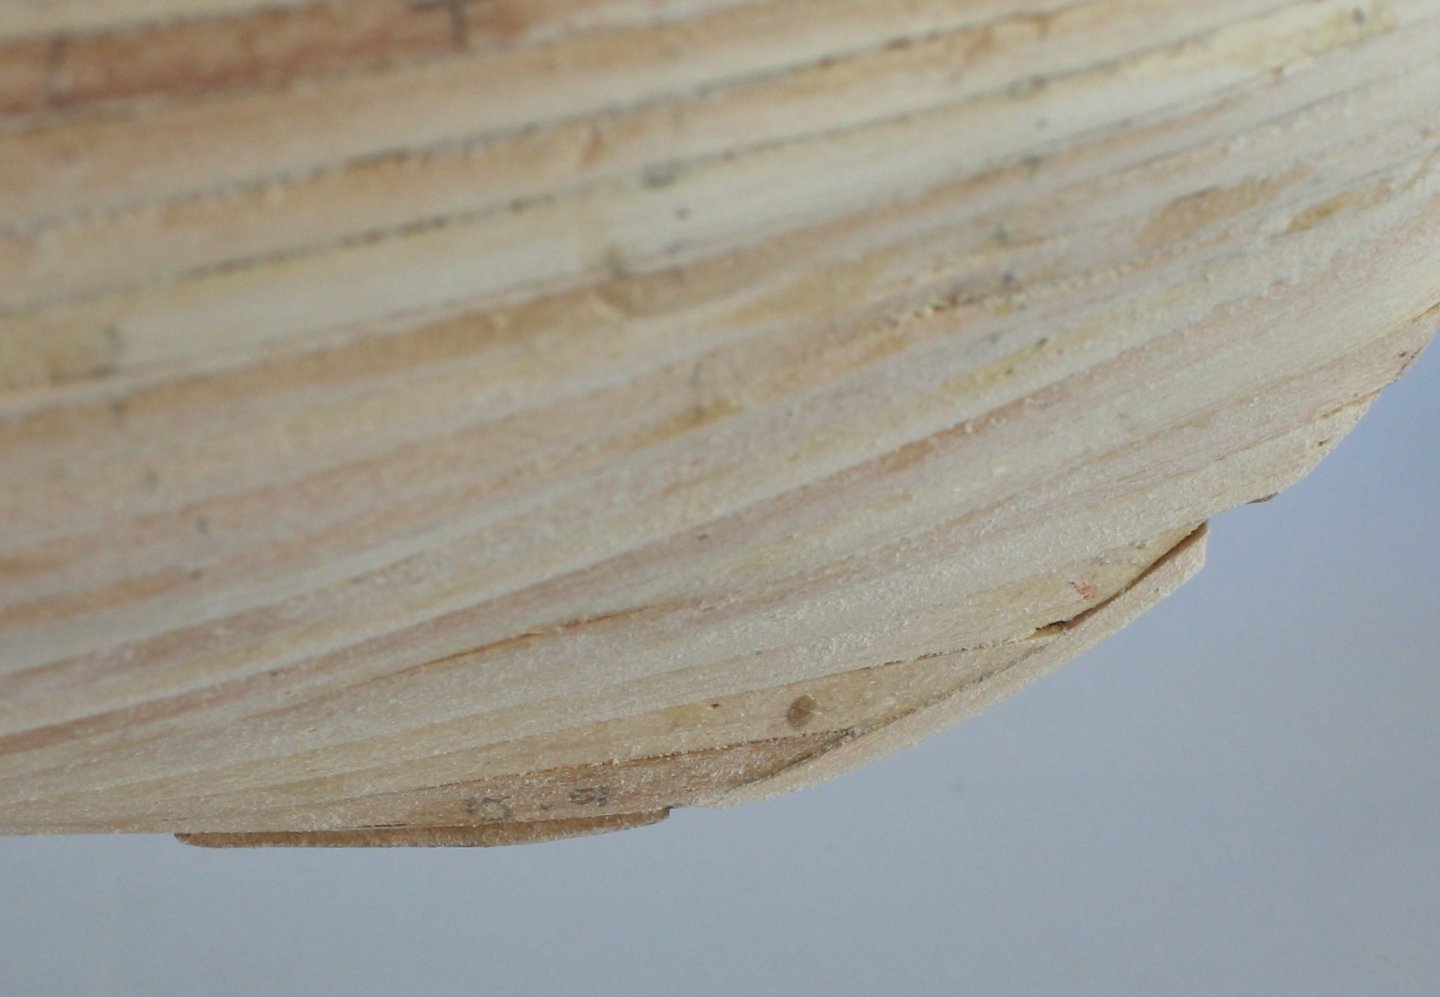
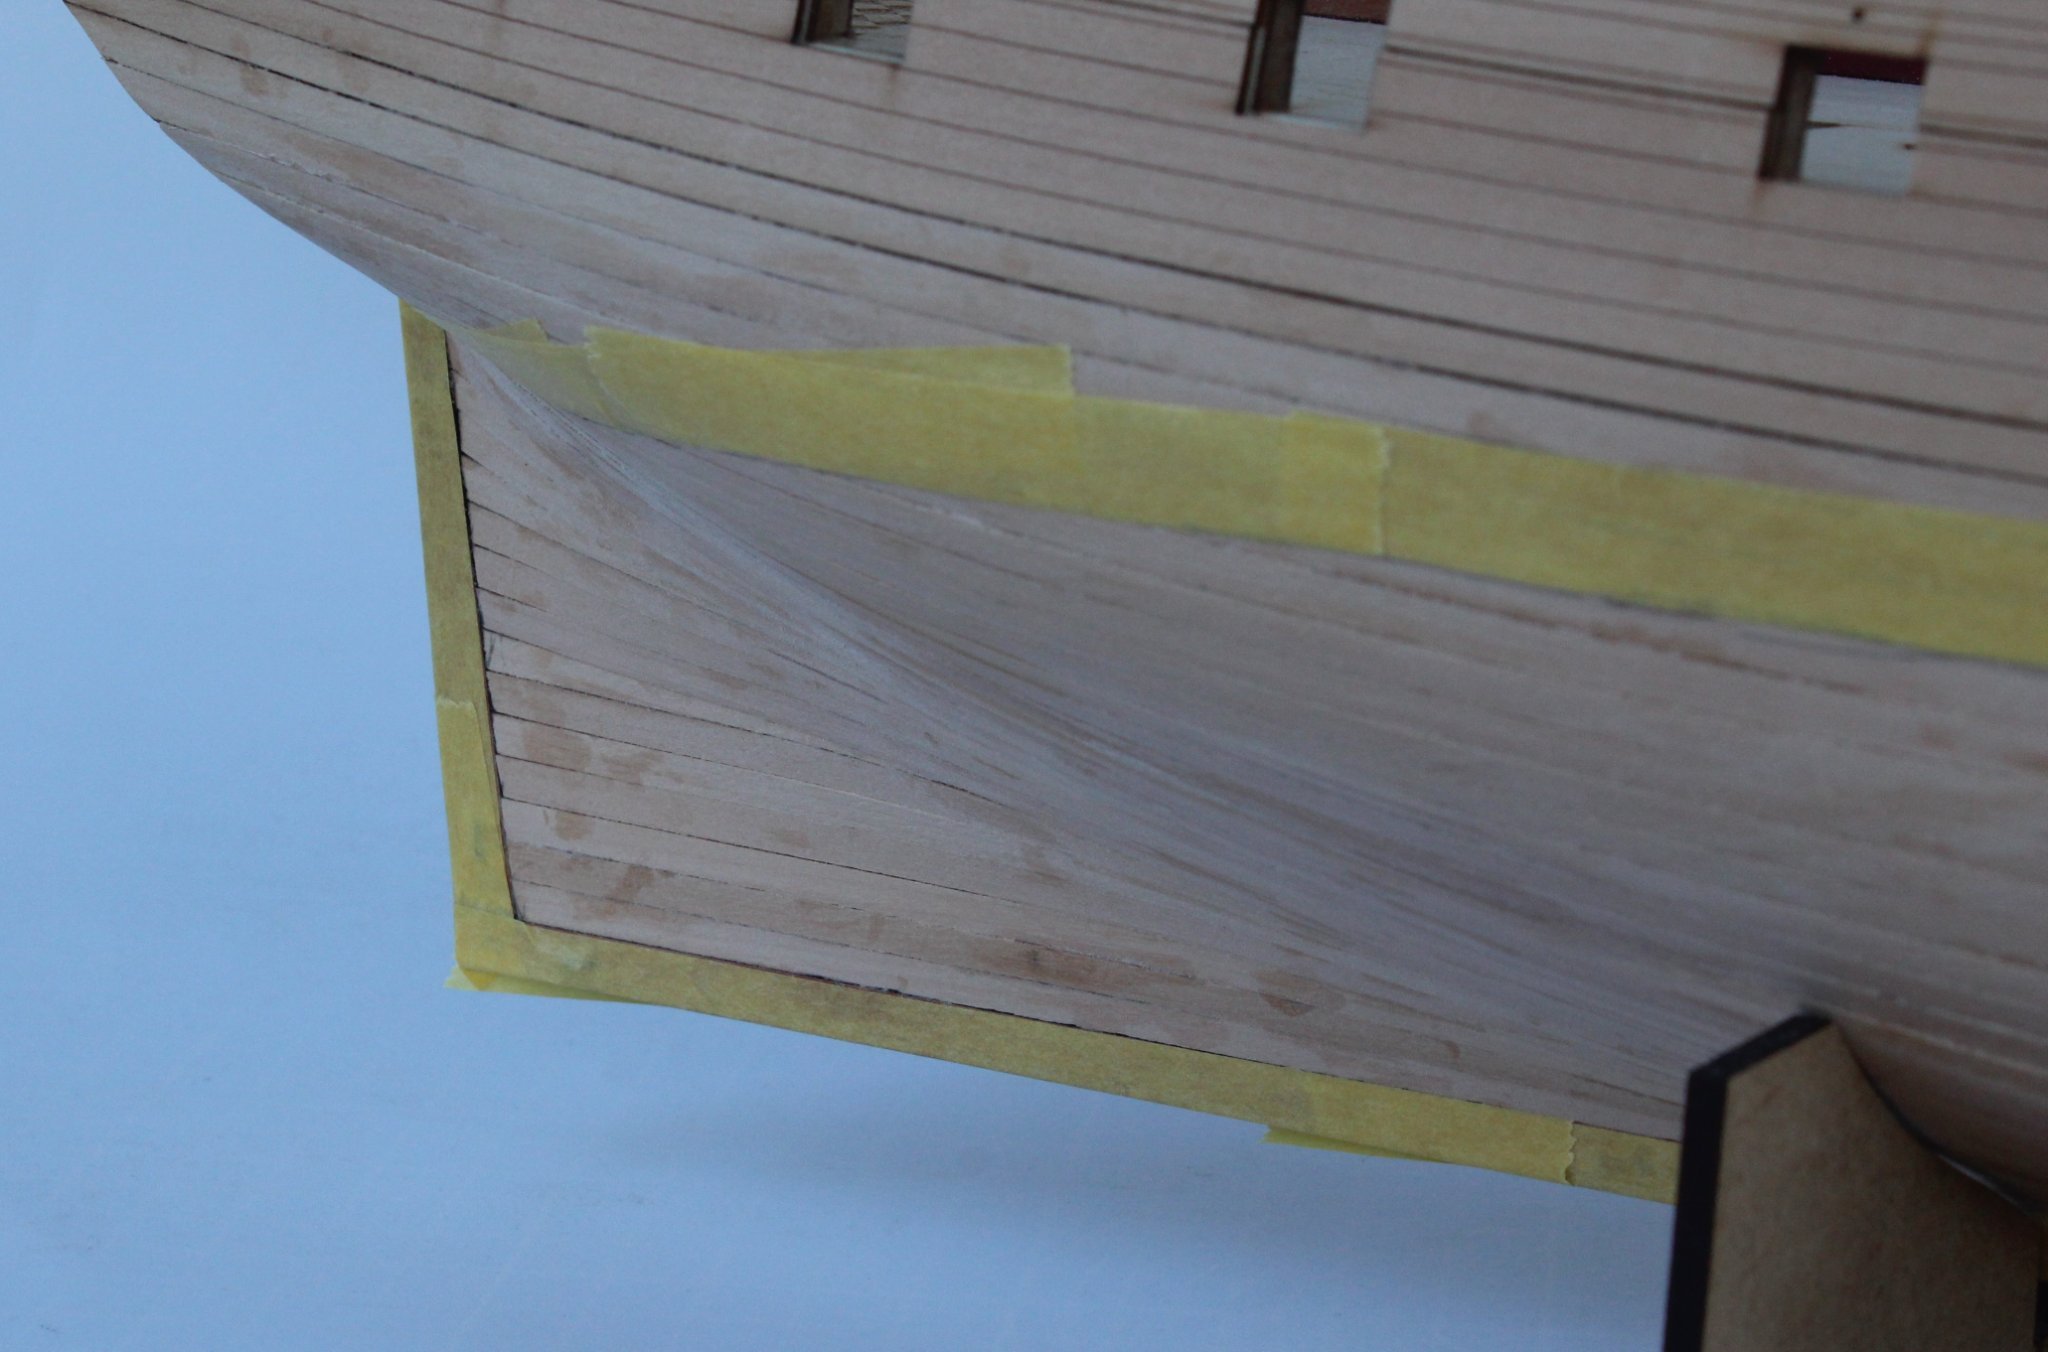
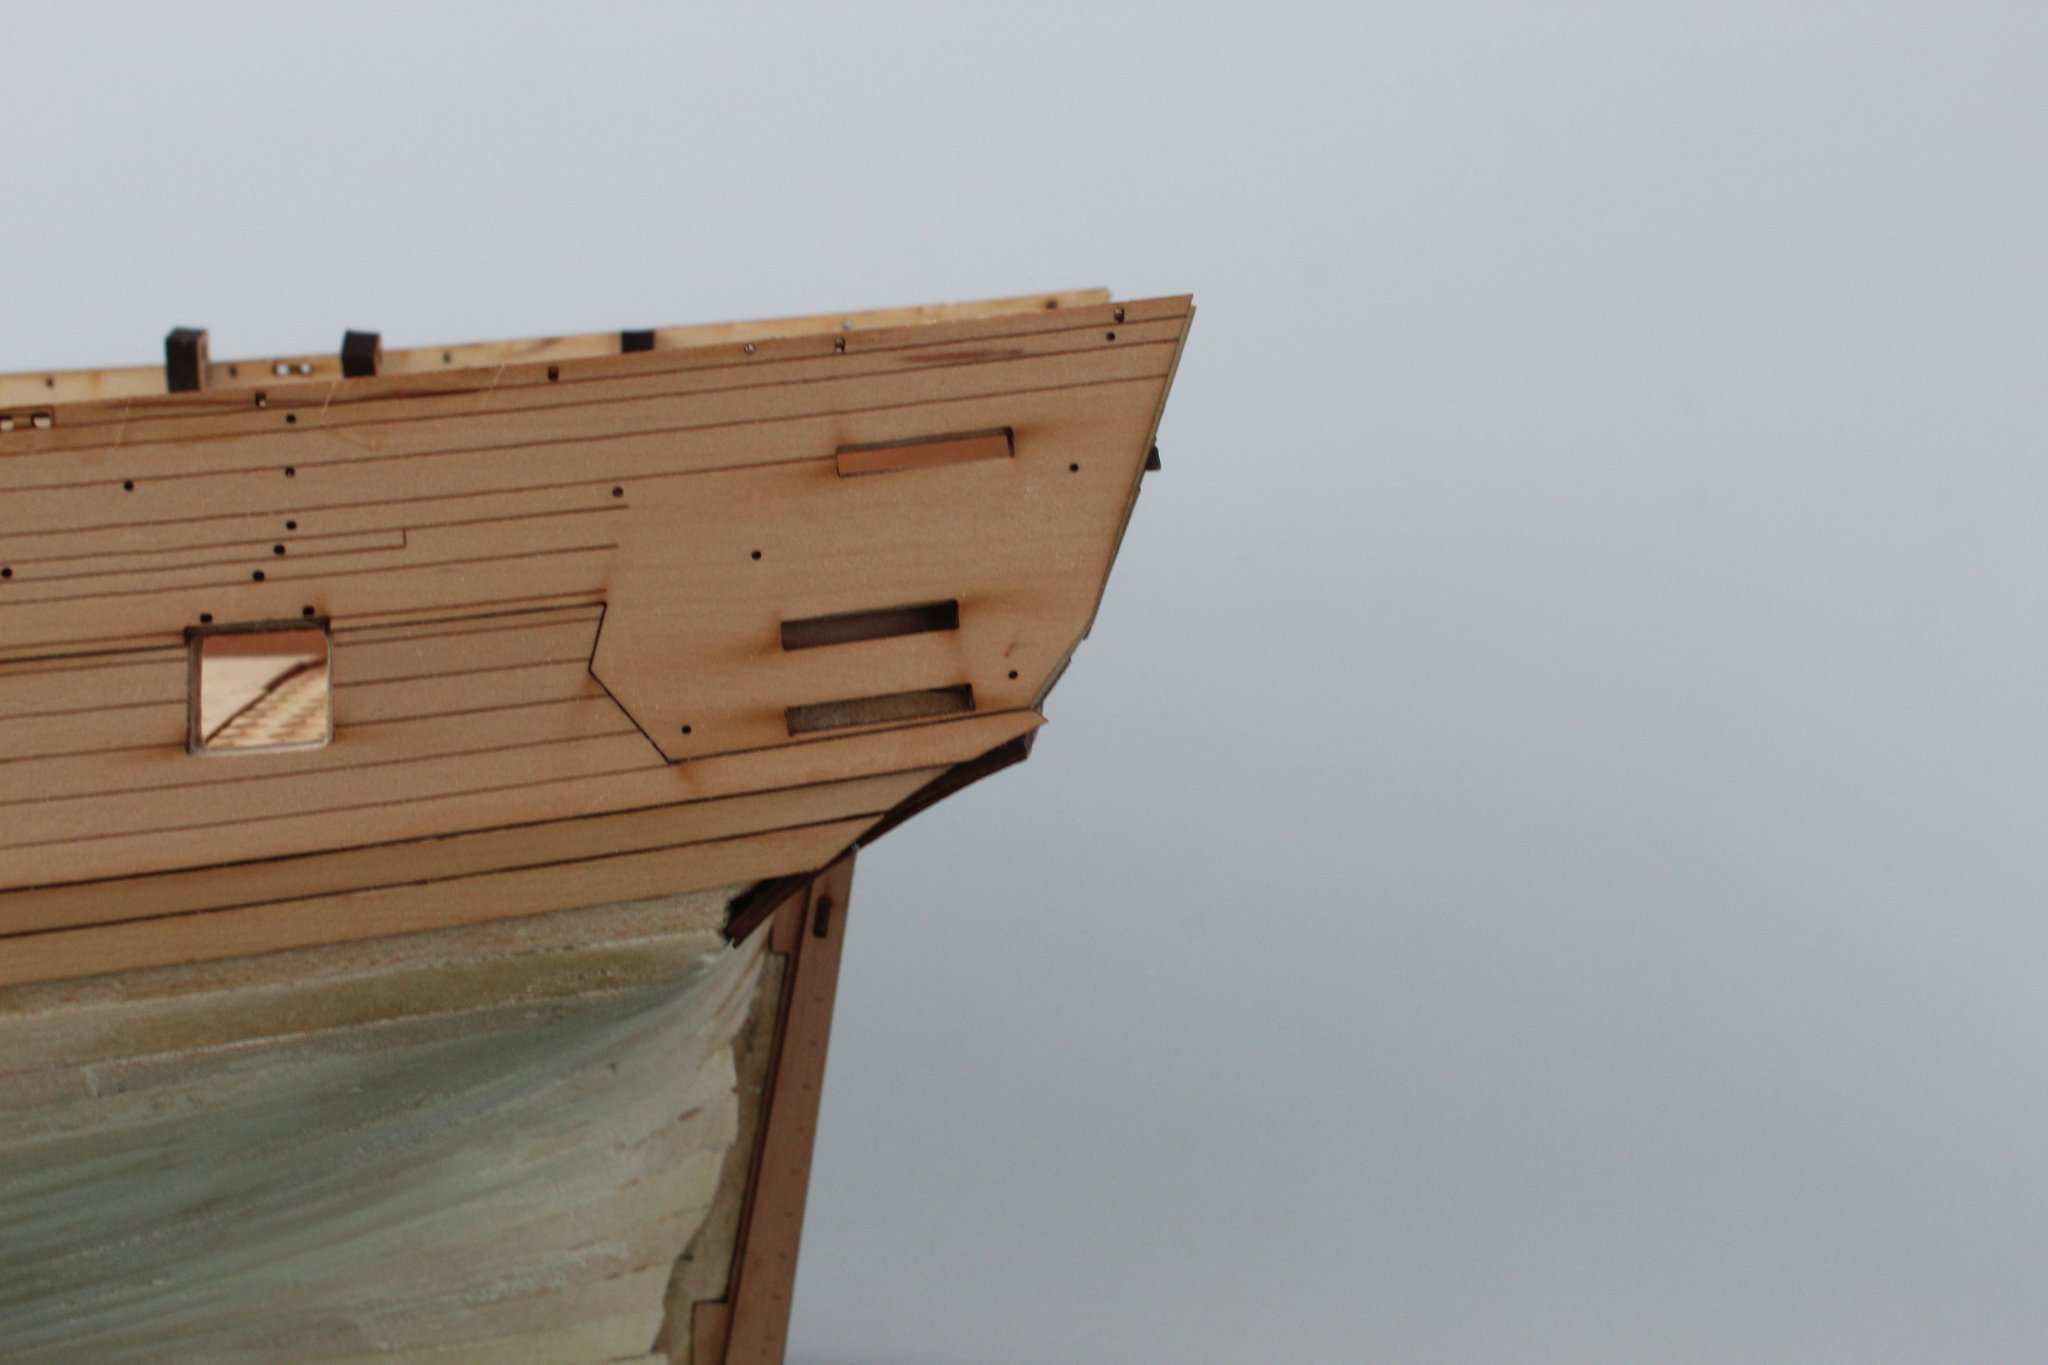
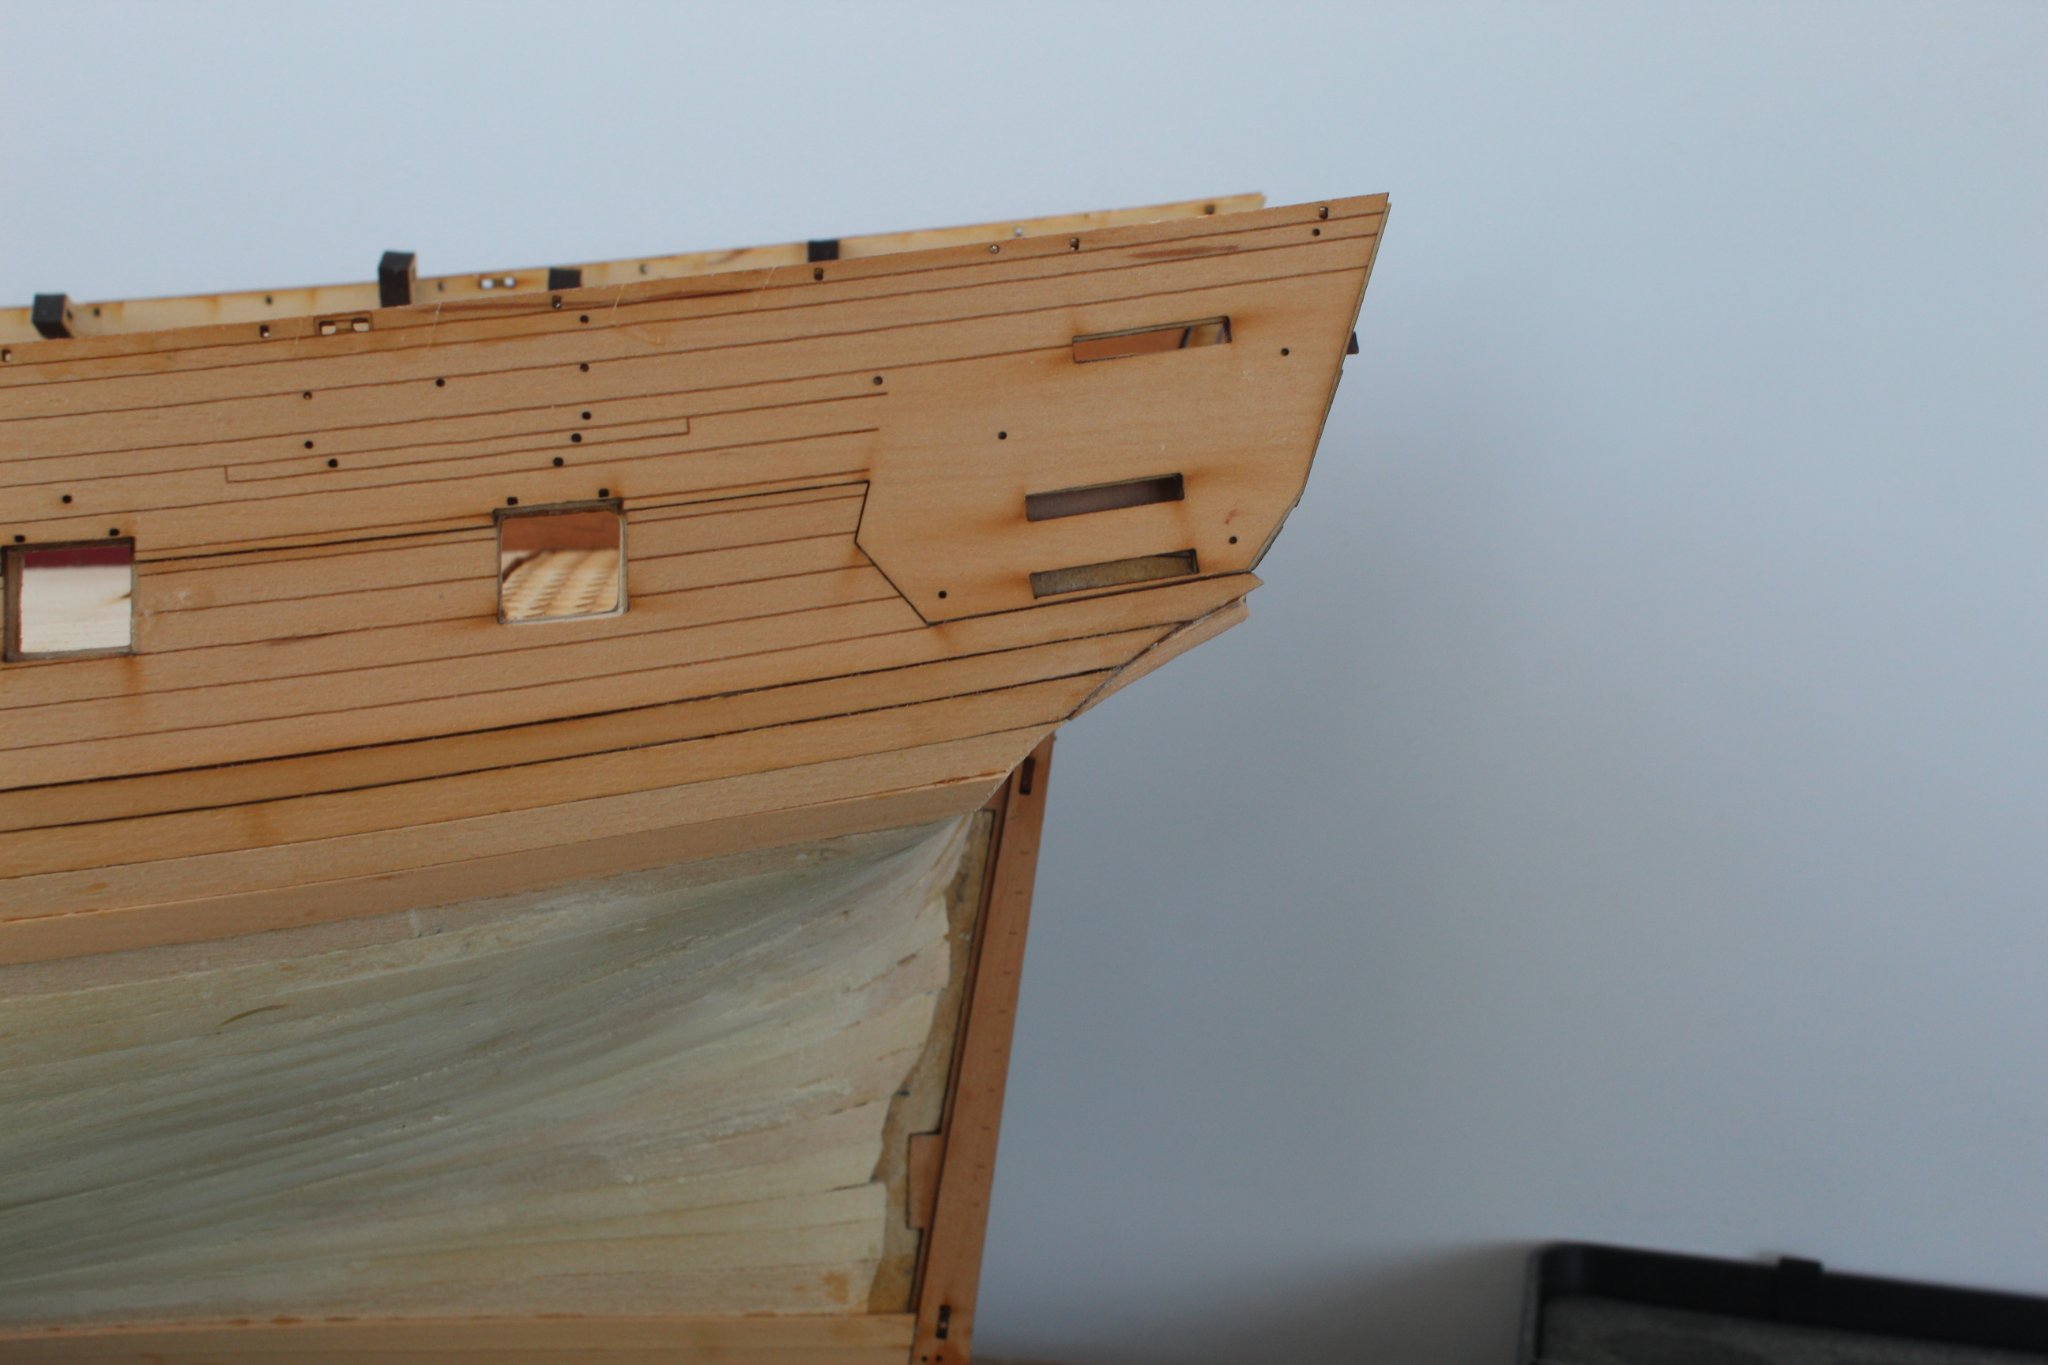
I have completed the 2nd planking along the bottom edge of the stern counter which I find this the hardest aspect of the planking task.
I am not very adept at the planking aspect, but I am reasonably happy with how the stern area has turned out.

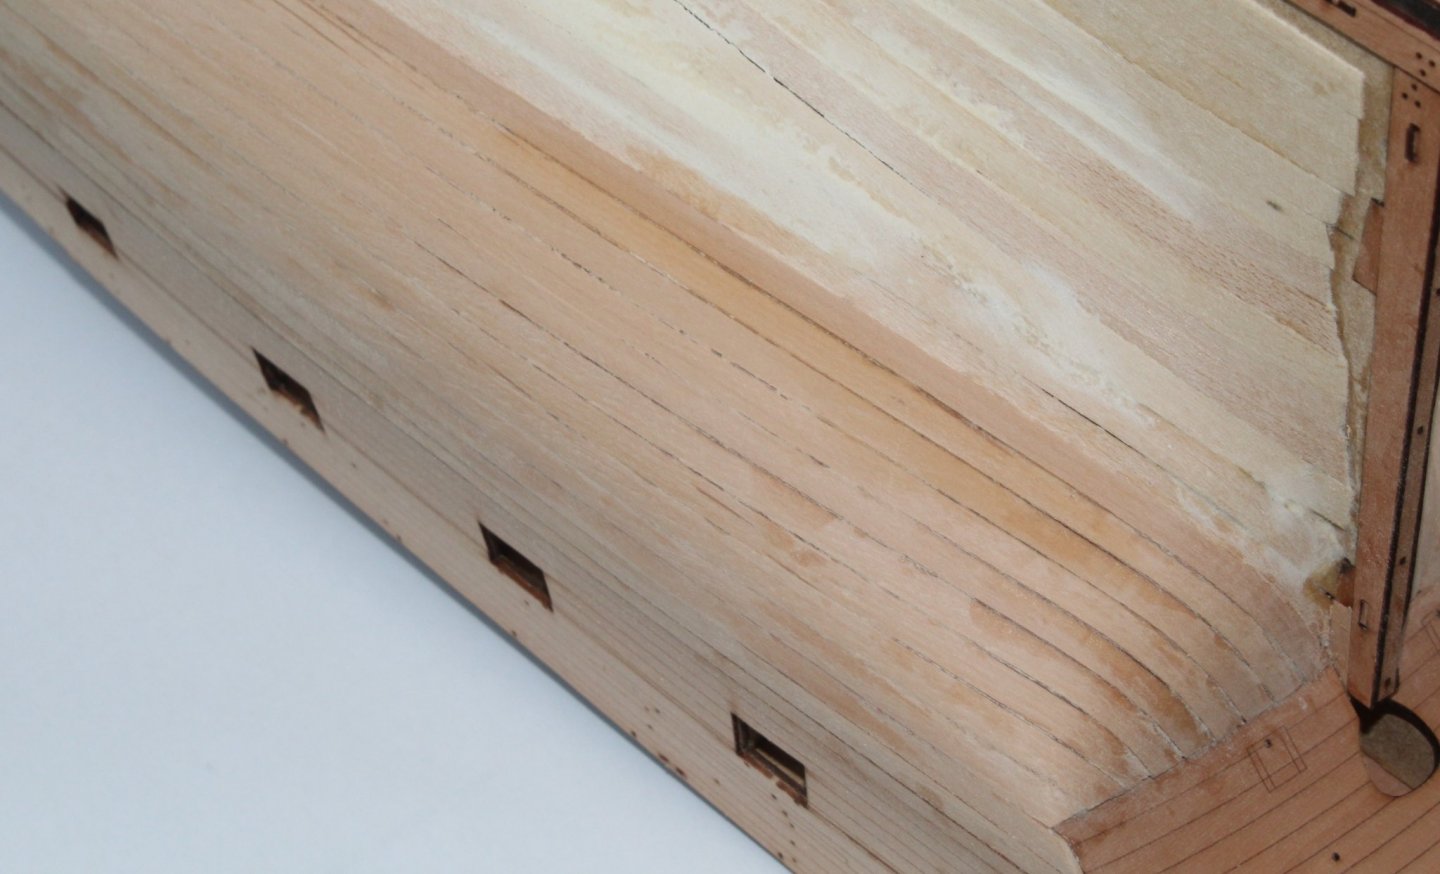
The bow is not too bad, the bottom edge looks a bit odd in the photos below which may be a weird shadow effect. It will require a small amount of filler however in one small area.


-
HULL ASSEMBLY
2ND PLANKING LEFT SIDE
BUILD MANUAL STEP 182
Tools Used
Craft knife
120 & 400-grit sandpaper
Gorilli super glue gel
Gathering the materials required
The following kit parts are required for this section of the build:
Planking strips
Assembly Process
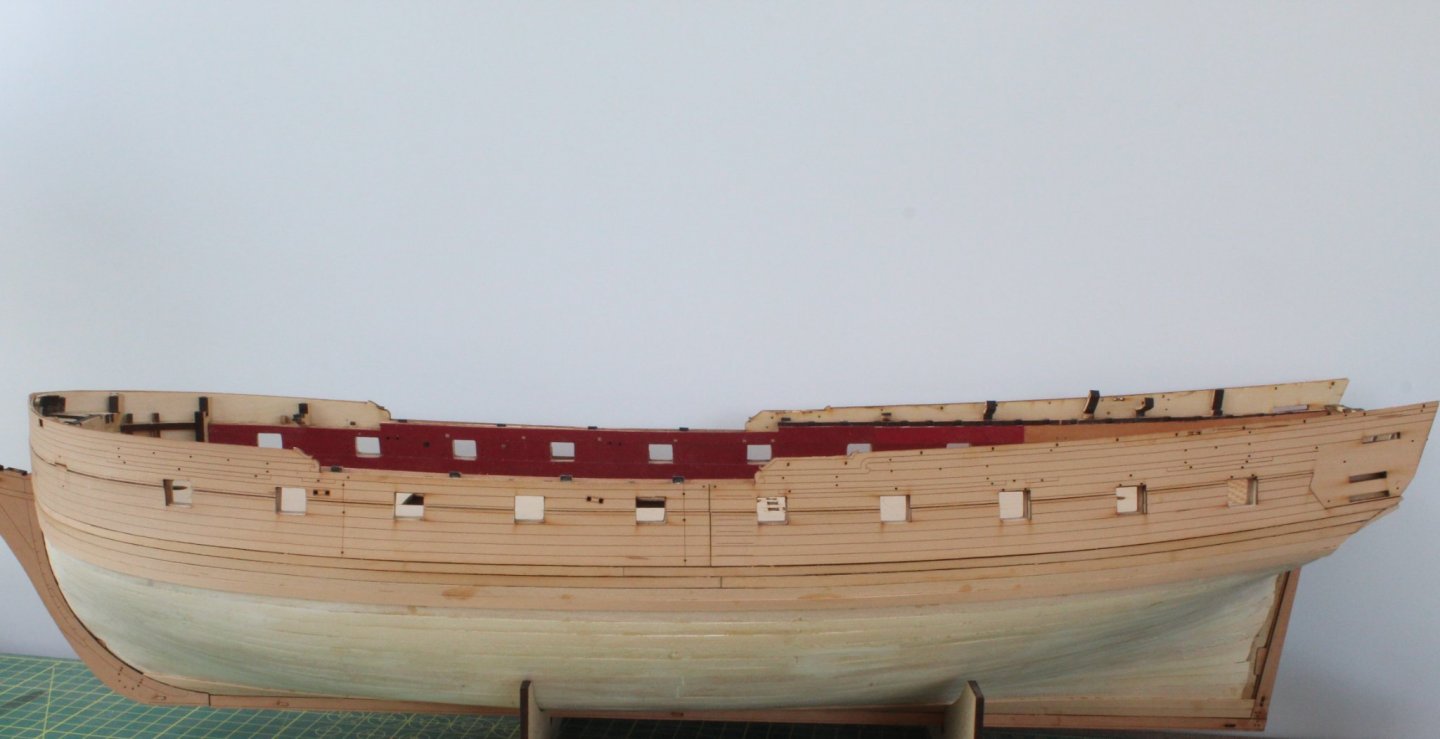
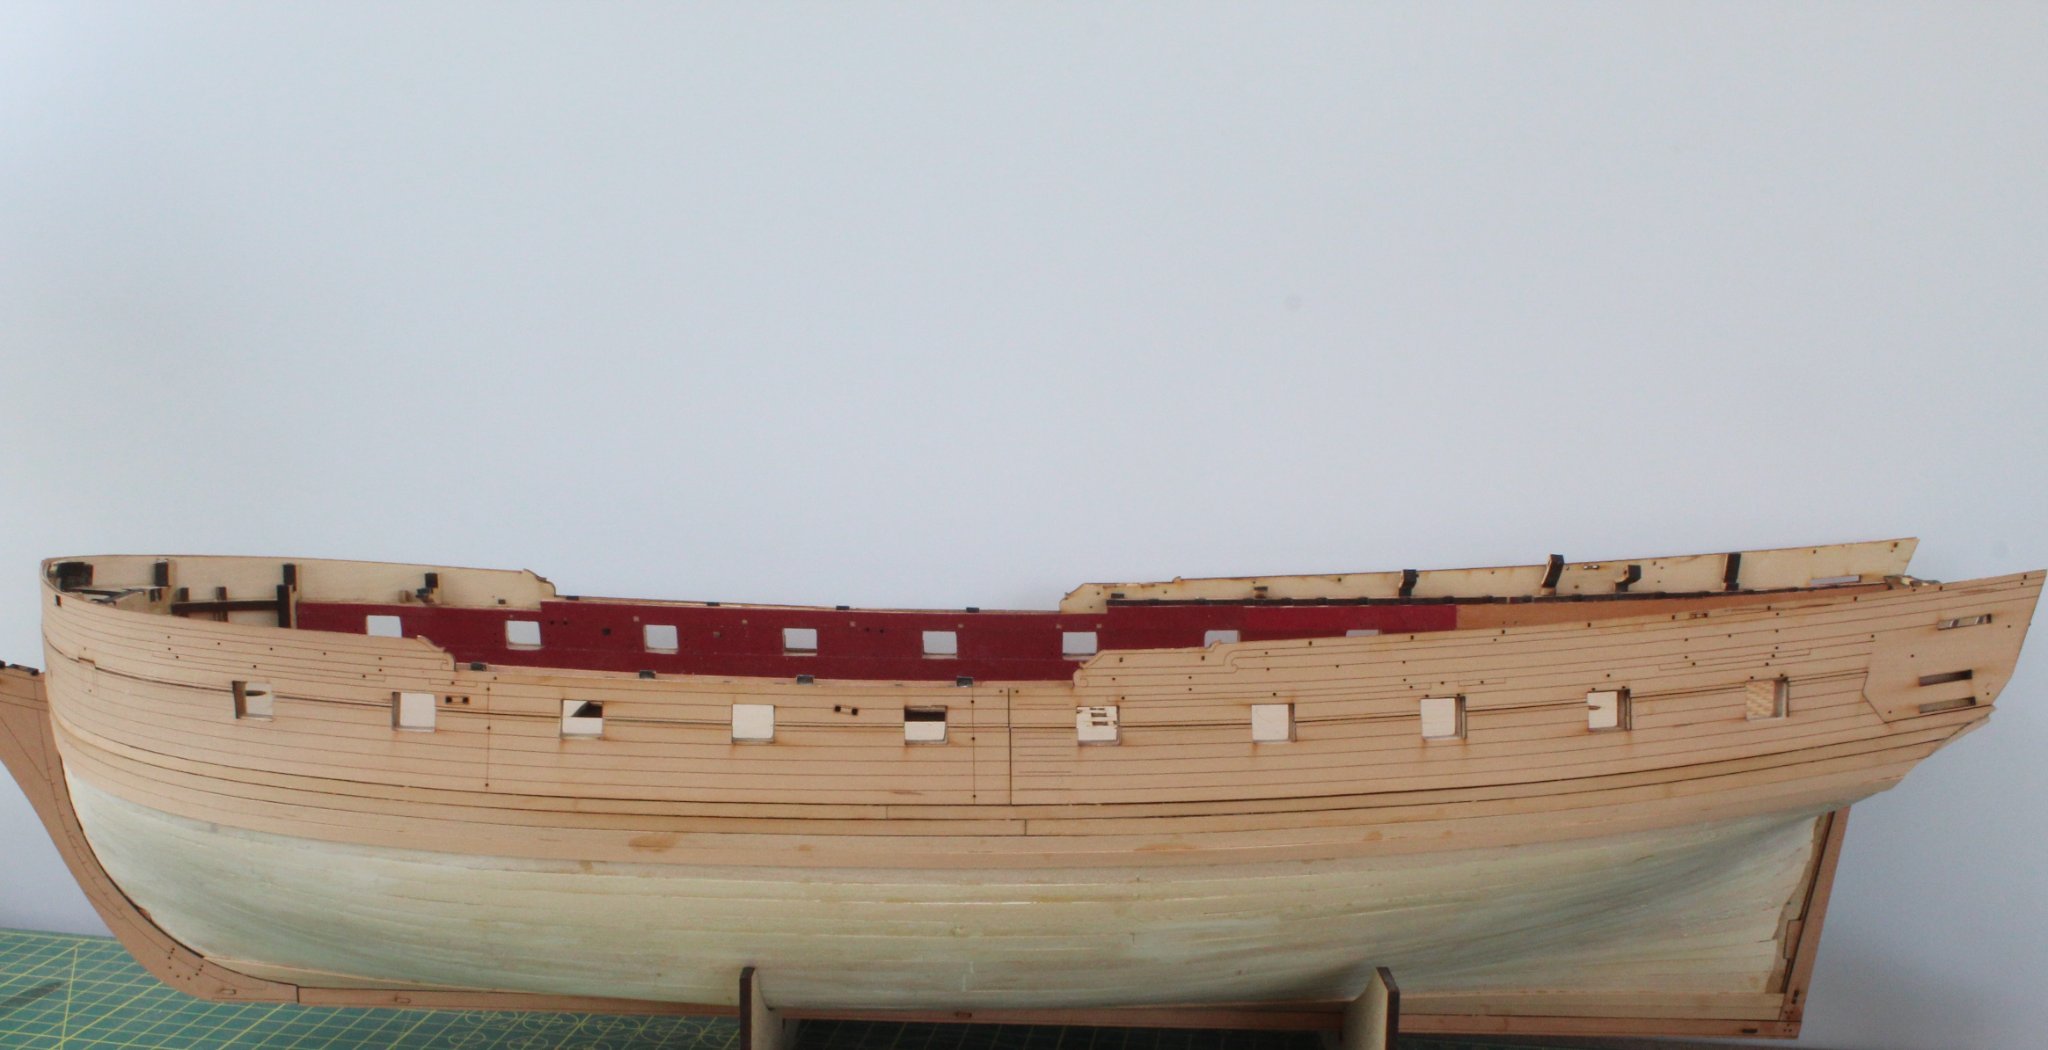
Following on from my last post I have completed the 2nd planking to the left-hand side. Each plank was cut in two with one half used for the bow and the other half used for the stern and a joint around the midship area. This made the job so much easier.
I found by sanding the joint line once the plank had glued the sawdust could bind with any residual ga gel in the joint to fill gaps.
Occasionally I found it necessary to brush some diluted pva over the parts of the plank joint area so the gaps would get filled with the sawdust / pva mix during sanding.
Overall I am reasonably happy with the 2nd planking and I do not think it will require too much more work (sanding and filling) before the painting phase. The right-hand side 2nd planking task will be done next.


- Blue Ensign, JeffT, GrandpaPhil and 12 others
-
 15
15
-
1 minute ago, Blue Ensign said:
Thanks for looking in Malcolm, I don't know about skill and experience, I'm making it up as I go along most of the time.🙄
Looks like you're using the same method as me 😂, looking good however.
- Blue Ensign and mtaylor
-
 2
2
-
-
10 minutes ago, Jasseji said:
I was wondering if using Varnish would be better or worse than PVA ?
I have just experimented to find what works best for me. This is the first time I have tried to sand the hull as plank. So far it seems to be working as I can focus my attention to a small area. Once the hull has been full planked it may need some more work before it is ready to be painted.
-
1 hour ago, Jasseji said:
are you collecting the dust and mixing it with glue or how ?
@Jasseji I am using three very similar methods.
a) In the first instance, straight after the plank is glued in place, I will sand the joint line between the two planks. This will remove any excess ca gel and the sawdust can sometimes bind with any residual ga gel in the joint area to fill gaps.
b) For the plank edges with the stern counter, stern post and stem post I am sanding the planks in situ and then using an old paint brush which is dipped in diluted pva move the plank sawdust to the joint between the planks and posts where needed.
c) Where the plank joint has been made (i.e. when I have cut a plank in half and then fitted one half for the bow and the other half for the stern) I brush some diluted pva over the plank joint area and sand so any gaps get filled with the sawdust / pva mix. This is also will be used if there a small gap between adjacent planks.
I hope that explains what I am doing.
-
HULL ASSEMBLY
2ND PLANKING STAGE 1
BUILD MANUAL STEP 182
Tools Used
Craft knife
120 & 400-grit sandpaper
Gorilla super glue gel
Plank nipper
Gathering the materials required
The following kit parts are required for this section of the build:
Planking strips
Assembly Process
I have started planking both directions, i.e., from the keel upward and the planking patterns downward. I am happy with how the planks are looking. Unlike the tradition method of sanding and filling the completed plank hull I am tending to sand as I go along and using the sawdust to fill around the edges and joints. So far this seems to be working well, but time will tell if this was a good or bad idea. I am fully expecting the completed hull may need some extra filling and sanding before the painting phase.
The use of the gel ca glue is good and is proving to be a great way to complete this task. As per build instruction suggestion I am fitting the planks as two halves, except for the first two planks located below the planking patterns.
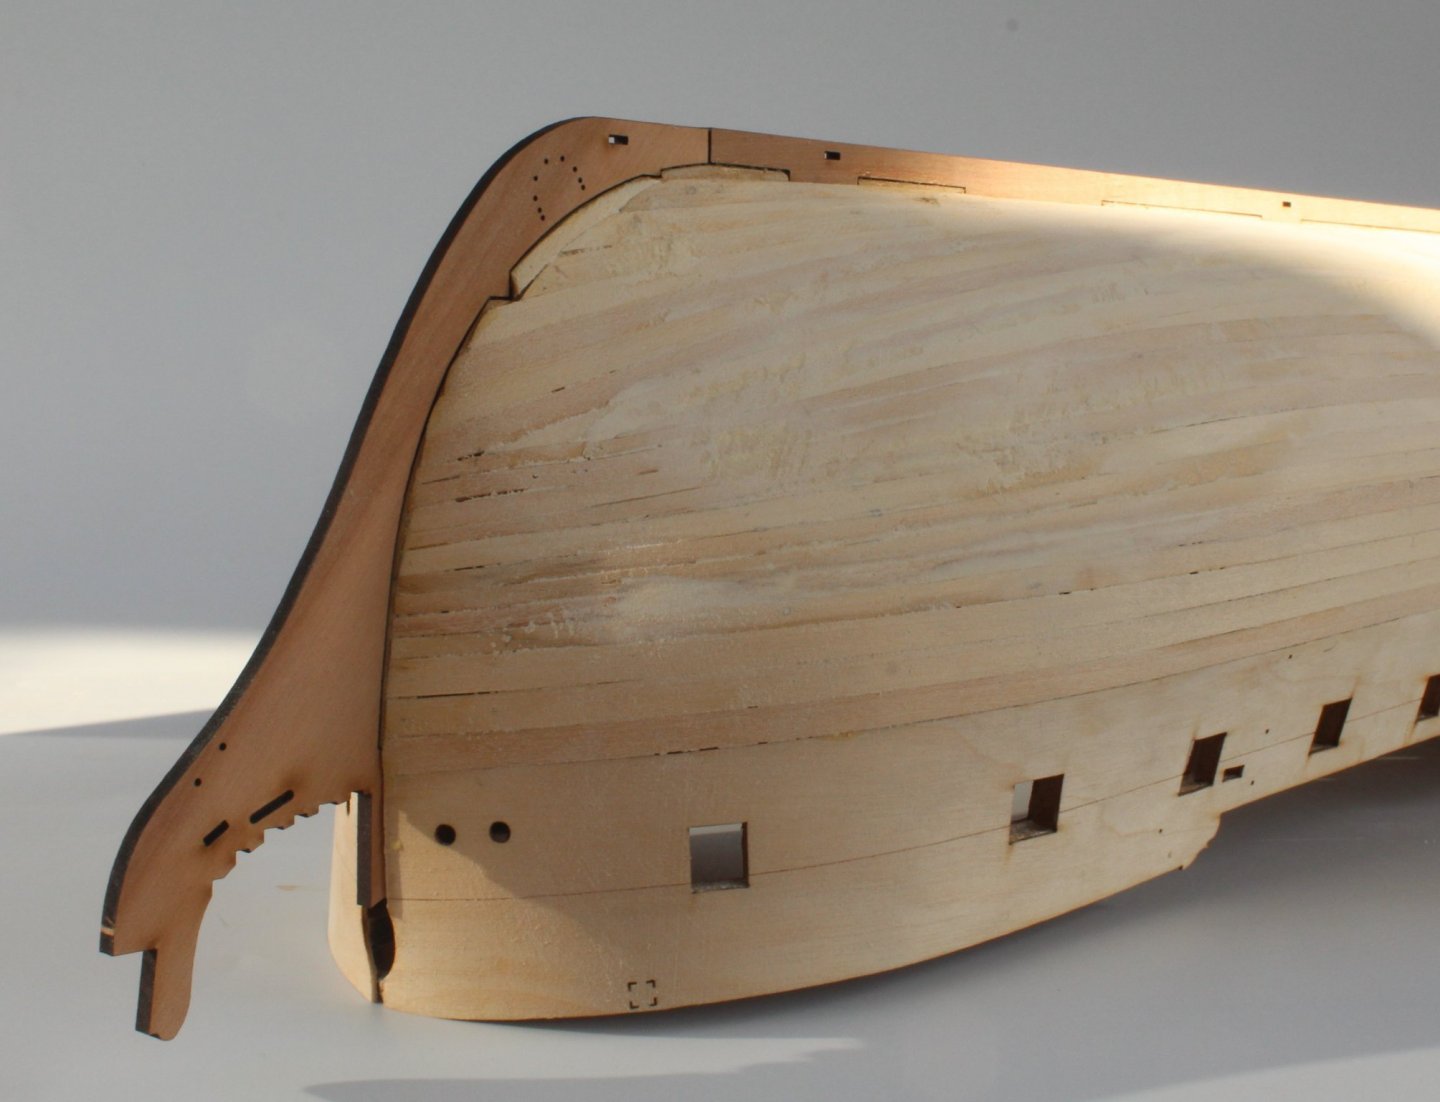
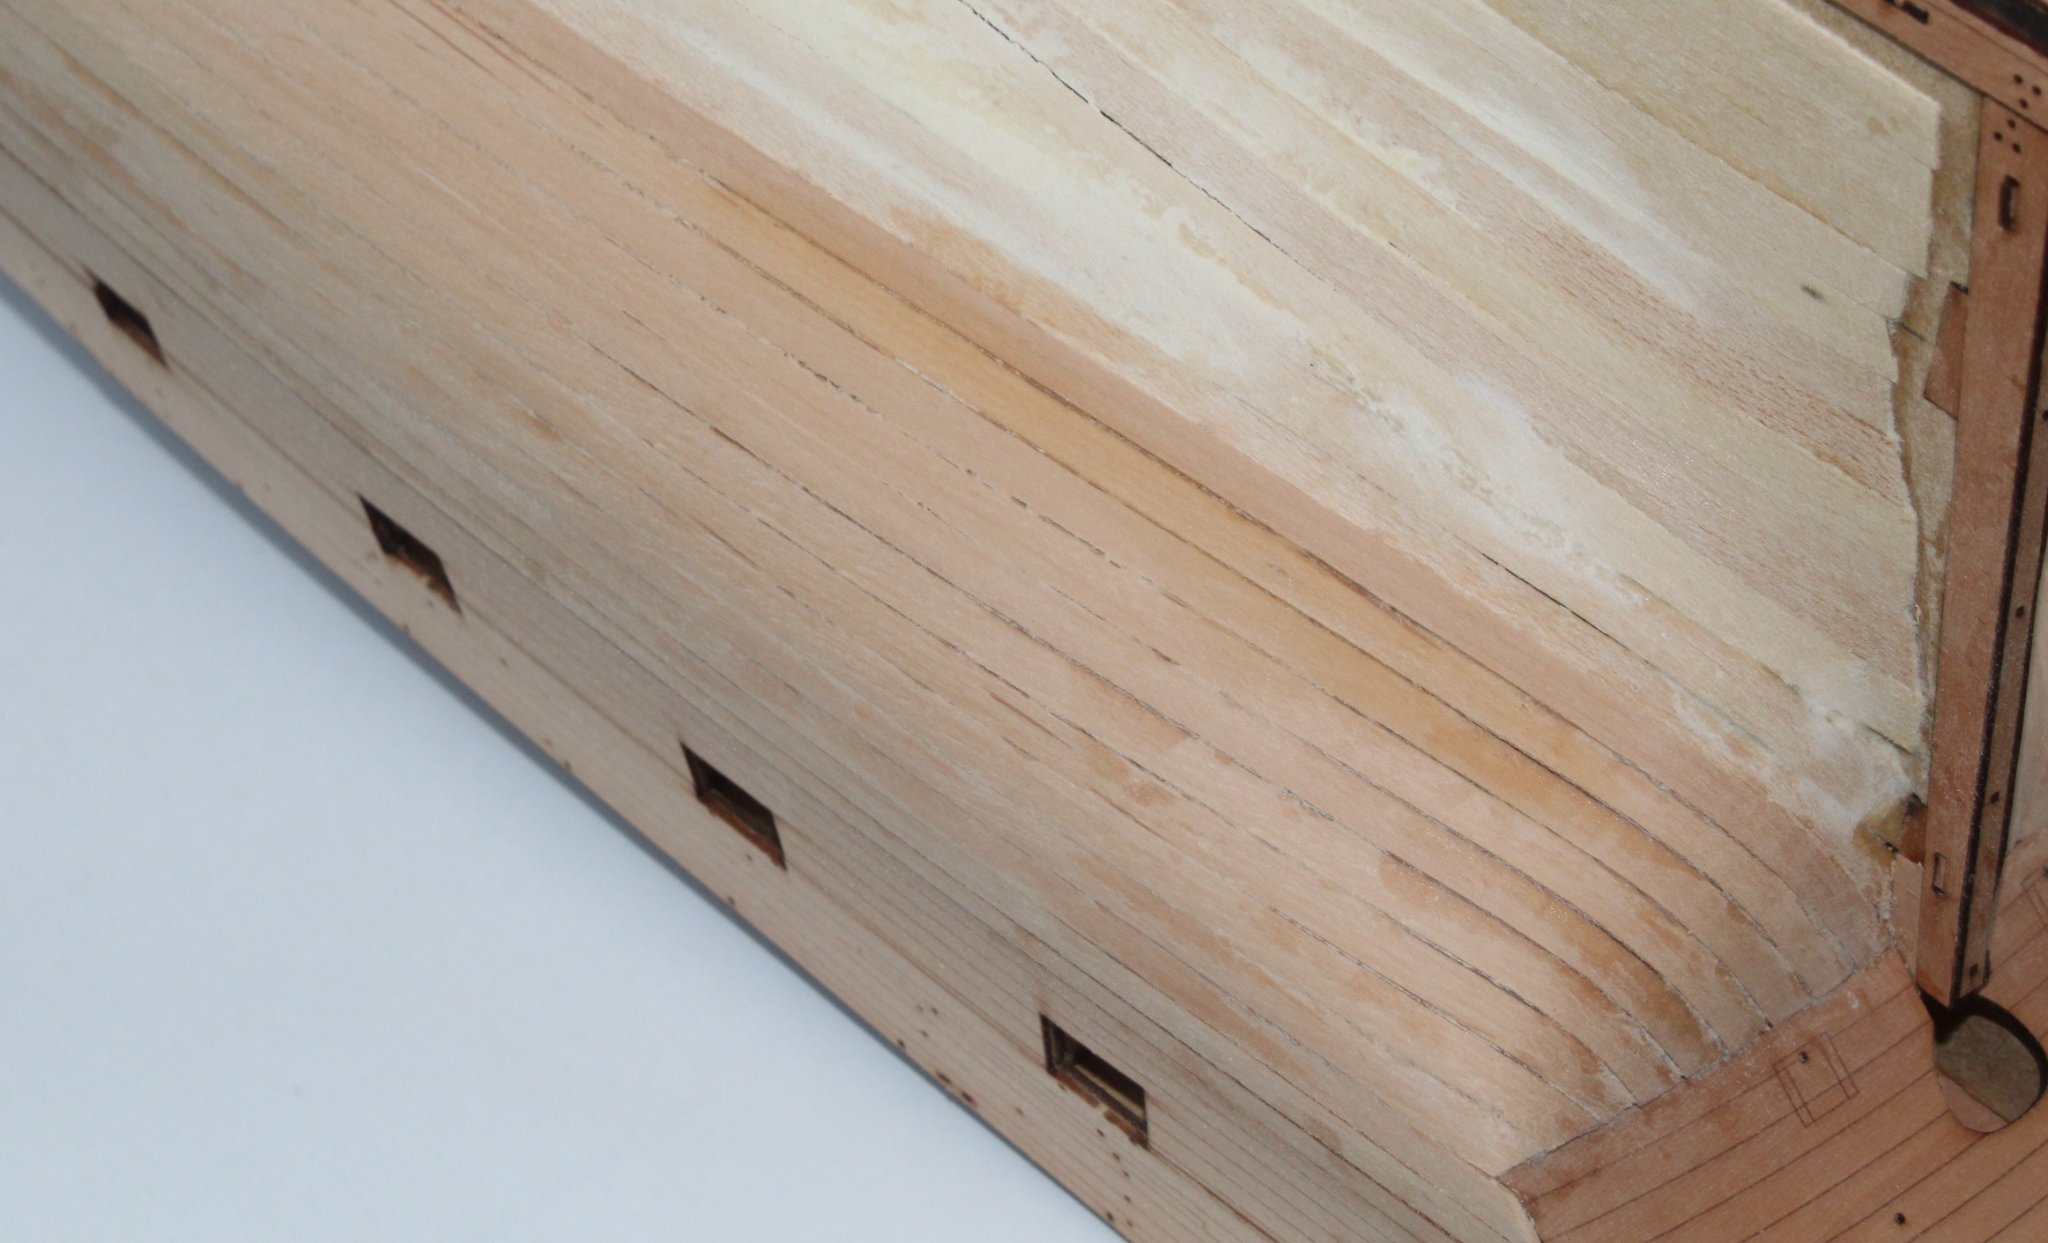
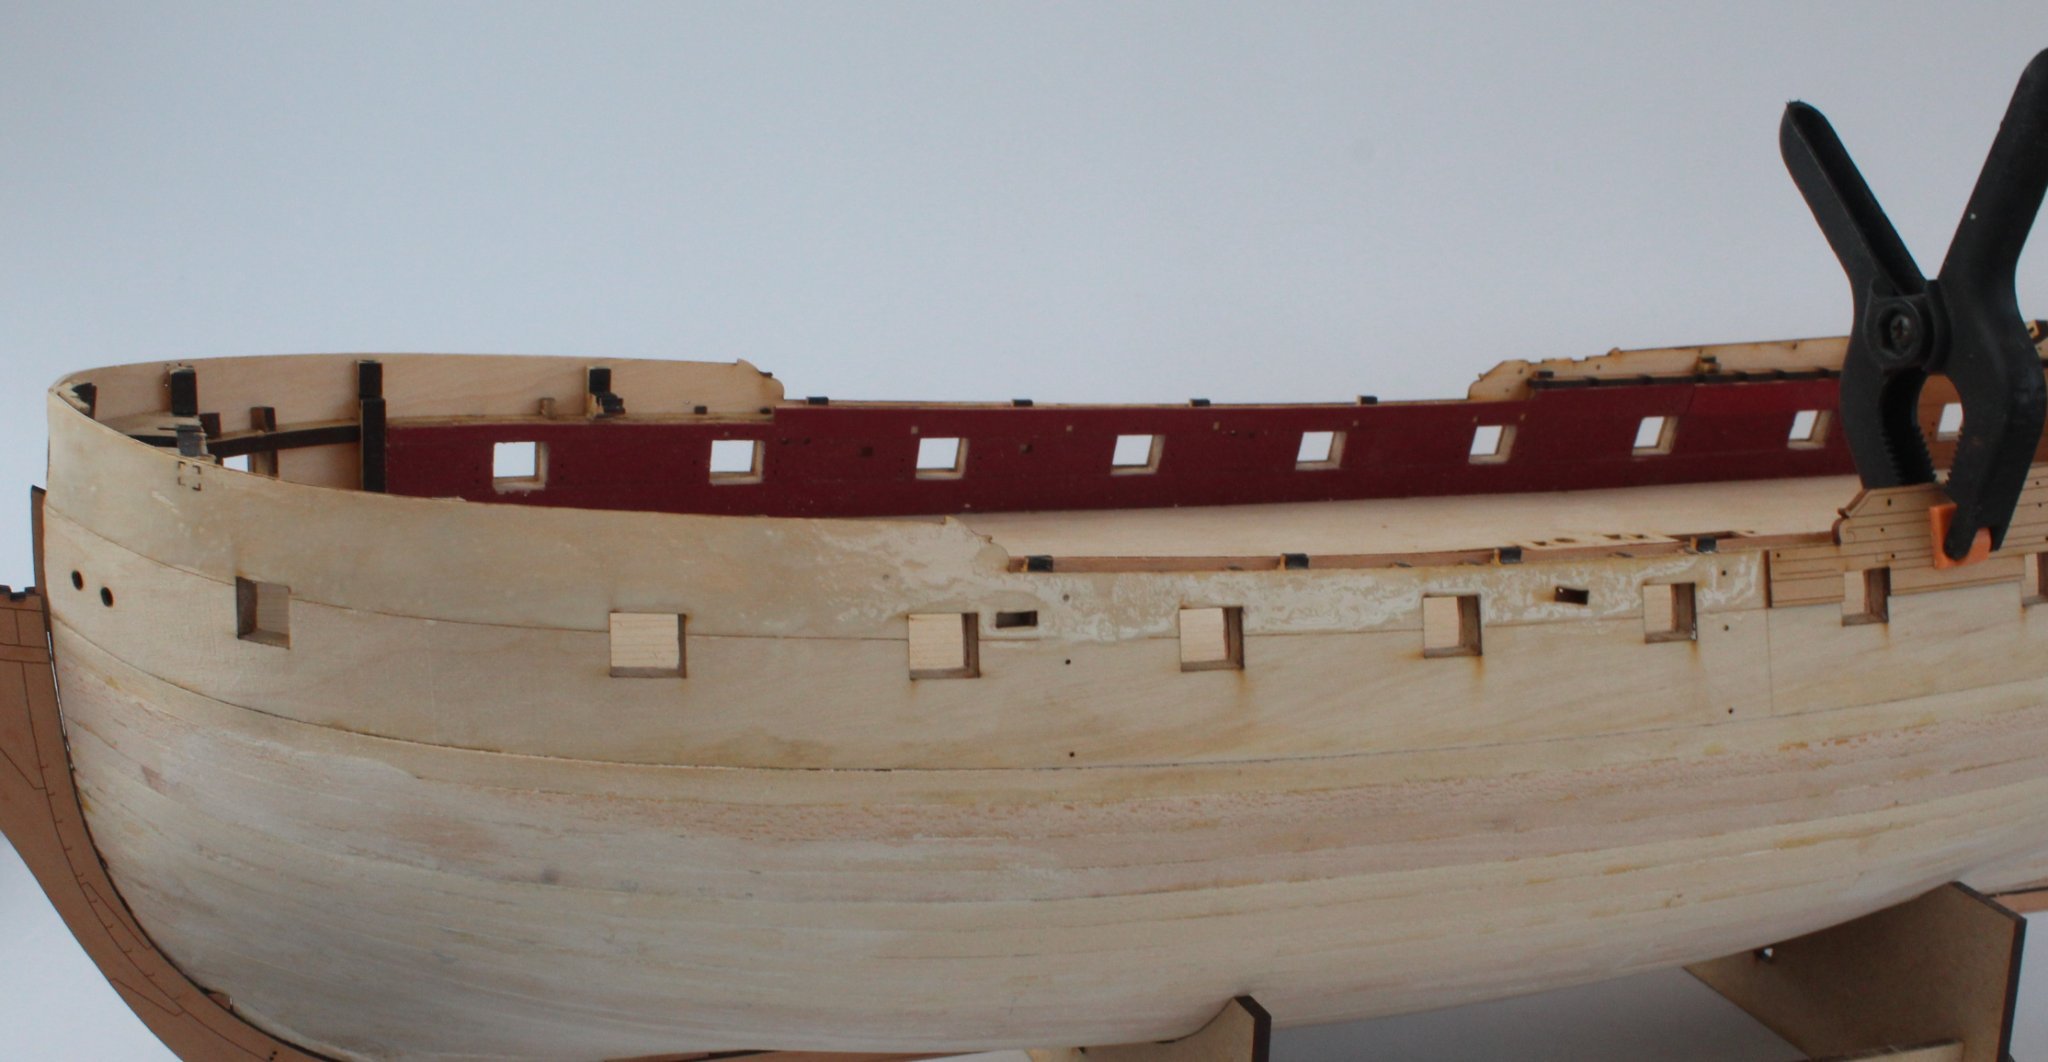
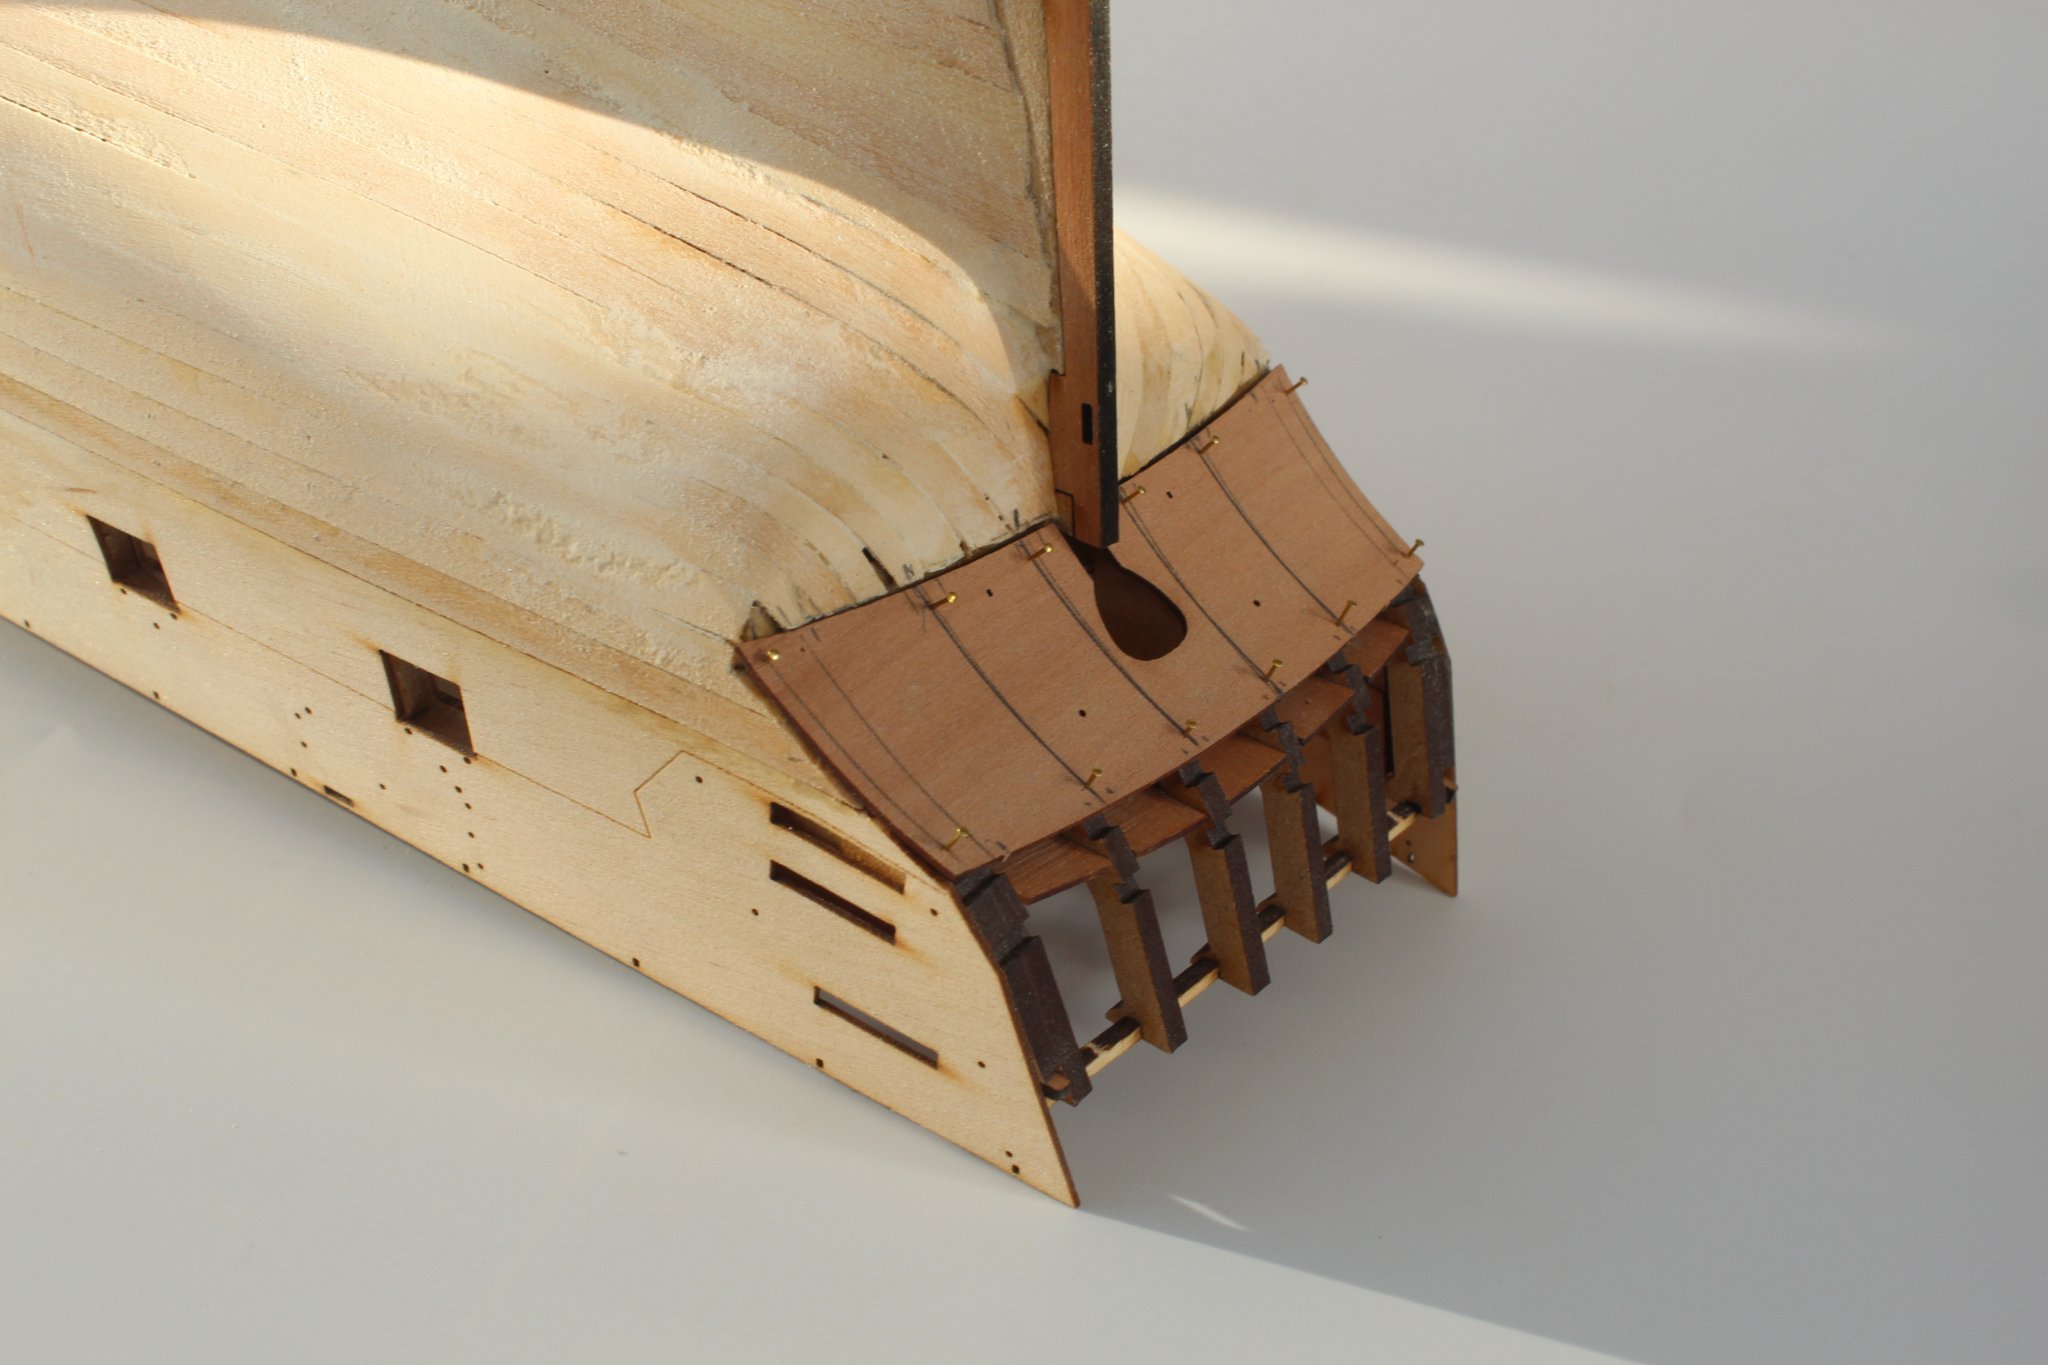
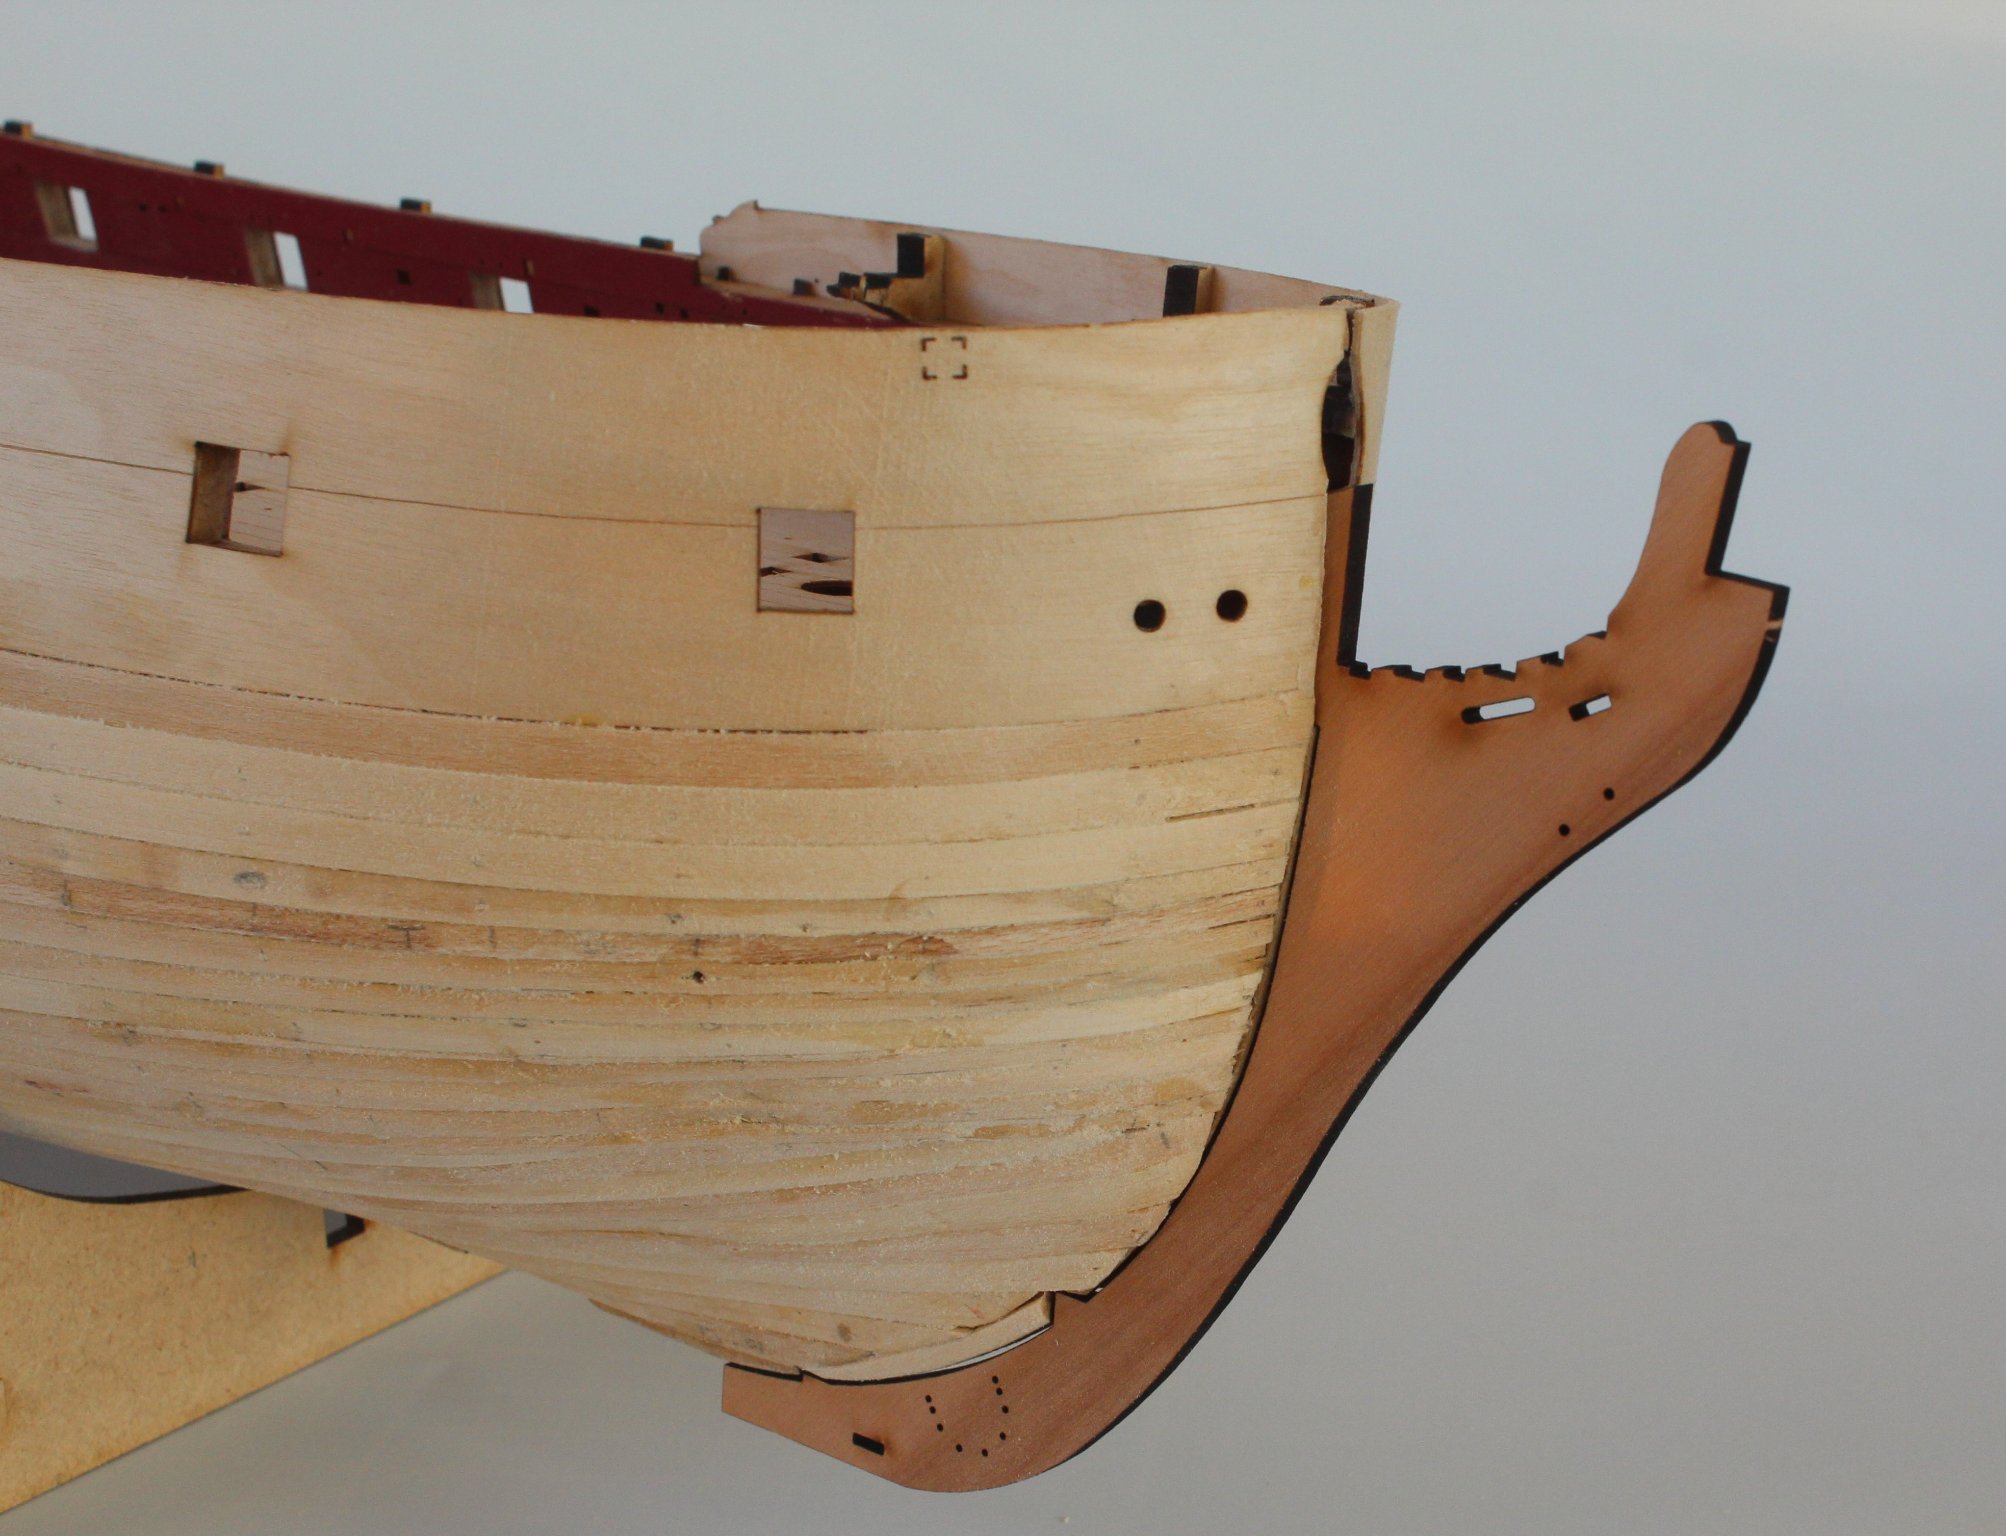
This shows the upper bow section. I will decide if I need to sort the gap between the upper planking patterns later on in the build as I think the rails, when fitted, will cover the gap.

The garboard planks fitted

The stern area. At the moment I am using a plank nipper to shape the planks which seems to be working very well at the moment. Once the sawdust filler solution has full dried the excess sawdust can be brushed away. I am hoping the gallery, when fitted, will help hide the infill
A broadside view
-
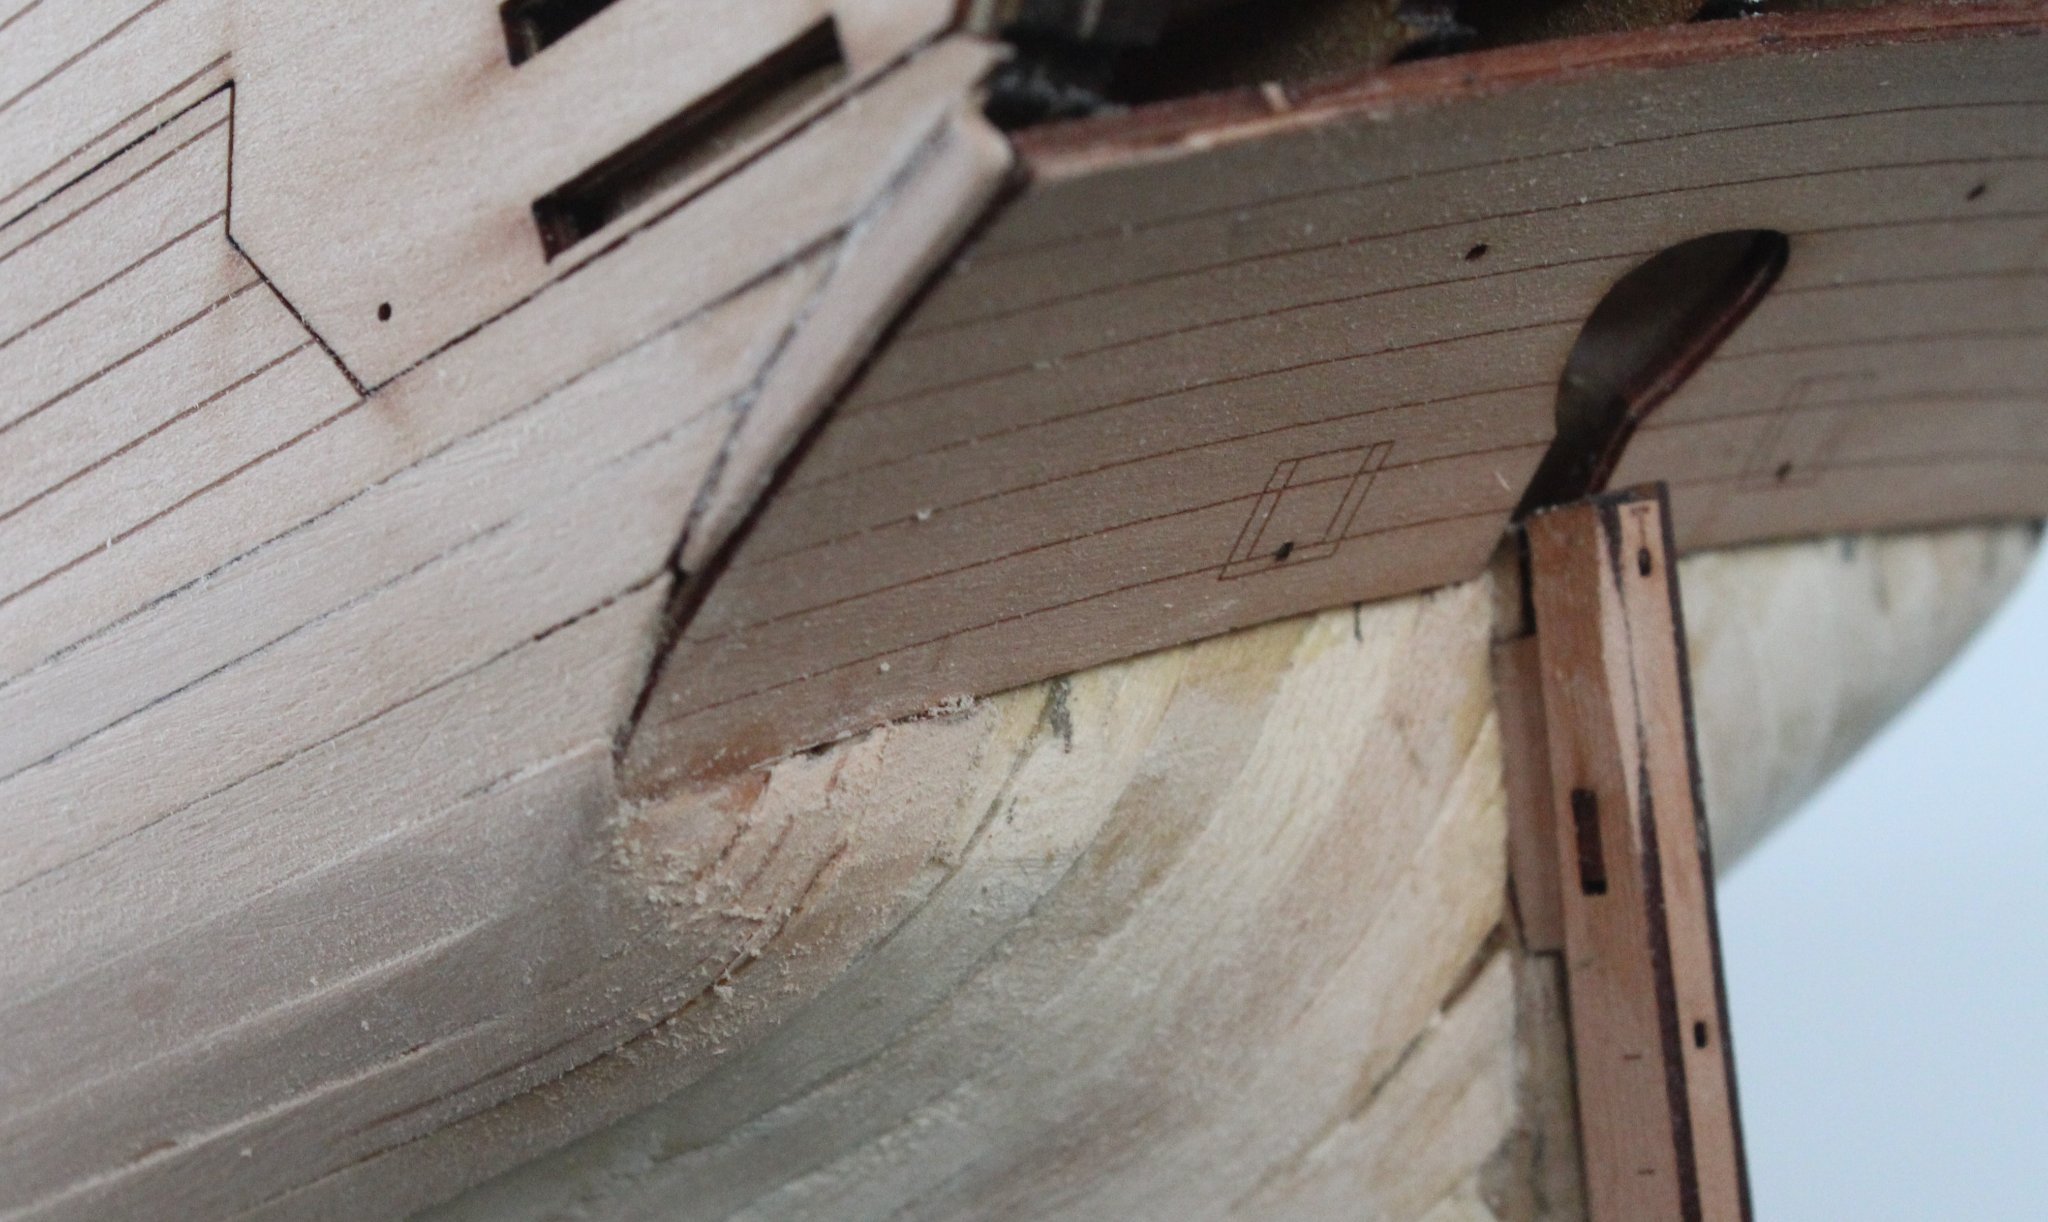
This post is not in my normal format, as it not really covering a build stage.
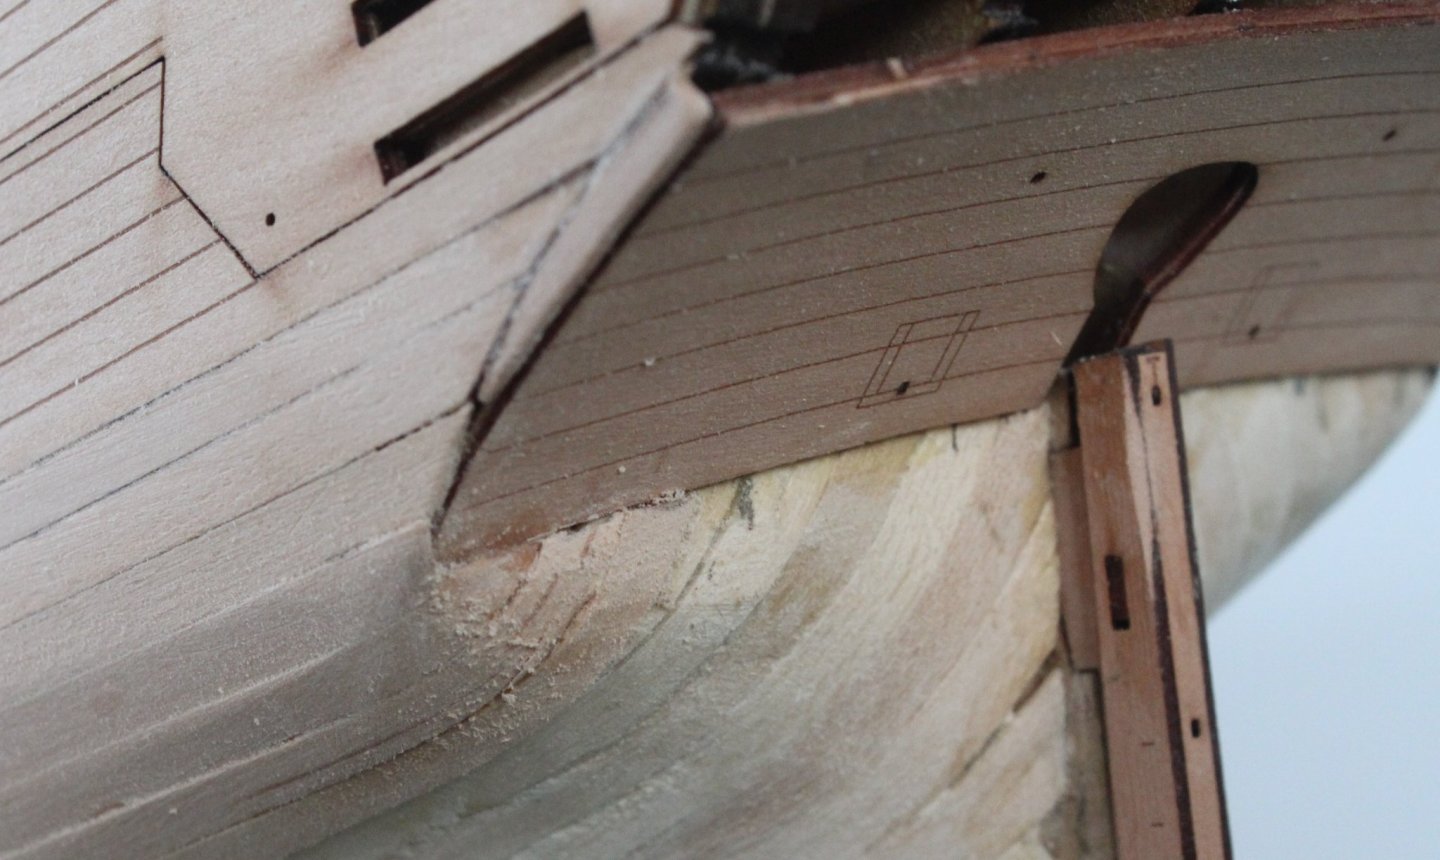
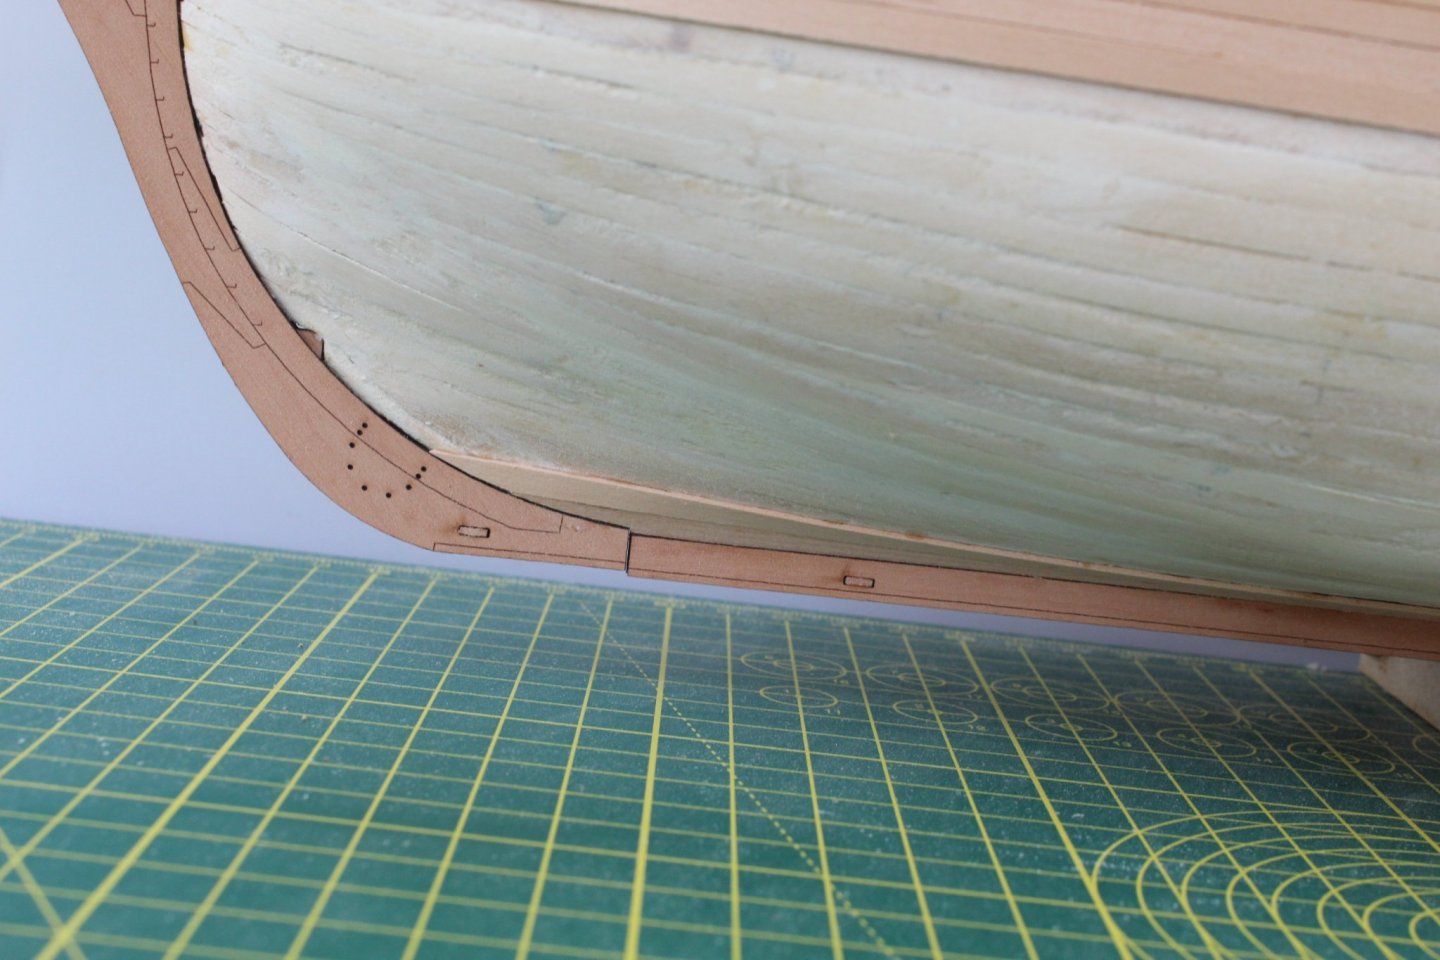
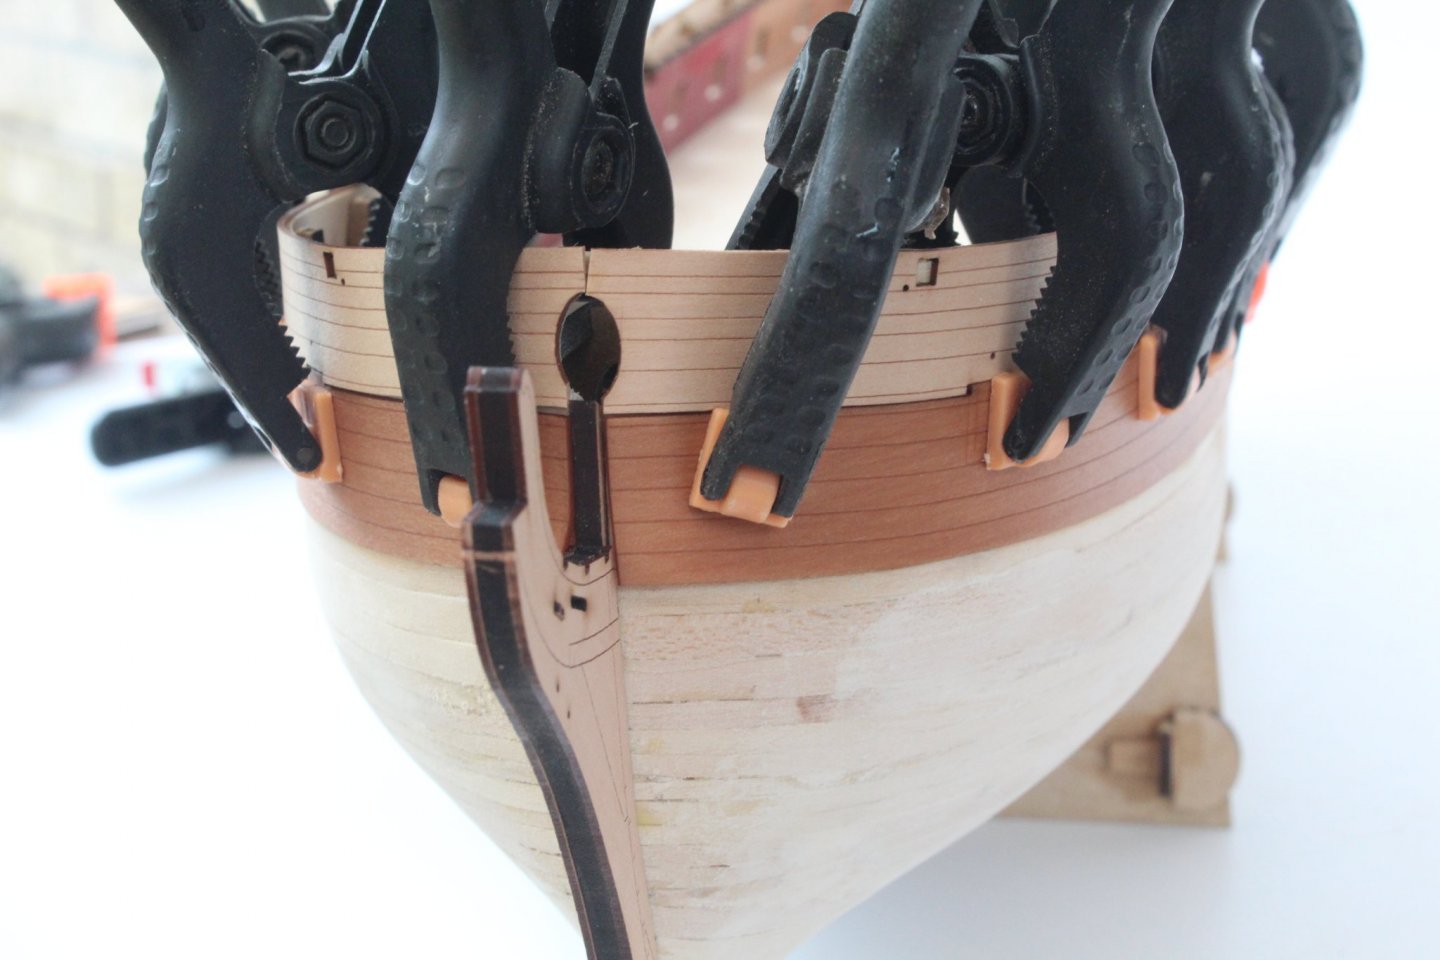
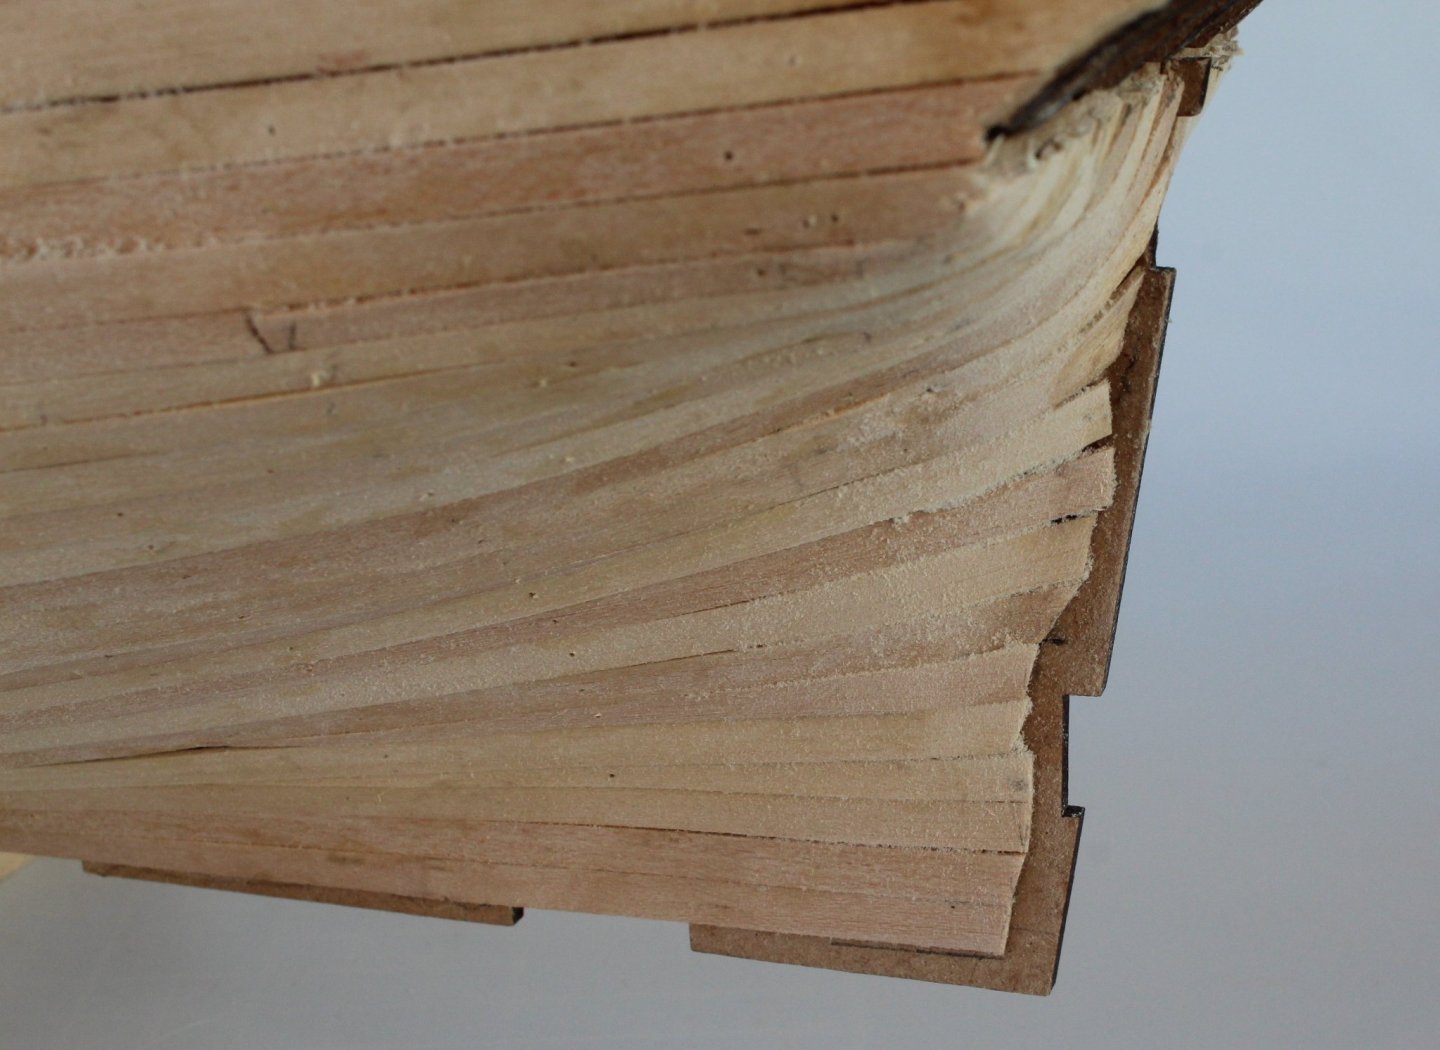
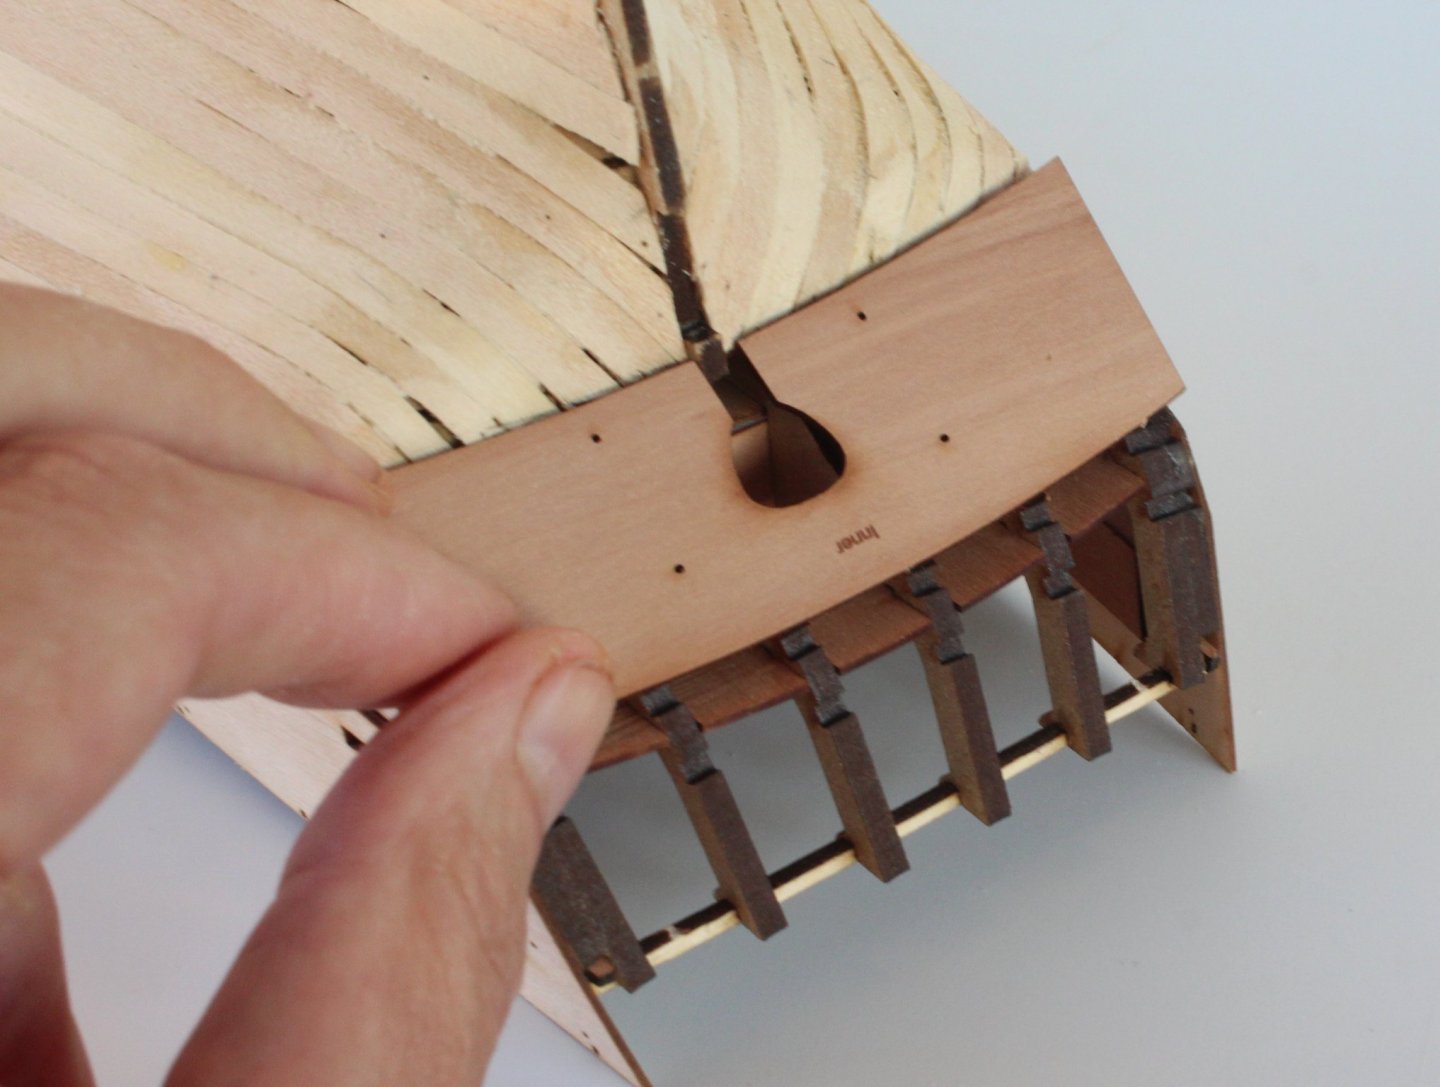
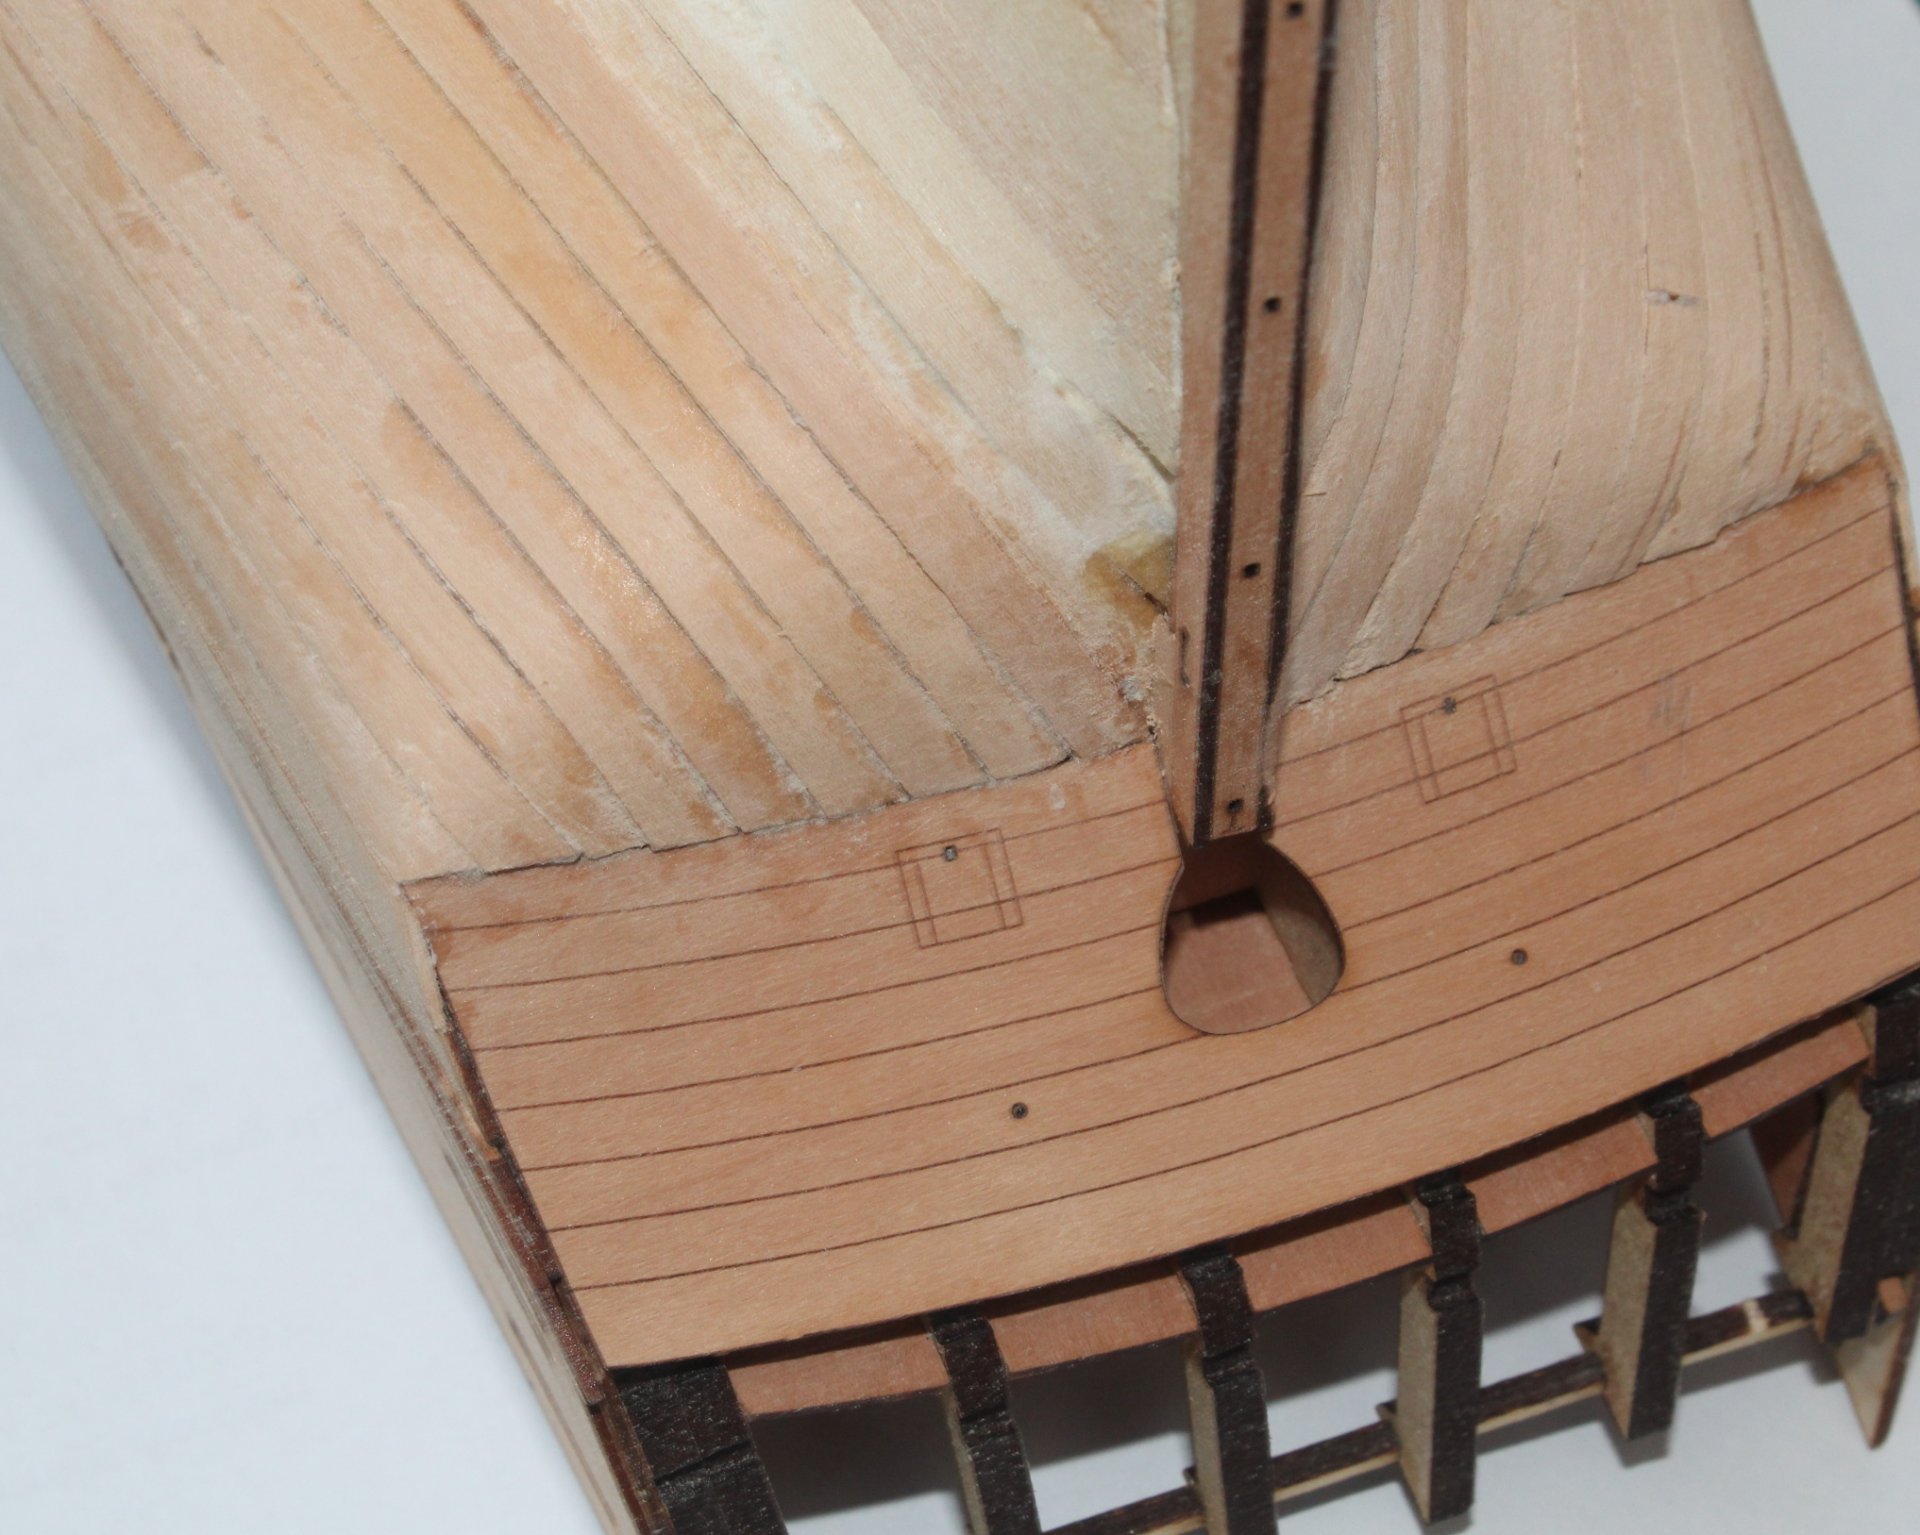
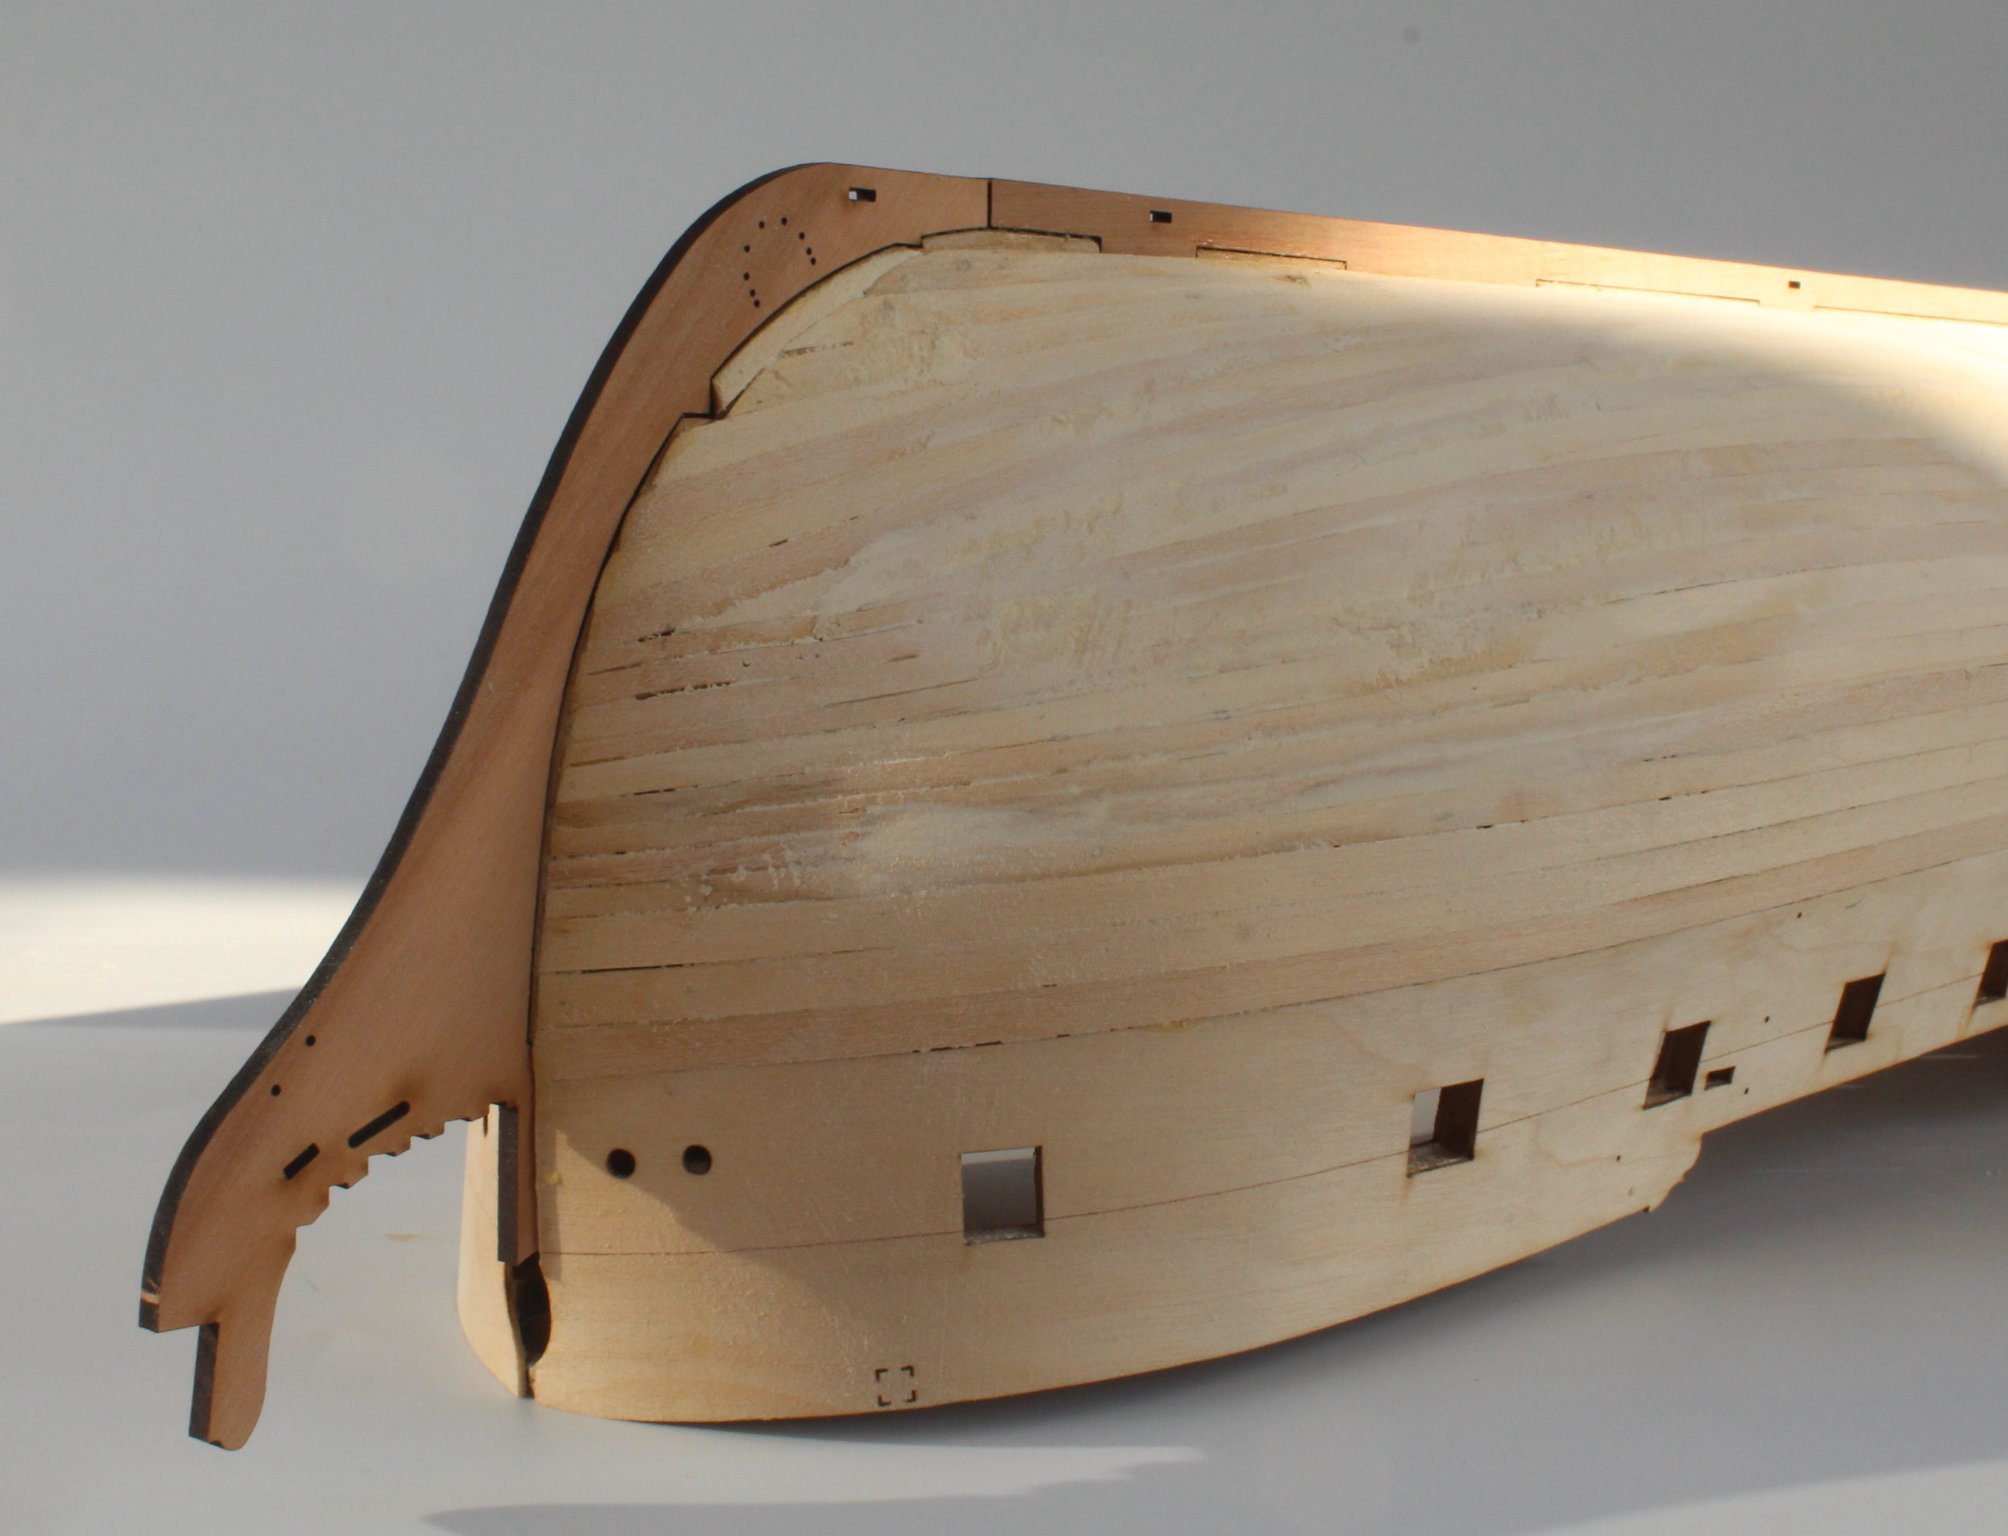
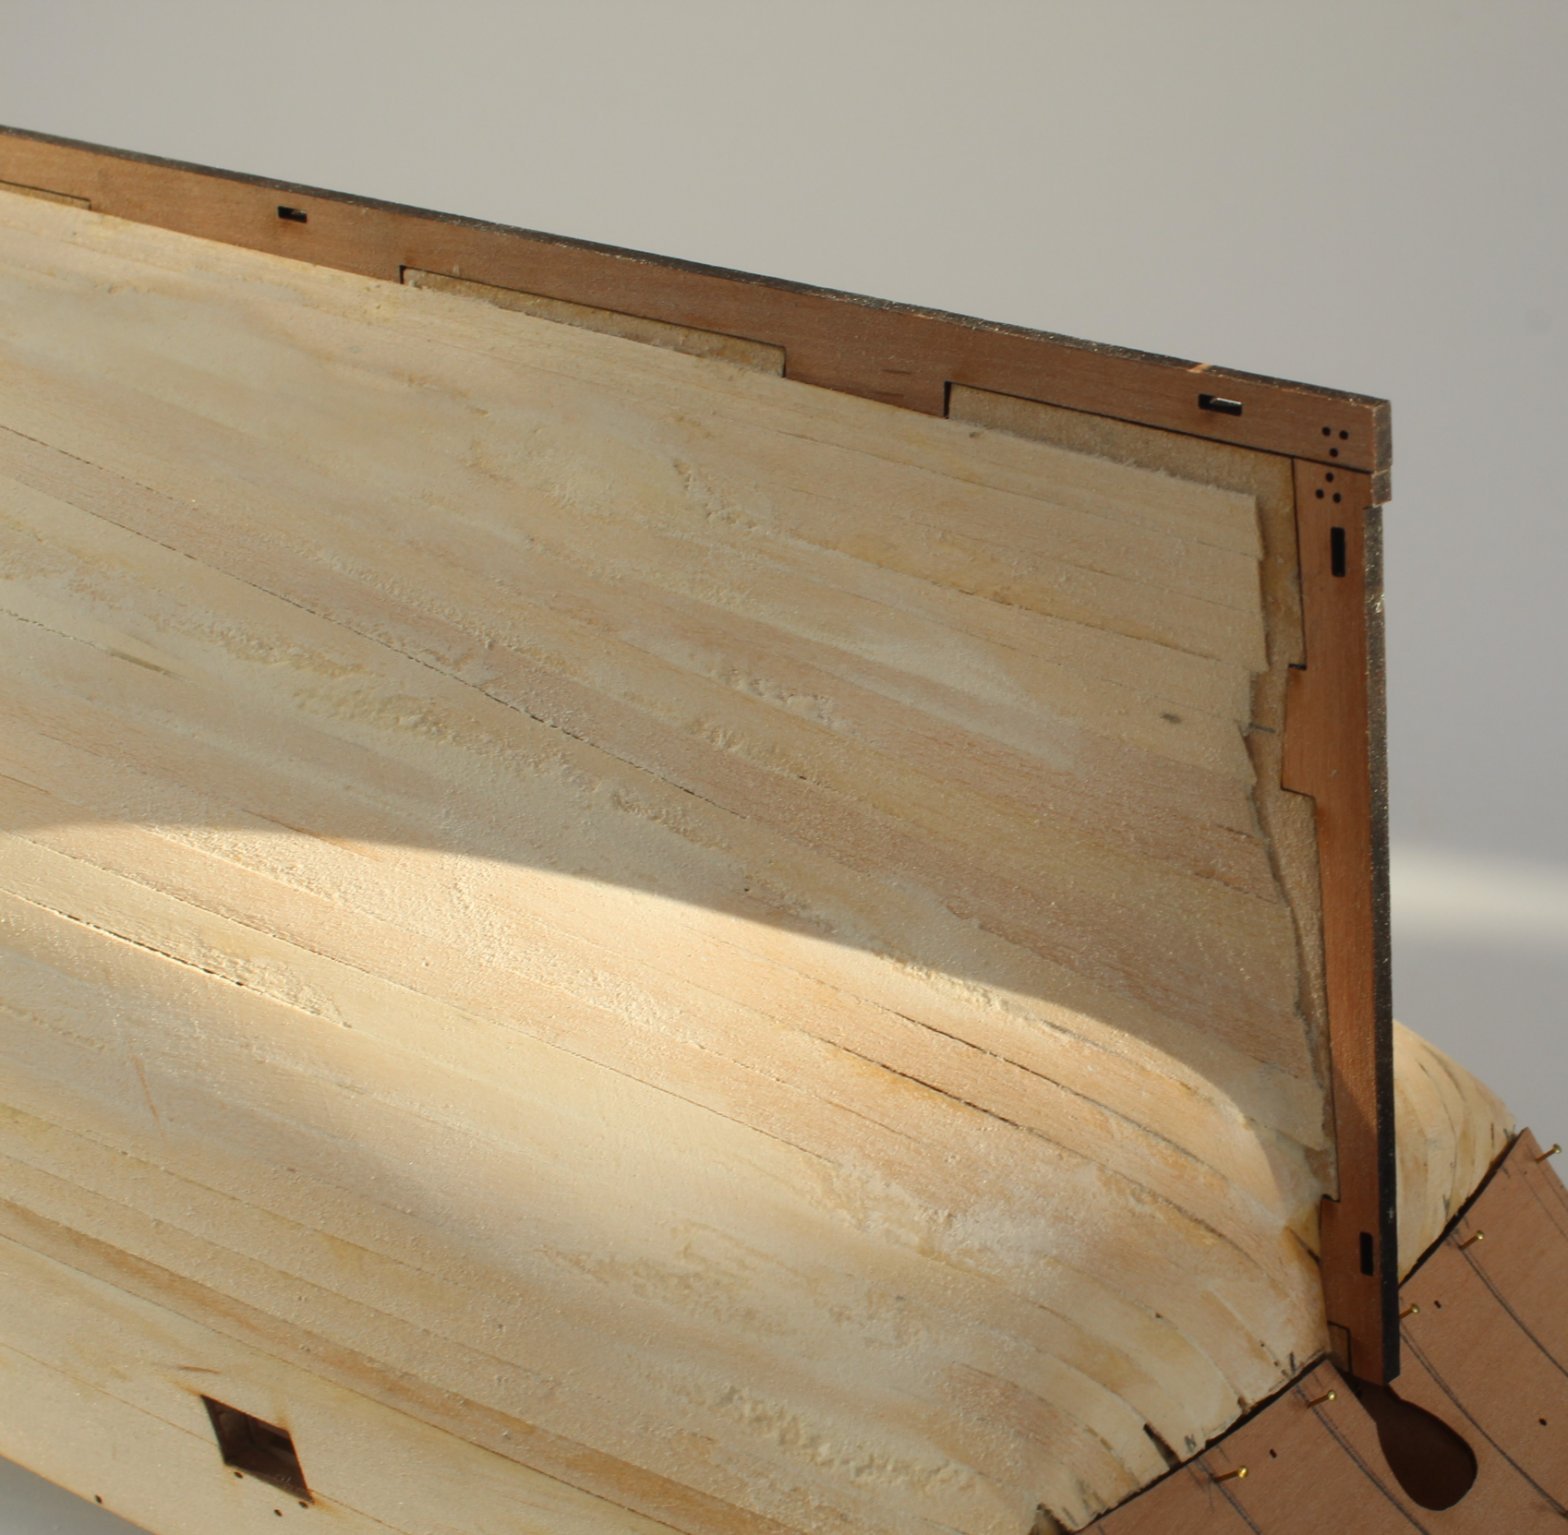
After fitting the outer planking patterns I noticed a problem with the left-hand side stern where the patterns and stern counter meet. The shaped planking patterns should follow the shape of the stern counter, as it does on the right-hand side of my model. However has can be seen in the photo below there is a gap,

I did consider leaving the gap until after the gallery had been fitted to see what I could do but in the end I decided to fit a small filler piece and can then take further action, if needed, later on in the build.
I have made a start with the 2nd planking I have add the first two top planks on the left-hand side. I have also fitted the garboard (2 planks wide). Given the majority of the 2nd planking will be covered with white paint I am not going to worry too much about the method I used to get the planks fitted.
-
7 minutes ago, James H said:
I use spots of Gorilla CA gel on all my second planking 😉
I reaĺly like the Gorilla CA Gel, used it on my last two builds and I plan to use it on the 2nd planking. I had trouble today with the tube version today as it came out in a large splunge at one point and ended up with glue everywhere😤. I have now managed to unstick my fingers from the tube.😂
-
-
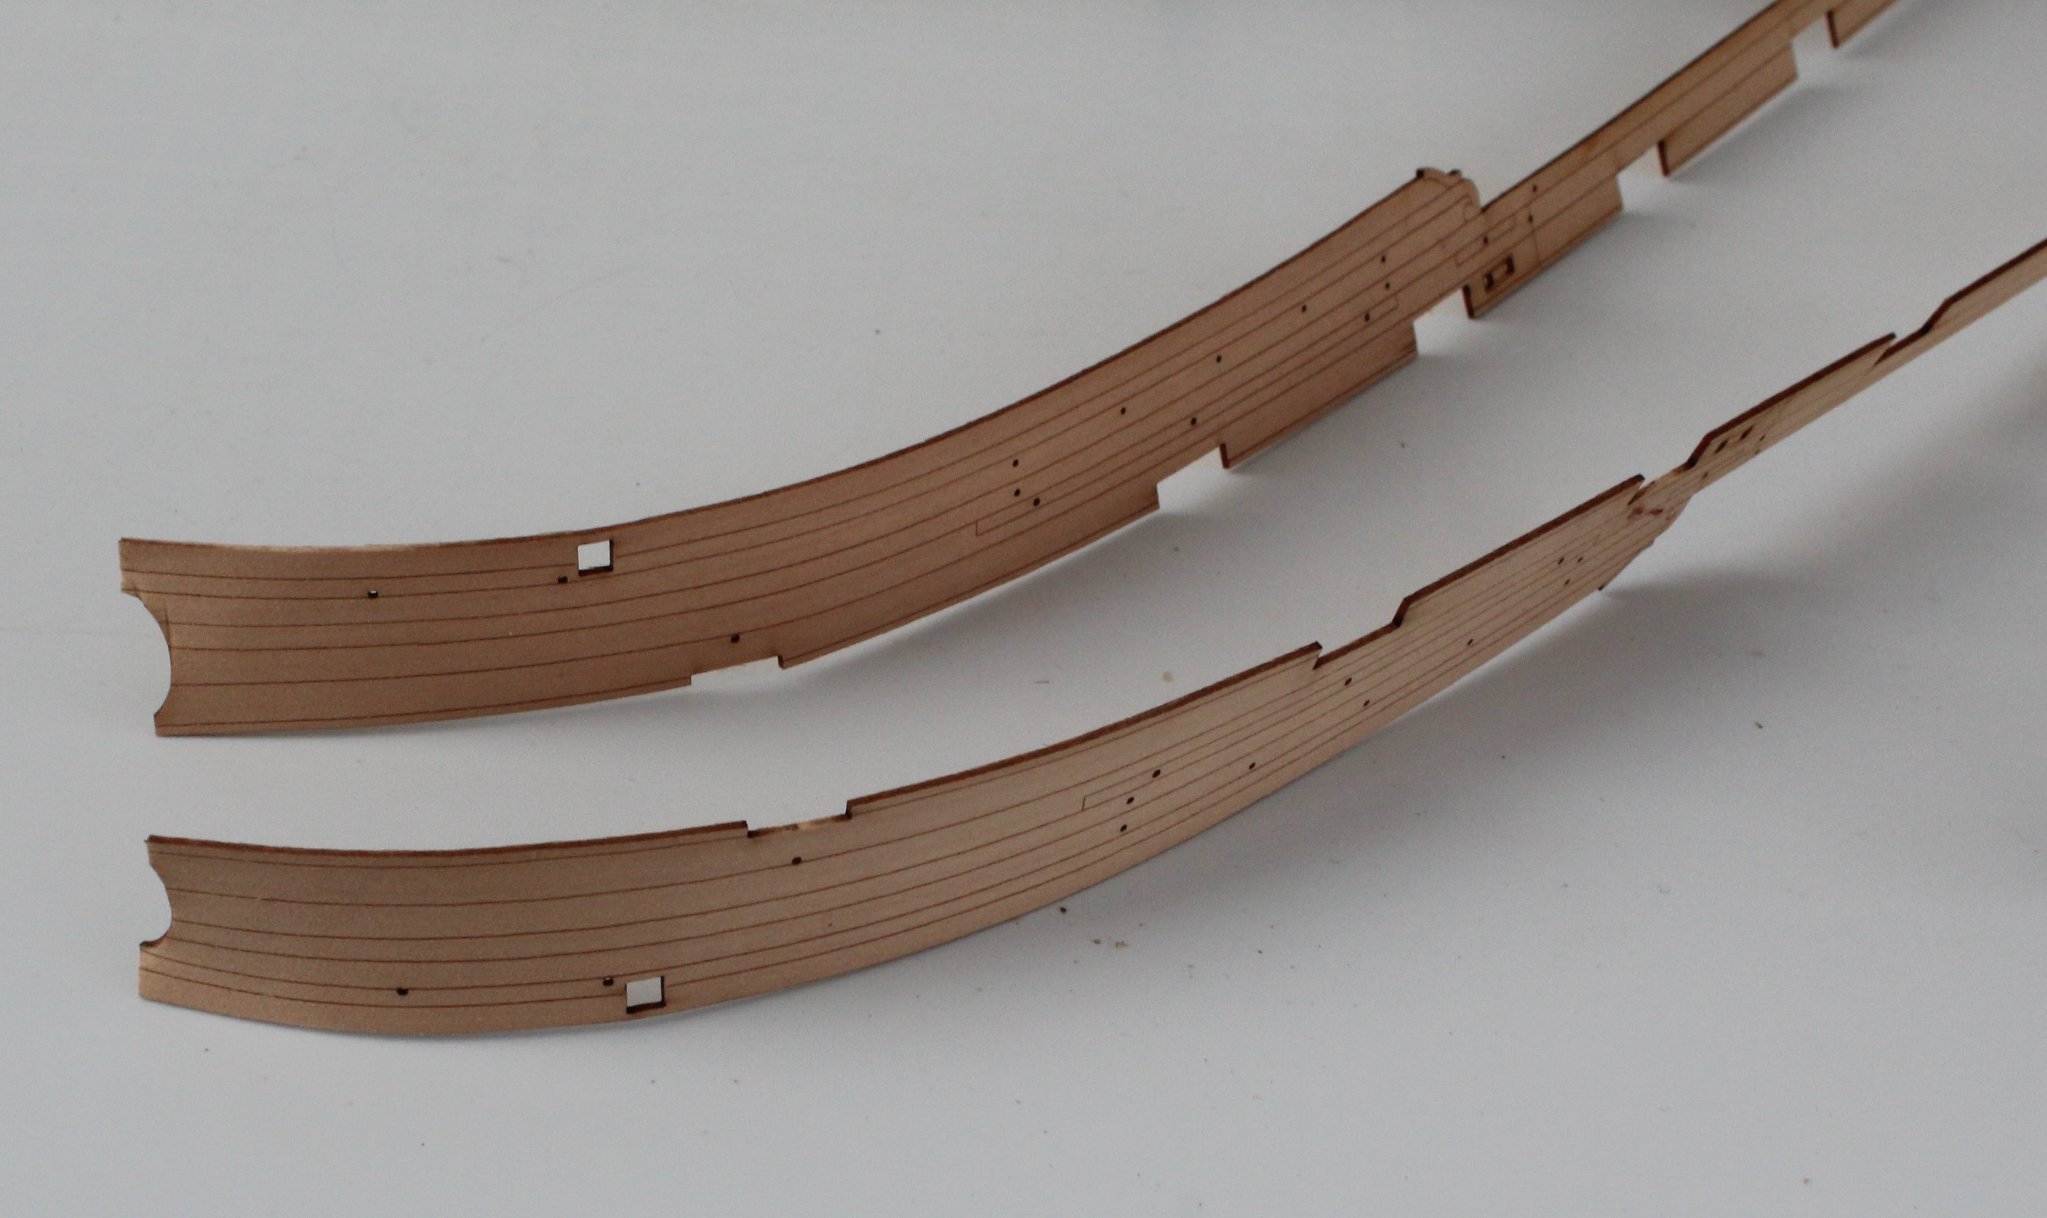
HULL PLANKING
OUTER PLANKING PATTERNS
BUILD MANUAL STEPS 164 - 181
Tools Used
Titebond original glue
Gorilli super glue gel
Old paint brush
Clamps and tape
Gathering the materials required
The following kit parts are required for this section of the build:
76, 271, 272, 273, 274, 305, 306, 307, 308, 309 (x2), 310 (x2), 311 (x2), 312 (x2)
Assembly Process – Sanding The Hull
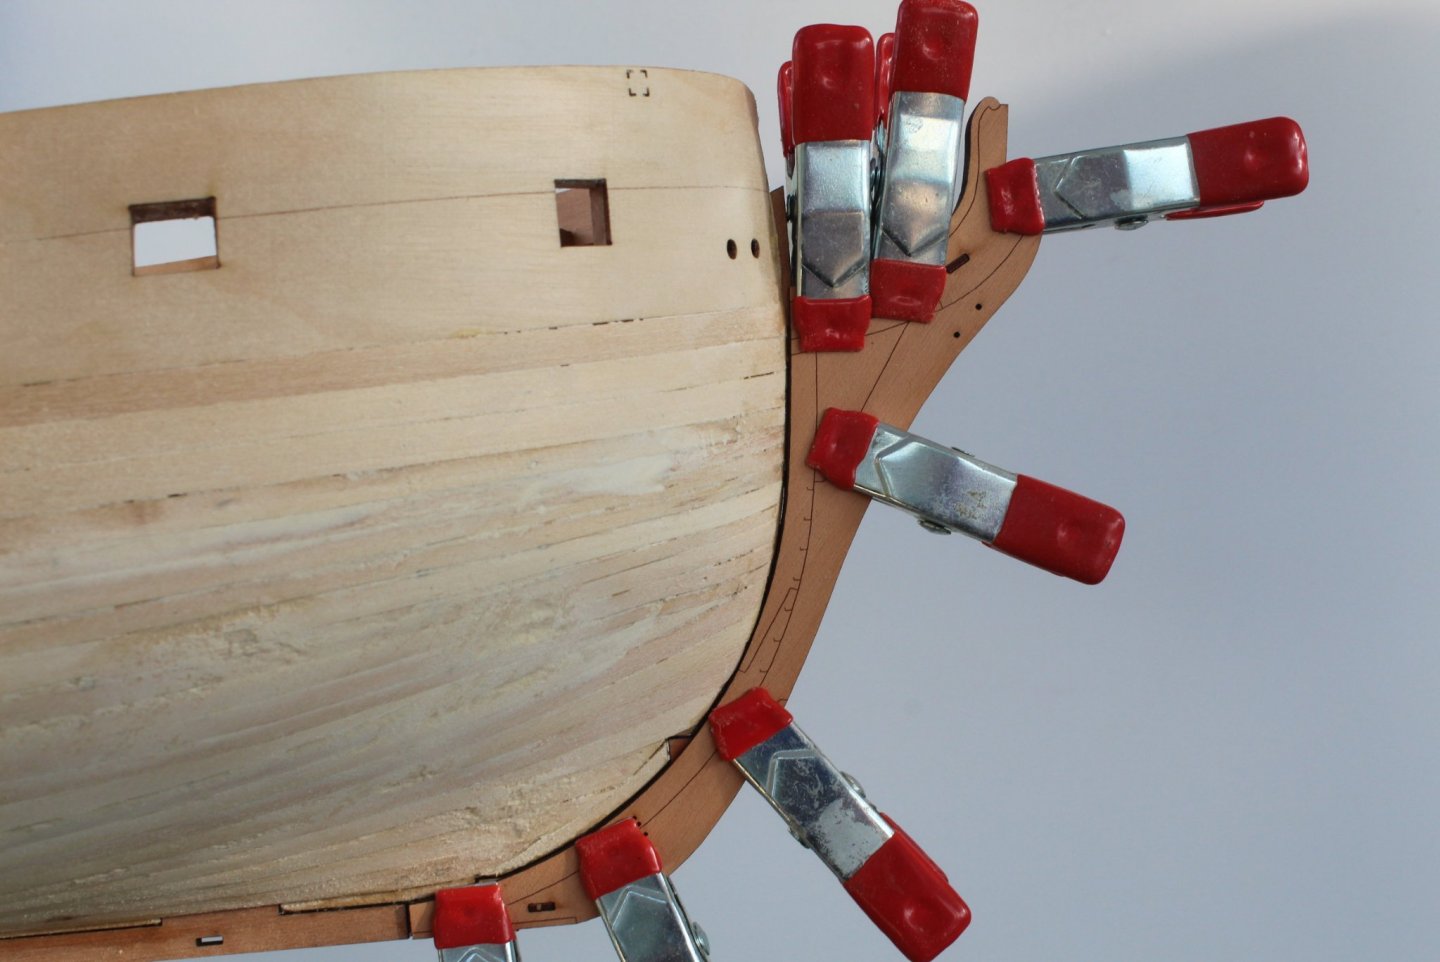
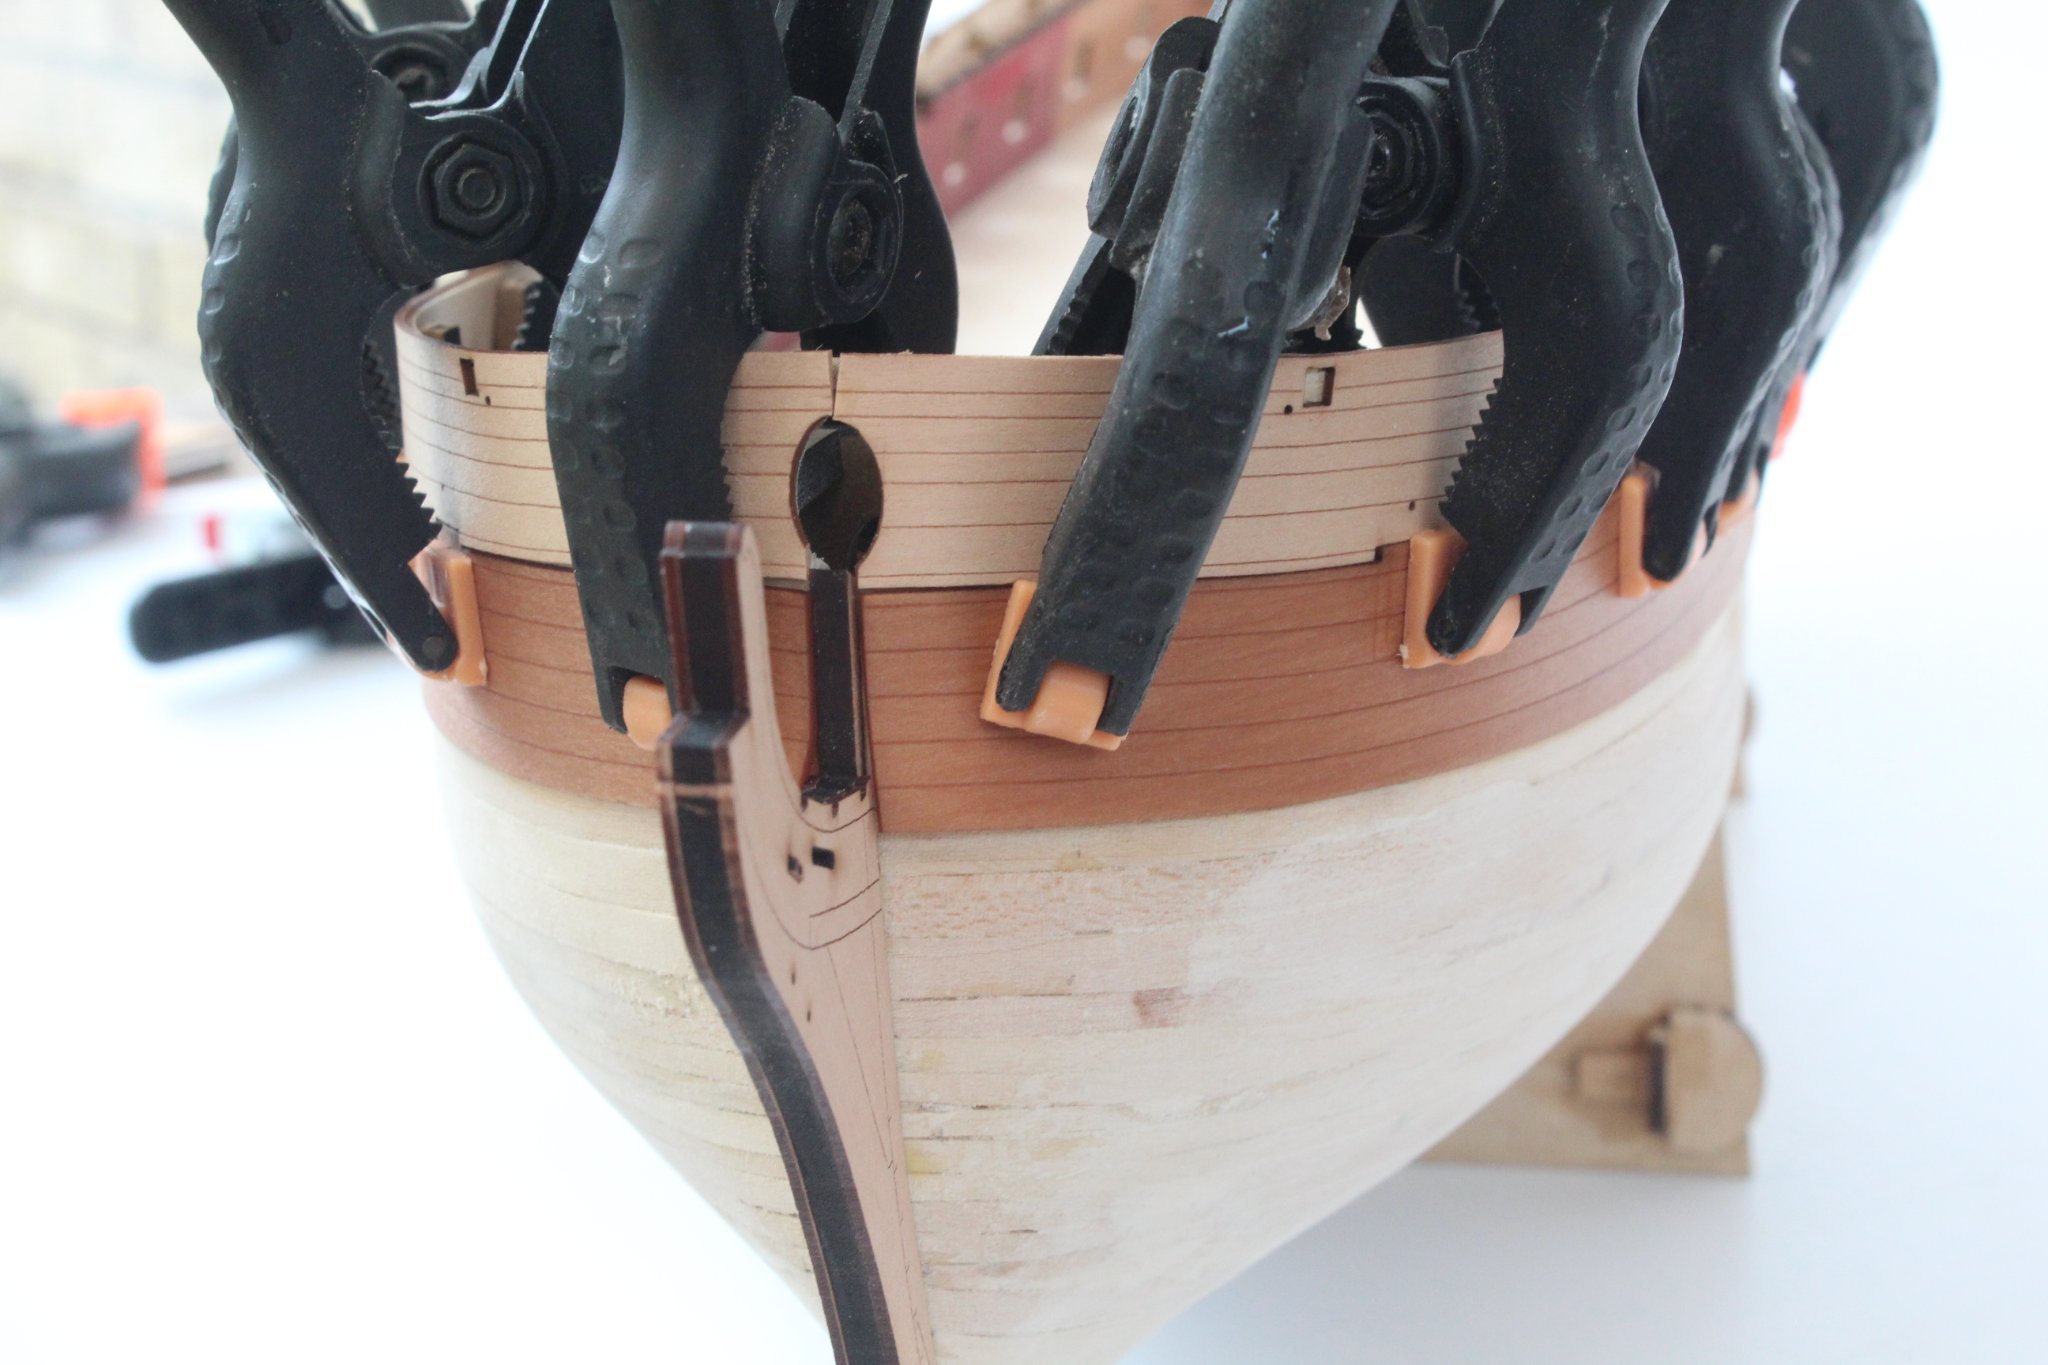
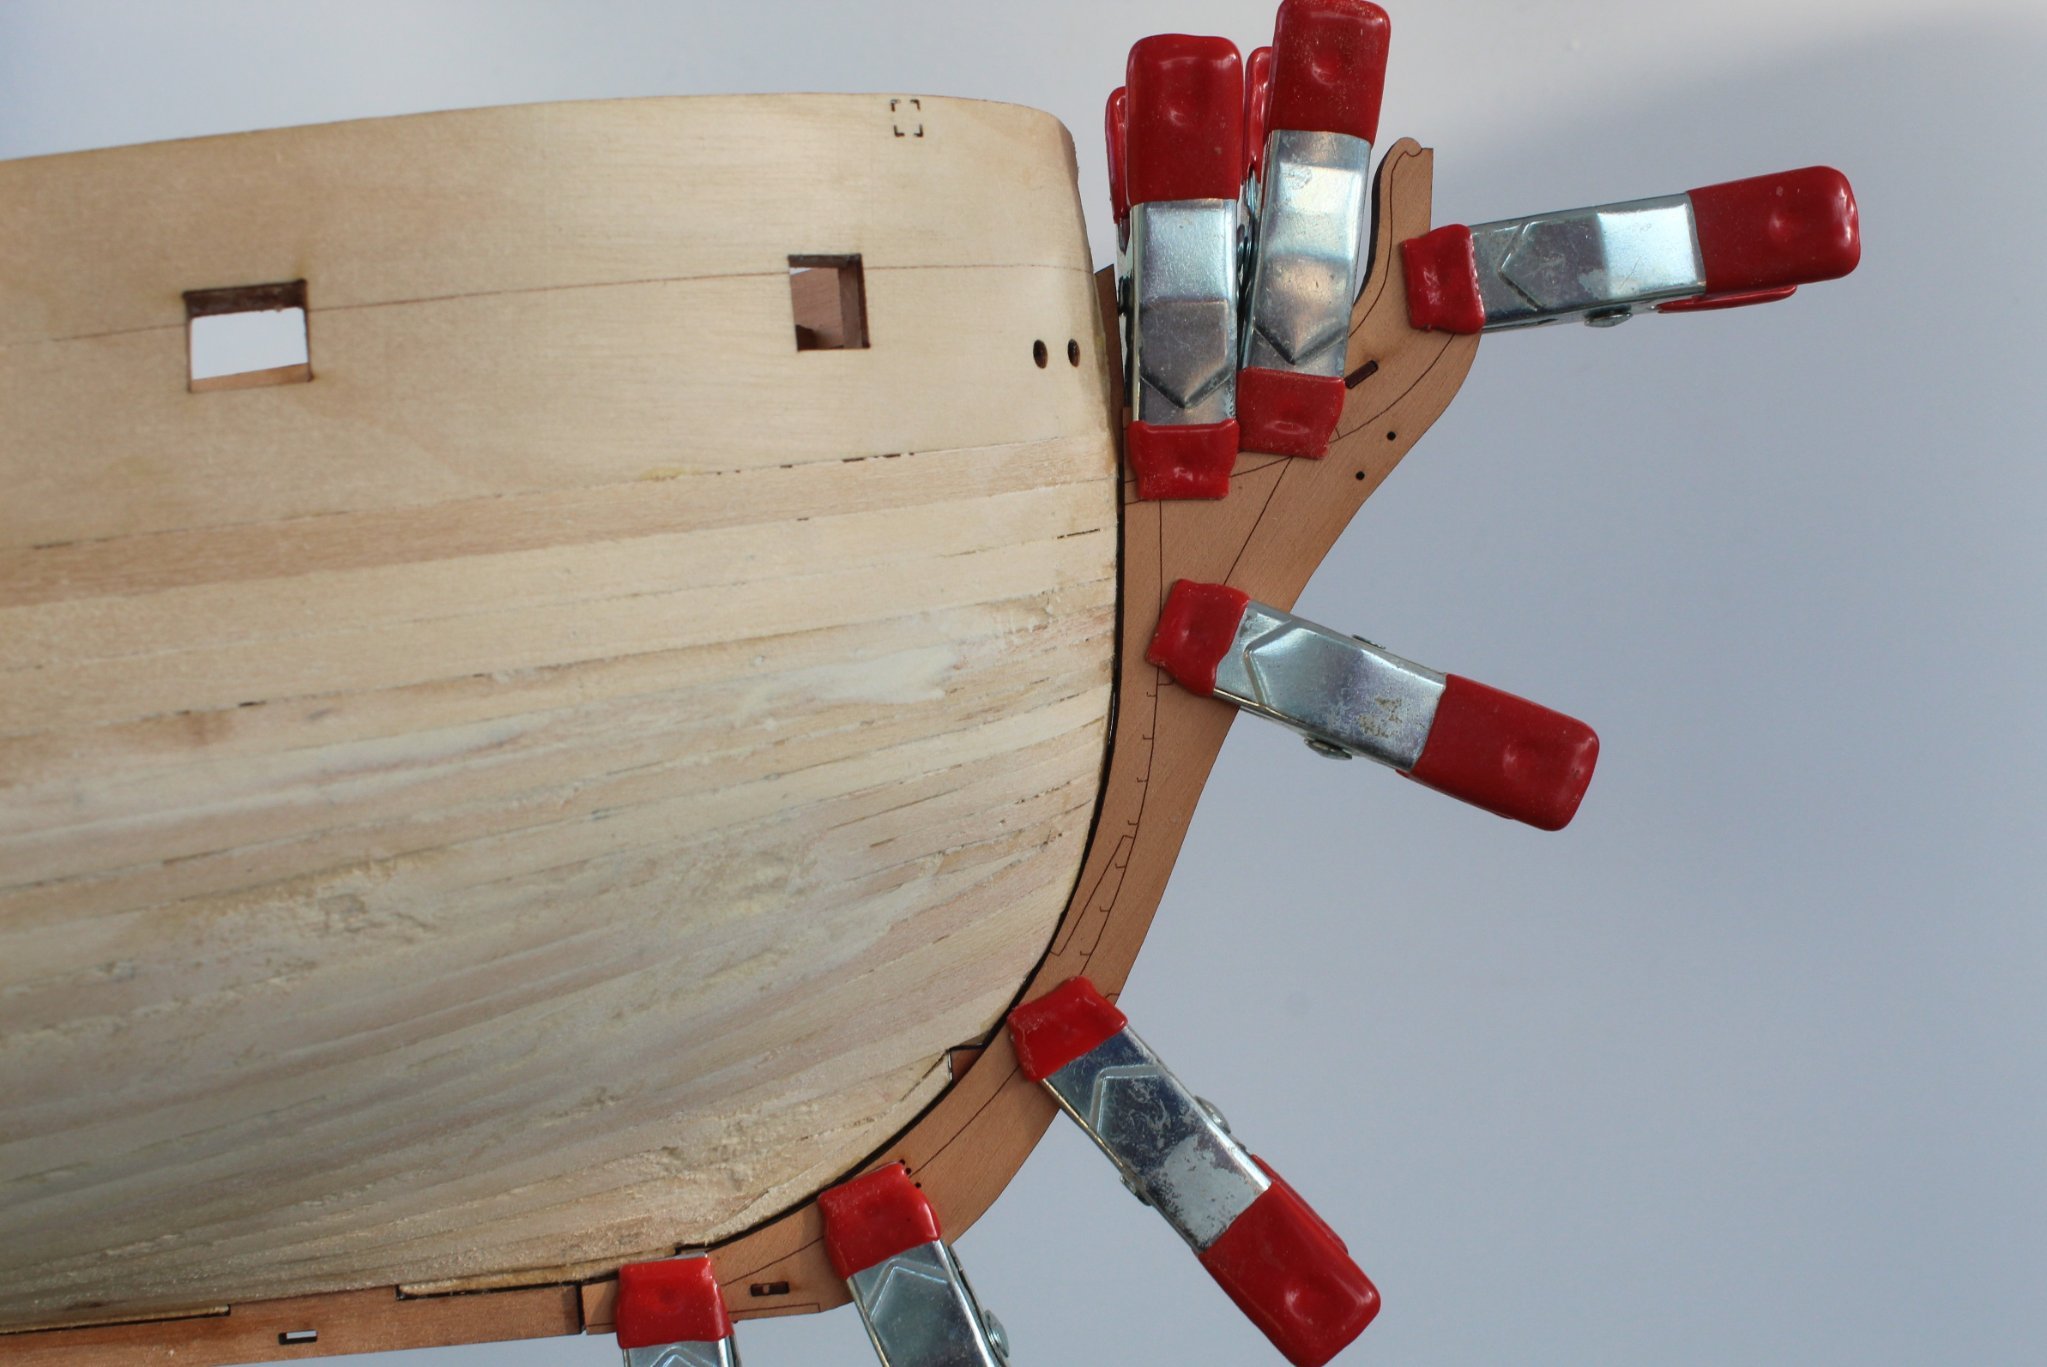
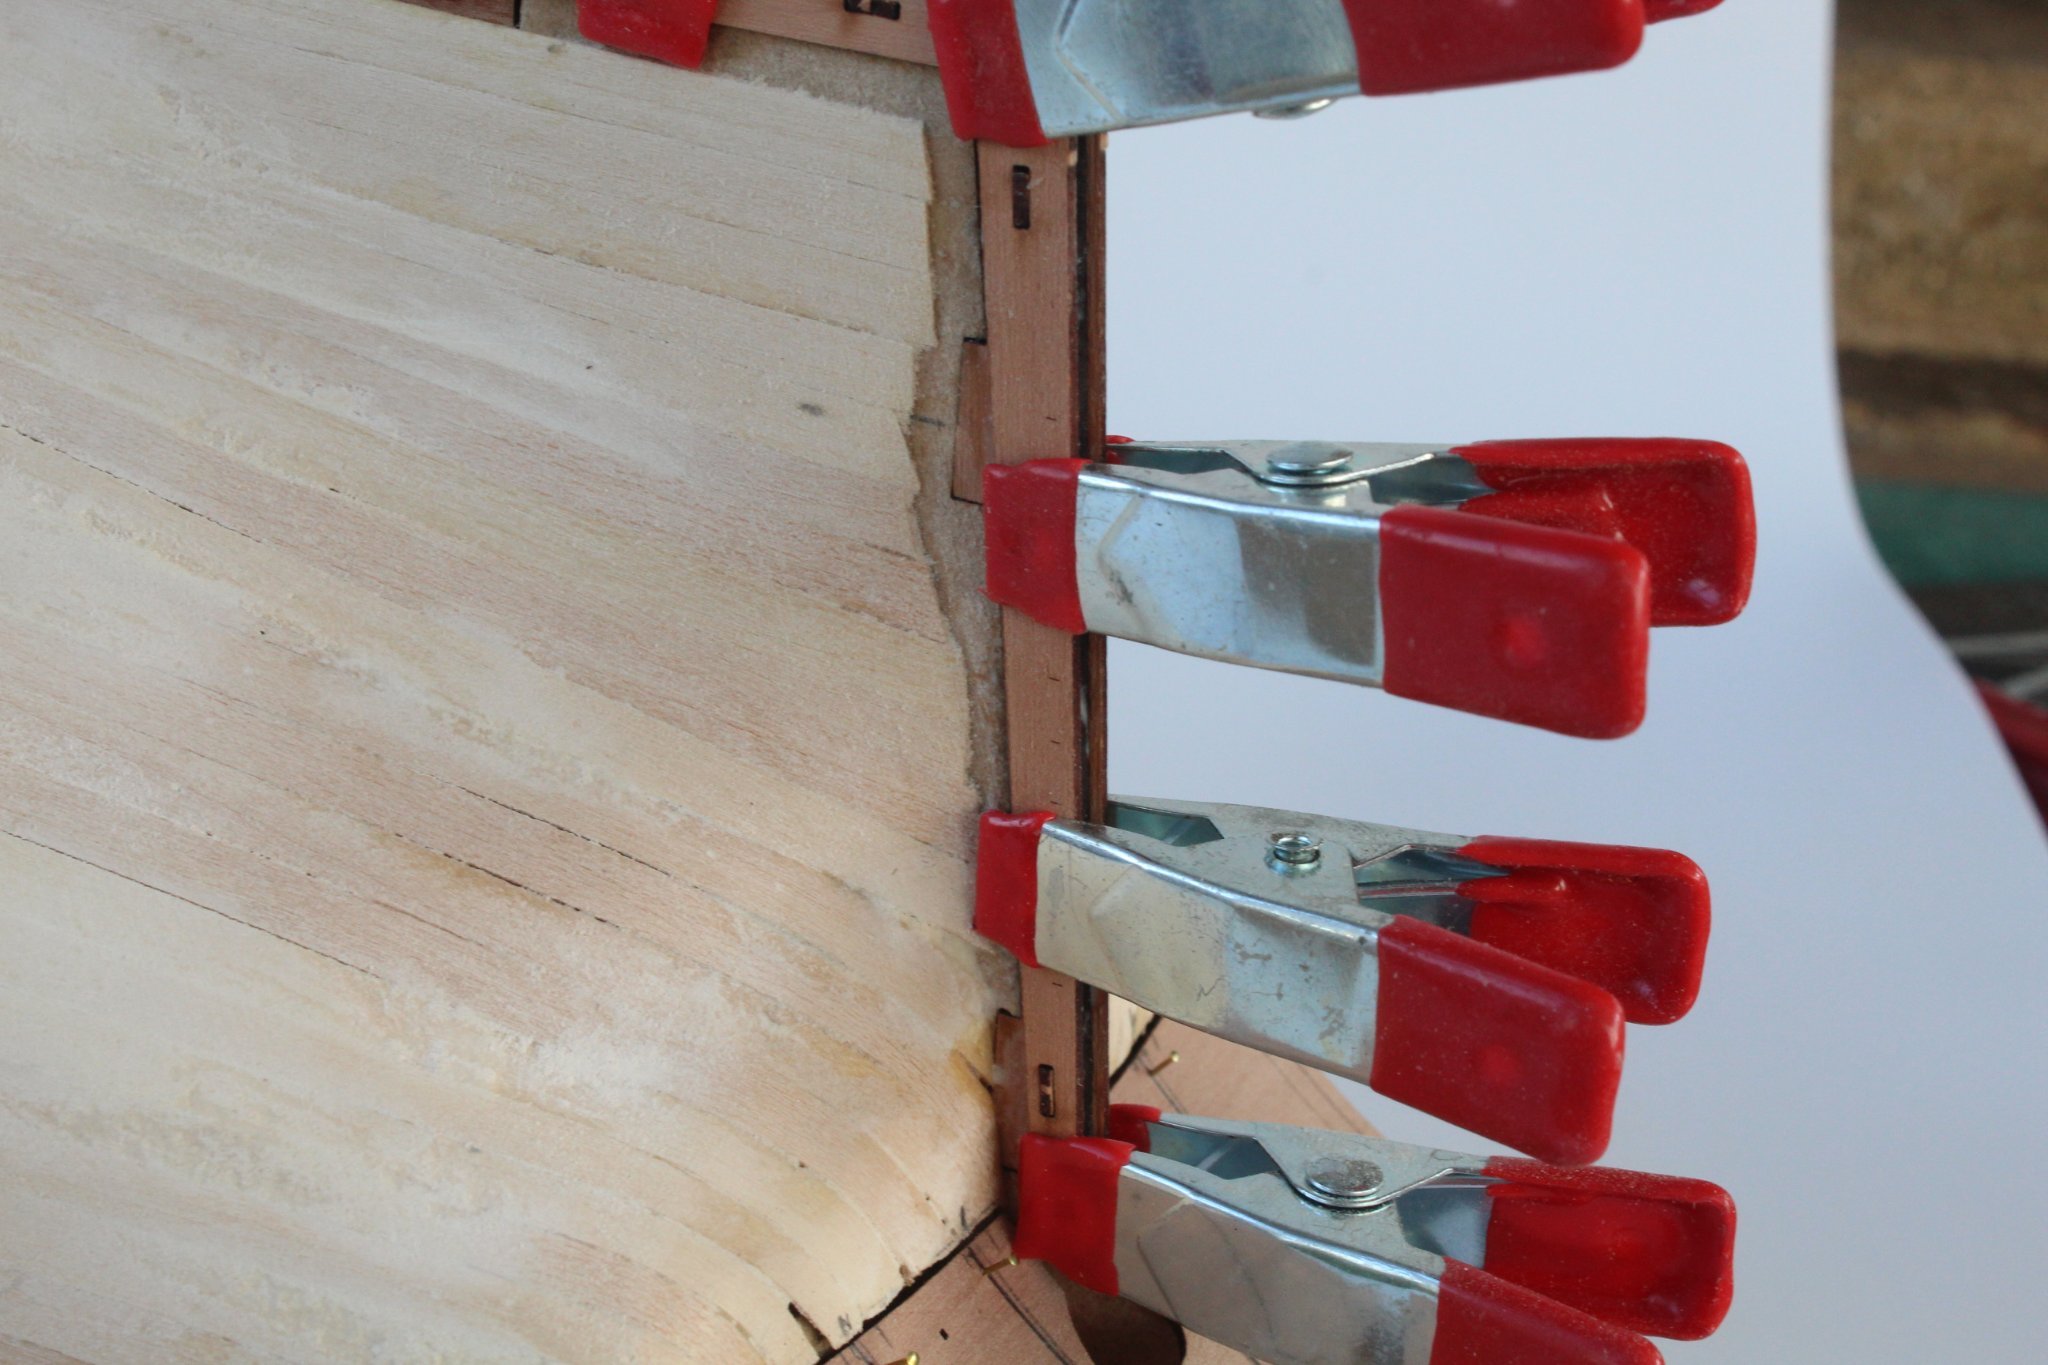
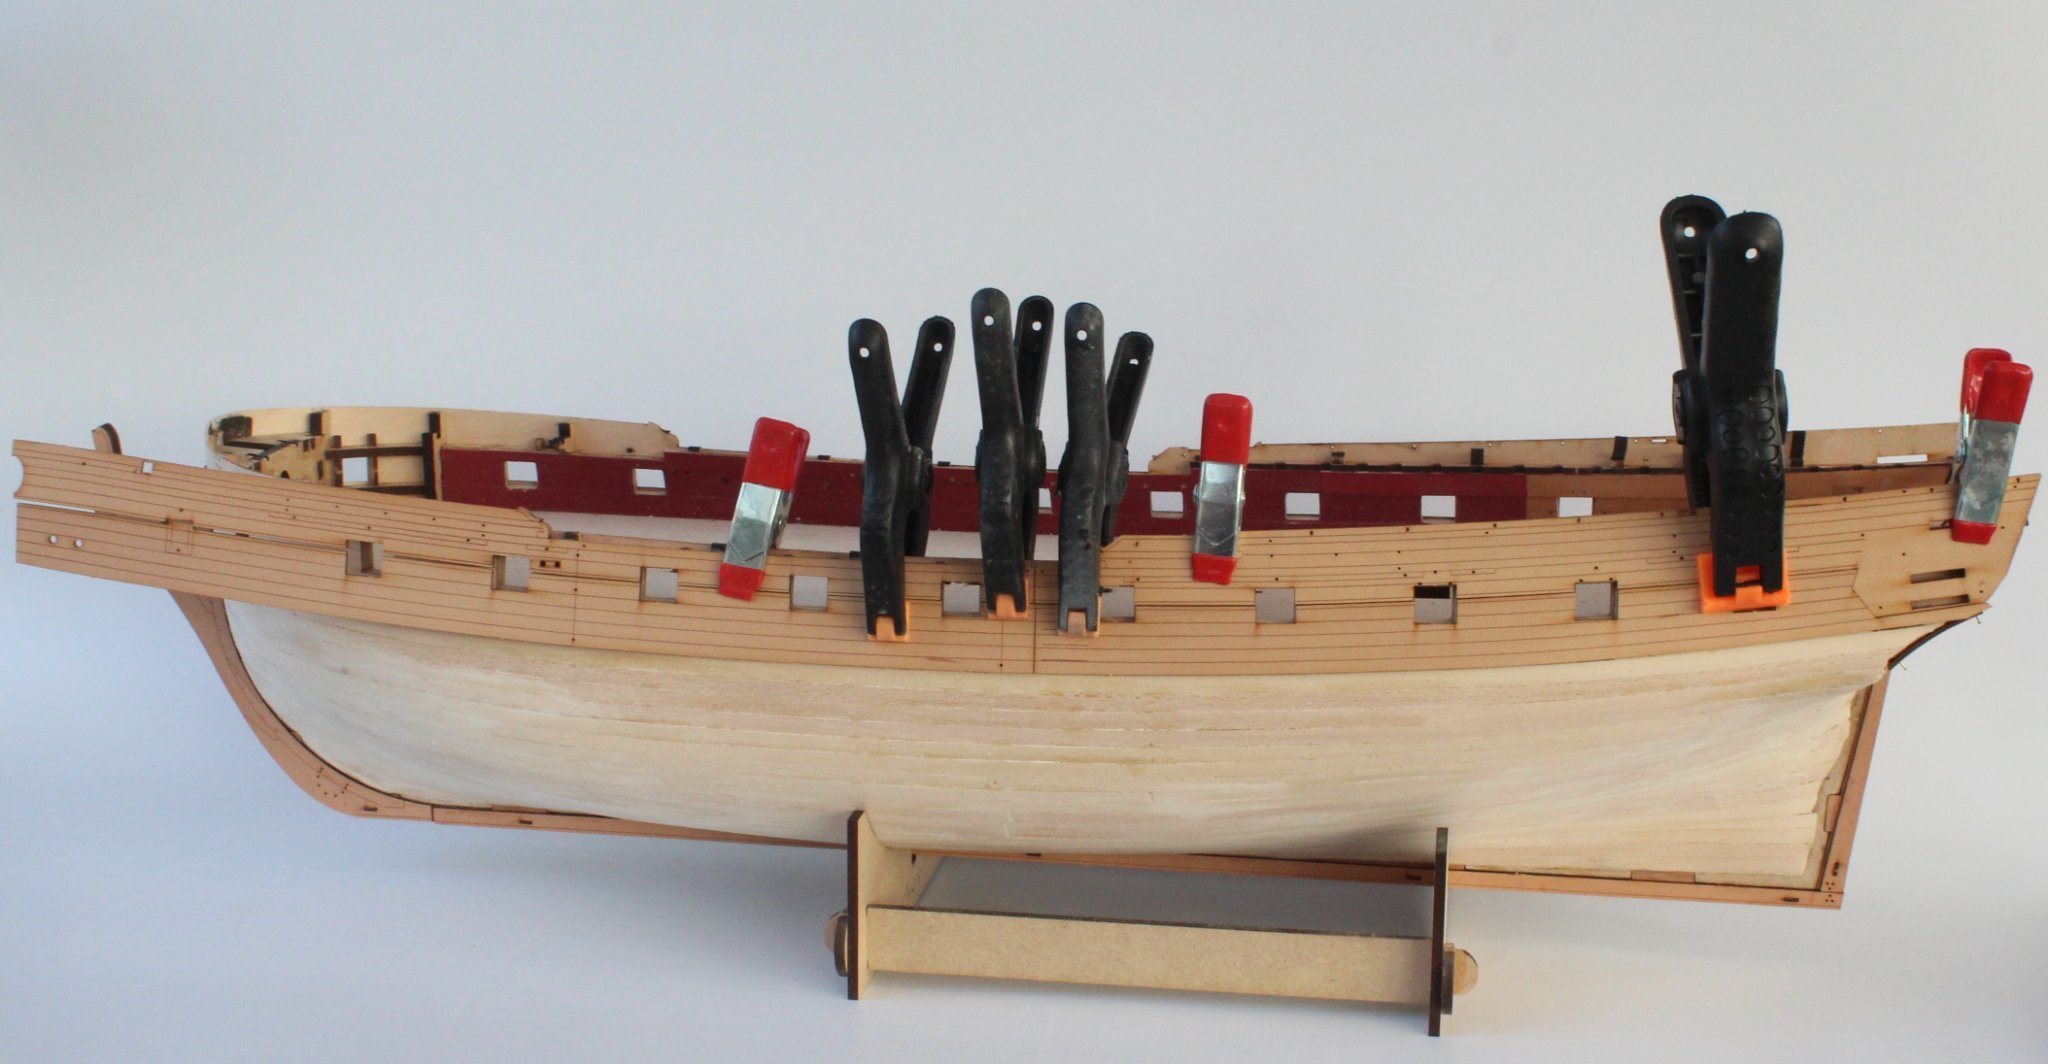
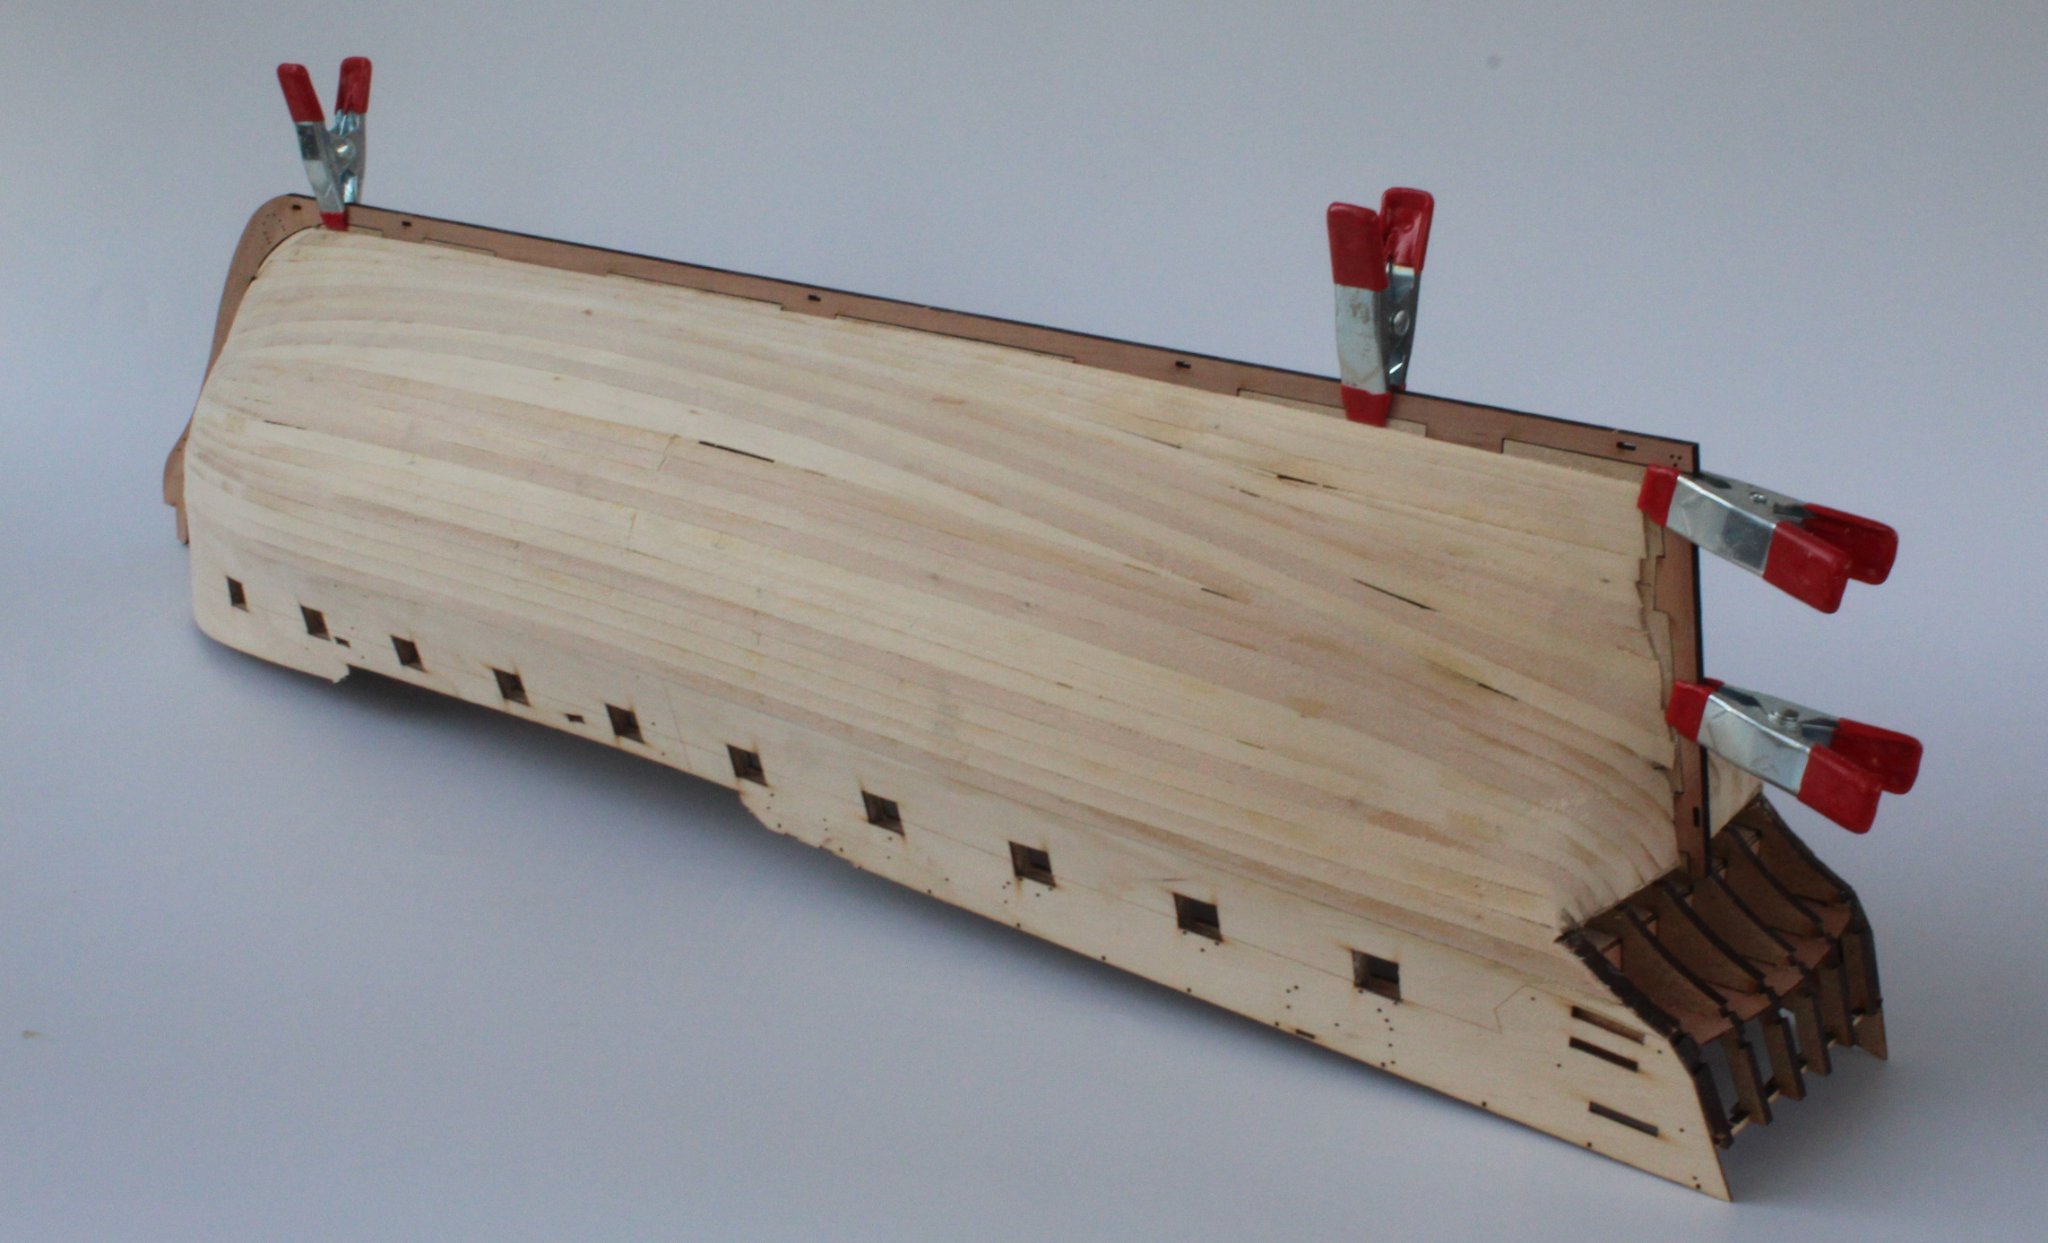
The fore upper planking patterns that had been clamped to the hull and left to dry overnight had retained the required shape.

As a guide I clamped the left-hand side aft upper planking pattern in position. I then applied some diluted Titebond glue to the hull, using an old paintbrush, ready for the fore upper planking pattern.

The left-hand fore upper planking pattern was then positioned and clamped in place. Great care was taken to make sure everything was correctly aligned. The guidelines provided on the upper hull side pattern was a great help, another great feature of the kit design. The left-hand aft upper planking panel was also glued and clamped in place.
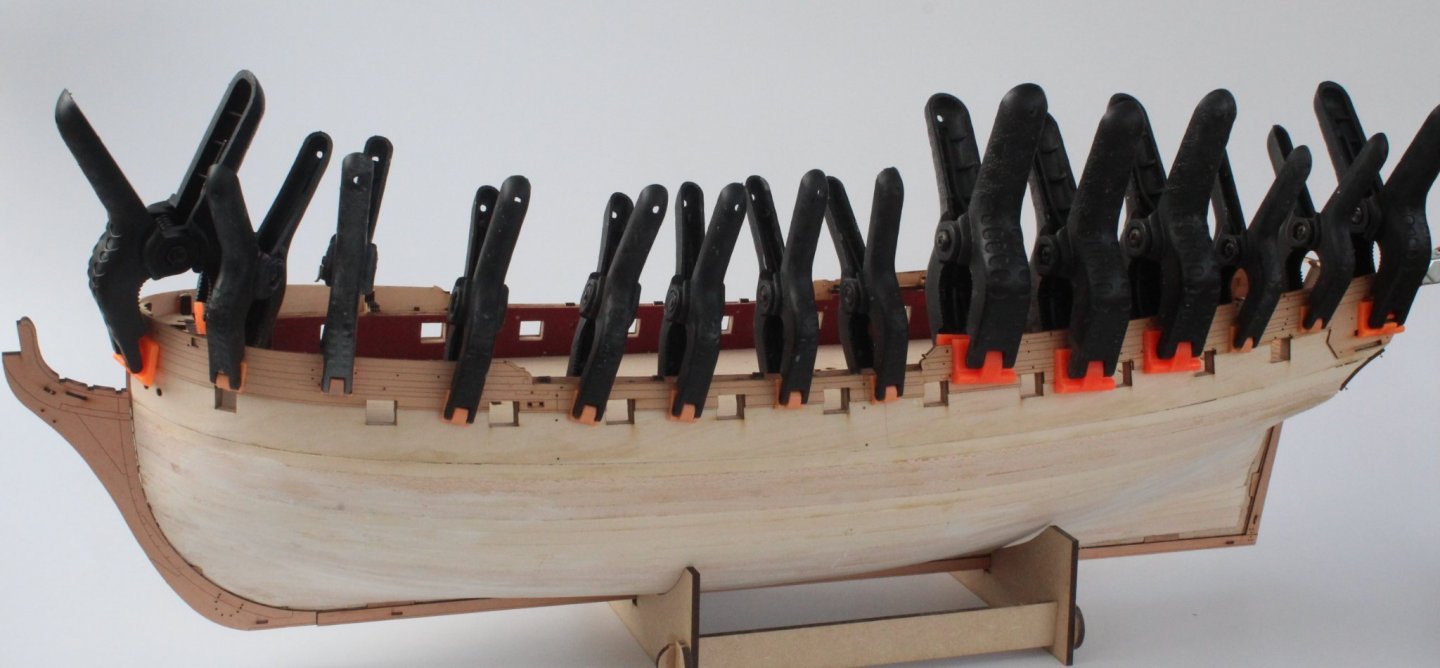
I waited for the glue to cure before repeating the process for the right-hand side upper planking patterns, due to a lack of clamps.
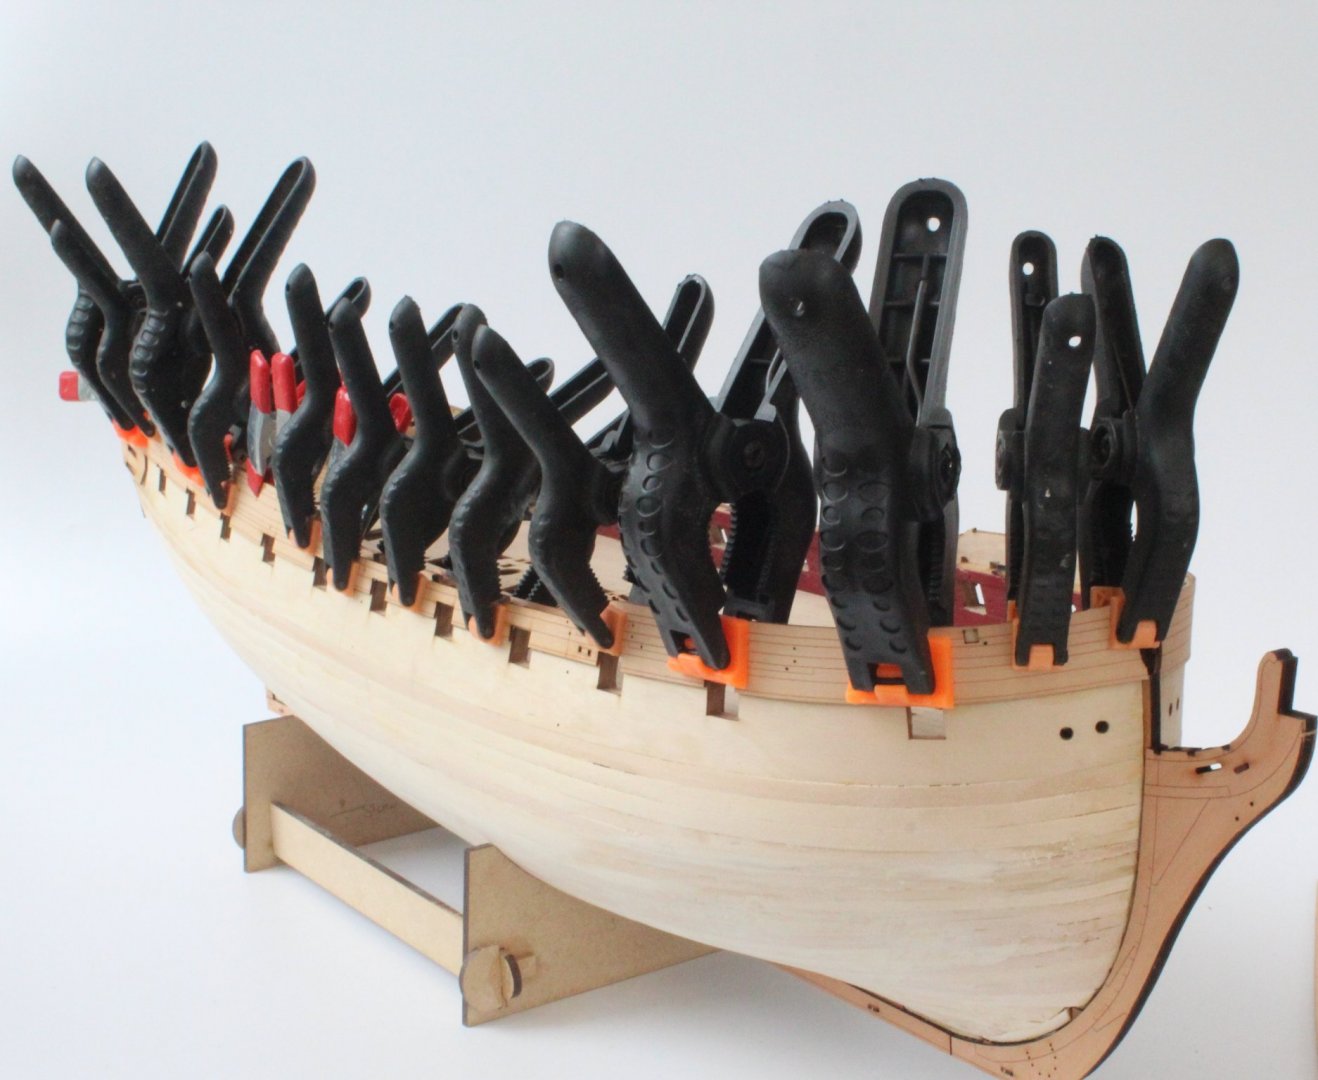

The lower fore planking patterns were then soaked in hot water for 30 minutes and then clamped to the hull and left to dry for a minimum of 12 hours.
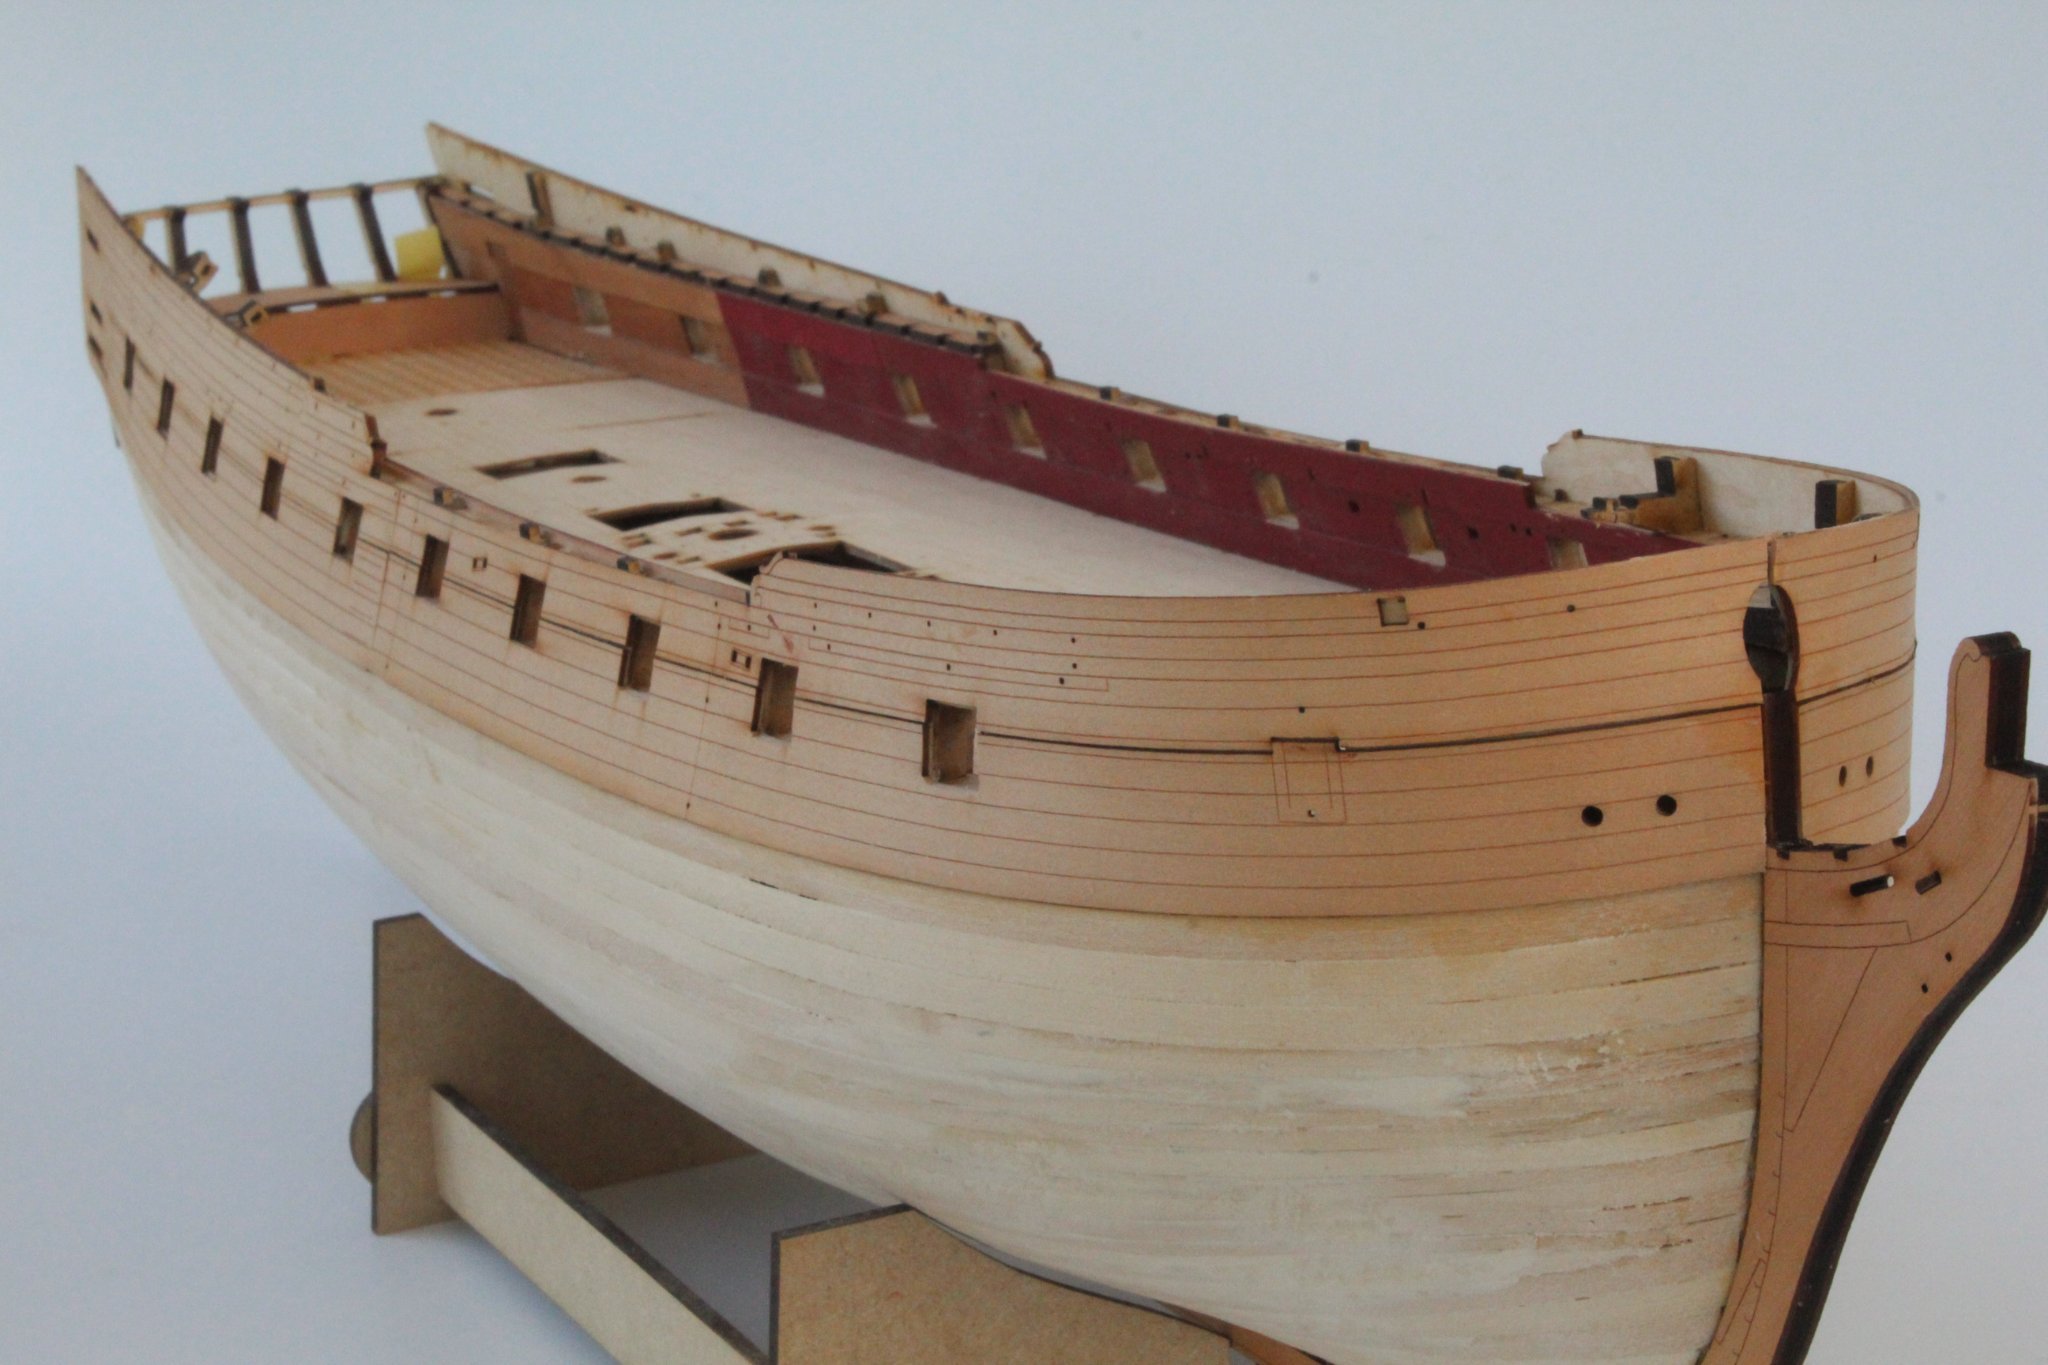
The lower planking patterns were glued in place. I noted a slight alignment issue with some of the gun port edges. This was soon corrected with a bit of trimming and sanding.


The stern lower counter pattern was then added. I used Titebond for this.


The final task was to fit the two lower plank patterns to each side. I opted to use gorilla super glue gel.

Despite being very careful I still managed to get more glue on my fingers than the planks. The hull is now ready for the 2nd planking stage.


- drjeckl, CaptMorgan, BobG and 12 others
-
15
-
Thanks for the kind words @Malcolm Greig
-
HULL ASSEMBLY
FIRST PLANKING – SANDING
FITTING LOWER STERN, PROW, KEEL AND RUDDER POST PATTERNS
BUILD MANUAL STEPS 144 - 163
Tools Used
Sandpaper 120-grit and 400-grit
Titebond original glue
Old paint brush
Clamps
Gathering the materials required
The following kit parts are required for this section of the build:
155, 187 (x8), 188, 189, 190, 191, 192, 193, 196, 272, 274, 445, 446, 447, Brass pins
Assembly Process – Sanding The Hull
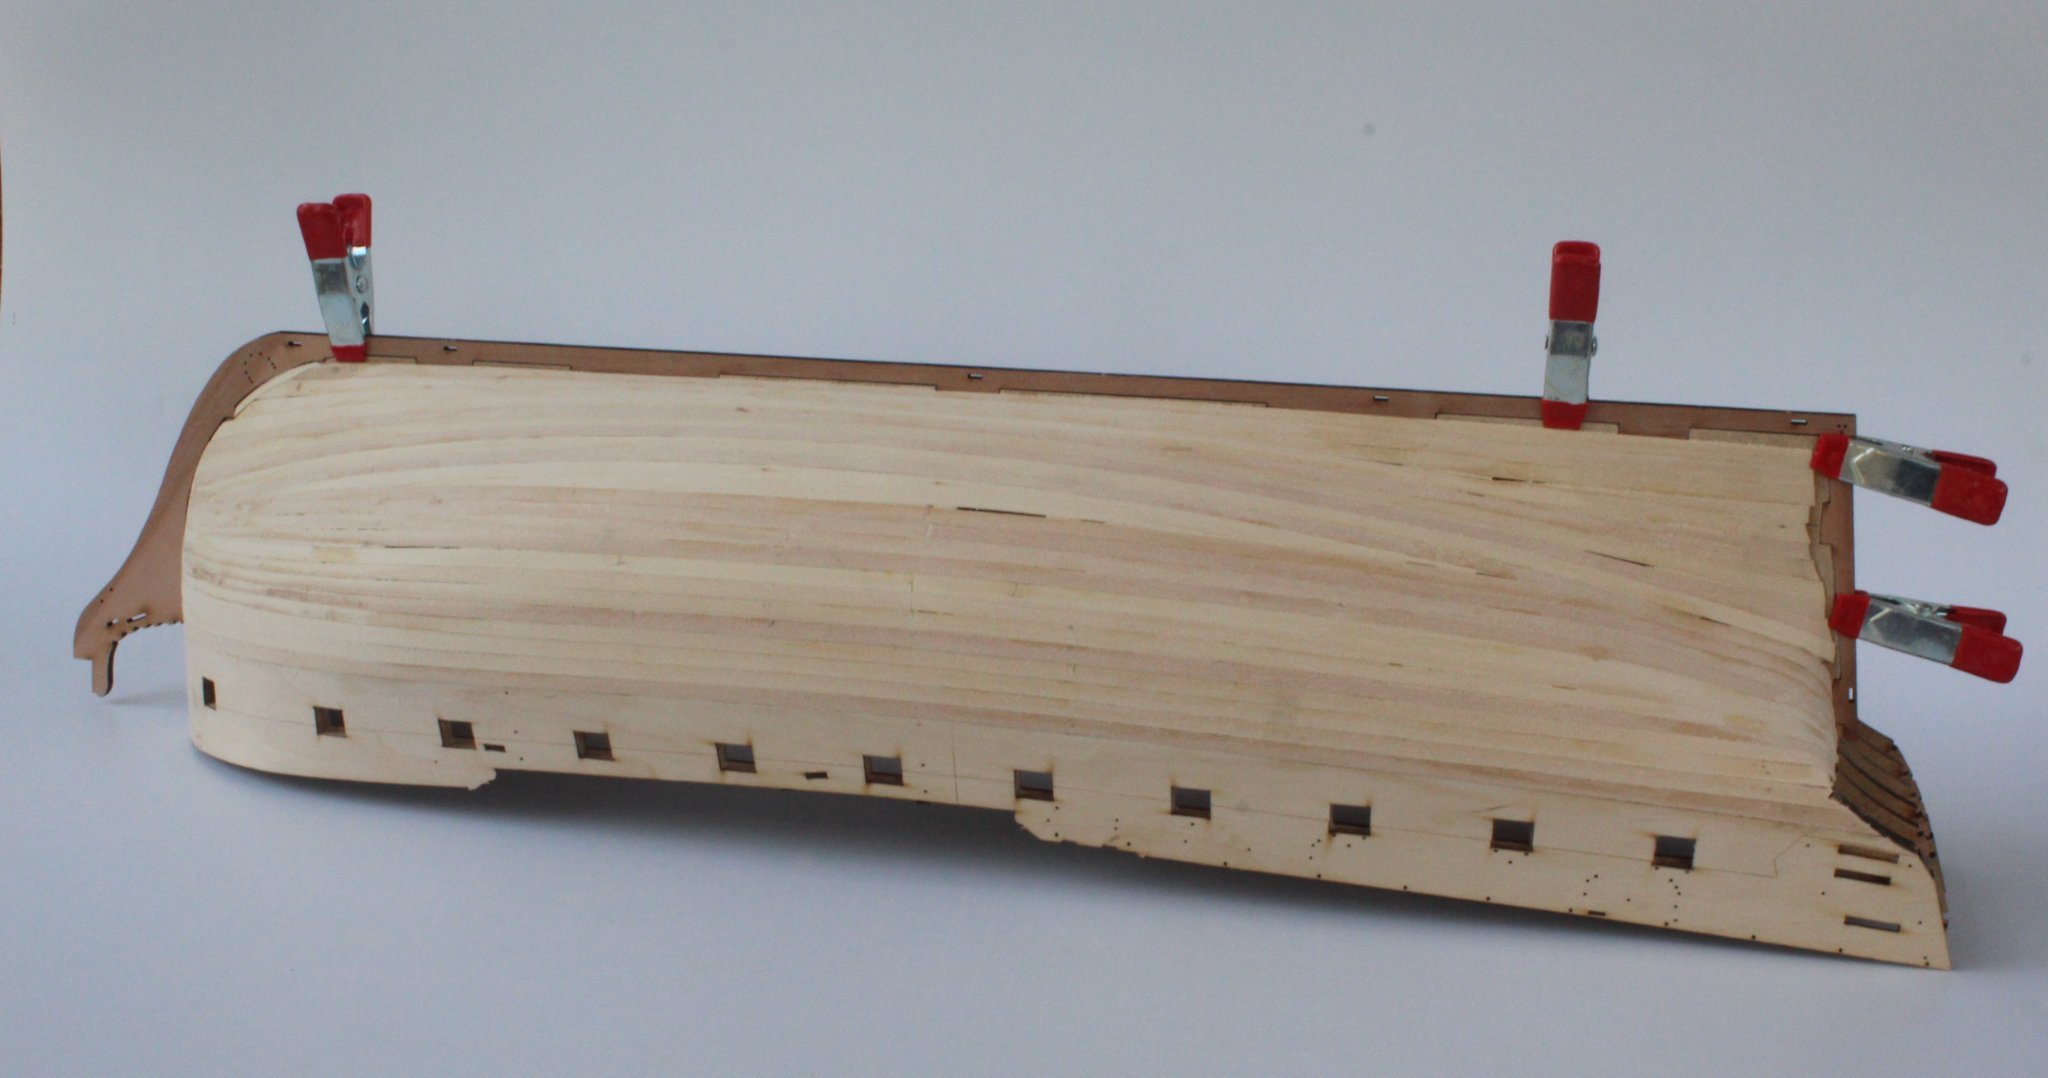
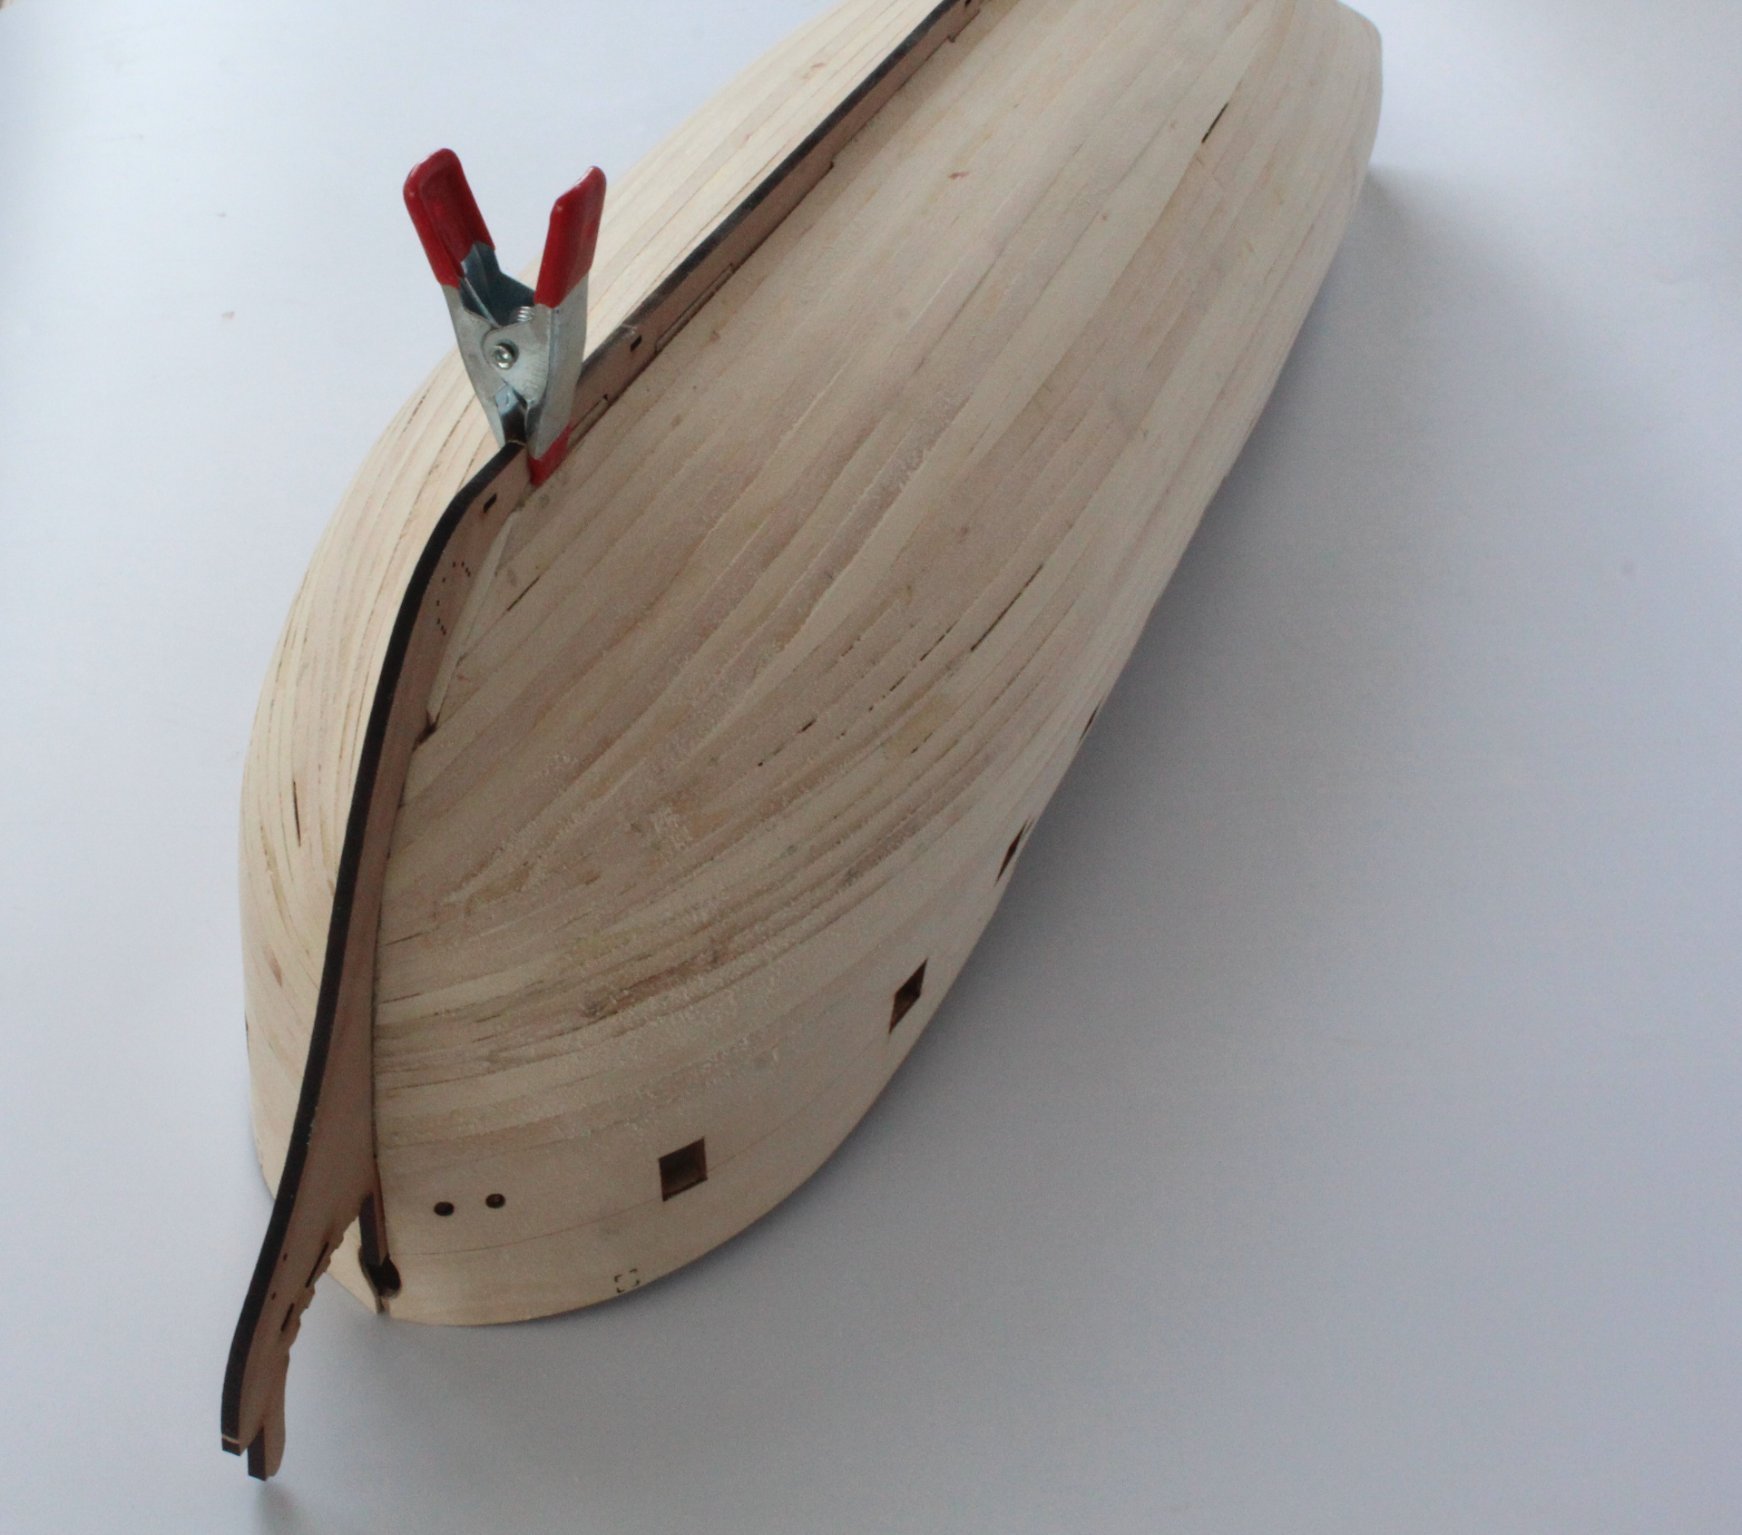
I was reasonably happy with how the first planking turned out and did not take as much sanding as I was expecting. I started with 120- grit sandpaper. After about an hour the hull looked smooth.

I mixed some wood filler with water and titebond and applied the paste to a few areas and then once it had dried sanded the areas smooth. I completed the sanding process using 400-grit sandpaper.
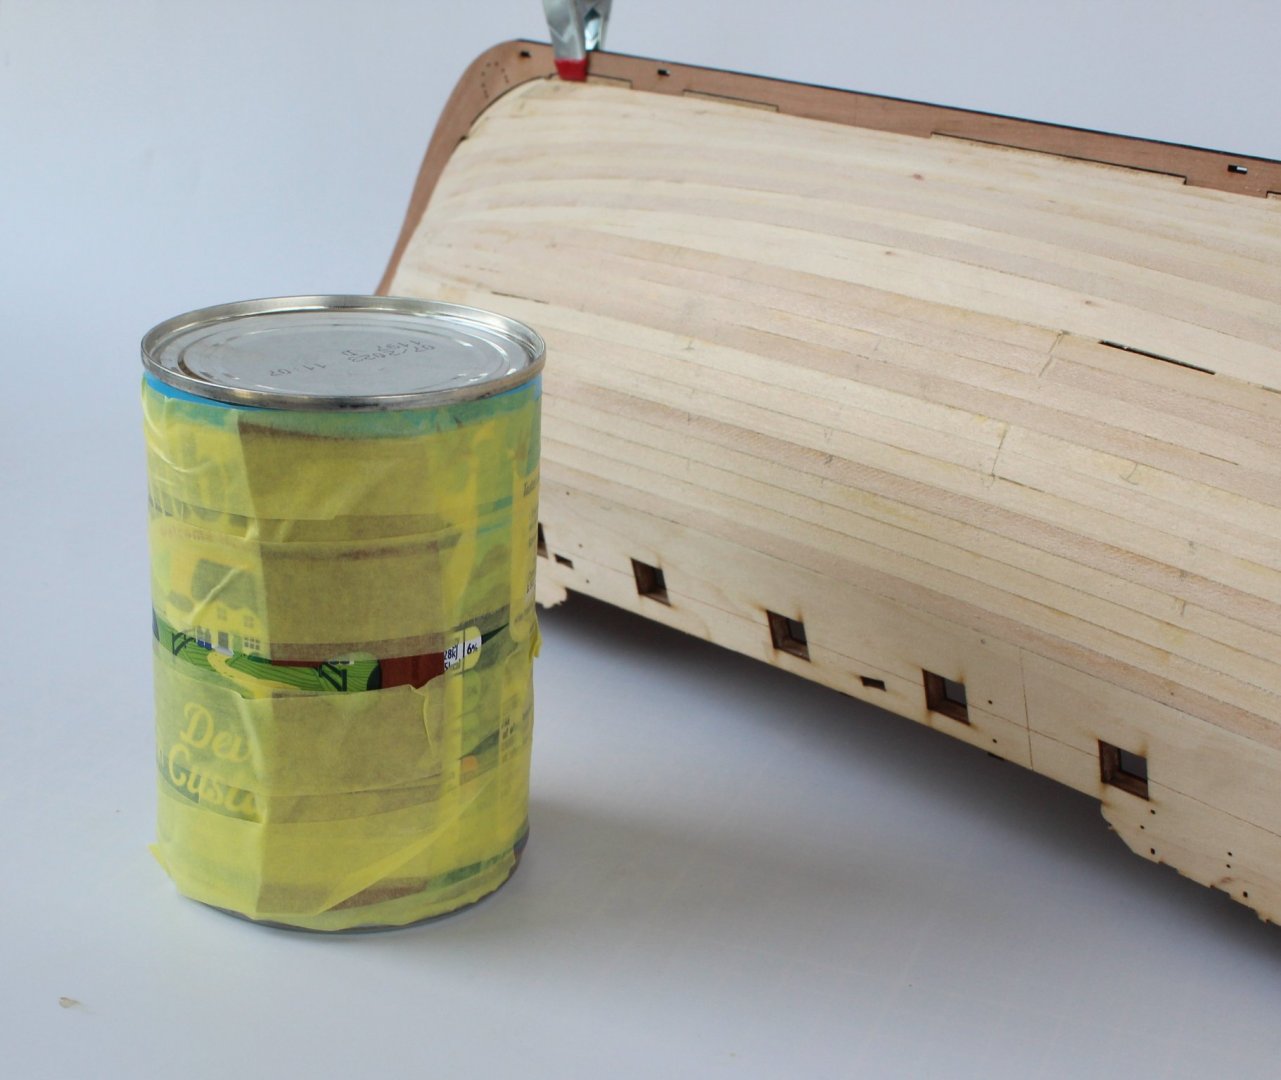
The lower stern counter pattern had already been bent around a tin can. I applied glue and pined the lower counter in place. There is a couple of areas will be filled before the 2nd planking stage. Taking note of the build instructions I positioned the top edge stern counter pattern with the stern timber slots.

The prow, keel and rudder post patterns were then glued in place.

Once the glue had dried the outer patterns were fitted, using the location pegs to align each pattern. The outer patterns were clamped in place.


I then tried a test fit of the outer planking patterns and I was happy with how these parts looked.
Finally fore outer planking patterns (272 & 274) were soaked in hot water for 30 minutes and then clamped to the hull. They will be left to dry overnight ready to be glued in place in the morning along with the aft outer planking patterns (271 and 273). I did contemplate soaking and clamping the lower fore outer patterns also but I decided that I was not going to rush this stage so this will be done once the upper patterns have been glued in place.

-
-
Just a quick update, not in my normal build log format.
The 1st planking turned out better than I first thought and looks smooth after about an hours work sanding with 120-grit sandpaper. It will need a bit more sanding with a finer grit sandpaper.
I have not needed to use any filler so far but I will fill some of the small gaps. I have tested fitted rudder post, prow pattern and keel pattern and everything looks good.


I have also soaked the Inner Lower Counter Pattern in hot water for 30 mins and it has now been taped to a tin can (Devon Custard) and will be left to dry for the next 12 hours.
- Jasseji, chris watton, BobG and 6 others
-
9
-
1 minute ago, James H said:
Make sure that stern counter upper edge is roughly along the bottom edge of the stern timber slots.
Thanks @James H. I had already noted that in the build manual and it will be fitted as instructed so hopefully everything will line up.
- BobG, hollowneck and James H
-
3
-
HULL ASSEMBLY
FIRST PLANKING – PART 4
BUILD MANUAL STEP 142 - 143
Tools Used
Titebond original glue
Old paint brush
Clamps
Gathering the materials required
The following kit parts are required for this section of the build:
F-43 1mm x 5mm x 650mm strip – Limewood
Brass pins
Assembly Process – Keel
When looking at the photo of the garboard plank(s) in my previous post I noticed I had left the planks short at the bow end, as can be seen in the photo below

It was a relatively easy task to cut and fit a filler piece, as shown in the next photo.
After fitting the three keel planks I then proceeded to complete the planking task by planking in both directions. I made sure I left the stern planks a bit short so I could taper the ends in this deadwood error down to 0mm when I get to sanding the 1st planking. I also found it better to fit a couple of stealers.
The first planking layer is now complete and ready to be filled where necessary (I have noted a few areas) and then it can be sanded smooth. I can forecast a large dust cloud forming in the Scarborough (UK) region over the weekend.
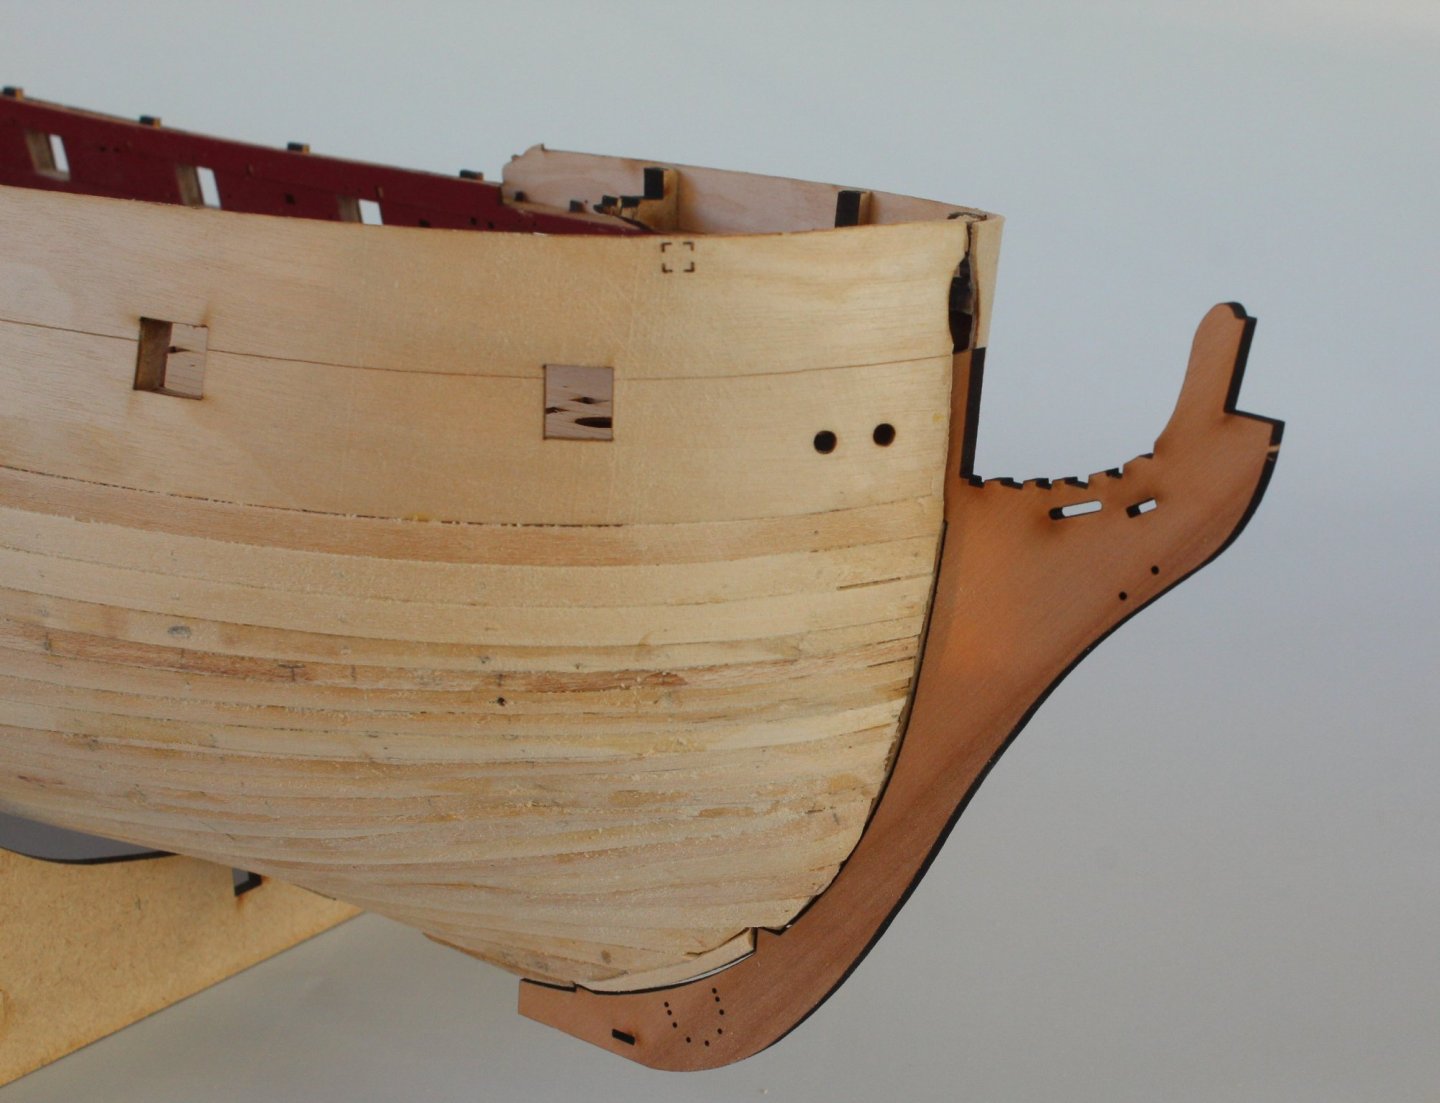
The bow filler piece can be seen but overall the bow profile looks reasonably Ok
The stern area will require a little bit of filler
I did trim the ends at the stern and tried a test fit of the lower stern counter pattern – inner. It looks to be a good fit. I will bend the pattern before it is fitted. I might fit a couple of mini stealers to fill the two small gaps on the left side.
I also test fitted the prow pattern and I was pleased to see it was a good fit. This picture really shows the importance of adding the small bow filler piece.
- Nirvana, GrandpaPhil, JpR62 and 6 others
-
9
-
46 minutes ago, Jasseji said:
ye, i dont really care as long as the planks are invisible.
I will try to do the last few today as well
I've just finished my 1st planking. Time to go for my daily run so the glue can cure on the last three planks. I had exactly 23 plank widths on one side and 22.8 plank widths on the other side.
- GrandpaPhil, JpR62, Jasseji and 3 others
-
6


HMS Sphinx 1775 by Glenn-UK - Vanguard Models - 1:64
in - Kit build logs for subjects built from 1751 - 1800
Posted
HULL ASSEMBLY
SANDING AND FILLING 2ND PLANKING
BUILD MANUAL STEP 186 & 230
LINK TO MY BUILD LOG INDEX
Tools Used
Craft knife
120 & 400-grit sandpaper
Wood filler
White (water based) paint
Titebond original
Gathering the materials required
No parts required
Assembly Process
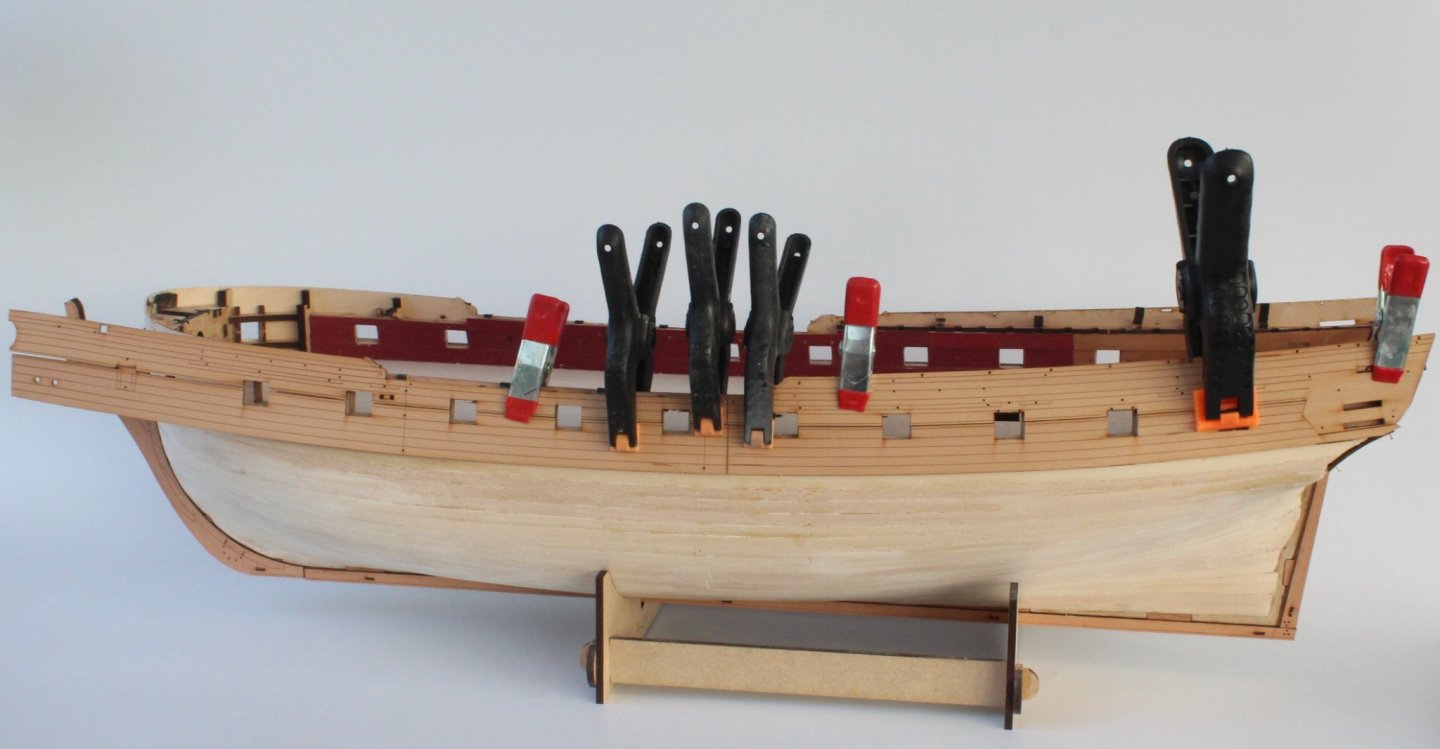
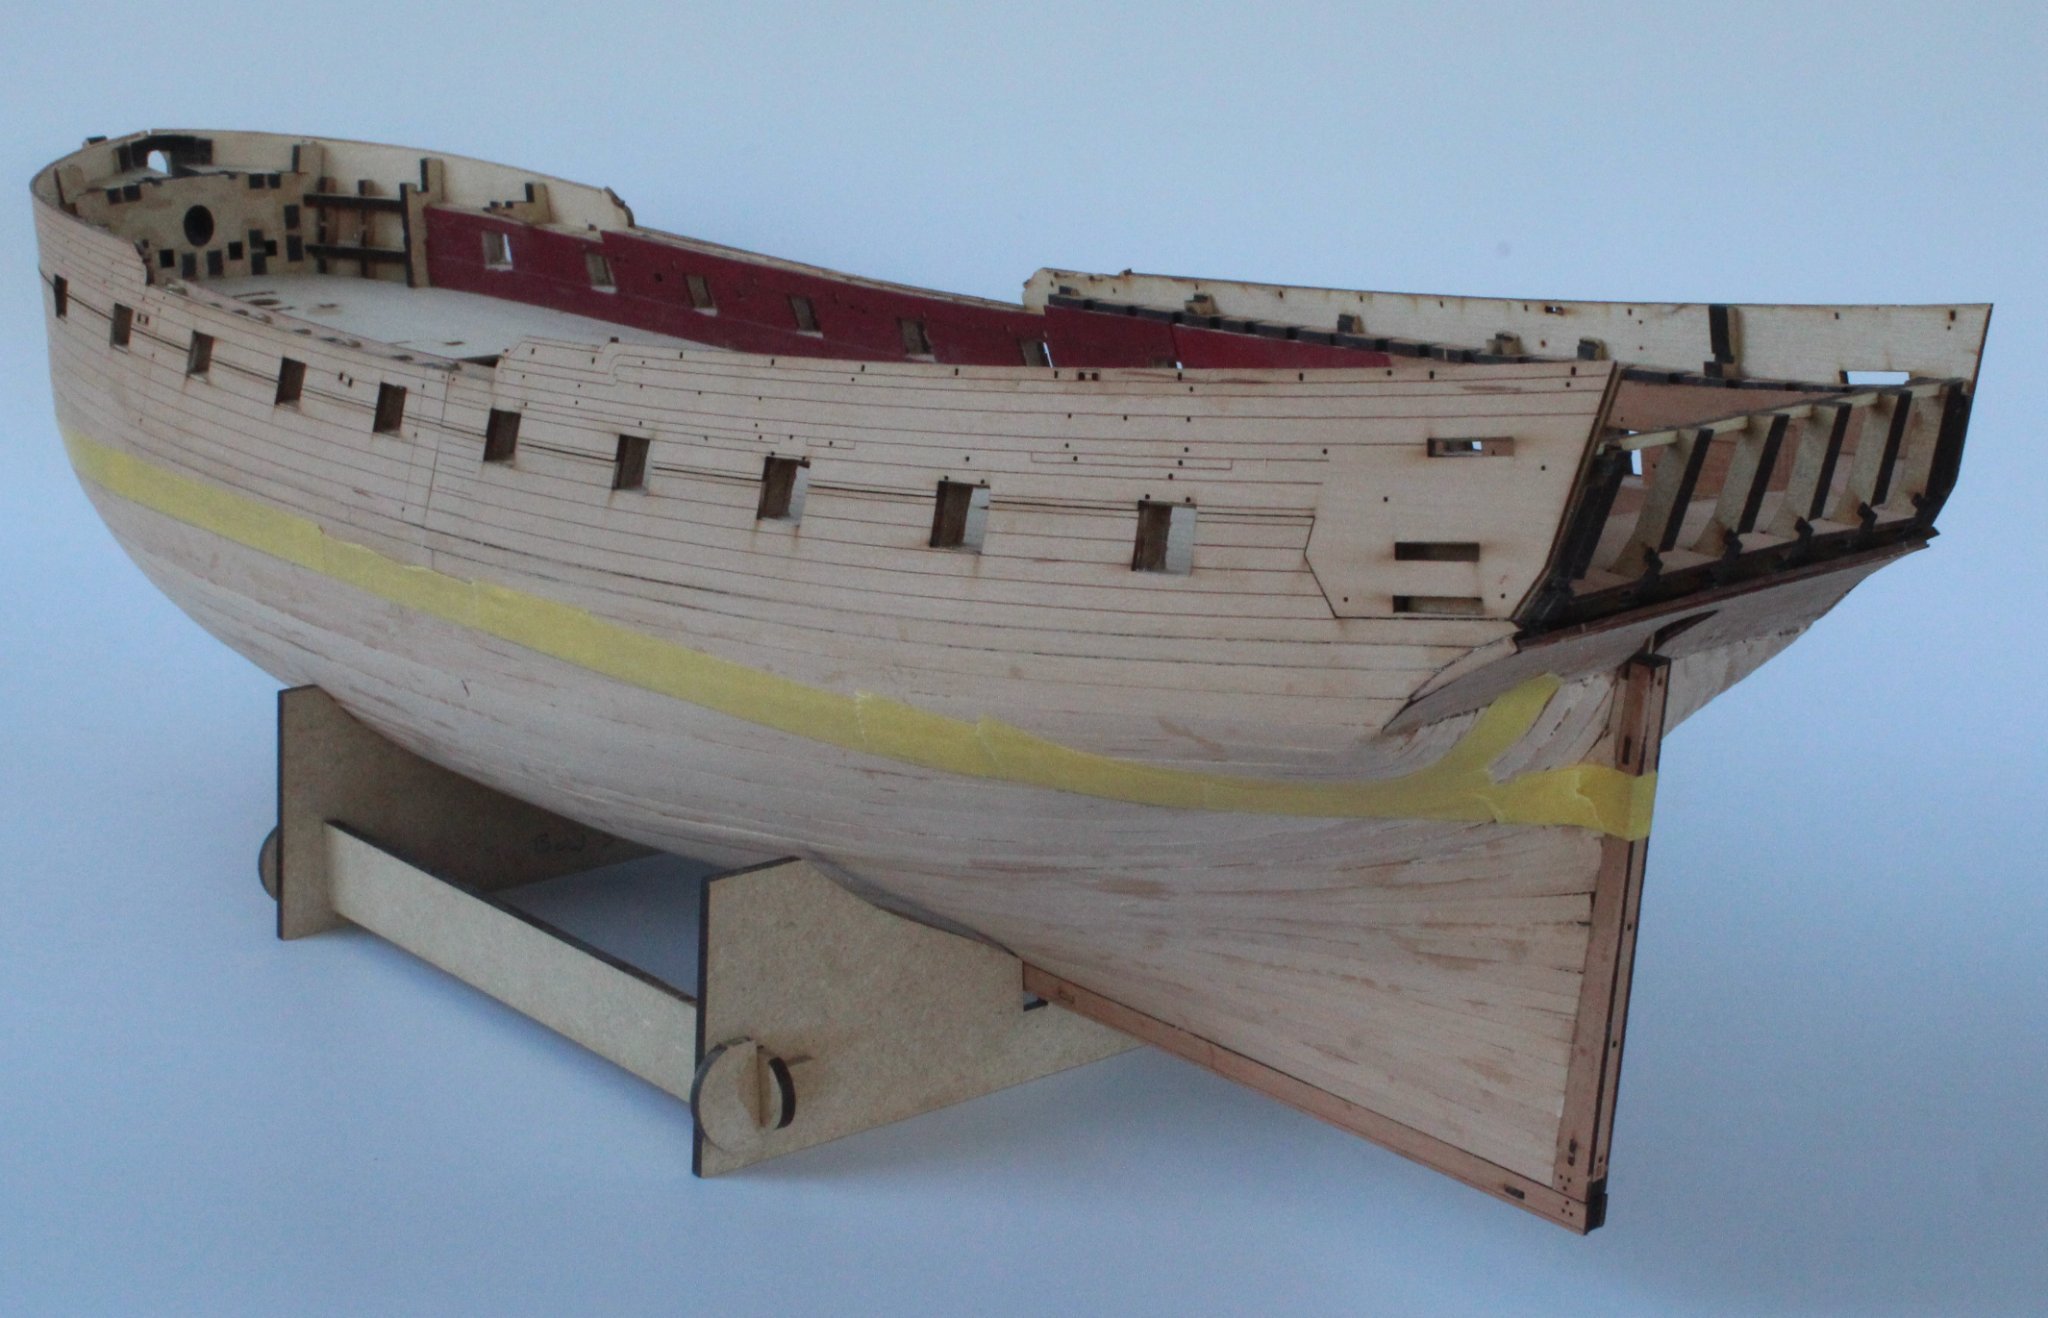
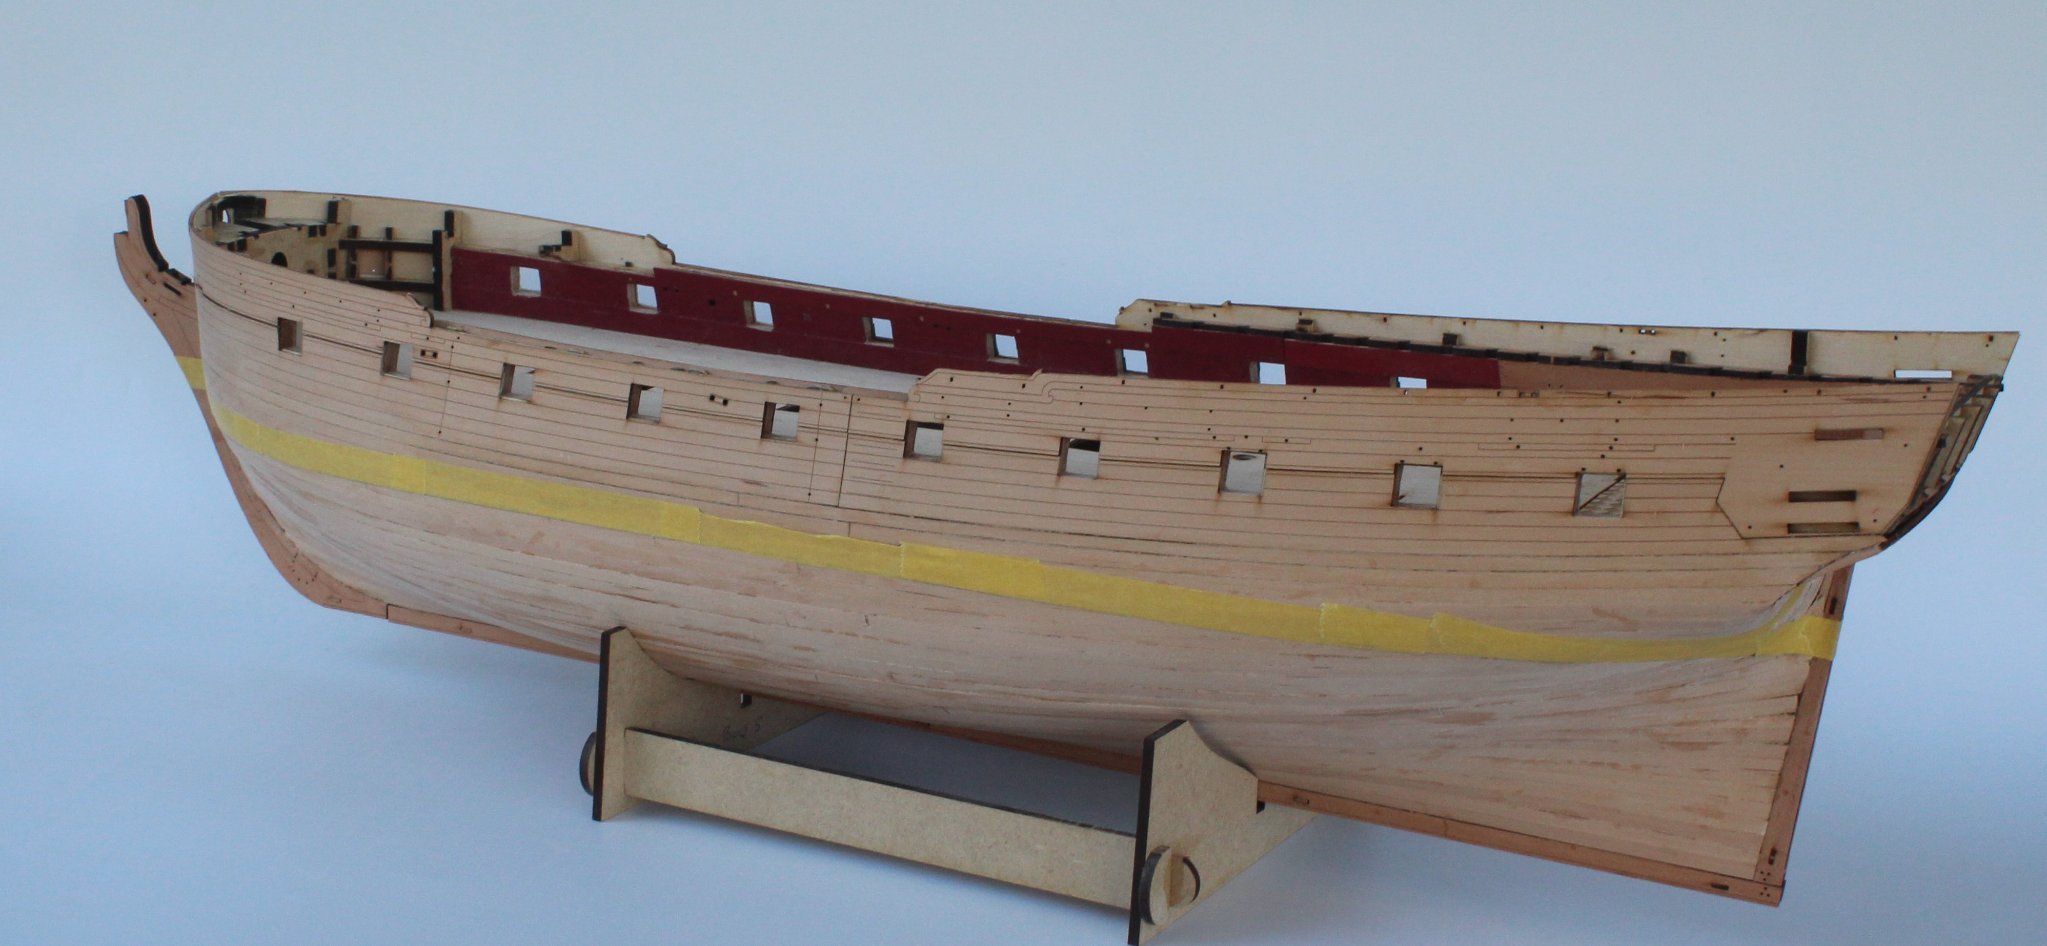
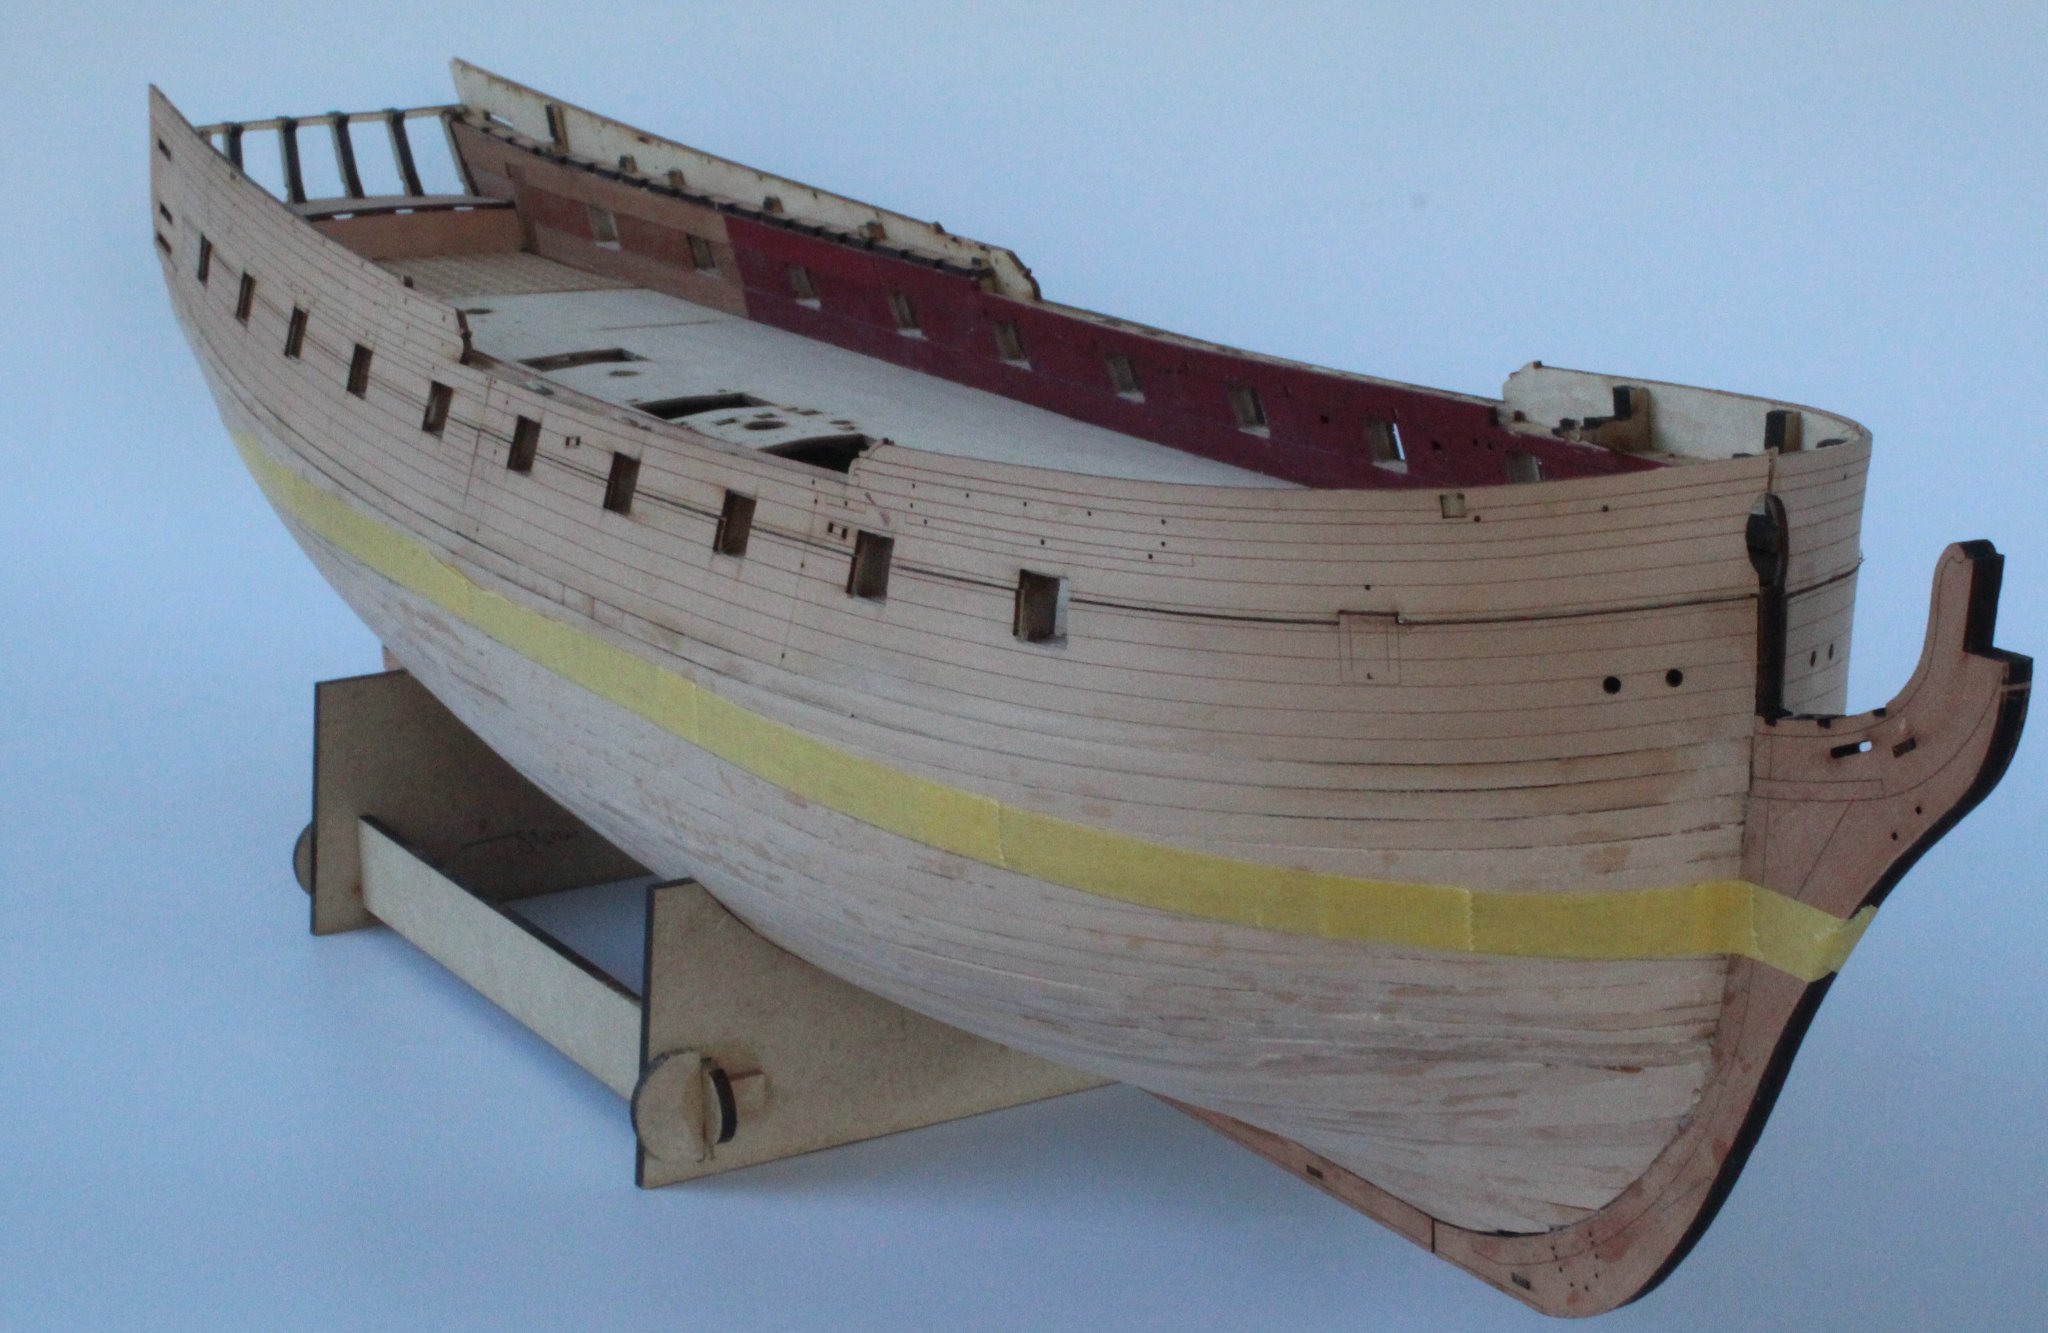
I started the process by brushing on a thin coat of white paint to the hull. This really shows up the areas which needs to be sanded and filled.
After the initial sanding I was reasonably happy that the hull was smooth. I then decided to continue with the sanding and filling phase (step 230 of build manual) to get the hull ready for the painting phase.
I made up a solution which was approximately 50% wood filler, 40% water and 10% Titebond original and coated it over the hull. Using an old paint the diluted solution was applied to the hull. The diluted solution fills any gaps between the adjacent planks very nicely. The hull was then left overnight to allow the solution to dry and harden.
The hull was then sanded, to remove the excess filler and paint before a new coat of white paint was applied. A few areas dips were once again highlighted so another diluted wood filler solution was used and left overnight to dry. After sanding the hull look much better, but still required another application of the diluted wood filler solution. This does take time, but hopefully I will reap the benefits when the hull is ready for painting. I plan to move on to adding the wales and starting work on the gallery assembly once the hull has been sanded, after the current wood filler solution has fully dried.