


Old Collingwood
-
Posts
11,572 -
Joined
-
Last visited
Content Type
Profiles
Forums
Gallery
Events
Everything posted by Old Collingwood
-
 Some good work with the details Mark, I remember the same experience with planks bending and fitting - I nearly gave up more than once - but keeping at it is the key. Read through my Greayhound build you will se what I meant. OC.
 -
Hasegawa Spitfire Mk IX 1:48 by jwvolz - FINISHED
Old Collingwood replied to jwvolz's topic in Non-ship/categorised builds
You got any other plane builds in the pipeline Joe? OC. -
Hasegawa Spitfire Mk IX 1:48 by jwvolz - FINISHED
Old Collingwood replied to jwvolz's topic in Non-ship/categorised builds
Looking good Joe, very nice fitting kit. OC. -
We normaly see rain here so its nice for the sun to dry us off, I too suffer from Hay fever and am on meds for it all year round. OC.
-
No progress or pics folks (sorry) I was in the back yard all day getting some vit D off the sun, then after supper I fell asleep in the chair and was too late when I woke up, think the fresh air and sun made me tired. OC.
-
It is looking super Jack, do you super detail with washes highlighting etc when assembled? I was never that good at that part when I was younger inpatient I think I was. OC.
-
Glad I'm not building it with all those additions / add - ons I would be building for ages picking out the details with my scraper and knife. OC.
-
Aston Martin DB5 by Fnick - Revell 1:32 (Finished)
Old Collingwood replied to fnick's topic in Non-ship/categorised builds
Indeed - I did though make the Action Man bed add whitling emoji. OC. -
First rate work (no pun intended) phil, you should be so pleased with how she is coming on. OC.
-
She is looking Superb mate, sorry to hear of your little set back but glad you have it in hand - it is really turning into a head turner. OC.
- 337 replies
-
- 3
-

-
- finished
- mountfleet models
- (and 1 more)
-
Aston Martin DB5 by Fnick - Revell 1:32 (Finished)
Old Collingwood replied to fnick's topic in Non-ship/categorised builds
You have surgeons hand when it comes to model building Kevin , bet back in the days of Blue Peter bet you used to make loads of stuff same as I did. OC. -
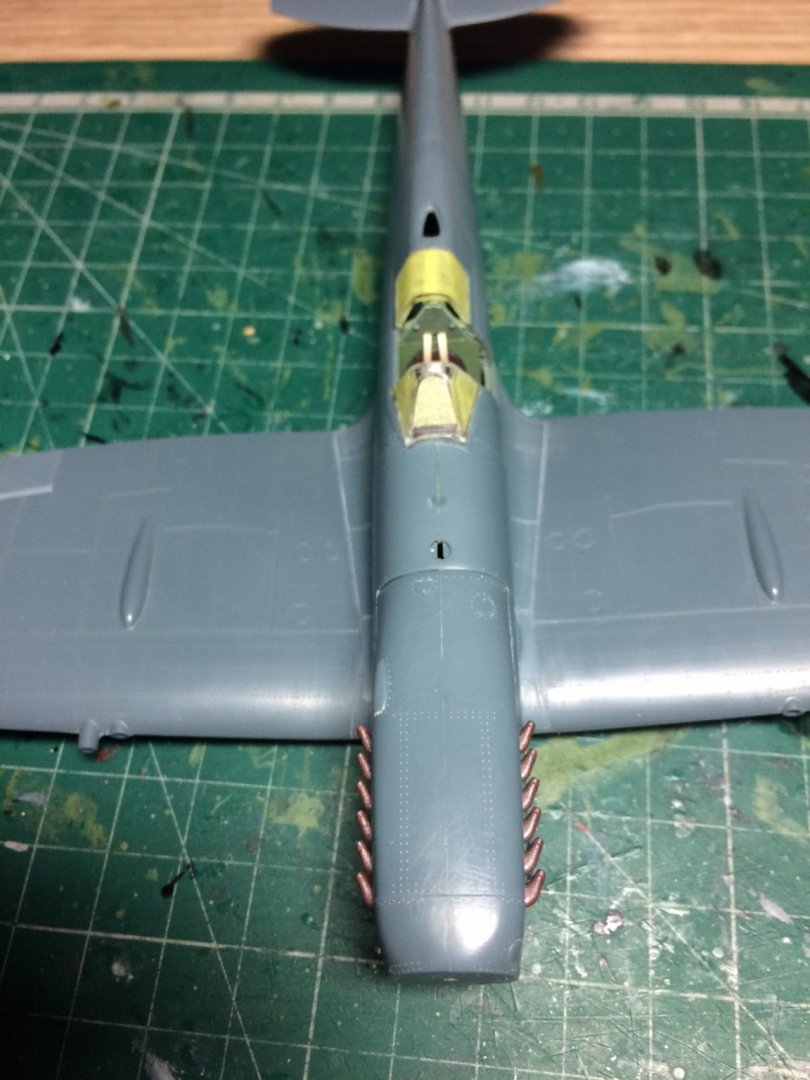
Evening all home inmates, I did a bit more on the spit this eve as I was in the back yard enjoying some nice but cold sunshine from that strange thing in the sky, so first thing I ran some putty into that gap where the top engine cowl meets the forward fuselage, then it was time to construct the bottom cowl at the front, this also has a pe vent filter fitted inside (fiddly with limited acsess) after cleaning the join seams (slightly) I then glued it in place. No pics as I will wait till I have cleaned up the join seams where it meets the fuselage. OC.
-
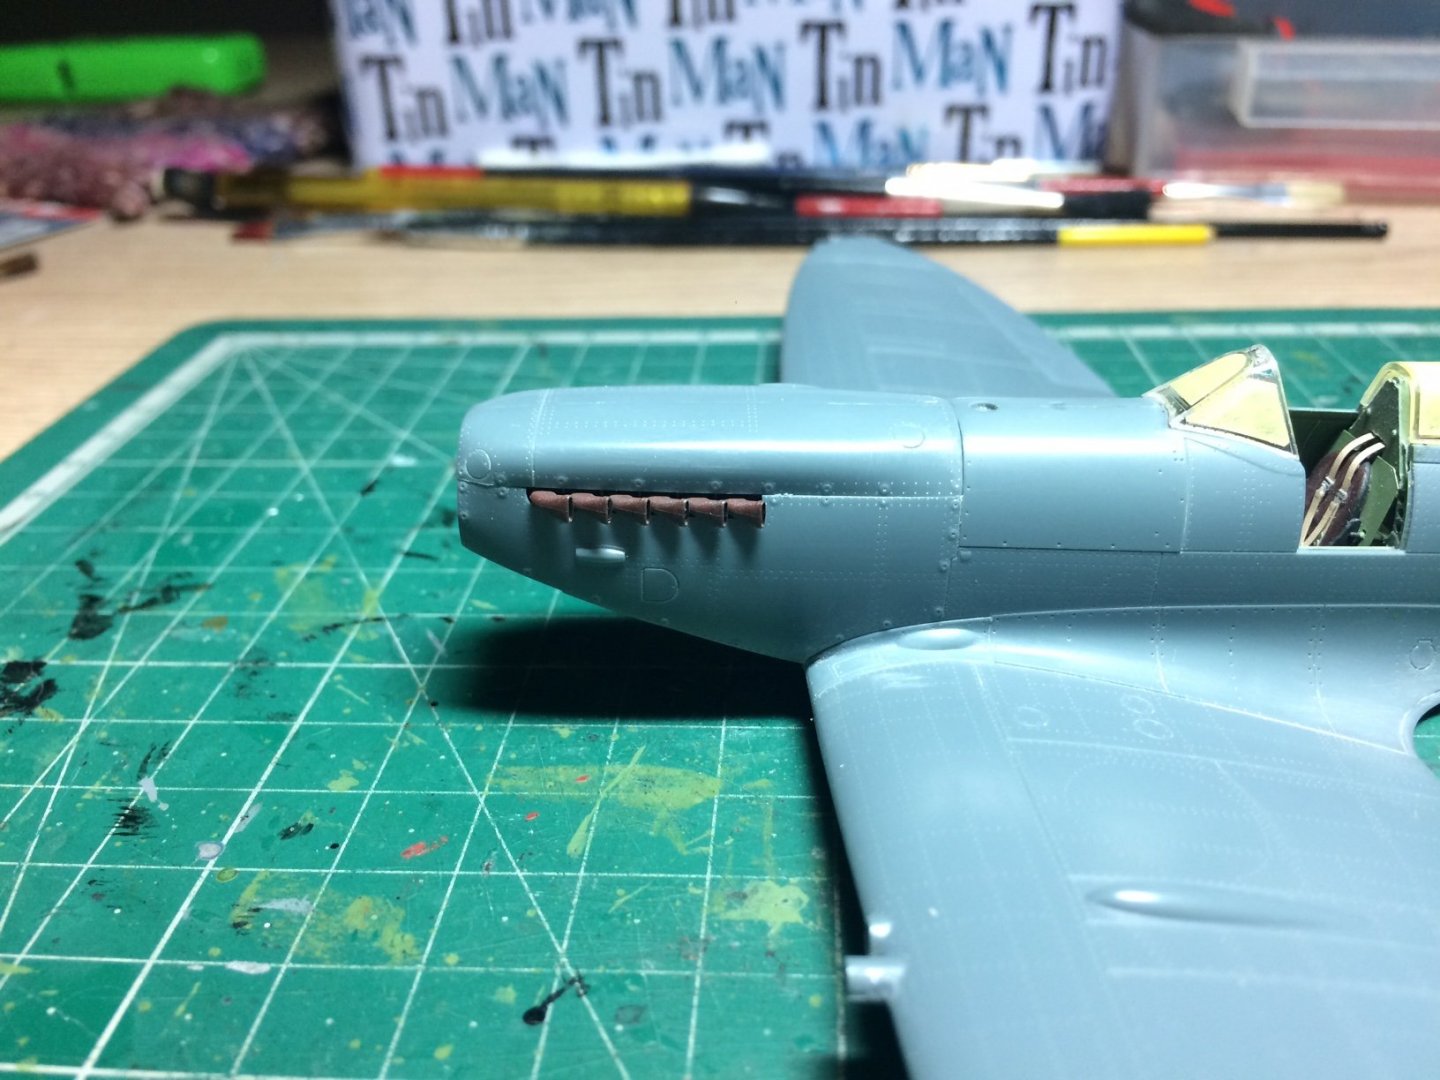
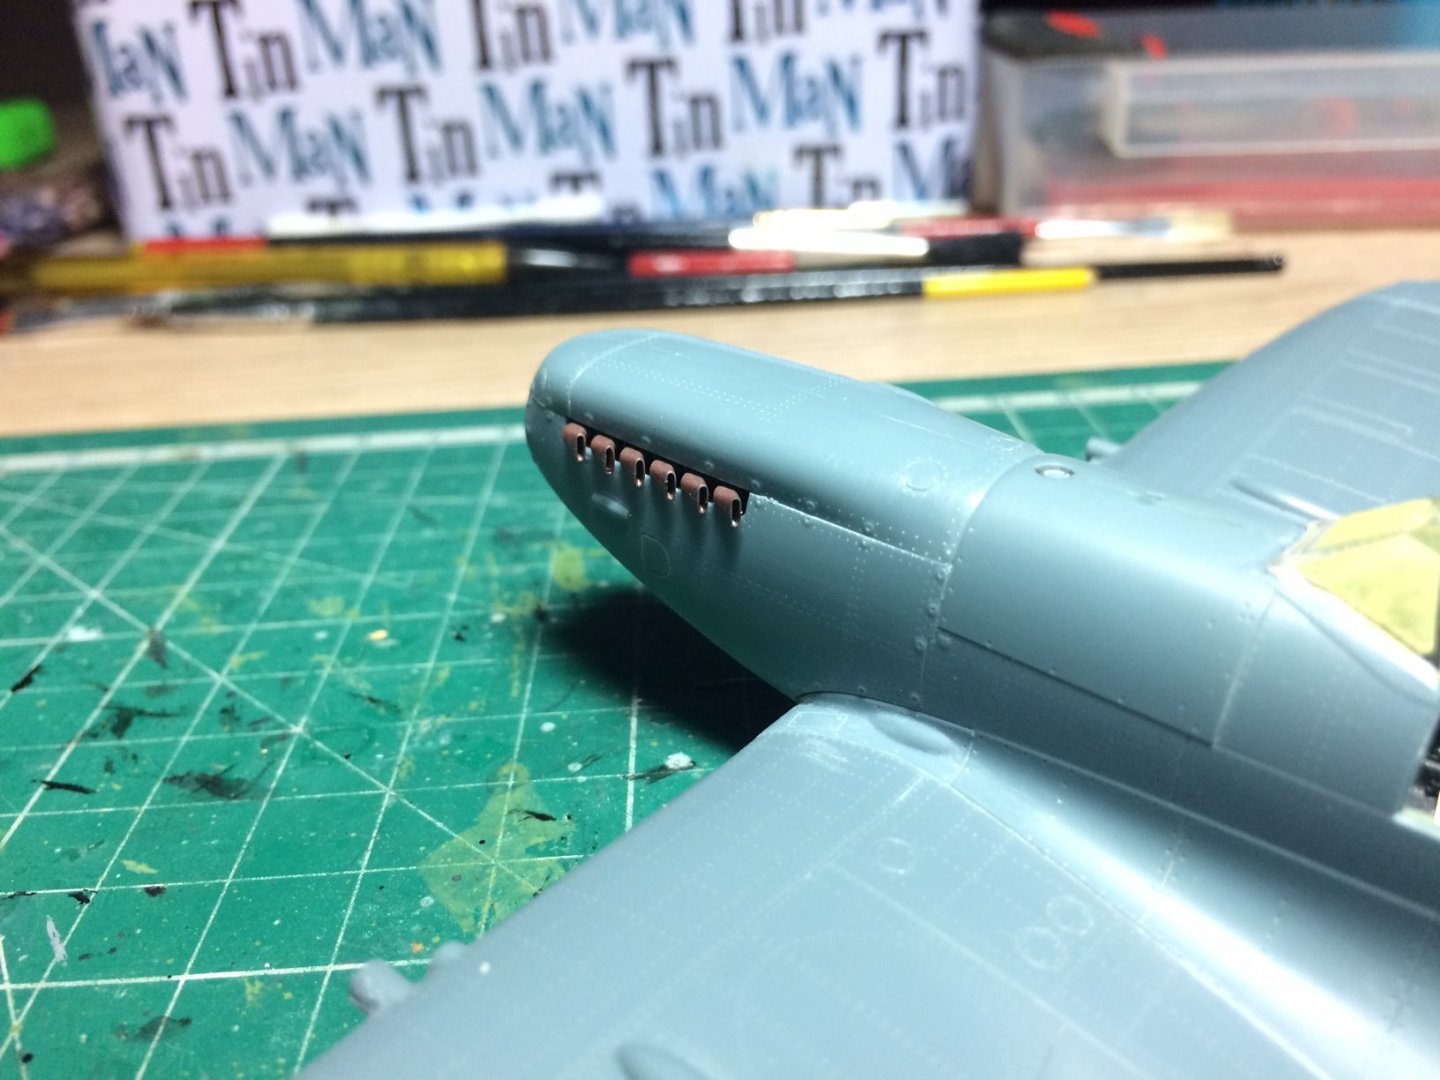
Hiya mate, thank you for the compliment, I'm not sure about the exhausts - guess it is quite unusaul for them to be this detailed with in a kit, in the box there is a choice of two different sets of exhausts I guess for early or late - if not a different model of Spit. OC.
-
AMT Body Snatcher - 1:25 by Fright
Old Collingwood replied to Fright's topic in Non-ship/categorised builds
Looking excellent. OC. -
B-25J Mitchell by Tom E - Revell - 1:48 Scale
Old Collingwood replied to Tom E's topic in Non-ship/categorised builds
Looking great. OC. -
Mutch better. OC.
-
Nothing wrong with that lou - looks spot on from my direction dont care what you think you are doing a great job (trust me). OC.
-
Yep we like our chatter us lot do. OC.
-
Hawker Typhoon by Asat - Airfix- 1/24
Old Collingwood replied to ASAT's topic in Non-ship/categorised builds
That looks really nice so much detail at this scale. OC. -
Getting all the essential nibbles in first - Mark is leading with his cupboard on wheels with popcorn, I'm making some hot dogs but the hob is on low - dont want the dogs getting to warm before the rest turn up. OC.
-
Looking good I think we all have to do this as the kit parts are just so bad. OC.
-
It looks really good that way, I used to collect Dinky and Corgi Armour tanks and stuff when I was kid. OC.
-
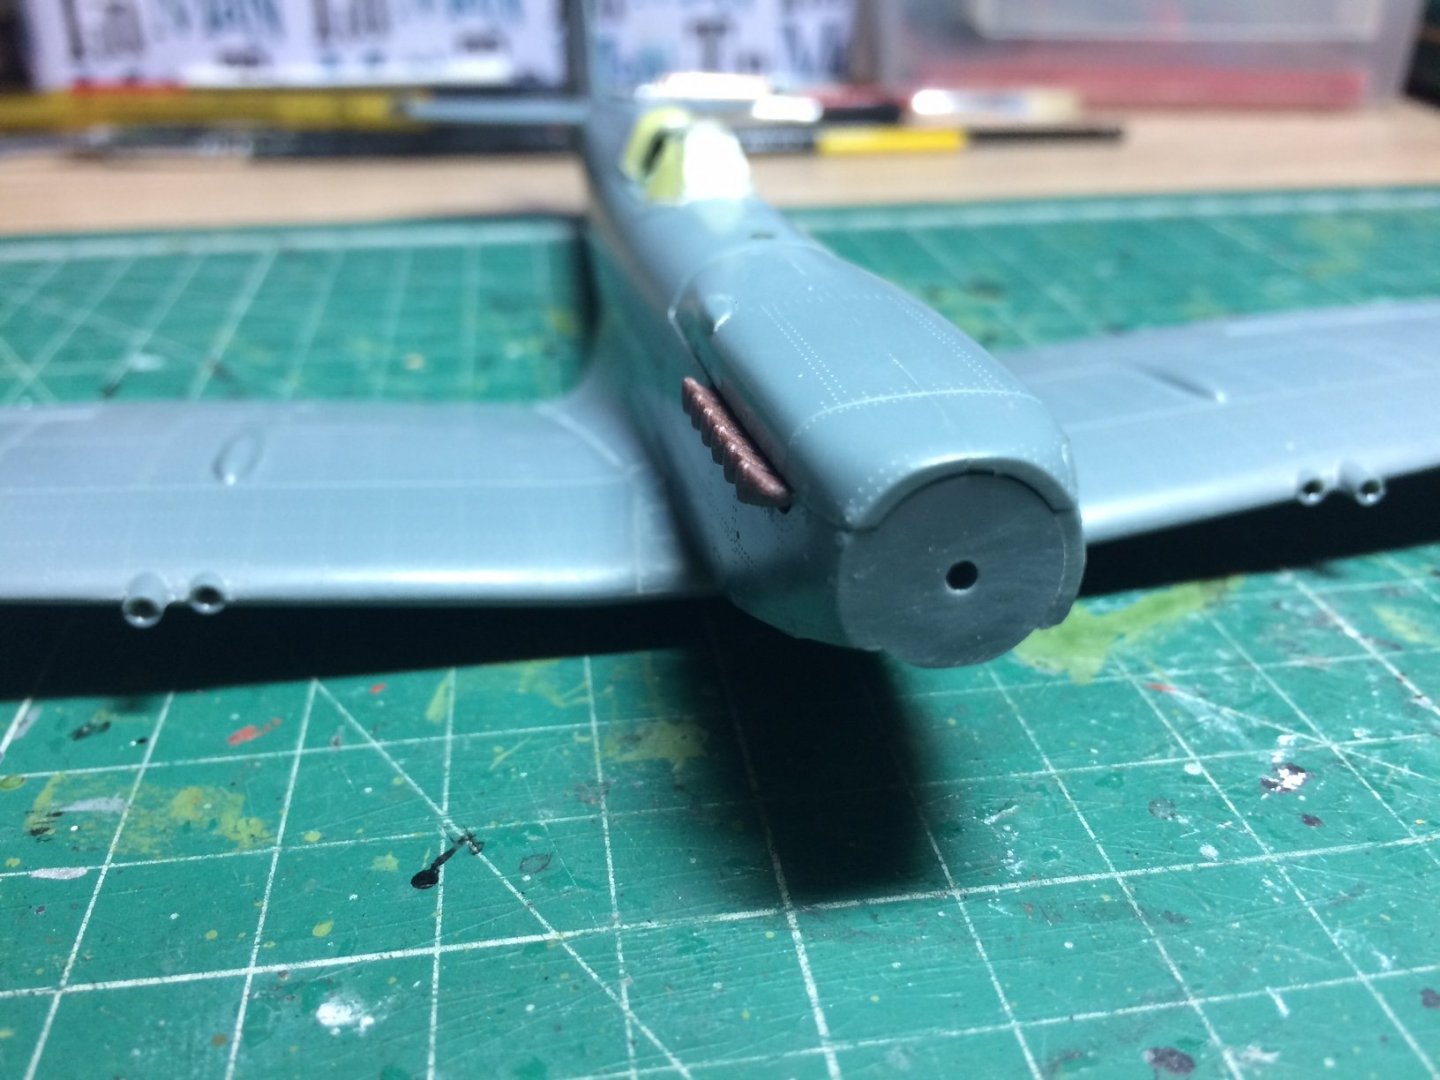
Bit more progress - the other exhaust was built and painted then glued in place, then I glued down the top cover. OC.
- 298 replies
-
- 12
-
-
Thanks mate. OC.


