HOLIDAY DONATION DRIVE - SUPPORT MSW - DO YOUR PART TO KEEP THIS GREAT FORUM GOING!
×


Old Collingwood
-
Posts
12,097 -
Joined
-
Last visited
Content Type
Profiles
Forums
Gallery
Events
Everything posted by Old Collingwood
-
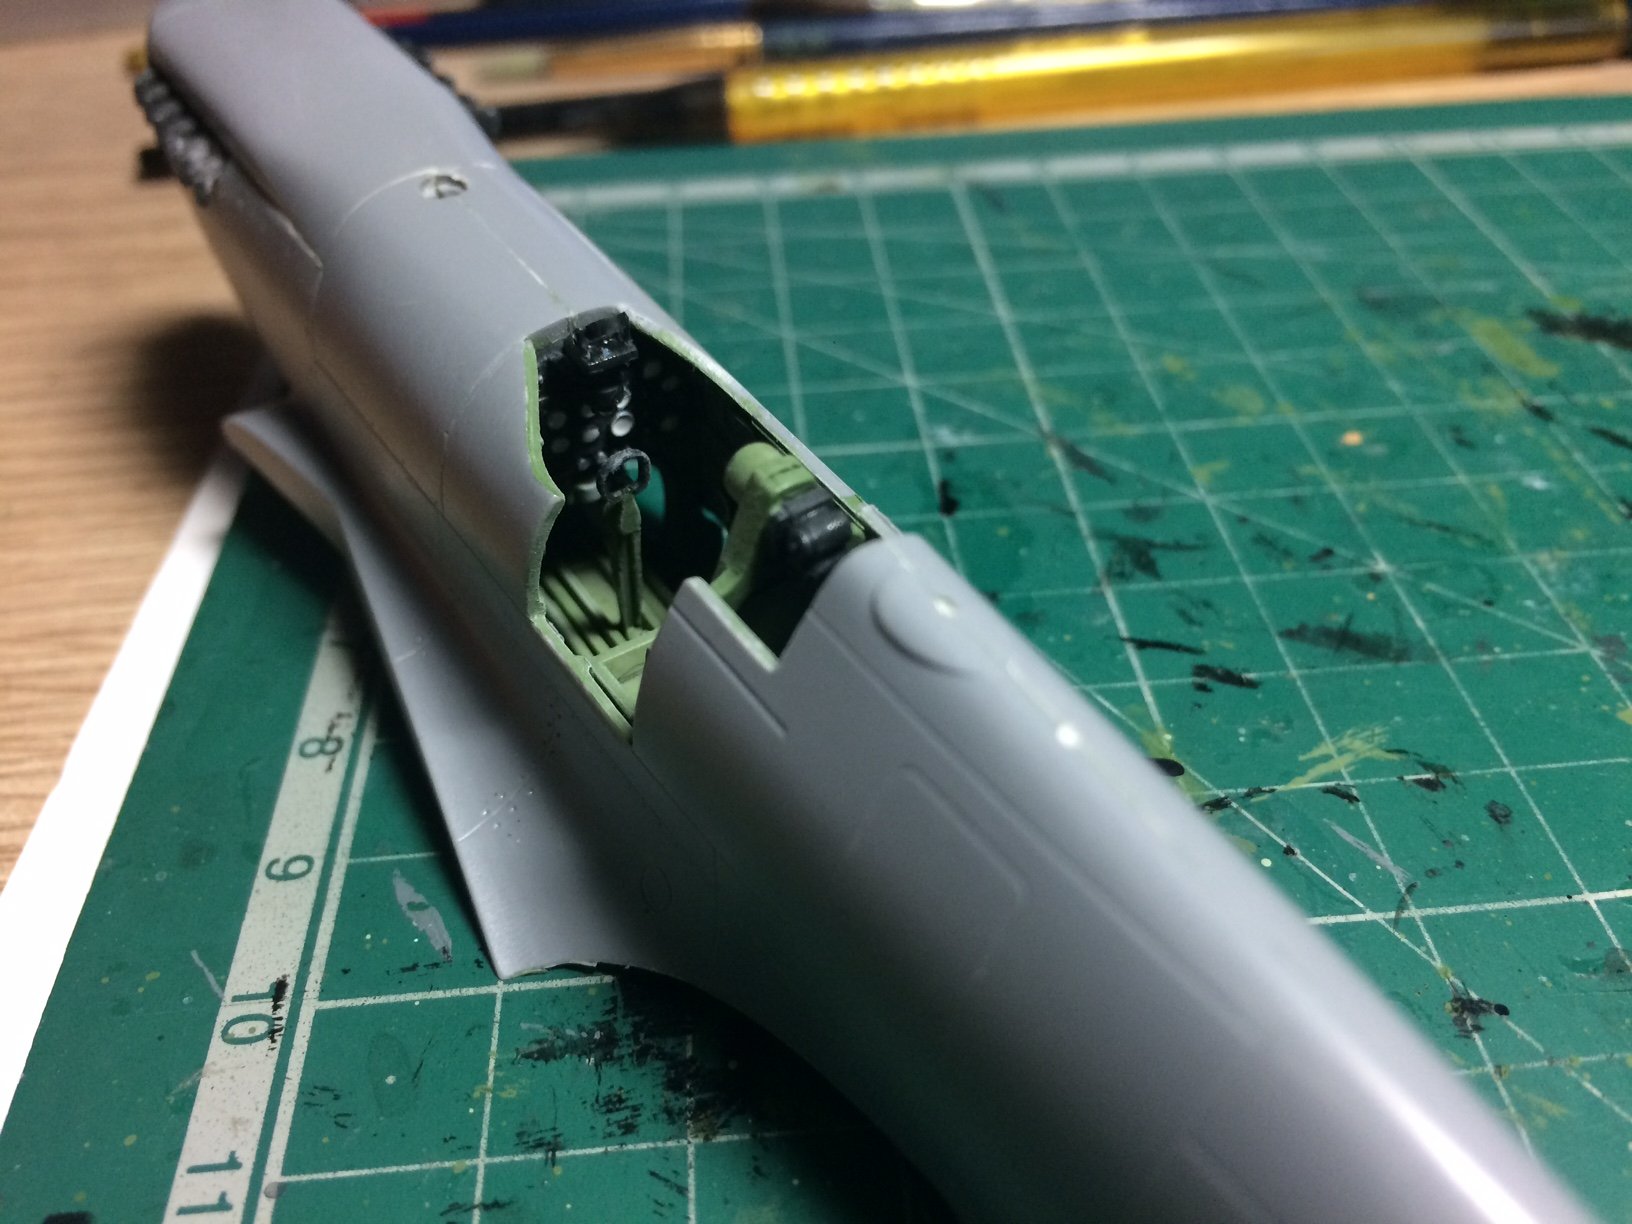
 Evening all, more progress on the cockpit I started by painting the instrument panel this had the sight added then shaded/highlighted, after it was glued to the main assembly the whole thing was pushed in place in the fuselage. OC.
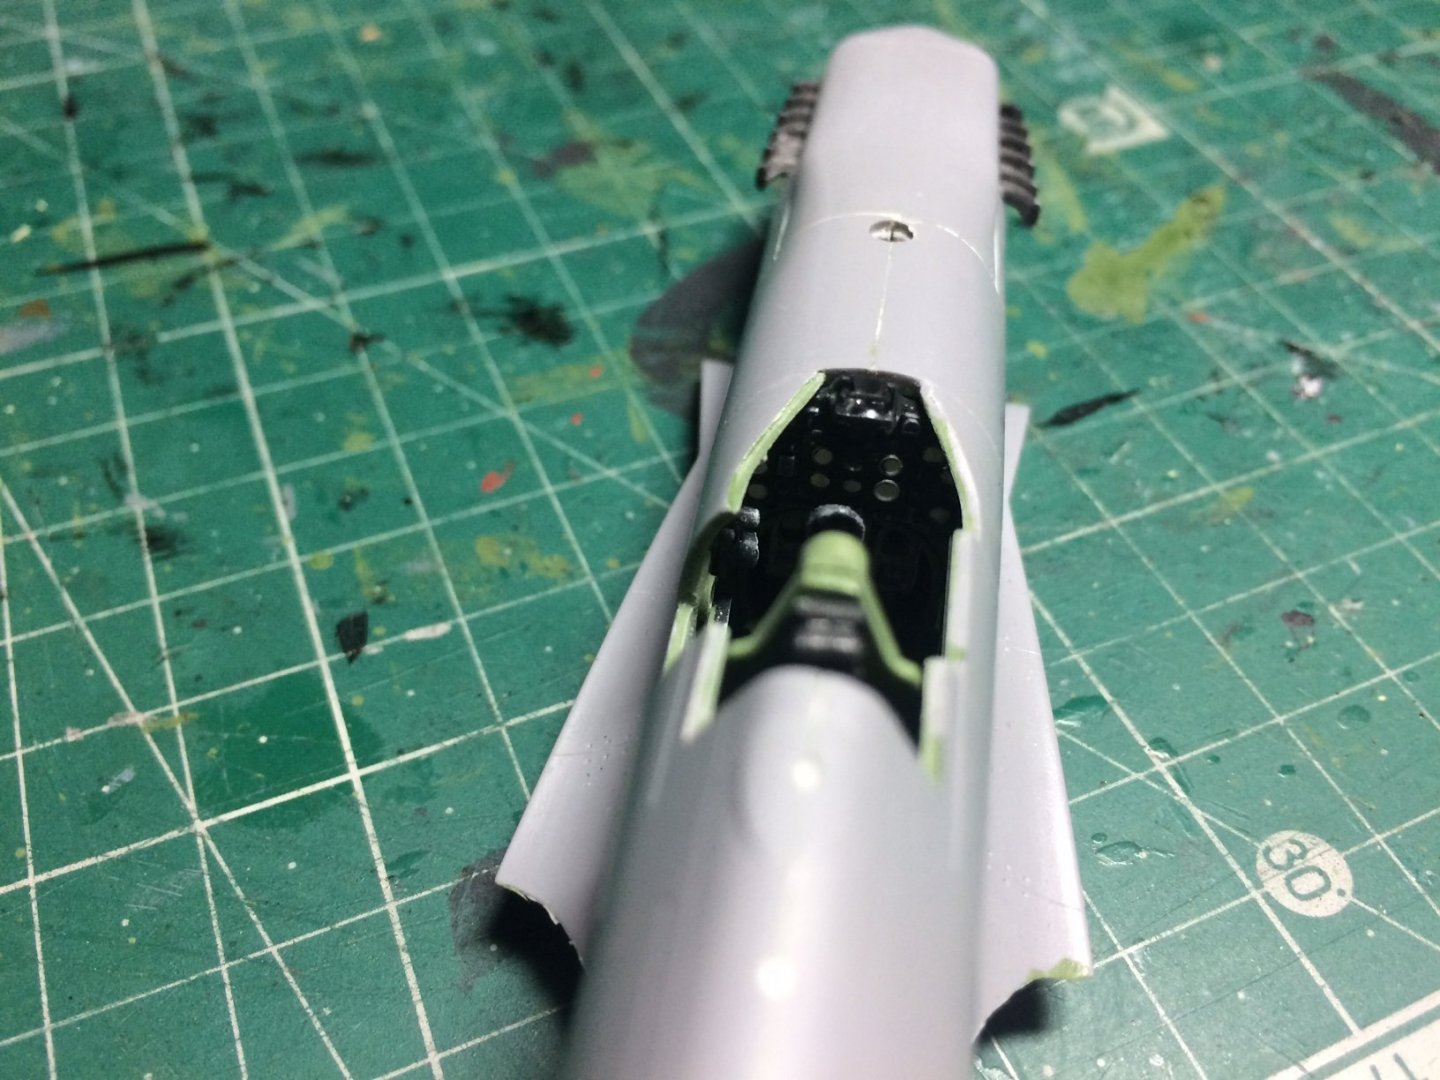

- 122 replies
-
- 10
-

-
Suzuki GSX 1100 S kpnuts 1/6 tamiya
Old Collingwood replied to kpnuts's topic in Non-ship/categorised builds
Very nice - somthing about early Suzi's with that dropped down fairing style. OC. -
F-5F by ErnieL - Kitty Hawk Models - 1/32 - PLASTIC
Old Collingwood replied to ErnieL's topic in Completed non-ship models
I think a show has to be one thing at max or another - do a high speed fly through at near supersonic but also do more graceful wing perfomances, the in betweens spoil it modern jets just doing wing slides and power turns are boring to be honest. OC. -
F-5F by ErnieL - Kitty Hawk Models - 1/32 - PLASTIC
Old Collingwood replied to ErnieL's topic in Completed non-ship models
Very good display very tight - not a lot of speed but the sound makes up for it. OC. -
F-5F by ErnieL - Kitty Hawk Models - 1/32 - PLASTIC
Old Collingwood replied to ErnieL's topic in Completed non-ship models
Have you seen the Swiss dispay team with theirs? OC. -
Sounds like a good plan - getting planks to sit down can be like an uphill battle its as if the little blitters have a will of their own, my mistake was being too impatient not giving the wood glue enough time under pressure to set. OC.
-
F-5F by ErnieL - Kitty Hawk Models - 1/32 - PLASTIC
Old Collingwood replied to ErnieL's topic in Completed non-ship models
Very nice work love F5's. OC. -
Well done finishing her - the sails really brought the kit to life. Whats next? OC.
- 24 replies
-
- 2
-
-
- golden hind
- airfix
- (and 1 more)
-
I know the wood has let you down my friend - but you are doing a fine job of getting past the hurdles, its credit to you and your abilities - keep up the great work Mark you will crack it. OC.
-
As Edward and Gregory said - she is looking really nice well on track mate. OC.
- 436 replies
-
- 2
-
-
- vanguard models
- alert
- (and 1 more)
-
Just got back on our internet has been down for about Two hours, anyway plan latter is to make the instrument consol - paint and weather it. OC.
-
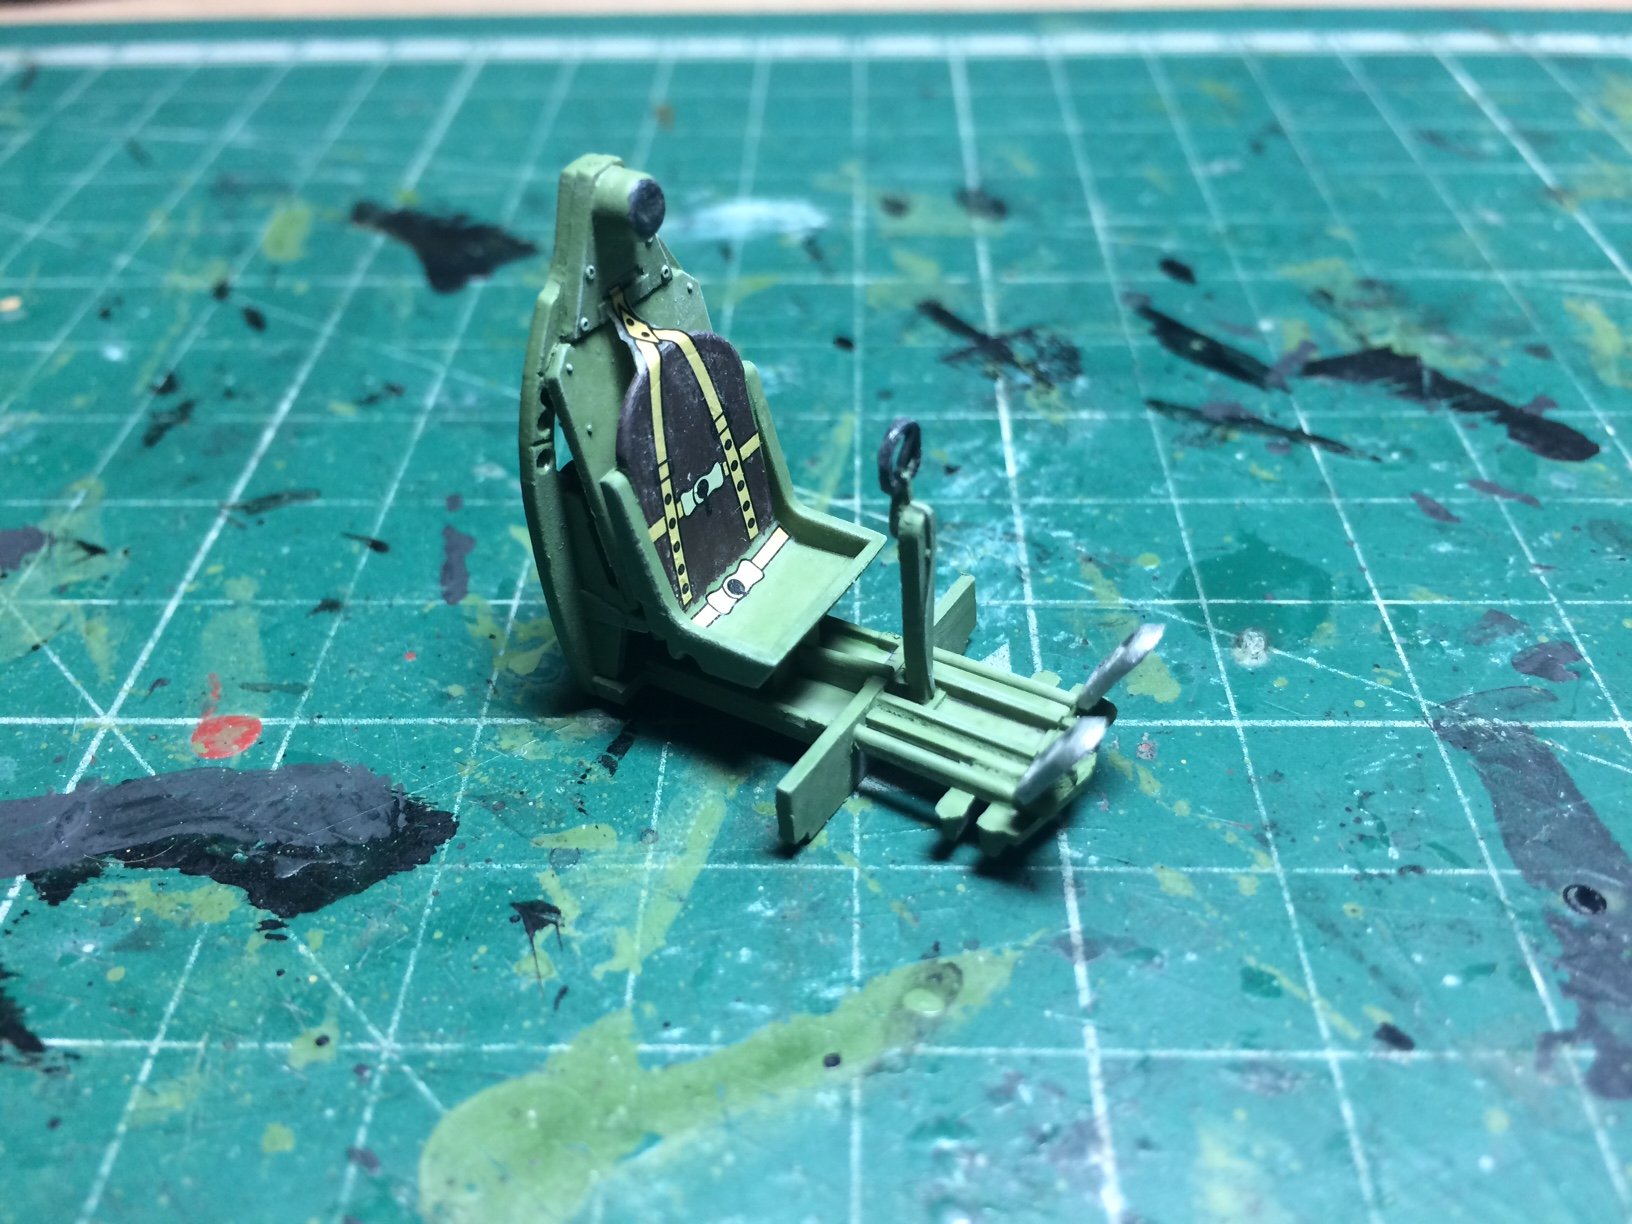
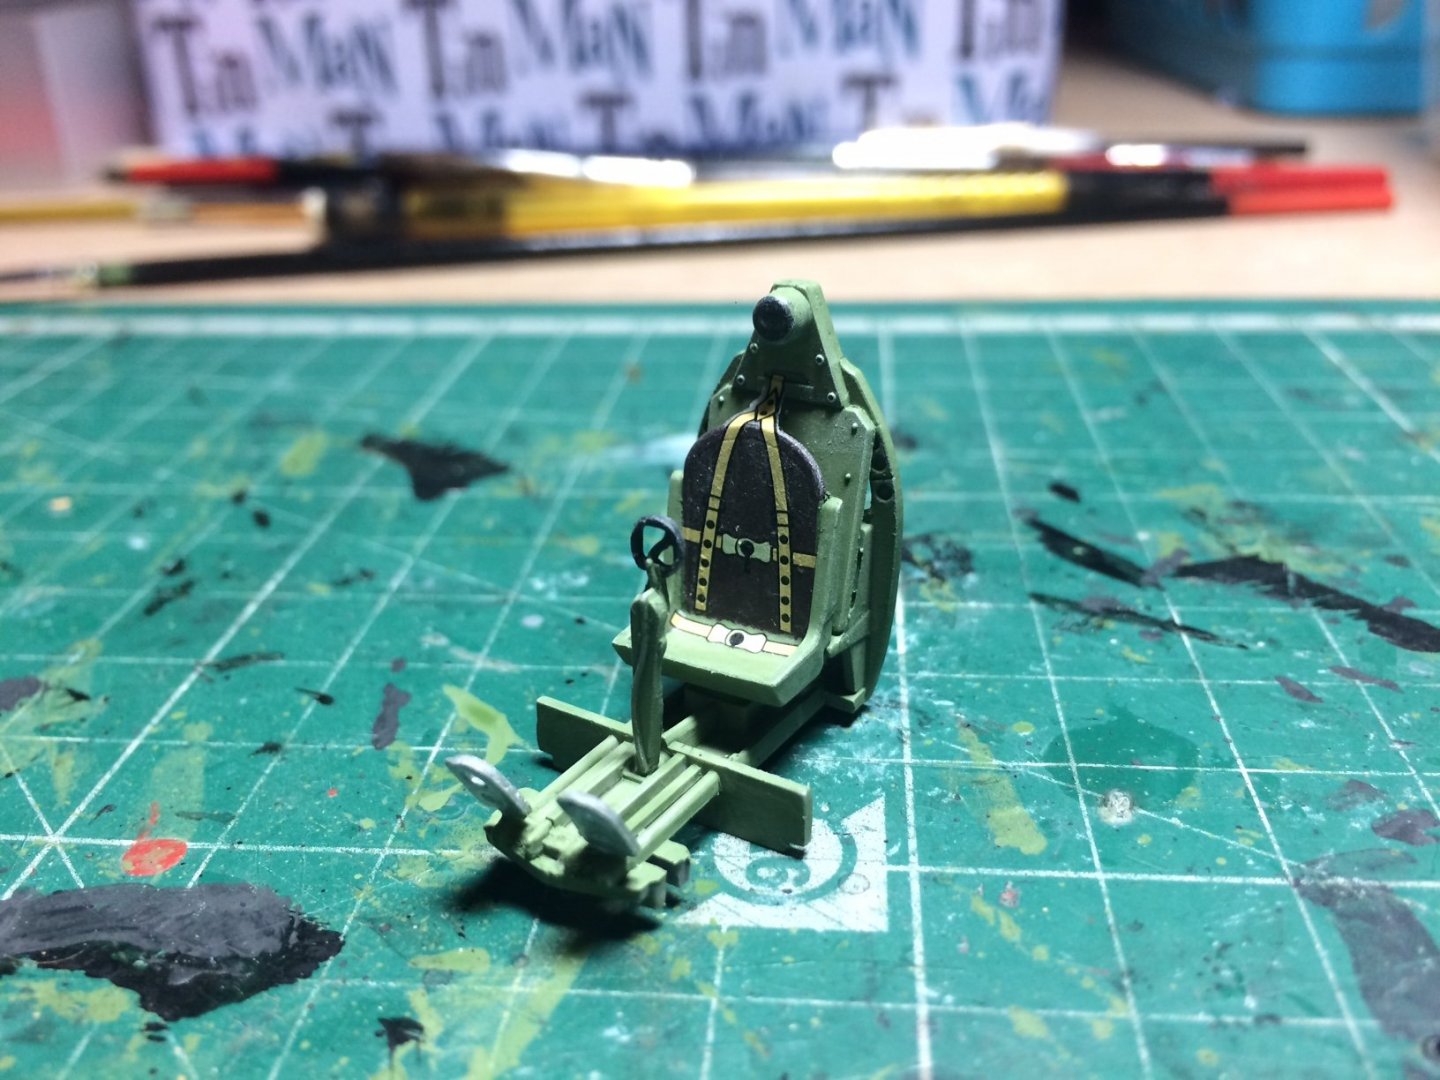
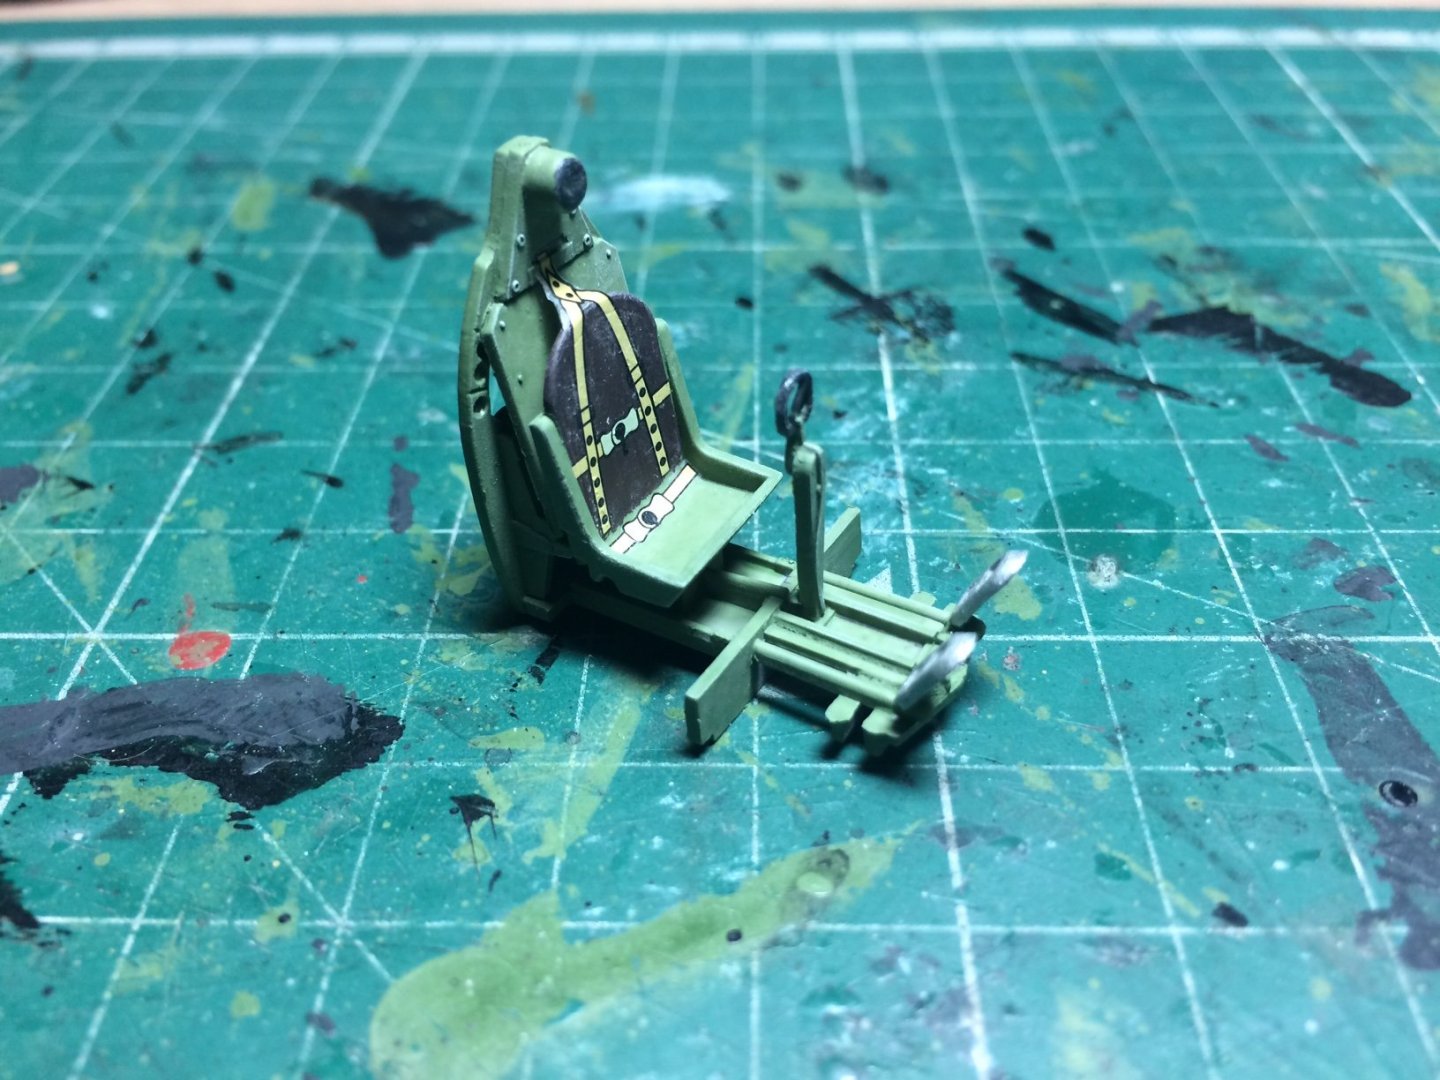
Evening all, while waiting for the Mossie to have her touch up, and the spit to de-gas, I decided to continue with my seafire - next to work on was to paint the cockpit/seat section - this had the normal colours applied, then a bit of shading/highlighting, then I fitted the seat belts that was in the form of decals, after I gave the whole thing a few coats of flat top coat. OC.
-
Remember the board game Risk. OC.
-
They even do live displays of car crushing by tanks. OC.
-
When things get back to some kind of normal and travel is easier you should pay a visit over the pond here - https://tankmuseum.org/home I have been and its a Fab place. OC.
-
A bit of an update - this afternoon I masked up the top side edges and used my Dark Sea Grey rattle can on the underside of the spit, I started with a gentle mist over, gave it about Ten minutes then built it up till it was smoothly covered, from what I could tell there was no reaction with the Acrylic underneath. OC.
-
Thank you again, the Eduard kits are considered the top shop build of the spit, and do go together really well. OC.
-
Thank you so kind, yep its a nice kit - has its issues that need fiddling like the fuselage halves joining, and the engine units fitting them over the wing is a pain, they need filing/sanding and then a bit of filler. But over all it is a nice kit. OC.
-
Thanks EG, I think I will have to use a bit of artistic license choose a squadron use the right unit numbers but be a bit flexible with a frame serial, at least it will be 90% correct. OC.
-
Just to add more confusion - after contacting a Spitfire reference library, I found another squadron that was on base same time my dad was there - 274sqn with Spit IX's they had codes JJ and in mid 44 they were asigned V1 Flying bomb duties over south England, in mid 44 they were part of No.11 Group; Air Defence of Great Britain; Allied Expeditionary Air Force. OC.
-
Thank you for doing all that - it is mutch appreciated bro, I am not stuck on that aircraft in the pic - still flexible as long as I display a Spit IX that was at RAF West Malling when my dad was there - I will be happy, tracking down the decs for that is another things as they are not in the kit for that airfield/ I know its "nit picking" but I want to get it right for me dad - show him I do care and listen to him. OC.
-
Thank you Denis - yep wont be too long I dont think. OC.
-
I always assumed 402sqn based at West Malling was RAF, thats what I have been searching for West Malling Spit IX squadrons, I know the squardon had many different a/c types over the years and times at Malling including the Spit IX. It is a bit confusing trying to track down reliable facts of Spitfire IX aircraft that would have been at RAF West Malling from early 44 - 45, this was the time frame (I think) my dad was stationed there, he certainly worked on othe marks of spit (I chose the IX as I brought the kit. I have done the normal Wiki searches and googled his base to find all the Spitfires that would have been there during those years, but there is a lot of less than reliable info out there. I am sure I will find markings for one my dad would have worked on - "keep digging OC" OC.
-
I have realised something - the undersides in late Spits - Mk IX and newer had Sea Grey paintwork not Sky, I have Sea Grey in Tamiya rattle can but its a Laquer type again where as the Sky was brushed on Acrylic, hope that will be ok spraying the laquer over the top of tha Acrylic? OC.