Old Collingwood
-
Posts
12,106 -
Joined
-
Last visited
Content Type
Profiles
Forums
Gallery
Events
Everything posted by Old Collingwood
-
 Shouln't have been any - was indoors no heating on and about 18deg I keep telling myself "should have just sprayed the Tamiya rattle can flat over it and not tried to even up the gloss coat first, perhaps you can not apply acrylic over the top of Tamiya rattle cans as they are laquar and not acrylic. To try to rescue it would mean trying to get a smooth surface then re masking the entire rear section from the fuselage joining section, meaning fresh black and on the tail/rudder, fresh camo on the top, I have found in the box and alternative large code with side roundel and registration code, but no spare tail decals (that would have to be left blanc. Just the thought of having to re do it again - a third time - this kit is becoming a real knitmare. OC. OC.
 -
Dont understand why it happened reaction between tamiya rattle can and acrylic? Still keep looking at it with diss-belief. OC.
-
Think I have Wrecked it, I decided to apply the Tamiya Acrylic Semi Gloss top coat from a Bottle by brush, I brushed it on as well as I could, when covered I used the hairdryer and the result A Cloudy Mess just Horendous. So I thought as its Acrylic it should wipe off using soapy water and a sponge - "Wrong Wrong Idea" Dont know what I am gonna do now, even if I could re paint the whole things (so dont want to have to do all that again) I dont have any replacement decals. Disspaointed dont cut it to be honest. OC.

-
Thank you EG. OC.
-
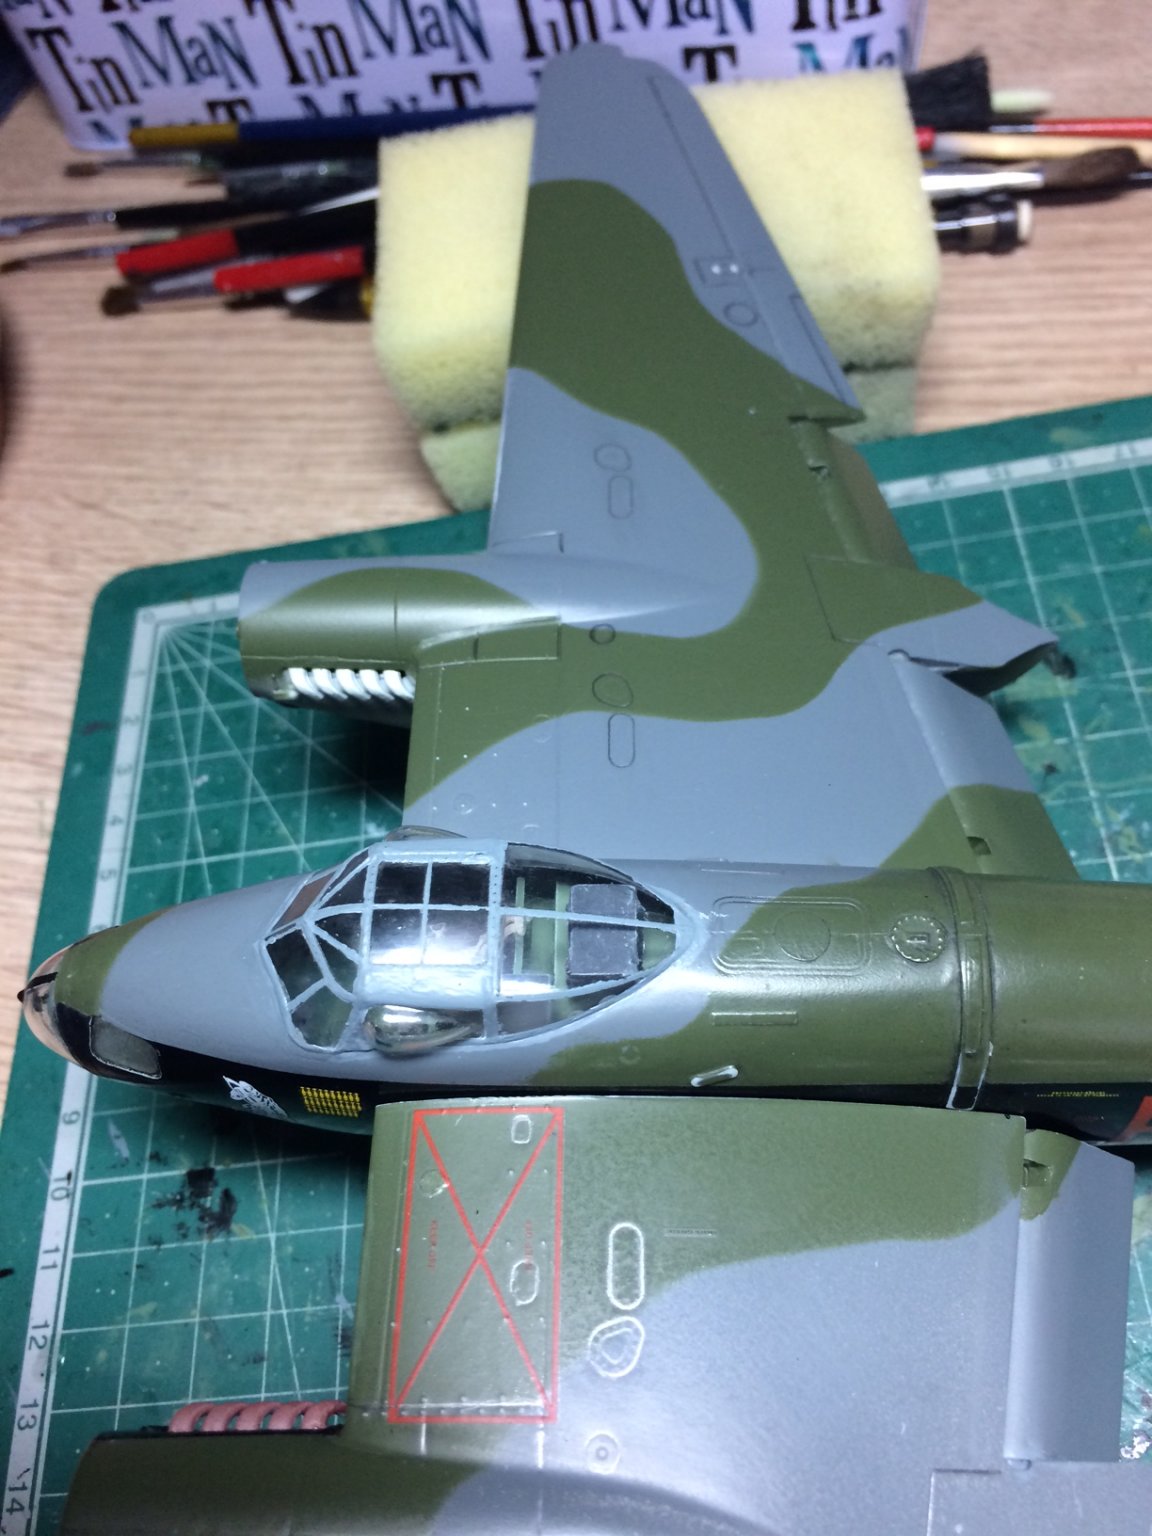
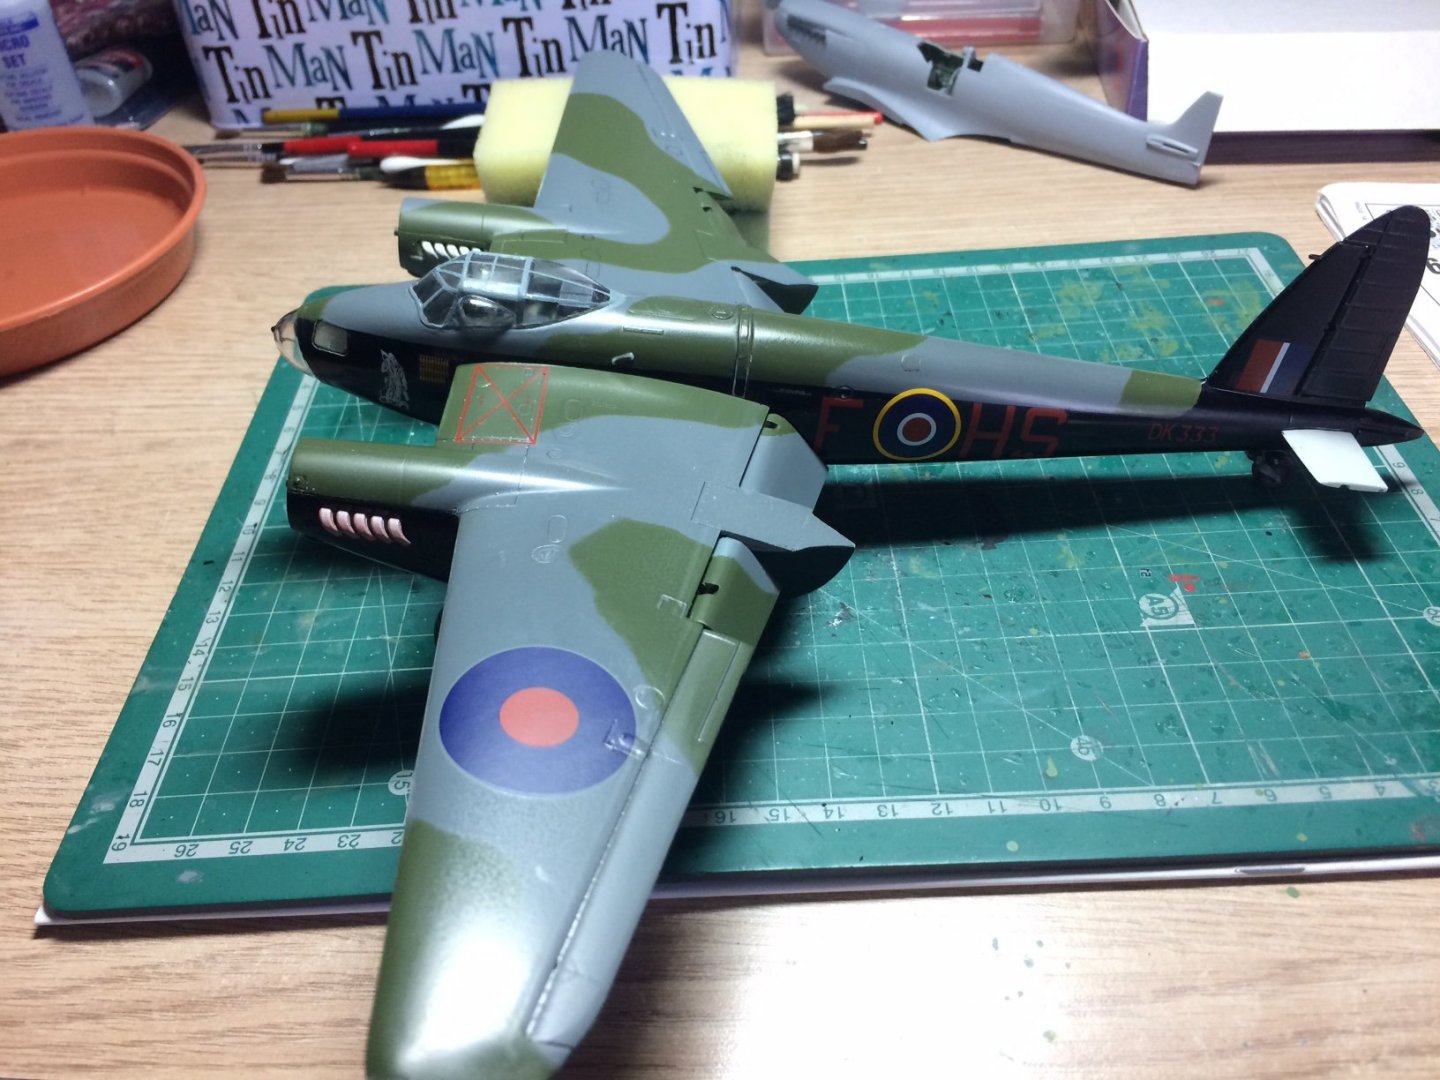
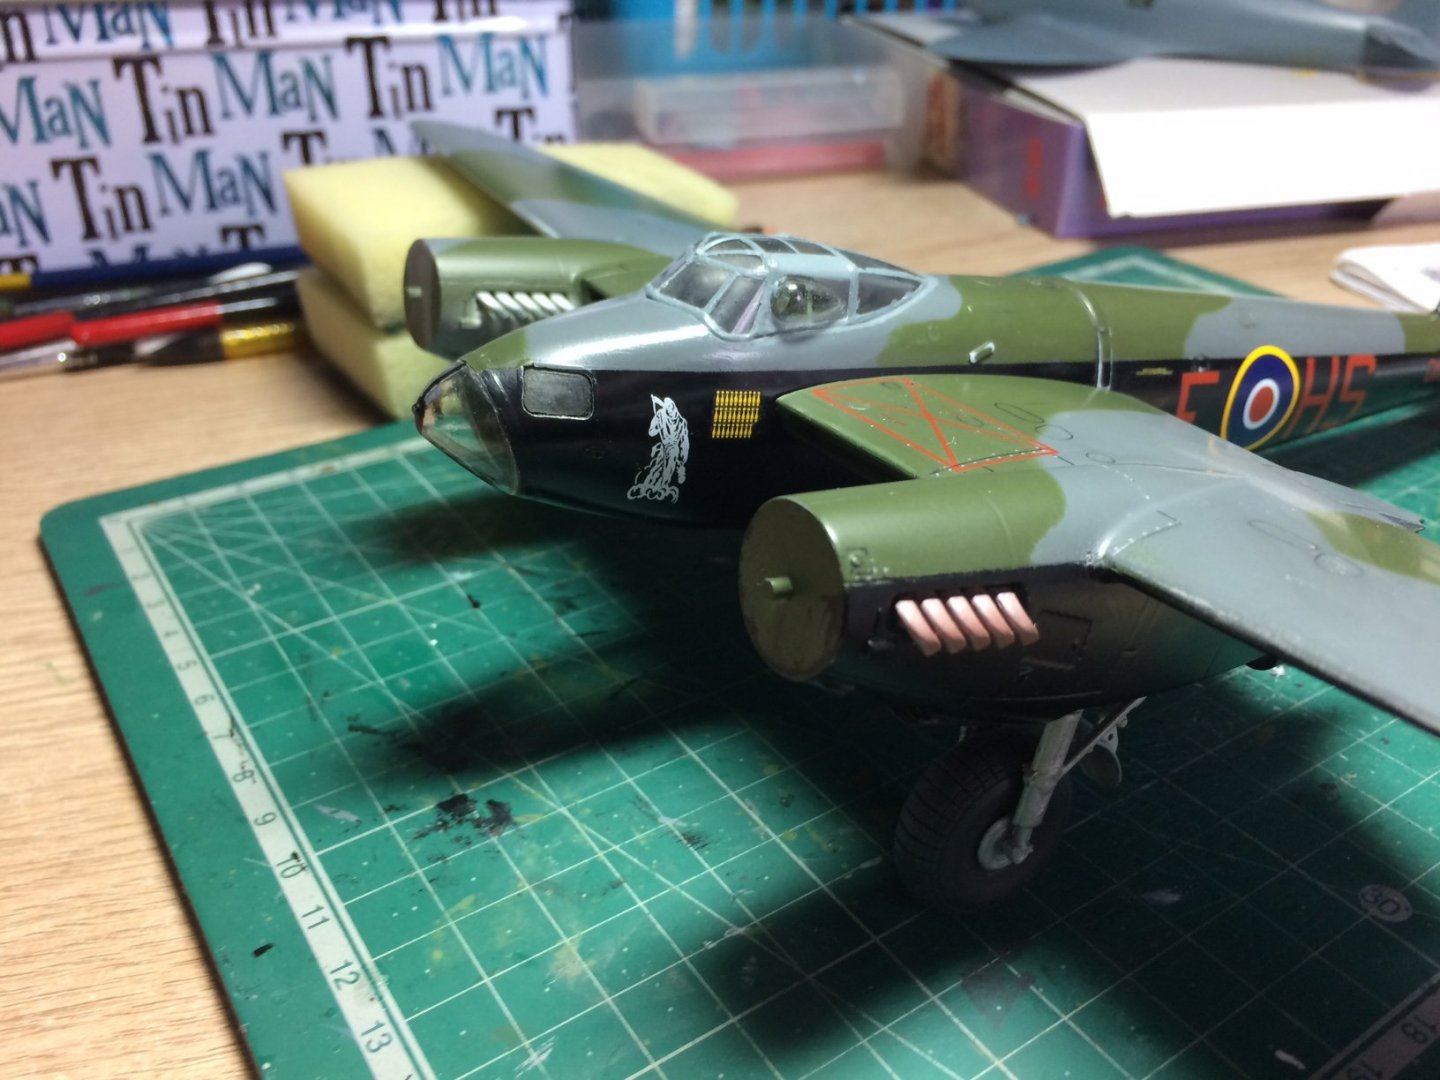
More progress today - my building has a pattern - you can tell waht the weather is like by what time I spend at the table, anyway more progress on mossie, I carried on attaching the various decals on the fuselage including the bomb drop count and grin reaper, I then put a first coat of micro sol, and put it aside, then it was time to have a llok at the wing and stabs that had been sprayed - I gently removed the paper/blue tak masks and gave them a wipe down with soapy water, then I gave then a gentle rub over with fine wet and dry (as I have been trying to age the paintwork slightly to show fadded/rubbed areas from use. I also used my pencil and worked along some of the panel lines/around obstructions, the wing still needs the roundel and other decs. Here is a few pics showing a dry run with wings attached not glued o yet. OC.

- 932 replies
-
- 11
-

-
Thank you for the kind words Denis, I should have looked into trimming the decals with a rule and blade, but it occured to me after fitting them, but its something I will look into if I come across decs like these again. OC.
-
Thank you so much Kevin, good wishes to you and the family stay well my friend. OC.
-
Thats what I have in jar/pot form Tamiya Semi Gloss top coat, I will be brushing it on once all the decs are on, then I will blast over with a couple of coats of Tamiya rattle can Flat top coat (after leaving the semi gloss a good few days to harden) OC.
-
Thank you kindly Ken. OC.
-
Another thought - "Did they put covers over stairway openings during action" to save sailors falling down them at the heat of action? OC.
-
Thank you carl, I think a combination of perseverance and stubbornness not to let it beat me, also driven by wanting to make my late farther proud, also not trying to do to much or achieve too much when dog tired - but save for better days like yesterday was. OC.
-
As Ryland said - it depends how you want the wood finish to be (still show the wood grain - or aim for a smoother finish) if you look at pics of say HMS Victories inner bulwarks they look like a fairly thick layer/layers of paint has been applied, but it really depends how you feel about the finish also how thick the paint is inside the tins/jars, if it very thick you could dilute it say 3/4 paint to 1/4 acrylic thinner or distilled water. Hope this helps mate. OC.
- 436 replies
-
- 3
-
-
- vanguard models
- alert
- (and 1 more)
-
Hi Mark, with the planking it doesn't hurt doing a couple of rows coming from the keel garboard plank thats how I did mine and others do it the same way, I have been over Vic possibly about Three times years ago, If memory serves me the upper gun deck under the boats has Two facing stairs following the line of the deck both looking into the middle. OC.
-
Superb work EJ, she has turned out marvelous a real credit to all the hard work you put into her, stay well and safe, look froward to following you next project. OC.
-
Truly Amazing, any thoughts of what you will do with here when finished? She is Museum Standard and I am sure many many people would love to see her (when we are back to some degree of normal) OC.
-
Fokker Dr.I triplane by cog - multiple - 1:72 - PLASTIC
Old Collingwood replied to cog's topic in Non-ship/categorised builds
I agree completely - this is superb work of small subjects at a small scale - not much room for error, they look loverly mate. OC. -
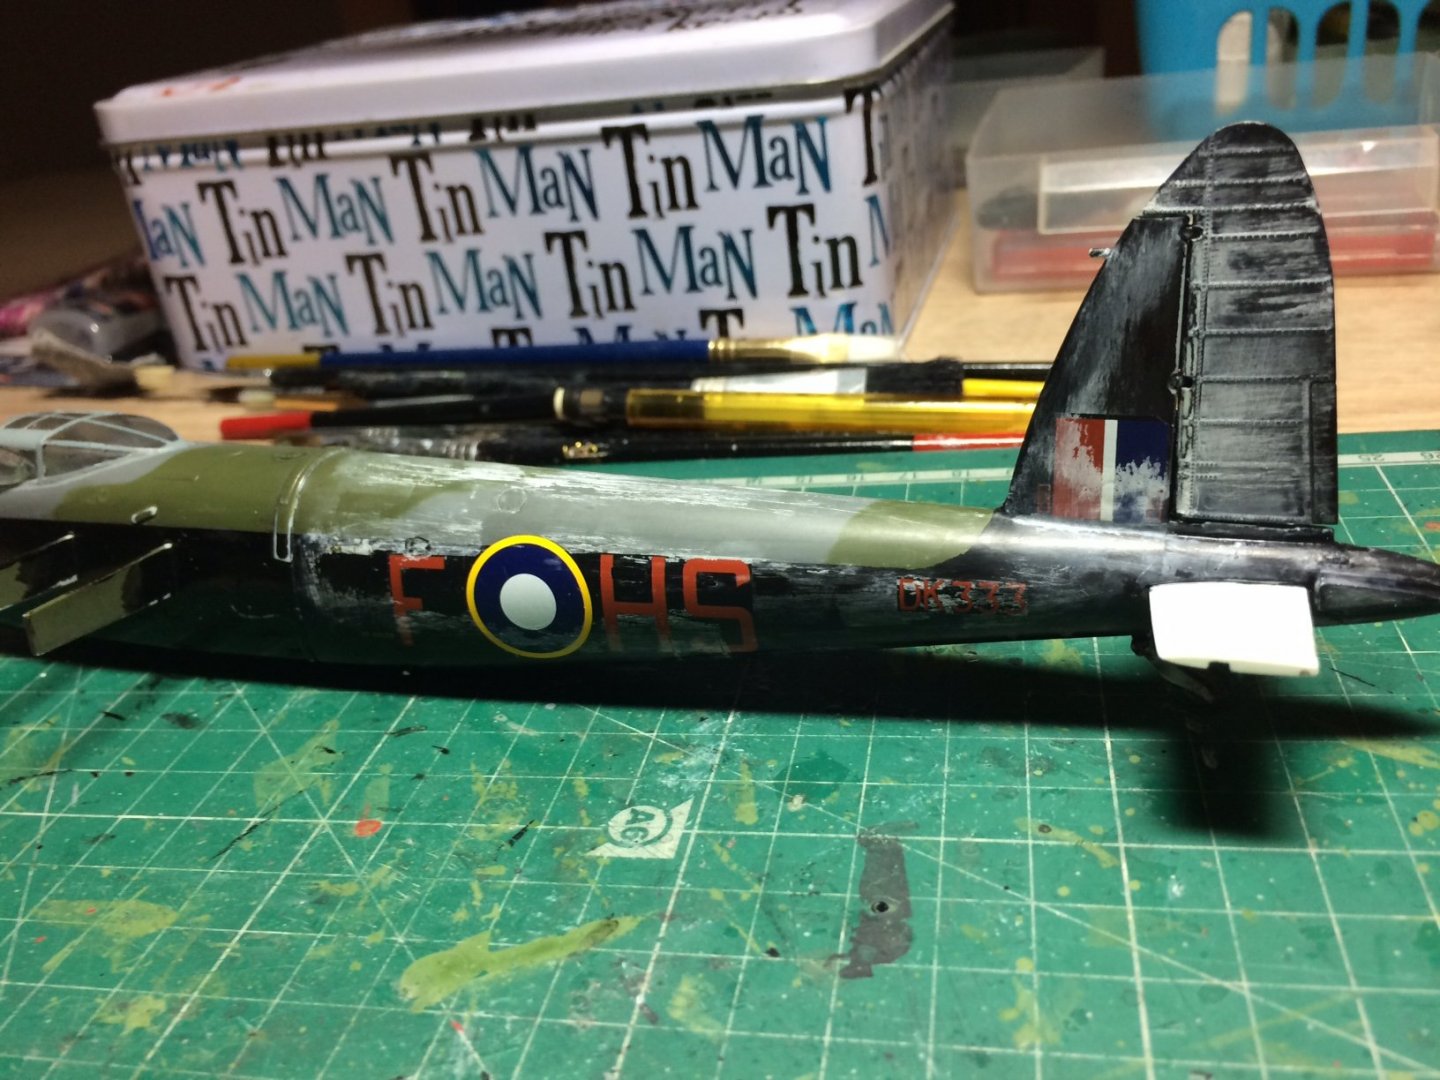
Thank you sincerley EG, I think as was mentioned earlier if the decals had been of a higher standard and with a glossy sheen to them, the backing would have settled down over the shiny paint surface that was also very smooth from buffing for that purpose, when you look at them on the backing strip they are deffinatly more flat in finnish than shiny like others tend to be. What I will do is put a fourth layer of micro sol ontop of the large decals leave over night, put the other smaller ones on (more micro sol on them) then when the whole fuselage is decalled, I will hand paint a layer of semi gloss top coat all over and put it aside to harden for several days. Then I will work on the wings and stabs that have been sprayed up today. OC.
-
Thank you Diver, as I explained somewhere further back my farther was an Engineer in the RAF during the war his service knick name as an ERK, he specialized in airframes and engines, and on base he would do anything from bench strip downs to engines and right through to light to medium/heavy airframe work either on the pan or in the hangar, all dependent on what was needed or the condition of aircraft returning from duties. The mosquito was one of his fave planes to work on but he also serviced Spits, Hurricanes, Lancs, Wellies, Shorties, and prior to this he cut his teeth in the FAA on Seafires and Corsairs. OC.
-
That was my thinking Ken - top coat to blend it all in. OC.
-
Thanks mike, I am wondering the same thing with the decals, I am hoping that by first painting on a layer of semi gless top coat (as I have a jar of this for hand painting) then after a few days spraying the tamiya rattle can flat top coat will bring it all to the same finish. OC.
-
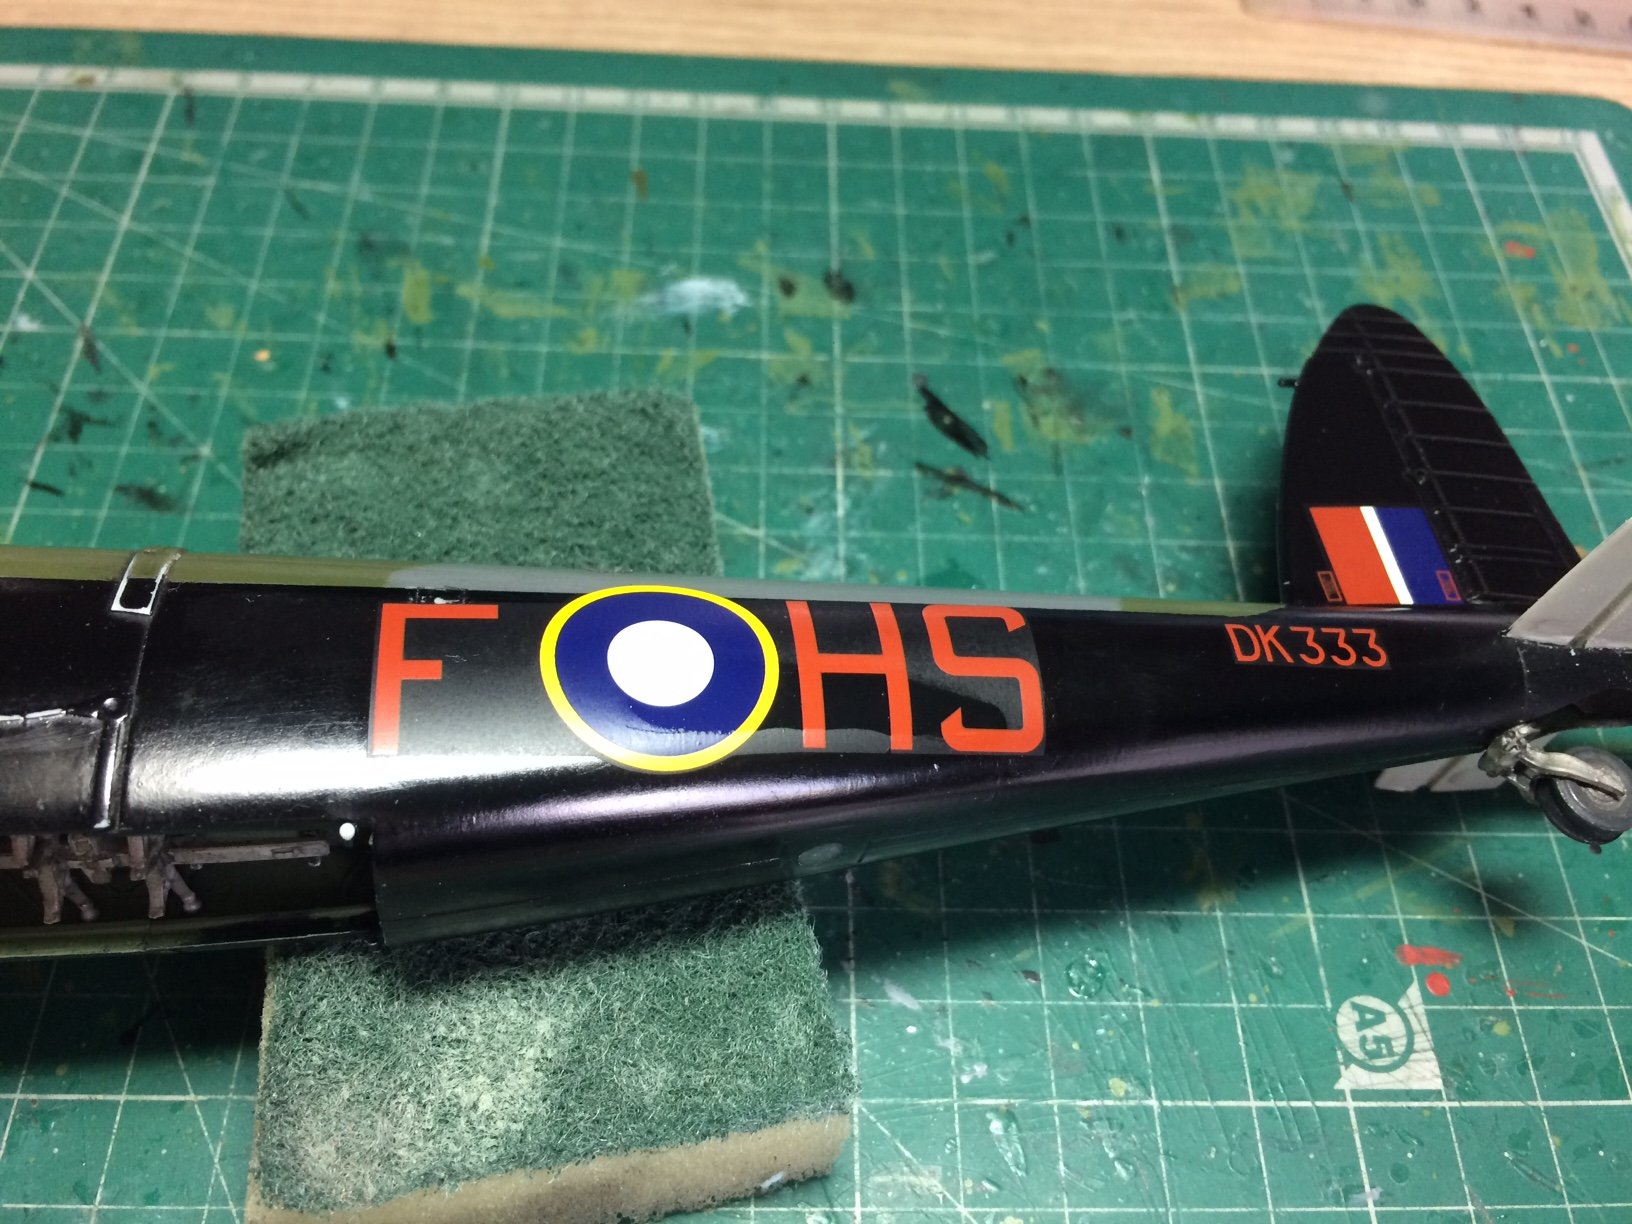
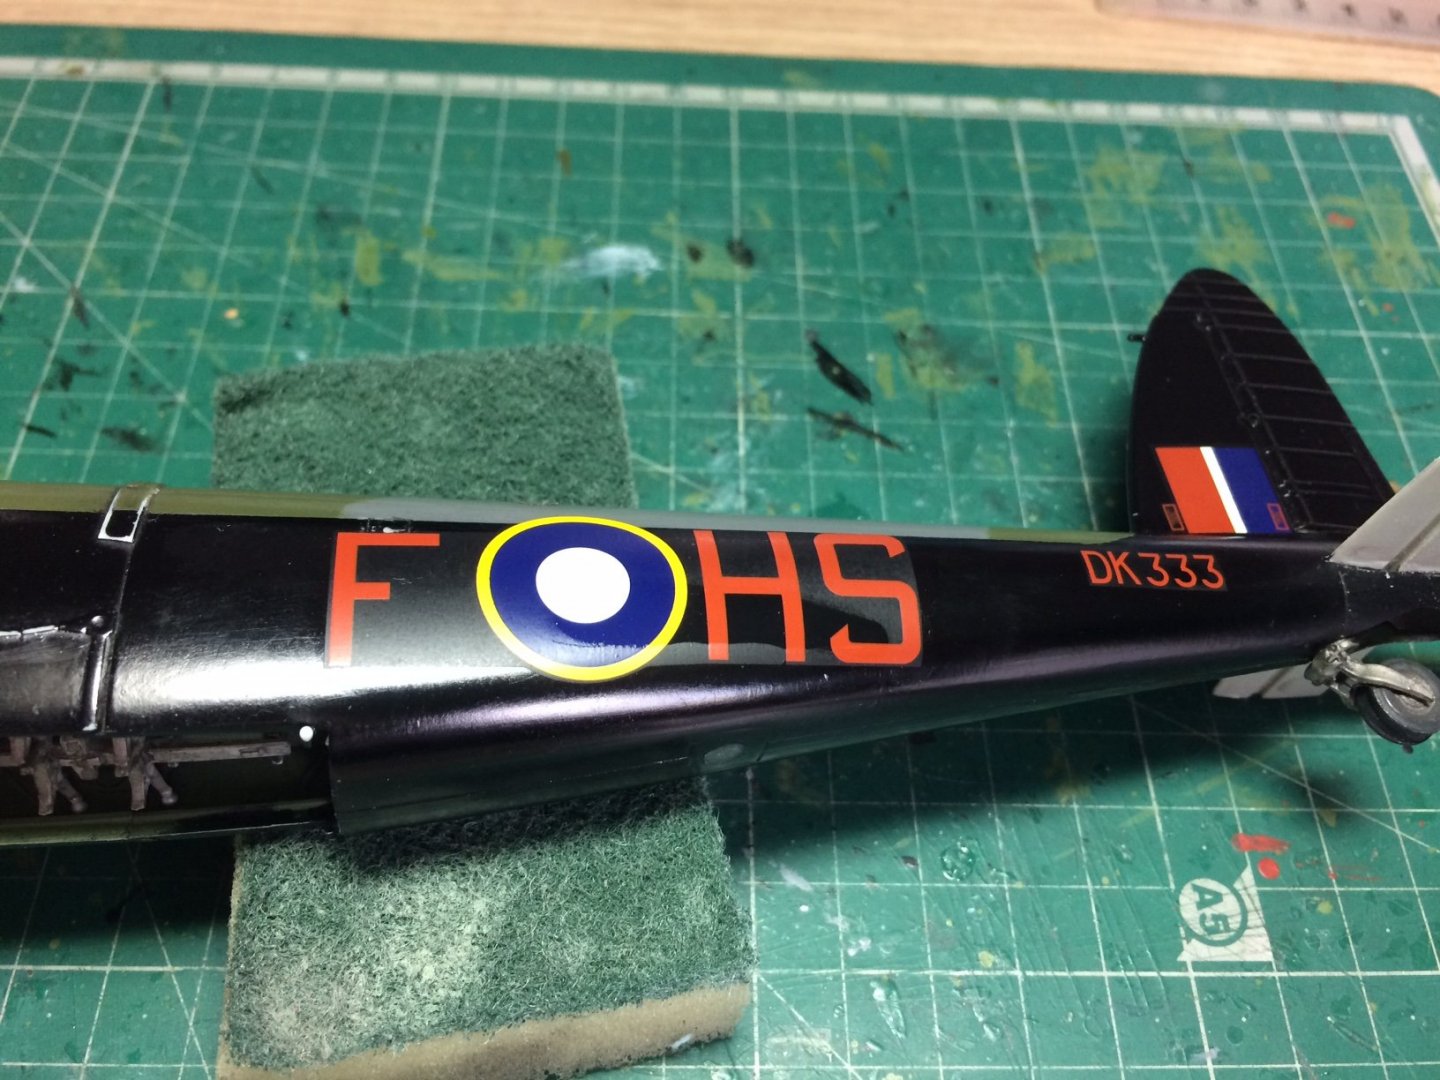
I dont rate these revell ones that highly dont think they are cartograpgh ones, have a lot of edging to them - in hindsight I should have trimmed them. OC.
-
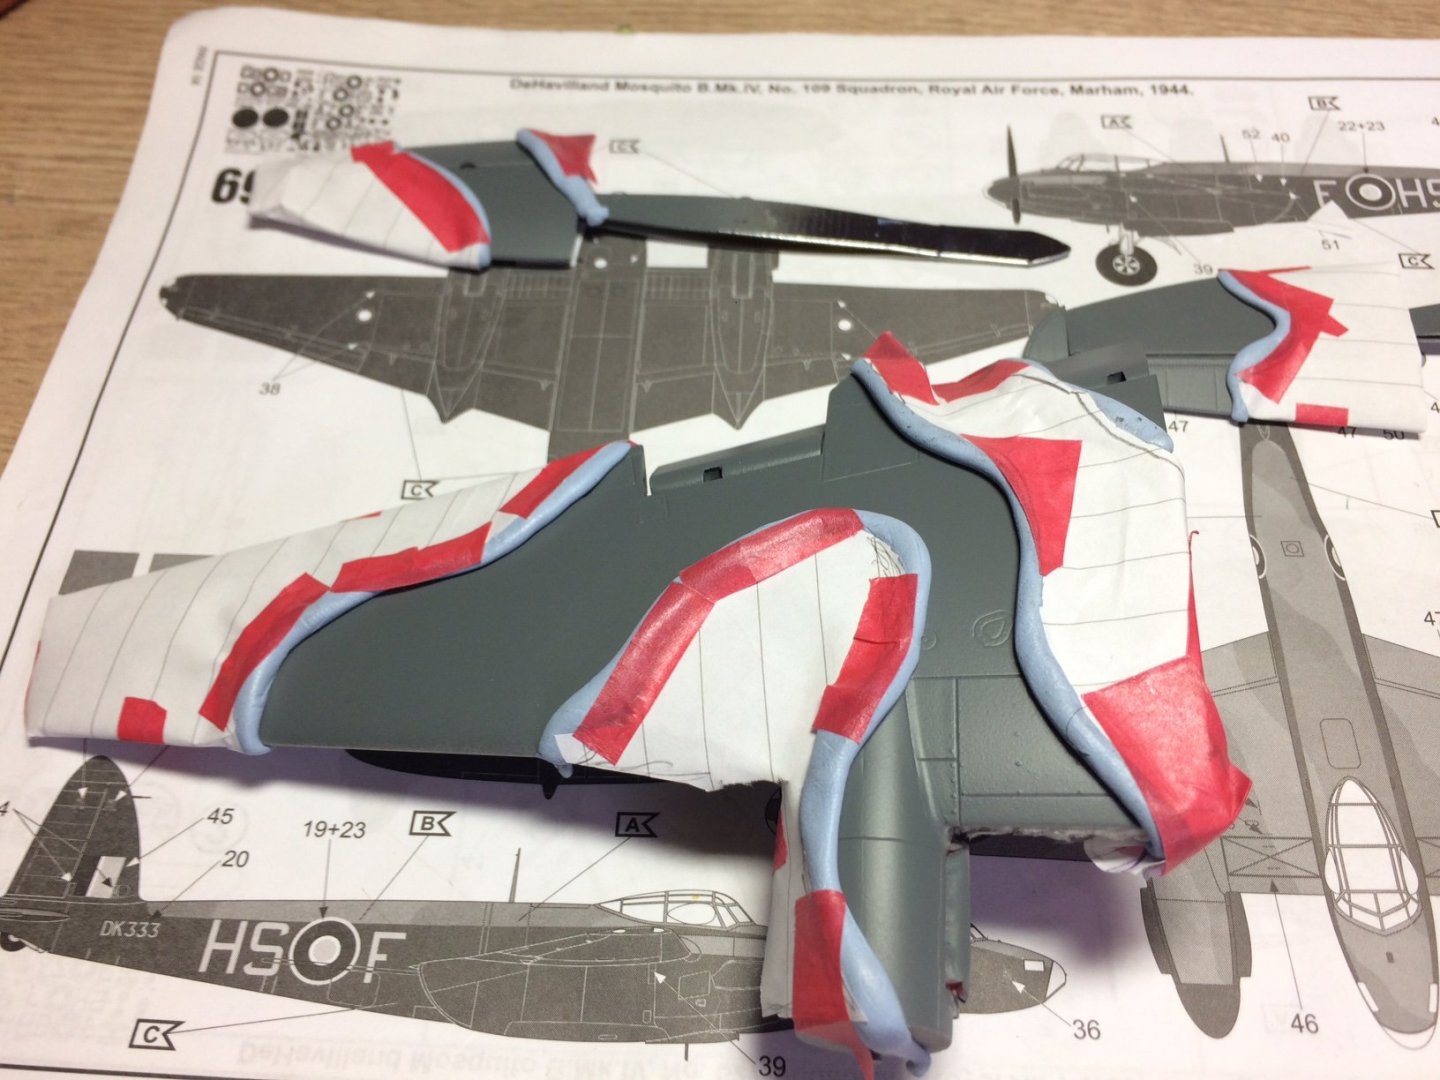
Right last major spray work on the mossie - masked up wing and stabs ready for rattle can green, after I took the parts out into the back patio and sprayed away then put them in my box, went on ok I think. Pic of the masked up parts prior to spraying. OC.
-
Thanks for the advice Kevin, my first work using decals with setting producs, I polished the fuselage as I thought the advice is to put them down on a gloss / shiny surface? guess it doesn't help with the decs being a flat finish not shiny. OC.
-
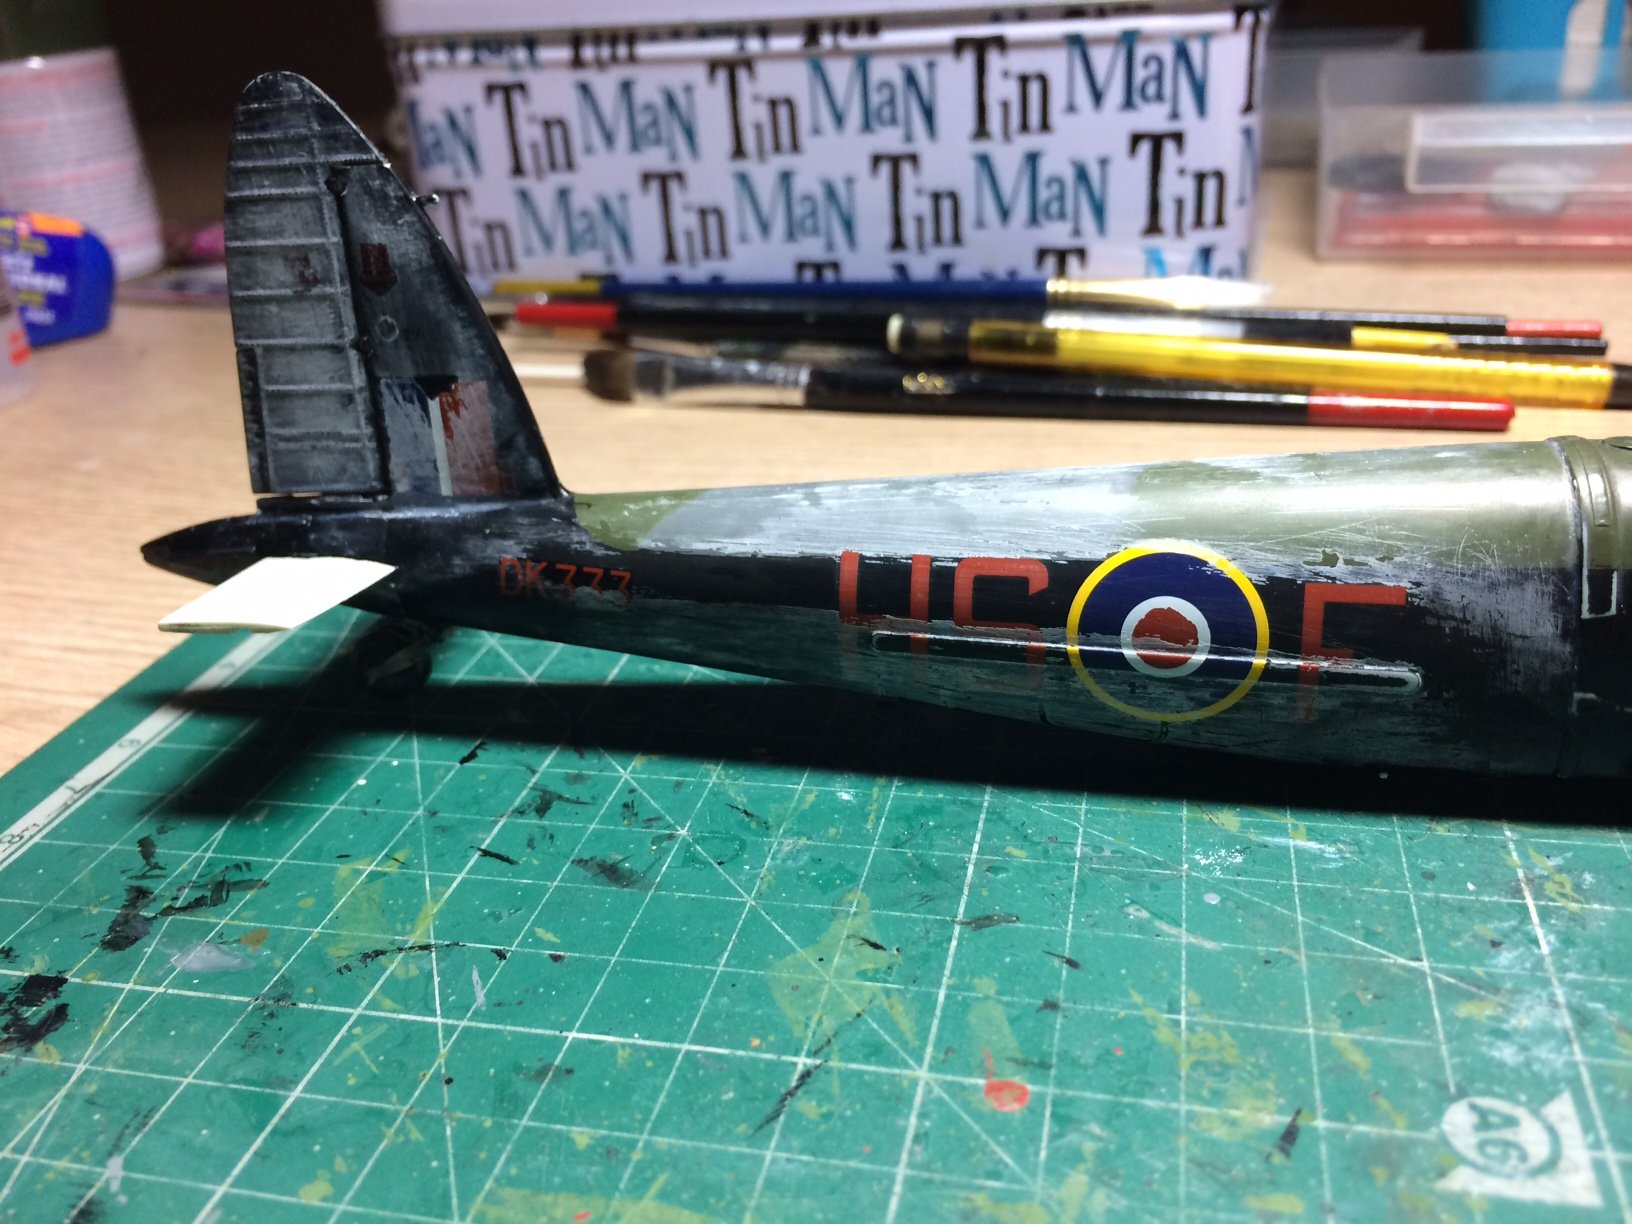
More progress with the decals - I put a few layers of micro sol over the tail, then today I brushed over a coat of semi gloss top coat just to seal them down, next was the serial this went down ok, then the large one piece fuselage decal, this was a little more trouble-some even with a coat of micro sol you can clearly see the decal paper between the letters - this might settle down with a coat of semi gloss top coat. The decal is still wet from the micro sol. OC.
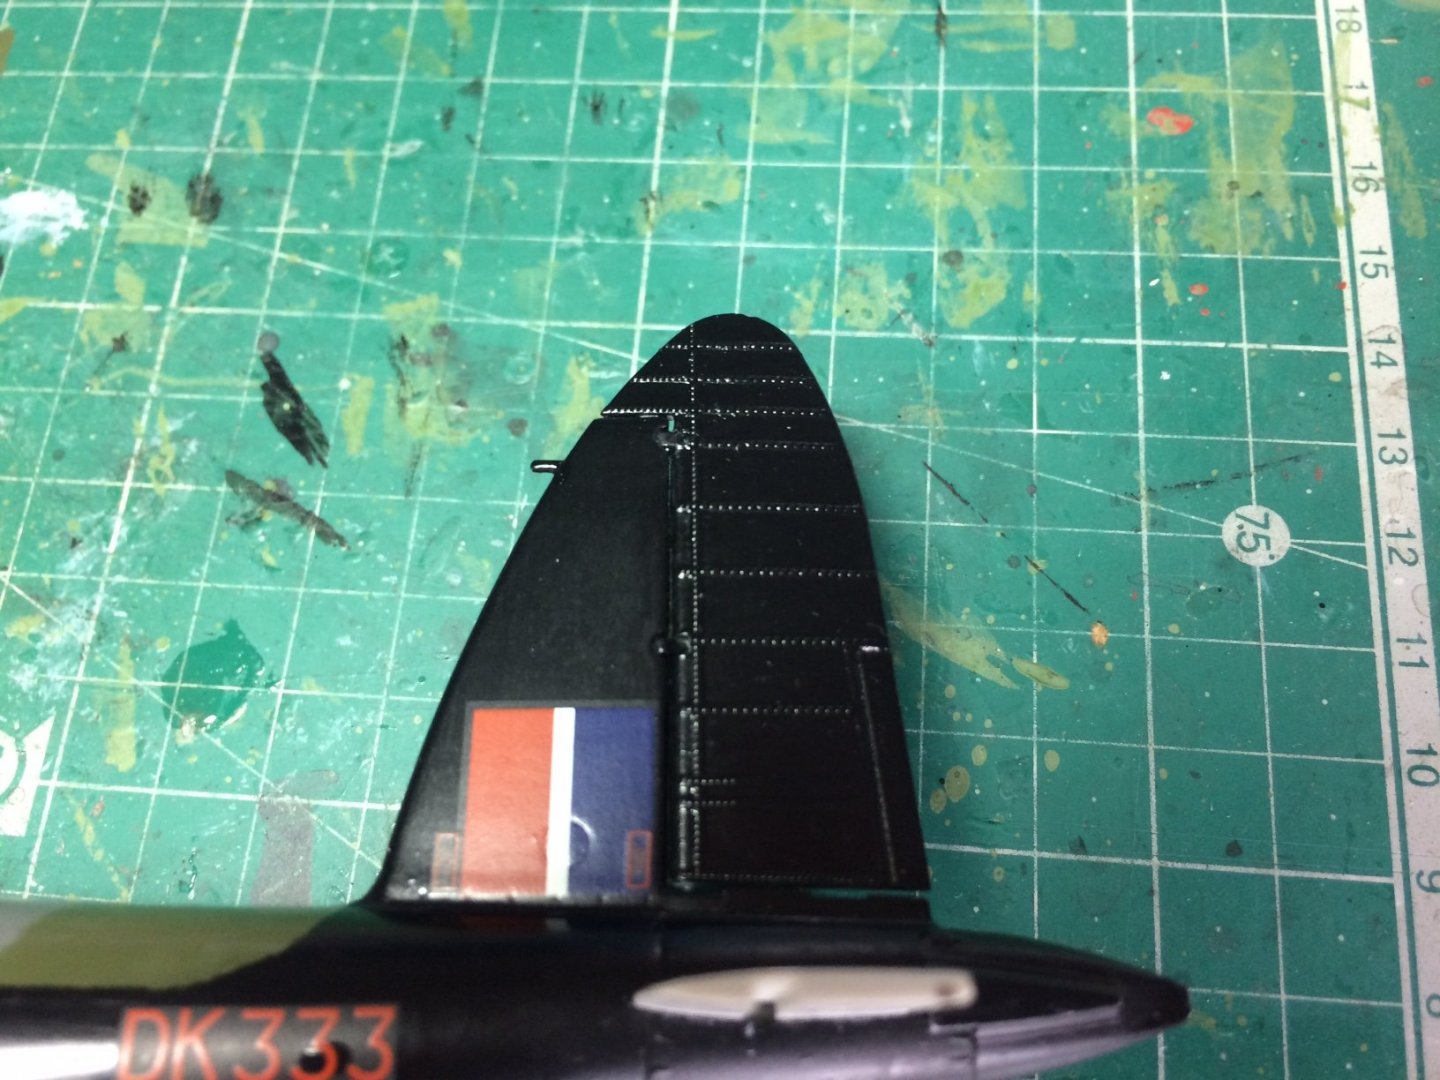
- 932 replies
-
- 12
-
-
I so get you bro with head aches these kits can cause - its not us we do our best - kit manu companies please learn - you are dealing with grown ups not children - get your stuff sorted please. OC.